How it Works
Log In / Sign Up
Buy Points
How it Works
FAQ
Contact Us
Questions and Suggestions
Users
Philips
Loading...
C
CityLine FC8432/01
City Line FC8436
City Line FC8437
City Line FC8438
City Line FC8439
2
CityTouch Connector Node LV LLC7260
CKA5720
11
CKA5720/05
2
CKA7740N
7
CKA7740N/05
2
CKW7740N
10
CKW7740N/05
2
CL-1
CL-4
CLAA320WB02P
CLASS 1 LASER PRODUCT EXP7361
CL-DVD625/AHOLD
CleanCare+ hx3214
ClearTouch GC532
ClearTouch GC534
ClearTouch GC536
CLIP-ON NOTEBOOK SCREEN SPA5200
CLIP-ON NOTEBOOK SCREEN SPA5200/27
CLNBPBV1
CLNBPBV2
Clock Radio
2
CLON99BK
2
Clon99-BKI
Clothes Iron
Clé USB
3
CM0200
CM0200-TRI
CM11342
CM11362
CM12
CM120
CM-150 CA
CM1800
CM-20
CM200
3
CM2089JS51
CM2300
2
cm6800
2
cm8510
cm8520
CM8833
2
CM9043
CM9053
CM9073
CMB-1100
CMB1100/55
2
CMB-2100
2
CMB2100/55
2
CMD305A
13
CMD310
10
CMD355
Cmfic
2
CMP100
2
CMP100/51
CMP100/55
CMP100/93
CMP200
4
CMP200/55
3
CMP200/93
CMP400
3
CMP400/51
CMP400/55
CMPD12CV-I
CMQ205
9
CMQ205-00
CMQ205 - annexe 1
CMQ405
13
CMQ405/00
3
CMQ405 - annexe 1
CMS
4
CMS V24 V26
CNC432
COBALT
Codemaster XL+
Coil Cord US2-P70051
Coil Cord US2-P70054
colette
Color Kinetics COLORBLAZE 72
Color Kinetic SPDS-60CA 24V
Color Kinetics Power/Data Supply SPDS-60CA 24V
Color Monitor 105S5
Color television
COLOR TELEVISION AND REMOTE CONTROL
6
COLOR TOUCH SCREEN REM CONT W-DATABASE TSU6000
COLOR TV 13 INCH 13PR18C
COLOR TV 13 INCH PORTABLE 13PR15C
COLOR TV 13 INCH PORTABLE PR1304B
COLOR TV 19 INCH PORTABLE 19PR15C
COLOR TV 19 INCH PORTABLE 19PS54C
COLOR TV 19 INCH PORTABLEESTIMATE PS1955C
COLOR TV 19 INCH PORTABLE PR1902C
COLOR TV 19 INCH PORTABLE PR1904B
COLOR TV 19 INCH PORTABLE XS1955C
COLOR TV 25 INCH TABLE
2
COLOR TV 25 INCH TABLE HD2518C
Loading...
Loading...
Nothing found
CMB-2100
Owners Manual
36 pgs
2.8 Mb
0
Service Manual
24 pgs
3.79 Mb
0
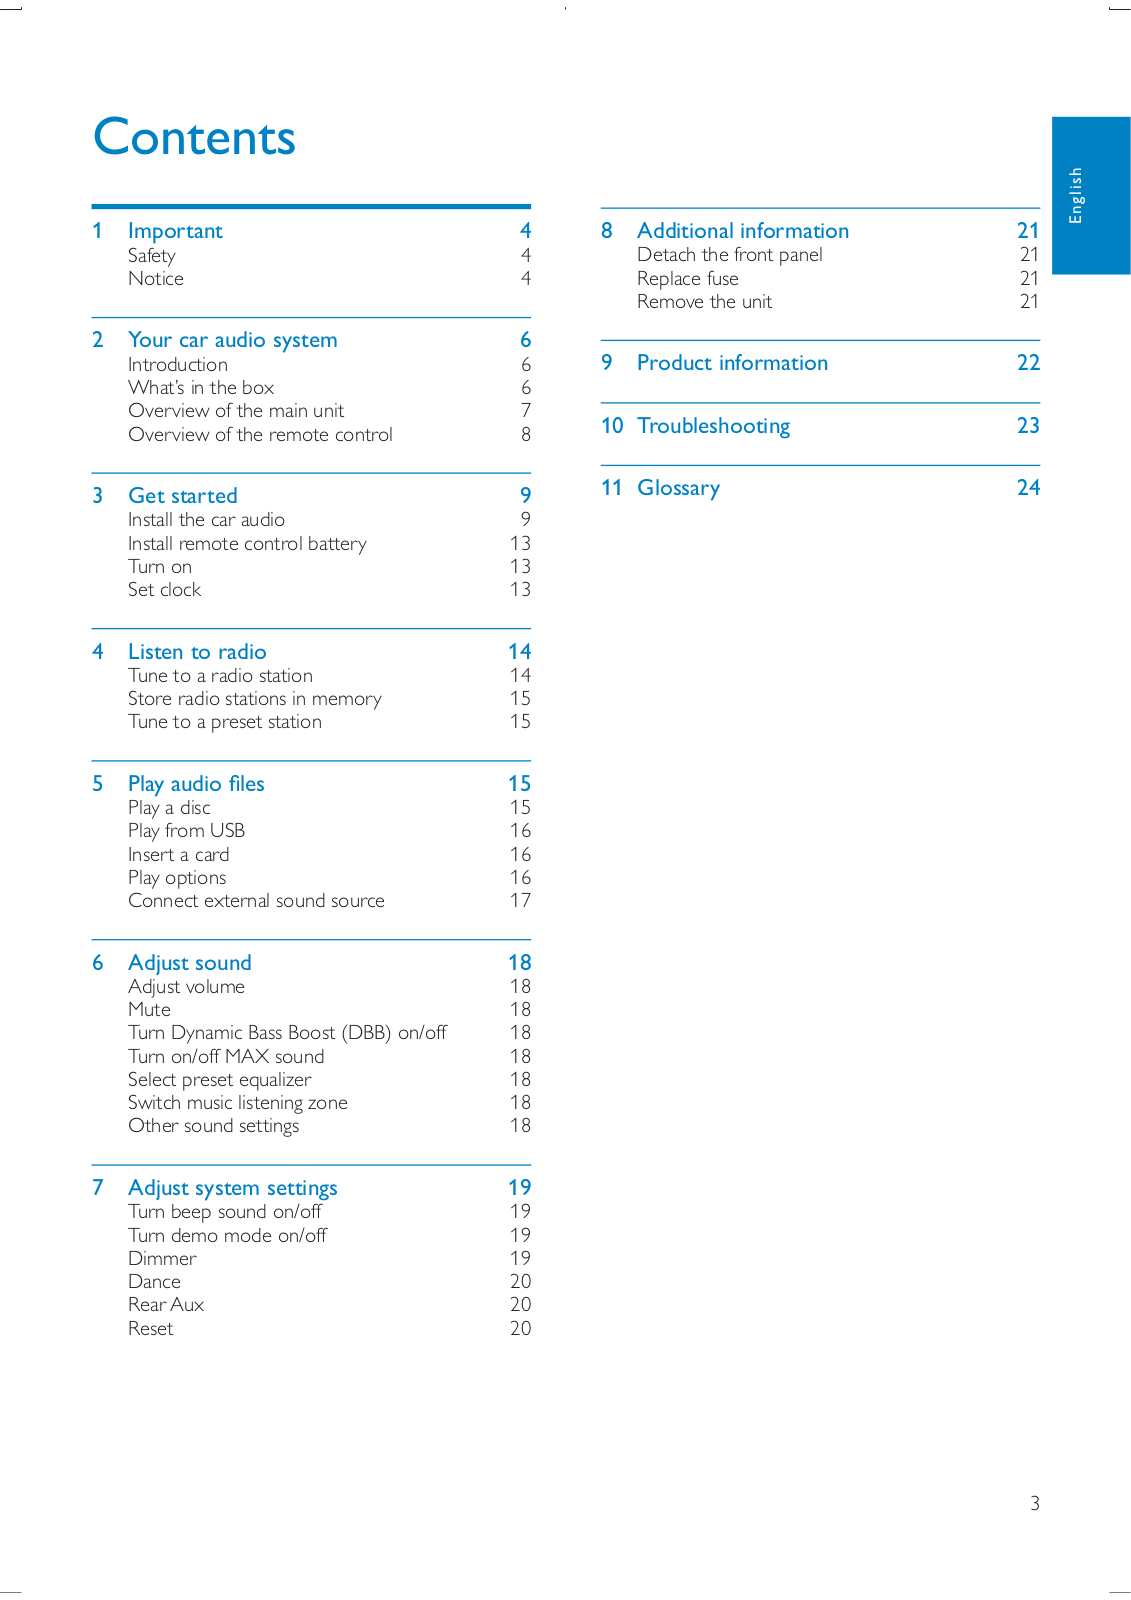
Table of contents
Loading...
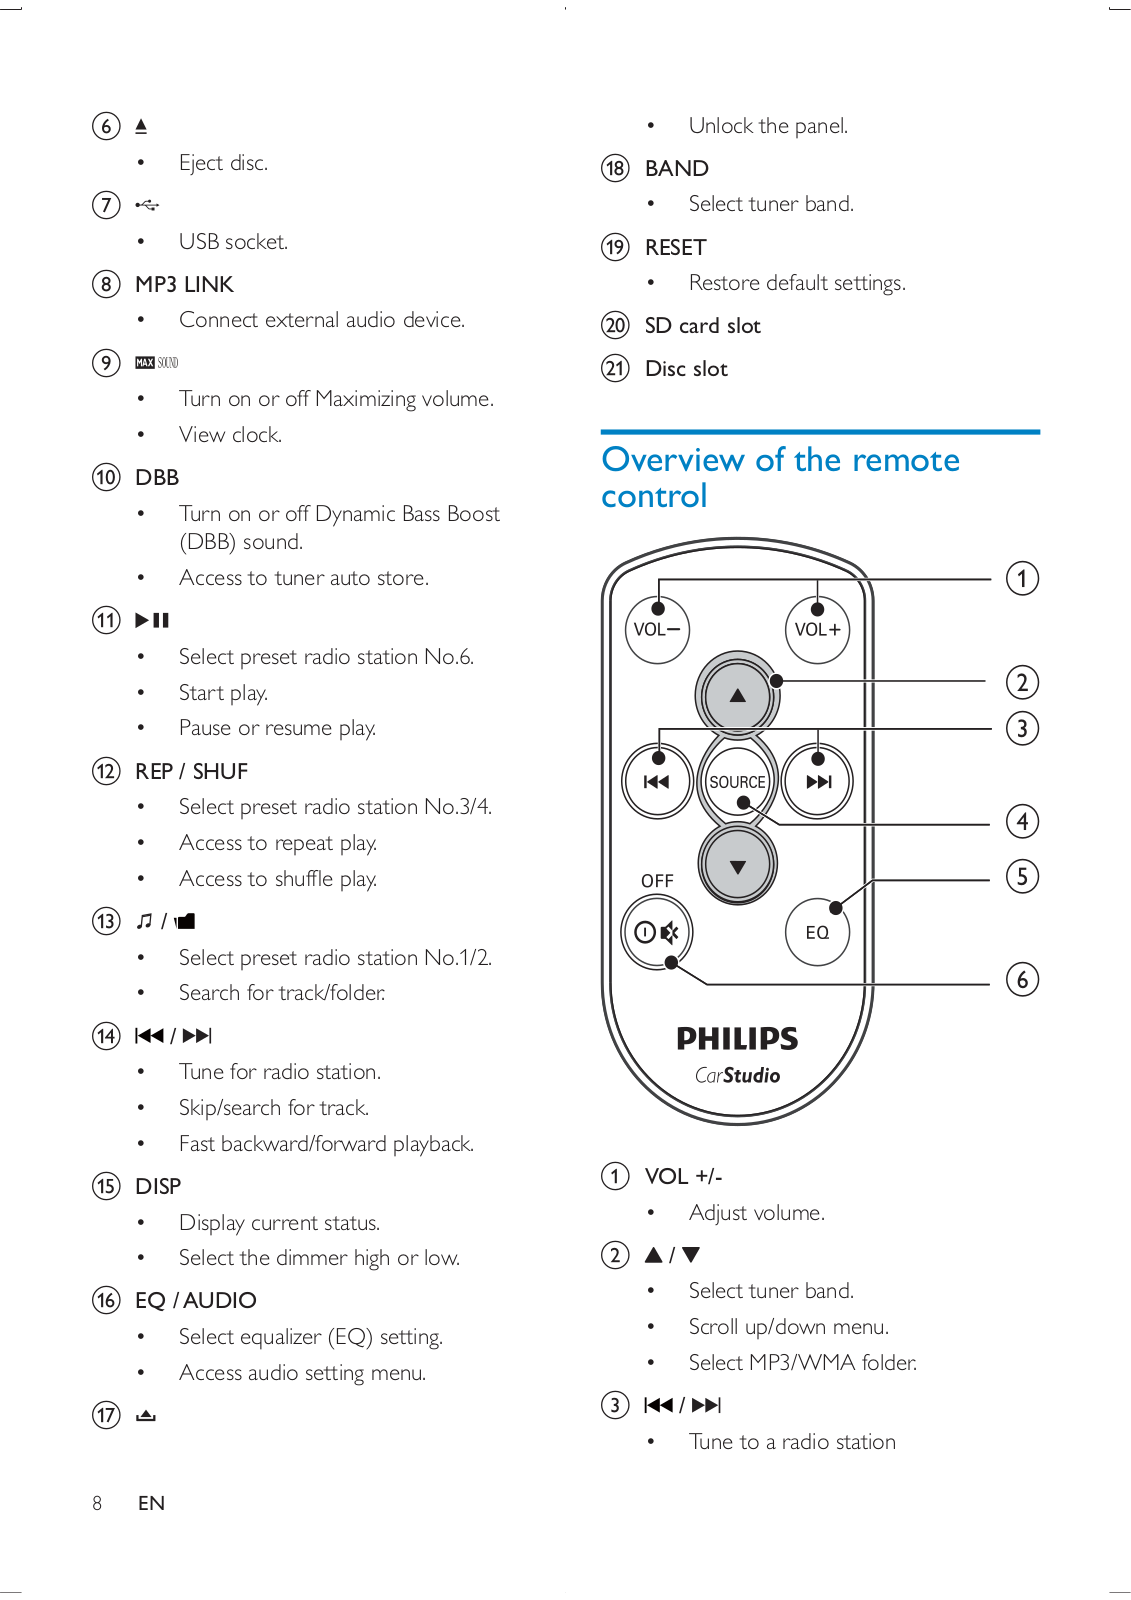
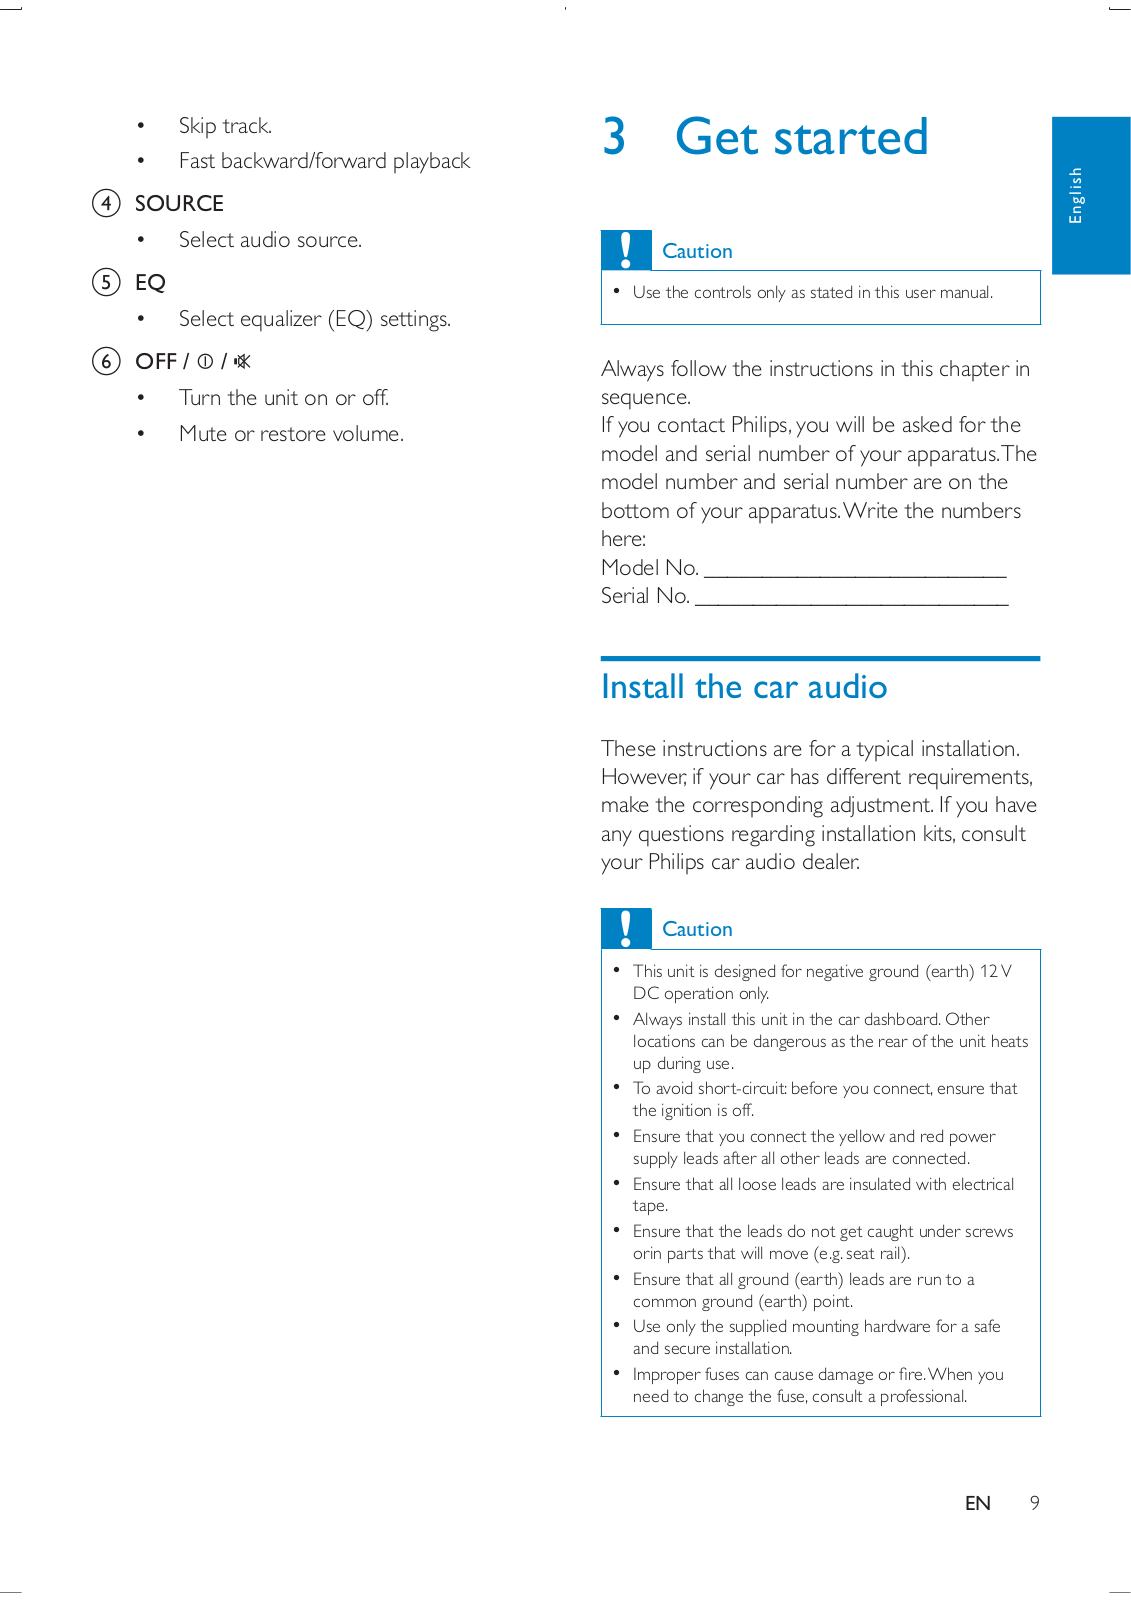
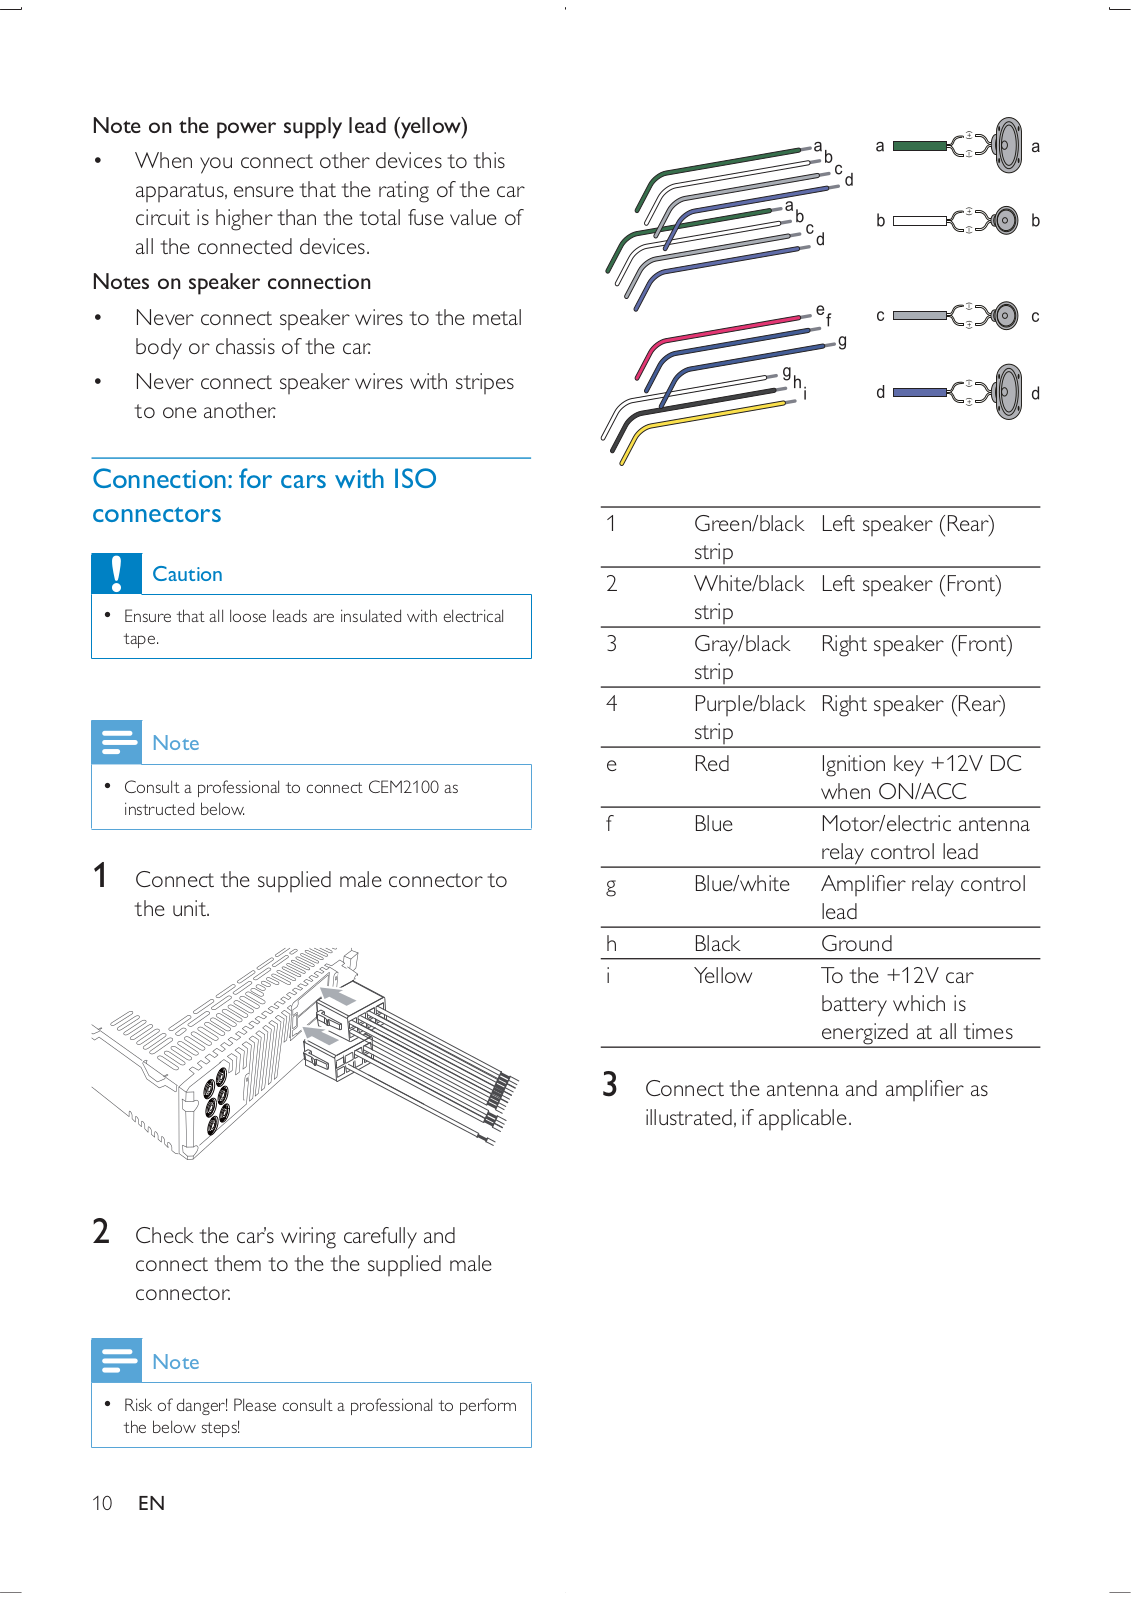
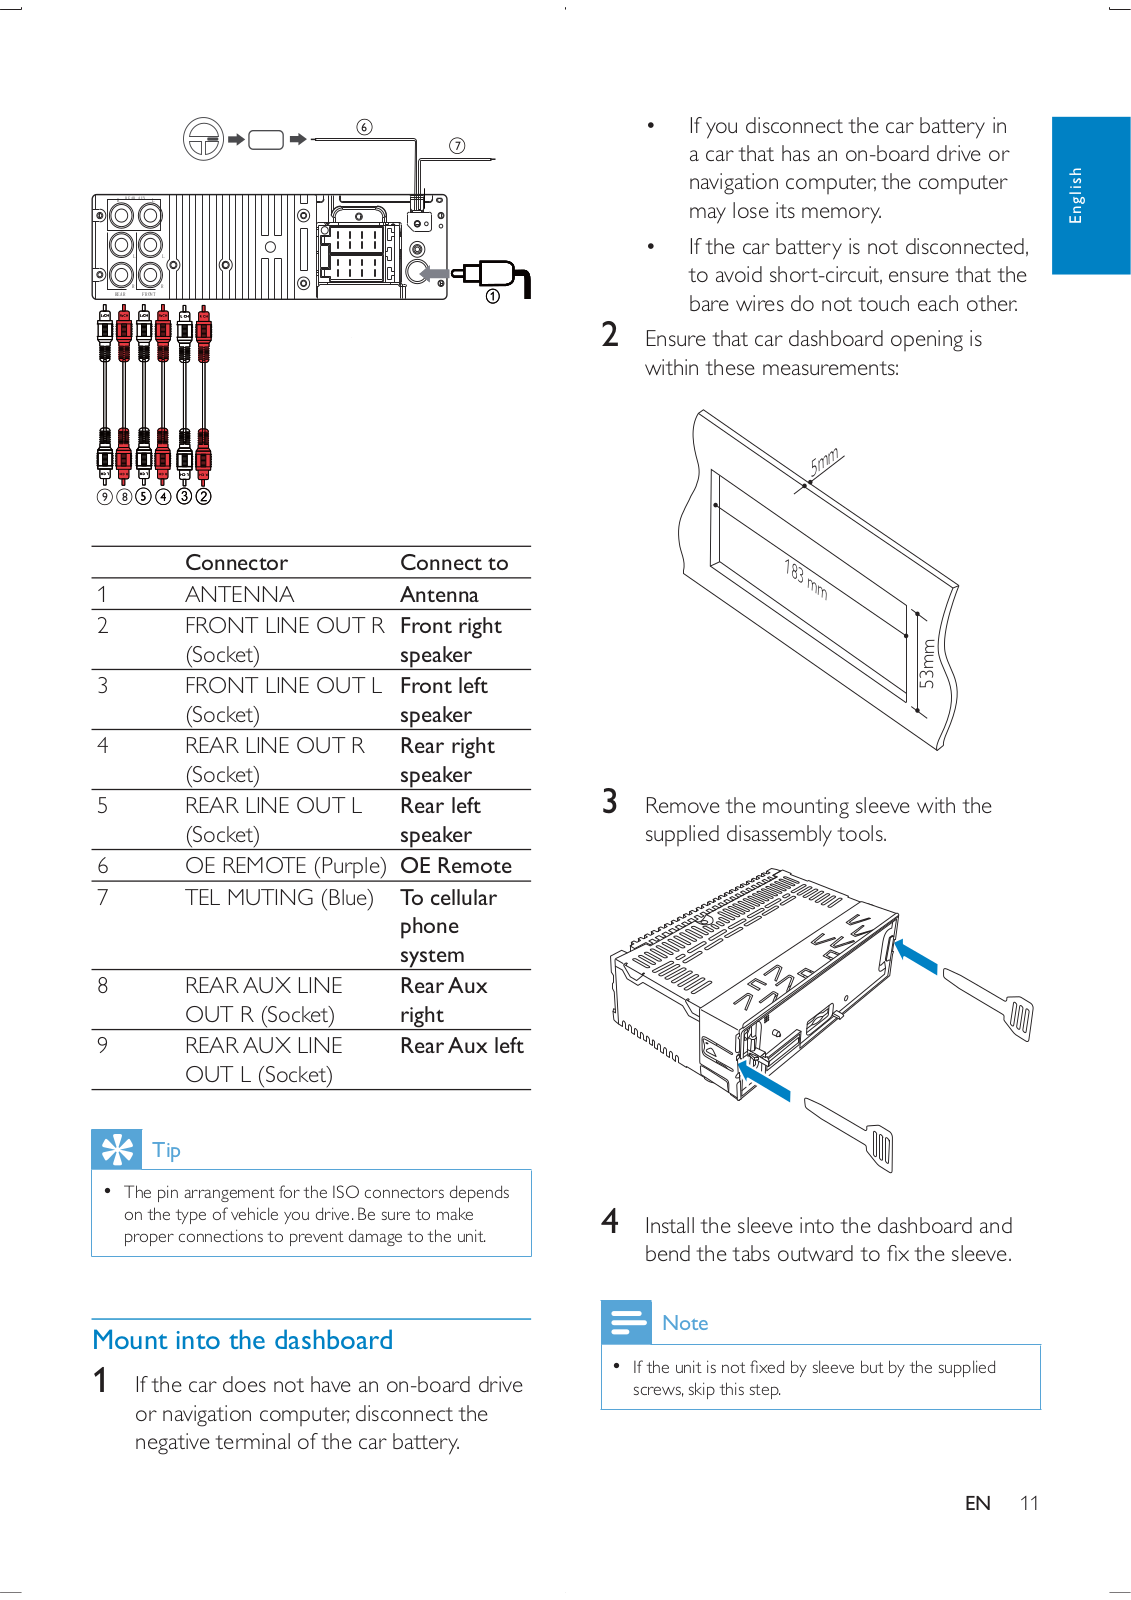
Philips CMB-2100 Owners Manual
...
Philips Owners Manual
Download
Specifications and Main Features
Frequently Asked Questions
User Manual
Download
Loading...
+
25
hidden pages
Unhide
You need points to download manuals.
1 point = 1 manual.
You can buy points or you can get point for every manual you upload.
Buy points
Upload your manuals
 Loading...