

Page 1

MAINTENANCE
Page 2

Changing the needle plate
Switch off the main switch
Removal
• Raise the presser foot. Position the needle plate changer (light bulb
changer) as shown and press the needle plate up on the right, then
on the left. It can now be easily removed.
Replacing
• Place the needle plate against the rear edge of the cut-out then press
down at the front until you hear it snap in place. Before you start
sewing, check that the needle plate is lying fl at.
Note: Lower the feed dogs to make removing the needle plate easier.
Cleaning
Switch off the main switch
• Remove the needle plate and lower the feed dogs. Clean the feed
dogs and hook area with the brush.
• Clean the sewing machine after every 10 - 15 hours of operation.
Cleaning the window
Wipe the window with a soft, lint-free dry cloth. DO NOT use abrasive
cleansers or solvents!
Maintenance
6:2
Page 3

Changing the light bulb
Switch off the main switch
• Disconnect the lead cord and the foot control plug from the
machine.
• Remove the accessory tray. The light bulb is located inside the
sewing machine near the needle threader.
Bulb removal
Push the light bulb changer up as far as it will go. Now turn the bulb
half a rotation counter clock-wise and remove the bulb.
Insertion of the bulb
Important: Use a light bulb as indicated on the left side of the machine,
12 V max 5 W.
Insert the bulb in the light bulb changer. Guide the bulb into the
diagonal holder and turn it until the pins of the bulb engage. Push
the bulb upward into the holder as far as it will go and turn it half a
rotation in a clock-wise direction. Remove the light bulb changer from
the bulb. The bulb will be held fi rmly so you can remove it safely.
Bulbs can be purchased from your Pfaff dealer.
Maintenance
6:3
Page 4
What to do if...?
In this chapter you are suggested solutions if you have a problem with your creative 2170. For further information please
contact your Pfaff dealer who will be pleased to help you.
Sewing
Problem/Cause Remedy
The machine skips stitches
Did you insert the needle properly? Push the needle fully upwards with its fl at side facing the
back.
Did you insert a wrong needle? Use needle system 130/705 H.
Is the needle bent or blunt? Insert a new needle.
Did you thread the machine properly? Check how the machine is threaded.
Is the needle too small for the thread? Change the needle.
Needle thread breaks
Did you insert the needle properly? Push the needle fully upwards with its fl at side facing the
back.
Did you insert a wrong needle ? Use needle system 130/705 H.
Is the needle bent or blunt? Insert a new needle.
Did you thread the machine properly? Check how the machine is threaded.
Is the needle too small for the thread? Change the needle.
Are you using poor thread with slubs or thread which has
become dry after overlong storage?
Change the thread.
Bobbin thread breaks
Did you insert the bobbin properly? Check the bobbin thread.
Maintenance
The seam is sewn unevenly
Is the thread tension misadjusted? Check needle thread tension.
Are you using too thick or slubbed thread? Change the thread.
Is the bobbin thread evenly wound? Check bobbin winding.
The machine does not feed or feeds irregularly
Did you thread the machine properly? Check how the machine is threaded.
Has sewing lint collected between the feed dog teeth rows? Remove the needle plate and clean the feed dog with a brush.
The machine binds
Is the feed dog lowered? Engage the feed dog.
Incorrect or no display
Are there thread remnants in the hook ways? Remove the thread remnants.
Is the contrast control for the display
misadjusted?
6:4
Set the contrast for the display.
Page 5

Embroidery
Problem/Cause Remedy
The embroidery design is distorted
Did you hoop the fabric strongly enough? The fabric must be tightly hooped, in such a way that no
creases form.
Is the inner embroidery hoop completely attached to the
outer embroidery hoop?
Hoop the fabric in such a way that the inner hoop always
exactly matches the outer hoop.
The embroidery design has contracted
Did you stabilize your fabric suffi ciently? Place a sheet of Adhesive backed paper/stabilizer and/or
Water-soluble stabilizer onto the fabric.
Needle thread breaks
Did you use the right needle? Insert a needle with a larger eye
(System 130N).
Is the needle bent or blunt? Insert a new needle.
Is the thread too thick for the needle? Use the right needle size.
Did you insert the needle properly? Push the needle fully upwards with its fl at side facing the
back.
Did you thread the machine properly? Check how the machine is threaded.
Maintenance
Are you using poor thread with slubs or thread which has
become dry after overlong storage?
Change the thread.
Non-original Parts and Accessories
The warranty does not cover any defect or damage caused by use of non-original accessories or
parts.
6:5
Page 6

Index
A
Accessories
embroidery accessories 5:10
standard accessories 1:16
Accessory tray 2:4
Alphabets 1:13, 4:26–4:27, 5:27–5:30
Animal stitches 1:12
Antique Embroidery stitches 1:12
Antique hand embroidery stitches 4:23
Appliqué embroidery 5:47
Arcing 5:6, 5:31–5:32
Automatic stitch building 5:5, 5:33
B
Balance 3:6
Index
Basting in the embroidery hoop 5:4, 5:17
Basting program 3:14
Blindhem stitch 3:22
elastic blind stitch 3:22
Bobbin and bobbin case
inserting 2:12
Bobbin thread 2:15
Bobbin thread monitor 2:12, 3:2
Bobbin winding
from the second spool pin 2:9
from the spool pin 2:8
from the third spool pin 2:9
setting the speed 2:11
through the needle 2:10
while embroidering 2:10
Bridging stitch 3:23
Built in designs 5:49–5:70
Buttonhole 3:15–3:18
attaching the foot 3:15
automatic buttonhole 3:16
Eyelet buttonhole with gimp thread 3:17–3:18
how to balance a buttonhole 3:16
how to sew 3:16
manual buttonhole 3:16
programmed buttonhole 3:16
sensormatic buttonhole guide 3:15
tips 3:18
with gimp thread 3:17
Buttons
sewing on buttons 3:19
C
Carrying case 2:4
Cleaning 6:2
Color changing 5:7, 5:18
Context menu 3:8–3:9
in embroidery 5:8
Contrast of the screen 2:3
Correct top tension 2:13
Creative Assistant 2:17, 3:10
creative Data Manager 2:18–2:19, 5:36–5:40
creative memory card
prepare for saving 5:41
Crosshem stitch 3:23
Cross Stitch 4:23
Cross stitches 1:11
Current state 5:8
Cutwork embroidery 5:47
D
Darning 3:20
automatic darning 3:20
6:6
Page 7

balancing the darning stitch 3:20
programmable Darning 3:20
with the elastic stitch 3:20
Data Manager 5:2, 5:9, 5:36–5:40
Decorative sewing 4:1–4:28
general notes 4:2
Decorative stitches 1:11, 1:12, 1:13
altering a decorative stitch 3:12
selecting 4:2
Delete 5:6
Demo 3:28
playing 3:28
programming 3:28
Designs
built in designs 5:49–5:70
transferring designs 5:41
one color embroidery 5:20
positioning of designs in the hoop 5:22–5:23
remove the hoop 5:13
selecting a design 5:16–5:17
speed 5:9
window 5:2
Embroidery template
how to use 5:42–5:43
Embroidery unit
connecting 5:12
remove 5:13
Embroider monograms and letters 5:27–5:30
End to end Mirroring 3:3
Enlarged representation 5:6, 5:22
Esc 3:10
Eyelets 3:19
Index
E
Electrical connection 2:2
Electronic knee lift 2:16
Embroider 5:21
Embroidering several colors 5:26
Embroidery 5:1–5:70
accessories 5:10
Appliqué embroidery 5:47
attaching the embroidery foot 5:10
attach the hoop 5:13
basting in the hoop 5:17
cutwork embroidery 5:47
embroidery combinations 5:31
embroider single designs from a card 5:16
get started to embroider 5:14
hoop 5:13
inserting a card 5:10
move the design within the hoop 5:20
multi-color embroidery 5:19
F
Feed dogs 2:7
lowering 5:11
File formats 5:40
Foot control, connecting 2:2
Four directions sewing 3:3, 3:25–3:26
Free-Motion Sewing 3:6, 4:24
Free-Motion Stippling 4:19
Free arm 2:4
Function Buttons 3:2
G
Gathering with straight stitch 4:25
General notes 2:17
Grid on 5:8
6:7
Page 8

H
M
Hemstitching 4:22
Hem stitches 1:11
Hoop 5:13
attach the hoop 5:13
remove the hoop 5:13
selection 5:7
Hooping the fabric 5:15
Hoop adapter 5:40
I
IDT (Integrated Dual Feed)
disengaging 2:6, 5:11
engaging 2:6
Immediate tie-off 3:4
Information 3:7, 5:9
Introduction 1:7–1:18
Index
J
Machine Assistant 2:17
Machine overview 1:14
Maintenance 6:1–6:5
Main Menu 3:7
Main switch 2:3
MAXI stitches 1:13, 4:24
Messages
options for messages 3:28
options for messanges 5:8
Mini Main menu 5:3
Mirroring 3:13
Mirror end to end 5:6
Mirror side to side 5:7
Monogram 4:28, 5:70
Monograms and letters
embroider monograms and letters 5:27–5:30
More options 5:6
Move Hoop 5:8
Move icon 5:5
Move the design within the hoop 5:20
Multi-color embroidery 5:19
Jumping over stitches 5:26
K
Knee lift 2:16
removing 5:11
L
Last stitch 3:7
Leaves and Flowers 1:12
Lid 2:4
Light bulb
changing 6:3
6:8
N
Needle
changing 2:7
threading 2:14
Needles 5:45
Needle plate
changing 6:2
Needle positions 3:13
Needle threader 2:14
Needle Up/Down Button 3:2
Nostalgia /Heirloom 4:22
Page 9

O
R
OK 3:10
One color embroidery 5:20
Operating Instructions 2:2
Overlock stitches 3:21
closed overlock stitch 3:21
closed with edge thread 3:21
open overlock stitch 3:21
P
Parts of the creative 2170 1:14
Parts of the embroidery hoop 1:15
Parts of the embroidery unit 1:15
Patchwork 4:16
Patchwork program 3:6, 4:16
create a new 4:17
Pattern start 3:2
Personal menu 3:27
Piecing the quilt top 4:18
Pintucks
twin needle Pintucks 4:23
Precise Positioning a design 5:6, 5:23–5:25
Preparations 2:1–2:24
Presser foot
changing 2:5
snap off 2:5
snap on 2:5
Presser foot lift 2:16
Q
Quilting 4:16
Quilt Appliqués 4:19
Quilt stitches 1:11
Reverse Sewing Button 3:2
Rolled hem 3:24
S
Satin stitches 1:11
Save parameter 3:12
Scalloped edgings 1:11
Select a stitch 3:11
Select stitches 5:4
Sensormatic buttonhole guide 3:15
Sewing 3:1–3:28
Sewing mode functions 3:3–3:6
Sewing sequence 4:4–4:10
adjust an existing sewing sequence 4:7
arrange stitches 4:6
close without saving 4:9
create 4:5
delete 4:9
inserting a stitch 4:7
inserting a stitch at the start 4:7
open from creative memory card 4:10
open from memory 4:10
save 4:8
select and open saved 4:9
Sew Slow Button 3:2
Shell edging 4:25
Side to side mirroring 3:3
Single Stitch 3:4
Speed
embroidery speed 5:9
Stabilizers 5:44–5:45
Stitch-in-the-Ditch 4:18
Index
6:9
Page 10

Stitch building
automatic 5:5, 5:33–5:34
Stitch Chart 1:8
Stitch Creator 4:11–4:15
Stitch information 5:4
Stitch length 3:11
Stitch settings
alter the stitch settings 4:3
Stitch width 3:11
Straight stitch 3:14
T
Table of Content 1:4–1:6
Tapering 3:5, 4:20–4:21
asymmetric taper 4:21
symmetric taper 4:20
Technical Data 6:11
Threading
Index
needle 2:14
twin needle 2:15
Threads 5:46
Thread cutter 2:3
Thread snips 5:9
Thread Snips Button 3:2
Thread tension 2:13, 3:11
Three-step Zigzag stitch 3:14
Tie-off 3:12
Tie-off program 3:5, 3:12
Toolbar 3:7
Twin needle 3:6, 3:24
sewing 3:24
sewing Maxi stitches 3:24
Twin needle, threading 2:15
Twin needle Pintucks 4:23
U
Undo pattern re-sort 5:7
Update your machine 2:20–2:23
Utility stitch
altering a utility stitch 3:11
Utility stitches 1:8-1:11
W
Welcome Screen 3:7
Wing Needle 4:22
Word sequence
editing 4:27
saving 4:27
Z
Zippers
sewing in zippers 3:23
Zoom
move the zoomed area 5:35
zoom in 5:4, 5:35
zoom out 5:4
6:10
Page 11

Please note that on disposal, this product must be
safely recycled in accordance with relevant National
legislation relating to electrical/electronic products.
If in doubt please contact your retailer for guidance.
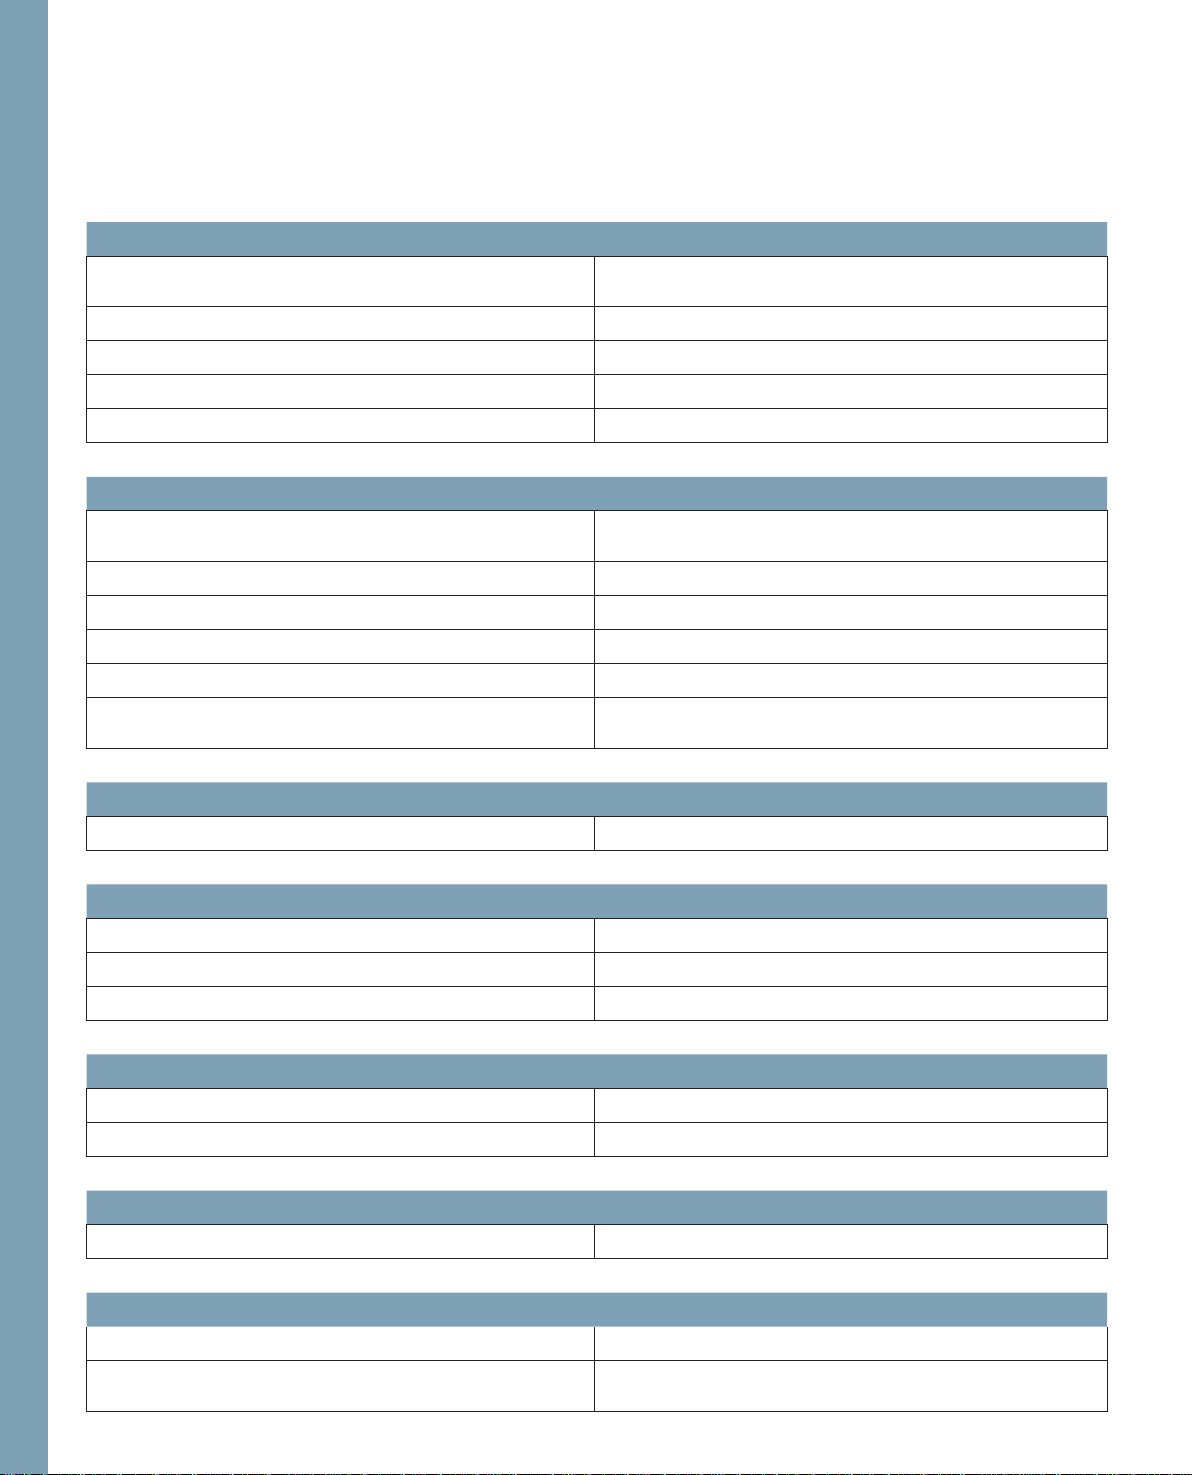
Technical Data
Dimensions (w x h x d) 187x290x408
Weight 9.5kg
Nominal voltage (reversible) 220-240 V/120 V
Power consumption 75W
Sewing lamp 12V/5W
Sewing speed (max and min) 1100rpm /60rpm
Stitching width 0 ... 9mm
Stitching length 0 ... 6mm
Presser foot lift 8mm
Max. presser foot height 8.3mm
Needle system 130/705H
We reserve the right to change the machine equipment and the
assortment of accessories without prior notice, or make modifi cations
to the performance or design.
Such modifi cations, however, will always be to the benefi t of the user
and the product.
Page 12

VSM Group AB • SE-561 84 Huskvarna • SWEDEN
www.pfaff.com
413 04 79-26A • English • Inhouse • © 2006 VSM Group AB • Printed in Sweden on environmental-friendly paper
 Loading...