

Page 1

Reproduced for Historical & Reference purposes by Paul M. Provencher - http://whitemetal.com
Page 2

Introduction......................................................................................................................................................1
Major working parts of the ASAHI PENTAX Spotmatic II .........................................................................2
Specifications....................................................................................................................................................4
Short operating course ...................................................................................................................................6
How to hold your camera ...............................................................................................................................8
Film Loading......................................................................................................................................................9
Film wind and rewind ....................................................................................................................................10
Bright field focusing.......................................................................................................................................11
Microprism.......................................................................................................................................................11
Automatic Diaphragm*...................................................................................................................................... 12
Shutter.............................................................................................................................................................13
Cautions.....................................................................................................................................................13
Depth-of-field guide......................................................................................................................................13
Depth-of-field tables:....................................................................................................................................14
Range of light measurement........................................................................................................................16
Mercury Battery.............................................................................................................................................. 17
Flash Synchronization ...................................................................................................................................18
Self-Timer........................................................................................................................................................19
Infra-red Photography..................................................................................................................................19
How to make deliberate double exposure.................................................................................................19
Important Notes.............................................................................................................................................20
How to take care of your camera...............................................................................................................22
Interchangeable Lenses................................................................................................................................24
Fixed Focus Setting.......................................................................................................................................24
Super-Multi-Coated (SMC) Takumars........................................................................................................ 24
DIFFERENCE OF ANGLE OF TAKUMAR LENSES........................................................................................25
SPECIFICATIONS OF TAKUMAR LENSES ...................................................................................................35
Complete System of Asahi Pentax Accessories for Close-Ups, Macrophotography,
Photomicrography, and other Miscellaneous Accessories...................................................................... 37
Super-Lite II Electronic Flash......................................................................................................................43
Spotmeter III..................................................................................................................................................44
ASAHI PENTAX Prism Binoculars.................................................................................................................45
ASAHI PENTAX Telescopes...........................................................................................................................46
GUIDE BOOK FOR ASAHI PENTAX SYSTEM OF PHOTOGRAPHY............................................................47
WARRANTY POLICY........................................................................................................................................49
Reproducers Comments........................................................................................................................................52
Reproduced for Historical & Reference purposes by Paul M. Provencher http://whitemetal.com
2
Page 3

Introduction
Your Asahi Pentax Spotmatic II is the finest photographic instrument on the market. The
Super-Multi-Coating" on the Takumar lens, developed by Pentax and available only on
Spotmatic II Takumars, reduces flare and boosts contrast to a degree far beyond what was
previously possible in optical technology. It is a tougher coating than is available on any
competitive lenses and results in pictures with more detail and richer colors than is possible
with any other system at any price
The Spotmatic II itself is an outgrowth and refinement of the original Spotmatic which
introduced through-the-lens metering to the world of photography. Its stopped-down metering
system is the most accurate method for perfect exposure determination. It also automatically
gives you a depth-of-field preview. It is an averaging system for the easiest and most
dependable exposures in typical picture-taking situations. This metering system has been
refined and improved each year in the Spotmatic to a degree of accuracy unmatched in the
industry.
The original Spotmatic was the most compact 35mm SLR made. The Spotmatic II retains
that same traditional compactness and classic feel. It also is designed for use with the
accessories from the Pentax system, including all of the superb Takumar lenses ranging from
the ultra-wide-angle 17mm Takumar up to the super-telephoto 1000mm Takumar. The Pentax
system can grow with you as your interests develop in any direction.
We are very proud of the Pentax Spotmatic II. We are sure you will be, too.
Reproduced for Historical & Reference purposes by Paul M. Provencher - http://whitemetal.com
Page 4

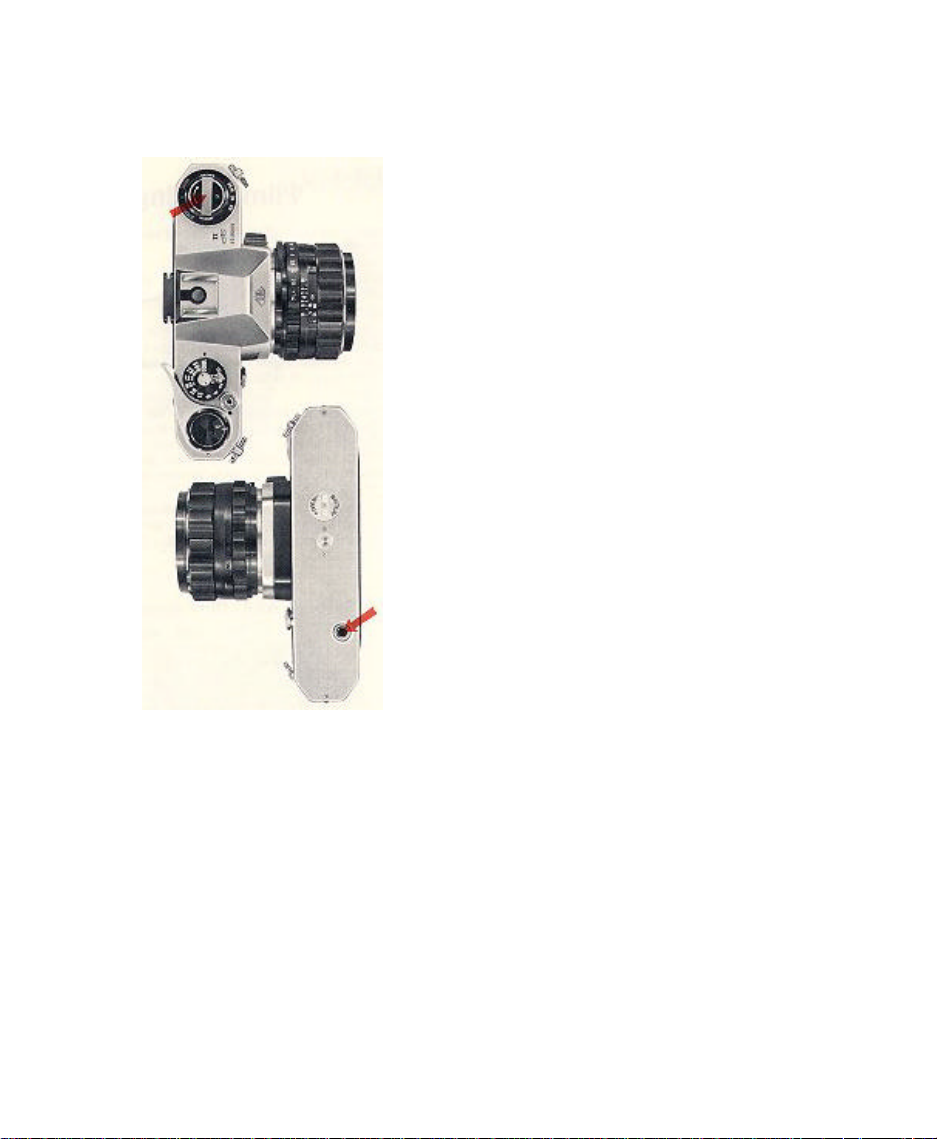
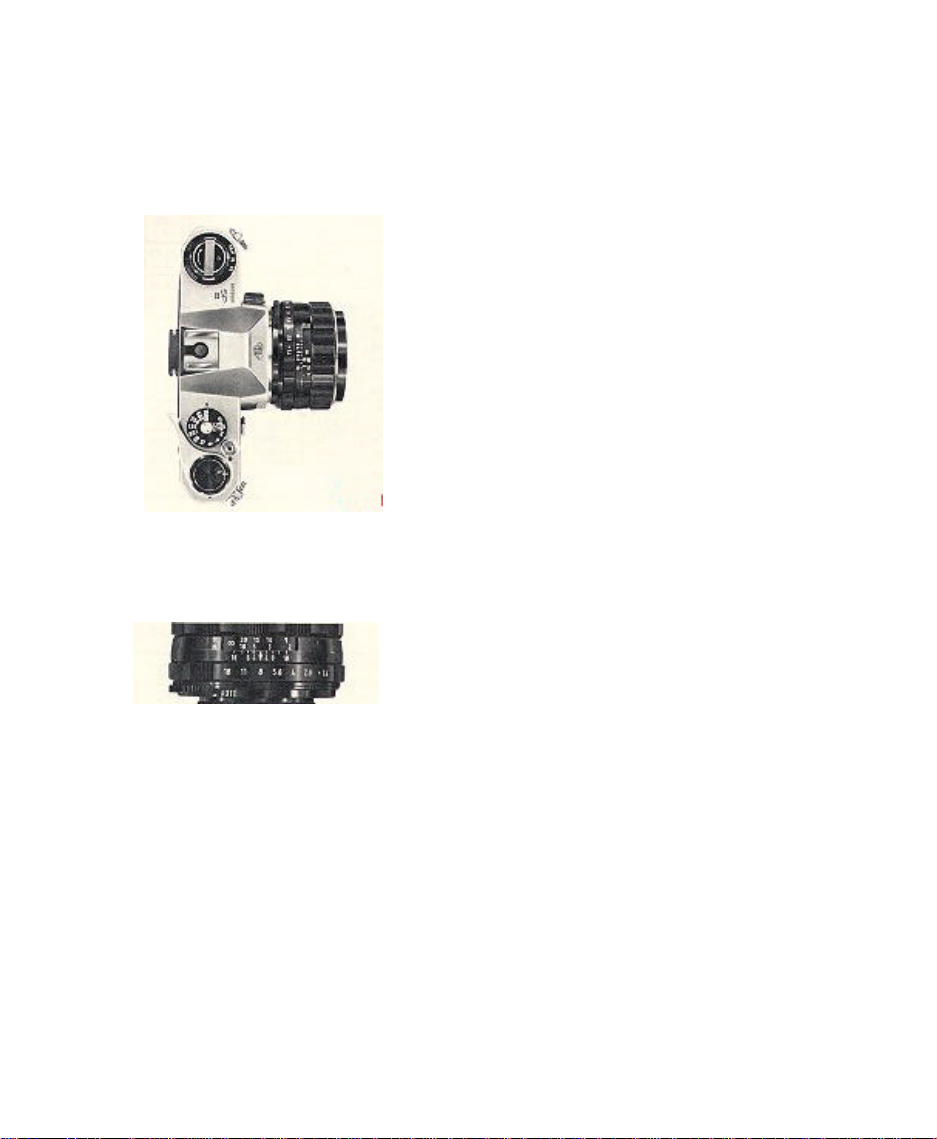
Major working parts of the ASAHI PENTAX Spotmatic II
A - Shutter Speed Index G - 'Cocked' indicator
B - Shutter Speed Dial H - D-ring lug
C - Rapid wind lever I - Self-timer cocking lever
D - ASA film speed setting J - Focusing ring
E - Shutter Release K - X flash terminal
F - Automatic reset exposure counter L - FP Flash terminal
Reproduced for Historical & Reference purposes by Paul M. Provencher http://whitemetal.com
2
Page 5
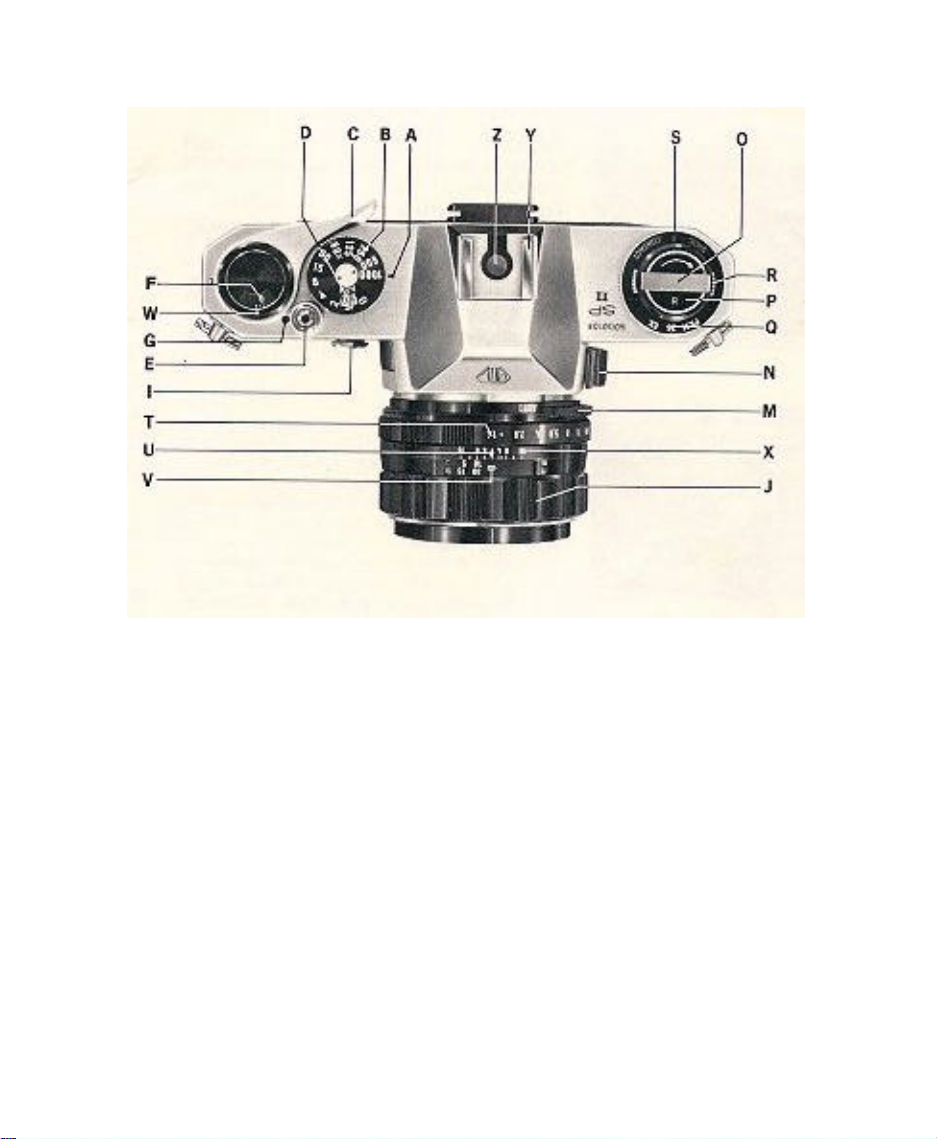
M - Preview lever T - Diaphragm ring
N - Exposure meter switch U - Diaphragm and distance index
O - Film rewind crank V - Distance scale
P - Film rewind knob W - Exposure counter index
Q - Film type reminder dial X - Depth-of-field guide
R - Reminder dial selector Y - Hot shoe
S - PF/X switch rim Z - Hot shoe flash contact
Reproduced for Historical & Reference purposes by Paul M. Provencher http://whitemetal.com
3
Page 6
Specifications
Type
35mm single-lens reflex with built-in light meter.
Film and Picture Size
35mm film (20 or 36 exposures). 24mm x 36mm
Standard Lenses
Super-Multi-Coated Takumar 50mm f/1.4 or 55mm
Super-Multi-Coated Takumar f/1.8 with fully automatic
diaphragm. Distance scale: 0.45m (1.5 feet) to infinity.
Filter size: 49mm. With depth-of-field scale. Equipped
with diaphragm preview lever which affords visual
check of depth of field. Distance Scale: 45cm (18") to
infinity.
Shutter
Focal plane shutter with single non-rotating dial (dial
rotates to select shutter speed but remains stationary
when exposure is made - this is a reference to earlier
cameras that had shutter speed dials that rotated when
the exposure was made). Speeds: B, 1-1/1000 sec.
Film speed (ASA) setting dial and window on shutter
speed dial. Built-in self-timer releases shutter in 5-13
seconds. Shutter curtains of special rubberized silk.
Warning Signal
The index of shutter speeds turns red when the
shutter and film speed settings are off the meter's
measurability range.
Finder
Pentaprism finder with microprism. Fresnel lens for
instant focusing; 0.88x magnification with 50mm lens,
and approximately life-size with 55mm lens.
Focusing
Turn the distance scale ring until the subject image in
the viewfinder comes into sharp focus. Minimum focus
distance: 0.45m (1.5 feet) (With 50/55mm lenses)
Reflex Mirror
Instant Return Type with special shock absorbers for
minimum vibration.
Lens Mount
42mm threaded lens mount (Pentax-mount)
Reproduced for Historical & Reference purposes by Paul M. Provencher http://whitemetal.com
4
Page 7
Film Advance
Ratchet type rapid wind lever (for film
advance and shutter cocking). 10° preadvance and 160° advancing angle.
"Cocked" Indicator
A red disk appears in a small window alongside the shutter release button when the
shutter is cocked, and blacks out when it is
released.
Film Exposure Counter
Automatic re-set type.
Flash Synchronization
FP & X contacts for conventional flash cord
connection. Electronic synchronization at
1/60 sec. Hot shoe with selectable sync (X or
FP)
Exposure Meter
Built-in meter measures the brightness of
the ground glass, and couples directly to the
shutter and film speed settings. Film speed
(ASA) setting ranges from 20 to 3200 (LV118 for ASA 100 film with standard lens.)
Meter is powered with a mercury battery.
Film Rewind
Rapid rewind crank for speedy film take-up.
Film rewind button on base of camera body
releases film from take-up spool for rewind
and rotates while film is being rewound.
Loaded Film Indicator
Loaded film reminder dial underneath film
rewind knob is marked "20" or "36" in green
(for color; tungsten type), in white (black and
white), in orange (for color, daylight type)
and "EMP" (empty).
Dimension
width 143mm (5.6") x height 93mm (3.66")
x thickness 88mm (3.4")
Weight
853g (1 lb. 11 oz.) with 50mm f/1.4 lens.
Body alone: 622 grams (1 lb, 4 oz.)
Reproduced for Historical & Reference purposes by Paul M. Provencher http://whitemetal.com
5
Page 8
Short operating course
A mercury battery for the light meter is packed separately. Be sure to insert it into the
battery housing when operating the camera. For battery insertion, refer to page 17.
1. SET FILM SPEED
Lift the outer ring of the shutter speed
dial, turn it around and set the same
number as the ASA number of the loaded
film to the small red index which appears
alongside the figure 1. Then cock the
rapid wind lever.
2. SET SHUTTER SPEED
Turn the shutter speed dial and set the
speed you wish to use to the index.
When outdoors, set the speed to 1/125
sec., or faster, depending upon the
lighting. When indoors, set it at 1/30, or
in its neighborhood. Change the shutter
speed later, when necessary. (Refer to 5
on next page.)
3. COMPOSE AND FOCUS
While viewing through the viewfinder,
turn the distance scale ring with your
thumb and index finger until you get the
sharpest image of your subject at the
microprism center of the finder
Reproduced for Historical & Reference purposes by Paul M. Provencher http://whitemetal.com
6
Page 9
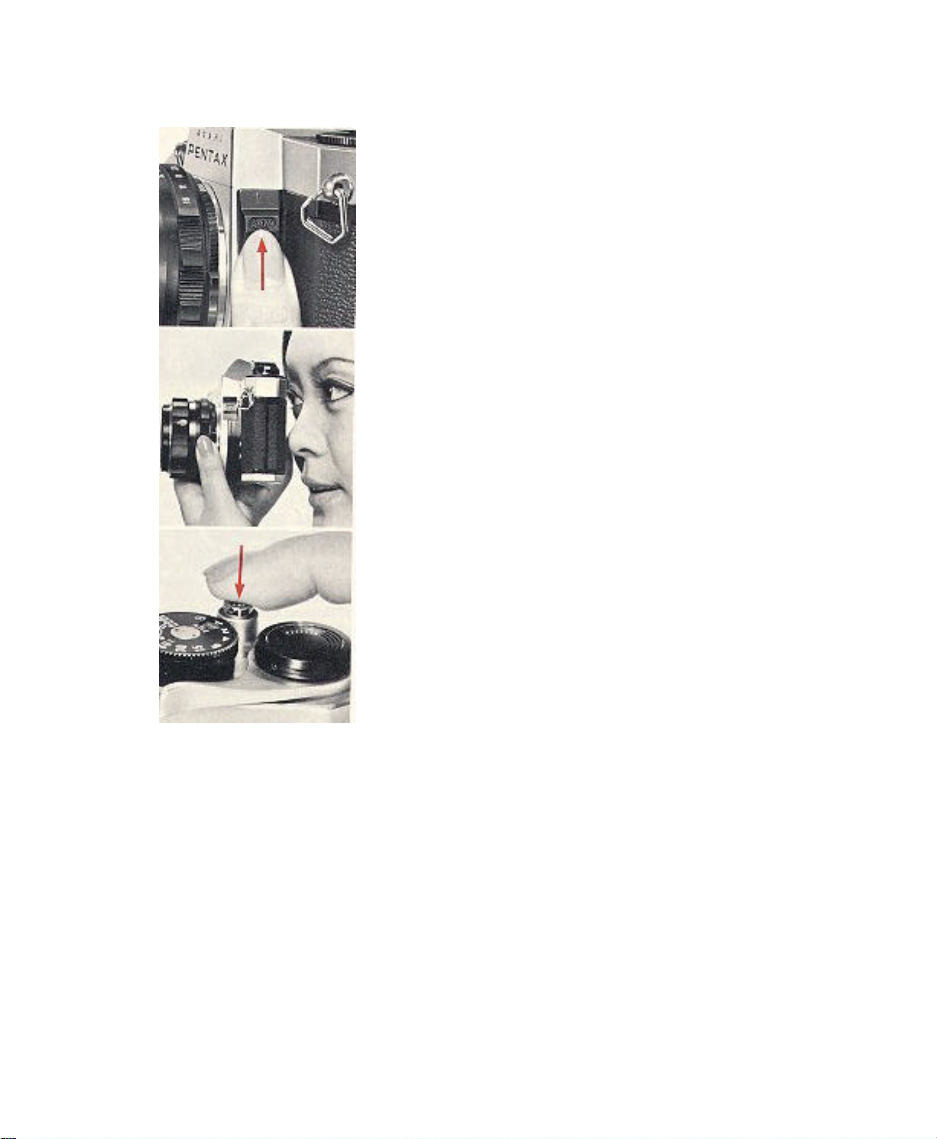
4. TURN ON THE LIGHT METER
turn of the diaphragm ring. When the
SWITCH
Push up the switch button with your
thumb. Through the viewfinder, you will
observe the movement of the meter's
needle on the right side of the ground
glass. Be sure to turn off the meter's
switch when not actually taking readings.
5. ROTATE DIAPHRAGM RING
The needle moves up and down with the
needle rests at the center, you will get
correct exposure. If the needle does not
come to the center no matter how far you
turn the diaphragm ring, change the
shutter speed. When the needle is off
center and close to the (+) mark, you will
get over-exposure: change the shutter
speed to a faster setting. If the needle is
closer to the (-) mark, you will get underexposure: change the shutter speed to a
slower setting.
6. RELEASE THE SHUTTER
Hold your camera firmly and trip the
shutter. When the shutter is released,
the meter switch will automatically turn
off, and the needle will remain fixed off
and underneath the center. The
diaphragm will reopen to its full aperture
and the overall image will look brighter.
Cock the rapid wind lever for the next
picture. (When taking a series of pictures
under the same lighting conditions, it is
not necessary to repeat instructions 4 and
5.)
Reproduced for Historical & Reference purposes by Paul M. Provencher http://whitemetal.com
7
Page 10

How to hold your camera
In horizontal position
A. Hold the camera firmly
with your left hand, and
draw your arm close to
your body.
As a general rule, your camera should be held more firmly by the left hand which does not
release the shutter. If you hold your camera with the right hand - the hand which releases the
shutter - it may cause camera movement. Very often, pictures which are not sharp are due to
movement of the camera. When you focus with the camera held horizontally (Position A), hold
the lens barrel as illustrated. Cradle the camera with your left hand thumb and little finger.
Turn the distance scale ring with your thumb and index finger. When holding the camera
vertically, some people release the shutter with the thumb (Position B), while others release it
with the index finger (Position C). Position C is more desirable for fast focusing and shooting.
With the Asahi Pentax, whether held vertically or horizontally, you see your subject image
through the taking lens, enabling you to compose, focus and shoot with a minimum of time and
effort.
In vertical position B.
Hold your camera tightly to
your forehead with your left
hand, and drawn your right
arm close to your body.
In vertical position C.
Hold your camera tightly to
your forehead with your left
hand, raise your right arm
and draw your left arm to
your body.
Reproduced for Historical & Reference purposes by Paul M. Provencher http://whitemetal.com
8
Page 11
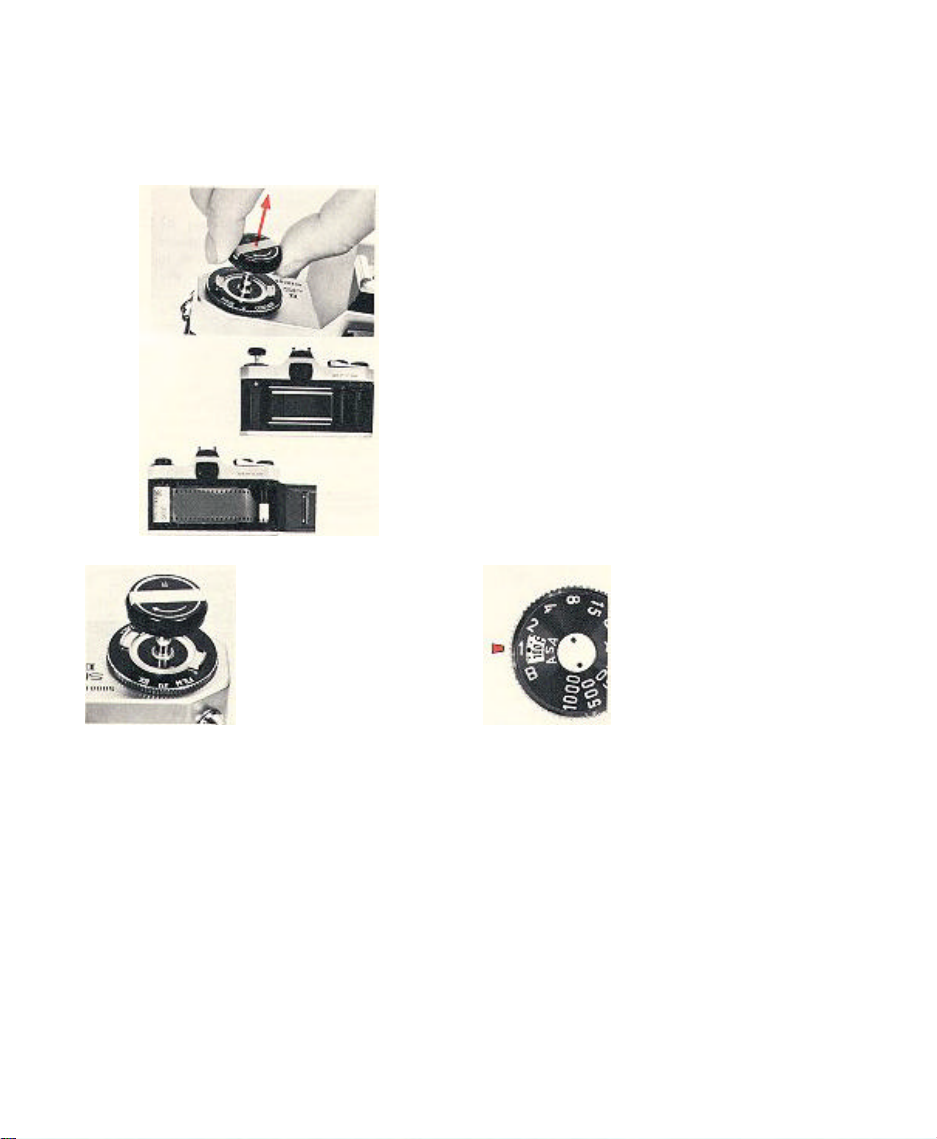
Film Loading
Avoid direct sunlight when loading your
film.
1. Open the back by pulling out the
rewind knob until the back cover snaps
open.
2. Place the film cassette into the
cassette chamber, and push back the
rewind knob. Draw out the film leader and
insert it into the slot of the take-up spool.
3. Advance the film by alternately
turning the rapid wind lever and releasing
the shutter until both sprockets have
properly engaged the film perforations.
Close the back by pressing it firmly.
4. If the film is properly loaded, the
rewind knob will turn counter-clockwise
when you advance the film by turning the
Film type reminder dial Setting ASA film speed
Use the film type
dial to show what
type of film is in your
camera. When you
have pulled out the
rewind knob to open
the back when
loading the film,
rapid wind lever.
The ASA film speed
rating of all 35mm
films is given in the
data sheet packed with
each roll of film. The
higher the ASA
number, the more
sensitive the film.
turn the dial selector so that the type of
film appears in the window. To check
whether the camera is loaded, turn the film
rewind knob clockwise. If it turns freely, the
camera is not loaded.
Reproduced for Historical & Reference purposes by Paul M. Provencher http://whitemetal.com
Lift the outer ring of the shutter speed
dial and rotate it until the ASA number of
your film is opposite the red index mark.
Be sure to set your film speed on the
shutter speed dial because the dial is
connected to the exposure meter system.
9
Page 12
1 The first portions of the film cannot be
used for picture taking as they have already
been exposed to light. Generally, two blank
exposures should be made before taking your
first picture. Cock the rapid wind lever until
it stops. Watch to see that the film rewind
knob automatically turns counter-clockwise,
indicating that the film is moving from
cassette to take-up spool. Trip the shutter.
Film wind and rewind
Cock the rapid wind lever for the first
picture; the exposure counter automatically
turns to '1', indicating that the first picture is
ready to be taken.
2 After the final picture on the roll (20 or
36 exposures) has been taken, the rapid
wind lever will not turn all the way as you
stroke it. This indicates that the final picture
has been taken on your film, and that the
film must be rewound. Don't open the back
of the camera, or all exposed frames will be
ruined.
3 Unfold the film rewind crank.
4 Depress the film rewind release button.
Turn the rewind crank to rewind the film into
the film cassette. The film rewind crank
permits rapid rewinding at a smooth, even
rate. (Under some atmospheric conditions,
erratic or too rapid rewinding will cause static
electricity marks on the film.) You will feel
the tension on the rewind crank lessen as the
leader end of the film slips off the take-up
spool.
Stop rewinding when you feel this happen.
AVOID DIRECT SUNLIGHT WHEN
UNLOADING YOUR FILM. (The rewind
release button will return to normal position
as you load your next film and turn the rapid
wind lever.)
5 Pull out the film rewind knob (the back
will open automatically), and remove the film
cassette.
Reproduced for Historical & Reference purposes by Paul M. Provencher http://whitemetal.com
10
Page 13

Bright field focusing
ground glass. As you look through the
1 You can start viewing and focusing before
and after cocking the rapid wind lever. When
the automatic preview lever is in the "AUTO"
(automatic) position, the meter is at "OFF",
the diaphragm is fully open except for the
moment of exposure.
2 Turn the distance scale ring until your
subject image is clearly in focus. It is not
always necessary for you to view and focus
with the diaphragm fully open. In bright
sunlight, you can easily focus with the
diaphragm closed to f/5.6 or f/8 and still
observe the depth of field. It is easier,
however, to focus with the diaphragm fully
open as your subject image is much brighter.
When the letters "MAN" appears beside the
lever, the lens is in manual position; when
"AUTO" appears, it is in the automatic
position.
Microprism
Asahi Pentax cameras have a Fresnel lens
with a microprism center underneath the
finder, you will see that the Fresnel lens
consists of many concentric rings which
provide the brightest possible image on the
ground glass.
Reproduced for Historical & Reference purposes by Paul M. Provencher http://whitemetal.com
The microprism is the center portion of this
diagram. When your subject is in focus, the
image in the microprism will be sharp and
perfectly clear. If your subject is not in
focus, the microprism will break the image up
into many small dots, much like and
engraver's screen. You can focus your
subject on any portion of the ground glass.
11
Page 14

Automatic Diaphragm*
OUT OF FOCUS
When the preview lever is in the "AUTO"
(automatic) position, and the exposure meter is
turned to "OFF", the fully automatic diaphragm
is at its largest aperture at all times, except for
the instant of exposure, no matter what
aperture is set on the diaphragm ring. When
you release the shutter, the diaphragm
automatically stops down to the predetermined
aperture and the shutter curtains start travelling
instantly. When the exposure is completed, the
diaphragm reopens to maximum aperture
completely automatically and you are ready to
compose, focus and shoot your next pictures. If
you wish to visually check exact depth-of-field
before making the exposure, move the preview
lever to the "MAN" (manual) position. This stops
the diaphragm to the aperture selected and
shows you exactly how much depth-of-field will
appear in your picture. The preview lever may
be moved back to "AUTO" (automatic) position
before or after making your exposure, or, if you
are making pictures in bright sunlight, it may be
left in manual position, which permits a constant
check of depth of field.
* When the exposure meter switch is turn to
the "on" position, the lens diaphragm changes
from the automatic to manual position even
though the preview lever is in the "AUTO"
(automatic) position. When the shutter is
released, the lens diaphragm will automatically
return to its automatic position if the lever is set
on "AUTO"
IN FOCUS
Reproduced for Historical & Reference purposes by Paul M. Provencher http://whitemetal.com
12
Page 15
Turn the shutter speed dial clockwise or
your finger from the shutter button, the
counter-clockwise to the shutter speed desired.
The shutter speed may be set either before or
Cautions
1 At slow speeds - slower than 1/30 - support
your camera rigidly or use a tripod to prevent
movement of your camera.
Shutter
after cocking the rapid wind lever. As you cock
the shutter by turning the rapid wind lever, the
"cocked" indicator turns red showing that the
shutter is cocked.
The indicator window blacks out as you trip
the shutter button. For use of the X setting
on the shutter speed dial, refer to page 18.
With the shutter speed dial set on B (bulb),
the shutter will stay open as long as you
depress the shutter button. As you release
shutter closes. When a long exposure is
desired while using the B setting, attach a
shutter release cable with a locking device to
the shutter button. This will permit a "Time"
exposure.
2 To protect the shutter mechanism, trip the
shutter release before putting the camera out
of use for any extended period.
Depth-of-field guide
If you want to know how great the depth of
field is at a certain aperture, look at the
depth-of-field guide. In the above
photograph, the distance scale is set at 5
meters…the lens is focused on a subject 5
meters away. The calibrations on each side
of the distance index correspond to the
diaphragm setting and indicate the range of
in-focus distance for different lens apertures.
For example, if the lens opening of f/8 is to
be used, the range on the distance scale ring
covered within the figure 8 on the depth-offield guide indicates the
Reproduced for Historical & Reference purposes by Paul M. Provencher http://whitemetal.com
area in focus at the lens opening. You will
note from the depth-of-field guide in the
photograph that the range from
approximately 10 to 25 feet is in focus. Note
that as the lens apertures change, the
effective depth of field also changes. For the
depth of fields at different apertures and
distances, refer to page 14 ~ 15.
Depth of field is the range between the
nearest and farthest distances which are in
focus at different lens apertures.
13
Page 16

Depth-of-field tables :
Super-Multi-Coated Takumar 50mm lens
Distance
Scale \
f setting
f/1.4 0.45
f/2 .045
f/2.8 0.44
f/4 0.44
f/5.6 0.44
f/8 0.44
f/11 0.43
f/16 0.42
0.45
m
0.453
0.454
0.46
0.46
0.46
0.47
0.47
0.48
Depth-of-field table :
Super-Multi-Coated Takumar 55mm lens
Distance
Scale \
f setting
f/1.8 0.45
f/2 0.45
f/2.8 0.45
f/4 0.44
f/5.6 0.44
f/8 0.44
f/11 0.44
f/16 0.43
0.45
m
0.45
0.45
0.45
0.46
0.46
0.46
0.47
0.47
0.6
m
0.59
0.61
.059
0.61
0.59
0.61
0.59
0.62
0.58
0.62
0.57
0.63
0.56
0.65
0.54
0.67
0.6
m
0.59
0.61
0.59
0.61
0.59
0.61
0.59
0.61
0.58
0.62
0.58
0.62
0.57
0.63
0.56
0.65
1
m
0.98
1.02
0.98
1.02
0.97
1.03
0.95
1.05
0.94
1.07
0.91
1.11
0.88
1.15
0.84
1.24
1
m
0.98
1.02
0.98
1.02
0.98
1.03
0.97
1.04
0.95
1.05
0.93
1.08
0.91
1.11
0.87
1.17
1.5
m
1.46
1.54
1.45
1.56
1.43
1.58
1.40
1.62
1.36
1.68
1.30
1.77
1.24
1.89
1.16
2.16
1.5
m
1.46
1.54
1.46
1.54
1.44
1.56
1.42
1.59
1.39
1.63
1.34
1.70
1.29
1.79
1.22
1.96
2
m
1.93
2.07
1.90
2.11
1.87
2.16
1.81
2.23
1.75
2.34
1.66
2.52
1.56
2.80
1.42
3.42
2
m
1.93
2.07
1.92
2.08
1.89
2.12
1.85
2.17
1.80
2.25
1.73
2.38
1.64
2.57
1.52
2.95
5
m
4.57
5.52
4.41
5.78
4.21
6.16
3.94
6.84
3.64
8.03
3.26
10.87
2.88
19.53
2.42
~ ∞
5
m
4.57
5.52
4.53
5.59
4.36
5.86
4.13
6.33
3.87
7.09
3.53
8.65
3.18
11.93
2.73
32.75
10
m
8.40
12.36
7.86
13.75
7.24
16.19
6.48
22.05
5.68
42.68
4.80
~ ∞
4.02
~ ∞
3.16
~ ∞
10
m
8.39
12.38
8.24
12.72
7.70
14.27
7.01
17.48
6.27
24.97
5.41
70.27
4.62
~ ∞
3.71
~ ∞
∞
m
51.75
~ ∞
36.24
~ ∞
25.90
~ ∞
18.14
~ ∞
12.97
~ ∞
9.10
~ ∞
6.63
~ ∞
4.57
~ ∞
∞
m
51.27
~ ∞
46.15
~ ∞
32.98
~ ∞
23.10
~ ∞
16.52
~ ∞
11.58
~ ∞
8.44
~ ∞
5.82
~ ∞
Reproduced for Historical & Reference purposes by Paul M. Provencher http://whitemetal.com
14
Page 17

Depth-of-field table :
Super-Multi-Coated Takumar 50mm lens
Distan
ce Scale
\
f
setting
f/1.4 1' 6.12"
f/2
f/2.8
f/4
f/5.6
f/8
f/11
f/16
1'6" 2' 3' 5' 10' 15' 30' ∞
1' 6.13"
Depth-of-field table :
Super-Multi-Coated Takumar 55mm lens
Distan
ce Scale
\
f
setting
f/1.8
f/2
f/2.8
f/4
f/5.6
f/8
f/11
f/16
1'6" 2' 3' 5' 10' 15' 30' ∞
1' 11.8"
2' 0.2"
2' 11.5"
3' 0.6"
4' 10.4"
5' 1.7"
9' 5.6"
10' 7.2"
13' 9.7"
16' 4.9"
25' 6.6"
36' 4.2"
9.2"
m
169'
∞
m
Reproduced for Historical & Reference purposes by Paul M. Provencher http://whitemetal.com
15
Page 18

Range of light measurement
The exposure meter of the Spotmatic measures the brightness of the ground glass. Therefore, the meter should be turned
on after you have focused your subject on the ground glass. The following table shows the range of the meter's light
measurement, and should not be interpreted as the camera's total range of f/stop-shutter speed combinations. As you will
note from the table below, with an ASA100 film, you may use any shutter speed from 1 sec. to 1/1000 sec. in combination with
any aperture that will bring the meter needle to the midpoint in the viewfinder. The total range of the aperture settings is, of
course, determined by the minimum and maximum apertures of the lens being used. For example, with the 50mm f/1.4 lens
and ASA 100 film, an aperture from f/1.4 (the maximum aperture of this lens) to f/16 (the minimum aperture) may be used
with any shutter speed from 1 sec. to 1/1000 sec. that will bring the meter needle to midpoint.
ASA B 1 1
20
• 25
32
• 40
• 50
64
• 80
100
• 125
• 160
200
• 250
• 320
400
• 500
• 640
800
• 1000
• 1250
1600
• 2000
• 2500
3200
The area A indicates the reading range of the meter. The area B indicates that although the shutter speed index is black and
the meter needle moves, the meter is NOT operating properly.
When the meter needle is centered with the shutter speed dial set at B using ASA 20~50 films, this indicates that the exact
shutter speed required is 2 seconds. Please expose your picture for 2 seconds.
/2
B
1
/4
1
/8
/15
1
A
/30
1
/60
1
/125
1
/250
1
/500
1
1
/1000
Reproduced for Historical & Reference purposes by Paul M. Provencher http://whitemetal.com
16
Page 19

Mercury Battery
with a coin. Remove old battery and insert new battery
How to check it
1. Set the shutter speed dial to B (bulb) position.
2. Turn the ASA dial to ASA 100.
3. Push the meter switch to "on" position.
Look at the meter's needle through the viewfinder. If the
needle rapidly drops, the meter has sufficient capacity; if it
does not, replace the mercury battery.
How to replace it
Open the battery housing cover on the bottom cover plate
with (+) side toward the top of the camera. For
replacement, use Mallory PX-400 or RM-400-R or
equivalent.
CAUTION: The mercury battery is like a phonograph
record. It can be damaged by skin acids. Handle by the
edges with a dry cloth only. Be sure the battery is cleaned
with the cloth before insertion into the camera. The battery
is not rechargeable.
DANGER! A serious accident has been reported of a small child who has put a mercury
battery into his mouth and has been hospitalized for serious gripes and stomach inflammation.
Please always keep a mercury battery from the reach of small children.
Reproduced for Historical & Reference purposes by Paul M. Provencher http://whitemetal.com
17
Page 20

Flash Synchronization
The Spotmatic II has FP and X terminals at the front of the camera body, and a separate FP/X
contact on the built-in hot shoe. The table below shows which flash contact, which shutter
speed and which flash bulb may be combined for maximum lamp efficiency. Unless these
combinations are rigidly followed, there will be a failure in flash synchronization. Note the "X"
setting is exactly the 60 marked on the speed dial. This indicates the highest shutter speed at
which electronic flash units may be used.
Use the hot shoe flash contact only when using the Super-Lite II or any other electronic flash
or flash gun that has a flash contact on the shoe bracket. To select FP or X, just turn the FP/X
switch rim so that either one of the marks appears in the window.
When not using these terminals, keep the plugs inserted in the terminals.
Flash
Terminal
\
Shutter
Speed
FP
1
/1000
1
/500
/250
FP Class (Screw Base)
FP Class (Bayonet Base)
1
1
/125
/60
1
/30
1
/15
1
/8
1
/4
1
/2
F Class
X
M Class and MF Class
Electronic Flash
1
1
Reproduced for Historical & Reference purposes by Paul M. Provencher http://whitemetal.com
18
Page 21

Self-Timer
Depending on how far down you turn the self-timer cocking lever (1),
it will release the shutter in 5 - 13 seconds. When operating the selftimer, always depress the self-timer release button (2) to release the
shutter. Do not depress the shutter button … it will immediately release
the shutter without delayed action. The self-timer cocking lever should
be turned down at least 90° or the release button will not operate.
Infra-red Photography
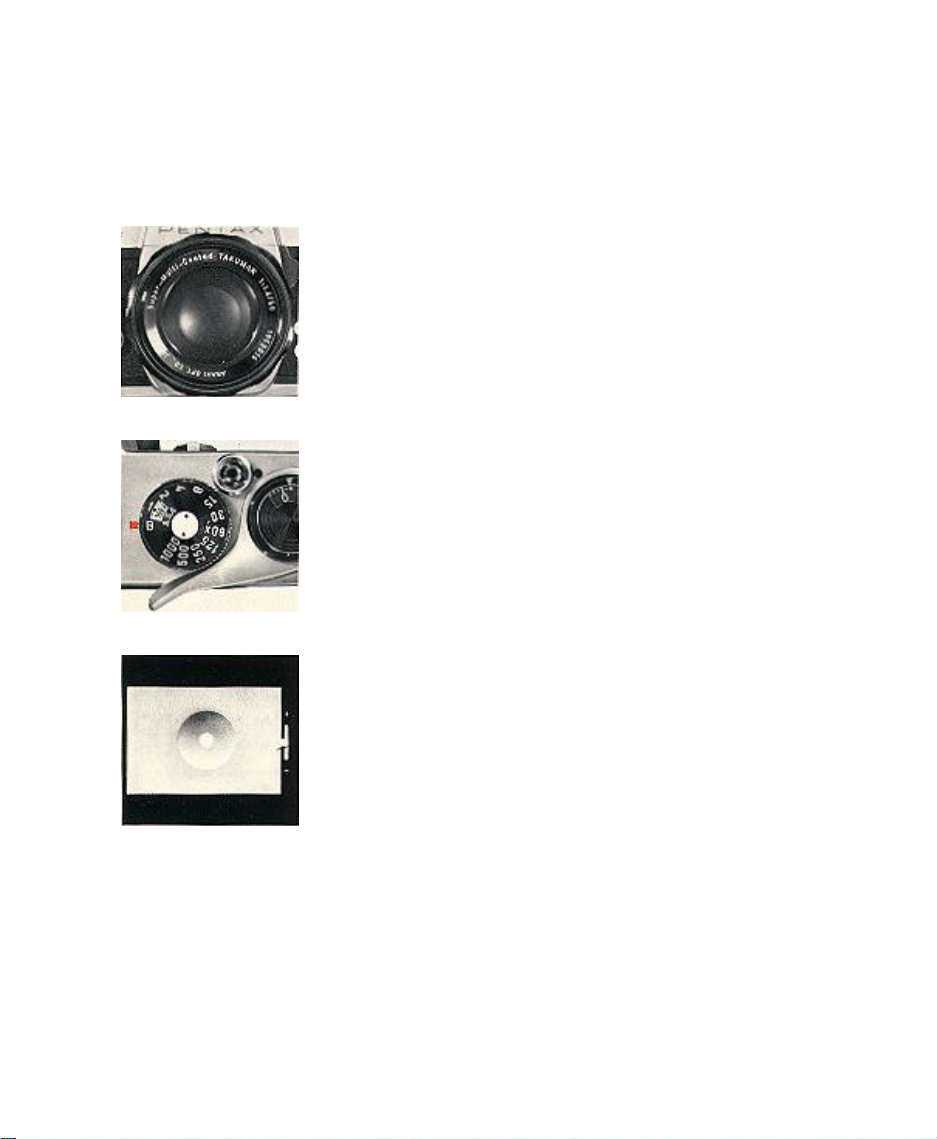
If you intend to take infra-red photographs, remember to use the
small "R" index marked on the depth-of-field guide. Some of the
Takumar lenses, however, like the above picture of Super-Takumar
50mm f/1.4, do not have the "R" mark. The index is just a short
orange line.
First, focus your lens on your subject. Determine the lens to subject distance from the
distance scale. Then match your lens to subject distance to the "R" mark my turning the
distance scale accordingly. For instance, if your subject is in focus at infinity, turn the distance
ring and move the infinity ( ∞ )mark to the "R" index.
The "R" index marking on Takumar lenses is based on the lens setting at infinity.
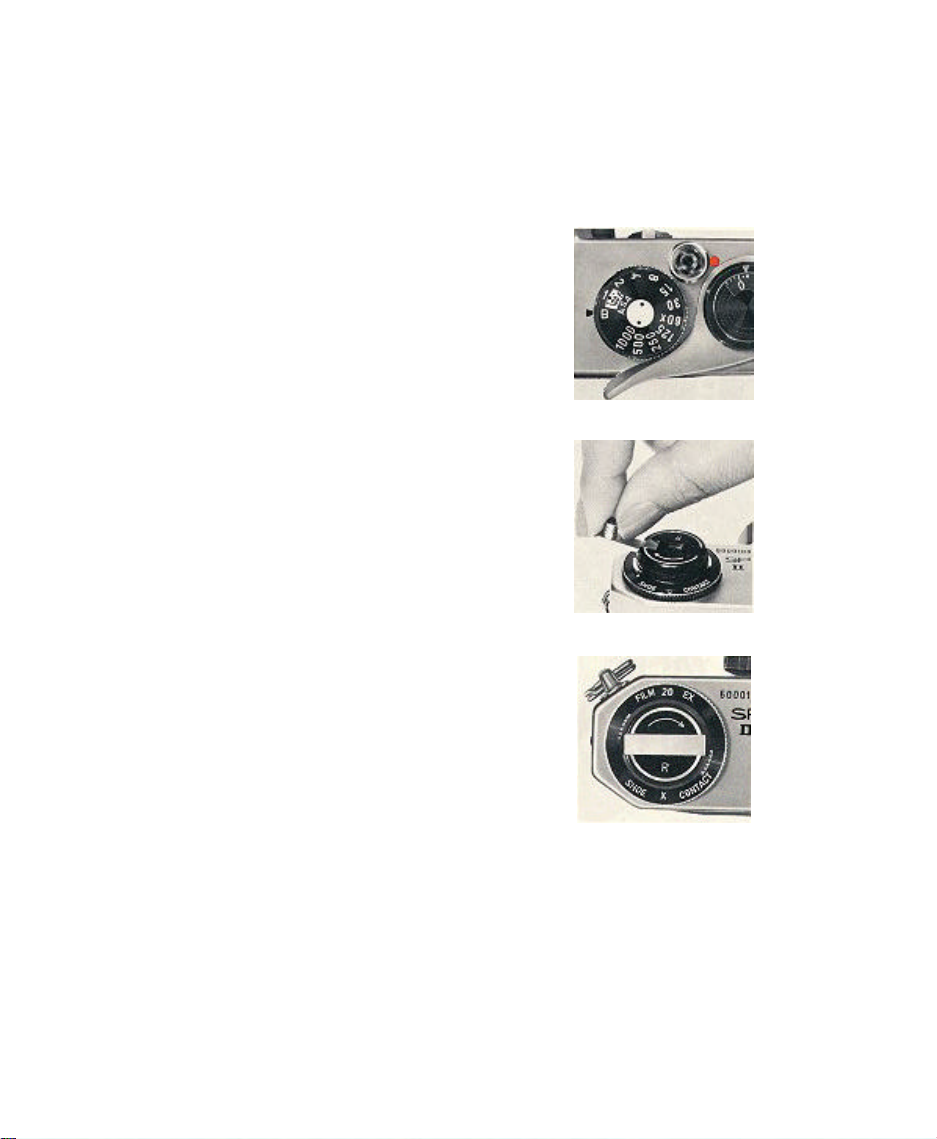
How to make deliberate double exposure
For deliberate double exposures, make the first exposure in the normal way. Then tighten
the film by turning the rewind knob (1), and keep hold of the rewind knob. Depress the film
rewind release button (2) and cock the rapid wind lever. This tensions the shutter without
advancing the film. Finally, release the shutter to make the second exposure. Then make one
blank exposure, before taking the next picture, to avoid overlapping.
Reproduced for Historical & Reference purposes by Paul M. Provencher http://whitemetal.com
19
Page 22

Important Notes
Always keep the meter switched off when
not actually taking readings. Leaving the
meter switched on will rapidly exhaust the
battery. It is also necessary to keep the
meter switched off when mounting a SuperTakumar or SMC Takumar lens on the
Spotmatic II camera body. If it is switched
on, the tip of the automatic diaphragm
release pin of the lens will hit the pin release
plate inside the camera body and may get
damaged.
When the index of the shutter speeds turns
red, it indicates that the shutter and film
speed settings are off the meter's
measurability range. Change the shutter
speed setting to a faster or slower setting.
Refer to page 16.
When the meter is switched on, the lens
(any Super-Takumar or SMC Takumar lens)
is in its manual position, even when the
diaphragm preview lever is in the "AUTO"
(automatic) position. When the meter is
switched off manually, or automatically after
shutter release, the lens returns to its
automatic position when it is set in "AUTO"
position.
1
2
3
Reproduced for Historical & Reference purposes by Paul M. Provencher http://whitemetal.com
20
Page 23

4
Exposure increase factors which apply
when taking pictures with filters, close-ups,
macro- and micro-photos, do not apply to
the Spotmatic
No!
Exposure
Factor
x1.63
x1.96
x3.20
x4.80
x5.46
5
6
Primarily made for use with the Spotmatic
II, the Super-Multi-Coated Takumar
50mm f/1.4 can also be used with the
original Spotmatic, the models SL and SP
500. Further, it can be used with only two
other cameras: Asahi Pentax SV and S1a
with an orange-colored R marking on the
film rewind knob. Use with any other
camera will damage the rear element lens
The length of the tripod's screw should not
exceed the normal length of 3/16"
(4.5mm). Do not extend it longer than this
length when mounting your camera on
tripod. Forcing longer screws into the tripod
socket of the camera will damage the
mechanism.
Reproduced for Historical & Reference purposes by Paul M. Provencher http://whitemetal.com
21
Page 24

How to take care of your camera
1. STORAGE
a) The instrument, when not in use, should be protected from dampness and dust.
Preferably, it should be kept in its case and, as an additional precaution, inserted into a
polyethylene bag.
b) Care should be taken to see that the camera is not kept in abnormally high or low
temperatures - normal room temperature is best.
c) Take the precaution of removing any batteries since, no matter how well made these may
be, there is always the risk of deterioration and corrosion.
2. EXERCISE
All mechanical instruments need to be exercised regularly to keep them in good condition.
Cameras are no exception to this rule. If you put your car in storage for the winter, the first
thing a prudent owner does in the spring is to have it serviced before putting it back on the
road. There is not quite the same parallel between a motor car and a camera, nevertheless,
you should store your camera where you can get to it easily and put it through its normal
operations at least once per month. i.e.
a) Set the shutter release and fire.
b) Turn to a slow shutter speed and again set the shutter release and fire. Also operate
delayed action device (self-timer).
c) Examine the exposure meter for correct operation.
d) Check film transport
e) Check the range finder or pentaprism viewfinder.
These actions will keep the mechanism in good order, retaining the natural qualities of the
lubricant - thus ensuring the camera is ready for instant use when required.
Reproduced for Historical & Reference purposes by Paul M. Provencher http://whitemetal.com
22
Page 25

3. RUNNING TEST BEFORE USE
Before embarking on a holiday, where your camera will be your constant companion or, in
fact, any other reason for the camera being required on an important assignment, make a few
trial exposures. It is advisable to test the camera at least four weeks prior to your departure to
give time for a test film to be exposed and processed. Many spoiled holiday records would have
been avoided if this precaution had been taken.
4. DUSTY CONDITIONS
When your camera is used at the beach, or in other conditions where dust or sand can easily
infiltrate the mechanism, take the precaution of putting the instrument with its case into a
polyethylene bag or other container so that flying dust or sand are prevented from entering the
camera. This applies particularly, of course, if it is laid down on a sandy beach. Furthermore,
avoid leaving the camera in such a position that direct sunlight is allowed to fall upon it for a
long length of time.
5. LOOSE PIECES OF FILM
This nuisance is often the cause of trouble with a camera. Small chips of film can easily
damage the mechanism. Therefore, check your camera every time it is loaded. Always make
sure it is free from small pieces of film.
6. TREATING YOUR CAMERA TENDERLY
Your camera is a fine precision instrument. It has been produced with great care and
attention to detail. Do not allow it to be swung by its shoulder strap, thrown into the back of a
car, or in any way treated as if it were as robust as a battle ship. If you protect the camera
against possible damage due to a knock, you will be amply rewarded by years of excellent and
trouble-free service.
Reproduced for Historical & Reference purposes by Paul M. Provencher http://whitemetal.com
23
Page 26

Interchangeable Lenses
The Asahi Pentax offers many interchangeable lenses in a wide variety of focal lengths, all of
which are highly respected by both professional and amateur photographers for their fine
resolution. The photographic coverage of various Takumar lenses is illustrated on page 25.
With focal length longer than 55mm, the subject image is seen through the viewfinder larger
than its life size. Regardless of the lens selected for your Asahi Pentax, there is never need for
an accessory viewfinder, ordinarily required for rangefinder type cameras.
When interchanging lenses, hold the lens by the distance scale ring. When attaching a lens,
filter, or lenshood, do not screw it too tightly, as you may find it difficult to remove.
Fixed Focus Setting
Because of the considerable depth of field of wide-angle lenses, you can use them as fixedfocus lens if the diaphragm and distance scales are set properly. For your convenience, the
Super-Takumar and SMC Takumar lenses shown on pages 26 and 27 (marked with *) have a
fixed focus mark. Just align with the index the orange-colored figures of the diaphragm and
distance scales, and the lens will be in fixed-focus from foreground to infinity. You'll find this
extremely convenient for fast shooting.
Super-Multi-Coated (SMC) Takumars
Pentax SMC Takumar lenses are the world's first 7-layer multi-coated lenses. A truly
remarkable optical achievement. Conventional lenses have only 1-3 layer coatings. The
additional coating of SMC Takumar lenses let in more lighting resulting in truer colors.
Reflection is reduced to 0.2% allowing the remaining 99.8% of light to pass through. This
means higher light transmission, and the brightest lens possible. Colors pass through with
equal intensity so color balance is strikingly improved. Brighter blues. Vibrant reds. Truer
yellows. SMC Takumar lenses make it possible. And no ghosts or flares even when shooting
against the sun. Ultra violet light is reflected off the glass surface. So only true colors are
absorbed. Undesired rays are kept out. SMC Takumar lenses are for people interested in the
ultimate in photographic lenses.
Reproduced for Historical & Reference purposes by Paul M. Provencher http://whitemetal.com
24
Page 27

DIFFERENCE OF ANGLE OF TAKUMAR LENSES
28mm
50~55mm 85mm 135mm
200mm 400mm 1000mm
All photographs were taken from the same location and distance
from the subject.
Reproduced for Historical & Reference purposes by Paul M. Provencher http://whitemetal.com
25
Page 28

Fish-Eye Takumar 17mm f/4*
The world's most efficient fish-eye lens with
maximum brightness of f/4. Covers an angle of
vision of about 180 °. Enables you to view and
focus through the viewfinder without keeping the
reflex mirror flipped up.
Lens element 11 (including 3 filters)
Minimum aperture f/22
Minimum distance 0.66ft. (0.2m)
Angle of view 180° (diagonal)
Weight 7.98 ozs. (228 gr.)
Super-Takumar 20mm f/4.5*
The new Super-Takumar 20mm f/4.5 - the
widest of the Takumar wide-angle family - lets
you view and focus at a 94° angle of vision
without keeping the reflex mirror flipped up.
Superb perspective effect and a minimum
focusing distance of 20cm also make it one of the
most exciting lenses of the whole range
Lens element 11
Minimum aperture f/16
Minimum distance 0.65 ft. (0.2m)
Angle of view 94°
Weight 8.79 ozs. (251 gr.)
Super-Takumar 24mm f/3.5*
The new Super-Takumar 24mm f/3.5 is an
ultra-wide-angle lens that increases even further
the versatility of your Asahi Pentax. Compact in
size and light in weight, it enables you to view
and focus at an 84° angle of vision without
keeping the reflex mirror flipped up. A wonderful
lens to create pictures with dramatic impact.
Lens element 9
Minimum aperture f/16
Minimum distance 0.8 ft. (0.25m)
Angle of view 84°
Weight 8.71 ozs. (247 gr.)
Reproduced for Historical & Reference purposes by Paul M. Provencher http://whitemetal.com
26
Page 29

SMC Takumar 28mm f/3.5*
A new super-wide-angle lens of 7 elements,
designed and produced to meet the most exacting
of professional requirements, this is the lens you
professionals and advanced amateurs need to
shoot more artistic photographs. Equipped with
fully automatic diaphragm ; ideal for architecture,
fast-action and artistic photography.
Lens element 7
Minimum aperture f/16
Minimum distance 1.3 ft. (40cm)
Angle of view 75°
Weight 7.6 ozs. (218 gr)
Super-Takumar 35mm f/2 *
One of the fastest wide-angle lenses for 35mm
single-lens reflex cameras. Edge-to-edge sharp
resolution at full aperture; unique lens design
without distortion; perfect for pictures of large
groups, buildings, sports events, and other large
spectacles.
Lens element 8
Minimum aperture f/16
Minimum distance 1.25 ft. (0.4m)
Angle of view 62°
Weight 8.3 ozs. (242gr)
SMC Takumar 35mm f/3.5 *
A medium speed lens with extremely high
resolving power, this is an excellent general
purpose wide-angle optic extremely useful for
scenic, industrial, and architectural photography.
Compact and light in weight.
Lens element 5
Minimum aperture f/16
Minimum distance 1.5 ft. (45cm)
Angle of view 62°
Weight 5.4 ozs. (152gr)
Reproduced for Historical & Reference purposes by Paul M. Provencher http://whitemetal.com
27
Page 30

SMC Takumar 50mm f/1.4
Also super-multi-coated standard lens for
Newest high-speed 7-element standard lens for
Spotmatic II. Super-multi-coated for higher light
transmission, it has become a much brighter lens.
You get improved contrast and richer colors. No
irritating "ghost" images or flare when shooting
directly against the light. An ideal all-around lens
for color photography.
Lens element 7
Minimum aperture f/16
Minimum distance 1.5ft. (0.45cm)
Angle of view 46°
Weight 8.1 ozs. (230 gr.)
SMC Takumar 55mm f/1.8
Spotmatic II, it reduces flare and boosts contrast
to a degree far beyond what was previously
possible in optical technology. You can get
pictures with more detail and richer colors than is
possible with any other system at any price. It
also features a tougher coating which means the
super-multi-coated lenses are more scratchresistant and durable.
Lens element 6
Minimum aperture f/16
Minimum distance 1.5 ft. (0.45cm)
Angle of view 43°
Weight 7.5 ozs. (215 gr.)
SMC Takumar 85mm f/1.8
This lens is brighter than the predecessor,
85mm f/1.9 lens , but smaller in size. With a focal
length of 85mm, perfect for portraiture, and a
maximum aperture of f/1.8, this lens is also very
suitable for indoor stage shots and outdoor night
photography.
Lens element 6
Minimum aperture f/16
Minimum distance 0.85m (2.75 ft.)
Angle of view 29°
Weight (341gr.) 11.9 ozs.
Reproduced for Historical & Reference purposes by Paul M. Provencher http://whitemetal.com
28
Page 31

SMC Takumar 105mm f/2.8
A quality medium telephoto lens of 5 elements,
with well corrected aberrations. Light-weight
design for portability and easy handling.
Recommended for scenery, portrait, news photos
and other moderate telephoto effects. Equipped
with fully automatic diaphragm; supplied with
special lenshood.
Lens element 5
Minimum aperture f/22
Minimum distance 4 ft. (1.2m)
Angle of view 23°
Weight 10.2 ozs. (290 gr.)
SMC Takumar 120mm f/2.8
The latest addition to the Super-Multi-Coated
Takumar medium telephoto family. So lightweight and compact, this fast lens is most ideal
for taking snapshots, portraits and
telephotographs.
Lens element 5 in 4 groups
Minimum aperture f/22
Minimum distance 4 ft. (1.2m)
Angle of view 20°
Weight 11.9 ozs. (340 gr)
SMC Takumar 135mm f/3.5
Produces a brilliant image in all corners of the
picture even with the diaphragm fully open.
Indispensable for distant subject matter and for
portrait. Ideal for close-ups of animals or plants
even at a distance. Recommended as the ideal
long telephoto lens for handheld camera
operation. Equipped with fully automatic
diaphragm; supplied with special lenshood.
Lens element 4
Minimum aperture f/22
Minimum distance 5 ft. (1.5m)
Angle of view 18°
Weight 12.1 ozs. (343gr)
Reproduced for Historical & Reference purposes by Paul M. Provencher http://whitemetal.com
29
Page 32

SMC Takumar 135mm f/2.5
A faster f/2.5 lens has joined the superb
Takumar 135mm lens family. Well balanced, its
total length is rather short so it is light in weight.
Most suitable for shooting night scenes, stage,
indoors, sports and snap portraits. An excellent
lens also for color photography.
Lens element 5
Minimum aperture f/22
Minimum distance 5 ft. (1.5 m)
Angle of view 18°
Weight 15.5 ozs. (444 gr.)
SMC Takumar 150mm f/4
This new fully automatic 150mm SMC Takumar
with a focal length three times as long as the
standard lens has been designed and produced to
suit the purpose of photographing subjects
requiring an intermediate angle between the
135mm and 200mm lenses. So compact, so
light-weight, it looks like a 135mm lens, yet it is
only 7mm longer. New-type, all-purpose
telephoto lens … for telephoto snaps, scenics,
sports, news events, stage photographs, nature
life, etc.
Lens element 5
Minimum aperture f/22
Minimum distance 6 ft. (1.8m)
Angle of view 16.5°
Weight 11.3 ozs. (324 gr.)
SMC Takumar 200mm f/4
A new member to the superb Takumar
telephoto lens family. Equipped with a fully
automatic diaphragm. Compact, light and
elegantly designed for fast handleability.
Lens element 5
Minimum aperture f/22
Minimum distance 8.2 ft. (2.5m)
Angle of view 12.5°
Weight 19.3 ozs. (550 gr.)
Reproduced for Historical & Reference purposes by Paul M. Provencher http://whitemetal.com
30
Page 33

Super-Takumar 300mm f/4
Light enough for hand-held picture taking, this
lens is the most ideal for spectacular
telephotographic effects. Even with the
diaphragm fully open, the aberrations are
corrected to the greatest extent possible. Gives
needle-sharp resolution to every corner of the
picture. Equipped with fully automatic
diaphragm; supplied with special lenshood.
SMC Takumar 400mm f/5.6
Especially designed for those professionals who
specialize in outdoor sports, news and nature-life
photography. Because of its f/5.6 aperture, this
tele-lens is extremely compact and light for its
focal length of 400mm. Also because of its
portability, it can be easily hand-held for fast and
successive shooting, depending upon the shutter
speed used. Equipped with click-stop manual
diaphragm; supplied with special lenshood.
Lens element 5
Minimum aperture f/22
Minimum distance 18 ft. (5.5m)
Angle of view 8°
Weight 33.1 ozs. (946 gr.)
Lens element 5
Minimum aperture f/45
Minimum distance 27 ft. (8m)
Angle of view 6°
Weight 45 ozs. (1.3 kg.)
Reproduced for Historical & Reference purposes by Paul M. Provencher http://whitemetal.com
31
Page 34

SMC Takumar 500mm f/4.5
Comparatively light and small for its
performance, this powerful long-focus lens brings
the inaccessible within reach. Its bright f/4.5
image simplifies composition and focusing, and it
produces edge-to-edge coverage of high
resolution. Equipped with manual diaphragm;
supplied with special lenshood.
SMC Takumar 1000mm f/8
Photographs subjects which are too far away to
be seen by the naked eye. The ultimate in fine
optics for the photographer who specializes in
news, sports, scientific or wildlife photography.
Fast, accurate focusing with manual diaphragm.
Furnished with built-on lenshood, rigid wooden
tripod and in wooden cases.
Lens element 4
Minimum aperture f/45
Minimum distance 32.8 ft. (10m)
Angle of view 5°
Weight 122.5 ozs. (3.5 kg.)
Lens element 5
Minimum aperture f/45
Minimum distance 98 ft. (30m)
Angle of view 2.5°
Weight 26 lbs. (11.8 kg.)
Reproduced for Historical & Reference purposes by Paul M. Provencher http://whitemetal.com
32
Page 35

SMC Takumar-Zoom 85mm~210mm f/4.5
With the new SMC Takumar-Zoom 85~210mm f/4.5, zooming
and focusing are done in one action. So you get the kind of
speed that's so essential to zoom shooting. With a zoom ratio of
2.5 and focal calibrations of 85, 100, 120, 135, 150, 180, 210,
and any point within this range, this one lens takes the place of
the most frequently used group of interchangeable lenses. It's
compact and lightweight, too. Truly the most versatile lens you
can own.
Lens element 11
Minimum aperture f/22
Minimum distance 11.5 ft. (3.5 m)
6.24 ft. (1.9m) with attachment
Angle of view 28° 5' ~ 11° 5'
Weight 24.86 ozs. (705 gr.)
SMC Macro-Takumar 50mm f/4
The new SMC Macro-Takumar 50mm f/4 lens is equipped with a
fully automatic diaphragm to further increase its high
performance. The magnification range is from 1/2 to infinity, but
by applying the Auto Extension Tubes, you can shoot from life
size to infinity. The automatic diaphragm enables you to shoot
such difficult subjects as moving insects, while holding your
camera and looking through the viewfinder.
Lens element 4
Minimum aperture f/22
Minimum distance .77 ft. (0.234m)
Angle of view 46°
Weight 8.74 ozs. (248 gr.)
SMC Bellows-Takumar 100mm f/4
Used with the standard Bellows Unit, this short barrel lens
enables you to photograph from life size to infinity. Extremely
convenient for close-ups from a distance.
Lens element 5
Minimum aperture f/22
Angle of view 24°
Weight 4.9 ozs. (139 gr.)
Reproduced for Historical & Reference purposes by Paul M. Provencher http://whitemetal.com
33
Page 36

Ultra-Achromatic Takumar 85mm f/4.5
The new Ultra-Achromatic-Takumar 85mm f/4.5
is corrected against chromatic aberration from
ultraviolet to infrared wavelength bands. Not only
is it a high resolution lens for visible light
photography, but also it gives unmatched optical
performance in ultraviolet and infrared
photography.
The lens uses no glass; it uses fluorite and
quartz. This unique lens answers some of the
optical quality and performance problems in
ultraviolet and infrared photography. Although it is
superb for infrared and visible light photography,
its main design emphasis is placed on ultraviolet
photography at close distance. It is corrected
against chromatic aberration
Ultra-Achromatic Takumar 300mm f/5.6
from 220mµ to1000mµ and
photographic tests without filters
show good results within these wavelength bands.
Lens element 5
Minimum aperture f/22
Minimum distance 2 ft. (0.6m)
Angle of view 29°
Weight 8.7 ozs. (248 gr.)
The new Ultra-Achromatic-Takumar 300mm f/5.6
uses glass and fluorite elements to achieve high
resolution and extreme chromatic aberration
correction over a wide range wavelength. It is
corrected against chromatic aberration from 400mµ
up to 850m µ. The visible portion of the spectrum
extends from 400mµ up to 700mµ. This lens is
excellent for telephotography in the visible and
infrared portion of the spectrum. The use of
fluorite elements allow a design that is very
compact for its focal length and sharp in contrast
and definition.
Reproduced for Historical & Reference purposes by Paul M. Provencher http://whitemetal.com
Lens element 5
Minimum aperture f/22
Minimum distance 16 ft. (4.85m)
Angle of view 8°
Weight 29 ozs. (825 gr.)
34
Page 37

SPECIFICATIONS OF TAKUMAR LENSES
LENSHOO
MINIMUM
NAME
OF
LENSES
FishEye
Takumar
SuperTakumar
SuperTakumar
SMC
Takumar
SuperTakumar
SMC
Takumar
SMC
Takumar
SMC
Macro
Takumar
SuperTakumar
SMC
Takumar
SMC
Takumar
-Zoom
SMC
Takumar
SMC
BellowsTakumar
FOCAL
LENGTH
&
MAXIMUM
APERTURE
17mm f/4
20mm
f/4.5
24mm
f/3.5
28mm
f/3.5
35mm f/2
35mm
f/3.5
50mm
f/1.4
50mm f/4
55mm f/2
2
55mm
f/1.8
85~210m
m f/4.5
85mm
f/1.8
100mm
f/4
APERTURE
221
161
1
6
1
6
1
6
1
6
1
6
2
2
1
6
1
6
221
1
6
2
2
LENS ELEMENT
DIAPHRAGM
F
1
A
F
1
A
F
9
A
F
7
A
F
8
A
F
5
A
F
7
A
F
4
A
F
6
A
F
6
A
F
1
A
F
6
A
P
5
S
MINIMUM
FOCUS
DISTANCE
m ft
.
0
.2
0
.2
0
.66180
0
.65
0
.250.8
0
.4
0
.4
1
.3
1
.25
0
.451.5
0
.451.5
0
.23
4
0
.77
0
.451.5
0
.451.5
3
.5
1
2
0
.852.75
- - 24
ANGLE OF
VIEW
de
gree
r.
s
1
28
94
51
84
47
75
18
62
42
62
52
46
30
46
48
43
15
43
15
11
~29705
29
41
39
WEIGHT
g
o
zs.mmmm
2
7
.98BI
2
8
.7977
2
8
.8158
2
7
.6
2
8
.5349
1
5
.4
2
8
.1
2
8
.7449
2
7
.5
2
7
.5
2
4.958
3
1
1.958
1
4
.9
FILTER
4
9
4
9
4
9
4
9
4
9
4
9
SIZE
-
8*
*
0*
*
1*
*
9*
9
9
-
9
9
8
8*
9*
-
5
6
5
4
4
4
-
4
4
5
5
4
D
SIZE
LENS CAP
m
m
6
0
6
0
6
0
5
1
5
1
5
1
5
1
5
1
5
1
5
1
6
0
6
0
5
1
SIZE
Reproduced for Historical & Reference purposes by Paul M. Provencher http://whitemetal.com
35
Page 38

SMC
Takumar
SMC
Takumar
SMC
Takumar
SMC
Takumar
SMC
Takumar
SMC
Takumar
Super-
Takumar
SMC
Takumar
SMC
Takumar
SMC
Takumar
UA
Takumar
UA
Takumar
105mm
f/2.8
120mm
f/2.8
135mm
f/3.5
135mm
f/2.5
150mm
f/4
200mm
f/4
300mm
f/4
400mm
f/5.6
500mm
f/4.5
1000mm
3
f/8
85mm
f/4.5
300mm
f/5.6
2
2
2
2
2
2
2
2
2
2
2
2
2
2
4
5
4
5
4
5
2
2
2
2
F
5
A
.2
F
5
A
.2
F
4
A
.5
F
5
A
.5
F
5
A
.8
F
5
A
.5
F
5
A
.5
5 M 8
4 M
5 M
5
5
A
A
0
0
F
.6
F
.8516
1
1
1
1
1
2
5
1
3
0
4
4 23
4 20
5 18
5 18
6
8
.2
1
8
2
7
3
2.8
9
8
2 29
16
.5
12
.5
8
6
5
2.
5
8
2
90
3
40
3
43
4
44
3
24
5
50
9
46
1
30
0
3
50
0
5
50
0
2
48
1
0.249
1
1.949
1
2.149
1
5.558
1
1.349
1
9.358
3
3.177
4
5
1
22.
5
1
92.
5
8
.7
8
.2529.158
7
9
9
9
All these lenses fit any Pentax model which has 42mm threaded lens mount.
BI - 3 filters built-in. M = Manual. FA = Fully Automatic. PS = Preset. SMC = Super-Multi-
Coated.
UA = Ultra-Achromatic. 1 = Diagonal Coverage. 2 = Supplied only with SP 500 body as its
standard lens. 3 = Supplied with wooden tripod in carrying cases. All lenses including standard
lenses purchased separately are supplied with leather case, straps, front and rear caps. All
filters and lenshoods are screw-in type unless otherwise indicated. (* Lenshood supplied with
lens. ** Clip-on type)
4
9*
4
9*
4
9*
5
8*
4
9*
5
8*
*
7
*
4
*12
5
1
5
1
5
1
6
0
5
1
6
0
8
5
8
5
7
4
*14
3
4
4
9
*
5
1
6
5
Reproduced for Historical & Reference purposes by Paul M. Provencher http://whitemetal.com
36
Page 39

Complete System of Asahi Pentax
Asahi Pentax and a 55mm automatic
Accessories for Close-Ups,
Macrophotography, Photomicrography,
and other Miscellaneous Accessories
• EXTENSION TUBE SET
A set of 3 rings, #1, #2 and #3 of 9.5mm,
19mm and 28.5mm respectively. They may
be used singly or in combination desired.
When all three are used simultaneously with
the 55mm Super-Takumar lens, the subject
is enlarged on film to a magnification of 1.17
life size.
• AUTO-EXTENSION TUBE SET
New extension tube set of 3 rings, 95mm
(#1), 19mm (#2) and 28.5mm (#3), with
coupled automatic diaphragm release pins.
Mounted singly or in combination between an
diaphragm lens, this set of Auto-Extension
Tubes permits focusing at a magnification
from 1.17x to 0.17 and operation of the
automatic diaphragm.
• HELICOID EXTENSION TUBE
Like the lens helicoid, the new Asahi Pentax
Helicoid Extension Tube extends from
16.8mm to 30.6mm. It serves the purposes
of the Asahi Pentax Extension Tubes #2 and
#3. Mounted between an Asahi Pentax and a
55mm lens, it permits photography at a
magnification from 0.30x to 0.7x. It is
extremely versatile variable extension ring.
Reproduced for Historical & Reference purposes by Paul M. Provencher http://whitemetal.com
37
Page 40

• BELLOWS UNIT I
Extremely flexible for ultra-close-up photography, the Bellows
I permits use of the camera's own lens. Provided with a special
precision-calibrated gear shaft for reading continuous
magnification from 0.62 to 2.45 with the standard 55mm lens.
• AUTO BELLOWS & SLIDE COPIER
The Asahi Pentax Auto-Bellows is a highly flexible close-up
and macro-photographic instrument. The bellows extension is
longer than the extension of the standard Bellows Unit. The
Auto-Bellows is more versatile. With the double cable release
supplied with the Auto-Bellows, you release the shutter and
activate the automatic diaphragm simultaneously if you use a
fully automatic diaphragm lens. With its lens reverse system,
you can use a lens in reversed position for higher macro
resolution.
The geared rail of the Auto-Bellows is meticulously engineered
with high precision. The freely movable tripod seat underneath
the rail rod maintains the whole equipment on tripod in
complete balance. Micro-action extension knobs are equipped
on the camera body and lens sides for precise bellows
extension.
The Slide Copier attaches to the front end of the Auto-Bellows
for easy duplication of color films
With the Bellows-Takumar 100mm f/4 lens, you can
photograph from 1.32X magnification to infinity ( ∞ ). You
easily obtain high magnification with a 28mm to 35mm lens.
By adding the standard Bellows Unit or Extension Tubes to the
front or back of the Auto-Bellows, you can reach 10X to 20X
magnification.
The Asahi Pentax Auto Bellows is a precisely designed closeup and macro equipment for professional photographers,
research workers, scientists and specialists in close-up and
macro works.
Reproduced for Historical & Reference purposes by Paul M. Provencher http://whitemetal.com
38
Page 41

• REVERSE ADAPTER
This allows 50mm or 55mm Takumar lenses to be used
on bellows or extension tubes in reverse position for better
macrophotographic results
• MICROSCOPE ADAPTER
Fitting between the Asahi Pentax camera body and the
microscope tube, this adapter permits utilization of the
microscope's optics in place of the camera's lens. It may
be used with any microscope which has a tube of 25mm
diameter. Complete set consists of an adapter tube,
fastening knob, light-sealing tube, and stopper.
• COPIPOD
Light-weight, but extremely rigid and sturdy. This
portable copying stand fits all models of the Asahi Pentax
and can be used anywhere for copying documents, artwork,
stamps, etc. Consists of a lens board complete with
adapter rings for 46mm and 49mm lenses, and four
calibrated telescoping legs. Sets up easily in seconds and is
quickly disassembled. Supplied in small black pouch for
storage or carrying convenience.
• COPY STAND
Reproduced for Historical & Reference purposes by Paul M. Provencher http://whitemetal.com
39
Page 42

• CLIP-ON MAGNIFIER
f/3.5, Super-Takumar or SMC Takumar 200mm
For added convenience in critical focusing for
close-ups, copying, macro-photography, etc. This
can be easily attached to the slotted frame of the
viewfinder of your Asahi Pentax and enlarges your
viewing image 2X.
• CLOSE-UP LENS
Ground and polished to the superb Takumar
lens standards and has screw-in mount for lenses
of 49mm thread. Magnification of 0.32 to 0.15
with the 55mm SMC Takumar lens.
• RIGHT ANGLE FINDER
Attaches quickly and easily to the viewfinder of
all Asahi Pentax models. Designed for added
convenience in low angle and close-up
photography, photomicrography, etc.
• MIRROR ADAPTER
An interesting adapter for detective
photographers, this allows you to take
photographs by NOT pointing your camera and
lens to your subjects. Fits the Takumar 200mm
f/4 and Tele-Takumar 300mm f/6.3 lenses only
• CABLE RELEASE
With floating collar, thread mounting and
locking screw for time exposure.
• FILTERS AND LENSHOODS
Asahi Pentax lenshoods are recommended for
use whenever possible to guard against off-angle
light which will cause flare in your pictures. (All
Takumar lenses from 85mm up to 1000mm are
supplied with a special lenshood.) Improve your
picture quality by using the Asahi Pentax filters
that are precision-ground, polished and coated for
your Asahi Pentax
Reproduced for Historical & Reference purposes by Paul M. Provencher http://whitemetal.com
40
Page 43

• ACCESSORY CLIP II
adapter and a viewer. The adapter is for taking pictures
Deluxe type, precision made accessory clip model II fits the
viewfinder frame of Asahi Pentax cameras
• CORRECTION LENS ADAPTER
A clip-on eyepiece for prescription lens (eye-piece only).
Also a convenient eye-cup for everyday photography.
• STEREO ADAPTER SET
The new Asahi Pentax Stereo Adapter consists of a stereo
(reversal color pictures) and the viewer is for viewing stereo
color slides. The Stereo Adapter fits the front frame of the
Takumar 55mm lens. The screw of the Stereo Adapter fastens
itself onto the front frame of the lens after it is positioned in
parallel with the camera body. Since the Stereo Adapter
reduces the amount of light coming through the taking lens
aperture, the diaphragm should be opened by a half f/stop for
optimum exposure.
The new Asahi Pentax Stereo Adapter is valuable accessory
for making stereo pictures of "ikebana", hair dressing,
architecture, sculpture, etc.
• FILM MAGAZINE
For bulk film loading
Reproduced for Historical & Reference purposes by Paul M. Provencher http://whitemetal.com
41
Page 44

• SHORT SOFT CASE
When the standard Takumar lens is removed
Especially designed soft case without a nose for
lens. This allows you to take pictures with the
camera in the case for quieter operation.
For use with SV and S1a only
• SOFT CASE JUMBO FRONT
Jumbo-size front for soft camera case to contain
an Asahi Pentax with 135mm, 105mm or 85mm
telephoto lens.
• GADGET BAG
A deluxe Asahi Pentax Gadget Bag for an
assortment of Asahi Pentax camera, lenses and
accessories with inside partition and strong
shoulder strap and front clasp.
• LEATHER CASE FOR STANDARD LENSES
from your Asahi Pentax camera body, protect it in
this leather case, available as a separate
accessory.
• ASAHI MOUNT ADAPTER
For use of Asahiflex-mount Takumar lenses with
your Asahi Pentax camera body.
• MISCELLANEOUS CAPS
Front and rear lens caps, and Asahi Pentax body
mount cap are also available.
Reproduced for Historical & Reference purposes by Paul M. Provencher http://whitemetal.com
42
Page 45

Super-Lite II Electronic Flash
The Asahi Pentax Super-Lite II is a compact easy-to-operate electronic flash unit produced
with the same engineering skill that perfects the Asahi Pentax System of Photography. Light
and compact, it simply attaches to your Asahi Pentax camera.
• The angle of light distribution of most flash guns is designed to match the angle of
the standard lens. The Super-Lite II is one of the widest-angle electronic flash units
on the market today. Because of the specially designed curvature of the reflector, its
angle of light distribution practically covers the angle of a 28mm super-wide-angle
lens.
• The Super- Lite II has a unique automatic light output stabilizer. The light output of
many other electronic flash units considerably decreases as you keep flashing the
units. This means you will have to open up your lens aperture. The light output of
some units goes down to as much as one f/stop extent after 40 flashes. The light
output stabilizer of the Super-Lite II constantly maintains its output at its maximum at
each flash.
• The Super- Lite II also operates on AC, powered by the AC Power Pack accessory.
• The circuitry of the Super-Lite II is designed for economical power consumption.
Pen-light batteries are inexpensive - and you will not waste the battery power.
• The 1/2000 second flash duration of the
Super-Lite II is so short, you can capture
practically anything you may like to photograph.
• The recycling time (time interval between
each flash) is short. You will be ready to follow
fast actions if you act fast.
The Asahi Pentax Super-Lite II is a highly versatile
electronic flash for Asahi Pentax enthusiasts - as ordinary
flash - as bounce flash - as fill-in flash (when
photographing back-lighted subjects.)
Reproduced for Historical & Reference purposes by Paul M. Provencher http://whitemetal.com
43
Page 46

Spotmeter III
Selective exposure photography … the most advanced concept in reflected light meters. The
Spotmeter III utilizes an optical reflect system which gives a 21° angle of view on the ground
glass screen. In the center of this viewing screen is a 1° circle which represents the angle
covered by the meter's CdS sensing element. For this reason, it is extremely selective,
permitting precise exposure reading at longer distances, and gives greater control over
exposure problems. Light intensity is read directly from the engraved scales on the viewing
lens. For dark area reading, a scale illuminator glows when a button is depressed. Exposure is
calculated easily by turning movable scales on the side of the meter. The Spotmeter III is also
equipped with an IRE (Institute of Radio Engineers) scale, which is especially useful for
television filming and other special readings.
Reproduced for Historical & Reference purposes by Paul M. Provencher http://whitemetal.com
44
Page 47

ASAHI PENTAX Prism Binoculars
The unique
coated
interference
filter of the
Asahi Pentax
prism
binoculars,
another
achievement
of the Asahi
Pentax
engineering,
eliminates
ultraviolet and
infrared rays
which may be
harmful to the
eyes.
Magnifi
cation
Reproduced for Historical & Reference purposes by Paul M. Provencher http://whitemetal.com
Diameter
of
Objective
Lens
Diame
ter of
Exit
Pupil
Angle
of View
Relative
Brightnes
s
Field
of View
at 1000
yards
Weight H
eig
ht
an
d
Wi
dth
45
Page 48

ASAHI PENTAX Telescopes
The superb Asahi Pentax telescopes, also designed and produced by the Asahi Pentax
engineering group, are available in the following sizes:
30X, 40mm telescope, in white or black finish, with tripod. 50X, 50mm telescope, in grey
finish, with sun glass and tripod. 60mm astronomical telescope with micro-moving attachment,
4X finder, 4 eyepieces (6mm, 9mm, 12.5mm and 20mm), erecting and diagonal prisms, sun
glass, wooden tripod and carrying case.
Reproduced for Historical & Reference purposes by Paul M. Provencher http://whitemetal.com
46
Page 49

GUIDE BOOK FOR ASAHI PENTAX SYSTEM OF PHOTOGRAPHY
The operating manual for the Asahi Pentax cameras is merely an instruction book for
the proper care and operation of the Asahi Pentax cameras. It does not, and can not,
deal fully with every possible application of the Asahi Pentax System of Photography
because those applications are almost limitless.
The following book is therefore recommended to those amateurs who are eager to learn
more about the Asahi Pentax System of Photography and photographic technique in
general. It is available in English, German and Italian languages, and each can be
obtained from your photo dealers or directly from the publishers listed on the next page.
THE ASAHI PENTAX WAY by Herbert Keppler
Herbert Keppler has been associated with the U. S. photographic magazine Modern
Photography for over 15 years as its editor and publisher. His column devoted exclusively
to single-lens reflex cameras and photography is very famous throughout the world. He
is well known for his objective outlook
on all things photographic and for his
healthy mistrust of any theory that he has
not tried out in practice. He has no interest
in pushing the products of any particular
manufacturer and brings to the Asahi Pentax
Way a knowledgeable, independent and
unprejudiced outlook.
This comprehensive book of 352 pages,
containing 8 full-color and 48 black-andwhite picture pages, deals mainly with the
following subjects:
OPERATION AND TECHNIQUE:
action, aperture, artificial light, camera care,
carrying, choosing
Reproduced for Historical & Reference purposes by Paul M. Provencher http://whitemetal.com
47
Page 50

films, close-ups, copying, depth-of-field, developers, exposure, exposure meter, films, film
speed, filters, flash, focal length, focusing, holding, lighting, loading, long-range work,
monocular, multiple flash, perspective, printing, shooting, slide projection, Spotmatic operation,
storing negatives, telescope, tripod, unloading, viewing.
ACCESSORIES: accessory clip, bellows unit, body cover, cable release, cassettes, close-up
lenses, copying unit, exposure meters, extension tubes, focusing magnifier, Leica adapter, lens
cap, lenses, microscope adapter, prescription eyepiece, right-angle finder, slide copier, SPOT
exposure meter.
ASAHI PENTAX SUBJECTS: animals, architecture, birds, candid, cinema, fireworks, flowers,
groups, lights, low light, nature, night, portraits, scenics, sport, television, theater, travel,
under water, wildlife.
FINDING DATA: close-up exposure, color temperature, depth of field, extension bellows,
extension tubes, feet-meter conversion, films, film speed conversion, filters, filter equivalents,
filters for color film flash.
English edition: Focal Press Ltd.
31 Fitzroy Square,
London, W1, U.K.
German edition: Verlag Die Schonen
Bucher
Dr. Wolf Strache,
7000 Stuttgart 1,
Postfach 1124
WEST GERMANY
Italian edition: Fotografare
Via Macalle 2
Rome 00199, ITALY
Spanish edition: Ediciones Omega, S.A.
Casanova, 220 Barcelona
SPAIN
Reproduced for Historical & Reference purposes by Paul M. Provencher http://whitemetal.com
48
Page 51

WARRANTY POLICY
All Asahi Pentax cameras purchased through authorized bona fide photographic distribution
channels are guaranteed against defects of material or workmanship for a period of twelve
months from date of purchase. Service will be rendered and defective parts will be replaced
without cost to you within that period, provided the equipment has not been abused, altered, or
operated contrary to instructions. Because the tolerances, quality, and design compatibility of
lenses other than Pentax-Takumar lenses are beyond our control, damage caused by use of
such lenses will not be covered by this warranty policy. The manufacturer or its authorized
representatives shall not be liable for any repair or alterations except those made with its
written consent and shall not be liable for damages from delay or loss of use or from any other
indirect or consequential damages of any kind, whether caused by defective material or
workmanship or otherwise; and it is expressly agreed that the liability of the manufacturer or
its representatives under all guarantees or warranties, whether expressed or implied, is strictly
limited to the replacement of parts as hereinbefore provided.
PROCEDURE DURING 12-MONTH WARRANTY PERIOD
Any Asahi Pentax which proves defective during the 12-month warranty period should be
returned to the dealer from whom you purchased the equipment or to the manufacturer. If
there is no representative of the manufacturer in your country, send the equipment to the
manufacturer, with postage prepaid. In this case, it will take a considerable length of time
before the equipment can be returned to you owing to the complicated customs procedures
required in Japan in importing and re-exporting photographic equipment. If the equipment is
covered by warranty, repairs will be made and parts replaced free of charge, and the
equipment will be returned to you upon completion of servicing. If the equipment is not
covered by warranty, regular charges of the manufacturer or of its representatives will apply.
Shipping charges are to be borne by the owner. If your Asahi Pentax was purchased outside of
the country where you wish to have it serviced during the warranty period, regular handling
and servicing fees may be charged by the manufacturers representatives in that country.
Notwithstanding this, your Asahi Pentax returned to the manufacturer will be serviced free of
charge according to this procedure and warranty policy. In any case, however, shipping
charges and customs clearance fees are to be borne by the sender. To prove the date of
purchase when required, please keep the receipts or bills covering the purchase of your
equipment for at least a year. Before sending your equipment for servicing, please make sure
that you are sending it to the manufacturer's authorized representatives or their accredited
repair shops, unless you are sending it directly to the manufacturer. Always obtain a quotation
of the service charge, and only after you accept the quoted service charge, instruct the service
station to proceed with the servicing required, or send the equipment for servicing, if not yet
delivered.
Reproduced for Historical & Reference purposes by Paul M. Provencher http://whitemetal.com
49
Page 52

All models, prices and specifications are subject to change without notice.
CAUTION Mercury Battery
The mercury battery should be kept dry and clean.
Don't touch it with your finger unnecessarily. Before
inserting it into its housing, wipe its surface completely
with a dry piece of cloth. To prevent rapid deterioration,
don't try to measure the short current or to charge the
battery. Don't throw a used battery into fire…it may
explode. If a mercury battery is put into a mouth, it
causes serious gripes or stomach inflammation. Always
keep the battery from the reach of small children. When
you do not intend to use the battery for sometime, keep
it out of its housing.
ASAHI OPTICAL CO., LTD.
C.P.O. 895, Tokyo, 100-91, Japan
ASAHI OPTICAL EUROPE S.A.
Freight Bldg., Brussels National Airport, 1930 Zaventem, BELGIUM
ASAHI OPTICAL EUROPE S.A.
HAMBURG OFFICE
2000 Hanburg 50, Koenigstrausse 28, WEST GERMANY
ASAHI OPTICAL (AMERICA) INC.
31 East 28th Street, New York, New York 10016, U.S.A.
ASAHI OPTICAL BRASILEIRA IND. E COM. LTDA.
Cx. Postal 7839 - São Paulo, BRASIL
7-72
Reproduced for Historical & Reference purposes by Paul M. Provencher http://whitemetal.com
50
Page 53

Reproduced for Historical & Reference purposes by Paul M. Provencher http://whitemetal.com
51
Page 54

Reproducers Comments
This manual was recreated by hand-entering all text and by scanning all graphics found in the
original manual. Every attempt was made to lay out this reproduction manual as it appears in
the original. Except for cases that could not be ignored, all text is exactly as it appears in the
July 1972 copy of this manual (including errors in spelling, grammar, etc.)
It should be noted that this manual could be reliably used to operate earlier Spotmatic
cameras except for some points:
1. The Spotmatic Meter range is slightly different
2. The Spotmatic does not have a hot shoe, or hot shoe switch.
3. The Spotmatic does not have Super-Multi-Coated Takumar lenses (as standard equipment)
The primary goal in producing this manual is to provide a quality document that can be used
by Spotmatic owners to learn more about their camera. It also serves to illustrate the state of
the art in camera documentation of the early 1970's
Version Notes:
• The second section of the depth-of-field tables (feet) was left incomplete due to the
volume of technical data to enter and the time required to verify it.
• The data about binoculars was left incomplete due to the volume of technical data to
enter and the time required to verify it. I felt that this information was not directly
related to the operation of Spotmatic cameras and was not essential
• There are three graphics missing that show how to hold the camera (Page 8). This
oversight will be corrected in a later version
Paul M. Provencher
August 31, 2000
http://whitemetal.com
ppro@whitemetal.com
Reproduced for Historical & Reference purposes by Paul M. Provencher http://whitemetal.com
52
 Loading...