

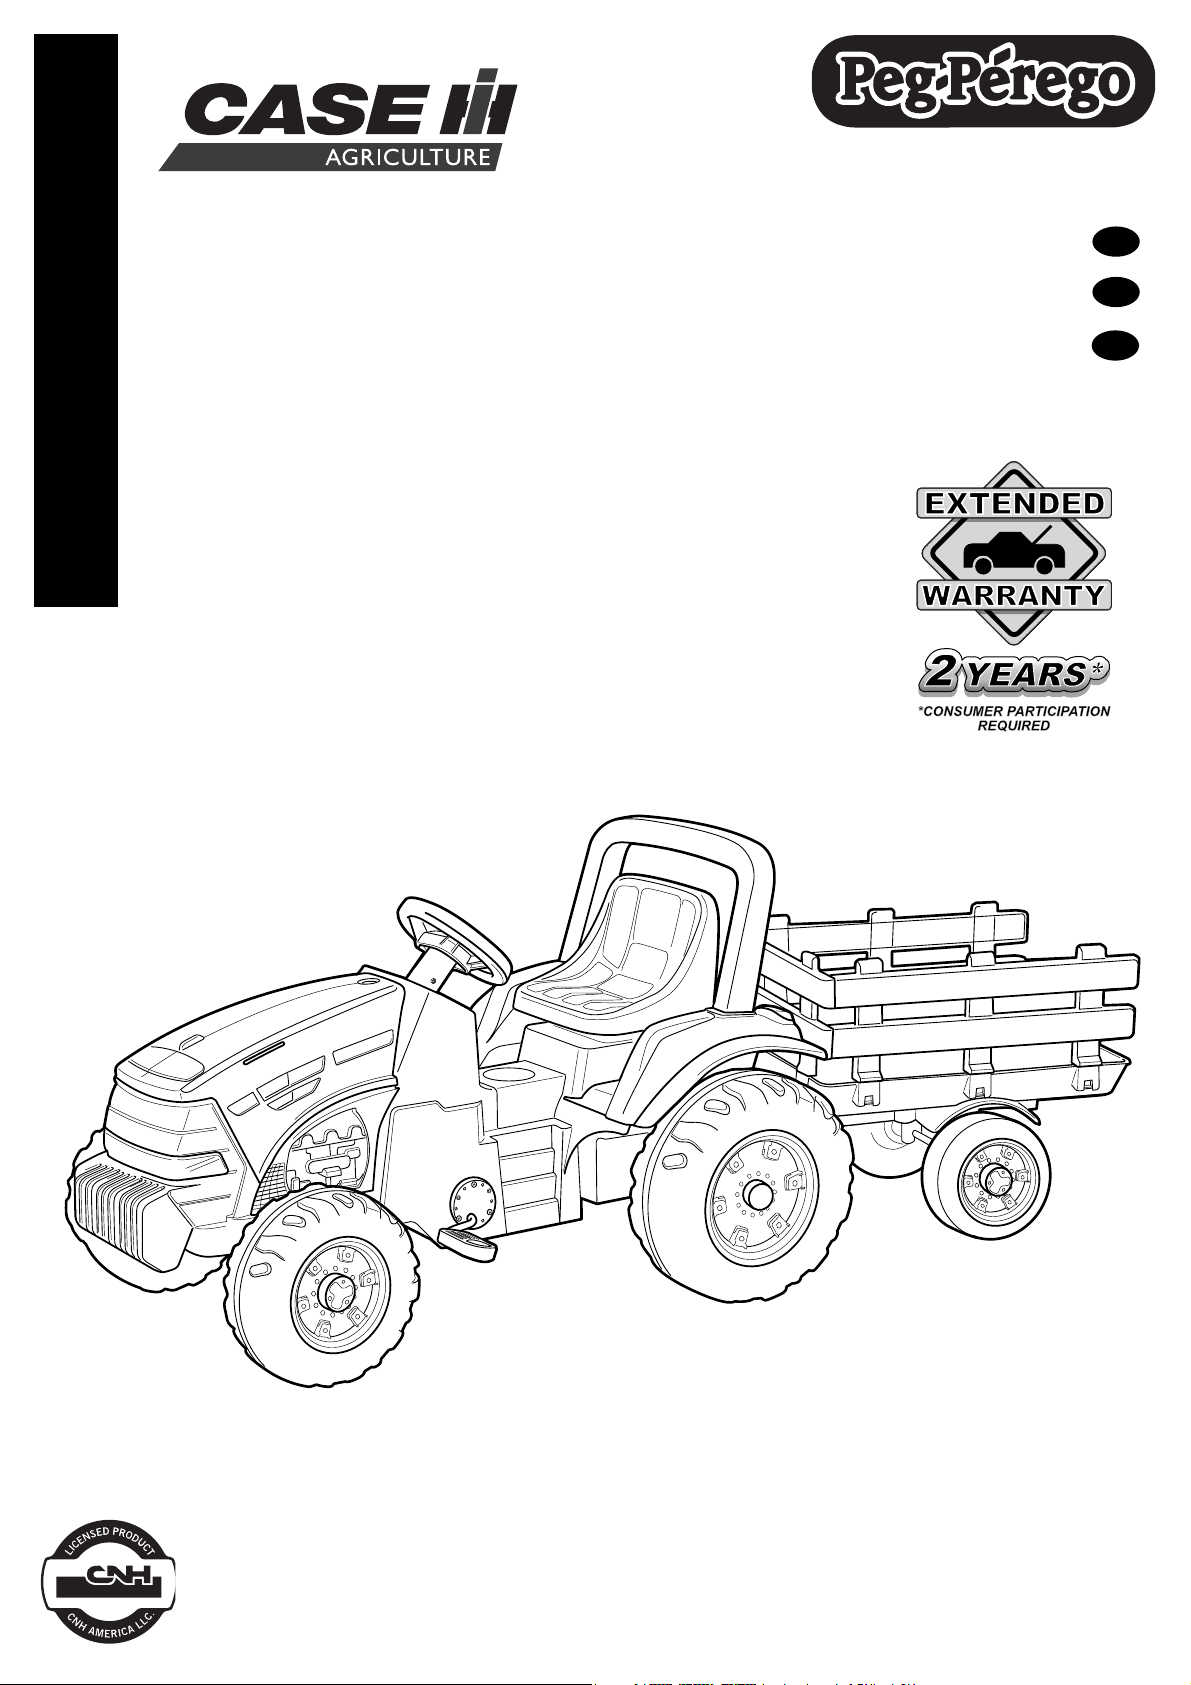
Peg-Perego CASE IH Agriculture IGCD0554 Use And Care Manual
See separate insert
sheet for more
information
Voir la feuille séparée
d’insertion pour plus
d’information
Vea la hoja separada del
separador de millares
para másinformación
TRACTOR &
Trailer
Model Number IGCD0554
CHAIN DRIVE
FIUS1801G182
USE AND CARE
UTILISATION ET ENTRETIEN
EN
FR
ES
EMPLEO Y MANUTENCION
Made in Italy
OK
1
2
3
1 2 3
4
5 6
7 8 9
10 11 12
13
A
14 15

ASSEMBLY INSTRUCTIONS
CAUTION:
ADULT ASSEMBLY REQUIRED.
USE CARE WHEN UNPACKING AS
COMPONENTS TO BE ASSEMBLED
MAY POSE A SMALL PARTS/SHARP
EDGE HAZARD.
IF THE PRODUCT IS DAMAGED
WHEN YOU OPEN THE
PACKAGING, CONTACT THE
SERVICE CENTER AND DO NOT
USE THE PRODUCT.
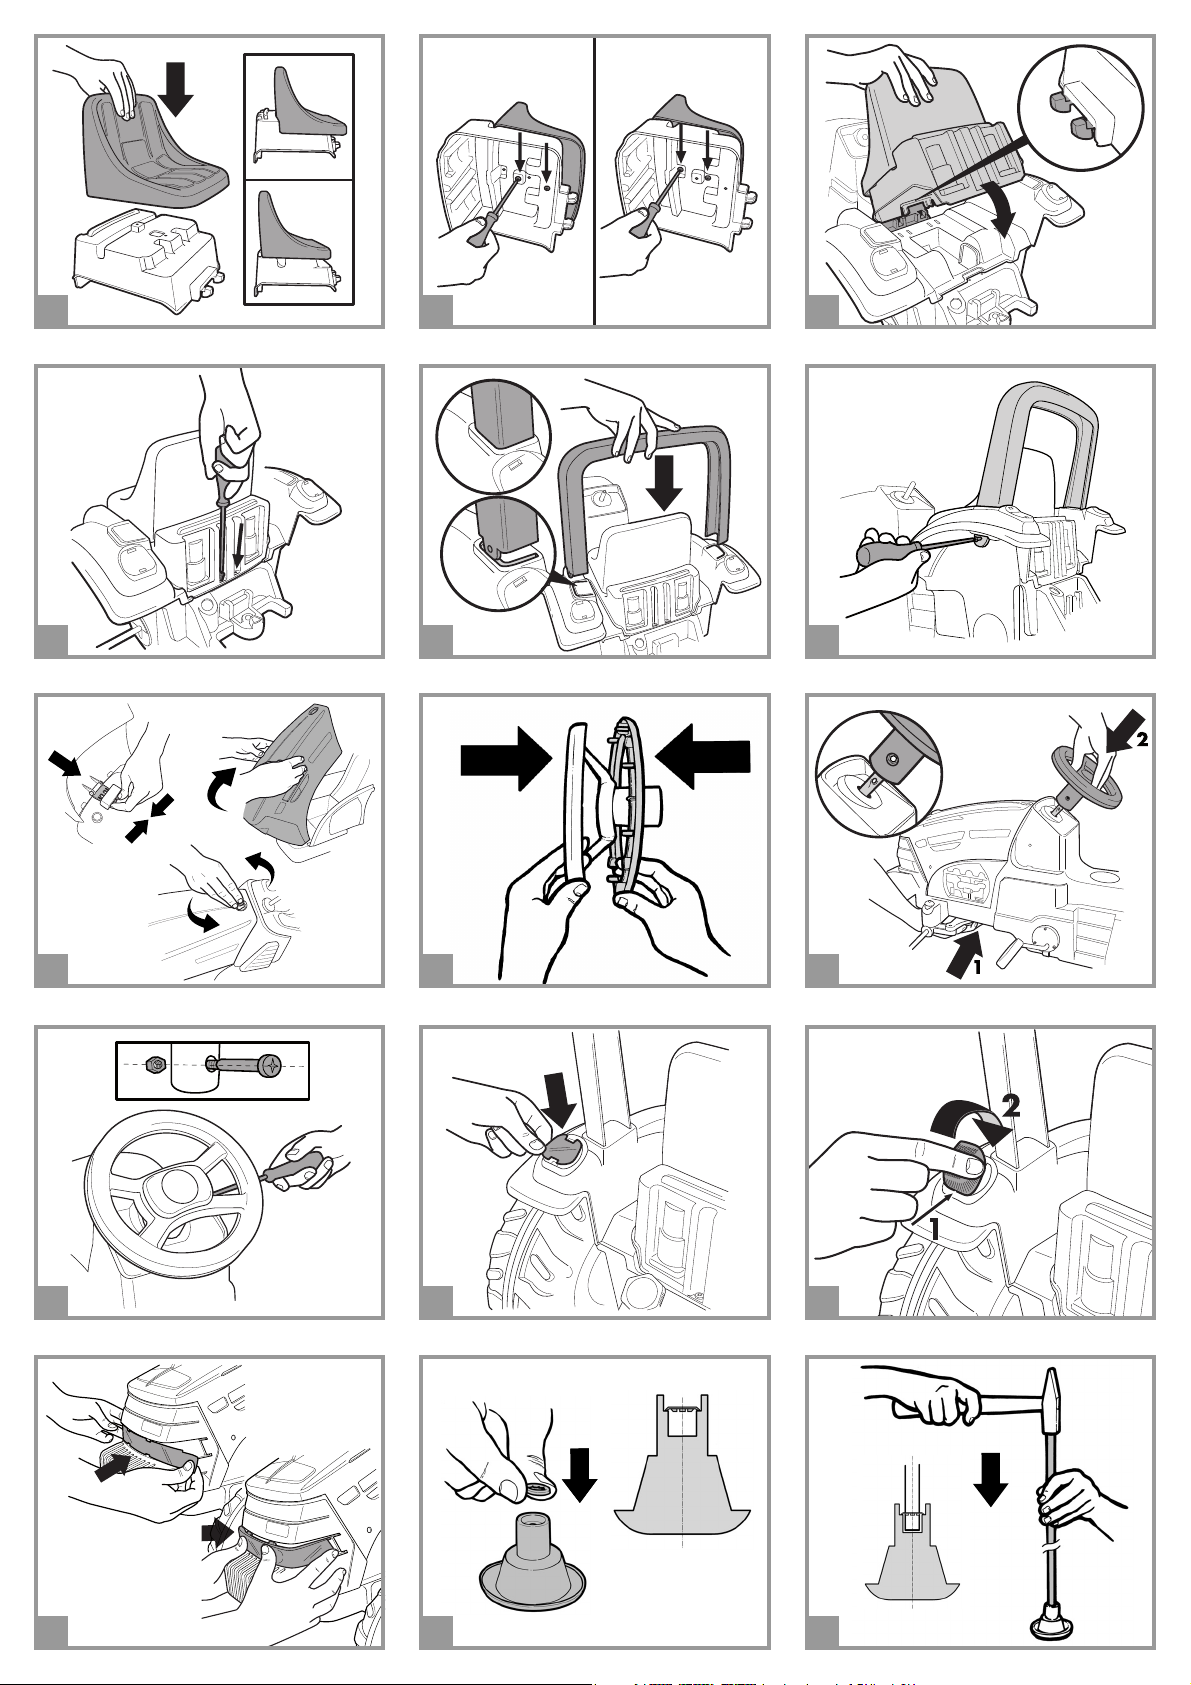
1 •Place the seat on its base. Please note: The
seat can be installed in 2 different
positions, as shown in the figure.
2 •Secure the seat in the desired position
with the 2 screws provided.
3 •Insert the seat and base assembly in the 2
slots in the chassis.
4 •Secure it at the rear with the 2 screws
provided.
5 •Insert the roll bar in the rear fender
assembly, as shown in the figure.
6 •Secure it with the 2 screws provided.
7 •Place the hood on the chassis. Insert the
loose end of the black hinge into the 2
slots in the chassis until they lock. Rotate
the hood down, making sure it fits
correctly over the simulated engine panels.
Place the black hood latch key through the
hood and into the chassis. Turn to lock the
hood in place.
8 •Click together the 2 parts of the steering
wheel.
9 •Push the steering column up from below
and slot the steering wheel onto it.
10 •Line up the holes in the steering column
and the steering wheel. Secure the steering
wheel with the screw and the nut: the nut
goes in the hexagonal hole and the screw
in the round hole.
11 •Put the silver decals (for reflective
taillights) on the rear fenders.
12 •Install the taillight lenses; slot in the lower
part first and then the upper part, as
shown in the figure.
13 •Put the silver decals on the grill (for
reflective headlights), then install the clear
plastic headlight lense.
TRAILER
Follow the instructions below to assemble the
trailer.
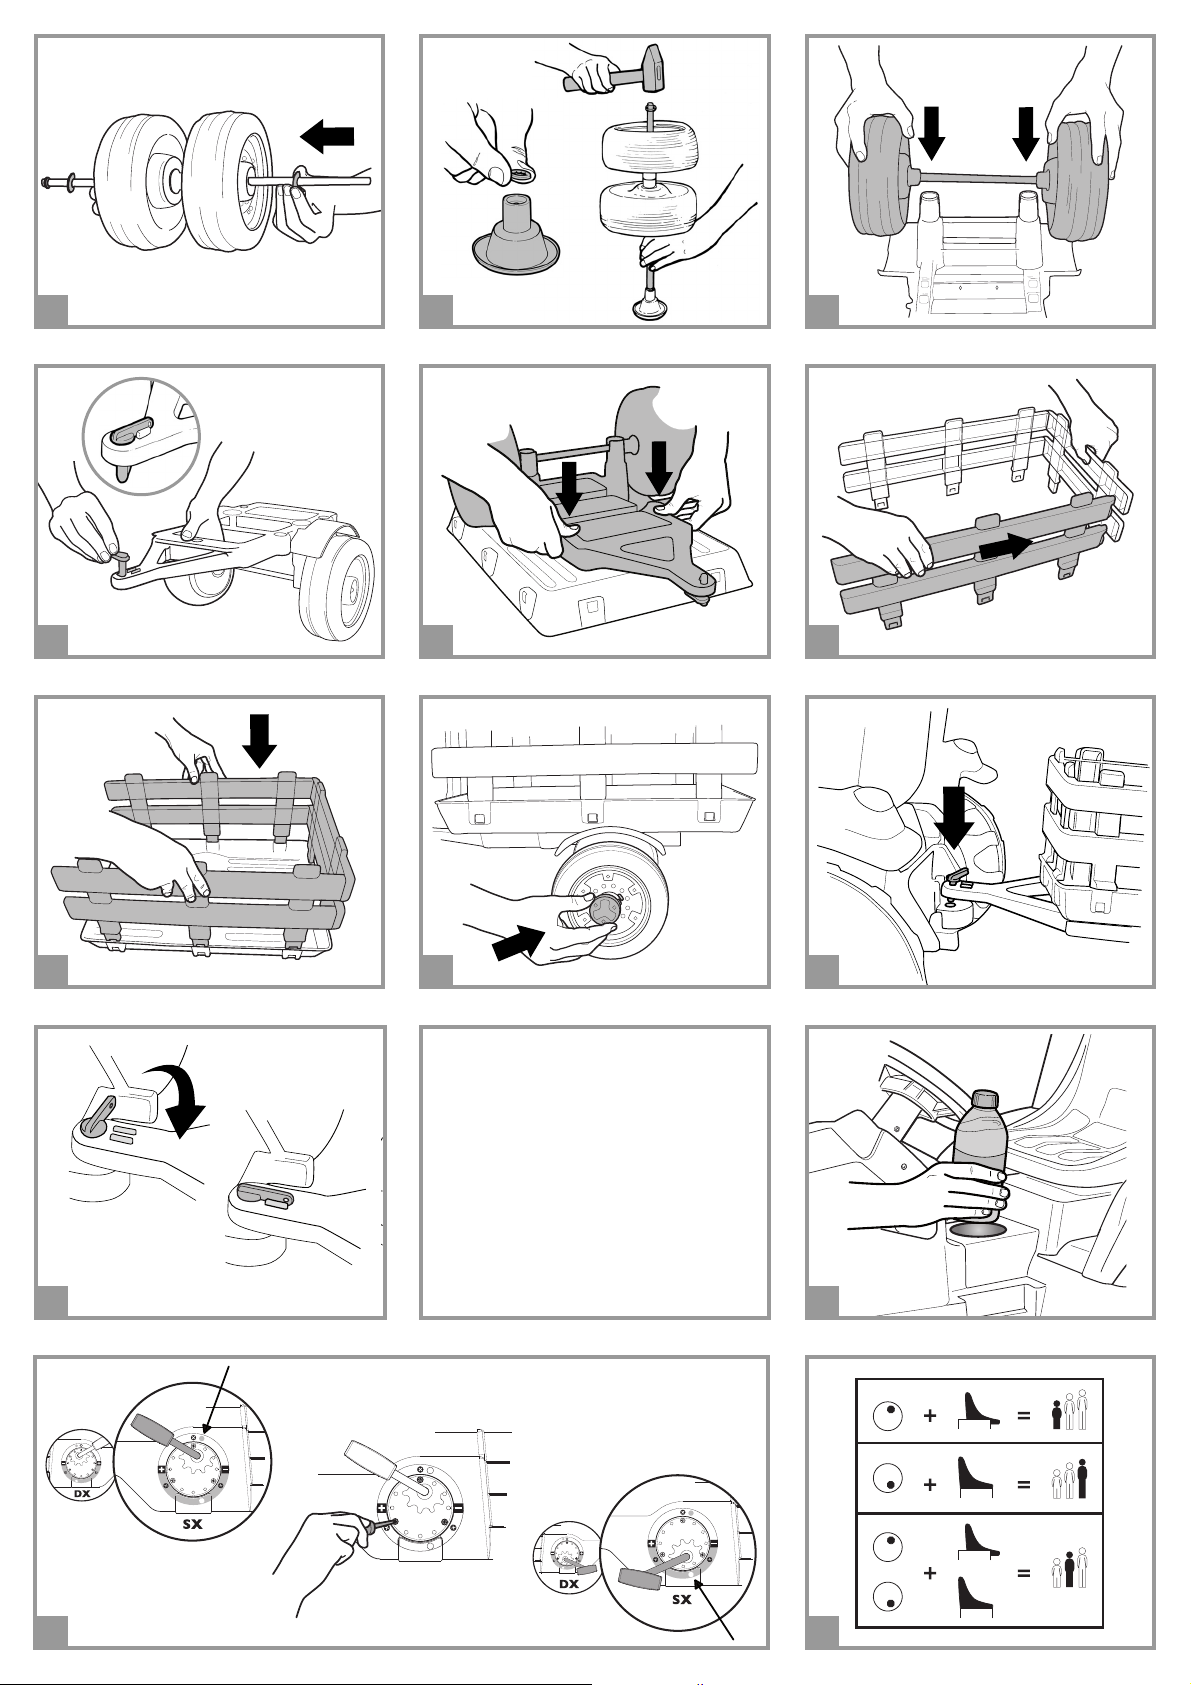
14 •Insert one of the 4 self-locking washers
(there are 2 spares) in the special tool
provided. PLEASE NOTE: The tabs on the
self-locking washer must face towards the
inside of the tool (see detail A).
15 •Remove the axle from the packaging and
take off its protective caps. Use a hammer
to drive the axle all the way down into the
tool provided, then remove the tool.
ENGLISH FRANÇAIS ESPAÑOL
INSTRUCTIONS D'ASSEMBLAGE
ATTENTION:
ASSEMBLAGE PAR UN ADULTE
REQUIS.
OUVRIR LES EMBALLAGES AVEC
PRÉCAUTION CAR LES PIÈCES À
ASSEMBLER PEUVENT
COMPORTER DES RISQUES DE
COUPURES OU DE BLESSURES.
SI LE PRODUIT EST ENDOMMAGÉ
LORSQUE VOUS OUVREZ
L’EMBALLAGE, CONTACTEZ LE
SERVICE APRÈS-VENTE ET
N’UTILISEZ PAS LE PRODUIT.
1 •Placer le siège sur son support. Attention :
le siège a 2 positions de réglage, comme
indiqué sur la figure.
2 •Fixer le siège dans la position désirée avec
les 2 vis fournies.
3 •Poser la partie avant du groupe que vous
venez d'assembler dans les 2 trous du
châssis.
4 •Fixer la partie arrière avec les 2 vis
fournies.
5 •Placer la roll-bar sur la caisse, comme
indiqué sur la figure.
6 •Visser avec les 2 vis fournies.
7 •Positionner le capot sur le châssis. Insérer
l’extrémité libre de la charnière noire dans
les 2 fentes du châssis en veillant à ce
qu’elle s’encastre correctement. Faire
pivoter le capot vers le bas et s’assurer
qu’il est correctement positionné sur le
faux tableau de bord. Insérer la clé de
verrouillage noire du capot dans le châssis
à travers le capot. La tourner pour
verrouiller le capot.
8 •Assembler par pression les 2 parties du
volant.
9 •Emboîter le volant en tirant la tige du
volant vers le haut.
10 •Aligner les trous de la tige du volant avec
ceux du volant. Fixer le volant avec la vis et
le boulon : le boulon se place dans le trou
hexagonal, la vis dans le trou rond.
11 •Appliquer les autocollants argentés sur les
feux arrières.
12 •Placer les 2 feux arrière en emboîtant
d'abord la partie inférieure puis la partie
supérieure, comme indiqué sur la figure.
13 •Appliquer l'autocollant argenté sur le feu
avant puis clipser toutes les fixations du
feu.
REMORQUE
Pour monter la remorque suivre les
instructions suivantes.
14 •Mettre l'une des 4 rondelles
autobloquantes (2 de réserve) dans l’outil
fourni à cet effet. ATTENTION : les
languettes de la rondelle autobloquante
doivent être tournées vers l'intérieur de
l'outil (voir détail A).
15 •Sortir l'essieu de l’emballage. Retirer les
capuchons de protection de l’essieu. Placer
l'essieu en tapant avec un marteau dans
l’outil fourni à cet effet jusqu'au fond, puis
retirer l'outil.
INSTRUCCIONES DE MONTAJE
PRECAUTION:
REQUIERE MONTAJE DE UN
ADULTO. ALGUNOS
COMPONENTES AL SER
ENSAMBLADOS PODRÍAN TENER
PARTES PEQUEÑAS/RIESGO POR
BORDES CONTANTES.
SI AL ABRIR EL PAQUETE SE
NOTASEN DAÑOS EN EL
PRODUCTO, CONTACTE CON EL
CENTRO DE ASISTENCIA. NO
UTILICE EL PRODUCTO.
1 •Colocar el asiento sobre su suporte.
Atención: el asiento se puede regular en 2
posiciones, como muestra la imagen.
2 •Fijar el sillín en la posición deseada con los
2 tornillos que se suministran.
3 •Insertar la parte delantera del grupo recién
montado en los 2 agujeros del chasis.
4 •Fijarlo en la parte trasera con los 2
tornillos que se suministran.
5 •Insertar la barra en la carrocería, como se
muestra en la imagen.
6 •Proceder atornillando con los dos tornillos
que se suministran.
7 •Colocar el capó en el chasis. Introducir la
parte libre de la bisagra negra en los 2
orificios del chasis hasta que encajen. Girar
el capó hacia abajo y asegurarse de que
encaje correctamente sobre la recreación
del compartimento del motor. Introducir el
cierre negro del capó entre el capó y el
chasis. Girar el cierre para asegurar el
capó.
8 •Unir mediante presión las dos partes del
volante.
9 •Manteniendo presionada la barra del
volante hacia arriba, insertar el volante.
10 •Alinear los agujeros la barra del volante y
del volante. Fijar el volante con el tornillo
y la tuerca: la tuerca se inserta en el
agujero hexagonal, el tornillo en el agujero
circular.
11 •Aplicar los adhesivos plateados en los
faros traseros.
12 •Insertar los dos faros traseros encajando
primero la parte inferior y después la
superior como se indica en la imagen.
13 •Aplicar el adhesivo plateado en el foco
delantero y proceder insertando con
presión todos los ganchos del faro.
REMOLQUE
Para montar el remolque, seguir las siguientes
intrucciones.
14 •Insertar una de las 4 arandelas de bloqueo
automático (2 de repuesto) en la
herramienta adecuada proporcionada.
ATENCIÓN: las lengüetas de las arandelas
de bloqueo automático deben estar giradas
hacia el interior de la herramienta (ver el
detalle A).
15 •Retirar los ejes del embalaje. Retirar las
tapas de protección de los ejes. Insertar
los ejes golpeando con un martillo en la
herramienta adecuada hasta el fondo,
remover sucesivamente la herramienta.
1
2
VEHICLE FEATURES AND
INSTRUCTIONS FOR USE
CARACTERÍSTICAS Y USO
DEL VEHÍCULO
CARACTERISTIQUES ET
EMPLOI DU VEHICULE
16 17 18
19 20
21
22 23 24
25 26
A
B
27 28
OROR
 Loading...