


Net2
Ins-30019 Net2 I/O board
20/08/2012
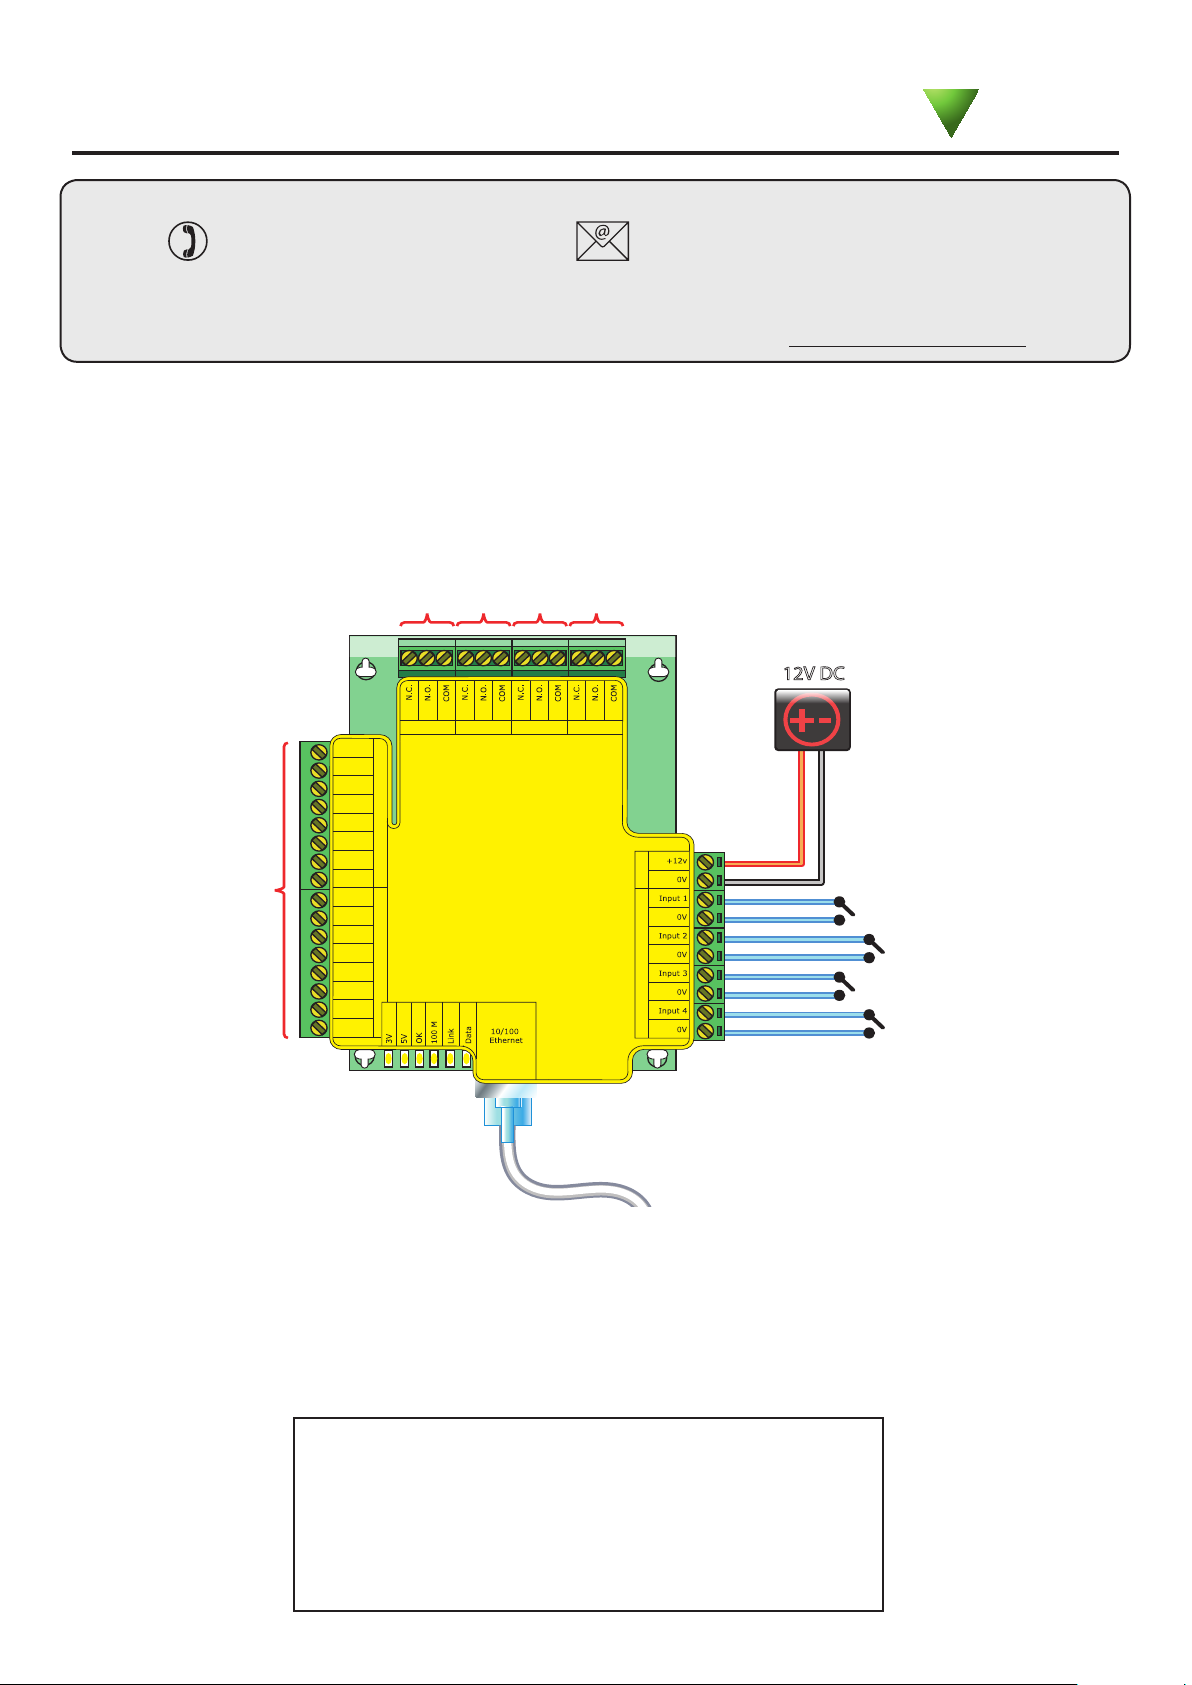
Output 1
12V DC
Power Inputs
Reader 2Reader 1
Red
Brown
Orange
Green
Yellow
Blue
Mauve
Black
Red
Brown
Orange
Green
Yellow
Blue
Mauve
Black
Relay 1 Relay 2 Relay 3 Relay 4
Input 1
Input 2
Input 3
Input 4
Output 2
Output 3
Output 4
Input terminal (FOR FUTURE USE)
Patch lead
Diagnostic LED's
Net2 I/O Boards are congured to switch their relays by setting up a 'Triggers and Actions' rules.
Four inputs are provided to allow connection to door contacts, etc, without the need of a Net2 ACU.
Four output relays are also provided to switch a variety of AC and DC output devices. The relay
contacts are rated at 13A at 240V AC, to enable mains voltages to be switched.
Technical Support
Technical help is available: Monday - Friday from 07:00 - 19:00 (GMT)
Saturday from 09:00 - 13:00 (GMT)
01273 811011
Documentation on all Paxton products can be found on our website - http://www.paxton.co.uk/
The I/O board is a Network based product and requires connection to the PC via a TCP/IP connection.
This unit requires the controlling PC to be running Net2 v4 software.
- 3V Power LED
- 5V Power LED
- OK LED - This should ash regularly
- 100 M - On = 100 Mbit/s : Off = 10 Mbit/s
- Link - The I/O board is connected to a Network port
- Data - The I/O board is receiving ethernet data
Diagnostic LED's
support@paxton.co.uk
Paxton
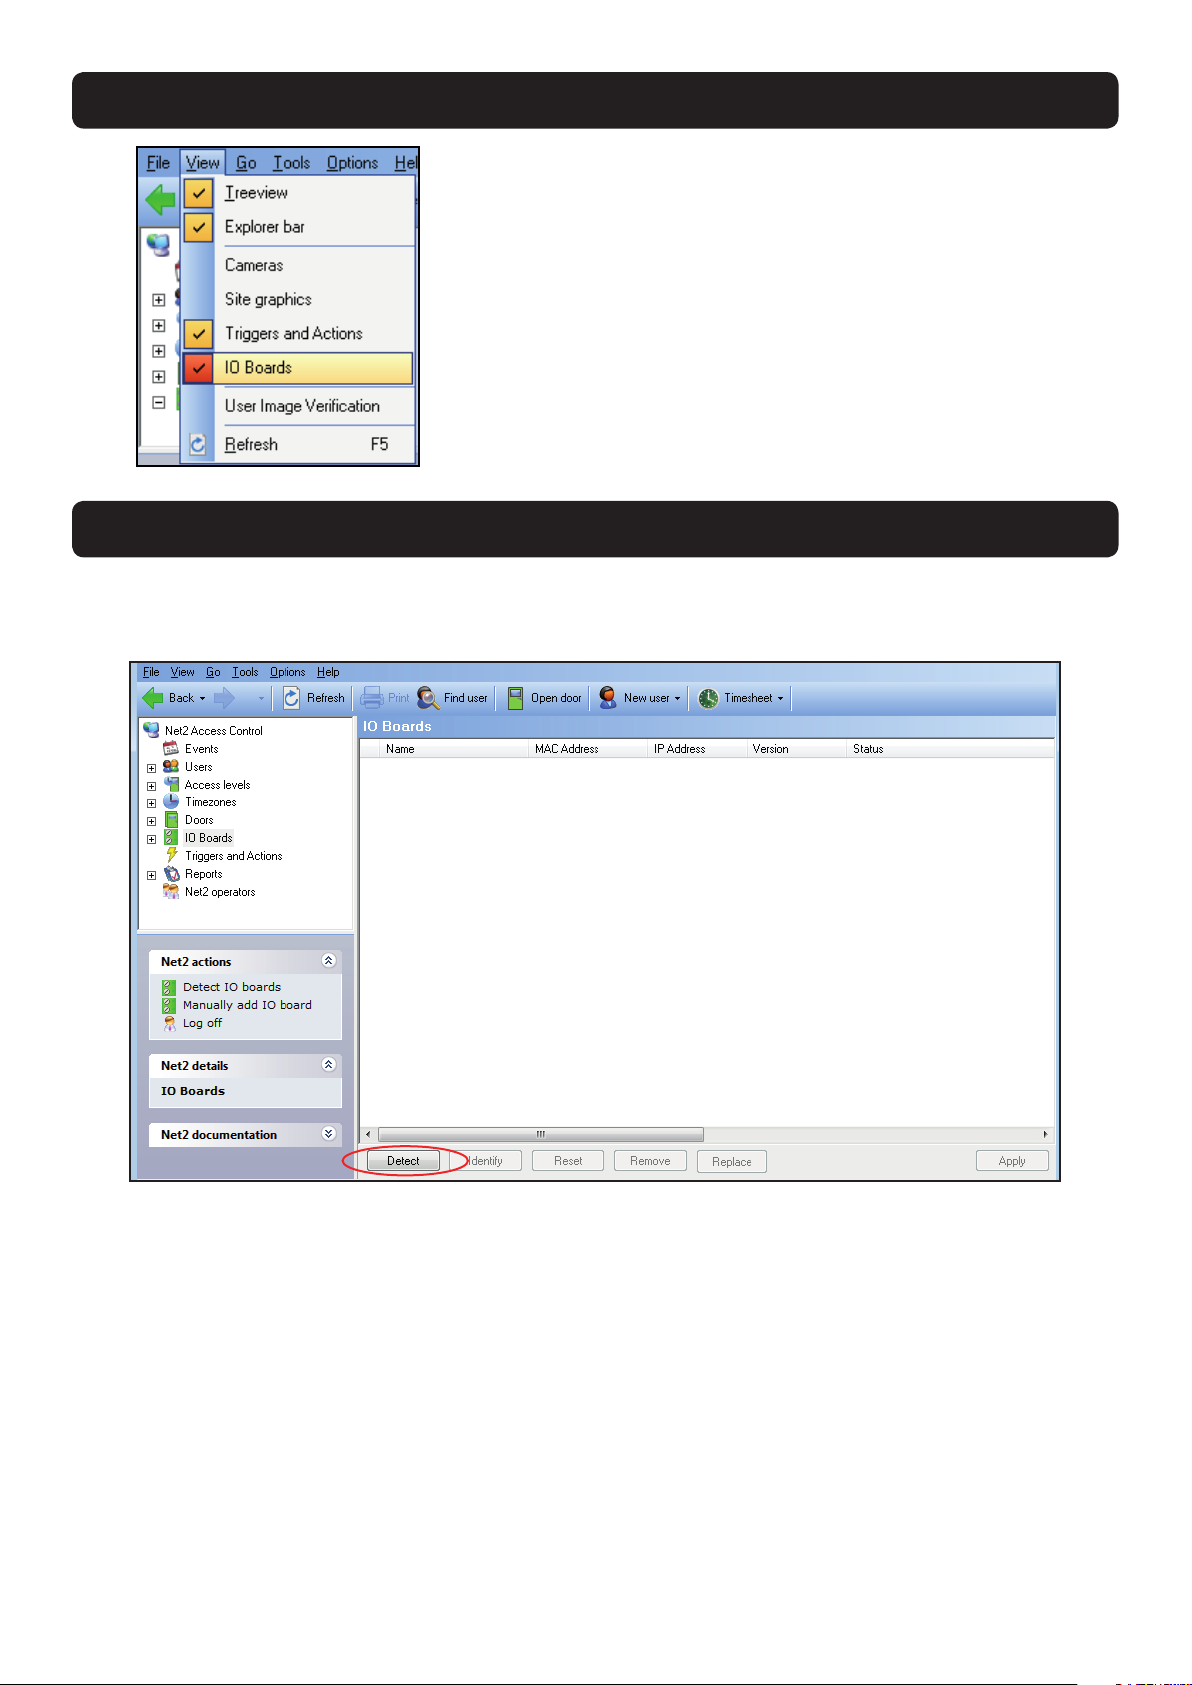
Select 'I/O boards' in the left hand tree diagram.
To enable the 'I/O board' icon, the 'Triggers & Actions'
icon needs to be active. Check in the view menu and
then select Triggers and Actions and then I/O boards
as necessary.
The 'I/O boards' option will remain grey until the
'Triggers & Actions' tab has been selected.
Detect - Clicking on this button will detect all I/O boards on the local network.
Identify - Clicking this button will cause the on-board sounder to 'beep' helping to locate this I/O board.
Reset - Clicking on this button will return the user settings to the factory default values.
Remove - Deletes an I/O board from the list.
Replace - This feature will enable an I/O board to be easily replaced. Once the new I/O board is online, a
wizard will copy all the settings from the old unit into the new I/O board.
I/O Board software conguration
Detection of the I/O boards
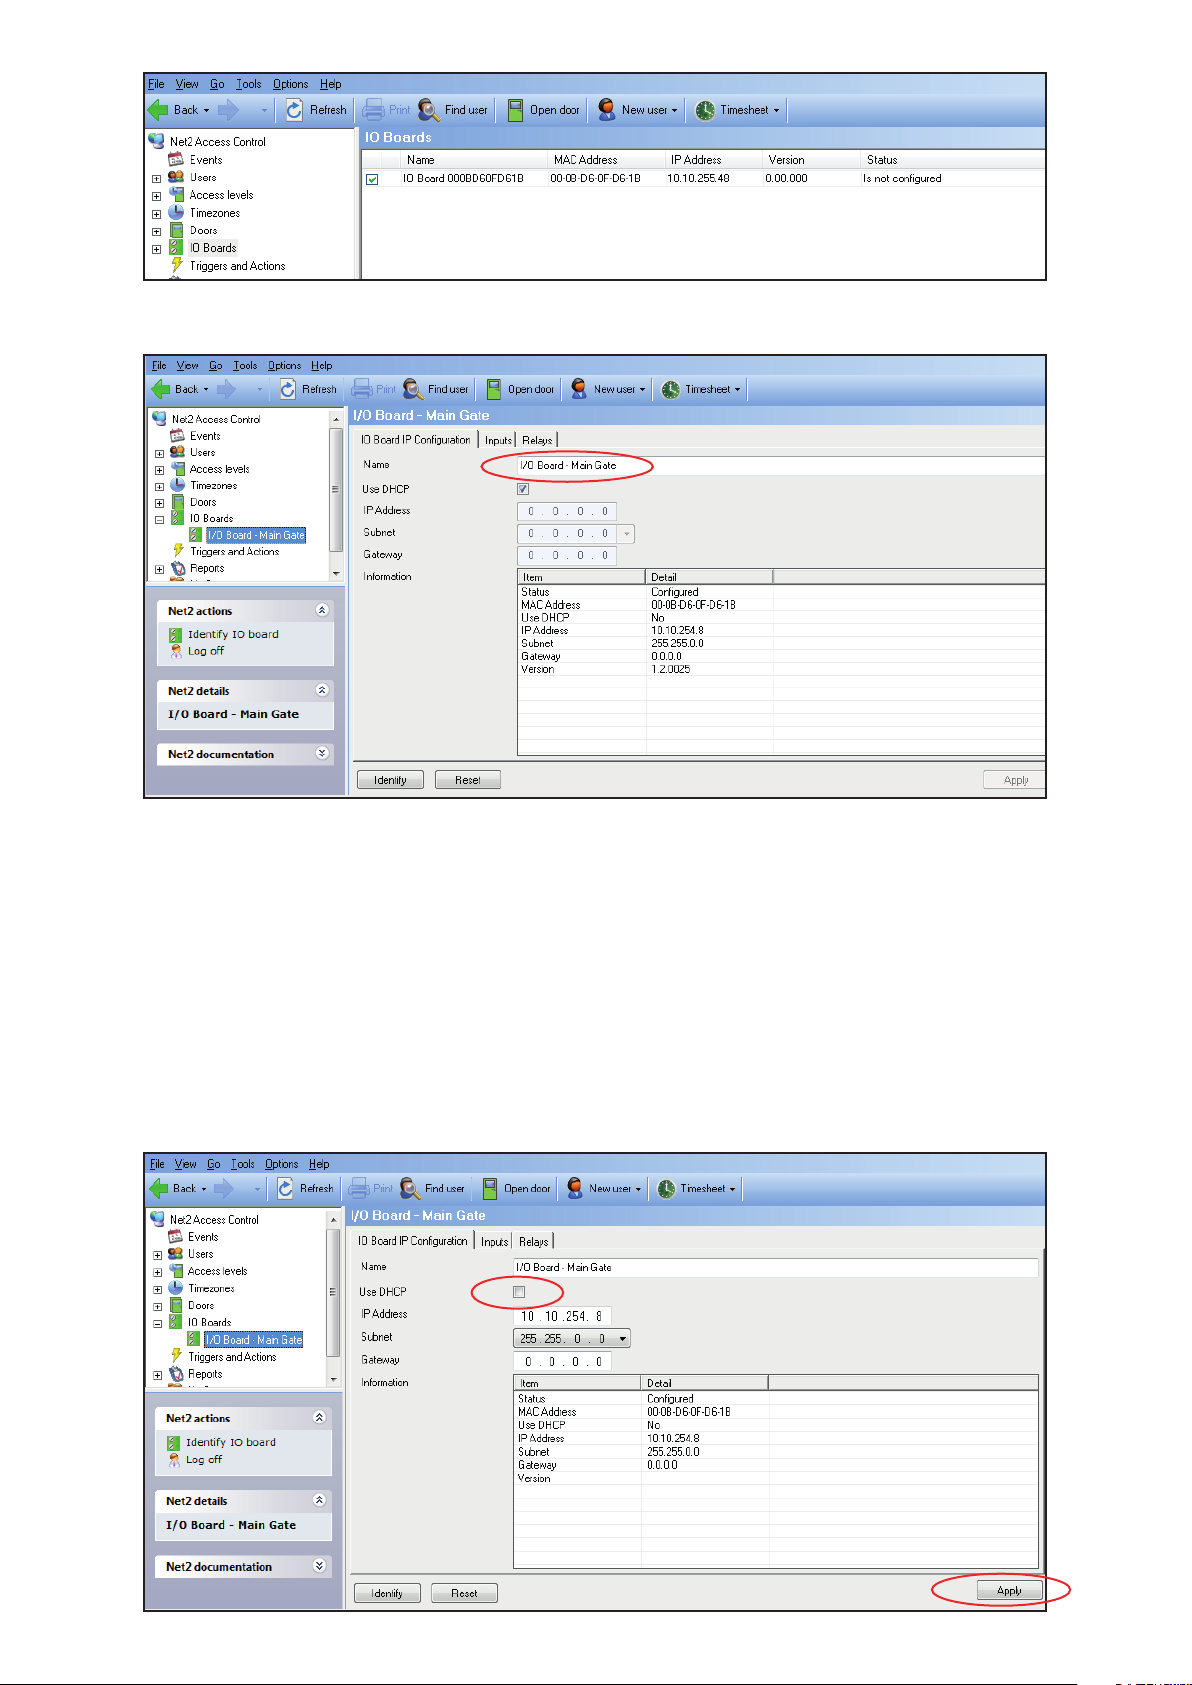
I/O boards that have been detected will be displayed with their MAC address.
Double click on an entry and it will bring up its conguration screen. The name can be
changed as required and then click Apply.
To ensure that the I/O board always has the same IP address, it is recommended that you
obtain a xed/reserved IP address from the network administrator.
Uncheck the DHCP option and enter the IP address in the text boxes using the . to move
between elds.
Click Apply. The I/O board will store and use this new xed address.
 Loading...