

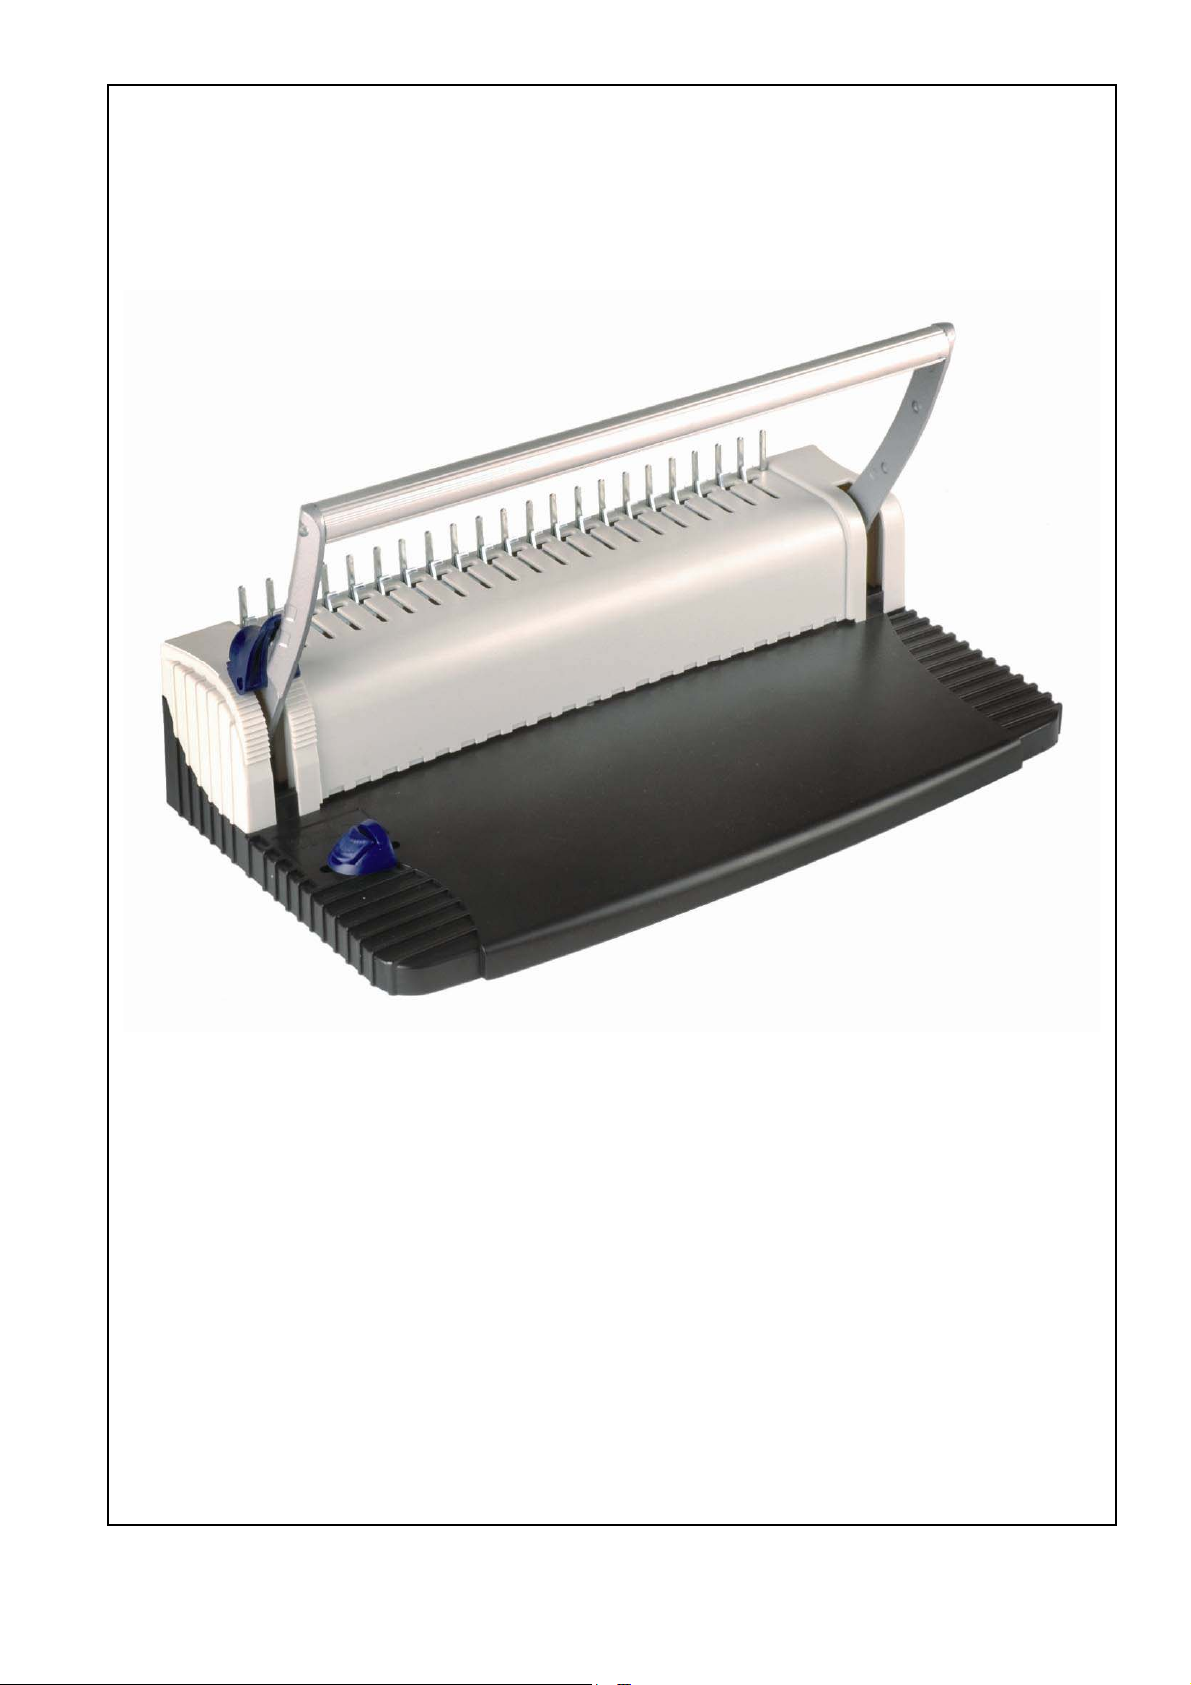
BINDING MACHINE
English............................................................................................................................3
Français..........................................................................................................................5
Deutsch...........................................................................................................................7
Polski ..............................................................................................................................9
Español.........................................................................................................................11
Nederlands...................................................................................................................13
1

2
BINDING MACHINE
SAFETY NOTICE
Read all instructions before use. Do not put any items through the holes.
Do not attempt to open casing. Do not bind more paper than advised.
OPERATING INSTRUCTIONS
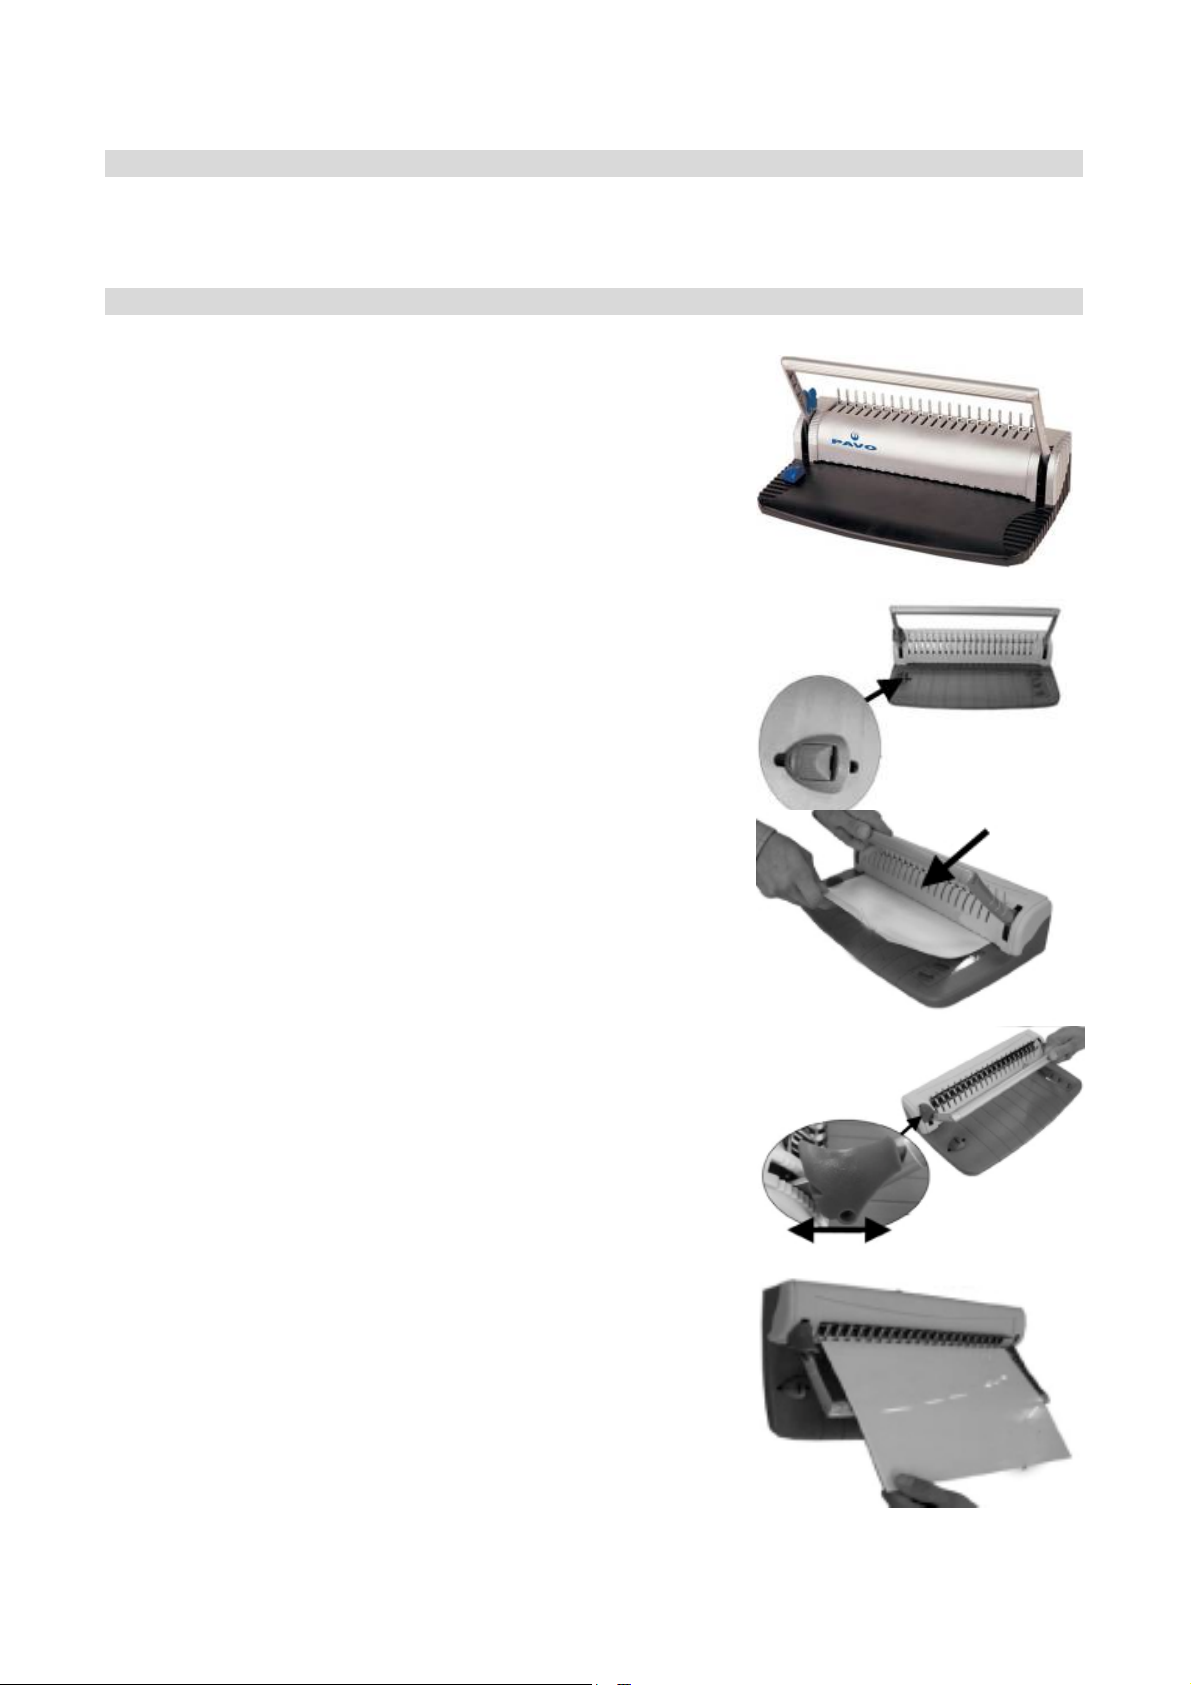
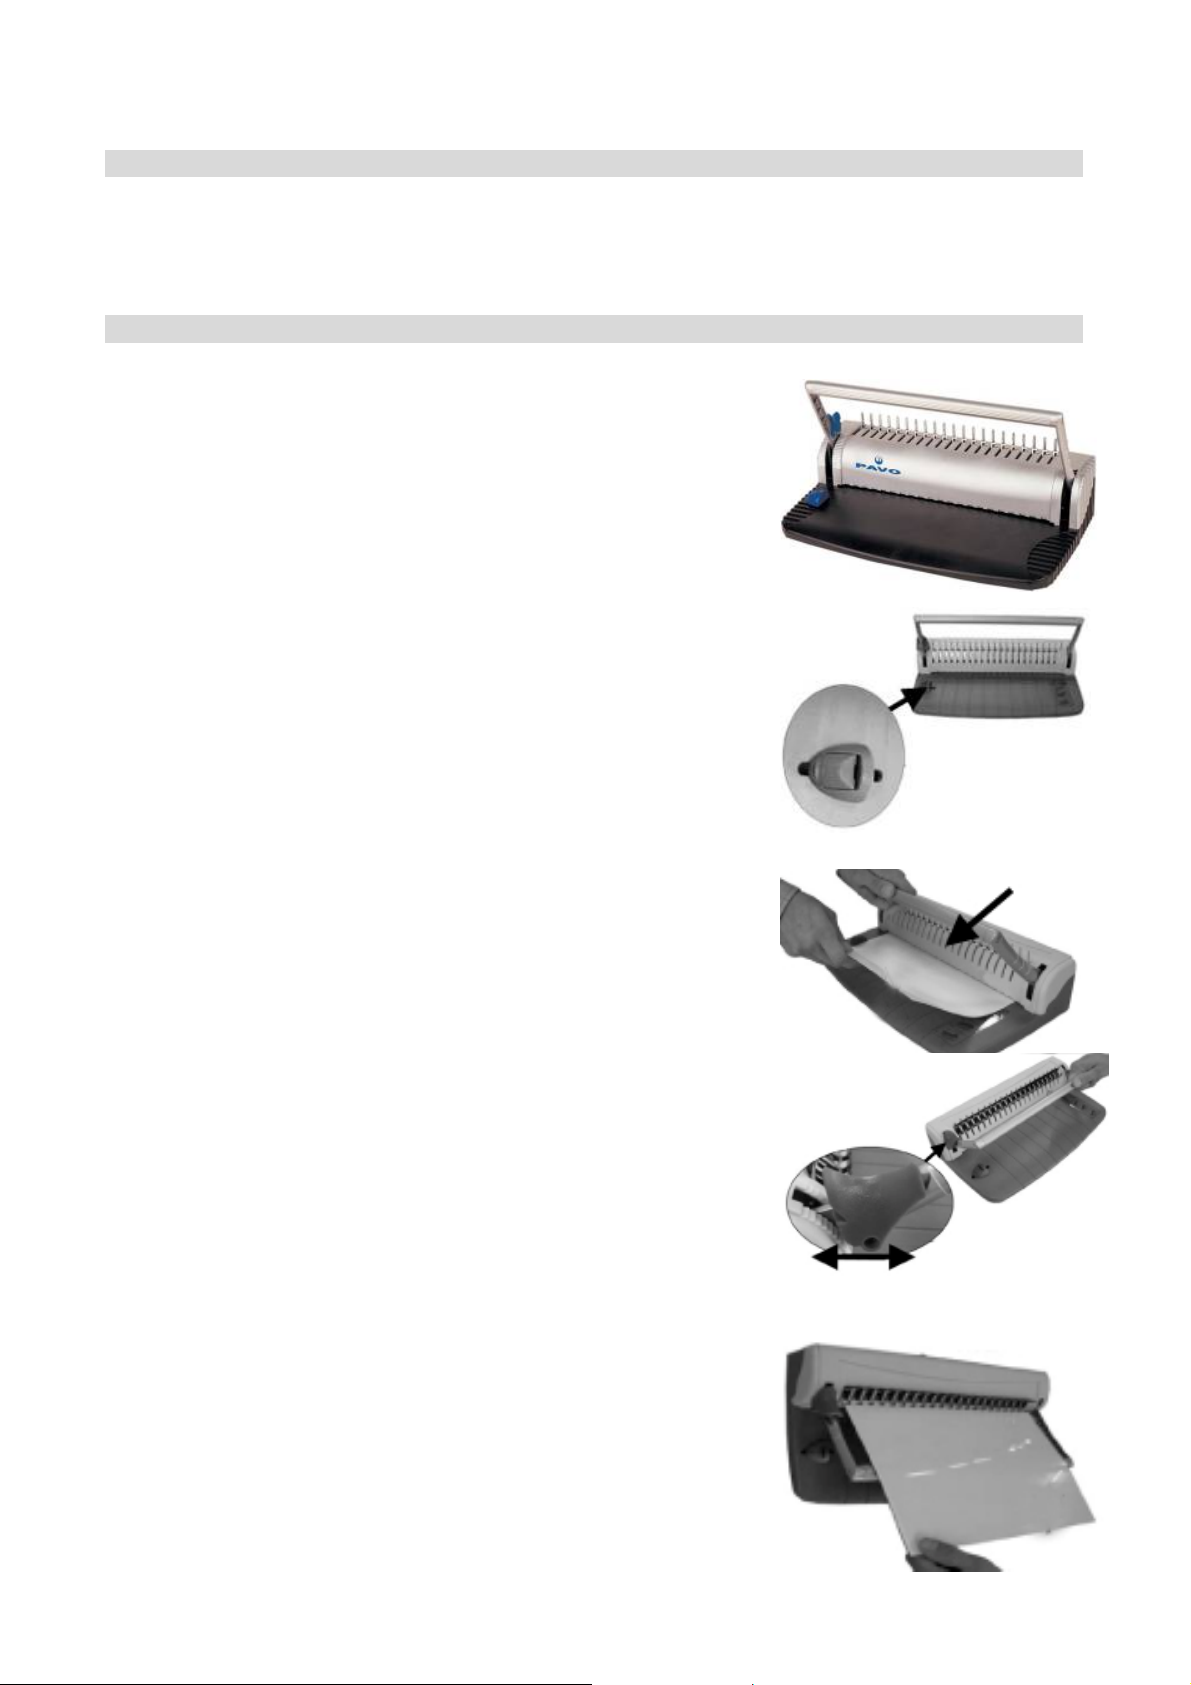
Before binding it is advisable to carry out a test to familiarise
yourself and to make sure that your machine is working
correctly.
1. Remove all packaging.
2. Use the side guide to select the size of the paper you will
punch.
3. Introduce the correct amount of pages (max 8 sheets 80gr/m2
or max 1 PVC cover) inside the machine and lower the handle to
punch the pages.
4. Once all your pages are punched. Place the comb over the
teeth on top of the machine and shift comb to the left so that the
upside down L is covered by the comb. To open the comb press
down the handle “slowly” As you do this the “L’s” pull forward
and open the comb. When sufficiently open secure the handle
with the ratchet while you load your paper.
5. Load all of your punched pages in the comb (by starting with
the front side of your report). When finished, release the ratchet
and remove your document.
3

IMPORTANT ADVICE
Be Careful: The waste paper tray should be regularly emptied.
TROUBLESHOOTING
• Can’t punch through: Too much paper / Chip tray full / Material is too thick
• Can’t remove paper: Machine has been overloaded and not all holes are punched through.
Lift arm and firmly press lever using bodyweight / The material being punched is too
flexible, common with soft plastics.
• Can’t align paper: Debris is trapped in the Paper Slot / Side guide is not correctly set
• Can’t Open Comb: Fronds should be facing upward and curling away.
WARRANTY
The machine has a warranty of 2 years (the warranty is not applicable if the machine has been used
for an inappropriate purpose).
TECHNICAL DATA
Max binding length.................................................................................................300mm/11’’
Max punching capacity (80gr/m2 sheets)................................................................8
Max binding capacity (80gr/m2 sheets) ..................................................................150
Max binding combs diameter..................................................................................20mm/3/4”
Dimension...............................................................................................................38 x 20 x 10 cm
Weight.....................................................................................................................1 KGS
4
PERFORELIEUR
CONSIGNES DE SECURITE
Lisez attentivement ce manuel avant
utilisation.
N’essayez pas d’ouvrir le boîtier.
CONSIGNES D’UTILISATION
Avant de perforer ou/et de relier, il est recommandé de faire un
essai pour se familiariser avec la machine et pour s’assurer que
celle-ci fonctionne correctement.
1. Retirez l’emballage.
2. Utilisez le guide latéral pour ajuster la taille du papier que vous allez
perforer.
3. Introduisez le nombre de pages souhaité (attention : max. 8 feuilles
80gr/m
levier afin de perforer vos pages.
4. Une fois que toutes vos pages sont perforées, introduisez l’anneau de
reliure dans les dents métalliques se trouvant au-dessus de la
machine, et décalez-le légèrement sur la gauche, de sorte qu’il
recouvre la languette métallique (en forme de « L » à l’envers). Pour
écarter les anneaux de reliure, appuyez lentement sur le levier. Le
« L » est ainsi tiré vers l’avant et permet d’ouvrir les anneaux.
Bloquez ensuite le levier avec la petite manette, afin de charger vos
feuilles.
5. Chargez toutes vos pages perforées dans l’anneau (en commençant
par la dernière page de votre rapport).Lorsque vous avez fini
d’introduire toutes vos pages, libérez la manette bloquant votre levier.
Vous pouvez retirer votre document.
2
ou max. 1 couverture PVC) dans la machine et abaissez le
N’insérez pas d’objets dans les trous.
Ne reliez pas plus de papier que la quantité conseillée.
5

CONSEILS DE PRECAUTION
Attention: Videz régulièrement le plateau récupérant les débris de papier.
DEPANNAGE
• Impossible de perforer: soit il y a trop de papier / soit le plateau contenant les débris est
plein / Soit le matériau utilisé est trop épais.
• Impossible de retirer les pages: La machine a été trop remplie et n’a pas pu perforer toutes
les pages. Appuyer fermement sur le levier en utilisant le poids du corps / le matériau perforé
est trop flexible comme par exemple des plastiques mous.
• Impossible d’aligner le papier: Des débris sont pris dans la fente / le guide latéral n’est pas
correctement positionné.
• Impossible d’ouvrir l’anneau de reliure: celui-ci est mal positionné, ce côté ouvert de
l’anneau doit être placé vert le haut.
GARANTIE
La machine est garantie 2 ans (la garantie ne s’applique pas si la machine a été utilisée de manière
inappropriée).
DONNEES TECHNIQUES
Longueur maximum de la reliure............................................................................300mm/11’’
Capacité maximum de perforation (feuilles 80gr/m2) ............................................8
Capacité maximum pour la reliure (feuilles 80gr/m2) ............................................150
Diamètre maximum des anneaux de reliure............................................................20mm/3/4”
Dimension...............................................................................................................38 x 20 x 10 cm
Poids........................................................................................................................1 KGS
6

BINDEMASCHINE
SICHERHEITSHINWEIS
Lesen Sie die Bedienungsanleitung
aufmerksam durch.
öffnen.
BEDIENUNGSANLEITUNG
Bevor Sie binden empfehlen wir eine Bindung für Testzwecke durchzuführen. Dadurch machen Sie
sich mit dem Gerät vertraut und stellen sicher, dass das Gerät
ordnungsgemäß funktioniert.
1. Entfernen Sie alle Verpackungseinheiten.
2. Benutzen Sie den Papierseitenanschlag um die gewünschte
Papiergröße einzustellen.
3. Führen Sie die richtige Anzahl der Blätter (max 8 Blätter 80gr/m
oder max 1 PVC Folie) in die Maschine ein und betätigen Sie den
Stanzhebel.
4. Nachdem Sie alle Blätter gestanzt haben, platzieren Sie den
Binderücken auf den Zähnen oberhalb der Maschine. Hierfür muss
die offene Seite des Binderückens unter die L-förmigen Zähne
gebracht werden, so dass dieser komplett öffnet. Um den
Binderücken zu öffnen drücken Sie den Stanzhebel vorsichtig nach
unten. Dabei fahren die L-förmigen Zähne nach vorne und öffnen den
Binderücken. Sobald Sie den Binderücken weit genug geöffnet
haben, fixieren Sie diesen mit Hilfe des Arretierhebels während Sie
die Blätter einfügen.
5. Platzieren Sie alle Blätter in dem Binderücken (beginnen Sie mit dem
Deckblatt). Danach klappen Sie den Stanzhebel zurück und
entnehmen das Dokument.
Schieben Sie keine Gegenstände zwischen die Löcher.
Binden Sie nicht mehr Blätter auf einmal als
angegeben. Versuchen Sie nicht das Gehäuse zu
2
7

WEITERE INFORMATIONEN
Achtung: Der Stanzabfall sollte regelmäßig geleert werden.
PROBLEMBEHANDLUNG
• Keine Stanzung möglich: Zu viele Blätter / Stanzabfallbehältnis ist voll / Material ist zu
dick
• Blätter lassen sich nicht entnehmen: Maschine ist überladen und nicht alle Löcher sind
komplett gestanzt. Lösen Sie den Stanzhebel und drücken Sie mit Hilfe Ihres Körpergewichts
den Stanzhebel nach unten / Das Material welches gestanzt werden soll ist zu weich,
insbesondere bei weichem Plastik.
• Angleichung des Papiers ist nicht möglich: Fremdkörper befinden Sich im Papierschlitz /
Papieranschlag ist falsch eingestellt.
• Binderücken lässt sich nicht öffnen: Binderücken muss nach oben hin geöffnet platziert
werden, damit sich dieser aufklappen kann.
GARANTIE
Die Garantiezeit des Gerätes beträgt 2 Jahre (die Garantie beinhaltet keine unsachgemäße
Benutzung).
TECHNISCHE INFORMATIONEN
Max Bindelänge......................................................................................................300mm/11’’
Max Stanzkapazität (80gr/m2 Blätter) ....................................................................8
Max Bindekapazität (80gr/m2 Blätter)....................................................................150
Max Binderücken Durchmesser..............................................................................20mm/3/4”
Abmessungen..........................................................................................................38 x 20 x 10 cm
Gewicht...................................................................................................................1 KGS
8

BINDOWNICA
NOTA BEZPIECZENSTWA
Przed uzyciem przeczytaj instrukcje. Nie umieszczaj zadnych przedmiotow w otworach.
Nie otwieraj obudowy. Nie dziurkuj wiekszej ilosci papieru, niz jest to
zalecane.
INSTRUKCJA OBSLUGI
Zalecamy wykonanie bindowania testowego, by zapoznac sie z urzadzeniem i by upewnic sie, ze
maszyna dziala prawidlowo.
1. Usun opakowanie.
2. Uzyj wskaznika rozmiaru arkusza papieru, by dopasowac
odpowiednia wielkosc.
3. Umiesc wlasciwa ilosc arkuszy papieru w urzadzeniu(max 8
kartek 80gr/m2 lub max 1 okladke PVC) i pociagnij za
dzwignie, celem przedziurkowania.
4. Po przedziurkowaniu papieru, umiesc grzbiet plastikowy na
grzebieniu, po czym przesun go w lewo, tak by zaszedl za
metalowe zeby bindownicy. Nacisnij dzwignie powoli w dol,
by otworzyc grzebien. Po otworzeniu zablokuj dzwignie
przyciskiem znajdujacym sie po lewej stronie dzwigni.
5. Umiesc przedziurkowane arkusze papieru na grzbiecie
plastikowym (zaczynajac od przedniej strony dokumentu) . Po
zakonczeniu tej czynnosci, odblokuj dzwignie i wyjmij
dokument.
9

UWAGA
Uwazaj: Pojemnik na scinki musi byc regularnie oprozniany.
MOZLIWE PROBLEMY:
• Nie mozna przedziurkowac: zbyt duza ilosc papieru / pelny pojemnik na scinki / zbyt gruby
material
• Nie mozna wyciagnac papieru: zbyt duza ilosc arkuszy zostala umieszczona i nie
wszystkie zostaly przedziurkowane. Unies dzwignie, po czym nacisnij na nia mocno masa
swojego ciala/dziurkowany material jest zbyt gietki , co zdarza sie przy miekkim plastiku.
• Nie mozna dopasowac papieru: pojemnik na scinki jest pelny i scinki zablokowaly wejscie
do dziurkowania/ wskaznik rozmiaru papieru nie jest prawidlowo ustawiony.
• Nie mozna otworzyc grzebienia: zeby grzebienia powinny by odwrocone do gory I
zawiniete w tyl.
GWARANCJA
Maszyna ma dwuletnia gwarancje. Gwarancja nie jest wazna, jezeli maszyna byla uzywana w
niewlasciwy sposob.
DANE TECHNICZNE
Max dlugosc bindowania........................................................................................300mm/11’’
Max ilosc arkuszy do dziurkowania (80gr/m2 )......................................................8
Max ilosc arkuszy do bindowania (80gr/m2 ).........................................................150
Max srednica grzebienia plastikowego...................................................................20mm/3/4”
Wymiary .................................................................................................................38 x 20 x 10 cm
Waga.......................................................................................................................1 KG
10

ENCUADERNADORA
AVISO DE SEGURIDAD
Lea las instrucciones antes de utilizarla. No ponga ningún elemento entre las clavijas
No intente abrir la carcasa No perfore más papel de lo aconsejado.
INSTRUCCIÓNES DE FUNCIONAMENTO
Antes de encuadernar es aconsejable llevar a cabo una prueba para familiarizarse con la maquina y
estar segura de que la maquina trabaja correctamente.
1. Extraiga todo el embalaje.
2. Utilice la guía lateral para seleccionar el tamaño del papel que
usted va a agujerear.
3. Introduzca la cantidad correcta de hojas (máximo 8 de 80
gramos o una portada de PVC) dentro de la maquina y tire
hacia debajo de la manillas para agujerear las hojas.
4. Una vez que toda las paginas son perforadas, sitúe las anillas
sobre las clavijas superiores moviéndolas hacia la izquierda de
manera que la parte d abajo de la clavija quede cubierta por la
anilla. Para abrir las anillas presione la manilla hacia abajo
despacio. Mientras que lo hace esta se ira abriendo, presione
hasta que sea suficiente.
5. Inserte todas las hojas perforadas en la anilla (empiece por la
parte frontal de su informe). Cuando acabe suelte el soporte de
la manilla y extraiga el documento.
11

CONSEJOS IMPORANTES
Tenga cuidado: La bandeja de papel debe ser vaciada constantemente.
DIAGNÓSTICO DE PROBLEMAS
• No se puede perforar: Demasiado papel / La bandeja esta llena/ El papel es demasiado
grueso
• No se puede extraer el papel: La maquina ha sido sobrecargada y las clavijas no pueden
perforar a través del documento. Suba la manilla presionado firmemente utilizando el peso
del cuerpo firmemente / El material a perforar es muy flexible ,es común con plásticos no
rígidos.
• No se puede alinear el papel: Han quedado el la ranura restos de papel / El soporte lateral
no esta correctamente situado
• No se pueden abrir las anillas: Las apertura de las anillas debe ser colocada hacia arriba .
GARANTIA
La maquina tiene una garantía de 2 años (La garantía no es aplicable cuando la maquina haya sido
utilizada para un fin distinto al debido).
DATOS TÉCNICOS
Máxima longitud de encuadernación......................................................................300mm/11’’
Máxima capacidad de agujereado (80gr/m2 hojas).................................................8
Máxima capacidad de encuadernación (80gr/m2 hojas) .........................................150
Máximo diámetro de anillas....................................................................................20mm/3/4”
Dimensión...............................................................................................................38 x 20 x 10 cm
Peso ........................................................................................................................1 KGS
12

BINDMACHINE
VEILIGHEIDSMAATREGELEN
Lees alle instructies voor gebruik. Stop geen voorwerpen in de gaatjes.
Probeer de kap van de machine niet
open te maken.
Voordat u begint met binden is het aan te raden eerst een test te doen om goed met het apparaat
overweg te kunnen en te controleren of de machine correct werkt.
1. Verwijder de verpakking.
2. Gebruik de knop aan de zijkant om de instellingen te wijzigen
van het papier formaat.
Probeer niet meer papier in te binden dan geadviseerd.
GEBRUIKS INSTRUCTIES
3. Stop het juiste aantal vellen in de machine (max 8 vellen
80gr/m2 of max. 1 plastic vel) en trek de hendel omlaag om de
vellen te perforeren.
4. Zodra alle vellen geperforeerd zijn plaatst u de bindring over de
tanden bovenop de machine en schuift u de bindring naar links
zodat de ondersteboven L bedekt wordt door de bindring. Om
de bindring te openen drukt u de hendel “langzaam” omlaag.
Zodra u dit doet zullen de “L’s” weer naar buiten steken en de
bindring gaat open. Als de hendel voldoende open is, moet u
het blokje van de hendel vastzetten zodat u de vellen kunt
inbinden.
5. Bind alle geperforeerde vellen in de bindring (start met de
voorkant van uw rapport). Als alle vellen in de bindring zitten,
kunt u het blokje van de hendel weer in de normale positie
brengen zodat u uw rapport kunt uitnemen.
13

BELANGRIJK ADVIES
De lade met restafval dient regelmatig geleegd te worden.
PROBLEMEN OPLOSSEN
• Kan niet geperforeerd worden: te veel papier / lade met restafval is te vol / papiermateriaal
is te dik
• Kan papier niet verwijderen: Machine is overbelast zodat niet alle gaatjes goed
geperforeerd zijn. Haal de hendel omhoog en duw de hendel stevig naar beneden met uw
lichaamsgewicht / papiermateriaal is te flexibel of het is van te zacht plastic.
• Kan papier niet goed lijnen: Restafval zit vast in de papiergleuf / de knop aan de zijkant is
niet correct ingesteld.
• Kan de bindring niet openen: De uitstekende pinnen van de bindring waar het papier op
bevestigd wordt, moeten naar voren wijzen zodat de bindring kan openen.
GARANTIE
De machine heeft een garantie van 2 jaar (de garantie geldt niet als de machine is gebruikt voor
ongeschikte doeleinden).
TECHNICAL DATA
Maximale bindlengte ..................................................................................300mm/11’’
Maximaal aantal te perforeren (80gr/m2 sheets).........................................8
Maximale bindcapaciteit (80gr/m2 sheets)..................................................150
Maximale diameter bindringen...................................................................20mm/ 3/4”
Dimensie.....................................................................................................38 x 20 x 10 cm
Gewicht.......................................................................................................1KG
14
 Loading...