

LAMINATING MACHINE
English............................................................................................................................3
Français..........................................................................................................................5
Deutsch...........................................................................................................................7
Español...........................................................................................................................9
Nederlands...................................................................................................................11
1

2
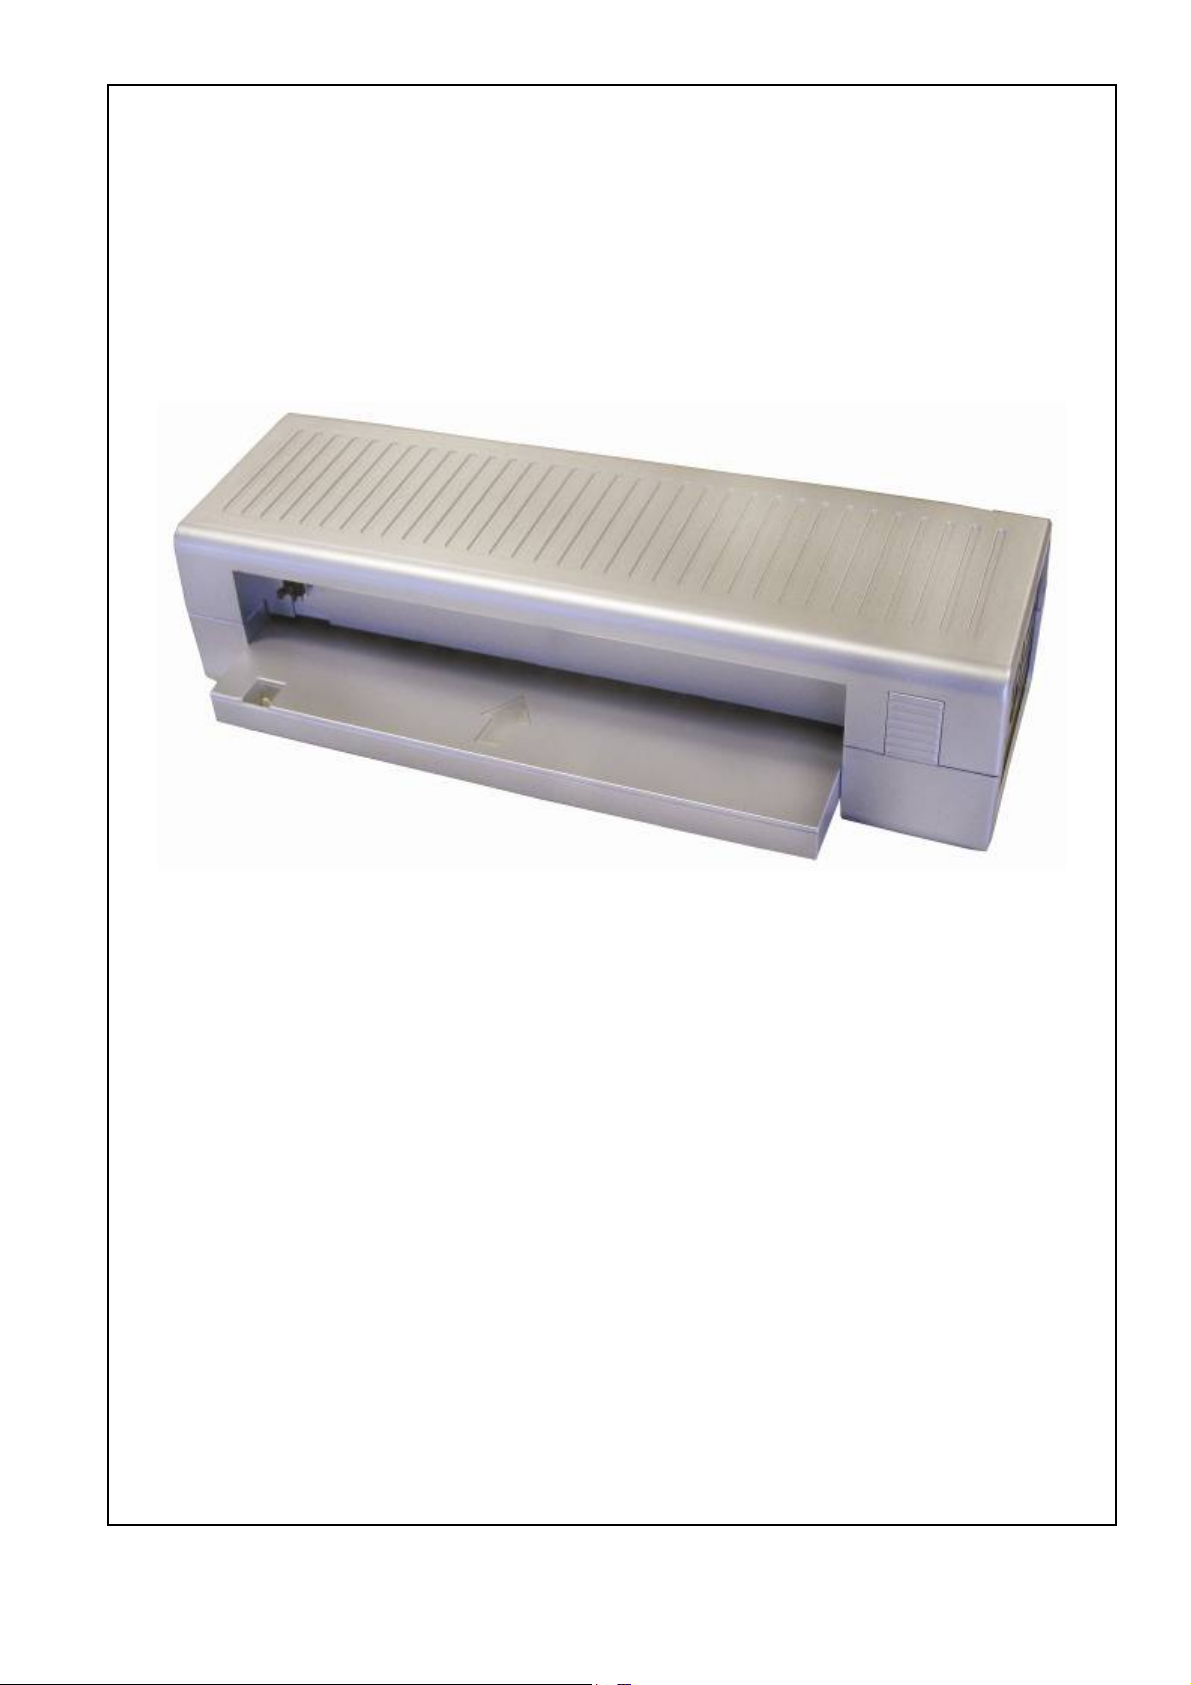
LAMINATING MACHINE
Congratulations on your purchase of the laminator. Now you can protect your favourite documents,
recipe cards, membership cards, letters and legal size documents etc. in a waterproof, airtight seal.
Follow the instructions for proper use and keep this book for future reference.
SAFETY NOTICE
Read all instructions before use Do not touch the heat vents when the machine is
working, Do not leave cable where others may trip
Do not attempt to open casing Do not use if machine, cable, or socket is damaged
Do not use if wet Wait for pouches to cool before handling. They may be
hot. Switch off and unplug when not in use
Do not cover the heat vents when in use Keep protective plastic bag + cable tie away from
children & animals
OPERATING INSTRUCTIONS
This machine is suitable for use with all lamination pouches up to 2x125 microns thick. You do not
need to use a pouch carrier.
All brands of hot melt lamination pouches should be compatible with your machine. However
because we cannot control the standards of other manufacturers pouches we recommend that you
carry out a test lamination to familiarise yourself, to make sure that your pouch is of the correct
standard and your machine is working correctly. This is always advisable before laminating
precious items.
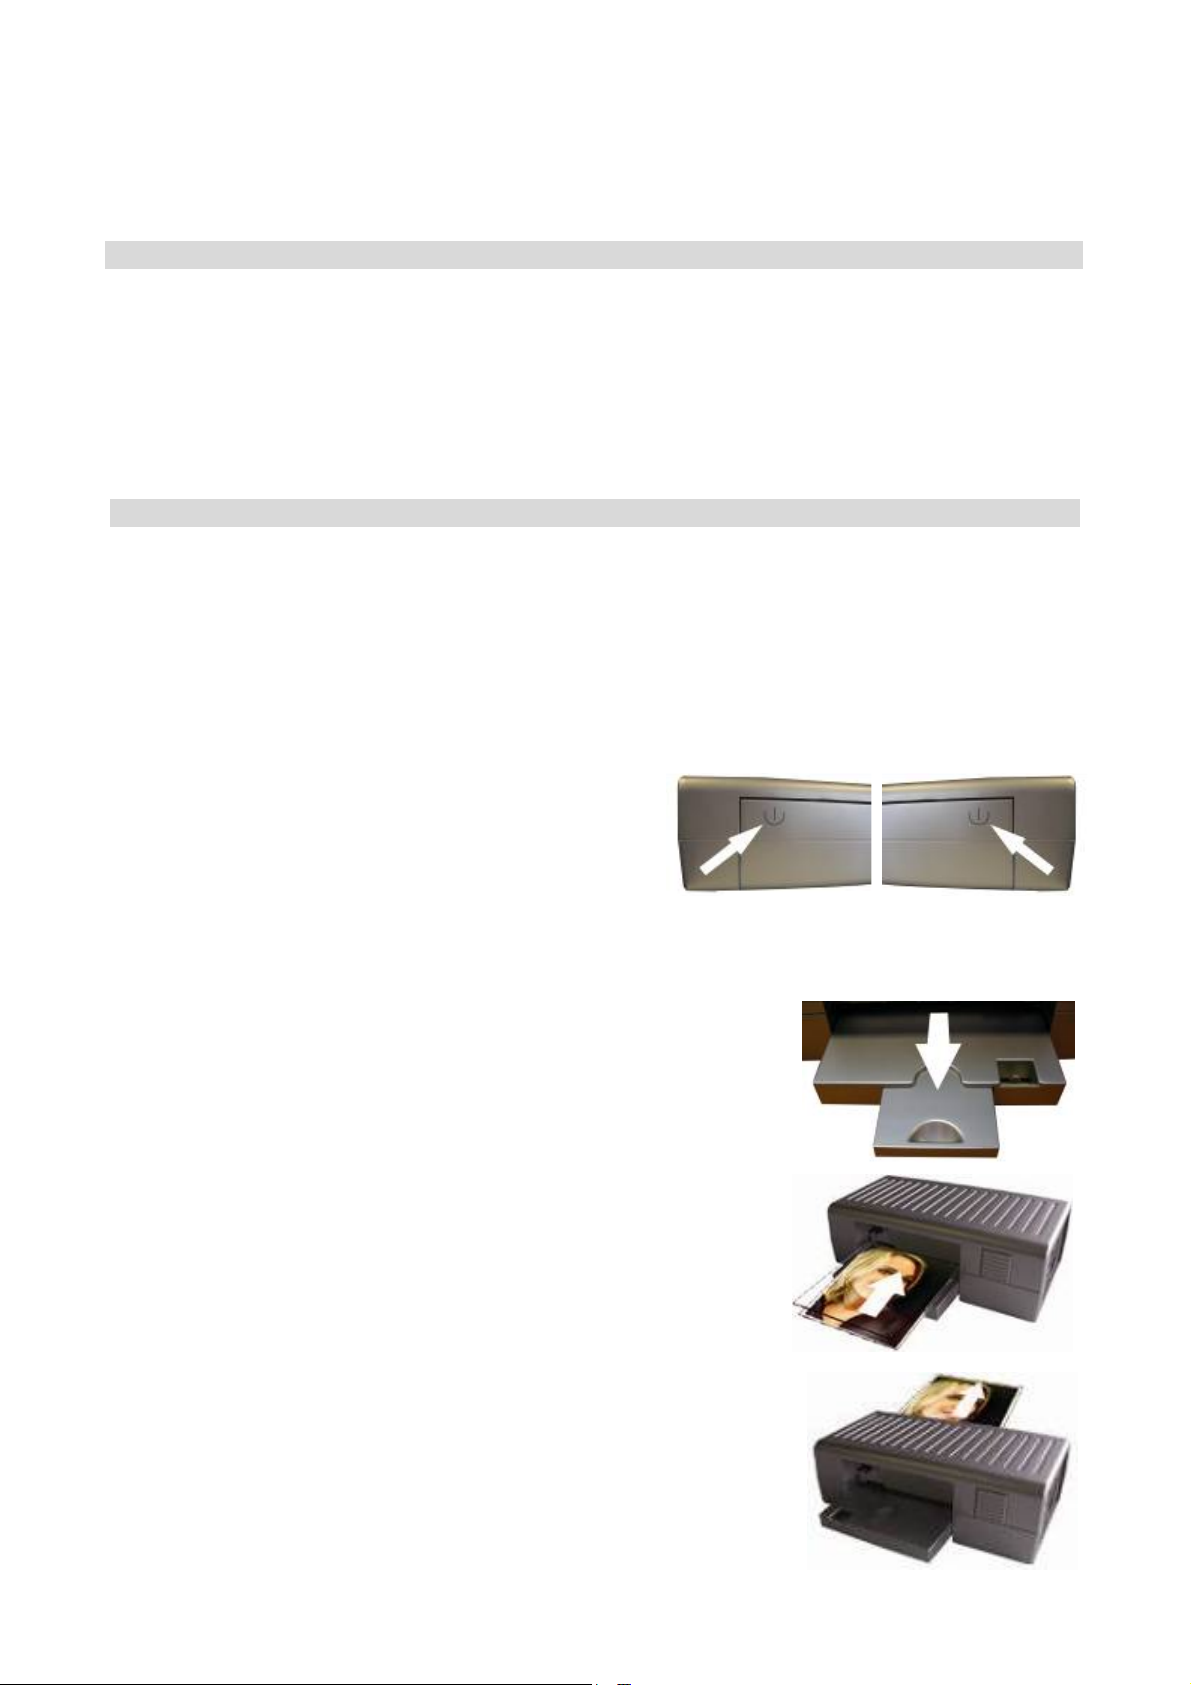
1. Remove all packaging and plug the machine into
an appropriate socket.
2. Press the front and back flaps of the machine to
open (the machine will automatically turn on Front Flap Back Flap
when both are open) and will reach the correct temperature in approx 3mins.
3. Extend exit flap.
4. When the ready light (arrow) turns blue, insert the laminating
pouch squarely and centrally (with the sealed side first) in
the direction of the arrow.
5. The pouch will automatically pass through the machine.
Remove pouch only when lamination is complete (pouch
completely out/stopped moving).
6. To turn off the machine close the back and front tray, and
unplug the machine.
3

OTHER INFORMATION
If you need to cut a pouch do so after laminating. Cut pouches can leak glue into your machine.
Pouches are also easier to cut accurately when laminated.
When the film exits after being laminated, it may be very hot and soft .Handle the newly laminated
item with care. Pressing the item with a book or other heavy objects may help make it flat and
smooth.
• We do not recommend laminating any type of self-developing photo.
• Any photo to be laminated must be dry before processing.
• Do not laminate any documents that appear thick or heavy, as they may get stuck in the
laminator.
• This product bonds the laminator sleeve to the item being processed. It is a permanent
seal and cannot be removed.
• We do not recommend laminating any collector’s item of value or any item you wish to
remove at a later date.
• Do not attempt to laminate coins or thicker items.
• Unfortunately we can not accept responsibility for any items damaged as a result of the
laminating process.
Machine Maintenance
For machine health we recommend that a page of plain paper (preferably blotting or similar paper) is
passed on its own through the machine on a regular basis. This will help to remove excess adhesive
that may have leaked from the lamination pouches. This is best done when the machine is hot.
Excess adhesive on rollers can cause spotting and may eventually cause your machine to jam.
TROUBLESHOOTING
A. If your pouch is not sealed, temperature is either too cold or there is not a big enough
margin.
B. If your pouch is cloudy the temperature is too low or the pouch to full.
C. If your pouch is wavy the temperature is too hot.
D. If there are spots on the pouch. Glue has seeped from pouches on to rollers. Run a sheet of
paper through, continue until clear.
E. Jammed Pouch – If for some reason your pouch jams, press and hold the front anti-jam
button, this separates the rollers allowing the pouch to be pulled freely.
For more information / assistance email: info@pavo.eu
WARRANTY
The machine has a warranty of 2 years (the warranty is not applicable if the pouches has been
inserted in the wrong position/direction, or the machines has been used for an inappropriate
purpose).
TECHNICAL DATA
Voltage....................................................................................................................220-240V
Power consumption (A4 version) ...........................................................................max 330W
Power consumption (A3 version) ...........................................................................max 350W
Max width laminating (A4 version)........................................................................230mm/9”
Max width laminating (A3 version)........................................................................330mm/13”
Max thickness laminating.......................................................................................2x125mic
Warm up time .........................................................................................................3-4min
Laminating speed....................................................................................................Approx.25cm/min
Max. Document thickness.......................................................................................0.5mm
4

PLASTIFIEUSE
Nous vous remercions d’avoir choisi cette plastifieuse. Désormais, vous pouvez protéger de l’eau et
de la poussière vos documents favoris, cartes, lettres, papiers officiels, etc. Suivez les consignes
d’utilisation et conservez-les précieusement.
CONSIGNES DE SECURITE
Lire attentivement les consignes avant
utilisation.
Ne pas brancher avec plusieurs fils
électriques.
Ne pas essayer d’ouvrir le boîtier. Ne mettre aucun objet dans la ventilation .
Ne pas utiliser dans un environnement
humide.
Eteindre et débrancher la machine
lorsqu’elle n’est pas utilisée.
CONSIGNES D’UTILISATION
Avant de plastifier, il est recommandé de faire un essai pour se familiariser avec la machine et pour
s’assurer que celle-ci fonctionne correctement.
1. Retirer l’emballage et brancher la machine sur une
prise de courant adéquate.
2. Ouvrir le capot de machine (la machine va s’allumer
automatiquement). La machine atteindra la correcte Avant Arrière
température en 3 minutes environ.
3. Lorsque le témoin lumineux d’utilisation s’allume en bleu, insérer
la pochette à plastifier (le côté collé en premier) à l’arrière de la
plastifieuse.
Il n’est pas nécessaire d’utiliser un transporteur de pochettes.
4. La pochette passera automatiquement à travers la machine.
Retirer la pochette seulement lorsque la plastification est
totalement terminée (la pochette sort complètement).
5. Pour éteindre la machine, fermer le capot et débrancher la
machine.
Ne pas couvrir la ventilation lorsque la machine
fonctionne.
Ne pas toucher la ventilation en cours de
fonctionnement.
Ne pas utiliser la machine, le fil électrique ou la prise
de courant si ceux-ci sont endommagés.
Attendre que les documents plastifiés refroidissent
avant de les manipuler, ils peuvent être chauds.
5

AUTRES INFORMATIONS
Si vous avez besoin de couper une pochette, faites-le après la plastification. Le fait de couper les
pochettes risque de déposer de la colle dans la machine. Les pochettes sont également plus faciles à
couper une fois plastifiées.
Lorsque le film transparent ressort de la machine après être plastifié, il peut être très chaud et
malléable. Le document plastifié est à manipuler avec précaution. Appuyer sur le document plastifié
avec un livre ou tout autre objet lourd pour rendre le document plat et lisse.
• Nous ne recommandons pas de plastifier tout type de photos développer par vos soins.
• Toutes les photos doivent être sèches avant d’être plastifiées.
• Ne pas plastifier tout document qui apparaît profond ou épais car il peut rester coincé dans la
plastifieuse.
• La pochette est enduite de colle qui sera directement appliquée sur le document une fois
plastifié . C’est une colle permanente qui ne s’enlève pas.
• Nous ne recommandons pas de plastifier tout document de valeur ou que vous souhaiteriez
récupérer plus tard (toute plastification est définitive et permanente). Ne pas essayer de
plastifier des pièces de monnaie ou des objets profonds.
Maintenance de la machine:
Pour l’entretien, nous vous conseillons de faire passer régulièrement du papier buvard ou du papier
similaire dans la machine afin d’enlever l’excès de colle que les pochettes de plastification peuvent
déposer. A réaliser de préférence lorsque la machine est bien chaude. L’excès de colle sur les
rouleaux peut causer des aspérités et peut éventuellement bloquer votre machine.
DEPANNAGE
A. Si votre pochette n’est pas collée, soit la température est trop froide ou soit la marge est trop
petite.
B. Si votre pochette est blanchâtre, c’est que la température est trop basse ou que la pochette est
trop chargée.
C. Si votre pochette est ondulée, c’est que la température es t trop élevée.
D. Aspérités sur la pochette. La colle a suinté et s’est répandue sur les rouleaux. Insérer une feuille
de papier....continuer jusqu’à disparition de la colle.
Si pour différentes raisons, votre pochette à plastifier se coince dans la machine, vous pouvez
appuyer sur le bouton de devant, cela sépare les rouleaux permettant à la pochette d’être retirée.
Pour plus d’informations envoyez un email à : info@pavo.eu
GARANTIE
La machine est garantie 2 ans (la garantie ne s’applique pas si les pochettes ont été mal insérées ou
dans le mauvais sens, ou si la machine a été utilisée de manière inappropriée).
DONNEES TECHNIQUES
Voltage....................................................................................................................220-240V
Puissance de consommation (version A4)..............................................................max 330 W
Puissance de consommation (version A3)..............................................................max 350 W
Largeur maximum de plastification (version A4)...................................................230mm/9”
Largeur maximum de plastification (version A3)...................................................330mm/13”
Epaisseur maximum de plastification.....................................................................2x125mic
Temps de préchauffage...........................................................................................3-4min
Vitesse de plastification..........................................................................................Approx.25cm/min
Epaisseur maximum du document à plastifier........................................................0.5mm
6

LAMINIERMASCHINE
Herzlichen Glückwunsch zum Erwerb Ihres Laminiergerätes. Nun können Sie Ihre wichtigen
Dokumente, Kochrezepte, Mitgliedskarten, Briefe, und weitere Dokumente gängiger Größen luftund wasserdicht einschweißen. Bitte lesen Sie zum korrekten Gebrauch die folgende
Bedienungsanleitung und heben Sie diese gut auf.
SICHERHEITSHINWEIS
Lesen Sie alle Hinweise vor
Benutzung der Maschine durch.
Platzieren Sie das Kabel so, dass
niemand darüber stolpern kann.
Öffnen Sie nicht das Gehäuse.
Benutzen Sie das Gerät nicht wenn
es nass ist.
Schalten Sie das Gerät aus und
entfernen Sie bei Nicht-Benutzung
den Stecker aus der Steckdose.
Bevor Sie laminieren ist es empfehlenswert eine Testlaminierung durchzuführen, um sich mit dem
Gerät vertraut zu machen und um sicher zu stellen, dass das Gerät ordnungsgemäß funktioniert.
1. Entfernen Sie die Verpackung und stecken Sie den
Stecker in die geeignete Steckdose.
2. Öffnen Sie die Klappen des Gerätes (das Gerät
schaltet sich automatisch ein). Das Gerät erreicht die Klappe Vorderseite Klappe Rückseite
richtige Temperatur in ungefähr 3 Minuten.
3. Wenn das Signalfeld “ready” leuchtet, führen Sie die
Laminierfolie mittig und mit der versiegelten Seite zuerst an der
Vorderseite des Gerätes ein.
Sie brauchen keinen Laminierträger.
4. Die Folie fährt automatisch durch das Gerät. Entfernen Sie die
Folie erst, wenn die Laminierung beendet wurde (Folie ist
vollständig durchgelaufen).
5. Um das Gerät abzuschalten, schließen Sie beide Klappen und
entfernen Sie den Stecker aus der Steckdose.
Verdecken Sie nicht die Wärmeöffnung während der
Benutzung.
Berühren Sie nicht die Wärmeöffnungen während der
Benutzung.
Führen Sie keine Gegenstände in die Wärmeöffnungen ein.
Benutzen Sie die Maschine nicht im Falle von
Beschädigungen des Kabels, des Gehäuses oder der
Fassung.
Warten Sie bis die Folie abgekühlt ist, sie könnte heiß sein.
BEDIENUNGSANLEITUNG
7

WEITERE INFORMATIONEN
Wenn Sie eine Folie schneiden wollen, ist es besser dies nach der Laminierung zu tun. Bereits
geschnittene Folien können Klebespuren in der Laminiermaschine hinterlassen. Außerdem ist es
einfacher laminierte Folien zu schneiden.
Nach dem Laminiervorgang kann das Dokument sehr heiß und formbar sein. Behandeln Sie das
eben Laminierte vorsichtig. Das Pressen in Büchern oder das Beschweren mit anderen schweren
Gegenständen kann dazu beitragen, dass die laminierten Dokumente plan und glatt werden.
• Wir empfehlen keine selbstentwickelnden Fotos, gleich welcher Art, zu laminieren.
• Jedes Foto muss vor Beginn des Laminiervorganges vollständig getrocknet sein.
• Laminieren Sie keine dicken oder schweren Dokumente, da diese unter Umständen im
Laminator festlaufen. Falls das passiert, kontaktieren Sie bitte Ihr örtliches Servicecenter.
• Dieses Gerät verklebt das Laminat mit dem laminierten Gegenstand. Diese Versiegelung
ist dauerhaft und kann nicht entfernt werden.
• Wir empfehlen keine Sammlerstücke von Wert oder sonstige Gegenstände, die Sie zu
einem späteren Zeitpunkt aus der Versiegelung entnehmen wollen würden zu laminieren.
Versuchen Sie nicht, Münzen oder andere dicke Gegenstände zu laminieren.
Instandhaltung:
Um die hochwertige Qualität dauerhaft beizubehalten, sollten Sie regelmäßig Wartungen an Ihrer
Laminiermaschine durchführen. Dafür lassen Sie ein Löschblatt durch die Laminiermaschine laufen.
Das beste Ergebnis erhalten Sie bei voller Temperatur. dadurch werden Klebespuren die durch
Folien hinterlassen wurden entfernt. Klebespuren können zu Problemen führen und das Gerät
blockieren.
PROBLEMBEHANDLUNG
A. Falls die Folie nicht versiegelt ist, ist entweder die Temperatur zu niedrig oder der Rand
nicht breit genug.
B. Falls die Folie wolkig ist, ist die Temperatur zu niedrig oder das Dokument zu dick.
C. Falls die Folie wellig ist, ist die Temperatur zu hoch.
D. Flecken auf der Folie. Kleber ist von der Folie auf die Rollen gesickert. Fahren Sie ein Blatt
Papier durch das Gerät, wiederholen Sie den Vorgang, bis das Gerät vollständig gereinigt ist.
GARANTIE
Die Garantiezeit des Gerätes beträgt 2 Jahre (die Garantie beinhaltet nicht durch falsche Einführung
der Folien und unsachgemäße Benutzung des Gerätes hervorgerufene Schäden).
TECHNISCHE INFORMATIONEN
Volt .........................................................................................................................220-240V
Strom Verbrauch (A4 Ausfuehrung) ......................................................................max 330W
Strom Verbrauch (A3 Ausfuehrung) ......................................................................max 350W
Max. Laminierbreite (A4 Ausfuehrung).................................................................230mm/9”
Max. Laminierbreite (A3 Ausfuehrung).................................................................330mm/13”
Max. Laminierstärke...............................................................................................2x125mic
Aufwärmzeit ...........................................................................................................3-4 min
Laminiergeschwindigkeit........................................................................................ca. 25cm/min
Max. Dokumentenstärke.........................................................................................0,5 mm
Abmessungen..........................................................................................................33,5 x 8 x 11,5 cm
8

PLASTIFICADORA
NORMAS DE SEGURIDAD
La detenidamentelas instrucciones antes
de su uso.
No conectar el cable donde otros puedan
tropezar.
No intente abrir la carcaza de la
maquina.
Desenchufela y cierrela despues de su
uso.
INSTRUCCIONES DE FUNCIONAMIENTO
Antes de realizar cualquier plastificacion, es aconsejable utilizar una laminacion de prueba para
familiarizarse con la maquina y asegurarse de que esta funciona correctam ente.
1. Extraiga todo el material de empaquetado y
enchufela en la placa adecuada.
2. Abriendo la lengueta de la maquina esta se pondra
automaticamente en marcha. La maquina alcazara Lengueta frente Lengueta trasera
esta temperature en un tiempo aproximado de
3 minutos.
3. Cuando esta a punto la luz se encendera, introduzca la funda,
intentando que quede en el centr, inserte la parte cerrada de la
funda primero por la parte trasera de la plastificadora.
No necesitas utilizar transportador.
4. La funda se deslizara automaticamente a traves de la funda.
Extraiga la funda solamente cuando la plastificacion sea
completa. (la funda se halle fuera de la maquina).
5. Para apagar cierre la lengueta y desenchufe la maquina.
No cobra las ranuras de ventilacion cuando este en
funcionamiento.
No situe ningun objeto cerca de las ranuras de
ventilacion.
No la utilice si la maquina, el cableado, o el enchufe
estan danados.
Espere a que la amina se enfrie despues de la
plastificacion.
9

OTRA INFORMACION
Si usted necesita cortar la funda , hagalo despues de la plastificacion .La laminas que han sido cortadas
pueden dejar restos de pegamento dentro de la maquina. Es mas facil cortar esta despues de ser
laminada.
Mantenimiento de la maquina
Para el correcto mantenimiento de la maquina le recomendamos que introduzca una sola hoja de papel
en la maquina de la misma forma que si fuera a plastificarla .Ello ayudara a extraer los restos de
pegamento que podrían haberse desprendido de las laminas; Los resultados serán aun mejores si la
maquina esta caliente. El exceso de pegamento en los rodillos puede manchar las carteritas y en algún
caso pude atascar la maquina.
DIAGNOSTICO DE PROBLEMAS
A. Si la funda no esta bien cerrada es porque la maquina aun no ha alcanzado la temperature adecuada
o no ha dejado margen suficiente.
B. Si la funda esta turbia, es porque esta esta demasiado llena o la temperatura es demasiado baja
C. Si la funda esta ondulada es debido a que la temperatura de laminacion es demasiado alta.
D. Agujeros en la funda. El pegamento se ha filtrado en los rodillos, introduzca hojas de papel hasta
que la maquina este limpia, utilice una hoja .
WARRANTYGARANTIA
La maquina tiene una garntia de dos anos (la garantia no es valida si las laminas han sido introducidas
el la la posicion o direccion adecuada, o esta no ha sido utlizada de acuerdo a su function.
INFORMACION TECNICA
Voltage....................................................................................................................220-240V
Consumo (A4 version)............................................................................................max 330W
Consumo (A3 version)............................................................................................max 350W
Maxima anchura de laminacion (A4 version).........................................................230mm/9”
Maxima anchura de laminacion (A3 version).........................................................330mm/13”
Maximo grosor de laminacion................................................................................2x125mic
10

LAMINEERMACHINE
VEILIGHEIDSVOORSCHRIFTEN
Lees alle instructies voor gebruik.
Laat geen kabels liggen waar mensen over
kunnen struikelen.
Probeer de behuizing niet te openen.
Niet gebruiken als de machine vochtig is.
Zet de machine uit en trek de steckker uit
het stopcontact, wanneer de machine niet
in gebruik is.
GEBRUIKSAANWIJZING
Er wordt geadviseerd om voor gebruik een test uit te voeren, zodat u handigheid krijgt in het
lamineren en om zeker te zijn dat de machine goed functioneert.
1. Verwijder alle verpakkingsmaterialen en sluit de
machine aan in een geschikt stopcontact.
2. Open de klep (de machine gaat automatisch aan.). De Ingang Uitgang
gevraagde temperatuur wordt na ongeveer 3 minuten bereikt.
3. Wanneer het ‘ready’-lampje oplicht, leg de lamineerfolie
rechthoekig en gecentraliseerd (met de aaneengehechte kant
voorop) in de lamineermachine
U heeft geen lamineerfoliehouder nodig.
4. De lamineerfolie wordt automatisch door de machine gehaald.
Verwijder de lamineerfolie alleen wanneer het lamineerproces
volledig is voltooid (haal de lamineerfolie in zijn geheel eruit).
5. Sluit de klep om de machine uit te zetten.
Houd de luchtroosters vrij bij gebruik.
Raak de luchtroosters niet aan als de machine in
werking is.
Stop niets in de luchtroosters.
Stop gebruik wanneer de machine, kabel of
aansluiting beschadigd is.
Wacht tot de lamineerfolie afgekoeld is, het kan nog
erg warm zijn.
11

VERDERE INFORMATIE
Als u de lamineerfolie in een ander formaat wilt snijden of knippen, doe dit dan na het lamineren.
Als u dit voor het lamineren doet, dan komt er lijm in het apparaat terecht. Ook is de lamineerfolie
makkelijker op maat te maken na het lamineren.
PROBLEMEN OPLOSSEN
A. Als het eindproduct niet gelamineerd is, dan is de temperatuur te laag of er is niet genoeg
marge genomen.
B. Als het eindproduct troebel is, dan is de temperatuur te laag of de lamineerfolie is te vol.
C. Als het eindproduct golvend is, dan is de temperatuur te heet.
D. Als er puntjes op het eindproduct zitten, dan is er lijm van de lamineerfolie op de rollers
gesijpeld. Voer een blad papier door tot de rollers weer schoon zijn.
GARANTIE
Op het apparaat zit 2 jaar garantie (de garantie geldt niet als de lamineerfolie in de verkeerde
positie/richting ingevoerd werd, of als de machine is gebruikt voor ongeschikte doeleinden).
TECHNISCHE GEGEVENS
Voltage................................................................................................................... 220-240V
Energieverbruik (A4 versie)................................................................................... max 330W
Energieverbruik (A3 versie)................................................................................... max 350W
Max. lamineer breedte (A4 versie) ........................................................................ 230mm/9”
Max. lamineer breedte (A3 versie) ........................................................................ 330mm/13”
Max. lamineer dikte ............................................................................................... 2x125mic
Opwarm tijd ........................................................................................................... 3-4min
Lamineersnelheid................................................................................................... Approx.25cm/min
Max. Document dikte............................................................................................. 0.5mm
12
 Loading...