

Page 1

MODUS
This sheet is designed to help you with the installation of a Parrot product and is provided purely for information purposes. The installer is
solely responsible for any installation carried out in accordance with the instructions in this sheet and for the quality of the installation. All
rights reserved © Copyright 2011 PARROT SA, a French Société Anonyme (Public Limited Company) Registered on the Paris Trade and
Companies Register under No. 394 149 496 Reproduction not permitted without authorisation from Parrot SA. Images not contractually
Installation manual:
Parrot MKi + Parrot
CK3100 range
MODUS & GRAND MODUS
The brand name RENAULT MODUS/GRAND MODUS and the RENAULT logo are the property of RENAULT.
This document is only valid for the vehicle models MODUS® and GRAND MODUS® year 2004 to 2011, excluding all other models in the same
range and excluding later modifications made to the vehicle by the manufacturer.
The Parrot brand name and logos are the exclusive property of Parrot SA.
Page 2
MODUS
This sheet is designed to help you with the installation of a Parrot product and is provided purely for information purposes. The installer is
solely responsible for any installation carried out in accordance with the instructions in this sheet and for the quality of the installation. All
rights reserved © Copyright 2011 PARROT SA, a French Société Anonyme (Public Limited Company) Registered on the Paris Trade and
Companies Register under No. 394 149 496 Reproduction not permitted without authorisation from Parrot SA. Images not contractually
Disassembly
15min
Kit installation
15min
Refitting
15min
Testing
15min
Total
1 hour
YES
ACC wire
YES
ISO
N/A
UNIKA
FRONT SPEAKER
TEL mode
ALL
MUSIC mode
Fitting time / Main features
Accessories required
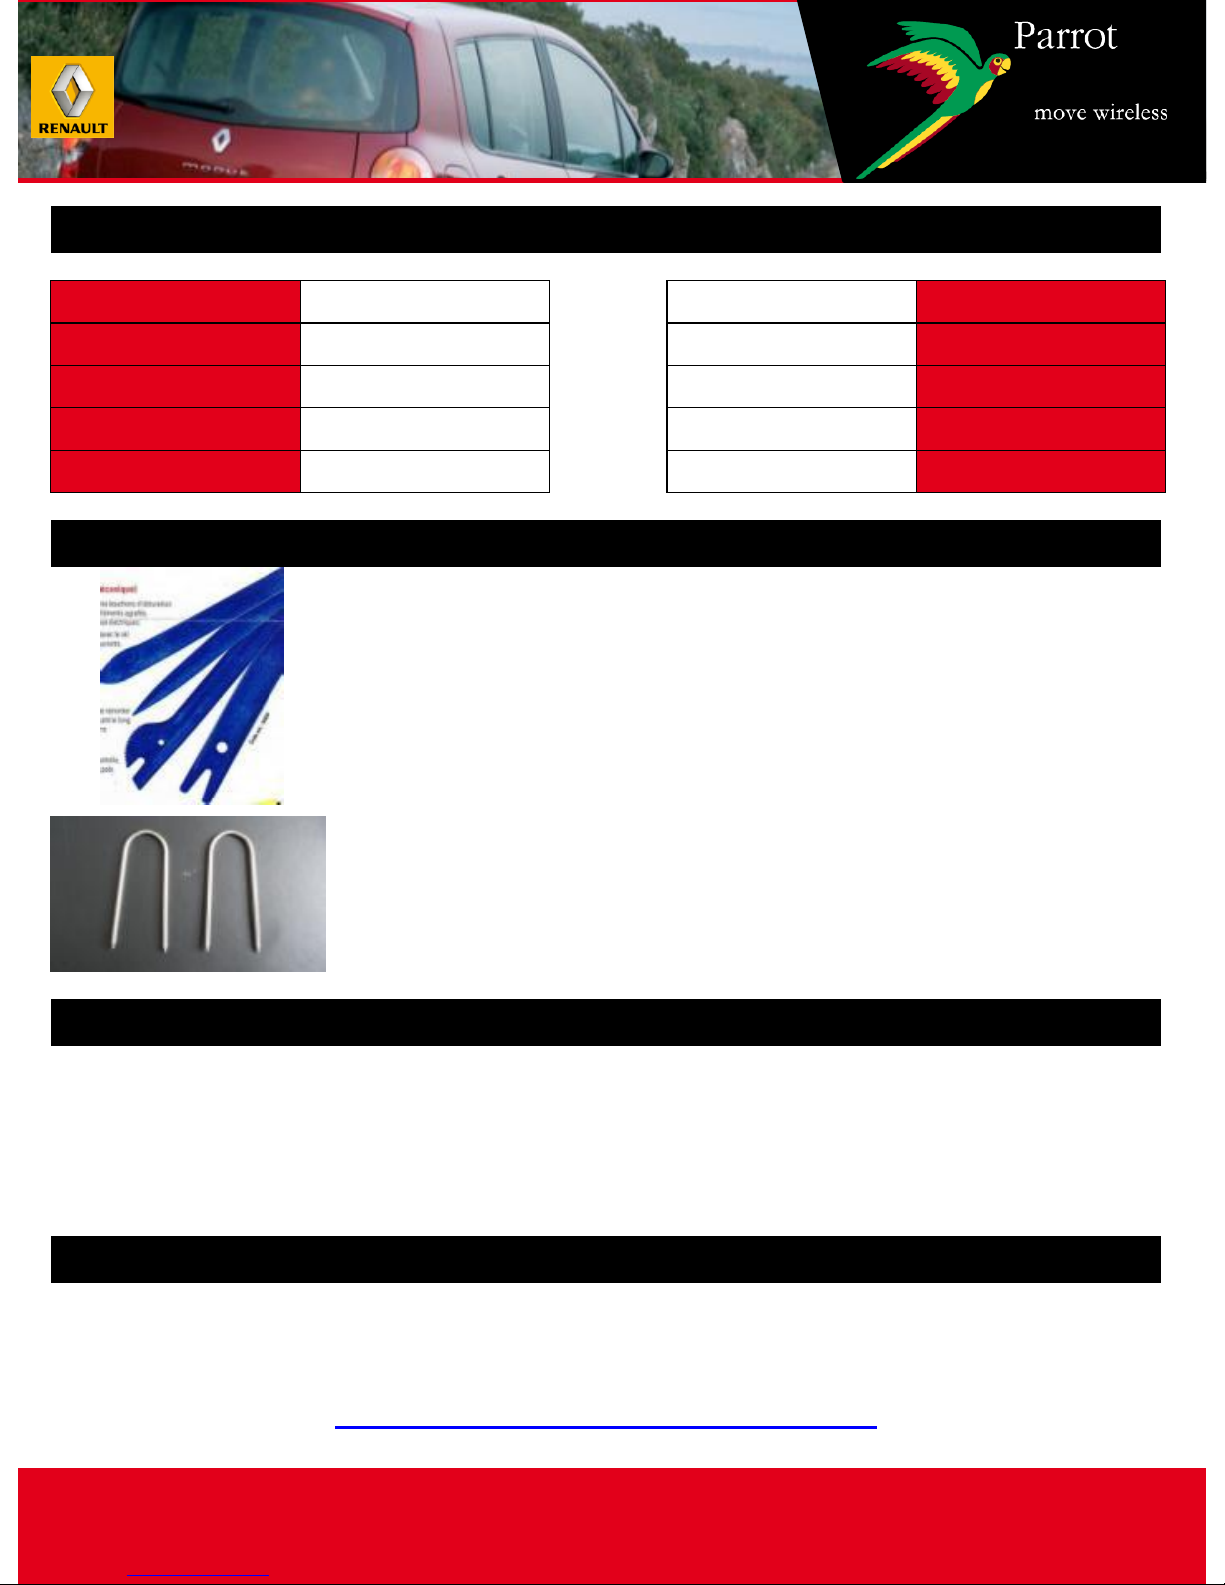
Tools
-Multimeter or Test lamp
-Hose clamp
- Electrical tape
"Please contact your Wholesaler to purchase accessories."
Updating
Plastic trim removal tools
FACOM / BERNER
FACOM DX-25 kit (n°4 tools)
To get the most out of your hands-free kit we recommend that you update your
software regularly. The update procedure can be found at
www.parrot.com/usa/support/downloads
Page 3
MODUS
This sheet is designed to help you with the installation of a Parrot product and is provided purely for information purposes. The installer is
solely responsible for any installation carried out in accordance with the instructions in this sheet and for the quality of the installation. All
rights reserved © Copyright 2011 PARROT SA, a French Société Anonyme (Public Limited Company) Registered on the Paris Trade and
Companies Register under No. 394 149 496 Reproduction not permitted without authorisation from Parrot SA. Images not contractually
Disassembly
MODUS
Page 4

MODUS
This sheet is designed to help you with the installation of a Parrot product and is provided purely for information purposes. The installer is
solely responsible for any installation carried out in accordance with the instructions in this sheet and for the quality of the installation. All
rights reserved © Copyright 2011 PARROT SA, a French Société Anonyme (Public Limited Company) Registered on the Paris Trade and
Companies Register under No. 394 149 496 Reproduction not permitted without authorisation from Parrot SA. Images not contractually
Disassembly 1 / 2
Insert the removal tools into the
slots on each side of the radio.
Unclip the radio, pull gently so you
can disconnect the connectors and
the antenna, then remove.
Using the plastic trim tools,
unclip the car stereo and air
conditioning surround.
Disconnect the WARNING
connector.
1
3
2
4
5 6
Using the plastic trim tools,
unclip and remove the central
display surround.
Remove the passenger side door
seal.
MODUS
Page 5

MODUS
This sheet is designed to help you with the installation of a Parrot product and is provided purely for information purposes. The installer is
solely responsible for any installation carried out in accordance with the instructions in this sheet and for the quality of the installation. All
rights reserved © Copyright 2011 PARROT SA, a French Société Anonyme (Public Limited Company) Registered on the Paris Trade and
Companies Register under No. 394 149 496 Reproduction not permitted without authorisation from Parrot SA. Images not contractually
Disassembly 2 / 2
Using the plastic trim tools, unclip
the cover located on the right side
of the dashboard.
Leave it hanging without
disconnecting it.
7 8
MODUS
Page 6

MODUS
This sheet is designed to help you with the installation of a Parrot product and is provided purely for information purposes. The installer is
solely responsible for any installation carried out in accordance with the instructions in this sheet and for the quality of the installation. All
rights reserved © Copyright 2011 PARROT SA, a French Société Anonyme (Public Limited Company) Registered on the Paris Trade and
Companies Register under No. 394 149 496 Reproduction not permitted without authorisation from Parrot SA. Images not contractually
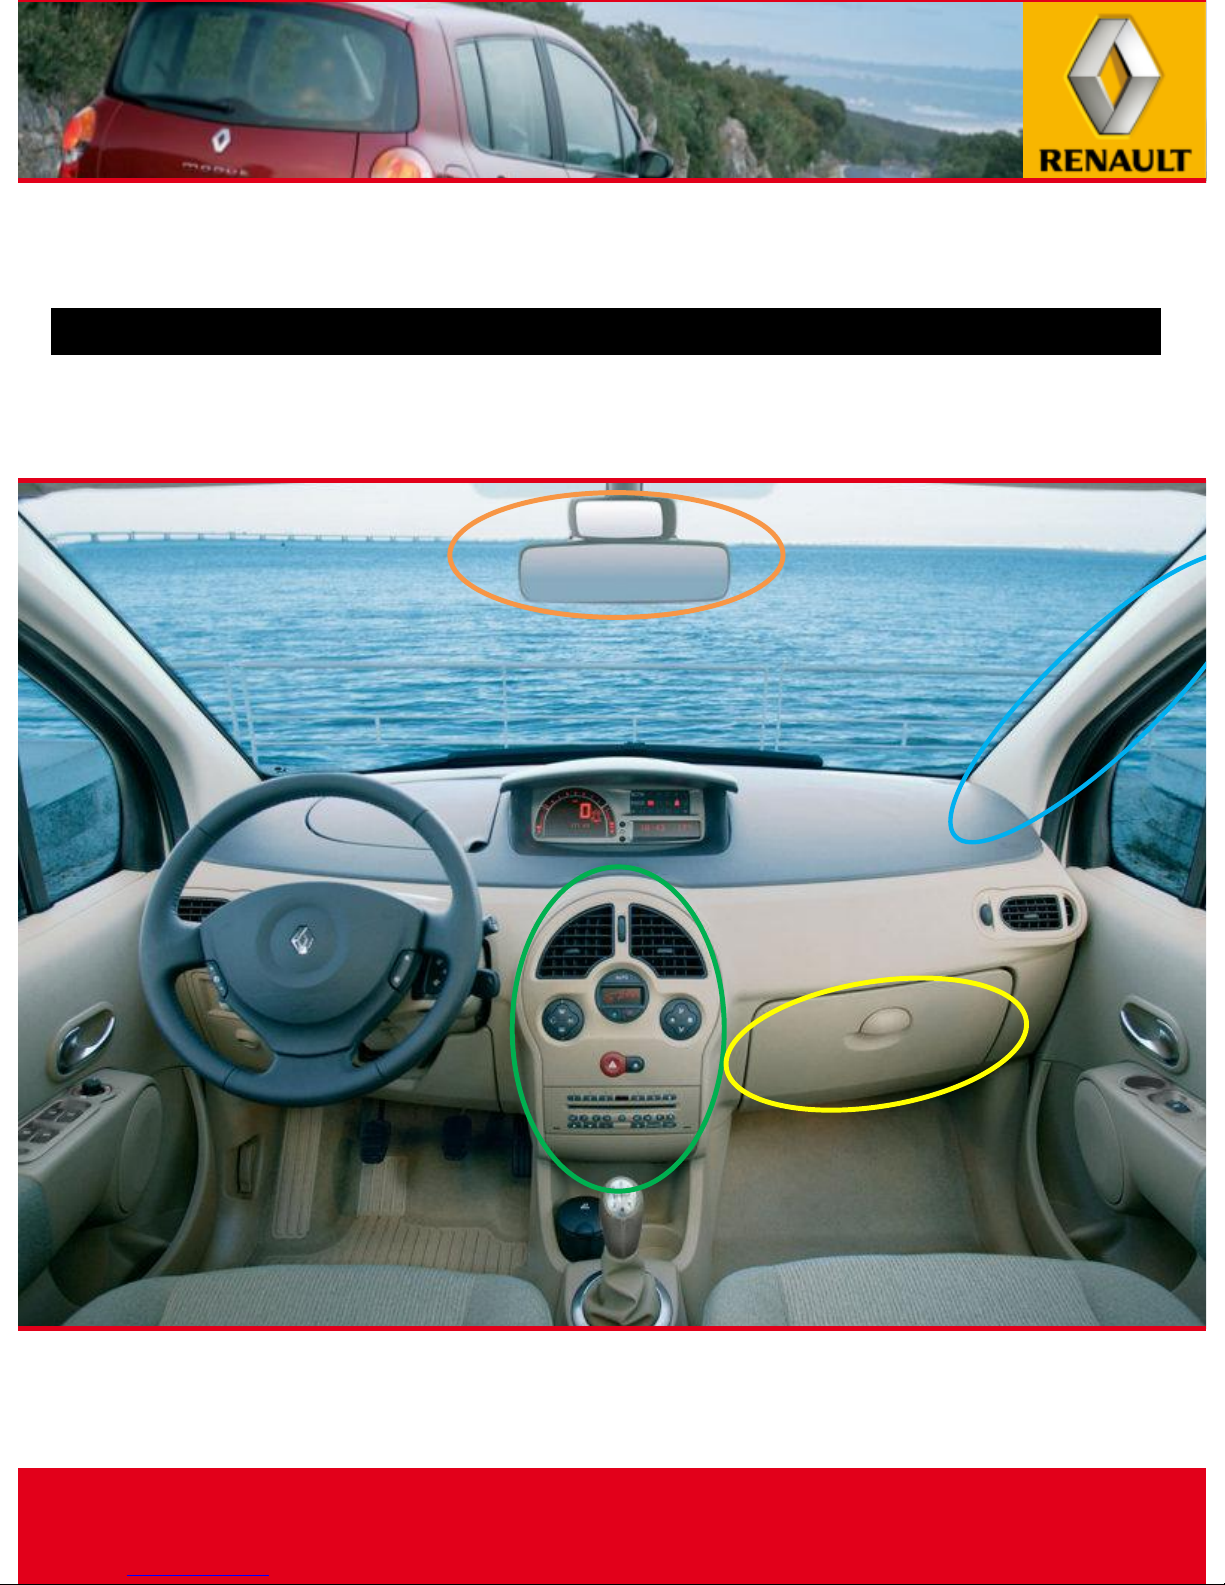
Run the cable under the headliner.
Microphone feeding 1 / 2
Stick the bracket (supplied) to the
panel above the rear view mirror
after thoroughly cleaning the
surface .
Using a guide, feed the cable
under the top of the windscreen
post panel.
Run the cable along the passenger side
windscreen support whilst replacing
the door seal.
1
3
2
4
5 6
Feed the cable into the cover on
the right-hand side.
Run the cable under the glove box,
attaching it with wire ties.
MODUS
Page 7

MODUS
This sheet is designed to help you with the installation of a Parrot product and is provided purely for information purposes. The installer is
solely responsible for any installation carried out in accordance with the instructions in this sheet and for the quality of the installation. All
rights reserved © Copyright 2011 PARROT SA, a French Société Anonyme (Public Limited Company) Registered on the Paris Trade and
Companies Register under No. 394 149 496 Reproduction not permitted without authorisation from Parrot SA. Images not contractually
Microphone feeding 2 / 2
Run the cable towards the radio
housing.
7
MODUS
Page 8

MODUS
This sheet is designed to help you with the installation of a Parrot product and is provided purely for information purposes. The installer is
solely responsible for any installation carried out in accordance with the instructions in this sheet and for the quality of the installation. All
rights reserved © Copyright 2011 PARROT SA, a French Société Anonyme (Public Limited Company) Registered on the Paris Trade and
Companies Register under No. 394 149 496 Reproduction not permitted without authorisation from Parrot SA. Images not contractually
Feeding the accessory cable
Feed the cable into the hole on
the bottom underneath the radio
housing.
1
MODUS
Bring it out leaving sufficient
length.
2
Page 9

MODUS
This sheet is designed to help you with the installation of a Parrot product and is provided purely for information purposes. The installer is
solely responsible for any installation carried out in accordance with the instructions in this sheet and for the quality of the installation. All
rights reserved © Copyright 2011 PARROT SA, a French Société Anonyme (Public Limited Company) Registered on the Paris Trade and
Companies Register under No. 394 149 496 Reproduction not permitted without authorisation from Parrot SA. Images not contractually
Fitting the hands-free system 1 / 2
Swap the fuses (red wire with orange wire) on
the kit connector provided. Then connect all of
the wires to the blue box as shown in the
diagram below.
1
ISO
adapter
2
Stow the box under the radio housing.
MODUS
Page 10

MODUS
This sheet is designed to help you with the installation of a Parrot product and is provided purely for information purposes. The installer is
solely responsible for any installation carried out in accordance with the instructions in this sheet and for the quality of the installation. All
rights reserved © Copyright 2011 PARROT SA, a French Société Anonyme (Public Limited Company) Registered on the Paris Trade and
Companies Register under No. 394 149 496 Reproduction not permitted without authorisation from Parrot SA. Images not contractually
Fitting the hands-free system 2 / 2
Feed the cable through the right-
hand hole on the dashboard near
the central display, towards the
radio housing.
Stick the support provided to the
central display surround after
cleaning the surface. (Make sure
that you DO NOT cut the screen
cable.)
3 4
MODUS
!
Page 11

MODUS
This sheet is designed to help you with the installation of a Parrot product and is provided purely for information purposes. The installer is
solely responsible for any installation carried out in accordance with the instructions in this sheet and for the quality of the installation. All
rights reserved © Copyright 2011 PARROT SA, a French Société Anonyme (Public Limited Company) Registered on the Paris Trade and
Companies Register under No. 394 149 496 Reproduction not permitted without authorisation from Parrot SA. Images not contractually
Testing
Before refitting the system, switch the kit on using the
ignition (or by starting the car). By pushing the central knob
of the remote control, check:
1 - That the menu is displayed on the screen. (Language or
iPod.)
2 - That the system can be muted. (Click in the blue box.)
3 - That there is no sound coming from the speakers.
4 - That the sound from the voice menu is coming out of the
front speakers.
5 - Then turn off the ignition, check that the kit switches off
and that the "goodbye" message appears on the screen. (If
this fails, reverse the fuses on the kit's wiring harness.)
6 - Pair a telephone with the kit to make a call. (Check that
both the microphone and the kit are working.)
MODUS
Page 12

MODUS
This sheet is designed to help you with the installation of a Parrot product and is provided purely for information purposes. The installer is
solely responsible for any installation carried out in accordance with the instructions in this sheet and for the quality of the installation. All
rights reserved © Copyright 2011 PARROT SA, a French Société Anonyme (Public Limited Company) Registered on the Paris Trade and
Companies Register under No. 394 149 496 Reproduction not permitted without authorisation from Parrot SA. Images not contractually
Reassembly
Refit the system using the following procedure:
1 – Re-fit the right dashboard panel.
2 – Re-connect and refit the car stereo and air conditioning surround.
3 – Re-connect the connectors and the antenna to the radio then slide it into its
housing.
MODUS
 Loading...