

Page 1
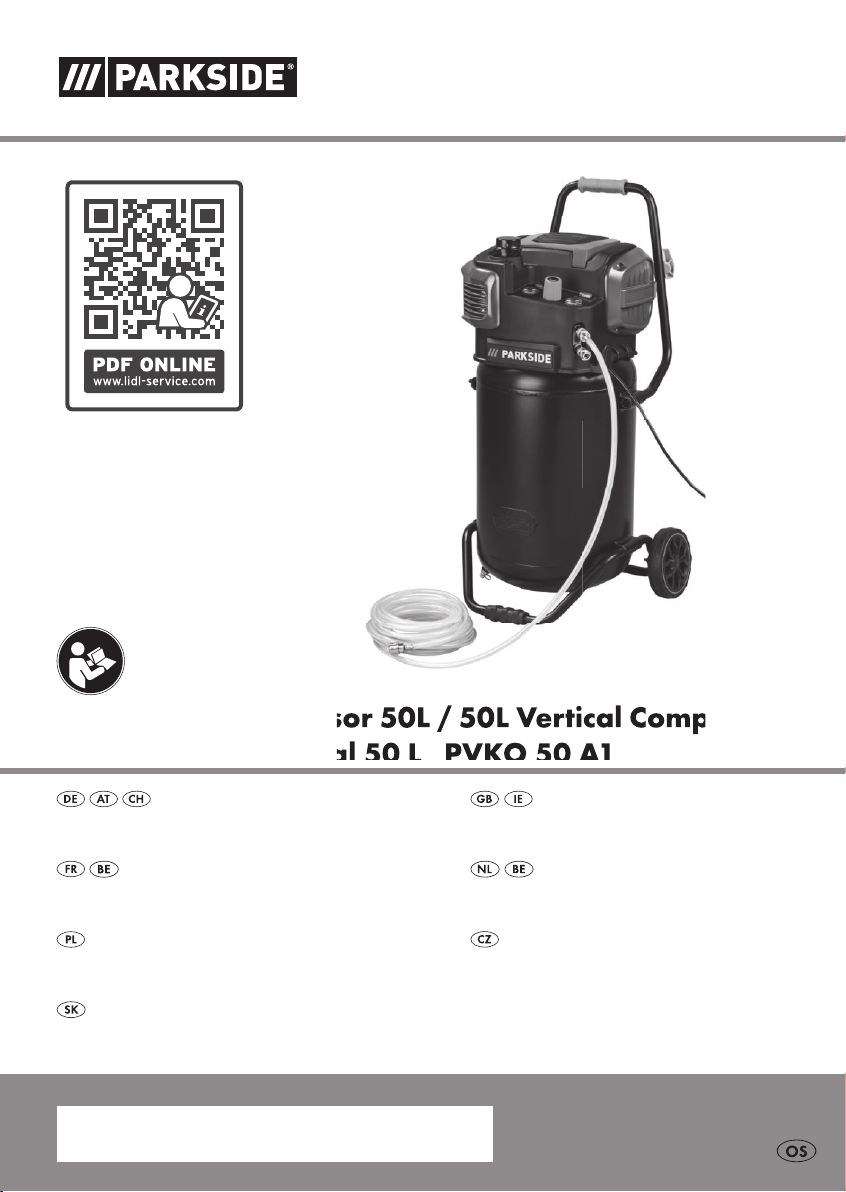
Vertikaler Kompressor 50L / 50L Vertical Compressor /
Vertikaler Kompressor 50L / 50L Vertical Compressor /
Compresseur vertical 50 L PVKO 50 A1
Vertikaler Kompressor 50L
Originalbetriebsanleitung
Compresseur vertical 50 L
Traduction des instructions d‘origine
Pionowy kompresor 50 l
Tłumaczenie oryginalnej instrukcji obsługi
Vertikálny kompresor 50 l
Preklad originálneho návodu na obsluhu
IAN 356332_2004
50L Vertical Compressor
Translation of the original instructions
Verticale compressor 50 l
Vertaling van de originele gebruiksaanwijzing
Vertikální kompresor 50 l
Překlad originálního provozního návodu
Page 2
Klappen Sie vor dem Lesen die Seite mit den Abbildungen aus und machen Sie sich anschließend mit
allen Funktionen des Gerätes vertraut.
Before reading, unfold the page containing the illustrations and familiarise yourself with all functions of
the device.
Avant de lire le mode d‘emploi, ouvrez la page contenant les illustrations et familiarisez-vous ensuite avec
toutes les fonctions de l‘appareil.
Vouw vóór het lezen de pagina met de afbeeldingen open en maak u vertrouwd met alle functies van het
apparaat.
Przed przeczytaniem proszę rozłożyć stronę z ilustracjami, a następnie proszę zapoznać się z
wszystkimi funkcjami urządzenia.
Před čtením si otevřete stranu s obrázky a potom se seznamte se všemi funkcemi přístroje.
Pred čítaním si odklopte stranu s obrázkami a potom sa oboznámte so všetkými funkciami prístroja.
DE / AT / CH Originalbetriebsanleitung Seite
GB / IE Translation of the original instructions Page
FR / BE Traduction des instructions d‘origine Page
NL / BE Vertaling van de originele gebruiksaanwijzing Pagina
PL Tłumaczenie oryginalnej instrukcji obsługi Strona
CZ Překlad originálního provozního návodu
Strana 56
X
15
24
36
46
SK Preklad originálneho návodu na obsluhu Strana 65
4
Page 3
13
1
3 4
2
6
5
7
8
3
12
5
2
9
10
11
7
4
14
15
6
7a
10
10a
16
17
18
11
3
Page 4

DE AT CH
Inhalt
Einleitung .....................................4
Bestimmungsgemäße
Verwendung ................................4
Allgemeine Beschreibung .............5
Lieferumfang .....................................5
Funktionsbeschreibung .......................5
Übersicht .........................................5
Technische Daten ..........................5
Sicherheitshinweise ......................6
Symbole und Bildzeichen ................... 6
Allgemeine Sicherheitshinweise für
Elektrowerkzeuge ..............................6
Restrisiken ........................................9
Inbetriebnahme ...........................9
Bügelgriff montieren ..........................9
Räder montieren ...............................9
Ein-/Ausschalten ...............................9
Bedienung ...................................9
Druckluftschlauch montieren................9
Arbeitshinweise .........................10
Druckluft einstellen ..........................10
Reinigung und Wartung .............10
Reinigung.......................................10
Luftlter reinigen ..............................10
Kondenswasser ablassen .................11
Sicherheitsventil überprüfen .............. 11
Lagerung ...................................11
Transport ...................................11
Entsorgung/Umweltschutz ..........11
Ersatzteile/Zubehör ...................12
Garantie ....................................13
Reparatur-Service ......................14
Service-Center ............................14
Importeur ..................................14
Original-EG-
Konformitätserklärung ............... 75
Explosionszeichnungen ......... 83/84
Einleitung
Herzlichen Glückwunsch zum Kauf Ihres
neuen Gerätes.
Sie haben sich damit für ein hochwertiges
Gerät entschieden. Dieses Gerät wurde
während der Produktion auf Qualität geprüft und einer Endkontrolle unterzogen.
Die Funktionsfähigkeit Ihres Gerätes ist
somit sichergestellt.
Die Betriebsanleitung ist Bestandteil
dieses Gerätes. Sie enthält wichtige
Hinweise für Sicherheit, Gebrauch
und Entsorgung. Machen Sie sich
vor der Benutzung des Gerätes mit
allen Bedien- und Sicherheitshinweisen vertraut. Benutzen Sie das
Gerät nur wie beschrieben und für
die angegebenen Einsatzbereiche.
Bewahren Sie die Betriebsanleitung
gut auf und händigen Sie alle Unterlagen bei Weitergabe des Gerätes an Dritte mit aus.
Bestimmungsgemäße
Verwendung
Der Kompressor ist zum Betreiben von
druckluftbetriebenen Werkzeugen (z.B.
Reifenfüller, Ausblaspistole und Lackierpistole) bestimmt. Das Gerät ist nicht geeig-
net zum Betreiben von Werkzeugen welche einen hohen Druckluftbedarf haben.
Jede andere Verwendung kann zu Schäden an den Geräten führen und eine ernsthafte Gefahr für den Benutzer darstellen.
Diese Geräte sind nicht zur gewerblichen
Nutzung geeignet. Bei gewerblichem Einsatz erlischt die Garantie.
Der Hersteller haftet nicht für Schäden, die
durch bestimmungswidrigen Gebrauch
oder falsche Bedienung verursacht wurden.
4
Page 5
DE AT CH
Allgemeine
Beschreibung
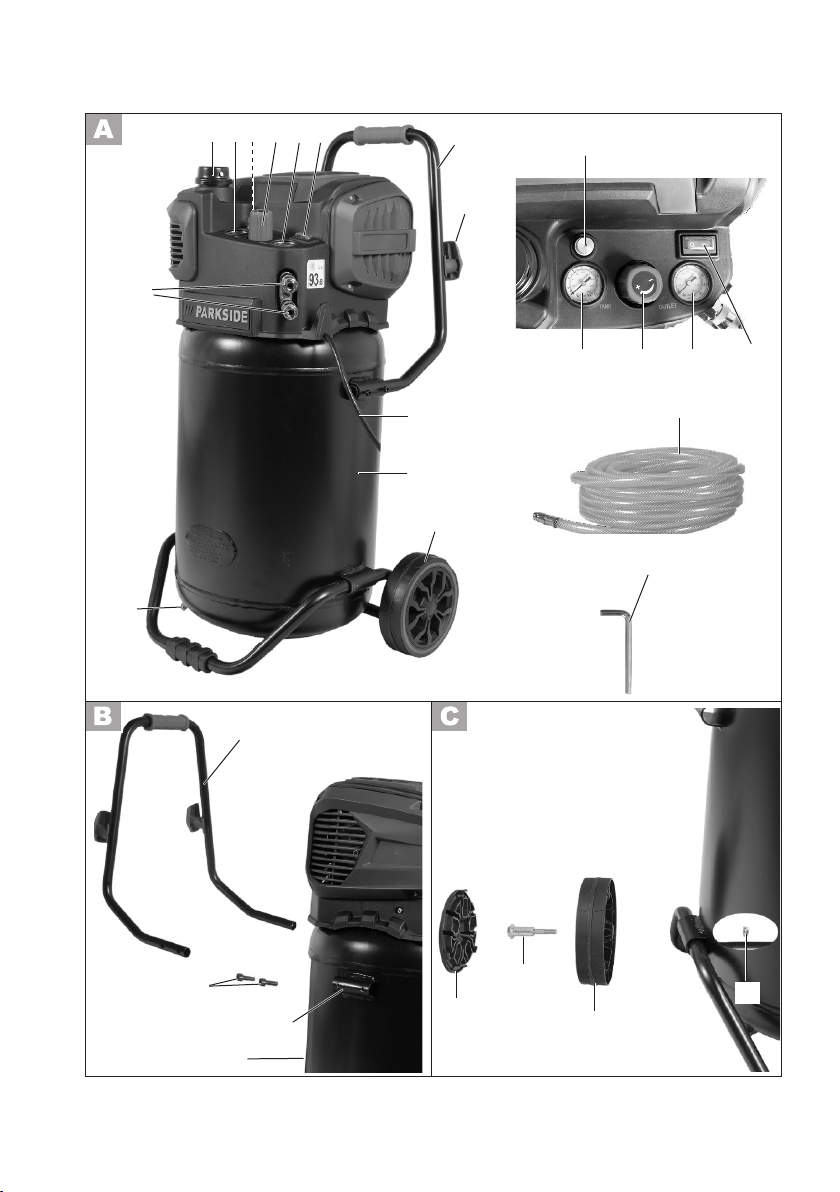
Die Abbildung der wichtigsten
Funktionsteile nden Sie auf
der vorderen und hinteren Ausklappseite.
Lieferumfang
Packen Sie zuerst das Gerät aus und kontrollieren Sie, ob es vollständig ist.
• Kompressor
• Bügelgriff
• 2 Räder
• Montagematerial
• 10 m Druckluftschlauch
• Innensechskantschlüssel
• Betriebsanleitung
Entsorgen Sie das Verpackungsmaterial
ordnungsgemäß.
Funktionsbeschreibung
Der Kompressor ist zum Betreiben von
druckluftbetriebenen Werkzeugen vorgesehen.
Die Funktion der Bedienteile entnehmen Sie
bitte den nachfolgenden Beschreibungen.
Übersicht
11 Rad
12 Ablassschraub
13 Schnellkupplungen
14 Druckluftschlauch
15 Innensechskantschlüssel
7a Innensechskantschraube
10a Halterung für Bügelgriff
16 Radkappe
17 Radschraube
18 Sicherungsmutter
1a Luftlter
19 Halterung für Netzleitung
Technische Daten
Vertikaler Kompressor 50 l .....PVKO 50 A1
Nennspannung U ............. 230 V~; 50 Hz
Nennleistung P ..........................1800 W
Motordrehzahl n
max. Arbeitsdruck P
Gewicht m ....................................35 kg
Kesselvolumen ................................. 50 l
Ansaugleistung .................. ca. 260 l/min
Schutzart.........................................IPX0
Schalldruckpegel
) ................... 71,9 dB(A), KpA= 3 dB
(L
pA
Schallleistungspegel (LWA)
gemessen ..... 90,9 dB(A), K
garantiert .............................. 93 dB(A)
....................2850 min
0
... 1,0 MPa (10 bar)
max
= 2,29 dB
WA
-1
1 Luftlterdeckel
2 Manometer (Druckkessel)
3 Sicherheitsventil
4 Druckregler
5 Manometer (eingestellter Druck)
6 Ein-/Ausschalter
7 Bügelgriff
8 Schlauchwicklung
9 Netzleitung
10 Druckkessel
Lärm- und Vibrationswerte wurden entsprechend den in der Konformitätserklärung
genannten Normen und Bestimmungen
ermittelt.
Der angegebene Schwingungsgesamtwert
und der angegebene Geräuschemissionswert sind nach einem genormten Prüfverfahren gemessen worden und können
zum Vergleich eines Elektro werk zeugs mit
5
Page 6
DE AT CH
einem anderen verwendet werden.
Der angegebene Schwingungsgesamtwert
und der angegebene Geräuschemissions-
wert können auch zu einer vorläugen
Einschätzung der Belastung verwendet
werden.
Warnung:
Die Schwingungs- und Geräusche-
missionen können während der
tatsächlichen Benutzung des Elektrowerk zeugs von den Angabewerten
abweichen, abhängig von der Art
und Weise, in der das Elektro werkzeug verwendet wird, insbesondere, welche Art von Werkstück
bearbeitet wird.
Es ist notwendig, Sicherheitsmaßnahmen zum Schutz des Bedieners
festzulegen, die auf einer Abschätzung der Schwingungsbelastung
während der tatsächlichen Benutzungsbedingungen beruhen
(hierbei sind alle Anteile des
Betriebszyklus zu berücksichtigen,
beispielsweise Zeiten, in denen das
Elektro werk zeug abgeschaltet ist,
und solche, in denen es zwar eingeschaltet ist, aber ohne Belastung
läuft).
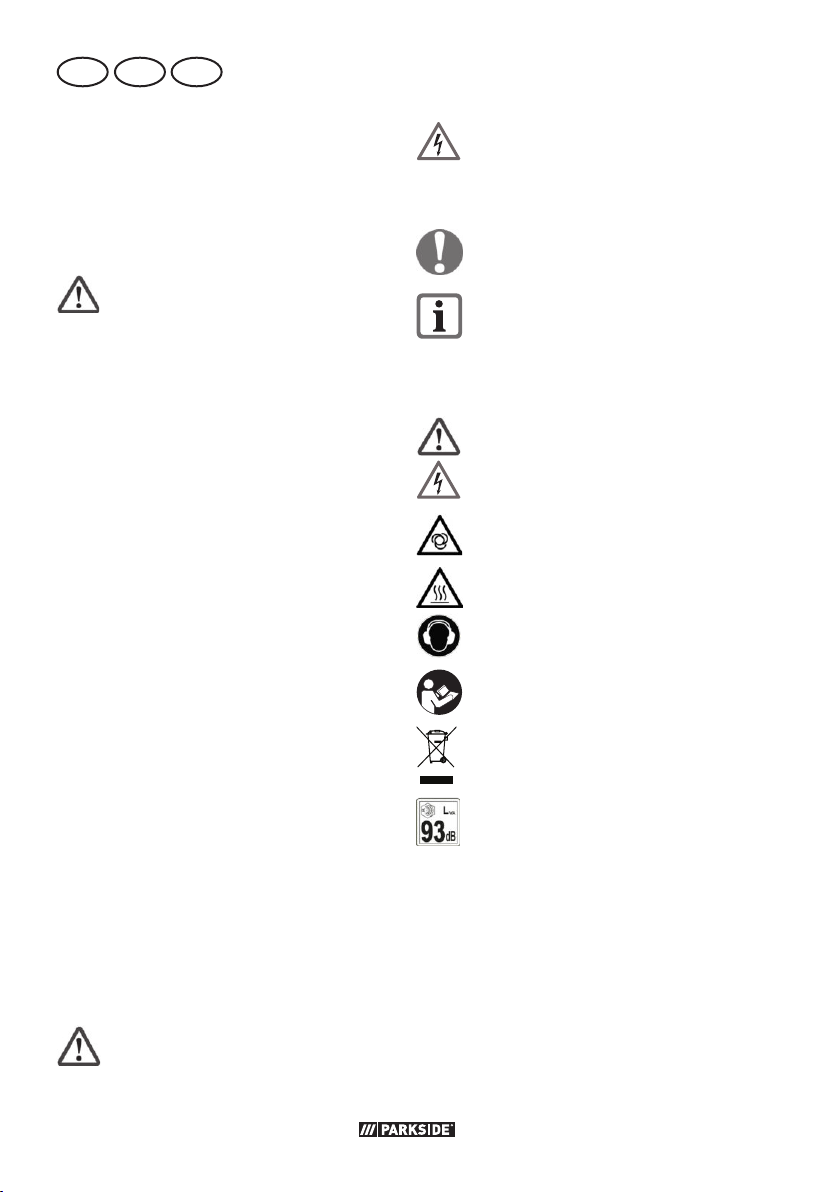
Gefahrenzeichen mit Anga-
ben zur Verhütung von Personenschäden durch einen
elektrischen Schlag
Gebotszeichen mit Angaben zur
Verhütung von Schäden
Hinweiszeichen mit Informa tionen
zum besseren Umgang mit dem Gerät
Symbole auf dem Gerät
Achtung!
Gefahr vor elektrischem Schlag!
Warnung! Kompressoranlage kann
ohne Warnung anlaufen.
Achtung - heiße Oberäche
Tragen Sie Gehörschutz!
Lesen Sie die Betriebsanleitung auf-
merksam durch.
Elektrische Geräte gehören nicht in
den Hausmüll.
Sicherheitshinweise
Dieser Abschnitt behandelt die grundlegenden Sicherheitsvorschriften bei der Arbeit
mit dem Gerät.
Symbole und Bildzeichen
Symbole in der Anleitung
Gefahrenzeichen mit Anga-
ben zur Verhütung von Personen- oder Sachschäden
6
Angabe des Schallleistungspegels
LWA in dB
Allgemeine Sicherheitshinweise für Elektrowerkzeuge
Der in den Sicherheitshinweisen verwendete Begriff „Elektro werk zeug“ bezieht sich
auf netzbetriebene Elektro werk zeuge (mit
Netzkabel) und auf akkubetriebene Elektrowerk zeuge (ohne Netzkabel).
Page 7

DE AT CH
Sicheres Arbeiten:
• Halten Sie Ihren Arbeitsbereich
in Ordnung.
Unordnung im Arbeitsbereich kann Un-
fälle zur Folge haben.
• Berücksichtigen Sie Umgebungs-
einüsse.
- Setzen Sie Elektro werk zeuge nicht
dem Regen aus.
- Benutzen Sie Elektro werk zeuge nicht
in feuchter oder nasser Umgebung.
Das Eindringen von Wasser in ein
Elektro werk zeug erhöht das Risiko
eines elektrischen Schlages.
- Sorgen Sie für gute Beleuchtung des
Arbeitsplatzes.
- Benutzen Sie Elektro werk zeuge
nicht, wo Brand- oder Explosionsgefahr besteht. Elektro werk zeuge erzeugen Funken, die den Staub oder
die Dämpfe entzünden können.
• Schützen Sie sich vor elektrischem Schlag.
Vermeiden Sie Körperberührung mit
geerdeten Teilen (z.B. Rohren, Radiatoren, Elektroherden, Kühlgeräten).
• Halten Sie andere Personen
fern. Lassen Sie andere Personen,
insbesondere Kinder, nicht das Elektrowerk zeug oder das Kabel berühren.
Halten Sie sie von Ihrem Arbeitsbereich
fern.
• Bewahren Sie unbenutzte
Elektro werk zeuge sicher auf.
Unbenutzte Elektro werk zeuge sind an
einem trockenen, hochgelegenen oder
abgeschlossenen Ort, außerhalb der
Reichweite von Kindern, abzulegen. Es
besteht Verletzungsgefahr.
• Überlasten Sie Ihr Elektro werkzeug nicht.
Sie arbeiten besser und sicherer im angegebenen Leistungsbereich.
• Benutzen Sie das richtige
Elektro werk zeug.
- Verwenden Sie keine leistungsschwachen Maschinen für schwere
Arbeiten.
- Benutzen Sie das Elektro werk zeug
nicht für solche Zwecke, für die es
nicht vorgesehen ist. Benutzen Sie
zum Beispiel keine Handkreissäge
zum Schneiden von Baumästen oder
Holzscheiten.
Der Gebrauch von Elektro werk zeugen
für andere als die vorgesehenen Anwendungen kann zu gefährlichen Situationen führen.
• Tragen Sie geeignete Arbeitskleidung.
- Tragen Sie keine weite Kleidung
oder Schmuck, sie können von beweglichen Teilen erfasst werden.
- Bei Arbeiten im Freien ist rutschfestes Schuhwerk empfehlenswert.
- Tragen Sie bei langen Haaren ein
Haarnetz.
• Benutzen Sie Schutzausrüstung.
- Verwenden Sie bei stauberzeugenden Arbeiten eine Atemmaske.
• Verwenden Sie das Kabel nicht
für Zwecke, für die es nicht bestimmt ist.
Benutzen Sie das Kabel nicht, um den
Netzstecker aus der Steckdose zu ziehen. Schützen Sie das Kabel vor Hitze,
Öl und scharfen Kanten. Beschädigte
oder verwickelte Kabel erhöhen das
Risiko eines elektrischen Schlages.
• Vermeiden Sie abnormale Körperhaltung.
Sorgen Sie für sicheren Stand und halten Sie jederzeit das Gleichgewicht.
Dadurch können Sie das Elektro werk-
zeug in unerwarteten Situationen besser kontrollieren.
7
Page 8

DE AT CH
• Pegen Sie Ihre Werkzeuge mit
Sorgfalt. Viele Unfälle haben ihre
Ursache in schlecht gewarteten Elektrowerk zeugen.
- Befolgen Sie die Hinweise zur
Schmierung und zum Werkzeugwechsel.
- Kontrollieren Sie regelmäßig das
Netzkabel des Elektro werk zeugs
und lassen Sie dieses bei Beschädigung von einem anerkannten Fachmann erneuern.
- Kontrollieren Sie Verlängerungsleitungen regelmäßig und ersetzen Sie
diese, wenn sie beschädigt sind.
- Halten Sie die Handgriffe trocken,
sauber und frei von Öl und Fett.
• Ziehen Sie den Netzstecker aus
der Steckdose bei Nichtgebrauch
des Elektro werk zeugs, vor der Wartung
und beim Wechsel von Werkzeugen.
Diese Vorsichtsmaßnahme verhindert
den unbeabsichtigten Start des Elektrowerk zeuges.
• Benutzen Sie Verlängerungskabel für den Außenbereich.
Verwenden Sie im Freien nur dafür
zugelassene und entsprechend gekennzeichnete Verlängerungskabel.
• Seien Sie aufmerksam.
Achten Sie darauf, was Sie tun, und
gehen Sie mit Vernunft an die Arbeit.
Benutzen Sie das Elektro werk zeug
nicht, wenn Sie unkonzentriert sind. Ein
Moment der Unachtsamkeit beim Gebrauch des Elektro werk zeuges kann zu
ernsthaften Verletzungen führen.
• Überprüfen Sie das Elektro werkzeug auf eventuelle Beschädigungen.
Damit wird sichergestellt, dass die
Sicherheit des Elektro werk zeuges erhalten bleibt.
- Vor weiterem Gebrauch des Elektrowerk zeugs müssen Schutzvorrichtungen oder leicht beschädigte Teile
sorgfältig auf ihre einwandfreie und
bestimmungsgemäße Funktion untersucht werden.
- Überprüfen Sie, ob die beweglichen
Teile einwandfrei funktionieren und
nicht klemmen oder ob Teile beschädigt sind. Sämtliche Teile müssen
richtig montiert sein und alle Bedingungen erfüllen, um den einwandfreien Betrieb des Elektro werk zeugs
zu gewährleisten.
- Beschädigte Schutzvorrichtungen
und Teile müssen bestimmungsgemäß durch eine anerkannte Fachwerkstatt repariert oder ausgewechselt werden, soweit nichts anderes
in der Betriebsanleitung angegeben
ist.
- Benutzen Sie keine Elektro werkzeuge, bei denen sich der Schalter
nicht ein- und ausschalten lässt.
Beschädigte Schalter müssen bei
einer Kundendienstwerkstatt ersetzt
werden.
• Achtung!
Der Gebrauch anderer Einsatzwerkzeu-
ge und anderen Zubehörs kann eine
Verletzungsgefahr für Sie bedeuten.
• Lassen Sie Ihr Elektro werk zeug
durch eine Elektrofachkraft reparieren. Dieses Elektro werk zeug
entspricht den einschlägigen Sicherheitsbestimmungen. Reparaturen dürfen
nur von einer Fachwerkstatt ausgeführt
werden, indem Originalersatzteile
verwendet werden; andernfalls können
Unfälle für den Benutzer entstehen.
• Wenn die Anschlussleitung dieses Gerätes beschädigt wird, muss sie durch
den Hersteller oder seinen Kunden-
dienst oder eine ähnlich qualizierte
8
Page 9
DE AT CH
Person ersetzt werden, um Gefährdungen zu vermeiden.
Restrisiken
Auch wenn Sie dieses Elektro werk zeug
vorschriftsmäßig bedienen, bleiben immer
Restrisiken bestehen. Folgende Gefahren
können im Zusammenhang mit der Bauweise und Ausführung dieses Elektro werkzeugs auftreten:
a) Lungenschäden, falls kein geeigneter
Atemschutz getragen wird.
b) Gehörschäden, falls kein geeigneter
Gehörschutz getragen wird.
c) Augenschäden, falls kein geeigneter
Augenschutz getragen wird.
d) Gesundheitsschäden, die aus
Hand-Arm-Schwingungen resultieren,
falls das Gerät über einen längeren
Zeitraum verwendet wird oder nicht
ordnungsgemäß geführt und gewartet
wird.
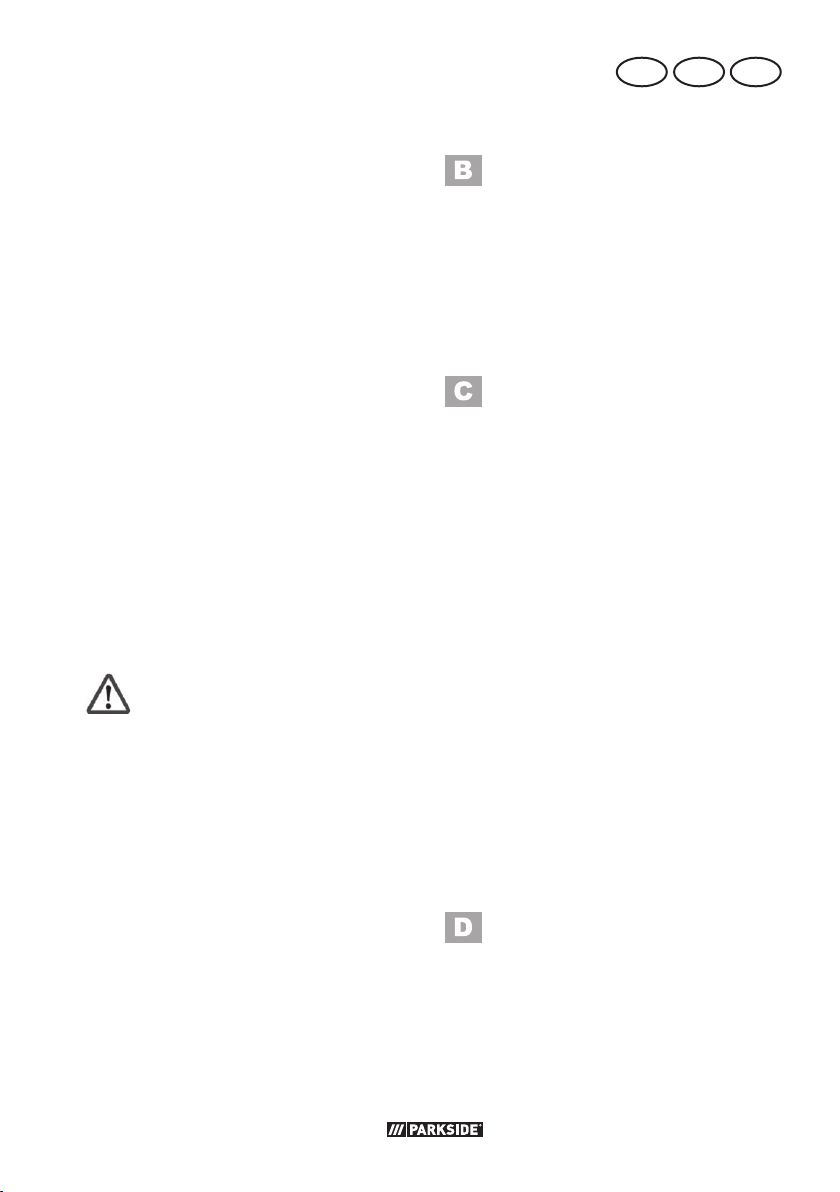
Warnung! Dieses Elektro werk zeug
erzeugt während des Betriebs ein
elektromagnetisches Feld. Dieses
Feld kann unter bestimmten Umständen aktive oder passive medizinische Implantate beeinträchtigen.
Um die Gefahr von ernsthaften
oder tödlichen Verletzungen zu
verringern, empfehlen wir Personen
mit medizinischen Implantaten ihren
Arzt und den Hersteller des medizinischen Implantats zu konsultieren,
bevor die Maschine bedient wird.
Inbetriebnahme
Bügelgriff montieren
1. Drücken Sie den Bügelgriff (7) in die
Halterung für Bügelgriff (10a) am
Druckkessel (10).
2. Befestigen Sie den Bügelgriff (7) mit
den Innensechskantschrauben und dem
beiliegenden Innensechskantschlüssel
(15).
Räder montieren
1. Führen Sie die Radschraube (17) durch
die Bohrung im Rad (11).
2. Führen Sie die Radschraube (17) durch
die Bohrung am Radgestänge.
3. Befestigen Sie das Rad (11) mit der Si-
cherungsmutter (18). Nehmen Sie dazu
ggf. einen Schraubenschlüssel (nicht im
Lieferumfang enthalten) zu Hilfe.
4. Drücken Sie die Radkappe (16) auf das
Rad (11).
5. Wiederholen Sie die Schritte 1-4 mit
dem anderen Rad.
Ein-/Ausschalten
1. Zum Einschalten kippen Sie den Ein-/
Ausschalter (6) auf Position „I“.
2. Zum Ausschalten kippen Sie den Ein-/
Ausschalter (6) auf Position „0“.
Bedienung
Druckluftschlauch
montieren
1. Drücken Sie den Druckluftschlauch (14)
in eine der beiden Schnellkupplungen
(13). Der Druckluftschlauch (14) rastet
ein.
9
Page 10
DE AT CH
Druckluftschlauch demontieren
2. Drücken Sie den Kupplungsring an
der Schnellkupplung (13) zum Gerät.
Der Druckluftlauch (14) springt aus der
Schnellkupplung (13).
3. Drücken Sie das Druckluftwerkzeug
in die Schnellkupplung am Druckluftschlauch.
Arbeitshinweise
Druckluft einstellen
An den Schnellkupplungen (13) kann der
eingestellte Druck abgenommen werden.
Dieser Druck ist über den Druckregler (4)
einstellbar und kann am Manometer (eingestellter Druck) (5) abgelesen werden.
1. Zum Erhöhen drehen Sie den Druckregler (4) im Uhrzeigersinn.
2. Zum Verringern drehen Sie den Druckregler (4) gegen den Uhrzeigersinn.
Reinigung und Wartung
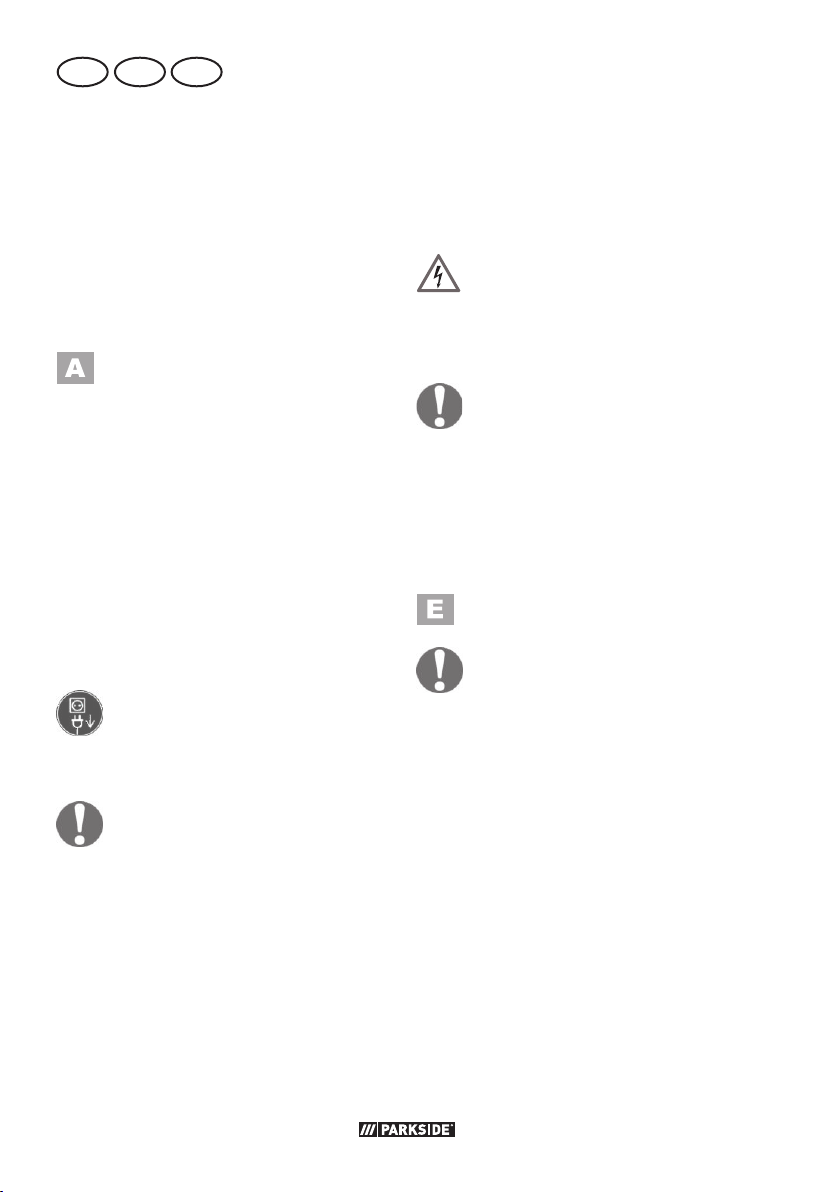
Schalten Sie das Gerät aus
und ziehen Sie vor allen Arbeiten am Gerät den Netzstecker.
Lassen Sie Instandsetzungsarbeiten
und Wartungsarbeiten, die nicht
in dieser Anleitung beschrieben
sind, von unserem Service-Center
durchführen. Verwenden Sie nur
Originalteile.
Führen Sie folgende Wartungs- und Reinigungsarbeiten regelmäßig durch. Dadurch
ist eine lange und zuverlässige Nutzung
gewährleistet.
• Halten Sie die Lüftungsschlitze am
Gerätegehäuse stets frei sonst überhitzt
das Gerät.
Reinigung
Das Gerät darf weder mit
Wasser abgespritzt werden,
noch in Wasser gelegt werden. Es besteht die Gefahr
eines Stromschlages.
Verwenden Sie keine Reinigungs-
bzw. Lösungsmittel. Sie könnten das
Gerät damit irreparabel beschädigen. Chemische Substanzen können die Kunststoffteile des Gerätes
angreifen.
• Reinigen Sie das Gehäuse mit einem
trockenen Tuch oder einem Pinsel.
Luftlterreinigen
Betreiben Sie das Gerät nie ohne
Luftlter. Staub und Schmutz gelangen sonst in den Motor und führen
zu Schäden.
Reinigen Sie den Luftlter (1a) ca. alle 300
Betriebsstunden von Staub und Schmutz,
um einen einwandfreien Betrieb zu gewährleisten können.
1. Nehmen Sie den Luftlterdeckel (1) ab.
2. Entnehmen Sie den Luftlter (1a).
3. Klopfen Sie den Luftlter (1a) aus.
4. Reinigen Sie den Luftlter (1a) und den
Luftlterdeckel (1) mit etwas Druckluft
(ca. 3 bar).
5. Montieren Sie den Luftlter (1a) und
den Luftlterdeckel (1) wieder in umge-
kehrter Reihenfolge.
10
Page 11
DE AT CH
Kondenswasser
ablassen
Leeren Sie nach jedem Betrieb den Druckkessel (10) von Kondenswasser.
1. Öffnen Sie die Ablassschraube (12).
2. Fangen Sie das Kondenswasser in einem geeigneten Behältnis auf.
3. Kippen Sie das Gerät etwas nach vorne, um das restliche Kondenswasser
auszulassen.
4. Schließen Sie die Ablassschraube (12)
wieder.
Sicherheitsventil überprüfen
Das Sicherheitsventil dient zum Druckablass im Fall von Überdrück im Druckkessel.
Betätigen Sie das Sicherheitsventil ca. alle
30 Betriebsstunden, aber mind. 3 mal im
Jahr, um die korrekte Funktion sicherzustellen.
1. Starten Sie das Gerät (siehe „Ein-/Ausschalten“.
2. Drehen Sie das Sicherheitsventil (3) im
Uhrzeigersinn, um das Sicherheitsventil
(3) zu öffnen. Das Sicherheitsventil (3)
sollte nun Luft ablassen.
3. Drehen Sie das Sicherheitsventil (3)
gegen den Uhrzeigersinn, um das Sicherheitsventil (3) wieder zu schließen.
Lagerung
• Lagern Sie die Geräte und Zubehörteile
stets:
- trocken.
- sauber.
- staubfrei.
- außerhalb der Reichweite von Kindern.
• Wickeln Sie die Netzleitung (9) um die
Halterung für Netzleitung (19).
• Wickeln Sie den Druckluftschlauch (14)
um die Schlauchwicklung (8).
• Lassen Sie den Überdruck im Kompressor ab, indem Sie den Kompressor
ausschalten und die noch im Druckkessel (10) vorhandene Druckluft verbrauchen.
• Lassen Sie das Kondenswasser ab. (siehe („Kondenswasser ablassen“).
Transport
Nutzen Sie den Bügelgriff (7), um das Gerät zu fahren. Beachten Sie beim Transport
das Gewicht des Gerätes.
Entsorgung/
Umweltschutz
Führen Sie Gerät, Zubehör und Verpackung einer umweltgerechten Wiederverwertung zu.
Elektrische Geräte gehören nicht in
den Hausmüll.
• Geben Sie das Gerät an einer Verwertungsstelle ab. Die verwendeten Kunststoff- und Metallteile können sortenrein
getrennt werden und so einer Wiederverwertung zugeführt werden. Fragen
Sie hierzu unser Service-Center.
• Die Entsorgung Ihrer defekten, eingesendeten Geräte führen wir kostenlos
durch.
11
Page 12

DE AT CH
Ersatzteile/Zubehör
Ersatzteile und Zubehör erhalten Sie unter
www.grizzlytools-service.eu
Sollten Sie Probleme mit dem Bestellvorgang haben, verwenden Sie bitte das Kontaktformular. Bei weiteren Fragen wenden Sie sich an das „Service-Center“ (siehe Seite 14).
Item Bezeichnung Bestell-Nr.
14 Druckluftschlauch 10m 91105933
1a Luftlter 91105932
11 Rad Set 91105929
8 Schlauchwicklung 91105930
12 Ablassschraube 91105928
6 Ein-/Ausschalter 91105931
13 Schnellkupplungen Set 91105926
12
Page 13

DE AT CH
Garantie
Sehr geehrte Kundin, sehr geehrter Kunde,
Sie erhalten auf dieses Gerät 3 Jahre Garantie ab Kaufdatum.
Im Falle von Mängeln dieses Gerätes
stehen Ihnen gegen den Verkäufer des
Gerätes gesetzliche Rechte zu. Diese
gesetzlichen Rechte werden durch unsere
im Folgenden dargestellte Garantie nicht
eingeschränkt.
Garantiebedingungen
Die Garantiefrist beginnt mit dem Kaufdatum. Bitte bewahren Sie den OriginalKassenbon gut auf. Diese Unterlage wird
als Nachweis für den Kauf benötigt.
Tritt innerhalb von drei Jahren ab dem
Kaufdatum dieses Gerätes ein Materialoder Fabrikationsfehler auf, wird das Gerät von uns – nach unserer Wahl – für Sie
kostenlos repariert oder ersetzt. Diese Garantieleistung setzt voraus, dass innerhalb
der Drei-Jahres-Frist das defekte Gerät und
der Kaufbeleg (Kassenbon) vorgelegt und
schriftlich kurz beschrieben wird, worin der
Mangel besteht und wann er aufgetreten
ist.
Wenn der Defekt von unserer Garantie gedeckt ist, erhalten Sie das reparierte oder
ein neues Gerät zurück. Mit Reparatur
oder Austausch des Gerätes beginnt kein
neuer Garantiezeitraum.
Garantiezeit und gesetzliche
Mängelansprüche
Die Garantiezeit wird durch die Gewährleistung nicht verlängert. Dies gilt auch
für ersetzte und reparierte Teile. Eventuell
schon beim Kauf vorhandene Schäden und
Mängel müssen sofort nach dem Auspacken gemeldet werden. Nach Ablauf der
Garantiezeit anfallende Reparaturen sind
kostenpichtig.
Garantieumfang
Das Gerät wurde nach strengen Qualitätsrichtlinien sorgfältig produziert und vor
Anlieferung gewissenhaft geprüft.
Die Garantieleistung gilt für Material- oder
Fabrikationsfehler. Diese Garantie erstreckt
sich nicht auf Geräteteile, die normaler
Abnutzung ausgesetzt sind und daher als
Verschleißteile angesehen werden können
(z.B. Druckluftschlauch, Luftlter) oder für
Beschädigungen an zerbrechlichen Teilen
(z.B. Schalter).
Diese Garantie verfällt, wenn das Gerät
beschädigt, nicht sachgemäß benutzt oder
nicht gewartet wurde. Für eine sachgemäße Benutzung des Gerätes sind alle in
der Betriebsanleitung aufgeführten Anweisungen genau einzuhalten. Verwendungszwecke und Handlungen, von denen in
der Betriebsanleitung abgeraten oder vor
denen gewarnt wird, sind unbedingt zu
vermeiden.
Das Gerät ist lediglich für den privaten
und nicht für den gewerblichen Gebrauch
bestimmt. Bei missbräuchlicher und unsachgemäßer Behandlung, Gewaltanwendung
und bei Eingriffen, die nicht von unserer
autorisierten Service-Niederlassung vorgenommen wurden, erlischt die Garantie.
Abwicklung im Garantiefall
Um eine schnelle Bearbeitung Ihres Anliegens zu gewährleisten, folgen Sie bitte den
folgenden Hinweisen:
• Bitte halten Sie für alle Anfragen den
Kassenbon und die Identikationsnummer (IAN356332_2004) als Nach-
weis für den Kauf bereit.
• Die Artikelnummer entnehmen Sie bitte
dem Typenschild.
• Sollten Funktionsfehler oder sonstige
Mängel auftreten, kontaktieren Sie
zunächst die nachfolgend benannte
13
Page 14
DE AT CH
Serviceabteilung telefonisch oder per
E-Mail. Sie erhalten dann weitere In-
formationen über die Abwicklung Ihrer
Reklamation.
• Ein als defekt erfasstes Gerät können
Sie, nach Rücksprache mit unserem
Kundenservice, unter Beifügung des
Kaufbelegs (Kassenbons) und der
Angabe, worin der Mangel besteht
und wann er aufgetreten ist, für Sie
porto frei an die Ihnen mitgeteilte
Service-Anschrift übersenden. Um Annahmeprobleme und Zusatzkosten zu
vermeiden, benutzen Sie unbedingt nur
die Adresse, die Ihnen mitgeteilt wird.
Stellen Sie sicher, dass der Versand
nicht unfrei, per Sperrgut, Express oder
sonstiger Sonderfracht erfolgt. Senden
Sie das Gerät bitte inkl. aller beim Kauf
mitgelieferten Zubehörteile ein und
sorgen Sie für eine ausreichend sichere
Transportverpackung.
Reparatur-Service
Sie können Reparaturen, die nicht der Garantie unterliegen, gegen Berechnung von
unserer Service-Niederlassung durchführen
lassen. Sie erstellt Ihnen gerne einen Kostenvoranschlag.
Wir können nur Geräte bearbeiten, die
ausreichend verpackt und frankiert eingesandt wurden.
Achtung: Bitte senden Sie Ihr Gerät gereinigt und mit Hinweis auf den Defekt an
unsere Service-Niederlassung.
Nicht angenommen werden unfrei - per
Sperrgut, Express oder mit sonstiger Sonderfracht - eingeschickte Geräte.
Die Entsorgung Ihrer defekten, eingesendeten Geräte führen wir kostenlos durch.
Service-Center
Service Deutschland
DE
Tel.: 0800 54 35 111
E-Mail: [email protected]
IAN 356332_2004
Service Österreich
AT
Tel.: 0820 201 222
(0,15 EUR/Min.)
E-Mail: [email protected]
IAN 356332_2004
Service Schweiz
CH
Tel.: 0842 665566
(0,08 CHF/Min.,
Mobilfunk max. 0,40 CHF/Min.)
E-Mail: [email protected]
IAN 356332_2004
Importeur
Bitte beachten Sie, dass die folgende
Anschrift keine Service-Anschrift ist. Kontaktieren Sie zunächst das oben genannte
Service-Center.
Grizzly Tools GmbH & Co. KG
Stockstädter Straße 20
D-63762 Großostheim
DEUTSCHLAND
www.grizzlytools-service.eu
14
Page 15
GB IE
Content
Introduction ...............................15
Proper use .................................15
General description ....................15
Scope of delivery ............................ 16
Description of functions .................... 16
Overview ....................................... 16
Technical data ............................16
Safety instructions ......................17
Symbols and icons ..........................17
General Safety Instructions for Power
Tools ..............................................17
Residual risks ..................................19
Initial start-up ............................19
Mounting the bow-type handle ..........19
Fitting the wheels ............................19
Switching on/off ............................. 20
Operation ..................................20
Mounting the compressed air hose ....20
Working instructions ..................20
Adjusting the compressed air ............20
Cleaning and servicing ...............20
Cleaning the air lter .......................20
Draining the condensation water .......20
Checking the safety valve ................. 21
Storage ......................................21
Transport ...................................21
Disposal/environmental
protection ..................................21
Replacement parts/Accessories ..21
Guarantee .................................22
Repair Service ............................23
Service-Center ............................23
Importer ....................................23
Translation of the original
EC declaration of conformity ...... 76
Exploded Drawing ............... 83/84
Introduction
Congratulations on the purchase of your
new device. With it, you have chosen a
high quality product.
During production, this equipment has
been checked for quality and subjected to
a nal inspection. The functionality of your
equipment is therefore guaranteed.
The operating instructions constitute
part of this product. They contain
important information on safety, use and
disposal. Before using the product, familiarise yourself with all of the operating
and safety instructions. Use the product
only as described and for the applications
specied.
Keep this manual safely and in the event
that the product is passed on, hand over
all documents to the third party.
Proper use
The compressor is intended for the oper-
ation of pneumatic tools (e.g. tyre inator,
blow-out gun and spray paint gun). The
device is not suitable for operating tools
that require a high degree of compressed
air.
Any other use can damage the devices
and thus pose a substantial risk to the user.
These devices are not suitable for commercial use. The warranty is void in the case
of commercial use.
The manufacturer is not liable for damage
caused by improper use or incorrect operation.
General description
The illustration of the most im-
portant functional components
can be found on the front and
the back fold-out pages.
15
Page 16
GB IE
Scope of delivery
First, unpack the device and check for completeness.
• Compressor
• Bow-type handle
• 2 wheels
• Mounting material
• 10 m compressed air hose
• Allen key
• Instruction manual
Dispose of the packaging material properly.
Description of functions
The compressor is intended for the operation of pneumatic tools.
Please refer to the descriptions below for
information on how the operating elements
work.
Overview
1 Air lter cover
2 Manometer (pressure vessel)
3 Safety valve
4 Pressure regulator
5 Manometer (set pressure)
6 On/off switch
7 Bow-type handle
8 Hose reel
9 Power cable
10 Pressure vessel
11 Wheel
12 Drain plug
13 Quick connectors
14 Compressed air hose
15 Allen key
7a Hexagon socket screw
10a Bracket for bow-type handle
16 Hubcap
17 Wheel bolt
18 Locknuts
1a Air lter
19 Power cable holder
Technical data
Vertical compressor 50 l ......... PVKO 50 A1
Nominal voltage U
Rated power P
Motor speed n
max. working pressure
P
..........................1.0 MPa (10 bar)
max
Weight m ......................................35 kg
Vessel volume
Suction pipe
Protection type
Sound pressure level
(L
) ................... 71.9 dB(A), KpA= 3 dB
pA
Sound power level (L
measured
guaranteed
Levels of noise and vibration were determined according to the standards and regulations in the declaration of conformity.
The specied total vibration value and the
stated noise emission value have been
measured according to a standardised test
method and can be used to compare one
power tool with another.
The specied total vibration value and the
stated specied noise emission value can
also be used for a provisional assessment
of the load.
Warning: The vibration emission
value may differ during actual use
of the power tool from the stated
value depending on the manner in
........... 230 V~; 50 Hz
...........................1800 W
.......................2850 min
0
.................................. 50 l
............... approx. 260 l/min
................................. IPX0
)
..... 90.9 dB(A), K
WA
= 2.29 dB
WA
........................... 93 dB(A)
-1
16
Page 17
GB IE
which the power tool is used.
Try to keep the exposure to vibrat-
ions as low as possible. Examples
of measures to reduce vibration
exposure are the wearing of gloves
when using the tool and limiting the
working hours. For this purpose all
parts of the operating cycle have to
be considered (for example, times
when the electric tool is switched
off and times when it is switched on
but running without any load).
Safety instructions
Ensure that the safety instructions are observed when operating the device.
Symbols and icons
Symbols in the manual:
Warning symbols with infor-
mation on damage and injury prevention.
Hazard symbol with infor-
mation on the prevention of
personal injury caused by
electric shock.
Instruction symbols with information
on preventing damage.
Help symbols with information on
improving tool handling.
Symbols on the device
Caution!
Danger of electric shock!
Warning! Compressor system can
start without warning.
Caution! Hot surface!
Wear ear protection!
Read the instruction manual careful-
ly.
Electrical devices do not belong in
domestic waste.
Sound power level LWA indicated in
dB
General Safety Instructions
for Power Tools
The term “power tool” used in the safety instructions refers to mains-operated
electric tools (with a mains cable) and to
battery-operated electric tools (without a
mains cable).
Safe working:
• Keep your work area tidy.
An untidy workplace can lead to acci-
dents.
• Consider environment inuenc-
es.
- Do not expose power tools to rain.
- Do not use power tools in damp or
wet surroundings. The penetration of
water into an electric tool increases
the risk of electric shock.
- Ensure the work area is adequately
lit.
- Do not use power tools where there
is a re or explosion hazard. Power
tools generate sparks that can ignite
dust or vapours.
• Protect yourself against electric
shock.
17
Page 18

GB IE
Avoid body contact with earthed parts
(e.g. pipes, radiators, electric cookers,
refrigerators).
• Keep other people away. Do not
allow other people, especially children,
to touch the power tool or cable. Keep
them away from your work area.
• Store unused power tools safely.
Unused power tools should be stored
in a dry, high or locked place, out of
the reach of children. There is a risk of
injury.
• Do not overload your power
tool.
They work better and more safely with-
in the specied power range.
• Use the correct power tool.
- Do not use low-performance machines for heavy work.
- Do not use the power tool for purposes for which it is not intended.
For example, do not use a circular
hand saw for cutting tree branches
or logs.
Using the power tool for anything other
than its intended use can lead to dangerous situations.
• Wear suitable work clothing.
- Do not wear loose clothing or jewellery that might become caught in
moving parts.
- When working outdoors, non-slip
footwear is recommended.
- Wear a hair net to contain long
hair.
• Use protective equipment.
- Use a dust mask for work which
generates dust.
• Do not use the cable for purposes for which it is not intended.
Do not use the cable to pull the plug
from the socket. Protect the cable from
heat, oil and sharp edges. Damaged
or untidy cables increase the risk of
electric shock.
• Avoid abnormal body postures.
Ensure secure footing and keep your
balance at all times.
This will help you to have better control
of the power tool in unexpected situations.
• Maintain tools with care. Many
accidents are caused by poorly maintained power tools.
- Follow the instructions for lubrication
and changing tools.
- Regularly check the connection
cable of the power tool and, if it is
damaged, have it replaced by a
qualied specialist.
- Check extension cords periodically
and replace them if they are damaged.
- Keep handles dry, clean and free
from oil and grease.
• Remove the plug from the mains
socket when the power tool is not in
use, before maintenance and when
changing tools.
These safety measures prevent acciden-
tally starting the power tool.
• Use extension cables outdoors.
Only use approved and appropriately
marked extension cables outdoors.
• Pay attention at all times.
Pay attention, be aware of what you
are doing and take the utmost care
when working. Do not use the power tool if you cannot concentrate. A
moment of inattention whilst using the
power tool can result in serious injuries.
• Check the power tool for possible damage.
This will ensure that the power tool remains safe.
- Before further use of the power tool,
safety devices or slightly damaged
18
Page 19
GB IE
parts must be carefully examined in
respect of their proper and intended
function.
- Check whether the moving parts
are working properly and are not
becoming jammed or whether parts
are damaged. All parts must be cor-
rectly tted and satisfy all conditions
to ensure the proper operation of
the power tool.
- Damaged safety equipment and
parts must be repaired properly or
replaced by an authorised specialist
workshop unless otherwise indicated in the instruction manual.
- Do not use power tools if the switch
cannot be turned on and off. Damaged switches must be replaced at
a customer service workshop.
• Caution!
Using other attachment tools and other
accessories may represent a risk of injury to you.
• Have your power tool repaired
by a qualied electrician. This
power tool complies with the relevant
safety regulations. Repairs may only
be performed by a specialist workshop
using original spare parts; otherwise
accidents involving the user may result.
• If the connection cable of this device is
damaged, it must be replaced by the
manufacturer or their customer service
or by a similarly qualied person in
order to avoid hazards.
a) Cuts
b) Ear damage if working without ear pro-
tection.
c) Eye damage if suitable eye protection
is not worn.
d) Damage to your health caused by
swinging your hands and arms when
operating the appliance for longer periods of time or if the unit is not held or
maintained properly.
Warning! During operation, this
electric tool generates an electro-
magnetic eld which, under certain
circumstances, may impair the
functionality of active or passive
medical implants. To reduce the risk
of serious or lethal injuries, we recommend that persons with medical
implants consult their doctor and
the manufacturer of their medical
implant before operating the machine.
Initial start-up
Mounting the bow-type
handle
1. Push the bow-type handle (7) into the
bracket for the bow-type handle (10a)
on the pressure vessel (10).
2. Attach the bow-type handle (7) using
the hexagon socket screws and the enclosed Allen key (15).
Residual risks
Even if properly operating and handling
this electric tool, some residual risks will
remain. Due to its construction and build,
this electric tool may present the following
hazards:
Fitting the wheels
1. Insert the wheel bolt (17) through the
hole in the wheel (11).
2. Insert the wheel bolt (17) through the
hole in the wheel rod.
3. Fasten the wheel (11) using the locknuts
(19). If necessary, use a spanner (not
included in delivery).
19
Page 20
GB IE
4. Press the hubcap (16) onto the wheel
(11).
5. Repeat steps 1-4 for the remaining
wheels.
Switching on/off
1. To switch the device on, move the On/
Off switch (6) to position “I”.
2. To switch the device off, move the On/
Off switch (6) to position “0”.
Operation
Mounting the
compressed air hose
1. Press the compressed air hose (14) into
one of the two quick connectors (13).
The compressed air hose (14) locks into
place.
Removing the compressed air hose
2. Press the coupling ring on the quick
connector (13) towards the device. The
compressed air hose (14) springs out of
the quick connector (13).
3. Press the compressed air tool into the
quick connector on the compressed air
hose.
Cleaning and servicing
Before carrying out work on
the device, switch it off and
unplug the mains plug.
You should have any repair and
maintenance work that is not described in these instructions carried
out by our Service Centre. Only use
original parts.
Perform the following maintenance and
cleaning work regularly. This will guarantee long and reliable use.
• Always keep the ventilation slits on the
device housing unobstructed otherwise
the device will overheat.
Cleaningtheairlter
Never run the device without an air
lter. Dust and dirt may otherwise
enter the motor and cause damage.
Remove dust and dirt from the air lter (1a)
approx. every 300 operating hours to ensure proper functioning of the device.
Working instructions
Adjusting the
compressed air
The set pressure can be released from the
quick connectors (13). This pressure can
be adjusted via the pressure regulator (4)
and can be read on the manometer (set
pressure) (5).
1. To increase, turn the pressure regulator
(4) clockwise.
2. To decrease, turn the pressure regulator
(4) anti-clockwise.
20
1. Remove the air lter cover (1).
2. Remove the air lter (1a).
3. Tap out the air lter (1a).
4. Clean the air lter (1a) and the air lter
cover (1) with a little compressed air
(approx. 3 bar).
5. Reverse the sequence to remount the air
lter (1a) and the air lter cover (1).
Draining the
condensation water
Empty condensation water from the pressure vessel (10) after every use.
Page 21
GB IE
1. Open the drain plug (12).
2. Collect the condensation water in a
suitable container.
3. Tilt forward slightly to let out the re-
maining condensation water.
4. Close the drain plug (12) again.
Checking the safety valve
The safety valve is used to release the pressure in case of overpressure in the pressure
vessel.
Activate the safety valve approx. every 30
operating hours, or at least 3 times a year
to ensure correct functioning.
1. Start the device (see “Switching On/
Off”.
2. Rotate the safety valve (3) clockwise in
order to open the safety valve (). The
safety valve (3) should now release air.
3. Turn the safety valve (3) anti-clockwise
to close the safety valve (3) again.
Storage
• Always store the devices and accesso-
ries:
- dry.
- clean.
- dust free.
- out of the reach of children.
• Wind the power cable (9) around the
power cable bracket (19).
• Wind the compressed air hose (15)
around the hose reel (8).
• Place the device upright if necessary.
• Release the overpressure in the com-
pressor by switching off the compressor
and using up the compressed air still
present in the pressure vessel (10).
• Drain the condensation water (see
(“Draining the condensation water”).
Transport
Use the bow-type handle (7) to move the
device. Pay attention to the weight of the
device during transport.
Disposal/environmental
protection
The device, accessories and packaging
should be properly recycled.
Electrical devices do not belong in
domestic waste.
• Take the device to a recycling plant.
The plastic and metal parts used on
your device can be properly sorted
according to materials and grades and
efciently recycled. Please contact our
service centre for more information.
• We will dispose of any defective devices that you send to us free of charge.
Replacement parts/
Accessories
Spare parts and accessories can
be obtained at
www.grizzlytools-service.eu
If you have issues ordering, please use the
contact form.
If you have any other questions, contact
the ”Service-Center” (see page 23).
21
Page 22

GB IE
Item Description Order No.
14 Compressed air hose 10m 91105933
1a Air lter 91105932
11 Wheel set 91105929
8 Hose reel 91105930
12 Drain plug 91105928
6 On/Off switch 91105931
13 Quick connectors set 91105926
Guarantee
Dear Customer,
This equipment is provided with a 3-year
guarantee from the date of purchase.
In case of defects, you have statutory rights
against the seller of the product. These
statutory rights are not restricted by our
guarantee presented below.
Terms of Guarantee
The term of the guarantee begins on the
date of purchase. Please retain the original
receipt. This document is required as proof
of purchase.
If a material or manufacturing defect
occurs within three years of the date of
purchase of this product, we will repair or
replace – at our choice – the product for
you free of charge. This guarantee requires
the defective equipment and proof of purchase to be presented within the three-year
period with a brief written description of
what constitutes the defect and when it
occurred.
If the defect is covered by our guarantee,
you will receive either the repaired product
or a new product. No new guarantee period begins on repair or replacement of the
product.
22
Guarantee Period and Statutory
Claims for Defects
The guarantee period is not extended by
the guarantee service. This also applies for
replaced or repaired parts. Any damages
and defects already present at the time of
purchase must be reported immediately after unpacking. Repairs arising after expiry
of the guarantee period are chargeable.
Guarantee Cover
The equipment has been carefully produced in accordance with strict quality guidelines and conscientiously checked prior to
delivery.
The guarantee applies for all material and
manufacturing defects. This guarantee
does not extend to cover product parts
that are subject to normal wear and may
therefore be considered as wearing parts
(e.g. valve adapter, compressed air hose)
or to cover damage to breakable parts
(e.g. switches, tension tear protection, slide
shoe).
This guarantee shall be invalid if the product has been damaged, used incorrectly
or not maintained. Precise adherence
to all of the instructions specied in the
operating manual is required for proper
use of the product. Intended uses and actions against which the operating manual
advises or warns must be categorically
avoided.
Page 23
GB IE
The product is designed only for private
and not commercial use. The guarantee
will be invalidated in case of misuse or
improper handling, use of force, or interventions not undertaken by our authorised
service branch.
Processing in Case of Guarantee
To ensure quick handling of you issue,
please follow the following directions:
• Please have the receipt and item num-
ber (IAN 356332_2004) ready as
proof of purchase for all enquiries.
• Please nd the item number on the rating plate.
• Should functional errors or other defects occur, please initially contact the
service department specied below by
telephone or by e-mail. You will then
receive further information on the processing of your complaint.
• After consultation with our customer
service, a product recorded as defective can be sent postage paid to the
service address communicated to you,
with the proof of purchase (receipt) and
specication of what constitutes the
defect and when it occurred. In order
to avoid acceptance problems and
additional costs, please be sure to use
only the address communicated to you.
Ensure that the consignment is not sent
carriage forward or by bulky goods,
express or other special freight. Please
send the equipment inc. all accessories
supplied at the time of purchase and
ensure adequate, safe transport packaging.
Repair Service
For a charge, repairs not covered by the
guarantee can be carried out by our ser-
vice branch, which will be happy to issue
a cost estimate for you.
We can handle only equipment that has
been sent with adequate packaging and
postage.
Attention: Please send your equipment to
our service branch in clean condition and
with an indication of the defect.
Equipment sent carriage forward or by bulky goods, express or other special freight
will not be accepted.
We will dispose of your defective devices
free of charge when you send them to us.
Service-Center
Service Great Britain
GB
IAN 356332_2004
Service Ireland
IE
IAN 356332_2004
Importer
Please note that the following address is
not a service address. Please initially con-
tact the service centre specied above.
Grizzly Tools GmbH & Co. KG
Stockstädter Straße 20
63762 Großostheim
GERMANY
www.grizzlytools-service.eu
23
Page 24

FR BE
Sommaire
Introduction ...............................24
Utilisation conforme ...................24
Description générale ..................25
Matériel livré ..................................25
Description fonctionnelle ..................25
Aperçu ..........................................25
Caractéristiques techniques ........25
Conseils de sécurité ....................26
Symboles utilisés dans le mode
d’emploi ........................................26
Consignes générales de sécurité
relatives aux outils électriques ...........26
Autres risques .................................28
Mise en service ..........................29
Montage de la poignée étrier ........... 29
Monter les roues .............................29
Mise en marche/arrêt ......................29
Utilisation ..................................29
Monter le exible à air comprimé .....29
Consignes de travail ...................29
Régler l'air comprimé ......................29
Nettoyage et maintenance .........30
Nettoyez le ltre à air ...................... 30
Vidanger l'eau de condensation .......30
Vérier la soupape de sécurité .......... 30
Stockage ....................................30
Transport ...................................31
Recyclage/Protection de
l'environnement .........................31
Pièces de rechange/Accessoires ..31
Garantie - France .......................32
Garantie - Belgique ....................34
Service Réparations ...................35
Service-Center ............................35
Importateur ...............................35
Traduction de la déclaration
de conformité CE originale .........77
Vue éclatée ..........................83/84
Introduction
Toutes nos félicitations pour l’achat de
votre nouvel appareil. Vous avez ainsi
choisi un produit de qualité supérieure.
La qualité de l’appareil a été vériée pendant la production et il a été soumis à un
contrôle nal. Le fonctionnement de votre
appareil est donc ainsi garanti.
La notice d’utilisation fait partie de
ce produit. Elle contient des instructions importantes pour la sécurité,
l’utilisation et l’élimination des
déchets. Avant d’utiliser ce produit,
lisez attentivement les consignes
d’emploi et de sécurité. N’utilisez le
produit que tel que décrit et uniquement pour les domaines d’emploi
indiqués.
Conservez cette notice et remet-
tez-la avec tous les documents si
vous cédez le produit à un tiers.
Utilisation conforme
Le compresseur est destiné au fonctionnement d'outils pneumatiques (par ex.
goneur de pneus, pistolet de soufage et
pistolet à peinture). L'appareil n'est pas
destiné au fonctionnement d'outils néces-
sitant un débit d'air comprimé élevé.
Toute autre utilisation peut entraîner des
dommages aux appareils et constituer un
sérieux danger pour l'utilisateur. Ces appareils ne sont pas conçus pour une utilisation
commerciale. Une utilisation commerciale
annule la garantie.
Le fabricant ne peut être tenu pour responsable des dommages causés par une
utilisation inappropriée ou par une manipulation incorrecte.
24
Page 25
FR BE
Description générale
Vous trouverez les images cor-
respondantes à l’arrière et à
l’avant de ce document, sur la
couverture.
Matériel livré
Déballez en premier lieu l'appareil et
contrôlez s'il est complet.
• Compresseur
• Poignée étrier
• 2 roues
• Matériel de montage
• Flexible à air comprimé de 10 m
• Clé Allen
• Mode d'emploi
Éliminez correctement les matériaux d’emballage.
Description fonctionnelle
Le compresseur est prévu pour le fonctionnement d'outils pneumatiques.
Pour savoir quelles fonctions remplissent
les éléments de commande, veuillez vous
reporter aux descriptions suivantes.
Aperçu
1 Couvercle de ltre à air
2 Manomètre (réservoir sous pres-
sion)
3 Soupape de sécurité
4 Régulateur de pression
5 Manomètre (pression réglée)
6 Interrupteur Marche/Arrêt
7 Poignée étrier
8 Enroulement de exible
9 Câble secteur
10 Réservoir sous pression
11 Roue
12 Vis de vidange
13 Raccords rapides
14 Flexible à air comprimé
15 Clé Allen
7a Vis à six pans creux
10a Support de la poignée étrier
16 Capuchon de roue
17 Vis de roue
18 Écrou de sécurité
1a Filtre à air
19 Support du câble secteur
Caractéristiques
techniques
Compresseur vertical 50 l .......PVKO 50 A1
Tension nominale U .......... 230 V~ ; 50Hz
Puissance nominale P..................1800 W
Régime moteur n
....................2850 min
0
Pression de service max.
.......................... 1,0 MPa (10 bar)
P
max.
Poids m .........................................35 kg
Capacité du réservoir ....................... 50 l
Puissance d'aspiration .......env. 260 l/min
Type de protection ............................IPX0
Niveau de pression acoustique
) ................... 71,9 dB(A), KpA= 3 dB
(L
pA
Niveau de puissance acoustique (LWA)
mesuré ......... 90,9dB(A), KWA= 2,29dB
garanti ................................. 93 dB(A)
La valeur totale de vibrations déclarée a
été mesurée conformément à une méthode
d’essai normalisée et peut être utilisée pour
comparer un outil à un autre.
L’indication du fait que la valeur totale de
vibrations déclarée peut également être
utilisée pour une évaluation préliminaire de
l’exposition.
-1
25
Page 26
FR BE
Avertissement :
L’émission de vibration au cours de
l’utilisation réelle de l’outil électrique
peut différer de la valeur totale déclarée, selon les méthodes d’utilisation de l’outil.
Essayez de maintenir aussi faible
que possible la contrainte que
constituent les vibrations. Mesures
à titre d‘exemple pour réduire la
contrainte que constituent les vibrations : porter des gants lors de l‘utilisation de l‘outil et limiter le temps de
travail. Il faut à ce titre tenir compte
de toutes les parties du cycle d‘exploitation (par exemple les temps au
cours desquels l‘outil électroportatif
est éteint, et ceux au cours desquels
il est certes allumé mais fonctionne
hors charge).
Conseils de sécurité
Ce chapitre traite des consignes de sécurité de base lors du travail avec une
appareil.
Symboles utilisés dans le
mode d’emploi
Signes de danger avec con-
seils de prévention des accidents sur les personnes ou
des dégâts matériels
Pictogramme de danger avec
informations de prévention
des dommages aux personnes
par décharge électrique
Signes indicatifs avec conseils de
prévention des dégâts
26
Signes de conseils avec des infor-
mations pour une meilleure manipulation de l’appareil
Symboles sur l'appareil
Attention!
Risque d'électrocution!
Avertissement ! Un compresseur
peut démarrer de manière intempestive.
Attention - surface chaude.
Portez une protection auditive !
Veuillez lire attentivement le mode
d'emploi.
Les appareils électriques ne doivent
pas être jetés avec les déchets ménagers.
Information sur le niveau de puis-
sance acoustique LWA en dB
Consignes générales de sécurité relatives aux outils
électriques
Le terme "outil électrique" utilisé dans les
consignes de sécurité fait référence aux outils électriques branchés sur le réseau (avec
câble secteur) et aux outils électriques sans
l (sans câble secteur).
Travail en toute sécurité :
• Gardez votre zone de travail
rangée.
Le désordre dans la zone de travail
peut être source d'accidents.
• Tenez compte des conditions
ambiantes.
Page 27

FR BE
- N'exposez pas les outils électriques
à la pluie.
- N'utilisez pas d'outils électriques
dans un environnement humide ou
mouillé. La pénétration d'eau dans
l'appareil électrique augmente le
risque d'électrocution.
- Veillez à un bon éclairage du lieu
de travail.
- N'utilisez pas d'outils électriques
dans des lieux présentant un risque
d'incendie ou d'explosion. Les outils
électriques produisent des étincelles
pouvant mettre le feu à la poussière
ou aux vapeurs.
• Protégez-vous d'une électrocution.
Évitez un contact corporel avec des élé-
ments reliés à la terre (par ex. tuyaux,
radiateurs, cuisinières électriques, réfrigérateurs).
• Éloignez les autres personnes.
Ne laissez pas des personnes, en
particulier des enfants, toucher l'outil
électrique ou le câble. Éloignez-les de
votre zone de travail.
• Stockez des outils électriques
inutilisés dans un endroit sûr.
Les outils électriques inutilisés doivent
être déposés dans un endroit sec, en
hauteur ou fermé, hors de portée des
enfants. Il existe un risque de blessures.
• Ne surchargez pas votre outil
électrique.
Vous travaillez mieux et avec une plus
grande sécurité dans la plage de puissance donnée.
• Utilisez l'outil électrique adapté.
- N'utilisez pas de machines de faible
puissance pour des travaux lourds.
- N'utilisez pas l'outil électrique à des
ns pour lesquelles il n'est pas prévu. N'utilisez pas par exemple une
scie circulaire portative pour couper
des branches ou des bûches.
L'utilisation d'outils électriques pour
d'autres applications que celles prévues peut provoquer des situations dangereuses.
• Portez des vêtements adaptés.
Ne portez pas de vêtements trop
amples ni de bijoux, ils peuvent être
happés par les pièces mobiles.
- Pour travailler en extérieur, il est recommandé de porter des chaussures
antidérapantes.
- Si vous avez les cheveux longs, portez une résille.
• Utilisez un équipement de protection.
- Pour les travaux générateurs de
poussière, portez un masque respiratoire.
• N'utilisez pas le câble à des ns
auxquelles il n'est pas adapté.
N'utilisez pas le câble pour retirer la
che secteur de la prise. Protégez le
câble de la chaleur, de l'huile et des
bords coupants. Des câbles endommagés ou emmêlés augmentent le risque
d'électrocution.
• Évitez toute position anormale
du corps.
Veillez à avoir une position sûre et
maintenez toujours l'équilibre.
Cela permet de mieux contrôler l'outil
électrique dans une situation inattendue.
• Entretenez soigneusement vos
outils. Beaucoup d'accidents ont pour
origine des outils électriques mal entretenus.
- Respectez les consignes de graissage et de changement d'outils.
- Vériez régulièrement le câble secteur de l'outil électrique et en cas
d'endommagement, faites-le remplacer par un spécialiste agréé.
- Contrôlez régulièrement les ral-
27
Page 28

FR BE
longes et remplacez-les si elles sont
endommagées.
- Gardez les poignées sèches,
propres et exemptes d'huile et de
graisse.
• Débranchez la che secteur de
la prise de courant lorsque l'outil
électrique n'est pas utilisé, avant la
maintenance et lors de l'échange d'outils.
Cette mesure de précaution empêche
un démarrage involontaire de l'outil
électrique.
• Utilisez une rallonge destinée à
l'extérieur.
Utilisez à l'extérieur uniquement des
rallonges autorisées à cet effet et
conformément identiées.
• Soyez attentif.
Faites attention à ce que vous faites;
commencez le travail raisonnablement.
N'utilisez pas l'outil électrique si vous
n'êtes pas concentré. Un moment
d'inattention lors de l'utilisation de l'outil électrique peut entraîner de graves
blessures.
• Vériez si l'outil électrique présente des dommages éventuels.
Ainsi, la sécurité de l'appareil électrique est garantie.
- Avant de continuer à utiliser l'outil
électrique, vériez soigneusement
le bon fonctionnement conforme
des dispositifs de protection ou des
pièces légèrement endommagées.
- Vériez si les pièces mobiles fonctionnent impeccablement et ne
coincent pas ou si les pièces sont
endommagées. Toutes les pièces
doivent être correctement montées et
toutes les conditions remplies pour
garantir le fonctionnement impeccable de l'outil électrique.
- Des dispositifs de protection et
28
pièces endommagés doivent être
réparés ou remplacés correctement
par un atelier spécialisé agréé, sauf
mention contraire dans le mode
d'emploi.
- N'utilisez pas d'outils électriques
dont l'interrupteur ne peut être mis
en marche et hors service. Des interrupteurs endommagés doivent être
remplacés dans un atelier de service
après-vente.
• Attention !
L'utilisation d'autres outils à insérer et
d'autres accessoires peut entraîner un
risque de blessures.
• Faites réparer votre outil électrique par un électricien quali-
é. Cet outil électrique satisfait aux
dispositions pertinentes en matière de
sécurité. Les réparations ne doivent être
effectuées que par un atelier spécialisé qui utilise des pièces de rechange
d'origine ; dans le cas contraire, des
accidents peuvent survenir pour l'utilisateur.
• En cas d'endommagement du câble de
raccordement de cet appareil, celui-ci
doit être remplacé par le fabricant ou
son service après-vente ou un spécia-
liste du même secteur an d'éviter toute
mise en danger.
Autres risques
Même si vous utilisez cet outil électrique
de manière conforme, il existe malgré
tout d’autres risques. Les dangers suivants
peuvent se produire en fonction de la méthode de construction et du modèle de cet
outil électrique:
a) Coupures
b) Dommages affectant l’ouïe si aucune
protection d’ouïe appropriée n’est portée.
Page 29
FR BE
c) Blessures aux yeux, si aucune protec-
tion oculaire appropriée n‘est portée.
d) Ennuis de santé engendrés par les
vibrations affectant les bras et les
mains si l’appareil est utilisé pendant
une longue période ou s’il n’est pas
employé de manière conforme ou correctement entretenu.
Avertissement ! Pendant son fonc-
tionnement cet outil électrique produit un champ électromagnétique
qui, dans certaines circonstances,
peut perturber des implants médicaux actifs ou passifs. Pour diminuer le risque de blessures graves
ou mortelles, nous recommandons
aux personnes portant des implants
médicaux de consulter leur médecin
et le fabricant de l’implant médical
avant d’utiliser cette machine.
Mise en service
Montage de la poignée
étrier
1. Enfoncez la poignée étrier (7) sur le
support de la poignée étrier (10a) situé
sur le réservoir sous pression (10).
2. Vissez la poignée étrier (7) avec les
vis à six pans creux et la clé Allen (14)
fournie.
4. Enfoncez le capuchon de roue (16) sur
la roue (11).
5. Répétez les étapes 1 à 4 pour l'autre
roue.
Mise en marche/arrêt
1. Pour la mise en marche, basculez l'interrupteur Marche/Arrêt (6) dans la
position "I".
2. Pour la mise à l'arrêt, basculez l'interrupteur Marche/Arrêt (6) dans la position "0".
Utilisation
Monterleexibleàair
comprimé
1. Enfoncez le exible à air comprimé
(14) dans l'un des deux raccords ra-
pides (13). Le exible à air comprimé
(14) s'enclenche.
Démonter le exible à air comprimé
2. Enfoncez la bague de raccordement
sur le raccord rapide (13) vers l'ap-
pareil. Le exible à air comprimé (14)
bondit hors du raccord rapide (13).
3. Enfoncez l'outil pneumatique dans le
raccord rapide situé sur le exible à air
comprimé.
Consignes de travail
Monter les roues
1. Passez la vis de roue (17) par l'orice
dans la roue (11).
2. Passez la vis de roue (17) par l'orice
situé sur la tringlerie de roue.
3. Fixez la roue (11) avec l'écrou de
sécurité (18). Pour ce faire, aidez-vous
éventuellement d'une clé plate (non
fournie).
Régler l'air comprimé
La pression réglée peut être diminuée sur
les raccords rapides (13). Cette pression se
règle à l'aide du régulateur de pression (4)
et peut être lue sur le manomètre (pression
réglée) (5).
1. Pour augmenter, tournez le régulateur
de pression (4) dans le sens horaire.
29
Page 30
FR BE
2. Pour diminuer, tournez le régulateur de
pression (4) dans le sens anti-horaire.
Nettoyage et
maintenance
Éteignez l’appareil et débran-
chez sa che secteur avant
tous travaux sur l'appareil.
Faites effectuer les travaux de
réparation et de maintenance qui
ne sont pas mentionnés dans cette
notice par notre Centre de service
après-vente. Utilisez exclusivement
des pièces d'origine.
Effectuez régulièrement les travaux de
maintenance et de nettoyage suivants.
Cela garantit une durée d'utilisation
longue et able.
• N'obstruez jamais la fente d'aération
sur le corps de l'appareil, dans le cas
contraire, l'appareil surchauffe.
Nettoyezleltreàair
N'utilisez jamais l'appareil sans
ltre à air. Sinon, de la poussière et
de la saleté pénètrent dans le moteur et entraînent des dégradations.
Nettoyez la poussière et la saleté du ltre
à air (1a) env. toutes les 300 heures de
service an de pouvoir garantir un fonctionnement impeccable.
1. Retirez le couvercle du ltre à air (1).
2. Retirez le ltre à air (1a).
3. Tapotez le ltre à air (1a).
4. Nettoyez le ltre à air (1a) et le couvercle du ltre à air (1) avec un peu
d'air comprimé (env. 3 bar).
5. Remontez le ltre à air (1a) et le couvercle du ltre à air (1) dans l'ordre
inverse.
Vidanger l'eau de
condensation
Après chaque utilisation, videz l'eau de
condensation du réservoir sous pression
(10).
1. Ouvrez la vis de vidange (12).
2. Récupérez l'eau de condensation dans
un récipient adapté.
3. Basculez un peu vers l'avant pour évacuer le reste de l'eau de condensation.
4. Refermez la vis de vidange (12).
Vérierlasoupapede
sécurité
La soupape de sécurité sert à évacuer la
pression en cas de surpression dans le réservoir sous pression.
Actionnez la soupape de sécurité env.
toutes les 30 heures de service, mais au
minimum 3 fois par an an de garantir un
fonctionnement correct.
1. Démarrez l'appareil (voir "Mise en
marche/arrêt").
2. Tournez la soupape de sécurité (3)
dans le sens horaire pour ouvrir la soupape de sécurité (3). La soupape de
sécurité (3) devrait maintenant laisser
l'air s'échapper.
3. Tournez la soupape de sécurité (3)
dans le sens antihoraire pour refermer
la soupape de sécurité (3).
Stockage
• Rangez toujours les appareils et accessoires dans un endroit :
30
Page 31
FR BE
- sec.
- propre.
- exempt de poussière.
- hors de portée des enfants.
• Enroulez le câble secteur (9) autour du
support du câble secteur (19).
• Enroulez le exible à air comprimé
(14) autour de l’enroulement de exible
(8).
• Placez l'appareil le cas échéant debout.
• Évacuez la surpression dans le compresseur en éteignant le compresseur
et en utilisant l'air comprimé encore
présent dans le réservoir sous pression
(10).
• Vidangez l'eau de condensation. (voir
"Vidanger l'eau de condensation").
Transport
Utilisez la poignée étrier (7) pour déplacer
l'appareil. Pendant le transport, faites attention au poids de l'appareil.
Recyclage/Protection de
l'environnement
Introduisez l'appareil, les accessoires et
l'emballage dans un circuit de recyclage
respectueux de l'environnement.
Les appareils électriques ne doivent
pas être jetés avec les déchets ménagers.
• Restituez l'appareil dans un point de
collecte des déchets à recycler. Il est
possible de trier les pièces en plastique
et métalliques par matières et de les
introduire ainsi dans un circuit de recyclage. Pour cela, veuillez vous adresser
à notre centre de SAV.
• Nous effectuons gratuitement la mise
au rebut de votre appareil défectueux
retourné.
Pièces de rechange/
Accessoires
Vous obtiendrez des pièces de
rechange et
des accessoires à l’adresse
www.grizzlytools-service.eu
Si vous avez des problèmes lors du passage de la commande, merci d’utiliser
le formulaire de contact. Pour toute autre
question, adressez-vous au ”Service-Center” (voir page 35).
Position Désignation n° de commande
14 Tuyau à air comprimé 10m 91105933
1a Filtre à air 91105932
11 Ensemble roue 91105929
8 Enroulement de exible 91105930
12 Vis de vidange 91105928
6 Interrupteur Marche/Arrêt 91105931
13 Ensemble raccords rapide 91105926
31
Page 32

FR BE
Garantie - France
Chère cliente, cher client,
Ce produit bénécie d’une garantie de
3ans, valable à compter de la date
d’achat.
En cas de manques constatés sur ce
produit, vous disposez des droits légaux
contre le vendeur du produit. Ces droits légaux ne sont pas limités par notre garantie
présentée par la suite.
Article L217-4 du Code de la
consommation
Le vendeur livre un bien conforme au
contrat et répond des défauts de conformité existant lors de la délivrance.
Il répond également des défauts de
conformité résultant de l‘emballage, des
instructions de montage ou de l‘installation
lorsque celle-ci a été mise à sa charge par
le contrat ou a été réalisée sous sa responsabilité.
Article L217-5 du Code de la
consommation
Le bien est conforme au contrat :
1° S´il est propre à l‘usage habituellement
attendu d‘un bien semblable et, le cas
échéant :
- s‘il correspond à la description donnée
par le vendeur et posséder les qualités
que celui-ci a présentées à l‘acheteur
sous forme d‘échantillon ou de mo-
dèle;
- s‘il présente les qualités qu‘un acheteur
peut légitimement attendre eu égard
aux déclarations publiques faites par le
vendeur, par le producteur ou par son
représentant, notamment dans la publicité ou l‘étiquetage ;
2° Ou s‘il présente les caractéristiques dé-
nies d‘un commun accord par les parties
ou être propre à tout usage spécial recher-
ché par l‘acheteur, porté à la connaissance
du vendeur et que ce dernier a accepté.
Article L217-16 du Code de la
consommation
Lorsque l‘acheteur demande au vendeur,
pendant le cours de la garantie commerciale qui lui a été consentie lors de l‘acquisition ou de la réparation d‘un bien meuble,
une remise en état couverte par la garantie,
toute période d‘immobilisation d‘au moins
sept jours vient s‘ajouter à la durée de la
garantie qui restait à courir. Cette période
court à compter de la demande d‘intervention de l‘acheteur ou de la mise à disposition pour réparation du bien en cause, si
cette mise à disposition est postérieure à la
demande d‘intervention.
Indépendamment de la garantie commerciale souscrite, le vendeur reste tenu des
défauts de conformité du bien et des vices
rédhibitoires dans les conditions prévues
aux articles L217-4 à L217-13 du Code de
la consommation et aux articles 1641 à
1648 et 2232 du Code Civil.
Article L217-12 du Code de la
consommation
L‘action résultant du défaut de conformité
se prescrit par deux ans à compter de la
délivrance du bien.
Conditions de garantie
Le délai de garantie débute avec la date
d’achat. Veuillez conserver soigneusement
le ticket de caisse original. En effet, ce document vous sera réclamé comme preuve
d’achat.
Si un défaut de matériel ou un défaut de
fabrication se présente au cours des trois
ans suivant la date d’achat de ce produit,
nous réparons gratuitement ou remplaçons
ce produit - selon notre choix. Cette garan-
32
Page 33

FR BE
tie suppose que l’appareil défectueux et le
justicatif d’achat (ticket de caisse) nous
soient présentés durant cette période de
trois ans et que la nature du manque et la
manière dont celui-ci est apparu soient explicités par écrit dans un bref courrier.
Si le défaut est couvert par notre garantie,
le produit vous sera retourné, réparé ou
remplacé par un neuf. Aucune nouvelle période de garantie ne débute à la date de
la réparation ou de l’échange du produit.
Durée de garantie et demande légale en
dommages-intérêts
La durée de garantie n’est pas prolongée
par la garantie. Ce point s’applique aussi
aux pièces remplacées et réparées. Les
dommages et les manques éventuellement
constatés dès l’achat doivent immédiatement être signalés après le déballage. A
l’expiration du délai de garantie les réparations occasionnelles sont à la charge de
l’acheteur.
Volume de la garantie
L’appareil a été fabriqué avec soin, selon
de sévères directives de qualité et il a été
entièrement contrôlé avant la livraison.
La garantie s’applique aux défauts de matériel ou aux défauts de fabrication.
Cette garantie ne s’applique pas aux
consommables. Les pièces d’usure sont
remplacées pendant les deux premières
années à compter de la date d’achat.
Cette garantie prend n si le produit endommagé n’a pas été utilisé ou entretenu
d’une façon conforme. Il en va de même
pour des dommages provoqués par l’eau,
le gel, la foudre ou le feu ou un transport
inadapté. Pour une utilisation appropriée
du produit, il faut impérativement respecter
toutes les instructions citées dans le manuel
de l’opérateur. Les actions et les domaines
d’utilisation déconseillés dans la notice
d’utilisation ou vis-à-vis desquels une mise
en garde est émise, doivent absolument
être évités.
Le produit est conçu uniquement pour un
usage privé et non pour un usage industriel. En cas d’emploi impropre et incorrect,
de recours à la force et d’interventions
entreprises et non autorisées par notre suc-
cursale, la garantie prend n.
Les pièces détachées indispensables à
l’utilisation du produit sont disponibles pendant la durée de la garantie du produit.
Article 1641 du Code civil
Le vendeur est tenu de la garantie à raison
des défauts cachés de la chose vendue qui
la rendent impropre à l‘usage auquel on
la destine, ou qui diminuent tellement cet
usage que l‘acheteur ne l‘aurait pas acquise, ou n‘en aurait donné qu‘un moindre
prix, s‘il les avait connus.
Article 1648 1er alinéa du Code civil
L‘action résultant des vices rédhibitoires
doit être intentée par l‘acquéreur dans un
délai de deux ans à compter de la découverte du vice.
Marche à suivre dans le cas de garantie
Pour garantir un traitement rapide de votre
demande, veuillez suivre les instructions
suivantes :
• Tenez vous prêt à présenter, sur demande, le ticket de caisse et le numéro
d’identication (IAN356332_2004)
comme preuve d’achat.
• Vous trouverez le numéro d’article sur
la plaque signalétique.
• Si des pannes de fonctionnement ou
d’autres manques apparaissent, prenez
d’abord contact, par téléphone ou par
e-Mail, avec le service après-vente
dont les coordonnées sont indiquées
33
Page 34

FR BE
ci-dessous. Vous recevrez alors des
renseignements supplémentaires sur le
déroulement de votre réclamation.
• En cas de produit défectueux vous pouvez, après contact avec notre service
clients, envoyer le produit, franco de
port à l’adresse de service après-vente
indiquée, accompagné du justicatif
d’achat (ticket de caisse) et en indiquant quelle est la nature du défaut et
quand celui-ci s’est produit. Pour éviter
des problèmes d’acceptation et des
frais supplémentaires, utilisez absolument seulement l’adresse qui vous est
donnée. Assurez-vous que l’expédition
ne se fait pas en port dû, comme marchandises encombrantes, envoi express
ou autre taxe spéciale. Veuillez renvoyer l’appareil, y compris tous les accessoires livrés lors de l’achat et prenez
toute mesure pour avoir un emballage
de transport sufsamment sûr.
Garantie - Belgique
Chère cliente, cher client,
Ce produit bénécie d’une garantie de 3
ans, valable à compter de la date d’achat.
En cas de manques constatés sur ce
produit, vous disposez des droits légaux
contre le vendeur du produit. Ces droits légaux ne sont pas limités par notre garantie
présentée par la suite.
Conditions de garantie
Le délai de garantie débute avec la date
d’achat. Veuillez conserver soigneusement
le ticket de caisse original. En effet, ce document vous sera réclamé comme preuve
d’achat.
Si un défaut de matériel ou un défaut de
fabrication se présente au cours des trois
ans suivant la date d’achat de ce produit,
nous réparons gratuitement ou remplaçons
ce produit - selon notre choix. Cette garantie suppose que l’appareil défectueux et le
justicatif d’achat (ticket de caisse) nous
soient présentés durant cette période de
trois ans et que la nature du manque et la
manière dont celui-ci est apparu soient explicités par écrit dans un bref courrier.
Si le défaut est couvert par notre garantie,
le produit vous sera retourné, réparé ou
remplacé par un neuf. Aucune nouvelle période de garantie ne débute à la date de
la réparation ou de l’échange du produit.
Durée de garantie et demande légale en dommages-intérêts
La durée de garantie n’est pas prolongée
par la garantie. Ce point s’applique aussi
aux pièces remplacées et réparées. Les
dommages et les manques éventuellement
constatés dès l’achat doivent immédiatement être signalés après le déballage. A
l’expiration du délai de garantie les réparations occasionnelles sont à la charge de
l’acheteur.
Volume de la garantie
L’appareil a été fabriqué avec soin, selon
de sévères directives de qualité et il a été
entièrement contrôlé avant la livraison.
La garantie s’applique aux défauts de
matériel ou aux défauts de fabrication.
Cette garantie ne s’étend pas aux parties
du produit qui sont exposées à une usure
normale et peuvent être donc considérées
comme des pièces d’usure (par exemple la
ltre à air, exible à air comprimé) ou pour
des dommages affectant les parties fragiles
(par exemple les commutateurs).
Cette garantie prend n si le produit endommagé n’a pas été utilisé ou entretenu
d’une façon conforme. Pour une utilisation
appropriée du produit, il faut impérativement respecter toutes les instructions citées
dans le manuel de l’opérateur. Les actions
34
Page 35
FR BE
et les domaines d’utilisation déconseillés
dans la notice d’utilisation ou vis-à-vis desquels une mise en garde est émise, doivent
absolument être évités.
Marche à suivre dans le cas de
garantie
Pour garantir un traitement rapide de votre
demande, veuillez suivre les instructions
suivantes :
• Tenez vous prêt à présenter, sur de-
mande, le ticket de caisse et le numéro
d’identication (IAN356332_2004)
comme preuve d’achat.
• Vous trouverez le numéro d’article sur
la plaque signalétique.
• Si des pannes de fonctionnement ou
d’autres manques apparaissent, prenez
d’abord contact, par téléphone ou par
e-Mail, avec le service après-vente
dont les coordonnées sont indiquées
ci-dessous. Vous recevrez alors des
renseignements supplémentaires sur le
déroulement de votre réclamation.
• En cas de produit défectueux vous pou-
vez, après contact avec notre service
clients, envoyer le produit, franco de
port à l’adresse de service après-vente
indiquée, accompagné du justicatif
d’achat (ticket de caisse) et en indiquant quelle est la nature du défaut et
quand celui-ci s’est produit. Pour éviter
des problèmes d’acceptation et des
frais supplémentaires, utilisez absolument seulement l’adresse qui vous est
donnée. Assurez-vous que l’expédition
ne se fait pas en port dû, comme marchandises encombrantes, envoi express
ou autre taxe spéciale. Veuillez renvoyer l’appareil, y compris tous les accessoires livrés lors de l’achat et prenez
toute mesure pour avoir un emballage
de transport sufsamment sûr.
Service Réparations
Vous pouvez, contre paiement, faire exécuter par notre service, des réparations
qui ne font pas partie de la garantie. Nous
vous enverrons volontiers un devis estimatif.
Nous ne pouvons traiter que des appareils
qui ont été correctement emballés et qui
ont envoyés sufsamment affranchis.
Attention: veuillez renvoyer à notre agence
de service votre appareil nettoyé et avec
une note indiquant le défaut constaté.
Les appareils envoyés en port dû - comme
marchandises encombrantes, en envoi
express ou avec toute autre taxe spéciale
ne seront pas acceptés. Nous exécutons
gratuitement la mise aux déchets de vos
appareils défectueux renvoyés.
Service-Center
Service France
FR
IAN 356332_2004
Service Belgique
BE
IAN 356332_2004
Importateur
Veuillez noter que l’adresse suivante n’est
pas une adresse de service après-vente.
Contactez d’abord le service après-vente
cité plus haut.
Grizzly Tools GmbH & Co. KG
Stockstädter Straße 20
63762 Großostheim
ALLEMAGNE
www.grizzlytools-service.eu
35
Page 36

NL BE
Inhoud
Inleiding ....................................36
Reglementair gebruik ................36
Algemene beschrving ...............36
Inhoud van het pakket .....................37
Beschrving van de werking ............. 37
Overzicht ....................................... 37
Technische specicaties ..............37
Veiligheidsvoorschriften .............38
Symbolen in de handleiding ............. 38
Algemene veiligheidsinstructies voor
elektrisch gereedschap ....................38
Restrisico´s .....................................40
Inbedrfstelling ..........................41
Beugelgreep monteren .....................41
Wielen monteren ............................41
In-/uitschakelen ..............................41
Het apparaat bedienen ..............41
Persluchtslang monteren ...................41
Werkinstructies ..........................41
Perslucht instellen ............................41
Reiniging en onderhoud .............41
Luchtlter reinigen ...........................42
Condenswater aftappen ...................42
Veiligheidsventiel controleren ............42
Opslag .......................................42
Transport ...................................43
Afval/milieubescherming ...........43
Reserveonderdelen/Accessoires ..43
Garantie ....................................44
Reparatieservice ........................45
Service-Center ............................45
Importeur ..................................45
Vertaling van de originele CE-
conformiteitsverklaring ..............78
Explosietekening ..................83/84
Inleiding
Hartelk gefeliciteerd met de aankoop van
uw nieuw apparaat. Daarmee hebt u voor
een hoogwaardig apparaat gekozen.
Dit apparaat werd tdens de productie op
kwaliteit gecontroleerd en aan een eindcontrole onderworpen. De functionaliteit
van uw apparaat is bgevolg verzekerd.
De gebruiksaanwzing vormt een
bestanddeel van dit apparaat.
Ze omvat belangrke aanwzingen voor
veiligheid, gebruik en afvalverwdering.
Maak u vóór het gebruik van het apparaat
met alle bedienings- en veiligheidsinstructies vertrouwd. Gebruik het apparaat
uitsluitend zoals beschreven en voor de
aangegeven toepassingsgebieden. Bewaar de handleiding goed en overhandig
alle documenten b het doorgeven van het
apparaat mee aan derden.
Reglementair gebruik
De compressor is bedoeld om met pers-
lucht aangedreven gereedschappen (bv.
bandenpomp, blaaspistool en verfpistool)
te laten werken. Het apparaat is niet
geschikt voor het bedienen van gereedschappen die veel perslucht nodig hebben.
Elk ander gebruik kan leiden tot schade
aan het apparaat en een ernstig risico
voor de gebruiker. Deze apparaten zn
niet bedoeld voor commercieel gebruik. B
commercieel gebruik vervalt de garantie.
De fabrikant is niet aansprakelk voor
schade die voortvloeit uit oneigenlk ge-
bruik of uit een foute bediening.
36
Algemenebeschrving
De afbeeldingen vindt u op de
uitklapbare pagina’s.
Page 37
NL BE
Inhoud van het pakket
Pak het apparaat uit en controleer of het
volledig is.
• Compressor
• Beugelgreep
• 2 wielen
• Montagemateriaal
• 10 m Persluchtslang
• Inbussleutel
• Gebruiksaanwzing
Voer het verpakkingsmateriaal af zoals
reglementair voorgeschreven.
Beschrvingvandewerking
De compressor is bedoeld om met perslucht aangedreven gereedschappen laten
werken.
De werking van de verschillende bedieningsonderdelen is hieronder beschreven.
Overzicht
1 Luchtlterdeksel
2 Manometer (drukketel)
3 Veiligheidsventiel
4 Drukregelaar
5 Manometer (ingestelde druk)
6 Aan-/uitknop
7 Beugelgreep
8 Slangwikkeling
9 Netsnoer
10 Drukketel
11 Wiel
12 Aftapschroef
13 Snelkoppelingen
14 Persluchtslang
15 Inbussleutel
7a Inbusbout
10a Houder voor de beugelgreep
16 Wieldop
17 Wielschroef
18 Borgmoer
1a Luchtlter
19 Houder voor netsnoer
Technischespecicaties
Verticale compressor 50 l ....... PVKO 50 A1
Nominale spanning U........ 230 V~; 50Hz
Nominaal vermogen P ................1800 W
Motortoerental n
max. werkdruk P
....................2850 min
0
........ 1,0 MPa (10 bar)
max
Gewicht m ....................................35 kg
Ketelvolume ..................................... 50 l
Aanzuigleiding .................. ca. 260 l/min
Beschermingsgraad .......................... IPX0
Geluidsdrukniveau
) ................... 71,9 dB(A), KpA= 3 dB
(L
pA
Geluidsvermogenniveau (LWA)
gemeten ........ 90,9 dB(A), K
= 2,29 dB
pA
gegarandeerd ....................... 93 dB(A)
De aangegeven trillingemissiewaarde
werd volgens een genormaliseerd testme-
thode gemeten en kan ter vergelking van
een stuk elektrisch gereedschap met een
ander gebruikt worden.
De aangegeven trillingemissiewaarde kan
ook voor een inleidende inschatting van de
blootstelling benut worden.
Waarschuwing:
Afhankelk van de manier, waar-
op het elektrische gereedschap
gebruikt wordt, kan de trilingemis-
siewaarde tdens het effectieve
gebruik van het elektrische gereedschap van de aangegeven waarde
verschillen.
Probeer de belasting door trillingen
zo gering mogelk te houden.
-1
37
Page 38
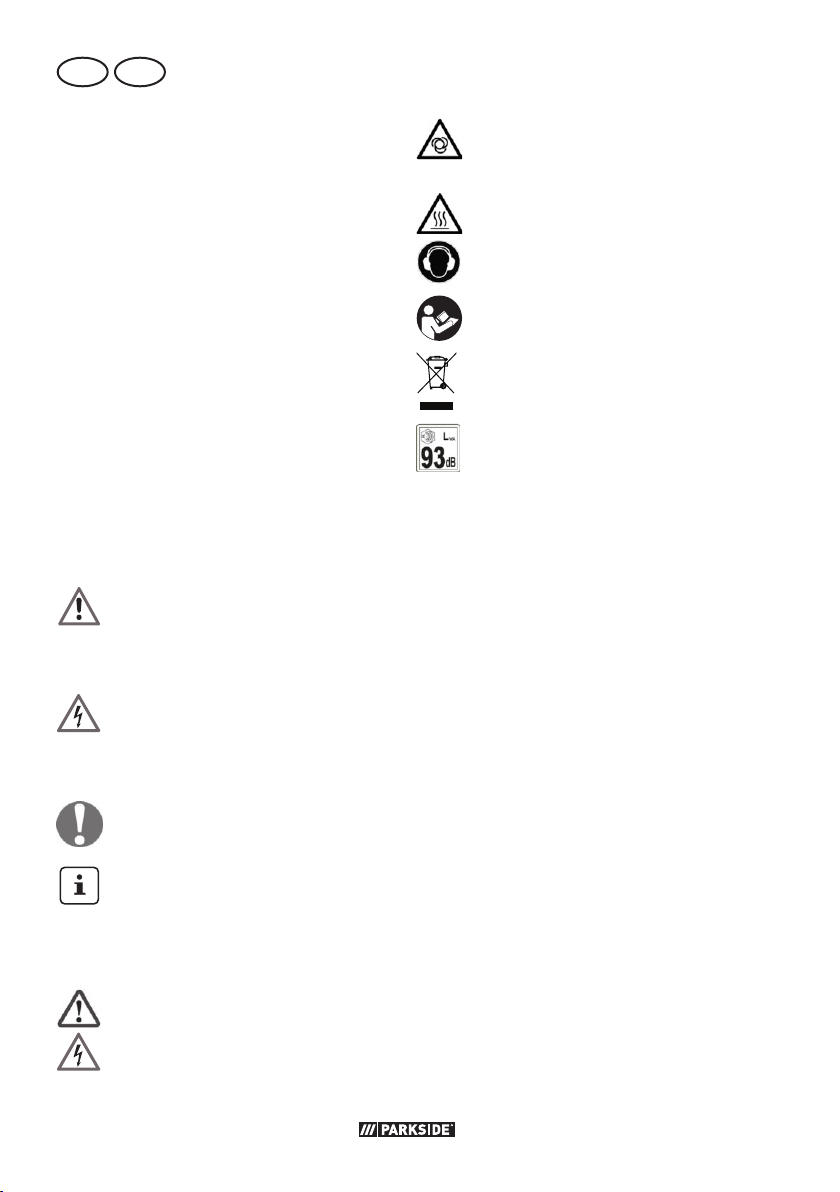
NL BE
Voorbeeldmaatregelen voor de re-
ductie van trillingsbelasting zn het
dragen van handschoenen b het
gebruik van het gereedschap en de
beperking van de werktd. Daarb
moeten alle delen van de bedrfscyclus in acht worden genomen (b
voorbeeld tden, waarop het elek-
trische werktuig is uitgeschakeld en
tden waarin het weliswaar is ingeschakeld, maar zonder belasting
draait).
Veiligheidsvoorschriften
Dit gedeelte behandelt de fundamentele
veiligheidsrichtlnen b het werken met de
aparat.
Symbolen in de handleiding
Gevaarsymbolen met gege-
vens ter preventie van licha-
melke letsels en materiële
schade
Waarschuwingsbord met in-
formatie voor het voorkomen
van letsels door elektrische
schok
Gebodsteken met gegevens ter pre-
ventie van beschadigingen
Aanwzingsteken met informatie
voor een betere omgang met het
apparaat
Pictogrammen op het apparaat
Let op!
Gevaar voor elektrische schok!
Waarschuwing! Compressorinstal-
latie kan zonder waarschuwing
aanlopen.
Let op - heet oppervlak
Draag gehoorbescherming!
Lees zorgvuldig de gebruiksaanw-
zing door.
Elektrische apparaten horen niet
thuis b het huisvuil.
Specicatie van het geluidsvermo-
gensniveau LWA in dB
Algemene veiligheidsinstructies voor elektrisch gereedschap
Het in de veiligheidsaanwzingen gebruikte begrip "elektrisch gereedschap" heeft
betrekking op elektrische gereedschap dat
op netstroom werkt (via een netsnoer) of
op accustroom (zonder netsnoer).
Veilig werken:
• Houd uw werkplek op orde.
Wanorde op de werkplek kan ongeluk-
ken veroorzaken.
• Houd rekening met omgevingsinvloeden.
- Stel het elektrische werktuig niet
bloot aan regen.
- Gebruik het elektrische werktuig niet
in een vochtige of natte omgeving.
Het binnendringen van water in een
elektrisch apparaat verhoogt het risico op een elektrische schok.
- Zorg voor een goede ventilatie van
de werkplek.
- Gebruik het elektrische werktuig
niet waar brand- of explosiegevaar
38
Page 39

NL BE
bestaat. Elektrisch gereedschap produceert vonken, die het stof of de
dampen kunnen ontsteken.
• Bescherm uzelf tegen elektrische
schok.
Vermd lichamelk contact met geaar-
de delen (bv. leidingen, radiatoren,
elektrische kachels, koelapparatuur).
• Houd het apparaat uit de buurt
van andere personen. Laat an-
dere mensen, vooral kinderen, het
elektrische werktuig of het snoer niet
aanraken. Houd ze uit de buurt van uw
werkplek.
• Bewaar het ongebruikte elektrische werktuig op een veilige
plaats.
Ongebruikt elektrisch gereedschap
moet op een droge, hoge of afgesloten
plaats worden bewaard, buiten bereik
van kinderen. Er bestaat een risico op
verwondingen.
• Overbelast uw elektrisch werktuig niet.
U werkt beter en veiliger in het aangegeven vermogensbereik.
• Gebruik het juiste elektrische
werktuig.
- Gebruik apparaten met een laag
vermogen niet voor zware werkzaamheden.
- Gebruik het apparaat niet voor
doeleinden waarvoor het niet be-
doeld is. Gebruik bvoorbeeld geen
cirkelzaag om boomtakken of stammen te zagen.
Het gebruiken van elektrisch gereed-
schap voor andere dan de bedoelde
toepassingen kan leiden tot gevaarlke
situaties.
• Draag gepaste werkkled.
- Draag geen losse kleding of juwelen, u zou kunnen worden gegrepen
door bewegende delen.
- Antislipschoenen worden aanbevolen wanneer buitenshuis wordt
gewerkt.
- Draag b lang haar een haarnetje.
• Gebruik beschermende uitrusting.
- Gebruik een ademhalingsmasker b
werkzaamheden waarb stof vr-
komt.
• Gebruik het netsnoer niet voor
doeleinden waarvoor het niet
bedoeld is.
Trek niet aan het netsnoer om de
stekker uit het stopcontact te halen.
Bescherm het netsnoer tegen hitte, olie
en scherpe randen. Beschadigde of
verwarde kabels verhogen het risico op
elektrische schokken.
• Vermd een abnormale lichaamshouding.
Zorg ervoor dat u stevig en veilig staat
en behoud uw evenwicht.
Op die manier kunt u het elektrische
gereedschap in onverwachte situaties
beter onder controle houden.
• Onderhoud uw gereedschap
met zorg. Veel ongevallen zn te w-
ten aan slecht onderhouden elektrische
gereedschappen.
- Volg de instructies voor smering en
werktuigwisseling.
– Controleer de aansluitkabel van het
elektrische werktuig regelmatig en
laat deze door een erkende specialist vervangen als deze beschadigd
is.
- Controleer de verlengkabels regelmatig en vervang ze als ze bescha-
digd zn.
- Houd de handgrepen droog,
schoon en vr van olie en vet.
• Trek het snoer uit het stopcontact b niet-gebruik van het elektrische
gereedschap, voorafgaand aan het
39
Page 40

NL BE
onderhoud en b de wisseling van
werktuigen.
Deze voorzorgsmaatregel voorkomt
een onverwachte, ongewenste start
van het elektrische gereedschap.
• Gebruik verlengkabels voor buitenshuis.
Gebruik in de openlucht alleen daarvoor toegestane en overeenkomstig
gemarkeerde verlengsnoeren.
• Wees alert.
Let op wat u doet en ga verstandig te
werk. Gebruik het elektrische werktuig
niet als u zich niet geconcentreerd
bent. Eén moment van onoplettendheid
tdens het gebruik van het apparaat
kan leiden tot ernstige letsels.
• Controleer het elektrisch werktuig op eventuele beschadigingen.
Zo wordt gegarandeerd dat de veiligheid van het elektrische werktuig
behouden blft.
- Voordat het elektrische werktuig
verder wordt gebruikt, moeten
beschermingsmiddelen of licht beschadigde onderdelen zorgvuldig
worden gecontroleerd op hun juiste
en beoogde functie.
- Controleer of de bewegende delen
probleemloos functioneren en niet
klemmen en dat er geen delen be-
schadigd zn. Alle onderdelen moeten correct gemonteerd zn en aan
alle voorwaarden voldoen om de
probleemloze werking van het elektrische gereedschap te garanderen.
- Beschadigde beschermingsmiddelen en onderdelen moeten worden
gerepareerd of vervangen door
een erkende gespecialiseerde werk-
plaats, tenz anders vermeld in de
gebruiksaanwzing.
- Gebruik geen elektrisch gereed-
schap waarvan de schakelaar niet
kan worden in- en uitgeschakeld.
Beschadigde schakelaars moeten in
een werkplaats van de klantendienst
vervangen worden.
• Opgelet!
Het gebruik van andere aan te sluiten
werktuigen en andere accessoires kan
risico's op verwondingen voor u opleveren.
• Laat uw elektrisch werktuig
repareren door een gekwaliceerde elektricien. Dit elektrisch
werktuig voldoet aan de relevante
veiligheidsvoorschriften. Reparaties
mogen alleen worden uitgevoerd door
een gespecialiseerde werkplaats met
originele reserveonderdelen; anders
kunnen er ongelukken gebeuren voor
de gebruiker.
• Als het netsnoer van dit apparaat
beschadigd is, moet het worden vervangen door de fabrikant of diens
klantendienst of een vergelkbaar
gekwaliceerd persoon, om gevaren te
voorkomen.
Restrisico´s
Ook als u dit elektrische gereedschap zo-
als voorgeschreven bedient, blven er altd restrisico’s bestaan. Volgende gevaren
kunnen zich in verband met de construc-
tiewze en uitvoering van dit elektrische
gereedschap voordoen:
a) Sndwonden
b) Gehoorschade indien er geen ge-
schikte gehoorbescherming gedragen
wordt.
c) Oogletsel, wanneer geen geschikte
oogbescherming wordt gedragen.
d) Schade aan de gezondheid, die van
hand-/armtrillingen het gevolg zn
40
Page 41
NL BE
indien het apparaat gedurende een
langere periode gebruikt wordt of niet
zoals reglementair voorgeschreven beheerd en onderhouden wordt.
Waarschuwing! Dit elektrische
gereedschap produceert tdens
de werking een elektromagnetisch
veld. Dit veld kan in bepaalde omstandigheden actieve of passieve
medische implantaten in negatieve
zin beïnvloeden. Om het gevaar
voor ernstige of dodelke verwondingen te verminderen, adviseren
w personen met medische implantaten, hun arts en de fabrikant van
het medische implantaat te raadplegen voordat de machine bediend
wordt.
Inbedrfstelling
Beugelgreep monteren
1. Druk de beugelgreep (7) in de houder
voor beugelgreep (10a) aan de drukketel (10).
2. Bevestig de beugelgreep (7) met de
meegeleverde inbusbouten en inbussleutel (14).
Wielen monteren
In-/uitschakelen
1. Om het apparaat in te schakelen, kipt
u de aan-/uitschakelaar (6) in positie
„I“.
2. Om het apparaat uit te schakelen, kipt
u de aan-/uitschakelaar (6) in positie
„0“.
Het apparaat bedienen
Persluchtslang monteren
1. Druk de persluchtslang (14) in één van
de twee snelkoppelingen (13). Die persluchtslang (14) klikt vast.
Persluchtslang demonteren
2. Druk de koppelring op de snelkoppeling (13) naar het apparaat. De persluchtslang (14) springt uit de snelkoppeling (13).
3. Druk het persluchtgereedschap in de
snelkoppeling op de persluchtslang.
Werkinstructies
Perslucht instellen
De insteldruk kan worden afgetapt uit de
snelkoppelingen (13). Deze druk is in te
stellen met de drukregelaar (4) en afgelezen op de manometer (insteldruk) (5).
1. Leid de wielschroef (17) door het gat in
het wiel (11).
2. Leid de wielschroef (17) door het gat in
de wielstang.
3. Bevestig het wiel (11) met de borgmoer
(18). Gebruik evt. als hulp een sleutel
(niet meegeleverd).
4. Duw de wieldop (16) op het wiel (11).
5. Herhaal stappen 1-4 voor het andere
wiel.
1. Voor het verhogen van de druk draait u
de drukregelaar (4) naar rechts.
2. Voor het verlagen van de druk draait u
de drukregelaar (4) naar links.
Reiniging en onderhoud
Schakel het apparaat uit en
haal voor alle werkzaamheden aan het apparaat de
netstekker uit het stopcontact.
41
Page 42
NL BE
Laat reparatiewerkzaamheden en
onderhoud, die niet zn beschreven
in deze handleiding, uitvoeren door
een gespecialiseerd service-center.
Gebruik uitsluitende originele delen.
Voer de volgende onderhouds- en reinigingswerkzaamheden regelmatig uit.
Daardoor is een lange levensduur en een
betrouwbare werking gegarandeerd.
• Houd de ventilatiegaten op de behuizing van het apparaat altd vr, anders oververhit het apparaat.
Luchtlterreinigen
Gebruik het apparaat nooit zonder
luchtlter. Anders kan stof en vuil in
de motor dringen en schade veroorzaken.
Verwder stof en vuil van het luchtlter (1a)
ongeveer elke 300 bedrfsuren om er zeker van te zn dat het goed werkt.
1. Neem het luchtlterdeksel(1) af.
2. Neem het luchtlter (1a) eruit.
3. Klop het luchtlter (1a) uit.
4. Reinig het luchtlter (1a) en het luchtl-
terdeksel (1) met een beetje perslucht
(ca. 3 bar).
5. Plaats het luchtlter (1a) en het luchtlterdeksel (1) in omgekeerde volgorde
terug.
Condenswater aftappen
Tap na elk gebruik het condenswater uit de
drukketel (10).
1. Open de aftapschroef (12).
2. Vang het condenswater op in een geschikt reservoir.
42
3. Kantel een beetje naar voren om de
resterende condens af te tappen.
4. Sluit de aftapschroef (12) weer.
Veiligheidsventiel
controleren
Het veiligheidsventiel wordt gebruikt om
druk af te laten b overdruk in de drukketel.
Bedien de veiligheidsklep ongeveer om de
30 bedrfsuren, maar minstens 3 keer per
jaar, om een correcte werking te garanderen.
1. Start het apparaat (zie „Aan-/uitschakelen“.
2. Draai de veiligheidsklep (3) rechtsom
om de veiligheidsklep (3) te openen.
Het veiligheidsventiel (3) moet nu lucht
laten ontsnappen.
3. Draai de veiligheidsklep (3) linksom om
de veiligheidsklep (3) weer te sluiten.
Opslag
• Opslag van het apparaat en accessoires gebeurt steeds:
- droog.
- zuiver.
- stofvr.
- buiten het bereik van kinderen.
• Wikkel het netsnoer (9) rond de houder
voor het netsnoer (19).
• Wikkel de persluchtslang (14) om de
motorafdekking.
• Plaats het apparaat evt. rechtop.
• Laat de overdruk in de compressor
ontsnappen door de compressor uit te
schakelen en de perslucht te gebruiken
die zich nog in het drukvat (10) bevindt.
• Tap het condenswater af. (zie („Condenswater aftappen“).
Page 43
NL BE
Transport
Gebruik de beugelgreep (7) om het appa-
raat te besturen. Let b het vervoeren op
het gewicht van het apparaat.
Afval/
milieubescherming
Voer afgedankte apparaten, toebehoren
en verpakkingsmaterialen op milieuvrien-
delke manier af.
• Lever het apparaat in b een recycle-
punt. De gebruikte kunststoffen en metalen delen kunnen naar soort worden
gescheiden en gerecycled. Vraag ons
service-center om advies.
• We voeren gratis uw defecte, ingezon-
den apparaten af.
Reserveonderdelen/
Accessoires
Reserveonderdelen en accessoi-
res verkrgt u op
Elektrische apparaten horen niet
thuis b het huisvuil.
Pos. Benaming bestelnummers
14 Persluchtslang 10 m 91105933
1a Luchtlter 91105932
11 Wielset 91105929
8 Slangwikkeling 91105930
12 Aftapschroef 91105928
6 Aan-/uitschakelaar 91105931
13 Snelkoppelingen-set 91105926
www.grizzlytools-service.eu
Ondervindt u problemen b het orderproces, gebruik dan het contactformulier.
B andere vragen neemt u contact op met
het “Service-Center” (zie pag. 45).
43
Page 44

NL BE
Garantie
Geachte cliënte, geachte klant,
U krgt op dit apparaat 3 jaar garantie,
te rekenen vanaf de datum van aankoop.
Ingeval van gebreken aan dit product heeft
u tegenover de verkoper van het product
wettelke rechten. Deze wettelke rechten
worden door onze hierna beschreven garantie niet beperkt.
Garantievoorwaarden
De garantietermn begint met de datum
van aankoop. Gelieve de originele kassabon goed te bewaren. Dit document wordt
als bews van de aankoop benodigd.
Indien er zich binnen drie jaar, te rekenen
vanaf de datum van aankoop van dit product, een materiaal- of fabricagefout voordoet, wordt het product door ons – naar
onze keuze – voor u gratis gerepareerd of
vervangen. Deze garantievergoeding stelt
voorop dat binnen de termn van drie jaar
het defecte apparaat en het bews van
aankoop (kassabon) voorgelegd en dat
schriftelk kort beschreven wordt, waarin
het gebrek bestaat en wanneer het zich
voorgedaan heeft.
Als het defect door onze garantie gedekt
is, krgt u het gerepareerde of een nieuw
product terug. Met herstelling of uitwisseling van het product begint er geen nieuwe
garantieperiode.
Garantieperiode en wettelke
kwaliteitsgarantie
De garantieperiode wordt door de garantievergoeding niet verlengd. Dit geldt ook
voor vervangen en gerepareerde onderdelen. Eventueel al b de aankoop bestaande beschadigingen en gebreken moeten
onmiddellk na het uitpakken gemeld
worden. Na het verstrken van de garan-
tieperiode tot stand komende reparaties
worden tegen verplichte betaling van de
kosten uitgevoerd.
Omvang van de garantie
Het apparaat werd volgens strikte kwali-
teitsrichtlnen zorgvuldig geproduceerd en
vóór aevering nauwgezet getest.
De garantievergoeding geldt voor materiaal- of fabricagefouten. Deze garantie is
niet van toepassing op productonderdelen,
die aan een normale sltage blootgesteld
zn en daarom als aan sltage onderhevi-
ge onderdelen beschouwd kunnen worden
(b.v. ventieladapter, persluchtslang) of op
beschadigingen aan breekbare onderdelen (b.v. schakelaars).
Deze garantie valt weg wanneer het product beschadigd, niet oordeelkundig gebruikt of niet onderhouden werd. Voor een
vakkundig gebruik van het product dienen
alle in de gebruiksaanwzing vermelde
aanwzingen nauwgezet in acht genomen
te worden. Gebruiksdoeleinden en handelingen, die in de gebruiksaanwzing afgeraden worden of waarvoor gewaarschuwd
wordt, dienen onvoorwaardelk vermeden
te worden.
Het product is uitsluitend voor het privé- en
niet voor het commerciële gebruik bestemd. B een verkeerde of onoordeelkundige behandeling, toepassing van geweld
en b ingrepen, die niet door het door ons
geautoriseerde serviceliaal doorgevoerd
werden, valt de garantie weg.
Afhandeling ingeval van garantie
Gelieve aan de volgende aanwzingen
gevolg te geven om een snelle behandeling van uw verzoek te garanderen:
• Gelieve voor alle aanvragen de
kassabon en het artikelnummer
(IAN356332_2004) als bews van de
aankoop klaar te houden.
44
Page 45
NL BE
• Gelieve het artikelnummer uit het typeplaatje.
• Indien er zich functiefouten of andere
gebreken voordien, contacteert u in
eerste instantie de hierna vernoemde
serviceafdeling telefonisch of per
e-mail. U krgt dan bkomende in-
formatie over de afhandeling van uw
klacht.
• Een als defect geregistreerd product
kunt u, na overleg met onze klantenservice, mits toevoeging van het
bews van aankoop (kassabon) en de
vermelding, waarin het gebrek bestaat
en wanneer het zich voorgedaan heeft,
voor u franco naar het u medegedeelde serviceadres zenden. Om proble-
men b de acceptatie en extra kosten
te vermden, maakt u onvoorwaardelk uitsluitend gebruik van het adres,
dat u medegedeeld wordt. Zorg ervoor
dat de verzending niet ongefrankeerd,
als volumegoed, per expresse of via
een andere speciale verzendingswze
plaatsvindt. Gelieve het apparaat met
inbegrip van alle b de aankoop bgeleverde accessoires in te zenden en
voor een voldoende veilige transportverpakking te zorgen.
Reparatieservice
zendingswze – ingezonden apparaten
worden niet geaccepteerd.
De afvalverwerking van uw defecte inge-
zonden apparaten voeren w gratis door.
Service-Center
Service Nederland
NL
IAN 356332_2004
Service België
BE
IAN 356332_2004
Importeur
Gelieve in acht te nemen dat het volgende
adres geen serviceadres is. Contacteer in
eerste instantie het hoger vermelde servicecenter.
Grizzly Tools GmbH & Co. KG
Stockstädter Straße 20
63762 Großostheim
DUITSLAND
www.grizzlytools-service.eu
U kunt reparaties, die niet onder de
garantie vallen, tegen berekening door
ons serviceliaal laten doorvoeren. Z
maakt graag voor u een kostenraming op.
W kunnen uitsluitend apparaten behandelen, die voldoende verpakt en gefrankeerd
ingezonden werden.
Opgelet: Gelieve uw apparaat gereinigd
en met een aanwzing op het defect naar
ons serviceliaal te zenden.
Ongefrankeerd – als volumegoed, per
expresse of via een andere speciale ver-
45
Page 46

PL
Spis tresci
Wstęp ........................................46
Użytkowanie zgodne z
przeznaczeniem .........................46
Zakres dostawy ..............................47
Opis działania ...............................47
Zestawienie ....................................47
Dane techniczne .........................47
Zasady bezpieczeństwa ............. 48
Symbole zawarte w instrukcji ...........48
Ogólne wskazówki bezpieczeństwa
dla elektronarzędzi .........................48
Uruchomienie .............................50
Montaż rączki prowadzącej ............. 50
Montaż kółek .................................51
Włączanie / wyłączanie urządzenia 51
Obsługa.....................................51
Montaż wężowego przewodu
ciśnieniowego ................................51
Instrukcje pracy .........................51
Ustawianie sprężonego powietrza ....51
Czyszczenie i konserwacja .........51
Czyszczenie ltra powietrza ............52
Spuszczanie kondensatu ..................52
Kontrola zaworu bezpieczeństwa .....52
Przechowywanie .......................52
Transport ...................................53
Utylizacja/ochrona środowiska ..53
Części zamienne / Akcesoria ......53
Gwarancja .................................54
Serwis naprawczy .....................55
Service-Center ............................55
Importer ....................................55
Tłumaczenie oryginalnej
deklaracji zgodności WE .............. 79
Rysunki eksplozyjne ............83/84
Wstęp
Gratulujemy zakupu nowego urządzenia.
Zdecydowali się Państwo na zakup wartościowego produktu. Niniejsze urządzenie
sprawdzono w trakcie produkcji pod kątem jakości, a także dokonano jego kontro-
li ostatecznej. W ten sposób zapewniona
jest jego sprawność.
Instrukcja obsługi jest częścią skła-
dową produktu. Zawiera ona ważne
wskazówki dotyczące bezpieczeństwa,
eksploatacji i utylizacji. Przed rozpoczęciem użytkowania produktu należy się zapoznać ze wszystkimi wskazówkami dotyczącymi obsługi i bezpieczeństwa. Produkt
należy użytkować tylko zgodnie z opisem i
podanym przeznaczeniem.
Instrukcję należy przechowywać starannie,
a w przypadku przekazania produktu oso-
bom trzecim należy dostarczyć nabywcy
kompletną dokumentację.
Użytkowaniezgodnez
przeznaczeniem
Sprężarkajest przeznaczona do pracy z
narzędziami pneumatycznymi (np. urzą-
dzenia do pompowania opon, pistolety
wydmuchowe i pistolety lakiernicze). Urządzenie nie jest przeznaczone do pracy
z narzędziami wymagającymi dużych
ilości sprężonego powietrza.
Każdy inny sposób użycia może doprowadzić do uszkodzenia urządzeń i stanowić
poważne zagrożenie dla użytkownika.
Urządzenia te nie są przeznaczone do
zastosowań w ramach działalności gospodarczej. Użytkowanie urządzenia
do celów komercyjnych powoduje utratę
gwarancji.
Producent nie odpowiada za szkody
spowodowane użyciem niezgodnym z
46
Page 47
PL
przeznaczeniem urządzenia lub jego nieprawidłową obsługą.
Zakres dostawy
Najpierw rozpakuj urządzenie i sprawdź,
czy jest kompletne.
• Sprężarka
• Rączka prowadzenia
• 2 kółka
• Materiał montażowy
• 10 m Wężowy przewód ciśnieniowy
• Klucz imbusowy
• Instrukcja obsługi
Materiały opakowaniowe należy usuwać
zgodnie z przepisami.
Opisdziałania
Sprężarka jest przeznaczona do pracy z
narzędziami pneumatycznymi.
Funkcje elementów obsługowych podano
w poniższych opisach.
Zestawienie
1 Pokrywa ltra powietrza
2 Manometr (zbiornik ciśnieniowy)
3 Zawór bezpieczeństwa
4 Regulator ciśnienia
5 Manometr (ustawione ciśnienie)
6 Włącznik/wyłącznik
7 Rączka prowadzenia
8 Bęben do nawijania węża
9 Przewód zasilający
10 Zbiornik ciśnieniowy
11 Kółko
12 Śruba spustowa
13 Szybkozłączki
14 Wężowy przewód ciśnieniowy
15 Klucz imbusowy
7a Śruba imbusowa
10a Uchwyt rączki prowadzącej
16 Kołpak
17 Śruba do kół
18 nakrętka zabezpieczająca
1a Filtr powietrza
19 Uchwyt do sieciowego przewo-
du zasilającego
Dane techniczne
Sprężarka pionowa 50 l ........ PVKO 50 A1
Napięcie znamionowe U .. 230 V~; 50 Hz
Moc znamionowa P ...................1800 W
Nominalna prędkość obrotowa silnika
.......................................2850 min
n
0
maks. ciśnienie robocze
.......................... 1,0 MPa (10 bar)
P
max
Waga m .......................................35 kg
Pojemność zbiornika......................... 50 l
Przewód zasysający ........... ok. 260 l/min
Stopień ochrony ............................... IPX0
Poziom ciśnienia akustycznego
) ................... 71,9 dB(A), KpA= 3 dB
(L
pA
Poziom mocy akustycznej (L
zmierzony .... 90,9 dB(A), KWA= 2,29 dB
gwarantowany ...................... 93 dB(A)
Podana wartość emisji drgań została
zmierzona metodą znormalizowaną i
może być wykorzystywana do porównań
urządzenia elektrycznego z innymi urzą-
dzeniami.
Podana wartość emisji drgań może też
służyć do szacunkowej oceny stopnia ekspozycji użytkownika na drgania.
Ostrzeżenie: Wartość emisji
drgań może się różnić w czasie korzystania z urządzenia od podanej
wartości, jest to zależne od sposo-
WA
)
-1
47
Page 48
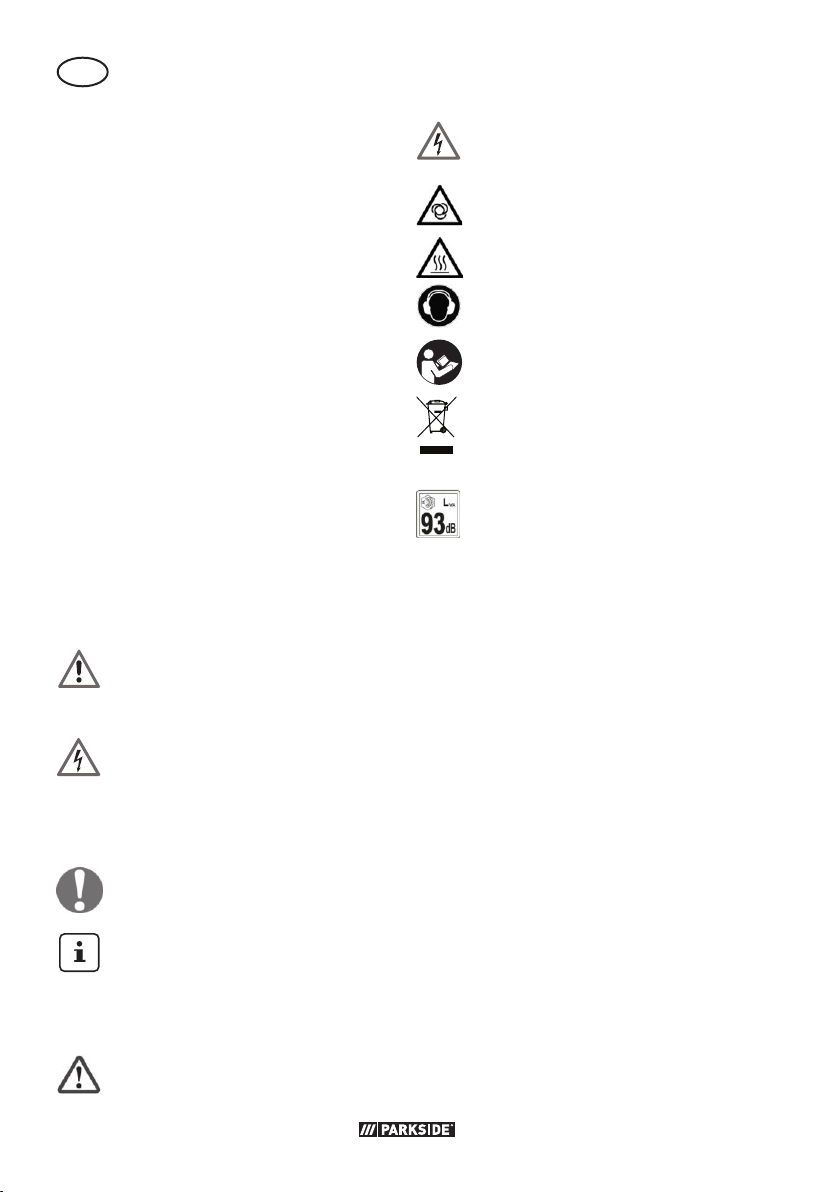
PL
bu używania urządzenia.
Proszę spróbować maksymalnie
ograniczyć narażenie na wibracje.
Przykładowymi sposobami zmniejszenia narażenia na wibracje jest
noszenie rękawic w trakcie pracy
z narzędziem i ograniczenie czasu
pracy. Należy przy tym uwzględnić
wszystkie elementy cyklu eksplo-
atacji (na przykład czas, w którym
elektronarzędzie jest wyłączone,
oraz czas, w których jest ono
wprawdzie włączone, ale pracuje
bez obciążenia).
Zasadybezpieczeństwa
Ten rozdział zawiera podstawowe zasady
bezpieczeństwa dotyczące pracy urządze-
nie.
Symbole zawarte w
instrukcji
Znaki niebezpieczeństwa z
informacjami dot. zapobiegania wypadkom
Znak zagrożenia z informa-
cjami dotyczącymi zapobie-
gania szkodom osobowym
na skutek porażenia prądem
elektrycznym
Znaki nakazowe z informacjami
dot. zapobiegania wypadkom
Wskazówki zawierające informa-
cje dot. lepszego użytkowania
urządzenia
Symbole na urządzeniu
Uwaga!
Ryzyko porażenia prądem elek-
trycznym!
Ostrzeżenie! Sprężarka może się
uruchamiać bez ostrzeżenia.
Uwaga - gorąca powierzchnia
Nosić ochronniki słuchu!
Uważnie przeczytać instrukcję ob-
sługi.
Urządzeń elektrycznych nie należy
wyrzucać razem ze śmieciami do-
mowymi.
Informacja o poziomie mocy aku-
stycznej L
WA
w dB
Ogólne wskazówki bezpie-
czeństwadlaelektronarzędzi
Użyte we wskazówkach bezpieczeństwa
pojęcie „elektronarzędzie“ dotyczy narzędzi elektrycznych zasilanych sieciowo
(przez kabel sieciowy) oraz narzędzi elek-
trycznych zasilanych akumulatorami (bez
kabla sieciowego).
Zasady bezpiecznej pracy:
• Należy dbać o porządek w stree wykonywania prac.
Brak porządku w stree pracy może
skutkować wypadkiem.
• Należy uwzględniać warunki
otoczenia.
- Nie narażać narzędzi elektrycznych
na działanie deszczu.
- Nie używać narzędzi elektrycznych
w wilgotnym lub mokrym otoczeniu.
Wniknięcie wody do narzędzia
elektrycznego zwiększa ryzyko porażenia prądem elektrycznym.
48
Page 49

PL
- Należy dbać o dobre oświetlenie
stanowiska pracy.
- Nie używać narzędzi elektrycznych
w miejscach o zagrożeniu pożaro-
wym lub wybuchowym. Elektrona-
rzędzia generują iskry, które mogą
zapalić pył lub opary.
• Należy się zabezpieczać przed
porażeniem elektrycznym.
Unikać kontaktu ciała z uziemionymi
częściami (np. z rurami, radiatorami,
piecami elektrycznymi, chłodnicami).
• Inne osoby nie mogą się zbliżać do urządzenia. Nie pozwalać
innym osobom, w szczególności
dzieciom, na dotykanie narzędzia
elektrycznego lub kabla. Należy utrzymywać ich z dala od strefy roboczej.
• Nieużywane elektronarzędzie
należy przechowywać w bez-
piecznym miejscu.
Nieużywane narzędzia elektryczne
należy przechowywać w suchym miejscu, położonym na dużej wysokości,
zamkniętym, poza zasięgiem dzieci.
Niebezpieczeństwo obrażeń ciała.
• Nie przeciążać narzędzi elektrycznych.
Elektronarzędzia pracują lepiej i bezpieczniej w podanym zakresie mocy.
• Stosować odpowiednie narządzie elektryczne.
- Do wykonywania ciężkich prac nie
używaj maszyn o słabej mocy.
– Nie używać urządzenia elektrycz-
nego do celów, do których nie jest
ono przeznaczone. Nie stosować
na przykład ręcznej piły tarczowej
do cięcia pni drzew i polan.
Użycie elektronarzędzi do celów
innych niż przewidziane może prowadzić do niebezpiecznych sytuacji.
• Nosić odpowiednią odzież roboczą.
– Nie należy nosić luźnej odzieży lub
biżuterii; występuje zagrożenie ich
przechwycenia przez maszynę.
– Podczas prac wykonywanych na
zewnątrz zaleca się stosowanie
obuwia antypoślizgowego.
– Długie włosy należy wiązać i za-
bezpieczać odpowiednim czepkiem
z siatki.
• Stosować środki ochrony indy-
widualnej.
– W trakcie prac generujących po-
wstawanie pyłu należy stosować
maskę chroniącą drogi oddechowe.
• Nie używać kabla do celów, do
których nie jest on przeznaczo-
ny.
Nie ciągnąć za kabel w celu wyciągnięcia wtyczki z gniazdka. Kabel
należy chronić przed wysokimi temperaturami, olejem i ostrymi krawędziami. Uszkodzone lub splątane kable
zwiększają ryzyko porażenia prądem
elektrycznym.
• Unikać nienaturalnej postawy
ciała.
Należy dbać o bezpieczną pozycję i
stale zachowywać równowagę.
Umożliwi to lepszą kontrolę nad elek-
tronarzędziem w nieoczekiwanych
sytuacjach.
• Należy dbać o narzędzia. Przy-
czyną wielu wypadków jest niewłaściwa konserwacja elektronarzędzi.
- Należy postępować zgodnie ze
wskazówkami w zakresie smarowa-
nia i wymiany narzędzi.
- Należy regularnie kontrolować kabel zasilający urządzenia elektrycz-
nego, a w przypadku jego uszko-
dzenia zlecać wymianę uznanemu
fachowcowi.
- Należy regularnie kontrolować
przewody przedłużające, a w
49
Page 50

PL
przypadku uszkodzenia należy je
wymieniać.
- Uchwyty należy utrzymywać w suchych warunkach, w czystości oraz
bez oleju i smaru.
• W czasie nieużywania elektronarzędzia, przed wykonaniem
konserwacji i podczas wymiany
narzędzi wtyczka musi być
wyciągnięta z gniazda.
Ten środek ostrożności zapobiegnie
przypadkowemu uruchomieniu elektro-
narzędzia.
• Podczas prac na zewnątrz należy stosować przedłużacz.
Na wolnym powietrzu należy stosować
jedynie odpowiednio dopuszczone i
oznaczone przedłużacze.
• Należy zachować ostrożność.
Należy zwracać uwagę na to, co się
robi i zachować zdrowy rozsądek
podczas pracy. Nie używać elektronarzędzi w sytuacji braku koncentracji.
Chwila nieuwagi podczas pracy z
elektronarzędziem może doprowadzić
do poważnych obrażeń ciała.
• Kontrolować narzędzie elektryczne pod kątem ewentualnych uszkodzeń.
Pozwoli to zachować bezpieczeństwo
elektronarzędzia.
- Przed dalszym użytkowaniem
urządzenia elektrycznego należy
skontrolować zabezpieczenia lub
starannie sprawdzić lekko uszkodzone części pod kątem prawidłowego działania i działania zgodnie
z przeznaczeniem.
- Sprawdzić, czy ruchome części
działają prawidłowo i nie zakleszczają się lub czy części te są uszkodzone. Wszystkie części muszą
być prawidłowo zamontowane i
muszą spełniać wszystkie warunki,
gwarantujące prawidłową pracę
elektronarzędzia.
- Naprawy lub wymianę uszkodzonych zabezpieczeń i części należy
zlecać uznanym warsztatom, o ile z
instrukcji obsługi nie wynikają inne
zasady.
- Nie używać urządzeń elektrycznych, gdy nie działa włącznik/
wyłącznik. Uszkodzony przełącznik
musi zostać wymieniony w jednym
z warsztatów obsługi klienta.
• Uwaga!
Użycie innych narzędzi końcowych i
innych akcesoriów może stwarzać niebezpieczeństwo urazu.
• Naprawy urządzenia elektrycznego należy zlecać jedynie wykwalikowanym elektrykom.
Niniejsze narzędzie elektryczne spełnia właściwe wymagania w zakresie
bezpieczeństwa. Naprawy mogą być
przeprowadzane jedynie przez wy-
kwalikowane warsztaty techniczne
przy zastosowaniu oryginalnych części
zamiennych; w przeciwnym razie
może dochodzić do wypadków użytkownika.
• Jeżeli przewód zasilający tego urządzenia jest uszkodzony, należy zlecić
jego wymianę producentowi, w punkcie serwisowym, lub osobie posiadającej podobne kwalikacje, aby uniknąć
zagrożeń.
Uruchomienie
Montażrączki
prowadzącej
1. Wcisnąć rączkę prowadzenia (7) w
uchwyt (10a) na zbiorniku ciśnienio-
wym (10).
50
Page 51
PL
2. Zamocować rączkę prowadzącą (7)
za pomocą śrub imbusowych i ndołą-
czonego do zestawu klucza imbusowego (15).
Montażkółek
1. Wprowadzić śrubę mocującą kółko
(17) przez otwór w kółku (11).
2. Wprowadzić śrubę mocującą kółko
(17) przez otwór na osi kółka.
3. Zamocować kółko (11) za pomocą nakrętki zabezpieczającej (18). W razie
potrzeby należy użyć pomocniczego
klucza do śrub (brak w zestawie).
4. Wcisnąć kołpak (16) na kółko (11).
5. Powtórzyć kroki 1-4 z drugim kółkiem.
Włączanie/wyłączanie
urządzenia
1. Aby załączyć urządzenie, włącznik/
wyłącznik (6) należy ustawić na pozycję „I“.
2. W celu wyłączenia włącznik/wyłącznik (6) odchylić do pozycji „0”.
Obsługa
Montażwężowego
przewodu
ciśnieniowego
1. Wcisnąć wężowy przewód ciśnieniowy (14) w jedną z dwóch szybkozłączek (13). Wężowy przewód ciśnieniowy (14) powinien wskoczyć w swoje
miejsce.
Demontaż wężowego przewodu
ciśnieniowego
2. Docisnąć pierścień szybkozłączki (13)
do urządzenia. Wężowy przewód
ciśnieniowy (14) wyskoczy z szybkozłączki (13).
3. Wcisnąć narzędzie pneumatyczne w
szybkozłączkę na wężowym przewodzie ciśnieniowym.
Instrukcje pracy
Ustawianiesprężonego
powietrza
Ustawione ciśnienie może być redukowane przez szybkozłączki (13). Ciśnienie to
można ustawiać za pomocą regulatora
ciśnienia (4) i odczytywać na manometrze
(ustawione ciśnienie) (5).
1. W celu zwiększenia ciśnienia należy
obrócić regulator (4) zgodnie z kierun-
kiem wskazówek zegara.
2. W celu zmniejszenia ciśnienia należy
obrócić regulator (4) w kierunku prze-
ciwnym do kierunku wskazówek zegara.
Czyszczenie i
konserwacja
Wyłączyć urządzenie i przed
wykonaniem wszelkich prac
wyciągnąć wtyczkę sieciową
z gniazdka.
Wykonanie prac naprawczych i
konserwacyjnych, które nie zostały
opisane w tej instrukcji, należy
powierzać naszym specjalistom z
działu serwisowego. Należy stosować jedynie oryginalne części.
Regularnie wykonywać opisane poniżej
zabiegi czyszczenia i konserwacji. Za-
pewni to długie i niezawodne użytkowanie
urządzenia.
51
Page 52

PL
• Należy dbać o drożność szczelin wentylacyjnych w obudowie urządzenia,
w przeciwnym razie urządzenie przegrzeje się.
Czyszczenieltra
powietrza
Nigdy nie używać urządzenia bez
ltra powietrza. Pył i brud przedostają się wtedy do silnika i powodują uszkodzenia.
Filtr powietrza (1a) należy oczyszczać co
ok. 300 godzin eksploatacyjnych z pyłu i
zabrudzeń w celu zapewnienia prawidłowej eksploatacji urządzenia.
1. Zdjąć pokrywę ltra powietrza (1).
2. Wyjąć ltr powietrza (1a).
3. Wytrzepać ltr powietrza (1a).
4. Filtr powietrza (1a) i pokrywę ltra
powietrza (1) należy czyścić niewielką
ilością sprężonego powietrza (ok. 3
bar).
5. Zamontować ponownie w odwrotnej
kolejności ltr powietrza (1a) i pokrywę ltra powietrza (1).
Spuszczanie kondensatu
Po każdym użyciu urządzenia należy
opróżniać zbiornik ciśnieniowy (10) z
kondensatu.
1. Odkręcić śrubę spustową (12).
2. Kondensat należy zbierać do odpo-
wiedniego pojemnika.
3. Aby wylać resztki kondensatu, należy
urządzenie przechylić lekko w przód.
4. Ponownie zakręcić śrubę spustową (12).
Kontrola zaworu
bezpieczeństwa
Zawór bezpieczeństwa służy do rozprężania układu w przypadku nadciśnienia w
zbiorniku ciśnieniowym.
Aby zapewnić prawidłowe działanie zaworu bezpieczeństwa, należy go uruchamiać co ok. 30 godzoin eksploatacyjnych,
ale co najmniej 3 razy w roku.
1. Uruchomić urządzenie (patrz „Włączanie / wyłączanie”.
2. Obrócić zawór bezpieczeństwa (3)
zgodnie z kierunkiem wskazówek ze-
gara, aby otworzyć zawór bezpieczeństwa (3). Przez zawór bezpieczeństwa
(3) zacznie wydostawać się powietrze.
3. Obrócić zawór bezpieczeństwa (3) w
kierunku przeciwnym do wskazówek
zegara, aby zamknąć zawór bezpieczeństwa (3).
Przechowywanie
• Urządzenie i akcesoria należy przez
cały czas przechowywać w warun-
kach:
- suchych.
- czystych.
- bezpyłowych.
- poza zasiegiem dzieci.
• Przewód zasilający (9) należy nawijać
na odpowiedni uchwyt (19).
• Nawinąć wężowy przewód sprężonego powietrza (14) na bęben do nawijania węża (8).
• Urządzenie należy ew. ustawiać w pio-
nie.
• Nadciśnienie w sprężarce należy uwalniać poprzez wyłączenie urządzenia i
zużycie pozostałej w zbiorniku ciśnieniowym (10) ilości sprężonego powie-
trza.
52
Page 53

PL
• Należy spuścić kondensat. (patrz
(„Spuszczanie kondensatu“).
Transport
W trakcie przejeżdżania należy używać
rączki prowadzącej (7). Podczas przenoszenia należy pamiętać o wadze urządze-
nia.
Utylizacja/ochrona
środowiska
Urządzenie, akcesoria i opakowanie należy oddać do punktu recyklingu.
Urządzeń elektrycznych nie należy
wyrzucać razem ze śmieciami do-
mowymi.
• Oddaj urządzenie do punktu recyklin-
gu. Zastosowane elementy z tworzywa
sztuczne i metali można posortować
według rodzajów odpadów i w ten
sposób przekazać do recyklingu. Odpowiednie informacje można uzyskać
w naszym Dziale serwisowym.
• Przesłane do nas urządzenia poddamy
bezpłatnie utylizacji.
Częścizamienne/Akcesoria
Części zamienne i akcesoria można zakupić na
www.grizzlytools-service.eu
W przypadku problemów z zamawianiem należy skorzystać z formularza kontaktowego. W razie kolejnych pytań należy zwracać się do „Service-Center” (patrz strona 55).
Pos Oznaczenie Nr. katalogowe
14 Wężowy przewód ciśnieniowy 10m 91105933
1a Filtr powietrza 91105932
11 Zestaw kółek 91105929
8 Bęben do nawijania węża 91105930
12 Śruba spustowa 91105928
6 Włącznik/wyłącznik 91105931
13 Zestaw szybkozłączek 91105926
53
Page 54

PL
Gwarancja
Szanowna Klientko, Szanowny Kliencie,
na zakupione urządzenie otrzymują Państwo 3 lata gwarancji od daty zakupu.
W przypadku wad tego produktu przysługują Państwu ustawowe prawa w stosunku
do sprzedawcy produktu. Prawa te nie są
ograniczone przez naszą przedstawioną
niżej gwarancję.
Warunki gwarancji
Okres gwarancji rozpoczyna się z datą
zakupu. Prosimy zachować oryginalny paragon. Będzie on potrzebny jako dowód
zakupu.
Jeśli w okresie trzech lat od daty zakupu
tego produktu wystąpi wada materiałowa
lub fabryczna, produkt zostanie – wedle
naszego wyboru – bezpłatnie naprawiony
lub wymieniony. Gwarancja zakłada, że
w okresie trzech lat uszkodzone urządzenie zostanie przesłane wraz z dowodem
zakupu (paragonem) z krótkim opisem,
gdzie wystąpiła wada i kiedy się pojawiła.
Jeśli defekt jest objęty naszą gwarancją,
otrzymają Państwo z powrotem naprawiony lub nowy produkt. Wraz z wymianą
urządzenia lub ważnej części, zgodnie
z art. 581 § 1 aktualnej wersji Kodeksu
cywilnego, okres gwarancji rozpoczyna
się od nowa.
Okres gwarancji i ustawowe rosz-
czenia z tytułu wad
Okres gwarancji nie wydłuża się z powodu świadczenia gwarancyjnego. Obowiązuje to również dla wymienionych lub
naprawionych części. Ewentualne uszkodzenia i wady istniejące już w momencie
zakupu należy zgłosić bezzwłocznie po
rozpakowaniu. Naprawy przypadające
po upływie okresu gwarancji są odpłatne.
Zakres gwarancji
Urządzenie wyprodukowano z zachowaniem staranności zgodnie z surowymi
normami jakościowymi i dokładnie sprawdzono przed wysyłką.
Gwarancja obowiązuje dla wad materiałowych lub fabrycznych. Gwarancja
nie rozciąga się na części produktu, które
podlegają normalnemu zużyciu i można je
uznać za części zużywalne (np. Łańcuch
tnący), oraz na uszkodzenia części delikatnych (np. przełączniki).
Gwarancja przepada, jeśli produkt został
uszkodzony, nie był zgodnie z przeznaczeniem użytkowany i konserwowany.
Użytkowanie zgodnie z przeznaczeniem
wiąże się z przestrzeganiem wszystkich
wskazówek zawartych w instrukcji obsługi.
Należy bezwzględnie unikać zastosowań
i działań, których odradza się lub przed
którymi ostrzega się w instrukcji obsługi.
Produkt jest przeznaczony do użytku
prywatnego, a nie komercyjnego. W przy-
padku niewłaściwego i nieodpowiedniego
obchodzenia się z urządzeniem, stosowania „na siłę” i zabiegów, które nie zostały
przeprowadzone przez nasz autoryzowa-
ny oddział, gwarancja wygasa.
Realizacja w przypadkach objętych
gwarancją
Aby zagwarantować szybkie przetworzenie Państwa sprawy, prosimy o przestrzeganie poniższych wskazówek:
• W przypadku wszelkich zapytań
prosimy o przygotowanie paragonu i
numeru artykułu jako dowodu zakupu
(IAN356332_2004).
• Numer artykułu znajduje się na tablicz-
ce znamionowej.
• W przypadku wystąpienia usterek lub
innych wad prosimy o skontaktowanie
się z wymienionym niżej działem ser-
54
Page 55

PL
wisowym telefonicznie lub mailowo.
Uzyskają Państwo wówczas szczegółowe informacje na temat realizacji
reklamacji.
• Uszkodzony produkt mogą Państwo
wysłać po skontaktowaniu się z
naszym działem obsługi klienta, załączając dowód zakupu (paragon) i
określając, na czym polega wada i
kiedy wystąpiła, bezpłatnie na podany
adres serwisu. Aby uniknąć problemów
z odbiorem i dodatkowych kosztów,
prosimy o wysłanie przesyłki na adres,
który Państwu podano. Należy się
upewnić, żeby wysyłka nie nastąpiła
odpłatnie, jako ponadwymiarowa,
ekspresowo lub na innych specjalnych
warunkach. Prosimy o przesłanie urządzenia wraz ze wszystkimi częściami
wyposażenia otrzymanymi przy zakupie i zadbanie o wystarczająco bez-
pieczne opakowanie.
Serwis naprawczy
Naprawy, które nie są objęte gwarancją,
można zlecić odpłatnie w naszym oddziale serwisowym. Serwis sporządzi Państwu
kosztorys naprawy.
Podejmujemy się wyłącznie naprawy urządzeń, które zostały prawidłowo zapako-
wane i ofrankowane.
Uwaga: Prosimy o przesłanie czystego
urządzenia ze wskazaniem usterki.
Urządzenia przesłane dla nas odpłatnie,
jako przesyłka ponadwymiarowa, ekspre-
sowa lub na innych warunkach specjal-
nych, nie zostaną odebrane.
Utylizację przesłanych do nas uszkodzonych urządzeń przeprowadzamy bezpłat-
nie.
Service-Center
Serwis Polska
PL
IAN 356332_2004
Importer
Prosimy mieć na uwadze, że poniższy
adres nie jest adresem serwisu. Prosimy
o kontakt z wymienionym wyżej centrum
serwisowym.
Grizzly Tools GmbH & Co. KG
Stockstädter Straße 20
63762 Großostheim
NIEMCY
www.grizzlytools-service.eu
55
Page 56

CZ
Obsah
Úvod..........................................56
Použití dle určení ........................56
Rozsah dodávky .............................56
Obecný popis .............................57
Popis funkce ...................................57
Přehled ..........................................57
Technické údaje ..........................57
Bezpečnostní pokyny .................58
Všeobecné bezpečnostní pokyny
pro elektrická zařízení .....................58
Uvedení do provozu ...................60
Montáž obloukové rukojeti ...............60
Montáž kol .....................................60
Zapnutí/vypnutí ..............................60
Obsluha .....................................60
Montáž hadice na stlačený vzduch ...60
Pokyny kpráci ..........................61
Nastavení stlačeného vzduchu .......... 61
Čištění aúdržba ......................... 61
Čištění vzduchového ltru ................61
Vypuštění kondenzační vody ............61
Kontrola pojistného ventilu ...............61
Skladování ................................62
Přeprava ...................................62
Likvidace/ochrana životního
prostředí ....................................62
Náhradní díly/příslušenství ........ 62
Záruka ......................................63
Opravna ....................................64
Service-Center ............................64
Dovozce .....................................64
Překlad originálního
prohlášení o shodě CE ................ 80
Rozvinuté náčrtky ................ 83/84
Úvod
Blahopřejeme vám ke koupi vašeho nového přístroje. Rozhodli jste se pro vysoce
kvalitní výrobek.
Kvalita tohoto přístroje byla kontrolována
během výroby a byla provedena také
závěrečná kontrola. Tím je zaručena funkčnost přístroje.
Návod k obsluze je součástí tohoto
výrobku. Obsahuje důležité pokyny
týkající se bezpečnosti, používání a likvidace. Před použitím výrobku se seznamte
se všemi pokyny k obsluze a bezpečnosti.
Výrobek používejte jen k popsaným účelům a v rámci uvedených oblastí použití.
Návod dobře uschovejte a při předávání
výrobku třetímu předejte i všechny podkla-
dy.
Použitídleurčení
Kompresor je určen pro provoz nástrojů
poháněných stlačeným vzduchem (např.
hustilka pneumatik, foukací pistole a lakovací pistole). Přístroj není vhodný k
provozování nástrojů, které mají vysokou
potřebu stlačeného vzduchu.
Při jakékoliv jiném použití může dojít k
poškození zařízení a uživatel může být vystaven vážnému nebezpečí. Tyto přístroje
nejsou vhodný pro komerční využití. V případě komerčního použití záruka zaniká.
Výrobce neručí za škody způsobené
nesprávným použitím nebo nesprávnou
obsluhou.
56
Rozsah dodávky
Vybalte nejprve přístroj a zkontrolujte, zda
je kompletní.
Page 57
CZ
• kompresor
• oblouková rukojeť
• 2 kola
• montážní materiál
• 10 mdlouhá hadice na stlačený vzduch
• klíč s vnitřním šestihranem
• návod k obsluze
Obalový materiál zlikvidujte správně dle
předpisů.
Obecný popis
Obrázky týkající se ovládání
a údržby najdete na rozkládací stránce.
Popis funkce
Kompresor je určen pro provoz nástrojů
poháněných stlačeným vzduchem.
Funkce ovládacích prvků naleznete vnásledujících popisech.
Přehled
1 víko vzduchového ltru
2 manometr (tlaková nádoba)
3 pojistný ventil
4 regulátor tlaku
5 manometr (nastavený tlak)
6 zapínač/vypínač
7 oblouková rukojeť
8 navíjení hadice
9 elektrické vedení
10 tlaková nádoba
11 kolo
12 vypouštěcí šroub
13 rychlospojky
14 hadice na stlačený vzduch
15 klíč s vnitřním šestihranem
7a šroub s vnitřním šestihranem
10a držák obloukové rukojeti
16 krytka kola
17 šroub kola
18 pojistná matice
1a vzduchový ltr
19 držák na síťový přívod
Technické údaje
Vertikální kompresor 50 l .......PVKO 50 A1
Jmenovité napětí U ........... 230 V~; 50 Hz
Jmenovitý výkon P ......................1800 W
Počet otáček motoru n
Max. praxcovní tlak P
............2850 min
0
1,0 MPa (10 bar)
max
Hmotnost m ...................................35 kg
Objem nádoby ................................ 50 l
Sací potrubí.......................ca. 260 l/min
Typ ochrany ....................................IPX0
Hladina akustického tlaku
) ................... 71,9 dB(A), KpA= 3 dB
(L
pA
Hladina akustického výkonu (LWA)
změřena ...... 90,9 dB(A), K
= 2,29 dB
WA
zaručená .............................. 93 dB(A)
Uvedená hodnota emisí vibrací byla změřena podle normovaného zkušebního postupu
a může se použít ke srovnání jednoho elektrického nářadí s jiným.
Uvedená hodnota emisí vibrací se může
použít také k odhadnutí přerušení funkce.
Výstraha:
Hodnota emisí vibrací se může bě-
hem skutečného používání elektrického nářadí lišit od uvedené hodnoty, v závislosti na způsobu, kterým
se elektrické nářadí používá.
Dle možnosti se snažte udržet co
nejnižší zatížení, způsobené vibracemi. Příklady opatření ke snížení
zatížení, způsobeno vibracemi, je
nošení rukavic při použití nástroje
a omezení pracovní doby. Přitom
-1
57
Page 58
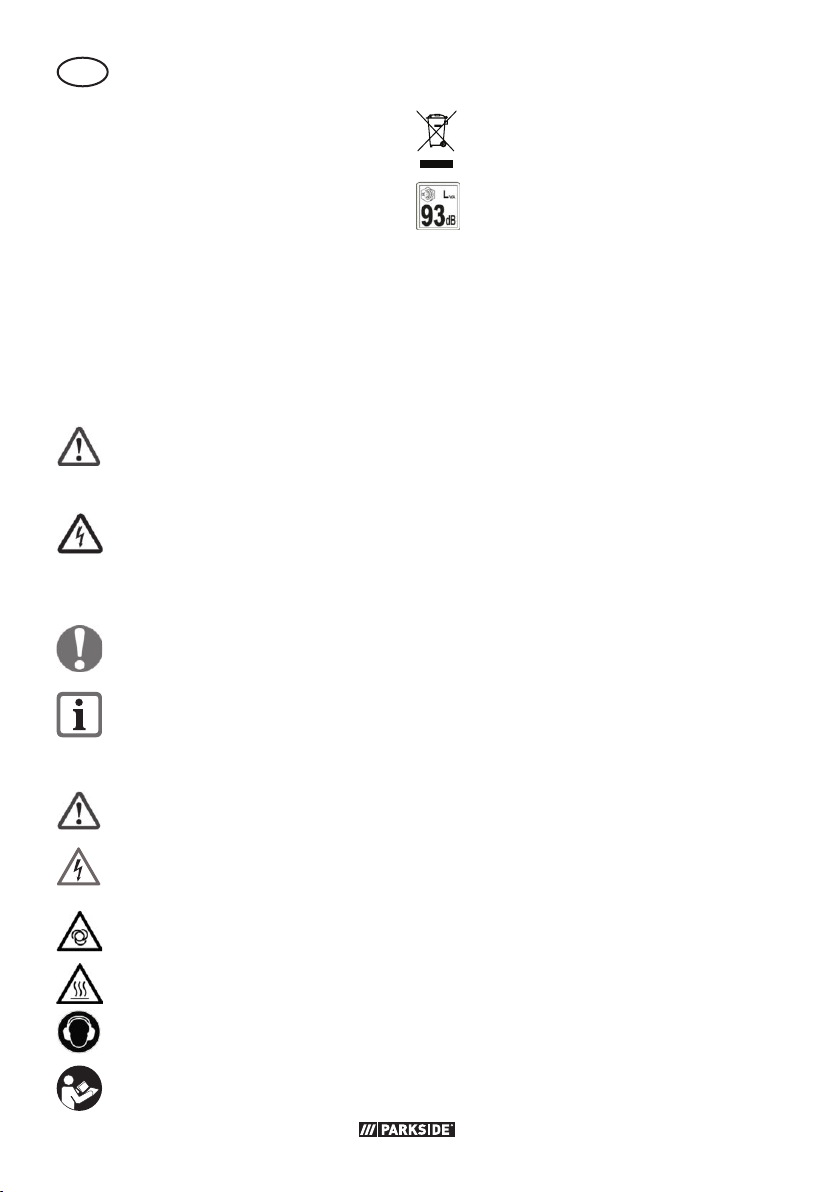
CZ
se musí brát v úvahu všechny části
pracovního cyklu (například doby,
během kterých je elektrický nástroj
vypnutý, a ty, ve kterých je sice zapnutý, ale běží bez zátěže).
Bezpečnostnípokyny
Tento odstavec pojednává o základních
bezpečnostních předpisech při práci s
přístroj.
Symboly v návodu
Výstražné značky s údaji pro
zabránění škodám na zdraví
anebo věcným škodám
Označení nebezpečí s infor-
macemi o zabránění zranění
osob v důsledku zasažení
elektrickým proudem
Příkazové značky s údaji pro pre-
venci škod
Informační značky s informacemi
pro lepší zacházení s nástrojem
Symboly na přístroji
Pozor!
Nebezpečí úrazu elektrickým prou-
dem!
Výstraha! Kompresorové zařízení
se může spustit bez výstrahy.
Pozor - horký povrch
Noste ochranu sluchu!
Pozorně si přečtěte návod kobslu-
ze.
58
Elektrická zařízení nepatří do do-
mácího odpadu.
Údaj hladiny akustického výkonu
v dB
L
WA
Všeobecnébezpečnostnípokynyproelektrickázařízení
Termín „elektrický nástroj“ používaný
vbezpečnostních pokynech se vztahuje
na elektrické nástroje napájené ze sítě (se
síťovým kabelem) ana akumulátorové elektrické nástroje (bez síťového kabelu).
Bezpečná práce:
• Udržujte ve své pracovní oblasti
pořádek.
Nepořádek v pracovní oblasti může mít
za následek nehody a úrazy.
• Zohledněte vlivy prostředí.
– Nevystavujte elektrické nástroje dešti.
– Nepoužívejte elektrický nástroj ve
vlhkém nebo mokrém prostředí. V
případě vniknutí vody do elektrického nástroje se zvyšuje riziko úrazu
elektrickým proudem.
– Zajistěte dobré osvětlení pracoviště.
– Nepoužívejte elektrický nástroj tam,
kde hrozí nebezpečí požáru nebo
výbuchu. Elektrické nástroje vytváří
jiskry, které mohou vznítit prach
nebo výpary.
• Chraňte se před úrazem elektric-
kým proudem.
Zamezte kontaktu těla s uzemněnými
částmi (např. potrubí, radiátory, elektrické sporáky, chladicí zařízení).
• Udržujte mimo dosah jiných
osob. –Nedovolte jiným osobám,
zejména dětem, dotýkat se elektrického
nástroje nebo kabelu. Udržujte je mimo
pracovní oblast.
Page 59

CZ
• Nepoužívané elektrické nástroje
skladujte bezpečně.
Nepoužité elektrické nástroje se musí
skladovat na suchém, vysoko položeném nebo uzamčeném místě, mimo
dosah dětí. Hrozí nebezpečí zranění.
• Svůj elektrický nástroj nepřetěžujte.
Pracujete lépe a bezpečněji v určeném
rozsahu výkonu.
• Používejte správný elektrický
nástroj.
– Nepoužívejte stroje s nízkým výko-
nem pro těžkou práci.
– Nepoužívejte elektrický nástroj pro
takové účely, pro které není určen.
Nepoužívejte například ruční kotoučovou pilu k řezání větví nebo
kmenů stromů.
Použití elektrického nástroje pro jiné
než určené použití může vést k nebezpečným situacím.
• Noste vhodný pracovní oděv.
– Nenoste volné oblečení nebo šper-
ky, mohou být zachyceny pohyblivými částmi.
– Při práci venku se doporučuje nosit
neklouzavou obuv.
– V případě dlouhých vlasů noste síť-
ku na vlasy.
• Používejte ochranné vybavení.
– Při práci, při které se vytváří prach,
používejte dýchací masku.
• Nepoužívejte kabel pro účely,
pro které není určen.
Nepoužívejte kabel k vytažení síťové zástrčky ze zásuvky. Chraňte kabel před
horkem, olejem a ostrými hranami. Poškozené nebo zamotané kabely zvyšují
riziko úrazu elektrickým proudem.
• Zabraňte abnormálnímu držení
těla.
Vždy dbejte na bezpečný postoj a udržujte vždy rovnováhu.
To Vám umožní lépe kontrolovat elektric-
ký nástroj v neočekávaných situacích.
• Pečujte o svůj nástroj s pečli-
vostí. Mnoho úrazů je způsobeno v
důsledku nedostatečně udržovaných
elektrických nástrojů.
– Postupujte podle pokynů pro mazání
a výměnu nástroje.
– Síťový kabel elektrického nástroje
pravidelně kontrolujte a v případě
poškození jej nechte vyměnit kvalikovaným odborníkem.
– Prodlužovací kabely pravidelně
kontrolujte a v případě poškození je
vyměňte.
– Rukojetě udržujte v suchém a čistém
stavu bez stop oleje či mastnoty.
• Vytáhněte síťovou zástrčku ze
zásuvky při nepoužívání elektrického
nástroje, před provedením údržby a při
výměně nástrojů, např. pilového listu,
vrtáku, frézy.
Tato opatření zabrání neúmyslnému
spuštění elektrického nástroje.
• Pro venkovní použití používejte
prodlužovací kabely.
Venku používejte pouze schválené a
příslušně označené prodlužovací ka-
bely.
• Buďte opatrní.
Dbejte na to, co děláte a při práci se
řiďte zdravým rozumem. Elektrický
nástroj nepoužívejte, když se nemůžete
soustředit. Okamžik nepozornosti při
použití elektrického nástroje může vést
k vážným zraněním.
• Zkontrolujte elektrický nástroj,
zda není případně poškozen.
Tím je zajištěno, že elektrický nástroj
bude i nadále bezpečný.
– Před dalším použitím elektrického
nástroje se musí pečlivě zkontrolovat
ochranná zařízení nebo lehce poškozené díly z hlediska jejich správ-
59
Page 60

CZ
né a zamýšlené funkce.
– Zkontrolujte, zda pohyblivé díly
bezvadně fungují a nezasekávají se
a zda nejsou poškozeny součásti.
Veškeré součásti musí být správně
namontovány a všechny podmínky
splněny, aby byl zajištěn bezvadný
provoz elektrického nástroje.
– Poškozená ochranná zařízení a po-
škozené díly se musí řádně opravit
nebo vyměnit v autorizované odborné dílně, pokud není v návodu k
obsluze uvedeno jinak.
– Nepoužívejte elektrické nástroje,
u kterých nelze spínač zapnout a
vypnout. Poškozené spínače se musí
nechat vyměnit v servisní dílně pro
zákazníky.
• Pozor!
Při používání jiných upínacích nástrojů
ajiného příslušenství může vzniknoutnebezpečí zranění.
• Opravy Vašeho elektrického
nástroje nechte provést kvalikovaným elektrikářem. Tento
elektrický nástroj vyhovuje příslušným
bezpečnostním předpisům. Opravy se
smí provádět pouze v odborné dílně s
použitím originálních náhradních dílů;
jinak může dojít k úrazům uživatele.
• Dojde-li kpoškození přípojného vedení
tohoto přístroje, musí jej vyměnit výrobce nebo zákaznický servis či podobně
kvalikovaná osoba, aby se předešlo
ohrožením.
Uvedenídoprovozu
Montážobloukové
rukojeti
1. Zatlačte obloukovou rukojeť (7) do
držáku obloukové rukojeti (10a) na tlakové nádobě (10).
2. Upevněte obloukovou rukojeť (7) pomocí přiložených šroubů s vnitřním šestihranem a přiloženého klíče s vnitřním
šestihranem (15).
Montážkol
1. Zasuňte šroub kola (17) otvorem v kole
(11).
2. Zasuňte šroub kola (17) otvorem na
soutyčí kola.
3. Kolo (11) upevněte pojistnou maticí
(18). V případě potřeby použijte jako
pomoc klíč na šrouby (není součástí
dodávky).
4. Natlačte krytku kola (16) na kolo (11).
5. Opakujte kroky 1-4 pro zbývající kolo.
Zapnutí/vypnutí
1. Přístroj zapněte překlopením zapínače/
vypínače (6) do polohy „I“.
2. K vypnutí zaklopte zapínač/vypínač
(6) do polohy „0“.
Obsluha
Montážhadicena
stlačenývzduch
1. Zatlačte hadici stlačeného vzduchu
(14) do jedné z obou rychlospojek
(13). Hadice na stlačený vzduch (14)
zaskočí.
Demontáž hadice na stlačený
vzduch
2. Zatlačte spojovací kroužek na rychlospojce (13) směrem k přístroji. Hadice stlačeného vzduchu (14) vyskočí z
rychlospojky (13).
3. Zatlačte nástroj na stlačený vzduch
do rychlospojky na hadici na stlačený
vzduch.
60
Page 61
CZ
Pokynykpráci
Nastavenístlačeného
vzduchu
Nastavený tlak lze odečíst na rychlospojkách (13). Tento tlak lze nastavit pomocí
regulátoru tlaku (4) a lze jej odečíst na
manometru (nastavený tlak) (5).
1. Ke zvýšení otočte regulátorem tlaku (4)
ve směru hodinových ručiček.
2. Ke snížení otočte regulátorem tlaku (4)
proti směru hodinových ručiček.
Čištěníaúdržba
Před jakoukoliv prací vypně-
te přístroj avytáhněte před
každou prací na přístroji síťovou zástrčku ze zásuvky.
Opravné a údržbářské práce, které
nejsou popsány vtomto návodu
kobsluze, přenechte našemu servisnímu centru. Používejte pouze originální díly.
K zaručení bezzávadného provozu odstraňte prach a nečistoty ze vzduchového
ltru (1a) cca po každých 300 provozních
hodinách.
1. Sejměte víko vzduchového ltru (1).
2. Vyjměte vzduchový ltr (1a).
3. Vyklepejte vzduchový ltr (1a).
4. Vyčistěte vzduchový ltr (1a) a víko
vzduchového ltru (1) trochou stlačené-
ho vzduchu (cca 3 bary).
5. Znovu v obráceném pořadí namontujte
vzduchový ltr (1a) a víko vzduchového ltru (1).
Vypuštěníkondenzační
vody
Po každém provozu vypusťte z tlakové nádoby (10) kondenzační vodu.
1. Otevřete vypouštěcí šroub (12).
2. Kondenzační vodu zachyťte do vhodné
nádoby.
3. K vypuštění zbývající kndenzační vody
nádobu mírně nakloňte dopředu.
4. Znovu uzavřete vypouštěcí šroub (12).
Pravidelně provádějte následující údržbu
ačištění. Tím zajistíte dlouhou životnost
aspolehlivé užívání.
• Větrací otvory na krytu přístroje nezakrývejte, jinak se přístroj přehřeje.
Čištěnívzduchového
ltru
Přístroj nikdy neprovozujte bez
vzduchového ltru. Prach anečis-
toty se jinak dostanou do motoru
azapříčiní poškození.
Kontrola pojistného ventilu
Pojistný ventil slouží k odlehčení tlaku v případě přetlaku v tlakové nádobě.
K zajištění správné funkce stiskněte pojistný ventil cca každých 30 provozních
hodin, minimálně však 3krát ročně.
1. Spusťte přístroj (viz „Zapnutí/vypnutí“.
2. Otočením pojistného ventilu (3) ve směru hodinových ručiček otevřete pojistný
ventil (3). Pojistným ventilem (3) by se
měl nyní vypouštět vzduch.
3. Otočením pojistného ventilu (3) proti
směru hodinových ručiček pojistný ventil (3) opět uzavřete.
61
Page 62
CZ
Skladování
• Vždy skladujte přístroje a příslušenství:
- suché.
- čisté.
- bez prachu.
- mimo dosah dětí.
• Oviňte síťové vedení (9) kolem držáku
síťového vedení (19).
• Hadici stlačeného vzduchu (14) naviňte
na navíjení hadice (8).
• Příp. postavte přístroj kolmo.
• Vypusťte přetlak v kompresoru vypnutím
kompresoru a použitím stále přítomného stlačeného vzduchu v tlakové nádobě (10).
• Vypusťte kondenzační vodu. (viz („Vypuštění kondenzační vody“).
Přeprava
K jízdě s přístrojem použijte obloukovou rukojeť (7). Při přepravě dbejte na hmotnost
přístroje.
Likvidace/ochrana
životníhoprostředí
Přístroj, příslušenství a balení zlikvidujte
ekologickou recyklací.
Elektrická zařízení nepatří do do-
mácího odpadu.
• Přístroj odevzdejte na sběrném recyklačním místě. Použité plastové a kovové
části lze oddělit a vytřídit pro recyklaci.
V případě dotazů se obraťte na servisní
centrum.
• Likvidaci Vašich vadných zaslaných
přístrojů provádíme bezplatně.
Náhradnídíly/
příslušenství
Náhradní díly a příslušenství
obdržíte na stránkách
www.grizzlytools-service.eu
Pokud máte problémy při objednávání, použijte prosím kontaktní formulář. V případě
jakýchkoliv dalších dotazů se obraťte na
servisní středisko / „Service-Center“ (viz
strana 64).
Pol. Označení Č. artiklu
14 hadice na stlačený vzduch 10m 91105933
1a vzduchový ltr 91105932
11 sada kol 91105929
8 navíjení hadice 91105930
12 vypouštěcí šroub 91105928
6 zapínač/vypínač 91105931
13 sada rychlospojek 91105926
62
Page 63

CZ
Záruka
Vážení zákazníci,
Na tento přístroj poskytujeme 3letou záruku od data zakoupení.
V případě závady tohoto výrobku vám vůči
prodejci výrobku přináleží zákonná práva.
Tato zákonná práva nejsou omezena naší
následovně uvedenou zárukou.
Záruční podmínky
Záruční doba začíná běžet ode dne nákupu. Uschovejte si, prosím, originál účtenky
pro pozdější použití. Tento dokument budete potřebovat jako doklad o koupi.
Zjistíte-li během tří let od data koupě u
tohoto výrobku materiálovou nebo výrobní
vadu, bude výrobek námi, podle našeho
výběru, bezplatně opraven nebo nahrazen. Tato záruční oprava předpokládá, že
během 3leté lhůty předložíte poškozený
přístroj s dokladem o koupi (pokladní stvrzenka) a písemně krátce popíšete, v čem
spočívá závada a kdy k ní došlo.
Bude-li závada kryta naší zárukou, získáte zpět opravený nebo nový výrobek.
Opravou nebo výměnou výrobku nezačíná
záruční doba běžet od začátku.
Záruční doba a zákonné nároky na
odstranění vady
Záruční doba se neprodlužuje poskytnutím
záruky. Toto platí i pro nahrazené a opravené díly. Již při koupi zjištěné závady
a nedostatky musíte nahlásit okamžitě
po vybalení výrobku. Po uplynutí záruční
doby musíte uhradit náklady za provedené
opravy.
Rozsah záruky
Přístroj byl precizně vyroben podle přísných jakostních směrnic a před dodáním
byl svědomitě zkontrolován.
Záruční oprava se vztahuje na materiálové
nebo výrobní vady. Tato záruka se netýká
dílů výrobku, které jsou vystaveny normálnímu opotřebení, a lze je považovat
za spotřební materiál (např. adaptér na
ventilek, hadice na stlačený vzduch), nebo
poškození křehkých dílů (např. spínač).
Tato záruka neplatí, je-li výrobek poškozen
z důvodu neodborného používání, nebo
pokud u něj nebyla prováděna údržba.
Pro odborné používání výrobku musí být
přesně dodržovány všechny pokyny uvedené v návodu k obsluze. Bezpodmínečně je
třeba zabránit používání a manipulacím s
výrobkem, které nejsou v návodu k obsluze
doporučeny, nebo je před nimi varováno.
Výrobek je určen jen pro soukromé účely
a ne pro komerční využití. Záruka zaniká
v případě zneužívání a neodborné manipulace, používání nadměrné síly a při
zásazích, které nebyly provedeny naším
autorizovaným servisem.
Postup v případě uplatňování
záruky
Pro zajištění rychlého zpracování vaší
žádosti, prosím, postupujte podle následujících pokynů:
• Na důkaz, že jste výrobek zakoupili,
mějte pro jakékoli případné dotazy
připravenou pokladní stvrzenku a číslo
výrobku (IAN 356332_2004).
• Číslo výrobku je uvedeno na typovém
štítku.
• Pokud by došlo k funkční poruše nebo
jiným závadám, nejdříve telefonicky
nebo e-mailem kontaktujte níže uvedené servisní oddělení. Pak získáte další
informace o vyřízení vaší reklamace.
• Výrobek označený jako vadný může-
te po domluvě s naším zákaznickým
servisem, s připojením dokladu o koupi
(pokladní stvrzenky) a po uvedení, v
čem závada spočívá a kdy k ní došlo,
63
Page 64

CZ
přeposlat bez platby poštovného na
vám sdělenou adresu příslušného servisu. Aby bylo zabráněno problémům
s přijetím a dodatečnými náklady,
bezpodmínečně použijte jen tu adresu,
která vám bude sdělena. Zajistěte, aby
zásilka nebyla odeslána nevyplaceně
jako nadměrné zboží, expres nebo
jiný, zvláštní druh zásilky. Přístroj zašlete včetně všech částí příslušenství
dodaných při zakoupení a zajistěte
dostatečně bezpečný přepravní obal.
Opravna
Opravy, které nespadají do záruky, můžete nechat udělat v našem servisu oproti
zúčtování. Rádi vám připravíme předběžný
odhad nákladů. Můžeme zpracovávat jen
ty přístroje, které byly dostatečně zabalené
a odeslány vyplaceně.
Pozor: Prosím, přístroj zašlete našemu autorizovanému servisu vyčištěný a s upozorněním na závadu.
Nepřijmeme přístroje zaslané nevyplaceně
jako nadměrné zboží, expres nebo jiný,
zvláštní druh zásilky.
Likvidaci vašich poškozených zaslaných
přístrojů provedeme bezplatně.
Service-Center
Servis Česko
CZ
IAN 356332_2004
Dovozce
Prosím, respektujte, že následující adresa
není adresou servisu. Nejdříve kontaktujte
shora uvedené servisní středisko.
Grizzly Tools GmbH & Co. KG
Stockstädter Straße 20
63762 Großostheim
NĚMECKO
www.grizzlytools-service.eu
64
Page 65

SK
Obsah
Úvod..........................................65
Používanie podľa určenia ...........65
Všeobecný popis ........................ 66
Rozsah dodávky .............................66
Opis funkcie ................................... 66
Prehľad ..........................................66
Technické údaje ..........................66
Bezpečnostné pokyny ................67
Všeobecné bezpečnostné pokyny
pre elektrické náradia ...................... 67
Uvedenie do prevádzky .............69
Montáž oblúkového držadla .............69
Montáž kolies .................................69
Zapnutie/vypnutie ...........................69
Obsluha .....................................69
Montáž hadice stlačeného vzduchu ... 69
Pracovné pokyny .......................70
Nastavenie stlačeného vzduchu ........ 70
Čistenie a údržba .......................70
Čistenie vzduchového ltra ...............70
Vypustenie kondenzovanej vody .......70
Kontrola bezpečnostného ventilu .......70
Skladovanie ...............................71
Preprava ...................................71
Likvidácia/ochrana životného
prostredia ..................................71
Náhradné diely/príslušenstvo .... 71
Záruka ......................................72
Servisná oprava ........................73
Service-Center ............................73
Dovozca .....................................73
Preklad originálneho
prehlásenia o zhode CE .............. 81
Výkres náhradných dielov ... 83/84
Úvod
Gratulujeme Vám k zakúpeniu Vášho
nového prístroja. Tým ste sa rozhodli pre
kvalitný produkt. Tento prístroj bol počas
výroby testovaný na kvalitu a podrobený
výstupnej kontrole. Tým je zabezpečená
funkčnosť vášho prístroja. Nie je vylúčené,
že v ojedinelých prípadoch sa na prístroji
alebo v prístroji, resp. v hadiciach nachádza zvyšková voda alebo mazivá. Nie je to
chyba alebo defekt a ani dôvod na obavu.
Návod na obsluhu je súčasťou tohto
produktu. Obsahuje dôležité upozornenia ohľadom bezpečnosti, obsluhy a
likvidácie. Pred používaním produktu sa
oboznámte so všetkými pokynmi pre obsluhu a bezpečnosť. Používajte produkt len
predpísaným spôsobom a len v uvedených
oblastiach použitia. Návod na obsluhu
uschovajte a v prípade odovzdania produktu tretím osobám odovzdajte aj všetky
podklady.
Používaniepodľa
určenia
Kompresor je určený na prevádzkovanie
nástrojov poháňaných stlačeným vzduchom (napr. hustič pneumatík, vyfukovacia
pištoľ a lakovacia pištoľ). Prístroj nie je
vhodný na prevádzkovanie nástrojov,
ktoré si vyžadujú vysokú spotrebu stlačené-
ho vzduchu.
Každé iné použitie môže viesť k škodám
na prístrojoch a predstavovať vážne nebezpečenstvo pre používateľa. Tieto prístroje
nie sú vhodné na komerčné používanie. Pri
komerčnom používaní záruka zaniká.
Výrobca neručí za škody, ktoré vzniknú
iným používaním než podľa určenia alebo
nesprávnou obsluhou.
65
Page 66
SK
Všeobecný popis
Vyobrazenia pre obsluhu a
údržbu nájdete na prednej odklápacej strane.
Rozsah dodávky
Najprv vybaľte prístroj a skontrolujte, či je
kompletný.
• Kompresor
• Oblúkové držadlo
• 2 kolesá
• Montážny materiál
• 10 m hadice stlačeného vzduchu
• Inbusový kľúč
• Návod na obsluhu
Obalový materiál riadne zlikvidujte.
Opis funkcie
Kompresor je určený na prevádzkovanie
nástrojov poháňaných stlačeným vzdu-
chom.
Funkcia prvkov obsluhy je uvedená v nasledujúcich opisoch.
Prehľad
14 Hadica stlačeného vzduchu
15 Inbusový kľúč
7a Inbusová skrutka
10a Držiak na oblúkové držadlo
16 Kryt kolesa
17 Skrutka kolesa
18 Poistná matica
1a Vzduchový lter
19 Držiak sieťového kábla
Technické údaje
Vertikálny kompresor 50 l ......PVKO 50 A1
Menovité napätie U .......... 230 V~; 50 Hz
Menovitý výkon P .......................1800 W
Otáčky motora n
max. pracovný tlak P
Hmotnosť m ...................................35 kg
Objem kotla .................................... 50 l
Nasávací výkon .................cca 260 l/min
Druh ochrany...................................IPX0
Hladina akustického tlaku
) ................... 71,9 dB(A), KpA= 3 dB
(L
pA
Hladina akustického výkonu (L
nameraná ....90,9 dB(A); K
zaručená .............................. 93 dB(A)
....................2850 min
0
.. 1,0 MPa (10 bar)
max
)
WA
= 2,29 dB
WA
-1
1 Kryt vzduchového ltra
2 Manometer (tlakový kotol)
3 Bezpečnostný ventil
4 Regulátor tlaku
5 Manometer (nastavený tlak)
6 Vypínač zap/vyp
7 Oblúkové držadlo
8 Navíjanie hadice
9 Sieťové vedenie
10 Tlakový kotol
11 Koleso
12 Vypúšťacia skrutka
13 Rýchlospojky
66
Uvedená emisná hodnota vibrácií bola
nameraná podľa normovanej skúšobnej
metódy a môže byť použitá na porovnanie
jedného elektrického prístroja s druhým.
Uvedená emisná hodnota vibrácií môže
byť použitá aj na úvodné posúdenie vysadenia prístroja.
Výstraha:
Emisná hodnota vibrácií sa môže
počas skutočného používania
elektrického nástroja odlišovať od
uvádzanej hodnoty, v závislosti od
Page 67
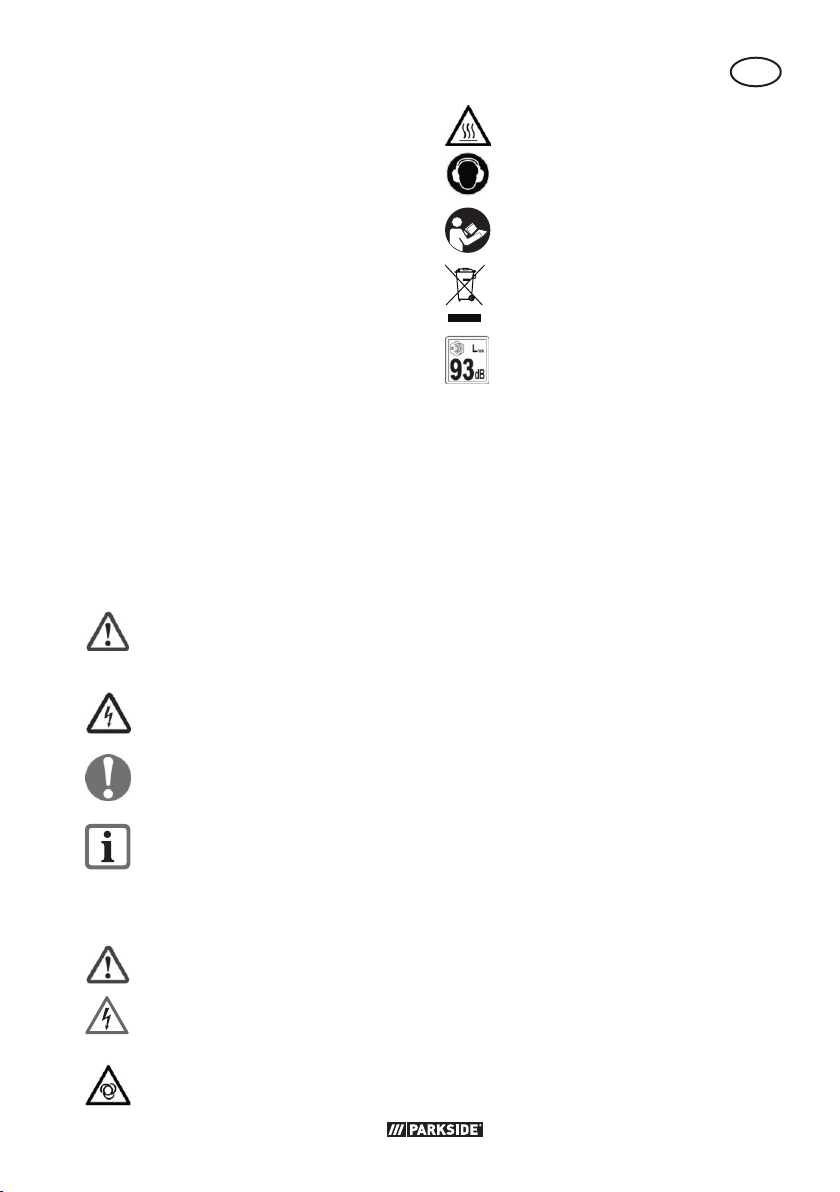
SK
druhu a spôsobu, v akom sa elek-
trický prístroj používa.
Zaťaženie spôsobené vibráciami
sa pokúste udržať tak malé, ako
je to možné. Príkladné opatrenia
na zníženie zaťaženia vibráciami
je nosenie rukavíc pri používaní
nástroja a obmedzenie pracovného
času. Pritom sa zohľadnia všetky
podiely cyklu prevádzky (napríklad
časy, kedy je elektrické zariadenie
vypnuté a také, kedy je zapnuté,
ale bez zaťaženia).
Bezpečnostnépokyny
Tento odstavec pojednáva o základných
bezpečnostných predpisoch pri práci s
zariadenie.
Symboly v návode
Výstražné značky s údajmi
pre zabránenie škodám na
zdraví alebo vecným škodám
Existuje nebezpečenstvo zá-
sahu elektrickým prúdom
Príkazové značky s údajmi pre pre-
venciu škôd
Informačné značky s informáciami
pre lepšie zaobchádzanie s nástro-
jom
Symboly na prístroji
Pozor!
Nebezpečenstvo v dôsledku zásahu
elektrickým prúdom!
Výstraha! Kompresorová stanica sa
môže spustiť bez výstrahy.
Pozor – horúci povrch
Noste ochranu sluchu!
Pozorne si prečítajte návod na ob-
sluhu.
Elektrické prístroje nepatria do do-
mového odpadu.
Údaj hladiny akustického výkonu
v dB
L
WA
Všeobecnébezpečnostnépokyny pre elektrické náradia
Pojem „elektrické náradie“ uvedený v bezpečnostnom pokyne sa vzťahuje na elektrické náradie pripojené na elektrickú sieť
(so sieťovým káblom) a elektrické náradie
pripojené na akumulátor (bez sieťového
kábla).
Bezpečná práca:
• Vašu pracovnú oblasť udržujte v
poriadku.
Neporiadok v pracovnej oblasti môže
mať za následok úrazy.
• Zohľadnite vplyvy okolia.
– Elektrické náradie nevystavujte daž-
ďu.
– Nepoužívajte elektrické náradie vo
vlhkom alebo mokrom prostredí.
Vniknutie vody do elektrického náradia zvyšuje riziko úrazu elektrickým
prúdom.
– Postarajte sa o dobré vetranie pra-
covnej oblasti.
– Nepoužívajte elektrické náradie,
kde existuje nebezpečenstvo požiaru alebo výbuchu. Elektrické náradie
vytvára iskry, ktoré môžu zapáliť
prach alebo výpary.
67
Page 68

SK
• Chráňte sa pred zásahom elek-
trickým prúdom.
Zabráňte kontaktu tela s uzemnenými
časťami (napr. rúry, radiátory, elektrické sporáky, chladiace zariadenia).
• Iné osoby nech sa nezdržujú v
blízkosti. Ostatné osoby, zvlášť deti,
nenechajte dotýkať sa elektrického
náradia alebo kábla. Držte ich mimo
svojej pracovnej oblasti.
• Nepoužívané elektrické náradie
bezpečne uschovajte.
Nepoužívané elektrické náradie je
nutné odložiť na suchom, vysoko položenom alebo uzavretom mieste, mimo
dosahu detí. Existuje nebezpečenstvo
poranenia.
• Elektrické náradie nepreťažujte.
Pracujete lepšie a bezpečnejšie v uvedenom rozsahu výkonov.
• Používajte správne elektrické
náradie.
– Na ťažké práce nepoužívajte stroje
so slabým výkonom.
– Vaše elektrické náradie nepoužívaj-
te na také účely, na ktoré nie je určené. Nepoužívajte napríklad ručnú
kotúčovú pílu na rezanie konárov
stromov alebo polien.
Používanie elektrického náradia na iné
ako plánované aplikácie môže viesť k
nebezpečným situáciám.
• Noste vhodný pracovný odev.
– Nenoste široké oblečenie ani ozdo-
by, mohli by byť zachytené pohyblivými dielmi.
– Pri prácach na voľnom priestranstve
sa odporúča protišmyková obuv.
– V prípade dlhých vlasov noste sieťku
na vlasy.
• Používajte ochranné vybavenie.
– Pri prácach generujúcich prach pou-
žívajte dýchaciu masku.
• Nepoužívajte kábel na účely, na
ktoré nie je určený.
Nepoužívajte kábel na vytiahnutie sieťovej zástrčky zo zásuvky. Kábel chráňte pred horúčavou, olejom a ostrými
hranami. Poškodené alebo zamotané
káble zvyšujú riziko zásahu elektrickým
prúdom.
• Nedržte telo v neprirodzenej polohe.
Dbajte na bezpečný postoj a stále udržiavajte rovnováhu.
Tak je možné elektrické náradie lepšie
kontrolovať v neočakávaných situáciách.
• Vaše náradie ošetrujte so starostlivosťou. Veľa úrazov má svoju
príčinu v zle udržiavanom elektrickom
náradí.
– Dodržiavajte pokyny k mazaniu a
výmene nástroja.
– Pravidelne kontroluje sieťový kábel
elektrického náradia a tento nechajte v prípade poškodenia vymeniť
uznávaným odborníkom.
– Pravidelne kontrolujte predlžovacie
vedenia a vymeňte ich, ak sú poško-
dené.
– Udržiavajte držadlá suché, čisté a
bez oleja a mastnoty.
• Vytiahnite sieťovú zástrčku zo
zásuvky v prípade nepoužívania
elektrického náradia, pred údržbou a
pri výmene nástrojov.
Toto bezpečnostné opatrenie bráni
neúmyselnému spusteniu elektrického
náradia.
• Používajte predlžovací kábel pre
vonkajšiu oblasť.
Vonku používajte iba schválené a príslušne označené predlžovacie káble.
• Buďte opatrní.
Dávajte pozor na to čo robíte a pri
práci rozmýšľajte. Nepoužívajte elek-
68
Page 69
SK
trické náradie, keď ste nekoncentrovaní. Chvíľka nepozornosti pri používaní
elektrického náradia môže spôsobiť
vážne poranenia.
• Elektrické náradie skontrolujte
vzhľadom na prípadné poškode-
nia.
Tým sa zabezpečí, že bezpečnosť elektrického náradia zostane zachovaná.
– Pred ďalším použitím elektrického
náradia sa musia ochranné zariadenia alebo ľahko poškodené diely
skontrolovať vzhľadom na ich bezchybnú funkciu na určený účel.
– Skontrolujte, či pohyblivé časti majú
bezchybnú funkciu a nie sú zaseknuté alebo či diely nie sú poškodené.
Všetky diely musia byť správne zabudované a všetky podmienky splnené, aby sa zabezpečila správna
prevádzka elektrického náradia.
– Poškodené ochranné zariadenia a
diely sa musia podľa účelu opraviť
alebo vymeniť v uznávanej odbornej
dielni, pokiaľ v návode na obsluhu
nie je uvedené niečo iné.
– Nepoužívajte elektrické náradie, pri
ktorom sa nedá vypínač zapnúť a
vypnúť. Poškodené vypínače sa musia vymeniť v zákazníckom servise.
• Pozor!
Používanie iných vložených nástrojov a
iného príslušenstva môže pre vás znamenať nebezpečenstvo zranenia.
• Vaše elektrické náradie nechajte
opraviť odborným elektrikárom.
Toto elektrické náradie zodpovedá príslušným bezpečnostným ustanoveniam.
Opravy smie vykonávať iba odborný
elektrikár tak, že sa použijú originálne
náhradné diely; v opačnom prípade
môžu vzniknúť úrazy pre používateľa.
• Ak sa pripojovací kábel tohto prístroja
poškodí, musí byť vymenený výrobcom
alebo jeho zákazníckym servisom alebo podobne kvalikovanou osobou,
aby sa zabránilo ohrozeniam.
Uvedenie do prevádzky
Montážoblúkového
držadla
1. Oblúkové držadlo (7) zatlačte do držiaka pre oblúkové držadlo (10a) na
tlakovom kotle (10).
2. Upevnite oblúkové držadlo (7) pomocou inbusových skrutiek a priloženého
inbusového kľúča (15).
Montážkolies
1. Skrutku kolesa (17) zaveďte cez otvor v
kolese (11).
2. Skrutku kolesa (17) zaveďte cez otvor
na sútyčí kolesa.
3. Koleso (11) upevnite pomocou poistnej
matice (18). Príp. si k tomu zoberte na
pomocou skrutkovač (nie je súčasťou
dodávky).
4. Zatlačte kryt kolesa (16) na koleso
(11).
5. Zopakujte kroky 1 – 4 na druhom kolese.
Zapnutie/vypnutie
1. Na zapnutie preklopte vypínač zap/
vyp (6) do polohy „I“.
2. Na vypnutie preklopte vypínač zap/
vyp (6) do polohy „0“.
Obsluha
Montážhadice
stlačenéhovzduchu
1. Hadicu stlačeného vzduchu (14) zatlačte do jednej z oboch rýchlospojok
69
Page 70
SK
(13). Hadica stlačeného vzduchu (14)
zaskočí.
Demontáž hadice stlačeného
vzduchu
2. Zatlačte krúžok spojky na rýchlospojke
(13) k prístroju. Hadica stlačeného
vzduchu (14) skočí z rýchlospojky (13).
3. Zatlačte pneumatický nástroj do rýchlospojky na hadici stlačeného vzduchu.
Pracovné pokyny
Nastaveniestlačeného
vzduchu
Na rýchlospojkách (13) môže klesať nastavený tlak. Tento tlak je možné nastaviť cez
regulátor tlaku (4) a je ho možné odčítať
na manometri (nastavený tlak) (5).
1. Na zvýšenie otočte regulátor tlaku (4) v
smere hodinových ručičiek.
2. Na zníženie otočte regulátor tlaku (4)
proti smeru hodinových ručičiek.
Čistenieaúdržba
Pred všetkými prácami na
prístroji vypnite prístroj a vy-
tiahnite sieťovú zástrčku.
Údržbárske a opravárske práce,
ktoré nie sú opísané v tomto návode, nechajte vykonať nášmu
servisnému centru. Používajte len
originálne diely.
Čistenievzduchového
ltra
Prístroj nikdy neprevádzkujte bez
vzduchového ltra. Inak sa do motora dostane prach a špina a môže
spôsobiť škody.
Vzduchový lter čistite (1a) cca každých
300 prevádzkových hodín od prachu a
špiny, aby bolo možné zaručiť bezchybnú
prevádzku.
1. Odoberte kryt vzduchového ltra (1).
2. Vyberte vzduchový lter (1a).
3. Vyklepte vzduchový lter (1a).
4. Vyčistite vzduchový lter (1a) a kryt
vzduchový ltra (1) trochou stlačeného
vzduchu (cca 3 bar).
5. Namontujte vzduchový lter (1a) a kryt
vzduchového ltra (1) znova v opačnom poradí.
Vypustenie
kondenzovanej vody
Po každej prevádzke vyprázdnite tlakový
kotol (10) od kondenzovanej vody.
1. Otvorte výpustnú skrutku (12).
2. Kondenzovanú vodu zachyťte vo vhodnej nádobe.
3. Naklopte nádobu smerom dopredu,
aby ste vypustili zvyšnú kondenzovanú
vodu.
4. Výpustnú skrutku (12) znova zatvorte.
Pravidelne vykonávajte údržbárske a čistiace práce. Tým sa zabezpečí dlhá a spoľahlivá životnosť.
• Vetracie štrbiny na kryte prístroja udržiavajte stále voľné, v opačnom prípa-
de nastane prehriatie.
70
Kontrolabezpečnostného
ventilu
Bezpečnostný ventil slúži na vypustenie tlaku, v prípade pretlaku v tlakovom kotle.
Bezpečnostný ventil stláčajte cca každých
30 prevádzkových hodín, ale min. 3 krát
za rok, aby ste zaistili správnu funkciu.
Page 71
SK
1. Spustite prístroj (pozri „Zapnutie/Vyp-
nutie“.
2. Bezpečnostný ventil (3) otočte v smere
hodinových ručičiek, aby ste otvorili
bezpečnostný ventil (3). Bezpečnostný
ventil (3) by mal teraz vypúšťať vzduch.
3. Bezpečnostný ventil (3) otočte proti
smeru hodinových ručičiek, aby ste
bezpečnostný ventil (3) znova zatvorili.
Skladovanie
• Prístroje a diely príslušenstva uskladnite
vždy:
– v suchu.
– v čistote.
– bez prachu.
– mimo dosahu detí.
• Oviňte sieťový kábel (9) okolo držiaka
pre sieťový kábel (19).
• Oviňte hadicu stlačeného vzduchu (14)
okolo navíjania hadice (8).
Postavte prístroj príp. vodorovne.
• Vypustite pretlak v kompresore tak, že
vypnete kompresor a spotrebujete stla-
čený vzduch ešte existujúci v tlakovom
kotle (10).
• Vypustite kondenzovanú vodu. (pozri
(„Vypustenie kondenzovanej vody“).
Preprava
Na pohybovanie s prístrojom použite oblúkové držadlo (7). Pri preprave zohľadnite
hmotnosť prístroja.
Likvidácia/ochrana
životnéhoprostredia
Prístroj, príslušenstvo a obal odovzdajte na
ekologické zhodnotenie.
Elektrické prístroje nepatria do do-
mového odpadu.
• Prístroj odovzdajte na zbernom mieste
na ďalšie zhodnotenie. Použité plastové
a kovové diely sa môžu vytriediť podľa
druhov a tak odovzdať na ekologické
zhodnotenie. Informujte sa o tom v na-
šom servisnom centre.
• Likvidáciu vašich zaslaných chybných
prístrojov vykonáme bezplatne.
Náhradné diely/
príslušenstvo
Náhradné diely a príslušenstvo
nájdete na strane
www.grizzlytools-service.eu
Ak by sa mali vyskytnúť problémy s procesom objednávky, použite, prosím, kontaktný formulár. Pri ďalších otázkach sa
obráťte na „Service-Center“ (pozri stranu
73).
71
Page 72

SK
Pol. Označenie Č. artiklu
14 Hadica stlačeného vzduchu 10 m 91105933
1a Vzduchový lter 91105932
11 Súprava kolies 91105929
8 Navíjanie hadice 91105930
12 Vypúšťacia skrutka 91105928
6 Vypínač zap/vyp 91105931
13 Súprava rýchlospojok 91105926
Záruka
Vážená zákazníčka, vážený zákazník,
Pre tento prístroj platí záruka 3 roky od
dátumu zakúpenia.
Ak je prístroj poškodený, podľa zákona
máte právo ho reklamovať u výrobcu produktu. Tieto práva vyplývajúce zo zákona
nie sú našou následne opísanou zárukou
obmedzené.
Záručné podmienky
Záručná lehota začína dňom zakúpenia.
Pokladničný doklad ako originál prosím
starostlivo uschovajte. Je potrebný ako dôkaz o zakúpení.
Ak sa počas troch rokov od dátumu zakúpenia tohto produktu vyskytne materiálna
alebo výrobná chyba, produkt - podľa
nášho rozhodnutia - bezplatne opravíme
alebo nahradíme. Predpokladom záruky je, že v priebehu trojročnej lehoty
bude predložený poškodený prístroj a
pokladničný doklad a stručne opísaná chy-
ba a kedy sa vyskytla.
Ak sa v rámci našej záruky chyba pokryje,
obdržíte späť opravený alebo nový prístroj.
S opravou alebo výmenou produktu sa
nezačína nová záručná doba.
Záručná doba a nárok na odstránenie vady
Záručná doba sa poskytnutím záruky
nepredlžuje. To platí aj pre nahradené
a opravené diely. Prípadné škody a nedostatky vzniknuté už pri zakúpení sa
musia ihneď po vybalení ohlásiť. Opravy
vykonané po uplynutí záručnej doby sú
spoplatnené.
Rozsah záruky
Prístroj bol vyrobený podľa prísnych smerníc kvality a pred dodaním bol svedomite
kontrolovaný.
Záruka sa týka materiálových alebo
výrobných chýb. Táto záruka sa nevzťahuje
na diely produktu, ktoré sú vystavené
normálnemu opotrebeniu a preto sa môžu
považovať za opotrebované diely (napr.
ventilový adaptér, hadica stlačeného vzduchu) alebo na poškodenia na krehkých
dieloch (napr. vypínač).
Táto záruka zaniká, ak bol produkt
používaný poškodený, neodborne alebo
nebola vykonávaná údržba. Pre odborné používanie produktu je nutné presne
dodržiavať všetky návody uvedené v
návode na obsluhu. Bezpodmienečne sa
vyhnite používaniu, ktoré sa v návode na
obsluhu neodporúča alebo pred ktorým ste
boli vystríhaní.
72
Page 73
SK
Produkt je určený len pre súkromné
použitie a nie v oblasti podnikania. Záruka zaniká pri nesprávnom a neodbornom
používaní, pri násilnom používaní a pri
zásahoch, ktoré neboli vykonané v našej
servisnej pobočke.
Postup v prípade reklamácie
Pre zabezpečenie rýchleho spracovania
vašej žiadosti postupujte prosím podľa nasledujúcich pokynov:
• Pri všetkých požiadavkách predložte
pokladničný doklad a číslo artiklu
(IAN 356332_2004) ako dôkaz o
zakúpení.
• Číslo artiklu nájdete na typovom štítku.
• Ak sa vyskytnú chyby funkcie alebo
iné nedostatky, kontaktujte najskôr
následne uvedené servisné oddelenie
telefonicky alebo emailom. Následne
obdržíte ďalšie informácie o priebehu
vašej reklamácie.
• Produkt evidovaný ako poškodený
môžete po dohode s našim zákazníckym servisom, s priloženým dokladom
o zakúpení (pokladničný doklad) a s
údajmi, v čom chyba spočíva a kedy
vznikla, zaslať bez poštovného na
adresu servisu, ktorá vám bude oznámená. Pre zabránenie dodatočných
nákladov a problémov pri prevzatí
použite len tú adresu, ktorá vám bude
oznámená. Nezasielajte prístroj ako
nadmerný tovar na náklady príjemcu,
expresne alebo s iným špeciálnym
nákladom. Prístroj zašlite so všetkými
časťami príslušenstva dodanými pri
zakúpení a zabezpečte dostatočne
bezpečné prepravné balenie.
Servisná oprava
Opravy, ktoré nepodliehajú záruke,
môžeme nechať vykonať v našej servisnej
pobočke za úhradu. Radi vám poskytneme
predbežnú kalkuláciu nákladov.
Môžeme spracovať len prístroje, ktoré boli
doručené dostatočne zabalené a so zaplateným poštovným.
Pozor: Prístroj zašlite do našej servisnej
pobočky vyčistený a s informáciami o
chybe.
Neprevezmeme prístroje zaslané ako nadmerný tovar na náklady príjemcu, expresne alebo s iným špeciálnym nákladom.
Likvidáciu vašich poškodených zaslaných
prístrojov vykonáme bezplatne.
Service-Center
Servis Slovensko
SK
Tel.: 0850 232001
E-Mail: [email protected]
IAN 356332_2004
Dovozca
Nasledujúca adresa nie je adresa servisu.
Najskôr kontaktujte hore uvedené servisné
centrum.
Grizzly Tools GmbH & Co. KG
Stockstädter Straße 20
63762 Großostheim
NEMECKO
www.grizzlytools-service.eu
73
Page 74

74
Page 75
DE
AT
CH
Hiermit bestätigen wir, dass der
Vertikaler Kompressor 50 l
Modelle: PVKO 50 A1
Seriennummer
000001 - 067500
folgenden einschlägigen EU-Richtlinien in ihrer jeweils gültigen Fassung entspricht:
2006/42/EG • 2014/30/EU • 2014/68/EU • 2014/29/EU
2000/14/EG • 2005/88/EG • 2011/65/EU & (EU)2015/863*
Um die Übereinstimmung zu gewährleisten, wurden folgende harmonisierte Normen
sowie nationale Normen und Bestimmungen angewendet:
EN 1012-1:2010 • EN 60204-1:2018 • EN IEC 63000:2018
EN 61000-6-1:2007 • EN 61000-6-3:2007/A1:2011
Zusätzlich wird entsprechend der Geräuschemissionsrichtlinie 2000/14/EG bestätigt:
Schallleistungspegel:
Garantiert: 93 dB(A);
Gemessen: 90,9 dB(A)
Angewendetes Konformitätsbewertungsverfahren entsprechend Anh. VI /
2000/14/EG und 2005/88/EG
Benannte Stelle: NB0036; TÜV SÜD Industrie Service GmbH, Westendstrasse 199,
80686 München, Germany
Baumusterbescheinigungs-Nr.: Z-IS-AN1-MAN-20-08-2708744-04115611
Konformitätserklärung
Original-EG-
Die alleinige Verantwortung für die Ausstellung dieser Konformitätserklärung trägt der
Hersteller:
Grizzly Tools GmbH & Co. KG
Stockstädter Straße 20
63762 Großostheim
Germany
05.12.2020
* Der oben beschriebene Gegenstand der Erklärung erfüllt die Vorschriften der Richtlinie
2011/65/EU des Europäischen Parlaments und des Rates vom 8. Juni 2011 zur Beschränkung
der Verwendung bestimmter gefährlicher Stoffe in Elektro- und Elektronikgeräten.
Christian Frank
Dokumentationsbevollmächtigter
75
Page 76
GB
IE
We hereby declare that the
50L Vertical Compressor
model series: PVKO 50 A1
Serial number
000001 - 067500
conforms with the following applicable relevant version of the EU guidelines:
2006/42/EC • 2014/30/EU • 2014/68/EU • 2014/29/EU
2000/14/EC • 2005/88/EC • 2011/65/EU & (EU)2015/863*
In order to guarantee consistency, the following harmonised standards as well as national standards and stipulations have been applied:
EN 1012-1:2010 • EN 60204-1:2018 • EN IEC 63000:2018
EN 61000-6-1:2007 • EN 61000-6-3:2007/A1:2011
We additionally conrm the following in accordance with the 2000/14/EC emissions
guideline:
Sound power level
Guaranteed: 93 dB(A);
Measured: 90,9 dB(A)
Compliance evaluation process carried out in accordance with Appendix VI, /
2000/14/EC and 2005/88/EC
Registered Ofce: NB0036; TÜV SÜD Industrie Service GmbH, Westendstrasse 199,
80686 München, Germany
Design Type Certicate No.: Z-IS-AN1-MAN-20-08-2708744-04115611
Translation of the original
EC declaration of conformity
This declaration of conformity is issued under the sole responsibility of the manufacturer:
Grizzly Tools GmbH & Co. KG
Stockstädter Straße 20
63762 Großostheim
Germany
05.12.2020
* The object of the declaration described above satises the provisions of Directive 2011/65/EU
of the European Parliament and the Council of 8 June 2011 on limiting the use of certain harmful
substances in electrical and electronic appliances.
Christian Frank
Documentation Representative
76
Page 77
FR
BE
Nous certions par la présente que le
Compresseur vertical 50 L
de construction PVKO 50 A1
Numéro de série
000001 - 067500
est conforme aux directives UE actuellement en vigueur :
2006/42/EC • 2014/30/EU • 2014/68/EU • 2014/29/EU
2000/14/EC • 2005/88/EC • 2011/65/EU & (EU)2015/863*
En vue de garantir la conformité les normes harmonisées ainsi que les normes et décisions nationales suivantes ont été appliquées :
EN 1012-1:2010 • EN 60204-1:2018 • EN IEC 63000:2018
EN 61000-6-1:2007 • EN 61000-6-3:2007/A1:2011
Nous certions également conformément à la directive sur les émissions de bruit
2000/14/EC que:
Niveau de puissance acoustique
garanti: 93 dB(A);
mesuré: 90,9 dB(A)
Procédé d’évaluation de la conformité appliqué selon l’annexe VI / 2000/14/EC et
2005/88/EC
Bureau declaré: NB0036; TÜV SÜD Industrie Service GmbH, Westendstrasse 199,
80686 München, Germany
Attestation de modèle type N°: Z-IS-AN1-MAN-20-08-2708744-04115611
Traduction de la déclaration
de conformité CE originale
This declaration of conformity is issued under the sole responsibility of the manufacturer:
Grizzly Tools GmbH & Co. KG
Stockstädter Straße 20
63762 Großostheim
Germany
05.12.2020
* L‘objet de la déclaration décrit ci-dessus est conforme aux dispositions de la directive
2011/65/UE du Parlement Européen et du Conseil du 8 juin 2011 sur la limitation de l‘utilisation
de certaines substances dangereuses dans les équipements électriques et électroniques.
Christian Frank
Chargé de documentation
77
Page 78
NL
BE
Vertaling van de originele
CE-conformiteitsverklaring
Hiermede bevestigen wij dat de
Verticale compressor 50 l
bouwserie PVKO 50 A1
Serienummer
000001 - 067500
is overeenkomstig met de hierna volgende, van toepassing zijnde EU-richtlijnen:
2006/42/EC • 2014/30/EU • 2014/68/EU • 2014/29/EU
2000/14/EC • 2005/88/EC • 2011/65/EU & (EU)2015/863*
Om de overeenstemming te waarborgen, werden de hierna volgende, in overeenstemming gebrachte normen en nationale normen en bepalingen toegepast:
EN 1012-1:2010 • EN 60204-1:2018 • EN IEC 63000:2018
EN 61000-6-1:2007 • EN 61000-6-3:2007/A1:2011
ovendien wordt in overeenstemming met de geluidsemissierichtlijn 2000/14/EC bevestigd:
Akoestisch niveau
gegarandeerd: 93 dB(A);
gemeten: 90,9 dB(A)
Toegepaste conformiteitbeoordelingsprocedure in overeenstemming met Annex VI /
2000/14/EC en 2005/88/EC
Benoemde instantie: NB0036; TÜV SÜD Industrie Service GmbH, Westendstrasse
199, 80686 München, Germany
Apparaat-Type nr.: Z-IS-AN1-MAN-20-08-2708744-04115611
De exclusieve verantwoordelijkheid voor de uitgifte van deze conformiteitsverklaring
wordt gedragen door de fabrikant:
Grizzly Tools GmbH & Co. KG
Stockstädter Straße 20
63762 Großostheim
Germany
05.12.2020
* Het hierboven beschreven voorwerp van de verklaring voldoet aan de voorschriften van
de richtlijn 2011/65/EU van het Europese Parlement en van de Raad van 8 juni 2011 inzake
beperking van het gebruik van bepaalde gevaarlijke stoffen in elektrische en elektronische apparaten.
Christian Frank
Documentatiegelastigde
78
Page 79
PL
Tłumaczenieoryginalnej
deklaracjizgodnościWE
Niniejszym oświadczamy, że:
Pionowy kompresor 50 l
typoszereg PVKO 50 A1
numer seryjny
000001 - 067500
spełnia wymogi odpowiednich Dyrektyw UE w ich aktualnie obowiązującym brzmieniu:
2006/42/EC • 2014/30/EU • 2014/68/EU • 2014/29/EU
2000/14/EC • 2005/88/EC • 2011/65/EU & (EU)2015/863*
W celu zapewnienia zgodności z powyższymi dyrektywami zastosowano następujące
normy harmonizujące oraz normy i przepisy krajowe:
EN 1012-1:2010 • EN 60204-1:2018 • EN IEC 63000:2018
EN 61000-6-1:2007 • EN 61000-6-3:2007/A1:2011
Ponadto potwierdzono, zgodnie z dyrektywą w sprawie emisji hałasu 2000/14/ EC:
Poziom mocy akustycznej
gwarantowany: 93 dB(A);
zmierzony: 90,9 dB(A)
Zastosowana procedura oceny zgodności odpowiada załącznikowi VI/ 2000/14/EC
i 2005/88/EC
Placówka zgłoszenia: NB0036; TÜV SÜD Industrie Service GmbH, Westendstrasse
199, 80686 München, Germany
Zaświadczenie o wzorze konstrukcyjnym nr:
Z-IS-AN1-MAN-20-08-2708744-04115611
Wyłączną odpowiedzialność za wystawienie tej deklaracji zgodności ponosi producent
Grizzly Tools GmbH & Co. KG
Stockstädter Straße 20
63762 Großostheim
Germany
05.12.2020
* Wyżej opisany przedmiot deklaracji spełnia wymogi dyrektywy 2011/65/UE Parlamentu
Europejskiego i Rady z dnia 8 czerwca 2011r. w sprawie ograniczenia stosowania niektórych
niebezpiecznych substancji w sprzęcie elektrycznym i elektronicznym.
Osoba upoważniona do sporządzania
Christian Frank
dokumentacji technicznej
79
Page 80
CZ
Překladoriginálního
prohlášeníoshoděCE
Potvrzujeme tímto, že
Vertikální kompresor 50 l
konstrukční řady PVKO 50 A1
Pořadové číslo
000001 - 067500
odpovídá následujícím příslušným směrnicím EÚ v jejich právě platném znění:
2006/42/EC • 2014/30/EU • 2014/68/EU • 2014/29/EU
2000/14/EC • 2005/88/EC • 2011/65/EU & (EU)2015/863*
Aby byl zaručen souhlas, byly použity následující harmonizované normy, národní normy a ustanovení:
EN 1012-1:2010 • EN 60204-1:2018 • EN IEC 63000:2018
EN 61000-6-1:2007 • EN 61000-6-3:2007/A1:2011
Navíc se v souhlase se směrnicí pro emisi hluku 2000/14/EC potvrzuje:
Úroveň akustického výkonu:
zaručená: 93 dB(A);
měřená: 90,9 dB(A)
Použitý postup konformitního ohodnocení dle dodatku Appendix VI, /
2000/14/EC a 2005/88/EC
Místo hlášení: NB0036; TÜV SÜD Industrie Service GmbH, Westendstrasse 199,
80686 München, Germany
Potvrzení o konstrukčním typu čís.: Z-IS-AN1-MAN-20-08-2708744-04115611
Výhradní odpovědnost za vystavení tohoto prohlášení o shodě nese výrobce:
Grizzly Tools GmbH & Co. KG
Stockstädter Straße 20
63762 Großostheim
Germany
05.12.2020
* Výše popsaný předmět prohlášení splňuje předpisy směrnice 2011/65/EU Evropského parlamentu a Rady z 8. června 2011 o omezení používání některých nebezpečných látek v elektrických a elektronických zařízeních.
Christian Frank
Osoba zplnomocněná k sestavení
dokumentace
80
Page 81
SK
Preklad originálneho
prehlásenia o zhode CE
Týmto potvrdzujeme, že
Vertikálny kompresor 50 l
konštrukčnej rady PVKO 50 A1
Poradové číslo
000001 - 067500
zodpovedá nasledujúcim príslušným smerniciam EÚ v ich práve platnom znení:
2006/42/EC • 2014/30/EU • 2014/68/EU • 2014/29/EU
2000/14/EC • 2005/88/EC • 2011/65/EU & (EU)2015/863*
Aby bola zaručená zhoda, boli použité nasledovné harmonizované normy ako i
národné normy a predpisy:
EN 1012-1:2010 • EN 60204-1:2018 • EN IEC 63000:2018
EN 61000-6-1:2007 • EN 61000-6-3:2007/A1:2011
Okrem toho sa v súlade so smernicou o emisiách hluku 2000/14/EC potvrdzuje:
Hladina akustického výkonu:
zaručená: 93 dB(A);
nameraná: 90,9 dB(A)
Použitý postup hodnotenia zhody v súlade s dodatkom VI, / 2000/14/EC a
2005/88/EC
Certikačn orgán: NB0036; TÜV SÜD Industrie Service GmbH, Westendstrasse 199,
80686 München, Germany
číslo certikát vzorky daného typu výrobku: Z-IS-AN1-MAN-20-08-2708744-04115611
Jediný zodpovedný za vystavenie tohto vyhlásenia o zhode je výrobca:
Grizzly Tools GmbH & Co. KG
Stockstädter Straße 20
63762 Großostheim
Germany
05.12.2020
* Vyššie popísaný predmet vyhlásenia spĺňa predpisy smernice 2011/65/EU Európskeho parlamentu a Rady z 8. júna 2011 pre obmedzenie používania určitých nebezpečných látok v elektrických a elektronických prístrojoch.
Christian Frank
Osoba splnomocnená na zostavenie
dokumentácie
81
Page 82

82
Page 83
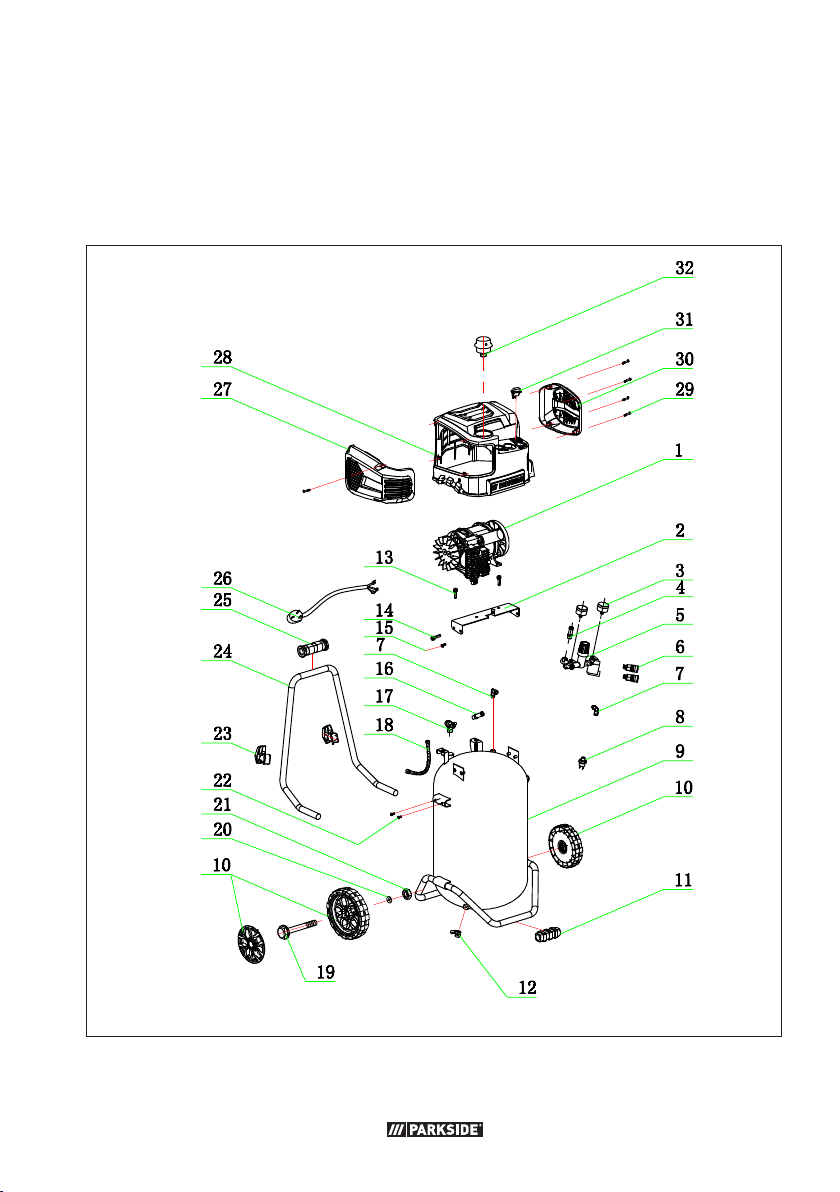
Explosionszeichnung • Exploded Drawing
Vue éclatée • Explosietekening
RysunkieksplozyjneVýkressestavení
Výkres náhradných dielov
PVKO 50 A1
informativ informative · informatif informatief · pouczający · informační · informatívny
83
Page 84
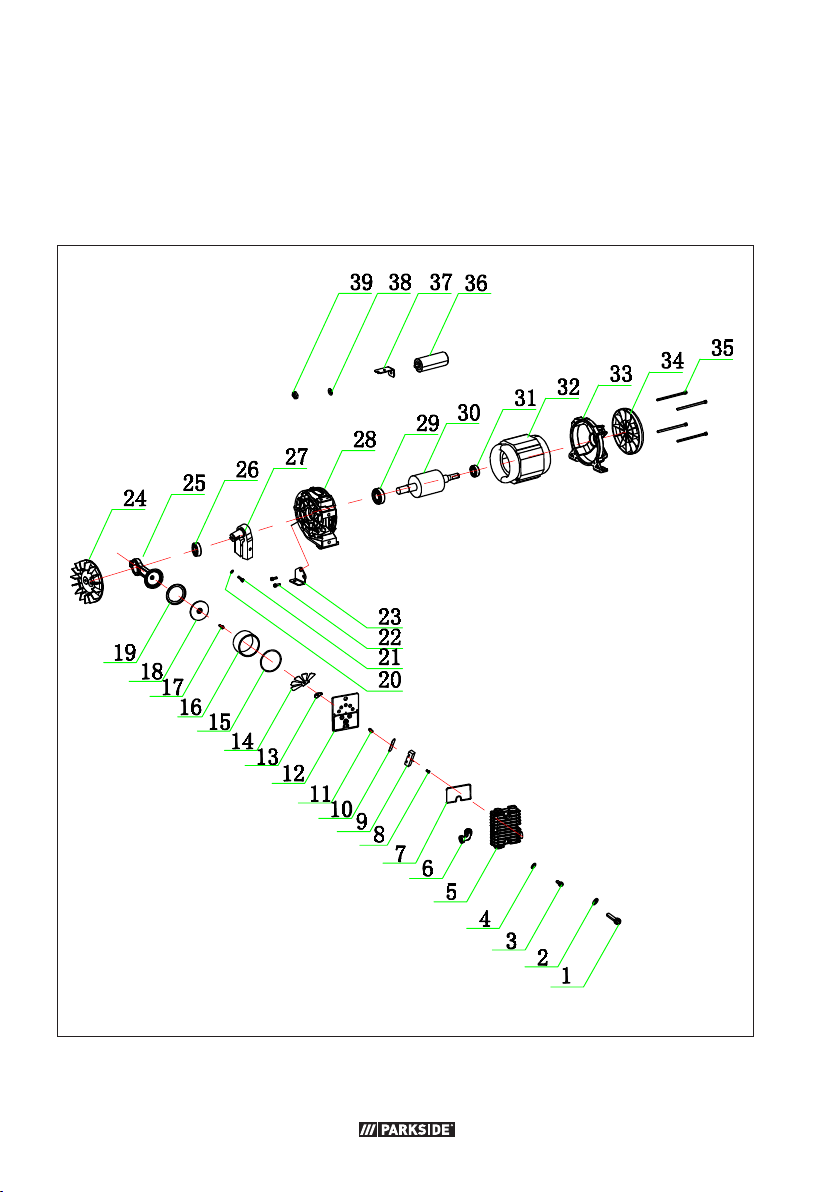
Explosionszeichnung • Exploded Drawing
Vue éclatée • Explosietekening
RysunkieksplozyjneVýkressestavení
Výkres náhradných dielov
PVKO 50 A1
informativ informative · informatif informatief · pouczający · informační · informatívny
20201106_rev02_mt
84
Page 85

85
Page 86
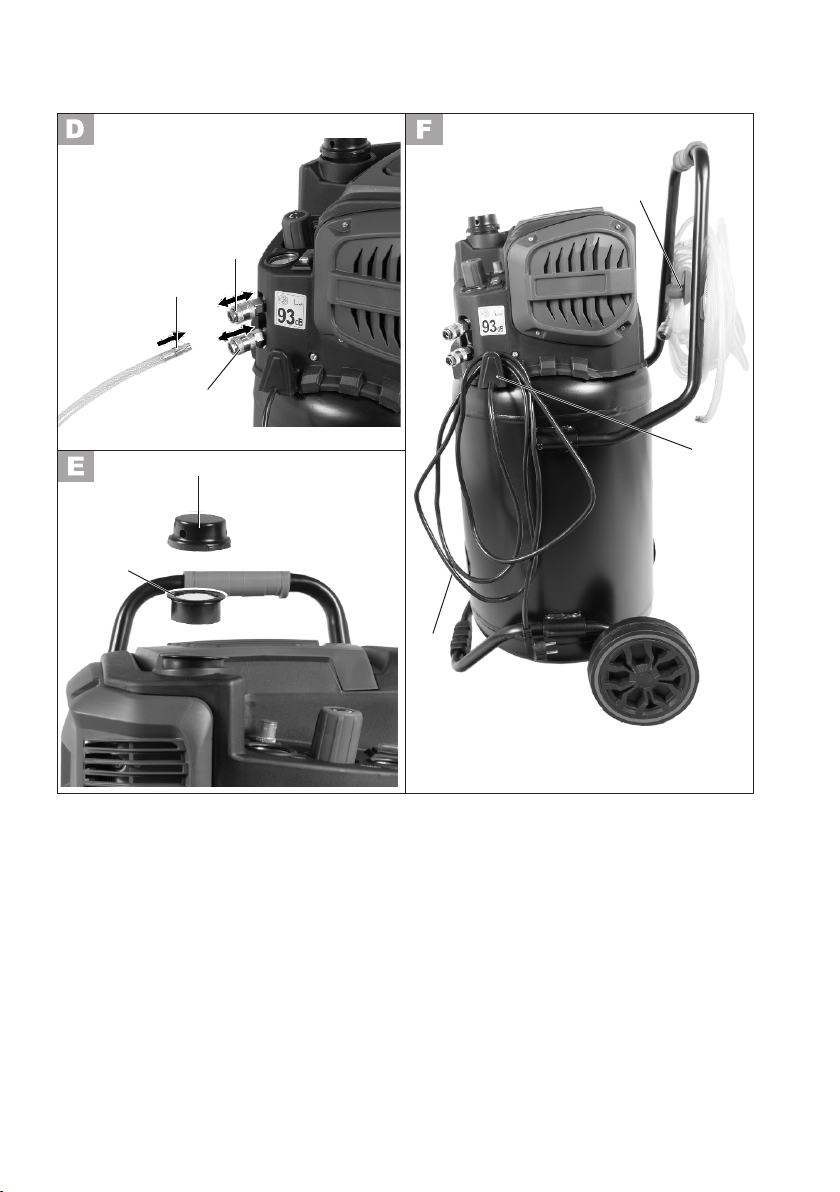
14
8
13
13
1a
1
9
19
86
Page 87

87
Page 88
GRIZZ LY TOOLS GM BH & CO. KG
Stockstädter Straße 20
DE-63762 Großostheim
GERMANY
Stand der Informationen · Last Information
Update · Version des informations ·
Stand van de informatie · Stan informacji ·
Stav informací · Stav informácií: 11/2020
Id ent.-No .: 8 95 0 01281120 20 - 8
IAN 356332_2004
 Loading...