

Page 1

AKKU-KREUZLINIENLASER 4 V/
CORDLESS CROSS LINE LASER4V/
NIVEAU LASER EN CROIX
SANSFIL4V PKLLP 360 B2
AKKU-KREUZLINIENLASER
4 V
Bedienungs- und Sicherheitshinweise
CORDLESS CROSS LINE
LASER 4V
Operation and safety notes
NIVEAU LASER EN CROIX
SANS FIL 4V
Instructions d‘utilisation et consignes de
sécurité
ACCU-KRUISLIJNLASER
4V
Bedienings- en veiligheidsinstructies
AKU KŘÍŽOVÝ LINIOVÝ
LASER 4V
Pokyny pro obsluhu a bezpečnostní
pokyny
AKUMULÁTOROVÝ
KRÍŽOVÝ LÍNIOVÝ LASER
4V
Pokyny pre obsluhu a bezpečnostné
pokyny
NIVEL LÁSER DE LÍNEAS
CRUZADAS RECARGABLE
4V
Instrucciones de utilización y de
seguridad
AKUMULATOROWY
LASER KRZYŻOWY 4V
Wskazówki dotyczące obsługi i
bezpieczeństwa
IAN 364888_2101
BATTERIDREVEN
KRYDSLINJELASER 4V
Brugs- og sikkerhedsanvisninger
Page 2
DE/AT/CH
GB/IE Operation and safety notes Page 19
FR/BE Instructions d‘utilisation et consignes de sécurité Page 33
NL/BE Bedienings- en veiligheidsinstructies
PL Wskazówki dotyczące obsługi i bezpieczeństwa Strona 62
CZ Pokyny pro obsluhu a bezpečnostní pokyny Strana 76
SK Pokyny pre obsluhu a bezpečnostné pokyny Strana 90
ES Instrucciones de utilización y de seguridad
DK Brugs- og sikkerhedsanvisninger Side 118
Bedienungs- und Sicherheitshinweise Seite 5
Pagina
Página
48
104
Page 3
A
[1] [2]
[]
[]
[]
[]
[]
[9]
[3]
[4]
[5]
[6]
[7]
[8]
[]
[]
[] []
[]
[]
[]
Page 4
B
[]
[]
[6]
[]
C
[7]
[8]
[]
[]
[9]
Page 5

Verwendete Warnhinweise und Symbole Seite 6
Einleitung ..................................... Seite 7
Bestimmungsgemäßer Gebrauch.................... Seite 7
Lieferumfang.................................... Seite 7
Teilebeschreibung ............................... Seite 8
Technische Daten................................ Seite 8
Sicherheitshinweise ......................... Seite 9
Sicherheitshinweise für Batterien / Akkus.............. Seite 10
Vor der ersten Verwendung................ Seite 11
Bedienung .................................... Seite 11
Akku aufladen .................................. Seite 11
Ein-/Ausschalten................................. Seite 12
Horizontale und vertikale Laserlinie verwenden......... Seite 12
Arbeiten mit der Nivellierautomatik .................. Seite 12
Arbeiten ohne Nivellierautomatik.................... Seite 13
Arbeiten mit dem Stativ ........................... Seite 13
Stativ einstellen.................................. Seite 14
Reinigung und Pflege ....................... Seite 15
Lagerung ..................................... Seite 15
Fehlerbehebung ............................. Seite 15
Entsorgung ................................... Seite 16
Garantie ...................................... Seite 17
V 4.0
5DE/AT/CH
Page 6
Verwendete Warnhinweise und Symbole
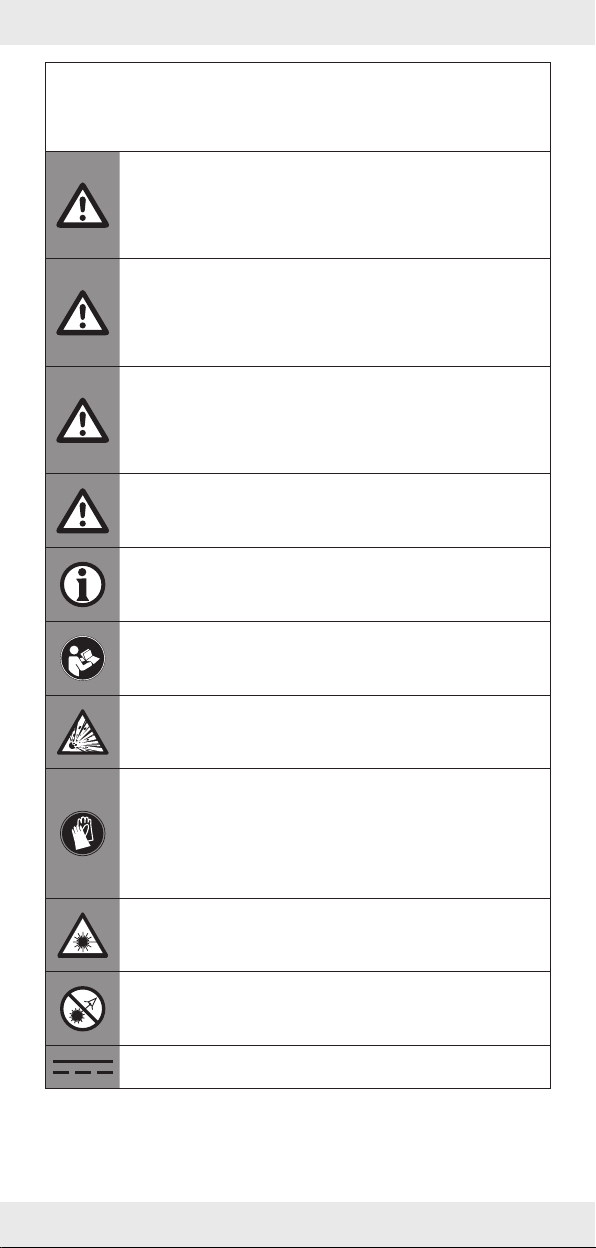
In dieser Bedienungsanleitung und auf der Verpackung werden die
folgenden Warnhinweise verwendet:
GEFAHR! Dieses Symbol mit dem Signalwort „Gefahr“
bezeichnet eine Gefährdung mit einem hohen Risikograd,
die, wenn sie nicht vermieden wird, eine schwere Verletzung
oder den Tod zur Folge hat.
WARNUNG! Dieses Symbol mit dem Signalwort
„Warnung“ bezeichnet eine Gefährdung mit einem mittleren
Risikograd, die, wenn sie nicht vermieden wird, eine schwere
Verletzung oder den Tod zur Folge haben kann.
VORSICHT! Dieses Symbol mit dem Signalwort „Vorsicht“
bezeichnet eine Gefährdung mit einem niedrigen Risikograd,
die, wenn sie nicht vermieden wird, eine geringe oder
mäßige Verletzung zur Folge haben kann.
ACHTUNG! Dieses Symbol mit dem Signalwort „Achtung“
zeigt die Gefahr einer möglichen Sachbeschädigung an.
HINWEIS: Dieses Symbol mit dem Signalwort „Hinweis“
bietet weitere nützliche Informationen.
Dieses Symbol bedeutet, dass bei der Verwendung des
Produkts die Betriebsanleitung zu beachten ist.
Explosionsrisiko!
Dieses Pflichtzeichen weist auf das Tragen geeigneter
Schutzhandschuhe hin! Befolgen Sie die Anweisungen
dieser Warnung, um Handverletzungen durch Gegenstände
oder den Kontakt mit heißen oder chemischen Stoffen zu
vermeiden.
Schützen Sie sich vor Laserstrahlung!
Nicht in den Laserstrahl blicken!
Gleichstrom/-spannung
6 DE/AT/CH
Page 7
USB-Anschluss
Nur in trockenen Innenräumen verwenden.
Das CE-Zeichen bestätigt Konformität mit den für das Produkt
zutreffenden EU-Richtlinien.
AKKU-KREUZLINIENLASER 4 V
Einleitung
Wir beglückwünschen Sie zum Kauf Ihres neuen Produkts. Sie haben sich
damit für ein hochwertiges Produkt entschieden. Die Bedienungsanleitung
ist Teil dieses Produkts. Sie enthält wichtige Hinweise für Sicherheit,
Gebrauch und Entsorgung. Machen Sie sich vor der Benutzung des
Produkts mit allen Bedien- und Sicherheitshinweisen vertraut. Benutzen
Sie das Produkt nur wie beschrieben und für die angegebenen
Einsatzbereiche. Händigen Sie alle Unterlagen bei Weitergabe des
Produkts an Dritte mit aus.
Bestimmungsgemäßer Gebrauch
Dieses Produkt eignet sich für die Projektion senkrechter und waagrechter
Linien. Die beiden Laserlinien können sowohl einzeln als auch gleichzeitig
genutzt werden.
Verwenden Sie dieses Produkt nicht für andere Zwecke.
Dieses Produkt ist nur für die bestimmungsgemäße Verwendung im
Innenbereich vorgesehen.
Dieses Produkt ist ausschließlich für die Nutzung in privaten Haushalten
und nicht für gewerbliche Zwecke vorgesehen.
Der Hersteller übernimmt keine Haftung für Schäden aufgrund
unsachgemäßer Verwendung.
Lieferumfang
Überprüfen Sie nach dem Auspacken des Produkts, ob die Lieferung
vollständig ist und ob alle Teile in ordnungsgemäßem Zustand sind.
Entfernen Sie vor der Verwendung sämtliche Verpackungsmaterialien.
Kontaktieren Sie den Kundenservice, falls Teile fehlen oder beschädigt
sein sollten.
1x Akku-Kreuzlinienlaser
1x Stativ
1x USB-C-Ladekabel
1x Bedienungsanleitung
7DE/AT/CH
Page 8

Teilebeschreibung
Falten Sie vor dem Lesen die Ausklappseite mit den Zeichnungen aus.
Machen Sie sich mit allen Funktionen des Produkts vertraut.
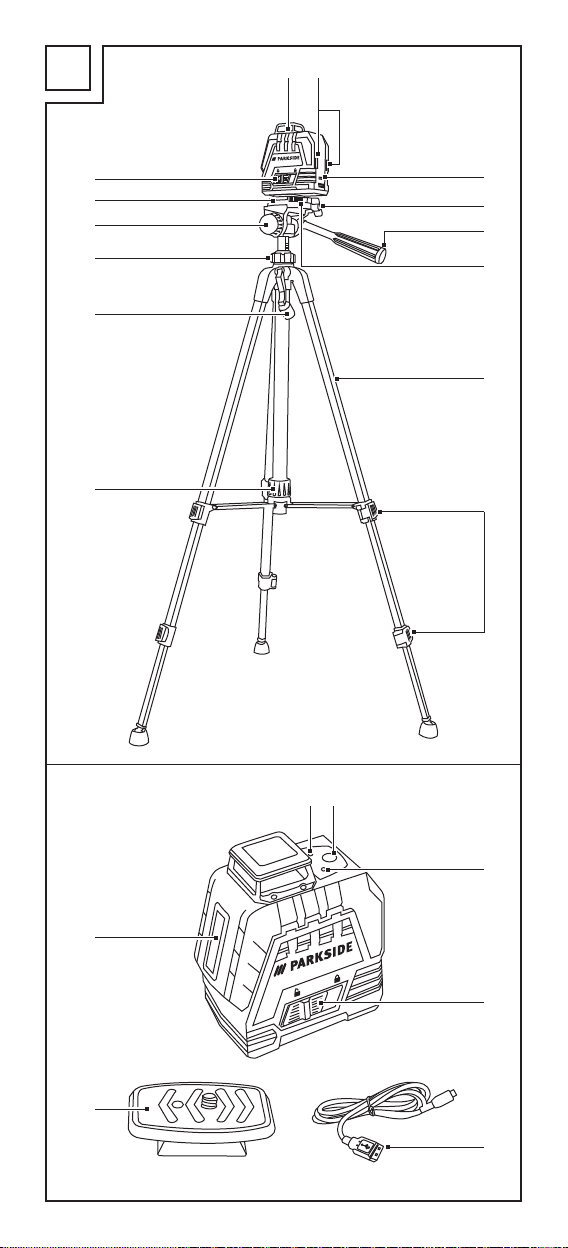
(Abb. A)
[1] 360°-Laser
[2] Magnete
[3] Ladebuchse
[4] Flügelschraube
[5] Griffschraube
[6] Hebel
[7] Stativbeine
[8] Klappverschlüsse
[9] Feststellring
[] Kurbel
[] Feststellring
[] Stellschraube
[] Libelle
[] Nivellier-Schiebeschalter
[] Ladekontrolllampe
[] Ein-/Aus-Taste
[] Nivellierlampe
[] Vertikaler Laser
[] Stativplatte
[] USB-C-Ladekabel
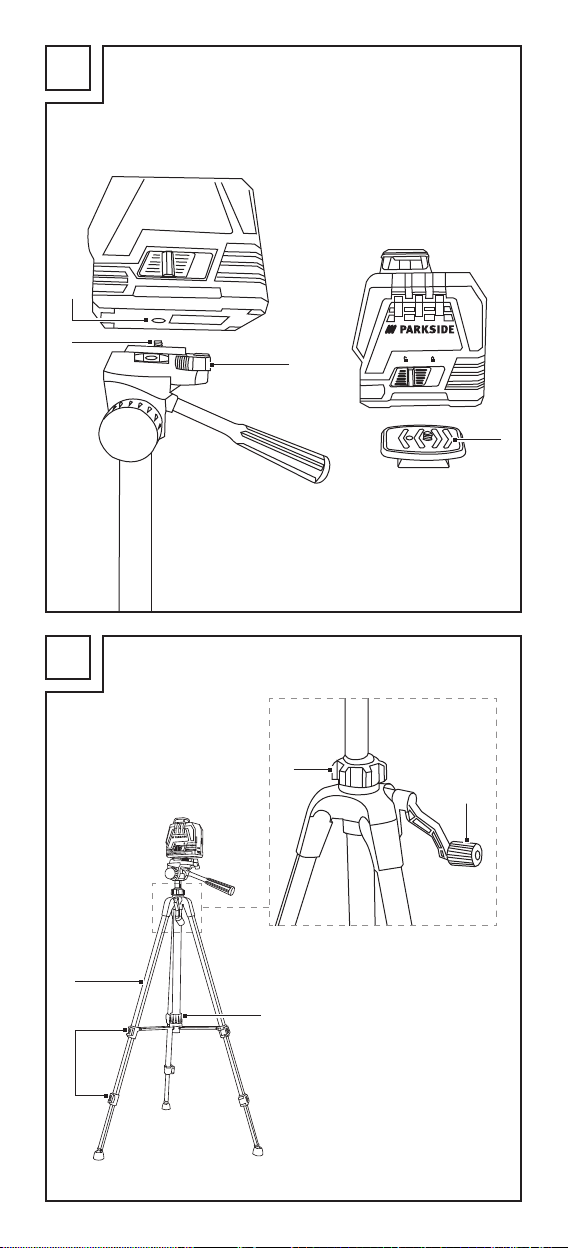
(Abb. B)
[] Innengewinde [] Stativschraube
Technische Daten
Arbeitsbereich: 20 m*
Gewicht (ohne Stativ): ca. 440 g
Betriebsspannung U
Nennkapazität: 2,6 Ah
Ladespannung UIN: 5 V
Ladestrom: 1,7 A
Selbstnivellierbereich: ± 3°
Nivelliergenauigkeit: ± 0,4 mm/m
Laserwellenlänge: 510–530 nm
Laserklasse: 2
Nivellierzeit: ca. 4 Sekunden
: 4 V
max
* Der Arbeitsbereich kann durch Umgebungsbedingungen (z. B. helles
Licht) eingeschränkt werden.
8 DE/AT/CH
Page 9
Sicherheitshinweise
MACHEN SIE SICH VOR DER BENUTZUNG
DES PRODUKTS MIT ALLEN SICHERHEITSUND BEDIENHINWEISEN VERTRAUT!
WENN SIE DIESES PRODUKT AN ANDERE
WEITERGEBEN, GEBEN SIE AUCH ALLE
DOKUMENTE WEITER!
Im Falle von Schäden aufgrund der
Nichteinhaltung dieser Bedienungsanleitung
erlischt Ihr Garantieanspruch!
Für Folgeschäden wird keine Haftung
übernommen! Im Falle von Sach- oder
Personenschäden aufgrund einer unsachgemäßen
Benutzung oder Nichteinhaltung der
Sicherheitshinweise wird keine Haftung
übernommen!
Kinder und Personen mit
Einschränkungen
WARNUNG! LEBENS GEFAHR UND
m
UNFALL GEFAHR FÜR SÄUGLINGE UND
KINDER!
Lassen Sie Kinder nicht mit dem
Verpackungsmaterial unbeaufsichtigt.
Das Verpackungs material stellt eine
Erstickungsgefahr dar.
Kinder unterschätzen die damit verbundenen
Gefahren häufig. Halten Sie Kinder stets von
Verpackungsmaterialien fern.
Das Produkt darf nur von Erwachsenen
verwendet werden. Kinder unter 16 Jahren
dürfen das Produkt nur unter Aufsicht
verwenden.
Halten Sie Kinder vom Produkt fern.
9DE/AT/CH
Page 10
Allgemeine Hinweise
Beachten Sie die Angaben in dieser
Bedienungsanleitung zur Bedienung, Reinigung,
Lagerung und Entsorgung.
Überprüfen Sie das Produkt vor jedem
Gebrauch. Lassen Sie ein beschädigtes Produkt
reparieren. Verwenden Sie kein beschädigtes
Produkt.
Schalten Sie das Produkt bei Nichtgebrauch
aus. Lassen Sie das Produkt nicht
unbeaufsichtigt.
Halten Sie das Produkt fern von medizinischen
Geräten, magnetischen Datenträgern und
magnetisch empfindlichen Geräten.
Umgang mit dem Laser
ACHTUNG! Laserstrahlung – Nicht in den
m
Strahl blicken! Laserklasse 2.
Laserstrahl nicht gegen Personen richten.
Kennzeichnungen und Warnhinweise befinden
sich auf der Ober- und Unterseite des Produkts.
Sicherheitshinweise für Batterien / Akkus
LEBENSGEFAHR! Halten Sie Batterien / Akkus außer Reichweite
m
von Kindern. Suchen Sie im Falle eines Verschluckens sofort einen
Arzt auf!
EXPLOSIONSGEFAHR! Laden Sie nicht aufladbare
Batterien niemals wieder auf. Schließen Sie Batterien / Akkus
nicht kurz und / oder öffnen Sie diese nicht. Überhitzung,
Brandgefahr oder Platzen können die Folge sein.
Werfen Sie Batterien / Akkus niemals in Feuer oder Wasser.
Setzen Sie Batterien / Akkus keiner mechanischen Belastung aus.
Risiko des Auslaufens von Batterien / Akkus
Vermeiden Sie extreme Bedingungen und Temperaturen, die auf
Batterien / Akkus einwirken können, z. B. auf Heizkörpern / direkte
Sonneneinstrahlung.
10 DE/AT/CH
Page 11

Wenn Batterien / Akkus ausgelaufen sind, vermeiden Sie den Kontakt
von Haut, Augen und Schleimhäuten mit den Chemikalien! Spülen Sie
die betroffenen Stellen sofort mit klarem Wasser und suchen Sie einen
Arzt auf!
SCHUTZHANDSCHUHE TRAGEN! Ausgelaufene oder
beschädigte Batterien / Akkus können bei Berührung mit der
Haut Verätzungen verursachen. Tragen Sie deshalb in diesem
Fall geeignete Schutzhandschuhe.
Dieses Produkt hat einen eingebauten Akku, welcher nicht durch
den Benutzer ersetzt werden kann. Der Ausbau oder Austausch des
Akkus darf nur durch den Hersteller oder seinen Kundendienst oder
eine ähnlich qualifizierte Person erfolgen, um Gefährdungen zu
vermeiden. Bei der Entsorgung ist darauf hinzuweisen, dass dieses
Produkt einen Akku enthält.
Vor der ersten Verwendung
Entfernen Sie das Verpackungsmaterial. Überprüfen Sie, ob alle Teile
vollständig sind.
Laden Sie den Akku auf (siehe „Akku aufladen“).
Bedienung
Akku aufladen
HINWEIS: Der Akku ist nicht austauschbar. Bei Problemen mit dem
Akku wenden Sie sich an das Service-Center.
1. Stecken Sie das USB-C-Ladekabel [] in die Ladebuchse [3].
2. Schließen Sie das USB-C-Ladekabel [] an einen USB-Port an.
Ladekontrolllampe []
Rot Akku wird aufgeladen.
Grün Akku ist voll aufgeladen.
3. Ziehen Sie nach erfolgtem Ladevorgang zuerst das
USB-C-Ladekabel
4. Ziehen Sie das USB-C-Ladekabel [] aus dem Produkt.
HINWEIS: Das Produkt kann während des Aufladens verwendet
werden. Es ist normal, dass sich das Produkt während des
Ladevorgangs leicht erwärmt. Während des Ladevorgangs kann es
vorkommen, dass Sie nicht mit dem Produkt arbeiten können, wenn
der Akku fast oder ganz leer ist. Dies hängt von dem verwendeten
Ladegerät ab.
[] aus dem USB-Port.
Bedeutung
11DE/AT/CH
Page 12

Ein-/Ausschalten
VORSICHT! Laserstrahlung ‒ Nicht in den Strahl [1] []
blicken! Wenden Sie den Kopf ab oder schließen Sie die
Augen, um einen Blick in den Laserstrahl zu vermeiden. Risiko
von Augenverletzungen!
Einschalten: Drücken Sie kurz die Ein-/Aus-Taste [].
Ausschalten: Halten Sie die Ein-/Aus-Taste [] 2 Sekunden lang
gedrückt.
Horizontale und vertikale Laserlinie
verwenden
Nach dem Einschalten sind die 360°-Laserlinie [1] und die vertikale
Laserlinie [] aktiviert.
Nur die 360°-Laserlinie [1] aktivieren:
Drücken Sie kurz die Ein-/Aus-Taste [].
Nur vertikale Laserlinie [] aktivieren:
Drücken Sie kurz die Ein-/Aus-Taste [].
Arbeiten mit der Nivellierautomatik
1. Schieben Sie den Nivellier-Schiebeschalter [] nach links
(geöffnetes Schloss).
2. Stellen Sie das Produkt auf einen waagerechten, festen Untergrund
oder befestigen Sie das Produkt auf einem Stativ (siehe „Arbeiten mit
dem Stativ“).
3. Schalten Sie das Produkt ein. Die Nivellierlampe [] leuchtet.
Nivellierlampe []
Grün Eine automatische Nivellierung ist möglich.
Rot Eine automatische Nivellierung ist nicht
HINWEIS: Bei Erschütterungen nivelliert sich der Laser wieder
automatisch. Warten Sie ab, bis sich die Laserlinien nicht mehr
bewegen.
12 DE/AT/CH
Bedeutung
Die Nivellierung ist abgeschlossen, wenn
sich die Laserlinien nicht mehr bewegen.
möglich. Die Laserlinien blinken.
Page 13

Arbeiten ohne Nivellierautomatik
HINWEISE:
Beim Arbeiten ohne Nivellierautomatik leuchtet die Nivellierlampe []
dauerhaft rot. Die abgebildeten Laserlinien sind nicht nivelliert.
Das Produkt verfügt über 2 Magnete [2]. Mit den Magneten
können Sie das Produkt an Oberflächen befestigen, die magnetische
Gegenstände anziehen, z. B. Regale aus Stahl.
ACHTUNG! Die verwendete magnetische Oberfläche sollte flach
m
und nicht gekrümmt oder uneben sein. Andernfalls könnte das Produkt
herunterfallen und beschädigt werden.
1. Schieben Sie den Nivellier-Schiebeschalter
(verriegeltes Schloss).
2. Schalten Sie das Produkt ein.
[] nach rechts
Arbeiten mit dem Stativ
(Abb. B)
Laser auf Stativplatte schrauben
Schrauben Sie das Produkt mit dem Innengewinde [] handfest auf
die Stativschraube [].
Stativplatte abnehmen/einsetzen
1. Öffnen Sie den Hebel
2. Nehmen Sie die Stativplatte [] nach oben heraus.
3. Platzieren Sie die Stativplatte [] zum Einsetzen auf dem Stativ.
4. Arretieren Sie die Stativplatte [], indem Sie den Hebel [6] schließen.
ACHTUNG! Wenden Sie keine zu große Kraft auf. Das Produkt
m
könnte beschädigt werden.
[6].
13DE/AT/CH
Page 14

Stativ einstellen
(Abb. C)
HINWEIS: Die horizontale Ausrichtung des Stativs können Sie an
der Libelle [] überprüfen.
1. Ziehen Sie die Stativbeine
2. Arretieren Sie die Stellung der Stativbeine [7] mit dem
Feststellring [9].
Höhe einstellen, Stativfüße
1. Öffnen Sie die Klappverschlüsse
2. Schieben Sie die Verlängerung der Stativbeine [7] auf die
gewünschte Länge.
3. Schließen Sie die Klappverschlüsse [8].
Höhe einstellen, Kurbel
1. Klappen Sie die Kurbel
2. Halten Sie die Kurbel [] mit einer Hand fest.
3. Lösen Sie den Feststellring [], indem Sie ihn nach links drehen.
4. Kurbeln Sie das Stativ auf die gewünschte Höhe.
5. Drehen Sie den Feststellring [] nach rechts, um diese Stellung zu
arretieren.
Neigung einstellen, vor/zurück
1. Drehen Sie die Griffschraube
2. Stellen Sie die gewünschte Neigung ein.
3. Drehen Sie die Griffschraube [5] nach rechts, um die Neigung zu
arretieren.
[7] auseinander.
[8].
[] hoch.
[5] zum Lockern nach links.
Neigung einstellen, seitlich
1. Drehen Sie die Flügelschraube
[4] zum Lockern nach links.
2. Klappen Sie das Stativ auf die gewünschte Neigung.
3. Drehen Sie die Flügelschraube [4] zum Arretieren nach rechts.
Stativ rotieren
1. Drehen Sie die Stellschraube
[] zum Lockern nach links.
2. Greifen Sie die Griffschraube [5] und drehen Sie das Stativ in die
gewünschte Richtung.
3. Drehen Sie die Stellschraube [] zum Arretieren nach rechts.
14 DE/AT/CH
Page 15

Reinigung und Pflege
WARNUNG! Tauchen Sie das Produkt niemals in Wasser oder
m
andere Flüssigkeiten.
WARNUNG! Zu Reparaturzwecken darf das Produkt nur von
m
einer Fachkraft geöffnet werden. Lassen Sie das Produkt von einer
qualifizierten Fachkraft und ausschließlich mit Original-Ersatzteilen
reparieren. Dadurch wird die Sicherheit des Produkts gewährleistet.
Das Produkt erfordert keinerlei Wartung.
Lassen Sie bei der Reinigung kein Wasser in das Produkt eindringen.
Halten Sie das Produkt sauber, um eine gutes und sicheres Arbeiten
zu gewährleisten.
Verwenden Sie ein trockenes Tuch, um das Äußere zu reinigen.
Reinigen Sie die Öffnungen des 360°-Lasers [1] und des vertikalen
Lasers [] mit einem sanften Luftstrahl. Entfernen Sie stärkere
Verschmutzungen mit einem leicht angefeuchteten Wattestäbchen.
Üben Sie keinen starken Druck aus!
Lagerung
Falls Sie das Produkt für längere Zeit nicht verwenden werden,
lagern Sie es an einem sauberen, trockenen Ort, der keiner direkten
Sonneneinstrahlung ausgesetzt ist.
Fehlerbehebung
Problem Mögliche Ursache Lösung
Produkt startet nicht. Akku ist leer.
Nivellierautomatik
kann nicht frei
Nivellierautomatik
funktioniert nicht.
schwingen. Produkt
ist nicht ausreichend
parallel zum Boden
ausgerichtet.
Laden Sie den Akku
auf.
Produkt parallel zum
Boden ausrichten.
15DE/AT/CH
Page 16
Entsorgung
Die Verpackung besteht aus umweltfreundlichen Materialien, die Sie über
die örtlichen Recyclingstellen entsorgen können.
Beachten Sie die Kennzeichnung der Verpackungsmaterialien
bei der Abfalltrennung, diese sind gekennzeichnet mit
Abkürzungen (a) und Nummern (b) mit folgender Bedeutung:
1–7: Kunststoffe / 20–22: Papier und Pappe / 80–98:
Verbundstoffe.
Das Produkt und die Verpackungsmaterialien sind recycelbar,
entsorgen Sie diese getrennt für eine bessere Abfallbehandlung.
Das Triman-Logo gilt nur für Frankreich.
Möglichkeiten zur Entsorgung des ausgedienten Produkts
erfahren Sie bei Ihrer Gemeinde- oder Stadtverwaltung.
Werfen Sie Ihr Produkt, wenn es ausgedient hat, im Interesse
des Umweltschutzes nicht in den Hausmüll, sondern führen Sie
es einer fachgerechten Entsorgung zu. Über Sammelstellen und
deren Öffnungszeiten können Sie sich bei Ihrer zuständigen
Verwaltung informieren.
Defekte oder verbrauchte Batterien / Akkus müssen gemäß Richtlinie
2006/66/EG und deren Änderungen recycelt werden. Geben Sie
Batterien / Akkus und / oder das Produkt über die angebotenen
Sammeleinrichtungen zurück.
Umweltschäden durch falsche Entsorgung der
Batterien / Akkus!
Batterien / Akkus dürfen nicht über den Hausmüll entsorgt werden.
Sie können giftige Schwermetalle enthalten und unterliegen der
Sondermüllbehandlung. Die chemischen Symbole der Schwermetalle
sind wie folgt: Cd = Cadmium, Hg = Quecksilber, Pb = Blei. Geben
Sie deshalb verbrauchte Batterien / Akkus bei einer kommunalen
Sammelstelle ab.
16 DE/AT/CH
Page 17

Garantie
Das Produkt wurde nach strengen Qualitätsrichtlinien sorgfältig produziert
und vor Anlieferung gewissenhaft geprüft. Im Falle von Mängeln dieses
Produkts stehen Ihnen gegen den Verkäufer des Produkts gesetzliche
Rechte zu. Diese gesetzlichen Rechte werden durch unsere im Folgenden
dargestellte Garantie nicht eingeschränkt.
Sie erhalten auf dieses Produkt 5 Jahre Garantie ab Kaufdatum. Die
Garantiefrist beginnt mit dem Kaufdatum. Bitte bewahren Sie den
Original-Kassenbon gut auf. Diese Unterlage wird als Nachweis für den
Kauf benötigt.
Tritt innerhalb von 5 Jahren ab dem Kaufdatum dieses Produkts ein
Material- oder Fabrikationsfehler auf, wird das Produkt von uns – nach
unserer Wahl – für Sie kostenlos repariert oder ersetzt. Diese Garantie
verfällt, wenn das Produkt beschädigt, nicht sachgemäß benutzt oder
gewartet wurde.
Die Garantieleistung gilt für Material- oder Fabrikationsfehler. Diese
Garantie erstreckt sich nicht auf Produktteile, die normaler Abnutzung
ausgesetzt sind (z. B. Batterien) und daher als Verschleißteile angesehen
werden können oder Beschädigungen an zerbrechlichen Teilen, z. B.
Schalter, Akkus oder die aus Glas gefertigt sind.
Abwicklung im Garantiefall
Um eine schnelle Bearbeitung Ihres Anliegens zu gewährleisten, folgen
Sie bitte den folgenden Hinweisen:
Bitte halten Sie für alle Anfragen den Kassenbon und die Artikelnummer
(z. B. IAN 123456_7890) als Nachweis für den Kauf bereit.
Die Artikelnummer entnehmen Sie bitte dem Typenschild, einer Gravur,
auf dem Titelblatt Ihrer Bedienungsanleitung (unten links) oder als
Aufkleber auf der Rück- oder Unterseite des Produkts.
Sollten Funktionsfehler oder sonstige Mängel auftreten, kontaktieren Sie
zunächst die nachfolgend benannte Serviceabteilung telefonisch oder per
E-Mail.
Ein als defekt erfasstes Produkt können Sie dann unter Beifügung des
Kaufbelegs (Kassenbon) und der Angabe, worin der Mangel besteht und
wann er aufgetreten ist, für Sie portofrei an die Ihnen mitgeteilte ServiceAnschrift übersenden.
17DE/AT/CH
Page 18
Service
Service Deutschland
Tel.: 0800 5435 111
E-Mail: [email protected]
Service Österreich
Service Schweiz
18 DE/AT/CH
Page 19

Warnings and symbols used ............... Page 20
Introduction .................................. Page 21
Intended use.................................... Page 21
Scope of delivery ................................ Page 21
Description of parts .............................. Page 22
Technical data .................................. Page 22
Safety instructions........................... Page 23
Safety instructions for batteries / rechargeable batteries . Page 24
Before first use ............................... Page 25
Operation..................................... Page 25
Charging the rechargeable battery .................. Page 25
Switching on/off ................................ Page 26
Using horizontal and vertical laser lines............... Page 26
Working with the automatic leveller.................. Page 26
Working without the automatic leveller ............... Page 27
Working with the tripod ........................... Page 27
Adjusting the tripod .............................. Page 28
Cleaning and care ........................... Page 29
Storage ....................................... Page 29
Troubleshooting.............................. Page 29
Disposal....................................... Page 30
Warranty ..................................... Page 31
19GB/IE
Page 20

Warnings and symbols used
The following warnings are used in this user manual and on the
packaging:
DANGER! This symbol in combination with the signal word
“Danger” marks a high-risk hazard that if not prevented
could result in death or serious injury.
WARNING! This symbol in combination with the signal
word “Warning” marks a medium-risk hazard that if not
prevented could result in death or serious injury.
CAUTION! This symbol in combination with the signal word
“Caution” marks a low-risk hazard that if not prevented could
result in minor or moderate injury.
ATTENTION! This symbol with the signal word “Attention”
indicates a possible property damage.
NOTE: This symbol in combination with “Note” provides
additional useful information.
This symbol means that the operating instructions must be
observed when using the product.
20 GB/IE
Risk of explosion!
This mandatory sign indicates to wear suitable protective
gloves! Follow the instructions of this warning to avoid hand
injuries caused by objects or contact with hot or chemical
materials.
Protect yourself from laser radiation!
Do not stare into the laser beam!
Direct current/voltage
Page 21
USB connection
Use in dry indoor rooms only.
CE mark indicates conformity with relevant EU directives
applicable for this product.
CORDLESS CROSS LINE LASER 4V
Introduction
We congratulate you on the purchase of your new product. You have
chosen a high quality product. The instructions for use are part of the
product. They contain important information concerning safety, use and
disposal. Before using the product, please familiarise yourself with all of
the safety information and instructions for use. Only use the product as
described and for the specified applications. If you pass the product on to
anyone else, please ensure that you also pass on all the documentation
with it.
Intended use
This product is suitable for projecting vertical and horizontal lines. The
laser lines can be used both individually and together.
Do not use this product for any other purpose.
This product is only intended for normal indoor use.
This product is only intended for private household use, not for
commercial purposes.
The manufacturer accepts no liability for damages caused by improper
use.
Scope of delivery
After unpacking the product, check if the delivery is complete and if all
parts are in good condition. Remove all packaging materials before use.
Please contact customer service if parts are missing or damaged.
1x Cordless cross line laser
1x Tripod
1x USB-C charging cable
1x Instruction manual
21GB/IE
Page 22

Description of parts
Before reading, unfold the page containing the illustrations and familiarise
yourself with all functions of the product.
(Fig. A)
[1] 360° laser
[2] Magnets
[3] Charging socket
[4] Butterfly screw
[5] Handwheel bolt
[6] Lever
[7] Tripod legs
[8] Snap fasteners
[9] Locking ring
[] Crank handle
[] Locking ring
[] Adjusting screw
[] Dragonfly (bubble vial)
[] Levelling slide switch
[] Charge indicator
[] On/off button
[] Leveller light
[] Vertical laser
[] Tripod mount
[] USB-C charging cable
(Fig. B)
[] Internal thread [] Tripod screw
Technical data
Working range: 20 m*
Weight (without tripod): approx. 440 g
Operating voltage U
Nominal capacity: 2.6 Ah
Charging voltage UIN: 5 V
Charging current: 1.7 A
Self-levelling range: ± 3°
Levelling accuracy: ± 0.4 mm/m
Laser wavelength: 510–530 nm
Laser class: 2
Levelling time: approx. 4 seconds
: 4 V
max
* The working range may be restricted by environmental conditions
(e.g. bright light).
22 GB/IE
Page 23
Safety instructions
BEFORE USING THE PRODUCT, PLEASE
FAMILIARISE YOURSELF WITH ALL OF THE
SAFETY INFORMATION AND INSTRUCTIONS
FOR USE! WHEN PASSING THIS PRODUCT
ON TO OTHERS, PLEASE ALSO INCLUDE ALL
THE DOCUMENTS!
In the case of damage resulting from noncompliance with these operating instructions the
warranty claim becomes invalid!
No liability is accepted for consequential damage!
In the case of material damage or personal injury
caused by incorrect handling or non-compliance
with the safety instructions, no liability is accepted!
Children and persons with disabilities
WARNING! RISK OF LOSS OF LIFE
m
OR ACCIDENT TO INFANTS AND
CHILDREN!
Never leave children unsupervised with the
packaging material. The packaging material
represents a danger of suffocation.
Children frequently underestimate the dangers.
Always keep children away from the packaging
material.
The product is to be used by adults only.
Children under the age of 16 may not use the
product except under supervision.
Keep children away from the product.
23GB/IE
Page 24
General notes
Observe the information on operation,
cleaning, storage and disposal in the operating
instructions.
Check the product each time before using. If
damaged, have the product repaired. Do not
use the product if damaged.
Turn off the product when not in use. Do not
leave the product unsupervised.
Keep the product away from medical devices,
magnetic data storage media and magnetically
sensitive devices.
Handling the laser
CAUTION! Laser beam – Do not look into the
m
beam! Laser class 2.
Do not aim the laser beam at people.
Markings and warnings are located on the top
and bottom of the product.
Safety instructions for batteries /
rechargeable batteries
DANGER TO LIFE! Keep batteries / rechargeable batteries out of
m
reach of children. If accidentally swallowed seek immediate medical
attention.
DANGER OF EXPLOSION! Never recharge nonrechargeable batteries. Do not short-circuit batteries /
rechargeable batteries and / or open them. Overheating, fire
or bursting can be the result.
Never throw batteries / rechargeable batteries into fire or water.
Do not exert mechanical loads to batteries / rechargeable batteries.
Risk of leakage of batteries / rechargeable batteries
Avoid extreme environmental conditions and temperatures, which
could affect batteries / rechargeable batteries, e.g. radiators / direct
sunlight.
24 GB/IE
Page 25

If batteries / rechargeable batteries have leaked, avoid contact
with skin, eyes and mucous membranes with the chemicals! Flush
immediately the affected areas with fresh water and seek medical
attention!
WEAR PROTECTIVE GLOVES! Leaked or damaged
batteries / rechargeable batteries can cause burns on contact
with the skin. Wear suitable protective gloves at all times if such
an event occurs.
This product has a built-in rechargeable battery which cannot
be replaced by the user. The removal or replacement of the
rechargeable battery may only be carried out by the manufacturer
or his customer service or by a similarly qualified person in order to
avoid hazards. When disposing of the product, it should be noted
that this product contains a rechargeable battery.
Before first use
Remove the packaging. Check if all parts are complete.
Charge the rechargeable battery (see “Charging the rechargeable
battery”).
Operation
Charging the rechargeable battery
NOTE: The rechargeable battery is not replaceable. If you have any
problems with the battery, please contact the service centre.
1. Plug the USB-C charging cable [] into the charging socket [3].
2. Connect the USB-C charging cable [] to a USB port.
Charge indicator []
Red Rechargeable battery is charging.
Green Rechargeable battery is fully charged.
3. Once charging is complete, first remove the USB-C charging
cable
[] from the USB port.
4. Remove the USB-C charging cable [] from the product.
NOTE: The product can be used whilst charging. It is normal for
the product to warm up slightly whilst charging. During the charging
process, you may not be able to work with the product if the battery
is almost or completely empty. This depends on the charger used.
Meaning
25GB/IE
Page 26
Switching on/off
CAUTION! Laser beam ‒ Do not look into the beam [1] []!
Turn your head away or close your eyes to prevent looking into
the laser beam. Risk of eye injury!
Switching on: Briefly press the on/off button [].
Switching off: Press and hold the on/off button [] for 2 seconds.
Using horizontal and vertical laser lines
After switching on, the 360° laser line [1] and the vertical laser
line [] are activated.
Activate the 360° laser line [1] only:
Briefly press the on/off button [].
Activate the vertical laser line [] only:
Briefly press the on/off button [].
Working with the automatic leveller
1. Push the levelling slide switch [] to the left (open lock).
2. Place the product on a horizontal, solid surface or fasten the product
to a tripod (see “Working with the tripod”).
3. Switch on the product. The leveller light [] lights up.
Leveller light []
Green Automatic levelling is possible. Levelling
Red Automatic levelling is not possible.
NOTE: In the event of vibrations, the laser will level itself
automatically. Wait until the laser lines no longer move.
Meaning
is complete once the laser lines no longer
move.
The laser lines flash.
26 GB/IE
Page 27

Working without the automatic leveller
NOTES:
The leveller light [] will illuminate permanently in red when working
without the automatic leveller. The laser lines depicted are not
levelled.
The product has 2 magnets [2]. The magnets allow you to attach the
product to surfaces that attract magnetic objects, e.g. steel shelves.
ATTENTION! The magnetic surface used should be flat and not
m
curved or uneven surface. Otherwise, the product will fall down and
will be damaged.
1. Push the levelling slide switch
2. Switch on the product.
[] to the right (closed lock).
Working with the tripod
(Fig. B)
Screwing the laser onto the tripod mount []
Screw the internal thread [] of the product hand tight onto the tripod
screw [].
Removing/inserting the tripod mount
1. Open the lever
2. Remove the tripod mount [] in an upward direction.
3. Place the tripod mount [] on the tripod for insertion.
4. Lock the tripod mount [] by closing the lever [6].
ATTENTION! Do not use excessive force. This may damage the
m
product.
[6].
27GB/IE
Page 28

Adjusting the tripod
(Fig. C)
NOTE: You can use the dragonfly [] to check the horizontal
alignment of the tripod.
1. Pull the tripod legs
2. Lock the tripod legs [7] into position with the locking ring [9].
Setting the height, tripod feet
1. Open the snap fasteners
2. Extend the tripod legs [7] to the desired length.
3. Close the snap fasteners [8].
Setting the height, crank handle
1. Fold up the crank handle
2. Hold the crank handle [] firmly with one hand.
3. Unscrew the locking ring [] by turning it to the left.
4. Crank the tripod to the desired height.
5. Turn the locking ring [] to the right to lock this position.
Adjusting the inclination, forward/back
1. Turn the handwheel bolt
2. Set the desired inclination.
3. Turn the handwheel bolt [5] to the right to lock the inclination into
place.
Adjusting the inclination, sideways
1. Turn the butterfly screw
2. Fold the tripod to the desired inclination.
3. Turn the butterfly screw [4] to the right to lock into place.
[7] apart.
[8].
[].
[5] to the left to loosen.
[4] to the left to loosen.
Rotating the tripod
1. Turn the adjusting screw
[] to the left to loosen.
2. Hold the handwheel bolt [5] and turn the tripod in the desired
direction.
3. Turn the adjusting screw [] to the right to lock into place.
28 GB/IE
Page 29

Cleaning and care
WARNING! Never submerge the product in water or other liquids.
m
WARNING! For repair purposes the product may only be
m
opened by a professional. Have the product repaired by qualified
professionals and only with original replacement parts. This ensures
that the safety of the product is maintained.
The product requires no maintenance.
Do not allow water to enter into the product during cleaning.
Keep the product clean to ensure good, secure work.
Use a dry cloth to clean the outside.
Clean the openings of the 360° laser [1] and the vertical laser []
with a soft air jet. In cases of heavy contamination, remove the dirt
with a slightly damp cotton swab.
Do not exert any strong pressure!
Storage
If you will not be using the product for a prolonged period of time,
store it in a clean, dry place that is not exposed to direct sunlight.
Troubleshooting
Problem Possible cause Solution
Product does not start.
Rechargeable battery
is flat.
Charge the
rechargeable battery.
Automatic leveller
does not work.
Automatic leveller
cannot oscillate freely.
Product is not aligned
sufficiently parallel with
the floor.
Align the product so
it is parallel with the
floor.
29GB/IE
Page 30
Disposal
The packaging is made entirely of recyclable materials, which you may
dispose of at local recycling facilities.
Observe the marking of the packaging materials for waste
separation, which are marked with abbreviations (a) and
numbers (b) with following meaning: 1–7: plastics / 20–22:
paper and fibreboard / 80–98: composite materials.
The product and packaging materials are recyclable, dispose of
it separately for better waste treatment.
The Triman logo is valid in France only.
Contact your local refuse disposal authority for more details of
how to dispose of your worn-out product.
To help protect the environment, please dispose of the product
properly when it has reached the end of its useful life and not in
the household waste. Information on collection points and their
opening hours can be obtained from your local authority.
Faulty or used batteries / rechargeable batteries must be recycled in
accordance with Directive 2006/66/EC and its amendments. Please
return the batteries / rechargeable batteries and / or the product to the
available collection points.
Environmental damage through incorrect disposal
of the batteries / rechargeable batteries!
Batteries / rechargeable batteries may not be disposed of with the usual
domestic waste. They may contain toxic heavy metals and are subject to
hazardous waste treatment rules and regulations. The chemical symbols
for heavy metals are as follows: Cd = cadmium, Hg = mercury, Pb = lead.
That is why you should dispose of used batteries / rechargeable batteries
at a local collection point.
30 GB/IE
Page 31

Warranty
The product has been manufactured to strict quality guidelines and
meticulously examined before delivery. In the event of product defects you
have legal rights against the retailer of this product. Your legal rights are
not limited in any way by our warranty detailed below.
The warranty for this product is 5 years from the date of purchase. The
warranty period begins on the date of purchase. Please keep the original
sales receipt in a safe location. This document is required as your proof of
purchase.
Should this product show any fault in materials or manufacture within
5 years from the date of purchase, we will repair or replace it – at our
choice – free of charge to you. This warranty becomes void if the product
has been damaged, or used or maintained improperly.
The warranty applies to defects in material or manufacture. This warranty
does not cover product parts subject to normal wear, thus possibly
considered consumables (e.g. batteries) or for damage to fragile parts,
e.g. switches, rechargeable batteries or glass parts.
Warranty claim procedure
To ensure quick processing of your case, please observe the following
instructions:
Please have the till receipt and the item number
(e.g. IAN 123456_7890) available as proof of purchase.
You will find the item number on the rating plate, an engraving, on the
front page of the instructions for use (bottom left), or as a sticker on the
rear or bottom of the product.
If functional or other defects occur, please contact the service department
listed either by telephone or by e-mail.
You can return a defective product to us free of charge to the service
address that will be provided to you. Ensure that you enclose the proof of
purchase (till receipt) and information about what the defect is and when
it occurred.
31GB/IE
Page 32
Service
Service Great Britain
Service Ireland
32 GB/IE
Page 33

Avertissements et symboles utilisés....... Page 34
Introduction .................................. Page 35
Utilisation conforme aux prescriptions ................ Page 35
Contenu de l'emballage........................... Page 35
Description des pièces ............................ Page 36
Données techniques.............................. Page 36
Consignes de sécurité ....................... Page 37
Consignes de sécurité pour piles/piles rechargeables
(accus) ........................................ Page 38
Avant la première utilisation............... Page 39
Fonctionnement .............................. Page 39
Recharger l'accu................................. Page 39
Marche/arrêt................................... Page 40
Utiliser les lignes laser horizontales et verticales ........ Page 40
Travailler avec le système d'autonivellement ........... Page 40
Travailler sans autonivellement...................... Page 41
Travailler avec le trépied .......................... Page 41
Régler le trépied................................. Page 42
Nettoyage et entretien ..................... Page 43
Rangement ................................... Page 43
Dépannage ................................... Page 43
Mise au rebut................................. Page 44
Garantie ...................................... Page 45
33FR/BE
Page 34

Avertissements et symboles utilisés
Les avertissements suivants sont utilisés dans ce mode d’emploi et sur
l’emballage:
DANGER! Ce symbole avec ce signal important de
«Danger» indique un danger avec un risque élevé de
blessures graves ou de mort si la situation dangereuse n’est
pas évitée.
AVERTISSEMENT! Ce symbole avec ce signal important
d'«Avertissement» indique un danger avec un risque moyen
de blessures graves ou de mort si la situation dangereuse
n'est pas évitée.
PRUDENCE! Ce symbole avec ce signal important de
«Prudence» indique un danger avec un risque faible de
blessures légères à importantes si la situation dangereuse
n'est pas évitée.
ATTENTION! Ce symbole avec la mention «Attention»
indique un possible risque de dégâts matériels.
REMARQUE: Ce symbole avec ce signal important de
«Remarque» propose plus d'informations utiles.
Ce symbole signifie que les instructions du mode d’emploi
doivent être respectées lors de l’utilisation du produit.
34 FR/BE
Risque d'explosion!
Ce symbole indique le port obligatoire de gants de
protection appropriés! Suivez les consignes de cet
avertissement, pour éviter des blessures aux mains
provoquées par des objets ou le contact avec des matériaux
chauds ou chimiques.
Protégez-vous du rayonnement laser!
Ne pas regarder dans le faisceau laser!
Courant continu/tension continue
Page 35

Port USB
À utiliser seulement à l'intérieur de locaux secs.
Le marquage CE confirme la conformité aux directives de
l'UE applicables au produit.
NIVEAU LASER EN CROIX SANS FIL 4V
Introduction
Nous vous félicitons pour l'achat de votre nouveau produit. Vous avez
opté pour un produit de grande qualité. Le mode d‘emploi fait partie
intégrante de ce produit. Il contient des indications importantes pour la
sécurité, l’utilisation et la mise au rebut. Veuillez lire consciencieusement
toutes les indications d‘utilisation et de sécurité du produit. Ce produit
doit uniquement être utilisé conformément aux instructions et dans les
domaines d‘application spécifiés. Lors d‘une cession à tiers, veuillez
également remettre tous les documents.
Utilisation conforme aux prescriptions
Ce produit convient à la projection de lignes verticales et horizontales. Les
deux lignes laser peuvent être utilisées individuellement ou simultanément.
N’utilisez pas ce produit à d'autres fins.
Ce produit est uniquement prévu pour une utilisation à l'intérieur de
locaux conformément aux prescriptions.
Ce produit est prévu exclusivement pour une utilisation dans le milieu
domestique et n'est pas conçu pour un usage commercial.
Le fabricant décline toute responsabilité pour les dommages résultant
d'une utilisation inadéquate.
Contenu de l'emballage
Après le déballage du produit, vérifiez l'exhaustivité du contenu de
l'emballage et si toutes les pièces sont en parfait état. Retirez tous les
matériaux d'emballage avant l'utilisation.
Contactez le service clientèle si des pièces manquent ou sont
endommagées.
1x Niveau laser en croix sans fil
1x Trépied
1x Câble de charge USBC
1x Mode d'emploi
35FR/BE
Page 36

Description des pièces
Avant de lire, dépliez la page attenante avec les illustrations. Familiarisezvous avec toutes les fonctions du produit.
(Ill. A)
[1] Laser à 360°
[2] Aimants
[3] Prise de chargement
[4] Vis papillon
[5] Poignée tournante
[6] Levier
[7] Pieds du trépied
[8] Fermeture à clapet
[9] Bague de verrouillage
[] Manivelle
[] Bague de verrouillage
[] Vis de réglage
[] Bulle
[] Taquet coulissant de nivellement
[] Voyant de contrôle de charge
[] Touche marche/arrêt
[] Voyant de nivellement
[] Laser vertical
[] Plaque du trépied
[] Câble de charge USBC
(Ill. B)
[] Filetage intérieur [] Vis du trépied
Données techniques
Zone de travail: 20 m*
Poids (sans trépied): env. 440 g
Tension de fonctionnement U
Capacité nominale: 2,6 Ah
Tension de charge UIN: 5 V
Courant de charge: 1,7 A
Plage d’autonivellement: ± 3°
Précision du nivellement: ± 0,4 mm/m
Longueur d'onde du laser: 510–530 nm
Classe de laser: 2
Temps de nivellement: env. 4secondes
: 4 V
max
* La zone de travail peut être limitée par les conditions
environnementales (par ex. lumière vive).
36 FR/BE
Page 37
Consignes de sécurité
AVANT L’UTILISATION DU PRODUIT,
FAMILIARISEZ-VOUS AVEC TOUTES
LES CONSIGNES DE SÉCURITÉ ET DE
FONCTIONNEMENT! TRANSMETTEZ TOUS
LES DOCUMENTS CONCERNANT LE PRODUIT
LORSQUE VOUS LE DONNEZ À UN TIERS!
Dans le cas de dommages résultant du non-respect
des instructions du mode d'emploi, le recours à la
garantie est annulé!
Toute responsabilité est déclinée pour des
dommages consécutifs! Aucune responsabilité
n'est assumée dans le cas de dommages aux
biens et aux personnes résultant d'une utilisation
inappropriée ou du non-respect des consignes de
sécurité!
Enfants et personnes atteintes d'un
handicap
AVERTISSEMENT! DANGER MORTEL ET
m
RISQUE D'ACCIDENT POUR BÉBÉS ET
ENFANTS!
Ne laissez jamais des enfants sans surveillance
avec des matériaux d'emballage. Les matériaux
d'emballage représentent un risque d'asphyxie.
Les enfants sous-estiment fréquemment les
dangers en résultant. Maintenez toujours
les enfants hors de la portée des matériaux
d'emballage.
Le produit doit être utilisé uniquement par
des adultes. Les enfants de moins de 16ans
peuvent utiliser le produit seulement s'ils sont
surveillés.
Maintenez les enfants hors de la portée du
produit.
37FR/BE
Page 38
Informations générales
Respectez les instructions contenues dans ce
mode d'emploi pour l'utilisation, le nettoyage, le
rangement et le recyclage.
Inspectez le produit avant chaque utilisation.
Faites réparer un produit endommagé. N'utilisez
aucun produit endommagé.
Éteignez le produit lorsqu'il n'est pas utilisé. Ne
laissez pas le produit sans surveillance.
Tenez le produit hors de la portée des
appareils médicaux, des supports de données
magnétiques et des appareils sensibles aux
champs magnétiques.
Manipulation du laser
ATTENTION! Rayonnement laser - Ne pas
m
regarder le faisceau! Classe de laser 2.
Il est interdit de diriger le faisceau laser vers des
personnes.
Des étiquettes de sécurité et des avertissements
se trouvent en haut et en bas du produit.
Consignes de sécurité pour piles/piles
rechargeables (accus)
DANGER DE MORT! Conservez les piles/piles rechargeables
m
(accus) hors de la portée des enfants. Consultez immédiatement un
médecin en cas d'ingestion!
RISQUE D'EXPLOSION! Ne rechargez jamais de piles
non rechargeables. Ne court-circuitez pas de piles/piles
rechargeables (accus) et ne tentez pas de les ouvrir. Cela est
susceptible de provoquer une surchauffe, un incendie ou une
explosion.
Ne jetez jamais de piles/piles rechargeables (accus) dans un feu ou
dans de l'eau.
Ne soumettez pas de piles/piles rechargeables (accus) à une
sollicitation mécanique.
Risque de fuite des piles/piles rechargeables (accus)
Évitez les conditions et températures extrêmes qui peuvent exercer
une influence sur les piles/piles rechargeables (accus), par ex.
positionnement sur des radiateurs/exposition à la lumière directe du
soleil.
38 FR/BE
Page 39

Si des piles/piles rechargeables (accus) ont fui, évitez tout contact
de la peau, des yeux et des muqueuses avec les produits chimiques
s’écoulant! Rincez immédiatement à l'eau claire les parties touchées
et consultez un médecin!
PRIÈRE DE PORTER DES GANTS PROTECTEURS!
Des piles/piles rechargeables (accus) qui fuient ou qui sont
endommagées sont susceptibles de causer des brûlures
lorsqu’elles entrent en contact avec la peau. Si tel est le cas,
portez des gants protecteurs adaptés.
Ce produit a un accu intégré qui ne peut pas être remplacé par
l'utilisateur. La dépose ou le remplacement de l'accu doivent être
exclusivement réalisés soit par le fabricant soit son service aprèsvente ou une personne semblablement qualifiée. Lors de la mise au
rebut de ce produit, il est important de transmettre l'information que
ce produit contient un accu à recycler.
Avant la première utilisation
Retirez les matériaux d'emballage. Vérifiez que toutes les pièces sont
présentes.
Rechargez l'accu (voir «Recharger l'accu»).
Fonctionnement
Recharger l'accu
REMARQUE: L'accu n'est pas remplaçable. Si vous rencontrez des
problèmes avec l'accu, contactez le service après-vente.
1. Branchez le câble de charge USBC[] dans la prise de
chargement[3].
2. Raccordez le câble de charge USBC[] à un port USB.
Voyant de contrôle de
charge[]
Rouge L'accu est en train de se recharger.
Vert L'accu est complètement rechargé.
3. Une fois le processus de recharge terminé, retirez d'abord le câble de
charge USBC
4. Débranchez le câble de charge USBC[] du produit.
REMARQUE: Le produit peut être utilisé durant le rechargement. Il
est normal que le produit chauffe légèrement durant le processus de
recharge. Pendant le processus de recharge, vous ne pourrez peutêtre pas utiliser le produit si l'accu est presque ou complètement vide.
Cela dépend du chargeur utilisé.
[] du port USB.
Signification
39FR/BE
Page 40
Marche/arrêt
PRUDENCE! Rayonnement laser - Ne pas regarder le
faisceau [1] []! Tournez la tête ou fermez les yeux afin
d'éviter de regarder dans le faisceau laser. Risque de lésions
oculaires!
Allumer: Appuyez brièvement sur la touche marche/arrêt[].
Éteindre: Maintenez la touche marche/arrêt[] enfoncée pendant
2secondes.
Utiliser les lignes laser horizontales et
verticales
Après la mise en marche, la ligne du laser à 360°[1] et la ligne du
laser vertical[] sont activées.
Activer seulement la ligne du laser à 360° [1]:
Appuyez brièvement sur la touche marche/arrêt[].
Activer seulement la ligne du laser vertical []:
Appuyez brièvement sur la touche marche/arrêt[].
Travailler avec le système d'autonivellement
1. Faites glisser le taquet coulissant de nivellement[] vers la gauche
(cadenas ouvert).
2. Placez le produit sur une surface ferme et horizontale ou montez le
produit sur un trépied (voir «Travailler avec le trépied»).
3. Allumez le produit. Le voyant de nivellement [] s'allume.
Voyant de
nivellement[]
Vert L'autonivellement est possible. Le
Rouge L'autonivellement est impossible. Les lignes
REMARQUE: En cas de vibrations, le laser se nivelle à nouveau
automatiquement. Attendez que les lignes du laser cessent de
bouger.
40 FR/BE
Signification
nivellement est terminé lorsque les lignes
du laser arrêtent de bouger.
du laser clignotent.
Page 41

Travailler sans autonivellement
REMARQUES:
Lorsque vous travaillez sans autonivellement, le voyant de
nivellement[] s'allume rouge en permanence. Les lignes du laser
formées ne sont pas de niveau.
Le produit dispose de 2aimants[2]. Les aimants vous permettent
de fixer le produit sur des surfaces métalliques comme par ex. des
étagères en acier.
ATTENTION! La surface magnétique utilisée doit être plane et
m
non incurvée ou inégale. Sinon, le produit pourrait tomber et être
endommagé.
1. Faites glisser le taquet coulissant de nivellement
(cadenas fermé).
2. Allumez le produit.
[] vers la droite
Travailler avec le trépied
(Ill. B)
Visser le laser sur la plaque du trépied
Vissez le produit avec le filetage intérieur[] à la main sur la vis du
trépied[].
Retirer/positionner la plaque du trépied
1. Ouvrez le levier
2. Sortez la plaque du trépied[] vers le haut.
3. Placez la plaque du trépied [] sur le trépied pour l'installer.
4. Bloquez la plaque du trépied[] en refermant le levier[6].
ATTENTION! N'utilisez pas trop de force. Le produit pourrait être
m
endommagé.
[6].
41FR/BE
Page 42

Régler le trépied
(Ill. C)
REMARQUE: Vous pouvez vérifier l'alignement horizontal du
trépied grâce à la bulle[].
1. Écartez les pieds du trépied
2. Verrouillez la position des pieds du trépied[7] avec la bague de
verrouillage[9].
Régler la hauteur, pieds du trépied
1. Ouvrez les fermetures à clapet
2. Faites glisser la rallonge des pieds du trépied[7] à la longueur
désirée.
3. Fermez les fermetures à clapet[8].
Régler la hauteur, manivelle
1. Dépliez la manivelle
2. Tenez la manivelle[] d’une main.
3. Desserrez la bague de verrouillage[] en la tournant vers la gauche.
4. Montez le trépied à la hauteur désirée.
5. Tournez la bague de verrouillage[] vers la droite pour verrouiller
cette position.
Régler l'inclinaison, avant/arrière
1. Tournez la poignée tournante
2. Ajustez l'inclinaison souhaitée.
3. Tournez la poignée tournante[5] vers la droite pour bloquer cette
position.
[7].
[8].
[] vers le haut.
[5] vers la gauche pour la desserrer.
Régler l'inclinaison, latéralement
1. Tournez la vis papillon
[4] vers la gauche pour la desserrer.
2. Pliez le trépied à l'inclinaison désirée.
3. Tournez la vis papillon[4] vers la droite pour la bloquer.
Faire pivoter le trépied
1. Tournez la vis de réglage
[] vers la gauche pour la desserrer.
2. Saisissez la poignée tournante[5] et tournez le trépied dans la
direction désirée.
3. Tournez la vis de réglage [] vers la droite pour la bloquer.
42 FR/BE
Page 43

Nettoyage et entretien
AVERTISSEMENT! Ne plongez jamais le produit dans de l’eau ou
m
tout autre liquide.
AVERTISSEMENT! Le produit ne peut être ouvert que par un
m
technicien spécialisé à des fins de réparation. Faites réparer le
produit par un technicien spécialisé en utilisant uniquement des
pièces de rechange d'origine. Cela garantit la sécurité du produit.
Le produit ne nécessite aucune maintenance.
Lors du nettoyage, ne laissez jamais d'eau pénétrer dans le produit.
Conservez le produit propre pour garantir un bon fonctionnement en
toute sécurité.
Pour nettoyer l'extérieur, utilisez un chiffon sec.
Nettoyez les orifices du laser à 360° [1] et du laser vertical[] au
jet d'air léger. Enlevez les salissures plus tenaces avec un coton-tige
légèrement humidifié.
N'appliquez jamais de pression forte!
Rangement
Si vous ne comptez pas utiliser le produit sur une longue période,
rangez-le dans un endroit propre et sec, à l'abri de la lumière directe
du soleil.
Dépannage
Problème Cause possible Solution
Le produit ne démarre
pas.
L'autonivellement ne
fonctionne pas.
Accu vide. Recharger l'accu.
L'autonivellement
ne peut pas osciller
librement. Le produit
n'est pas correctement
orienté parallèlement
au sol.
Alignez le produit
parallèlement au sol.
43FR/BE
Page 44

Mise au rebut
L’emballage se compose de matières recyclables pouvant être mises au
rebut dans les déchetteries locales.
Veuillez respecter l‘identification des matériaux d‘emballage
pour le tri sélectif, ils sont identifiés avec des abbréviations
(a) et des chiffres (b) ayant la signification suivante : 1–7 :
plastiques / 20–22 : papiers et cartons / 80–98 : matériaux
composite.
Le produit et les matériaux d’emballage sont recyclables,
mettez-les au rebut séparément pour un meilleur traitement des
déchets.
Le logo Triman n’est valable qu’en France.
Votre mairie ou votre municipalité vous renseigneront sur les
possibilités de mise au rebut des produits usagés.
Afin de contribuer à la protection de l’environnement, veuillez
ne pas jeter votre produit usagé dans les ordures ménagères,
mais éliminez-le de manière appropriée. Pour obtenir des
renseignements concernant les points de collecte et leurs
horaires d’ouverture, vous pouvez contacter votre municipalité.
Les piles / piles rechargeables défectueuses ou usagées doivent être
recyclées conformément à la directive 2006/66/CE et ses modifications.
Les piles et / ou piles rechargeables et / ou le produit doivent être
retournés dans les centres de collecte proposés.
Pollution de l’environnement par la mise au rebut
incorrecte des piles / piles rechargeables !
Les piles / piles rechargeables ne doivent pas être mises au rebut
avec les ordures ménagères. Elles peuvent contenir des métaux lourds
toxiques et doivent être considérées comme des déchets spéciaux. Les
symboles chimiques des métaux lourds sont les suivants : Cd = cadmium,
Hg = mercure, Pb = plomb. Pour cette raison, veuillez toujours déposer
les piles / piles rechargeables usagées dans les conteneurs de recyclage
communaux.
44 FR/BE
Page 45

Garantie
Article L217-16 du Code de la consommation
Lorsque l‘acheteur demande au vendeur, pendant le cours de la garantie
commerciale qui lui a été consentie lors de l‘acquisition ou de la
réparation d‘un bien meuble, une remise en état couverte par la garantie,
toute période d‘immobilisation d‘au moins sept jours vient s‘ajouter à la
durée de la garantie qui restait à courir. Cette période court à compter de
la demande d‘intervention de l‘acheteur ou de la mise à disposition pour
réparation du bien en cause, si cette mise à disposition est postérieure à
la demande d‘intervention.
Indépendamment de la garantie commerciale souscrite, le vendeur reste
tenu des défauts de conformité du bien et des vices rédhibitoires dans
les conditions prévues aux articles L217-4 à L217-13 du Code de la
consommation et aux articles 1641 à 1648 et 2232 du Code Civil.
Article L217-4 du Code de la consommation
Le vendeur livre un bien conforme au contrat et répond des défauts de
conformité existant lors de la délivrance.
Il répond également des défauts de conformité résultant de l‘emballage,
des instructions de montage ou de l‘installation lorsque celle-ci a été mise
à sa charge par le contrat ou a été réalisée sous sa responsabilité.
Article L217-5 du Code de la consommation
Le bien est conforme au contrat :
1° S´il est propre à l‘usage habituellement attendu d‘un bien semblable
et, le cas échéant :
• s‘il correspond à la description donnée par le vendeur et posséder
les qualités que celui-ci a présentées à l‘acheteur sous forme
d‘échantillon ou de modèle ;
• s‘il présente les qualités qu‘un acheteur peut légitimement attendre
eu égard aux déclarations publiques faites par le vendeur, par le
producteur ou par son représentant, notamment dans la publicité
ou l‘étiquetage ;
2° Ou s‘il présente les caractéristiques définies d‘un commun accord
par les parties ou être propre à tout usage spécial recherché par
l‘acheteur, porté à la connaissance du vendeur et que ce dernier a
accepté.
Article L217-12 du Code de la consommation
L‘action résultant du défaut de conformité se prescrit par deux ans à
compter de la délivrance du bien.
Article 1641 du Code civil
Le vendeur est tenu de la garantie à raison des défauts cachés de la
chose vendue qui la rendent impropre à l‘usage auquel on la destine, ou
qui diminuent tellement cet usage que l‘acheteur ne l‘aurait pas acquise,
ou n‘en aurait donné qu‘un moindre prix, s‘il les avait connus.
45FR/BE
Page 46

Article 1648 1er alinéa du Code civil
L‘action résultant des vices rédhibitoires doit être intentée par l‘acquéreur
dans un délai de deux ans à compter de la découverte du vice.
Les pièces détachées indispensables à l’utilisation du produit sont
disponibles pendant la durée de la garantie du produit.
Le produit a été fabriqué selon des critères de qualité stricts et contrôlé
consciencieusement avant sa livraison. En cas de défaillance, vous êtes
en droit de retourner ce produit au vendeur. La présente garantie ne
constitue pas une restriction de vos droits légaux.
Ce produit bénéficie d‘une garantie de 5 ans à compter de sa date
d’achat. La durée de garantie débute à la date d’achat. Veuillez
conserver le ticket de caisse original. Il fera office de preuve d’achat.
Si un problème matériel ou de fabrication devait survenir dans 5 ans
suivant la date d‘achat de ce produit, nous assurons à notre discrétion
la réparation ou le remplacement du produit sans frais supplémentaires.
La garantie prend fin si le produit est endommagé suite à une utilisation
inappropriée ou à un entretien défaillant.
La garantie couvre les vices matériels et de fabrication. Cette garantie
ne s’étend ni aux pièces du produit soumises à une usure normale
(p. ex. des piles) et qui, par conséquent, peuvent être considérées comme
des pièces d’usure, ni aux dommages sur des composants fragiles,
comme des interrupteurs, des batteries ou des éléments fabriqués en
verre.
Faire valoir sa garantie
Pour garantir la rapidité d’exécution de la procédure de garantie, veuillez
respecter les indications suivantes :
Veuillez conserver le ticket de caisse et la référence du produit
(par ex. IAN 123456_7890) à titre de preuve d’achat pour toute
demande.
Le numéro de référence de l’article est indiqué sur la plaque
d’identification, gravé sur la page de titre de votre manuel (en bas à
gauche) ou sur un autocollant apposé sur la face arrière ou inférieure du
produit.
En cas de dysfonctionnement du produit, ou de tout autre défaut,
contactez en premier lieu le service après-vente par téléphone ou par
e-mail aux coordonnées indiquées ci-dessous.
Vous pouvez alors envoyer franco de port tout produit considéré comme
défectueux au service clientèle indiqué, accompagné de la preuve
d’achat (ticket de caisse) et d’une description écrite du défaut avec
mention de sa date d’apparition.
46 FR/BE
Page 47

Service après-vente
Service après-vente France
Service après-vente Belgique
Tél.: 080071011
Tél.: 80023970 (Luxembourg)
E-Mail: [email protected]
47FR/BE
Page 48

Gebruikte waarschuwingen en
symbolen ..................................... Pagina 49
Inleiding....................................... Pagina 50
Beoogd gebruik ................................. Pagina 50
Leveringsomvang ................................ Pagina 50
Onderdelenbeschrijving........................... Pagina 51
Technische gegevens ............................. Pagina 51
Veiligheidstips ............................... Pagina 52
Veiligheidstips voor batterijen/accu’s ................ Pagina 53
Voor het eerste gebruik .................... Pagina 54
Bediening ..................................... Pagina 54
Accu opladen................................... Pagina 54
In-/uitschakelen ................................. Pagina 55
De horizontale en verticale laserlijn gebruiken ......... Pagina 55
Werken met automatische waterpas ................. Pagina 55
Werken zonder automatisch waterpassen............. Pagina 56
Werken met het statief ............................ Pagina 56
Statief instellen .................................. Pagina 57
Schoonmaken en onderhoud .............. Pagina 58
Opbergen..................................... Pagina 58
Probleemoplossing .......................... Pagina 58
Afvoer......................................... Pagina 59
Garantie ...................................... Pagina 60
48 NL/BE
Page 49
Gebruikte waarschuwingen en symbolen
In deze gebruiksaanwijzing en op de verpakking worden de volgende
waarschuwingen gebruikt:
GEVAAR! Dit symbool met de aanduiding “Gevaar” duidt
op een groot risico op gevaar dat, indien niet vermeden,
zware verwondingen of de dood tot gevolg kan hebben.
WAARSCHUWING! Dit symbool met de aanduiding
“Waarschuwing” betekent een middelmatig risico op gevaar
dat, indien niet vermeden, zware verwondingen of de dood
tot gevolg kan hebben.
VOORZICHTIG! Dit symbool met de aanduiding
“Voorzichtig” duidt op een klein risico op gevaar dat,
indien niet vermeden, kan leiden tot kleine of middelgrote
verwondingen.
OPGELET! Dit symbool met de aanduiding “Opgelet” geeft
aan dat er mogelijk gevaar bestaat op materiële schade.
TIP: Dit symbool met de aanduiding “Tip” duidt op verdere
nuttige informatie.
Dit symbool betekent dat er bij gebruik van het product de
hand moet worden gehouden aan de gebruiksaanwijzing.
Explosiegevaar!
Dit gebodsteken geeft aan dat er passende beschermende
handschoenen gedragen moeten worden! Volg de
aanwijzingen van deze waarschuwing op om verwondingen
aan de handen door voorwerpen of contact met hete of
chemische materialen te vermijden.
Bescherm u tegen laserstralen!
Niet in de laserstraal kijken!
Gelijkstroom/-spanning
49NL/BE
Page 50

USB-aansluiting
Alleen in droge binnenruimtes gebruiken.
Het CE-teken bevestigt dat het product voldoet aan de
betreffende EU-richtlijnen.
ACCU-KRUISLIJNLASER 4V
Inleiding
Hartelijk gefeliciteerd met de aankoop van uw nieuwe product. U heeft
voor een hoogwaardig product gekozen. De gebruiksaanwijzing is
een deel van het product. Deze bevat belangrijke aanwijzingen voor
veiligheid, gebruik en verwijdering. Maakt U zich voor de ingebruikname
van het product met alle bedienings- en veiligheidsvoorschriften
vertrouwd. Gebruik het product alleen zoals beschreven en voor de
aangegeven toepassingsgebieden. Overhandig alle documenten bij
doorgifte van het product aan derden.
Beoogd gebruik
Dit product is geschikt voor het projecteren van horizontale en verticale
lijnen. De beide laserlijnen kunnen zowel apart als tezamen gebruikt
worden.
Gebruik dit product niet voor andere doeleinden.
Dit product is alleen bestemd voor gebruik binnenshuis.
Het product is uitsluitend bestemd voor gebruik in privéhuishoudens en
niet voor commerciële doeleinden.
De fabrikant aanvaardt geen aansprakelijkheid voor schade als gevolg
van ondeskundig gebruik.
Leveringsomvang
Controleer na het uitpakken van het product of de levering volledig is en
of alle onderdelen in goede staat verkeren. Verwijder vóór gebruik al het
verpakkingsmateriaal.
Neem contact op met de klantenservice als er onderdelen ontbreken of
beschadigd zijn.
1x Accu-kruislijnlaser
1x Statief
1x USB-C-oplaadkabel
1x Gebruiksaanwijzing
50 NL/BE
Page 51

Onderdelenbeschrijving
Vouw voor het lezen de uitklapbare bladzijde met de tekeningen uit.
Maak u vertrouwd met alle functies van het product.
(Afb. A)
[1] 360°-Laser
[2] Magneten
[3] Oplaadbus
[4] Vleugelschroef
[5] Greepschroef
[6] Hendel
[7] Statiefpoten
[8] Klapsluitingen
[9] Vastzetring
[] Zwengel
[] Vastzetring
[] Stelschroef
[] Waterpas
[] Waterpas-schuifschakelaar
[] Laadcontrolelamp
[] Aan-/uit-toets
[] Waterpas-indicatielamp
[] Verticale laser
[] Statiefplateau
[] USB-C-oplaadkabel
(Afb. B)
[] Binnenschroefdraad [] Statiefschroef
Technische gegevens
Werkbereik: 20 m*
Gewicht (zonder statief): ca. 440 g
Werkspanning U
Nominale capaciteit: 2,6 Ah
Laadspanning UIN: 5 V
Laadstroom: 1,7 A
Zelfbereik waterpas: ± 3°
Nauwkeurigheid waterpas: ± 0,4 mm/m
Golflengte laserlicht: 510–530 nm
Laserklasse: 2
Waterpaste: ca. 4 seconden
: 4 V
max
* Het werkbereik kan door omgevingsomstandigheden (bijv. sterk licht)
beperkt worden.
51NL/BE
Page 52
Veiligheidstips
MAAK UZELF, VOORDAT U HET
PRODUCT VOOR HET EERST GEBRUIKT,
VERTROUWD MET ALLE VEILIGHEIDS- EN
BEDIENINGSAANWIJZINGEN! ALS U
DIT PRODUCT AAN IEMAND ANDERS
DOORGEEFT, GEEF DAN OOK ALLE
DOCUMENTATIE MEE!
In geval van schade als gevolg van het niet
naleven van deze gebruiksaanwijzing vervalt uw
aanspraak op garantie!
Wij aanvaarden geen aansprakelijkheid voor
gevolgschade! Er wordt geen aansprakelijkheid
aanvaard voor materiële schade of persoonlijk
letsel, die ontstaan als gevolg van ondeskundig
gebruik of het niet opvolgen van de
veiligheidsaanwijzingen!
Kinderen en personen met beperkingen
WAARSCHUWING! LEVENSGEVAAR
m
EN KANS OP ONGEVALLEN VOOR
PEUTERS EN KINDEREN!
Laat kinderen nooit zonder toezicht
achter met het verpakkingsmateriaal.
Het verpakkingsmateriaal vormt een
verstikkingsgevaar.
Kinderen onderschatten vaak de daaraan
verbonden gevaren. Houd kinderen altijd uit de
buurt van verpakkingsmateriaal.
Het product mag alleen door volwassenen
worden gebruikt. Kinderen jonger dan 16jaar
mogen het product alleen gebruiken als ze
onder toezicht staan.
Houd kinderen steeds uit de buurt van het
product.
52 NL/BE
Page 53
Algemene instructies
Houd de hand aan de specificaties in deze
gebruiksaanwijzing aangaande bediening,
schoonmaken, opslag en verwijdering.
Controleer het product voor ieder gebruik. Laat
een beschadigd product repareren. Gebruik het
product nooit als het is beschadigd.
Schakel het product uit als het niet gebruikt
wordt. Laat het product nooit zonder toezicht.
Houd het product uit de buurt van medische
apparatuur, magnetische gegevensdragers en
apparaten die gevoelig zijn voor magnetische
velden.
Werken met een laser
OPGELET! Laserstraling – Niet in de straal
m
kijken! Laserklasse2.
Laserstralen niet op personen richten.
Specificaties en waarschuwingen vindt u op de
boven- en onderkant van het product.
Veiligheidstips voor batterijen/accu’s
LEVENSGEVAAR! Houd batterijen/accu's buiten het bereik van
m
kinderen. Neem in geval van inslikken direct contact op met een arts!
EXPLOSIEGEVAAR! Laad niet-oplaadbare batterijen nooit
opnieuw op. Sluit batterijen/accu’s nooit kort en/of open
ze niet. Oververhitting, brandgevaar of openbarsten kan het
gevolg zijn.
Gooi batterijen/accu's nooit in vuur of water.
Stel batterijen/accu's nooit bloot aan welke mechanische druk dan
ook.
Kans op lekken van de batterijen/accu’s
Vermijd extreme omstandigheden en temperaturen, die op batterijen/
accu's kunnen inwerken zoals bijvoorbeeld verwarmingselementen/
direct zonlicht.
53NL/BE
Page 54
Als batterijen/accu’s lekken, vermijd dan dat de huid, ogen of
slijmvliezen in contact komen met de chemicaliën! Als dat toch
gebeurt, spoel dan die plaatsen direct af met schoon water en neem
contact op met een arts!
DRAAG VEILIGHEIDSHANDSCHOENEN! Lekkende of
beschadigde batterijen/accu’s kunnen bij contact met de huid
bijtende wonden veroorzaken. Draag daarom in een dergelijk
geval geschikte veiligheidshandschoenen.
In dit product is een accu ingebouwd die niet door de gebruiker
vervangen kan worden. Om gevaren te vermijden mag verwijdering
of vervanging van de accu alleen worden uitgevoerd door de
fabrikant of zijn klantendienst of een vergelijkbaar gekwalificeerd
persoon. Bij verwijdering van dit product moet erop gewezen worden
dat er in het product een accu zit.
Voor het eerste gebruik
Verwijder het verpakkingsmateriaal. Controleer of alle onderdelen
aanwezig zijn.
Laad het product op (zie “Accu opladen”).
Bediening
Accu opladen
TIP: De accu kan niet worden vervangen. Neem bij problemen met
de accu contact op met het servicecentrum.
1. Steek de USB-C-oplaadkabel [] in de oplaadbus [3].
2. Verbind de USB-C-oplaadkabel [] met een USB-poort.
Laadcontrolelamp []
Rood Accu wordt opgeladen.
Groen Accu is volledig opgeladen.
3. Trek na succesvol laden eerst de USB-C-oplaadkabel
poort.
4. Trek de USB-C-oplaadkabel [] uit het product.
TIP: Het product kan tijdens het opladen niet worden gebruikt. Het
is normaal dat het product tijdens het opladen wat warmer wordt.
Tijdens het laden kan het voorkomen dat u niet met het product kunt
werken, als de accu bijna of helemaal leeg is. Dit is afhankelijk van
de gebruikte oplader.
54 NL/BE
Betekenis
[] uit de USB-
Page 55
In-/uitschakelen
VOORZICHTIG! Laserstraling‒ Niet in de straal[1][]
kijken! Draai uw hoofd weg of sluit de ogen om een blik in de
laserstraal te vermijden. Risico op oogletsel!
Inschakelen: Druk kort op de aan-/uittoets[].
Uitschakelen: Houd de aan-/uittoets[] 2seconden lang
ingedrukt.
De horizontale en verticale laserlijn
gebruiken
Na het inschakelen zijn de 360°-laserlijn [1] en de verticale laserlijn
[] geactiveerd.
Alleen de 360°-laserlijn [1] activeren:
Druk kort op de aan-/uittoets[].
Alleen de verticale laserlijn [] activeren:
Druk kort op de aan-/uittoets[].
Werken met automatische waterpas
1. Schuif de waterpas-schuifschakelaar [] naar links (geopend slot).
2. Zet het product neer op een horizontale, vaste ondergrond of plaats
het product op een statief (zie “Werken met het statief”).
3. Schakel het product in. De waterpas-indicatielamp [] licht op.
Waterpasindicatielamp []
Groen Er kan automatisch gewaterpast worden.
Rood Er kan niet automatisch gewaterpast
TIP: Na trillingen stelt de laser zichzelf weer automatisch waterpas
in. Wacht tot de laserlijnen zich niet meer bewegen.
Betekenis
Het waterpassen is afgerond als de
laserlijnen niet meer bewegen.
worden. De laserlijnen knipperen.
55NL/BE
Page 56

Werken zonder automatisch waterpassen
TIPS:
Bij het werken zonder automatisch waterpassen brandt de waterpas-
indicatielamp [] continu rood. De afgebeelde laserlijnen zijn niet
gewaterpast.
Het product beschikt over 2magneten [2]. Met de magneten kunt u
het product op oppervlakken bevestigen die magnetisch zijn zoals
bijv. stalen rekken.
OPGELET! Het gebruikte magnetische oppervlak moet vlak en niet
m
krom of oneven zijn. Anders kan het product omvallen en worden
beschadigd.
1. Schuif de waterpas-schuifschakelaar
slot).
2. Schakel het product in.
[] naar rechts (vergrendeld
Werken met het statief
(Afb. B)
Laser op het statiefplateau schroeven
Schroef het product met de binnenschroefdraad [] met de hand op
de statiefschroef [].
Statiefplateau verwijderen/aanbrengen
1. Open de hendel
2. Neem het statiefplateau [] naar boven eruit.
3. Plaats het statiefplateau [] om vast te zetten op het statief.
4. Zet het statiefplateau [] vast door de hendel [6] te sluiten.
OPGELET! Gebruik niet teveel kracht. Het product kan daardoor
m
beschadigd worden.
[6].
56 NL/BE
Page 57

Statief instellen
(Afb. C)
TIP: U kunt de horizontale uitlijning van het statief controleren met de
waterpas [].
1. Trek de statiefpoten
2. Zet de stand van de statiefpoten [7] vast met de vastzetring [9].
Hoogte instellen, statiefpoten
1. Open de klapsluitingen
2. Schuif de verlengstukken van de statiefpoten [7] op de gewenste
lengte.
3. Sluit de klapsluitingen [8].
Hoogte instellen, zwengel
1. Klap de zwengel
2. Houd de zwengel [] met één hand vast.
3. Maak de vastzetring [] los door hem naar links te draaien.
4. Zet het statief met de zwengel op de juiste hoogte.
5. Draai de vastzetring [] naar rechts om hem deze stand vast te
zetten.
Hoek instellen, vooruit/terug
1. Draai de greepschroef
2. Stel de gewenste hoek in.
3. Draai de greepschroef [5] naar rechts om de hoek vast te zetten.
[7] uit elkaar.
[8].
[] omhoog.
[5] naar links om hem los te maken.
Hoek instellen, zijwaarts
1. Draai de vleugelschroef
[4] naar links om hem los te maken.
2. Klap het statief in de juiste hoek.
3. Draai de vleugelschroef [4] naar rechts om hem vast te zetten.
Statief draaien
1. Draai de stelschroef
[] naar links om hem los te maken.
2. Pak de greepschroef [5] vast en draai het statief in de gewenste
richting.
3. Draai de stelschroef [] naar rechts om hem vast te zetten.
57NL/BE
Page 58

Schoonmaken en onderhoud
WAARSCHUWING! Dompel het product nooit onder in water of
m
in andere vloeistoffen.
WAARSCHUWING! Het product mag voor reparaties alleen
m
door een vakman worden geopend. Laat het product uitsluitend
met originele reserveonderdelen door een gekwalificeerde vakman
repareren. Zodoende wordt gegarandeerd dat het product goed blijft
werken.
Het product hoeft niet onderhouden te worden.
Zorg ervoor dat er bij het schoonmaken geen water in het product
binnendringt.
Houd het product schoon om er zo voor te zorgen dat het goed en
veilig werkt.
Gebruik een droge doek om de buitenkant schoon te maken.
Maak de openingen van de 360°-laser [1] en de verticale
laser [] met een zachte luchtstraal schoon. Verwijder ernstiger
verontreinigingen met een enigszins vochtig wattenstaafje.
Druk niet te hard!
Opbergen
Als u het product voor langere tijd niet denkt te zullen gebruiken, berg
het dan weg op een schone, droge plaats, die niet blootstaat aan
direct zonlicht.
Probleemoplossing
Probleem
Het product start niet. De accu is leeg. Laad de accu op.
De automatische
waterpas werkt niet.
58 NL/BE
Mogelijke
oorzaak
De automatische
waterpas kan niet vrij
bewegen. Het positie
van het product is niet
in voldoende mate
parallel met de bodem
uitgelijnd.
Oplossing
Product zo instellen
dat het parallel met de
bodem uitgelijnd is.
Page 59

Afvoer
De verpakking bestaat uit milieuvriendelijke grondstoffen die u via de
plaatselijke recyclingcontainers kunt afvoeren.
Neem de aanduiding van de verpakkingsmaterialen voor
de afvalscheiding in acht. Deze zijn gemarkeerd met de
afkortingen (a) en een cijfers (b) met de volgende betekenis:
1–7: kunststoffen / 20–22: papier en vezelplaten / 80–98:
composietmaterialen.
Het product en de verpakkingsmaterialen zijn recyclebaar;
verwijder deze afzonderlijk voor een betere afvalbehandeling.
Het Triman-logo geldt alleen voor Frankrijk.
Informatie over de mogelijkheden om het uitgediende product
na gebruik te verwijderen, verstrekt uw gemeentelijke overheid.
Gooi het afgedankte product omwille van het milieu niet weg
via het huisvuil, maar geef het af bij het daarvoor bestemde
depot of het gemeentelijke milieupark. Over afgifteplaatsen
en hun openingstijden kunt u zich bij uw aangewezen instantie
informeren.
Defecte of verbruikte batterijen / accu‘s moeten volgens de richtlijn
2006/66/EG en veranderingen daarop worden gerecycled. Geef
batterijen / accu‘s en / of het product af bij de daarvoor bestemde
verzamelstations.
Milieuschade door foutieve verwijdering van de
batterijen / accu‘s!
Batterijen / accu‘s mogen niet via het huisvuil worden weggegooid.
Ze kunnen giftige zware metalen bevatten en vallen onder het
chemisch afval. De chemische symbolen van de zware metalen zijn:
Cd = cadmium, Hg = kwik, Pb = lood. Geef verbruikte batterijen / accu‘s
daarom af bij een gemeentelijk inzamelpunt.
59NL/BE
Page 60

Garantie
Het product wordt volgens strenge kwaliteitsrichtlijnen zorgvuldig
geproduceerd en voor levering grondig getest. In geval van schade
aan het product kunt u rechtmatig beroep doen op de verkoper van het
product. Deze wettelijke rechten worden door onze hierna vermelde
garantie niet beperkt.
Op dit product verlenen wij 5 jaar garantie vanaf aankoopdatum. De
garantieperiode start op de dag van aankoop. Bewaar de originele
kassabon alstublieft. Dit document is nodig als bewijs voor aankoop.
Wanneer binnen 5 jaar na de aankoopdatum van dit product een
materiaal- of productiefout optreedt, dan wordt het product door ons
– naar onze keuze – gratis voor u gerepareerd of vervangen. Deze
garantie komt te vervallen als het product beschadigd wordt, niet correct
gebruikt of onderhouden wordt.
De garantie geldt voor materiaal- en productiefouten. Deze garantie
is niet van toepassing op productonderdelen, die onderhevig zijn aan
normale slijtage en hierdoor als aan slijtage onderhevige onderdelen
gelden (bijv. batterijen) of voor beschadigingen aan breekbare
onderdelen, zoals bijv. schakelaars, accu’s of dergelijke onderdelen, die
gemaakt zijn van glas.
Afwikkeling in geval van garantie
Om een snelle afhandeling van uw reclamatie te waarborgen dient u de
volgende instructies in acht te nemen:
Houd bij alle vragen alstublieft de kassabon en het artikelnummer
(bijv. IAN 123456_7890) als bewijs van aankoop bij de hand.
Het artikelnummer vindt u op de typeplaat, ingegraveerd, op het titelblad
van uw handleiding (linksonder) of als sticker op de achter- of onderzijde.
Wanneer er storingen in de werking of andere gebreken optreden, dient
u eerst telefonisch of per e-mail contact met de onderstaande serviceafdeling op te nemen.
Een als defect geregistreerd product kunt u dan samen met uw
aankoopbewijs (kassabon) en vermelding van de concrete schade
alsmede het tijdstip van optreden voor u franco aan het u meegedeelde
servicepunt verzenden.
60 NL/BE
Page 61

Service
Service Nederland
Service België
61NL/BE
Page 62

Używane ostrzeżenia i symbole.......... Strona 63
Wstęp ......................................... Strona 64
Używać zgodnie z przeznaczeniem ................. Strona 64
Zakres dostawy ................................. Strona 64
Opis części..................................... Strona 65
Dane techniczne ................................ Strona 65
Instrukcje bezpieczeństwa ................. Strona 66
Instrukcje bezpieczeństwa dotyczące baterii i
akumulatorków.................................. Strona 67
Przed pierwszym użyciem ................. Strona 68
Obsługa....................................... Strona 68
Ładowanie akumulatora........................... Strona 68
Włączanie i wyłączanie .......................... Strona 69
Używanie poziomych i pionowych linii laserowych...... Strona 69
Praca z automatycznym systemem poziomowania ...... Strona 69
Praca bez poziomowania automatycznego ........... Strona 70
Praca ze statywem............................... Strona 70
Regulacja statywu ............................... Strona 71
Czyszczenie i konserwacja ................. Strona 72
Przechowywanie ............................ Strona 72
Usuwanie usterek ........................... Strona 72
Utylizacja ..................................... Strona 73
Gwarancja.................................... Strona 74
62 PL
Page 63
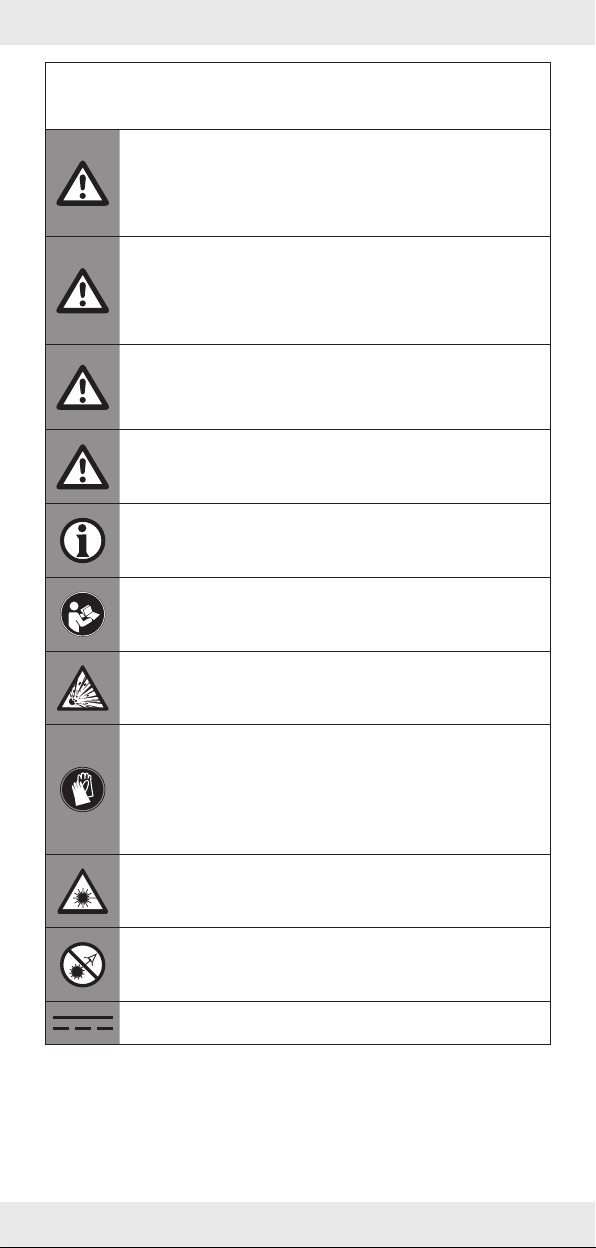
Używane ostrzeżenia i symbole
W tej instrukcji i na opakowaniu używane są poniższe ostrzeżenia:
NIEBEZPIECZEŃSTWO! Ten symbol ze słowem
„Niebezpieczeństwo” wskazuje na zagrożenie o wysokim
stopniu ryzyka, które, jeśli się go nie uniknie, spowoduje
śmierć lub poważne obrażenia.
OSTRZEŻENIE! Ten symbol ze słowem „Ostrzeżenie”
wskazuje na zagrożenie o średnim stopniu ryzyka, które,
jeśli się go nie uniknie, spowoduje śmierć lub poważne
obrażenia.
OSTROŻNIE! Ten symbol ze słowem „Ostrożnie” wskazuje
na zagrożenie o niskim stopniu ryzyka, które, jeśli się go nie
uniknie, spowoduje małe lub umiarkowane obrażenia.
UWAGA! Ten symbol ze słowem ostrzegawczym „Uwaga”
wskazuje na możliwość uszkodzenia mienia.
RADA: Ten symbol ze słowem „Rada” zawiera dalsze
użyteczne informacje.
Ten symbol oznacza, że podczas użytkowania produktu
należy przestrzegać instrukcji obsługi.
Ryzyko eksplozji!
Ten symbol oznacza obowiązek noszenia odpowiednich
rękawic ochronnych! Postępować zgodnie z instrukcjami
zawartymi w tym ostrzeżeniu, aby uniknąć obrażeń rąk
spowodowanych przez przedmioty lub kontakt z gorącymi
materiałami lub chemikaliami.
Chronić się przed promieniowaniem laserowym!
Nie patrzeć w promień lasera!
Stały prąd/napięcie
63PL
Page 64
Port USB
Używać tylko w suchych pomieszczeniach.
Znak CE potwierdza zgodność z dyrektywami UE mającymi
zastosowanie do produktu.
AKUMULATOROWY LASER KRZYŻOWY 4V
Wstęp
Gratulujemy Państwu zakupu nowego produktu. Tym samym zdecydowali
się Państwo na zakup produktu wysokiej jakości. Instrukcja obsługi
jest częścią tego produktu. Zawiera ona ważne wskazówki dotyczące
bezpieczeństwa, użytkowania i utylizacji. Przed pierwszym użyciem
produktu należy zapoznać się ze wszystkimi wskazówkami dotyczącymi
obsługi i bezpieczeństwa. Używać produktu wyłącznie zgodnie z jego
poniżej opisanym przeznaczeniem. W przypadku przekazania produktu
innej osobie należy dołączyć do niego całą jego dokumentację.
Używać zgodnie z przeznaczeniem
Ten produkt służy do rzutowania linii pionowych i poziomych. Dwie linie
laserowe mogą być używane pojedynczo lub jednocześnie.
Nie używać tego produktu do żadnych innych celów.
Ten produkt jest przeznaczony wyłącznie do użytku w pomieszczeniach
zgodnie z przeznaczeniem.
Ten produkt jest przeznaczony wyłącznie do użytku w prywatnych
gospodarstwach domowych, a nie do celów komercyjnych.
Producent nie ponosi odpowiedzialności za szkody wynikłe z
niewłaściwego użytkowania.
Zakres dostawy
Po rozpakowaniu produktu należy sprawdzić, czy dostawa jest
kompletna i czy wszystkie części są w dobrym stanie. Przed użyciem
usunąć wszystkie materiały pakunkowe.
Jeśli brakuje jakichkolwiek części lub są uszkodzone, to należy
skontaktować się z biurem obsługi klienta.
1x Akumulatorowy laser krzyżowy
1x Statyw
1x Kabel ładowania USB-C
1x Instrukcja obsługi
64 PL
Page 65

Opis części
Przed przeczytaniem rozwinąć złożoną stronę z rysunkami. Zapoznać się
ze wszystkimi funkcjami tego produktu.
(Rys.A)
[1] Laser 360°
[2] Magnesy
[3] Gniazdo ładowania
[4] Śruba motylkowa
[5] Śruba uchwytu
[6] Dźwignia
[7] Nogi statywu
[8] Zamki zatrzaskowe
[9] Pierścień blokujący
[] Korba
[] Pierścień blokujący
[] Śruba regulacyjna
[] Poziomica
[] Suwak poziomowania
[] Kontrolka ładowania
[] Przełącznik zasilania
[] Lampa poziomowania
[] Laser pionowy
[] Płyta statywu
[] Kabel ładowania USB-C
(Rys. B)
[] Gwint wewnętrzny [] Śruba statywu
Dane techniczne
Obszar roboczy: 20 m*
Waga (bez statywu): ok.440 g
Napięcie robocze U
Pojemność nominalna: 2,6 Ah
Napięcie ładowania UIN: 5 V
Prąd ładowania: 1,7 A
Zakres samopoziomowania: ± 3°
Dokładność poziomowania: ± 0,4 mm/m
Długość fali lasera: 510–530 nm
Klasa lasera: 2
Czas poziomowania: ok. 4sekundy
: 4 V
max
* Obszar pracy może być redukowany warunkami otoczenia (np.
jasnym światłem).
65PL
Page 66

Instrukcje bezpieczeństwa
PRZED PIERWSZYM UŻYCIEM PRODUKTU
ZAPOZNAĆ SIĘ ZE WSZYSTKIMI
INSTRUKCJAMI O BEZPIECZEŃSTWIE!
PRZEKAZUJĄC PRODUKT INNYM OSOBOM,
NALEŻY DOŁĄCZYĆ DO NIEGO PEŁNĄ
DOKUMENTACJĘ!
Uszkodzenia powstałe w wyniku nieprzestrzegania
niniejszej instrukcji obsługi nie są objęte
gwarancją!
Nie ponosimy żadnej odpowiedzialności w
przypadku wystąpienia szkód wtórnych! Nie
bierzemy odpowiedzialności za uszkodzenia
mienia lub obrażenia ciała, powstałe w wyniku
niewłaściwego użytkowania lub nieprzestrzegania
instrukcji bezpieczeństwa!
Dzieci i osoby z ograniczeniami
OSTRZEŻENIE! ZAGROŻENIE
m
WYPADKIEM I NIEBEZPIECZEŃSTWO
UTRATY ŻYCIA DLA NIEMOWLĄT I
MAŁYCH DZIECI!
Nie zostawiać dzieci bez nadzoru w
pobliżu materiałów pakunkowych. Materiały
pakunkowe grożą zadławieniem.
Dzieci często nie są w stanie ocenić
związanych z tym niebezpieczeństw.
Zawsze trzymać dzieci z dala od materiałów
pakunkowych.
Produkt może być używany tylko przez osoby
dorosłe. Dzieci poniżej 16roku życia mogą
używać produktu tylko pod nadzorem.
Trzymać dzieci z dala od produktu.
66 PL
Page 67
Informacje ogólne
Przestrzegać zawartych w niniejszej instrukcji
obsługi informacji dotyczących obsługi,
czyszczenia, przechowywania i utylizacji.
Przed każdym użyciem sprawdzić produkt.
Uszkodzony produkt oddawać do naprawy.
Nie używać uszkodzonego produktu.
Wyłączać produkt, gdy nie jest używany. Nie
pozostawiać produktu bez nadzoru.
Produkt należy przechowywać z dala od
urządzeń medycznych, magnetycznych
nośników danych i urządzeń wrażliwych na
pole magnetyczne.
Obsługa lasera
UWAGA! Promieniowanie laserowe– nie
m
patrzeć w wiązkę! Laser klasy2.
Wiązkę laserową nie kierować na ludzi.
Etykiety i ostrzeżenia znajdują się na górze i na
dole produktu.
Instrukcje bezpieczeństwa dotyczące
baterii i akumulatorków
ZAGROŻENIE ŻYCIA! Baterie i akumulatorki należy trzymać poza
m
zasięgiem dzieci. W razie połknięcia należy niezwłocznie poszukać
pomocy lekarza!
ZAGROŻENIE WYBUCHEM! Nigdy nie ładować
zwykłych baterii nieprzeznaczonych do ładowania. Baterii
lub akumulatorków nie zwierać ani ich nie otwierać. Może to
spowodować przegrzanie, pożar lub pęknięcie.
Baterii lub akumulatorków nie wolno wrzucać do ognia lub wody.
Nie wywierać obciążeń mechanicznych na baterie lub akumulatorki.
Ryzyko wycieku z baterii lub akumulatorków
Unikać ekstremalnych warunków otoczenia oraz temperatur, które
mogłyby mieć wpływ na baterie lub akumulatorki, np. grzejników lub
bezpośredniego światła słonecznego.
67PL
Page 68

Jeśli baterie lub akumulatorki wylały się, unikać kontaktu chemikaliów
ze skórą, oczami i błonami śluzowymi! Miejsca kontaktu natychmiast
przepłukać czystą wodą i skonsultować się z lekarzem!
NOSIĆ RĘKAWICE OCHRONNE! Cieknące albo
uszkodzone baterie lub akumulatorki mogą powodować
poparzenia w kontakcie ze skórą. Przez cały czas nosić
odpowiednie rękawice ochronne.
Ten produkt zawiera wbudowany akumulator, który nie jest
niewymienialny przez użytkownika. Usunięcie lub wymiana
akumulatorka musi być wykonana przez producenta, autoryzowany
serwis lub osobę o odpowiednich kwalifikacjach w celu uniknięcia
zagrożenia. Podczas utylizacji tego produktu należy pamiętać, że ten
produkt zawiera akumulatorek.
Przed pierwszym użyciem
Usunąć opakowanie. Upewnić się, że wszystkie elementy są
dostępne.
Ładowanie akumulatora (patrz akapit „Ładowanie akumulatora”).
Obsługa
Ładowanie akumulatora
RADA: Akumulator jest niewymienny. W przypadku problemów z
akumulatorem należy skontaktować się z centrum serwisowym.
1. Kabel ładowania USB-C [] podłączyć do gniazda ładowania [3].
2. Podłącz kabel ładowania USB-C [] do portu USB.
Kontrolka ładowania
[]
Czerwony Akumulator jest ładowany.
Zielony Akumulator jest całkowicie
3. Po zakończeniu procesu ładowania najpierw kabel ładowania USB-C
[] należy wyciągnąć z portu USB.
4. Kabel ładowania USB-C [] odłączyć od produktu.
RADA: Produkt może być używany podczas ładowania. Lekkie
nagrzewanie się produktu podczas ładowania jest normalnym
zjawiskiem. Podczas procesu ładowania korzystanie z produktu
może być niemożliwe, jeśli bateria będzie prawie lub całkowicie
rozładowana. Zależy to od używanej ładowarki.
68 PL
Znaczenie
naładowany.
Page 69

Włączanie i wyłączanie
OSTROŻNIE! Promieniowanie laserowe ‒ nie patrzeć w
wiązkę lasera 360° [1] i wiązkę lasera pionowego []!
Odwracać głowę lub zamykać oczy, aby nie patrzeć w
promień lasera. Ryzyko obrażeń oczu!
Włączanie: Nacisnąć przełącznik zasilania [].
Wyłączanie: Wcisnąć na 2sekundy przełącznik zasilania[].
Używanie poziomych i pionowych linii
laserowych
Po włączeniu aktywowane są linia lasera 360° [1] i pionowa linia
lasera [].
Aktywacja tylko linii lasera 360° [1]:
Nacisnąć przełącznik zasilania [].
Aktywacja tylko pionowej linii lasera []:
Nacisnąć przełącznik zasilania [].
Praca z automatycznym systemem
poziomowania
1. Suwak poziomowania [] przesunąć w lewo (zamek otwarty).
2. Produkt postawić na stabilnej, poziomej powierzchni lub zamontować
produkt na statywie (patrz akapit „Praca ze statywem”).
3. Włączyć produkt. Lampa poziomowania [] zaświeci się.
Lampa
poziomowania []
Zielony Automatyczne poziomowanie jest możliwe.
Czerwony Automatyczne poziomowanie nie jest
RADA: W przypadku wibracji laser ponownie sam wypoziomuje się
automatycznie. Poczekać, aż linie laserowe przestaną się poruszać.
Znaczenie
Poziomowanie będzie zakończone, gdy
linie laserowe przestaną się poruszać.
możliwe. Linie laserowe migają.
69PL
Page 70

Praca bez poziomowania automatycznego
R ADY:
Podczas pracy bez automatycznego poziomowania lampa
poziomowania [] świeci światłem ciągłym w kolorze czerwonym.
Linie laserowe nie będą wypoziomowane.
Produkt posiada 2magnesy [2]. Magnesy umożliwiają mocowanie
produktu do powierzchni, które przyciągają przedmioty
magnetyczne (np. półki stalowe).
UWAGA! Użyta powierzchnia magnetyczna powinna być płaska,
m
niezakrzywiona lub nierówna. W przeciwnym razie produkt może
upaść i ulec uszkodzeniu.
1. Suwak poziomowania
2. Włączyć produkt.
[] przesunąć w prawo (zamek zamknięty).
Praca ze statywem
(Rys. B)
Przykręcanie lasera do płyty statywu
Gwint wewnętrzny [] produktu wkręcić ręcznie na śrubę statywu
[].
Wyjmowanie lub wkładanie płyty statywu
1. Otworzyć dźwignię
2. Wyjąć płytę statywu [] ciągnąc w górę.
3. W celu włożenia płytę statywu [] umieścić na statywie.
4. Zablokować płytę statywu [] zamykając dźwignię [6].
UWAGA! Nie używać nadmiernej siły. Produkt może zostać
m
uszkodzony.
[6].
70 PL
Page 71

Regulacja statywu
(Rys. C)
RADA: Poziome ustawienie statywu można sprawdzić za pomocą
poziomicy [].
1. Rozsunąć nogi statywu
2. Pozycję nóg statywu [7] zablokować za pomocą pierścienia
blokującego [9].
Dostosowywanie wysokości, nogi statywu
1. Otworzyć zamki zatrzaskowe
2. Nogi statywu [7] wysunąć na żądaną długość.
3. Zamknąć zamki zatrzaskowe [8].
Dostosowywanie wysokości, korba
1. Złożyć korbę
[].
2. Jedną ręką przytrzymywać korbę [].
3. Poluzować pierścień blokujący [] kręcąc w lewo.
4. Ustawić żądaną wysokość statywu.
5. Pierścień blokujący [] przekręcić w prawo, aby zablokować tę
pozycję.
Dostosowywanie nachylenia, przód lub tył
1. Śrubę uchwytu
2. Ustaw żądane nachylenie.
3. Śrubę uchwytu [5] przekręcić w prawo, aby zablokować nachylenie.
[7].
[8].
[5] przekręcić w lewo, aby ją poluzować.
Dostosowywanie nachylenia, na boki
1. Śrubę motylkową
[4] przekręcić w lewo, aby ją poluzować.
2. Ustawić żądane nachylenie statywu.
3. Śrubę motylkową [4] przekręcić w prawo, aby zablokować.
Obracanie statywu
1. Śrubę regulacyjną
[] przekręcić w lewo, aby ją poluzować.
2. Przytrzymać śrubę uchwytu [5] i obrócić statyw w żądanym kierunku.
3. Śrubę regulacyjną [] przekręcić w prawo, aby zablokować.
71PL
Page 72

Czyszczenie i konserwacja
OSTRZEŻENIE! Nigdy nie zanurzać produktu w wodzie ani w
m
innych cieczach.
OSTRZEŻENIE! Produkt może być otwierany wyłącznie przez
m
specjalistę w celu naprawy. Produkt powinien być naprawiany tylko
przez wykwalifikowanego specjalistę i tylko z użyciem oryginalnych
części zamiennych. Zapewnia to bezpieczeństwo produktu.
Produkt nie wymaga żadnej konserwacji.
Nie dopuszczać do przedostania się wody do produktu podczas
czyszczenia.
Produkt należy utrzymywać w czystości, aby zapewnić jego
prawidłowe i bezpieczne działanie.
Do czyszczenia powierzchni zewnętrznych używać suchej szmatki.
Otwory lasera 360° [1] i lasera pionowego [] czyścić delikatnym
strumieniem powietrza. Silniejsze zabrudzenia usuwać lekko
zwilżonym wacikiem.
Nie wywierać nadmiernego nacisku!
Przechowywanie
Jeśli produkt nie będzie używany przez dłuższy czas, to należy
przechowywać go w czystym, suchym miejscu z dala od
bezpośredniego światła słonecznego.
Usuwanie usterek
Problem
Produkt się nie
uruchamia.
Poziomowanie
automatyczne nie
działa.
72 PL
Możliwa
przyczyna
Rozładowany
akumulatorek.
Automatyczny system
poziomowania nie
może swobodnie
oscylować. Produkt
nie jest ułożony
równolegle do
podłogi.
Rozwiązanie
Naładować
akumulator.
Tak ustawić produkt,
aby był równoległy do
podłogi.
Page 73
Utylizacja
Opakowanie wykonane jest z materiałów przyjaznych dla środowiska,
które można przekazać do utylizacji w lokalnym punkcie przetwarzania
surowców wtórnych.
Przy segregowaniu odpadów prosimy zwrócić uwagę na
oznakowanie materiałów opakowaniowych, oznaczone są
one skrótami (a) i numerami (b) o następującym znaczeniu:
1–7: Tworzywa sztuczne / 20–22: Papier i tektura / 80–98:
Materiały kompozytowe.
Produkt i materiał opakowania nadają się do ponownego
przetworzenia, należy je zutylizować osobno w celu lepszego
przetworzenia odpadów.
Logo Triman jest ważne tylko dla Francji.
Informacji na temat możliwości utylizacji wyeksploatowanego
produktu udziela urząd gminy lub miasta.
Z uwagi na ochronę środowiska nie wyrzucać urządzenia
po zakończeniu eksploatacji do odpadów domowych, lecz
prawidłowo zutylizować. Informacji o punktach zbiorczych i ich
godzinach otwarcia udziela odpowiedni urząd.
Uszkodzone lub zużyte baterie / akumulatory muszą być poddane
recyklingowi zgodnie z dyrektywą 2006/66/WE i jej zmianami. Oddać
baterie / akumulatory i / lub produkt w dostępnych punktach zbiórki.
Niewłaściwa utylizacja baterii / akumulatorów
stwarza zagrożenie dla środowiska naturalnego!
Baterii / akumulatorów nie należy wyrzucać razem z odpadami
domowymi. Mogą one zawierać szkodliwe metale ciężkie i należy je
traktować jak odpady specjalne. Symbole chemiczne metali ciężkich
są następujące: Cd = kadm, Hg = rtęć, Pb = ołów. Dlatego też zużyte
baterie / akumulatory należy przekazywać do komunalnych punktów
gromadzenia odpadów niebezpiecznych.
73PL
Page 74

Gwarancja
Produkt wyprodukowano według wysokich standardów jakości i
poddano skrupulatnej kontroli przed wysyłką. W przypadku wad
produktu nabywcy przysługują ustawowe prawa. Gwarancja nie
ogranicza ustawowych praw nabywcy produktu.
Produkt objęte jest 5 gwarancją, licząc od daty zakupu. Gwarancja
wygasa w razie zawinionego przez użytkownika uszkodzenia produktu,
niewłaściwego użycia lub konserwacji.
W przypadku wystąpienia w ciągu 5 lat od daty zakupu wad
materiałowych lub fabrycznych, dokonujemy – według własnej oceny –
bezpłatnej naprawy lub wymiany produktu.
Świadczenie gwarancyjne obejmuje wady materiałowe i fabryczne.
Gwarancja nie obejmuje części produktu ulegających normalnemu
zużyciu, uznawanych za części zużywalne (np. baterie) oraz uszkodzeń
części łamliwych, np. przełączników, akumulatorów lub wykonanych ze
szkła.
Zgodnie z Kodeksem Cywilnym art. 581 §1 wraz z wymianą urządzenia
lub ważnej części czas gwarancji rozpoczyna się na nowo.
Sposób postępowania w przypadku naprawy
gwarancyjnej
Aby zapewnić szybkie rozpatrzenie Państwa wniosku, prosimy stosować
się do następujących wskazówek:
Przed skontaktowaniem się z działem serwisowym należy przygotować
paragon i numer artykułu (np. IAN 123456_7890) jako dowód zakupu.
Numery artykułów można znaleźć na tabliczce znamionowe, na
grawerunku, na stronie tytułowej jego instrukcji (na dole po lewej stronie)
lub jako naklejkę na stronie odwrotnej lub spodniej.
W razie wystąpienia błędów w działaniu lub innych wad, należy
skontaktować się najpierw z wymienionym poniżej działem serwisowym
telefonicznie lub pocztą elektroniczną.
Produkt uznany za uszkodzony można następnie z dołączeniem dowodu
zakupu (paragonu) i podaniem, na czym polega wada i kiedy wystąpiła,
przesłać bezpłatnie na podany Państwu adres serwisu.
74 PL
Page 75
Page 76

Použitá výstražná upozornění a
symboly....................................... Strana 77
Úvod........................................... Strana 78
Použití v souladu s určením ........................ Strana 78
Rozsah dodávky................................. Strana 78
Popis dílů ...................................... Strana 79
Technické údaje . . . . . . . . . . . . . . . . . . . . . . . . . . . . . . . . . Strana 79
Bezpečnostní pokyny ....................... Strana 80
Bezpečnostní pokyny pro baterie/akumulátory......... Strana 81
Před prvním použitím ....................... Strana 82
Obsluha ....................................... Strana 82
Nabíjení akumulátoru ............................ Strana 82
Zapnutí/vypnutí napájení ......................... Strana 83
Použijte vodorovnou a svislou laserovou linii ........... Strana 83
Práce se systémem automatického vyrovnávání......... Strana 83
Práce bez automatického vyrovnávání................ Strana 84
Práce se stativem ................................ Strana 84
Nastavte stativ .................................. Strana 85
Čištění a péče................................. Strana 86
Skladování ................................... Strana 86
Odstraňování chyb .......................... Strana 86
Zlikvidování.................................. Strana 87
Záruka ........................................ Strana 88
76 CZ
Page 77
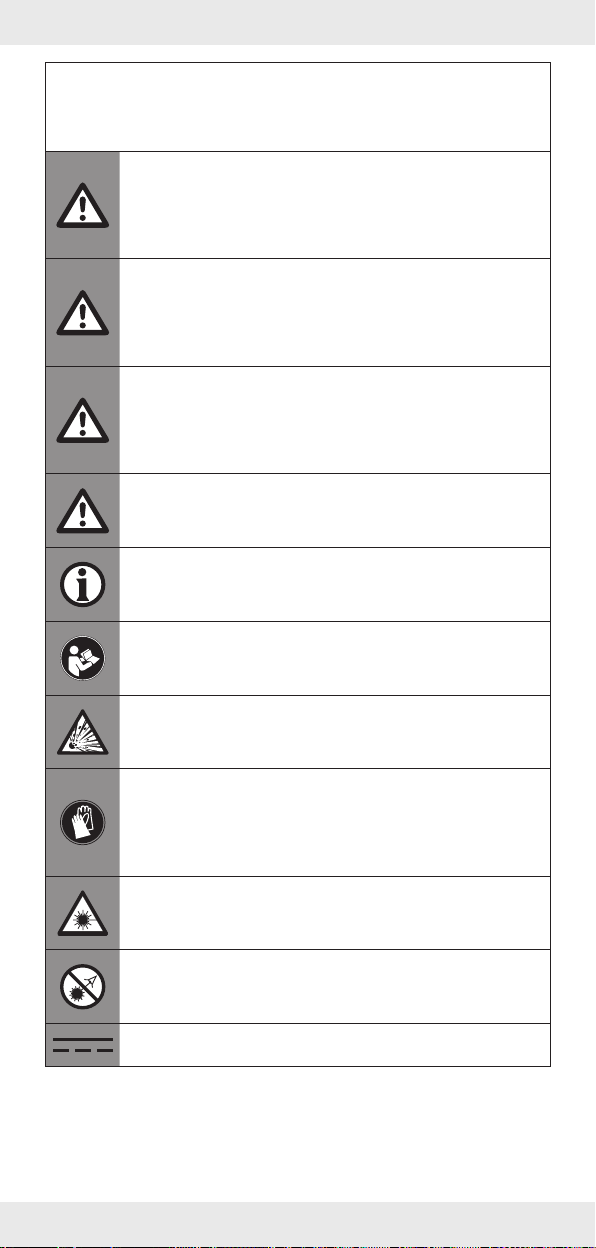
Použitá výstražná upozornění a symboly
V tomto návodu k obsluze a na obalu jsou používána následující
upozornění:
NEBEZPEČÍ! Tento symbol se signální slovem „Nebezpečí“
označuje ohrožení s vysokým stupněm rizika, které má,
pokud se mu nezabrání, za následek těžké zranění nebo
smrt.
VAROVÁNÍ! Tento symbol se signální slovem „Varování“
označuje ohrožení se středním stupněm rizika, které může
mít, pokud se mu nezabrání, za následek těžké zranění nebo
smrt.
OPATRNĚ! Tento symbol se signální slovem „Opatrně“
označuje ohrožení s nízkým stupněm rizika, které může
mít, pokud se mu nezabrání, za následek malé nebo lehké
zranění.
VÝSTRAHA! Tento symbol se signálním slovem „Výstraha“
označuje nebezpečí možného poškození majetku.
UPOZORNĚNÍ: Tento symbol se signálním slovem
„Upozornění“ poskytuje další užitečné informace.
Tento symbol znamená, že při použití tohoto výrobku je třeba
dodržet návod k obsluze.
Riziko výbuchu!
Toto povinné znamení upozorňuje na nošení ochranných
rukavic! Postupujte podle pokynů v tomto varování pro
zamezení poranění rukou objekty nebo kontaktu s horkými
nebo chemickými látkami!
Chraňte se před laserovým zářením!
Nedívejte se do laserového paprsku!
Stejnosměrný proud/napětí
77CZ
Page 78

USB port
Používat jen suchých vnitřních prostorách.
Značka CE potvrzuje shodu se směrnicemi EU, které se na
výrobek vztahují.
AKU KŘÍŽOVÝ LINIOVÝ LASER 4V
Úvod
Blahopřejeme Vám ke koupi nového výrobku. Rozhodli jste se pro kvalitní
produkt. Návod k obsluze je součástí tohoto výrobku. Obsahuje důležité
pokyny pro bezpečnost, použití a likvidaci. Před použitím výrobku se
seznamte se všemi pokyny k obsluze a bezpečnostními pokyny. Používejte
výrobek jen popsaným způsobem a na uvedených místech. Při předání
výrobku třetí osobě předejte i všechny podklady.
Použití v souladu s určením
Tento výrobek je vhodný pro projekci svislých a vodorovných linií. Obě
laserové linie lze použít jednotlivě i současně.
Výrobek nepoužívejte pro jiné účely.
Tento výrobek je určen jen pro použití ve vnitřních prostorách.
Výrobek je určen výhradně pro použití v soukromých domácnostech,
nikoliv pro komerční účely.
Výrobce nepřebírá žádnou odpovědnost za škody způsobené
neodborným použitím.
Rozsah dodávky
Po vybalení výrobku zkontrolujte, zda je dodávka kompletní a zda jsou
všechny díly v řádném stavu. Před použitím odstraňte všechny obalové
materiály.
Kontaktujte zákaznický servis, pokud by nějaké díly měly chybět nebo být
poškozeny.
1x Aku křížový liniový laser
1x Stativ
1x Nabíjecí kabelUSB-C
1x Návod na obsluhu
78 CZ
Page 79

Popis dílů
Rozložte před čtením poskládanou stránku s výkresy. Seznamte se se
všemi funkcemi výrobku.
(Obr.A)
[1] 360° laser
[2] Magnety
[3] Nabíjecí zdířka
[4] Křídlatý šroub
[5] Šroub s rukojetí
[6] Páka
[7] Nohy stativu
[8] Poklopové uzávěry
[9] Stavěcí kroužek
[] Klika
[] Stavěcí kroužek
[] Stavěcí šroub
[] Vodováha
[] Posuvný spínač vyrovnání
[] Kontrolka nabíjení
[] Tlačítko Zap/Vyp
[] Nivelační lampa
[] Vertikální laser
[] Deska stativu
[] Nabíjecí kabelUSB-C
(Obr. B)
[] Vnitřní závit [] Šroub stativu
Technické údaje
Pracovní rozsah: 20 m*
Hmotnost (bez stativu): cca 440 g
Provozní napětí U
Jmenovitá kapacita: 2,6 Ah
Nabíjecí napětí UIN: 5 V
Nabíjecí proud: 1,7 A
Rozsah samočinného vyrovnávání: ± 3°
Přesnost vyrovnávání: ± 0,4 mm/m
Vlnová délka laseru: 510–530 nm
Třída laseru: 2
Doba vyrovnání: cca4sekund
: 4 V
max
* Pracovní rozsah může být omezen okolními podmínkami (např.
jasným světlem).
79CZ
Page 80

Bezpečnostní pokyny
SEZNAMTE SE PŘED POUŽITÍM VÝROBKU
SE VŠEMI BEZPEČNOSTNÍMI POKYNY A
POKYNY PRO OBSLUHU! KDYŽ PŘEDÁVÁTE
TENTO VÝROBEK JINÝM LIDEM, PŘEDEJTE JIM
I VŠECHNY DOKUMENTY!
V případě poškození v důsledku nedodržení tohoto
návodu na obsluhu se Vaše záruka ruší!
Za následné škody se nepřebírá žádná
odpovědnost! V případě škody na majetku nebo
zranění způsobené nesprávným používáním nebo
nedodržením bezpečnostních pokynů se nepřebírá
žádná odpovědnost!
Děti a osoby se zdravotním omezením
VAROVÁNÍ! NEBEZPEČÍ ŽIVOTA A
m
NEHOD PRO KOJENCE A DĚTI!
Nenechte děti hrát si bez dozoru sbalicími
materiály. Balicí materiál představuje nebezpečí
udušení.
Děti často podceňují s tím spojená nebezpečí.
Vždy udržujte balicí materiál mimo dosah dětí.
Výrobek smí být používán pouze dospělými.
Děti do 16let smí výrobek používat pouze pod
dozorem.
Vždy udržujte výrobek mimo dosah dětí.
80 CZ
Page 81
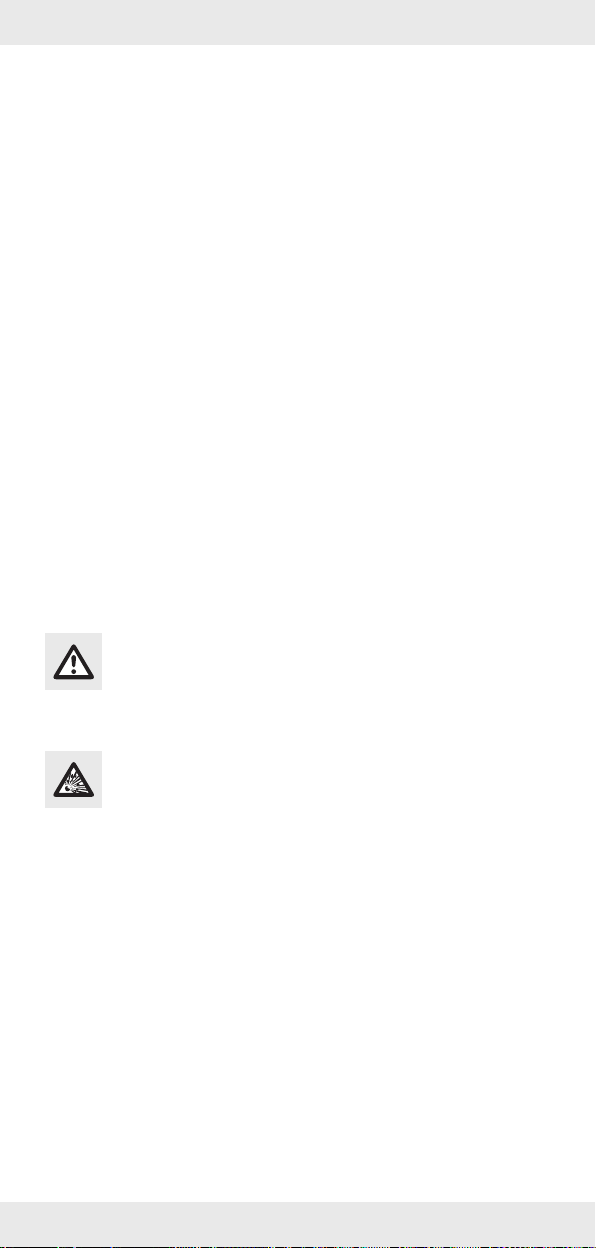
Obecné pokyny
Při provozu, čištění, skladování a likvidaci
postupujte podle pokynů v tomto návodu na
obsluhu.
Před každým použitím výrobek zkontrolujte.
Poškozený výrobek nechte opravit. Poškozený
výrobek nepoužívejte.
Když výrobek nepoužíváte, vypněte ho.
Nenechávejte výrobek nikdy bez dozoru.
Udržujte výrobek v bezpečné vzdálenosti od
zdravotnických přístrojů, magnetických médií a
magneticky citlivých zařízení.
Manipulace s laserem
VÝSTRAHA! Laserové záření– Nedívejte se
m
do paprsku! Třída laseru2.
Nesměřujte laserový paprsek směrem k lidem.
Označení a výstrahy jsou umístěny na horní a
dolní straně produktu.
Bezpečnostní pokyny pro baterie/
akumulátory
NEBEZPEČÍ ŽIVOTA! Uchovávejte baterie/akumulátory mimo
m
dosah dětí. V případě spolknutí vyhledejte ihned lékaře!
NEBEZPEČÍ VÝBUCHU! Nikdy nedobíjejte nedobíjitelné
baterie. Nezkratujte baterie/akumulátory, ani je neotevírejte.
Přehřátí, nebezpečí požáru nebo roztržení může být následkem.
Nikdy neházejte baterie/akumulátory do ohně nebo do vody.
Nevyvíjejte na baterie/akumulátory mechanickou zátěž.
Riziko vytečení baterií/akumulátorů
Vyhněte se extrémním podmínkám a teplotám, které by mohly mít
vliv na baterie/akumulátory, např. na radiátorech/přímém slunečním
světle.
81CZ
Page 82
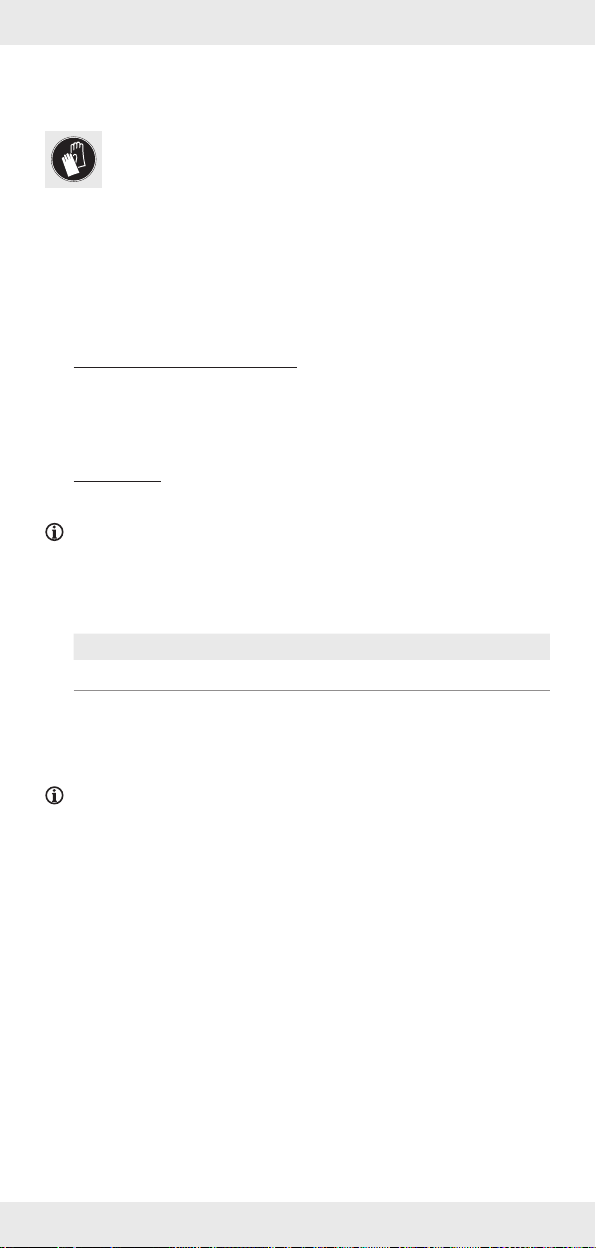
Pokud jsou baterie/akumulátory vyteklé, zabraňte kontaktu kůže, očí
a sliznic s chemikáliemi! Postižené místo pečlivě opláchněte čistou
vodou a ihned vyhledejte lékařskou pomoc!
NOSTE OCHRANNÉ RUKAVICE! Vytékající nebo
poškozené baterie/akumulátory mohou způsobit při styku
spokožkou chemická poleptání. V tomto případě použijte
vhodné ochranné rukavice.
Tento výrobek má vestavěný akumulátor, který nemůže být vyměněn
uživatelem. Aby se zabránilo rizikům, může odstranění nebo náhradu
akumulátoru provést pouze výrobce nebo jeho služba zákazníkům
nebo podobně kvalifikovaná osoba. Při likvidaci je třeba upozorni na
to, že tento výrobek obsahuje akumulátor.
Před prvním použitím
Odstraňte veškeré balicí materiály. Zkontrolujte, zda jsou všechny díly
úplné.
Nabijte akumulátor (viz„Nabíjení akumulátoru“).
Obsluha
Nabíjení akumulátoru
UPOZORNĚNÍ: Akumulátor není vyměnitelný. Pokud máte
problémy s akumulátorem, obraťte se na servisní středisko.
1. Zastrčte nabíjecí kabel USB-C[] do nabíjecí zdířky[3].
2. Připojte nabíjecí kabel USB-C[] k portu USB.
Kontrolka nabíjení[]
Červená Akumulátor se nabíjí.
Zelená Akumulátor je plně nabitý.
3. Po nabití nejprve vytáhněte nabíjecí kabel USB-C
4. Vytáhněte nabíjecí kabel USB-C[] z výrobku.
UPOZORNĚNÍ: Výrobek může být během procesu nabíjení
používán. Je normální, že se výrobek během nabíjení mírně zahřívá.
Během procesu nabíjení se může stát, že nebudete moci s výrobkem
pracovat, pokud je akumulátor skoro nebo zcela vybitý. To závisí na
použité nabíječce.
82 CZ
Význam
[] z portu USB.
Page 83

Zapnutí/vypnutí napájení
OPATRNĚ! Laserové záření– Nedívejte se do
paprsku [1] []! Odvraťte hlavu nebo zavřete oči, abyste se
vyhnuli pohledu do laserového paprsku. Riziko zranění očí!
Zapnutí: Krátce stiskněte tlačítko Zap/Vyp[].
Vypnutí: Podržte tlačítko Zap/Vyp[] stlačené po dobu 2 sekund.
Použijte vodorovnou a svislou laserovou linii
Po zapnutí se aktivuje 360° laserová linie[1] a vertikální laserová
linie[].
Aktivujte pouze 360° laserovou linii[1]:
Krátce stiskněte tlačítko Zap/Vyp[].
Aktivujte pouze svislou laserovou linii[]:
Krátce stiskněte tlačítko Zap/Vyp[].
Práce se systémem automatického
vyrovnávání
1. Posuňte posuvný spínač vyrovnání[] doleva (otevřený zámek).
2. Umístěte výrobek na rovný a pevný povrch nebo jej upevněte na
stativ (viz část „Práce se stativem“).
3. Výrobek zapněte. Svítí nivelační lampa[].
Nivelační
lampa[]
Zelená Automatické vyrovnávání je možné.
Červená Automatické vyrovnávání není možné.
UPOZORNĚNÍ: V případě otřesů se laser opět automaticky
vyrovná. Počkejte, dokud se laserové linie nepřestanou pohybovat.
Význam
Vyrovnávání je dokončeno, když se
laserové linie přestanou pohybovat.
Laserové linie blikají.
83CZ
Page 84

Práce bez automatického vyrovnávání
UPOZORNĚNÍ:
Při práci bez automatického vyrovnávání svítí nivelační lampa[]
trvale červeně. Zobrazené laserové linie nejsou vyrovnány.
Výrobek disponuje 2magnety[2]. Magnety umožňují připojit
výrobek k povrchům, které přitahují magnetické předměty, jako jsou
police z oceli.
VÝSTRAHA! Použitý magnetický povrch by měl být plochý, nikoli
m
zakřivený nebo nerovný. V opačném případě by mohl výrobek
spadnout a poškodit se.
1. Posuňte posuvný spínač vyrovnání
2. Výrobek zapněte.
[] doprava (uzamčenýzámek).
Práce se stativem
(Obr. B)
Laser našroubujte na desku stativu
Našroubujte výrobek vnitřním závitem[] rukou na šroub stativu[].
Vyjměte/vložte desku stativu
1. Otevřete páku
2. Vyjměte desku stativu[] směrem nahoru.
3. Pro vložení umístěte desku stativu[] na stativ.
4. Aretujte desku stativu[] zavřením páky[6].
VÝSTRAHA! Nepoužívejte příliš velkou sílu. Výrobek by mohl být
m
poškozen.
[6].
84 CZ
Page 85

Nastavte stativ
(Obr. C)
UPOZORNĚNÍ: Horizontální vyrovnání stativu můžete zkontrolovat
pomocí vodováhy[].
1. Roztáhněte nohy stativu
2. Zajistěte polohu noh stativu[7] stavěcím kroužkem[9].
Nastavte výšku, nohy stativu
1. Otevřete poklopové uzávěry
2. Posuňte prodloužení noh stativu[7] na požadovanou délku.
3. Zavřete poklopové uzávěry[8].
Nastavte výšku, klika
1. Vyklopte kliku
[] nahoru.
2. Pevně držte kliku[] jednou rukou.
3. Uvolněte stavěcí kroužek[] otočením doleva.
4. Vytočte stativ klikou do požadované výšky.
5. Otočte stavěcí kroužek[] doprava pro aretaci této polohy.
Nastavte náklon dopředu/dozadu
1. Otočením šroubu s rukojetí
2. Nastavte požadovaný náklon.
3. Otočením šroubu s rukojetí[5] doprava aretujte náklon.
Nastavte náklon, boční
1. Otočte křídlatý šroub
2. Nakloňte stativ do požadovaného náklonu.
3. Otočením křídlatého šroubu[4] doprava jej aretujte.
[7].
[8].
[5] doleva ho uvolněte.
[4] doleva, abyste ho uvolnili.
Otočte stativ
1. Otočte stavěcí šroub
[] doleva, abyste ho uvolnili.
2. Uchopte šroub s rukojetí[5] a otočte stativ požadovaným směrem.
3. Otočením stavěcího šroubu[] doprava jej aretujte.
85CZ
Page 86

Čištění a péče
VAROVÁNÍ! Nikdy neponořujte výrobek do vody nebo jiných
m
kapalin.
VAROVÁNÍ! Pro účely opravy smí výrobek otevřít pouze
m
kvalifikovaná osoba. Nechte výrobek opravovat jen od
kvalifikovaného odborného personálu s výhradním použitím
originálních náhradních dílů. Tím je zajištěna bezpečnost výrobku.
Výrobek nevyžaduje žádnou údržbu.
Během čištění zabraňte vniknutí vody do produktu.
Udržujte výrobek čistý, aby byla zaručena dobrá a bezpečná práce.
K čištění vnějšku používejte suchý hadřík.
Vyčistěte otvory 360° laseru[1] a svislého laseru[] jemným
proudem vzduchu. K odstranění silnějších nečistot použijte lehce
navlhčenou vatovou tyčinku.
Nevyvíjejte silný tlak!
Skladování
Pokud nebudete výrobek delší dobu používat, skladujte jej na čistém
a suchém místě mimo dosah přímého slunečního světla.
Odstraňování chyb
Problém Možná příčina Řešení
Výrobek se nespustí. Akumulátor je vybitý. Nabijte akumulátor.
Automatické
vyrovnávání se
Automatické
vyrovnávání
nefunguje.
nemůže volně
otáčet. Výrobek není
vyrovnán dostatečně
rovnoběžně s
podlahou.
Výrobek vyrovnejte
rovnoběžně s
podlahou.
86 CZ
Page 87
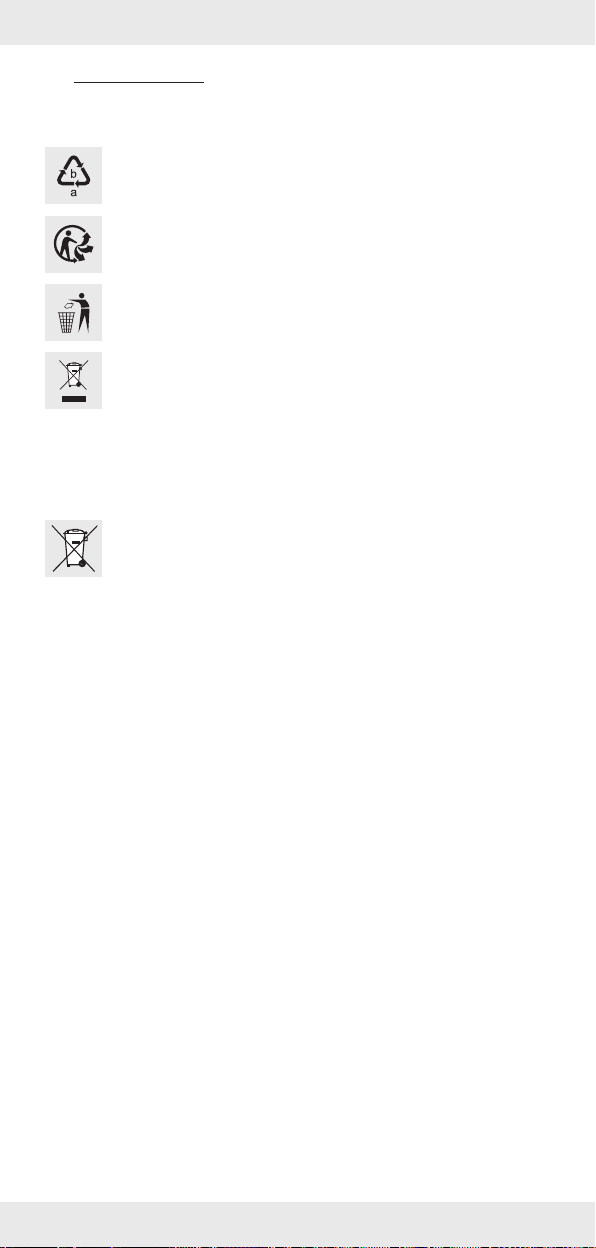
Zlikvidování
Obal se skládá z ekologických materiálů, které můžete zlikvidovat
prostřednictvím místních sběren recyklovatelných materiálů.
Při třídění odpadu se řiďte podle označení obalových materiálů
zkratkami (a) a čísly (b), s následujícím významem: 1–7: umělé
hmoty / 20–22: papír a lepenka / 80–98: složené látky.
Výrobek a obalové materiály jsou recyklovatelné, zlikvidujte je
odděleně pro lepší odstranění odpadu.
Logo Triman platí jen pro Francii.
O možnostech likvidace vysloužilých zařízení se informujte u
správy vaší obce nebo města.
V zájmu ochrany životního prostředí vysloužilý výrobek
nevyhazujte do domovního odpadu, ale předejte k odborné
likvidaci. O sběrnách a jejich otevíracích hodinách se můžete
informovat u příslušné správy města nebo obce.
Vadné nebo vybité baterie resp. akumulátory se musí, podle směrnice
2006/66/ES a jejích příslušných změn, recyklovat. Baterie, akumulátory i
výrobek odevzdejte zpět do nabízených sběren.
Ekologické škody v důsledku chybné likvidace
baterií / akumulátorů!
Baterie / akumulátory se nesmí zlikvidovat v domácím odpadu. Mohou
obsahovat jedovaté těžké kovy a musí se zpracovávat jako zvláštní
odpad. Chemické symboly těžkých kovů: Cd = kadmium, Hg = rtuť,
Pb = olovo. Proto odevzdejte opotřebované baterie / akumulátory u
komunální sběrny.
87CZ
Page 88

Záruka
Výrobek byl vyroben s nejvyšší pečlivostí podle přísných kvalitativních
směrnic a před odesláním prošel výstupní kontrolou. V případě závad
máte možnost uplatnění zákonných práv vůči prodejci. Vaše práva ze
zákona nejsou omezena naší níže uvedenou zárukou.
Na tento artikl platí 5 záruka od data zakoupení. Záruční lhůta začíná
od data zakoupení. Uschovejte si dobře originál pokladní stvrzenky. Tuto
stvrzenku budete potřebovat jako doklad o zakoupení.
Pokud se do 5 let od data zakoupení tohoto výrobku vyskytne vada
materiálu nebo výrobní vada, výrobek Vám – dle našeho rozhodnutí –
bezplatně opravíme nebo vyměníme. Tato záruka zaniká, jestliže se
výrobek poškodí, neodborně použil nebo neobdržel pravidelnou údržbu.
Záruka platí na vady materiálu a výrobní vady. Tato záruka se nevztahuje
na díly výrobku podléhající opotřebení (např. na baterie), dále na
poškození křehkých, choulostivých dílů, např. vypínačů, akumulátorů nebo
dílů zhotovených ze skla.
Postup v případě uplatňování záruky
Pro zajištění rychlého zpracování Vašeho případu se řiďte následujícími
pokyny:
Pro všechny požadavky si připravte pokladní stvrzenku a číslo artiklu
(např. IAN 123456_7890) jako doklad o zakoupení.
Číslo artiklu najdete na typovém štítku, gravuře, titulní stránce návodu
(vlevo dole) nebo na nálepce na zadní nebo spodní straně.
V případě poruch funkce nebo jiných závad nejdříve kontaktujte,
telefonicky nebo e-mailem, v následujícím textu uvedené servisní oddělení.
Výrobek registrovaný jako vadný potom můžete s přiloženým dokladem
o zakoupení (pokladní stvrzenkou) a údaji k závadě a kdy k ní došlo,
bezplatně zaslat na adresu servisu, která Vám byla sdělena.
88 CZ
Page 89

Page 90

Použité výstražné upozornenia a
symboly..................................... Strana 91
Úvod......................................... Strana 92
Používanie v súlade s určením .................... Strana 92
Rozsah dodávky............................... Strana 92
Popis súčiastok................................ Strana 93
Technické údaje . . . . . . . . . . . . . . . . . . . . . . . . . . . . . . . Strana 93
Bezpečnostné upozornenia .............. Strana 94
Bezpečnostné upozornenia pre batérie/nabíjateľné
batérie ...................................... Strana 95
Pred prvým použitím...................... Strana 96
Obsluha ..................................... Strana 96
Nabíjanie batérie.............................. Strana 96
Zapnutie/vypnutie ............................. Strana 97
Používanie horizontálnych a vertikálnych
laserových línií ................................ Strana 97
Práca s nivelačnou automatikou................... Strana 97
Práca bez nivelačnej automatiky .................. Strana 98
Práca so statívom .............................. Strana 98
Nastavenie statívu ............................. Strana 99
Čistenie a starostlivosť.................... Strana 100
Skladovanie................................ Strana 100
Odstránenie porúch ....................... Strana 100
Likvidácia................................... Strana 101
Záruka ...................................... Strana 102
90 SK
Page 91
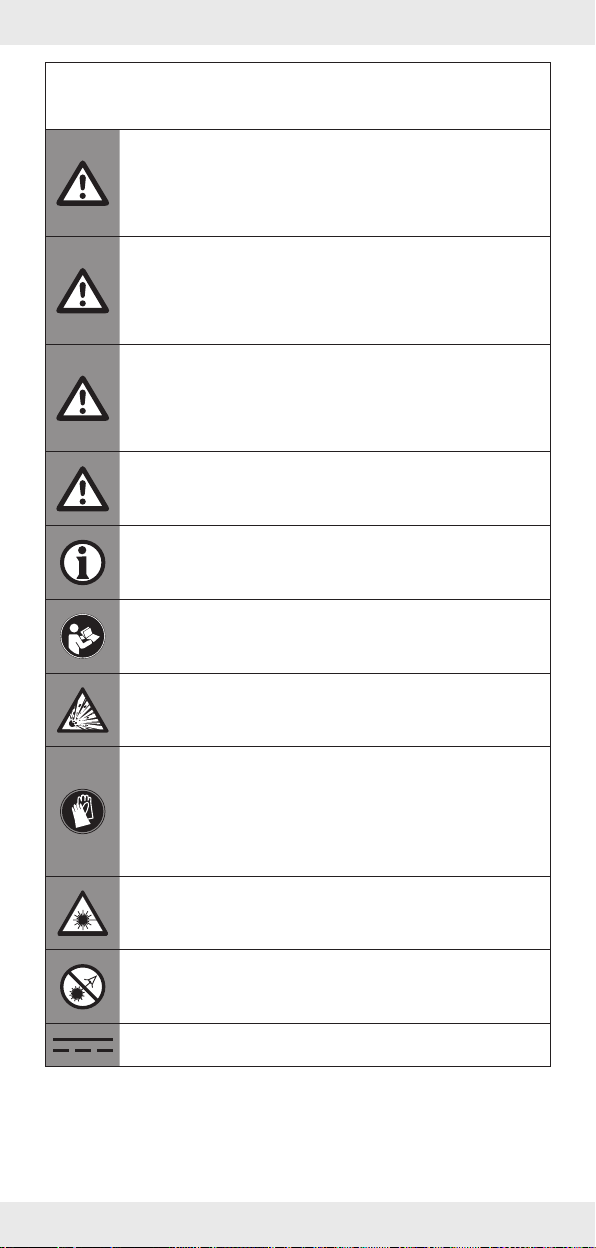
Použité výstražné upozornenia a symboly
V tejto príručke a na obale sa používajú nasledujúce upozornenia:
NEBEZPEČENSTVO! Tento symbol so signálnym slovom
„Nebezpečenstvo“ označuje nebezpečenstvo s vysokým
stupňom rizika, ktoré, ak sa mu nevyhnete, bude mať za
následok smrť alebo vážne zranenie.
VÝSTRAHA! Tento symbol so signálnym slovom „Výstraha“
označuje nebezpečenstvo so stredným stupňom rizika, ktoré,
ak sa mu nevyhnete, bude mať za následok vážne zranenie
alebo smrť.
POZOR! Tento symbol so signálnym slovom „Pozor“
označuje nebezpečenstvo s nízkym stupňom rizika, ktoré, ak
sa mu nevyhnete, bude mať za následok ľahké alebo stredne
ťažké zranenie.
OPATRNE! Tento symbol so signálnym slovom „Opatrne“
označuje možné poškodenie majetku.
UPOZORNENIE: Tento symbol so signálnym slovom
„Upozornenie“ ponúka ďalšie užitočné informácie.
Tento symbol znamená, že pri použití produktu sa musí
dodržiavať návod na obsluhu.
Riziko výbuchu!
Tento znak povinnosti odkazuje na nosenie vhodných
ochranných rukavíc! Postupujte podľa pokynov uvedených
v tomto upozornení, aby ste predišli zraneniam rúk rôznymi
predmetmi alebo kontaktom s horúcimi, alebo chemickými
materiálmi.
Chráňte sa pred laserovým žiarením!
Nepozerajte sa do laserového lúča!
Jednosmerný prúd/jednosmerné napätie
91SK
Page 92

USB port
Používajte len v suchých interiéroch.
Značka CE potvrdzuje zhodu so smernicami EÚ, ktoré sú
relevantné pre produkt.
AKUMULÁTOROVÝ KRÍŽOVÝ LÍNIOVÝ LASER 4V
Úvod
Blahoželáme Vám ku kúpe Vášho nového výrobku. Rozhodli ste sa pre
veľmi kvalitný výrobok. Návod na obsluhu je súčasťou tohto výrobku.
Obsahuje dôležité upozornenia týkajúce sa bezpečnosti, používania a
likvidácie. Skôr ako začnete výrobok používať, oboznámte sa so všetkými
pokynmi k obsluhe a bezpečnosti. Výrobok používajte iba v súlade s
popisom a v uvedených oblastiach používania. V prípade postúpenia
výrobku ďalším osobám odovzdajte aj všetky dokumenty patriace k
výrobku.
Používanie v súlade s určením
Tento produkt je vhodný na projekciu vertikálnych a horizontálnych línií.
Obe laserové línie je možné použiť samostatne, ale aj súčasne.
Tento produkt nepoužívajte na iné účely.
Tento produkt je určený len na použitie v interiéroch a v súlade s určením.
Tento produkt je určený len na použitie v súkromných domácnostiach a
nie na komerčné účely.
Výrobca nepreberá žiadnu zodpovednosť za škody spôsobené
neodborným používaním.
Rozsah dodávky
Po vybalení produktu skontrolujte, či je balenie kompletné a či sú všetky
časti v požadovanom stave. Pred používaním odstráňte všetky obalové
materiály.
Ak chýbajú diely alebo sú poškodené, spojte sa s oddelením služieb
zákazníkom.
1x Akumulátorový krížový líniový laser
1x Statív
1x Nabíjací kábelUSBC
1x Návod na obsluhu
92 SK
Page 93

Popis súčiastok
Pred čítaním si rozložte stranu s nákresmi. Oboznámte sa so všetkými
funkciami produktu.
(Obr.A)
[1] 360° laser
[2] Magnety
[3] Nabíjacia zásuvka
[4] Krídlová skrutka
[5] Skrutka rukoväte
[6] Páčka
[7] Nohy statívu
[8] Zaisťovacie uzávery
[9] Upevňovací krúžok
[] Kľuka
[] Upevňovací krúžok
[] Nastavovacia skrutka
[] Vodováha
[] Nivelačný posuvný spínač
[] Kontrolka stavu nabitia
[] Vypínač
[] Nivelačné svetlo
[] Vertikálny laser
[] Stojan na statív
[] Napájací kábelUSBC
(Obr. B)
[] Vnútorný závit [] Statívová skrutka
Technické údaje
Oblasť činnosti: 20 m*
Hmotnosť (bez statívu): pribl. 440 g
Prevádzkové napätie U
Menovitá kapacita: 2,6 Ah
Nabíjacie napätie UIN: 5 V
Nabíjací prúd: 1,7 A
Oblasť samonivelácie: ± 3°
Presnosť nivelácie: ± 0,4 mm/m
Dĺžka laserových vĺn: 510–530 nm
Trieda laseru: 2
Čas nivelácie: pribl. 4 sekúnd
: 4 V
max
* Podmienky okolia (napr. silné svetlo) môžu pracovnú oblasť
obmedziť.
93SK
Page 94

Bezpečnostné upozornenia
PRED POUŽITÍM PRODUKTU SA OBOZNÁMTE
SO VŠETKÝMI BEZPEČNOSTNÝMI
POKYNMI A POKYNMI NA OBSLUHU! KEĎ
BUDETE TENTO PRODUKT ODOVZDÁVAŤ
ĎALEJ, ODOVZDAJTE AJ KOMPLETNÚ
DOKUMENTÁCIU K PRODUKTU!
V prípade poškodenia z dôvodu nedodržania
tohto návodu na používanie zaniká nárok na
záruku!
Za následne vzniknuté škody nepreberáme
žiadnu záruku! V prípade majetkových alebo
personálnych škôd z dôvodu neodborného
používania alebo nedodržania bezpečnostných
upozornení nepreberáme žiadnu zodpovednosť!
Deti a osoby s postihnutím
VÝSTRAHA! NEBEZPEČENSTVO
m
OHROZENIA ŽIVOTA A ÚRAZU PRE
DOJČATÁ A DETI!
Deti nenechávajte bez dozoru v blízkosti
obalových materiálov. Obalový materiál
predstavuje nebezpečenstvo udusenia.
Deti často podceňujú nebezpečenstvo spojené
s obalovými materiálmi. Nedovoľte, aby sa deti
dostali sa do blízkosti obalového materiálu.
Tento produkt môžu používať len dospelé
osoby. Deti pod 16rokov smú produkt používať
iba pod dozorom.
Deti udržujte v dostatočnej vzdialenosti od
produktu.
94 SK
Page 95
Všeobecné upozornenia
Riaďte sa informáciami ohľadne obsluhy,
čistenia, skladovania a likvidácie, ktoré nájdete
v tomto návode na používanie.
Produkt skontrolujte pred každým použitím.
Poškodený produkt dajte opraviť. Nepoužívajte
poškodený produkt.
Ak produkt nepoužívate, vypnite ho.
Nenechávajte výrobok bez dozoru.
Produkt držte v dostatočnej vzdialenosti od
medicínskych prístrojov, magnetických nosičov
dát a prístrojov citlivých na magnety.
Zaobchádzanie s laserom
OPATRNE! Laserové žiarenie – Nepozerajte
m
sa do lúča! Trieda laseru2.
Laserové žiarenie nesmerujte na osoby.
Označenia a výstražné upozornenia sa
nachádzajú na vrchnej a spodnej strane
produktu.
Bezpečnostné upozornenia pre batérie/
nabíjateľné batérie
OHROZENIE ŽIVOTA! Batérie/nabíjateľné batérie udržiavajte
m
mimo dosahu detí. V prípade prehltnutia okamžite vyhľadajte lekársku
pomoc!
NEBEZPEČENSTVO VÝBUCHU! Nikdy nenabíjajte
nenabíjateľné batérie. Batérie/nabíjateľné batérie neskratujte
ani neotvárajte. Následkom môže byť prehriatie, požiar alebo
prasknutie.
Batérie/nabíjateľné batérie nevhadzujte do ohňa alebo do vody.
Na batérie/nabíjateľné batérie nikdy nevyvíjajte mechanické
zaťaženie.
Riziko vytečenia batérií/nabíjateľných batérií
Vyhnite sa extrémnym podmienkam ateplotám okolia, ktoré by mohli
ovplyvniť batérie / nabíjateľné batérie, napr. radiátory / priame
slnečné žiarenie.
95SK
Page 96
Keď sú batérie / nabíjateľné batérie vytečené, zabráňte kontaktu
chemikálií s pokožkou, očami a sliznicami! Postihnuté miesta ihneď
opláchnite čistou vodou a vyhľadajte lekársku pomoc!
NOSTE OCHRANNÉ RUKAVICE! Vytečené alebo
poškodené batérie/nabíjateľné batérie môžu pri kontakte s
pokožkou spôsobiť podráždenie. Vždy, keď sa takéto niečo
vyskytne, použite vhodné ochranné rukavice.
Tento produkt má zabudovanú nabíjateľnú batériu, ktorú používateľ
nedokáže vymeniť. Odstránenie alebo výmenu nabíjateľnej batérie
môže vykonávať iba výrobca alebo jeho zákaznícky servis, alebo
podobne kvalifikovaná osoba, aby sa zabránilo nebezpečenstvám.
Pri likvidácii nezabudnite, že tento produkt obsahuje nabíjateľnú
batériu.
Pred prvým použitím
Odstráňte obalový materiál. Skontrolujte, či sú všetky časti kompletné.
Nabite batériu (pozri „Nabíjanie batérie“).
Obsluha
Nabíjanie batérie
UPOZORNENIE: Batéria nie je vymeniteľná. V prípade problémov
s akumulátorom sa obráťte na zákaznícky servis.
1. Nabíjací kábelUSBC [] zasuňte do nabíjacej zásuvky [3].
2. Nabíjací kábelUSBC [] zapojte do USBportu.
Kontrolka stavu
nabitia []
Červená Batéria sa nabíja.
Zelená Batéria je plne nabitá.
3. Po úspešnom nabití najprv vytiahnite nabíjací kábelUSBC
USBportu.
4. Nabíjací kábelUSBC [] vytiahnite z produktu.
UPOZORNENIE: Produkt sa počas nabíjania môže používať.
Je normálne, že sa rukoväť počas nabíjania mierne zohreje. Počas
nabíjania sa môže stať, že s produktom nebudete môcť pracovať, ak
je batéria takmer alebo úplne vybitá. Závisí to od nabíjačky, ktorú
používate.
96 SK
Význam
[] z
Page 97
Zapnutie/vypnutie
POZOR! Laserové žiarenie – Nepozerajte sa do lúča [1] []!
Odvráťte hlavu alebo zavrite oči, aby ste sa nepozreli do
laserového lúča. Riziko poranenia očí!
Zapnutie: Krátko stlačte vypínač [].
Vypnutie: Vypínač[] držte stlačený 2sekundy.
Používanie horizontálnych a vertikálnych
laserových línií
Po zapnutí je aktivovaná 360° laserová línia [1] a vertikálna
laserová línia [].
Aktivácia len 360° laserovej línie [1]:
Krátko stlačte vypínač [].
Aktivácia len vertikálnej laserovej línie []:
Krátko stlačte vypínač [].
Práca s nivelačnou automatikou
1. Posuňte nivelačný posuvný spínač [] doľava (otvorený zámok).
2. Produkt položte na vodorovný pevný podklad alebo ho upevnite na
statív (pozri „Práca so statívom“).
3. Zapnite produkt. Nivelačné svetlo [] svieti.
Nivelačné
svetlo []
Zelená Automatická nivelácia je možná. Nivelácia
Červená Automatická nivelácia nie je možná.
UPOZORNENIE: V prípade otrasov sa laser automaticky znova
niveluje. Počkajte, kým sa laserové línie nebudú hýbať.
Význam
sa ukončí, keď sa laserové línie už nehýbu.
Laserové línie blikajú.
97SK
Page 98

Práca bez nivelačnej automatiky
UPOZORNENIA:
Pri práci bez nivelačnej automatiky svieti nivelačné svetlo [] stále
načerveno. Zobrazené laserové línie nie sú nivelované.
Produkt je vybavený 2magnetmi [2]. Magnetmi môžete produkt
upevniť na plochy, ktoré priťahujú kovové predmety, napr. oceľové
regály.
OPATRNE! Použitá magnetická plocha musí byť plochá. Nesmie
m
byť ohnutá ani krivá. Inak by mohol produkt padnúť a poškodiť sa.
1. Posuňte nivelačný posuvný spínač
2. Zapnite produkt.
[] doprava (zatvorený zámok).
Práca so statívom
(Obr. B)
Priskrutkovanie lasera na stojan na statív
Produkt priskrutkujte ručne na statívovú skrutku [] pomocou
vnútorného závitu [].
Odobratie/nasadenie stojana na statív
1. Otvorte páčku
2. Stojan na statív [] vyberte smerom hore.
3. Stojan na statív [] položte a nasaďte na statív.
4. Zatvorením páčky [6] stojan na statív [] zaistíte.
OPATRNE! Nepoužívajte hrubú silu. Produkt by sa mohol poškodiť.
m
[6].
98 SK
Page 99

Nastavenie statívu
(Obr. C)
UPOZORNENIE: Horizontálne vyrovnanie statívu môžete
skontrolovať na vodováhe [].
1. Nohy statívu
2. Upevňovacím krúžkom [9] zaistite nastavenie nôh statívu [7].
Nastavenie výšky, nohy statívu
1. Otvorte zaisťovacie uzávery
2. Predĺženie nôh statívu [7] posuňte na požadovanú dĺžku.
3. Zatvorte zaisťovacie uzávery[8].
Nastavenie výšky, kľuka
1. Sklopte kľuku
2. Kľuku[] držte pevne jednou rukou.
3. Upevňovací krúžok [] uvoľnite otočením doľava.
4. Statív nastavte na požadovanú výšku.
5. Otočením upevňovacieho krúžku doľava [] zaistite toto nastavenie.
Nastavenie náklonu, dopredu/dozadu
1. Skrutku rukoväte
2. Nastavte požadovaný náklon.
3. Otočením skrutky rukoväte [5] doprava zaistite náklon.
Nastavenie náklonu, do strán
1. Krídlovú skrutku
2. Statív zaklapnite do požadovaného náklonu.
3. Krídlovú skrutku [4] zaistite otočením doprava.
[7] od seba odtiahnite.
[8].
[].
[5] uvoľnite otočením doľava.
[4] uvoľnite otočením doľava.
Otáčanie statívu
1. Nastavovaciu skrutku
[] uvoľnite otočením doľava.
2. Uchopte skrutku rukoväte [5] a otočte statív do požadovaného smeru.
3. Nastavovaciu skrutku [] zaistite otočením doprava.
99SK
Page 100

Čistenie a starostlivosť
VÝSTRAHA! Produkt neponárajte do vody alebo iných kvapalín.
m
VÝSTRAHA! Za účelom opravy smie produkt otvárať len odborník.
m
Produkt dajte opravovať kvalifikovanému odborníkovi a výlučne s
použitím originálnych náhradných dielov. Zaručí sa tým bezpečnosť
produktu.
Produkt nevyžaduje žiadnu údržbu.
Počas čistenia sa do produktu nesmie dostať voda.
Produkt udržujte čistý, aby ste zabezpečili dobrú a bezpečnú prácu.
Na čistenie povrchu používajte suchú handričku.
Otvory 360° lasera [1] a vertikálneho lasera [] čistite jemným
prúdom vzduchu. Silné nečistoty odstráňte jemne navlhčenou vatovou
tyčinkou.
Nevyvíjate silný tlak!
Skladovanie
Ak produkt nebudete používať dlhší čas, uskladnite ho na čistom a
suchom mieste bez priameho slnečného žiarenia.
Odstránenie porúch
Problém Možná príčina Riešenie
Produkt sa nezapína. Batéria je vybitá. Nabite batériu.
Nivelačná automatika
Nivelačná automatika
nefunguje.
sa nevie voľne
kývať. Produkt nie je
dostatočne zarovnaný
paralelne so zemou.
Produkt zarovnajte
paralelne so zemou.
100
SK
 Loading...