

Page 1

Parallels H-Sphere 3.6.1 Customization
Guide
Page 2

Legal and Copyright Notice
Parallels IP Holdings GmbH
Vordergasse 59
CH-Schaffhausen
Switzerland
Phone: +41-526320-411
Fax: +41-52672-2010
Copyright © 2012 Parallels IP Holdings GmbH. All rights reserved.
www.parallels.com
This product is protected by United States and international copyright laws. The product’s
underlying technology, patents, and trademarks are listed at
http://www.parallels.com/trademarks.
Microsoft, Windows, Windows Server, Windows NT, Windows Vista, and MS-DOS are
registered trademarks of Microsoft Corporation.
Linux is a registered trademark of Linus Torvalds.
Mac is a registered trademark of Apple, Inc.
All other marks and names mentioned herein may be trademarks of their respective owners.
Page 3

Contents
Preface 6
Typographical Conventions ........................................................................................................... 6
Feedback ....................................................................................................................................... 7
Introduction To Parallels H-Sphere Customization 8
Template Customization 10
Understanding Parallels H-Sphere Templates ............................................................................ 11
What Are Templates .......................................................................................................... 11
Location of Templates ....................................................................................................... 11
System E-Mail Notification Templates .............................................................................. 12
Skeletons ........................................................................................................................... 12
Web Interface Templates .................................................................................................. 12
Designs .............................................................................................................................. 14
Replacements.................................................................................................................... 15
Template Directory Structure ............................................................................................ 15
Template Lookup Sequence ............................................................................................. 16
Customizing Templates Step by Step ......................................................................................... 17
Pre-Cautions ...................................................................................................................... 17
Pre-Requisites ................................................................................................................... 17
Step-By-Step Template Customization Procedure ........................................................... 18
Compiling Templates With Client-Side Form Validation .............................................................. 19
Customizing Skeleton Templates ................................................................................................ 20
Adding Context Help Pages ........................................................................................................ 20
System E-Mail Templates ............................................................................................................ 22
Customizing User Signup ............................................................................................................ 25
Design Customization 31
Skin And Icon Set Customization ................................................................................................ 32
Design XML Customization ............................................................................................... 32
Implementation of Custom Design Templates .................................................................. 33
Design XML Configuration ........................................................................................................... 35
Icons .................................................................................................................................. 35
Skill Icon Groups ............................................................................................................... 36
Icon Image Sets................................................................................................................. 37
Common Images ............................................................................................................... 38
Color Types ....................................................................................................................... 39
Designs .............................................................................................................................. 39
Interface Controls And Colors in Templates ................................................................................ 41
Interface Colors ................................................................................................................. 43
Adding Custom Icons................................................................................................................... 43
Menu Customization 47
Menu XML Customization ........................................................................................................... 48
Changing Menu Structure ............................................................................................................ 48
Location ............................................................................................................................. 48
Page 4

Preface 4
XML Structure.................................................................................................................... 49
Modifying Menu Groups And Items ................................................................................... 49
Configuring Individual Menu Layouts For Different Hosting Plans .................................... 51
Assigning External Links to Menu Items ........................................................................... 52
Menu Design Customization ........................................................................................................ 54
Interface Text Customization (Language Bundles) 57
Understanding Interface Text (Language) Bundles ..................................................................... 58
Interface Text Customization ....................................................................................................... 60
Language Bundle Compiler ......................................................................................................... 62
Localization 64
Adding New Languages To Parallels H-Sphere .......................................................................... 65
Translating Language Bundles.......................................................................................... 65
Adding New Language Bundles Into Parallels H-Sphere ................................................. 66
With packages ................................................................................................................... 66
Compiling bundles ............................................................................................................. 66
Changing Language of Context Help .......................................................................................... 68
Updating Translation of Parallels H-Sphere Interface ................................................................. 69
XML Customization 70
Merging XML Configuration Files ................................................................................................ 71
XML Manager .............................................................................................................................. 73
XML Manager Implementation .......................................................................................... 73
XML Merge Processing Instructions.................................................................................. 75
Creating Plan Wizards with XML ................................................................................................. 77
Introduction ........................................................................................................................ 77
Adding a New Wizard to the List of Plan Wizards ............................................................. 78
Defining Plan Wizard ......................................................................................................... 78
Adding Custom CP Cron Jobs ..................................................................................................... 84
CP Cron XML Configuration .............................................................................................. 86
Adding Custom Promotion Validators and Calculators ............................................................... 88
Adding Custom MS Exchange Plans into Parallels H-Sphere .................................................... 91
Customizing E-Mail Notification List ............................................................................................ 94
Using Variables in Parallels H-Sphere E-Mail Notifications .............................................. 96
Packages 112
Building Packages ..................................................................................................................... 113
Step 1. Preconfiguration .................................................................................................. 115
Step 2. Configuration ....................................................................................................... 117
Step 3. Package Builder .................................................................................................. 119
Building Language Packages .................................................................................................... 119
Java Tools For Packaging ......................................................................................................... 122
Package Configurator ...................................................................................................... 122
Package Builder .............................................................................................................. 124
Package Installer ............................................................................................................. 125
Package Uninstaller ........................................................................................................ 125
Package Checker ............................................................................................................ 126
Package XML Configuration File (_pkg.xml) ............................................................................. 126
Template Customization With Packages ................................................................................... 129
XML Customization With Packages .......................................................................................... 130
Package Installation................................................................................................................... 132
Package Uninstallation .............................................................................................................. 133
Package Upgrade ...................................................................................................................... 134
Page 5

Preface 5
Appendix 135
Logging in as the cpanel User ................................................................................................... 136
Restarting Parallels H-Sphere Control Panel ............................................................................ 136
Page 6

In this chapter:
Typographical Conventions ............................................................................... 6
Feedback .......................................................................................................... 7
Formatting convention
Type of Information
Example
Special Bold
Items you must select,
such as menu options,
command buttons, or
items in a list.
Go to the System tab.
Titles of chapters,
sections, and
subsections.
Read the Basic
Administration chapter.
Italics
Used to emphasize the
importance of a point, to
introduce a term or to
designate a command
line placeholder, which is
to be replaced with a real
name or value.
The system supports the
so called wildcard
character search.
Monospace
The names of
commands, files,
directories, and domain
names.
The license file is located
in the
http://docs/common/
licenses directory.
C H A P T E R 1
Preface
Typographical Conventions
Before you start using this guide, it is important to understand the documentation
conventions used in it.
The following kinds of formatting in the text identify special information.
Page 7

Preface 7
Preformatted
On-screen computer
output in your commandline sessions; source
code in XML, C++, or
other programming
languages.
# ls –al /files
total 14470
Preformatted
Bold
What you type,
contrasted with on-screen
computer output.
# cd /root/rpms/php
CAPITALS
Names of keys on the
keyboard.
SHIFT, CTRL, ALT
KEY+KEY
Key combinations for
which the user must
press and hold down one
key and then press
another.
CTRL+P, ALT+F4
Feedback
If you have found a mistake in this guide, or if you have suggestions or ideas on how to
improve this guide, please send your feedback using the online form at
http://www.parallels.com/en/support/usersdoc/. Please include in your report the
guide's title, chapter and section titles, and the fragment of text in which you have found
an error.
Page 8
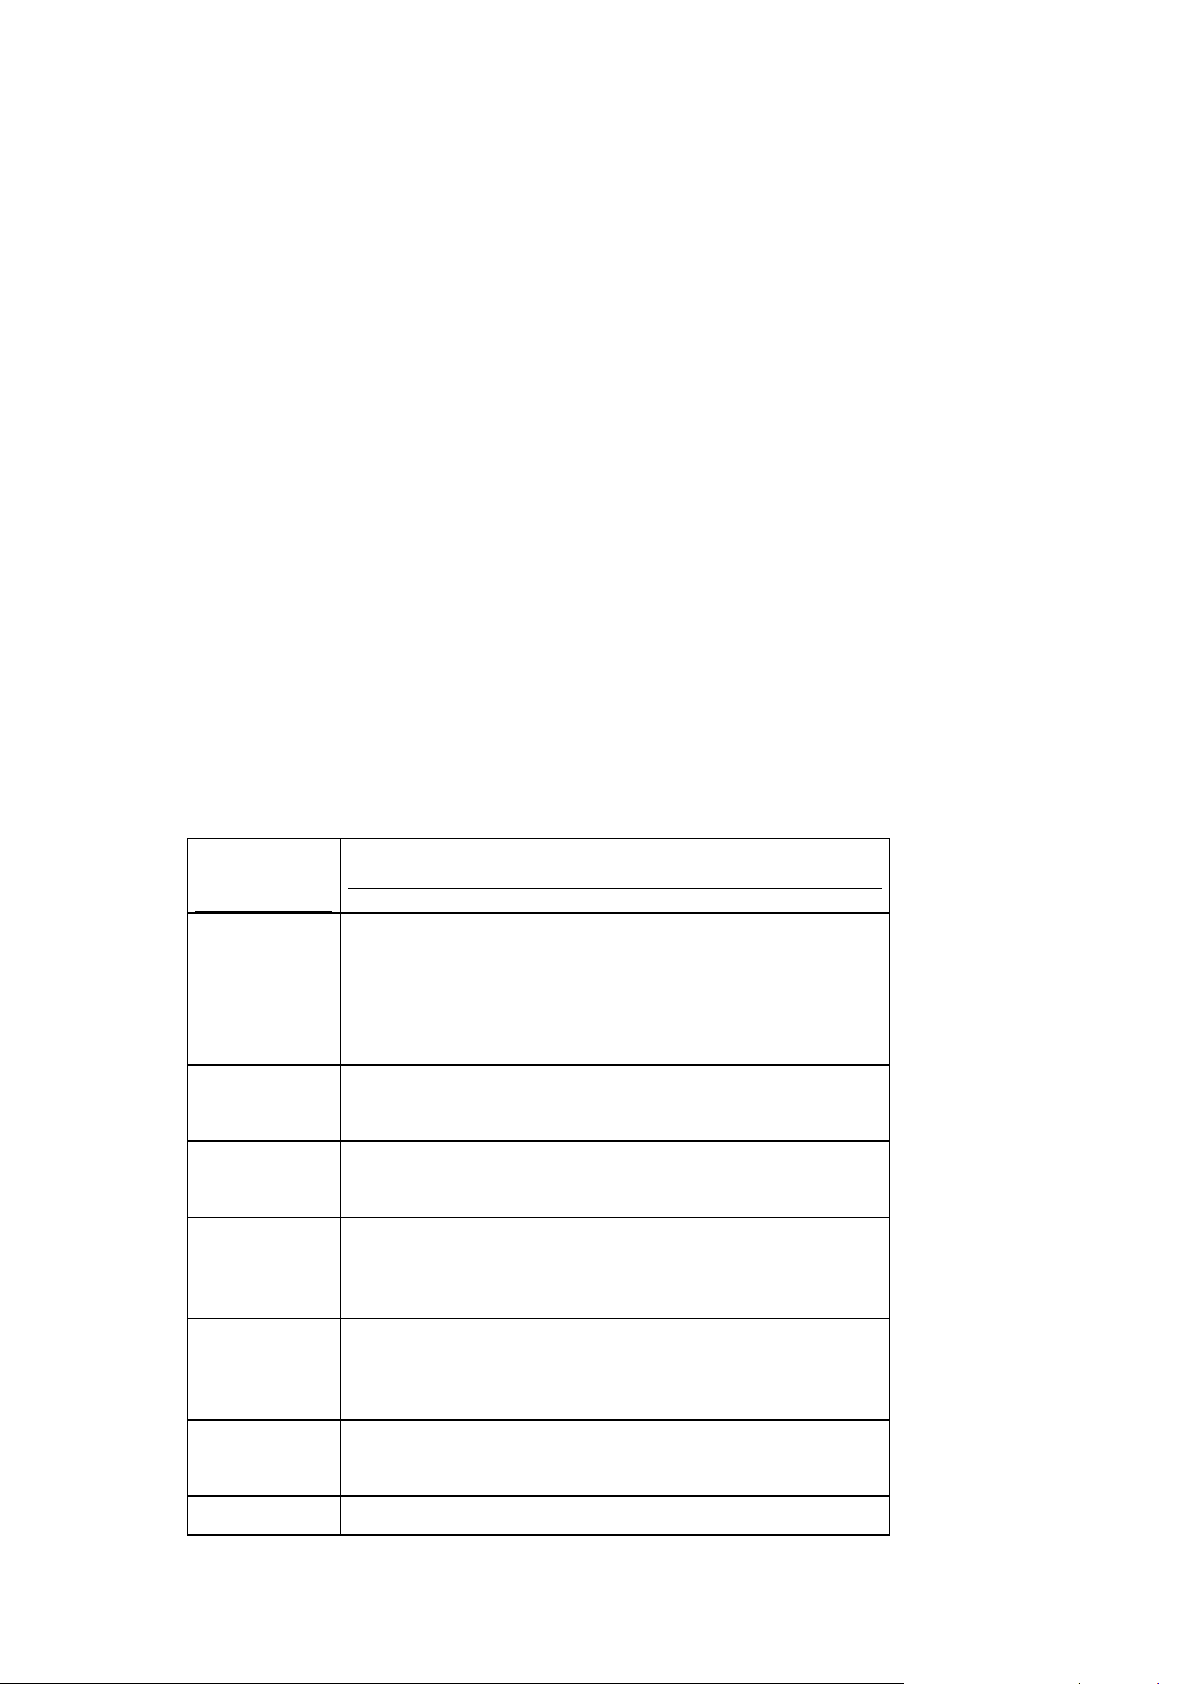
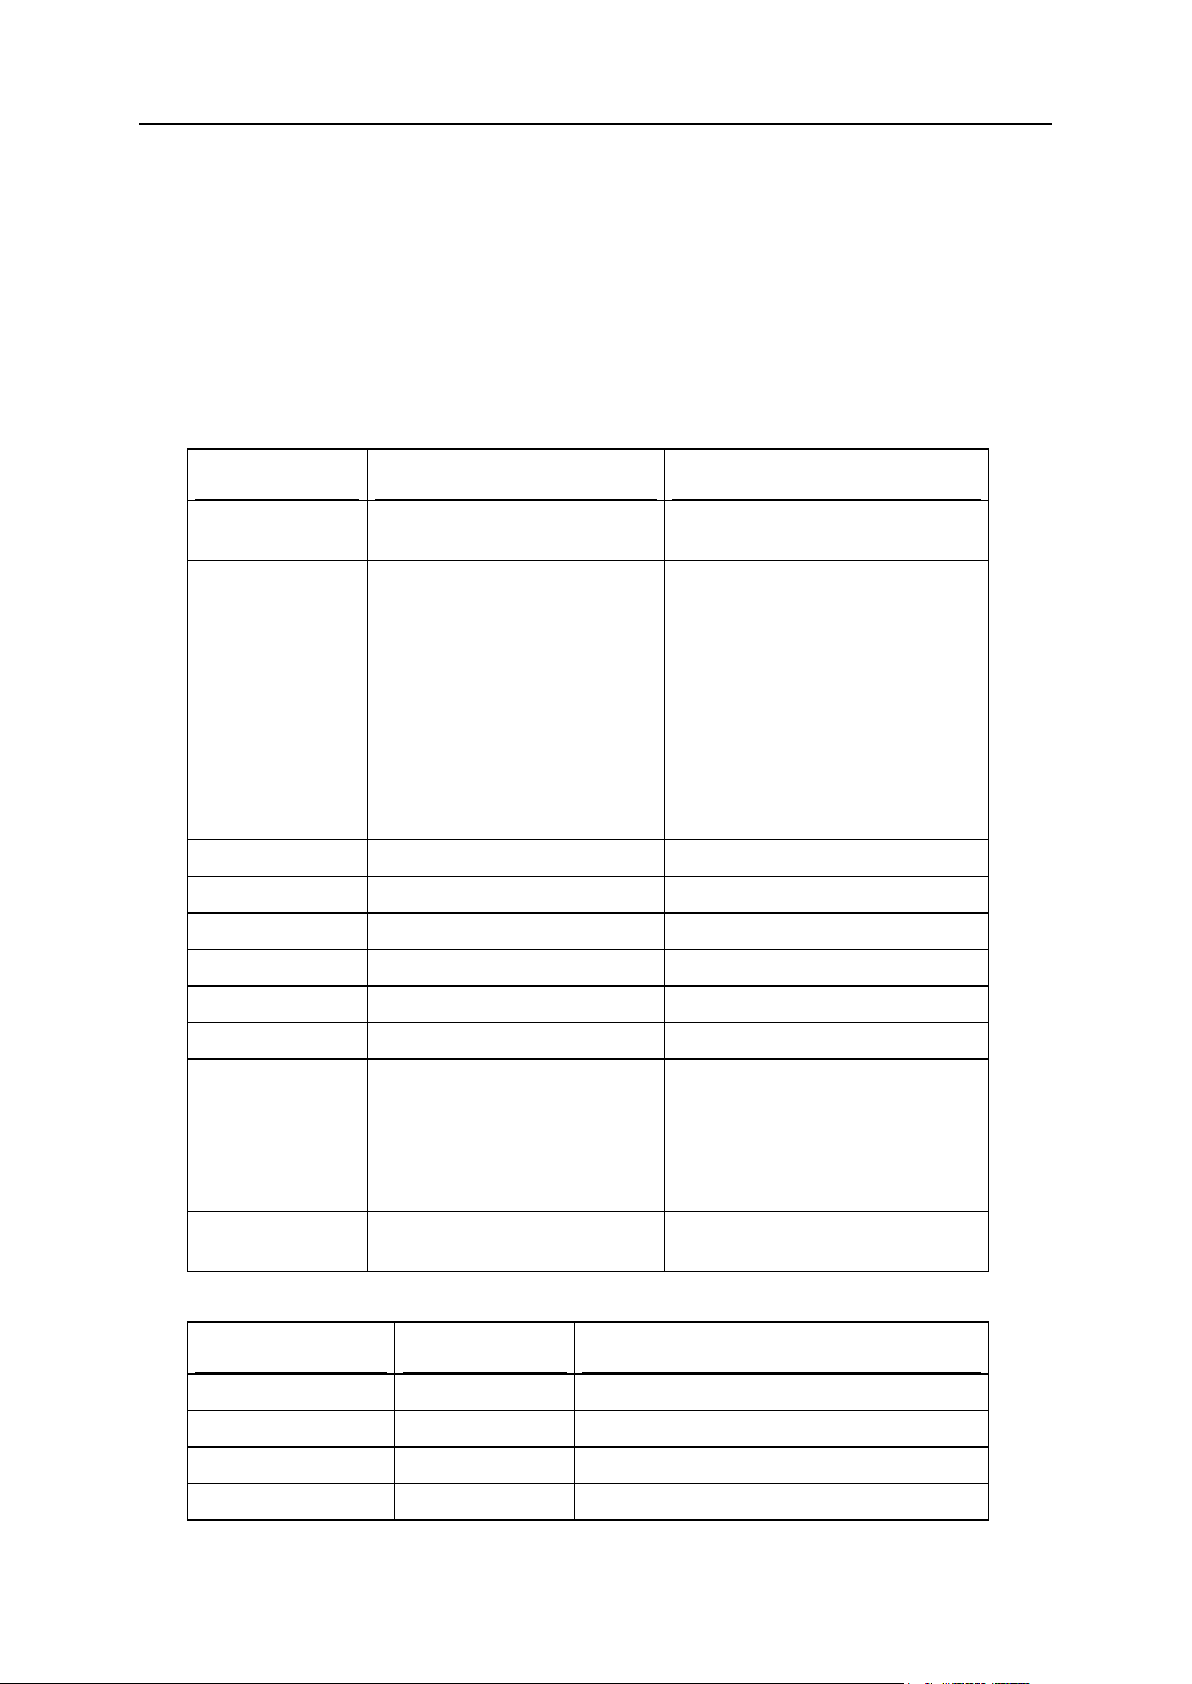
There are the following tiers of Parallels H-Sphere control panel customization:
Customizable
Elements
Description
Templates
Design and control patterns for dynamic HTML
generation. They are to be modified if you need to
restructure the layout of certain pages of the Control
Panel interface, or to change the look of the Control
Panel header and footer.
System E-Mail
Notifications
A special type of templates used to generate standard
email notifications sent by Parallels H-Sphere.
Context Help
A special type of templates to generate context help
for certain elements of the Control Panel interface.
GUI Texts
Standard messages and labels that appear on the
interface pages are placed in the special configuration
files and may be set for different languages.
Localization
Adding new languages to the interface and modifying
language files with interface texts in different
languages.
CP Menu
Generating and modifying control panel menus and
submenus and adding external links to the menu.
GUI Design
Parallels H-Sphere interface design has a broader
C H A P T E R 2
Introduction To Parallels H-Sphere
Customization
Basic interface settings can be configured through the control panel. The Look and Feel
menu allows to set skins and colors, images and icons, and some interface texts.
Advanced interface customization is what goes beyond the scope of the Control Panel
settings. It is performed on the Parallels H-Sphere CP server by designers and
programmers with administrative rights, in order to create or modify Parallels HSphere interface elements.
Parallels H-Sphere Packages (.hsp) are installable addons that extend H-Sphere
functionality. This is a way to share custom elements between Parallels H-Sphere
installations. Third parties can use it to develop and distribute packages that add
new or extend/override standard Parallels H-Sphere functionality. Documentation
on building packages is introduced in Parallels H-Sphere Developer Guide.
This Customization Guide explains how to customize the following Parallels H-Sphere
elements:
Page 9
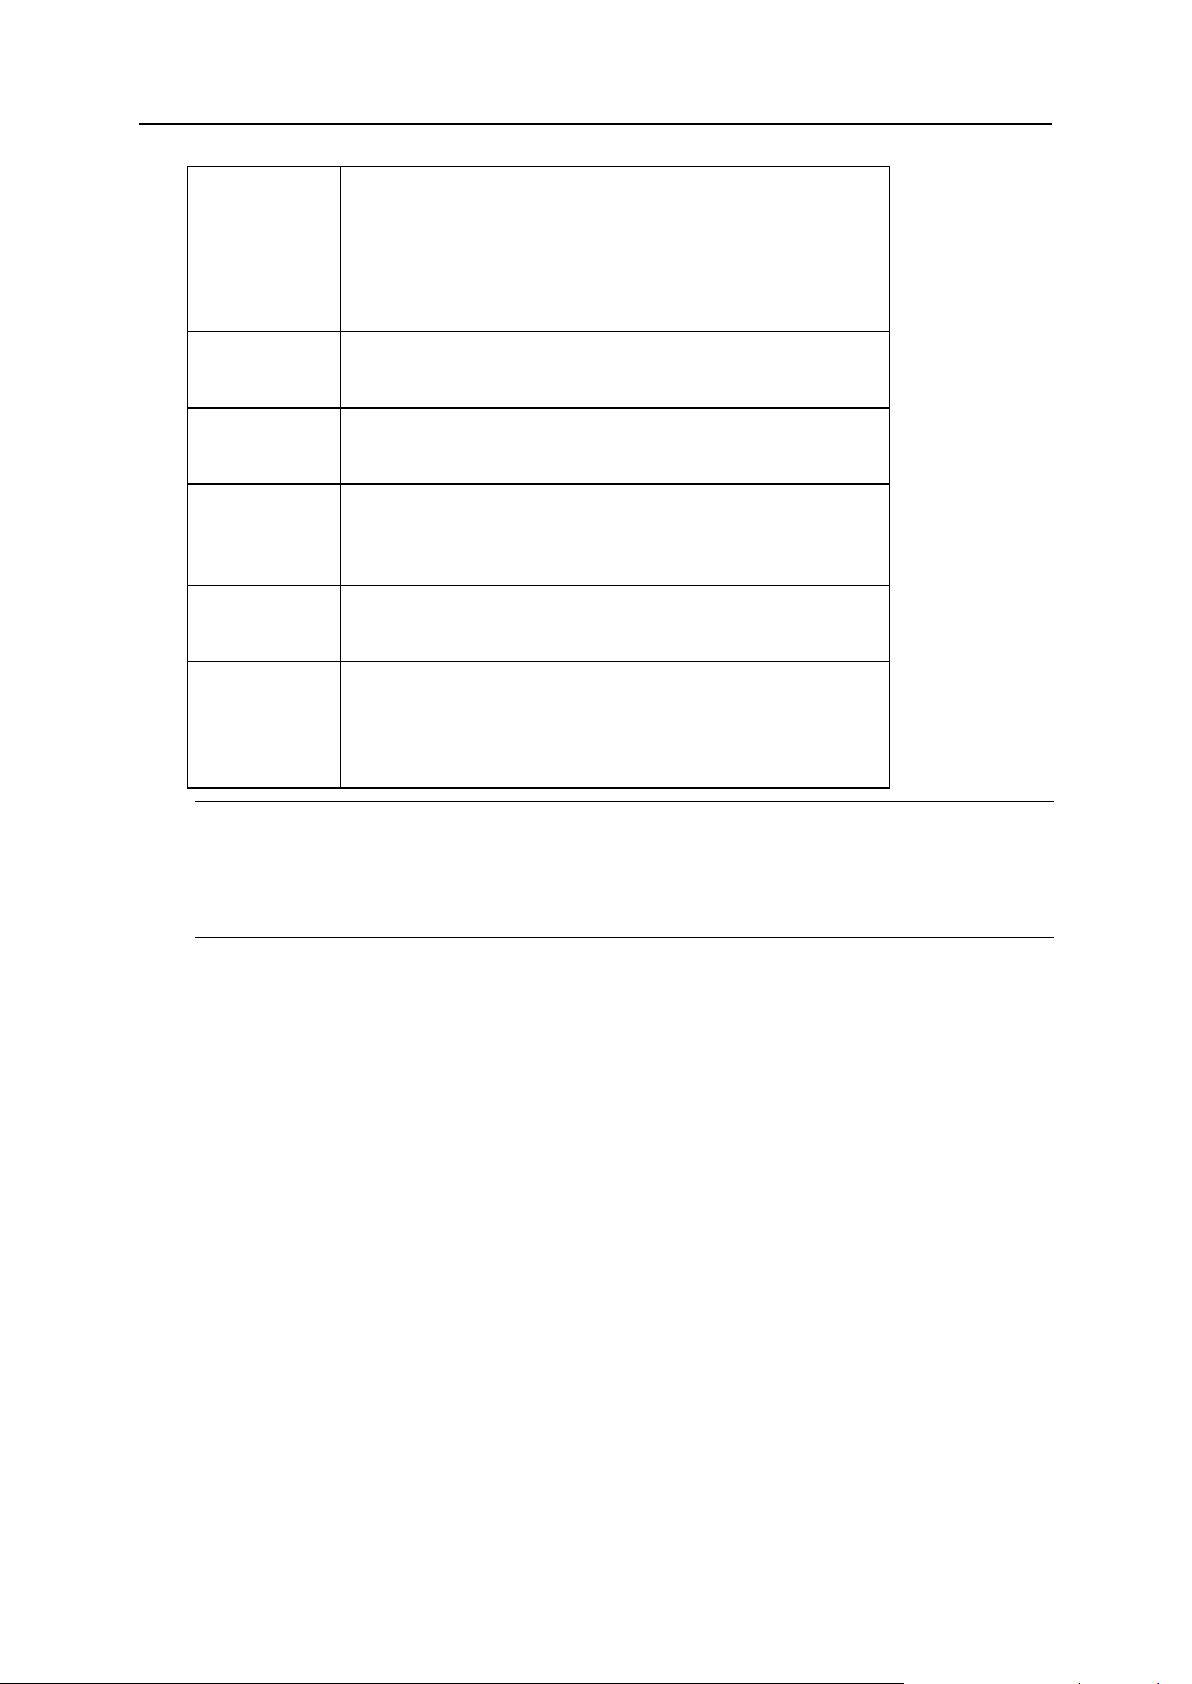
Introduction To Parallels H-Sphere Customization 9
(Skins And
Icon Sets)
meaning than just configuration of certain color
schemes and the corresponding icon sets, what is
called the skin. It also determines the set of skins
available for this design, specifies the sets of icons in
the Quick Access page and enables to override the
standard settings with the custom ones.
CP Crons
Parallels H-Sphere utilities regularily executed on the
Control Panel server.
Plan Wizards
Custom plan wizards defined and configured in XML
documents.
Merchant
Gateways
The media for making real-time payments with online
credit card processing centers automatically from the
CP.
Web Payment
Systems
The media for making payments manually from the
web interface of the payment systems.
Signup Forms
Generating custom signup forms to sign up users
aside from the standard signup procedure provided in
Parallels H-Sphere, as well as modifying the standard
signup pages.
Warning:
1. Advanced customization may produce unpredictable results after updating Parallels
H-Sphere, since updates affect the template structure and the page generation.
2. Advanced customization performed by Parallels H-Sphere customers is done at their
own risk and is not supported by the Parallels.
Page 10

This section explains how to customize Parallels H-Sphere templates.
In this chapter:
Understanding Parallels H-Sphere Templates ................................................... 11
Customizing Templates Step by Step ................................................................ 17
Compiling Templates With Client-Side Form Validation ..................................... 19
Customizing Skeleton Templates ...................................................................... 20
Adding Context Help Pages .............................................................................. 20
System E-Mail Templates .................................................................................. 22
Customizing User Signup .................................................................................. 25
C H A P T E R 3
Template Customization
Page 11

Template Customization 11
Understanding Parallels H-Sphere
Templates
What Are Templates
Parallels H-Sphere templates lay behind the Parallels H-Sphere Control Panel Web
interface. For the most part, templates are written using Freemarker Java processing
language for dynamic content generation.
Location of Templates
Template root directory
Parallels H-Sphere template root directory is by default ~cpanel/shiva/shiva-
templates. It is set by the TEMPLATE_PATH parameter in the
~cpanel/shiva/psoft_config/hsphere.properties file:
TEMPLATE_PATH = /hsphere/local/home/cpanel/shiva/shivatemplates/
Default (common) design directory
Design, or skin, is the Control Panel GUI representation. Each design is defined by its
own sets of templates, images, CSS styles, JavaScripts, etc. The most important part
of GUI, templates, are placed in separate subdirectories of the template root directory
in accordance with a design they belong to. The special common subdirectory is used
to store templates that are the same for different designs. Also, this directory contains
templates for the Left Menu design which is the default Parallels H-Sphere design. The
path to this directory, relative to TEMPLATE_PATH, is set in hsphere.properties:
DEFAULT_TEMPLATES = common/
Important: Common template directory must always exist!
Custom template directory
Custom template directory is usually ~cpanel/shiva/custom/templates. Its
location is set in hsphere.properties:
USER_TEMPLATE_PATH=/hsphere/local/home/cpanel/shiva/custom/te
mplates/
Page 12

12 Template Customization
Custom templates directory structure should correspond with the default template root
directory (shiva-templates) tree. However, you should be aware that templates in
the custom template directory override the corresponding templates in the default
template directory, thus all modifications and new features in existing default templates
coming with new Parallels H-Sphere releases would be also overriden by custom
templates. Therefore, only customized templates should be placed to your custom
template directory.
System E-Mail Notification Templates
System email notifications templates are used to generate standard Parallels H-Sphere
e-mail messages sent to customers or to admins on certain events related to account
management, billing, and the like. It is made possible to edit these messages directly
from Control Panel, in plain text or HTML and for each of the available languages,
without the need of customizing the default templates.
E-mail templates are located in the ~cpanel/shiva/shiva-
templates/common/mail directory and have .txt extension. See the list of the
system e-mail templates (on page 22).
Skeletons
Skeleton templates, or skeletons, are special templates designed to generate user
default sites for newly created domains in corresponding domain subdirectories of user
home directories. Skeleton templates are written in HTML (without Freemarker
instructions) and located in the /hsphere/shared/skel directory. See how to modify
default skeletons (on page 20).
Web Interface Templates
Templates for generating Control Panel interface pages are of the following types:
main templates
control templates
submit templates
function templates
special purpose templates
context help page templates
Main Templates
Main, or basic, templates are templates for generating the entire Web page in CP. The
code of a main template represents a framework that contains calls of functions (on
page 22) for generation of the page header, menu and footer, and includes control
templates for processing forms.
Page 13

Template Customization 13
Main templates are .html files located in the ~cpanel/shiva/shivatemplates/<design>/ directories for each design (on page 22).
Control Templates
Contol templates, or controls, are responsible for generation and management of forms
in the working area of Parallels H-Sphere interface. They represent the part of HTML
code included in the main templates.
Control templates are with or without form field validation mechanism implemented:
Client-side form validation: .html.in templates provide client-side form validation.
They need to be compiled to apply changes made in them. The corresponding .html
templates are generated as the result of compilation of .html.in templates of the
same name. Thus, if there is a pair of .html and .html.in templates with the
same name, it is recommended to modify the .html.in template and then to
recompile it. Read more about compiling templates with client-side validation (on
page 19).
No field validation mechanism is implemented in .html templates that do not have the
initial .html.in templates of the same name. Changes in .html templates take
effect immediately.
Control templates are located in the ~cpanel/shiva/shiva-
templates/<design>/control directories for each group of main templates.
Control templates assign submit templates that do not have visual HTML
representation and serve solely to process form submits.
Submit Templates
Submit templates do not have visual representation. They contain instructions to be
performed upon the form submit. These templates provide server-side validation of
submitted data and scenarios of subsequent actions if submit is successful or if an error
occurs. Submit template files have .sbm extension.
Function Templates
These templates contain collections of functions (or macros) used in other templates,
for example, for drawing menu, footer and header.
~cpanel/shiva/shiva-templates/common/functions - generic macro
collection, Does not depend on designs.
~cpanel/shiva/shiva-templates/<design>/menu.fn - functions for drawing
menu for a particular design.
~cpanel/shiva/shiva-templates/<design>/design.fn - functions for
drawing interface elements for a particular design (implemented for common and
XPressia/XPressia Lite designs)
~cpanel/shiva/shiva-templates/<design>/extra.fn - extra functions.
Page 14

14 Template Customization
~cpanel/shiva/shiva-
templates/common/control/signup_function.html - functions for signup
templates.
Templates For Special Purposes
There are some Web interface templates that do not fall into any of the above
mentioned categories. They are designed for special tasks such as to draw a menu on
the left, or the page header or footer, or login page, etc. Some special purpose
templates are located in the ~cpanel/shiva/shiva-
templates/<design>/design/ directory, some like signup_top.html.in or
signup_bottom.html in the ~cpanel/shiva/shivatemplates/<design>/signup directory. There is no general classification for such
templates.
Context Help Templates
Context help templates are special templates for generating online help message in
popup windows. Each context help template has its topic header and body. They can
be modified as usual Parallels H-Sphere templates.
Online help files are located in the ~cpanel/shiva/shiva-
templates/common/online_help directory. They have .oh extension and contain
the text in HTML format. See the instructions how to add context help pages to
Parallels H-Sphere interface (on page 20). Also read about context help in different
languages (on page 68).
Designs
Design, or skin, is the Control Panel GUI representation. It provides a different look of
menu (left menu or dropdown menu on the top, or no menu present at all), CSS styles,
colors and images, and the Quick Access page with icon links to different CP pages.
These are basic Parallels H-Sphere designs whose templates are located in the
corresponding design template directories of ~cpanel/shiva/shiva-templates
(referred to as <design> in the document):
common - the left-menu design (Left Menu in CP). All core templates are made for this
design scheme. Other templates that do not depend on design, inlcuding online
help templates (on page 11) and system e-mail notification templates (on page 11),
are also located there.
nomenu - the design with no left menu (No Menu in CP). It is turned on as the default
user design after the Parallels H-Sphere installation.
text_based is the alternative look of the No Menu design (Text-Based in CP) where only
captions with no icons are provided in the Quick Access menu page.
xcp - the XPressia design with dropdown menus, extensive use of CSS styles and
other advancements.
xcpl - the XPressia Lite design, a simpler and faster implementation of XPressia.
reloaded - the XP Reloaded design introduced in H-Sphere 3.0.
Page 15

Template Customization 15
If a certain template is not found for a particular design, Parallels H-Sphere gets that
template in the common directory.
The default design configuration file design_config.xml is located in the
~cpanel/shiva/psoft/hsphere/ directory.
Replacements
Replacements are templates that override basic templates for particular plans.
Replacements' root directory for each design is the ~cpanel/shiva/shiva-
templates/<design>/replacements directory. Replacements are located in
separate subdirectories specified in plan settings as the Template Directory parameter,
relative to the replacement directory.
Parallels H-Sphere first searches for a template in the
<design>/replacements/<plan> directory which has the same structure as the
<design> directory. If the template is not found, it starts to look for it in the <design>
directory. Read more about template lookup sequence (on page 11).
Template Directory Structure
~cpanel/shiva/shiva-templates/<design> - template directory for one of the
Parallels H-Sphere basic designs.
~cpanel/shiva/shiva-templates/common/JS - JavaScript functions (used
for all designs)
~cpanel/shiva/shiva-templates/<design>/design - contains templates for
special purposes such as login page, password reminder page, header and footer
templates and the like.
~cpanel/shiva/shiva-templates/<design>/CSS - CSS styles for a design.
~cpanel/shiva/shiva-templates/<design>/<subdir> - main templates are
placed into separate subdirectories, according to their tasks, e.g., admin,
billing, MSSQL, etc.
~cpanel/shiva/shiva-templates/<design>/control/<subdir> -
corresponding control templates.
~cpanel/shiva/shiva-templates/<design>/submit/<subdir> - corresponding
submit templates.
~cpanel/shiva/shiva-templates/<design>/replacements/ - template
replacements for different types of plans.
~cpanel/shiva/shiva-templates/<design>/replacements/<plan>/<subdir>
- template replacements overriding templates in corresponding subdirectories for
that design. directory.
~cpanel/shiva/shiva-
templates/<design>/replacements/control/<resources> - control templates
for corresponding replacements.
Page 16

16 Template Customization
~cpanel/shiva/shiva-
templates/<design>/replacements/submit/<resources> - submit
templates for corresponding replacements.
Template Lookup Sequence
1. Parallels H-Sphere searches for a template of a particular design first in
the custom template directory in replacements, then, if the template is
not found there, it proceeds to the corresponding default template
directory:
~cpanel/shiva/custom/templates/<design>/replacements/
~cpanel/shiva/shiva-templates/<design>/replacements/
2. If the template is not found in replacements, Parallels H-Sphere
searches in the design directory, first in among the custom templates,
then amonng the corresponding default templates:
~cpanel/shiva/custom/templates/<design>/
~cpanel/shiva/shiva-templates/<design>/
3. If the template is not found for this design, the search continues in the
same sequence in the common design template directory:
~cpanel/shiva/custom/templates/common/replacements/
~cpanel/shiva/shiva-templates/common/replacements/
~cpanel/shiva/custom/templates/common/
~cpanel/shiva/shiva-templates/common/
Page 17

Template Customization 17
Customizing Templates Step by Step
This document will guide you through the generic step-by-step instruction on
customizing templates. This implies you are already familiar with the concept of
templates (on page 11) in Parallels H-Sphere.
It is possible to create and install packages of templates. Read more about template
packages in Developer Guide.
Pre-Cautions
1. Advanced customization may produce unpredictable results after
updating Parallels H-Sphere, since updates affect the template structure
and the page generation.
2. Advanced customization performed by Parallels H-Sphere customers is
done at their own risk and is not supported by the PSoft team.
3. Template customization affects ALL Parallels H-Sphere accounts, regardless of their
plans!
In terms of Parallels H-Sphere customization, only two types of accounts are
customized, regardless of plans: admin accounts which are Parallels H-Sphere
administrative accounts, and user accounts - all other accounts. Reseller accounts
are regarded as user accounts, except for the reseller administrative account which
relates to the admin account type.
Pre-Requisites
Before you do any customization, log into CP server under root as the cpanel (on
page 136) user.
Make sure templates have the cpanel:cpanel ownership. Mind, however, that
images, CSS and JavaScript files and directories have cpanel:httpdcp
ownership and you must not change their ownership to cpanel:cpanel. Parallels
H-Sphere updater checks and automatically sets correct ownership and
permissions on respective default and custom files and directories (this does not
refer to Parallels H-Sphere packages).
Note: We don't recommend changing manually the ownership and permissions of
default templates!
The make directive which is performed to rebuild *.html templates should be run
ONLY under cpanel.
Do not use whitespaces in the template filenames!
Do not make any changes to the default templates, because:
1. You may need them to restore the original setup;
2. You will lose all your changes with the next upgrade.
Instead, follow the step-by-step instructions specified below.
Page 18

18 Template Customization
Step-By-Step Template Customization Procedure
1. On the CP server, log in as the cpanel (on page 136) user.
2. In the ~cpanel/shiva/ directory, create the custom template
directory custom/templates/ if it doesn't exist.
3. In the ~cpanel/shiva/psoft_config/hsphere.properties file,
find the USER_TEMPLATE_PATH parameter. Here, the full to your
custom template directory must be specified:
USER_TEMPLATE_PATH=/hsphere/local/home/cpanel/shiva/custom/te
mplates/
The directory name must end with a slash. Don't do anything if the directory name is
already there.
Warning: Don't change the TEMPLATE_PATH variable in hsphere.properties!
TEMPLATE_PATH points to the default template directory. If you change it, you won't
see any updates in the default templates.
4. Copy the templates you would like to customize into
shiva/custom/templates/, preserving their file paths relative to this
directory.
For instance, if you are going to customize the ~cpanel/shiva/shiva-
templates/path_to_template/FILE,
copy it to ~cpanel/shiva/custom/templates/path_to_template/FILE.
The original configuration can be restored without server restart by simply deleting
your custom files from the custom template directory.
Warning: Don't copy the whole directory content! Your custom templates will
override the default templates and you won't see the new features and bugfixes that
come with new versions!
5. Modify the templates you have copied to the
~cpanel/shiva/custom/templates/ directory.
The following documents will be helpful:
Interface Controls and Colors (on page 41)
Skin and Icon Set Customization (on page 32)
Edit Interface Texts (on page 60)
Important:
1. We don't recommend inserting the interface text directly into the templates. Use
text labels defined in language bundles (on page 58) to ensure multilingual
support.
2. Parallels H-Sphere uses the Unicode (UTF-8) charset for all languages.
Therefore, text directly inserted into templates (i.e., not by means of text labels
defined in language bundles) must be in the UTF-8 encoding.
6. Restart Parallels H-Sphere (on page 136).
Page 19

Template Customization 19
Compiling Templates With Client-Side
Form Validation
There are two types of templates that are responsible for generating Control Panel web
content:
*.html.in templates with client-side form validation that require compilation
before modifications in them would take effect, and
*.html templates that provide server-side form validation and don't need to be
recompiled after their modification.
This document provides step-by-step instructions on how to compile control panel
templates with the client-side validation of HTML form input fields.
To compile templates with client-side form validation:
1. Log into the control panel server as the cpanel (on page 136)
user.
To implement customization correctly, all template files and directories should have
the cpanel:cpanel ownership.
2. Check settings in
~cpanel/shiva/psoft_config/hsphere.properties:
1. Check the TEMPLATE_PATH parameter. It should point to the default template
directory. Default setting is:
TEMPLATE_PATH = /hsphere/local/home/cpanel/shiva/shivatemplates/
2. Uncomment the USER_TEMPLATE_PATH parameter and set it to your custom
templates directory, for example:
USER_TEMPLATE_PATH =
/hsphere/local/home/cpanel/shiva/custom/templates/
3. Check the JS (JavaScripts) and IMAGES parameters:
JS =
IMAGES =
By default, JS and IMAGES are left blank. It means that javascripts and images are
placed inside each design directory (on page 11). You don't need to change these
parameters if you have default system settings.
3. Go to the default templates directory (DocumentRoot,
~cpanel/shiva/shiva-templates by default). Check parameters in
the configure file:
SHIVA_ROOT - Parallels H-Sphere Control Panel's root directory
(~cpanel/shiva by default)
HSPHERE_PROPERTIES - path to the hsphere.properties file.
Page 20

20 Template Customization
4. Run ./configure in the templates directory. This will create
Makefile's for all of designs.
Warning: Running ./configure clean would remove ALL the compiled
templates in the nested directories and delete ALL Makefile's created by the
previous configure execution! After that, your control panel interface would not show
up correctly!
5. To compile all modified templates, run make or make all in your
default templates directory (gmake for FreeBSD). If you need just to
modify one template, run make from the directory where this template is
located.
Warning: Running the make clean command from a certain template directory
would clear all the compiled template files (*.html) in the nested directories! After
that, your control panel interface would not show up correctly!
Customizing Skeleton Templates
When an end-user adds a new domain, the system generates initial web site based on
skeleton templates. Skeleton templates are written in HTML. Unlike FreeMarker
templates (on page 10), Skeleton templates are customized right in the directory they
are located.
To modify Skeleton templates:
1. Log in as the cpanel (on page 136) user.
2. Enter the Skeleton template directory:
cd /hsphere/shared/skel
3. Customize the template files directly according to your needs.
Please only pay attention that with each automatic upgrade of web boxes, all the
customizations get lost. So, after performing the customization, backup the templates
into a safe location to get them back working after performing box upgrades.
Adding Context Help Pages
Context help (or online help) is implemented through special templates, each with a
topic header and a body. Context help files are located in the
/hsphere/local/home/cpanel/shiva/shiva-
templates/common/online_help directory. They have .oh extension and contain
text in HTML format. Context help may be implemented in different languages (on page
68).
To add a new context help page to Parallels H-Sphere interface:
Page 21

Template Customization 21
1. Log into the CP server as the cpanel (on page 136) user.
2. Create an online help file and put it anywhere inside
~cpanel/shiva/shiva-templates/common/online_help/. You
can create new subdirectories for your files where necessary.
3. In ~cpanel/shiva/psoft/hsphere/online_help.xml, add an
id/file correspondence, where file is the path and filename of the context
help file, and id is the string that will be used in the template.
4. Find the template where the context help icon will be added. The
easiest way to find the name of the template is to view html page source
code. The templates you need are located in ~cpanel/shiva/shiva-
templates/common/control/. More about templates (on page 11)
5. Add context help function call to the template. The function call has the
following syntax:
<call draw_help("HELP_ID","LABEL")>
where HELP_ID is the id of the file specified in
~cpanel/shiva/psoft/hsphere/online_help.xml, and LABEL is the
description used as the title in the html link.
If the second parameter is left empty, the default text ("Click to get help") is
used. For example:
<call draw_help("admin-emanager-l_availableforsignup","")>
Alternatively, you can call the function that draws help PLUS gives a link to send a
trouble ticket:
<call draw_tt_help("RESOURCE_ID", "HELP_ID", "LABEL")>
6. In plan creation and edit wizard templates, context help file IDs are
passed with resource calls:
<call service(TAG,PARENT,STRMOD,CAN_ENABLED,OH_ID)>
where OH_ID is the id of the file specified in
~cpanel/shiva/psoft/hsphere/online_help.xml. For example:
<call service("asp", "hosting","","1","admin-editwizardw_asp")>
7. If the edited template is in *.html.in format, run make in this
template's directory.
8. Restart Parallels H-Sphere (on page 136).
Page 22
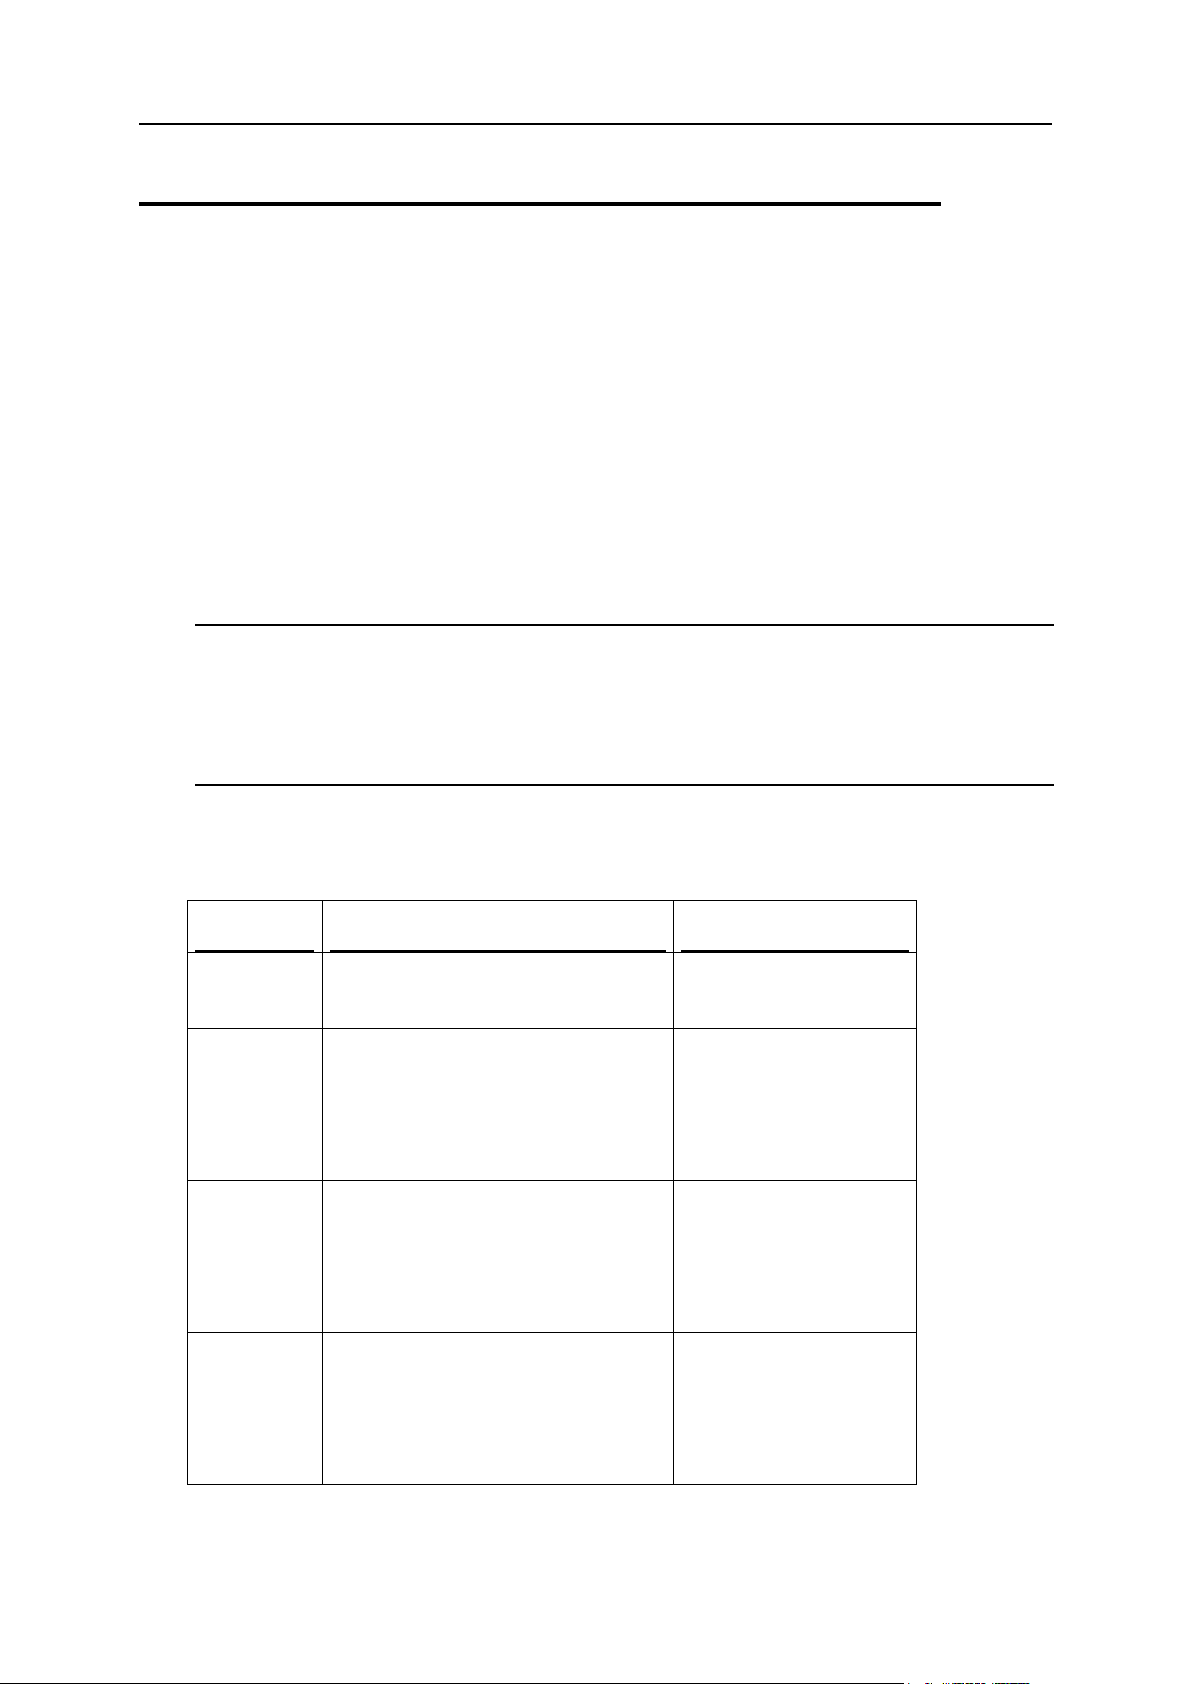
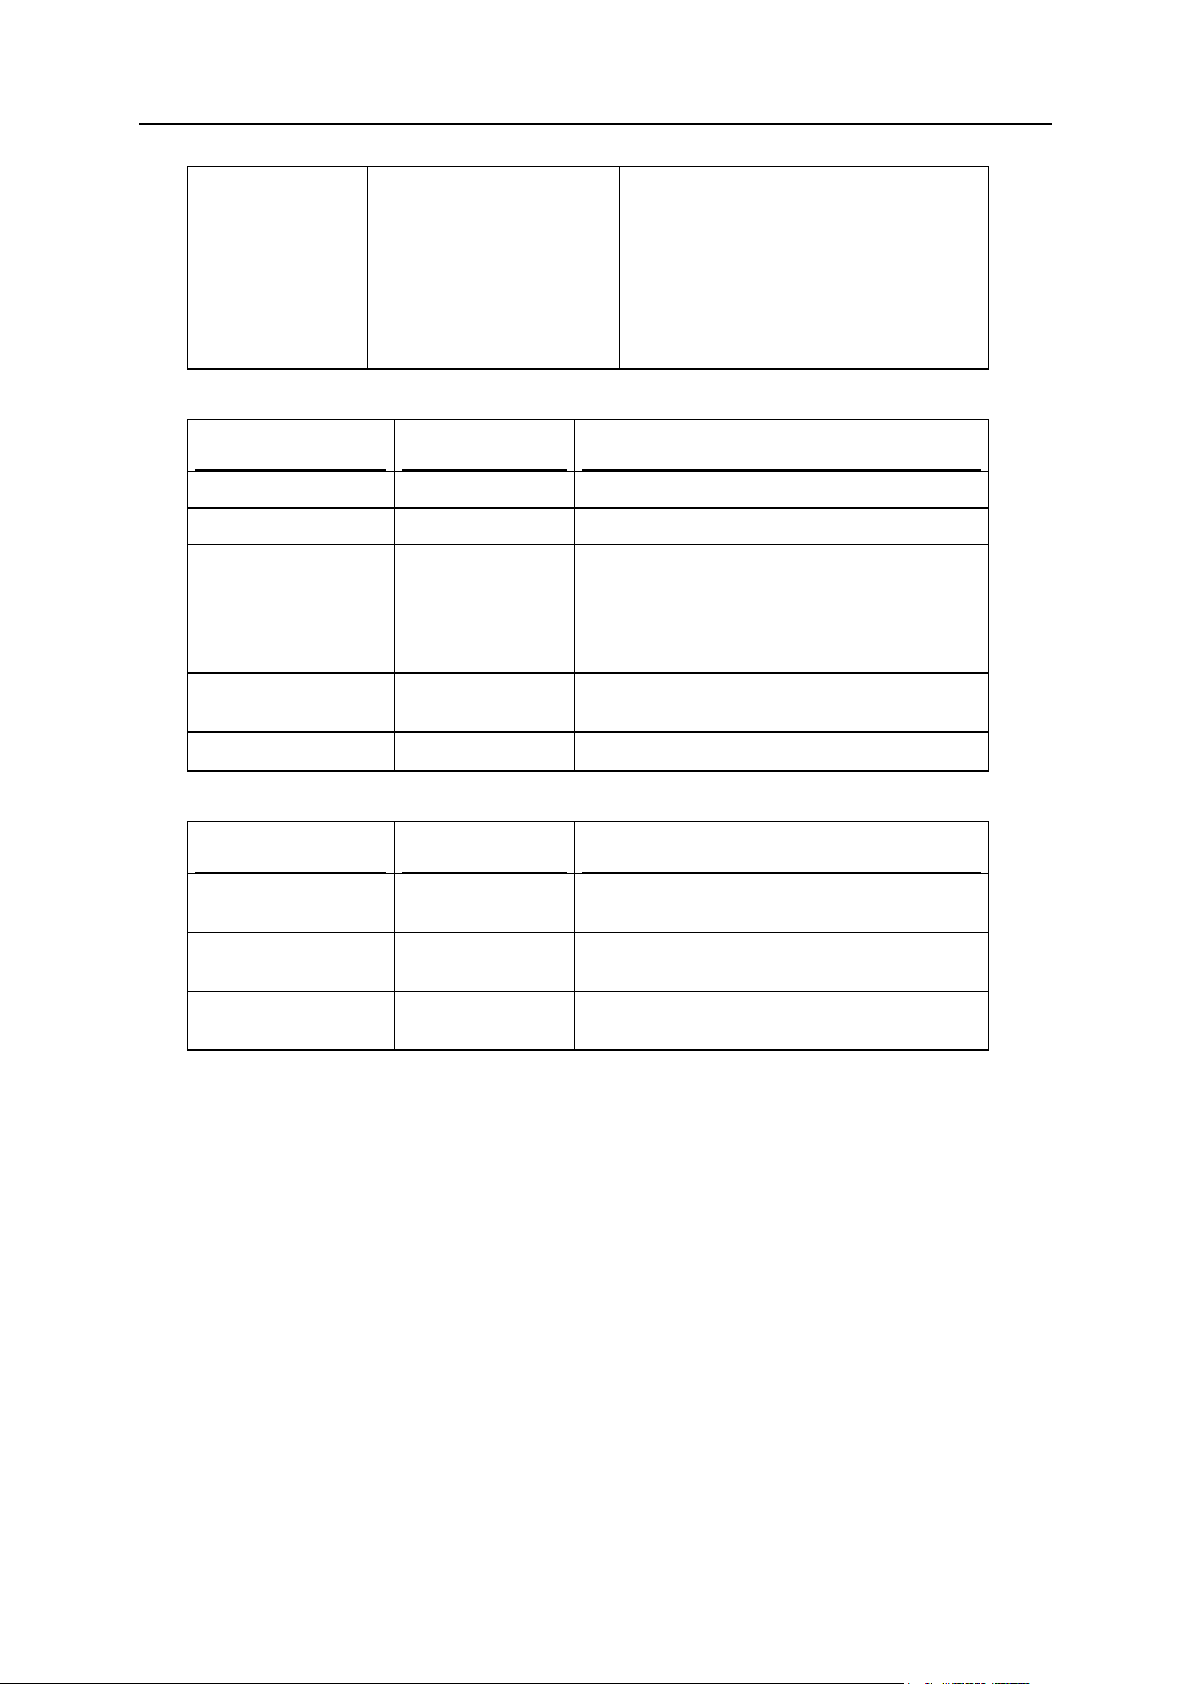
22 Template Customization
System E-Mail Templates
Template
Filename
Notification Sent
Welcome
Letter
new_account.txt
to customer on
account activation
Welcome
Letter for
Moderated
Accounts
new_account_moderated.tx
t
to customer on
moderated check
account registration
(accounts waiting
activation)
Welcome
Letter For
Moderated
Account
with CC
new_account_moderated_cc
.txt
to customer on
moderated credit card
registration
Welcome
Letter For
Moderated
Trial
Account
trial_moderated.txt
to customer on
moderated trial
account registration
System e-mail notifications are messages Parallels H-Sphere automatically sends to
customers.
It is possible to edit system emails in the admin CP interface, in the
Settings/Notifications/E-Mail Notifications menu (see Parallels H-Sphere Administrator
Guide for details). Both default messages and messages in each interface language
can be customized there. Custom modifications are stored in the Parallels H-Sphere
database and do not affect the system email templates. On the contrary, default
settings can be restored from the templates.
This document explains where to find the default system email templates and how to
customize them.
Note: Support info and checks info is modified in the Settings -> Look and Feel -> Misc.Text
menu by filling in the Customer Support Info and Checks Info forms.
Important: It is strongly recommended not to touch the default system email templates;
instead, you should edit notifications in the administrator's Control Panel to be able to
restore default texts from the templates.
Here is the list of default templates for system email messages (located in the
~cpanel/shiva/shiva-templates/common/mail/ directory) that can be
customized via CP interface:
Page 23

Template Customization 23
Trial
Registratio
n
trial_account.txt
to customer on
account trial period
expiration
Invoice
invoice.txt
to customer: - on each
paid operation
- at the beginning of
the next billing period
- on switching to
another billing period
Money
Back
money_back.txt
to admin when a user
chooses to cancel
hosting and wants
his/her money back
Overlimit
Notification
overlimit.txt
to customers when
they reach traffic or
disk usage limit
Account
Suspended
Notification
suspended_account.txt
to customers when
their accounts get
suspended
Account
Resumed
Notification
resumed_account.txt
to customers when
their accounts get
suspended
Accounting
Error letter
accounting_error.txt
to admin on
accounting error
Lost
Password
forgot_passwd.txt
to customers after
they enter their email
address on the "forgot
your password" page
Failed
Signup
Notification
you_have_files_signups.t
xt
to admin when
customer signup fails
Domain
Transfer
Message
tranfer_domain.txt
to customers
explaining how to
transfer an external
domain
Internal
Ticket
ticket_internal.txt
to admin in case of
internal problems
Shell
Access
Notificaton
ssh_notification.txt
to the customer when
Shell Access is
granted or refused
(disabled)
Page 24

24 Template Customization
Welcome
Letter (Tax
Exemption)
new_account_tax_exemptio
n.txt
to new customers
awaiting approval of
their Tax Exemption
Codes
Tax
Exemption
Approved
Notification
(Moderated
Accounts)
tax_exemption_approved_n
ew.txt
to new customers
signed up to tax
exemption plan,
awaiting moderation
Tax
Exemption
Rejected
Notification
(Moderated
Accounts)
tax_exemption_rejected_n
ew.txt
to new customers
signed up to tax
exemption plan, on
failing to verify tax
exemption data
Tax
Exemption
Approved
Notification
(Live
Accounts)
tax_exemption_approved.t
xt
to customers on tax
exemption approval
Tax
Exemption
Rejected
Notification
(Live
Accounts)
tax_exemption_rejected.t
xt
to customers on failing
to verify tax exemption
data
Below is the list of templates for standard texts sent as mass mail. Messages in these
Template
Filename
Notification Sent
Welcome Letter
welcome.txt
optionally from mass
mail
User login and
password
login_psw.txt
optionally from mass
mail
User balance
balance.txt
optionally from mass
mail
templates cannot be customized via Parallels H-Sphere interface:
Page 25
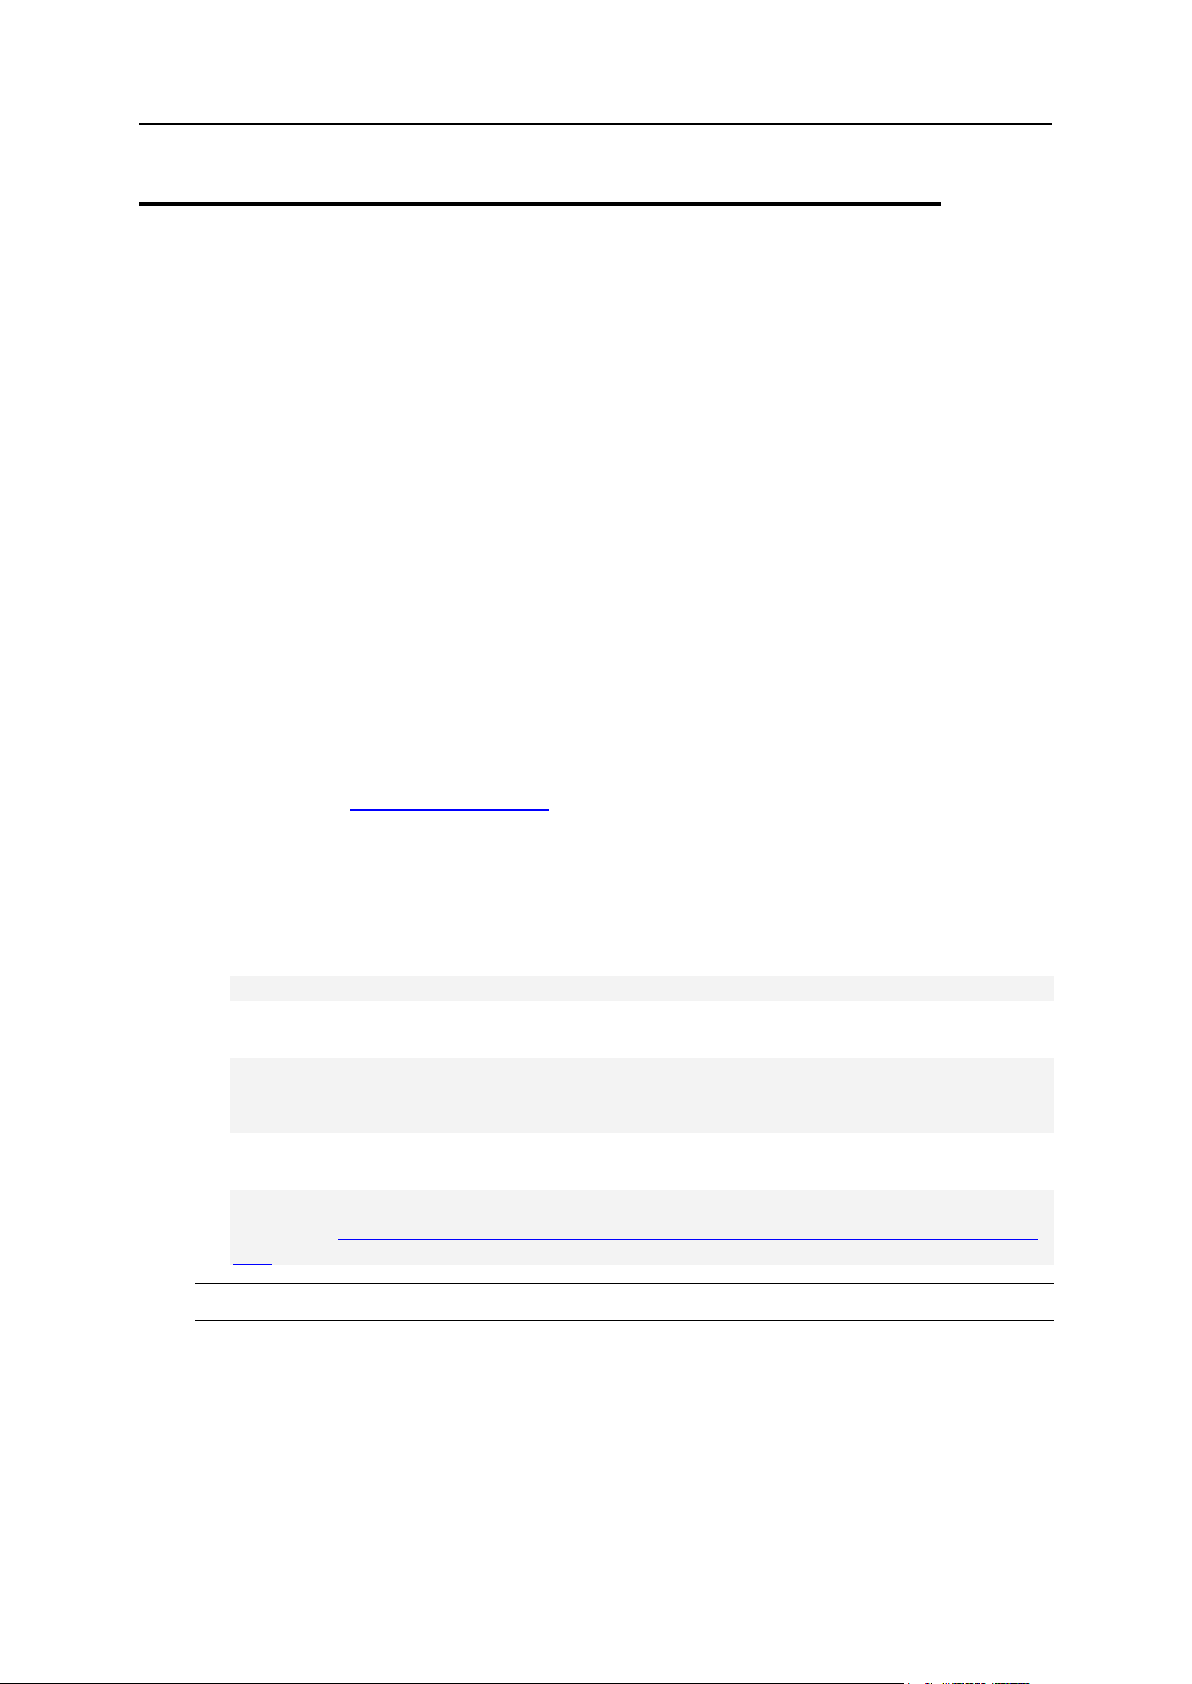
Template Customization 25
Customizing User Signup
This document explains how to modify standard user signup (order) forms or replace
them with custom forms.
Before you begin signup customization, please note the following:
The default signup forms contain validation scripts. It is recommended that your
custom signup forms also provide a client side validation mechanism (on page 19).
When Parallels H-Sphere server-side validation rejects user data, the user is
redirected to the error page generated based on the template
~cpanel/shiva/shiva-templates/common/signup/end.html, which has
the look and feel of the standard Parallels H-Sphere interface and links to the
STANDARD Parallels H-Sphere signup forms. Normally, you would want to
customize this template to ensure that:
it has the look and feel of your custom signup forms,
it gives a way to go back to the signup forms, then modify and re-submit the
signup data.
The template has been written in FreeMarker, and in order to make changes to its
code, please become familiar with the FreeMarker technology, the documentation
available at http://freemarker.org. The way you customize the page will totally
depend on how you organize your signup forms.
Custom signup fields must match those in the default signup. If more fields are
added in newer versions, you will need to update your custom forms.
Your signup script has to put the collected data into the html fields below and submit
them to the following URL:
<form name="login" action="psoft.hsphere.CP" method="POST">
or
<form name="login"
action="protocol://cp.domain.name:PORT/psoft/servlet/psoft.hs
phere.CP" method="POST">.
For example:
<form name="login"
action="http://www.psoft.net:8080/psoft/servlet/psoft.hsphere
.CP" method="POST">
Note: psoft.hsphere.CP is case sensitive!
Some signup texts can be customized through the control panel from Look And Feel ->
Signup Texts. If you have customized texts through the control panel, they will override
the texts in your custom signup forms, so you may need to remove them.
Signup fields:
Basic (service fields required for signup)
Page 26
26 Template Customization
User Contact Info
Field name
Possible Values
Explanation
_eul_accept
"1"
Accept terms of End User License
Agreement
_mod
"signup" - transfer domain,
"opensrs" - domain
registration,
"nodomain" - stopgap
domain,
"3ldomain" - third level
domain,
"service" - service domain,
"empty" - signup without
domain
Signup mode
action
"signup"
Service parameter
plan_id
numeric
Number of the plan for signup
signup
"yes"
Service parameter
login
alphanumeric
user login
password
alphanumeric
user password
password2
alphanumeric
Confirm user password
template_name
"submit/signup/end.sbm"
("submit/signup/end_osr
s.sbm" for Domain
registration)
The so-called submit template
located in the
~cpanel/shiva/shiva-
templates/common directory
and used to perform server-side
form validation.
admin_signup
"yes" - if we sign user up from
the admin panel
Service parameter
Field name
Possible Values
Explanation
_ci_first_name
alphanumeric
User's first name
_ci_last_name
alphanumeric
User's last name
_ci_address1
alphanumeric
User's address 1
_ci_address2
alphanumeric
User's address 2
Billing Info (not used for trial registration)
Credit Cards
Billing Period
Domains
Domain Registration
Domain Regisration Contact Info
Basic (service fields required for signup)
User Contact Info
Page 27

Template Customization 27
_ci_city
alphanumeric
User's city of residence
_ci_company
alphanumeric
User's company name
_ci_country
alphanumeric
User's country code
_ci_email
alphanumeric
User's contact e-mail address
_ci_phone
numeric
User's phone number
_ci_postal_code
numeric
User's zip code
_ci_state
e.g.: "NY"; "NA"
for non US or
Canada
residents.
User's state code. In the custom form for
non US or Canada residents, you should
add this field as hidden.
_ci_state2
alphanumeric
User's state or province for non US and
Canada residents. Should be present in the
custom form only in case
_ci_state='NA'.
_promo_code
alphanumeric
PROMO code for subsidized plan. Contains
2-20 chars and starts from the letter.
Billing Info (not used for trial registration)
Field name
Possible Values
Explanation
_bi_first_nam
e
alphanumeric
User's first name
_bi_last_name
alphanumeric
User's last name
_bi_address1
alphanumeric
User's address 1
_bi_address2
alphanumeric
User's address 2
_bi_city
alphanumeric
User's city of residence
_bi_company
alphanumeric
User's company name
_bi_country
alphanumeric
User's country code
_bi_email
alphanumeric
User's contact e-mail address
_bi_phone
numeric
User's phone number
_bi_postal_co
de
numeric
User's zip code
_bi_state
e.g.: "NY"; "NA" for non
US or Canada residents.
User's state code. In the custom form
for non US or Canada residents, you
should add this field as hidden.
_bi_state2
alphanumeric
User's state or province for non US or
Canada residents. Should be present
in the custom form only in case
_bi_state='NA'.
Page 28
28 Template Customization
_bi_type
"CC" - credit card,
"Check" - check or
bank transfer,
"PayPal" - PayPal,
"2CheckOut" -
2CheckOut,
"TRIAL"
Payment type
Credit Cards
Field name
Possible Values
Explanation
_bi_cc_name
alphanumeric
Credit card name
_bi_cc_number
numeric
Credit Card number
_bi_cc_type
strings available
in the Merchant
Gateway
Manager: "VISA",
"MC", etc.
Credit Card type
_bi_cc_exp_mont
h
two digits
the month of Credit Card expiry date
_bi_cc_exp_year
four digits
the year of Credit Card expiry date
Field name
Possible Values
Explanation
_bi_cc_issues_n
o
alphanumeric
Issue number
_bi_cc_start_mo
nth
two digits
Card Start Month
_bi_cc_start_ye
ar
four digits
Card Start Year
Below are the fields for Solo/Switch debit cards used in some countries:
Page 29

Template Customization 29
Billing Period
Field name
Possible Values
Explanation
_bp
0 or a positive
integer
Sequence number of the billing period in the
list of billing periods for the selected plan.
To see the list of the billing periods, go to
your control panel, click the Settings link for
this plan and scroll down to the Billing
configuration section.
Field name
Possible Values
Explanation
type_domai
n
"transfer_new_misc_domain" - transfer
domain without registrar changes
"domain_transfer" - transfer domain with
registrar changes
"without_domain" - stopgap domain
"3ldomain" - third level domain
"service_domain" - service domain
"empty_domain" - signup without domain
"new_opensrs_domain" - register new
domain
Type of new domain
_mod
"signup" - transfer domain without registrar
changes
"dtransfer" - transfer domain with registrar
changes. It accepts the same fields as
OpenSRS registration except the period
field and extra contact/billing info for
domain registration.
"nodomain" - stopgap domain
"3ldomain" - third level domain
"service" - service domain
"empty" - signup without domain
"opensrs" - register new domain
Domain registration
mode.
domain_nam
e
alphanumeric
Domain name; may be
omitted if
type_domain="emp
ty_domain"
Field name
Possible Values
Explanation
period
numeric
Registrar's periods (years)
_srs_owner_first_na
me
alphanumeric
User's first name
_srs_owner_last_nam
e
alphanumeric
User's last name
_srs_owner_address1
alphanumeric
User's address 1
Domains
Domain Registration
Page 30

30 Template Customization
_srs_owner_address2
alphanumeric
User's address 2
_srs_owner_city
alphanumeric
User's city of residence
_srs_owner_org_name
alphanumeric
User's company name
_srs_owner_country
alphanumeric
User's country code
_srs_owner_email
alphanumeric
User's contact e-mail address
_srs_owner_phone
numeric
User's phone number
_srs_owner_postal_c
ode
numeric
User's zip code
_srs_owner_state
e.g.: "NY"; "NA" for
non US or Canada
residents.
User's state code. In the custom
form for non US or Canada
residents, you should add this field
as hidden.
_srs_owner_state2
alphanumeric
User's state or province for non US
or Canada residents. Should be
present in the custom form only in
case _srs_owner_state='NA'.
Domain Registration Contact Info
Field name
Possible Values
Explanation
_srs_billing_first_name
alphanumeric
User's first name
_srs_billing_last_name
alphanumeric
User's last name
_srs_billing_address1
alphanumeric
User's address 1
_srs_billing_address2
alphanumeric
User's address 2
_srs_billing_city
alphanumeric
User's city of residence
_srs_billing_org_name
alphanumeric
User's company name
_srs_billing_country
alphanumeric
User's country code
_srs_billing_email
alphanumeric
User's contact e-mail
address
_srs_billing_phone
numeric
User's phone number
_srs_billing_postal_code
numeric
User's zip code
_srs_billing_state
e.g.: "NY"; "NA" for
non US or Canada
residents.
User's state code. In the
custom form for non US or
Canada residents, you
should add this field as
hidden.
_srs_billing_state2
alphanumeric
User's state or province for
non US or Canada
residents. Should be present
in the custom form only in
case
_srs_billing_state='N
A'.
Page 31

This chapter explains how to customize graphic elements of the Parallels H-Sphere
In this chapter:
Skin And Icon Set Customization ...................................................................... 32
Design XML Configuration ................................................................................. 35
Interface Controls And Colors in Templates ...................................................... 41
Adding Custom Icons ........................................................................................ 43
C H A P T E R 4
Design Customization
Web interface.
Page 32

32 Design Customization
Skin And Icon Set Customization
Parallels H-Sphere interface design has a broader meaning than just configuration of
certain color schemes and the corresponding icon sets, what is called the skin. It also
determines the set of skins available for this design, specifies the sets of icons in the
Quick Access page and enables to override the standard settings with the custom ones.
To provide multiple design support, Parallels H-Sphere uses the
design_config.xml file, which can be found in the
/hsphere/local/home/cpanel/shiva/psoft/hsphere/ directory. Its structure
is explained in the Design XML Configuration (on page 35) guide.
The current document shows you how to customize this file to add your own designs,
color schemes, colors and images. For this, you need to:
1. customize design_config.xml
2. implement custom design templates
Design XML Customization
A designer should have access to the Parallels H-Sphere server as the cpanel user.
To implement customization correctly, all template files and directories should have
cpanel:cpanel ownership. In version 2.5 and up templates, images, CSS and
JavaScript files and directories must have cpanel:httpdcp ownership.
Important: We don't recommend you to modify the default
~cpanel/shiva/psoft/hsphere/design_config.xml file. These modifications
will be lost with the next Parallels H-Sphere updates.
There are the following ways of customizing design XML configuration:
With packages
You can customize design_config.xml by means of packages. In this case, within
a package you create custom XML file that will be merged with default XML
configuration (on page 71).
Merging custom XML configuration
Instead of creating a package, create a custom XML configuration file to be merged
with the default XML configuration (on page 71 ) and a custom package XML if installed.
Overrriding default XML configuration with custom XML configuration
1. You create the custom design configuration file and perform
modifications there:
Page 33

Design Customization 33
2. Login to the CP server as the cpanel (on page 136) user under root.
3. Copy the standard design_config.xml file to a certain custom
directory (it may be ~cpanel/shiva/custom/xml):
cp ~cpanel/shiva/psoft/hsphere/design_config.xml
~cpanel/shiva/custom/xml/design_config.xml
4. Make changes into the custom design_config.xml structure (on
page 35).
5. In ~cpanel/shiva/psoft_config/hsphere.properties, change the
DESIGN_SCHEME_CONFIG variable to point to this new file:
DESIGN_SCHEME_CONFIG =
/hsphere/local/home/cpanel/shiva/custom/xml/design_config.xml
Implementation of Custom Design Templates
Custom design templates are created in the ~cpanel/shiva/custom/templates
custom template directory. In order to implement these custom designs, the symlinks to
them should be put into the Apache DocumentRoot directory which is set by default to
the ~cpanel/shiva/shiva-templates standard templates directory.
However, on the subsequent Parallels H-Sphere update all symlinks in
~cpanel/shiva/shiva-templates would be lost, and custom designs would not
be displayed correctly.
To avoid this, we suggest to use another directory as DocumentRoot and to create
there the symlinks to ALL design directories, for both custom designs and the Parallels
H-Sphere built-in designs.
Warning: Don't change the TEMPLATE_PATH variable in hsphere.properties!
TEMPLATE_PATH points to the default template directory. If you change it, you won't
see any updates in the default templates.
1. Log into the CP server as the cpanel (on page 136) user.
2. Create the ~cpanel/shiva/web directory.
3. Create the symlinks to the design directories using the ln -s
command.
You should have something similar to this:
$ pwd
/hsphere/local/home/cpanel/shiva/web
$ ls -la
Page 34

34 Design Customization
...
lrwxrwxrwx 1 cpanel cpanel 55 Jun 4 08:55 common ->
/hsphere/local/home/cpanel/shiva/shiva-templates/common
lrwxrwxrwx 1 cpanel cpanel 46 Jun 2 13:39 counter ->
/hsphere/shared/SiteStudio/public_html/counter
lrwxrwxrwx 1 cpanel cpanel 47 Jun 2 13:39 custom-images ->
/hsphere/local/home/cpanel/shiva/custom/images/
lrwxrwxrwx 1 cpanel cpanel 50 Jun 2 13:39 custom-templates ->
/hsphere/local/home/cpanel/shiva/custom-templates/
lrwxrwxrwx 1 cpanel cpanel 48 Jun 2 13:40 guestbook ->
/hsphere/shared/SiteStudio/public_html/guestbook
lrwxrwxrwx 1 cpanel cpanel 55 Jun 2 13:42 IMAGES ->
/hsphere/local/home/cpanel/shiva/shiva-templates/IMAGES
lrwxrwxrwx 1 cpanel cpanel 46 Jun 2 13:40 masonry ->
/hsphere/shared/SiteStudio/public_html/masonry
lrwxrwxrwx 1 cpanel cpanel 55 Jun 4 08:55 nomenu ->
/hsphere/local/home/cpanel/shiva/shiva-templates/nomenu
lrwxrwxrwx 1 cpanel cpanel 43 Jun 2 13:40 poll ->
/hsphere/shared/SiteStudio/public_html/poll
lrwxrwxrwx 1 cpanel cpanel 48 Jun 2 13:41 shiva-templates ->
/hsphere/local/home/cpanel/shiva/shiva-templates
lrwxrwxrwx 1 cpanel cpanel 59 Jun 4 08:55 text_based ->
/hsphere/local/home/cpanel/shiva/shiva-templates/text_based
lrwxrwxrwx 1 cpanel cpanel 62 Jun 2 15:19 YourDesign1 ->
/hsphere/local/home/cpanel/shiva/custom/templates/YourDesign1
lrwxrwxrwx 1 cpanel cpanel 62 Jun 2 15:19 YourDesign2 ->
/hsphere/local/home/cpanel/shiva/custom/templates/YourDesign2
Here, the counter, guestbook, masonry, and poll directories are Parallels
SiteStudio-related directories; YourDesign1 and YourDesign2 are custom
design directories.
4. Make the ~cpanel/shiva/web directory in the DocumentRoot
directory. To do this, in the ~cpanel/apache/etc/httpd.conf
Apache configuration file change the DocumentRoot global definition
line:
DocumentRoot "/hsphere/local/home/cpanel/shiva/shivatemplates"
to the following line:
DocumentRoot "/hsphere/local/home/cpanel/shiva/web"
Then, delete all other instances of the DocumentRoot definition (for virtual hosts) in this
file. Also, delete all DocumentRoot definitions in all configuration files located in the
~cpanel/apache/etc/sites directory.
4. Logout from cpanel back to root and restart Parallels H-Sphere (on page 136).
Page 35

Design Customization 35
Design XML Configuration
Parallels H-Sphere design configuration is represented in the design_config.xml
file, which can be found by default in the
/hsphere/local/home/cpanel/shiva/psoft/hsphere/ directory. You can
customize (on page 32) this XML configuration to add your own designs, color
schemes, colors and images.
This document explains all important parts of the design configuration file, including:
Icons
Skill Icon Groups
Icon Image Sets
Common Images
Color Types
Designs (Skins)
Important:
1) Do not make changes into the default XML configuration file! Instead, follow
instructions on design.xml customization (on page 32).
2) Changing design XML configuration implies proper knowledge of XML. Errors in XML
structure may badly damage your Control Panel interface.
Icons
By icon we mean an Parallels H-Sphere control that provides quick access to a certain
functional page of the control panel. All Parallels H-Sphere icons are displayed only on
the Quick Access page, which is based on the quick/quick_view.html template.
icon
An icon description includes the following:
id - the mnemonic system name of the icon
url_param - typically, the name of the base template for the functional page this icon
links to. Multiple url parameters are separated with the & delimiter
rtype - the list of Parallels H-Sphere resource types whose availability determines
whether the icon will be drawn. It may include simple resource types separated by
semicolons and commas in the following way:
res1 - simple resource type, icon will appear if the resource is available;
res1, res2, res3 - group of resources where all of them must be available
to show an icon (operation 'AND');
res1; res2; res3 - icon will be shown if any of the resources is available
(operation 'OR'). Example: rtype="webalizer; modlogan; urchin"
Page 36

36 Design Customization
res1,res2; res3,res4; res5,res6 - combination of groups where an
icon will be shown if any of the groups: res1,res2 or res3,res4 or
res5,res6 includes both available resources. If translated to C or Java, this
would mean (res1 & res2) || (res3 & res4) || (res5 & res6)
platform - operating system (unix|win2k) on which plans using this icon are
based. If platform=unix or platform=win2k, this means that the icon is
displayed for Unix-based or Windows-based plans, respectively. If the platform
attribute is left empty, the icon is available for all plans.
label - mnemonic id of the caption under the icon image. It must be defined in the
hsphere_lang.properties file
tip - mnemonic id of the HTML tooltip of the icon. It must be defined in the
hsphere_lang.properties file
help - reserved for future use.
One icon can have many visual representations. This means that it will have a different
look depending on which icon image set was selected by the user. You can specify
which icon image sets will be available for each individual design, for example:
<allowed_icon_image_sets>
<set id="wooden"/>
<set id="square_set"/>
<set id="cartoon_set"/>
<set id="bubble_set"/>
</allowed_icon_image_sets>
Skill Icon Groups
In terms of the Parallels H-Sphere interface visual settings, only two types of accounts
are customized, regardless of plans:
admin accounts which are Parallels H-Sphere administrative accounts,
user accounts - all other accounts.
Reseller accounts are regarded as user accounts, except for the reseller administrative
account which relates to the admin account type.
Skill icon groups determine the structure of the icon groups in the Quick Access page for
these two types of accounts and are defined as follows:
<skill_icon_sets account_type="account_type">
<skill_set id="standard"
label="icon_skill_set.standard_account_type_l">
<icon_group id="group_id" label="icongroups.group_id">
<icon id="icon_id1"/>
. . .
</icon_group>
. . .
</skill_set>
<skill_set id="advanced"
label="icon_skill_set.advanced_account_type_l">
<icon_group id="group_id" label="icongroups.group_id">
<icon id="icon_id1"/>
Page 37

Design Customization 37
. . .
</icon_group>
. . .
</skill_set>
<skill_set id="simplified"
label="icon_skill_set.simplified_account_type_l">
<icon_group id="group_id" label="icongroups.group_id">
<icon id="icon_id1"/>
. . .
</icon_group>
. . .
</skill_set>
</skill_icon_sets>
Account types:
admin for admin accounts
user for user accounts.
Skill set ids are of the following types:
standard for the common (left menu) interface.
advanced for the 'no menu' interface.
simplified skill set may be chosen for any of the two types of accounts.
Icon groups are defined within the skill_set element structure. The icon group id
attribute corresponds to menu groups, such as Info, FTP, mail, etc., and is a mnemonic
identifier of the icon group (mail, admin_mail, and the like).
icon_group construction enlists the set of icons which are displayed in this icon
group. Each icon is defined in the icons construction described above in the previous
section.
Icon Image Sets
By icon image set we mean the set of icons corresponding to a certain Parallels HSphere color scheme:
<icon_image_sets base_dir="/IMAGES">
<icon_image_set id="image_set_id" label="iconsets.image_set_id"
dir="relative_image_set_dir">
<preview_image file="/IMAGES/previews/icons_default.gif"
width="375" height="60"/>
<image id="icon_id" file="filename_with_relative_path" width="xx"
height="yy"/>
. . .
</icon_image_set>
. . .
</icon_image_sets>
base_dir attribute defines the directory where the Parallels H-Sphere images, both
standard and custom, are to be stored. Typically, it is the IMAGES directory in the
Apache document root directory (usually, ~cpanel/shiva/shiva-templates).
Page 38

38 Design Customization
Note: The base image directory is actually relative to the alternative directory for
images which is located in the document root. This directory is set in the IMAGES
variable in the hsphere.properties file. If it is not set there, base_dir
contains the path relative to the document root.
icon_image_set
The icon_image_set element sets the list of images corresponding to a color
scheme.
Attributes:
id attribute refers to mnemonic name of the color scheme. It is default for the default
color scheme; cocoa, bubble and some other schemes go with Parallels H-Sphere
installation, while others may be created manually.
dir is the path relative to the base_dir directory. If it is empty, images are located in
the base images directory.
preview_image
The preview_image tag refers to the preview image appeared in the Parallels HSphere Look and Feel interface when choosing the available design. The following
attributes are determined for the preview image:
file - filename and path to the preview image relative to the document root directory.
width, height - image width and height.
image - image description tag.
Please keep in mind that the image should be set for EACH color scheme. In order to
add a new image, first, add the image definition to the icons tag, and then add image
elements with the same id attribute to EACH icon_image_set element.
The following attributes should be set:
id attribute value refers to the icon described in the icons section.
file is the image filename with the path relative to the icon image set subdirectory of
the image set basic directory.
For example, if base_dir="/IMAGES" and dir="wooden", then images for
wooden scheme will be located in /IMAGES/wooden directory. However, if
dir="", then, to do so that Parallels H-Sphere would find, let say, a GIF image,
you should set the file attribute as file="wooden/name_of_the_file.gif".
width, height - image width and height. Unless these parameters are not changed,
the user custom image would be displayed by Parallels H-Sphere with this width
and height, regardless of the image size parameters.
Common Images
Common images are the set of images that have the same look in all designs, such as,
arrows, bullets, home icon, etc.
The common_images element structure is as follows:
<common_images base_dir="/IMAGES/">
Page 39

Design Customization 39
<image id="spacer" file="spacer.gif" width="1" height="1"/>
<image id="arrow" file="arrow.gif" width="22" height="22"/>
. . .
</common_images>
The base_dir attribute is defined in the same way as for the icon image sets.
The image id attribute is an image mnemonic name used in templates.
Color Types
Color types comprise all possible interface entities for which colors are set: basic text,
background, header, menu, error messages, etc.
The following attributes are present in the color_type tag:
id is a mnemonic color type identifier later used in designs description;
label is a mnemonic id to the caption under which this color type is configured in the
CP interface.
Designs
Design, or skin, is a GUI representation including certain icon image sets and color
schemes. The following designs are included into the default Parallels H-Sphere
installation:
common is the Left Menu design. All basic templates are made for this design
scheme.
nomenu (No Menu) is the design with no left menu. It is turned on as the default user
design after the Parallels H-Sphere installation.
text-based (Text-Based) is the alternative look of the nomenu design where only
captions with no icons are provided in the Quick Access menu page.
xcp, xcpl - XPressia and XPressia Lite are designs with dropdown menus.
reloaded (XP Reloaded) is a left-menu design, default in Parallels H-Sphere 3.1 and
up.
design
Attributes of the design element:
id is a design mnemonic identifier: nomenu, common, text-based, xcp, xcpl,
reloaded.
label is a mnemonic id to the design name in the CP interface.
template_dir is a directory relative to the document root directory where where
template files for this design are located.
default_color_scheme is the default color scheme identifier (see below, the
color_scheme tag description).
preview_image
The preview_image tag defines the design preview image settings. The structure is
the same as for the icon image sets.
Page 40

40 Design Customization
colors
The colors element defines all available colors for this design. They are taken by
default for every color scheme. Individual color settings for each color scheme could be
defined in the corresponding color_scheme constructions (see description below).
Color id attribute refers to the color type identifier (see Color types).
base_images
base_images is the set of images that look the same for all color schemes in this
design. The base_images tag structure is the same as for the common images.
image_sets
The image_sets element contains the settings for each image set enabled for this
design. base_dir attribute points to the images directory (usually, IMAGES). The
element includes the following tags:
the set_images element contains the list of images in a standard image
description which are taken by default for this design.
the image_set tag contains image definitions for a color scheme to override the
set_images default definitions. Here you may set an alternative directory where
images for this color scheme will be searched, or modify settings so that an image
will be taken from a file different from the default image file. image_set may contain
image tags for images with alternative settings (for example, if the image file name
is different from the default one).
Attributes:
id - identifier for a color scheme (for example, default or cocoa);
label - color scheme label;
dir - alternative image directory relative to the base_dir directory; if it is empty the
image search would be performed in the base_dir directory (usually, IMAGES).
For example, if we need to change the banner.jpg image to banner1.jpg in
the default color scheme so that this image would be searched in the base
directory, the image tag should be inserted into the image_set construction in the
following way:
<image_set id="default" label="imagesets.default" dir=""/>
<image id="banner" file="banner1.jpg" width="468"
height="60"/>
</image_set>
allowed_skill_icon_sets
The allowed_skill_icon_sets tags are used to determine a skill icon set for user
and admin accounts (see Skill icon groups):
<allowed_skill_icon_sets account_type="user">
<set id="standard"/>
</allowed_skill_icon_sets>
allowed_icon_image_sets
Page 41

Design Customization 41
The allowed_icon_image_sets tags determine icon image sets that would be
available for each account type (see Icon sets):
<allowed_icon_image_sets account_type="admin">
<set id="default"/>
</allowed_icon_image_sets>
color_scheme
color_scheme sets page colors, image sets and icon image sets in this design.
Attributes:
id - color scheme identifier (for example, blue_haze or default);
label - color scheme label defined in hsphere.properties;
image_set - image set identifier (for example, blue_haze or default);
icon_image_set - icon image set identifier (for example, blue_haze or default).
The color_scheme element may include the color tags to set colors for this color
scheme. If these colors are not set here, default colors would be taken from the
colors tag definition for this design.
Example:
<color_scheme id="marsh" image_set="marsh"
icon_image_set="marsh" label="imagesets.marsh">
<color id="logo_bgcolor" value="#C9D1CA"/>
. . .
</color_scheme>
Interface Controls And Colors in
Templates
This document introduces basic Freemarker functions related to interface controls
(images, buttons, interface texts, etc.) and interface colors in Parallels H-Sphere
templates.
To generate HTML representation of Parallels H-Sphere control panel, we use Java
and Java-based FreeMarker package. Parallels H-Sphere templates contain calls to
FreeMarker functions, variables, and substitutions. Due to the added support of multiple
designs in user's control panel, some of the functions needed to be changed. If you are
using templates that have been developed for Parallels H-Sphere earlier than 2.1, you
need to bring parameters in all FreeMarker function calls in line with the following list:
Inserting HTML images:
<function draw_image(image_id)>
<function draw_image_width(image_id, image_width)>
<function draw_image_alt(image_id, alt_msg)>
<function draw_image_align(image_id, img_align)>
<function draw_image_align_alt(image_id, img_align, alt_msg)>
Page 42

42 Design Customization
<function draw_spacer(s__width,s__height)>
Inserting ON/OFF buttons:
<function draw_state(state,toDisableURL,toEnableURL)>
<function draw_state_on(toDisableURL)>
<function draw_state_off(toEnableURL)>
<function draw_off()>
<function draw_on()>
<function draw_on_always()>
Inserting other control images:
<function draw_add(addURL, label)>
<function draw_edit(editURL, label)>
<function draw_delete(deleteURL, label)>
<function draw_change(editURL, label)>
<function draw_select(selectURL, label)>
<function draw_fix(selectURL, label)>
<function draw_setup(selectURL, label)>
<function draw_select_signup(plan)>
<function draw_select_adminsignup(plan)>
<function draw_preview(previewURL, label)>
<function draw_preview_large(previewURL, label)>
<function draw_launch(launchURL, label)>
<function draw_launch_large(launchURL, label)>
<function draw_uninstall(launchURL, label)>
<function draw_credit(jumpURL, label)>
<function draw_enlarge_credit(jumpURL, label)>
<function draw_debit(jumpURL, label)>
<function draw_set_period_begin(jumpURL, label)>
<function draw_login_account(loginURL, label)>
<function draw_suspend_account(toSuspendURL, label)>
<function draw_resume_account(toResumeURL, label)>
<function draw_delete_account(toDeleteURL, label)>
<function draw_mail_type(editURL, image_id, label)>
<function draw_mailbox_type(editURL)>
<function draw_mailforward_type(editURL)>
<function draw_mailalias_type(editURL)>
<function draw_maillist_type(editURL)>
<function draw_submit(field_name, image_id)>
<function draw_oscommerce(previewURL, label)>
<function draw_oscommerce_admin(previewURL, label)>
Inserting text labels/messages:
<function draw_colored_label(llabel,lcolor)>
<function draw_colored_label_bold(llabel,lcolor)>
<function draw_label(label)>
<function draw_label_bold(label)>
<function draw_header(header)>
<function draw_important_label(label)>
<function draw_important_header(header)>
Inserting basic link elements (t - target, p - picture, a - alt):
<function draw_link(url,label)>
<function draw_tlink(url,target,label)>
Page 43

Design Customization 43
<function draw_plink(url, image_id)>
<function draw_palink(url, image_id, alter)>
<function draw_ptlink(url, target, image_id)>
<function draw_ptalink(url, target, image_id, alter)>
<function draw_onclick_palink(img, onClick, alt)>
Drawing traffic and disk usage charts:
<function draw_load_diagram(d_value, d_limit, d_app_percent,
d_width)>
<function draw_diagram_legend()>
Interface Colors
Designs in Parallels H-Sphere have customizable color schemes. To display interface
elements, we use colors, each having its own id_handle. For example, bgcolor is the
id for the background of the HTML page other than the menu and the header. Its color
can be set in the Look And Feel menu.
To get the RGB value of the color by color_id, the following syntax is used:
${design.color("color_id")}
Note: the color_id value must be replaced with an approprate handle and must be
enclosed in double quotation marks.
Some colors are predefined in the functions file:
<assign LIGHT_STRIP=design.color("table_light_strip")>
<assign DARK_STRIP=design.color("table_dark_strip")>
<assign HEADER_COLOR=design.color("header_color")>
<assign ERROR_COLOR = design.color("error_color")>
<assign BG_COLOR = design.color("bgcolor")>
Use them as follows:
${BG_COLOR}
Adding Custom Icons
To provide multiple design support, Parallels H-Sphere uses the
design_config.xml file, which can be found in the
/hsphere/local/home/cpanel/shiva/psoft/hsphere/ directory. Its structure
is explained in the Design XML Configuration (on page 35) guide.
The current document provides an example of how to customize this file to add your
own custom icons. For this, you need to:
1. Create custom design_config file in custom location that will be merged
with the default XML configuration file (on page 71). Your
design_config.xml should include only differences in relation to the
original Parallels H-Sphere one.
Page 44

44 Design Customization
2. As Parallels H-Sphere supports several icon sets, create an icon for
each icon set and include information about this icon location into your
custom design_config.xml. To do this:
1. Declare the url and the image id that will be used for your icon:
<design_config>
<icons>
<icon id="custom_mail_icon"
url_param="template_name=email/custom_email.html"
rtype="" platform=""
label="quick.your_custom_mail_web_app"
tip="quick.your_custom_mail_web_app" help=""/>
</icons>
</design_config>
Where:
The email/custom_email.html is a custom template from which a
customer will be redirected to your url.
The quick.your_custom_mail_web_app label should be described in the
customized hsphere_lang.properties file.
2. Specify the place where the icon will be displayed. It can be included into the
Quick Access page for the Admin Account or end user Quick Access page:
<design_config>
...
...
<skill_icon_sets account_type="user">
<skill_set id="advanced"
label="icon_skill_set.advanced_user_l">
<icon_group id="mail" label="icongroups.mail">
<icon id="custom_mail_icon"/>
</icon_group>
</skill_set>
<skill_set id="standard"
label="icon_skill_set.standard_user_l">
<icon_group id="mail" label="icongroups.mail">
<icon id="custom_mail_icon"/>
</icon_group>
</skill_set>
</skill_icon_sets>
</design_config>
3. Describe which image will be used for each icon set. Use the custom image
<design_config>
...
...
<icon_image_sets base_dir="/CUSTOM_IMAGES">
<icon_image_set id="default" label="iconsets.default"
dir="">
So, your icon will be included into standard and advanced Quick Access of the
Mail section.
directory to store your new icons
/hsphere/local/home/cpanel/shiva/custom/images:
Page 45

Design Customization 45
<image id="custom_mail_icon"
file="custom_mail_icon.gif" width="46" height="49"/>
</icon_image_set>
<icon_image_set id="blue_haze"
label="iconsets.blue_haze" dir="blue_haze">
<image id="custom_mail_icon"
file="custom_mail_icon.gif" width="46" height="49"/>
</icon_image_set>
<icon_image_set id="cocoa" label="iconsets.cocoa"
dir="pebble">
<image id="custom_mail_icon"
file="custom_mail_icon.gif" width="46" height="49"/>
</icon_image_set>
<icon_image_set id="marsh" label="iconsets.marsh"
dir="marsh">
<image id="custom_mail_icon"
file="custom_mail_icon.gif" width="46" height="49"/>
</icon_image_set>
<icon_image_set id="wooden"
label="quick.iconsets.wooden" dir="ICONS/wooden">
<image id="custom_mail_icon"
file="custom_mail_icon.gif" width="48" height="48"/>
</icon_image_set>
<icon_image_set id="square_set"
label="quick.iconsets.square_set" dir="ICONS/square_set">
<image id="custom_mail_icon"
file="custom_mail_icon.gif" width="48" height="48"/>
</icon_image_set>
<icon_image_set id="cartoon_set"
label="quick.iconsets.cartoon_set" dir="ICONS/cartoon_set">
<image id="custom_mail_icon"
file="custom_mail_icon.gif" width="48" height="48"/>
</icon_image_set>
<icon_image_set id="bubble_set"
label="quick.iconsets.bubble_set" dir="ICONS/bubble_set">
<image id="custom_mail_icon"
file="custom_mail_icon.gif" width="48" height="48"/>
</icon_image_set>
<icon_image_set id="xcp1_set"
label="quick.iconsets.xcp1_set" dir="ICONS/xcp1">
<image id="custom_mail_icon"
file="custom_mail_icon.png" width="48" height="48"/>
</icon_image_set>
<icon_image_set id="xcpl_set"
label="quick.iconsets.xcpl_set" dir="ICONS/xcp1">
<image id="custom_mail_icon"
file="custom_mail_icon.gif" width="48" height="48"/>
</icon_image_set>
</icon_image_sets>
</design_config>
3. Create images for each icon set and place them into the corresponding
directories. The base directory for your images is
/hsphere/local/home/cpanel/shiva/custom/images.
Page 46

46 Design Customization
Page 47

Control Panel menu customization affects the following elements:
In this chapter:
Menu XML Customization ................................................................................. 48
Changing Menu Structure ................................................................................. 48
Menu Design Customization ............................................................................. 54
C H A P T E R 5
Menu Customization
menu structure (on page 48): by customizing the menu XML configuration file, you can
restructure menu, add/delete menu groups and items, configure menu layouts for
individual plans, add external links to menu.
menu texts (on page 60): texts for menu item labels are stored in menu language
bundles.
menu design (on page 54): you can change the menu appearance: color, bullets, etc.
Page 48

48 Menu Customization
Menu XML Customization
The Control Panel menu structure (on page 48) is represented in an XML file. Its
default location is set in ~cpanel/shiva/psoft_config/hsphere.properties
by the MENU_CONFIG parameter:
MENU_CONFIG=/hsphere/local/home/cpanel/shiva/psoft/hsphere/me
nu.xml
You should not make changes in the default menu.xml file, because these changes
will be lost with the next Parallels H-Sphere upgrade. Instead, you create custom XML
files that either override or merge changes with default configuration.
Below are the alternative ways to customize menu.xml.
With Packages
You create a custom menu.xml file within an Parallels H-Sphere package (on page
112). After the package is installed, this custom XML configuration will be merged
with default XML configuration.
Merging custom XML configuration
If you need minor modifications in menu configuration, you don't need to rebuild a
package. Instead, you create a custom XML configuration (on page 48) file to be
merged with the default XML configuration and a custom package XML if installed.
In this case, you avoid changing the default MENU_CONFIG property in
hsphere.properties and use the CUSTOM_MENU_CONFIG parameter to specify
your custom menu.xml location.
Changing Menu Structure
Parallels H-Sphere's control panel menu structure is defined in XML file,
~cpanel/shiva/psoft/hsphere/menu.xml by default.
This document explains how you can make changes into the XML structure in order to:
modify menu items and groups
configure individual menu layouts for different plans
add external links to menu items
Location
The default location of menu.xml is set in
~cpanel/shiva/psoft_config/hsphere.properties:
MENU_CONFIG =
/hsphere/local/home/cpanel/shiva/psoft/hsphere/menu.xml
Texts for menu elements are set in language bundles:
Page 49

Menu Customization 49
MENU_BUNDLE = psoft.hsphere.lang.menu
You should not make changes into the default
~cpanel/shiva/psoft/hsphere/menu.xml file! There are several ways how to
customize menu XML data correctly, and they are explained in a separate Menu XML
Customization (on page 48) document.
Here in the text we refer to menu.xml assuming it is correctly customized according to
menu.xml customization rules.
XML Structure
menu.xml consists of the following blocks going one after another:
1. DTD Scheme:
http://hsphere.parallels.com/HSdocumentation/xmls/menu.dtd;
2. definition of menu groups (tag <menus>)
3. definition of menu layouts for different hosting plans (tag <interface>)
Here is an example of menu.xml:
http://hsphere.parallels.com/HSdocumentation/xmls/menu.xml.
Modifying Menu Groups And Items
Groups of menu items are set within the menus tag. Each group is defined by a menu
tag and comprises definitions of items in this group (menuitem tags), as well as
inclusions of submenus (initmenu tags).
<menus>
<menu name="SomeMenu" label="somemenu.label"
defaultitem="SomeMenu-Item1" tip="somemenu.tip">
<menuitem name="SomeMenu-Item1"
label="somemenu.edit.label"
URL="template1.html" resource=""
tip="somemenu.edit.tip"/>
<menuitem name="SomeMenu-Item2"
label="somemenu.add.label"
URL="template2.html" resource=""
tip="somemenu.add.tip"/>
. . .
<initmenu name="SomeSubmenu">
. . .
</menu>
. . .
<menu name="SomeSubmenu" label="somesubmenu.label"
defaultitem="SomeSubmenu-Item1" tip="somesubmenu.tip">
<menuitem name="SomeSubmenu-Item1"
label="somesubmenu.item1.label"
URL="submenu_template1.html" resource=""
tip="somesubmenu.item1.tip"/>
. . .
Page 50

50 Menu Customization
</menu>
. . .
</menus>
These menu groups are grouped into different menu layouts defined below in
menu.xml within the interface container.
menu
Attributes of the menu tag:
name - the name of the group.
label - the mnemonic identifier of the text label for the menu group name displayed
in CP. This label is set in the menu.properties bundle, for example:
somemenu.label = Sample Menu Group
See more about interface text bundles (on page 60).
defaultitem - the name of the menu item that becomes active by default when the
menu group is opened; contains the menu item name (the name attribute of the
menu tag).
tip - the menu group tooltip label set in the menu.properties bundle. menuitem
Attributes of the menuitem tag:
name - the name of the item.
label - the menu item mnemonic identifier from the menu.properties bundle (see
explanation above for the label attribute of the menu tag).
URL - the template file the item refers to, the pathname is relative to each design
directory in the template directory. Read more in Understanding Templates (on
page 11) for template directory structure.
resource - the resource name that must exist in the account for this item to be shown
in the menu.
tip - the menu item tooltip label set in menu.properties.
initmenu
Attributes of the initmenu tag:
name - name of the menu group referred to the name attribute of the menu tag
described among other menus in the menus container.
According to menu.xml customization rules (on page 48), you can do the following
modifications in the structure of menu items and groups:
1. add/delete menu groups, items and submenus, and edit their attributes.
2. choose menu items to be activated by default when menu group is
opened in CP.
3. restructure the order of menu items within a group.
Page 51

Menu Customization 51
Configuring Individual Menu Layouts For Different
Hosting Plans
Each hosting plan in Parallels H-Sphere may have its own menu configuration set in
menu.xml after the description of menu groups. Plan menu structure is set by the
menudef tag within the interface container. For example:
<interface>
. . .
<menudef id="TestPlan">
<initmenu name="acct-pref"/>
<initmenu name="billing"/>
<initmenu name=""/>
<menuitem name="logout" label="logout.label"
URL="design/logout.html&action=logout" resource=""
tip="logout.tip"/>
</menudef>
. . .
</interface>
The menudef tags contain sets of menu groups (on page 48) and separate items in
order of their appearance in Parallels H-Sphere interface. The name attribute of
initmenu tags points to the name of the respective menu group defined above in
menu.xml in the menus container.
The value for the id attribute of the menudef tag (TestPlan in the example above) must
be the same as of the menuId parameter in the Plan Settings form (the Plans menu, the
Settings icon for the plan, in admin CP). Please refer to the Plan Settings document in
the Parallels H-Sphere Administrator Guide.
These are default menu identifiers for the standard Parallels H-Sphere plan types:
unix - Unix plan;
admin - Admin plan;
ttadmin - Trouble Ticket Admin plan;
bill - Billing plan;
reseller - Reseller plan;
winduz - Windows plan;
real - Real Server plan;
mysql - MySQL Only plan;
email_only - Mail Only plan;
vps - VPS plan.
To add your custom menu and assign it to a specific plan:
1. According to menu.xml customization rules (on page 48), add the new
menudef structure for the plan and fill it with menu groups and items
as shown in the above example:
Page 52

52 Menu Customization
<menudef id="custom_menuId">
...
</menudef>
2. In the admin control panel, in the plan's Settings form, set the menuId
custom value to custom_menuId (read the Plan Settings document in the
Parallels H-Sphere Administrator Guide for details.)
Assigning External Links to Menu Items
It is not possible to put a direct URL to the external page in the menu XML description.
The path in the URL attribute of the menuitem element is relative to design
subdirectories of the template directory (~cpanel/shiva/shiva-templates by
default) and will be searched by Parallels H-Sphere according to its template lookup
sequence (on page 11).
A solution is in creating a template (specially-formatted HTML document) redirecting to
an external URL.
Consider an example of menu customization where to a certain external page on logout
from admin CP.
We assume that menu.xml (on page 48) and the template (on page 10) created are
customized properly according to the respective customization rules.
Note: Alternatively, instead of creating a new logout_redirect.html template with an
external link, you may customize the standard logout.html template without
customizing menu.xml. The example below is given merely to illustrate menu.xml
customization.
1. In menu.xml, find the element corresponding to the admin plan:
<menudef id="admin">
This would mean we are going to change CP menu only for the admin user and the
change would not affect resellers and other plans.
2. Within this menudef element, find the line:
<menuitem name="logout" label="logout.label"
URL="design/logout.html&action=logout" resource=""
tip="logout.tip"/>
3. Change the URL attribute to the HTML file which would redirect to the
URL you want. It is preferable to place this file to the
~cpanel/shiva/shiva-templates/common/misc directory. In this
case, the URL attribute should be set as:
URL="misc/logout_redirect.html"
4. In the specified directory, create the redirecting HTML file. Parallels HSphere will search for it in
~cpanel/shiva/custom/templates/common/misc/logout_redi
rect.html.
The HTML redirecting document will be organized as follows:
Page 53

Menu Customization 53
<HTML>
<HEAD>
<meta HTTP-EQUIV="refresh" CONTENT="0;
URL=http://external_link">
</HEAD>
<BODY>
</BODY>
</HTML>
5. Restart Parallels H-Sphere (on page 136).
6. Refresh browser to see the changes. It is better to log out and in again.
Page 54

54 Menu Customization
Menu Design Customization
This document explains how to change the appearance of the navigation menu in the
Parallels H-Sphere control panel. You are expected to be familiar with the FreeMarker
technology and with Parallels H-Sphere templates (on page 11).
The template to be customized is ~cpanel/shiva/shiva-
templates/common/menu.fn. The instruction below is the regular way of template
customization. This customization can be also performed by means of Parallels HSphere packages (on page 112).
1. Login as the cpanel (on page 136) user from root.
2. Create the ~cpanel/shiva/custom directory if it doesn't exist yet.
3. Inside the custom/ directory, create the following directories if they
aren't there:
templates/
images/
bundles/
Note: If the images/ directory is created, there must be a symlink to this directory
from the Apache document root (which is the default template directory
~cpanel/shiva/shiva-templates); if not, users should place their images into
the IMAGES directory.
4. Put your images into the images/ directory and your interface text files
(on page 60) (bundles) into the bundles/ directory.
5. In the templates/ directory, create the common/ directory if it doesn't
exist and copy the menu.fn file from the shiva-templates/common/
directory into that directory.
6. Make changes in the custom menu.fn. The following Freemarker
functions are used in menu.fn to draw the navigation menu:
<function draw_menu(activeItem)>;
<function draw_sub(item, level)>;
<function draw_item(item, level)>;
<function draw_blank_menu()>.
These functions draw different elements of the control panel menu. If you change
them, please note that the HTML tags you add must be well ordered and valid. For
example, you have to make sure that the number of columns in the menu table,
which is set in draw_menu, is the same in all these functions.
1. The draw_menu function calls the other mentioned functions to draw the menu
and also defines the menu table as follows:
<TABLE WIDTH="100%" BORDER="0" CELLPADDING="0"
CELLSPACING="0">.
Page 55

Menu Customization 55
2. The draw_sub function draws the menu item which is the node for the submenu
(group name):
The menu_was_drawn variable is used to figure out how to show the next item.
3. The draw_item function draws the menu item which does not have a
submenu. It may be a second-level item:
Or, it could be even a first-level item that does not fall into any menu group:
Page 56

56 Menu Customization
4. The draw_sub_items function checks the type of the menu item and calls the
function draw_item or draw_sub.
If you don't want to use a standard Parallels H-Sphere image, change the
following calls:
<call draw_image("standard-image-mnemonic-id")>
with:
<IMG SRC="path_to_your_image/replacing_image" WIDTH="xx"
HEIGHT="yy"></TD>
where path_to_your_image could be set either as the /IMAGES URL relative to the
Apache document root, or as any absolute URL to your image, like
http://www.yourdomain.com/replacing/image/dir/.
7. Open the ~cpanel/shiva/psoft_config/hsphere.properties
file, uncomment and correct (if necessary) the following lines:
USER_TEMPLATE_PATH =
/hsphere/local/home/cpanel/shiva/custom/templates/
CUSTOM_MENU_BUNDLE = custom.bundles.menu
See more about template customization (on page 10) and menu.xml customization
(on page 48).
Note: Don't initialize the variables you are not using!
8. Login as root and restart Parallels H-Sphere (on page 136).
Page 57

This chapter explains how to add and modify texts in the Parallels H-Sphere Control
In this chapter:
Understanding Interface Text (Language) Bundles ............................................ 58
Interface Text Customization ............................................................................. 60
Language Bundle Compiler ............................................................................... 62
C H A P T E R 6
Interface Text Customization (Language
Bundles)
Panel interface.
Page 58

58 Interface Text Customization (Language Bundles)
Understanding Interface Text (Language)
Bundles
Interface texts are defined in key=value sets collected in separate files for each language
and encoding, where key is a mnemonic identifier for the text, and value is the text itself
that is different for each language and encoding. Such files are called resource
bundles, or language bundles, or simply bundles. Parallels H-Sphere templates (on
page 11) include mnemonic identifiers and thus generate language-independent
dynamic content.
We distinguish the following types of language bundles:
Default bundles - bundles installed with Parallels H-Sphere and containing default
interface text values.
Custom bundles - bundles created by H-Sphere customers that adding new interface
texts or overriding the default ones.
Internal bundles - resulting bundles whereto default and custom bundles are merged
after language bundle compilation.
Default bundles
Default bundle location is set in
~cpanel/shiva/psoft_config/hsphere.properties:
TEMPLATE_BUNDLE=psoft.hsphere.lang.hsphere_lang
It means that default bundles are set in the following files of the
~cpanel/shiva/psoft/hsphere/lang/ directory.
hsphere_lang.properties - default English bundle.
Important: Starting with Parallels H-Sphere 3.0 RC 1, menu.properties and
messages.properties with navigation menu and system email notification texts
become deprecated, and all labels are collected in a single
hsphere_lang.properties for each language!
hsphere_lang_<language>_<COUNTRY>_<ENCODING>.properties - default language
bundles in other languages.
Please refer to the tables of canonical identifiers:
Language: http://www.ics.uci.edu/pub/ietf/http/related/iso639.txt
Countries: http://www.chemie.fu-berlin.de/diverse/doc/ISO_3166.html
Encodings (charsets or variants):
http://java.sun.com/j2se/1.4.2/docs/guide/intl/encoding.doc.html
Note: For CP server under FreeBSD, use canonical encodings for Java 1.3:
http://java.sun.com/j2se/1.3/docs/guide/intl/encoding.doc.html.
All source bundles, in whatever encoding they were created, are compiled into Unicode
(UTF-8). Therefore, in most cases <ENCODING> and <COUNTRY> identifiers may be
omitted in bundle names according to the following rules:
Page 59

Interface Text Customization (Language Bundles) 59
Some languages have different character sets, e.g., standard Chinese and
simplified Chinese. In such case you cannot omit the encoding in bundle names.
Standard Chinese (Big5 encoding) bundle will look like:
hsphere_lang_zh_CN_Big5.properties
Simplified Chinese (EUC_CN encoding) bundle will be:
hsphere_lang_zh_CN_EUC_CN.properties
Some languages have variations in different countries, e.g., Portuguese (Portugal) and
Portuguese (Brazil). Then, you specify language and country for each case:
Portuguese (Portugal) bundle will be: hsphere_lang_pt_PT.properties
Portuguese (Brazil) bundle will be: hsphere_lang_pt_BR.properties
If you know for sure the language won't be used for other countries, you may omit
the country identifier.
For example, for Russian: hsphere_lang_ru.properties
Important: In any case, you must fully specify the correct language, country and
encoding identifiers in the LANG_LIST parameter in hsphere.properties or in
package properties file for Parallels H-Sphere packages (on page 112). In particular,
Parallels H-Sphere should know in what encoding the bundles were created to be able
to convert them to Unicode.
LANG_LIST contains definitions for the languages, delimited with whitespace, each
including the following components:
<language>_<COUNTRY>_<ENCODING>|<HTML_ENCODING>:misc.langs.<LABEL>lang
Here:
<HTML_ENCODING> is HTML-compliant encoding (parameter deprecated since 2.4
and is not really used but must still be specified for the sake of compatibility);
misc.langs.<LABEL>lang is the label for the language name in Parallels H-Sphere
interface. These labels are set in the bundles in the following way:
misc.langs.rulang = Russian
Custom Bundles
Default bundle directory is being rewritten with each Parallels H-Sphere update. So, if
you make changes in the default bundles or add new bundles to the default bundle
directory, you will lose all such modifications.
Instead, you use custom bundles to modify and expand default bundles.
Custom bundle location is set in hsphere.properties in the
CUSTOM_TEMPLATE_BUNDLE parameter. For example:
CUSTOM_TEMPLATE_BUNDLE=custom.bundles.hsphere_lang
It means that custom bundles will be searched by Parallels H-Sphere in the
~cpanel/shiva/custom/bundles/ custom bundle directory.
Page 60

60 Interface Text Customization (Language Bundles)
Custom bundle files are of the same filename format as in the default bundle directory.
To customize texts in the default bundles, files with the same names are created in the
custom bundle directory; they contain only labels to be added or to override the default
texts. New language bundles are also created in the custom bundle directory, and you
don't worry they'll be lost with the next updates.
See the following documents for customization instructions:
Interface Text Customization (on page 60)
Adding New Language To Parallels H-Sphere (on page 65)
It is also possible to build installable packages with custom bundles.
Internal Bundles
Default and custom bundles, along with bundles coming with Parallels H-Sphere
packages (on page 112), are compiled and merged into the so-called internal bundles
located in the ~cpanel/shiva/languages directory. It is there that Parallels HSphere takes bundles from.
Internal bundles location can be changed. You either set
INT_LANGBUNDLE_DIRECTORY to override the whole internal bundles directory
(~cpanel/languages/), or set INT_TEMPLATE_BUNDLE to override the respective
internal bundle.
Please refer to Compiling Language Bundles (on page 62) for details.
Bundle Lookup Sequence
Parallels H-Sphere searches for text labels in language bundles in the following order:
The search is made in the internal bundle directory (~cpanel/shiva/languages by
default):
1. hsphere_lang_<language>_<COUNTRY>_<ENCODING>.properties
2. hsphere_lang_<language>_<COUNTRY>.properties
3. hsphere_lang_<language>.properties
4. hsphere_lang.properties (default English text)
If no appropriate labels are found, the user will get a corresponding notification and a
possibility to send a trouble ticket.
Note: No different encodings for languages are present in internal bundles. Language
bundle compiler (on page 62) converts all regional data in default and custom language
bundles into UTF-8 format.
Interface Text Customization
Page 61

Interface Text Customization (Language Bundles) 61
This document dwells on interface text customization methods. It implies you are
familiar with the concept of language bundles (on page 58).
These are the following alternative ways to customize texts:
With packages
Packages are helpful when you want to add a new language (on page 119) to Parallels
H-Sphere. In this case, you build new language bundles into a portable package easily
installed on other Parallels H- Sphere clusters (on page 132).
Compiling bundles
This scheme of customizing bundles enables you to apply modifications by merging
custom bundles with default bundles without building and installing packages. Read
more about compiling bundles (on page 62).
1. Log into CP server as cpanel (on page 136) user.
2. All affected files must have cpanel:cpanel ownership.
3. Create custom bundle directory, e.g.,
~cpanel/shiva/custom/bundles if it is not created yet.
4. Set custom bundle location in
~cpanel/shiva/psoft/hsphere/lang/hsphere_lang.properti
es (if it's not set):
CUSTOM_TEMPLATE_BUNDLE=custom.bundles.hsphere_lang
5. Find the string you want to modify among default or custom bundles.
Create the corresponding custom bundle file if it doesn't exist to place
modified string there.
6. For example, you are going to change the label Shell Access to SSH
Access. It is set in the
~cpanel/shiva/psoft/hsphere/lang/hsphere_lang.properti
es file. Create the file
~cpanel/shiva/custom/bundles/hsphere_lang.properties if
it isn't there already.
7. Copy the line with the identifier and the value you want to change into
the custom bundle and change its value the way you want. You should
use two single quotes (apostrophes) instead of one in labels containing
Freemarker variables in curly brackets, such as {0}. For example:
search.view_invoice = View Client's Invoice
but:
billing.del_no = No, I don''t want to delete {0}
8. Run language bundle compiler (on page 62) to implement
customization:
java psoft.hsphere.LangBundlesCompiler
Page 62

62 Interface Text Customization (Language Bundles)
Language Bundle Compiler
Language bundles (on page 58) - default, custom, and those installed with Parallels HSphere packages (on page 132) - are compiled and merged into the resulting internal
bundles located in the internal bundle directory, ~cpanel/shiva/languages by
default. Instead of parsing default and custom bundles, Parallels H-Sphere takes
interface texts directly from this directory.
Merging language bundles is performed by a Java tool called language bundle compiler:
java psoft.hsphere.LangBundlesCompiler
Language bundle compiler works in the following way:
1. Bundle compiler parses the LANG_LIST parameters set in:
package properties files for all packages installed in Parallels H-Sphere: usually,
~cpanel/shiva/packages/PackageName/default.properties, where
PackageName is the name of the package without its version and build number;
the default ~cpanel/shiva/psoft_config/hsphere.properties file;
LANG_LIST contains definitions for the languages, delimited with whitespace,
each including the following components:
<language>_<COUNTRY>_<ENCODING>|<HTML_ENCODING>:misc.langs.<LABEL>la
ng
Here:
<language>, <COUNTRY>, and <ENCODING> are Java locale identifiers. For detailed
description and the tables of canonical identifiers, please refer to Understanding
Language Bundles) (on page 58). <ENCODING> is an encoding in which bundles
were created and saved,
<HTML_ENCODING> is the HTML-compliant encoding (this parameter is
deprecated since 2.4 and is not really used but must still be specified for the
sake of compatibility);
misc.langs.<LABEL>lang is a label for language name set in language bundles.
1. According to Java locale identifiers set in the LANG_LIST parameters,
bundle compiler looks for the bundles:
hsphere_lang.properties
hsphere_lang_<language>.properties
hsphere_lang_<language>_<COUNTRY>.properties
hsphere_lang_<language>_<COUNTRY>_<ENCODING>.properties
in the following directories, in order of priority:
installed package bundles directory: ~cpanel/shiva/packages/PackageName/
Package bundle location is set in the package properties file
~cpanel/shiva/packages/PackageName/default.properties:
Page 63

Interface Text Customization (Language Bundles) 63
TEMPLATE_BUNDLE=packages.PackageName.hsphere_lang
custom bundles directory: ~cpanel/shiva/custom/bundles/
Custom bundle location is set in
~cpanel/shiva/psoft_config/hsphere.properties:
CUSTOM_TEMPLATE_BUNDLE=custom.bundles.hsphere_lang
default bundles directory: ~cpanel/shiva/psoft/hsphere/lang/
Default bundle location is set in hsphere.properties:
TEMPLATE_BUNDLE=psoft.hsphere.lang.hsphere_lang
See Introduction To Bundles (on page 58) for details.
2. Bundle compiler merges default, custom and package bundles with the
same filenames and save the resulting bundles in UTF-8 format into the
internal bundle directory ~cpanel/shiva/languages/.
See Bundle Lookup Sequence (on page 58).
Notes:
If the ~cpanel/shiva/languages directory is not found, language bundle
compiler will be launched automatically and will create this directory with the
resulting bundles.
To override the default internal bundle directory, set the
INT_LANGBUNDLE_DIRECTORY parameter in hsphere.properties. Or, set
INT_TEMPLATE_BUNDLE to override the location of the respective internal bundles.
When a text label is set several times, e.g., in a package bundle and in a
custom/default bundle, package bundle takes precedence and override labels set in
custom or default bundles. The order of priority is: package bundles, custom
bundles, default bundles.
Depending on bundle encodings specified in the LANG_LIST parameters, bundle
compiler converts all regional language bundles into UTF-8. This is done due to the
Java restrictions in relation to regional encodings: Java can work only with ISO-
8859-1 and Unicode symbols.
Encoding conversion hints:
To convert regional symbols into Unicode, you can use the native2ascii JDK tool:
http://java.sun.com/j2se/1.4.2/docs/tooldocs/windows/native2ascii.html.
To convert a language bundle file into Unicode, you can also run make in the
~cpanel/shiva/psoft/hsphere/lang directory.
Page 64

This chapter dwells on adding new Parallels H-Sphere localization.
In this chapter:
Adding New Languages To Parallels H-Sphere ................................................. 65
Changing Language of Context Help ................................................................. 68
Updating Translation of Parallels H-Sphere Interface ........................................ 69
C H A P T E R 7
Localization
Page 65

Localization 65
Adding New Languages To Parallels HSphere
This document introduces methods of adding languages to Parallels H-Sphere
interface. We presume you are familiar with the concept of language bundles (on page
58).
Translating Language Bundles
Note: Parallels H-Sphere developers are not responsible for adding languages to
Parallels H-Sphere interface and updating translation (on page 69) of the default
English bundles. It is entirely up to Parallels H-Sphere owners. All language bundle
translations included into Parallels H-Sphere interface or localization packages are
kindly provided by our customers.
Default Parallels H-Sphere interface language is English. The default English interface
labels are located in the ~cpanel/shiva/psoft/hsphere/lang directory in the
hsphere_lang.properties file.
Note: Since H-Sphere 3.0, menu.properties and messages.properties with
menu labels and system e-mail notification texts are collected in a single
hsphere_lang.properties file.
You can also download default (English) language bundles from our site:
http://hsphere.parallels.com/downloads/English.zip
Translate these files and save new language bundles to a separate location as:
hsphere_lang_<language>_<COUNTRY>_<ENCODING>.properties
here, <language>, <COUNTRY>, and <ENCODING> are Java locale identifiers. For detailed
description and the tables of canonical identifiers, please refer to Understanding
Language Bundles (on page 58).
For example, for Portuguese (Brazil) it will be hsphere_lang_pt_BR.properties.
Please take into account the following considerations on translating the bundles:
Using quotes in the text: If a label or message has a Freemarker variable in curly
brackets, e.g. {0}, single quotes and apostrophes (') must be replaced with two
single quotes (''). For example, in English we write:
search.view_invoice = View Client's Invoice
but:
billing.del_no = No, I don''t want to delete {0}
Updating the translation: With upcoming versions of Parallels H-Sphere, default
English texts may be changed and new labels may be added, so you need to
update translation (on page 69) of your language bundles accordingly.
Page 66

66 Localization
Encoding: Translation can be performed in any encoding. All language bundles are
converted into UTF-8 during their compilation (on page 65).
Right-to-left languages (Arabic, Hebrew, etc.): Parallels H-Sphere supports right to left
languages, such as Arabic or Hebrew. On this step, you need to specify whether the
target language is "left to right" or "right to left". In the file
hsphere_lang_<LANGUAGE_CODE>.properties, add the following lines:
######################################################
# "text_direction" is a special label used to define
# which text direction is appropriate for the current
# language bundle.
# There are 2 possible values:
# - "ltr" means "Left to right";
# - "rtl" means "Right to left".
text_direction = ltr
Adding New Language Bundles Into Parallels H-Sphere
Parallels H-Sphere provides the following alternative ways of adding new languages:
With packages
Parallels H-Sphere provides an easy way to add languages by installing packages (on
page 132) (.hsp files) to the system. You may install ready-to-use and portable
packages to any of your Parallels H-Sphere control panels or build language packages
yourself (on page 119).
Compiling bundles
Instead of building a package, you create new language bundles in custom bundle
directory and run language bundle compiler (on page 62).
1. Login as the cpanel (on page 136) user. All affected files must have
cpanel:cpanel ownership.
2. Create custom bundle directory, e.g., ~/shiva/custom/bundles if it
is not created yet.
3. Set custom bundle location in
~cpanel/shiva/psoft_config/hsphere.properties (if it's not
set):
CUSTOM_TEMPLATE_BUNDLE=custom.bundles.hsphere_lang
4. Create the files hsphere_lang.properties, menu.properties, and
messages.properties in the ~/shiva/custom/bundles directory if
they are not there. Even if you don't need to modify them, they are
important for correct bundle compilation:
cd ~cpanel/shiva/custom/bundles
touch hsphere_lang.properties
Page 67

Localization 67
5. Copy the translated language bundles (on page 65) to
~cpanel/shiva/custom/bundles. For example, for Portuguese
(Brazil):
cd ~cpanel/shiva/custom/bundles
cp /some/location/hsphere_lang_pt_BR.properties .
6. To ensure that the new language is available to choose from the
interface, add a label for your language (ID and definition) into the
~cpanel/shiva/custom/bundles/hsphere_lang.properties
file, following the pattern:
misc.langs.<LABEL>lang = <LANGUAGE> (<COUNTRY>)
For example, for Portuguese (Brazil):
misc.langs.ptlang = Portugu\u00eas (Brasil)
Notes:
1. Default (English) language bundles are written in the ISO-8859-1 encoding.
Special Latin and non-Latin characters must be presented in Unicode. Use the
native2ascii JDK tool to convert these symbols into Unicode characters (\uxxxx
notations, like "\u00ea" instead of "e" in the example above).
2. If the original language name significantly differs from that in English, (especially
for non-Latin alphabets), we recommend adding its English transcription, e.g.:
misc.langs.de_atlang = Deutch (\u00d6sterreich) - German
(Austria)
7. Add new language to the list of languages available in Parallels HSphere. For this, add the language and encoding of the translated files
to the LANG_LIST parameter in
~cpanel/shiva/psoft_config/hsphere.properties. For
example:
LANG_LIST = en_US_ISO8859_1|ISO-8859-1:misc.langs.englang
pt_BR_ISO-8859-15|ISO-8859-15:misc.langs.ptlang
This line contains definitions for the languages that come with Parallels H-Sphere,
delimited with whitespace, each including the following components:
<language>_<COUNTRY>_<ENCODING>|<HTML_ENCODING>:misc.langs.<LABEL>la
ng
Here, misc.langs.<LABEL>lang; is the label with the language name, which is set in
the previous step.
8. In hsphere.properties set system locale and encoding to custom
values. The locale should correspond to the Java ISO standards, the
encoding must correspond to the browser standards. For example,
settings for the Portuguese (Brazil) language will look as follows:
# Override system locale
LOCALE = pt_BR
# Encoding
ENCODING = UTF-8
The LOCALE value will affect not only the interface language, but also the currency,
date, time, days of the week and other locale settings.
Page 68

68 Localization
9. Run language bundle compiler (on page 62) to implement new bundles
into Parallels H-Sphere:
java psoft.hsphere.LangBundlesCompiler
10. Restart Parallels H-Sphere (on page 136).
Changing Language of Context Help
Online help texts are hard-coded in special Parallels H-Sphere templates (on page 11)
with .oh extension located in the ~cpanel/shiva/shiva-
templates/common/online_help/ directory.
Carefully follow the procedure outlined in the Customizing Templates (on page 10)
document, with the following considerations specific to context help templates:
Copy the online help files from the ~cpanel/shiva/shiva-
templates/common/online_help/ folder to the custom template directory
~cpanel/shiva/custom/templates/common/online_help/, to files whose
names contain identifiers for target language, country and encoding, in the format
similar to that of language bundles (on page 58):
cp ~cpanel/shiva/shivatemplates/common/online_help/some/dir/helpfile.oh
~cpanel/shiva/custom/templates/common/online_help/some/dir/helpfile_<
LANGUAGE>_<COUNTRY>.oh
Consider the following example for the Russian language:
cp ~cpanel/shiva/shivatemplates/common/online_help/user/b_invoice/01balance.oh
~cpanel/shiva/custom/templates/common/online_help/user/b_invo
ice/01balance_ru_RU.oh
Important: Parallels H-Sphere uses the UTF-8 charset for all languages. Therefore,
text directly inserted into templates (i.e., not by means of text labels defined in
language bundles (on page 58)) must be in the UTF-8 encoding. Other regional
encodings (for example, Windows-1251 for Russian) must not be used anymore in
context help templates, and texts there must be converted into UTF-8.
Translate the heading and the body of each help file in the corresponding encoding.
Page 69

Localization 69
Updating Translation of Parallels HSphere Interface
With every update of Parallels H-Sphere, your translation of the control panel interface
becomes outdated, and you need to update translation in language bundles (on page
58).
Note: Parallels H-Sphere developers are not responsible for adding languages to
Parallels H-Sphere interface and updating translation of the default English bundles. It
is entirely up to Parallels H-Sphere owners. All language bundle translations included
into Parallels H-Sphere interface are kindly provided by our customers.
Parallels H-Sphere comes with a script that finds differences between two files: the new
English file and its old translated version. This script, diff_labels.pl, is located in
the ~cpanel/shiva/psoft/hsphere/lang/ default bundle directory.
To compare these 2 files with a new English language bungle with outdat, do the
following:
1. Log into your CP server as the cpanel (on page 136) user.
2. Go to the default bundle directory:
cd shiva/psoft/hsphere/lang/
3. Execute the following command:
./diff_labels.pl hsphere_lang.properties
/path/to/hsphere_lang_<LOCALE>.properties >
/path/to/hsphere_lang_<LOCALE>.diff
./diff_labels.pl menu.properties /path/to/menu_<LOCALE>.properties
> menu_<LOCALE>.diff
./diff_labels.pl messages.properties
/path/to/messages_<LOCALE>.properties >
/path/to/messages_<LOCALE>.diff
Here, /path/to/ is a path to language bundles in another language (they may not be
located in the default bundle directory), <LOCALE> contains language, country and
encoding identifier in accordance with language bundle filename format (on page
58).
The tool will write all the differences between these updated default language
bundles and their previous translation into the corresponding .diff files.
4. Customize your language bundles (on page 60) by adding translated
labels from the resulting .diff files.
Page 70

The following Parallels H-Sphere components are configured by means of XML files
Component
Property
Filename
CP Skins
(Designs)
DESIGN_SCHEME_CONFI
G
design_config.xml
CP Menu
MENU_CONFIG
menu.xml
CP Crons
CRON_CONFIG
cron_config.xml
Online (Context)
Help
HELP_CONFIG,
ONLINE_HELP_CONFIG
help.xml
help_url.xml
Promotion
Validators And
Calculators
PROMO_CONFIG
promotion/xml/promotions
.xml
Merchant
Gateways
MERCHANT_GATEWAYS_C
ONF
merchants.xml
Domain Registrars
REGISTRAR_CONF
registrar.xml
E-Mail
Notifications
USER_EMAILS
user_emails.xml
In this chapter:
Merging XML Configuration Files ...................................................................... 71
XML Manager .................................................................................................... 73
Creating Plan Wizards with XML ....................................................................... 77
Adding Custom CP Cron Jobs ........................................................................... 84
Adding Custom Promotion Validators and Calculators....................................... 88
Adding Custom MS Exchange Plans into Parallels H-Sphere ............................ 91
Customizing E-Mail Notification List................................................................... 94
C H A P T E R 8
XML Customization
located in the ~cpanel/shiva/psoft/hsphere/ directory:
Custom XML files can be merged with default XML files by means of XML merger (on
page 73). Instead of moving and changing a default XML file, a small custom file is
created containing only the changes to be implemented, and its location is specified in
~cpanel/shiva/psoft_config/hsphere.properties in the parameter with the
"CUSTOM_" prefix added to the default parameter name. For example:
MENU_CONFIG = /hsphere/local/home/cpanel/shiva/psoft/hsphere/menu.xml
CUSTOM_MENU_CONFIG =
/hsphere/local/home/cpanel/shiva/custom/xml/menu.xml
Page 71

XML Customization 71
Merging XML Configuration Files
To customize XML configuration files:
1. Login as the cpanel (on page 136) user.
2. Create a directory for custom XML configuration files if it does not exist,
for example, ~cpanel/custom/xml.
3. In the custom directory, create a custom XML file if it hasn't been
created yet. Here, you add only those tags that need to be added or
modified with relation to the default XML file. Please follow the rules for
merging XMLs.
For example, if you need just to add a new item to the menu, the custom menu.xml
file will look like:
<?xml version="1.0"?>
<!DOCTYPE config [
<!ELEMENT config (menus,interface)>
<!ELEMENT menus (menu+)>
<!ELEMENT menu (menuitem*,initmenu*)>
<!ELEMENT menuitem (#PCDATA)>
<!ELEMENT initmenu (#PCDATA)>
<!ELEMENT interface (menudef+)>
<!ELEMENT menudef (initmenu*,menuitem*)>
<!ATTLIST menudef id CDATA #REQUIRED>
<!ATTLIST menu name CDATA #REQUIRED>
<!ATTLIST menu label CDATA #REQUIRED>
<!ATTLIST menu platform_type CDATA "">
<!ATTLIST menu resource CDATA "">
<!ATTLIST menu defaultitem CDATA #REQUIRED>
<!ATTLIST menu tip CDATA "">
<!ATTLIST menuitem name CDATA #REQUIRED>
<!ATTLIST menuitem label CDATA #REQUIRED>
<!ATTLIST menuitem URL CDATA #REQUIRED>
<!ATTLIST menuitem platform_type CDATA "">
<!ATTLIST menuitem resource CDATA "">
<!ATTLIST menuitem tip CDATA "">
<!ATTLIST menuitem check_type CDATA "1">
<!ATTLIST menuitem new_window CDATA "0">
<!ATTLIST initmenu name CDATA #REQUIRED>
]>
<config>
<menus>
<menu name="info" label="info.label" defaultitem="info-plans"
tip="info.tip">
<menuitem name="new_item" label="NEW PAGE"
URL="/newpage.html" resource="" tip="Positive Software
Corporation"/>
</menu>
</menus>
Page 72

72 XML Customization
</config>
Important: In the custom XML file to be merged with the default one, you must
define the same DTD structure!
4. In ~cpanel/shiva/psoft_config/hsphere.properties, add the
location for the custom XML file, for instance:
CUSTOM_MENU_CONFIG =
/hsphere/local/home/cpanel/shiva/custom/xml/menu.xml
5. Login as root (log off from cpanel) and restart Parallels H-Sphere (on
page 136).
Page 73

XML Customization 73
XML Manager
XML Manager serves for loading custom XMLs into Parallels H-Sphere and merging
them with the standard, or default, Parallels H-Sphere XML configuration files. This
enables to extend Parallels H-Sphere by adding new elements, like custom menu
items, without changing the standard XML configuration files. This mechanism makes
customization more flexible to the Parallels H-Sphere updates. Now you don't need to
apply custom settings each time the standard configuration files are rewritten by new
releases.
XML Manager Implementation
XMLManager is the subclass of the psoft.hsphere.util class of Parallels H-Sphere
utilities. XMLManager returns either Document object or TemplateXML object.
XMLManager searches for custom XML configuration files, by the key, not by the
filename:
1. in hsphere.properties;
2. in the predefined values (see
psoft.hsphere.util.PackageConfigurator).
For example, the menu XML configuration file is set in hsphere.properties as follows:
MENU_CONFIG =
/hsphere/local/home/cpanel/shiva/psoft/hsphere/menu.xml
XMLManager looks for the MENU_CONFIG key instead of the full pathname
(/hsphere/local/home/cpanel/shiva/psoft/hsphere/menu.xml).
XMLManager may also process the group of XML files. It is currently implemented for
XML plan wizards (on page 77), where the key is compounded from the corresponding
path + the name of XML file, like:
XMLManager.getXML(PLAN_WIZARDS_DIR, "unix.xml");
Example:
Consider an example of merging menu default and custom menu XMLs. For details,
please refer to Menu Customization in Customization Guide.
1. Log in as the cpanel user.
2. Create custom XML file and specify its location as
CUSTOM_XML_CONFIG in hsphere.properties (see XML Merge
Customization in Customization Guide for details):
MENU_CONFIG =
/hsphere/local/home/cpanel/shiva/psoft/hsphere/menu.xml
CUSTOM_MENU_CONFIG =
/hsphere/local/home/cpanel/shiva/custom/xml/test1_menu.xml
Page 74

74 XML Customization
3. To add a custom menu item,
~cpanel/shiva/custom/xml/test1_menu.xml should look like
this:
<?xml version="1.0"?>
<!DOCTYPE config [
<!ELEMENT config (menus,interface)>
<!ELEMENT menus (menu+)>
<!ELEMENT menu (menuitem*,initmenu*)>
<!ELEMENT menuitem (#PCDATA)>
<!ELEMENT initmenu (#PCDATA)>
<!ELEMENT interface (menudef+)>
<!ELEMENT menudef (initmenu*,menuitem*)>
<!ATTLIST menudef id CDATA #REQUIRED>
<!ATTLIST menu name CDATA #REQUIRED>
<!ATTLIST menu label CDATA #REQUIRED>
<!ATTLIST menu platform_type CDATA "">
<!ATTLIST menu resource CDATA "">
<!ATTLIST menu defaultitem CDATA #REQUIRED>
<!ATTLIST menu tip CDATA "">
<!ATTLIST menuitem name CDATA #REQUIRED>
<!ATTLIST menuitem label CDATA #REQUIRED>
<!ATTLIST menuitem URL CDATA #REQUIRED>
<!ATTLIST menuitem platform_type CDATA "">
<!ATTLIST menuitem resource CDATA "">
<!ATTLIST menuitem tip CDATA "">
<!ATTLIST menuitem check_type CDATA "1">
<!ATTLIST menuitem new_window CDATA "0">
<!ATTLIST initmenu name CDATA #REQUIRED>
]>
<config>
<menus>
<menu name="info" label="info.label" defaultitem="info-plans"
tip="info.tip">
<menuitem name="xyz-wow" label="NEW PAGE"
URL="/newpage.html" resource="" tip="Positive Software
Corporation"/>
</menu>
</menus>
</config>
Note: In the custom XML file to be merged with the default one, you must define the
same DTD structure!
Also note that we don't copy the whole structure of the standard menu.xml file. The
custom menu will be merged with the standard menu in the following way (the NEW
PAGE item in the INFO menu):
Page 75

XML Customization 75
4. To check if the merge is performed correctly, run the DOMLoader utility
and check out.xml afterwards:
java psoft.util.xml.DOMLoader
/hsphere/local/home/cpanel/shiva/psoft/hsphere/menu.xml
/hsphere/local/home/cpanel/shiva/custom/xml/test1_menu.x
ml > out.xml
With DOMLoader, you may merge more than two XML files:
java psoft.util.xml.DOMLoader file1.xml file2.xml ...
fileN.xml > out.xml
XML Merge Processing Instructions
In your custom XML configuration files you should use the processing instructions to
change or remove certain fragments in the default configuration file, instead of merging
these fragments directly.
There are 4 major processing instructions:
<?change?>
<?remove?>
<?merge?>
<?changeattr?>
The merge instruction is used by default and can be omitted.
The <?changeattr?> instruction is added to customize tag attributes in XML
documents.
In order to change, remove, or merge an element, you need to create a well formed
XML document, which describes the location of this element relative to other elements.
Leave out the elements you don't want to change/remove/merge. Put the instruction
before the XML element that needs to be changed/removed/merged.
Examples:
1) To remove a certain (tt) item from the the default menu configuration:
<?xml version="1.0"?>
<!DOCTYPE config [
<!ELEMENT config (menus,interface)>
<!ELEMENT menus (menu+)>
<!ELEMENT menu (menuitem*,initmenu*)>
<!ELEMENT menuitem (#PCDATA)>
<!ELEMENT initmenu (#PCDATA)>
<!ELEMENT interface (menudef+)>
<!ELEMENT menudef (initmenu*,menuitem*)>
<!ATTLIST menudef id CDATA #REQUIRED>
<!ATTLIST menu name CDATA #REQUIRED>
<!ATTLIST menu label CDATA #REQUIRED>
<!ATTLIST menu platform_type CDATA "">
<!ATTLIST menu resource CDATA "">
Page 76

76 XML Customization
<!ATTLIST menu defaultitem CDATA #REQUIRED>
<!ATTLIST menu tip CDATA "">
<!ATTLIST menuitem name CDATA #REQUIRED>
<!ATTLIST menuitem label CDATA #REQUIRED>
<!ATTLIST menuitem URL CDATA #REQUIRED>
<!ATTLIST menuitem platform_type CDATA "">
<!ATTLIST menuitem resource CDATA "">
<!ATTLIST menuitem tip CDATA "">
<!ATTLIST menuitem check_type CDATA "1">
<!ATTLIST menuitem new_window CDATA "0">
<!ATTLIST initmenu name CDATA #REQUIRED>
]>
<config>
<interface>
<menudef id="unix">
<?remove?>
<initmenu name="tt"/>
</menudef>
</interface>
</config>
2) To replace the whole icon section to the one with only 3 icons:
<?change?>
<icons>
<icon id="changelanguage"
url_param="template_name=misc/langs.html"
rtype="" platform="" label="nomenu.language" tip=""
help=""/>
<icon id="changedesign"
url_param="template_name=misc/user_account_lf.html"
rtype="" platform=""
label="nomenu.lookfeel.alt" tip="" help=""/>
<icon id="cgiwiz_formmail"
url_param="template_name=quick/choice_script.html&sname=formm
ail"
rtype="hosting" platform="unix"
label="quick.quickview.cgiwiz_formmail"
tip="quick.quickview.cgiwiz_formmail"
help=""/>
</icons>
3) To remove a certain (cgiwiz_formmail) icon from the default configuration:
<icons>
<icon id="changelanguage"
url_param="template_name=misc/langs.html"
rtype="" platform="" label="nomenu.language" tip=""
help=""/>
<icon id="changedesign"
url_param="template_name=misc/user_account_lf.html"
rtype="" platform=""
label="nomenu.lookfeel.alt" tip="" help=""/>
<?remove?>
<icon id="cgiwiz_formmail"
Page 77

XML Customization 77
url_param="template_name=quick/choice_script.html&sname=formm
ail"
rtype="hosting" platform="unix"
label="quick.quickview.cgiwiz_formmail"
tip="quick.quickview.cgiwiz_formmail"
help=""/>
</icons>
4) To change and add tag's attributes:
<?changeattr newtag="xyz" tip="My Tip"?>
<icon id="changelanguage"
url_param="template_name=misc/langs.html"
rtype="" platform="" label="nomenu.language" tip=""
help=""/>
The resulting element will look like:
<icon id="changelanguage"
url_param="template_name=misc/langs.html"
rtype="" platform="" label="nomenu.language" tip="My
Tip" help="" newtag="xyz"/>
Creating Plan Wizards with XML
This document explains how to customize plan wizards by modifying plan wizard XML
configuration files.
Introduction
Parallels H-Sphere supports XML-based plan wizards. Wizards are located in the
~cpanel/shiva/psoft/hsphere/plan/wizard/xml directory. Location can be
altered by setting PLAN_WIZARDS_DIR in
~cpanel/shiva/psoft_config/hsphere.properties to a target directory.
PLAN_WIZARDS_DIR =
/hsphere/local/home/cpanel/shiva/psoft/hsphere/plan/wizard/xm
l
The list of wizards is defined in the plan_wizards.xml file, which is by default
located in the plan wizards directory. The file's name and location is set in the
PLAN_WIZARDS parameter in hsphere.properties (the full path to the file is required):
PLAN_WIZARDS =
/hsphere/local/home/cpanel/shiva/psoft/hsphere/plan/wizard/xm
l/plan_wizards.xml
Important: When you customize plan wizard XMLs make sure the
PLAN_WIZARDS_DIR and PLAN_WIZARDS parameters are set in
hsphere.properties.
Page 78

78 XML Customization
You can also customize plan wizard XML files by means of Parallels H-Sphere
packages (on page 112).
Adding a New Wizard to the List of Plan Wizards
To add a new wizard, add the following line to the list of wizards in
plan_wizards.xml:
<wizard name="NAME" description="DESCRIPTION"/>
Here,
name - the name of a plan's XML file. It must be specified without .xml extension
(.xml will be appended automatically). The file contains plan wizard specification.
description is a language bundle label defined in
~cpanel/shiva/psoft/hsphere/lang/hsphere_lang.properties. It
should not contain the lang.
Example:
<wizard name="unix" description="planeditor.res_unix"/>
Here, Unix plan XML definition file is
~cpanel/shiva/psoft/hsphere/xml/unix.xml, and the plan's description is set
in the lang.planeditor.res_unix label in
~cpanel/shiva/psoft/hsphere/lang/hsphere_lang.properties.
Defining Plan Wizard
Plan wizard definition starts with creating a new .xml file. See unix.xml
(http://hsphere.parallels.com/HSdocumentation/xmls/unix.xml) as an example of
planwizard definition.
<PlanWizard>
The root XML tag is <PlanWizard>:
<PlanWizard name="NAME" description="DESCRIPTION">
Attributes:
name: should match the filename (without .xml prefix) and the corresponding name
attribute in plan_wizards.xml.
description: language bundle with plan wizard description from
hsphere_lang.properties without "lang." prefix.
<DefaultName>
DefaultName is the name that will serve as the default plan name in creating plans.
<DefaultName>name</DefaultName>
<DefaultValues>
Page 79

XML Customization 79
DefaultValues is a construction where the plan's default values are set. Usually, the
add _template and menuId values are added here.
<DefaultValues>
<value name="NAME1">VALUE1</value>
<value name="NAME2">VALUE2</value>
...
</DefaultValues>
<categories>
The categories tag defines plan resources. Resources are grouped into categories
and described within the <category> tags. Each category tag can have the
description attribute which is optional. Categories are used in plan wizard screens
to group resources into logical groups.
<categories>
<category>
...
</category>
<category description="DESCRIPTION">
...
</category>
</category>
<resource>
The <resource> tag within the <category> construction defines the resource class,
name, description and includes the following attributes if necessary:
name - name of the resource, like account, mailbox;
class - name of the resource class;
help (optional) - description of the resource from the hsphere_lang.properties
file;
unit (optional) - units for the resource, MB or GB;
required (optional) - if it is set to 1, the resource is required in the plan and regarded
to be automatically included to the plan;
include (optional) - if it is set to 1, the resource will be marked as included by default
to the plan wizard;
active (optional) - if active parameter is not set, no active checkbox will be available
for the resource. Otherwise, if it is set to 1, resource will be marked as active by
default. Any other value - active checkbox will be present but not checked;
noprice (optional) - if 1, the wizard will not prompt to enter pricing for the resource;
ifresource (optional) - list of resources separated by the vertical bar '|' character. If
any of the resources are included to or required in the plan, this resource will also
be included.
<field>
Inside the <resource> construction, the <field> tag allows to get more info from the
user for a resource specified. The data will be returned as a part of HTTP request and
can be used later via the #name parameter.
Page 80

80 XML Customization
Attributes:
name - name of the field, you can retrieve it later via the #name parameter;
label - label from hsphere_lang.properties, refers to a caption to be displayed in the
wizard;
type - type of the field to be displayed: textbox|checkbox.
If type = "textbox", the following attributes are set:
value - the default value;
planvalue - name of the resource plan value (value defined in the plan); While editing
the plan, the wizard will try to retrieve this value and show it as the textbox value;
size - size of the textbox;
check - yafv check (not implemented yet).
Example:
<field type="textbox" name="max_conn"
label="planeditor.max_connections" value="10"
planvalue="MAX_CONN" size="4" check="vPriceReq"/>
<LogicalGroup>
The <LogicalGroup> tag defines a logical server, allows user to select one logical
server if several are present.
Attributes:
name - name of the group;
type - type of the group;
help - help message;
default - default group.
Example:
<LogicalGroup name="unix_real" type="unix_real" help="admineditwizard-o_lsgunix_real"/>
<ifresource>
The <ifresource> element allows to group resources/LogicalGroup and activate
them for the plan, only if the resource is enabled via global resources, or for the reseller
plan.
Attributes:
name - resource name. Will be checked by admin.isResourceDisabled;
description - description of the resource from hsphere_lang.propeperties.
<ifgroup>
The <ifgroup> element works in the same way as ifresource but checks if the
server group is available.
Attributes:
Page 81

XML Customization 81
name - server group name;
else - resource name to show as unavailable.
<resources>
The <resources> element is used to define resources and their initialization
sequence.
Resources are defined in the resources element in the custom res_RESOURCE_NAME
child tag where RESOURCE_NAME is the resource mnemonic identifier.
For example, for the unixuser resource the tag would look like:
<res_unixuser> </res_unixuser>
<mod>
The <mod> tags determine what mods will be defined in the plan.
Attributes:
name - name of the mod; "" if missing;
ifresource - list of resources delimited with '|'. If any of those resources will be
available in plan, i.e., required, selected through the Web as included, or derived as
included, the mod will be defined in the plan, otherwise it won't be defined.
<initresource>
The <initresource> tags inside mod constructions define what child resources are
created with the creation of this resource.
Attributes:
name - name of the resource. The system automatically checks if the resource is
included in the plan before adding the initresource;
ifactive - list of resources delimited with '|'. If any of these resources are selected in
the plan wizard as activated, the initresource is created; otherwise, it won't be
created, but will be available for creation by account owners.
unique (optional) - a flag to mark the initresource whose mod will be changed in the
plan wizard. For example, you may set initresource for the IP resource to shared IP,
and then change shared IP to dedicated IP in the plan wizard in Control Panel. In
this case, if you don't set the unique attribute in the initresource tag, another
initresource record will be added to the system database and that will cause serious
malfunctions.
However, if unique="1" is set, no new initresouce record will be created when
another mod is selected; instead, the existing initresource record will be modified.
Example:
<initresource name="ip" mod="shared" unique="1"/>
<initvalue>
The <initvalue> tag defines initial plan values.
Page 82

82 XML Customization
Initvalues are passed to the resource constructor as a Collection, and you need to be
very careful with their order. Initvalue names aren't used as keys. Typically, the
constructor would read initvalues like this:
Iterator i = initValues.iterator();
value1 = (String) i.next();
value2 = (String) i.next();
Attributes:
type - one of the following types as defined in psoft.hsphere.plan.InitValue:
static - the value enclosed in the tag.
field - the value taken from the submitted form by the name enclosed in the tag.
relative - the value obtained with the TemplateModel get(String key)
method of the resource chain from the current resource up the resources tree. The
search stops upon finding the first not null value.
absolute - the value obtained with the TemplateModel get(String key)
method of the current resource. Unlike 'relative', it allows getting values of
TemplateHash returned by the TemplateModel get method.
Example: A resource returns a hash accessible from TemplateModel
get(String key) by the key a. This hash, in its turn, contains a value accessible
by the key b. To access this value, you need to set initvalue to a.b.
relative_rec - implements embedding as in 'absolute' with support of ascending
recursion as in 'relative'.
absolute_rec - implements embedding, but calls TemplateModel get(String
key) of the top resource in the tree - the account.
hostgroup - is used to get a random HostEntry object within the given logical server
group. The value of the group is stored as a plan value with id '_HOST_' + value of
the current init value.
plan_free - returns free units for the current resource if applicable.
plan_value - returns plan value accessible by the current initvalue as key.
label - is not used anymore, can be considered a comment.
The initvalue tag content is a string. If it starts with #, the value will be used as a
name of the parameter which is passed via http request.
Here are several pre-defined variables that could serve as the initvalue tag
content:
$STOPGAP_ZONE
$STOPGAP_PREFIX
$INSTANT_ZONE
$INSTANT_PREFIX Example:
<if>
<initvalue type="static" label="Home
Directory">#homedir</initvalue> <initvalue
type="static">$INSTANT_PREFIX</initvalue>
Page 83

XML Customization 83
The <if> tag allows to include initresources or initvalues under a certain condition. For
example:
<if type="eq" left="#mixedip" right="dedicated">
<true><initresource name="ip" mod="dedic_no_a"/></true>
<false><initresource name="ip" mod="shard_no_a"/></false>
</if>
Here, the value of the mixedip parameter that is passed via HTTP request is checked
for being equal to the value of the dedicated parameter.
<values>
The <values> element includes the <value> constructions inside.
<value>
The <value> tag defines the resource values in the plan.
Attributes:
name - mnemonic identifier. If the tag content string starts with #, the value will be
used as a name of the parameter that is passed via HTTP request.
Example:
<value name="SSI">1</value>
<special>
The <special> element is used to define some additional settings such as tld pricing.
It allows to add checkbox to any resource and, if checkbox is selected, to include
another template.
To define the special attribute for a resouce, create the <res_RESOURCE_NAME> tag
(like <res_opensrs>) inside the <special> element (you can have multiple tags
inside the special section).
<field>
Inside <res_RESOURCENAME> tag, the <field> tag is used to define the HTML field.
Attributes:
type - checkbox type;
name - name of the checkbox field;
label - label from hsphere_lang.properties referrring to the field caption;
value - value of the checkbox;
checked - equals 1 if checked.
<include>
Inside the <field> element, the <include> tag defines a template to be included.
Attributes:
Page 84

84 XML Customization
ifvalue - a value to match against the field; if it matches, the template is included;
name - the name of the template to be included.
Example:
<special>
<res_opensrs>
<field type="checkbox" name="leave_osrs_prices"
label="planwizard.leave_osrs_prices" value="1"
checked="1">
<include ifvalue=""
name="admin/wizards/tldprices.html"/>
</field>
</res_opensrs>
</special>
Adding Custom CP Cron Jobs
CP cron jobs are internal Parallels H-Sphere Java utilities that perform regular tasks
such as accounting, trouble ticket management, etc.
It is possible to manage crons in XML configuration files (on page 86) and to add
custom cron jobs.
To create a custom cron job:
1. Log in as the cpanel (on page 136) user.
2. Create the cron job class.
3. Extend the abstract class
psoft.hsphere.background.BackgroundJob and implement the
method:
protected abstract void processJob() throws Exception
4. Add the custom cron job class to CLASSPATH set in the
.bash_profile file located in the ~panel home directory.
5. Create the custom cron XML configuration file if it is not created yet. We
recommend to add all custom cron jobs into the custom cron
configuration file, not to the standard cron XML configuration file (on
page 86).
1. Create the custom cron configuration file, for example,
~cpanel/shiva/custom/xml/cron_config.xml
2. The XML structure of the custom cron config file should be the same as of the
standard cron configuration file.
DTD Scheme:
http://hsphere.parallels.com/HSdocumentation/xmls/cron_config.dtd
Example: http://hsphere.parallels.com/HSdocumentation/xmls/cron_config.xml
Page 85

XML Customization 85
1. Set the full pathname to the custom cron configuration file in
In this section:
CP Cron XML Configuration .............................................................................. 86
~cpanel/shiva/psoft_config/hsphere.properties:
CRON_CONFIG =
/hsphere/local/home/cpanel/shiva/custom/xml/cron_config.xml
6. Add the custom cron job to the custom cron configuration file.
Add a new group of jobs if required or add your custom cron job there, or, add your
custom job to an existing group. Group is set by the group tag. Jobs are set in the
cron tags within their groups. For example:
<config>
...
<group name="GroupN" maxpriority="10" defpriority="3">
<!-- priority of jobs within the group is ranked from 1 to
10;
if job priority is not specified, it is 3 by default -
->
...
<job name="CustomCron" class="custom.cron.CustomCron"
starttime="5:00" period="1440"/>
<!-- job starts every day (1440 minutes) at 5am -->
...
<group>
</config>
XML syntax is described in the CP Cron XML Configuration (on page 86) guide.
Page 86

86 XML Customization
CP Cron XML Configuration
Control Panel cron configuration is represented in XML format in the
~cpanel/shiva/psoft/hsphere/cron_config.xml file. Its location is set by the
CRON_CONFIG parameter in hsphere.properties:
CRON_CONFIG =
/hsphere/local/home/cpanel/shiva/psoft/hsphere/cron_config.xml
DTD Scheme:
http://download.hsphere.parallels.com/HSdocumentation/xmls/cron_config.dtd
Example:
http://download.hsphere.parallels.com/HSdocumentation/xmls/cron_config.xml
Cron jobs are grouped according to their purpose. Default group is CRON. Cron groups
are set in the group constructions that contain the job tags describing jobs in these
groups:
<config>
<group name="CRON" maxpriority="10" defpriority="3">
<!-- priority of jobs within the group is ranked from 1 to
10;
if job priority is not specified, it is 3 by default -
->
...
<job name="CustomCron" class="custom.cron.CustomCron"
db_mark="C_CRON"
starttime="now+15m" period="15"/>
<!-- job starts in 15 minutes after CP start and runs
every 15 minutes -->
...
</group>
...
</config>
Group attributes:
name - group name;
disabled - group jobs are all disabled if disabled="1". If not set, disabled is set to
0 (enabled);
maxpriority - sets the maximum number to which job priority within a group is scaled.
For example, if maxpriority is 15, then job priority within a group is from 1 to 15,
where 1 is the least priority, and 15 is the maximum priority. If this option is not set,
maximum priority for a group is 10 by default;
defpriority - set the default job priority. If the job's priority attribute is not set, the job
priority will be equal to the group's defpriority value.
defperiod - sets the default launching period for group jobs, in minutes;
maxjobcount - maximum number of jobs in the group running at a time.
Job attributes:
name - job name;
Page 87

XML Customization 87
class - a fully qualified Java class name for the cron job (see Adding Custom CP
Crons (on page 84) for instructions on adding custom cron job classes);
disabled - if set to 1, the job is disabled; otherwise, it is enabled;
priority - if set, overrides the default group priority;
starttime - time when the job starts first. Format:
HH:MM - time in hours and minutes, for example, 5:15;
now - job starts immediately after CP start/restart;
now+HHhMMm - job starts in HH hours MM minutes after CP start/restart, for
example, now+15m, now+2h, now+2h15m.
If starttime is not set, the job won't start automatically.
period - sets the job launching period, in minutes; if not set, the job won't run;
maxinstancecount - maximum number of job instances running at a time.
threadcount - maximum number of threads running at a time in a multi-thread job.
db_mark - points to the job name in the Parallels H-Sphere database (value of the
name field in the last_start table).
See CP Crons in H-Sphere Sysadmin Guide for the last_start table description.
Page 88

88 XML Customization
Adding Custom Promotion Validators and
Calculators
Parallels H-Sphere allows to define custom promotions - flexible discount systems and assign them for individual plans.
Usually, a customer enters a certain promotion code on signup, the system verifies the
entered code if it proves to be valid and corresponds to the chosen plan, that user signs
up with that discount. This is called a codeable promotion. There are also codeless
promotions that don't require a code. Discount depends on a particular promotion and
the way the discount is calculated.
This document explains how to add and configure custom promotion validators and
calculators.
To add a custom promotion validator or calculator to Parallels H-Sphere:
1. Log into the CP server as the cpanel (on page 136) user.
2. Create a custom promotion validator or calculator:
To create a promotion validator, use the the
psoft.hsphere.promotion.PromoValidator Java class interface:
http://hsphere.parallels.com/HSdocumentation/sdk/api/psoft/hsphere/promotion/
PromoValidator.html.
The class can also extend the AbstractPromoDataStorage class to store
the validator's data in the Parallels H- Sphere database:
http://hsphere.parallels.com/HSdocumentation/sdk/api/psoft/hsphere/promotion/
AbstractPromoDataStorage.html.
To create a promotion calculator, use the
psoft.hsphere.promotion.calc.PromoCalculator Java class
interface:
http://hsphere.parallels.com/HSdocumentation/sdk/api/psoft/hsphere/promotion/
calc/PromoCalculator.html.
The class can also extend the AbstractPromoDataStorage class to store
the calculator's data in the Parallels H- Sphere database:
http://hsphere.parallels.com/HSdocumentation/sdk/api/psoft/hsphere/promotion/
AbstractPromoDataStorage.html.
Example:
package psoft.hsphere.promotion.calc;
import psoft.hsphere.promotion.AbstractPromoDataStorage;
import psoft.hsphere.Session;
import psoft.hsphere.Account;
import psoft.util.USFormat;
import java.util.Hashtable;
public class PercentDiscountCalc
Page 89

XML Customization 89
extends AbstractPromoDataStorage implements
PromoCalculator {
private double discountPercent;
public PercentDiscountCalc(long promoId) throws Exception
{
super(promoId);
discountPercent =
USFormat.parseDouble((String)
data.get("discount_percent"));
}
public PercentDiscountCalc(long promoId, Hashtable data)
throws Exception {
super(promoId, data);
discountPercent =
USFormat.parseDouble((String)
data.get("discount_percent"));
}
public int getDataType() {
return 2;
}
public double getPromoDiscount(Account a, double sum) {
return sum*discountPercent/100;
}
public void updateData(long promoId, Hashtable data)
throws Exception {
super.updateData(promoId, data);
Session.getLog().debug("Updating discount percent");
discountPercent =
USFormat.parseDouble((String)
data.get("discount_percent"));
}
}
3. Configure custom promotion validator or calculator in the XML
configuration file.
All promotion validators and calculators should be added to and configured in the
promotions.xml file. Its default location is
~cpanel/shiva/psoft/hsphere/promotion/xml/. The file location can be
altered with the PROMO_CONFIG and CUSTOM_PROMO_CONFIG properties in
~cpanel/shiva/psoft_config/hsphere.properties:
PROMO_CONFIG=/hsphere/local/home/cpanel/shiva/psoft/hsphere/p
romotion/xml/promotions.xml
CUSTOM_PROMO_CONFIG=/hsphere/local/home/cpanel/shiva/custom/x
ml/promotions.xml
promotions.xml should be customized according to XML customization (on page
71) rules.
DTD Structure: http://hsphere.parallels.com/HSdocumentation/xmls/promotions.dtd
Example: http://hsphere.parallels.com/HSdocumentation/xmls/promotions.xml
Page 90

90 XML Customization
Elements and attributes:
<promotions> - contains all defined promotion validators.
<promo> - configuration of a particular promotion validator.
Attributes:
id - a unique promotion identifier: 1,2,...
description - a short description of a validator. It shows up in the dropdown list of
promotions in Control Panel.
class - a name of a Java class for this validator.
itype - a type of the validator's interface. If it is set to "AUTO", interface for adding
the validator parameter will be built automatically, depending on parameters
defined for the validator or calculator; otherwise, values of the add_template and
edit_template attributes will be used as template names for adding/editing set of
data which is required for a given promotion validator.
add_template - a name of a template for adding the validator data; the value of
this attribute will take effect only in case if itype is not set to "AUTO".
edit_template - a name of a template for editing the validator data; the value of
this attribute will take effect only in case if itype is not set to "AUTO".
<calculators> - contains all defined promotion calculators.
<calc> - configuration of a particular promotion calculator. Attributes have the same
meaning as for promotion validators.
<params> - contains all parameters used by promotion validators or calculators.
<param> - configuration of a particular parameter.
Attributes:
label - a name of a label in
~cpanel/psoft/hsphere/lang/hsphere_lang.properties with the
message that appears on the page where users enters a promo code.
name - the parameter's name. The AbstractPromoDataStorage object stores
validators' or calculators' data from HttpRequest using this name with the prefix
pv_ for a validator and pc_ for a calculator. For example, if name="percent",
AbstractPromoDataStorage expects the pv_percent variable for the validator
and the pc_percent variable for the calculator to be present in HttpRequest.
Page 91

XML Customization 91
Adding Custom MS Exchange Plans into
Parallels H-Sphere
Since version 2.5 Parallels H-Sphere provides integration with Microsoft Exchange mail
hosting plans. The following four default MS Exchange plans are already included into
Parallels H-Sphere as resources:
Base Mail
Gold Mail
Platinum Mail
Platinum Mail Pro
Parallels H-Sphere admin can also import more plans created on MS Exchange server
into Parallels H-Sphere as MS Exchange hosting resources. This document is an
example of a step-by-step procedure on how to do it:
1. Create a custom msExchangePlans.xml file with description of your
new custom MsExchange plan (it will be merged with the standard
msExchangePlans.xml):
<plans>
<plan type="new_plan">
<planName>NewPlanName</planName>
<planDescription>New MS Exchange Plan
Name</planDescription>
<planFeatures>
. . . .
<feature>
<featureName>some_feature</featureName>
<featureDescription>This feature's
description</featureDescription>
<featureValue>some_value</featureValue>
</feature>
. . . .
</planFeatures>
</plan>
</plans>
2. Create the msexchange.xml file that will be merged with the standard
hsphere plan wizard xml (msexchange.xml):
Page 92

92 XML Customization
<PlanWizard name="msexchange"
description="planeditor.res_msexchange">
<categories>
<category description="planeditor.other">
<resource name="new_plan" required="1"
class="psoft.hsphere.resource.mpf.hostedexchange.HostedExchan
gePlan"/>
</category>
</categories>
<resources>
<res_bizuser>
<mod name="new_plan">
<initresource name="new_plan"/>
</mod>
</res_bizuser>
</resources>
</PlanWizard>
where new_plan is the name of the MS Exchange hosting plan you are adding. This
name must not exceed 10 symbols.
Notes:
1. Don't copy content of the existing standard HS MsExchange plan xml file.
2. Parallels H-Sphere 2.5 and up implements a Java utility that fetches this
information from MS Exchange hosting server:
java psoft.hsphere.tools.HePlanExctractor
This utility prints XML output with properties of all available MS Exchange
hosting plans. Or, you can obtain plan features in XML form in the
HostedExchange Web interface under the GetPlanDetail service.
3. Read more how to merge custom XML files in Customization Guide.
3. Log into the CP server as the cpanel user.
4. Create a special location where you will assemble and build a package
describing your MsExchange plan, for example,
~cpanel/shiva/custom/Packages:
mkdir ~cpanel/shiva/custom/Packages
5. Run package configurator (on page 113):
cd ~cpanel/shiva/custom/Packages
java psoft.hsp.tools.PkgConfigurator --withprefix=./ms_customization --with-xmls --with-properties -with-sql
Package configurator will create the ms_customization directory, which includes the
following structure:
src/pkg_config/ - directory with the default.properties file
src/pkg_xmls/ - directory directory where you will place msExchangePlans.xml
and msexchange.xml
src/_pkg.xml - file to set package name, version, build, vendor and description
src/_SCRIPTS/_pkg.sql - file to add the SQL query that will be executed during the
package installation
Page 93

XML Customization 93
1. Set the package name, version, build, vendor, description in
src/_pkg.xml:
<?xml version="1.0" encoding="UTF-8"?>
<pkg build="00" description="Description for test package"
info="Additional information" name="MSExchangeCustomization"
vendor="Vendor" version="00.00.00">
<xmls src="pkg_xmls/"/>
<config path="pkg_config/default.properties"/>
Note: Package name can't contain spaces and special characters.
2. Edit src/_SCRIPTS/_pkg.sql. Add the following line into it:
INSERT INTO type_name (id, name, price, description, rprice)
VALUES ('resource_type_id', 'new_plan', 'RFS', 'resource_type_description',
'RFS');
where:
resource_type_id is an integer from the range 20100-21490, unique in the
type_name.
new_plan is a resource type name, up to 10 symbols string without spaces.
resource_type_description is your plan description.
RFS - price type, should be RFS for all MS Exchange plans you add.
For example, a standard MS Exchange plan will have the following records:
hsphere=# SELECT * from type_name where description like
'Hosted Exchange%';
id | name | price | description | rprice | required |
priority | ttl
------+------------+-------+---------------------------------
--------+--------+----------+----------+-----
7222 | plat_mailp | RFS | Hosted Exchange Platinum Mail Plus
Plan | RFS | | |
7219 | base_mail | RFS | Hosted Exchange Base Mail Plan | RFS
| | |
7221 | plat_mail | RFS | Hosted Exchange Platinum Mail Plan |
RFS | | |
7220 | gold_mail | RFS | Hosted Exchange Gold Mail Plan | RFS
| | |
3. Copy the prepared msExchangePlans.xml and msexchange.xml
files to ms_cutomization/src/pkg_xmls/:
cp /some/location/msExchangePlans.xml
~cpanel/shiva/custom/Packages/ms_customization/src/pkg_xmls/
cp /some/location/msexchange.xml
~cpanel/shiva/custom/Packages/ms_customization/src/pkg_xmls/
4. Edit src/pkg_config/default.properties:
Add properties that specify location of xml file implemented in this package:
PLAN_WIZARDS_DIR=.
HOSTED_EXCHANGE_PLANS = msExchangePlans.xml
Return from the package directory and run package builder (on page 122):
cd ~cpanel/shiva/custom/Packages
Page 94

94 XML Customization
java psoft.hsp.tools.PkgBuilder --with-source=ms_customization
The hsp package, for example, MSExchangeCustomization-00.00.00-01.hsp,
will be created in the directory.
Customizing E-Mail Notification List
Parallels H-Sphere e-mail notifications can be customized directly in CP admin
interface as in the Settings->E-Mail Notifications menu.
Page 95

XML Customization 95
The list of e-mail notifications is set in the
In this section:
Using Variables in Parallels H-Sphere E-Mail Notifications ............................... 96
~cpanel/shiva/psoft/hsphere/user_emails.xml XML configuration file. It is
customizable by means of Parallels H-Sphere packages (on page 130).
DTD Scheme: http://hsphere.parallels.com/HSdocumentation/xmls/user_emails.dtd
Example: http://hsphere.parallels.com/HSdocumentation/xmls/user_emails.xml
user_emails.xml has the following structure:
groups - container for description of the groups of e-mail notifications. (In Settings->E-
Mail Notifications, notifications are displayed in groups, according to their purpose.)
group - tag for the group description.
Attributes:
id - group identifier.
name - group name, corresponds to the label in language bundles (on page 58)
(~cpanel/languages/hsphere_lang.properties).
emails - container for description of e-mail notifications.
email - tag with notification description.
Attributes:
tag - notification tag. Corresponds to the notification's ce.TAG_NAME.title
(name of the notification in the list in CP), and ce.TAG_NAME.desc (short
description in the list) labels in hsphere_lang.properties, where TAG_NAME
is the value set in the tag attribute of the notification in user_emails.xml
group_id - corresponds to the id attribute of the group to which this e-mail
notification belongs to.
template - pathname to the corresponding system e-mail notification template,
relative to the ~cpanel/shiva/shiva-templates/common directory of
default Parallels H-Sphere templates. For example,
template="mail/custom_registrar_registration.txt" points to the
~cpanel/shiva/shiva-templates/common/mail/new_account.txt
template for the "welcome" message on creating a new account.
massmail_applicable - if set to 1, this notification is available for mass mail
delivery.
admin_only - if admin_only="true", this notification is available only from the
admin CP.
no_cc - if no_cc="true", no copies (the BCC: field) of this e-mail notification
are sent to the addresses defined in the CP admin's Settings->Notification
Recipients menu. That corresponds to unchecking the Sent CC checkbox while
editing the notification in CP.
subject - tag with the subject of the e-mail message to be sent to customers.
Page 96

96 XML Customization
Using Variables in Parallels H-Sphere E-Mail
Tag
Description
Variables
Misc
LOST_PASSWORD
Lost Password
Message
standard variables
OVERLIMIT
Overlimit Notification
suspend
over_limit_res
standard variables
SSH_NOTIFICATION
Shell Access
Notification
result
subject
standard variables
VPS_INIT
Virtual Private Server
Initialization
Notification
vpsname
ips
ci
standard variables
Custom Domain Registration
ASYNC_CANCELED
Async. Manager
Canceled
Transactions
Not implemented
ASYNC_DONE
Async. Manager
Processed
Transactions
d
toolbox
CUSTOM_REGISTRAR_CONTACT_CHA
NGED
User Information
Changed Message
registrant
tech
admin
billing
domain_name
renew_days
Notifications
Parallels H-Sphere e-mail notifications can be customized directly in CP admin
interface in the Settings->E-Mail Notifications menu.
This document aims at advanced customization of these messages. It contains the
description of basic notification variables.
Below is the table illustrating which variables are used in which notifications. The
notifications are grouped and named according to their XML configuration file,
user_emails.xml. The Tag column corresponds to the names of the notifications set
in the tag attributes in user_emails.xml. In the Variables column, only variables
specific to that particular notifications are listed. Standard variables are variables
common for all notifications. Properties and methods for variables are listed below.
The List of Notification Variables
Page 97

XML Customization 97
email_days
standard variables
CUSTOM_REGISTRAR_REGISTRATION
Custom Domain
Registration Request
Message
registrant
tech
admin
billing
domain_name
renew_days
email_days
standard variables
CUSTOM_REGISTRAR_RENEW
Custom Renew
Domain Registration
Message
registrant
domain_name
renew_days
email_days
period
standard variables
Managing Debtors
DEBT_DEL_NOT
Deletion Warning
bill
negative_date
current_date
suspend_date
delete_date
standard variables
DEBT_DEL_REASON
Account Deletion
bill
negative_date
current_date
suspend_date
delete_date
standard variables
DEBT_SUSP_NOT
Suspension Warning
bill
negative_date
current_date
suspend_date
delete_date
standard variables
DEBT_SUSP_REASON
Account Suspension
Not implemented
DEBT_WARN_NOTIFICATION
Outstanding Balance
Notification
bill
negative_date
current_date
suspend_date
delete_date
standard variables
TRIAL_SUSP_REGISTER
Trial Suspension
Notification
standard variables
Welcome Messages
Page 98
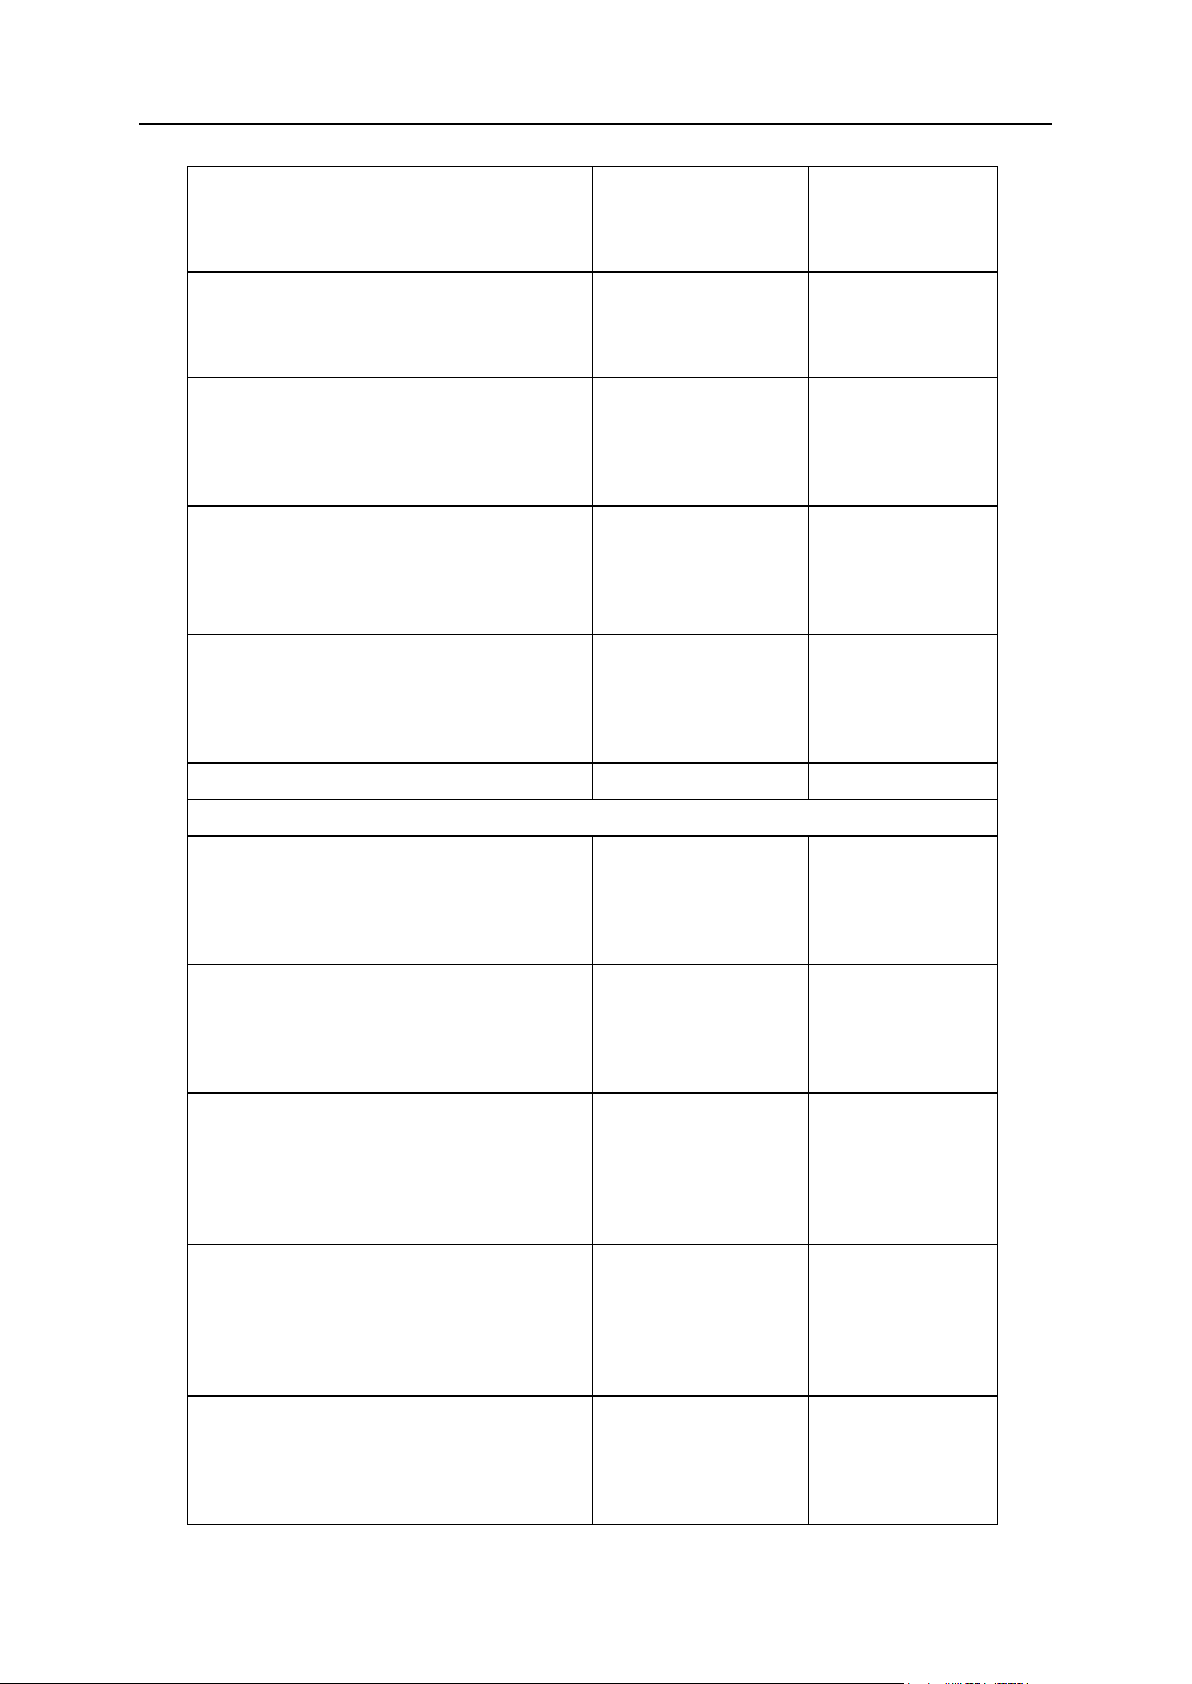
98 XML Customization
FAILED_SIGNUP
Failed Signup
Notification
failed_signups_q
accounts
lang
NEW_ACCOUNT
Welcome Letter
bi
ci
standard variables
NEW_MODERATED
Welcome Letter For
Moderated Accounts
bi
ci
reseller_url
standard variables
NEW_MODERATED_CC
Welcome Letter For
Moderated Account
with CC
bi
ci
reseller_url
standard variables
TRIAL_MODERATED
Welcome Letter For
Trial/Moderated
Account
bi
ci
reseller_url
standard variables
TRIAL_REGISTER
Trial Registration
standard variables
Tax Exemptions
ACCOUNT_TEXEMPT_APPROVED
Tax Exemption
Approved Notification
(Live Accounts)
bi
ci
date
standard variables
ACCOUNT_TEXEMPT_REJECTED
Tax Exemption
Rejected Notification
(Live Accounts)
bi
ci
date
standard variables
MODERATED_TEXEMPT_APPROVED
Tax Exemption
Approved Notification
(Moderated
Accounts)
bi
ci
date
request
standard variables
MODERATED_TEXEMPT_REJECTED
Tax Exemption
Rejected Notification
(Moderated
Accounts)
bi
ci
date
request
standard variables
NEW_MODERATED_TEXEMPT
Welcome Letter (Tax
Exemption)
bi
ci
reseller_url
standard variables
Page 99

XML Customization 99
Domain Registration
DOMAIN_TRANSFER
Domain Transfer
Message
domain
standard variables
REGISTRAR_EXPIRED_WARN
Expired Domain
Registration
Notification
osrs
standard variables
REGISTRAR_RENEW_WARN
Domain Registration
Renew Warning
osrs
standard variables
Managing Trials
TRIAL_APPROACH_NOT
Trial Expiry Warning
current_date
delete_date
suspension_date
trial_days_till
standard variables
TRIAL_DEL_NOT
Deletion Warning
current_date
delete_date
suspension_date
trial_days_till
standard variables
TRIAL_DEL_REASON
Account Deletion
current_date
delete_date
suspension_date
trial_days_till
standard variables
TRIAL_SUSP_NOT
Suspension Warning
current_date
delete_date
suspension_date
trial_days_till
standard variables
Trouble Ticket System
INTERNAL_TICKET
Internal Ticket
standard variables
Accounting
ACCOUNTING_ERROR
Accounting Error
letter
error
date
stack
error_subject
standard variables
INVOICE
Order Confirmation
entries
taxes
subtotal
total
reseller_url
Page 100

100 XML Customization
standard variables
MONEY_BACK
Money Back
Notification
standard variables
Suspend/Resume
RESUME
Account Resumed
Notification
standard variables
SUSPEND
Account Suspended
Notification
reason
standard variables
 Loading...