


 Loading...
Parallels Desktop® 15 for Mac
User's Guide
Parallels International GmbH Vordergasse 59
8200 Schaffhausen Switzerland
Tel: + 41 52 672 20 30 www.parallels.com
Copyright © 1999-2019 Parallels International GmbH. All rights reserved.
This product is protected by United States and international copyright laws. The product’s underlying technology, patents, and trademarks are listed at http://www.parallels.com/about/legal/.
Microsoft, Windows, Windows Server, Windows Vista are registered trademarks of Microsoft Corporation.
Apple, Mac, the Mac logo, OS X, macOS, iPad, iPhone, iPod touch are trademarks of Apple Inc., registered in the US and other countries.
Linux is a registered trademark of Linus Torvalds.
All other marks and names mentioned herein may be trademarks of their respective owners.
Contents |
|
Welcome to Parallels Desktop.................................................................................. |
9 |
What You Can Do ........................................................................................................... |
9 |
Set Up Your Mac to Use Windows Applications ............................................................. |
10 |
Other Operating Systems .............................................................................................. |
10 |
Install or Upgrade Parallels Desktop ...................................................................... |
11 |
What You Need............................................................................................................. |
11 |
Install Parallels Desktop................................................................................................. |
12 |
Activate and Register Parallels Desktop ......................................................................... |
12 |
Purchase Parallels Desktop ........................................................................................... |
14 |
Upgrade Parallels Desktop ............................................................................................ |
14 |
Install Software Updates........................................................................................................ |
15 |
Set the Language.......................................................................................................... |
16 |
Install or Import Windows ....................................................................................... |
18 |
Install Windows ............................................................................................................. |
18 |
Import Your Data from a PC .......................................................................................... |
19 |
Overview of Methods for Importing........................................................................................ |
20 |
Requirements for Importing Your Data .................................................................................. |
20 |
Step 1: Install Parallels Transporter Agent on Your Windows PC........................................... |
20 |
Step 2: Import Your Data....................................................................................................... |
21 |
Solving Problems................................................................................................................... |
26 |
Use Boot Camp with Parallels Desktop.......................................................................... |
28 |
Import from an Earlier Parallels Desktop or Other Virtualization Application...................... |
30 |
Download and Install Windows From Microsoft .............................................................. |
30 |
Use Windows on Your Mac..................................................................................... |
31 |
Get Started ................................................................................................................... |
31 |
Start Windows....................................................................................................................... |
31 |
Open a Windows Application ................................................................................................ |
32 |
Install Windows Applications ................................................................................................. |
35 |
Shut Down or Suspend Windows.......................................................................................... |
35 |

Contents
Set How Windows Works with macOS .......................................................................... |
39 |
Merge Windows and macOS................................................................................................. |
40 |
Set Windows to Appear in a Single Window.......................................................................... |
42 |
Set Windows to Take Up the Whole Screen .......................................................................... |
43 |
Set an Application to Open When You Insert a CD or DVD.................................................... |
47 |
Share Items Between macOS and Windows ......................................................................... |
47 |
Apply macOS Parental Controls to Windows......................................................................... |
63 |
Mouse, Trackpad, and Keyboard................................................................................... |
63 |
Set Your Mouse or Trackpad to Right-Click and Middle-Click ............................................... |
64 |
Use Keyboard Shortcuts ....................................................................................................... |
65 |
Customize Keyboard Shortcuts............................................................................................. |
66 |
Create New Keyboard Shortcuts........................................................................................... |
69 |
See and Change Windows Input Language In macOS .......................................................... |
70 |
Mouse & Keyboard Settings .................................................................................................. |
71 |
Connect External Devices.............................................................................................. |
73 |
Adjust Devices Settings ......................................................................................................... |
75 |
Connect Bluetooth Devices ........................................................................................... |
77 |
Print from Windows....................................................................................................... |
78 |
Share a Printer Connected to Your Mac ................................................................................ |
78 |
Set Up a Printer Using Bonjour.............................................................................................. |
80 |
Set Up a Network Printer....................................................................................................... |
82 |
Set Up a USB Printer............................................................................................................. |
85 |
Create a PDF File .................................................................................................................. |
85 |
Use the Built-in iSight Camera or Another Webcam........................................................ |
86 |
Show a Presentation on an External Monitor or Projector ............................................... |
86 |
Protect Your Data ......................................................................................................... |
88 |
Isolate Windows from Mac .................................................................................................... |
88 |
Work in Windows Without Saving Changes........................................................................... |
88 |
Set Password Requirements ................................................................................................. |
89 |
Encrypt Windows to Protect It from Unauthorized Use .......................................................... |
89 |
Connect to the Internet or a Network............................................................................. |
90 |
Share Network Access Between macOS and Windows ........................................................ |
90 |
Apply Separate Network Settings to Windows ...................................................................... |
91 |
Use Host-Only Network Settings ........................................................................................... |
93 |
Use Wi-Fi with Windows........................................................................................................ |
93 |

|
Contents |
Connect Windows to a VLAN ................................................................................................ |
94 |
Optimize Performance................................................................................................... |
94 |
Set How Much Memory is Allocated to Windows .................................................................. |
94 |
Optimization Settings............................................................................................................. |
95 |
Speed Up Games and Graphics Applications........................................................................ |
96 |
Pause Windows When No Applications Are Open ................................................................. |
97 |
Optimize Virtual Machine for Games, Graphics, Productivity, or Development....................... |
97 |
Work with Windows in Travel Mode....................................................................................... |
98 |
Schedule Windows Maintenance........................................................................................... |
99 |
Use Windows on Your iPad, iPhone, or Android Device................................................ |
100 |
Save Time With Parallels Toolbox ................................................................................ |
101 |
Save a Picture of the Screen ....................................................................................... |
101 |
Set the Appearance of Virtual Machine Dock Icons ...................................................... |
102 |
Allow Windows Updates While Your Mac is Sleeping ................................................... |
102 |
Translate Words in Windows ....................................................................................... |
103 |
Use the Touch Bar with Windows................................................................................ |
103 |
Advanced Topics................................................................................................... |
105 |
Work with Virtual Machines.......................................................................................... |
105 |
Supported Guest Operating Systems .................................................................................. |
105 |
About Virtual Machines........................................................................................................ |
108 |
Arrange Virtual Machines..................................................................................................... |
109 |
Make Virtual Machines Distinctive........................................................................................ |
109 |
Change the Virtual Machine Icon ......................................................................................... |
110 |
Change the Virtual Machine Name ...................................................................................... |
110 |
Clone a Virtual Machine ....................................................................................................... |
110 |
Back Up a Virtual Machine .................................................................................................. |
111 |
Browse Virtual Hard Disks in macOS................................................................................... |
113 |
Create and Use Virtual Machine Templates ......................................................................... |
114 |
Save Snapshots of a Virtual Machine................................................................................... |
115 |
Change Virtual Machine Configuration at Runtime ............................................................... |
118 |
Use Mouse Wheel Horizontal Scrolling ................................................................................ |
120 |
Remove a Virtual Machine ................................................................................................... |
120 |
Download Pre-configured Virtual Appliances ....................................................................... |
121 |
Set the Guest OS Type and Version .................................................................................... |
122 |

Contents
Set How Many Processors are Allocated to a Virtual Machine ............................................. |
122 |
Check Your Virtual Machine CPU and Memory Usage ........................................................ |
122 |
Get Acronis True Image....................................................................................................... |
123 |
Use AppleScript with the Guest OS..................................................................................... |
124 |
Quickly Free Up Disk Space ................................................................................................ |
124 |
Archive and Unarchive Virtual Machines .............................................................................. |
124 |
Use Other Operating Systems on Your Mac................................................................. |
125 |
Use Linux in Coherence Mode............................................................................................. |
125 |
Customize the Keyboard for the Guest OS.......................................................................... |
125 |
Use macOS as a Guest OS ................................................................................................. |
127 |
Install or Update Parallels Tools ................................................................................... |
129 |
Parallels Tools Overview ...................................................................................................... |
129 |
Parallels Tools for Windows................................................................................................. |
131 |
Parallels Tools for Linux ....................................................................................................... |
132 |
Parallels Tools for Mac ........................................................................................................ |
136 |
For Software Developers ............................................................................................. |
137 |
Optimize Remote Debugging............................................................................................... |
137 |
Generate a Core Dump ....................................................................................................... |
138 |
Start a Debugging Session .................................................................................................. |
139 |
Integration With Chef/Ohai................................................................................................... |
139 |
Integration With Docker ....................................................................................................... |
140 |
Use Virtual Machine Names as DNS Names........................................................................ |
140 |
Resolve Guest OS DNS Requests Using etc/hosts.............................................................. |
140 |
Quickly Change the Screen Resolution................................................................................ |
141 |
Other Actions ...................................................................................................................... |
141 |

|
Contents |
Set File Type Associations ........................................................................................... |
141 |
Picture in Picture Mode ............................................................................................... |
142 |
Hide and Show Parallels Desktop ................................................................................ |
144 |
Remove Parallels Desktop........................................................................................... |
145 |
Advanced Preferences ................................................................................................ |
146 |
Shared Networking Settings ........................................................................................ |
147 |
Host-Only Networking Settings.................................................................................... |
150 |
Create a Custom Host-Only Network........................................................................... |
152 |
Parallels Desktop Preferences and Virtual Machine Settings ............................. |
153 |
Parallels Desktop Preferences ..................................................................................... |
154 |
General Preferences ............................................................................................................ |
154 |
Shortcuts Preferences ......................................................................................................... |
156 |
Devices Preferences............................................................................................................ |
164 |
Security Preferences ........................................................................................................... |
166 |
Network Preferences ........................................................................................................... |
167 |
Advanced Preferences ........................................................................................................ |
172 |
Parallels Toolbox ................................................................................................................. |
173 |
Parallels Access .................................................................................................................. |
174 |
Virtual Machine Settings .............................................................................................. |
175 |
General Settings.................................................................................................................. |
175 |
Options ............................................................................................................................... |
177 |
Hardware Settings............................................................................................................... |
198 |
Security Settings ................................................................................................................. |
224 |
Backup Settings .................................................................................................................. |
226 |
Adding and Removing Devices .................................................................................... |
228 |
Support for Virtual and Real Disks ....................................................................................... |
230 |
Initialize a Newly Added Disk ............................................................................................... |
231 |
Connect Physical Disk to Virtual Machine as Internal ........................................................... |
233 |

Contents
Tips and Troubleshooting ..................................................................................... |
236 |
Install Parallels Tools for Seamless Operation Between Windows and macOS .............. |
236 |
Find Settings............................................................................................................... |
237 |
Restore Virtual Machine Default Settings...................................................................... |
237 |
Memory Usage Problems ............................................................................................ |
238 |
Windows Seems Slow................................................................................................. |
238 |
Pressing Ctrl+Alt+Del .................................................................................................. |
239 |
My Password Isn't Working ......................................................................................... |
239 |
Boot Windows Securely .............................................................................................. |
240 |
My Virtual Machine Doesn't Boot................................................................................. |
240 |
I'm Having Problems Connecting to the Internet........................................................... |
240 |
I'm Having Problems with Antivirus Software................................................................ |
241 |
The F8 Key Isn't Working Correctly.............................................................................. |
241 |
A Password is Required to Open the Virtual Machine Configuration.............................. |
241 |
Windows or Windows Applications Ask for Reactivation............................................... |
241 |
Manage Virtual Machines via Command Line Interface ................................................. |
243 |
Change Password in Windows via Command Line Interface......................................... |
243 |
Checking the Build Number......................................................................................... |
243 |
Send Technical Data to Parallels.................................................................................. |
244 |
More Resources .................................................................................................... |
245 |
Visit the Parallels Desktop Twitter and Facebook Pages ............................................... |
245 |
Glossary................................................................................................................. |
246 |
Index ...................................................................................................................... |
250 |

C H A P T E R 1
Welcome to Parallels Desktop
You no longer have to choose between the Mac and the PC. Parallels Desktop lets you use Windows side-by-side with macOS on your Mac.
Use this guide to quickly set up and start using Parallels Desktop 15 for Mac.
In This Chapter |
|
What You Can Do .................................................................................................. |
9 |
Set Up Your Mac to Use Windows Applications ...................................................... |
10 |
Other Operating Systems ....................................................................................... |
10 |
What You Can Do |
|
With Parallels Desktop, you can: |
|

Welcome to Parallels Desktop
•Open Windows applications side-by-side with your macOS applications, without having to restart
•Copy and paste text and drag and drop files between Mac and Windows applications
•Run Windows games and other 3D applications
•Transfer all your data from a PC and use it on your Mac
•Easily share files, devices, and other resources between Windows and the Mac
•Install different operating systems, such as Windows, Linux, macOS, free virtual appliances and use them together
•And much more
Set Up Your Mac to Use Windows Applications
After just a few steps, you can begin using Windows applications on your Mac. Setting up your Mac to run Windows applications involves the following steps:
Step 1: Install Parallels Desktop on your Mac (p. 11).
Step 2: Install Windows in a virtual machine (p. 18).
Step 3: Install your Windows applications in Windows (p. 35).
You only need to follow these steps once. Then you can open and use your Windows applications on your Mac anytime you like, just as you do with your Mac applications.
Other Operating Systems
Important: This guide is focused on using Parallels Desktop with Windows.
Using Parallels Desktop for Mac you can run several other kinds of operating systems (p. 105) on your Mac, such as several flavors of Linux and Unix, macOS Server, Windows 10 and earlier versions of Windows, and more.
Finding Information On Running Other Operating Systems
You can find much more information and details on using Parallels Desktop to run other operating systems on your Mac by checking the resources listed in More Resources (p. 245).
Additionally, though not explicitly stated, many of the instructions presented in this guide also apply to supported operating systems other than Windows. And some important instructions relating to other operating systems are in the Advanced Topics (p. 105) section.
10
C H A P T E R 2
Install or Upgrade Parallels Desktop
Follow the instructions in this chapter to install or upgrade Parallels Desktop.
Note: You can either purchase a boxed version of Parallels Desktop or purchase and download it from the Parallels website.
In This Chapter |
|
What You Need ...................................................................................................... |
11 |
Install Parallels Desktop .......................................................................................... |
12 |
Activate and Register Parallels Desktop................................................................... |
12 |
Purchase Parallels Desktop..................................................................................... |
14 |
Upgrade Parallels Desktop...................................................................................... |
14 |
Set the Language ................................................................................................... |
16 |
What You Need |
|
To install and set up Parallels Desktop 15 for Mac, you need: |
|
•A Mac computer with:
•Intel Core 2 Duo, Core i3, Core i5, Core i7, Core i9, Intel Core M or Xeon processor.
•At least 4GB of RAM (8GB recommended).
•At least 500 MB of space available on the boot volume (the volume that has macOS) for Parallels Desktop installation.
•Enough free disk space for each virtual machine and its applications (for example, at least 16 GB for each installation of Windows 10).
•macOS 10.15 Catalina, macOS 10.14 Mojave, macOS 10.13 High Sierra, macOS 10.12.6 Sierra.
To identify your computer's processor, memory, and macOS version, choose Apple menu
> About This Mac.
•Internet connection required for product activation, select features, and online updates.
•One of the following:
•Windows installation media.
Note: If you don't have Windows, Parallels Desktop can help you download and install Windows 10.

Install or Upgrade Parallels Desktop
•An Internet connection to download and install freely available operating systems such as Ubuntu, Fedora or other Linux systems supported by Parallels Desktop.
•A macOS recovery partition that can be used to create a virtual machine with the guest version of macOS.
•A Windows computer to transfer to a virtual machine and use it on your Mac alongside macOS.
•The Boot Camp partition with Windows to create a Boot Camp-based virtual machine.
For a list of operating systems that Parallels Desktop supports for use with your Mac, see
Supported Guest Operating Systems (p. 105) or go to https://www.parallels.com/products/desktop/resources/#requirements.
Install Parallels Desktop
You can be up and running with Parallels Desktop in a few easy steps:
1Make sure you have the latest version of macOS.
2Do one of the following:
•If you downloaded Parallels Desktop from the Parallels website, double-click the disk image file, most likely in your Downloads folder.
•If you purchased a boxed copy of Parallels Desktop with a USB thumb drive, connect the drive to your Mac, open it and double-click the disk image file.
•If you purchased a boxed copy with a link to the installation file, open the link in your web browser, download Parallels Desktop and double-click the disk image file.
•If you purchased a boxed copy with an installation disc, insert the disc.
Note: If your Mac doesn't have a DVD-ROM, you can use the download link, available in the retail box, to download Parallels Desktop over the Internet.
3 Double-click the Install icon and follow the onscreen instructions to install Parallels Desktop.
Activate and Register Parallels Desktop
After the installation, activate and register Parallels Desktop. Do the following:
12

Install or Upgrade Parallels Desktop
1 Sign in to your Parallels account:
Parallels account allows you to:
•store your product activation keys - you will never forget or lose them;
•prevent anyone but you from using your license keys;
•manage your subscriptions to Parallels products;
•contact the Parallels Support and track your support requests;
•download the latest versions of Parallels products and accompanying documentation;
•get info about the latest updates to your products and beta versions of new products;
•work with remote computers via a web browser (as a Parallels Desktop user, you will get Parallels Access for free);
•manage Parallels Desktop licenses on the Macs belonging to your company (if you use Parallels Desktop for Mac Business Edition).
To sign in, do one of the following:
•If you have an account, select I have a password, enter your email and password and click
Sign In.
•If you don't have a Parallels account, select I am a new user, enter an email address that will be used to create the account, your name, password and click Create Account.
2 In the next step, enter your Product Activation Key to activate Parallels Desktop.
13

Install or Upgrade Parallels Desktop
Note: If you purchased Parallels Desktop from the Parallels Online Store, a key was sent to the email address you provided. If you bought a boxed copy, you can find your key printed on the installation disc sleeve.
If you already have a license available and associated with your account, just select the license and click Activate.
If You Don't Have A Product Activation Key
If you don't have a key already, you can get a free trial Product Activation Key so you can try out Parallels Desktop for a limited time, click Try Free for 14 days. Or to purchase a key that lets you use Parallels Desktop permanently, click Buy.
Purchase Parallels Desktop
If you're using a trial version of Parallels Desktop 15, you can easily purchase the full version right from the application interface. To do so:
1Click Buy in the About Parallels Desktop window or when you see the promo.
2Choose one of the following:
•Upgrade: Select this option to upgrade your current version of Parallels Desktop. Please keep in mind that you will need the activation key for your previous version. If the Upgrade option is selected by default, Parallels Desktop has already automatically detected the key for the previous version. If not, please make sure you have it.
•Buy Full Version: Select this option to purchase Parallels Desktop if you have never used it before.
3Follow the onscreen instructions.You may need to scroll down to see all the information.
Upgrade Parallels Desktop
If you already have some version of Parallels Desktop, follow these steps to upgrade to Parallels Desktop 15.
1If you haven't already done so, purchase and download a "Parallels Desktop 15 for Mac Upgrade," available from the Parallels Online Store at https://www.parallels.com.
A Product Activation Key is sent to the email address you provide.
2If Parallels Desktop is open, quit Parallels Desktop.
3Follow the instructions to install Parallels Desktop 15. See Install Parallels Desktop.
During installation, the previous version of Parallels Desktop is automatically removed from your computer.
4Open Parallels Desktop and enter your upgrade Product Activation Key.
14

Install or Upgrade Parallels Desktop
If you were using a trial version of Parallels Desktop or you purchased a previous version but haven't installed it on your computer, you will also be prompted to enter a full or upgrade key for that version.
Troubleshooting
If you have any problems upgrading Parallels Desktop, you can find troubleshooting information at https://www.parallels.com/products/desktop/support/.
Install Software Updates
Periodically, Parallels provides free software updates to improve Parallels Desktop.
By default, Parallels Desktop is configured to automatically check for and download available software updates once a week. When an update is available, Parallels Desktop prompts you to install it. Simply follow the onscreen instructions.
Adjust Software Update Settings
1Do one of the following:
•Click the Parallels icon  in the menu bar and choose Preferences. Then click General.
15

Install or Upgrade Parallels Desktop
•Right-click the Parallels Desktop icon in the Dock and choose Preferences. Then click
General.
•
2Do one of the following:
•To adjust the frequency that Parallels checks for software updates, choose Never, Once a Day, Once a Week, or Once a Month from the Check for Updates menu.
•To choose whether you want Parallels Desktop to download updates automatically, select or deselect Download updates automatically.
If you choose not to download updates automatically, Parallels Desktop notifies you when an update is available and asks whether you want to download it.
Check for an Update Manually
•Follow the instructions in step 1 above and then click Check Now. You can also choose
Check for Updates from the Parallels Desktop application menu.
Note: To check for updates and download them, your Mac must be connected to the Internet.
Set the Language
You can set which language the Parallels Desktop interface uses by doing the following:
16

Install or Upgrade Parallels Desktop
1Quit Parallels Desktop.
2Choose Apple menu > System Preferences > Language & Region.
3Drag the language you want to the top of the list. If you don't see the language you want to use in the list, click the Add button  .
.
4Open Parallels Desktop.
If the primary language you chose is supported by Parallels Desktop, the menus and interface text appear in that language. If the primary language you selected isn't supported, menus appear in the first language listed that Parallels Desktop supports.
17
C H A P T E R 3
Install or Import Windows
There are a few ways to get Windows up and running on your Mac:
•Install Windows (p. 18)
•Import your data from a Windows PC (p. 19)
•Use Windows that you already have installed from a Boot Camp partition (p. 28)
•Import Windows from a previous version of Parallels Desktop or other virtualization software (p. 30)
In This Chapter |
|
Install Windows....................................................................................................... |
18 |
Import Your Data from a PC.................................................................................... |
19 |
Use Boot Camp with Parallels Desktop.................................................................... |
28 |
Import from an Earlier Parallels Desktop or Other Virtualization Application ............... |
30 |
Download and Install Windows From Microsoft........................................................ |
30 |
Install Windows
If you have a Windows installation source (a DVD disc, an image file, or a USB storage) and a valid Windows product key, you can install Windows on your Mac and use it with Parallels Desktop.
To install Windows:
1Open Parallels Desktop (in the Applications folder) and choose File > New.
2If you have a Windows installation disc, insert it into the DVD drive. If you have a USB storage with Windows, connect the storage to the Mac.
3Click Install Windows or another OS from a DVD or image file.
4Parallels Desktop scans for and lists installable operating systems. If you see the version of Windows you want to install, select it, click Continue and go to step 6.
5If the Windows installation source didn't show up automatically in Step 4, click Choose Manually to browse for it manually. You can browse from the following sources:
•DVD: If you have a Windows DVD, insert it into the DVD drive. Once Windows is detected, click Continue. If your Mac doesn't have a DVD drive, you can use an Apple SuperDrive, another Mac's DVD drive via Remote Disc, or make an image from the disc.

Install or Import Windows
•Image File: If you have a Windows image file, click Image File and drag the image to the Parallels Wizard window. Once Windows is detected, click Continue.
•USB Drive: If you have a bootable USB installer with Windows, click USB Drive and connect the drive to the Mac. Once Windows is detected, click Continue.
Note: Parallels Desktop may fail to detect some operating systems (for example, the latest Linux distributions). If this happens but you're sure that the operating system can be installed, click Continue, specify the OS type manually (if it's not listed, choose Other), and follow the onscreen instructions.
6Choose what for you're going to primarily use Windows. Its settings will be tuned to best fit your needs.
7Choose where you want to store Windows from the Location menu.
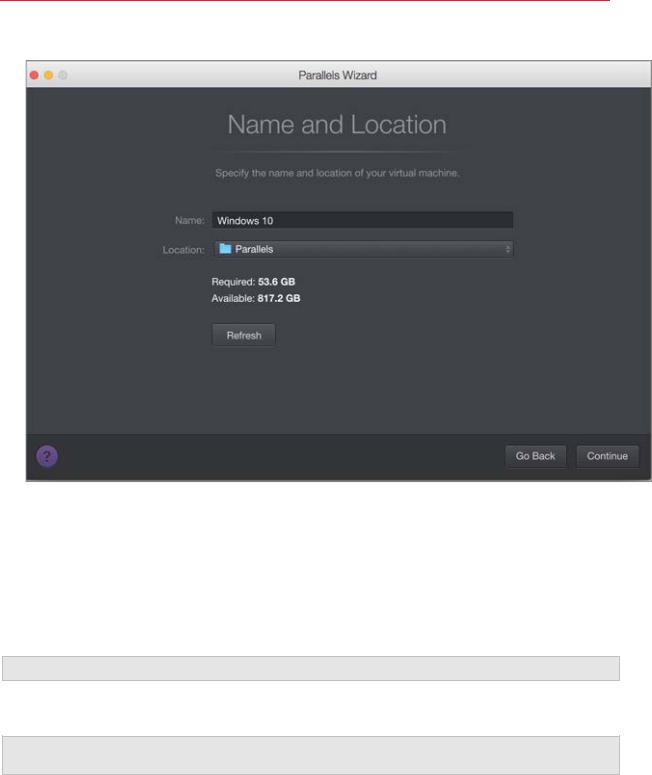
By default, Parallels Desktop stores Windows in the /Users/<username>/Parallels folder.
8If you want to pre-set things like how much memory Windows uses or whether it starts automatically when you open Parallels Desktop, select Customize settings before installation. You can also adjust these settings after the operating system is installed.
9Click Continue.
The assistant installs Windows.
Once Windows is installed, you can start it up by opening a Windows application (p. 32) or by clicking the power button in Control Center.
Important: The first time you start Windows, Parallels Tools are installed to allow seamless operation between Windows and macOS. Once Parallels Tools are installed, you're prompted to restart Windows.
When you install Windows, Parallels Desktop creates an administrator account with a blank password. Once the installation is complete, it is recommended that you change this password.
Note: You can also install Windows from a disk image file (p. 230) of an installation disc. Simply choose the disk image file in step 4 above. Parallels Desktop supports ISO, DMG, CUE, and CCD disk images.
Import Your Data from a PC
You can import all your data from a Windows PC to Parallels Desktop on your Mac. Then you can continue to work with all your Windows applications, files, and data, side-by-side with macOS.
19

Install or Import Windows
Overview of Methods for Importing
You can import your data using one of the following:
•Network (p. 21): If both the Windows PC and your Mac are connected to a network, you can import your data over the network.
•External storage device (p. 24): You can transfer the data from a Windows PC to an external storage device, such as an external hard drive. Then, you can connect the device to your Mac and import your data into Parallels Desktop.
Requirements for Importing Your Data
To import your data to your Mac, you need a Windows computer with:
•Windows 10, Windows 8.1, Windows 8, Windows 7, Windows Vista, or Windows XP with Service Pack 2 or later.
Note: You can also use a computer running Windows Server 2008 R2 (64-bit only), Windows Server 2008, or Windows 2000 Professional (32-bit only).
•An Intel or AMD (700 MHz or higher) x86 or x64 processor
•At least 256 MB of RAM
•At least 70 MB of hard disk space for installing Parallels Transporter Agent
•One of the following:
•An Ethernet port for transferring your data over network
•An external storage device, such as a USB hard disk
Note: Parallels Desktop does not support migrating Windows dynamic volumes. These are volumes which size is not fixed as in basic volumes. They are migrated as data disks only. You can later add them (p. 228) to an already existing virtual machine.
Step 1: Install Parallels Transporter Agent on Your Windows PC
To import your data you must first install the Parallels Transporter Agent software on the Windows PC.
To install Parallels Transporter Agent:
1Do one of the following:
•If you purchased a physical copy of Parallels Desktop, insert the Parallels Desktop installation DVD into your Windows PC. If the installation doesn't start automatically, locate and double-click the Parallels Transporter Agent.exe file on the disc.
20
Install or Import Windows
•Download Parallels Transporter Agent for Windows from the Parallels website at http://www.parallels.com/download/desktop/ and double-click the installation file.
If your computer is connected to the Internet, Parallels Transporter Agent checks for available updates. If an update is available, click Download and Install New Version.
2 Follow the onscreen instructions to install Parallels Transporter Agent.
Step 2: Import Your Data
Follow one of the methods below to import your data from your PC to your Mac.
Over a Network
Important: After importing your data, you may need to reactivate some of your Windows applications using the activation keys you received when you purchased the applications.
To import your data from a PC over a network:
1Turn on your Mac and your Windows PC and log in.
2Make sure that Windows Firewall (p. 27) is turned off. You can turn it on again after the import is finished.
21

Install or Import Windows
3On the Windows PC, open Parallels Transporter Agent by clicking the Start menu and choosing
All Applications > Parallels > Parallels Transporter Agent.
In Parallels Transporter Agent, select Network and click Continue.
4On your Mac, open Parallels Desktop and choose File > New.
5Select Transfer Windows from a PC and click Continue.
6Select Network and click Continue.
7Find the passcode displayed in Parallels Wizard on your Mac and enter it in Parallels Transporter Agent on your Windows PC.
22

Install or Import Windows
If the remote PC and Mac are not connected to the same network, you can transfer the remote PC using its name or IP address. To do so, click Connect using IP address, select the Windows PC name from the list or type the IP address, and click Continue.
8If you have chosen to use the computer name or IP address, provide the Windows administrator credentials. Parallels Desktop connects to Parallels Transporter Agent and starts collecting information about the source computer.
9If you want to log in to Windows automatically whenever you start up Windows, select Enable Automatic Logon. When ready, click Continue.
10Choose what you want to transfer;
•System only: this option allows you to transfer the operating system and applications only.
•System and documents: this option allows you to transfer the operating system, applications, and user's files like pictures, documents, downloads, music, videos, etc.
11If you choose System only in step 10, you will have to use Apple Migration Assistant to transfer the user's files.
23
Install or Import Windows
12 Choose where you want to install your data.
When ready, click Continue.
13In the next step there's a warning about Windows activation that might be required when you start using it. To proceed, read this message, select I want to continue and click Continue.
14Once the transfer is complete, click Done.
15Start Windows (p. 31).
16When Windows boots up, choose Actions > Install Parallels Tools and follow the onscreen instructions.
Note: To be able to install Parallels Tools, you must be logged in to Windows as an administrator.
Using an External Storage Device
Important: After importing your data, you may need to reactivate some of your Windows applications using the activation keys you received when you purchased the applications.
To import your data from a PC using an external storage device:
1 Connect an external storage device to your Windows PC.
24

Install or Import Windows
2On the Windows PC, open Parallels Transporter Agent by clicking the Start menu and choosing
All Applications > Parallels > Parallels Transporter Agent.
3Select External storage and click Continue. Parallels Transporter Agent collects information about the Windows PC.
4If you want to log in to Windows automatically whenever you start up Windows, select Enable Automatic Logon and specify the Administrator's password. When ready, click Continue.
5Choose what you want to transfer;
•System only: this option allows you to transfer the operating system and applications only.
•System and documents: this option allows you to transfer the operating system, applications, and user's files like pictures, documents, downloads, music, videos, etc.
6If you choose System only in step 5, you will have to use Apple Migration Assistant to transfer the user's files.
7Choose where you want to store your data. You can also click Customize and select which Windows volumes to migrate.
When ready, click Continue.
8In the next step there's a warning about Windows activation that might be required when you start using it. To proceed, read this message, select I want to continue and click Continue.
9Once the migration is complete, click Done to quit Parallels Transporter Agent.
25

Install or Import Windows
10Disconnect the storage device from the Windows PC and connect it to your Mac.
11On your Mac, open Parallels Desktop and choose File > New.
12Select Transfer Windows from a PC and click Continue.
13Select External storage and click Continue.
14Parallels Desktop scans the connected storages for the newly created virtual machine. If Parallels Desktop cannot find it, select the virtual machine manually. Then click Continue.
15Choose where you want to install Windows and your data, and then click Continue.
16Once the transfer is complete, click Done.
17Start Windows (p. 31).
18When Windows boots up, choose Actions > Install Parallels Tools and follow the onscreen instructions.
Note: To be able to install Parallels Tools, you must be logged in to Windows as an administrator.
Solving Problems
Read this section if you have problems importing your data from a Windows PC.
General Tips
This section provides solutions to some errors that may occur during the import process.
Parallels Transporter Agent Doesn't Work Correctly
If you experience any problems while importing, make sure that the snapman.sys driver is installed in C:\WINDOWS\system32\drivers\.
If the snapman.sys driver is not installed, follow these steps:
1Uninstall Parallels Transporter Agent.
2Restart your Windows PC.
3Reinstall Parallels Transporter Agent.
4Restart your Windows PC again.
5Try to import Windows and your data again.
Import is Interrupted by an Error
If the import process is interrupted by an error, do the following:
1 From the Start menu, choose My Computer.
26

Install or Import Windows
2In the Hard Disk Drives pane, right-click the volume you want to import, and choose
Properties.
3In the Properties pane, click the Tools tab, and in the Error Checking section, click the
Check Now button.
4In the Check Disk window, select Automatically fix file system errors and Scan for and attempt recovery of bad sectors, and then click Start.
5Wait till the disk is scanned and errors are fixed.
Dynamic Volumes are not Imported
Only basic volumes can be imported. You can't import dynamic volumes using Parallels Desktop.
The only way to import the data stored on a dynamic disk is to copy the data to a basic disk on your Mac and then import the basic disk.
If Your Mac Fails to Connect with Parallels Transporter Agent
Firewall applications may block connections between your Mac and Parallels Transporter Agent on the Windows PC.
Firewall problems in macOS
If your Mac fails to connect with Parallels Transporter Agent on your Windows PC, the reason may be that the built-in Mac firewall blocks the connection to Parallels Transporter Agent.
To enable connections between your Mac and Parallels Transporter Agent and prevent further blocking, you can configure the firewall settings in macOS by doing the following:
1From the Apple menu, choose System Preferences, and then click Security.
2Click the Firewall tab.
3Configure the necessary settings.
If you try to search for Parallels Transporter Agent by typing the Windows PC IP address manually, you may receive a message saying that Parallels Transporter Agent is blocked. Click the Unblock button.
Firewall problems in Windows
Microsoft Windows operating system has a built-in firewall that blocks connections to and from other computers. When starting Parallels Transporter Agent for the fist time, you may see a message saying that Windows Firewall has blocked some features of the application.
To enable the connection between your Mac and Parallels Transporter Agent, click Unblock.
27

Install or Import Windows
To prevent this problem from happening again, add Parallels Desktop and/or Parallels Transporter Agent to the firewall exceptions (the list of applications allowed to communicate through the firewall):
1From the Start menu, choose Control Panel > Network Connections.
2In the Network Tasks pane, click Change Windows Firewall Settings.
3Add Parallels Desktop and/or Transporter Agent to the firewall exceptions list.
If Parallels Doesn't Detect Windows Correctly
If Parallels Desktop detects the source operating system (Microsoft Windows XP or Windows Vista computer) incorrectly, make sure that neither of your Windows applications are running in compatibility mode - a special mode of Windows allowing you to run applications that are incompatible with your version of Windows.
See Windows Help for more information.
Problems Using a Application After an Import
Applications that depend on specific hardware may not work in Parallels Desktop.
If you import from several source volumes, the disk drive letters are changed. Make sure that the application paths are set correctly. See Windows Help for more information.
Use Boot Camp with Parallels Desktop
Boot Camp is a feature of macOS that lets you start up your Mac in Windows. If you have already installed Windows 10, Windows 8.1, Windows 8, Windows 7, Windows Vista, or Windows XP on your Mac using Boot Camp, you can set Parallels Desktop to work with Boot Camp using either of these two options:
•Set Parallels Desktop to run Windows from the Boot Camp partition: Changes you make in Windows applications either while working in macOS or when you start up your Mac in Windows using Boot Camp will be reflected in both places.
Note: Parallels Desktop supports Boot Camp created using Boot Camp Assistant on the same disk where macOS is installed.
Windows running from Boot Camp has the following limitations:
•It can't be paused
•It can't be saved as a snapshot (p. 115)
•It can't run in Rollback Mode (p. 88)
•It can't be compressed
28

Install or Import Windows
•Import Windows and your data from Boot Camp into Parallels Desktop: Windows running from Parallels Desktop doesn't have the above listed limitations. Boot Camp and Parallels Desktop are separate. Changes you make in Windows applications while working in macOS are not reflected when you start up your Mac in Windows using Boot Camp.
When you import Windows from Boot Camp, Parallels Desktop creates an expanding .hdd file and copies all the contents from Boot Camp to it. During this operation, initial Windows on Boot Camp doesn't get changed. All you need is just enough free disk space on the Mac's hard disk.
Set Parallels Desktop to run Windows from the Boot Camp Partition
1Open Parallels Desktop (in the Applications folder) and choose File > New.
2Click Boot Camp, and then follow the onscreen instructions.
Note: If you plan to start up in Windows using Boot Camp, it is recommended that you shut down Windows in Parallels Desktop rather than suspending Windows.
Import Windows and Your Data from Boot Camp into Parallels Desktop
1Set Parallels Desktop to use Boot Camp, as described in the steps above.
2Right-click (Control-click) the Boot Camp version of Windows in Control Center and choose
Import Boot Camp.
Note: Windows must be shut down.
3Click Import.
4Locate where you want to store Windows and your data, and then click Choose.
Windows and all your data are imported from Boot Camp. You can still use the original Boot Camp Windows installation, separately from Parallels Desktop.
Important: The first time you start Windows after setting Parallels Desktop to work with Boot Camp, Parallels Tools are installed to allow seamless operation between Windows and macOS. Once Parallels Tools are installed, you're prompted to restart Windows.
Save Disk Space with Parallels Desktop
You can save disk space on your Mac by importing Windows from Boot Camp into Parallels Desktop and then deleting the Boot Camp partition. Here is how it works:
1For example, you have a 40 GB Boot Camp partition and only 20 GB are taken by Windows and its files. Other 20 GB are not used.
2You choose to import Boot Camp. Parallels Desktop copies Windows and all its files from Boot Camp into a new virtual machine. This virtual machine will occupy only20 GB of disk space.
3Once the import is complete, delete the Boot Camp partition and save 20 GB of disk space.
29

Install or Import Windows
Note: The hard disk of the resulting virtual machine is not limited to 20 GB. It is expanding which means that you can continue installing applications, downloading movies, music, etc. The disk will grow in size proportionally. For example, if you download a 5 GB movie to this virtual machine, it will occupy 25 GB of disk space.
Import from an Earlier Parallels Desktop or Other Virtualization Application
With Parallels Desktop for Mac you can use Windows that you set up using earlier versions of Parallels Desktop, as well as VMware Fusion, Microsoft Virtual PC, and VirtualBox:
1Open Parallels Desktop (in the Applications folder) and choose File > Open.
2Select the Windows data file you want to import, then click Open and follow the onscreen instructions.
•Parallels Desktop data files end with .pvm.
•VMware files end with .vmx.
•Virtual PC files end with .vmc.
•VirtualBox files end with .xml or .vbox.
You can also simply drag a Parallels .pvm file to Control Center to add it to Parallels Desktop.
3Start Windows (p. 31).
4Choose Actions > Install Parallels Tools and follow the onscreen instructions.
Download and Install Windows From Microsoft
If you don't have Windows, you can download and install it from Microsoft. To do so, please follow the onscreen instructions.
30
Loading...