

Panasonic WVCS5C, WVCS5S Specsheet
Operating Instructions
Included Installation Instructions
ENGLISHDEUTSCH
WV-CS5C
WV-CS5S
please read these instructions carefully and save this manual for future use.
Precautions
Installation work requires technique and experience.•
Failure to observe this may cause injury or damage to the product.•
Be sure to consult the dealer.•
Mounting procedures
Dome Cover
Model No. WV-CS5S
WV-CS5C
Before attempting to connect or operate this product,
WV-CS5S is a smoke type, WV-CS5C is a clear type.
FRANÇAISESPAÑOL
Read along with the Installation Guide of the camera body.
Step 1
Connect the cables to the camera, and fix them to the ceiling. (Refer to the Installation Guide of the camera in use.)
Step 2
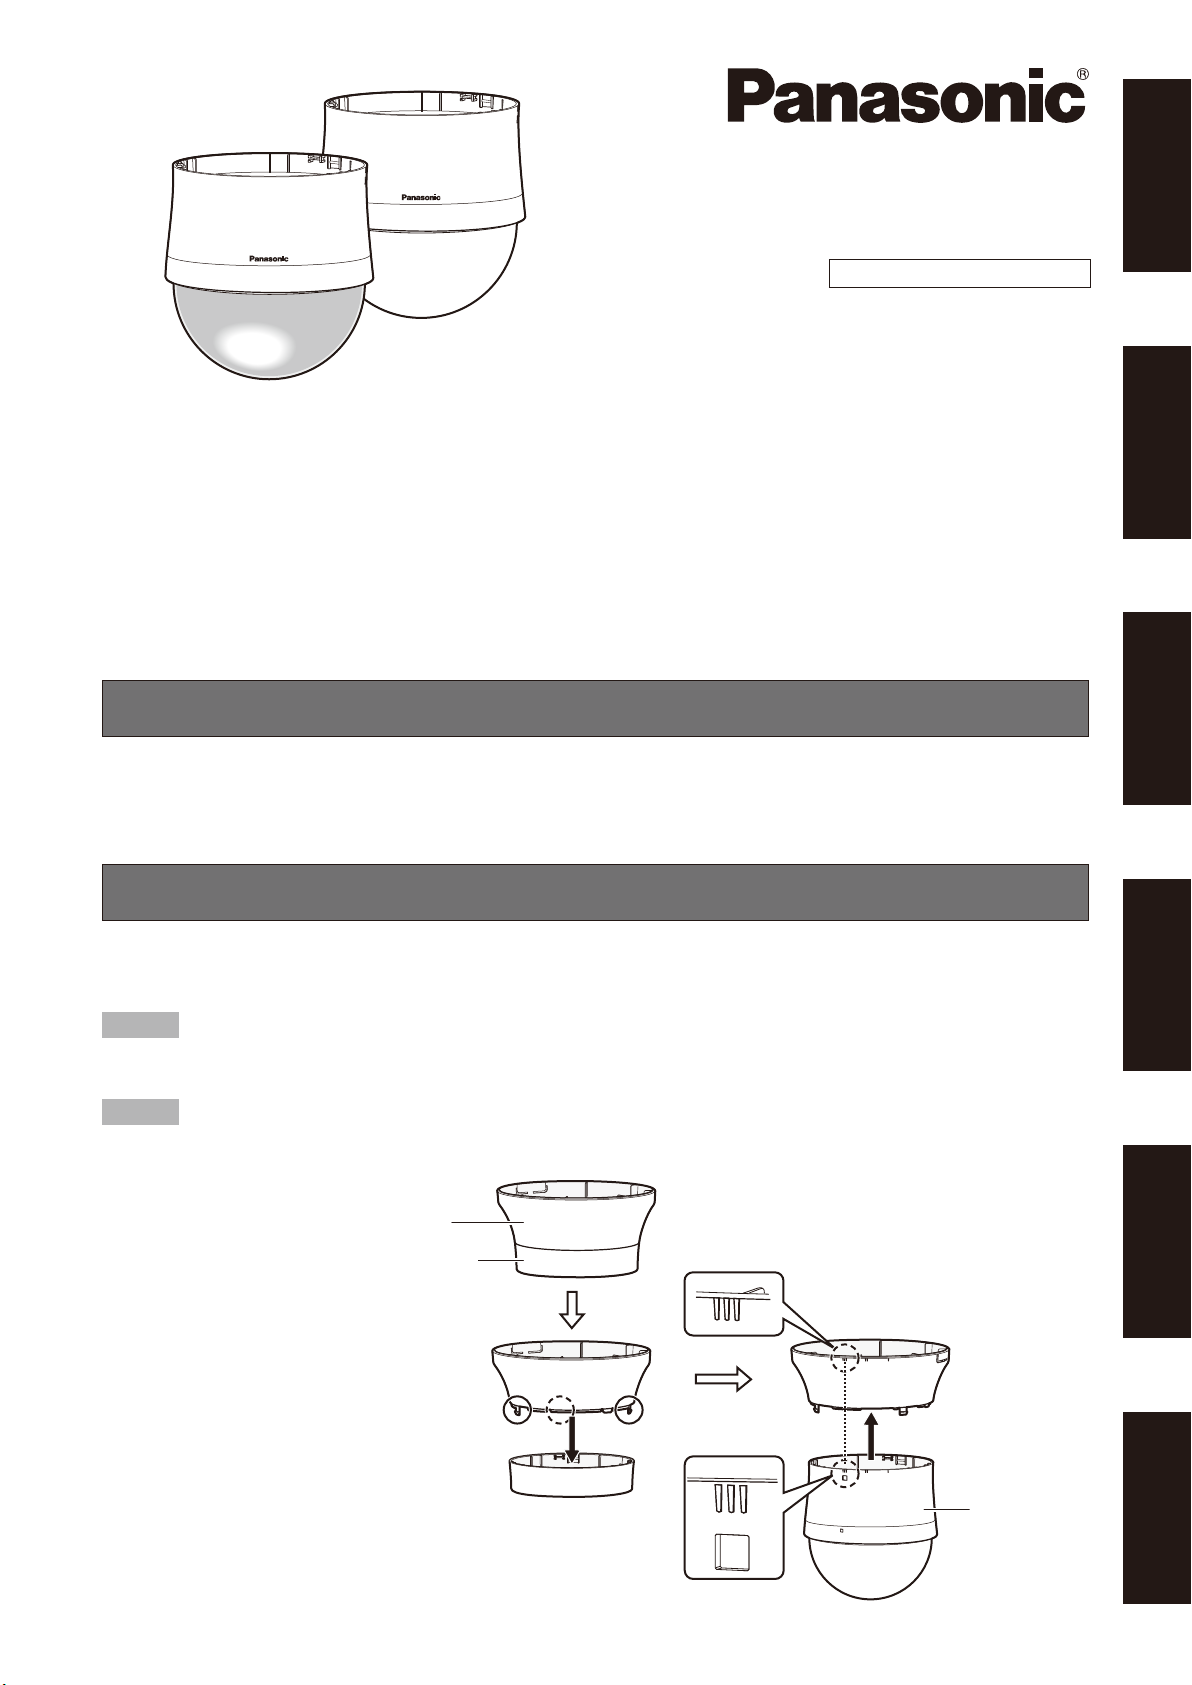
Remove the bottom decorative cover, and attach the dome cover to the top decorative cover.
Decorative cover (Top)
Decorative cover (Bottom)
Remove
The decorative cover (Bottom) is not used.•
The decorative cover is secured with hooks at 3 points.•
The dome cover is also secured with the same hooks.
Match the markings.
ITALIANOРУССКИЙ
Dome cover
Step 3
Remove the protective sheet from the lens surface of the camera.
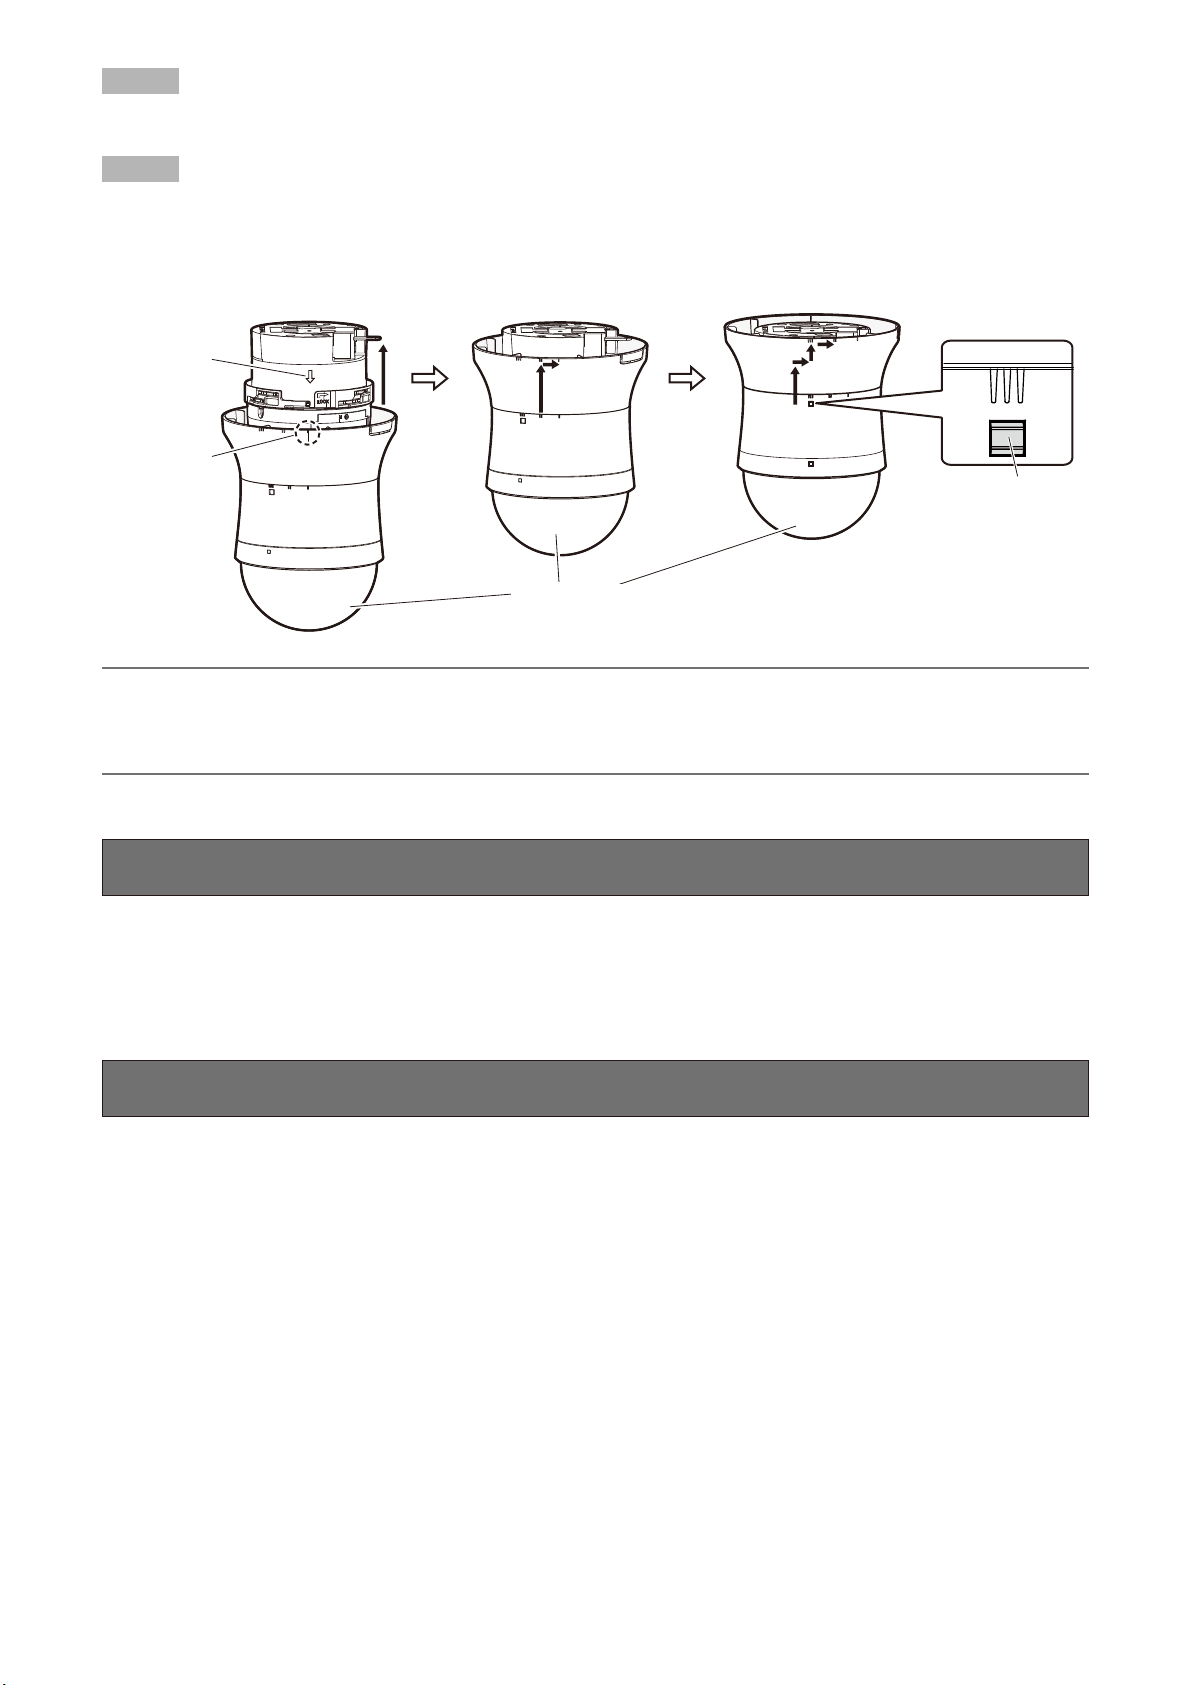
Step 4
Align the "|" mark of the decorative (Top) and the arrow mark of the camera body, and insert the cover from the bottom.
After inserting the decorative cover, rotate it clockwise when looking at it from underneath by 2 steps to engage the cover by
pushing it up as shown in the drawing below.
Make sure that the lock lever is securely inserted into the slot of the decorative cover. Then remove the protective sheet from
the dome cover.
Arrow mark
"|" mark
Lock lever
Protective sheet
Note:
To remove the decorative cover from the camera body, rotate the decorative cover counterclockwise when looking at it from •
underneath and pull it slightly downward while pressing the lock lever.
The body part of the dome cover may be caught in the view depending on the lens direction and the angle. In such a case, •
adjust the lens direction.
Specifications
Ambient operating temperature: –10 °C to +55 °C {14 °F to 131 °F}
Mass: Approx. 200 g {0.44 lbs}
Dimensions: ø156 mm x 162 mm (H) {ø6-5/32 inches x 6-3/8 inches (H)},
diameter of the dome: 145 mm {5-23/32 inches}
Standard Accessories
Operating Instructions .................................1 set
2

DEUTSCHE AUSGABE
(GERMAN VERSION)
Vorsichtsmaßregeln
Installationsarbeiten erfordern Fachkenntnisse und Erfahrung.•
Andernfalls besteht die Gefahr von Verletzungen oder Schäden am Produkt.•
Unbedingt einen Fachhändler konsultieren.•
Montagevorgänge
In Verbindung mit dem dem Kameragehäuse beiliegenden Installationshandbuch lesen.
Schritt 1
Die Kabel an die Kamera anschließen und an der Decke befestigen. (Siehe das der Kamera beiliegende Installationshandbuch.)
Schritt 2
Die untere Abdeckblende entfernen und die Dome-Abdeckung an der oberen Abdeckblende befestigen.
Abdeckblende (Oberen)
Abdeckblende (Untere)
Entfernen
Die Markierungen
ausrichten.
DEUTSCH
Die (untere) Abdeckblende wird nicht benötigt.•
Die Abdeckblende ist an 3 Stellen mit Haken gesichert.•
Dieselben Haken sichern auch die Dome-Abdeckung.
Dome-Abdeckung
3
Schritt 3
Die Schutzfolie vom Objektiv der Kamera abziehen.
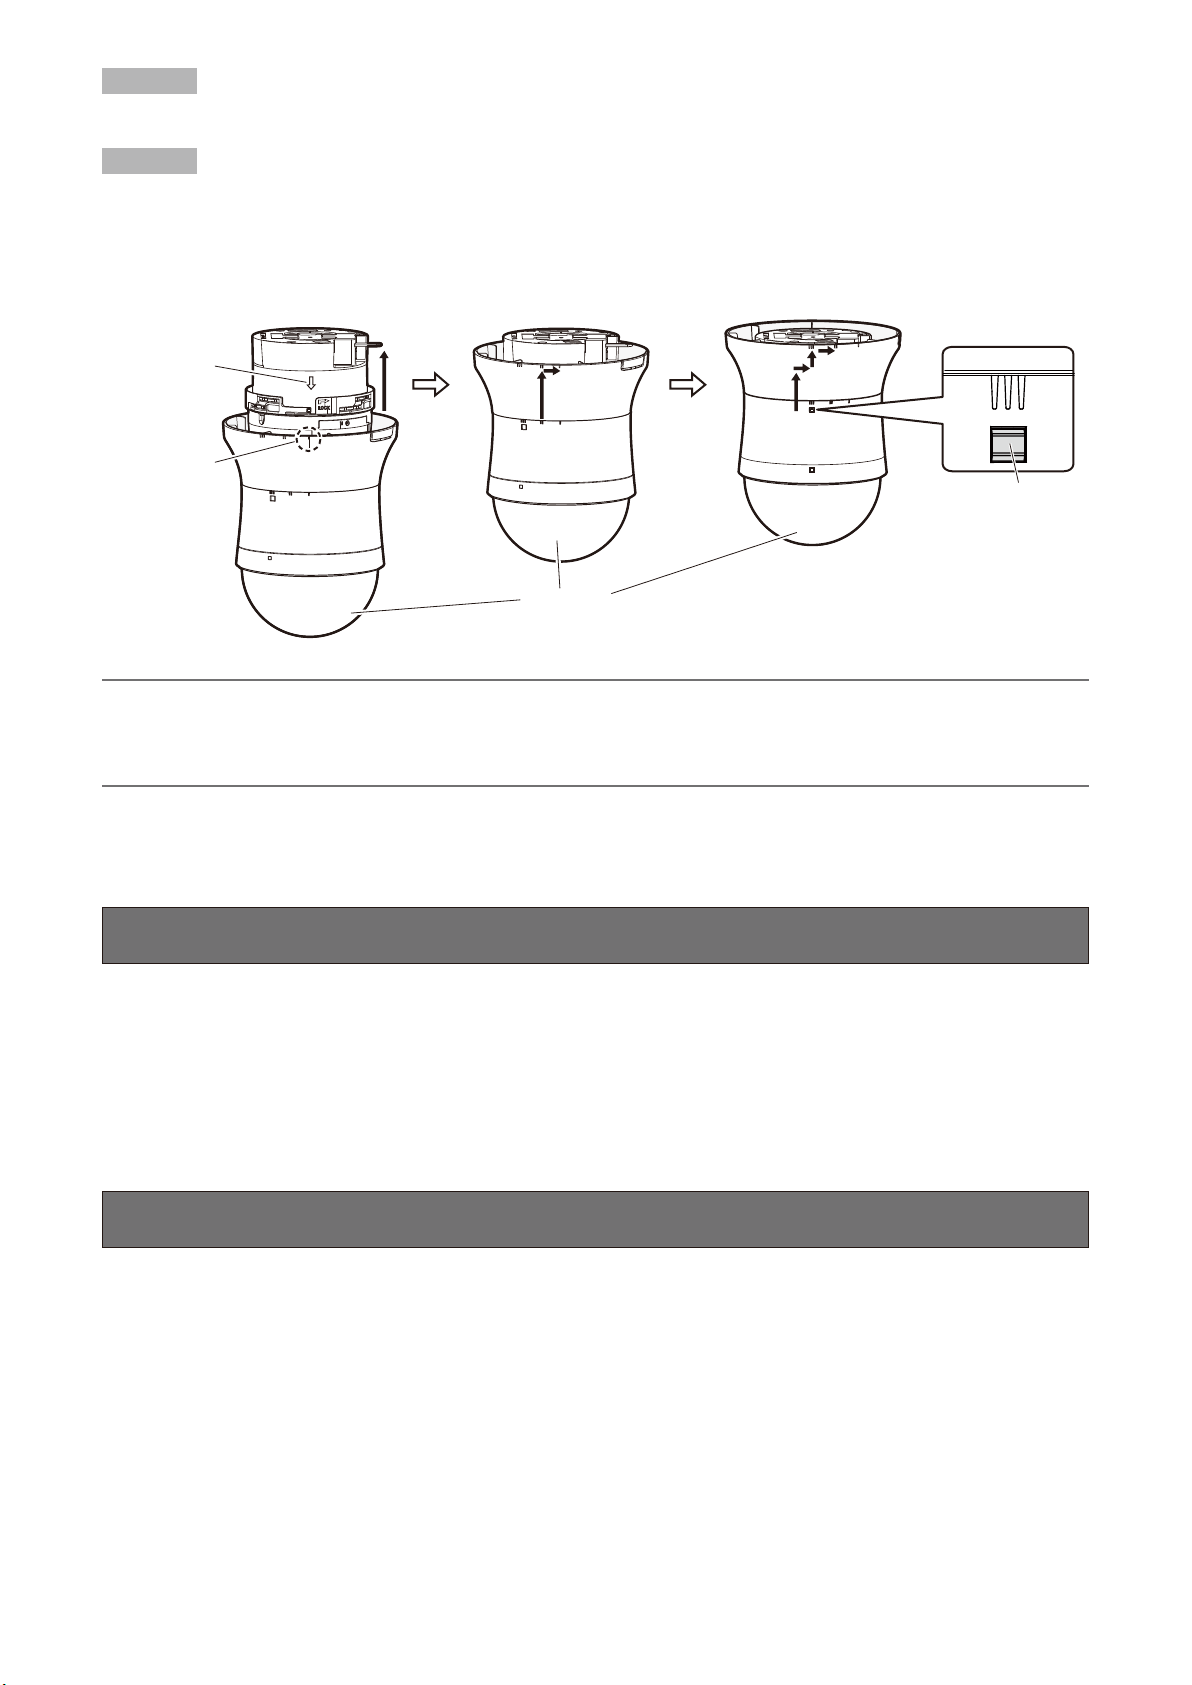
Schritt 4
Die Markierung "|" an der (oberen) Abdeckblende auf die Pfeilmarkierung am Kameragehäuse ausrichten und die Abdeckung
von unten her aufsetzen.
Die Abdeckblende gemäß Abbildung andrücken und in 2 Stufen nach rechts drehen (von der Unterseite her gesehen), bis sie
fest sitzt.
Sicherstellen, dass der Verriegelungshebel fest in der Öffnung in der Abdeckblende sitzt. Anschließend die Schutzfolie von der
Dome-Abdeckung abziehen.
Pfeilmarkierung
"|"-Position
Verriegelungsarm
Schutzfolie
Anmerkung:
Zum Trennen der Abdeckblende vom Kameragehäuse die Abdeckblende nach links drehen (von der Unterseite her gese-•
hen), auf den Verriegelungshebel drücken und die Blende nach unten abziehen.
Je nach Ausrichtung des Objektivs kann der undurchsichtige Teil der Glockenabdeckung die Sicht verdecken. In diesem •
Fall die Ausrichtung des Objektivs verändern.
Technische Daten
Betriebsumgebungstemperatur: –10 °C bis +55 °C
Masse: Ca. 200 g
Abmessungen: ø156 mm x 162 mm (H), Glockendurchmesser: 145 mm
Standardzubehör
Bedienungsanleitung ...................................1 Satz
4
VERSION FRANÇAISE
(FRENCH VERSION)
Mesures de précaution
Les travaux d'installation exigent des connaissances techniques et de l'expérience.•
Le fait de ne pas respecter cette recommandation risque de blesser quelqu'un voire endommager ce produit.•
Faire en sorte de consulter le distributeur.•
Procèdures de fixation
Lire avec le guide d'installation du bloc de caméra vidéo.
Étape 1
Connecter les câbles à la caméra vidéo et les fixer au plafond. (Se référer au Guide d'installation de la caméra vidéo utilisée.)
Étape 2
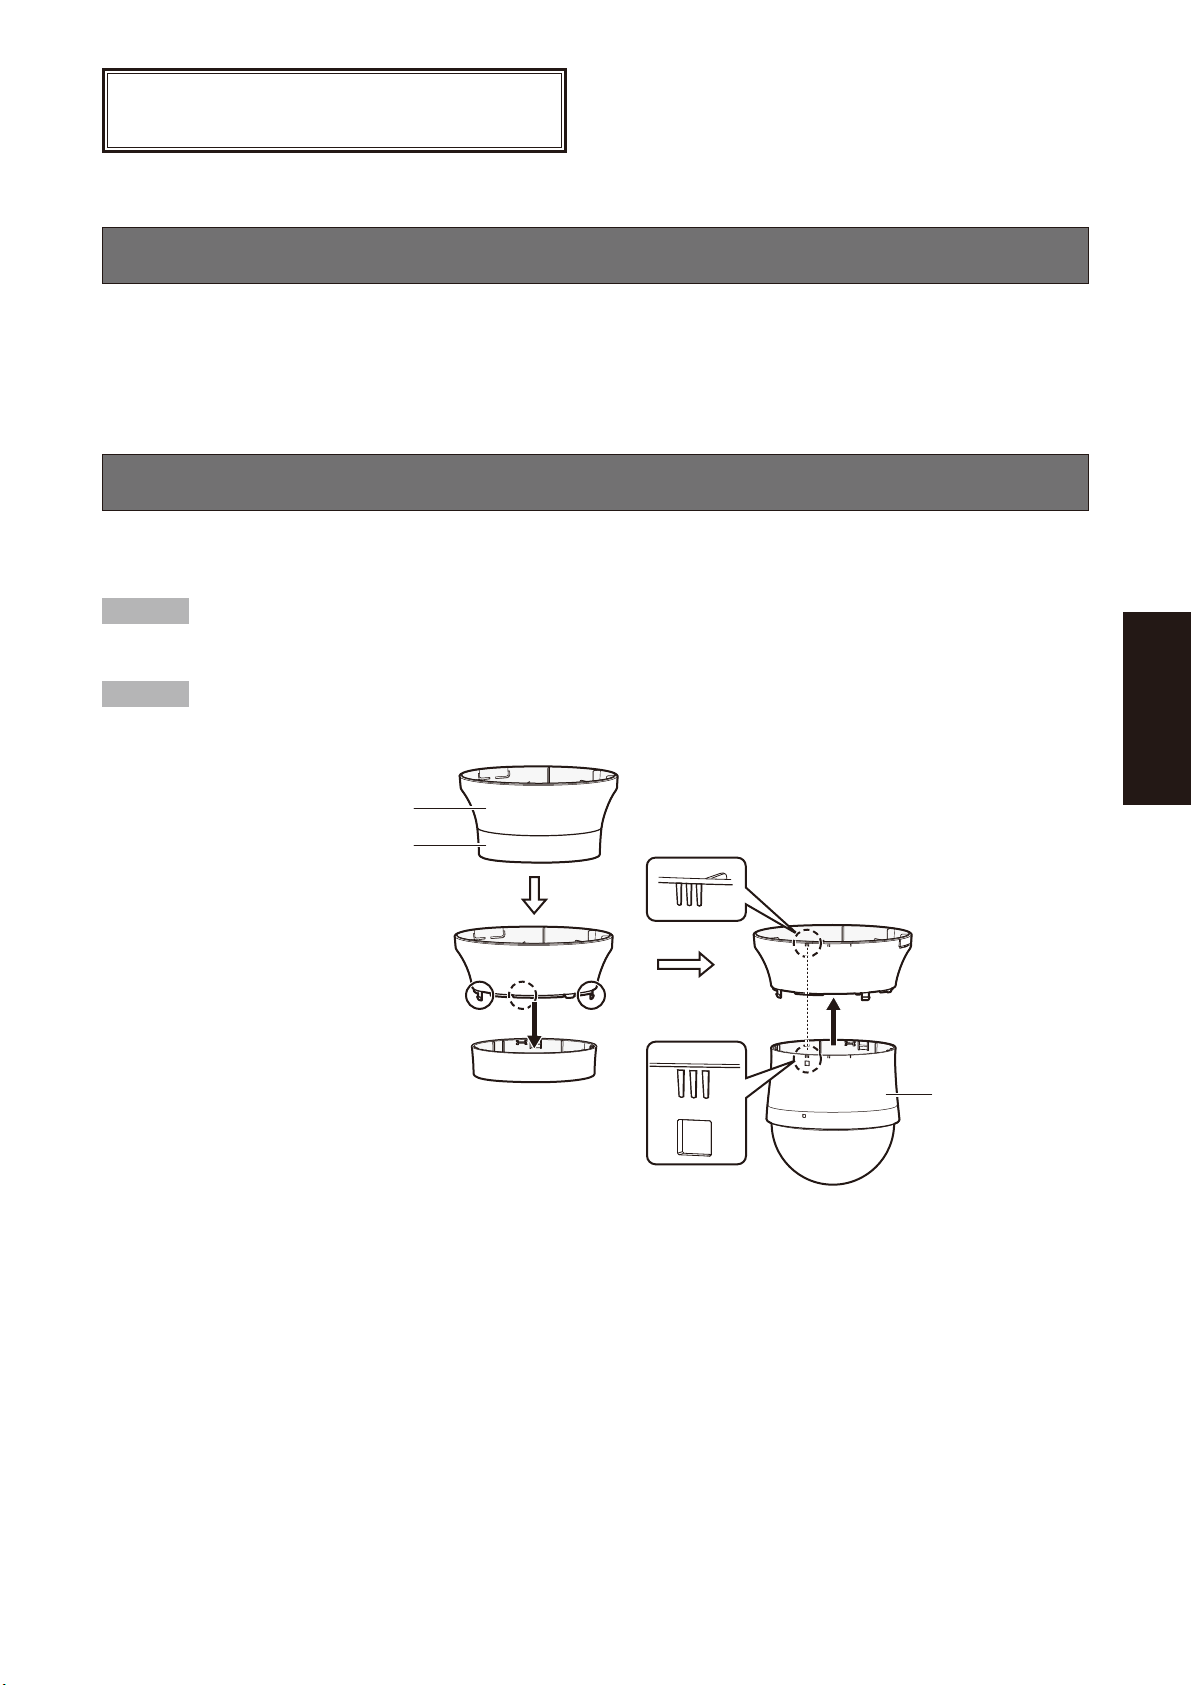
Retirer le couvercle décoratif inférieur, puis fixer le couvercle en dôme sur le couvercle décoratif supérieur.
Couvercle décoratif (Supérieur)
Couvercle décoratif (Inférieur)
Retirer
Le couvercle décoratif (inférieur) n'est pas utilisé.•
Le couvercle décoratif est fixé à l'aide de crochets à 3 emplacements.•
Le couvercle en dôme est également fixé à l'aide des mêmes crochets.
Faire correspondre
les repérages.
FRANÇAIS
Couvercle en dôme
5
 Loading...