

Panasonic WJ-HD300, WJ-HD309, WJ-HD316, WJ-HD309A, WJ-HD316A Conversion Manualline
Digital Disk Recorder
WJ-HD300 series S-ATA conversion guide
WJ-HD309, WJ-HD316,WJ-HD309A,WJ-HD316A
Panasonic System Solutions
1. Sept. 2008

WJ-HD300 S-ATA conversion guide
Screw
Connectors cover
Maintenance guide
1. Introduction
This manual describes how to convert the hard disk drive installed in the WJ-HD300 series from the P-ATA type to the S-ATA type.
Applicable models: WJ-HD309, WJ-HD316, WJ-HD309A, WJ-HD316A
2. Preparation
(1) Screwdriver
(2) S-ATA conversion kit (part number: 0E0A0027AA)
Part name Part number Quantity
S-ATA Board Ass’y JH30AJKY6A 1
S-ATA cable K1V322Y20001 1
S-ATA angle 3CA005877AAA 1
S-ATA label, small (for front, 2pcs) 3PD003840AAA 1
S-ATA label, large (for top) 3PD003841AAA 1
S-ATA leaet 3TU001942AAA 1
(3) S-ATA HDD (250GB) x 2 (part number: HDATW250GASY)
3. Replacement Procedure
Important +++++++++++++++++++++++++++++++++++++++++++++++++++++++++++++++++++++++++++++++++++++++++
• Do not detach the cable connecting the unit and the front panel while the HDD status indicators are still lit or until 30 seconds have passed
since the HDD status indicators went off.
• Protect the hard disk drives from static electricity.
• Do not stack them, or keep them upright.
• Do not use an electric screwdriver to x them. (Tightening torque: Approx. 0.49 N · m (5 kgf · cm))
• Avoid rapid changes in the temperature/humidity to prevent condensation. (Acceptable change: within 15°C/h (59 °F/h))
+++++++++++++++++++++++++++++++++++++++++++++++++++++++++++++++++++++++++++++++++++++++++++++++++
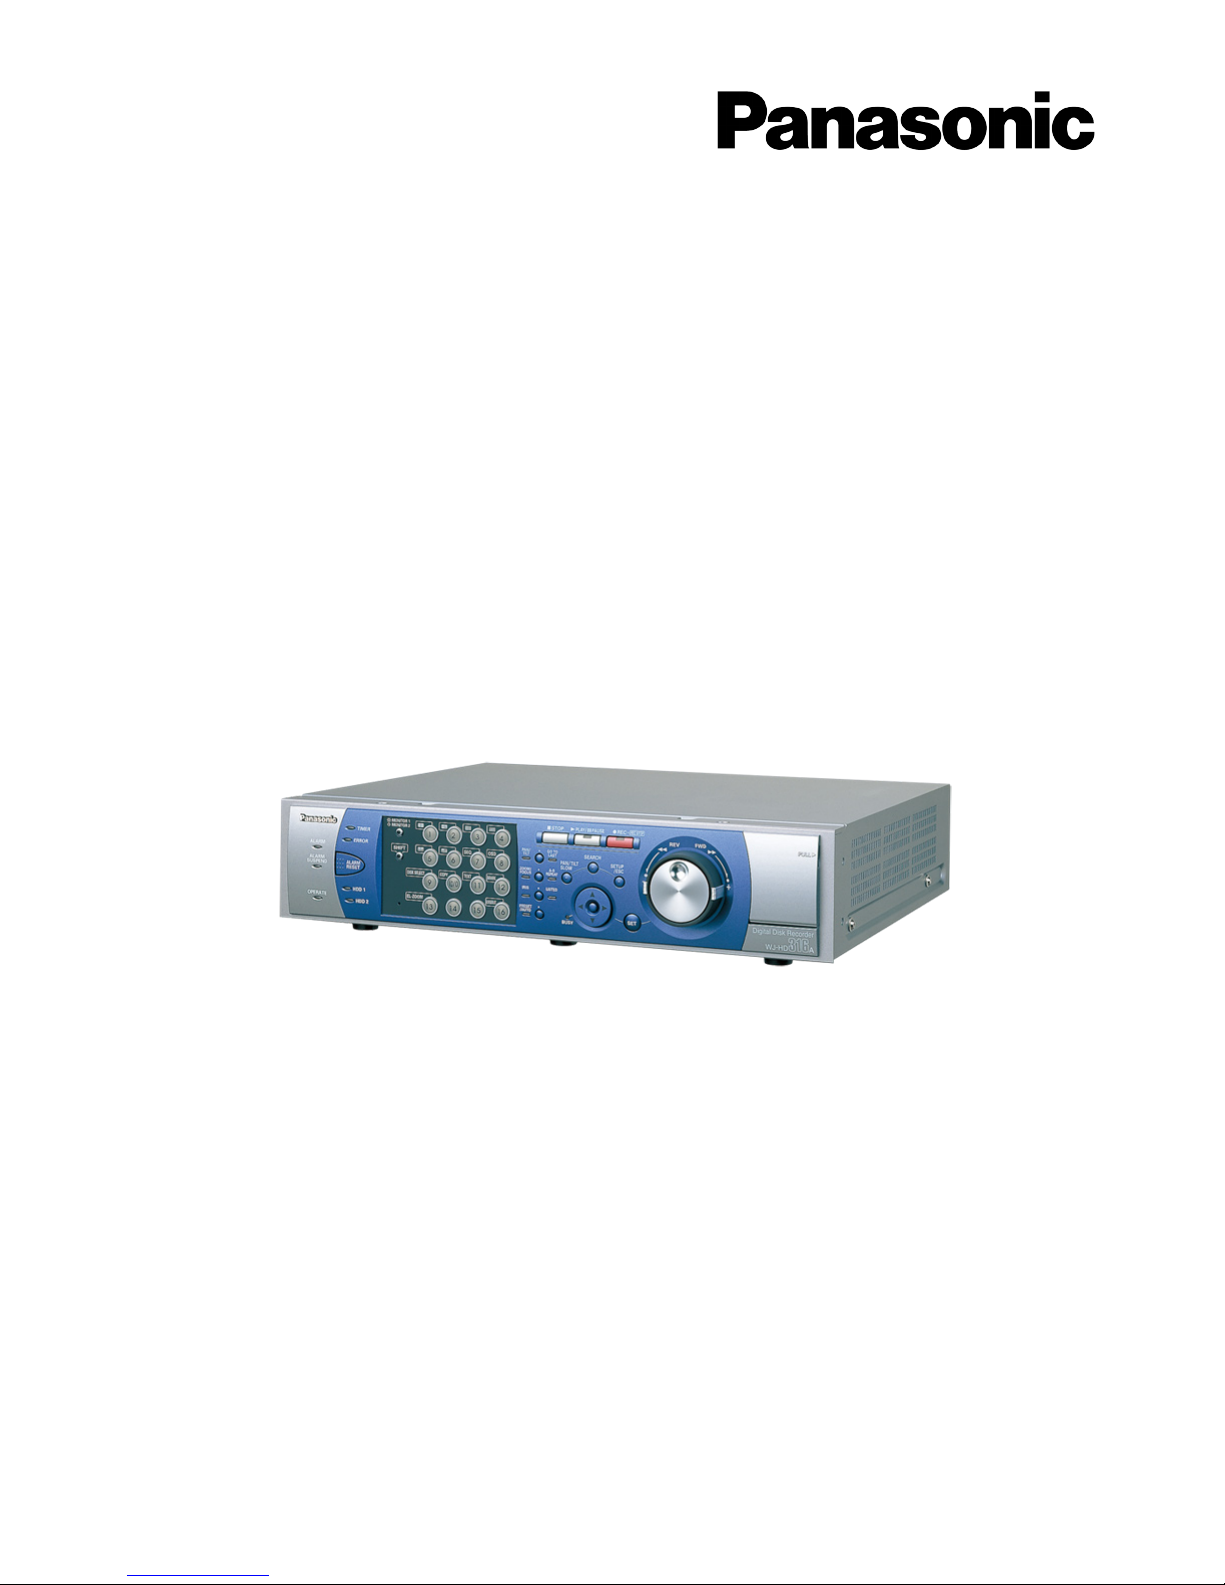
(1) Open the connectors cover on the front panel, and remove
the screw.
Then, remove the front panel by sliding it to the left.
Panasonic System Solutions
1
HD300_SATAConversionGuide_B
WJ-HD300 S-ATA conversion guide
Front panel
connector
SSD
S
S
D
Screws
Hold these
tabs and pull
SSD
Pull-ring
Jumper pin
Screws for the upper
hard disk drive
(4 screws: 2 screws each
on the both sides)
Hard disk drive mounting angle
Flat cable
Power supply
cable
Maintenance guide
(2) Disconnect the connector from the front panel.
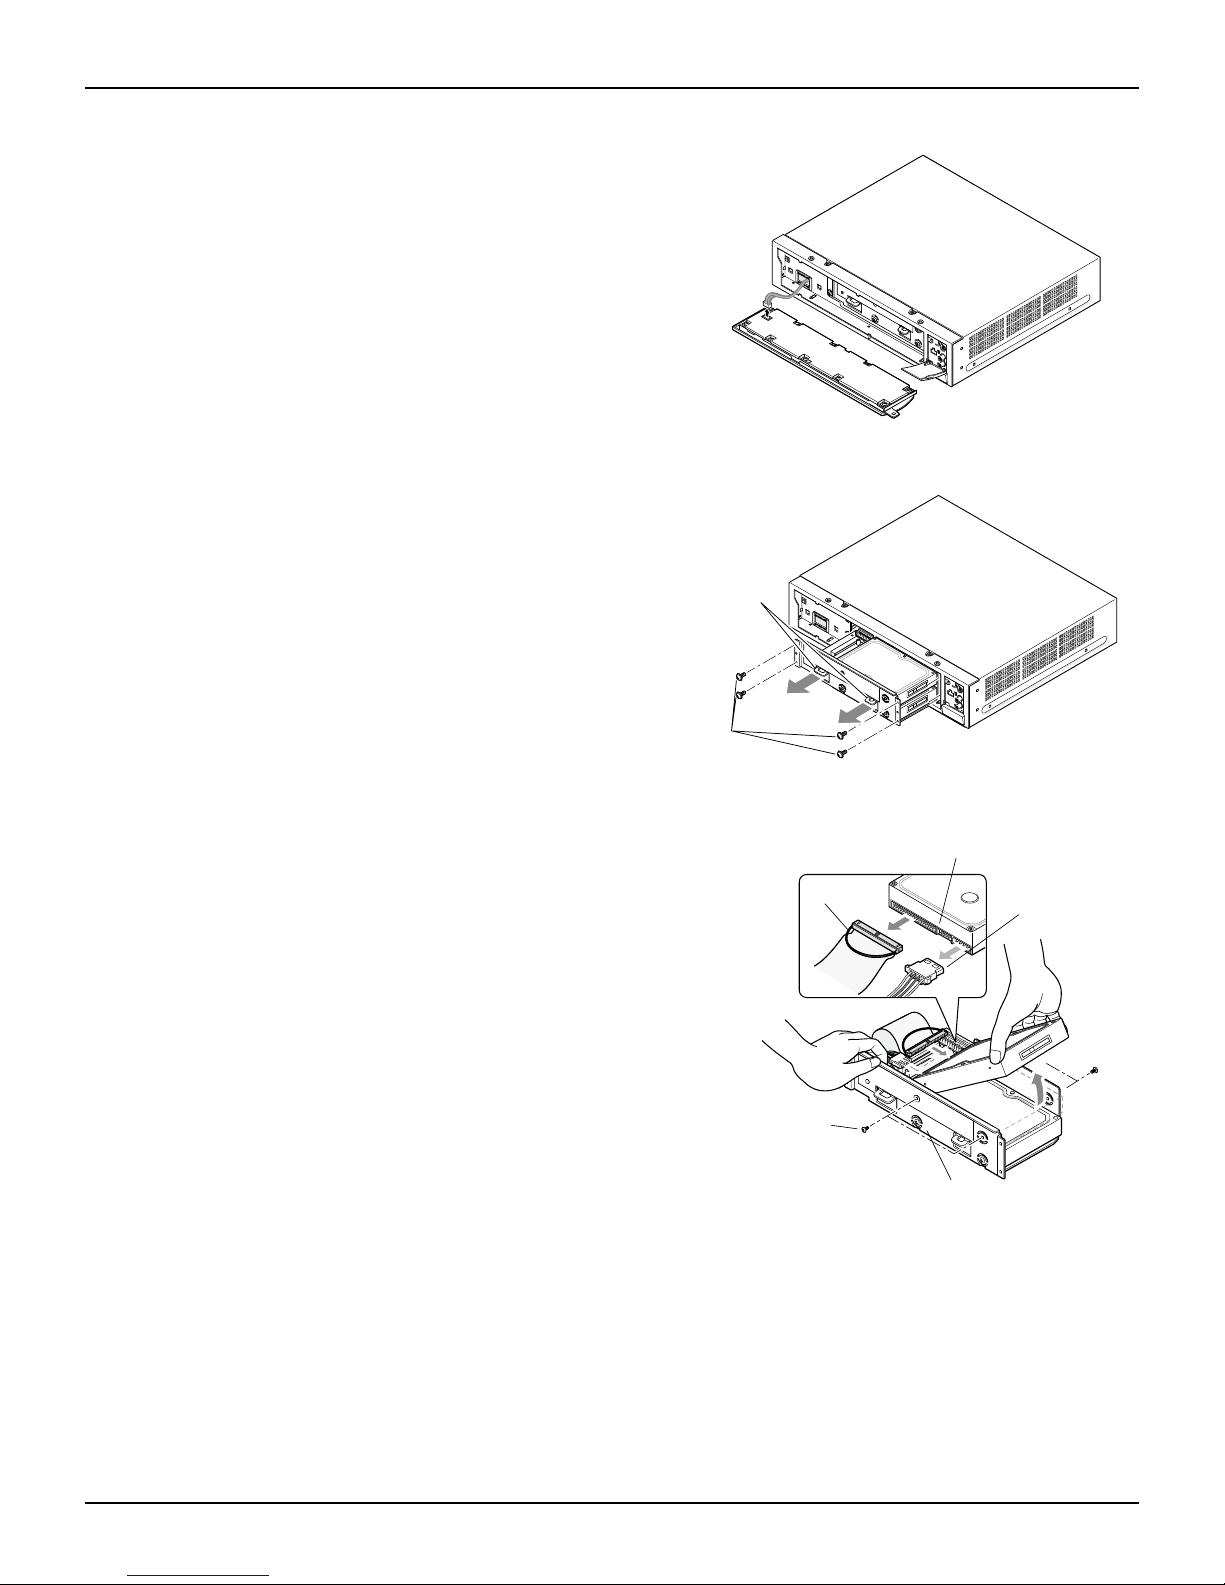
(3) Remove four screws that x the HDD mounting unit, and
then pull the HDD unit toward you by holding the tabs of
the angle.
(4) Remove four screws xing the upper HDD.
Disconnect the IDE connector and power connector from
the HDD, and remove the HDD from the HDD mounting
angle.
Caution++++++++++++++++++++++++++++++++++++
When removing the screws, hold the HDD by hand to prevent
it from falling and being impacted.
+++++++++++++++++++++++++++++++++++++++++++
Panasonic System Solutions
2
HD300_SATAConversionGuide_B
 Loading...