

Page 1
Panasonic*
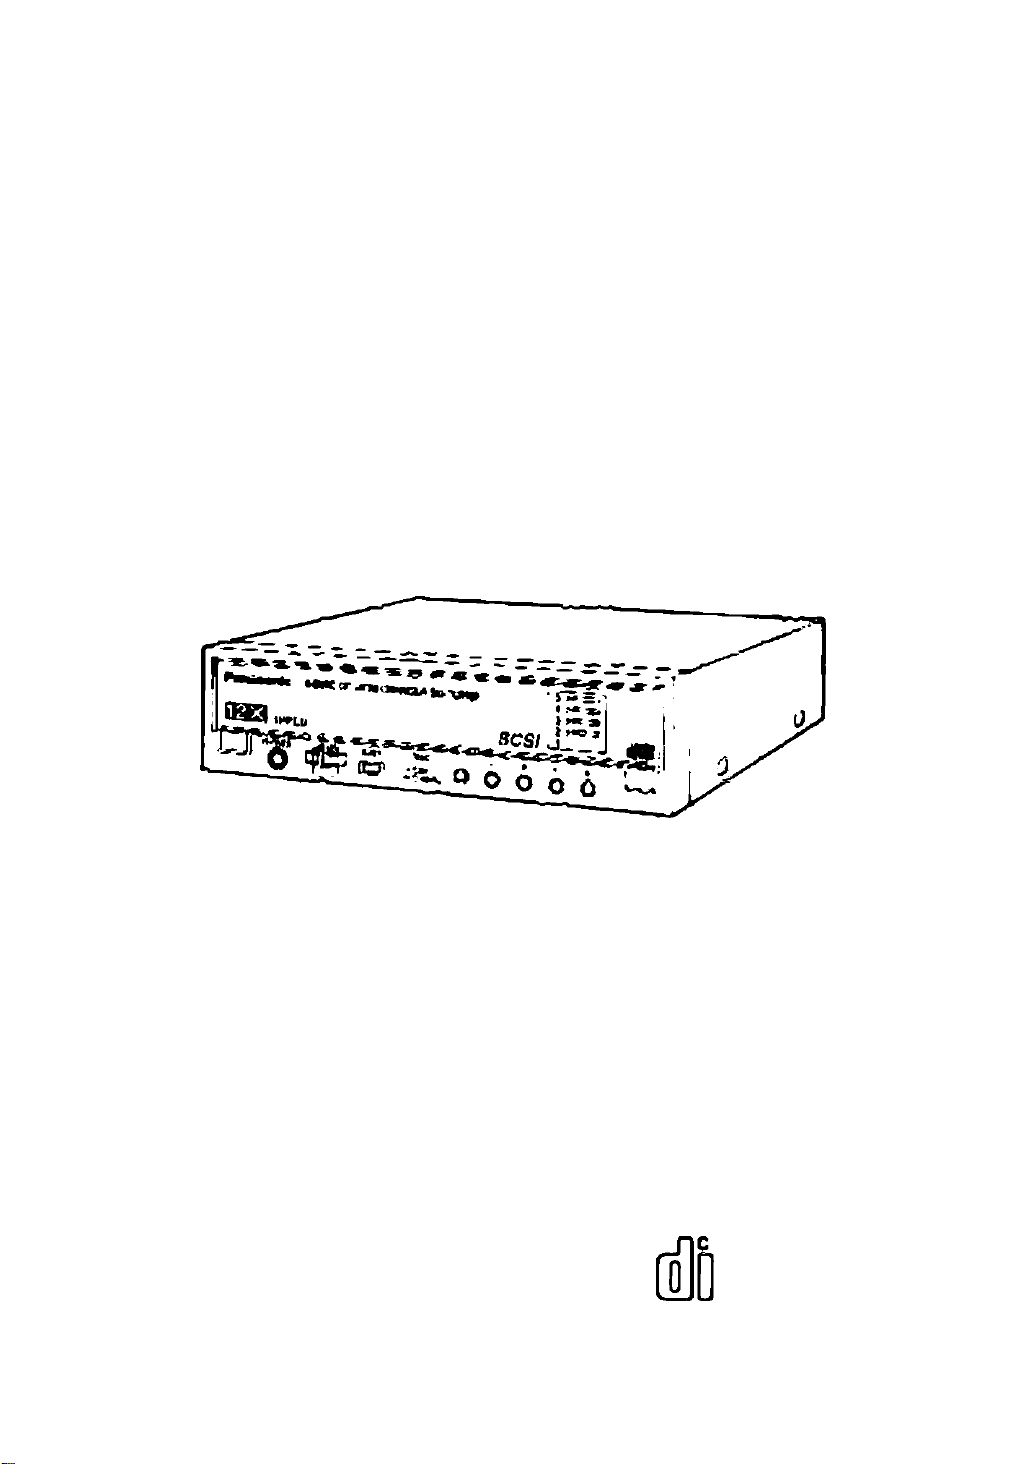
5-Disc CD-ROM Changer
SQ-TC512F
Operating Instructions
IPP'
or 9m çnxkxl,
(HOMO rood them m9\ttbam cofryluiÿ Plane save
this ewuioJ.
OMPACT
IMS®
ÜD OmtALAUCM
nCOMnACT
ROT4004 P
Page 2

IMPORTANT SAFETY NOTICE
To prevent fire or electric shock, do not expose this appliance to rain or moisture.
FEDERAL COMMUNICATIONS COMMISSION (FCC)
RADIO FREQUENCY INTERFERENCE STATEMENT
Class B Computing Device
CAUTION:
This equipment has been tested and found to comply with the limits for a Ciass B digital device, pursuant
to Part 15 of the FCC Rules.
These limits are designed to provide reasonable protection against harmful interference in a residential
installation. This equipment generates, uses and can radiate radio frequency energy and, if not installed
and used in accordance with the instructions, may cause harmful interference to radio communications.
However, there is no guarantee that interference will not occur in a particular installation, if this equip
ment does cause harmful interference to radio or television reception, which can be determined by turn
ing the equipment off and on, the user is encouraged to try to correct the interference by one of the
following measures:
• Reorient or relocate the receiving antenna.
• Increase the separation between the equipment and receiver.
•Connect the equipment into an outlet on a circuit different from that to which the receiver is connected.
•Consult the dealer or an experienced radio/TV technician for help.
Any unauthorized changes or modifications to this equipment would void the user's authority to operate
this device.
This device complies with Part 15 of the FCC Rules. Operation is subject to the following two conditions:
(1) This device may not cause harmful interference, and (2) this device must accept any interference
received, including interference that may cause undesired operation.
FCC WARNING: Changes or modifications not expressly approved by the manufacturer
responsible for compliance could void the user's authority to operate the equipment.
NOTICE
(1) Reproduction of any part of this publication without authorization is prohibited.
(2) The manufacturer reserves the right to revise this document without notice at any time.
(3) If any questions arise concerning this document, please contact your sales representative or Panasonic
Technical Support at 1-800-Panasys (1-800-726-2797),
LASER SAFETY INFORMATION
Class 1 LASER Product
This equipment is certified to comply with DHHS Rule 21 CFR Chapter 1, Subchapter J in effect as of date
of manufacture.
This equipment is classified as a Class 1 level LASER product and there is no hazardous LASER radiation.
Caution:
(1) The use of controls or adjustments or performance of procedures other than those specified herein
may result in hazardous radiation exposure.
(2) The CD-ROM Changer is designed to be incorporated into a computer-based system or unit which
has an enclosed cover. The CD-ROM Changer may not be used as a stand-alone unit.
LASER Specification:
Type: Semiconductor laser GaAIAs
Wave length: 780 nm
Page 3
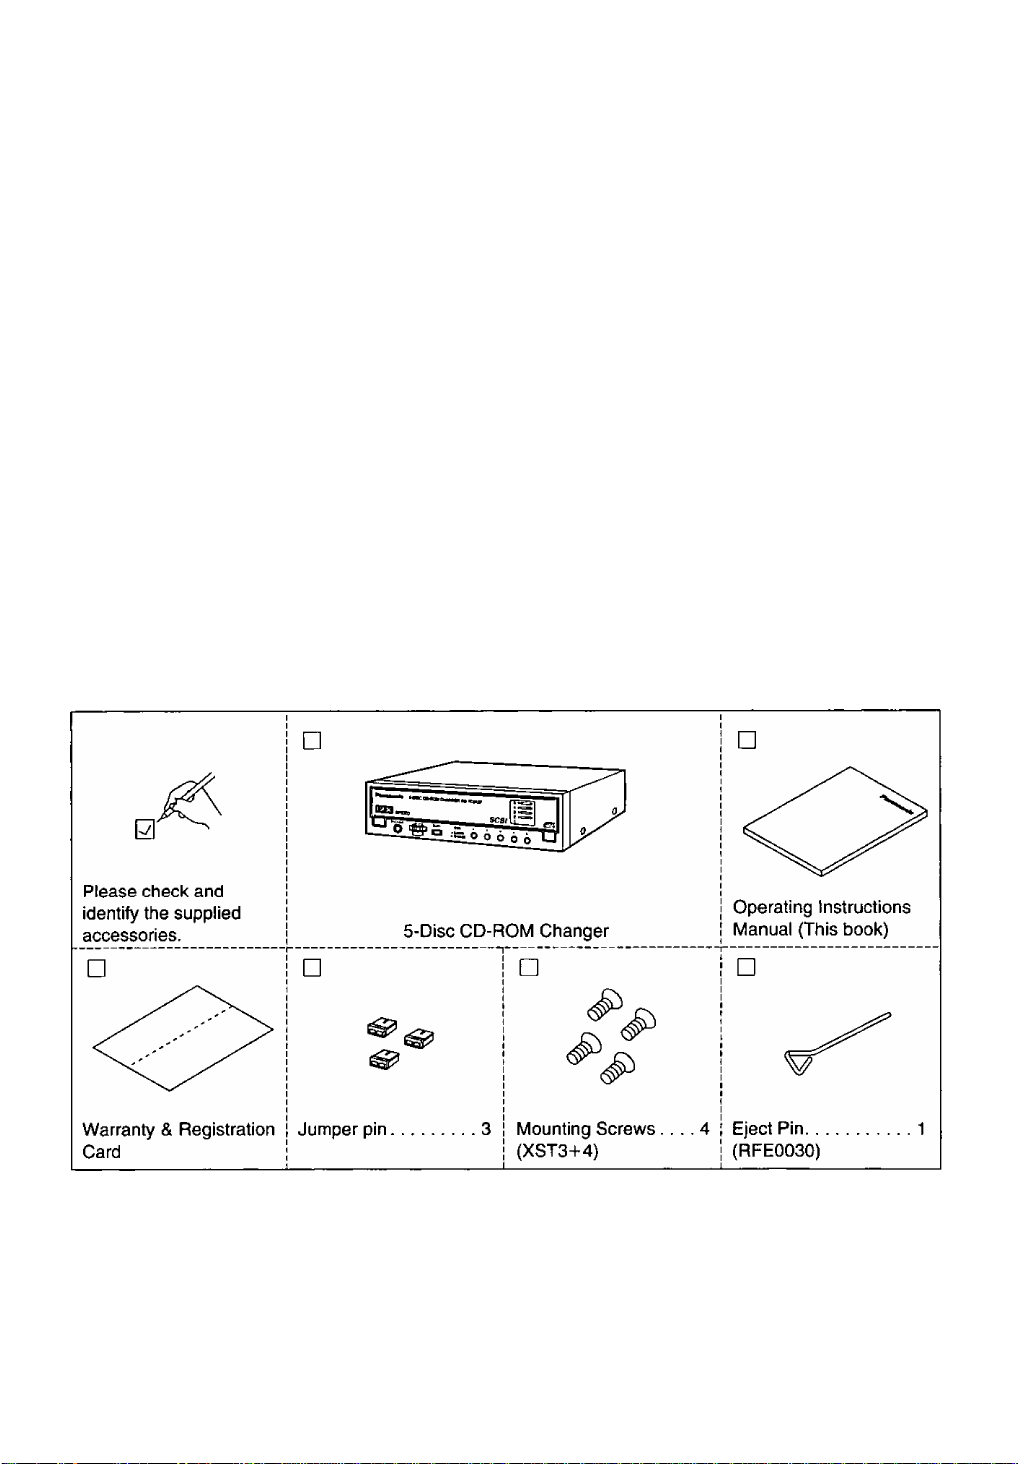
TABLE OF CONTENTS
IMPORTANT SAFETY NOTICE........................................................................2
LASER SAFETY INFORMATION......................................................................2
IDENTIFYING THE KIT CONTENTS
INTRODUCTION...............................................................................................4
OPERATION GUIDE......................................................................................... 5
PARTS AND FUNCTIONS................................................................................6
BEFORE USING/SHIPPING THE CD-ROM CHANGER
INSERTING/REMOVING DISCS
SPECIFICATION SUMMARY.........................................................................11
TROUBLESHOOTING
........................................................................
................................................................
..................................
......................................................................
Back cover
3
8
9
IDENTIFYING THE KIT CONTENTS
The following is a checklist of items which are included with your Panasonic CD-ROM Changer. Be sure to
save the original box and packing materials for future shipments or transportation of your Panasonic CD-
ROM Changer.
Page 4

INTRODUCTION
Congratulations on your purchase the 5-DISC CD-ROM Changer. The Panasonic SQ-TC512F CD-ROM
Changer features Panasonic's 12x speed technology, which allows data to be accessed at high speed.
CD-ROM is read-only memory using an audio compact disc system as a media package which handles digi
tal data.
This CD-ROM Changer
uses CD-ROM data discs
which bear the following
mark.
However, do not use irregular shape CDs {heart-shape, octagonal, etc.). CDs of the sort can damage the
unit.
COMPACT
Supports Major CD-ROM Formats
CD-DA(Audio), CD-ROM. CD-ROM XA, Photo CD
Multisession*
Video for Windows**, QuickTime for Windows**,
CD-I***, Video-CD***
* Requires a Photo CD viewer (not included)
’* Requires Microsoft Video for Windows, Apple
QuickTime for Windows (not included)
***Requires MPEG decoder board or MPEG
decoder software and CD-I and/or Video-CD
playback software (not included)
This CD-ROM Changer
uses digital audio compact
discs which bear the fol
lowing mark.
COMPACT
DIGITAL AUDIO
Feature Summary
1 Half-height mounting 5-disc CD-ROM Changer
2 Tray system permits easy exchange of any sin
gle disc.
3 High Quality and Durability adopted by Stepping
Traverse Motor
4 12x-speed data transfer rate
[1800 KB/s (average)]
5 SCSI-2 Interface
6 Easy visible “DISC WINDOW” to check which
disc is loaded
Licenses and Trademarks
System Requirements
80386, 80486 or Pentium based ISA Computer
8 MB of RAM
3 MB of free space on Hard Disk
Most EIDE hard disk (HDD) controllers
Windows 95 & Windows NT 4.0 Ready
Supports DOS 5.0 & Higher, Windows 3.1 & 3.11
Product names mentioned in this manual are
trademarks or registered trademarks of their
respective companies and are hereby acknowl
edged. Information in this manual is subject to
change without notice and does not represent a
commitment on the part of the vendor.
•Microsoft Windows, MS-DOS and Video for
Windows are trademarks of Microsoft
Corporation.
•QuickTime for Windows is a trademark of Apple
Computer, Inc.
•© Copyright LHA Version 2.13 H. Yoshizaki,
1988-1991
•© Copyright Matsushita Electric Industrial Co.,
Ltd. 1997
Page 5

OPERATION GUIDE
Before you begin installing your Panasonic CD-ROM Changer, please take a few minutes to read the
following Operation Guidelines.
I) WHEN TRANSPORTING
To avoid damage
•Keep the original packing
materials.
•Before transporting the CDROM Changer, remove the
discs from the Changer and
repack it in its original packing,
II) WHEN INSTALLING
Do not install the CD-ROM
Changer in environments where
it would be subjected to
•High-temperature, highhumidity, or extreme
temperature changes
• Dust
• Excessive vibration/sudden
shock
• Inclines or angled operation
• Direct sunlight
Do not install the CD-ROM
Changer in a vertical position.
III) WHEN USING
• Never push objects of any kind
through the cabinet slots.
• Never spill liquid of any kind on
the CD-ROM Changer.
• Do not place objects on the
unit.
•This CD-ROM Changer is not
user serviceable; do not open
or remove cover.
• Do not insert foreign objects
in the disc insertion slot and
attempt to operate.
IV) WHEN OPERATING
To avoid data errors
• Do not move the CD-ROM
Changer while operating.
• Do not operate the CD-ROM
Changer immediately after a
sudden change in temperature.
V) WHEN HANDLING
DISCS
To remove a disc from its case
Press the center holder and lift
the disc by grasping the edges.
Center Holder
To hold the disc
Hold the disc by the edges so
the surface is not soiled with
fingerprints.
Fingerprints, dirt and scratches
can cause skipping and
distortion.
O X
(Correct) (Incorrent)
If the surface is soiled
Wipe gently with a soft, damp
(water only) cloth.
o X
([
(Correct) (Incorrect)
To store a disc in its case
Insert the disc with label facing
upwards and press downwards
at the center.
Label
Handling precautions:
• If you are taking the disc from a
cold to a warm environment,
moisture may form on the disc.
Wipe this off with a soft, dry,
lint-free cloth before using the
disc.
• Do not write on the label side
with a bail-point pen or other
writing instrument.
•Do not use record cleaning
sprays, benzine, thinner, static
electricity prevention liquids or
any other solvent.
•Do not use CDs with poorly
attached labels or stickers.
Adhesive protruding from
underneath stickers or left over
from peeled of stickers can
cause your stereo to
malfunction.
• Do not use irregular shape
CDs (heart-shape, octagonal.
Storage precautions:
Be sure to store discs in their
cases to protect them from dust,
scratches and warping.
Do not place or store discs in the
following places:
• Locations exposed to direct
sunlight
• Humid or dusty locations
• Locations directly exposed to a
heat vent or heating appliance
• In the glove compartment or on
the rear deck of an automobile
Page 6

PARTS AND FUNCTIONS
FRONT VIEW
DISC TRAY
(inside)
Accepts up to 5 discs of
CD-ROM or digital audio
discs.
-------------
DISC WINDOW
Easy visible “DISC WINDOWS” for viewing the
installed discs. Visual confirmation of which disc is
loaded. The slot with the white mark missing is the disc
which is currently loaded in the CD-ROM Changer.
VOLUME
Adjusts the headphone
audio output level.
HEADPHONE JACK
Accepts a standard 3.5mm
stereo mini plug to connect
your headphones to the CD-
ROM Changer.
--------------
-----
PHQ№S ^ 'Ot
Q
5-Dli : CD-ROli/ CHAJWER SO-TC51ZF
W [p -
BUSY INDICATOR
Lights when data is
being accessed from
the disc or when the
CD-ROM Changer is
playing an audio CD.
5 oc
4 OC
3 oc
© ©
2 oc
o
SCSI
EJECT/CHANGE BUTTONS
(DISC 1-DISC 5)
Press quickly to eject a disc tray/
press and hold for a moment to
load the disc.
the ID. Please refer to
page 7 for more
information.
Page 7

Jumper pin setting
PARTS AND FUNCTIONS
PIN NO.
1 to3
FUNCTION
SCSI ID setting
PARITY
SECTOR SIZE
TERMINATOR
LUN
ASSIGNMENT
SHIPMENT DEFAULT
SETTINGS
0
CONFIGURATION OPTIONS
0 [ O D
O 1 o o
IDO
001
ID 4
Set the ID number different from SCSI card and the
other devices connected to your computer.
CHECK
512 Bytes
ON: The Changer is the last device connected
I
OFF: The Changer is not the last device in the
LUN/DRIVE R LUN/SLOT
■ 10
ID 1
o
ID 5
to the SCSI adapter.
SCSI chain.
(o
Ls-H
ID 2
0n
ID 6
^ NON-CHECK
2048 Bytes
m
ID3
III
ID 7
FACTORY USE
ONLY
0 0
Use factory preset.
Page 8

BEFORE USING/SHIPPING THE CD-ROM CHANGER
Removing the Shipping Spacer
Before using the CD-ROM Changer, you must remove the shipping spacer from the disc tray. Install the
Driver and Utility only after you have removed the spacer.
Failure to do this may damage your disc on the changer.
1 Turn the computer ON.
The CD-ROM Changer will turn ON.
^ Turn OFF the computer.
NOTE:
Save the shipping spacer and box. You will need them when moving or shipping the equipment.
Caution for Shipping
Be sure to take the following precautions before moving your Changer a considerable distance, shipping the
changer, or taking it in for service.
Insert the shipping spacer into disc tray 1.
{This is also necessary if moving your computer with the CD-ROM Changer still installed.)
1 Turn your computer ON.
The CD-ROM Changer will turn ON.
2 Remove all discs.
3 Press DISC EJECT button 1.
Disc tray 1 will eject.
4 Insert the shipping spacer into disc tray 1.
5 Push the tray until it retracts automatically.
6 Turn OFF the computer.
2 Check for the white mark next to tray “1 ”
on the disc window. If the white mark is
still visible, press and hold tray button
number 1 until the white mark disap
pears.
Shipping Spacer
Disc T ray 1
Pwmtmia sottt co-now CHW»nsoTC$ijf
E^B SPEED SCSI
1—>0’Wo:^oÔÔÔÔ ^
Slide the tabs
into the front
of the tray and
lay the spacer
down.
B *^9
I
V"
Disappear
^ Your Changer is ready for shipping.
Pack the Changer in the originai box.
8
Page 9

INSERTING/REMOVING DISCS
1 Turn the computer ON.
The CD-ROM Changer will turn ON.
2 Press one of the tray eject buttons.
The disc tray will eject.
D Repeat steps 2 and 3 until you have loaded all your favorite discs.
NOTE;
• Do not insert any objects other than an audio CD or a CD-ROM disc into the disc tray. This could result in
a malfunction and jam the changer.
• Do not manually force the tray open or press down hard on the tray when loading a disc, since this may
result in damage or malfunction of the tray.
•When the CD-ROM Changer is not in use, keep the tray closed to protect it from dust and dirt.
•You cannot open/close the disc tray while using the headphones jack.
For 3.5' discs
c
Use the disc adapter (option: RMQ0611) designed specifically for this unit. As shown below, insert the
adapter in the tray, then the disc in the adapter.
3.5" Disc Adapter
3
3.5" Disc
Label Side
Label Side
Keep the latches on the
adapter to the bottom
when fitting it into the tray.
CAUTION:
Do not use other types of CD adapters. Incompatible products could cause the equipment to malfunction.
Page 10

If the tray does not eject automatically
Turn OFF your computer.
1
Open the front cover of the CD-
2
ROM Changer carefully.
INSERTING/REMOVING DISCS
Insert the eject pin.
1 Gently push the pin along the right
edge of the left slot until the pin
stops.
The tray will eject a little.
2 Pull the pin out and then push it
again about four times until the tray
is extended enough that you can pull
it out by hand.
Mechanism inside works as follows:
Insert
the pin.
Pull the tray the rest of the way by
hand.
(The tray currently in the play position
and the tray immediately below it can
both be pulled out by hand.)
Push the pin
forward until
it stops.
Along the Right
Edge of the Left
Slot
Eject Pin
Pull the
pin out
then push
it again.
Disc
Remove the disc from the tray and
turn ON your computer.
(This is to check, if the Changer returns
to normal position.)
If the CD-ROM Changer becomes Jammed, please contact our hotline for assistance.
(1-800-726-2797)
10
Page 11

SPECIFICATION SUMMARY
Interface
Playable Disc Format
Data Transfer Rate
From Buffer
Access Time 1/3 Stroke
Buffer Memory Capacity
Error Rates
Output Level
(Impedance)
Frequency Response Line Out
S/N
Hard Read Errors
Soft Read Errors
Headphone
Line Out
Line Out
SCSI-2 Interface
CD-ROM {mode 1 and mode 2)
CD-ROM XA (mode 2 form 1 and form 2)
PHOTO CD (Single and multisession)*’
CD-DA, CD Extra (CD Plus)
Video CD*’, Video for Windows*’
1200-1900 KB/s
1800 KB/s (average)*^
10 MB/s (Synchronous)
5 MB/s (Asynchronous)
130 ms typ.
512 KB
Less than 10 ’^
Less than 10 ®
0.6 Vrms (320)
0.8 Vrms (50 kO)
20 Hz-20 kHz (-hO.5, -3dB)
More than 85 dB
Temperature
Operating
Storage
Operating
Humidity
Storage
Source Voltage
Source Current
Dimensions (WXHXD)
Weight
‘^Requires Viewer or Playback Software
‘^Average of 650 Mbytes Transfer time
Note:
Weight and dimensions shown are approximate.
Specifications are subject to change without notice.
5 to 45°C
-20 to 60“C
20 to 90% Rh (Non-condensing)
20 to 90% Rh (Non-condensing)
DC 5 V±5%
DC 12 V±10%
1.2 A (DC 5 V)
1.5 A (DC 12 V)
146x41,3x234 mm
(5y4"x1Va"x9%2")
1.3 kg (2.9 lb.)
11
Page 12

TROUBLESHOOTING
Problem
Tray doesn't eject.
CD or CD-ROM won't
play.
No sound comes out
of headphones.
Check these possibilities:
Is the power cord plugged in correctly?
Is the CD or CD-ROM inserted properly?
Disconnect the headphones.
Are you trying to use a CD or CD-ROM that is not compatible with this machine?
Are you using the appropriate CD or CD-ROM software?
Is the CD or CD-ROM inserted into the tray properly?
Is the CD or CD-ROM inserted with the label side up?
Is the CD or CD-ROM scratched, broken, warped or dirty?
Is there condensation on the machine? (Is so, leave the machine on for an hour
and try again.)
Is the volume adjusted properly?
Are the headphones properly connected?
Panasonic Computer Peripheral Company
Division of Matsushita Electric Corporation of America
Two Panasonic Way, Secaucus, New Jersey 07094
RQT4004-P
F0497D0 (D)
 Loading...