

Panasonic SL-MC6, SL-MC3 User Manual
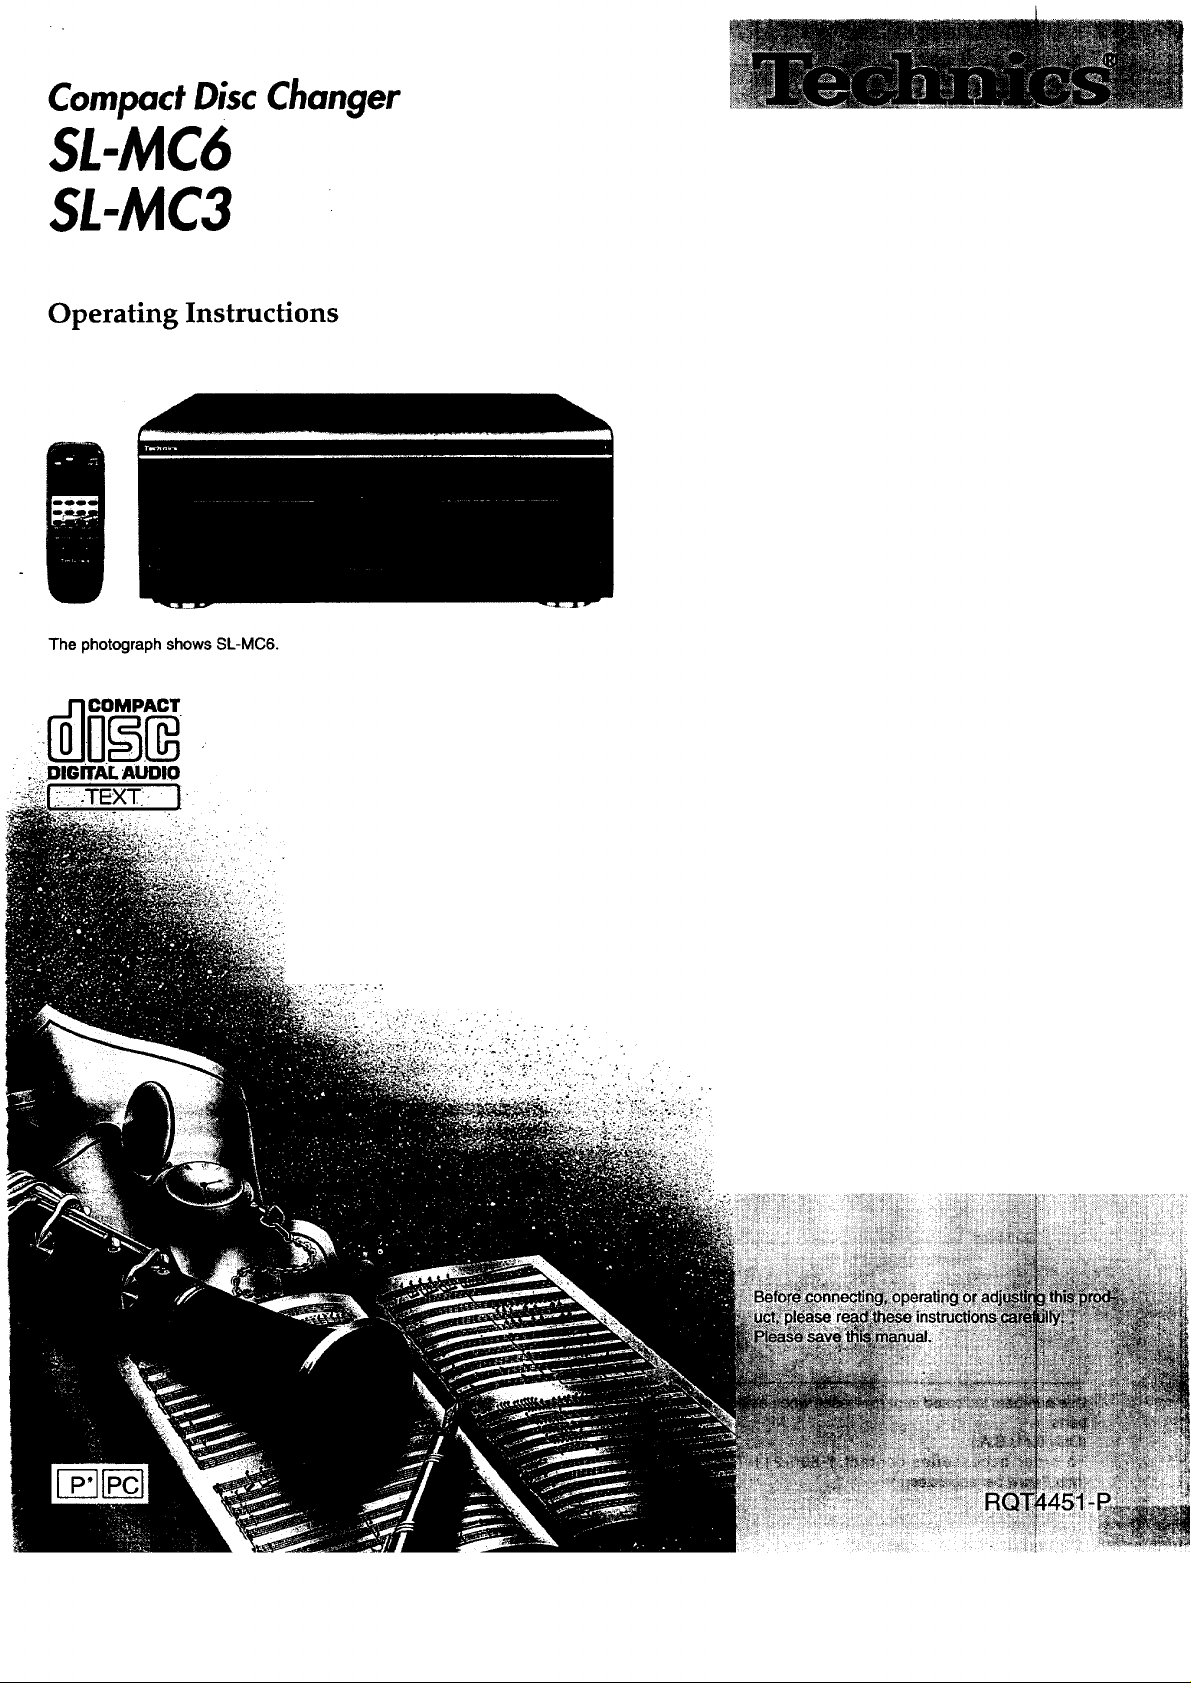
CompactDiscChanger
SL-MC6
SL-MC3
Operating Instructions
The photograph shows SL-MC6.
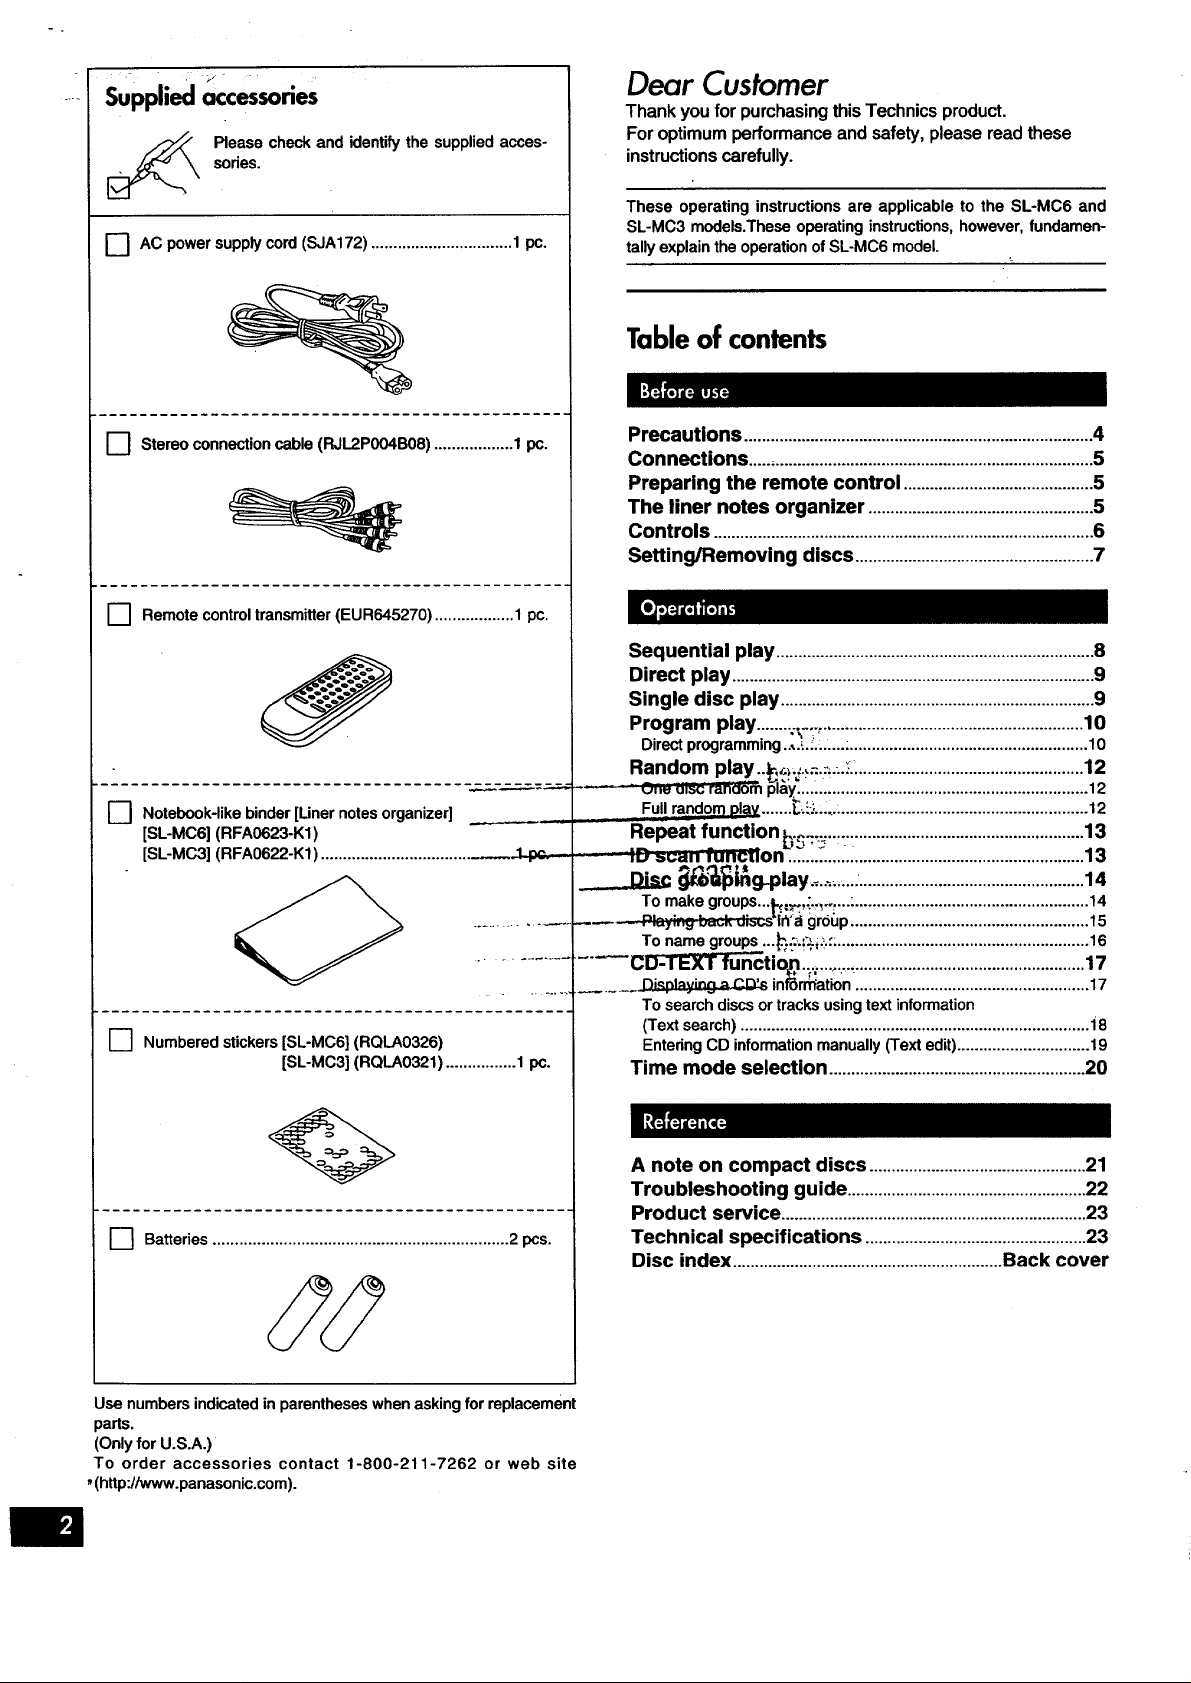
Supplied accessories
sories.
Please check and identifythe suppliedacces-
r--I Ac power supply cord (SJA172) ................................ 1 pc.
Dear Customer
Thank you for purchasing this Technics product.
For optimum performance and safety, please read these
instructionscarefully.
These operating instructionsare applicableto the SL-MC6 and
SL-MC3 models.Theseoperatinginstructions,however,fundamen-
tallyexplainthe operationof SL-MC6 model.
Table of contents
I_1 Stereoconnectioncable(RJL2P004B08)..................1 pc.
[] Remote control transmitter (EUR645270) .................. 1 pc.
[] Notebook-like binder [Liner notes organizer] ......
[SL-MC6] (RFA0623-K1)
[SL-MC3] (RFA0622-K1) .................................... 1 ,._
[] Numbered stickers [SL-MC6] (RQLA0326)
[SL-MC3] (RQLAO321) ................ 1 pc.
r--
................ _°lr_ __igroup ...................................................... 15
.................CD_tion.... .............................................................17
............._ inr6_ti0n_' .....................................................17
Precautions ...............................................................................4
Connections ..............................................................................5
Preparing the remote control ...........................................5
The liner notes organizer ...................................................5
Controls ......................................................................................6
Setting/Removing discs ......................................................7
Sequential play ........................................................................8
Direct play ..................................................................................9
Single disc play .......................................................................9
Program play .........<_._...........................................................10
Direct programming ..,.LL......: ...................................................... 10
Random play ..kd_.:._..:,,.=_.....................................................12
....... G,u disc ranoo, i 151;zy.................................................................. 12
Fu!! random pl_y ....... _L-;o.....:........................................................ 12
Repeat function _.._::...........................................................13
-;G =,_;U._unciionL_._...._...i_......................................................13
_l_g.play .............................................................14
Tomakegreups...l_.:_,i.._..:...:.....................................................14
To name groups .--_--!_i_.:; ......................................................... 16
To search discs or tracks using text information
(Text search) ............................................................................... i8
Entering CD information manually (Text edit) .............................. 19
Time mode selection ..........................................................20
[] Batteries ................................................................... 2 pos.
Use numbers indicated in parentheses when asking for replacement
parts.
(Only for U.S.A.)
To order accessories contact 1-800-211-7262 or web site
, (http://www.panasonic.com).
A note on compact discs .................................................21
Troubleshooting guide ......................................................22
Product service .....................................................................23
Technical specifications ..................................................23
Disc index .............................................................Back cover
_'he model number and serial number of this product can be
found on either the back or the bottom of the unit.
Please note them in the space provided below and keep for
future reference.
MODEL NUMBER
SERIAL NUMBER
CAUTION!
THIS PRODUCT UTILIZES A LASER.
USE OF CONTROLS OR ADJUSTMENTS OR PERFORMANCE
OF PROCEDURES OTHER THAN THOSE SPECIFIED HEREIN
MAY RESULT IN HAZARDOUS RADIATION EXPOSURE.
DO NOT OPEN COVERS AND DO NOT REPAIR YOURSELF.
REFER SERVICING TO QUALIFIED PERSONNEL.
Jsermemo:
DATE OF PURCHASE
DEALER NAME
DEALER ADDRESS
TELEPHONE NUMBER
THE FOLLOWING APPLIES ONLY IN THE U.S.A.
CAUTION:
This equipment has been tested and found to comply with the
limits for a Class B digital device, pursuant to Part 15 of the
FCC Rules. These limits are designed to provide reasonable
protection against harmful interference in a residential installa-
tion. This equipment generates, uses and can radiate radio fre-
quency energy and, if not installed and used in accordance with
the instructions, may cause harmful interference to radio com-
munications. However, there is no guarantee that interference
will not occur in a particular installation. If this equipment does
cause harmful interference to radio or television reception,
which can be determined by turning the equipment off and on,
the user is encouraged to try to correct the interference by one
of the following measures:
• Reorient or relocate the receiving antenna.
• Increase the separation between the equipment and receiver.
• Connect the equipment into an outlet on a circuit different from
that to which the receiver is connected.
• Consult the dealer or an experienced radio/TV technician for
help.
Any unauthorized changes or modifications to this equipment
would void the user's authority to operate this device.
This device complies with Part 15 of the FCC Rules: Operation
is subject to the following two conditions: (1) This device may
not cause harmful interference, and (2) this device must accept
any interference received, including interference that may cause
undesired operation.
CAUTION:
TO PREVENT ELECTRIC SHOCK MATCH WiDE
BLADE OF PLUG TO WIDE SLOT, FULLY
INSERT.
WARNING:
TO REDUCE THE RISK OF FIRE, ELECTRIC
SHOCK OR PRODUCT DAMAGE, DO NOT
EXPOSE THIS APPLIANCE TO RAIN, SPLASH-
ING, DRIPPING OR MOISTURE.
CAUTION:TO REDUCE THE RISK OF ELECTRIC
SHOCK, DO NOT REMOVE SCREWS.
NO USER-SERVICEABLE PARTS
INSIDE.
REFER SERVICING TO QUALIFIED
SERVICE PERSONNEL.
The lightning flash with arrowhead symbol, within
an equilateral triangle, is intended to alert the user
to the presence of uninsulated "dangerous voltage"
within the product's enclosure that may be of suffi-
cient magnitude to constitute a risk of electric shock
to persons.
is intended to alert the user to the presence of
__IL The exclamation point within an equilateral triangle
important operating and maintenance (servicing)
instructions in the literature accompanying the ap-
pliance.
n
q)
Beforeusingthisunitpleasereadtheseoperatinginstructionscare-
-fully.Take specialcare to follow the wamingsindicatedon the unit
itselfas wellasthesafetysuggestionslistedbelow.
Afterwardskeepthemhandyforfuture reference.
1. Power Source - The unit shouldbeconnectedto powersupply
only of the type describedin the operatinginstructionsor as
marked on theunit.
2. Polarization - Ifthe unitisequippedwitha polarized AC power
plug(a plughavingonebladewiderthantheother),thatplugwillfit
intotheAC outletonlyone way.Thisisa safetyfeature.Ifyouare
unableto inserttheplugfully intothe outlet,try reversingthe
plug.If the plug shouldstillfail to fit, contactyour electricianto
replaceyourobsoleteoutlet.Do not defeat the safetypurposeof
the polarizedplug.
3. Power Cord Protection -- AC power supplycordsshould be
routedso thatthey are not likelyto be walked on or pinchedby
itemsplaceduponoragainstthem.Nevertakeholdof the plugor
cordif your hand iswet, and alwaysgraspthe plugbody when
connectingordisconnectingit.
4. Nonuse Periods - When theunitisnotused,tumthepoweroff.
When left unusedfor a long period of time, the unitshouldbe
unpluggedfromthehouseholdACoutlet.
6. Carts and Stands - The unit should be used only with a cart or
stand that is recommended by the manufacturer.
The unit and cart combination should be moved with care.
Quick stops, excessive force, and uneven sur-
faces may cause the unit and cart combination to
overturn.
7. Wall or Ceiling Mounting - The unit should not be mounted to a
wall or ceiling, unless specified in this operating instructions.
Clean the cabinet, panel and controls with a soft cloth lightly moist-
ened with mild detergent solution.
Do not use any type of abrasive pad, scouring powder or solvent
such as alcohol or benzine.
I Environment ]
1. Water and Moisture - Do not use this unit near water-for ex-
ample, near a bathtub, washbowl, swimming pool, or the like.
.Damp basements should also be avoided.
2. Condensation - Moisture may form on the lens in the following
conditions...
• immediately after a heater has been turned on.
• in a steamy or very humid room.
• when the unit is suddenly moved from a cold environment to a
warm one.
If moisture forms inside this unit, it may not operate properly. To
correct this problem, turn on the power and wait about one hour
for the moisture to evaporate.
3. Heat - The unit should be situated away from heat sources such
as radiators and the like. It also should not be placed in tempera-
tures less than 5" C (41" F) or greater than 35" C (95" F).
I Placement ]
1. Ventilation - The unit should be situated so that its location or
position does not interfere with its proper ventilation. Allow 10 cm
(4") clearance from the rear ofthe unit.
2. Foreign Material - Care should be taken so that objects do not
fall into and liquids are not spilled into the unit. Do not subjectthis
unitto excessive smoke, dust, mechanical vibration, or shock.
3. Magnetism - The unit should be situated away from equipment
or devices that generate strong magnetic fields.
4. Stacking - Do not place heavy objects, other than system com-
ponents, on top of the unit.
5. Surface - Place the unit on a flat, level surface.
1. Damage Requiring Service - The unit should be serviced by
qualified service personnel when:
(a) The AC power supply cord or the plug has been damaged; or
(b) Objects have fallen or liquidhas been sp!!!ed into the unit; or
(c) The unit has been exposed to rain; or .
(d) The unit does not appear to operate normally or exhibits a
marked change in performance; or
(e) The unit has been dropped, or the enclosure damaged.
2. Servicing - The user should not attempt to service the unit be-
yond that described in the operating instructions. All other servic-
ing should be referred to an authorized service personnel.
For the address of an authorized servicenter:
In the U.S.A. 1-800-211-7262 or web site
(http://www.panasonic. corn)
In Canada 905-624-5505 or web site
(www.panasonic.ca/fdbckca.htm)
Cautions on moving this unit
Before moving the changer to another location, be sure to
remove all discs from the slots and turn off the changer.
Failure to do so will expose the compact discs and the changer
to the risk of severe damage.
CAUTION
The changer mechanism automatically locks when power is
turned off, to protect it against damage intransport.
Therefore, always press POWER and make sure "OFF' appears
on the display before you unplug the changer.
Other cautions
Outside light or noise may sometimes cause the changer to
detect a disc when there isn't one. However, the changer always
correctly detects the disc when in the play mode.
Do not leave the front panel open. Infiltrating dust or other mat-
ter may lead to damage or malfunctions.

Receiver
oramplifier (AC 120V,
CD orAUX terminals or
Household
ACoutlet
60 Hz)
• Set thechangerona flat, levelsurface.
• Beforeconnectingthechangerto your audiosystem,make sure
thatthe powerofthe changerand all othersystemcompOnentsis
turnedoff.
Stereo connection cable
White (L)
Red (R)
Memory retention
The information and presetting you enter is retained in the unit's
memory even if the unit is disconnected from the AC power source.
The period of retention for each type of information isas follows:
• program play (,,l, page 10) and disc grouping play (,,F page 14);
approximately one week
• text editing (=1,page 19); unlimited.
[]
Check the (+) and (-) sides.
I Useof batteries
Put two liners back-to-back inside each pocket, as shown above.
,5
number
• Do not mix old and new batteries, or batteries of different types
(carbon and alkaline, etc.).
• Never subject batteries to excessive heat or flame; do not attempt
to disassemble them; and be sure they are not short-cimuited.
• If the remote control is not to be used for a long period of time,
remove the batteries and store them in a cool, dark place.
• Do not attempt to recharge alkaline or carbon batteries.
• Do not use rechargeable type battedes.
When you need to replace these batteries
Usetwo R6/LR6,AA, UM-3orequivalentbatteries.
[]
Use the remote control within 60 degrees and within 7 meters (23
ft.) facing toward the unit.
I Operation notes I
• Aim the remote control's transmission window toward the unit's
sensor. Avoid any obstacles.
• Be sure the transmission window and the unit's sensor are free
from dust. Excessive dust might affect performance.
• Do not expose the remote cotrol signal sensor to direct sunlight or
to the bright lightof an inverter fluorescent light.
I To prevent damage
• Never place heavy items on top of the unit.
• Do not disassemble or reconstruct the unit.
• Do not spill water or other liquids into the unit.
Adhesive
Your changer comes with a notebook-like binder (liner notes orga-
nizer) in which you can keep your CD liners. There are also num-
bered stickers to indicate slot numbers in the binder. This is a con-
venient way to keep track of what disc isin what slot.
|
Disc slot for single
disc play
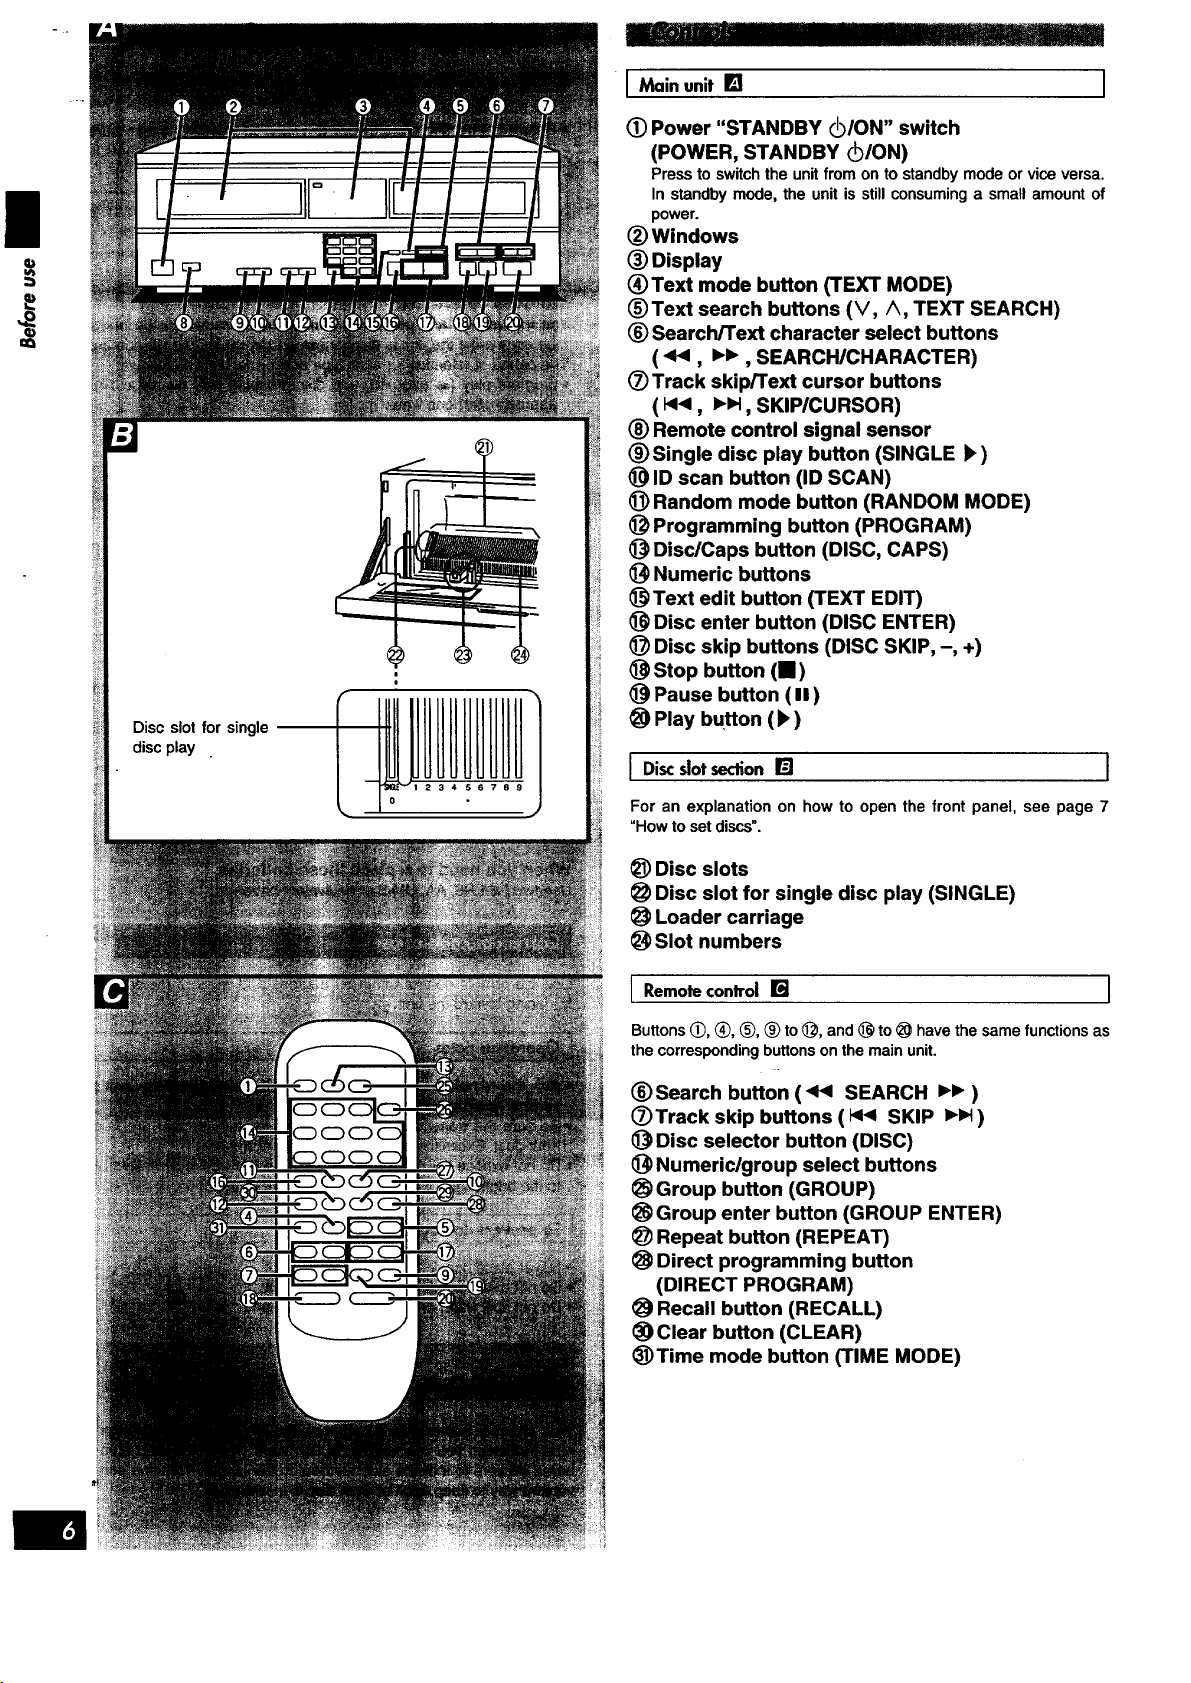
1 Main unit [] I
(i) Power "STANDBY IO/ON" switch
(POWER, STANDBY _ION)
Press to switch the unit from on to standby mode or vice versa.
In standby mode, the unit is still consuming a small amount of
power.
(_)Windows
(!) Display
(_)Text mode button (TEXT MODE)
(_)Text search buttons (V,/% TEXT SEARCH)
(_)Search/Text character select buttons
( 4<, _._., SEARCH/CHARACTER)
(Z)Track skip/Text cursor buttons
( 14_, _._t, SKIPICURSOR)
(_) Remote control signal sensor
(_)Single disc play button (SINGLE b)
_) ID scan button (ID SCAN)
Random mode button (RANDOM MODE)
(_ Programming button (PROGRAM)
Disc/Caps button (DISC, CAPS)
Numeric buttons
_Text edit button (TEXT EDIT)
Disc enter button (DISC ENTER)
_) Disc skip buttons (DISC SKIP, -, +)
(_ Stop button (n)
Pause button ( II )
_) Play button (b)
] Discslotsection[] I
For an explanation on how to open the front panel, see page 7
UHow to set discs".
€_)Disc slots
Disc slot for single disc play (SINGLE)
Loader carriage
_) Slot numbers
Remotecontrol[] ]
Buttons (_, (_, (_, _) to (_, and (_ to _ have the same functions as
the corresponding buttons on the main unit.
(_)Search button ( 44 SEARCH _1_ )
(_Track skip buttons ( 1_14SKIP I_ )
Disc selector button (DISC)
_) Numeric/group select buttons
Group button (GROUP)
Group enter button (GROUP ENTER)
_) Repeat button (REPEAT)
Direct programming button
(DIRECT PROGRAM)
Recall button (RECALL)
_) Clear button (CLEAR)
_)Time mode button (TIME MODE)
n
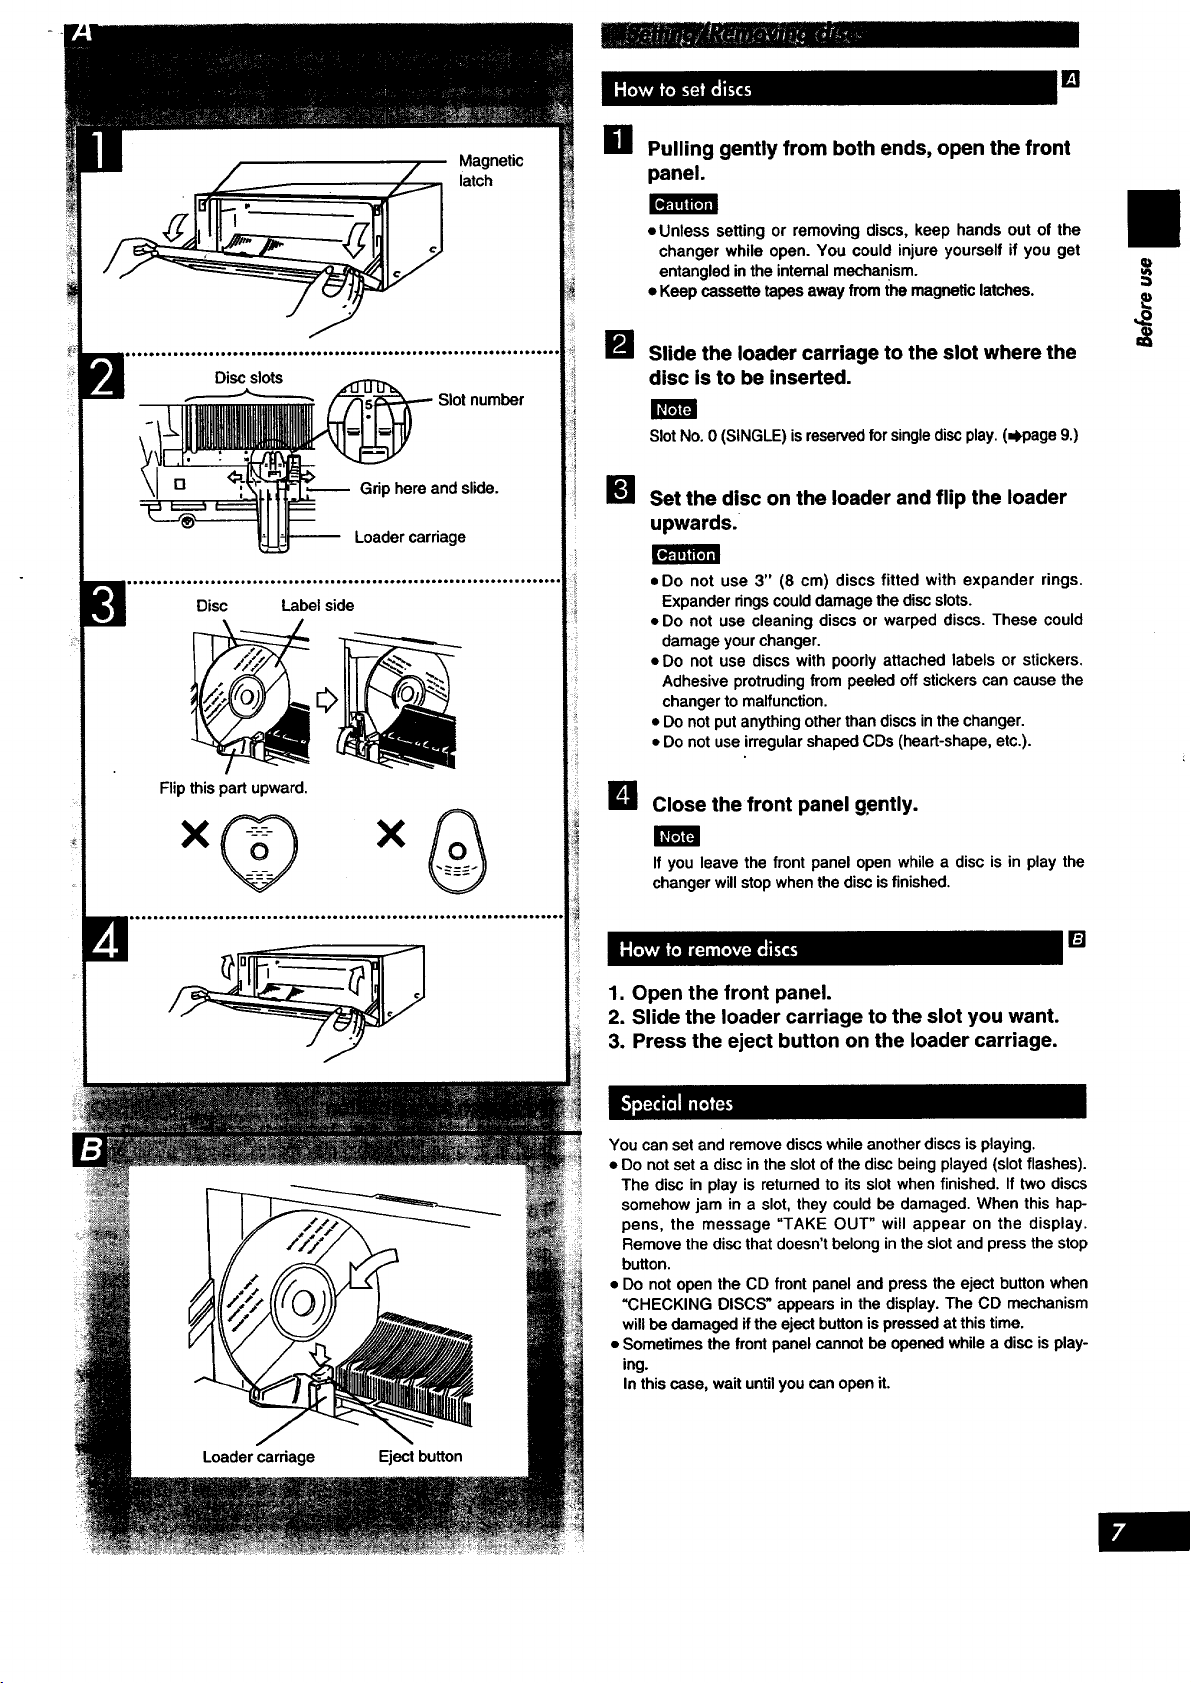
mR Pulling gently from both ends, open the front
. L_ _._ . latch
Magnetic
k';I.............................................................
Slot number
panel.
[d_ltlt_g
• Unless setting or removing discs, keep hands out of the
changer while open. You could injure yourself if you get
entangled in the internal mechanism.
• Keep cassette tapes away from the magnetic latches.
B
Slide the loader carriage to the slot where the
disc is to be inserted.
Slot No. 0 (SINGLE) is reserved for single discplay. (=kpage 9.)
Grip here and slide.
Loader carriage
k'!............;,:c............................................
Flip this part upward.
la
Set the disc on the loader and flip the loader
upwards.
Eo]_riit'R_
• Do not use 3" (8 cm) discs fitted with expander rings.
Expander rings could damage the disc slots.
• Do not use cleaning discs or warped discs. These could
damage your changer.
• Do not use discs with poorly attached labels or stickers.
Adhesive protruding from peeled off stickers can cause the
changer to malfunction.
• Do not put anything other than discs in the changer.
• Do not use irregular shaped CDs (heart-shape, etc.).
Close the front panel gently.
mm
If you leave the front panel open while a disc is in play the
changer will stop when the disc isfinished.
Q°.°.°o° ° °.oo.o °.... ..... .°°..H...°.ooo°.°o..°.a °°.....e°o°..........o_
1. Open the front panel.
2. Slide the loader carriage to the slot you want.
3. Press the eject button on the loader carriage.
[]
You can set and remove discs while another discs is playing.
• Do not set a disc in the slot of the disc being played (slot flashes).
The disc in play is returned to its slot when finished. If two discs
somehow jam in a slot, they could be damaged. When this hap-
pens, the message "TAKE OUT" will appear on the display.
Remove the disc that doesn't belong in the slot and press the stop
button.
• Do not open the CD front panel and press the eject button when
"CHECKING DISCS" appears in the display. The CD mechanism
will be damaged if the eject button is pressed at this time.
• Sometimes the front panel cannot be opened while a disc is play-
ing.
In this case, wait until you can open it.
ii
u_
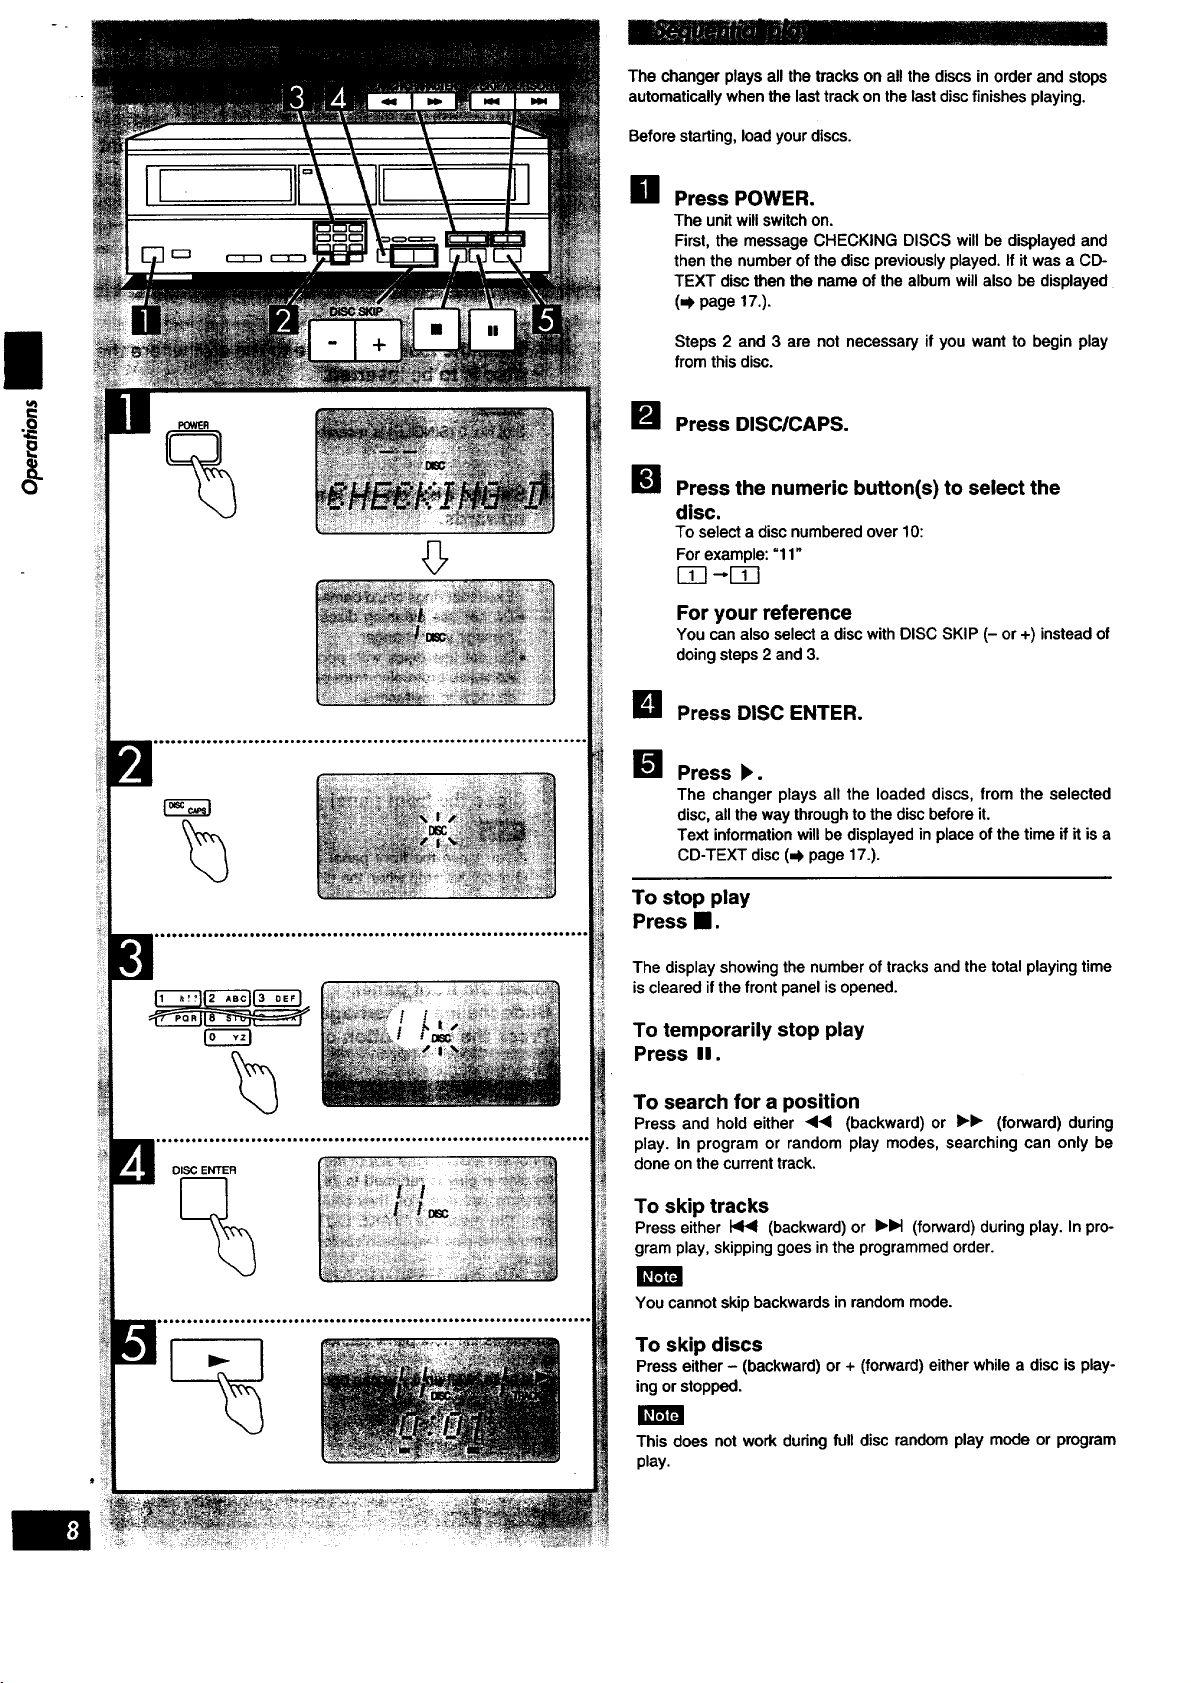
The changerplaysall the trackson allthe discsinorderand stops
automaticallywhenthelasttrackonthelastdiscfinishes playing.
Before starting, load your discs.
[] Press POWER.
The unitwill switchon.
First,the messageCHECKING DISCS willbe displayedand
thenthe numberofthe discpreviouslyplayed.Ifit was a CD-
TEXT discthen the name of thealbumwillalsobe displayed
(,,I,page 17.).
Steps 2 and 3 are not necessary if you want to begin play
from this disc.
I_ Press DlSClCAPS.
la
Press the numeric button(s) to select the
disc.
To select a disc numbered over 10:
For example: =11"
I_-! --,ITI
For your reference
You can also select a disc with DISC SKIP (- or +) instead of
doing steps 2 and 3.
1
DISC ENTER
Lq Press DISC ENTER.
Press b.
The changer plays all the loaded discs, from the selected
disc, all the way through to the disc before it.
Text information will be displayed in place of the time if it is a
CD-TEXT disc (=k page 17.).
To stop play
Press II.
The display showing the number of tracks and the total playing time
is cleared if the front panel is opened.
To temporarily stop play
Press II.
To search for a position
Press and hold either <1,< (backward) or I_1_ (forward) during
play. In program or random play modes, searching can only be
done on the current track.
To skip tracks
Press either I_<1 (backward) or I_b,I (forward) during play. In pro-
gram play, skipping goes inthe programmed order.
IPh_IIN
You cannot skip backwards in random mode.
To skip discs
Press either - (backward) or + (forward) either while a disc is play-
ing or stopped.
This does not work during full disc random play mode or program
play.
 Loading...