

Panasonic NVVHD1EC Super Drive User Manual
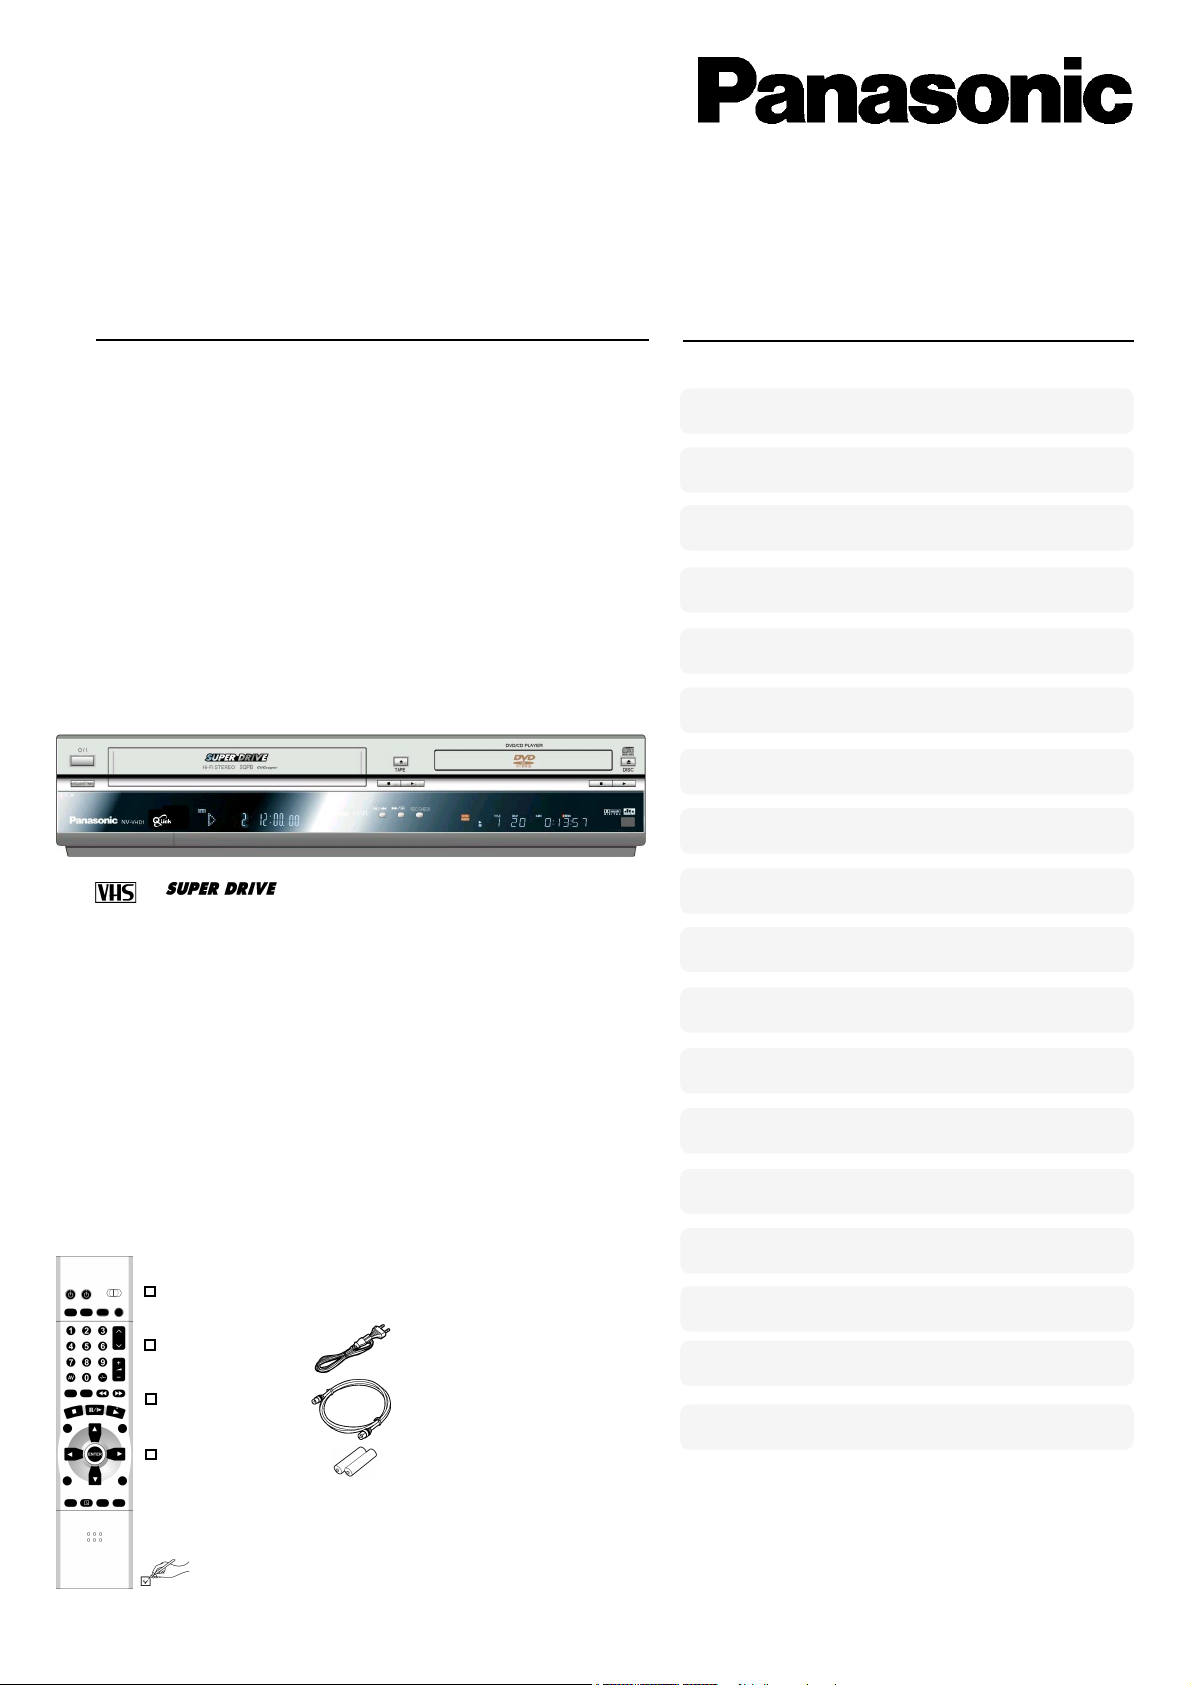
Operating Instructions
DVD Player / Video Cassette Recorder
(DVD/CD Player with MP3 and Hi-Fi Video Cassette Recorder)
NV-VHD1EC
NV-VHD1EE
Contents
Page
Warning and Precautions 2
Setting up 3
VCR / DVD Controls 4
VCR / DVD Operations 5
VCR Recording 6
VCR Playback / VCR Functions 8
VCR Tuning 10
Connecting External Equipment 11
PAL
VPS/PDC
Accessories
Remote Control
EUR7615KA0
AC Mains lead
RJA0043-1C
RF lead
VJA0728-A
Remote Control Batteries
AA, UM3 or R6
b
R
Y
X
DVD Easy Setup 13
DVD Operation 14
DVD Playback 15
DVD Settings 17
DVD OSD Menu 19
Information about the player 20
Information about the VCR 21
Troubleshooting 22
Language codes
Remote Control codes
23
Index / Specifications 24
Please read through all these operating instructions
(especially the safety information) before connecting
or operating this unit, or adjusting any settings.
OSD = On Screen Display
VCR = Video Cassette Recorder
TV = Television
RQTD0035-A
Warnings and Precautions
This unit is intended for use in moderate climates.
Please observe copyright laws when recording sound tracks and film.
Caution !
Do not install, or place this unit, in a bookcase, built-in cabinet or in another confined space. Ensure the
unit is well ventilated. To prevent risk of electric shock or fire hazard due to overheating, ensure that
curtains and any other materials do not obstruct the ventilation vents.
Do not obstruct the unit’s ventilation openings with newspapers, tablecloths, curtains, and similar items.
Do not place sources of naked flames, such as lighted candles, on the unit.
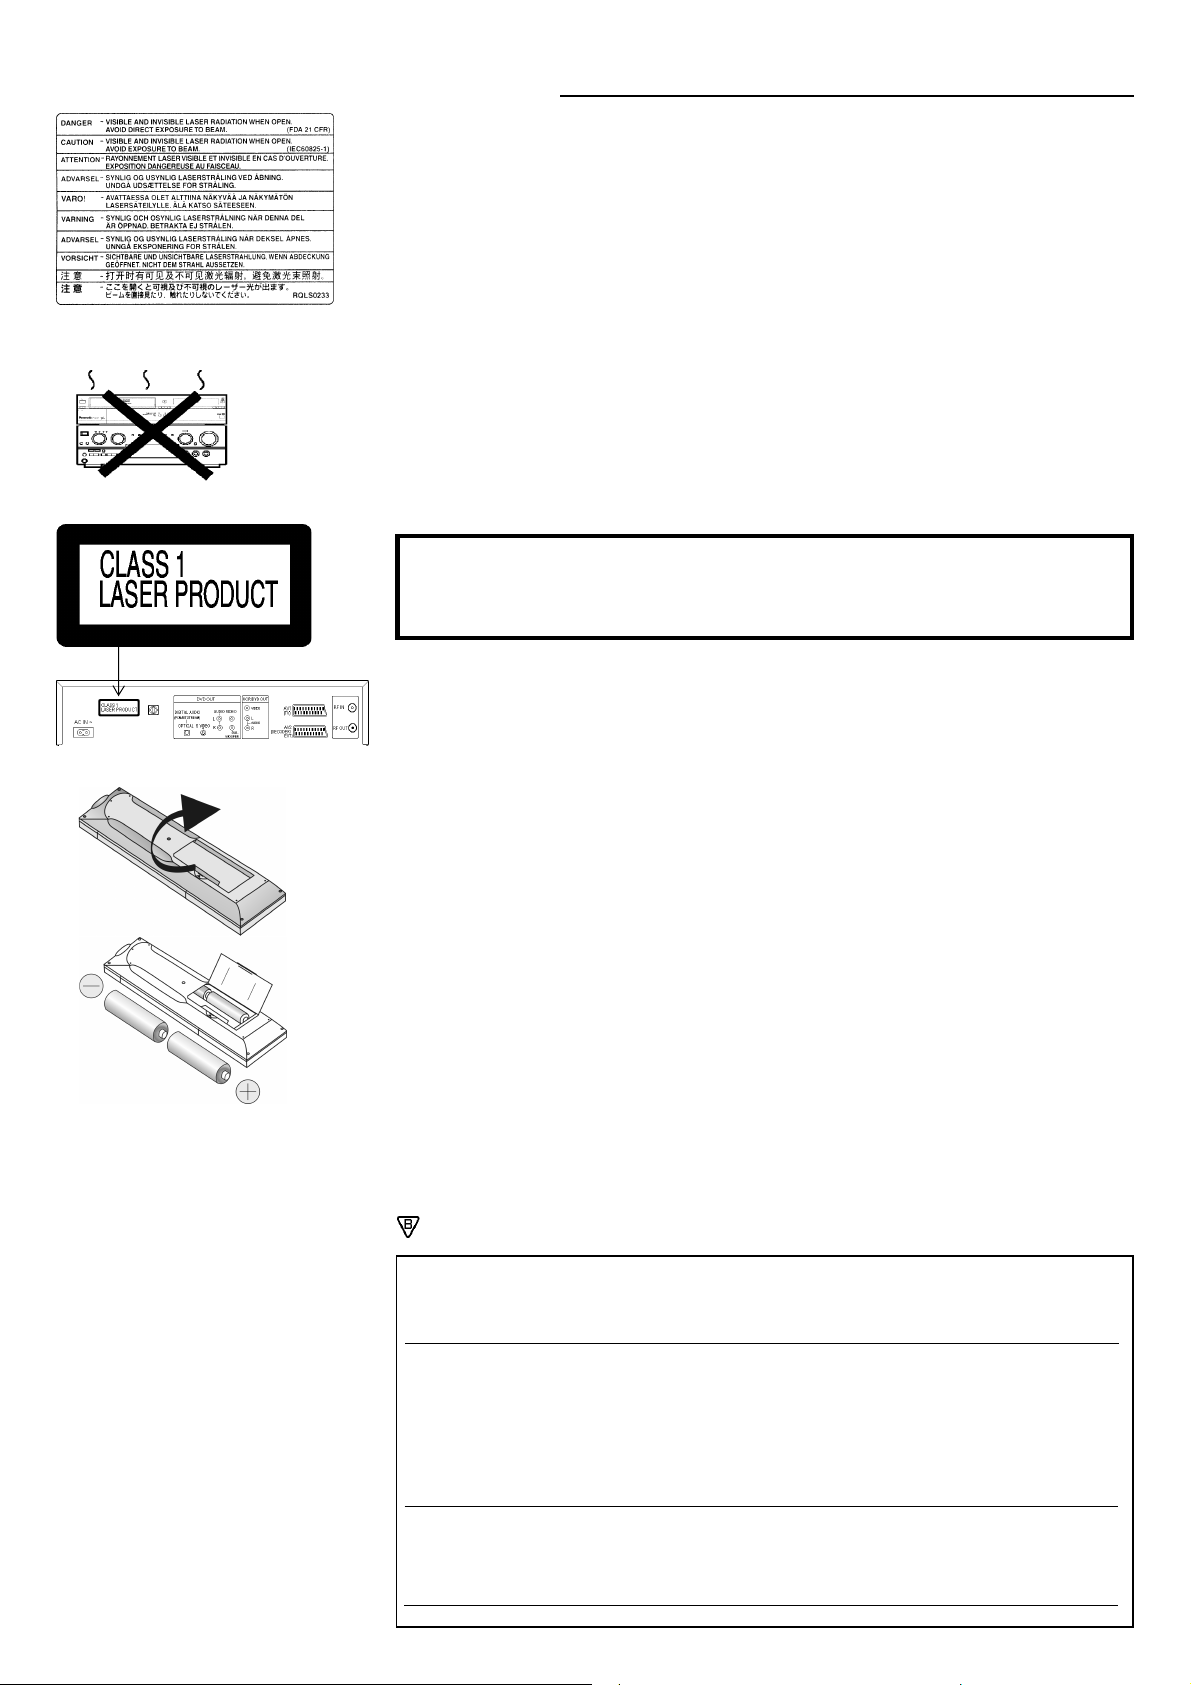
Inside of product
Produktets innside (Norwegian)
Dispose of batteries in an environmentally friendly manner. Batteries, packaging and old equipment
should not be disposed of as domestic waste, but in accordance with the applicable regulations. a S
Do not remove outer cover to prevent electric shock. There are no user serviceable parts inside.
Refer all servicing to qualified service personnel.
Only transport and set up this equipment in a horizontal position and do not place anything heavy on it.
Only connect leads when all the parts of this equipment, the TV and other equipment are switched off.
Only clean the outside of this equipment, using a soft cloth and no cleaning fluid.
The mains lead must not be used for other equipment.
Do not connect or handle the equipment with wet hands.
In case of rapid temperature changes, do not operate this equipment for minimum of 1 hour.
Do not place the unit on amplifiers or equipment that may become hot. The heat can damage the unit.
CAUTION!
THIS PRODUCT UTILIZES A LASER. USE OF CONTROLS OR ADJUSTMENTS OR PERFORMANCE
OF PROCEDURES OTHER THAN THOSE SPECIFIED HEREIN MAY RESULT IN HAZARDOUS RADIATION
EXPOSURE. DO NOT OPEN COVERS AND DO NOT REPAIR YOURSELF. REFER SERVICING TO
QUALIFIED PERSONNEL.
2
back of product
Warning!
To reduce the risk of fire, electric shock or product damage, do not expose this equipment to rain, moisture,
dripping or splashing and that no objects filled with liquids, such as vases, shall be placed on the equipment.
This equipment, the remote control, the mains lead must not be used if it is damaged. Protect them from:
Direct sunlight, heat, cold, rain, wetness, oil, soiling and dust
Insertion of fingers or objects
Shock, vibrations and mechanical stress (do not bend the mains lead)
Electric and magnetic fields
Lightning strikes during thunderstorms (disconnect mains and aerial plugs)
Instructions for inserting remote control batteries:
The lifetime of the battery is about 1 year, depending on the frequency of use.
Do not use one old and one new battery, or different types of batteries together
(e.g. one alkali and one zinc-carbon battery).
Only insert batteries which contain no toxic materials (such as lead, cadmium, mercury).
Do not use rechargeable type batteries.
If the remote control will not be used for a long time, remove the batteries and store them in a
cool and dry place.
Do not heat or short-circuit the batteries.
Remove spent batteries immediately and replace them with type AA, UM3 or R6.
Observe the O and N polarities when replacing the batteries.
Safety information
T
U
V
This equipment complies with European conformity requirements,
in accordance with the conditions of electromagnetic compatibility and product safety.
This equipment complies with the requirements of protection class 2.
This equipment complies with the safety requirements of the VDE.
(German Association of Electrical Engineers)
This equipment complies with the safety requirements of the PCBC.
(Polskie Centrum Badań i Certyfikacji)
ADVARSEL:
FOR Å REDUSERE FAREN FOR BRANN, ELEKTRISK STØT ELLER SKADER PÅ PRODUKTET, MÅ DETTE
APPARATET IKKE UTSETTES FOR REGN, FUKTIGHET, VANNDRÅPER ELLER VANNSPRUT. DET MÅ HELLER
IKKE PLASSERES GJENSTANDER FYLT MED VANN, SLIK SOM BLOMSTERVASER, OPPÅ APPARATET.
APPARATET MÅ IKKE PLASSERES I EN BOKHYLLE, ET INNEBYGGET KABINETT ELLER ET ANNET LUKKET
STED HVOR VENTILASJONSFORHOLDENE ER UTILSTREKKELIGE. SØRG FOR AT GARDINER ELLER
LIGNENDE IKKE FORVERRER VENTILASJONSFORHOLDENE, SÅ RISIKO FOR ELEKTRISK SJOKK ELLER
BRANN FORÅRSAKET AV OVERHETING UNNGÅS
APPARATETS VENTILASJONSÅPNINGER MÅ IKKE DEKKES TIL MED AVISER, BORDUKKER, GARDINER OG
LIGNENDE.
PLASSER IKKE ÅPEN ILD, SLIK SOM LEVENDE LYS, OPPÅ APPARATET
BRUKTE BATTERIER MÅ KASSERES UTEN FARE FOR MILJØET.
DETTE PRODUKTET ANVENDER EN LASER.
BETJENING AV KONTROLLER, JUSTERINGER ELLER ANDRE INNGREP ENN DE SOM ER BESKREVENT I
DENNE BRUKSANVISNING, KAN FØRE TIL FARLIG BESTRÅLING.DEKSLER MÅ IKKE ÅPNES, OG FORSØK
ALDRI Å REPARERE APPARATET PÅ EGENHÅND. ALT SERVICE OG REPARASJONSARBEID MÅ UTFØRES
AV KVALIFISERT PERSONELL.
DETTE APPARATET ER BEREGNET TIL BRUK UNDER MODERATE KLIMAFORHOLD.
.
.
NORSK
RQTD0035-A
VCR / DVD
RF IN
AV1
RF OUT
RF coaxial lead
(supplied)
21-pin scart lead
(not supplied)
On Screen Display
Panasonic VCR
Country
Belgien Deutschland
Belgique Österreich
Belgiê Portugal
Panasonic VCR
Clock setting
Clock setting : MAN.
Time : 20:30:24
Date : 21.03.01
Panasonic VCR
Panasonic VCR
Download
Download
Download in
progress,
please wait.
Position 49
VCR display
Aerial
(not supplied)
TV
(not supplied)
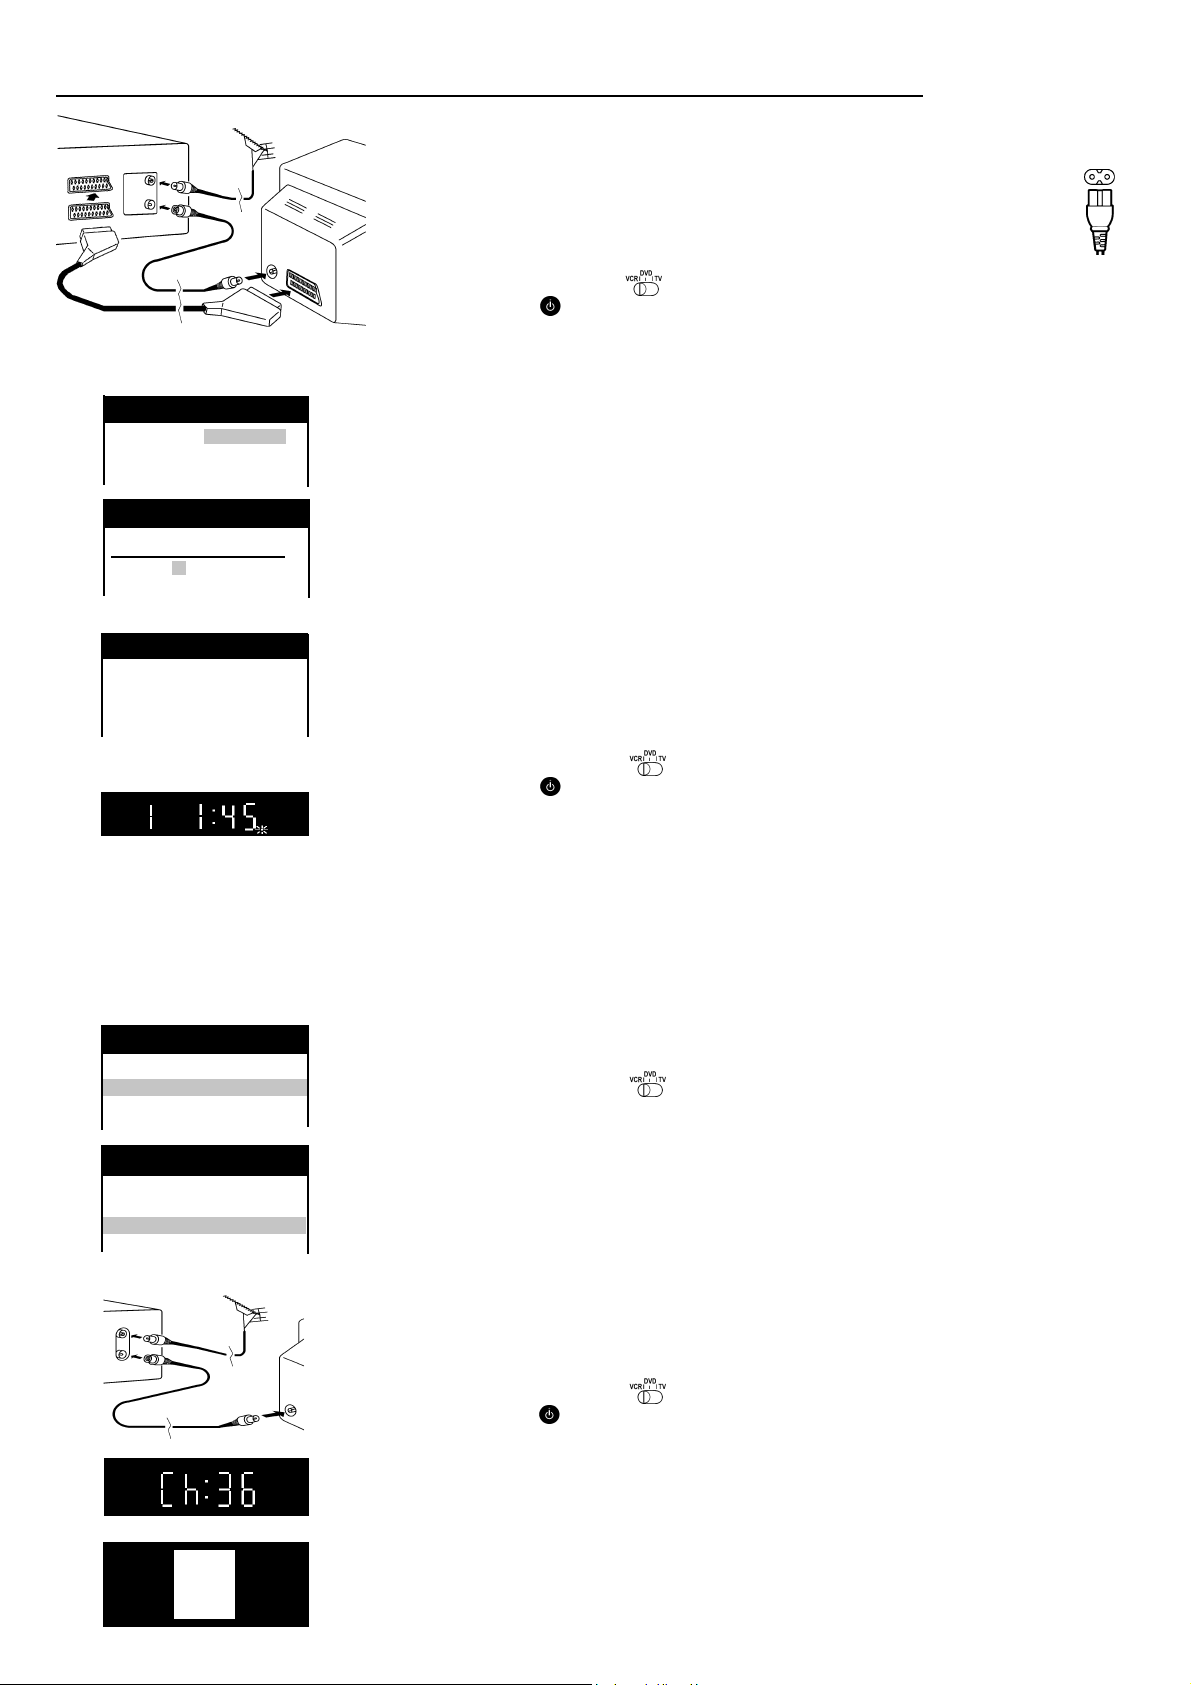
Setting up
Set up the connections shown here and connect the mains lead (supplied) to your AC IN.
The RF (radio frequency) coaxial lead must be connected for TV reception,
even if the video recorder is already connected with a 21-pin scart lead.
For more information about the remote control buttons and cursors see pages 4-5.
Automatic Setting without Q Link
Set the remote control to VCR
Switch on the unit and the [Country] setting menu will appear.
Use the cursors
on the remote control to select your country.
After pressing |ENTER|, all the TV stations which can be received will be tuned automatically in about 5 minutes.
If the menu [Clock setting] appears, use the cursors
or the numeric buttons
on the remote control to set the Time and Date manually.
To end this procedure, press |ENTER|.
To cancel this settings press |EXIT|.
Note: If the selection for the Country menu does not appear after switching on the unit, you can restart
the automatic setting; see page 10. An incorrect setting of time or date (observe summer- and wintertime)
will influence the timer recording.
Automatic Setting with Q Link
If your TV is equipped with Q Link or with a similar function from other manufacturers (see note),
the TV programme positions can be downloaded with a fully-wired 21-pin scart lead (not supplied).
The programme positions must be tuned on the TV first.
Connect the scart lead.
Set the AV channel of the TV.
Set the remote control to VCR .
Switch on the unit .
Downloading of the TV data starts.
When the channel indication stops flashing on the VCR display, the downloading is complete.
Note about
Panasonic. List of registered trademarks: Q Link (Panasonic), DATA LOGIC (Metz), Easy Link (Philips),
Megalogic (Grundig), SMARTLINK (Sony)
: The following systems from other manufacturers have a similar function to Q Link from
R
AC IN~
AC mains lead
(supplied)
Panasonic VCR
Main menu
Timer recording
Tuning
Clock setting
Other settings
Panasonic VCR
Tuning
Manual
Auto-Setup Restart
Download
Shipping condition
VCR / DVD
RF Coaxial lead (supplied)
VCR display
On Screen Display
RQTD0035-A
VCR
Ch:36
TV
Manual download start
Set the AV channel of the TV.
Set the remote control to VCR .
Press |MENU|
Select [Tuning]
Access by pressing |ENTER|
Select [Download]
Press |ENTER|
Confirm by pressing |ENTER|
When the channel indication stops flashing on the VCR display, the downloading is complete.
Connect the TV only with a RF coaxial lead
You must ensure that the video output channel is adjusted to the input channel of the TV.
Please also read the operating instructions for your TV.
Set the remote control to VCR .
Switch on the unit
Press |MENU| for about 7 seconds until the number of the channel appears
on the VCR display. The pre-setting is channel 36 (NV-VHD1 EC) 38 (NV-VHD1 EE).
Tune the TV until the test screen appears. A distorted picture on the channel can be reduced
by adjusting the unit and the TV to another channel.
Use the |CH| button or the numeric buttons to select the channel number (e.g. channel 39).
Tune the TV until the test screen appears.
To store this adjustment, press |ENTER| .
After that, please continue with the Automatic Setting with the [Country] setting menu.
3
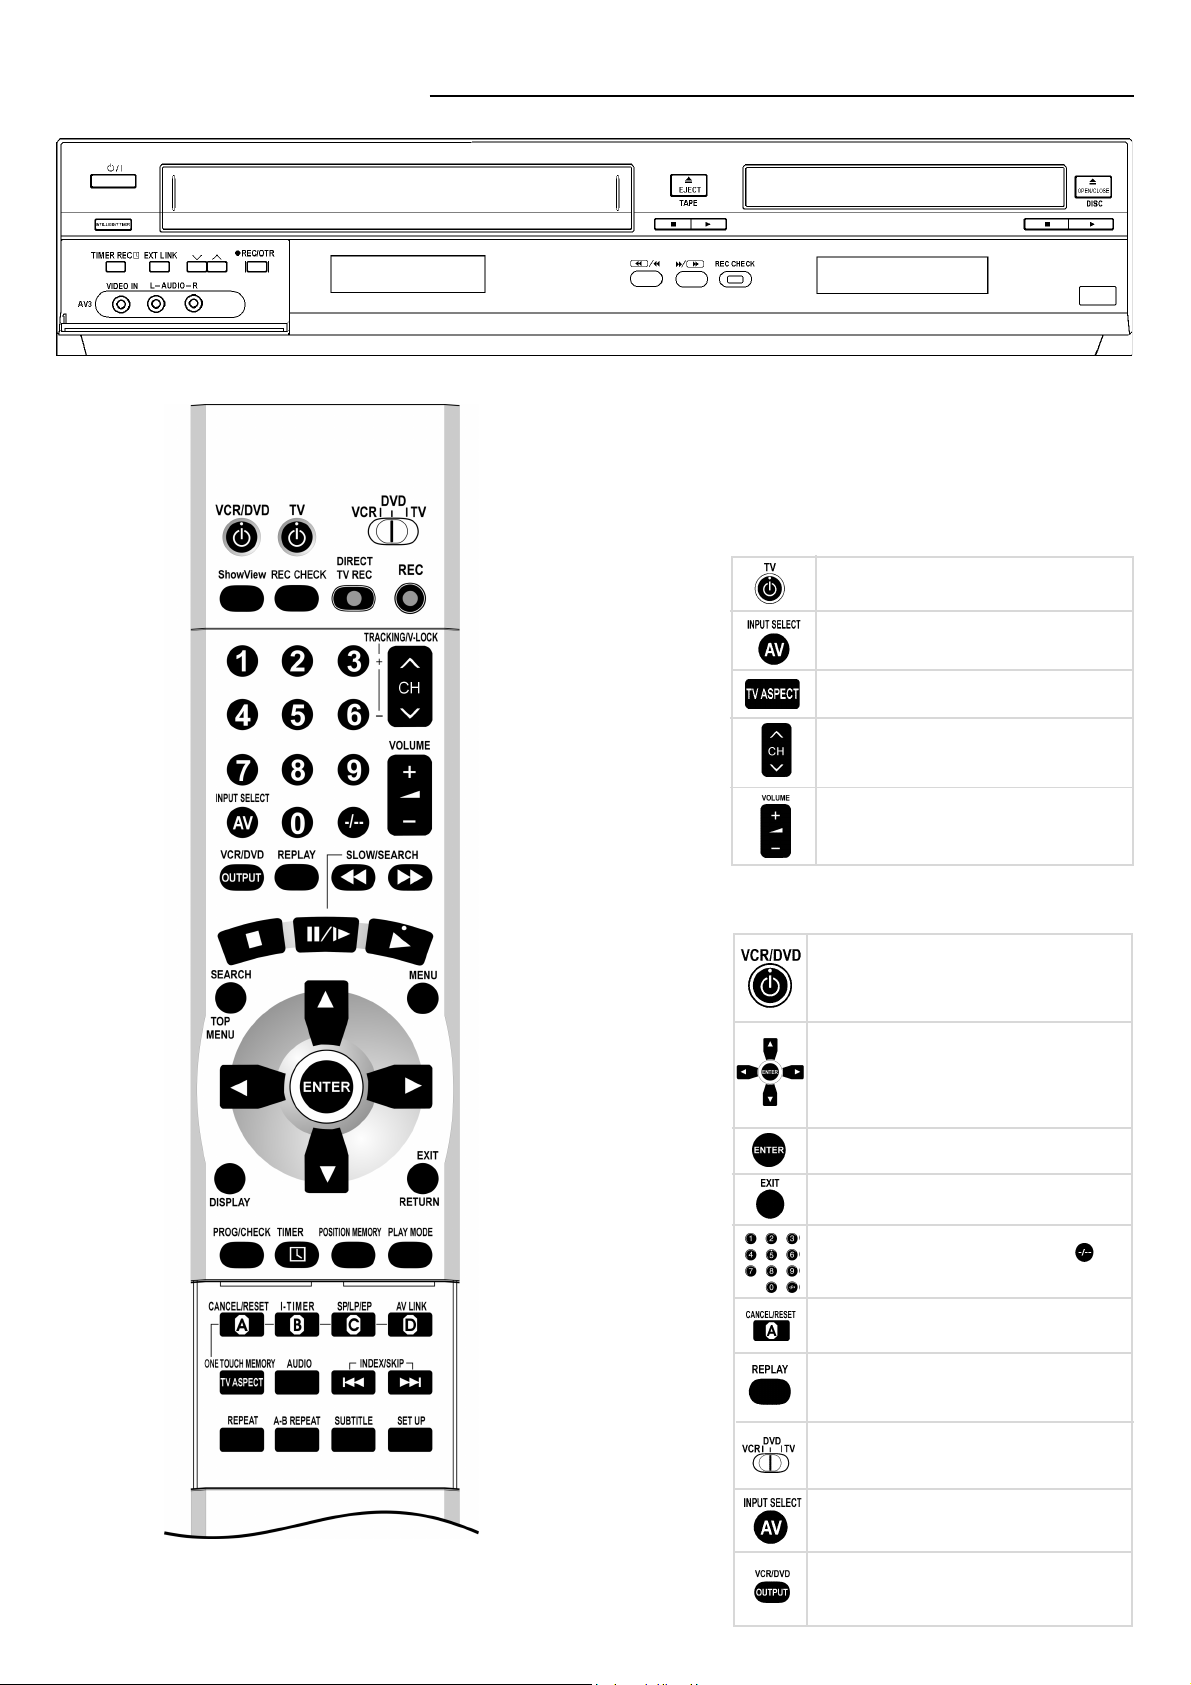
VCR / DVD Controls
VCR display
DVD display
The functions of these buttons can be operated by the
remote control or directly on the unit. In this description,
the remote control symbols are used in most cases.
TV Operations
To set the remote control code to operate the TV,
see page 23.
Switch the TV on and off.
Select TV or AV channel.
Switch the screen format between
the wide screen and other formats.
Select the TV channel.
Operate the TV volume.
General Operations
Standby/on switch
Press to switch the unit from on to standby mode
or vice versa. In standby mode, the unit is still
consuming a small amount of power.
Menu Operation (indicated by
These buttons are also used as cursors
in order to select items on the menu.
next line = , next page =
Select or Store Operation
EXIT a menu
Direct input (indicated by
by pressing numeric buttons
Clear settings
Operate REPLAY Function.
Press this button during playback.
Switch the remote control
to VCR, DVD or TV
*/
|
1 ) ....
)
)
4
To select the input press this button repeatedly:
VCR channel, A1, A2, A3
Switch the output from
VCR to DVD or vice versa.
Not for DVD OUT (see page 9, 12)
(front input) or dc (DVD)
RQTD0035-A
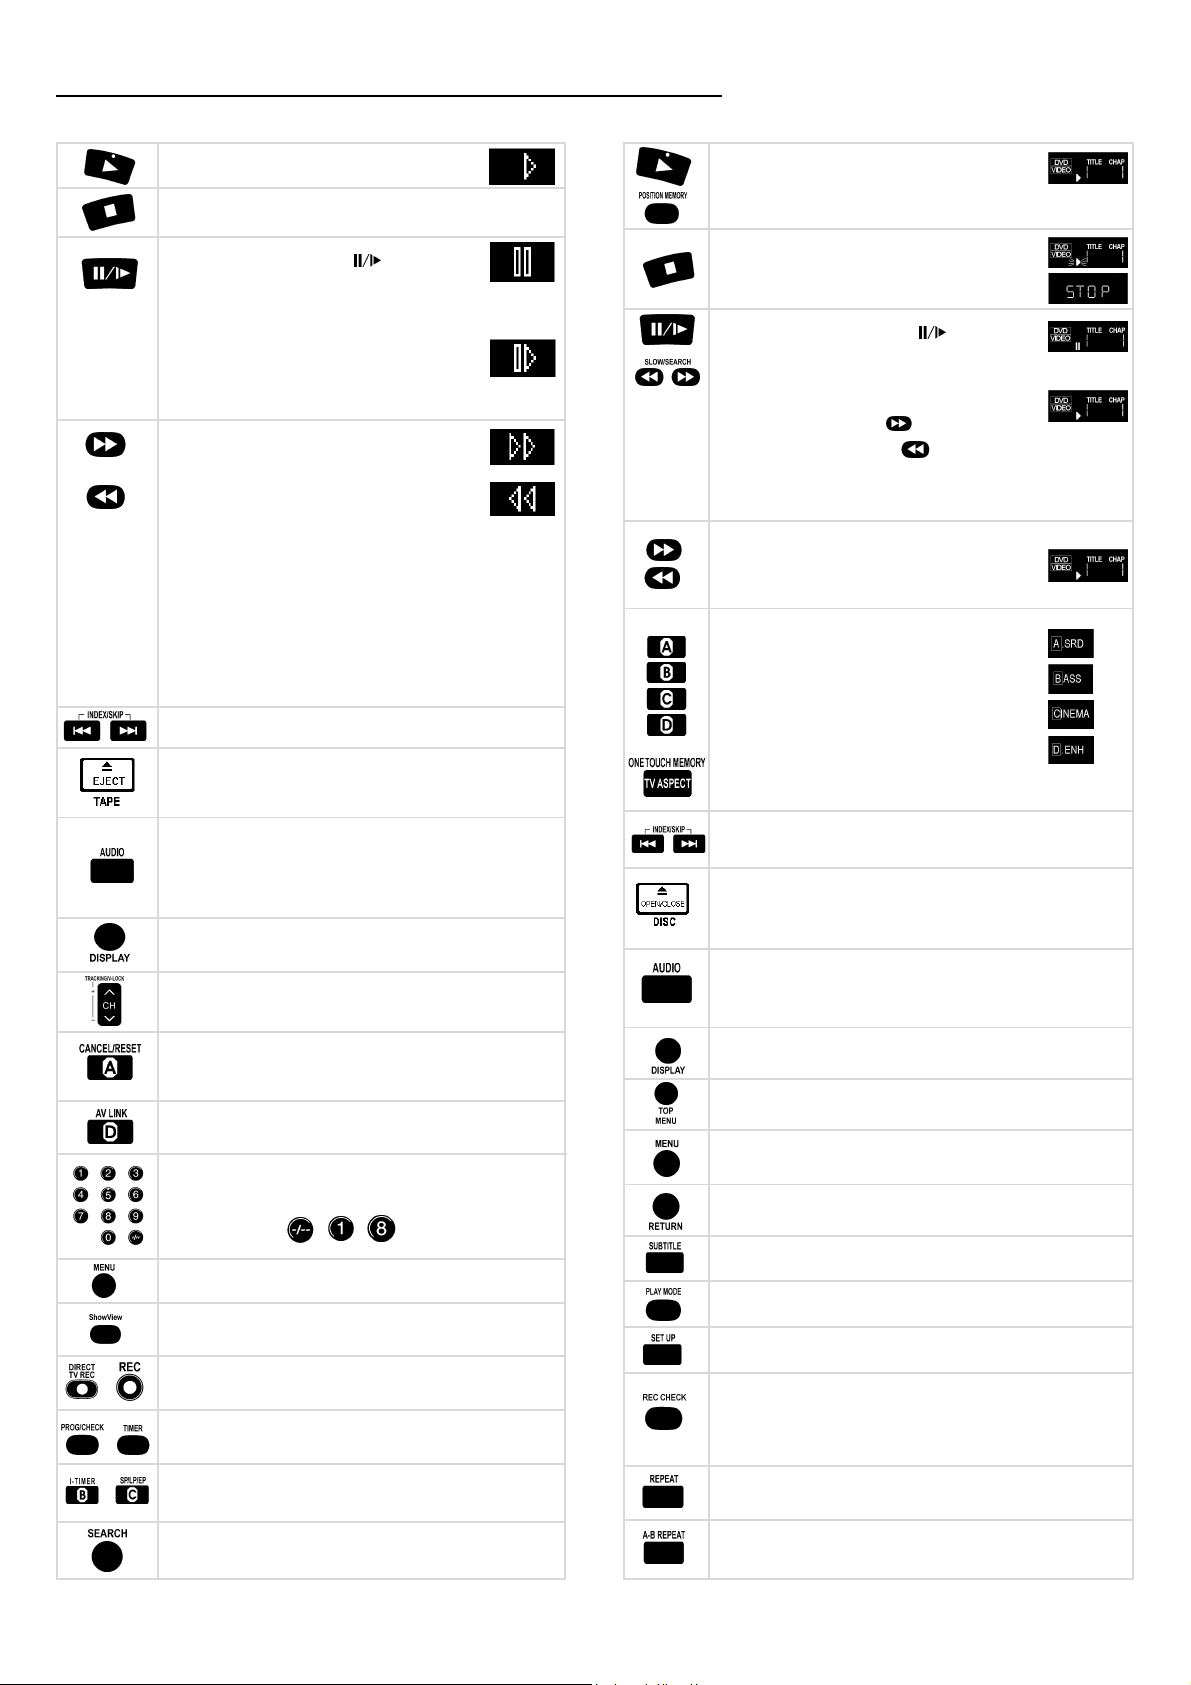
VCR / DVD Operations
VCR Operations
Playback (indicated by 9)
Stop (indicated by
To stop winding a tape, recording or playback.
Still Playback (indicated by
Press this button during playback.
Resume normal playback by pressing
this button again or Playback 9 .
Slow Playback
Keep this button pressed down for more
than 2 seconds during playback.
Resume normal playback by pressing Playback
Fast Forward and
Forward Search
Fast Rewind and
Backward Search
To select Fast Forward or Fast Rewind,
press these buttons when the video has stopped.
To briefly watch the picture during Fast Forward or Fast
Rewind, hold down the corresponding button.
To search press these buttons briefly during playback,
and the search will continue until Playback 9 is pressed.
Two times pressing increases search speed (JET SEARCH).
If you keep this button pressed, the search
function will continue until you release the button.
VHS Index Search Function (see page 8)
Remove the cassette.
Press the EJECT button on the unit
or press Stop
Change the Sound mode.
Press this button repeatedly.
Stereo sound: OSD Display L R
Left channel: OSD Display L
Right channel: OSD Display R
Mono sound: OSD Display - -
Display time, Tape counter or Remaining tape time.
Press this button repeatedly.
Select the VCR channel
and adjust the tracking, see page 23
VCR display
<<
< )
<<
)
9 .
for more than 3 seconds on the remote control.
<<
<
<<
DVD Operations
Playback (indicated by 9)
Restart from the memorized position
Playback Stop Resume (press button 1x)
Playback Stop (press button 2x)
(indicated by
Playback Pause (indicated by )
Slow-motion playback
Keep this button pressed down while paused.
Slow playback forward
Slow playback backward
Resume normal playback by pressing
Playback 9 .
Forward Search
Backward Search
ADVANCED SURROUND:
Playback if you are using 2 front speakers
BASS PLUS: If you connected a subwoofer
PICTURE: Enhances detail in dark scenes
DIALOGUE ENHANCER: Increases the volume
of the dialogue sound
Reselect or store this settings
Skip chapters or tracks
Remove the disc.
Press the OPEN/CLOSE button on the unit
or press Stop
Change audio soundtrack / language
Press AUDIO during playback. The soundtrack changes
each time you press the button (see page 19).
DVD display
<<
< )
<<
for more than 3 seconds on the remote control.
<<
<
<<
Reset the Tape counter.
Press this button. When inserting a cassette,
Call up the OSD-screens
the counter is reset to 0:00.00 .
AV Link Function
Call up the top menu of a disc
see page 11
Call up the menu of a disc
Select the channel or the ShowView number
Use the numeric buttons.
Example: 18 =
Return from DVD SETUP menu to playback
Select language of subtitles (see page 17)
Display the Main menu
VCR Timer Recording Function
(see page 7)
Call up the PLAYLIST menu (see page 15)
Call up the DVD SETUP menu (see page 18)
VCR Recording Functions
(see page 6)
VCR Timer Recording Functions
(see page 6, 7)
VCR Timer Recording and Tape Speed Functions
(see page 6, 7)
VCR Programme List and Intro-Jet Scan Function
(see page 8)
REC CHECK
Check the VCR recording status. For a moment the Timer
recording menu or an Info box appears on the OSD.
Not for DVD OUT (see page 12)
Repeat Playback (see page 16)
A-B Repeat Playback (see page 16)
Note: To preserve the video heads, the following functions are switched off automatically after 5 - 10 minutes : Forward Search (Cue), Backward Search (Review),
Jet Search, Still Playback, Slow Playback. (Distorted pictures and tape transport noises during these functions are not functional faults)
RQTD0035-A
5
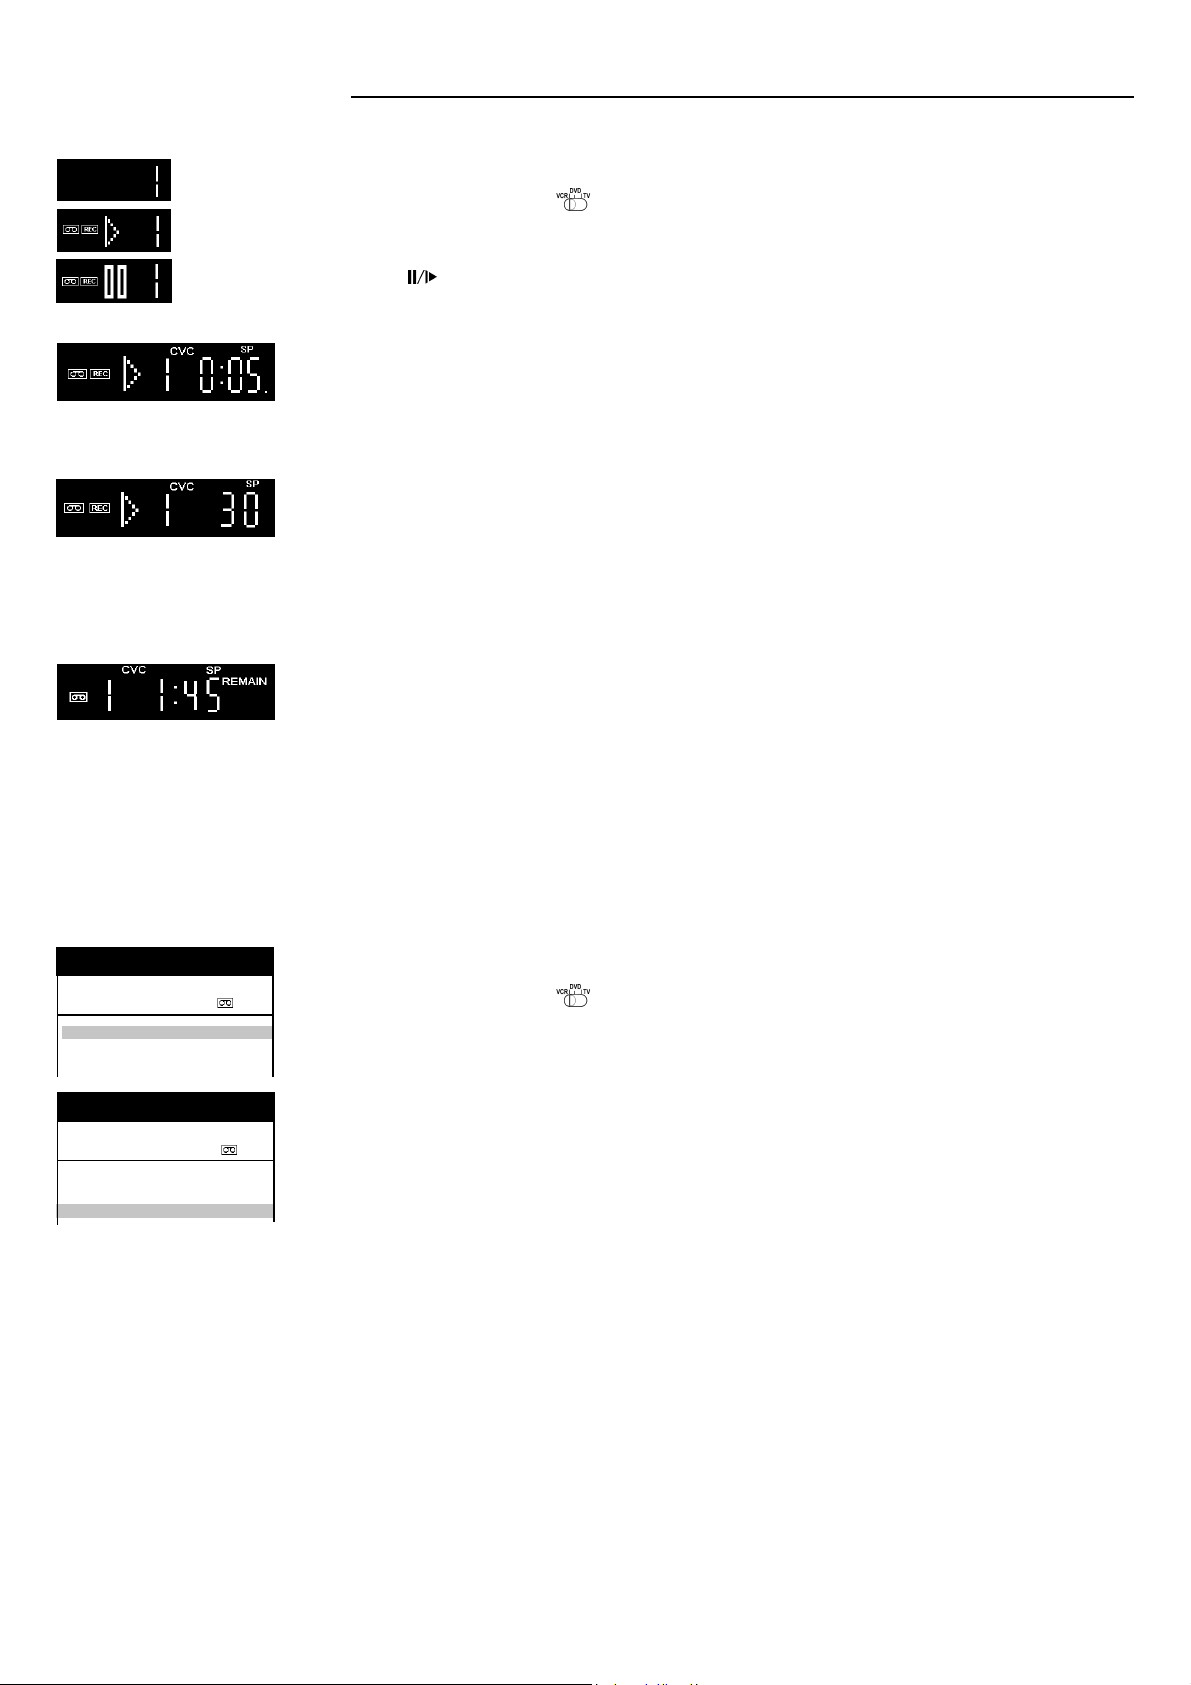
VCR Recording
Switch on and set the TV to the video output channel and insert a cassette with an intact erasure prevention tab into the VCR.
VCR display
Before recording, select the channel with the |CH| button. Select the AV channel |INPUT SELECT AV| if you want to record
a programme from scart AV1, AV2, front input = A3 or Disc = dc.
Switch the remote control to VCR .
Press |REC| to start recording.
Press Stop
Use Pause to pause recording.
Restart recording by pressing this button again. To preserve the video heads, the function will be switched off after 5 minutes.
Direct TV Recording
The |DIRECT TV REC| button allows you to immediately start recording the same programme that you are viewing on the
TV, if your TV is equipped with Q Link or with a similar function from other manufacturers (see page 3) and connected
with a fully-wired 21-pin scart lead (not supplied).
<<
< to stop recording.
<<
VCR Display
On Screen Display
Panasonic VCR
Timer recording 1/2
Pos VPS
Name Date Start Stop
1. - - - - - - -/- - - -:- - - -:- - - - - -
2. - - - - - - -/- - - -:- - - -:- - - - - -
3. - - - - - - -/- - - -:- - - -:- - - - - -
Panasonic VCR
Timer recording 1/2
Pos VPS
Name Date Start Stop
1.
32 Mo-Sa 13:30 14:00 LP ON
***
2.
32 20/9 15:00 16:00 SP OFF
***
3. - - - - - - -/- - - -:- - - -:- - - - - -
PDC
PDC
OTR Function (OTR = One Touch Recording)
REC/OTR
To record for a specific length of time, press this button on the VCR. You can extend the recording time from
30, 60, 120, 180 to 240 minutes by pressing the button repeatedly.
The selected length of recording time will appear on the VCR display. To stop in advance press Stop
<<
< .
<<
If you want to watch another TV programme at the same time as you are recording, select the channel on the TV.
Tape Speed
Press |DISPLAY| until [REMAIN] on the VCR display appears.
Press |SP/LP/EP| before recording, in order to select the tape speed for the recording.
Make sure that the remaining time on the cassette is longer than the time set for recording,
otherwise the whole programme cannot be recorded.
The following information appears on the VCR display:
[SP] standard recording time: optimum picture quality.
[LP] double recording time: slightly reduced picture quality.
[EP] (SUPER LP) triple recording time: slightly reduced picture quality.
Note: Distorted pictures produced when playing back some cassettes (e.g. type E300) after LP or EP recordings are not functional faults.
Timer recording with On Screen Menu
With the On Screen Menu you can programme Timer recordings (up to 16 programmes).
Switch on and set the TV to the video output channel and insert a cassette with an intact erasure prevention tab into the VCR.
Switch the remote control to VCR .
Press |PROG/CHECK| to display [Timer recording] menu and press |ENTER|.
Set the channel [Pos].
You can use the cursors
Set the recording [Date], day or week.
For example: Sa means that the programme will be recorded every Saturday, or Mo - Sa means that the
programme will be recorded every day from Monday to Saturday.
Set the [Start] time. If you keep this button pressed down
Set the [Stop] time.
Set the Tape Speed [SP], [LP], [EP] or [A] (automatic).
on the remote control to move around the menu, in order to make changes.
, the time will change in 30 minute jumps.
6
In the setting A (automatic), the VCR automatically switches (with a short picture distortion) to the slow tape speed LP,
to record the programme as long as possible, if the remaining tape time is not long enough.
The preset [VPS / PDC] settings can be manually changed.
[ON] The broadcaster provides VPS / PDC signals. If the program is starting earlier or later than planned
the timer recording will be synchronised to the actual broadcast start.
Important ! The time and date settings must be exactly same as programme information (programme magazine).
If there is a special VPS / PDC time noted, it must be used. (The recording can not start, if the settings are not exact.)
[- - -] The broadcaster does not provide VPS / PDC signals.
[OFF] The broadcaster providing VPS / PDC signals, but the function is turned off. With this setting you have to
add to the start and stop time so that the whole film can be recorded completely, just in case the film is
broadcasted out of the planned time.
To store the programme, press |ENTER|.
In order to preset other recordings, repeat this procedure.
Press |TIMER| to switch the VCR to Standby mode for Timer recording. Make sure that in the VCR display
appears.
RQTD0035-A
VCR Recording
Panasonic VCR
Show View
8 3 5 4 2 - - - -
Panasonic VCR
Timer recording 1/2
Pos VPS
Name Date Start Stop
1. ARD 20/4 15:00 16:00 SP ON
2. - - - - - - -/- - - -:- - - -:- - - - - -
3. - - - - - - -/- - - -:- - - -:- - - - - -
Panasonic VCR
INTELLIGENT TIMER 19/04/02
Pos VPS
Name Date Start Stop PDC
ARD 20/04 15:00 16:00 SP ON
ZDF 21/04 15:00 16:00 SP ON
Panasonic VCR
Timer recording 1/2
Pos VPS
Name Date Start Stop
1. ZDF 21/04 15:00 16:00 SP ON
2. - - - - - - -/- - - -:- - - -:- - - - - -
3. - - - - - - -/- - - -:- - - -:- - - - - -
PDC
PDC
Timer recording with ShowView
Switch on and set the TV to the video output channel, insert a cassette with an intact
erasure prevention tab into the VCR and set the remote control to VCR operation.
Press |ShowView|
Enter the ShowView number. For correction use
.
To access [Timer recording], press |ENTER|.
If the channel name is not set automatically, select the channel [Pos] and store with |ENTER|.
The name of channel will be saved. To modify the [Name], see page 10.
Set the tape speed [SP], [LP], [EP] or [A] (automatic).
Check the remaining tape time.
To store the programme, press |ENTER| .
To preset other recordings repeat the procedure.
Press |TIMER| to switch the VCR to Standby mode. Make sure that in the VCR display
b is a trademark of Gemstar Development Corporation. The bsystem is manufactured under licence from
Gemstar Development Corporation.
appears.
Recording with Intelligent Timer Function
To easily set the Timer for programmes often broadcasted on the same channel and time each day (for example series),
the Intelligent Timer Function remembers the channel number along with the start and end times o f the last 8 programmes
that you have recorded using Timer recording.
Press | I-TIMER|
To select the programme
Press |TIMER| to switch the VCR to Standby mode for Timer recording. If you want to modify the data first, follow the next steps.
If more than 8 programmes are stored, the oldest data will be lost. To delete recording data manually, press |CANCEL|.
To protect a programme press
To modify the data, press |ENTER| and the [Timer recording] menu will appear.
Change the data
Press |TIMER| to switch the VCR to Standby mode for Timer recording. For more information, see page 6.
Note: These functions can be also used with the VCR buttons: | INTELLIGENT TIMER|, |TIMER REC|
When [Shipping condition], [Auto - Setup Restart] etc. has been carried out, Intelligent Timer data will be lost.
To use Intelligent Timer Function, at least one timer recording has to be done.
and the lock symbol will appear. To unlock a programme press .
.
DVD display
VCR display
Cancel Standby mode for Timer recording
Press |TIMER| and in the VCR display
Now you can playback a cassette or make a recording.
After that, you must press the button again to switch the VCR to the Standby mode for Timer recording.
will disappear.
Check the Timer recording
Press |PROG/CHECK| to display the [Timer recording] menu.
Press |EXIT| to quit the menu.
Delete or change a Timer recording
Press |PROG/CHECK| to display the [Timer recording] menu.
Use to select the entry to be changed, press |CANCEL| to delete the Timer recording.
Use to select the entry to be changed, press |ENTER|, change entry with
.
Press |ENTER| to store these changes.
Press |EXIT| to quit the menu or press |TIMER| to switch the VCR to Standby mode.
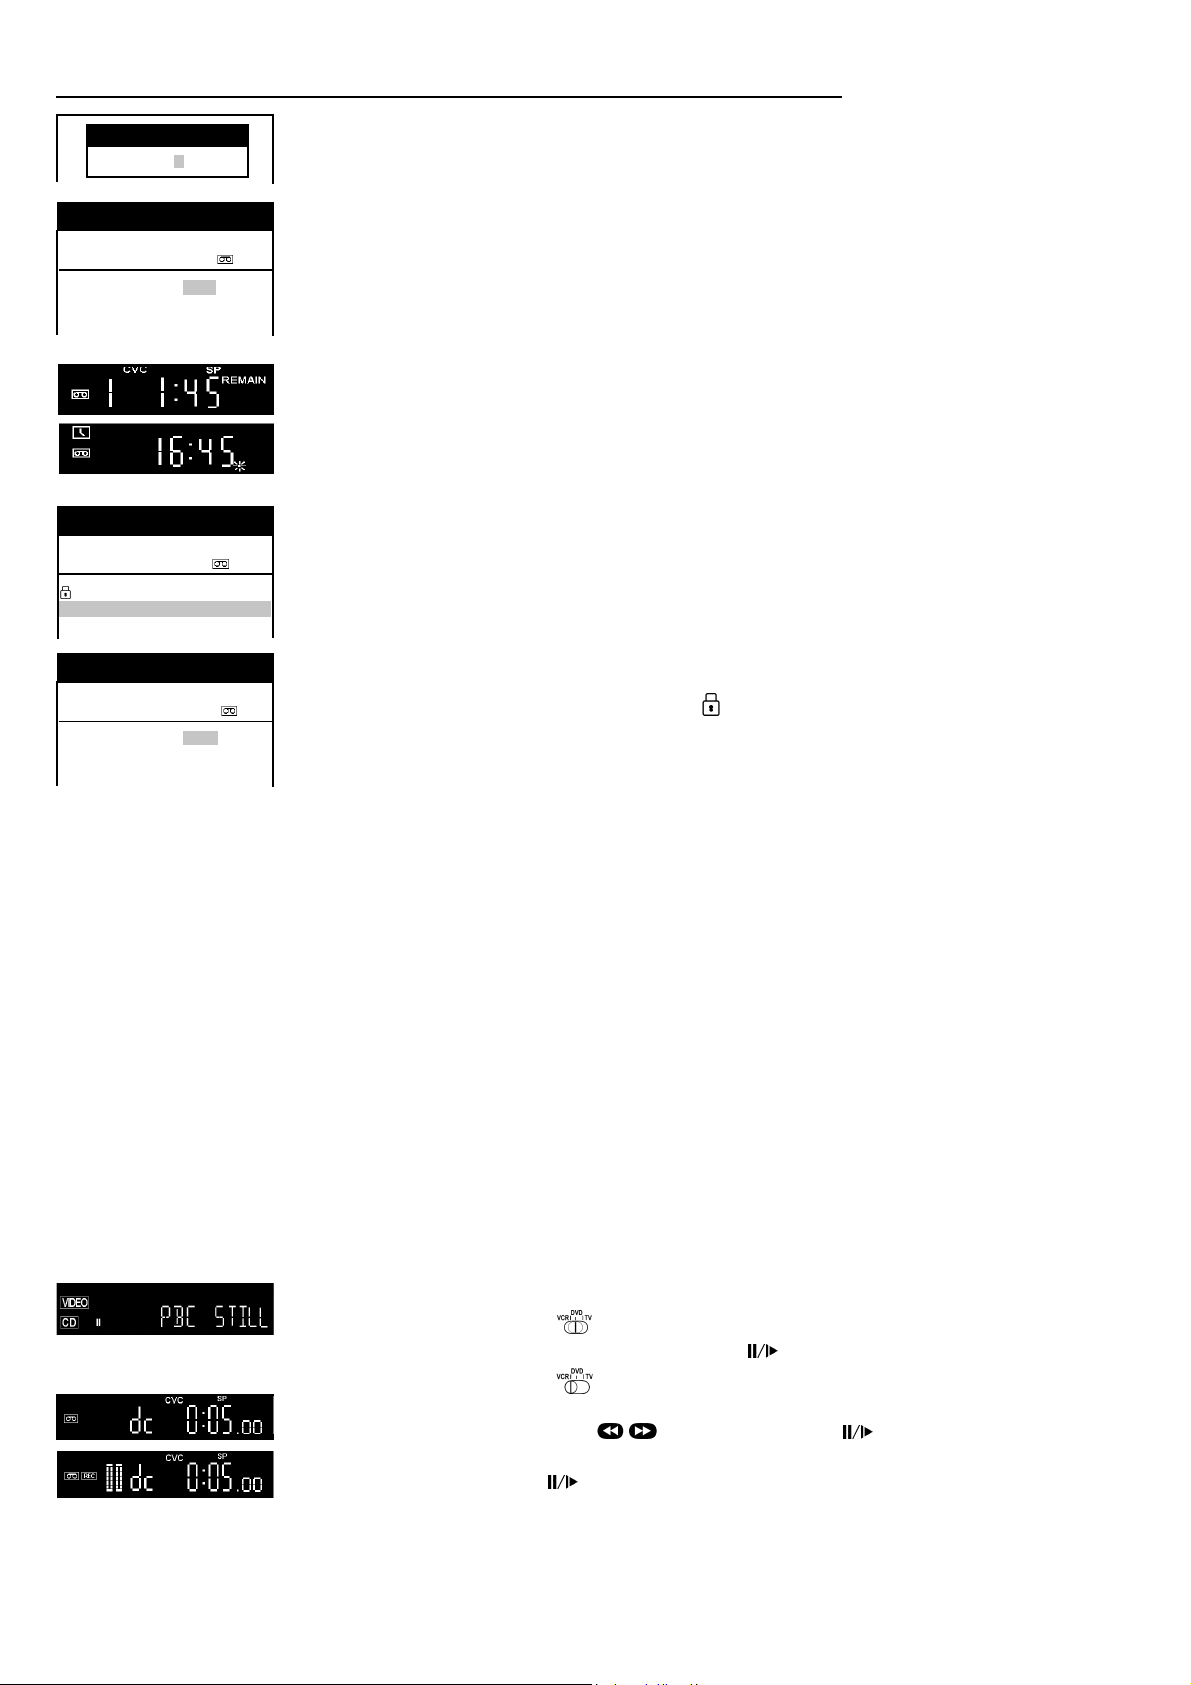
Synchronous recording (DVD, VCD, CD, MP3)
To copy synchronous from the DVD, VCD, CD or MP3 to a VHS tape.
Switch the remote control to DVD .
Set the beginning of the scene with Playback 9 and Pause
Switch the remote control to VCR .
Select the Disc channel (dc) by pressing |AV|
Set the beginning of the recording with , Playback 9 and Pause
Press |REC|
Start the recording, press Pause (disc will start the playback synchronous).
RQTD0035-A
Note: Music or films with copy protection or with the NTSC format can not be recorded.
7
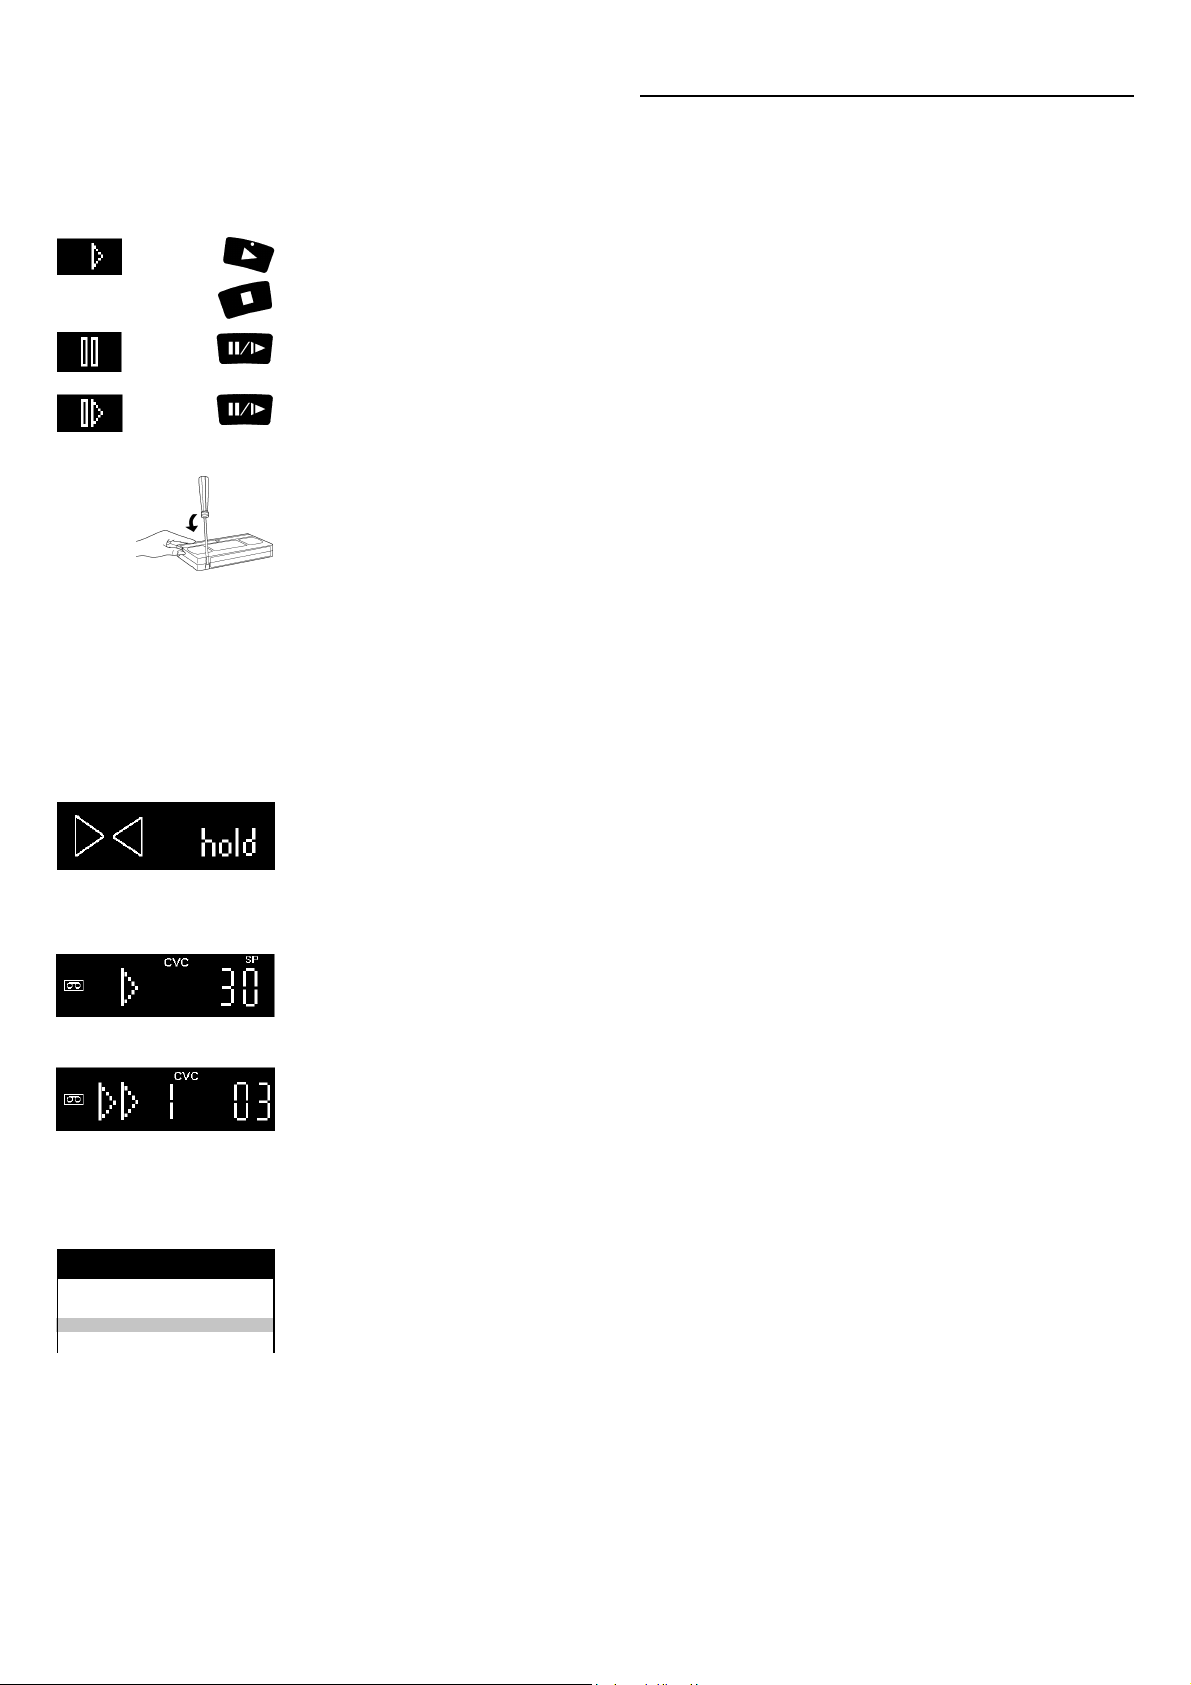
VCR Playback / VCR Functions
VCR Playback
When a cassette is inserted, the VCR switches on automatically.
When a cassette without an erasure prevention tab is inserted, the VCR will automatically start playback.
The cassette will automatically rewind when the tape end is reached.
VCR display
The CVC System (Crystal View Control) ensures optimum picture quality.
Normal Playback
Press this button to start Playback.
Stop Playback
Press this button to stop winding a tape or to stop recording.
Still Playback
Press this button during playback.
Resume normal playback by pressing this button again or Playback 9 .
Slow Playback
Keep this button pressed down for more than 2 seconds during playback.
Resume normal playback by pressing Playback 9 .
Note: For search functions, see page 5.
Erasure prevention of a cassette
To prevent the accidental erasure of a cassette, remove the erasure prevention tab. If you want to record again on a
cassette with erasure prevention, and this symbol ! is flashing on the VCR display, then cover the hole with adhesive tape.
NTSC Function
This function allows to playback tapes, which were recorded in NTSC, on a PAL TV. On some TV the pictures may be distorted
during NTSC playback. Try to adjust your TV. For this purpose, please also read the operating instructions for your TV.
To playback tapes on NTSC 4.43 TV with NV-VHD1 EE: |MENU|, [Other settings]
the input field
Dubbing or recording of NTSC tapes in NTSC4.43 Format is possible only with NV-VHD1 EE.
select the setting [4.43] , |ENTER|, |EXIT|
,
|ENTER|, [NTSC playback] , select
,
Panasonic VCR
Programme List 1/2
Pos
Name Date Start
1.
01 27/10 17:44
***
2.
01 28/10 15:00
***
Repeat Playback Function
Press Playback 9 for more than 5 seconds when the VCR is on stop mode (the letter R will appear on the OSD).
The VCR will keep replaying the cassette until the end of the recorded part. Press Stop
to exit this function.
<<
<
<<
Child lock Function
To deactivate the buttons on the unit and the remote control, press the |ENTER| and |EXIT| buttons at the same time
until this display appears. This display will also appear if attempts are made to operate the unit when this function is
activated, to inform that the unit cannot be operated. To cancel the Child Lock Function, press the same buttons
until the display disappears.
If the power supply of the unit is disconnected, the Child Lock Function is cancelled after about 60 minutes.
Playback Off Timer Function (to stop Playback automatically)
To stop the playback after a preset time, press Playback 9 on the VCR for more than 3 seconds during playback.
You can extend the playback time from 30, 60, 120, 180 to 240 minutes by pressing the button repeatedly .
To stop in advance press Stop
. The selected length of playback time will appear on the VCR display.
<<
<
<<
Intro-Jet Scan Function
You can playback the beginning of each recording with the Intro-Jet Scan Function. Press the |SEARCH| button.
The VCR will rewind to the start of the tape, and play with high speed for 10 seconds the beginning of each recording
(which is longer than 15 minutes). Once you have found the recording, press Playback 9 .
To cancel the search function, press the Stop
.
<<
<
<<
Note: For more explanation of the SEARCH button, see Programme List.
Programme List
The List of the Timer recordings are stored if the recordings are longer than 15 minutes (EP mode 25 minutes)
and the cassette was not removed.
Press |SEARCH| to display the [Programme List].
Select the programme
By pressing the |SEARCH| button again, the VCR will wind the tape to the selected programme and start to playback.
If you select another programme, press |SEARCH| again, the playback will stop and the [Programme List] will appear.
Press |EXIT| to quit the menu.
Note: If you have removed the cassette, or the power supply was interrupted, the Intro-Jet Scan will be activated
when pressing the |SEARCH| button.
.
8
VHS Index Search System
To quickly find the beginning of a programme, press forward INDEX , or press backward INDEX .
This function only works on playback mode or in stop mode. Depending on how many times you press these INDEX
buttons (up to a maximum of 20 times), the VCR will search through the tape to find the start of the programme,
and will automatically start playback (for each programme which is longer than 5 minutes).
For example, if you press the INDEX button three times, the VCR will search for the third programme.
To cancel the Index Search System, press Stop
.
<<
<
<<
RQTD0035-A
 Loading...