

Panasonic LX5 User Manual
1
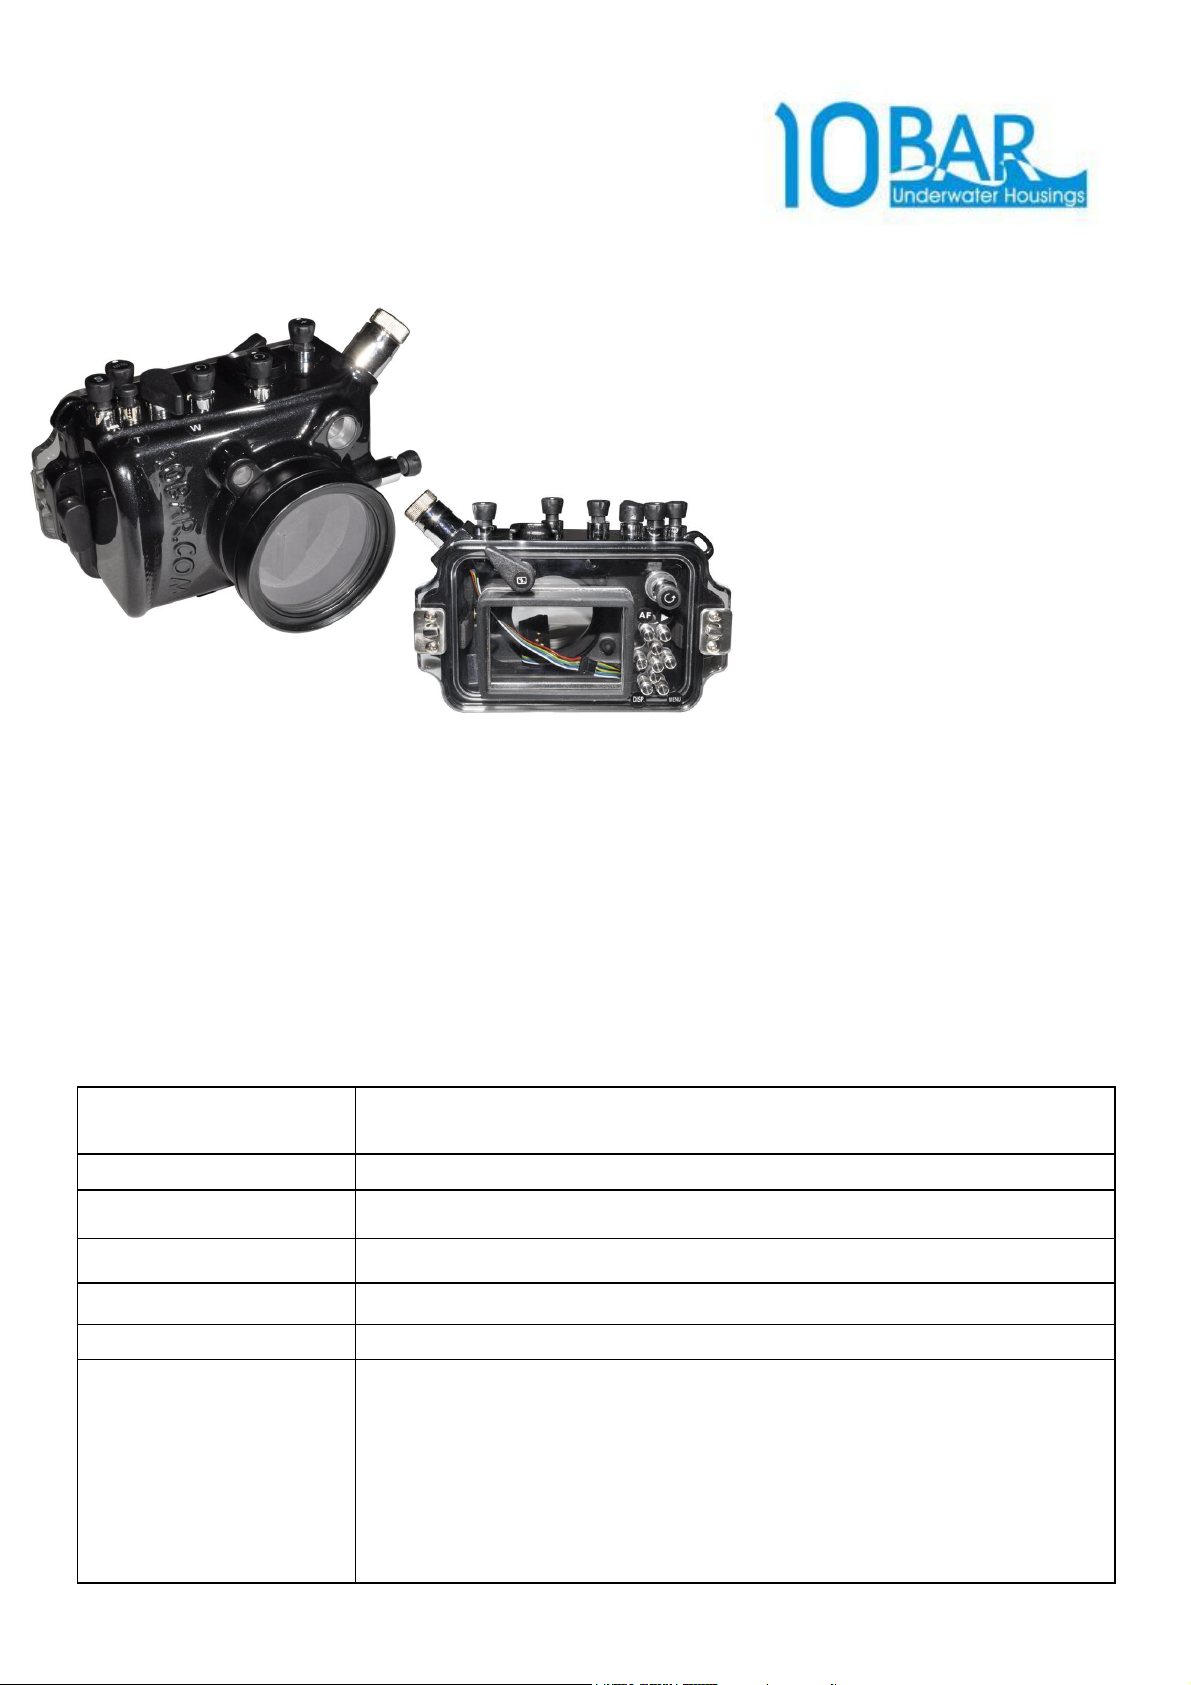
Camera Underwater Housing – LX5 (Panasonic)
User Manual
Contents: 1. Introduction
2. Specifications
3. Function Controls
4. Set up Instructions
5. Use & Care of Housing
6. Service
7. Warranty
1. Introduction
Made of 6061 aluminum, 10Bar Housing is a sturdy choice for the Panasonic LX5 camera. For
those who favour small cameras, it is the ideal housing to suit their needs. It is equipped with
full-function control buttons, bulkhead connector for external flash and interchangeable ports for
conversion lens. The acrylic back cover allows taking pictures and checking on the camera much
easier. For closure, the double o-rings and key-hole lock design provide ease of use and added
security. Now you can use small cameras with the feel and function of professional housings.
2. Specifications
Test Pressure
Closure Design Double O-rings, Key-hole Lock
Body Material 6061 Aluminum, Acrylic
Overall Size 134 x 152 x 112 mm (LxWxH)
Total Weight Approximately 0.9 kg (Housing only)
Buoyancy (with camera) Slightly negative in salt water
Housings individually tested to 10 Bar (90 m / 300 ft.) Recommended
working pressure 60 m
Spare main O-rings ( included)
Silicone O-ring grease ( included) Carrying bag ( included)
Red filter (optional)
Accessories
Extension arm for strobe or video light (optional)
Macro and Wide Angle lens (optional)
Dome port and extension adaptor (optional)
Housing for FL50 Flash (optional)
2
3. Function Controls
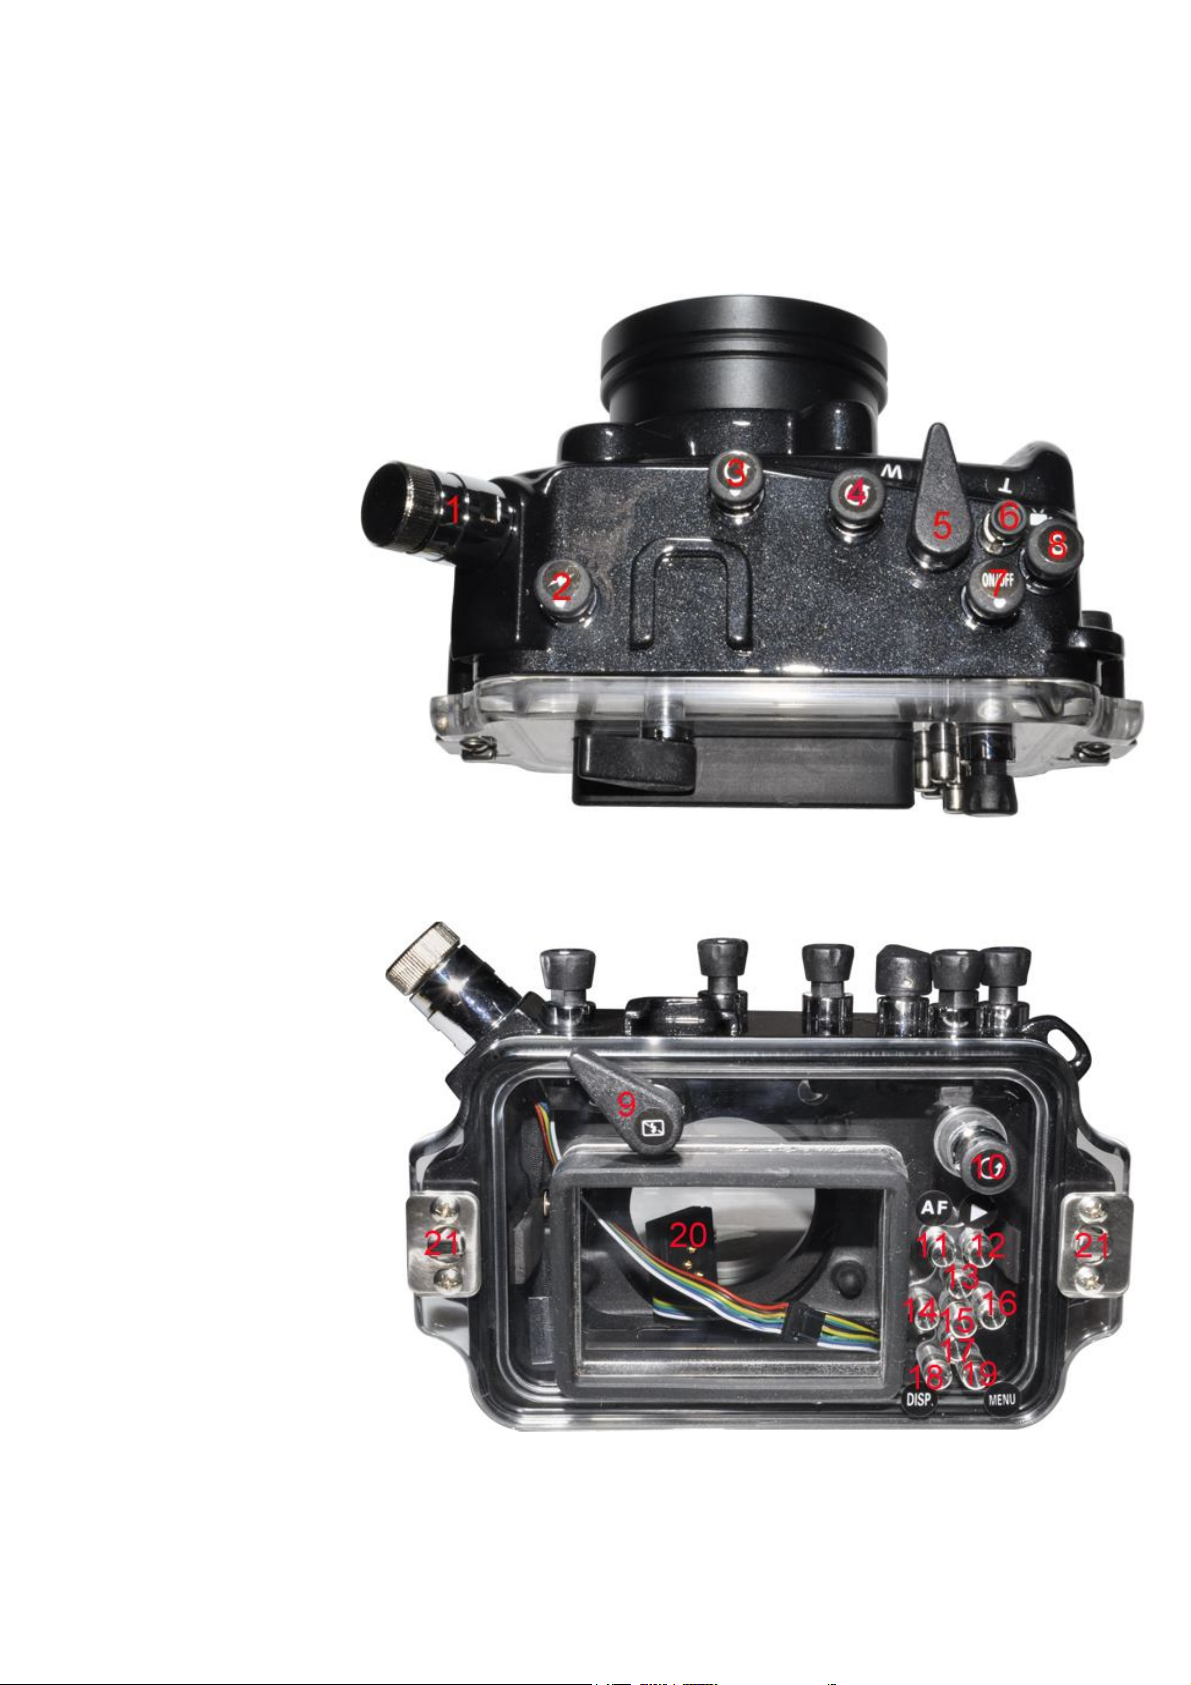
3.1 Buttons & Parts
(1) BULKHEAD
(2) FLASH ON
(3) ASPECT RATIO
(4) MODE DIAL
(5) ZOOM
(6) MOTION PICTURE
(7)Camera ON/OFF
(8) SHUTTER
(9) FLASH OFF
(10) REAR DIAL
(11) AF/AE LOCK
(12) PLAYBACK
(13) FOCUS
(14) SELF-TIMER
(15) MENU / SET
(16) ISO
(17) Fn
(18) DISPLAY
(19) DELE
(20) HOUSING Lid
(21) Key Hole Lock

3
3.2 Control Details
(1) Bulkhead – for connecting sync cord, unscrews the blank plug and installs the sync cord. Always
keep the blank plug in place if sync cord is not installed
(2) Flash On – align the white dot towards the lid, press down and turn towards the “lighting” logo,
the flash should pop up
(3) Aspect Ratio – rotate to select the required ratio
(4) Mode Dial – switch the mode by press and rotating the button
(5) Zoom – press turn to activate the zoom function
(6) Motion picture – press the motion picture button to start the recording and press subsequently to
stop recording.
(7) Camera On /Off – align the white dot towards the lid, press and turn on and off
(8) Shutter – press to activate the shutter
(9) Flash Off –turn the ‘Flash On’ white dot towards the lid, turn the button towards the ‘no
lighting’ logo. Make sure that the Flash is turn off before opening the lid.
(10) Rear Dial – gently press and turn to rotate the dial, press down to select or change mode
(11) AF / AE LOCK – rotate until the white dot align and press, when not in use rotate.
(12) Playback – press and turn to select
(13) Focus – press to activate / confirm
(14) Self-timer – press and turn the button to select Self-timer
(15) Menu / Set – rotate until the white dot align and press
(16) ISO Speed Dial - press down and turn to adjust the ISO value
(17) Fn – rotate until the white dot align and press
(18) Display – rotate to select and press to activate
(19) DELE – rotate to select and press to activate
(20) Housing Lid – monitor display
(21) Key Hole Lock – The Key hole Lock is simple and easy to use and adding security
For the full list of camera functions and settings accessed by each control, please consult
the Panasonic LX5 camera instruction manual.
4. Set up Instructions
4.1 Special note on responsibility for watertight integrity
Each housing is individually inspected and hydrostatically tested in the factory. The design of the
main piston O-ring seal is among the most reliable in the industry and the watertight integrity is
excellent. This special O-ring design provides a perfect seal even if there is any movement
between the body and lid due to change of ambient pressure. However please note that
responsibility for ensuring the integrity of the watertight seal lies entirely with the user. 10BAR
accepts no liability for damage to, or loss of any equipment used with, or placed inside the
housing. Users are highly recommended to carry out in-water test of the housings without
installing of the camera for their first dive, after change of new ports or alternation of any
new configuration. The test can be carried out by lowering the housing with ballast to the
working depth or dive down to the safe diving range.
 Loading...