

Page 1
Panasonic
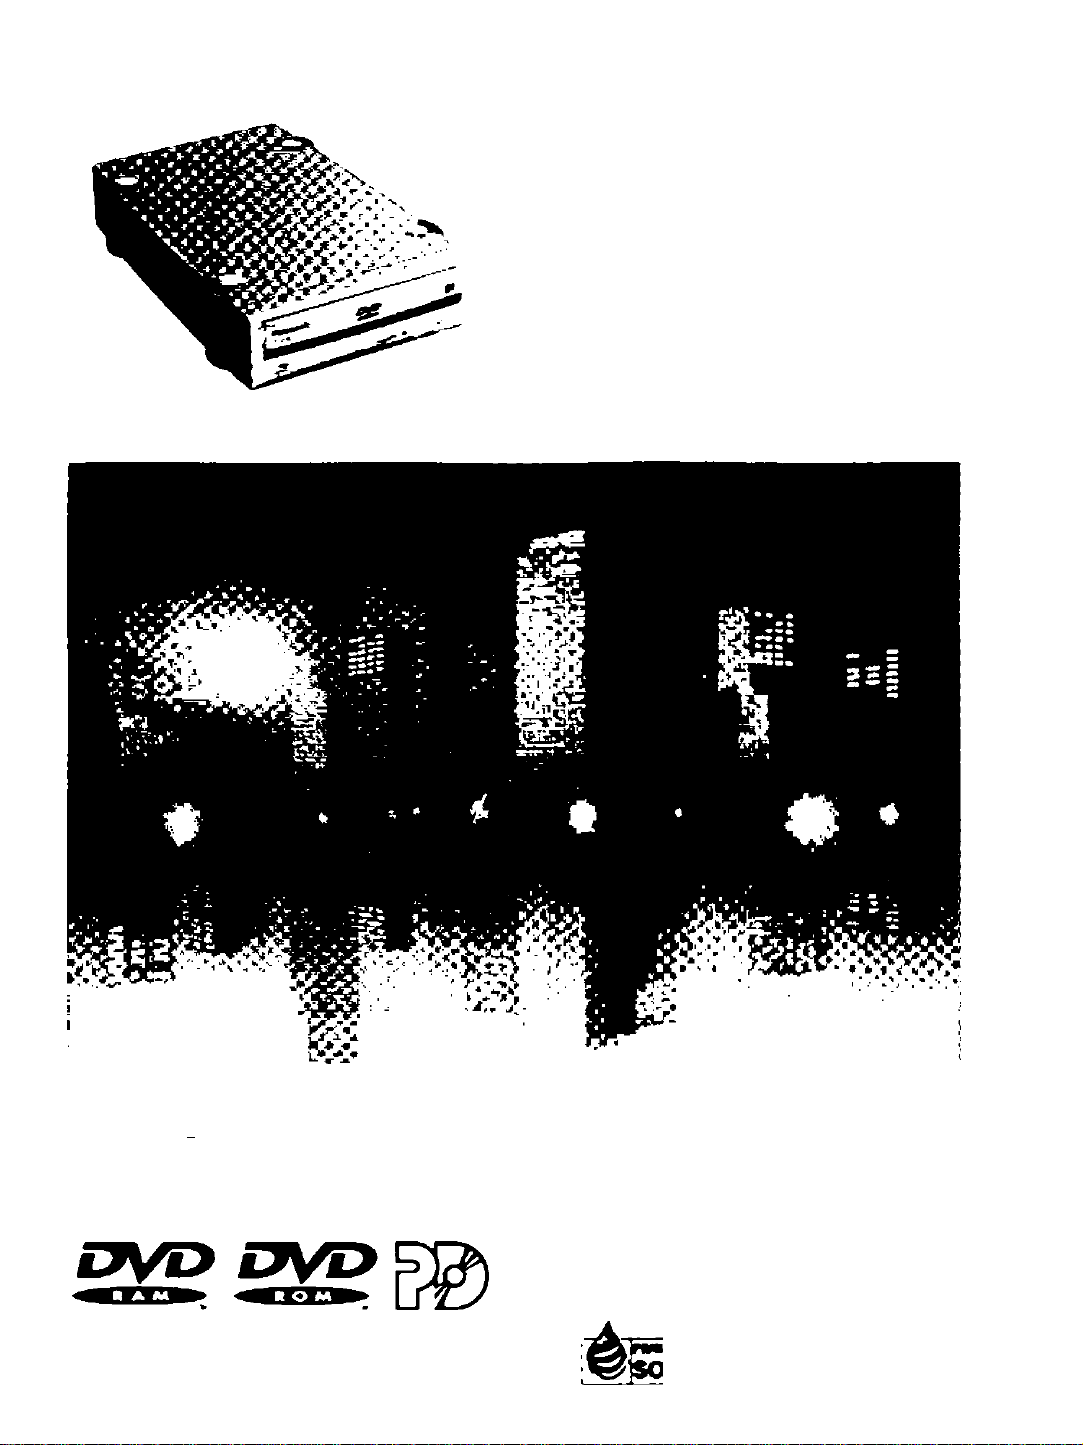
DVD-RAM Drive
Operating Instructions
Model No LF-D102U
anempeng to connect operate or ad^ dnve qImsi r«ttd tfiM« nalrucltene conpteMy
PtMM marteal.
Compatible operadng systecn : Windows‘95. Window« *9t, IVMowa MT*4U)
Ttewud
VINKj,.
iMiE
i
IMGmU. AUDIO ru-M ««* wf fceeedr*
VQT8383
Page 2

Dear Customers
May we take this opportunity to thank you for
purchasing this Panasonic DVD-RAM drive.
We strongiy recommend that you carefuliy study the
Operating Instructions before attempting to operate
the drive and that you note the listed precautions.
Table of Contents
IMPORTANT SAFETY NOTICE
SAFETY LABEL
LASER PRODUCT.................................................. 5
IMPORTANT SAFETY INSTRUCTIONS
DISK DISPOSAL......................................................6
OPERATING PRECAUTIONS
.....................................................
............................
.................
................................
Getting Started:
Kit Contents
Features ..................................................................9
Parts and Functions
............................................................
.............................................
Operation:
Checks and Preparations Before
Installation
• SCSI connecting ..............................................11
• Function switch settings ...................................12
Connections ...........................................................13
Checks and Preparations Before Use
• Instaliing driver software/format software
• Checks after installation ...................................16
Using a DVD-RAM Disc .........................................18
• Logicai formatting
• Reading and writing a DVD-RAM disc
Using a PD Cartridge
• Logicai formatting
• Reading and writing a PD cartridge
Using CD-ROM, DVD-ROM and Other CD/DVD
Discs ..................................................................25
• Playing a disc....................................................25
About the Supplied Application Software
• Using MPEG1 Coder
(MPEGl compression software)
• Using FileSafe (backup software)
• Using MediaSafe (disc copying software)
• Using DVDRgn
(region number setting utility)
• Using DVD Agent (utility)
• Installing the supplied application software
Uninstalling the Software .......................................33
• Uninstalling driver software...............................33
• Uninstalling the supplied utility and application
software
..........................................................
...................
..........
.............................................
..............
............................................
.............................................
.................
...............
.......................
.....................
........
...........................
.................................
.......
............................................................
11
14
15
18
22
23
23
24
26
26
27
28
29
30
32
34
3
4
6
7
8
10
For Your Reference:
When Operation Indicator Lamp Blinks..
Troubleshooting
Handling DVD-RAM Discs
Handling PD Cartridges............................
Handling CD-ROM, DVD-ROM and Other
CD/DVD Discs
Specifications
.......................................
........................
.......................................
...........................................
35
36
37
38
38
39
Page 3

TRADEMARKS, etc.
“Windows", “Windows NT" and “MS-DOS” are registered trademarks of Microsoft Corporation (U.S.) in the U.S.
and other countries.
(The long title of “Windows" is “Microsoft® Windows® Operating System”,)
All other trademarks are property of their respective owners.
Matsushita Electric Industrial Co., Ltd. herewith declares that it will not be liable in any way for any loss of data
or any other damage, whether direct or indirect, caused by the operation or malfunctioning of this product.
Make backups of important data in order to protect it from possible loss.
IMPORTANT SAFETY NOTICE
• RADIO FREQUENCY INTERFERENCE STATEMENT
Class B Digital Device/Information Technology Equipment
Note:
This equipment has been tested and found to comply with the limits for a Class B digital device, pursuant
to Part 15 of the FCC Rules.
These limits are designed to provide reasonable protection against harmful interference in a residential
installation. This equipment generates, uses, and can radiate radio frequency energy and, if not installed
and used in accordance with the instructions, may cause harmful interference to radio communications.
However, there is no guarantee that interference will not occur in a particular installation. If this
equipment does cause harmful interference to radio or television reception, which can be determined by
turning the equipment off and on, the user is encouraged to try to correct the interference by one or more
of the following measures:
— Reorient or relocate the receiving antenna.
— Increase the separation between the equipment and receiver.
— Connect the equipment into an outlet on a circuit different from that to which the receiver is connected.
— Consult the dealer or an experienced radio/TV technician for help.
FCC Warning:
To assure continued FCC emission limit compliance, use only the provided AC Adaptor, the proper power
supply cord and the shielded interface cable when connecting this device to the computer.
Also, any unauthorized changes or modifications to this equipment would void the user’s authority to
operate this device.
This device complies with Part 15 of the FCC Rules.
Operation is subject to the following two conditions:
(1) This device may not cause harmful interference, and
(2) this device must accept any interference received, including interference that
may cause undesired operation.
Responsible Party : Matsushita Electric Corporation of America
One Panasonic Way
Secaucus, NJ. 07094 USA
Telephone No.:1-800-PANASYS (1-800-726-2797)
Page 4

SAFETY LABEL
The following label is used in this DVD-RAM drive to remind you of safety precautions (located on bottom of the
DVD-RAM drive).
Please read it and follow the instruction.
Panasonic
Model No. LF-D102U
5V—1.4A,12V—0.7A
Mat su sh ita Ele ctr ic In du str ia l
Kad om a ,O sa ka , J ap an M a de
Man u fac tu re d
Ser ial N o.
THI S PR O DU CT C O MP LI ES W I TH D HH S R UL ES 2 1 CF R
CHA P TE R I, SU BC H AP TE R J. 1 30 KO J
TES TE D T O CO M PL Y
WIT H FC C S TA ND A RD S
(fy listed
FOR HOME OR OFFICE USE
Co. ,Lt d.
in J ap an
El40407
VGH4370
Page 5

LASER PRODUCT
Class 1 LASER Product
• This DVD-RAM drive is certified to comply with DHHS Rule 21 CFR Chapter I, Subchapter J in effect as of
date of manufacture
This DVD-RAM drive is classified as a Class l LASER product and there is no hazardous LASER radiation with
the safety protection
Caution
Use of controls or adjustments or performance of procedures other than those specified herein may result
in hazardous radiation exposure
• When the power switch is on, do not place your eyes close to the front panel opening door and other
openings to look into the inside of the DVD-RAM drive
LASER Specification
Class I LASER Product
Wave Length 635-675 nm/640-666 nm, 775-815 nm
Laser Power No hazardous radiation is emitted with the safety protection
Included with this booklet is a questionnaire which requests important information required by the U S
Center for Devices and Radiological Health
It should be filled out by the end-user/purchaser of this equipment-not the reseller
If you are the end-user and this questionnaire card is missing, please call Panasonic at 1-800-PANASYS
and another will be promptly mailed to you
Please also call 1-800-PANASYS (1-800-726-2797) if you require technical support This technical
support hotline IS available 9am to 7 p m EST, normal business days
Page 6

IMPORTANT SAFETY INSTRUCTIONS
• Do not disassemble or modify the DVD-RAM drive or the AC adaptor.
• Do not place liquids and metallic objects on or near the DVD-RAM drive.
• Do not exceed the limits of the household AC outlet or AC pow/er supply cords. Connect only to a power supply
of 100 -120 V.
• Do not damage the AC adaptor, AC power supply cord, and AC power plug.
• Fully insert the AC power plug.
• Regularly remove dust from the AC power plug.
• Do not handle the plug with wet hands.
• Do not handle the plug, AC adaptor, or main DVD-RAM drive during an electrical storm.
• Do not spray the DVD-RAM drive with water or allow it to get wet.
• Do not insert metal or inflammable objects inside the DVD-RAM drive.
• If a liquid or foreign object has found its way inside, turn off the power and disconnect the power plug.
• If the DVD-RAM drive has been dropped or otherwise damaged, turn off the power and disconnect the power
plug.
• If smoke, odors, or noises are emitted from the DVD-RAM drive, turn it off and disconnect the AC power
supply cord.
• When the AC power supply cord has been damaged (when its conductors are exposed, etc.), stop using the
DVD-RAM drive and disconnect the power plug.
• Do not place the DVD-RAM drive where it will be exposed to direct sunlight or where the temperature will
become abnormally high,
• Do not use cracked or warped discs.
• Do not place the DVD-RAM drive where it is extremely dusty or where the level of moisture from a humidifier,
etc. is high.
• Do not force the tray open! Do not insert your fingers! Do not look inside the DVD-RAM drivel
• Do not use an AC adaptor other than the one supplied. (Using another AC adaptor can cause a fire.)
• Do not move the DVD-RAM drive while a disc is rotating. (Doing so may damage the disc.)
• Place the DVD-RAM drive on a flat surface, protected from vibration and shock.
• Do not place heavy objects on the DVD-RAM drive . Do not block the DVD-RAM drive’s ventilation.
DISK DISPOSAL
Caution:
This Optical Disk contains tellurium which may be considered hazardous.
Check and follow your local regulations before Disposal.
Page 7

OPERATING PRECAUTIONS
Handling
When operating the DVD-RAM drive
• Do not instaii on a sheif or other high place.
• Do not touch the DVD-RAM drive or its cable connector area. {Doing so may cause it to maifunction.)
• The DVD-RAM drive can be installed horizontally or vertically.
• Do not move the DVD-RAM drive during operation. (Doing so may damage the equipment.)
• Do not leave the tray out. (Doing so will allow dust to get inside the DVD-RAM drive and may damage it.)
• Only load DVD-RAM discs, PD cartridges, and designated 12 cm discs in the tray. (Loading other types of discs or other
media may damage the drive.)
• Do not open or close the tray while pressing on the shutter (doing so may damage the DVD-RAM drive).
• Do not force the shutter open (doing so may damage the DVD-RAM drive).
• Do not bring magnets or magnetic objects near the DVD-RAM drive. (Operation may become unstable due to the effects of
the magnetism.)
• Do not use the DVD-RAM drive when condensation has formed in or on it.
[When the DVD-RAM drive is suddenly taken from a cold place to a warm location, droplets of water(condensation) will
form, causing the drive to malfunction. In such cases, remove the disc and leave the DVD-RAM drive standing for about an
hour before proceeding with operation.]
• Do not expose the DVD-RAM drive to the sprays from volatile insecticides, etc. (Doing so may deform the external cabinet
or cause the paint to peel off.)
• If the DVD-RAM drive is used near a radio or TV set and it causes interference with reception, place it at least 6'6 "
(2 meters) away from the set or use a main outlet which does not share power with the set.
When moving or transporting the DVD-RAM drive
• Before moving the DVD-RAM drive , remove all media, turn off the DVD-RAM drive , and disconnect the AC
power supply cord.
• Repackage the DVD-RAM drive in its packaging before shipping it.
• Ensure the DVD-RAM drive is not dropped or hit during shipment.
Maintenance
Maintaining the DVD-RAM drive's panel surfaces
• Turn the DVD-RAM drive off and unplug the AC power supply cord from the household AC outlet.
• Gently wipe off the dirt using a soft dry cloth.
• To remove stubborn dirt, soak the cloth in some diluted kitchen neutral detergent, wring it out well, and then wipe clean.
• Observe any applicable precautions when using chemical cleaning cloths.
• Do not use benzine, paint thinners or other solvents.
Maintaining the lens and discs
• Dust, dirt, etc. will adhere to the DVD-RAM drive’s lens, DVD-RAM media, PD cartridges, CD-ROMs, CDs and DVD discs
over a prolonged period of use, possibly making it impossible for data to be read and/or written properly.
Although the exact period will differ according to the operating environment and number of times the DVD-RAM drive is
used, Panasonic recommends that maintenance be performed using the cleaners available as optional accessories once
every one to four months.
To maintain the DVD-RAM drive's lens
• Obtain the PD Lens Cleaner (model number: LF-K123LCA). Although this cleaner is for PD/CD-ROM drive, this can be
used with this DVD-RAM drive, too.
To maintain the media
• Obtain the DVD-RAM/PD Disc Cleaner (model number: LF-K200DCA).
Page 8

Kit Contents
Please check and identify the supplied accessories.
Note:
Please read this manual completely and obtain whatever additional components are required for the uses
that you intend for this product.
8
Page 9

Features______________
Extensive multimedia support
Thanks to the dual laser, dual lens optic head and high-performance, high-speed LSI processing technology,
this DVD-RAM drive supports not only the playback of conventional CD-compliant media, but also the playback
of DVD media, recording and playback of DVD-RAM media and even PD recording and playback.
Supported media Recording Playback
DVD-RAM [supports 5.2 GB (double-sided), 2.6 GB (single-sided)]
DVD format
PD format
CD format
An MPEG2 decoder board (not included) or MPEG2 decoder software (not included) is also necessary to
play DVD-VIDEO discs.
DVD-VIDEO
DVD-ROM
DVD-R (supports playback of Disc-at-Once mode)
PD
CD-ROM (supports XA)
CD-R/RW (supports MultiRead)
CD-DA
CD-EXTRA
Photo CD (supports Multisession)
Video CD
V V
V*'
\/
V
V V
V
V
V
V
V
V
A full lineup of utilities included
MPEG1 Coder (MPEG1 compression software) {See page 26.)
This software allows you to compress, in real time, full-motion video shot with a video camera and other data
into the MPEG1 format, and record it to a DVD-RAM disc or PD cartridge.
• A video for Windows-compatible video capture card and sound card are also required.
FileSafe (backup software) (See page 27.)
This software can automatically back up data in specified folders, or back up only updated folders to a
DVD-RAM disc or PD cartridge, enabling you to protect important files efficiently.
Backed up files can be used directly in Explorer and various applications.
MediaSafe (disc copying software) (See page 28.)
This software lets you copy data recorded on a DVD-RAM disc or PD cartridge to a different DVD-RAM disc or
PD cartridge using a single DVD-RAM drive.
DVDRgn (region number setting utility) (See page 29.)
This software is used to set the region number of the DVD-RAM drive (this setting can only be made a
maximum of four times). The regions where DVD-ROM and DVD-VIDEO discs can be played are specified by
region numbers. In order to play a disc, the region number on the DVD-RAM drive must match the region
number on the disc. When this DVD-RAM drive is shipped from the factory, the region number is set to “1 ”.
DVD Agent (utility) (See page 30.)
This software enhances the standard Windows GUI by replacing the default icons for removable drives and
CD-ROM drives with customized DVD-RAM icons. Additionally, DVD Agent provides functionality to
automatically launch applications upon insertion of a DVD-RAM disc or PD cartridge.
Page 10

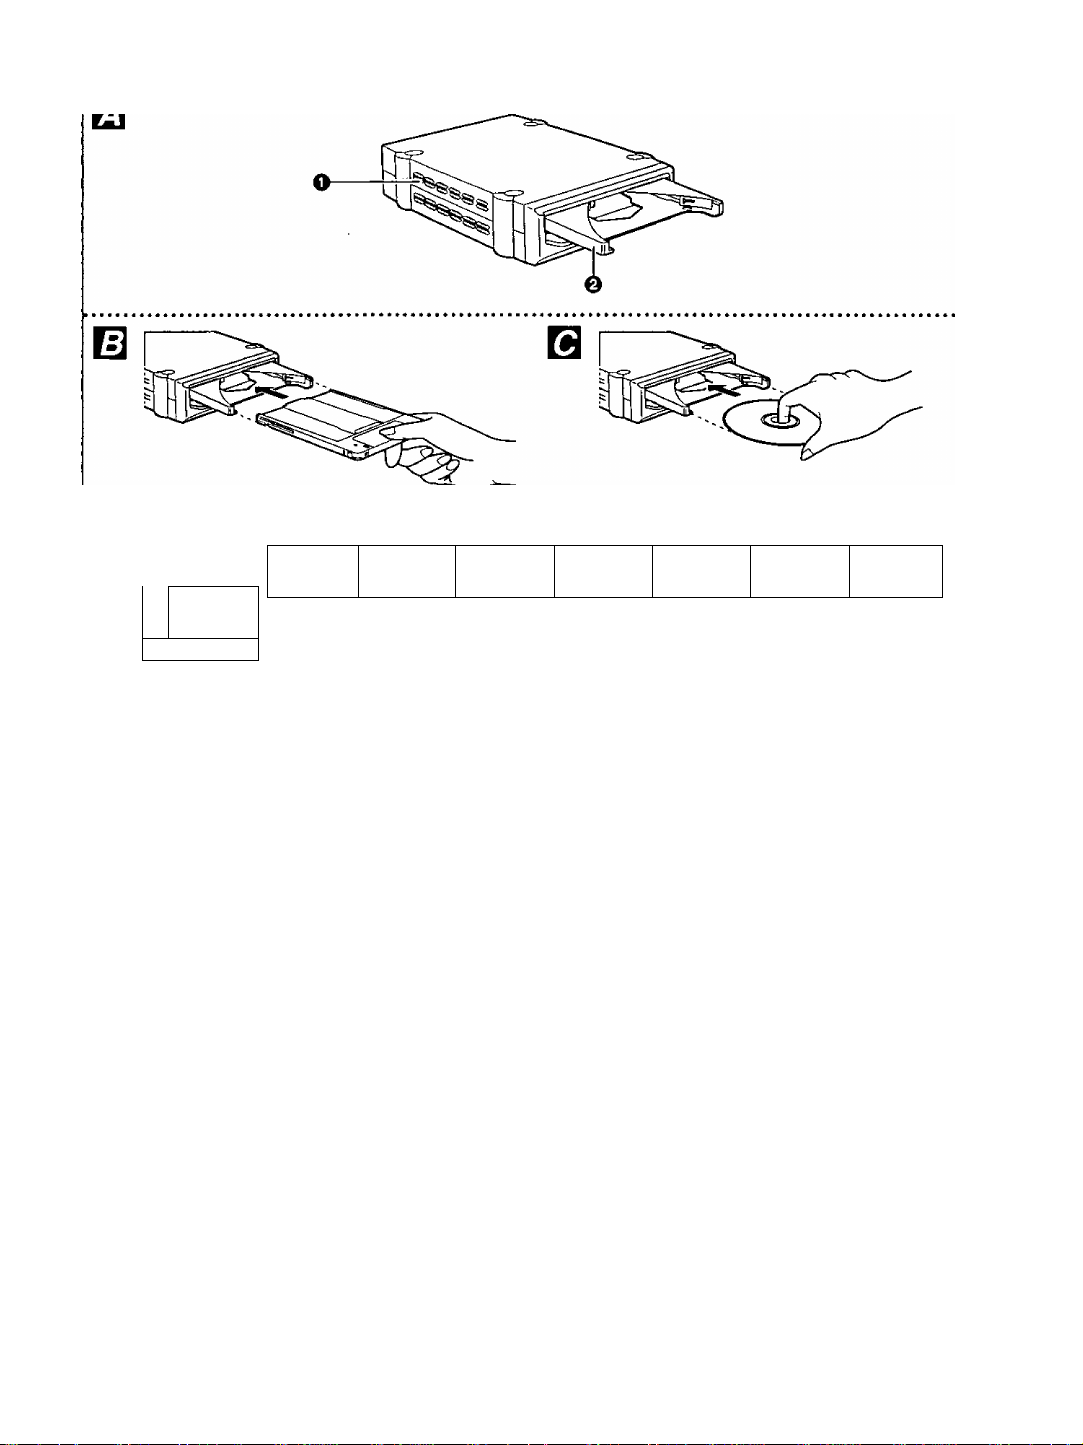
Parts and Functions
Front panel Q
OPower indicator
Off: DVD-RAM drive is off
Green: DVD-RAM drive is on
OOperation indicator lamp
Off: No media inside
Steady Green: Media inserted in DVD-RAM drive
Steady Orange: Recording, piayback or tray opening/closing
Flashing Green: Error (See page 35.)
OOpen/close button
For opening and closing the tray.
O Manual eject hole
Used to manually eject tray in the event that the tray does not eject normally using the open/close button or
software commands.
Pulling out the tray
1. Power off the DVD-RAM drive.
2. Gently insert the emergency ejection pin (included) until shutter opens slightly.
3. Remove the emergency ejection pin.
4. Use your hand to open shutter.
5. Pull out the tray horizontally using your fingertips.
To close the tray after it has been manually pulled out, turn on the DVD-RAM drive’s power and press the
open/close button. (Depending on the position of the tray, it may automatically retract inside the DVD-RAM
drive as soon as the power is turned on.)
Do not use this procedure under normal circumstances as it mav result in the malfunctioning of the
DVD-RAM drive.
10
Rear panel m
OSCSI connectors
©Function switches
©audio out terminal
©SCSI ID labels
©Cooling fan
©DC IN terminal
©Power switch
Connect half-pitch 50-pin SCSI cables (not included).
Used to change the settings for the terminator and SCSI ID (see page 12).
Connect an audio cable (not included).
Refer to these when changing the settings with the function switches.
Operates if the temperature in the DVD-RAM drive rises. It does not operate under
normal conditions.
Connect the AC adaptor (included).
Switch to turn the DVD-RAM drive on and off.
Page 11
computer
©
©
SCSI
host adaptor
© © ©
Side panels El
OVentilatlon slots (on both sides of the DVD-RAM drive )
These slots allow ventilation to prevent the temperature In the DVD-RAM drive from rising. Ensure these
slots are not blocked when installing the DVD-RAM drive to prevent malfunction of the DVD-RAM drive .
©Tray
The tray is for inserting DVD-RAM discs, PD cartridges and 120 mm Disc Media.
Insert the media with the printed title side facing up.
• Insert the media in the tray, then push media into the DVD-RAM drive to load the tray. (You can also load
the tray by pushing on it directly.)
Cartridge media E]
120 mm Disc Media B
Checks and Preparations Before Installation
SCSI connecting
This DVD-RAM drive conforms to the SCSI-2 standard.
A SCSI host adaptor is therefore required to connect the DVD-RAM drive with a computer.
If a SCSI host adaptor is not already Installed in your computer, you must purchase one separately.
Example B
No more than 7 SCSI units (®-©) can be connected to a computer.
Also, the total length of the SCSI cable from the computer to the last DVD-RAM drive must be shorter than the
length specified by the SCSI host adaptor to be used.
11
Page 12

□
Rear panel of this DVD-RAM drive
iP-
TERMINATOR
SCSI ID
1 2 4
(ШШД1
Al
tr
ON
OFF
оШ 2Ш 4Ei
IT
Function switch settings в
SCSI
SCSI
^ POWER
n ®
6И
5H
“2”
“3” toiuui™.
тШ
DC IN5V.12V
“4”
“5”
“6”
ily
ON
r~
^oyoijyij ™
yOOULlUl™
ООО SCSI ID setting
OTerminator setting
© © Factory default only (OFF)
----------------------------------------------------
E3 Terminator setting
(Factory Default; ON)
A terminator refers to a terminating resistance.
The terminators must be set properly when
SCSI units (including the DVD-RAM drive) have
been connected to the computer.
• When the DVD-RAM drive is a terminating
device (for example, illustration © on page
11)
Set to ON.
• When the DVD-RAM drive is not a terminating
device (for example, illustration ®-© on page
11)
Set to OFF.
V --
...............................
...-.--
---------------
f--------------------------------------------------------------\
H SCSI ID setting (Factory Default; 4)
SCSI IDs are a number identifying each SCSI
unit. Consequently, SCSI IDs must be set so
that no two units duplicate each other on the
SCSI bus.
Note:
Generally, the SCSI IDs are set as follows;
• Hard disk drive: 0
• CD-ROM drive: 3
• SCSI host adaptor: 7
Check the SCSI ID (refer to devices instruction
manual) for each device connected on the SCSI
bus.
Set the DVD-RAM drive’s ID so as not to
duplicate any other device’s ID.
J ^..-..
.......... ..............
^
12
Page 13

Note:
• When purchasing a sound board, review the product specifications thoroughly. Some sound boards
have MPEG play functions. Verify that functions are not duplicated or missing. For details on the
connections, refer to the respective instructions accompanying the products concerned.
• Turn off the power to all equipment before making any connections. Do not make any connections
while power is supplied to any of the equipment.
• Connect the AC power supply cord only after all other connections have been completed.
• Carefully read the instructions of the other equipment.
• Use shielded SCSI cables.
• Insert the cables correctly and firmly.
13
Page 14

Checks and Preparations Before Use
The following programs are supplied on CD-ROM with this DVD-RAM drive (be sure to install them on your
computer). All of the software programs listed below are installed when you run the installation program.
■ Driver software
A program containing 2 device drivers that enable your computer to operate properly with the LF-D100 Series
DVD-RAM drive.
1. LF-D100 series device driver A device driver that enables Windows to properly communicate with the
LF-D100 hardware.
2. UDF file system driver A device driver that enables Windows to read from and write to a UDFformatted DVD-RAM disc.
■ Format software {DVDForm)
A utility that provides functionality to format a DVD-RAM disc using the UDF format or FAT format and to format
a PD cartridge using FAT format.
■ Region setting software (DVDRgn)
A utility that provides functionality to set the region number.
Before installing the above software programs, carefully read the Limited Use License Agreement shown
below. This software can only be used if you agree to the terms of the Limited Use License Agreement. By
installing this software, you are agreeing to the terms of the Limited Use License Agreement.
LIMITED USE LICENSE AGREEMENT
THE SOFTWARE PROGRAM(S) (“PROGRAMS”) FURNISHED WITH THIS PANASONIC PRODUCT
(“PRODUCT’) ARE LICENSED ONLY TO THE END-USER (“YOU"), AND MAY BE USED BY YOU ONLY IN
ACCORDANCE WITH THE LICENSE TERMS DESCRIBED BELOW. YOUR USE OF THE PROGRAMS
SHALL BE CONCLUSIVELY DEEMED TO CONSTITUTE YOUR ACCEPTANCE OF THE TERMS OF THIS
LICENSE.
Matsushita Electric Industrial Co., Ltd. (“MEI”) has developed or otherwise obtained the Programs and hereby
licenses their use to you. You assume sole responsibility for the selection of the Product (including the
associated Programs) to achieve your intended results, and for the installation, use and results obtained
therefrom.
LICENSE
A. MEI hereby grants you a personal, non-transferable and non-exclusive right and license to use the
Programs in accordance with the terms and conditions stated in this Agreement, You acknowledge that you
are receiving only a LIMITED LICENSE TO USE the Programs and related documentation and that you
shall obtain no title, ownership nor any other rights in or to the Programs and related documentation nor in or
to the algorithms, concepts, designs and ideas represented by or incorporated in the Programs and related
documentation, all of which title, ownership and rights shall remain with MEI.
B. You may use the Programs only on the single Product which was accompanied by the Programs.
C. You and your employees and agents are required to protect the confidentiality of the Programs. You may not
distribute or otherwise make the Programs or related documentation available to any third party, by time
sharing or otherwise, without the prior written consent of MEI.
D. You may not copy or reproduce, or permit to be copied or reproduced, the Programs or related
documentation for any purpose, except that you may make one (1) copy of the Programs for backup
purposes only in support of your use of the Programs on the single Product which was accompanied by the
Programs. You shall not modify, or attempt to modify, the Programs.
E. You may transfer the Programs and license them to another party only in connection with your transfer of
the single Product which was accompanied by the Programs to such other party. At the time of such a
transfer, you must also transfer all copies, whether in printed or machine readable form, of every Program,
and the related documentation, to the same party or destroy any such copies not so transferred.
14
F. You may not remove any copyright, trademark or other notice or product identification from the Programs
and you must reproduce and include any such notice or product identification on any copy of any Program.
Page 15

YOU MAY NOT REVERSE ASSEMBLE, REVERSE COMPILE, OR MECHANICALLY OR ELECTRONICALLY
TRACE THE PROGRAMS, OR ANY COPY THEREOF, IN WHOLE OR IN PART.
YOU MAY NOT USE, COPY, MODIFY, ALTER, OR TRANSFER THE PROGRAMS OR ANY COPY
THEREOF, IN WHOLE OR IN PART, EXCEPT AS EXPRESSLY PROVIDED IN THE LICENSE.
IF YOU TRANSFER POSSESSION OF ANY COPY OF ANY PROGRAM TO ANOTHER PARTY, EXCEPT AS
PERMITTED IN PARAGRAPH E ABOVE, YOUR LICENSE IS AUTOMATICALLY TERMINATED.
TERM
This license is effective only for so long as you own or lease the Product, unless earlier terminated. You may
terminate this license at any time by destroying, at your expense, the Programs and related documentation
together with all copies thereof in any form. This license will also terminate effective immediately upon
occurrence of the conditions therefor set forth elsewhere in this Agreement, or if you fail to comply with any
term or condition contained herein. Upon any such termination, you agree to destroy, at your expense, the
Programs and related documentation together with all copies thereof in any form.
YOU ACKNOWLEDGE THAT YOU HAVE READ THIS AGREEMENT, UNDERSTAND IT AND AGREE TO BE
BOUND BY ITS TERMS AND CONDITIONS. YOU FURTHER AGREE THAT IT IS THE COMPLETE AND
EXCLUSIVE STATEMENT OF THE AGREEMENT BETWEEN US, WHICH SUPERSEDES ANY PROPOSAL
OR PRIOR AGREEMENT, ORAL OR WRITTEN, AND ANY OTHER COMMUNICATIONS BETWEEN US,
RELATING TO THE SUBJECT MATTER OF THIS AGREEMENT.
Installing driver software / format software
1
2
Insert the supplied CD-ROM into the DVD-RAM drive.
The installation program starts automatically.
• If the installation program does not start automatically, start it manually by following the procedure
below,
(This assumes that the drive letter assigned to the DVD-RAM drive for CD-ROM media is E:.)
^ From the Start menu select [Run].
p In the “Open” box,
^ enter “ei'^etup.exe” and click [OK].
The installation program starts.
^ DVD-RAM Software Setup
Type the name o( a [vogram. foldGr, ot document, and
Windows wiB open it foi you.
I eAsetup.exe
OK I j Cancel j Browse...
m
[K|
Click [Driver & Formatter Setup].
The installation begins.
• Follow the on-screen instructions to proceed.
bnver&Fprmatter Setup
ApplieatiQni Setup
l^xit
15
Page 16

3
When the dialog at right is displayed,
select “Install DVD Driver” and click
[Next].
Selact Iran dnd Odr
0‘irat5i DVD On^
OUrvtst^CVDDm«
ji <£acK
4
want to restart my computer now.”
and click [Finish].
After the Installation, select “Yes, I
The computer now reboots.
• You can use the DVD*RAM drive after rebooting.
• To verify that the drivers were installed correctly,
refer to “Checks after installation” below (to page
17).
For your reference:
• About the DOS driver
The DOS driver is supplied on a CD-ROM installation disc.
You can use the DVD-RAM drive under MS-DOS® by installing this driver in your computer.
Please refer to [e:\DosDrv\English\readme.txt] of the CD-ROM.
(This assumes that the drive letter assigned to the DVD-RAM drive for CD-ROM media is E:.)
Checks after installation
Follow the steps described below (to page 17) to check that the DVD-RAM drive is recognized properly.
If a problem occurs, refer to “Troubleshooting” on page 36.
Checking with [My Computer]
If this DVD-RAM drive was correctly connected and the driver programs were properly installed, icons for
DVD-RAM disc/PD cartridge and CD-ROM/DVD-ROM will be added in [My Computer).
In the example below, removable disks (DVD-RAM disc/PD cartridge) have been assigned the drive name D:,
and CD-ROMs (CD-ROM/DVD-ROM drive) have been assigned the drive name E:.
• If the correct icons do not appear, select [Refresh] from the View pull-down menu.
If the correct icons fail to appear even after selecting [Refresh], check by following the procedure “Checking
use [Device Manager]” on page 17, then refer to “Troubleshooting” on page 36.
16
CD-ROM/DVD-ROM icon (example: E drive)
DVD-RAM disc/PD cartridge icon (example: D drive)
Page 17

Checking use [Device Manager] (Windows 95/windows 98 only)
1. From the Start menu, select [Settings], then [Control Panel].
2. Select [System], then click on [Device Manager] tab to bring up the window below which shows all devices
connected.
3. Double-click “CD-ROM", “Disk drives” and “SCSI controllers” and verify whether items 0> © ^nd Q
appear.
• If ©, © or O fails to appear, or if a yellow [!] or red [x] appears over 0, © or ©, refer to “Troubleshooting"
on page 36.
Syttem Ptopeiliei
JrGw>w5l[ Device Mawga^j Haidwae Pioties | Petionnance 1
© View rfewes hv lype Q) View devices by connection
CDHOM
S MATSHITAPD-2LF-D100
Q Disk drives
S GENERIC IDE DISK TYPEE5
<3 GENERIC NEC FLOFWOlSK
Q MATSHITAP0.2LFinOO —
DispJey edepters
0'#
Floppy disk cortroleis
a-Q
Hard disk controlets
Keyboard
Monita
Mouse
II
Pods (COM i LPT]
SCSI conltolos
^ Adaptec AHA-154X/AHA-1E4X/AHA-1535 SCSI HostAd/^j
Ptopetties Rejrosh Remove Print.,.
---------
mn
-©CD-ROM/DVD-ROM side of this DVD-RAM drive is
r
recognized.
-©DVD-RAM disc/PD cartridge side of this DVD-RAM
drive is recognized.
■©SCSI host adaptor is recognized.
]
□K
]C
Caned
Note:
• Checking with [SCSI Adapters] on Windows NT
Double-click [SCSI Adapters] on [Control Panel],
then click [Devices]. The screen shown at right
(equipment connection statuses) is displayed.
When the SCSI host adaptor, which is connected to
DVD-RAM drive, is double-clicked, only the CD-ROM
/ DVD-ROM portion is displayed.
This is a limitation of this driver software’s
specification.
Dsiflcei I Oriva; j
SCSI ddapiett dfid connected devices are kted 6dow.
IDE CD-ROM [ATAPI 1.21/Dual channd PO IDE ContioUer
Adaptec AHA 29or AIC-7gK< PO SCSI Conifole
If
MATSHI7APD-2LFCnW
Roperiies
□K Cancel
DS
]C
17
Page 18

Using a DVD-RAM Disc
A DVD-RAM disc must be logically formatted prior to use, just as you would similarly format a floppy disk prior
to use.
However, a DVD-RAM disc is formatted with the UDF file system which is optimized for large capacity, high
performance removable media. Windows native formatting utilities do not support UDF, therefore the DVDForm
software, supplied with the DVD-RAM drive, needs to be used in order to take advantage of the UDF file
system and optimize your DVD-RAM drive’s performance.
Logical formatting
A DVD-RAM disc can be formatted using either UDF (Universal Disk Format) or FAT format.
Format 5.2 GB double-sided DVD-RAM discs one side at a time.
■ UDF Format
The UDF format is newly specified for the DVD family of products to enable a high level of data compatibility
between DVD-ROM, DVD-R and DVD-RAM. This new format is optimized for big capacity files, such as Video
and Audio capture and playback, to keep constant, high transfer rates.
• Since the file control structure is relatively complicated compared with FAT, it is not as good when handling a
large number of small files.
• When the UDF format is used for formatting, files will be displayed more slowly in Explorer.
■ FAT Format
FAT is the Windows OS embedded file system and used for current hard disk drive and PD cartridge.
• Compared with UDF, it is good for small random files access.
1
Insert the DVD-RAM disc you wish to format into the DVD-RAM drive.
2
3
(Continued on the next page)
Open [My Computer] and click
[Removable Disk] icon
assigned to DVD-RAM disc/PD
cartridge using the right
button of the mouse.
Click [Format] on the menu
screen.
2H Roppy (A:) (C:)
Control Panel Printeis Dial-Up
Formats the selected drive.
Networkinc
Cop^ Disk,.,
Eject
Create Shortcut
Properties
18
Page 19

4
On the screen, click [Start],
0 DVDFodn - D drive
Drive:
I <D:> DVD-RAM Disk (UDF)
format type:
|u«versal Disk Format (UDF)
...
------
f Option-^
Volume label
IPANA-UDF '
fjj) E xecUle physical fctmal
Qi(^^4i0it
©Click the II area to select the format type.
Universal Disk Format
[UDFl
In case of
Windows 95/Windows 98
FDISK FAT-16
In case of Windows NT
FDISK FAT-16 2.0 GB
FAT-32
FDISK FAT-16 2.32 GB
(Windows NT Only)
-
z^ir
: 3iIl
Start ^
Oose -ij-
3
This is the standard format type for DVD-RAM.
The available disc space on one side of the disc is 2.3 GB*’ after
formatted. Immediately after a DVD-RAM disc is formatted in UDF,
the used disc space is displayed as 128 KB.
This is the Windows OS embedded format type.
The available disc space is limited to 2.0 GB after formatted. This
formatted DVD-RAM disc can be used on Windows NT.
This is the additional format type on Windows 95 (OSR2*^) and
Windows 98. This is not displayed in Windows NT. The available
disc space on one side of the disc is 2.3 GB ® ’ after formatted.
This formatted DVD-RAM disc cannot be used on Windows NT.
This is the Windows NT embedded format type. This is not
displayed in Windows 95 or Windows 98. The available disc space
on one side of the disc is 2.3 GB * ’ after formatted. Do not use this
formatted DVD-RAM disc on Windows 95/98.
©Start formatting.
©Close DVDForm.
O
o
o
*’The entire space on one side of the unformatted DVD-RAM disc is 2.6 GB, but the available disc
space is 2.3 GB after logical formatting.
*2 Windows 95 whose system property is “4.00.950 B” or “4.00.950 C”.
O Enter a volume name.
• You must input a volume name when you select UDF format. When you do not input it, a
volume name is set as "PANA-UDF” automatically.
© Select this when you want to perform physical formatting. (There is no need to do this every time.)
No Certification:
This mode does not check sectors for defects. Instead, it allocates defective sectors previously
registered during usage. (Normally this is completed in 20 or 30 seconds.)
Certification:
This mode forces a check of all sectors for defects and allocates detected defective sectors to the
spare area. (Normally this is completed in about an hour.)
(Continued on the next page)
19
Page 20

5
When the formatting confirmation
message is dispiayed,
click [Yes] in the diaiog box.
Formatting begins.
Formatting this DVD-RAM disk will erase all data on the disk.
Ate you sure to format this disk?
О
i I [CJ ll
• You can use the DVD-RAM disc after
formatting.
Note:
• Displaying the folder name or file name written on the UDF-formatted DVD-RAM disc on
Windows 95 / Windows 98
In case of FAT- formatted DVD-RAM disc
When you are at the MS-DOS prompt or in an MS-DOS or Windows 3.1 application, if you display folder
names or file names which are not 8.3 file (folder) names*' on a FAT-formatted DVD-RAM disc, the folder
names or file names will be displayed as 8.3 file (folder) names * ’ as shown below.
Display on Windows 95/Windows 98
& CAsample
file £dil View help
Ш
tutmap.bmp
I Hew Bitmap I New text j [
4 obteci(sl_
tngpi
Display on
MS-DOS
1icrotort<R> Windows 95
C:\UINDOUS>dii‘ с:У*анр1в
Uolufiia in drive C li WIN9SA
Uolupia Serial Nunber is 325C-14FE
Directory of C:4sanple
...........................
HEVIEX"! TXT *
XEVBIT~1 ВПР
TEXT
В1ТПЙР ВПР
C:\UINDOWS>
<C>Copyright nicrosoft Coi'p 1981-1995.
<DIR>
<DIR>
----------
ГХГ - ^
Л flLe<s>
2 dlr<8>
06-21-99
06-21-99
e 06-21-99
0 06-21-99
0 06-21-99
e 06-21-99
0 byt
46.Б94.400 bytes Free
4:13p .
4:l3p ..
4:13p New Text DocUMent
4:l3p Hew BitiMp IfWige.bAp
4:13p toxt.txt
4:t3p bitnap.beip
prompt
20
In case of UDF- formatted DVD-RAM disc
When the folder name or file name other than 8.3 file (folder) name*^ ’ is written on the UDF-formatted DVDRAM disc, it will be displayed only up to 8 characters with the MS-DOS prompt or in an MS-DOS or Windows
3.1 application as shown below. In this case, you cannot copy, delete or perform other operations on
these folders or files.
[□ i^i^i |g] r^fi^
C:\WIKDOWS>dir c:\sanpU
Moluiw in drive C is W]N95R
UdIuiw Serial Nunber is Э26С-14РЕ
Directory of C:\aanpLe
____________ <DIH>
KEVrEK"! TXT '
hlEWDIT*! BMP ♦
ГЕХГ-TXr
В11ПЙР ВНР
C:4WIHD0W8>
4 File<s>
2 dir<s>
<DIR>
06-21-99
06-21-99
0 06-21-99
0 06-21-99
0 06-21-99
0 06-21-99
46,694,400 bytes
4:i3p .
4:13p ..
4:l3p New Text DocuPwnt.txt
4=l3p New Bitnap 1»а9в*Ьяр
4:i3p text.txt
4 = l3p bitisap.bnp
0 bytes
To perform operations at the MS-DOS prompt or in an MS-DOS or Windows 3.1 application on folders or
files on the UDF-formatted DVD-RAM disc that are not 8.3 file (folder) names* \ use UDFTOOL.EXE in the
‘^Program Files\Panasonic DVD-RAM\Utility” folder, and set this application to generate 8.3 file (folder)
names* ^
[Select “Create MS-DOS file name according to UDF 1.02 specification.” under “Select the creation
method of MS-DOS name (8.3 type) for UDF”.]
' ’ An 8.3 file (folder) name is a file (folder) name in which the name part is 8 characters or less and the extension is 3
characters or less. In file (folder) names following this convention, periods (.) are only used to separate the
name part from the extension.
Page 21

Note:
• Displaying the folder name or file name written on the UDF-formatted DVD-RAM disc on
Windows NT
In case of FAT- formatted DVD-RAM disc
When you are at the MS-DOS prompt or in an MS-DOS or Windows 3.1 application, if you display folder
names or file names which are not 8.3 file (folder) names on a FAT-formatted DVD-RAM disc, the folder
names or file names will be displayed as 8.3 file (folder) names* ’ as shown below.
Command Prompt
11ci'Osoft<R> Ulndows NT<Tn>
Display on Windows NT
<G> Copyright 1985^1996 fUcrosoft Corp.
C:\>dir /x test
Uolui%e in drive G has no label»
UoluiM Serial Nunber is FG42-9ERE
Directory of C:\test
tl/30/98
Ll/30/98
Ll/30/98
11/30/98
02=S9p
Q2:S9p
02:59p
0iHEU6li''1.8nP!
0iHEWTEX~l.TXT
25,805,632 byte^kfree
Display on MS-DOS prompt
In case of UDF- formatted DVD-RAM disc
When the folder name or file name other than 8.3 file (folder) names*'' is written on the UDF formatted DVD-
RAM disc, it will not be displayed with the MS-DOS prompt or in an MS-DOS or Windows 3.1 application.
Command Piompt
C:\>dir /X d:
UoIurte in drive D is P8N8-UDF
Uolune Serial Kufiber is 0E5D-BFBD
Directory of D:\.
13/05/99 03:23p
13/05/99 03:23p
C:\>_
lie
0 bytea
30 bytes free
!liS3
This is a limitation of this driver software.
When you create a folder name or file name other than 8.3 file (folder) name * ^ by using MS-DOS prompt
or Windows 3.1 application, please use the FAT-formatted DVD-RAM disc.
’■'An 8.3 file (folder) name is a file (folder) name in which the name part is 8 characters or less and the extension is
3 characters or less. In file (folder) names following this convention, periods (.) are only used to separate the
name part from the extension. ^
I
Page 22

Caution:
• Do not format a DVD-RAM disc on Windows 95/Windows 98 in the following manner:
1. Do not format by using Windows format program opening [My Computer], right-clicking [Removable
Disk] icon assigned to DVD-RAM discs and clicking [Format] on the menu that appears.
2. Do not format by using Windows format program opening [My Computer], left-double clicking the
[Removable Disk] icon assigned to DVD-RAM discs and clicking [Yes] of the following panel.
T he diil^ in drive D it not Fotmalted.
Do you want to format it riow?
Formatting a DVD-RAM disc with the standard format program included in Windows 95AA/indows 98
results in a FAT16 format that exceeds the 2.0 GB limit, which can interfere with subsequent use.
• Executing Format software on Windows NT
The following notes apply to the logical format of PD cartridge, too. (See page 23.)
(1) When using the format software, you must login with the user name that belongs to “Administrator
group”.
(2) You must close all applications used on a DVD-RAM disc or a PD cartridge prior to formatting.
Reading and writing a DVD-RAM disc
Once you have logically formatted a DVD-RAM disc, it can be used to read and write files just as you would
with a hard disk or floppy disk.
For instance, if the [Removable Disk] icon assigned to this DVD-RAM drive is recognized as D drive, insert the
DVD-RAM disc and perform the operations from D drive.
(The actual drive letter of the DVD-RAM drive will differ according to the environment of the system you are
using.)
22
Note:
The error checking and optimizing programs cannot be used on a UDF-formatted DVD-RAM disc.
Removable Ditk (D:l Piopeiliei
I rGeräiäi1[ r
ooh [
_______
? Erra checking tfalut-
Windowt wfli unable to determine when
you last checked thit tkive let eirort.
IniheckNSW^r-
^ Backup statue-^
3. Wrrxjowj wes uiable to determino v^ien you last
tJ backed up ties on this drive.
^ Deha(prentation status
S Whdowt was utsaUe to dslenn^ when you last
defragmented this drive.
ffßet ragment Now,_j_j;.^
i 0^ I jr Carscel | \ fyfafjij
Sackup Now..
Cannot be used.
Cannot be used.
Page 23

Using a PD Cartridge
Logical formatting
A PD cartridge must be logically formatted prior to use, just as you would similarly format a floppy disk or hard
disk prior to use.
Follow the instructions below to proceed with logical formatting.
1
Insert the PD cartridge you wish to format into the DVD-RAM drive.
Open [My Computer] and click
2
[Removable Disk] icon allocated
to DVD-RAM disc/PD cartridge
using the right button of the
mouse.
Click [Format] on the menu screen.
3
(Continued on the next page)
B- My Computer
File Edit View Help
3H Floppy (A;)
fi] m
Control Panel Pfinteis
Formats the selected drive.
(C:)
Dial-Up ^
Networkinr
Hi=ia
(E:
Open
Exfdore
Find...
Copy Disk...
Eject
Create Shortcut
Pjoperties
23
Page 24

4
On the screen, click [Start].
O Start formatting,
O Close DVDForm.
o
o
0
Super Floppy Disk [SFD]
FAT-16
FDISK FAT-16
O Enter a volume name.
This is the Windows OS embedded format type.
This is the Windows OS embedded format type.
This format type cannot be used in Windows NT 3.5x and other
versions that do not support the FDISK format.
O Select this when you want to perform physical formatting. (There is no need to do this every time.)
No Certification:
In case of PD cartridge, this mode cannot be selected.
Certification:
This mode forces a check of all sectors for defects and allocates detected defective sectors to the
spare area. Since this mode performs a thorough check of all sectors, it takes about a half-hour
for PD cartridge.
5
When the formatting confirmation message is displayed, click [Yes] in the dialog box.
Formatting begins.
You can use the PD cartridge after
formatting.
Reading and writing a PD cartridge
Formatthg this PD cartridge will erase all data on the cartridge.
Are you ^te to format this cartridge?
O
Yes
r
No
Once you have logically formatted a PD cartridge, it can be used to read and write files just as you would with a
hard disk or floppy disk.
For instance, if the [Removable Disk] icon assigned to the DVD-RAM drive is recognized as D drive, insert the
PD cartridge and perform the operations from D drive.
(The actual drive fetter of the DVD-RAM drive will differ according to the environment of the system you are
using.)
24
Page 25

Using CD-ROM, DVD-ROM and Other CD/DVD Discs
Playing a disc
The DVD-RAM drive can be used to play back music CDs, CD-ROMs, CD-Rs/RWs, DVD-ROMs, DVD-Rs, and
other discs just as you would with a CD-ROM drive or DVD-ROM drive.
For details, refer to the instruction manual supplied with the disc you wish to play back.
For instance, if the [CD-ROM] icon assigned to the DVD-RAM drive is recognized as the E drive, insert a CDROM or DVD-ROM and access it from E drive.
(The actual drive letter of the DVD-RAM drive will differ according to the environment of the system you are
using.)
■ What you will need to play DVD (e.g., DVD-VIDEO and DVD-ROM)
• Your computer will need to have a MPEG2 decoder board (not included) or MPEG2 decoder software
(not included).
• The region numbers on the DVD-RAM drive and MPEG2 decoder board (or MPEG2 decoder software)
must match the region number on the DVD.
When this DVD-RAM drive was shipped from the factory, the region number was set to “1” to match the
region number on DVD sold in your region. Therefore it is normally not necessary to change the region
number setting.
Use the included DVDRgn software to change the region number setting on the DVD-RAM drive. (See
page 29.)
This mark indicates the region number of a DVD.
It is displayed in areas such as the case jacket of a DVD.
The example shown here is the mark for region number 1.
For your reference:
• When CD-R, CD-RW and DVD-R media are read on this DVD-RAM drive, there may be a decline in
the read speed and on rare occasions the reading process may not work properly, depending on the
writing drive and disc statuses and compatibility. If such problems occur, this DVD-RAM drive may be
able to properly read the media if the write speed on the writing device is lowered.
25
Page 26

About the Supplied Application Software
Using MPEG1 Coder (MPEG1 compression software)
MPEG1 Coder
This software allows you to compress, in real time, full-motion video shot with a video camera and other data
into the MPEG1 format, and record it to a DVD-RAM disc or PD cartridge.
With a single 2.6 GB DVD-RAM disc, you can record approximately 2 hours of MPEG1 video in standard mode
(with a video data rate of 2.0 Mbps and an image size of 320 x 240).
It can also play video recorded in the Windows standard Active Movie (software decoder) format.
Note;
• A sample MPEG1 file is stored in the “Sample" folder in the root directory of supplied CD-ROM disc.
This sample data can be used with MPEG1 Coder.
Operating requirements for MPEG1 Coder
Computer:
OS:
CPU:
Memory:
Hard disk space;
Others:
Video capture card
A video capture card (not included) is required to capture video with MPEG1 Coder.
Below are the two compatibility requirements for video capture cards.
1. Compatible with Video for Windows Verl.1 or higher
2. Support of the RGB capture data format
Verified compatible video capture cards:
1. Panasonic EggCam™ Camera Kit GP-KR0011
IBM PC/AT compatible computer
Windows 95, Windows 98
Intel Pentium 166 MHz or higher (MMX capabilities recommended)
32 MB or higher (64 MB recommended)
3 MB (minimum)
An environment with a video capture card and sound card
26
Sound cards
A Sound Blaster-compatible sound card (not included) is required to record sound.
Verified compatible sound cards
1. Sound Blaster 16 PNP
2. Sound Blaster AWE 32
3. Sound Blaster AWE 64
4. Sound Blaster PCI 64
5. XGYMF-724V 3D Chip PCI
Note:
• Because MPEG1 Coder uses software to compress image data, some computers may not have
sufficient performance for data compression (e.g., software processing may take a long time).
Example performance
Mode:
Capture card:
CPU:
Capture settings:
With the above conditions, a capture rate of roughly 30 frames per second is possible.
Standard mode
Panasonic EggCam^^^ Camera Kit GP-KR0011
Pentium II 266 MHz (Memory: 64 MB)
size 320 X 240, capture format RGB15, video rate 3 Mbps,
audio rate 96 kbps, audio 11 kHz, mono
J
Page 27

Using DVDRgn (region number setting utiiity)
DVDRan
This software is used to set the region number of the DVD-RAM drive (this setting can only be made a
maximum of four times). The regions where DVD-ROM and DVD-VIDEO discs can be played are specified by
region numbers. In order to play a disc, the region number on the DVD-RAM drive must match the region
number on the disc. When this drive is shipped from the factory, the region number is set to “1”.
Operating requirements for DVDRgn
Computer: IBM PC/AT compatible computer
OS: Windows 95, Windows 98, Windows NT4.0
Hard disk space: 1 MB or higher
Starting DVDRan
From the Start menu, select [Programs]-
■ Settings
Select the DVD-RAM drive.-
1
O Insert a DVD disc with the desired region
number in the DVD-RAM drive.
• If no disc is inserted, you cannot set the region
number.
Be sure to check the region number
3
currentiy set and the number of times
the region number can be changed.--------------------
• Under the factory default, the region number setting
can only be changed a maximum of four times, so
keep track of the number of times you change the
setting. (You cannot change it more than four
times.)
The radio button(s) representing the
4
region number(s) of the inserted DVD disc
wiil be seiectable. Select the region
number for the inserted disc.
You can select the region number by country name.
Click [Select Country Name...], and select your
country.
----------------------------
[Panasonic DVD-RAM]^ [Utility]^ [DVDRgn].
DVD-RAM Regional Selling Piogiain.
r Seled Drive
j[F): MATSHITA. PD-2 LF-D100
rs Drive Status
_^J
T Select Region Number ^------------------------------------
r
No DVD disk is inserted.
Region Number : No. 1
User Reset Available : 4
Ngfl & Q No>3j
Qf y_o,4 OJ NPrSj Q No,®
jSelect Country Name... jSet Region b
■
.....
. . _!
■ 1
umber!
r
..............
HE
.......
E
0
.
g Click [Set Region Number].
Note:
• Please note that the number of times the DVD-RAM drive region number setting can be
set/changed is limited to 4.
• When [User reset available] is “1”, be absolutely sure to set the region number for the DVD discs you
wish to playback in future.
After this final setting, you will be unable to change the region number again and will only be able to
playback DVD discs with the region number that is set.
• When changing the region number for the fourth and last time, be sure to insert a DVD disc that only
displays one region number. If a disc displaying multiple region number is inserted, you will be unable
to set/change the region number.
J
29
Page 28

Using DVD Agent (utility)
DVD Agent
This software enhances the standard Windows GUI by replacing the default icons for removable drives and
CD-ROM drives with customized DVD-RAM icons. Additionaily, DVD Agent provides functionaiity to
automatically launch applications upon insertion of a DVD-RAM disc or PD cartridge.
Operating requirements for DVD Agent
Computer: IBM PC/AT compatible computer
OS: Windows 95, Windows 98
Hard disk space: 1 MB or higher
Starting DVD Agent
■ Icon Manager
When you install DVD Agent and reboot your computer, the standard Windows icons for the
DVD-RAM drive in the [My Computer] window are replaced with special icons for the DVD-RAM drive.
Before installing DVD Agent
Ш My Computer
File Edit View Help
Î3ÏÏ Fïoipfÿ'Î^^ 0sr2 (C:) Removable
Control Panel Printers
6 objectfs]
After installing DVD Agent
ШИ
(E;
Disk (D;)
Auto Run
When a DVD-RAM disc or PD cartridge is placed in this DVD-RAM drive, a preset application can be run.
Right-click the icon for DVD-RAM discs or PD cartridges, then select [Auto Run]^[Setting].
(£te ЕЛ y™ Й*
^ ^ M ^
3:4 Floppy* (A ) English [C ) [2^^213 1^ )
ai
Cortd P«l Prrtet
fSiltcl Alio Яип Afcicoton
Opon
£Ф<ои
End.
Fofn>et..
Í Elocl
>
You canMt4n46picet)DnforAiiyau)wtiichwibe rescued
И
«tierr (№ ÛVO-RAM àtk or й nterlod
OjÉnabie
30
I Pioperti«
J ¿лгал
Note:
• If you encounter system problems (i.e. system hangs, performance deteriorates, etc.) after setting Auto
Run, you can disable the Auto Run function.
How to disable Auto Run
Click the [DVD-RAM Drive] icon in the Task Bar. The icon will change so that a red “x" is placed over it
i§Ml indicating that the Auto Run function is disabled.
How to enable Auto Run
When the [DVD-RAM Drive] icon in the Task Bar indicates that Auto Run is disabled (i.e. icon
has red “ x ” over it), simply click the icon. This will remove the red" x" indicating the Auto Run is enabled.
Page 29

starting MPEG1 Coder
From the Start menu, select [Programs]
TOTAL:
fSTDPi 0:00:00
t I
Caution;
• Select Active Movie before using MPEG1 Coder. To start the Active Movie selection program, from the
Start menu select [Programs]-^[Panasonic DVD-RAM]-»[MPEG1 Coder]->[Active Movie Select Switch].
• Before data that you have recorded with MPEG1 Coder is used in a manner that exceeds the scope of
personal use, you must first obtain the permission of the copyright holder in accordance with copyright law.
Note:
• Refer to the help files for operating and troubleshooting procedures. The help files can be opened
either by clicking [Help] on the application, or by selecting [Programs]^[Panasonic DVD-
RAM]^[MPEG1 Coder]-*[Help for MPEG1 Coder] from the Start menu.
'[Panasonic DVD-RAM]^[MPEG1 Coder]-»[MPEG1 Coder].
Using FileSafe (backup software)
FileSafe
This software can automatically back up data in specified folders, or back up only updated folders, enabling you
to protect important files efficiently.
■ Copying in the same file format as the actual file
When a job is run, a folder with the same name as the job name is created in the root directory of the
DVD-RAM disc or PD cartridge inserted into the DVD-RAM drive, and the contents of the selected source
folder are copied in the actual file format.
As a result, copied folders and files can be used in Explorer and other applications.
■ Copying and restoring
The following modes are supported.
1. Normal Copy
Same as Explorer’s Copy in that the selected source folder is simply copied to the DVD-RAM drive.
2. Clone Copy
Duplicates the contents of the selected source folders onto the DVD-RAM or PD media. (Deletes all data
in the copy destination and copies the data from the original.)
3. Synchronized Copy
Files which are not the same on the original and this DVD-RAM drive are copied to corresponding
folders, and the folder contents are updated to match each other. (When both folders contain a file with
the same name, the most recent version of the file is copied.)
4. Restore
Copy files on the DVD-RAM drive back onto the source drive to restore data.
■ Copying only changed files (Default setting)
In this mode, only files that have been changed are copied from the source folders to the DVD-RAM drive.
In the first execution, all files in the specified source folders are copied, but from the second execution on,
only those files and folders that have been newly created or changed from the previous execution are
copied.
■ Scheduled Execution function
Three Scheduled Execution modes are supported: “Keyboard Not Use Mode”, “Clock Mode” and “Interval
Mode". This allows you to define a schedule to automatically execute pre-configured jobs at a time best
suited for the data and usage of the system.
27
Page 30

■ Management of copy Jobs using Job files
It is possible to configure settings for each copy mode (“Normal Copy”, “Clone Copy" and "Synchronized
Copy") which are saved in a Job file.
This allows you to execute the copy, with all the corresponding settings, simply by selecting the job.
Operating requirements for FileSafe
Computer: IBM PC/AT compatible computer
OS: Windows 95, Windows 98, Windows NT4.0
Hard disk space: 1 MB or higher
Starting FileSafe
From the Start menu, select [Programs]-
'[Panasonic DVD-RAM]^[FileSafe]^[FileSafe].
^MODE-
♦ O!^ MCHEf
- E5CJ
>-OZs
□ CJ PDBAD
li-OD present
'* Ddl Pi09amF4M
Î DCJ RECtUED
"-DD ^nPEG
^EAErUP 9№£bULE
Executivi
] OSchediMExeci^ien
r.
Çj rJofmii Ccfiy
ООзлвСфГ
\ ^ I QfjffictBmedCvtr
■ - p ~zn\
[П m
[fi''
c POApVDFüW Skd* s«*(ihgt ì
N..
О
f- SafasJB^ r^ldw/Ffe '
. TmaStdirp
-----------
d fi»r C
Told
:Пчд1 I Opfcjn I 1^ ^ _1
1
Note:
• FileSafe manages discs based on their volume
names, so you must enter volume names on
the hard disk, DVD-RAM discs, and PD
cartridges you are using.
• Refer to the help files for operating and
troubleshooting procedures. The help files can
be opened by clicking [Help] on the
application. Alternately, move the mouse
pointer to any button on the application and
click right button of the mouse to see detailed
help information about that item.
Using MediaSafe (disc copying software)
MediaSafe
This software lets you copy data recorded on a DVD-RAM disc or PD cartridge to a different DVD-RAM disc or
PD cartridge using a single DVD-RAM drive.
Operating requirements for MediaSafe
Computer: IBM PC/AT compatible computer
OS: Windows 95, Windows 98, Windows NT4.0
Hard disk space; 1 MB or higher
28
Starting MediaSafe
From the Start menu, select [Programs]-*[Panasonic DVD-RAM]^[MediaSafe]^[MediaSafe].
M
Wok HDD
0% 1
B.IDIxl
Note:
• Refer to the help files for operating and
troubleshooting procedures. The help files can
be opened by clicking [Help] on the application.
Alternately, move the mouse pointer to any
button on the application and click right button
of the mouse to see detailed help information
about that item.
Be^iew lool JJHp
!-aiUE\
QQ Th« fleol rûot direclory
[ DiU B«kup
*; BCJ E«CCOata
hB(ljQSS
□ Qi PttVamt
Proied
T 0CJ Tools
WofdD^o
Э
[ START I [¡¿1
Scorce Oitk
Tbit tone 1
Ttlgl 1
¡When inth to »beet №eiddei,p(»alSlARTlbjBorL ^ /
I - J1
R«nvi estchanpe
Page 31

DVD-RAM drive management
You can enter cache settings for this DVD-RAM drive.
Right-ctick the DVD-RAM disc or PD cartridge icon, then select [Properties]-»‘[Drive Control] (the
error checking and optimizing programs found under the Tools tab cannot be used on a UDFformatted DVD-RAM disc).
[£ie £« ÏBW tiilp
^ 5 S ^
3XF)ixw(M Er«*ihii:i
EÏI S)
Control Pond
I bbpl^ Ihi ptcpertie» ol the «etocwl timi ^
[¡MHlI
Foffoal..,
C)ect
WAV Player
The WAV Player lets you capture music CDs on a DVD-RAM disc or PD cartridge, and play captured tracks.
From the Start menu, select [Programs]-»[Panasonic DVD-RAM]-^[DVD Agent]-»[WAV Player],
Caution:
TRACK T ItlE
STOP
D;¥OVD-RAMViniAV-Data
Vtlagner. Richard No23. lAlAV - 5;17
Bach. Johann No06. WAV
Mendessohn, Bartholdy No05.WAV 2:54
Piano Trio, No03.wav
Dvorak. Antonin. Mew World.WAV - 3:54
Haydon, Franz No94.WAV 2:43
Vivaldi. Antonio No02.WAV - 4:20
Chopin, Frederic Piano01.WAV - 2:03
Debussy. Claude NoO’i. WAV 6:11
Beethoven, Ludwig No09.WAV 1 :42
Duet No10.WAV - 3:35
I »
[o
N4
m
2; 59
1 :06
1
• Before data that you have recorded with WAV
Player’s audio capture feature is used in a manner
that exceeds the scope of personal use, you must
first obtain the permission of the copyright hoider in
accordance with copyright law.
:»'li
.................................................
..................................
1
Note:
• Refer to the help files for operating and
troubleshooting procedures. The help files can be
opened either by clicking [Help] on the application,
or by seiecting (Programs]-»[Panasonic DVD-
RAM]^[DVD Agentj^lHelp for DVD Agent] from
the start menu.
In addition, you can access heip by clicking the
ieft mouse button on [?J button on the appiication
and then ciicking the left mouse button again to
seiect the item you wish to see help. Help
information for that item wiil appear.
nati
You can iti an app&cabon lor Ai<otu> vrhich wfl be executed
when iHs DVD-RAM dttk or PO cartiidge it interlel
Th» application automatically executed when this DVD-RAM
dtf kci PD eartndge is loaded musi be specified
!
......
.
31
Page 32

Installing the supplied application software
Note:
• The supplied application software is for use with this DVD-RAM drive only, and will not run on other devices.
1
2
Insert the supplied CD-ROM into the DVD-RAM drive.
The installation program starts automatically.
• If the installation program does not start automatically, start it manually by following the procedure
below.
{This assumes that the drive letter assigned to the DVD-RAM drive for CD-ROM media is E:.)
-j| From the Start menu select [Run].
O In the “Open” box,
Tjjpe the rwme of a program, folder, or documei-it, and
Windows wHt open it for you.
^ enter “e:\setup.exe” and
click [OK].
The installation program starts.
□ pen: jeAsetup.exe
i
Cancel |[ Bmwse
Click [Application Setup].
bnyejrSiFQrnii.attej Se.tup^
32
3
Select the application to install i and click [Next].
Installation begins.
• You can select multiple programs at the same !
time.
• Follow the on-screen instructions to proceed.
Select Component!
SetecI It» iippliciliont checi; bo* you t*anl lo inttal
AT .Peats the apttication't totctei
rj¡¡DVOAg^
n MPEG1 Codet
Q TJeSafe
MedaSate
tflact-. ] Ns*t> [P" Caned j
Page 33

Uninstalling the Software
I Uninstalling driver software^
To delete the driver software that you have installed on your computer, uninstall it by following the procedure
below.
1
Insert the supplied CD-ROM into
the DVD-RAM drive.
(This assumes that the drive letter assigned to
the DVD-RAM drive for CD-ROM media is E:.)
• if the window as right is displayed, click [Exit].
From the Start menu select [Run].
Enter the following file name in
the “Open” box, and click [OK].
The uninstallation program starts automatically.
■ In case of Windows 95 / Windows 98
[e:\win9x\english\driver\setup.exe]
■ In case of Windows NT
[e:\winnt\english\driver\setup.exe]
ttieii'
i \ /
Ap.|
Type the name of a program, folder, or document, and
Windows will open it for you.
j e: VwhnlVenglishVdTivef\setup. exe
r3 Run in Separate Memory Space
' OK j Cancel
S,e,tu^
Exit
m
1 Browse...
4
(Continued on the next page)
Select “Uninstall DVD Driver” and click [Next].
Uninstalling begins.
Sekret CoRiponent
Seied Setf^s Item and Cidf [Next).
Q Instdl OVD Di^
gf jjj
CSack I > I jf Cancel
33
Page 34

5
After uninstallation, Select “Yes, I want to restart my computer now.” and click [Finish].
Uriiraidl cofipisletlNeed tesiarl loi siiiì.ara.Feslait nw ?
The computer now reboots.
• After rebooting, uninstallation is completed.
O No, I ™l lestart rv coir^ef btei.
ii «6?!^
Uninstalling the supplied utility and application software
To delete supplied utility (Format software/Region setting software) and application software that you have
installed on your computer, uninstall it by following the procedure below.
From the Start menu, select [Settings], then [Control Panel].
1
• You may also open the [My Computer] window and then select [Control Panel],
Add/Reioove Pfograms Pioperties
fnial/Unirvstajl [ Windows Setup f Statup Di^ j
T0 instai a new (iogtam fiom a disk ck CD-ROM
drive, click tnsiaS.
2
Double-click [Add/Remove
Programs] and select the
application you wish to delete.
34
3
Click [Add/Remove].
• Follow the on-screen instructions to proceed.
• When you finish uninstalling, reboot your
system.
Jhe foilEKwhg softwate can be automaticaly reraovad by
Windùws. T 0 remove a program or to modify its instaled
conponerits. select it from the fist md
Add/Remove.
DVD Agent
DVD-RAM Utililv
Files ate
MediaSaie
MPEG I Coder
Write DVD!
11 OK ||f~~Canoei 1C
Page 35

When Operation Indicator Lamp Blinks
This DVD-RAM drive will indicate malfunctions by blinking in green the operation indicator lamp on the front
panel.
Blinking mode
Triple blinking mode
Dual blinking mode
Single blinking mode
Cause possible
Drive has used almost all of spare area
sectors for defect management. This
symptom typically occurs when drive
lens and/or disc are dusty. In this
condition, inserted disc will be write-
protected.
The lens of the drive or inserted disc is
dusty. In this condition, inserted disc will
be write-protected.
The drive internal temperature is too
high.
Use this as Read Only mode disc. Or
clean the lens and disc by using special
cleaning kit recommended for the drive
(see page 7) and format the disc with
certification mode {see page 18 for
DVD-RAM discs or page 23 for PD
cartridges) after backing up the data.
Clean the lens and disc by using special
cleaning kit recommended for the drive
(see page 7).
Shut down DVD-RAM drive and cool it.
Action
If recommended action does not correct the problem...
Contact the dealer where you purchased the DVD-RAM drive.
When getting technical support to repair the DVD-RAM drive...
Inform us of the operation indicator lamp blinking mode.
35
Page 36

When this occurs
No power
Tray fails to open.
Tray fails to close.
Computer fails to
work.
Drive cannot be
accessed normally.
Drive is not
recognized on
Windows.
DVD-RAM disc
cannot be read or
written to.
PD cartridge cannot
be read or written to.
Discs cannot be
read.
No sound from the
computer’s speaker
Possible cause
• Ensure connections through the AC adaptor are complete and correct. 13
• Is the DVD-RAM drive powered on?
• Has the media been inserted correctly?
• Has the drive’s SCSI ID been set correctly?
• Has the drive’s terminator been set correctly?
• Has a floppy disk been left inside the computer?
• Is the DVD-RAM drive powered on?
• Is the total length of SCSI cable shorter than the length specified by
the SCSI host adaptor to be used?
• Has the drive’s terminator been set correctly?
• Is the driver software installed correctly?
• Is the SCSI host adaptor recognized correctly?
• Is the driver software installed correctly?
O In case drive letter of CD-ROM/DVD-ROM side is recognized only,
driver software is not installed.
• Did you initialize (format) the DVD-RAM disc?
• Did you access the correct drive letter assigned to the drive?
• Did you insert a single-sided DVD-RAM disc with the space for an
adhesive label facing up?
• Is the DVD-RAM disc dirty?
• Has condensation formed in the drive?
(Wait an hour or so after turning on the DVD-RAM drive for the drive
to dry out and then try operating.)
• Did you initialize (format) the PD cartridge?
• Did you access the correct drive letter assigned to the drive?
• Did you insert the PD cartridge with the space for an adhesive label
facing up?
• Is the PD cartridge dirty?
• Has condensation formed in the drive?
(Wait an hour or so after turning on the DVD-RAM drive for the drive
to dry out and then try operating.)
• Did you access the correct drive letter assigned to the drive?
• Only the discs supported by this drive can be used.
• Have the discs been placed correctly In the tray?
• Did you insert the discs with label facing up?
• Are you using correct software program for playing discs?
• Is the disc dirty, scratched, cracked, warped, written on the surface or
is a label put on the disc?
• Has condensation formed in the drive?
(Wait an hour or so after turning on the DVD-RAM drive for the drive
to dry out and then try operating.)
• Have you set the driver's region number?
• Ensure the connections to the computer (or speakers with internal
amplifiers) through this drive’s AUDIO OUT terminal are complete and
correct.
Refer to
Page
10
11
12
12
10
11
12
15,16
16,17
15,16
18
22
11
7
7
23
24
11
25
11
11
7, 38
29
13
7
7
9
7
36
Page 37

Handling DVD-RAM Discs
To safeguard DVD-RAM discs from damage
Do not place the DVD-RAM discs in the following
locations:
• Dirty or dusty locations
• Hot or humid locations or where they will be exposed to
direct sunlight
• Locations susceptible to significant differences in temperature
(condensation can occur)
Handling notes:
• Do not touch the disc surface,
• Do not drop, bend or place heavy objects on the DVD*
RAM discs.
• Do not adhere a label which has been peeled off.
• Do not incinerate the cartridge.
Dispose of the cartridge correctly.
Preventing loss of valuable information
• To prohibit writing
S=-FTi=^1
• Making backups
Just as with a hard disk or floppy disk, Panasonic
recommends that you make backups (copy the data) at
regular intervals.
Keeping the cartridges in their cases
(when they are not being used)
Remove the cartridge from the DVD-RAM drive and store it
in its case.
To remove the disc out of the TYPE2 cartridge
Push out the pin tor disc removing using an
object with a pointed end such as the
1
emergency ejection
pin (included).
Pressing the hole located on the left side using
an object with a pointed end, open the
open/close cover.
Notes:
• The disc which has been removed out of the TYPE2
cartridge can be used as read-only media.
CF Writing speed may be reduced in some cases if a
• Be sure not to soil the disc surface with dirt, dust and
fingerprints or damage the disc. In addition, do not drop
it, bend it or adhere paper to it. (This may cause data
read error.)
• To return a removed disc to its cartridge, first set the
printed side of the shutter and the printed side of the
disc to the same side. When doing this, make note of
the write protection setting.
о
1
iL
When the disc is returned inside the cartridge,
writing is possible again.
disc is removed and then returned to the cartridge.
^0
Write prohibit statusWrite enable status
I
Taking care not to soil or damage the disc
surface, remove the disc horizontally.
DVD-RAM disc
A DVD-RAM disc is a removable media developed as a “DVD to which data can be written", aiming at reading and
writing large amounts of computer data. There are two types of DVD-RAM discs.
■ TYPE1
The disc inside cannot be removed. Single-sided discs have a capacity of 2,6 GB. Double-sided discs have a
capacity of 5.2 GB.
■ TYPE2
Single-sided 2.6 GB DVD-RAM discs. The disc inside can be removed for future use in DVD-ROM drives which
have DVD-RAM read compatibility.
37
Page 38

Handling PD Cartridges
To safeguard PD cartridges from damage
Do not place PD cartridges in the following
locations:
• Dirty or dusty locations
• Hot or humid locations or where they will be
exposed to direct sunlight
• Locations susceptible to significant differences in
temperature (condensation can occur).
Handling notes:
• Do not open the shutter and touch the disk surface.
• Do not drop, bend or place heavy objects on the PD
cartridges.
• Do not adhere a label which has been peeled off.
• Do not incinerate the cartridge.
Dispose of the cartridge correctly.
Keeping the cartridges in their cases
(when they are not being used)
Remove the cartridge from the DVD-RAM drive and
store it in its case.
Preventing loss of valuable information
• To prohibit writing
Write enable status
Write prohibit status
• Making backups
Just as with a hard disk or floppy disk, Panasonic
recommends that you make backups (copy the data)
at regular intervals.
Handling CD-ROM, DVD-ROM and Other CD/DVD Discs
To safeguard discs from damage
Do not place the discs in the following locations:
• Hot or humid locations or where they will be
exposed to direct sunlight.
• Locations susceptible to significant differences in
temperature (condensation can occur).
Handling notes:
• Do not dirty or damage them.
• Do not drop or bend them.
• Do not write on or adhere labels to them.
How to remove a disc from its case
Press down on the center part and lift the disc free.
How to place a disc in its case
With its label side facing up, press the disc into place.
What to do when a disc is dirty
Wipe the disc using a soft cloth which has been
dipped in water, and then wipe with a dry cloth.
The disc must be wiped from the inside toward the
outside.
How to hold a disc
Take care not to touch the side which has no label
printing.
38
Page 39

Specifications
DVD-RAM Drive
Power requirements (AC adaptor VSK 0558) AC 100-120 V 50/60 Hz
Input current 0.3-0.25 A
Drive model number
Interface supported SCSI-2 (Fast SCSI) (Supports SCAM Level 1)
DVD-RAM
Seek time
(using Panasonic’s
measurement method)
Sustained data transfer rate
Buffer memory
Audio output level (impedance)
Drive orientation
Allowable operating temperature range
Allowable operating humidity range
(no condensation)
Dimensions (W x H x D)
Weight (main unit)
SCSI connector type 50-pin connector (pin type)
Applicable media
DVD-ROM
PD
CD-ROM
DVD-RAM
DVD-ROM
PD 518-1,141 KB/s
CD-ROM
Line out
Read/Write DVD-RAM, PD
Read only
LF-D102
120 ms
85 ms
1,385 KB/s
2,770 KB/s (2 X speed mode)
1,293-3,000 KB/s (Max. 20 X speed)
2 MB
0.84 Vrms (47 kO)
Horizontal/Vertical
41-95“F (5-35°C) (during operation)
10-80% RH (during operation)
65/8” X 131/32" X 921/32" (168 X 50 X 245 mm)
(excluding protrusions)
3.3 lbs. (1.5 kg)
DVD-ROM, DVD-VIDEO^i, DVD-R^2^3_ CD-DA^^ CDROM (Supports XA), Photo CD (Supports
multisession), Video CD, CD-EXTRA, CD-R/RW*2*5_
[120 mm Disc Media]
A MPEG2 decoder board (not included) or MPEG2 decoder software (not included) is also necessary to play
DVD-VIDEO discs.
Supports discs with a capacity of 3.95 GB that are written with the Disc-at-Once option.
Depending on how the disc is written, performance may not match the specified levels.
CD-G not supported.
Supports MultiRead for CD-R and CD-RW.
Specifications and external design are subject to change without notice because of product improvements.
39
Page 40

DVD-RAM Disc
Model number
Disc type
Disc diameter/thtckness
Memory size (unformat)
Bytes/sector
Sector/track
Track/side
Track pitch
Track format
Disc life More than 30 years
Ambient temperature
Humidity range (no condensation)
Dimensions (W x H x D)
Weight
Cartridge type
Specifications and external design are subject to change without notice because of product improvements.
LM-DB26U
(optional)
Phase-change rewritable
4%" (120 mm)/Vie" (1.2 mm) (0.6 mm x 2)
2.6 GB (single side)
2,048 Bytes/sector
17-40 (ZCLV)
45,701
0.74 pm
Wobbled Land & Groove Format
41-140°F (5-60°C) (during operation)
3-85% RH (during operation)
4'yi6" X 5Vi6" X (124.6 X 138.0 X 8.0 mm)
Approx. 0.2 lb. (75 g)
TYPE2 (Removable) TYPE 1 (Non-Removable)
LM-DA26U
(optional)
2.6 GB (single side)
LM-DA52U
(optional)
5.2 GB (dual side)
TYPE1 (Non-Removable)
Technical Support
To answer questions or requests from customers who have bought the Panasonic DVD-RAM drive, the
following Hotline is available for Panasonic customers. Please do not hesitate to call us.
The Hotline number is 1-800-PANASYS (1-800-726-2797)
This number is available 9 a.m. to 7 p.m. EST, normal business days.
Panasonic Document Imaging Company
Two Panasonic Way, 7D-9 Secaucus,
New Jersey 07094
© 1999 Matsushita Electric Industrial Co., Ltd.
Printed in Japan M0999TY0 (D)
VQT8383
 Loading...