

Page 1

TGA715E_717E(e-e).book Page 1 Wednesday, August 2, 2006 2:46 PM
Operating Instructions
Additional Digital Cordless Handset
Model No. KX-TGA715E
KX-TGA717E
KX-TGA715
This unit is an additional handset for use with the following Panasonic
Digital Cordless Phones:
KX-TG7100/KX-TG7120/KX-TG7160/KX-TG7180
KX-TG8100/KX-TG8120
KX-TG9120/KX-TG9140/KX-TG9150
You must register this unit to your base unit before it can be used.
Charge the batteries for about 7 hours before initial use.
Please read these operating instructions before using the unit and save them for future
reference.
Page 2
TGA715E_717E(e-e).book Page 2 Wednesday, August 2, 2006 2:46 PM
Table of Contents
Preparation
Introduction .............................................. 3
Accessory information...............................4
Important information ............................... 5
Bone conduction earpiece (KX-TGA717
only) ......................................................... 6
Controls .................................................... 7
Displays .................................................... 8
Connections ............................................. 8
Battery installation/replacement ...............9
Battery charge ..........................................9
Symbols used in these operating
instructions ............................................. 10
Registering the handset to your base
unit .........................................................11
Accessibility features
Voice announce ..................................... 12
Basic Operations
Making/answering calls ..........................13
Handset phonebook ............................... 13
Caller list ................................................ 14
Multi-unit operation................................. 15
Handset/Base Unit Settings
Handset/base unit settings ..................... 16
Time settings.......................................... 18
Answering System Features
Answering system ..................................19
Useful Information
Using the belt clip ................................... 20
Using the shoulder rest attachment ....... 20
Character entry ....................................... 21
Troubleshooting for accessibility
features .................................................. 22
Specifications ......................................... 23
2 Helpline Tel. No.: U.K. 08700 100 076 R.O.I. 01289 8333
Page 3
TGA715E_717E(e-e).book Page 3 Wednesday, August 2, 2006 2:46 PM
Preparation
Preparation
Introduction
Thank you for purchasing a new Panasonic digital cordless phone.
Declaration of Conformity:
L Panasonic Communications Co., Ltd. declares that this equipment is in compliance with the
essential requirements and other relevant provisions of Radio & Telecommunications
Terminal Equipment (R&TTE) Directive 1999/5/EC.
Declarations of Conformity for the relevant Panasonic products described in this manual
are available for download by visiting:
http://www.doc.panasonic.de
Contact:
Panasonic Services Europe
a Division of Panasonic Marketing Europe GmbH
Panasonic Testing Centre
Winsbergring 15, 22525 Hamburg, Germany
Note:
L This equipment is designed for use on the UK and Republic of Ireland analogue telephone
network.
L In the event of problems, you should contact your equipment supplier in the first instance.
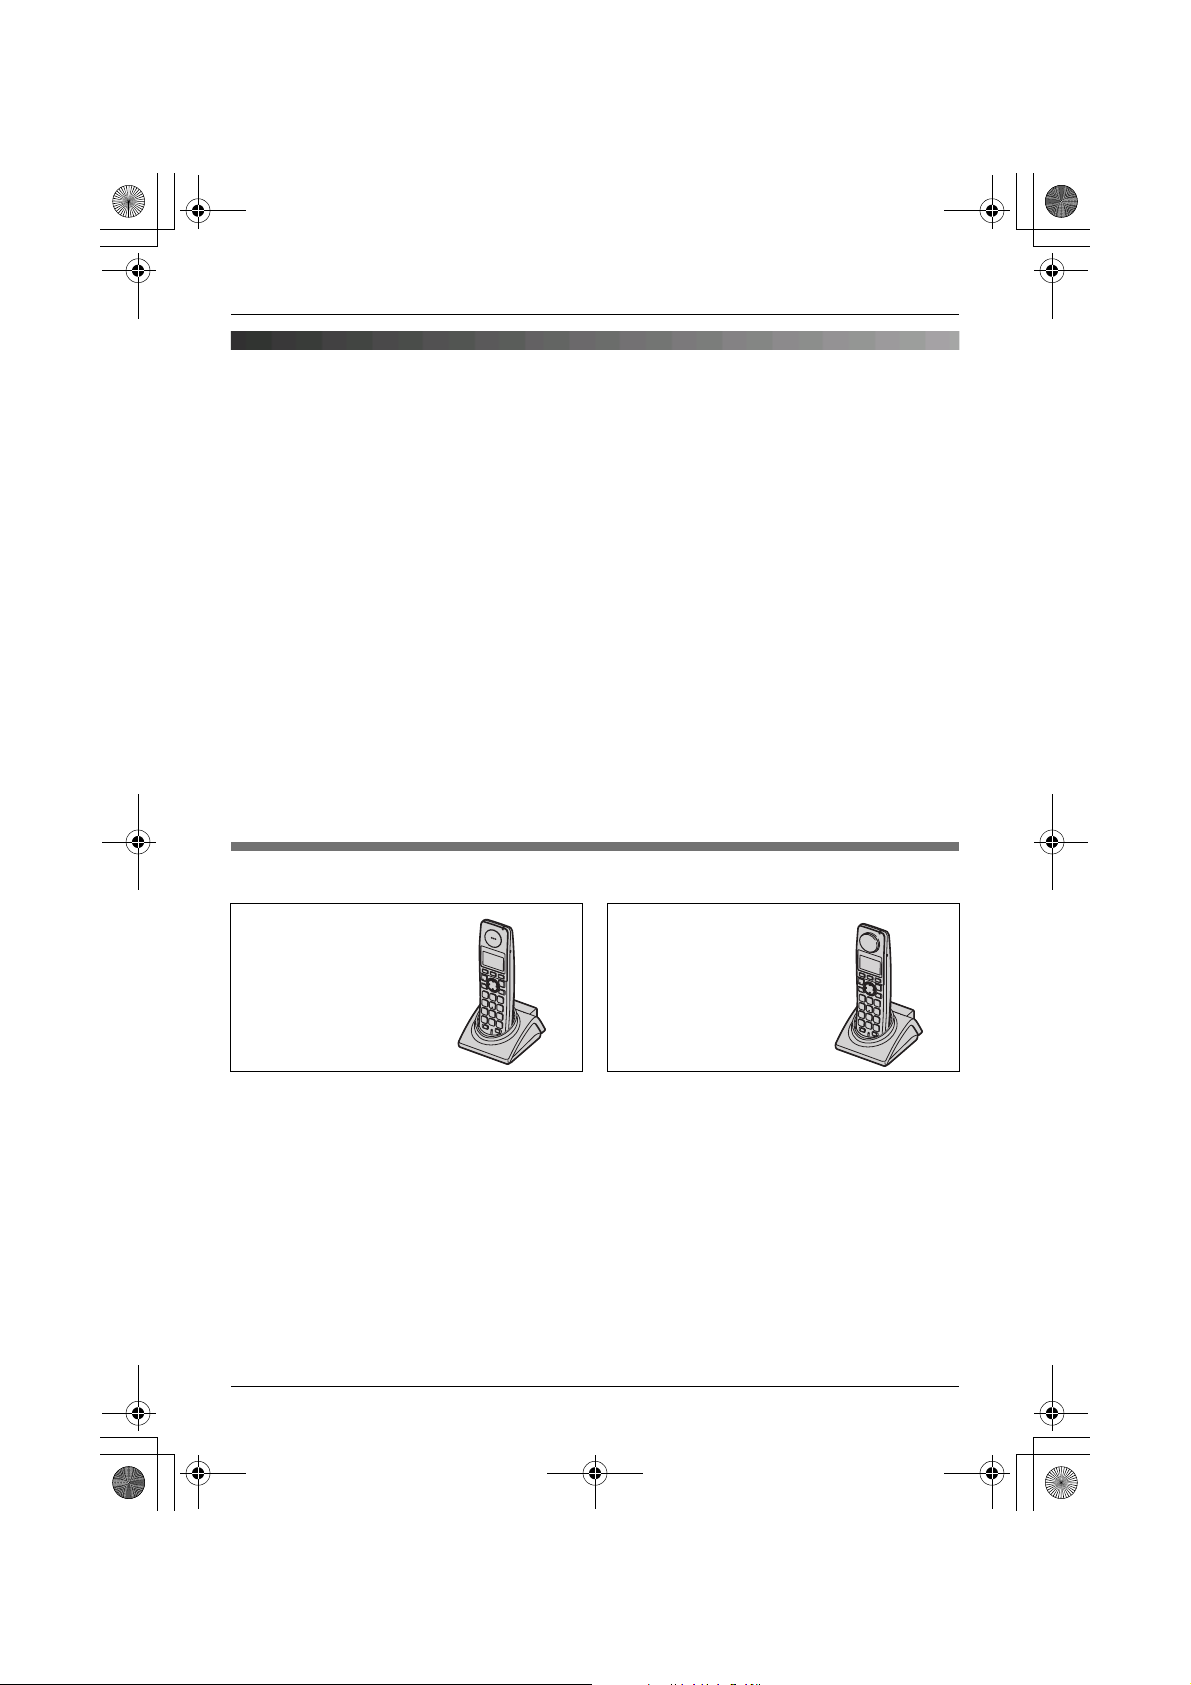
Your phone
KX-TGA715
(Big button type
handset)
KX-TGA717
(Bone conduction
type handset)
Helpline Tel. No.: U.K. 08700 100 076 R.O.I. 01289 8333 3
Page 4
TGA715E_717E(e-e).book Page 4 Wednesday, August 2, 2006 2:46 PM
Preparation
Accessory information
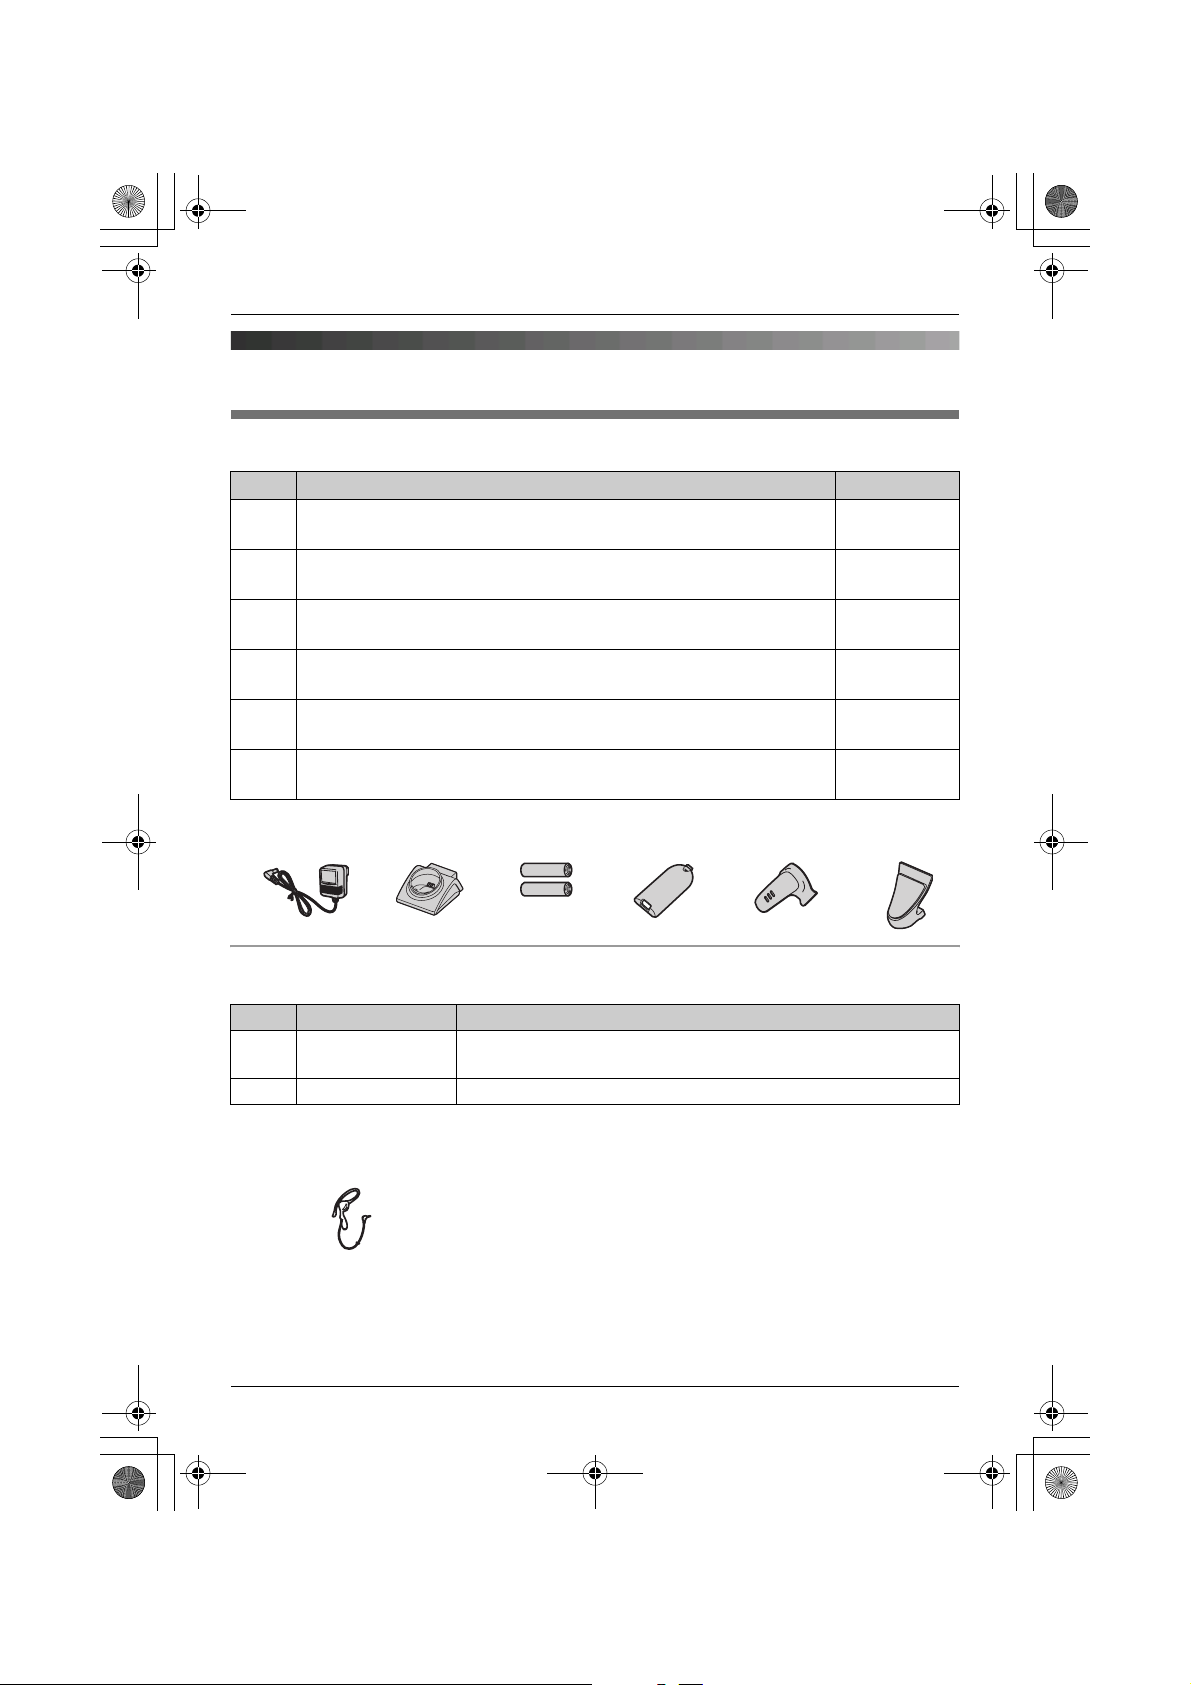
Included accessories
No. Accessory items Quantity
1 AC adaptor
Part No. PQLV209EZ (PQLV209E)
2 Charger
Part No. PQLV30045Z
3 Rechargeable batteries AAA (R03) size
Part No. HHR-55AAAB or HHR-4EPT
4 Handset cover
Part No. PQYNTG8100E
5 Belt clip
Part No. PQKE10464Z1
6 Shoulder rest
Part No. PQZXTG7160E
*1 The handset cover comes attached to the handset.
123456
*1
1
1
2
1
1
1
Additional/replacement accessories
Please contact your nearest Panasonic dealer for sales information.
No. Model No. Description
1 P03P
2 KX-TCA94EX Headset
*1 Maximum capacity of 750mAh
2
*1
2 rechargeable nickel metal hydride (Ni-MH) batteries,
AAA (R03) size
4 Helpline Tel. No.: U.K. 08700 100 076 R.O.I. 01289 8333
Page 5
TGA715E_717E(e-e).book Page 5 Wednesday, August 2, 2006 2:46 PM
Important information
Preparation
can cause fire or electric shock. Confirm
that smoke has stopped emitting and
contact an authorised service centre.
General
L Use only the AC adaptor included with this
product, noted on page 4.
L Do not connect the AC adaptor to any AC
outlet other than a standard 220–240 V
AC outlet.
L This product is unable to make calls when:
– the portable handset battery(ies) need
recharging or have failed.
– there is a power failure.
L Do not open the charger or handset other
than to replace the battery(ies).
L This product should not be used near
emergency/intensive care medical
equipment and should not be used by
people with pacemakers.
L Care should be taken that objects do not
fall onto, and liquids are not spilled into,
the unit. Do not subject this product to
excessive smoke, dust, mechanical
vibration or shock.
Environment
L Do not use this product near water.
L This product should be kept away from
heat sources such as radiators, cookers,
etc. It should also not be placed in rooms
where the temperature is less than 5 °C or
greater than 40 °C.
L The AC adaptor is used as the main
disconnect device. Ensure that the AC
outlet is installed near the product and is
easily accessible.
Warning:
L To prevent the risk of electrical shock, do
not expose this product to rain or any
other type of moisture.
L Unplug this product from power outlets if it
emits smoke, an abnormal smell, or
makes unusual noise. These conditions
Battery caution
L We recommend using the battery(ies)
noted on page 4. Use only rechargeable
battery(ies).
L Do not mix old and new batteries.
L Do not dispose of the battery(ies) in a fire,
as they may explode. Check with local
waste management codes for special
disposal instructions.
L Do not open or mutilate the battery(ies).
Released electrolyte from the battery(ies)
is corrosive and may cause burns or injury
to the eyes or skin. The electrolyte may be
toxic if swallowed.
L Exercise care when handling the
battery(ies). Do not allow conductive
materials such as rings, bracelets or keys
to touch the battery(ies), otherwise a short
circuit may cause the battery(ies) and/or
the conductive material to overheat and
cause burns.
L Charge the battery(ies) in accordance
with the information provided in these
operating instructions.
L Only use the included base unit (or
charger) to charge the battery(ies). Do not
tamper with the base unit (or charger).
Failure to follow these instructions may
cause the battery(ies) to swell or explode.
Information on Disposal for Users of
Waste Electrical & Electronic Equipment
(private households)
This symbol on the products and/or
Helpline Tel. No.: U.K. 08700 100 076 R.O.I. 01289 8333 5
Page 6
TGA715E_717E(e-e).book Page 6 Wednesday, August 2, 2006 2:46 PM
Preparation
accompanying documents means that used
electrical and electronic products should not
be mixed with general household waste. For
proper treatment, recovery and recycling,
please take these products to designated
collection points, where they will be
accepted on a free of charge basis.
Alternatively, in some countries you may be
able to return your products to your local
retailer upon the purchase of an equivalent
new product.
Disposing of this product correctly will help
to save valuable resources and prevent any
potential negative effects on human health
and the environment which could otherwise
arise from inappropriate waste handling.
Please contact your local authority for
further details of your nearest designated
collection point.
Penalties may be applicable for incorrect
disposal of this waste, in accordance with
national legislation.
For business users in the European
Union
If you wish to discard electrical and
electronic equipment, please contact your
dealer or supplier for further information.
Information on Disposal in other
Countries outside the European Union
This symbol is only valid in the European
Union.
If you wish to discard this product, please
contact your local authorities or dealer and
ask for the correct method of disposal.
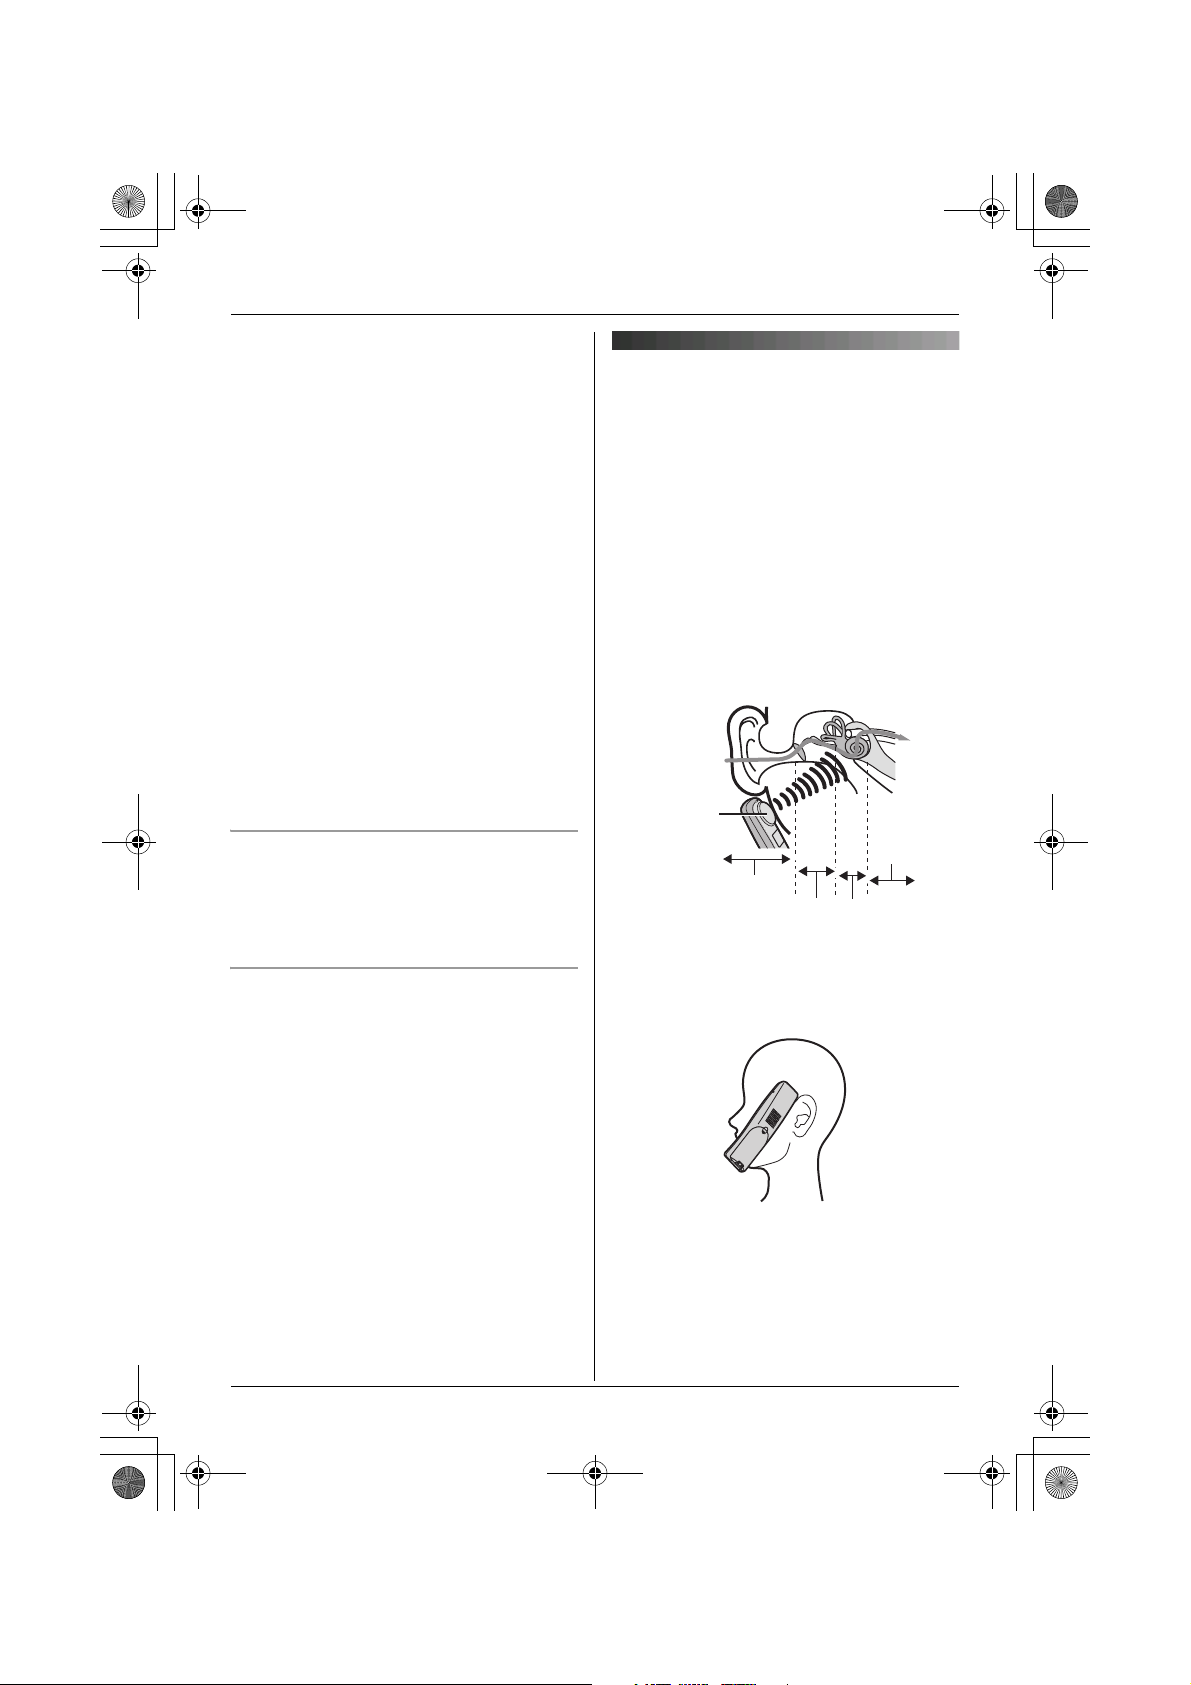
Bone conduction earpiece
(KX-TGA717 only)
The handset features a bone conduction
earpiece that uses vibrations to create
sound during your telephone conversations.
For proper operation press the bone
conduction earpiece against your face near
the ear.
Normally, sound enters the ear canal and
vibrates the eardrum. People feel the
vibration within the inner ear and
comprehend it as it is received by the
auditory nerve.
Place the bone conduction earpiece against
your face (not your ear). Try different
locations to find which location works best.
Start with the temple area.
Sound
Bone
conduction
earpiece
External ear
Middle ear
Auditory
nerve
Inner ear
Note:
L Do not place the bone conduction
earpiece on a hearing aid. Howling or
other interference may be heard.
L The effectiveness of the bone conduction
earpiece will vary by the type and degree
of hearing loss of the user.
6 Helpline Tel. No.: U.K. 08700 100 076 R.O.I. 01289 8333
Page 7

TGA715E_717E(e-e).book Page 7 Wednesday, August 2, 2006 2:46 PM
Preparation
L As sound is generated by vibration, users
with normal hearing can use the handset
by placing the bone conduction earpiece
against the ear, as an ordinary telephone.
L If the bone conduction earpiece gets dusty
or greasy, clean it with a soft, dry cloth.
Controls
Handset (KX-TGA715)
A
C
D
E
F
G
H
B
I
J
K
L
M
N
O
P
Q
R
A Speaker
B Charge contact
C Headset jack
D {j/OK} (Menu/OK)
E {k} (Phonebook)
F {C} (Talk)
G Navigator key ({^}/{V}/{>}/{<})
H {s} (Speakerphone)
I {R} (Recall)
J Charge indicator/Ringer indicator/
Message indicator
K KX-TGA715
Receiver
KX-TGA717
Bone conduction earpiece
L Display
M {R} (Redial/Pause)
N {ih} (Off/Power)
{
C/T} (Clear/Mute)
O
P Dial keypad
Q {INT} (Intercom)
R Microphone
Handset (KX-TGA717)
A
C
D
E
F
G
H
B
I
Helpline Tel. No.: U.K. 08700 100 076 R.O.I. 01289 8333 7
J
K
L
M
N
O
P
Q
R
Page 8

TGA715E_717E(e-e).book Page 8 Wednesday, August 2, 2006 2:46 PM
Preparation
Displays
Display icons
Display
icon
w Within range of a base unit
L Handset is accessing base
k Handset is on an outside
u Answering system is on.
5 Battery strength
[2] Handset number (Standby
*1 For KX-TG7120/KX-TG7160/KX-
TG7180/KX-TG8120/KX-TG9120/KXTG9140/KX-TG9150 users only
Meaning
L When flashing: Handset
is searching for base unit.
(out of range of base unit,
handset is not registered
to base unit, no power on
base unit)
unit. (intercom, paging,
changing base unit
settings, etc.)
call.
(page 19)
display setting, page 16)
L Line is being used by
another handset.
L Answering system is
being used by another
handset or the base unit.
Connections
Connect the AC adaptor to the charger and
route the cable as shown. The charger can
be mounted on the wall, if required.
Hooks
25 mm
Screws
Use only the included AC adaptor.
Note:
L The AC adaptor must remain connected
*1
at all times. (It is normal for the adaptor to
feel warm during use.)
L The AC adaptor should be connected to a
vertically oriented or floor-mounted AC
outlet. Do not connect the AC adaptor to a
ceiling-mounted AC outlet, as the weight
of the adaptor may cause it to become
disconnected.
Location
L For maximum distance and noise-free
operation, place your base unit:
– away from electrical appliances such as
TVs, radios, personal computers or
other phones.
– in a convenient, high and central
location.
(220–240 V,
50 Hz)
8 Helpline Tel. No.: U.K. 08700 100 076 R.O.I. 01289 8333
Page 9

TGA715E_717E(e-e).book Page 9 Wednesday, August 2, 2006 2:46 PM
Preparation
Battery installation/
replacement
Important:
L Use only the included rechargeable
batteries noted on page 4, 5.
L When replacing batteries, we recommend
using the Panasonic rechargeable
batteries noted on page 4, 5.
L Wipe the battery ends (S, T) with a dry
cloth.
L When installing the batteries, avoid
touching the battery ends (S, T) or the
unit contacts.
1 Press the notch on the handset cover
firmly and slide it in the direction of the
arrow.
L When replacing batteries, remove the
old batteries positive (S) end first.
2 Insert the batteries negative (T) end first.
Close the handset cover.
Battery charge
Place the handset on the charger for
about 7 hours before initial use.
When charging, the battery icon is shown as
follows.
When the batteries are fully charged, 5
remains on the display.
L The charge indicator lights up when the
handset is placed on the charger.
Charge contact
L The pictured model is KX-TGA715.
Note:
L The handset display may show “Please
Wait...” when the handset is placed on
the charger if it is not registered to a base
unit.
L It is normal for the handset to feel warm
during charging.
L If you want to use the unit immediately,
charge the batteries for at least 15
minutes.
L Clean the charge contacts of the handset,
charger with a soft, dry cloth once a
month, otherwise the batteries may not
charge properly. Clean more often if the
unit is exposed to grease, dust, or high
humidity.
Helpline Tel. No.: U.K. 08700 100 076 R.O.I. 01289 8333 9
Page 10

TGA715E_717E(e-e).book Page 10 Wednesday, August 2, 2006 2:46 PM
Preparation
Battery strength
Battery icon Battery strength
5 High
6 Medium
7 Low
When flashing: Needs
to be charged.
Panasonic Ni-MH battery performance
(included batteries)
Operation Operating time
In continuous use KX-TGA715:
12 hours max.
KX-TGA717:
10 hours max.
In continuous
standby mode
Note:
L It is normal for batteries not to reach full
capacity at the initial charge. Maximum
battery performance is reached after a few
complete cycles of charge/discharge
(use).
L Actual battery performance depends on a
combination of how often the handset is in
use and how often it is not in use
(standby).
L Battery operating time may be shortened
over time depending on usage conditions
and ambient temperature.
L Even after the handset is fully charged,
the handset can be left on the charger
without any ill effect on the batteries.
L The battery strength may not be displayed
correctly after you replace the batteries. In
this case, place the handset on the
charger and charge for at least 7 hours.
150 hours max.
Symbols used in these
operating instructions
Symbol Meaning
{j/OK} Press {j/OK}.
i Proceed to the next
“ ” Select the words in
operation.
quotations shown on the
display (e.g., “Handset
Setup”) by pressing {^}
or {V}.
10 Helpline Tel. No.: U.K. 08700 100 076 R.O.I. 01289 8333
Page 11

TGA715E_717E(e-e).book Page 11 Wednesday, August 2, 2006 2:46 PM
– Alarm function
Registering the handset to
– Index search (Handset phonebook)
– Copying the phonebook items between
your base unit
Register to:
KX-TG7100/KX-TG7120/KX-TG7160/KXTG7180/KX-TG8100/KX-TG8120/KXTG9120/KX-TG9140/KX-TG9150
Ensure that the handset is switched on. If it
is not on, press and hold {ih} for few
seconds to turn the handset on.
1 Lift the handset and press {ih} to put
the handset in standby mode.
2 Press and hold {x} on the base unit for
about 3 seconds, until the registration
tone sounds.
3 Place the handset on the base unit. The
registration tone continues to sound. With
the handset still on the base unit, wait
until a confirmation tone sounds and w
stops flashing.
Note:
L If an error tone sounds, or if w is still
flashing, register the handset manually
(page 15).
L If all registered handsets start ringing in
step 2, press {x} to stop. Start again from
step 1.
L Charge the batteries for about 7 hours
before initial use.
L The answering system is available only
when KX-TGA715/KX-TGA717 is
registered to KX-TG7120/KX-TG7160/
KX-TG7180/KX-TG8120/KX-TG9120/KXTG9140/KX-TG9150.
L KX-TGA715/KX-TGA717 does not
support the SMS features.
L For KX-TG7100 users
The following functions become available
when KX-TGA715/KX-TGA717 is
registered to your base unit. These
functions can only be operated using KXTGA715/KX-TGA717.
L For KX-TG9140/KX-TGA914 users
KX-TGA715/KX-TGA717 does not
support camera monitoring features.
L For KX-TG9150/KX-TGA915 users
KX-TGA715/KX-TGA717 does not
support internet call features.
Preparation
2 handsets (KX-TGA715 and KXTGA717).
Helpline Tel. No.: U.K. 08700 100 076 R.O.I. 01289 8333 11
Page 12

TGA715E_717E(e-e).book Page 12 Wednesday, August 2, 2006 2:46 PM
Accessibility features
Accessibility features
Voice announce
The voice announce features allow the
handset to announce displayed phone
number. (Caller ID announce/List
announce)
Caller ID announce
When you receive an outside call which has
phone number information, the handset
announces the displayed phone number
from the handset speaker.
L To announce outside caller’s phone
number, you must first subscribe to Caller
ID service. Consult your service provider/
telephone company for details.
L When receive a call while on the phone,
the 2nd caller’s phone number will not be
announced even if you subscribe to both
Caller ID and Call Waiting Caller ID
services.
L The announcement is heard at the ringer
volume (page 16).
L This feature can be turned on or off (page
12).
Setting volume for voice
announce
You can set the volume for list announce.
The volume for caller ID announce is set
when setting the ringer volume on (page
16).
1 {j/OK}
2 “Handset Setup” i {>}
3 “Other Options” i {>}
4 “Voice Announce” i {>}
5 “Volume” i {>}
6 Select the desired volume.
7 {>} i {ih}
Note:
L The caller ID announce is heard at the
handset ringer volume (page 16). When
the volume for voice announce is set to
“Off”, the handset does not announce the
phone number regardless of the ringer
volume.
L To turn the voice announce feature off,
select the volume “Off”.
List announce
The handset announces phone numbers
from the handset speaker while you are
viewing the redial list, caller list, and
phonebook.
L If the displayed phone number has a P
(pause), the handset inserts a 0.5 second
pause for each P and if the number has
the other symbols (for example, ;, #,
etc.), the handset skips the symbols and
announces the next number.
Selecting language for voice
announce
{j/OK}
1
2 “Handset Setup” i {>}
3 “Other Options” i {>}
4 “Voice Announce” i {>}
5 “Select Language” i {>}
6 Select the desired language. i {>} i
{ih}
Note:
L To change the display language, see
page 16.
12 Helpline Tel. No.: U.K. 08700 100 076 R.O.I. 01289 8333
Page 13

TGA715E_717E(e-e).book Page 13 Wednesday, August 2, 2006 2:46 PM
Basic Operations
Basic Operations
Making/answering calls
Feature Operation
Power on Press {ih} for about 1 second.
Power off Press {ih} for about 2 seconds.
Making calls Dial the phone number. i {C}/{s}
Answering calls {C}
Hanging up {ih}
Receiver/speaker volume Press {^} or {V} while on a call.
Making a call with redial list {R} i Press {^} or {V} to select the desired
number. i {C}/{s}
Erasing numbers in the redial
list
Muting your voice While on a call, press
Call waiting: switching between
callers
{R} i Press {^} or {V} to select the desired
number. i {>} i “Erase” i {>} i “Yes” i
{>} i {ih}
{
C/T}. To return to the
{
conversation, press
If a second call is received while in a conversation, a
beep tone will be heard. Press
between callers. Consult your service provider/
telephone company for details.
C/T} again.
{R}
button to switch
Handset phonebook
Feature Operation
Adding entries (up to 50 names
and phone numbers)
Making calls {k} i Press {^} or {V} to display the desired entry.
Searching by first character
(index search)
Helpline Tel. No.: U.K. 08700 100 076 R.O.I. 01289 8333 13
{k} i {j/OK} i “New Entry” i {>} i
Enter the party’s name (16 characters max.). i
{j/OK} i Enter the party’s phone number (24 digits
max.). i {j/OK} i “Save” i {>} i {ih}
L To enter a name, see page 21.
i {C}/{s}
{k} i Press the dial key ({0} to {9}) which contains
the character you are searching for (page 21). i
Press {^} or {V} to display the desired entry.
L To change the character entry mode while
searching:
{R} i Select the character entry mode. i {>}
Page 14

TGA715E_717E(e-e).book Page 14 Wednesday, August 2, 2006 2:46 PM
Basic Operations
Feature Operation
Editing entries {k} i Press {^} or {V} to display the desired entry.
i {j/OK} i “Edit” i {>} i Edit the name.
i {j/OK} i Edit the phone number. i {j/
OK} i “Save” i {>} i {ih}
Erasing an entry {k} i Press {^} or {V} to display the desired entry.
i {j/OK} i “Erase” i {>} i “Yes” i {>}
i {ih}
Erasing all entries {k} i {j/OK} i “Erase All” i {>} i
“Yes” i {>} i “Yes” i {>} i {ih}
Copying one entry {k} i Press {^} or {V} to display the desired entry.
i {j/OK} i “Copy” i {>} i Enter the
handset number you wish to send the handset
phonebook entry to. i Press {ih} when
“Completed” is displayed.
Copying all entries {k} i {j/OK} i “Copy All” i {>} i Enter
the handset number you wish to send the handset
phonebook entry to. i Press {ih} when
“Completed” is displayed.
Chain dial While on a call, press {k}. i Press {^} or {V} to
select the desired entry. i Press {>} to dial the
number.
Caller list
Phone numbers of the last 50 callers will be logged in the caller list.
Feature Operation
Viewing the caller list and
calling back
Editing a caller’s phone number
before calling back
Storing caller information into
the handset phonebook
Erasing an entry {j/OK} i “Caller List” i {>} i Press {^}
14 Helpline Tel. No.: U.K. 08700 100 076 R.O.I. 01289 8333
{j/OK} i “Caller List” i {>} i Press {V}
to search from the most recent call, or press {^} to
search from the oldest call. i {C}/{s}
{j/OK} i “Caller List” i {>} i Press {^}
or {V} to display the desired entry. i {j/OK} i
“Edit and Call” i {>} i Edit the number. i
{C}/{s}
{j/OK} i “Caller List” i {>} i Press {^}
or {V} to display the desired entry. i {j/OK} i
“Add phonebook” i {>} i Continue from “Enter
the party’s name” on page 13 (Adding entries).
or {V} to display the desired entry. i {j/OK} i
“Erase” i {>} i “Yes” i {>} i {ih}
Page 15

TGA715E_717E(e-e).book Page 15 Wednesday, August 2, 2006 2:46 PM
Basic Operations
Feature Operation
Erasing all entries {j/OK} i “Caller List” i {>} i {j/OK}
“Erase All” i {>} i “Yes” i {>} i {ih}
Multi-unit operation
Feature Operation
Intercom: calling Example: When you call handset 1
{INT} i Press {1} (desired handset number).
L When finished talking, press {ih}.
Intercom: answering Press {C}/{s}.
L When finished talking, press {ih}.
Transferring calls between
handsets
Conference calls
*1
(2 people can have a
conference call with an outside
party)
Manual registration Handset:
Cancelling a handset {j/OK} i “Base Unit Setup” i {>} i Enter
*1 KX-TG7100 does not support conference call feature.
*2 After pressing {x}, the rest of this procedure must be completed within 1 minute.
*3 If you forget the base unit PIN, consult your nearest Panasonic service centre.
Example: When you transfer a call to handset 1
During an outside call, press {INT}. i Press {1}
(desired handset number). i When the handset 1
answered, press {ih} to complete transfer.
Example: When you make a conference call with
handset 1
During an outside call, press {INT}. i Press {1}
(desired handset number). i When the handset 1
answered, press {3} to establish a conference call.
{j/OK} i “Handset Setup” i {>} i
“Registration” i {>} i “Register H.set”
i {>}
Base unit:
Press and hold {x} on the base unit for about 3
seconds, until the registration tone sounds.
*2
Handset:
Wait until “Enter Base PIN” is displayed, then enter
the base unit PIN (default: “0000”).
*3
i {j/OK}
L When the handset has been registered successfully,
w will stop flashing.
“335”. i “Cancel Handset” i {>} i Select the
handset(s) you want to cancel, by pressing the desired
handset number. i {j/OK} i “Yes” i {>} i
{ih}
Helpline Tel. No.: U.K. 08700 100 076 R.O.I. 01289 8333 15
Page 16

TGA715E_717E(e-e).book Page 16 Wednesday, August 2, 2006 2:46 PM
Handset/Base Unit Settings
Handset/Base Unit Settings
Handset/base unit settings
When customising the handset/base unit, the current item or setting is indicated by >.
1 {j/OK}
2 Press {^} or {V} to select “Handset Setup” or “Base Unit Setup”. i {>}
3 Press {^} or {V} to select the desired item in the handset/base unit settings menu. i {>}
4 Press {^} or {V} to select the desired item in the sub-menu. i {>}
L In some cases, you may need to select from a second sub-menu. i {>}
5 Press {^} or {V} to select the desired setting then press {>} or follow the instruction in the
rightmost column of the chart.
L To exit the operation, press {ih}.
Handset settings
Handset settings
Sub-menu Sub-menu 2 Feature (default setting)
menu
Time Settings Set Date & Time — Set the date and time
Alarm — Set the alarm: page 18
Ringer Setup Ringer Volume — Handset ringer volume
(Maximum)
Ext. Ringtone
(External ringtone)
Int. Ringtone
(Intercom ringtone)
— Ringtones for outside calls
(“Ringtone 1”)
— Ringtones for intercom
calls
(“Ringtone 3”)
Display Setup Standby Display — Standby mode display
(“Off”)
*1
*2*3
*3
*4
Select Language — Display language*5
(“English”)
Contrast — Display contrast (Level 3)
Registration Register H.set
(Register handset)
Other Options New Msg. Alert
*6
— Manual registration:
page 15
— New message alert (“Off”)
(New message alert)
Keytones — Keytones on/off (“On”)
Auto Talk — Auto talk on/off (“Off”)
Voice Announce Volume Voice announce volume
(“Middle”): page 12
Select
Language
Voice announce language
(“English”): page 12
*7
16 Helpline Tel. No.: U.K. 08700 100 076 R.O.I. 01289 8333
Page 17

TGA715E_717E(e-e).book Page 17 Wednesday, August 2, 2006 2:46 PM
Handset/Base Unit Settings
*1 When the ringer is turned off, the handset will ring:
– at the minimum level for alarm
– at the minimum level for intercom calls
– at the maximum level for paging
*2 If you select one of the melody ringtones, the ringtone will continue to sound for several
seconds if the caller hangs up before you answer. You may hear a dial tone or no one on
the line when you answer a call.
*3 The preset melodies in this product are used with permission of © 2006 Copyrights Vision
Inc.
*4 If “Off” is selected, only current date and time are displayed.
If “Handset Number” is selected and the current handset number is 2, [2] is displayed.
*5 If you select a language you cannot read, press {ih}, press {j/OK}, press {^} 3 times,
press {>}, press {V} 2 times, press {>}, press {V}, press {>}, select the desired
language, press {>}, then press {ih}.
*6 For KX-TG7120/KX-TG7160/KX-TG7180/KX-TG8120/KX-TG9120/KX-TG9140/KX-
TG9150 users only
This feature alerts you when new messages have been recorded (page 19).
The message indicator on the handset flashes until you have listened to all new
messages.
While message alert is on, battery operating time is shortened (page 10).
*7 Auto talk feature allows you to answer calls simply by lifting the handset off the base unit
or charger. You do not need to press {C}.
Helpline Tel. No.: U.K. 08700 100 076 R.O.I. 01289 8333 17
Page 18

TGA715E_717E(e-e).book Page 18 Wednesday, August 2, 2006 2:46 PM
Handset/Base Unit Settings
Base unit settings
Base unit
settings menu
Ringer Volume — Base unit ringer volume (Medium)
Call Options Recall/Flash Change the recall time (“100 msec.”).
Other Options Base Unit PIN Change base unit PIN (“0000”).
*1 Change the recall time, if necessary, depending on the requirements of your service
provider/telephone company or PBX.
*2 If you change the PIN, please make note of your new PIN. The unit will not reveal the PIN
to you. If you forget your PIN, consult your nearest Panasonic service centre.
Sub-menu Feature (default setting)
*1
*2
– Enter the current 4-digit base unit PIN.
i Enter the new 4-digit base unit PIN.
i {j/OK}
Repeater Mode (“Off”)
Time settings
Alarm
An alarm will sound for 3 minutes at the set time once or daily. Set the date and time
beforehand (page 16).
1 {j/OK} i “Handset Setup” i {>}
2 “Time Settings” i {>}
3 “Alarm” i Press {>} 2 times.
4 Select an alarm mode. i {>}
Off Turns alarm off. Press {>} again, then press {ih} to finish.
Once The alarm sounds once at the set time. Enter the desired day and month.
Daily An alarm sounds daily at the set time.
5 Enter the desired hour and minute. i {j/OK}
6 Select the desired ringtone. i {>}
7 “Save” i {>} i {ih}
Note:
L To stop the alarm, press any dial key.
L When in talk or intercom mode, the alarm will not sound until the call has ended.
L If you select “Once”, the setting will change to “Off” after the alarm sounds.
18 Helpline Tel. No.: U.K. 08700 100 076 R.O.I. 01289 8333
Page 19

TGA715E_717E(e-e).book Page 19 Wednesday, August 2, 2006 2:46 PM
Answering System Features
Answering System Features
Answering system
Applicable for:
KX-TG7120/KX-TG7160/KX-TG7180/KX-TG8120/KX-TG9120/KX-TG9140/KX-TG9150
You can operate your base unit answering system using this handset.
1 {j/OK}
2 Press {^} or {V} to select “Answer System”. i {>}
3 Press {^} or {V} to select the desired item in the answering system menu. i {>}
L In some cases, you may need to select from sub-menu. i {>}
L To exit the operation, press {ih}.
Answering
system menu
Play New Msg.
(Play new
messages)
Play All Msg.
(Play all
messages)
Record
Greeting
Answer On — Turn answering system on
Answer Off — Turn answering system off
Play Greeting — Play greeting message
Erase Message Erase All Erase all messages
Settings Remote Code Enter a 3-digit remote code
Sub-menu Feature (default setting)
— Play new messages
– To repeat the message, press {<} or {1}.
– To skip the message, press {>} or {2}.
– To stop the message, press {9}.
– To erase the message, press {*}{4}.
— Play all messages
– To repeat the message, press {<} or {1}.
– To skip the message, press {>} or {2}.
– To stop the message, press {9}.
– To erase the message, press {*}{4}.
— Record greeting message
– To stop recording, press {j/OK}.
– To stop the message, press {9}.
Erase Greeting Erase greeting message
L To turn off remote operation, press {*}.
Number of Rings Set the number of times the phone rings
before the unit answers a call (“4 rings”)
Recording Time Set the maximum recording time allotted to
each caller (“3 Minutes”)
Call Screening Turn call screening on/off (“On”)
Helpline Tel. No.: U.K. 08700 100 076 R.O.I. 01289 8333 19
Page 20

TGA715E_717E(e-e).book Page 20 Wednesday, August 2, 2006 2:46 PM
Useful Information
Useful Information
Using the belt clip
Attaching the belt clip
Removing the belt clip
Using the shoulder rest
attachment
The shoulder rest attachment allows handsfree phone conversations.
Attaching the shoulder rest attachment
Attach the included belt clip to the handset
beforehand (page 20). Slide the shoulder
rest attachment to the belt clip until it clicks.
Note:
L If the charger is mounted on a wall,
remove the shoulder rest attachment
before charging the handset.
Removing the shoulder rest attachment
L The pictured model is KX-TGA715.
20 Helpline Tel. No.: U.K. 08700 100 076 R.O.I. 01289 8333
Page 21

TGA715E_717E(e-e).book Page 21 Wednesday, August 2, 2006 2:46 PM
Useful Information
Character entry
The dial keys are used to enter characters and numbers. Each dial key has multiple
characters assigned to it. The available character entry modes are Alphabet (ABC), Numeric
(0-9), Greek (F), Extended 1 (G), Extended 2 (H), and Cyrillic (I). When in these
entry modes except Numeric, you can select which character is entered by pressing a dial
key repeatedly.
– Press {<} or {>} to move the cursor.
– Press dial keys to enter characters and numbers.
– Press {C/T} to erase the character or number highlighted by the cursor.
Press and hold {C/T} to erase all characters or numbers.
– Press {*} to switch between uppercase and lowercase.
– To enter another character located on the same dial key, press {>} to move the cursor to
the next space, then press the appropriate dial key.
Character entry modes
Several character entry modes can be used when entering text. The characters that can be
entered depend on the entry mode.
Characters available in each character entry mode
When the unit displays the character entry screen:
{k} i Select a character entry mode. i {>}
Alphabet character table (ABC)
Numeric entry table (0-9)
Greek character table (M)
Helpline Tel. No.: U.K. 08700 100 076 R.O.I. 01289 8333 21
Page 22

TGA715E_717E(e-e).book Page 22 Wednesday, August 2, 2006 2:46 PM
Useful Information
Extended 1 character table (N)
L The following are used for both uppercase and lowercase:
Extended 2 character table (O)
L The following are used for both uppercase and lowercase:
Cyrillic character table (P)
Troubleshooting for accessibility features
For other troubleshooting information, please refer to your base unit operating instructions.
Problem Cause & solution
The handset does not
announce the displayed
phone number.
22 Helpline Tel. No.: U.K. 08700 100 076 R.O.I. 01289 8333
L The handset ringer volume is turned off. Adjust it (page 16).
L The voice announce feature is turned off. Turn it on (page 12).
L While you are on an outside call, the handset does not
announce phonebook information when searching the
phonebook.
L For KX-TG9120/KX-TG9140/KX-TG9150 users only
If audible call is set for the displayed phone number, the
handset will not announce the phone number. Only the
selected ring tone is heard.
Page 23

TGA715E_717E(e-e).book Page 23 Wednesday, August 2, 2006 2:46 PM
Note:
Specifications
■ Standard:
DECT (Digital Enhanced Cordless
Telecommunications),
GAP (Generic Access Profile)
■ Number of channels:
120 Duplex Channels
■ Frequency range:
1.88 GHz to 1.90 GHz
■ Duplex procedure:
TDMA (Time Division Multiple Access)
■ Channel spacing:
1,728 kHz
■ Bit rate:
1,152 kbit/s
■ Modulation:
GFSK (Gaussian Frequency Shift Keying)
■ RF transmission power:
Approx. 250 mW
■ Voice coding:
ADPCM 32 kbit/s
■ Power source:
220–240 V, 50 Hz
■ Power consumption, Charger:
Standby: Approx. 0.8 W
Maximum: Approx. 5.0 W
■ Operating conditions:
5 °C–40 °C, 20 %–80 % relative air humidity
(dry)
■ Dimensions:
Charger: Approx. 61 mm × 87 mm × 95 mm
Handset (KX-TGA715): Approx. 179 mm ×
48 mm × 34 mm
Handset (KX-TGA717): Approx. 179 mm ×
48 mm × 38 mm
■ Mass (weight):
Charger: Approx. 90 g
Handset (KX-TGA715): Approx. 154 g
Handset (KX-TGA717): Approx. 164 g
L Specifications are subject to change.
L The illustrations used in these operating
instructions may differ slightly from the
actual product.
Useful Information
Helpline Tel. No.: U.K. 08700 100 076 R.O.I. 01289 8333 23
Page 24

TGA715E_717E(e-e).book Page 24 Wednesday, August 2, 2006 2:46 PM
Sales and support information
Customer Care Centre
For customers within the UK: 08700 100 076
L
L
For customers within the Republic of Ireland: 01289 8333
L
Visit our website for product information: www.panasonic.co.uk
L
E-mail: customer.care@panasonic.co.uk
Direct Sales at Panasonic UK
Order accessory and consumable items for your product with ease and confidence by
L
phoning our Customer Care Centre Monday - Thursday 9:00am - 5:30pm, Friday 9:30am
- 5:30pm (Excluding public holidays).
L
Or go on line through our Internet Accessory ordering application at www.panasonic.co.uk
L
Most major credit and debit cards accepted.
L
All enquiries transactions and distribution facilities are provided directly by Panasonic UK Ltd.
L
It couldn’t be simpler!
L
Also available through our Internet is direct shopping for a wide range of finished products,
take a browse on our website for further details.
Customer Care Helpline Tel. No.: U.K. 08700 100 076 / R.O.I. 01289 8333
1999/5/EC
Sales Department:
Panasonic Business Systems U.K.
Panasonic House, Willoughby Road, Bracknell, Berkshire, RG12 8FP
Panasonic Communications Zhuhai Co., Ltd.
3 Ping Xi 8 Lu, Nanping Keji Gongye Yuan, Zhuhai, Guangdong, China 519060
Copyright:
This material is copyrighted by Panasonic Communications Co., Ltd., and may be reproduced
for internal use only. All other reproduction, in whole or in part, is prohibited without the written
consent of Panasonic Communications Co., Ltd.
© 2006 Panasonic Communications Co., Ltd. All Rights Reserved.
PQQX15515ZA DC0806PM0
 Loading...