

Page 1
TGA715FX_717FX(e-e).book Page 1 Wednesday, February 28, 2007 2:47 PM
Operating Instructions
Additional Digital Cordless Handset
Model No. KX-TGA715FX
KX-TGA715
KX-TGA717FX
Contents/İçindekiler/Spis treści Page/Sayfa/Strona
English instructions 1 - 24
Türkçe talimatlar (1) - (24)
Instrukcje po polsku <1> - <28>
This unit is an additional handset for use with the following Panasonic
Digital Cordless Phones:
KX-TG7100/KX-TG7120/KX-TG7150/KX-TG7170
KX-TG8100/KX-TG8120
KX-TG9120
You must register this unit to your base unit before it can be used.
Charge the batteries for about 7 hours before initial use.
Please read these operating instructions before using the unit and save them for future
reference.
Page 2
TGA715FX_717FX(e-e).book Page 2 Wednesday, February 28, 2007 2:47 PM
Table of Contents
Preparation
Introduction .............................................. 3
Accessory information............................... 4
Important information ............................... 5
Bone conduction earpiece (KX-TGA717
only) ......................................................... 6
Controls .................................................... 7
Displays .................................................... 8
Connections ............................................. 8
Battery installation/replacement ............... 9
Battery charge .......................................... 9
Symbols used in these operating
instructions ............................................. 10
Display language .................................... 10
Registering the handset to your base
unit ......................................................... 11
Accessibility features
Talking number display (Voice
announce) .............................................. 12
Basic Operations
Making/answering calls .......................... 13
Handset phonebook ............................... 13
Caller list ................................................ 14
Multi-unit operation................................. 15
Handset/Base Unit Settings
Handset/base unit settings ..................... 16
Time settings........................................... 18
Answering System Features
Answering system .................................. 19
Useful Information
Using the belt clip ................................... 20
Using the shoulder rest attachment ....... 20
Character entry ....................................... 21
Troubleshooting for accessibility
features .................................................. 22
Specifications ......................................... 23
2
Page 3
TGA715FX_717FX(e-e).book Page 3 Wednesday, February 28, 2007 2:47 PM
Preparation
Preparation
Introduction
Thank you for purchasing a new Panasonic digital cordless phone.
Declaration of Conformity:
L Panasonic Communications Co., Ltd. declares that this equipment is in compliance with the
essential requirements and other relevant provisions of Radio & Telecommunications
Terminal Equipment (R&TTE) Directive 1999/5/EC.
Declarations of Conformity for the relevant Panasonic products described in this manual
are available for download by visiting:
http://www.doc.panasonic.de
Contact:
Panasonic Services Europe
a Division of Panasonic Marketing Europe GmbH
Panasonic Testing Centre
Winsbergring 15, 22525 Hamburg, Germany
Note:
L In the event of problems, you should contact your equipment supplier in the first instance.
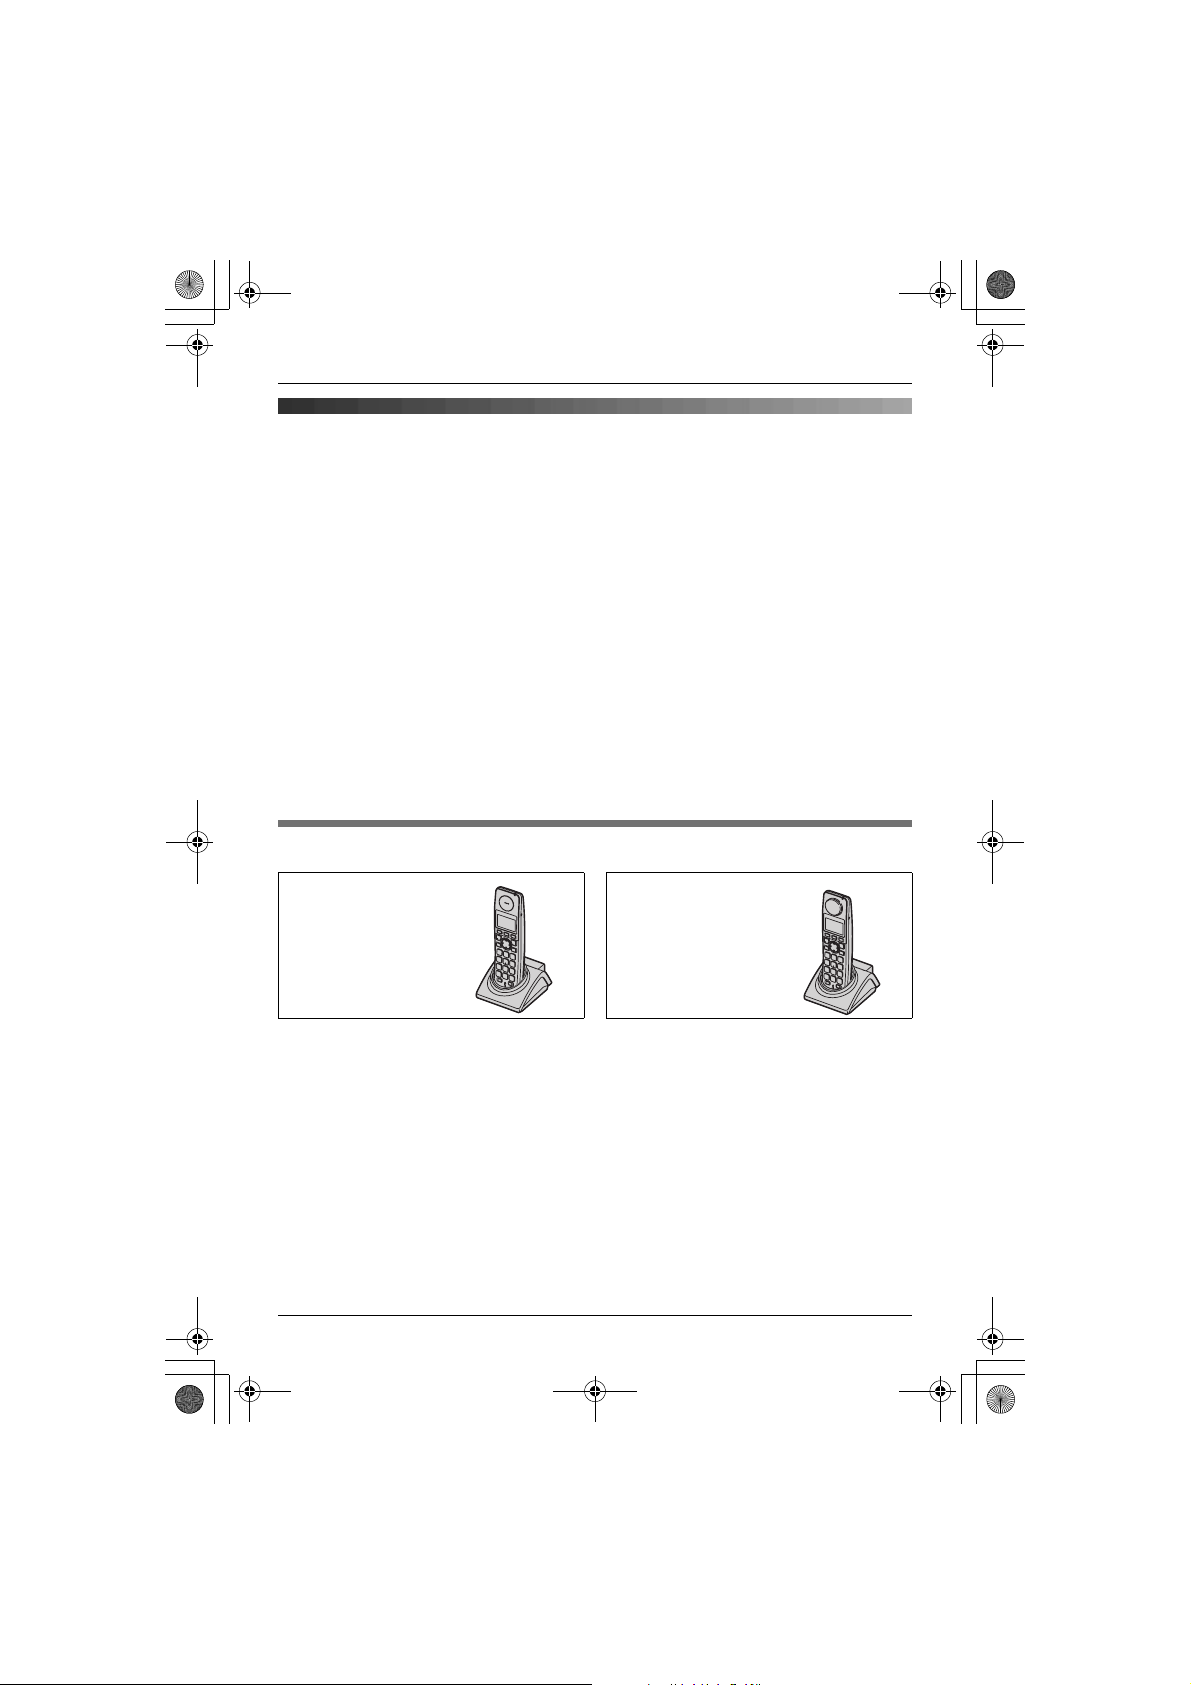
Your phone
KX-TGA715
(Big button type
handset)
KX-TGA717
(Bone conduction
type handset)
3
Page 4
TGA715FX_717FX(e-e).book Page 4 Wednesday, February 28, 2007 2:47 PM
Preparation
Accessory information
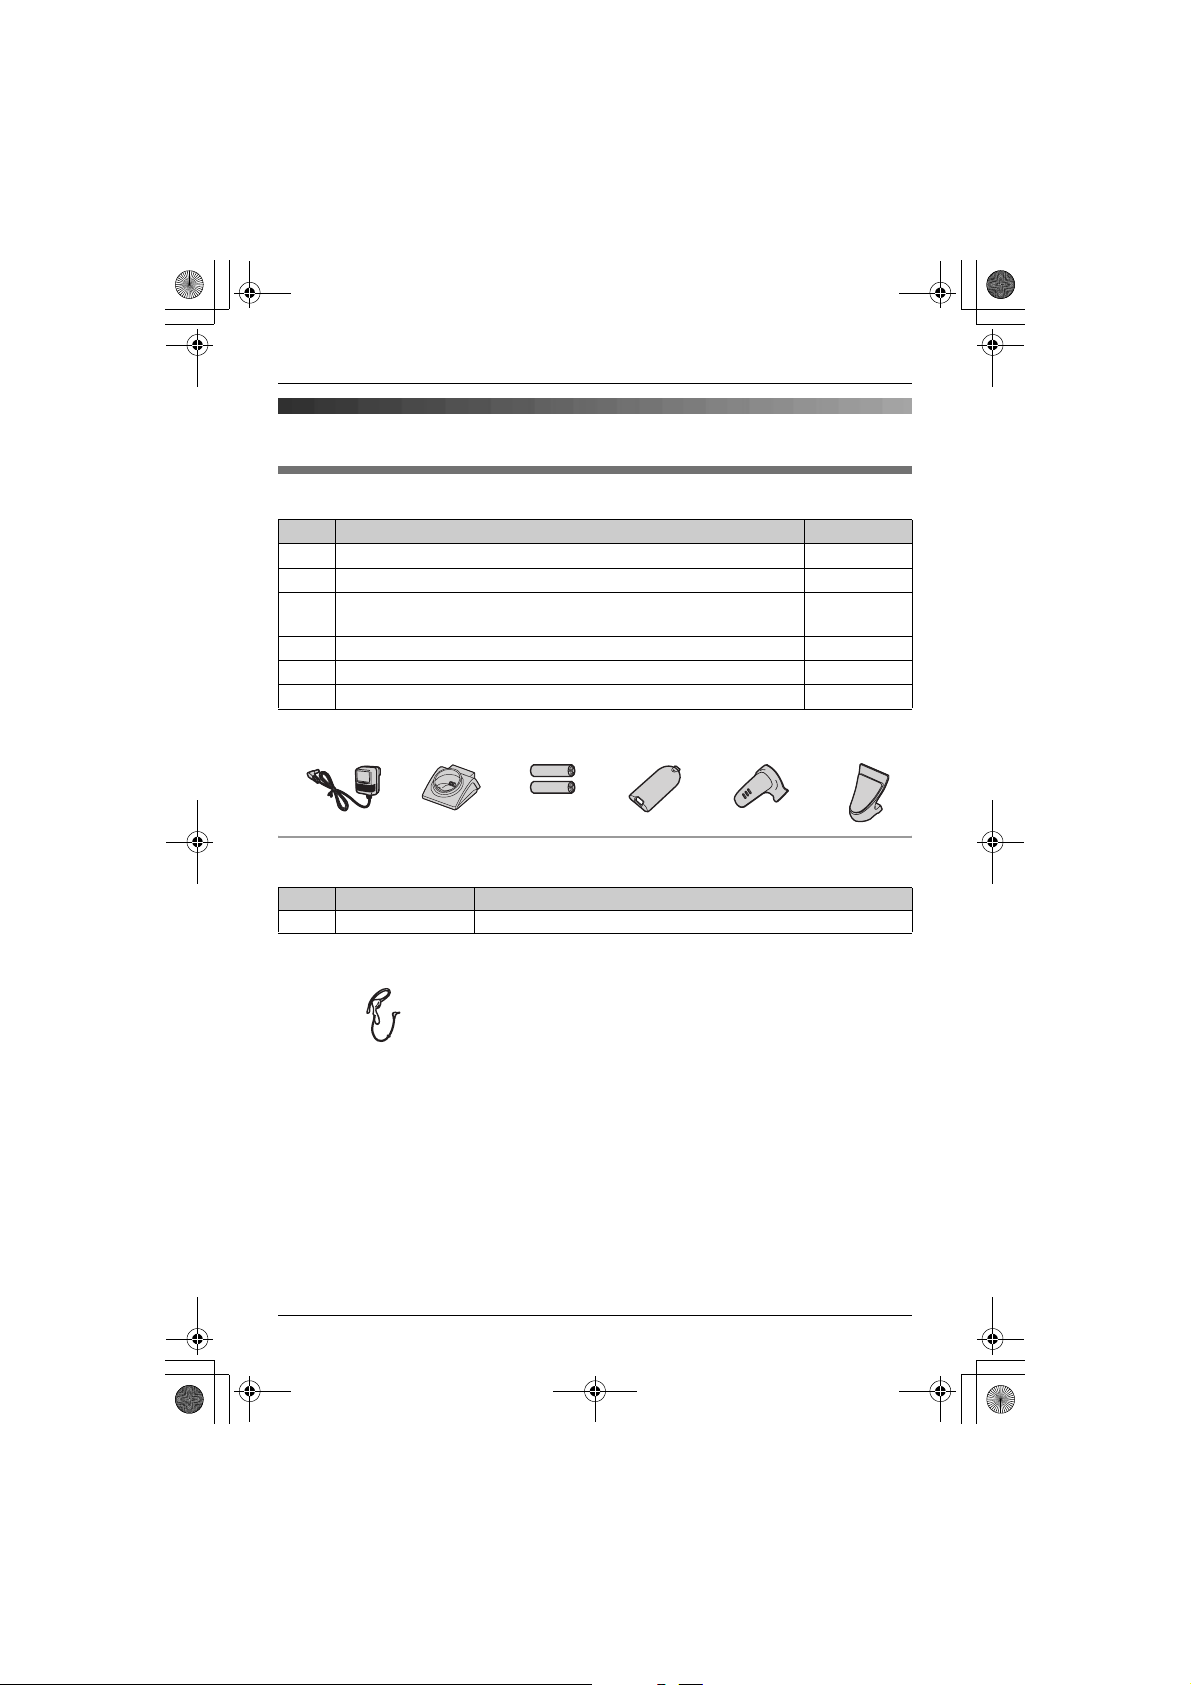
Included accessories
No. Accessory items Quantity
1 AC adaptor (Part No. PQLV209CE) 1
2 Charger (Part No. PQLV30045) 1
3 Rechargeable batteries AAA (R03) size
(Part No. HHR-55AAAB or HHR-4EPT)
4 Handset cover
5 Belt clip 1
6 Shoulder rest 1
*1 The handset cover comes attached to the handset.
123456
Additional/replacement accessories
Please contact your nearest Panasonic dealer for sales information.
No. Model No. Description
1 KX-TCA94EX Headset
1
*1
2
1
Note:
L When replacing the batteries, use only 2 rechargeable AAA (R03) size nickel metal hydride
(Ni-MH) batteries of capacity up to 750 mAh. We recommend using Panasonic
rechargeable batteries (Model No. P03P).
L We cannot be responsible for any damage to the unit or degradation of performance which
may occur from using non-Panasonic rechargeable batteries.
4
Page 5
TGA715FX_717FX(e-e).book Page 5 Wednesday, February 28, 2007 2:47 PM
can cause fire or electric shock. Confirm
Important information
General
L Use only the AC adaptor included with this
product, noted on page 4.
L Do not connect the AC adaptor to any AC
outlet other than a standard 220–240 V
AC outlet.
L This product is unable to make calls when:
– the portable handset battery(ies) need
recharging or have failed.
– there is a power failure.
L Do not open the charger or handset other
than to replace the battery(ies).
L This product should not be used near
emergency/intensive care medical
equipment and should not be used by
people with pacemakers.
L Care should be taken that objects do not
fall onto, and liquids are not spilled into,
the unit. Do not subject this product to
excessive smoke, dust, mechanical
vibration or shock.
Environment
L Do not use this product near water.
L This product should be kept away from
heat sources such as radiators, cookers,
etc. It should also not be placed in rooms
where the temperature is less than 5 °C or
greater than 40 °C.
L The AC adaptor is used as the main
disconnect device. Ensure that the AC
outlet is installed near the product and is
easily accessible.
Warning:
L To prevent the risk of electrical shock, do
not expose this product to rain or any
other type of moisture.
L Unplug this product from power outlets if it
emits smoke, an abnormal smell, or
makes unusual noise. These conditions
that smoke has stopped emitting and
contact an authorised service centre.
L Do not spill liquids (detergents, cleansers,
etc.) onto the telephone line cord plug, or
allow it to become wet at all. This may
cause a fire. If the telephone line cord plug
becomes wet, immediately pull it from the
telephone wall jack, and do not use.
Battery caution
L We recommend using the battery(ies)
noted on page 4. Use only rechargeable
battery(ies).
L Do not mix old and new batteries.
L Do not dispose of the battery(ies) in a fire,
as they may explode. Check with local
waste management codes for special
disposal instructions.
L Do not open or mutilate the battery(ies).
Released electrolyte from the battery(ies)
is corrosive and may cause burns or injury
to the eyes or skin. The electrolyte may be
toxic if swallowed.
L Exercise care when handling the
battery(ies). Do not allow conductive
materials such as rings, bracelets or keys
to touch the battery(ies), otherwise a short
circuit may cause the battery(ies) and/or
the conductive material to overheat and
cause burns.
L Charge the battery(ies) in accordance
with the information provided in these
operating instructions.
L Only use the included base unit (or
charger) to charge the battery(ies). Do not
tamper with the base unit (or charger).
Failure to follow these instructions may
cause the battery(ies) to swell or explode.
Preparation
5
Page 6
TGA715FX_717FX(e-e).book Page 6 Wednesday, February 28, 2007 2:47 PM
Preparation
Information on Disposal for Users of
Waste Electrical & Electronic Equipment
(private households)
This symbol on the products and/or
accompanying documents means that used
electrical and electronic products should not
be mixed with general household waste. For
proper treatment, recovery and recycling,
please take these products to designated
collection points, where they will be
accepted on a free of charge basis.
Alternatively, in some countries you may be
able to return your products to your local
retailer upon the purchase of an equivalent
new product.
Disposing of this product correctly will help
to save valuable resources and prevent any
potential negative effects on human health
and the environment which could otherwise
arise from inappropriate waste handling.
Please contact your local authority for
further details of your nearest designated
collection point.
Penalties may be applicable for incorrect
disposal of this waste, in accordance with
national legislation.
ask for the correct method of disposal.
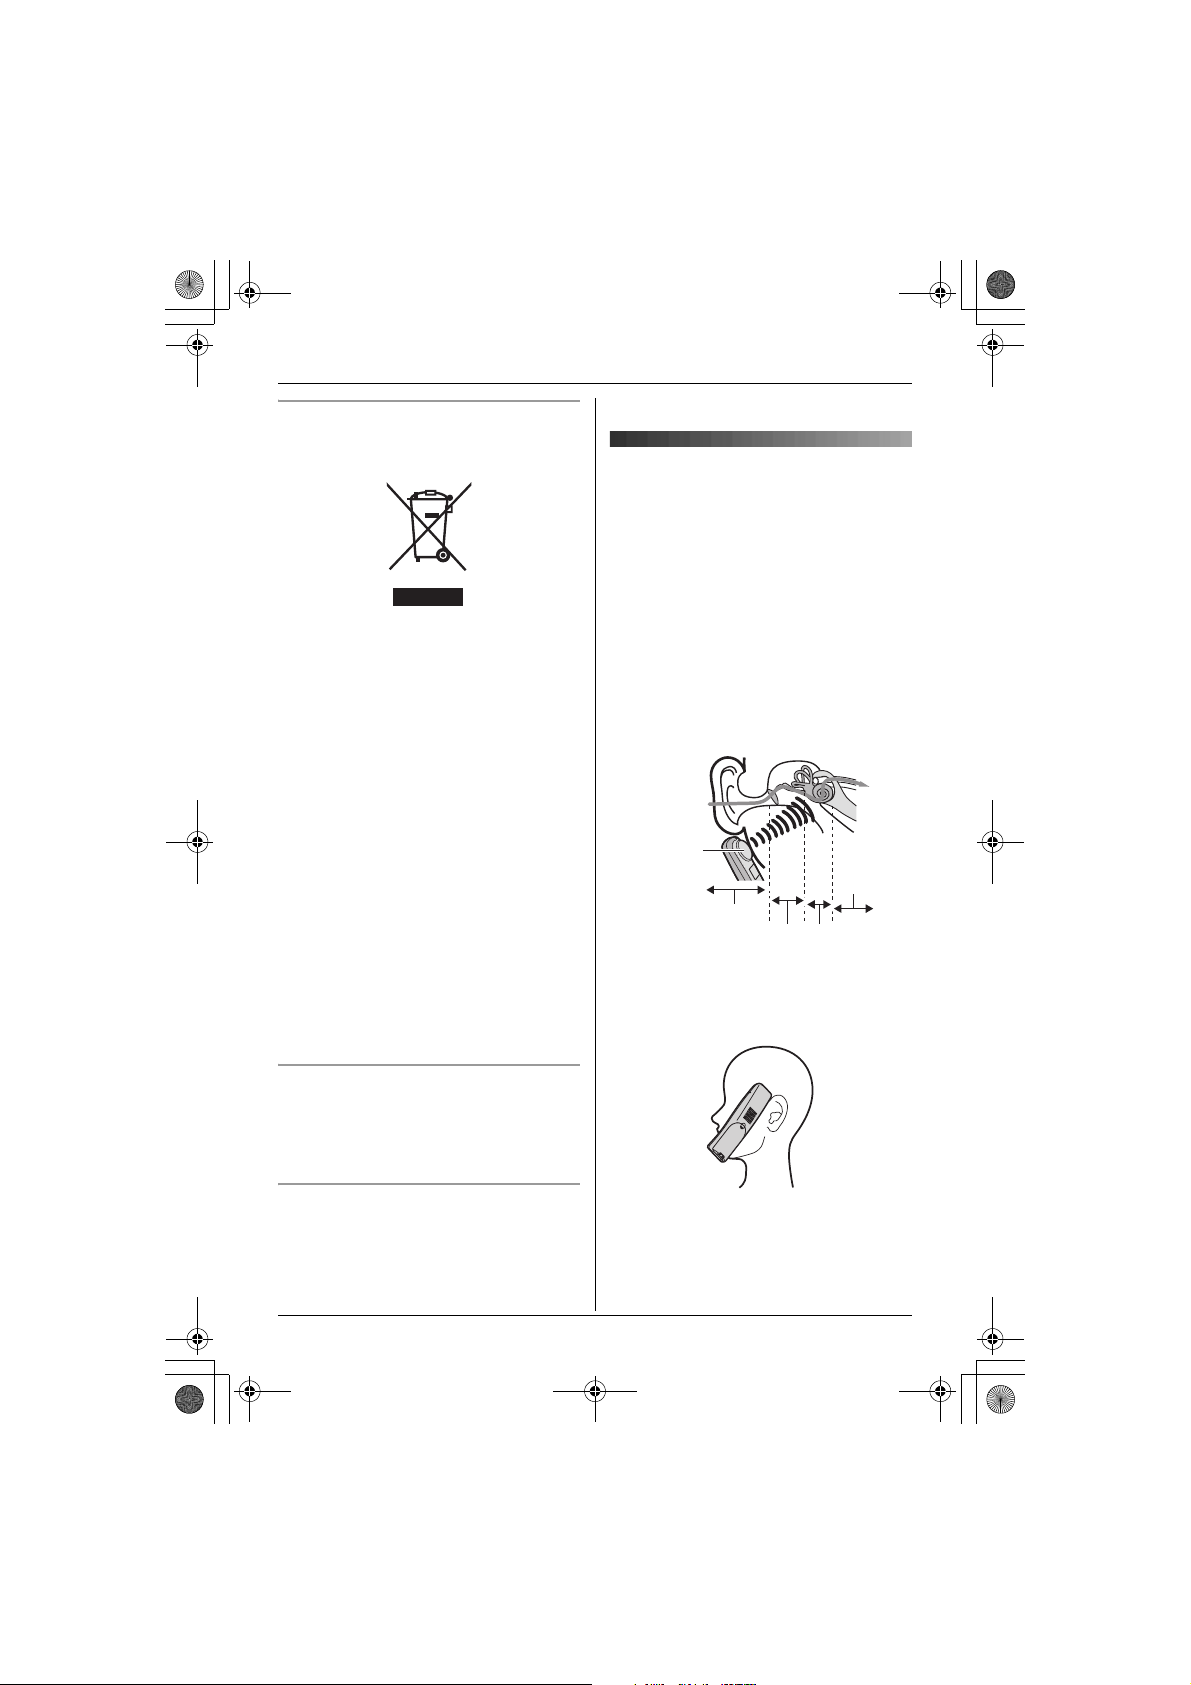
Bone conduction earpiece
(KX-TGA717 only)
The handset features a bone conduction
earpiece that uses vibrations to create
sound during your telephone conversations.
For proper operation press the bone
conduction earpiece against your face near
the ear.
Normally, sound enters the ear canal and
vibrates the eardrum. People feel the
vibration within the inner ear and
comprehend it as it is received by the
auditory nerve.
Sound
Bone
conduction
earpiece
External ear
Middle ear
Place the bone conduction earpiece against
your face (not your ear). Try different
locations to find which location works best.
Start with the temple area.
Auditory
nerve
Inner ear
For business users in the European
Union
If you wish to discard electrical and
electronic equipment, please contact your
dealer or supplier for further information.
Information on Disposal in other
Countries outside the European Union
This symbol is only valid in the European
Union.
If you wish to discard this product, please
contact your local authorities or dealer and
6
Note:
L Do not place the bone conduction
earpiece on a hearing aid. Howling or
other interference may be heard.
L The effectiveness of the bone conduction
Page 7
TGA715FX_717FX(e-e).book Page 7 Wednesday, February 28, 2007 2:47 PM
Preparation
earpiece will vary by the type and degree
of hearing loss of the user.
L As sound is generated by vibration, users
with normal hearing can use the handset
by placing the bone conduction earpiece
against the ear, as an ordinary telephone.
L If the bone conduction earpiece gets dusty
or greasy, clean it with a soft, dry cloth.
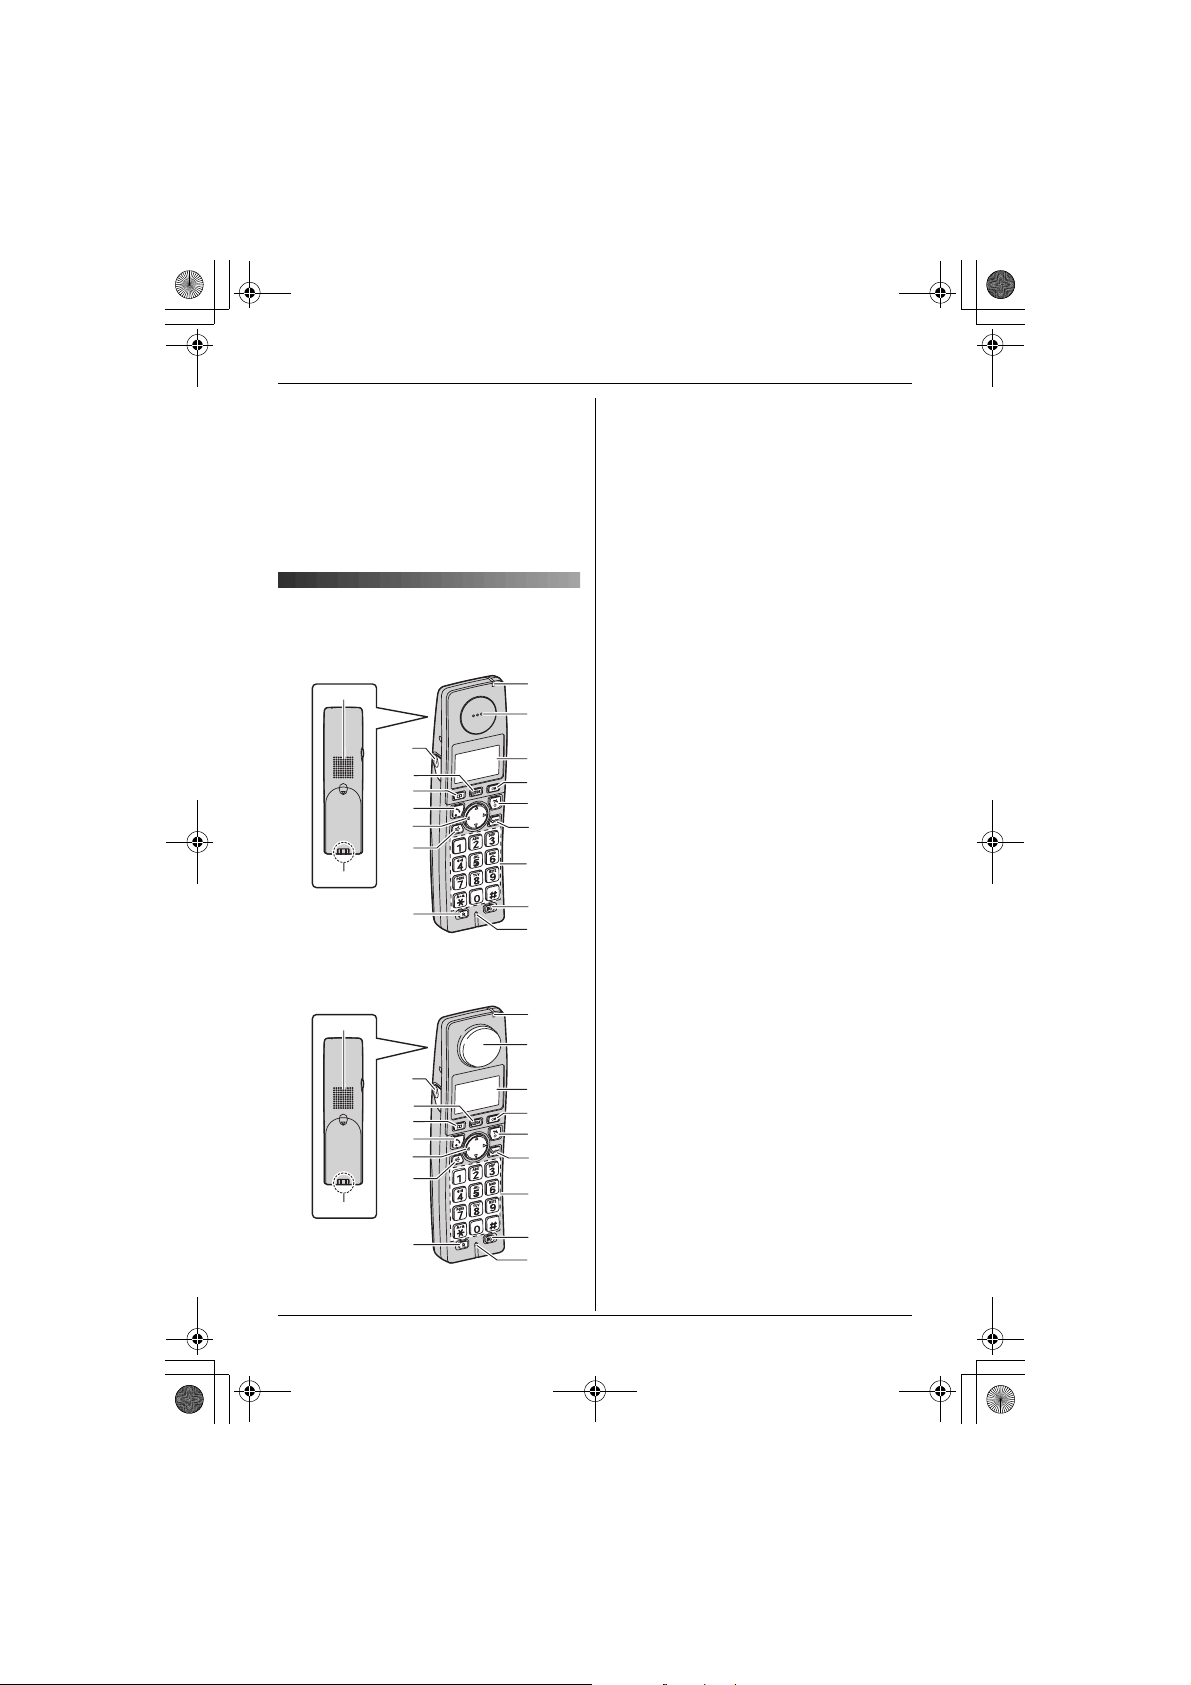
Controls
Handset (KX-TGA715)
A
C
D
E
F
G
H
B
I
Handset (KX-TGA717)
J
K
L
M
N
O
P
Q
R
A Speaker
B Charge contact
C Headset jack
D {j/OK} (Menu/OK)
E {k} (Phonebook)
F {C} (Talk)
G Navigator key ({^}/{V}/{>}/{<})
H {s} (Speakerphone)
I {R} (Recall)
J Charge indicator
Ringer indicator
Message indicator
K KX-TGA715
Receiver
KX-TGA717
Bone conduction earpiece
L Display
M {R} (Redial/Pause)
N {ih} (Off/Power)
{
C/T} (Clear/Mute)
O
P Dial keypad
Q {INT} (Intercom)
R Microphone
*1 For KX-TG7120/KX-TG8120/KX-
TG9120 users only
*1
A
B
C
D
E
F
G
H
I
J
K
L
M
N
O
P
Q
R
7
Page 8
TGA715FX_717FX(e-e).book Page 8 Wednesday, February 28, 2007 2:47 PM
Preparation
Displays
Display icons
Display
icon
w Within range of a base unit
L Handset is accessing base
k Handset is on an outside
u Answering system is on.
5 Battery strength
[2] Handset number (Standby
0 New voice mail message
*1 For KX-TG7120/KX-TG8120/KX-
TG9120 users only
*2 Voice mail users only
Meaning
L When flashing: Handset
is searching for base unit.
(out of range of base unit,
handset is not registered
to base unit, no power on
base unit)
unit. (intercom, paging,
changing base unit
settings, etc.)
call.
(page 19)
display setting, page 16)
*2
received
L Line is being used by
another handset.
L Answering system is
being used by another
handset or the base
*1
unit.
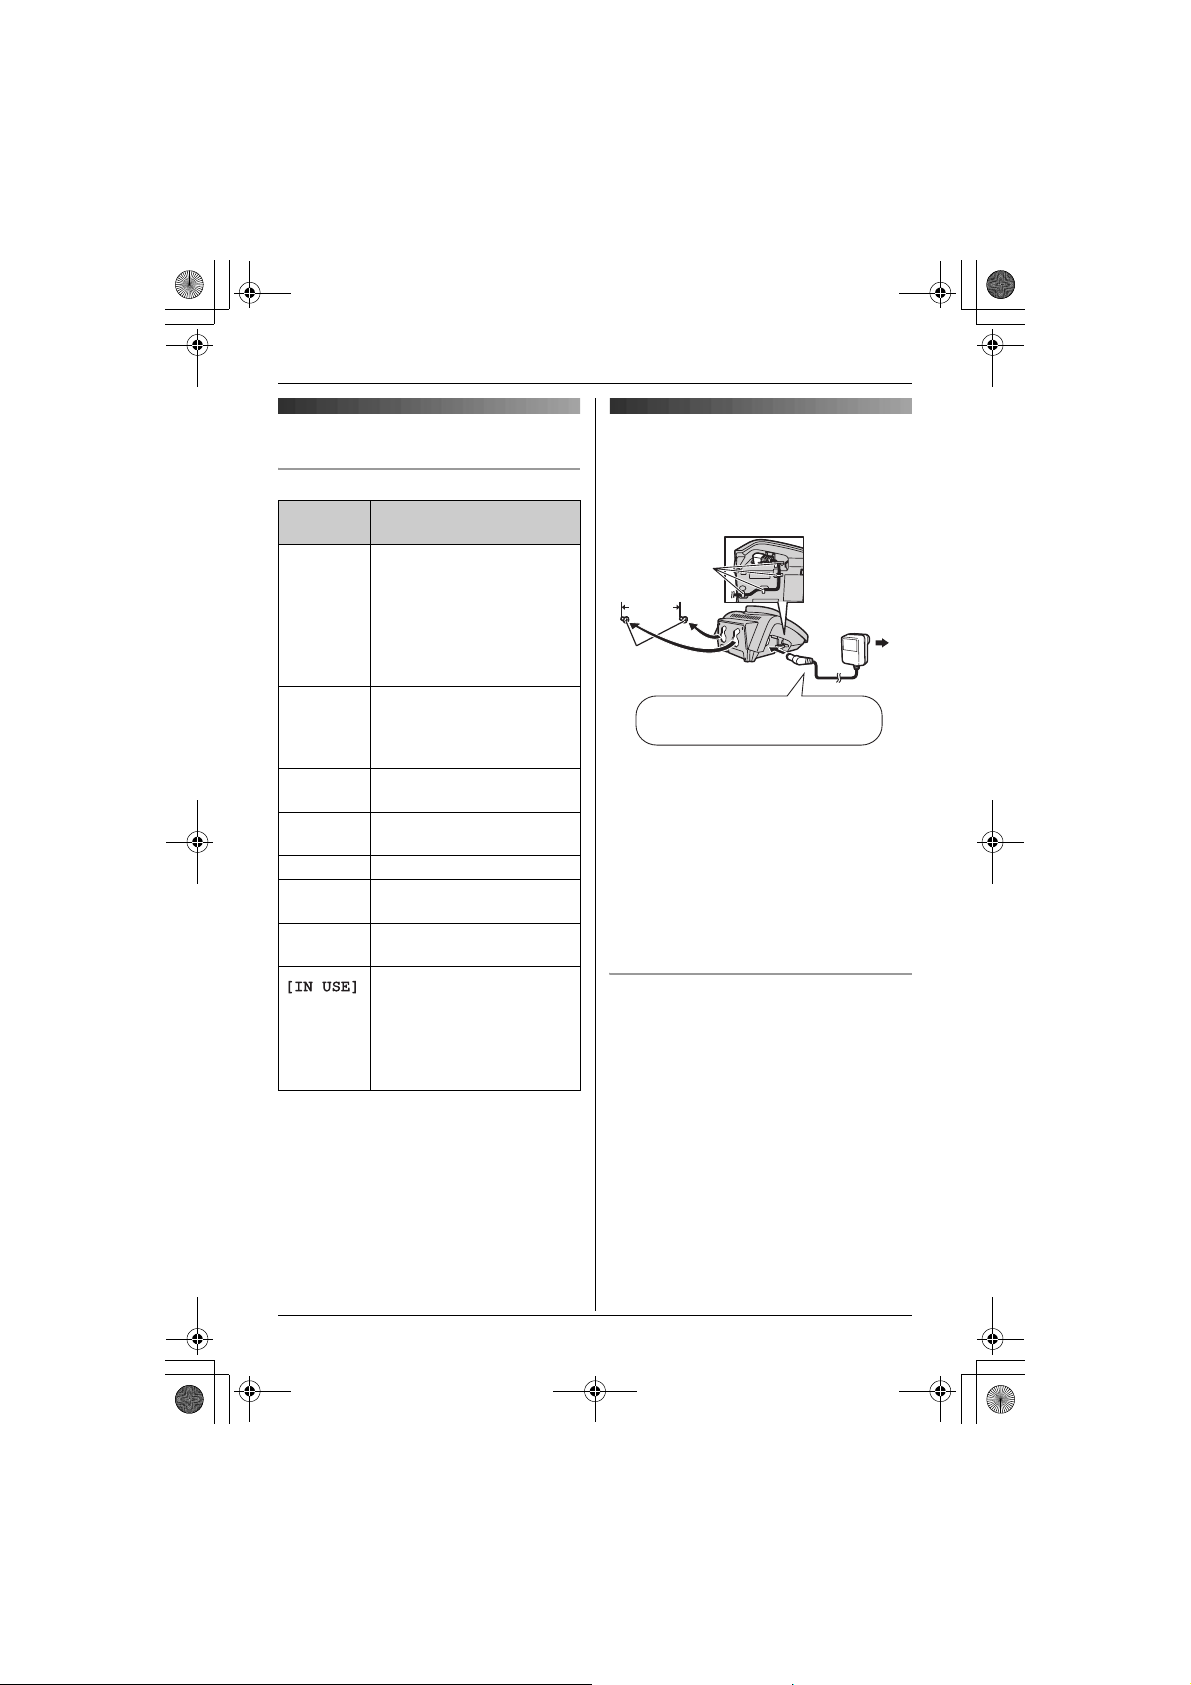
Connections
Connect the AC adaptor to the charger and
route the cable as shown. The charger can
be mounted on the wall, if required.
Hooks
25 mm
Screws
Use only the included AC adaptor.
Note:
L The AC adaptor must remain connected
*1
at all times. (It is normal for the adaptor to
feel warm during use.)
L The AC adaptor should be connected to a
vertically oriented or floor-mounted AC
outlet. Do not connect the AC adaptor to a
ceiling-mounted AC outlet, as the weight
of the adaptor may cause it to become
disconnected.
Location
L For maximum distance and noise-free
operation, place your base unit:
– away from electrical appliances such as
TVs, radios, personal computers or
other phones.
– in a convenient, high and central
location.
(220–240 V,
50 Hz)
8
Page 9

TGA715FX_717FX(e-e).book Page 9 Wednesday, February 28, 2007 2:47 PM
Preparation
Battery installation/
replacement
Important:
L Use only the included rechargeable
batteries noted on page 4, 5.
L When replacing batteries, we recommend
using the Panasonic rechargeable
batteries noted on page 4, 5.
L Wipe the battery ends (S, T) with a dry
cloth.
L When installing the batteries, avoid
touching the battery ends (S, T) or the
unit contacts.
1 Press the notch on the handset cover
firmly and slide it in the direction of the
arrow.
L When replacing batteries, remove the
old batteries positive (S) end first.
2 Insert the batteries negative (T) end first.
Close the handset cover.
Battery charge
Place the handset on the charger for
about 7 hours before initial use.
When charging, the battery icon is shown as
follows.
When the batteries are fully charged, 5
remains on the display.
L The charge indicator lights up when the
handset is placed on the charger.
Charge contacts
L The pictured model is KX-TGA715.
Note:
L The handset display may show “Please
Wait...” when the handset is placed on
the charger if it is not registered to a base
unit.
L It is normal for the handset to feel warm
during charging.
L If you want to use the unit immediately,
charge the batteries for at least 15
minutes.
L Clean the charge contacts of the handset,
charger with a soft, dry cloth once a
month, otherwise the batteries may not
charge properly. Clean more often if the
unit is exposed to grease, dust, or high
humidity.
9
Page 10
TGA715FX_717FX(e-e).book Page 10 Wednesday, February 28, 2007 2:47 PM
Preparation
Battery strength
Battery icon Battery strength
5 High
6 Medium
7 Low
Panasonic Ni-MH battery performance
(included batteries)
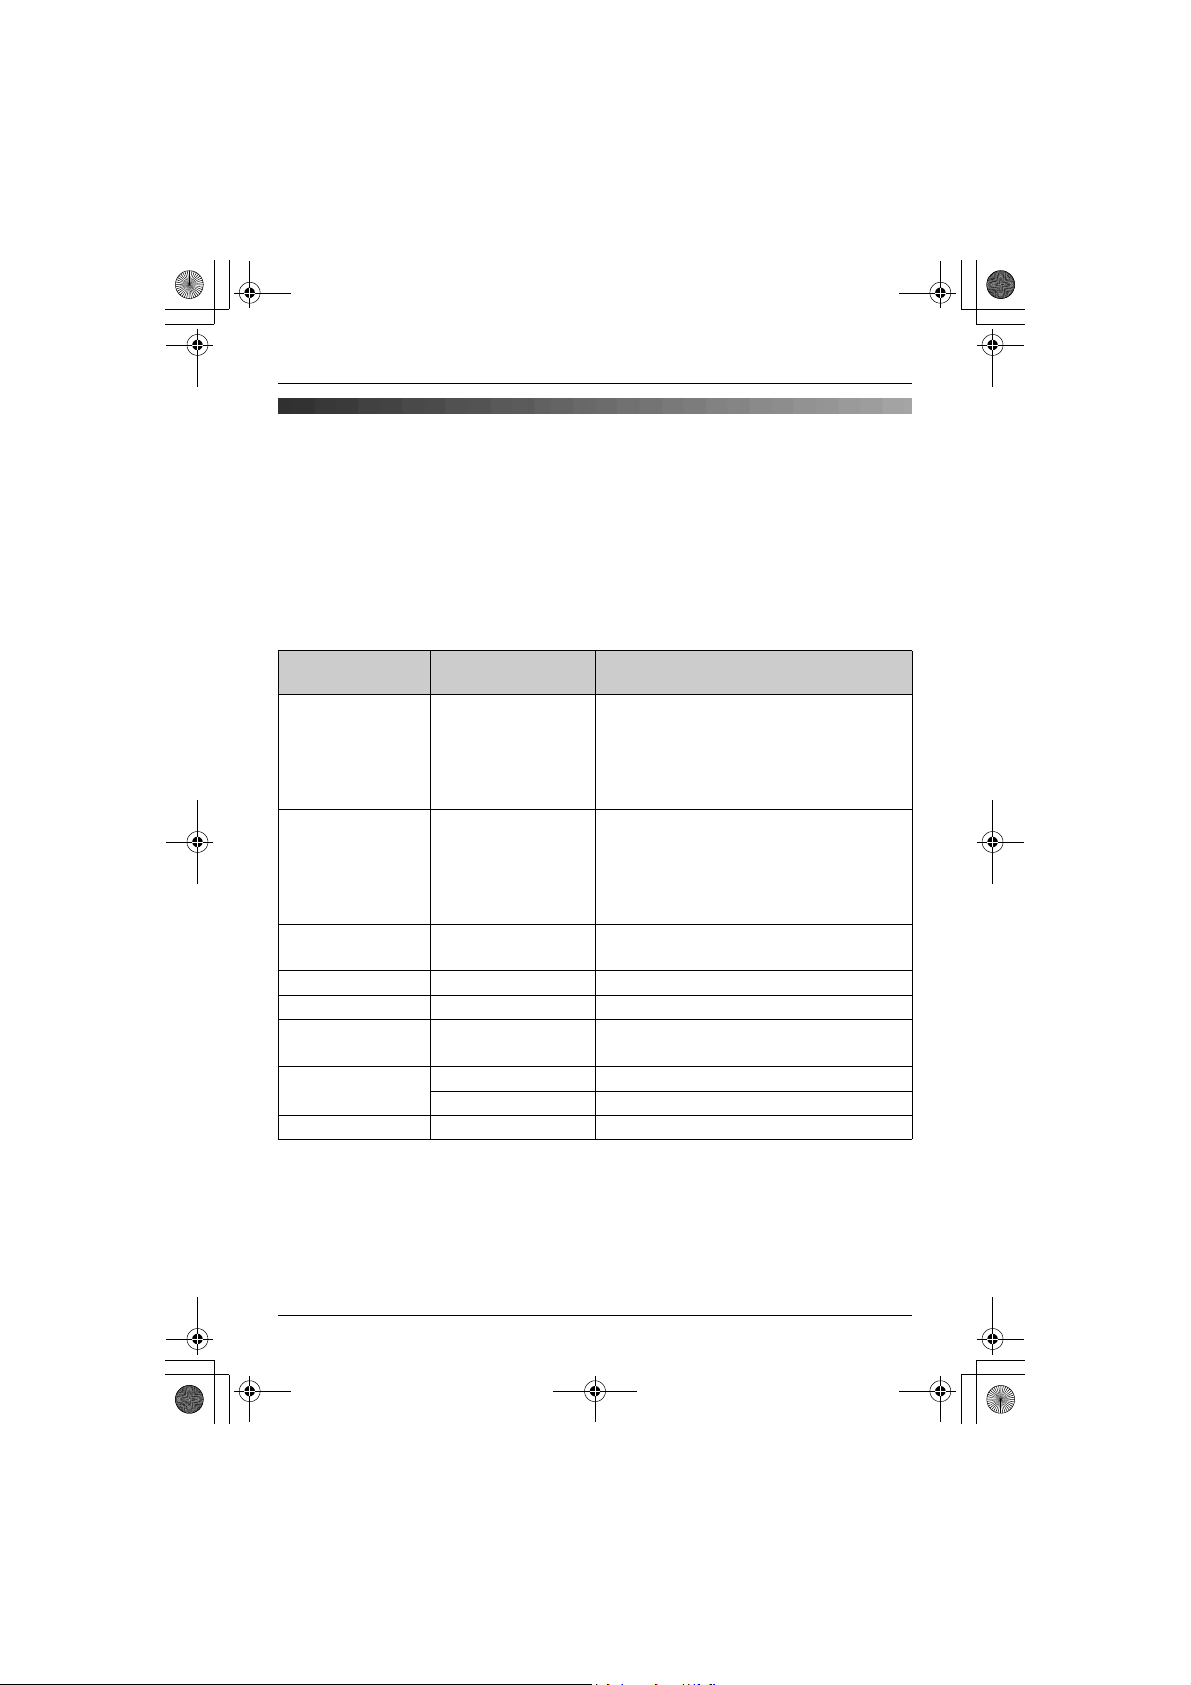
Operation Operating time
In continuous use KX-TGA715:
In continuous
standby mode
Note:
L It is normal for batteries not to reach full
capacity at the initial charge. Maximum
battery performance is reached after a few
complete cycles of charge/discharge
(use).
L Actual battery performance depends on a
combination of how often the handset is in
use and how often it is not in use
(standby).
L Battery operating time may be shortened
over time depending on usage conditions
and ambient temperature.
L Even after the handset is fully charged,
the handset can be left on the charger
without any ill effect on the batteries.
L The battery strength may not be displayed
correctly after you replace the batteries. In
this case, place the handset on the
charger and charge for at least 7 hours.
When flashing: Needs
to be charged.
12 hours max.
KX-TGA717:
10 hours max.
150 hours max.
Symbols used in these
operating instructions
Symbol Meaning
{j/OK} Press {j/OK}.
i Proceed to the next
“ ” Select the words in
Display language
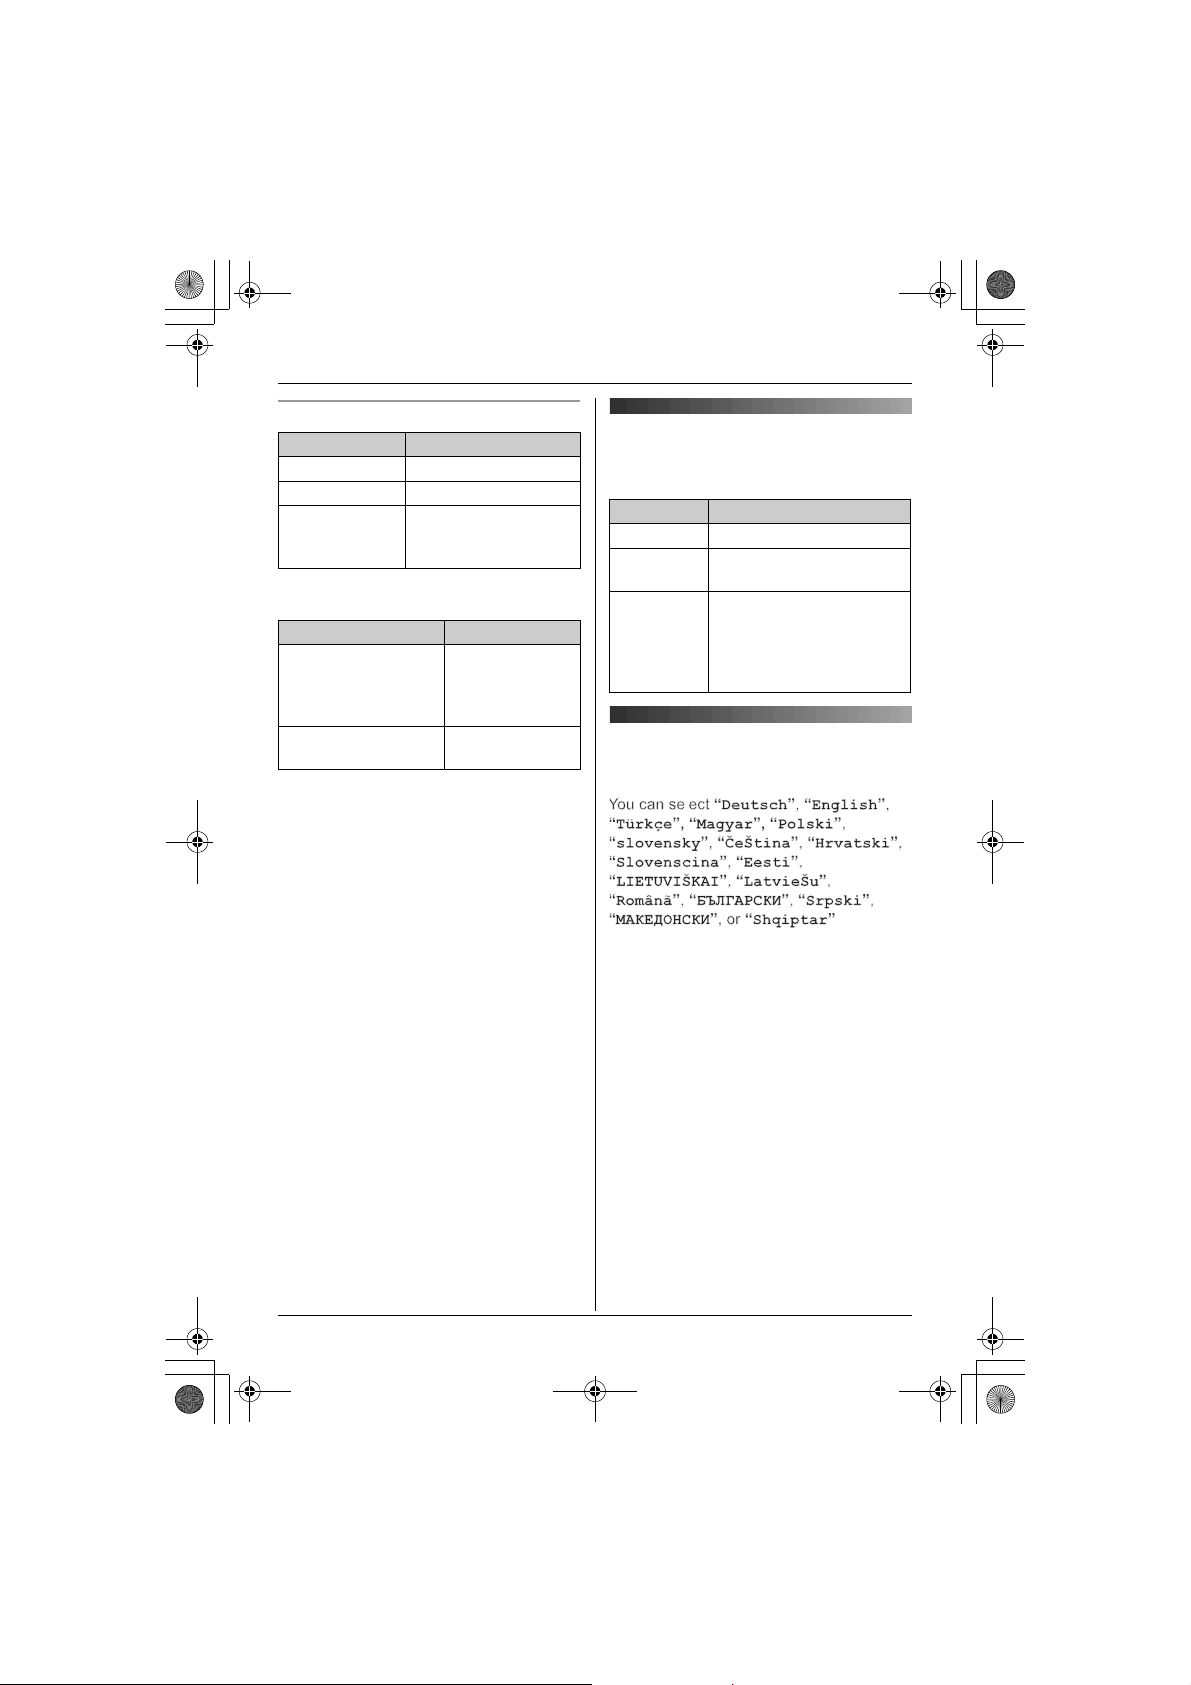
17 display languages are available.
1 {ih} i {j/OK}
2 Press {^} or {V} to select “Handset
Setup”. i {>}
3 Press {^} or {V} to select “Display
Setup”. i {>}
4 Press {^} or {V} to select “Select
Language”. i {>}
5 Press {^} or {V} to select the desired
language. i {>} i {ih}
Note:
L If you select a language you cannot read,
press {ih}, press {j/OK}, press {^} 3
times, press {>}, press {V} 2 times, press
{>}, press {V}, press {>}, select the
desired language, press {>}, then press
{ih}.
L To change the voice announce language,
operation.
quotations shown on the
display (e.g., “Handset
Setup”) by pressing {^}
or {V}.
10
Page 11
TGA715FX_717FX(e-e).book Page 11 Wednesday, February 28, 2007 2:47 PM
Preparation
see page 12.
Registering the handset to
your base unit
Register to:
KX-TG7100/KX-TG7120/KX-TG7150/KXTG7170/KX-TG8100/KX-TG8120/KXTG9120
Ensure that the handset is switched on. If it
is not on, press and hold {ih} for few
seconds to turn the handset on.
1 Lift the handset and press {ih} to put
the handset in standby mode.
2 Press and hold {x} on the base unit for
about 3 seconds, until the registration
tone sounds.
3 Place the handset on the base unit. The
registration tone continues to sound. With
the handset still on the base unit, wait
until a confirmation tone sounds and w
stops flashing.
Note:
L If an error tone sounds, or if w is still
flashing, register the handset manually
(page 15).
L If all registered handsets start ringing in
step 2, press {x} to stop. Start again from
step 1.
L Charge the batteries for about 7 hours
before initial use.
L The answering system is available only
when KX-TGA715/KX-TGA717 is
registered to KX-TG7120/KX-TG8120/
KX-TG9120.
L KX-TGA715/KX-TGA717 does not
support the SMS features.
L For KX-TG9120 with KX-TGA914
(Cordless camera) users
KX-TGA715/KX-TGA717 does not
support camera monitoring features.
L For KX-TG9120 with KX-TGA915 (USB
adaptor) users
KX-TGA715/KX-TGA717 does not
support internet call features.
11
Page 12
TGA715FX_717FX(e-e).book Page 12 Wednesday, February 28, 2007 2:47 PM
Accessibility features
Accessibility features
Talking number display
(Voice announce)
The voice announce features allow the
handset to announce displayed phone
number. (Caller ID announce/List
announce)
when setting the ringer volume on (page
16).
1 {j/OK}
2 “Handset Setup” i {>}
3 “Other Options” i {>}
4 “Voice Announce” i {>}
5 “Volume” i {>}
6 Select the desired volume.
Caller ID announce
When you receive an outside call which has
phone number information, the handset
announces the displayed phone number
from the handset speaker.
L To announce outside caller’s phone
number, you must first subscribe to Caller
ID service. Consult your service provider/
telephone company for details.
L When receive a call while on the phone,
the 2nd caller’s phone number will not be
announced even if you subscribe to both
Caller ID and Call Waiting Caller ID
services.
L The announcement is heard at the ringer
volume (page 16).
L This feature can be turned on or off (page
12).
L To turn the voice announce feature off,
select the volume “Off”.
7 {>} i {ih}
Note:
L The caller ID announce is heard at the
handset ringer volume (page 16). When
the volume for voice announce is set to
“Off”, the handset does not announce the
phone number regardless of the ringer
volume.
Selecting language for voice
announce
6 voice announce languages are available.
List announce
The handset announces phone numbers
from the handset speaker while you are
viewing the redial list, caller list, and
phonebook.
L If the displayed phone number has a P
(pause), the handset inserts a 0.5 second
pause for each P and if the number has
the other symbols (for example, ;, #,
etc.), the handset skips the symbols and
announces the next number.
Setting volume for voice
announce
You can set the volume for list announce.
The volume for caller ID announce is set
12
1 {j/OK}
2 “Handset Setup” i {>}
3 “Other Options” i {>}
4 “Voice Announce” i {>}
5 “Select Language” i {>}
6 Select the desired language. i {>} i
{ih}
Note:
L To change the display language, see
page 10
Page 13
TGA715FX_717FX(e-e).book Page 13 Wednesday, February 28, 2007 2:47 PM
Basic Operations
Making/answering calls
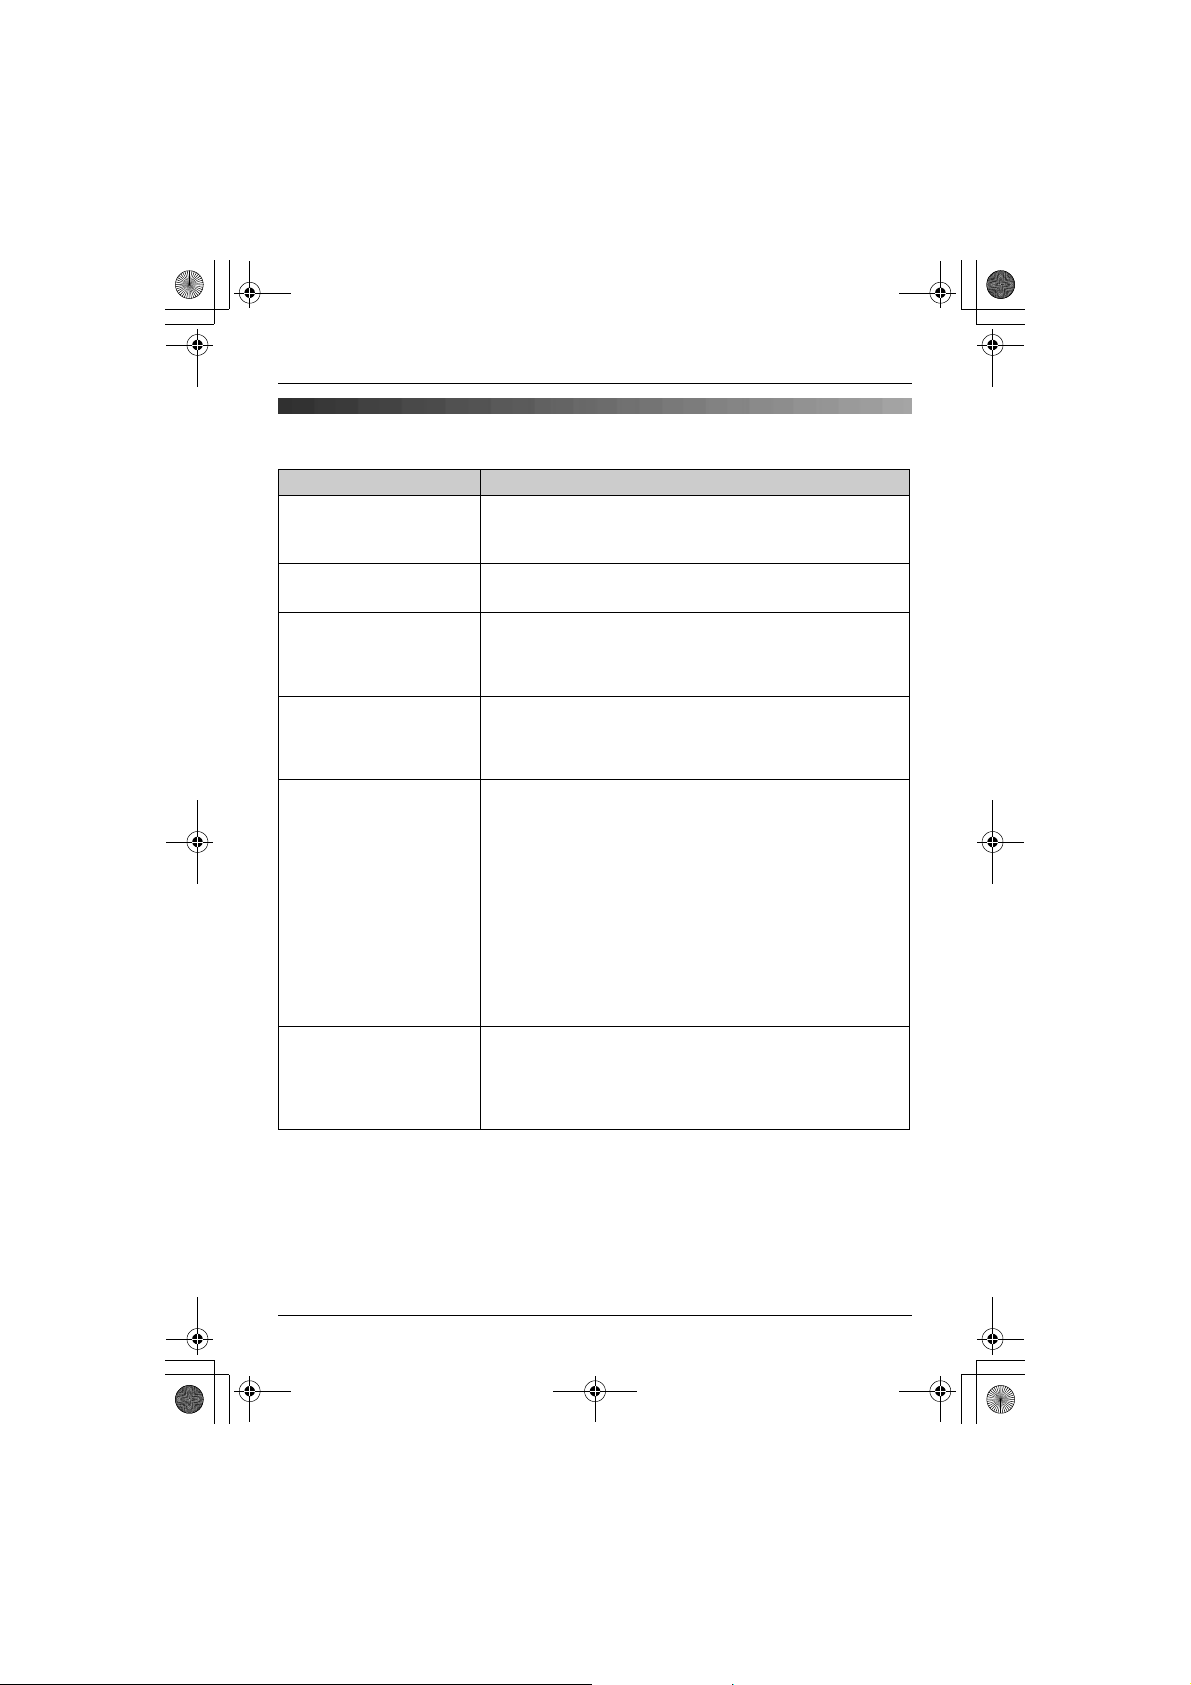
Feature Operation
Power on Press {ih} for about 1 second.
Power off Press {ih} for about 2 seconds.
Making calls Dial the phone number. i {C}/{s}
Answering calls {C}
Hanging up {ih}
Receiver/speaker volume Press {^} or {V} while on a call.
Making a call with redial
list
Erasing number in the
redial list
Muting your voice While on a call, press
{R}
button (to use the
recall feature)
{R} i Press {^} or {V} to select the desired number.
i {C}/{s}
{R} i Press {^} or {V} to select the desired number.
i {>} i “Erase” i {>} i “Yes” i {>} i
{ih}
{
{
C/T} again.
press
{R}
is used to access optional telephone services. Contact
your service provider/telephone company for details.
C/T}. To return to the conversation,
Basic Operations
Handset phonebook
Feature Operation
Adding entries (up to 50
names and phone
numbers)
Making calls {k} i Press {^} or {V} to display the desired entry. i
Searching by first
character (index search)
Editing entries {k} i Press {^} or {V} to display the desired entry. i
{k} i {j/OK} i “New Entry” i {>} i Enter the
party’s name (16 characters max.). i
{j/OK} i Enter the party’s phone number (24 digits
max.). i {j/OK} i “Save” i {>} i {ih}
L To enter a name, see page 21.
{C}/{s}
{k} i Press the dial key ({0} to {9}) which contains the
character you are searching for (page 21). i Press {^} or
{V} to display the desired entry.
L To change the character entry mode while searching:
{R} i Select the character entry mode. i {>}
{j/OK} i “Edit” i {>} i Edit the name. i
{j/OK} i Edit the phone number. i {j/OK} i
“Save” i {>} i {ih}
13
Page 14

TGA715FX_717FX(e-e).book Page 14 Wednesday, February 28, 2007 2:47 PM
Basic Operations
Feature Operation
Erasing an entry {k} i Press {^} or {V} to display the desired entry. i
Erasing all entries {k} i {j/OK} i “Erase All” i {>} i “Yes”
Copying one entry {k} i Press {^} or {V} to display the desired entry. i
Copying all entries {k} i {j/OK} i “Copy All” i {>} i Enter the
Chain dial While on a call, press {k}. i Press {^} or {V} to select
{j/OK} i “Erase” i {>} i “Yes” i {>} i
{ih}
i {>} i “Yes” i {>} i {ih}
{j/OK} i “Copy” i {>} i Enter the handset
number you wish to send the handset phonebook entry to.
i Press {ih} when “Completed” is displayed.
handset number you wish to send the handset phonebook
entry to. i Press {ih} when “Completed” is displayed.
the desired entry. i Press {>} to dial the number.
Caller list
Phone numbers of the last 50 callers will be logged in the caller list.
Feature Operation
Viewing the caller list and
calling back
Editing a caller’s phone
number before calling
back
Storing caller information
into the handset
phonebook
Erasing an entry {j/OK} i “Caller List” i {>} i Press {^} or {V}
Erasing all entries {j/OK} i “Caller List” i {>} i {j/OK} i
{j/OK} i “Caller List” i {>} i Press {V} to
search from the most recent call, or press {^} to search from
the oldest call. i {C}/{s}
{j/OK} i “Caller List” i {>} i Press {^} or {V}
to display the desired entry. i {j/OK} i “Edit and
Call” i {>} i Edit the number. i {C}/{s}
{j/OK} i “Caller List” i {>} i Press {^} or {V}
to display the desired entry. i {j/OK} i “Add
phonebook” i {>} i Continue from “Enter the party’s
name” on page 13 (Adding entries).
to display the desired entry. i {j/OK} i “Erase” i
{>} i “Yes” i {>} i {ih}
“Erase All” i {>} i “Yes” i {>} i {ih}
14
Page 15
TGA715FX_717FX(e-e).book Page 15 Wednesday, February 28, 2007 2:47 PM
Basic Operations
Multi-unit operation
Feature Operation
Intercom: calling Example: When you call handset 1
Intercom: answering Press {C}/{s}.
Transferring calls between
handsets
Conference calls
(2 people can have a
conference call with an
outside party)
Manual registration Handset:
Cancelling a handset {j/OK} i “Base Unit Setup” i {>} i Enter
*1 KX-TG7150/KX-TG7170 does not support conference call feature.
*2 After pressing {x}, the rest of this procedure must be completed within 1 minute.
*3 If you forget the base unit PIN, consult your nearest Panasonic service centre.
*1
{INT} i Press {1} (desired handset number).
L When finished talking, press {ih}.
L When finished talking, press {ih}.
Example: When you transfer a call to handset 1
During an outside call, press {INT}. i Press {1} (desired
handset number). i When the handset 1 answered, press
{ih} to complete transfer.
Example: When you make a conference call with handset 1
During an outside call, press {INT}. i Press {1} (desired
handset number). i When the handset 1 answered, press
{3} to establish a conference call.
{j/OK} i “Handset Setup” i {>} i
“Registration” i {>} i “Register H.set” i
{>}
Base unit:
Press and hold {x} on the base unit for about 3 seconds,
until the registration tone sounds.
Handset:
Wait until “Enter Base PIN” is displayed, then enter the
base unit PIN (default: “0000”).
L When the handset has been registered successfully, w
will stop flashing.
“335”. i “Cancel Handset” i {>} i Select the
handset(s) you want to cancel, by pressing the desired
handset number. i {j/OK} i “Yes” i {>} i
{ih}
*2
*3
i {j/OK}
15
Page 16
TGA715FX_717FX(e-e).book Page 16 Wednesday, February 28, 2007 2:47 PM
Handset/Base Unit Settings
Handset/Base Unit Settings
Handset/base unit settings
Handset settings
When customising the handset, the current item or setting is indicated by >.
1 {j/OK}
2 Press {^} or {V} to select “Handset Setup”. i {>}
3 Press {^} or {V} to select the desired item in the handset settings menu. i {>}
4 Press {^} or {V} to select the desired item in the sub-menu. i {>}
L In some cases, you may need to select from a second sub-menu. i {>}
5 Press {^} or {V} to select the desired setting then press {>} or follow the instruction in the
rightmost column of the chart.
L To exit the operation, press {ih}.
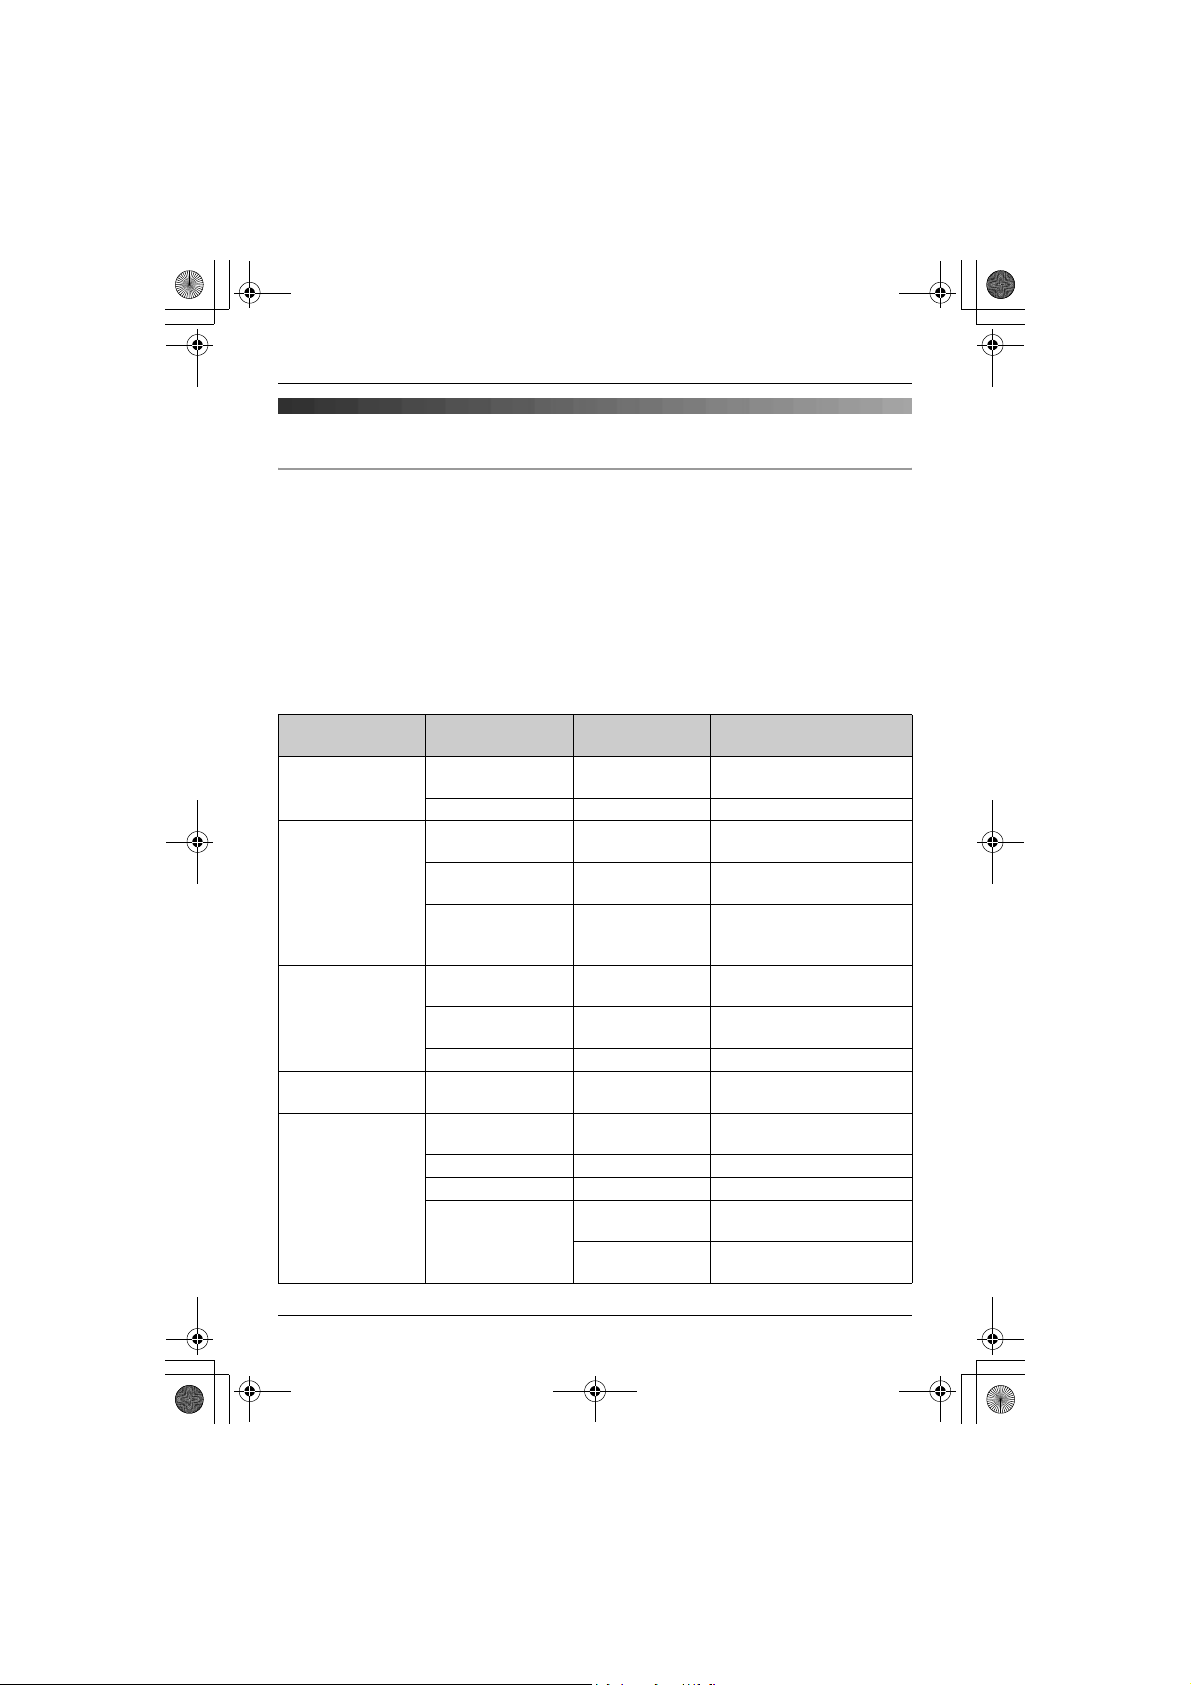
Handset settings
menu
Time Settings Set Date &
Ringer Setup Ringer Volume — Handset ringer volume
Display Setup Standby
Registration Register H.set — Manual registration:
Other Options New Msg.
Sub-menu Sub-menu 2 Feature (default setting)
— Set the date and time
Time
Alarm — Set the alarm: page 18
(Maximum)
Ext. Ringtone — Ringtones for outside calls
(“Ringtone 1”)
*1
*2*3
Int. Ringtone — Ringtones for intercom
Display
Select
Language
calls
(“Ringtone 3”)
— Standby mode display
(“Off”)
*4
— Display language
(“English”): page 10
*3
Contrast — Display contrast (Level 3)
page 15
Alert
*5
— New message alert (“Off”)
Keytones — Keytones on/off (“On”)
Auto Talk — Auto talk on/off (“Off”)
*6
Voice Announce Volume Voice announce volume
(“Middle”): page 12
Select
Language
Voice announce language
(“English”): page 12
16
Page 17
TGA715FX_717FX(e-e).book Page 17 Wednesday, February 28, 2007 2:47 PM
Handset/Base Unit Settings
*1 When the ringer is turned off, the handset will ring:
– at the minimum level for alarm
– at the minimum level for intercom calls
– at the maximum level for paging
*2 If you select one of the melody ringtones, the ringtone will continue to sound for several
seconds if the caller hangs up before you answer. You may hear a dial tone or no one on
the line when you answer a call.
*3 The preset melodies in this product are used with permission of © 2006 Copyrights Vision
Inc.
*4 If “Off” is selected, only current date and time are displayed.
If “Handset Number” is selected and the current handset number is 2, “[2]” is displayed.
*5 For KX-TG7120/KX-TG8120/KX-TG9120 users only
This feature alerts you when new messages have been recorded.
The message indicator on the handset flashes until you have listened to all new
messages.
While message alert is on, battery operating time is shortened (page 10).
*6 Auto talk feature allows you to answer calls simply by lifting the handset off the base unit
or charger. You do not need to press {C}.
Base unit settings
You can set your base unit settings using this handset, please refer to your base unit
operating instructions for further details.
17
Page 18
TGA715FX_717FX(e-e).book Page 18 Wednesday, February 28, 2007 2:47 PM
Handset/Base Unit Settings
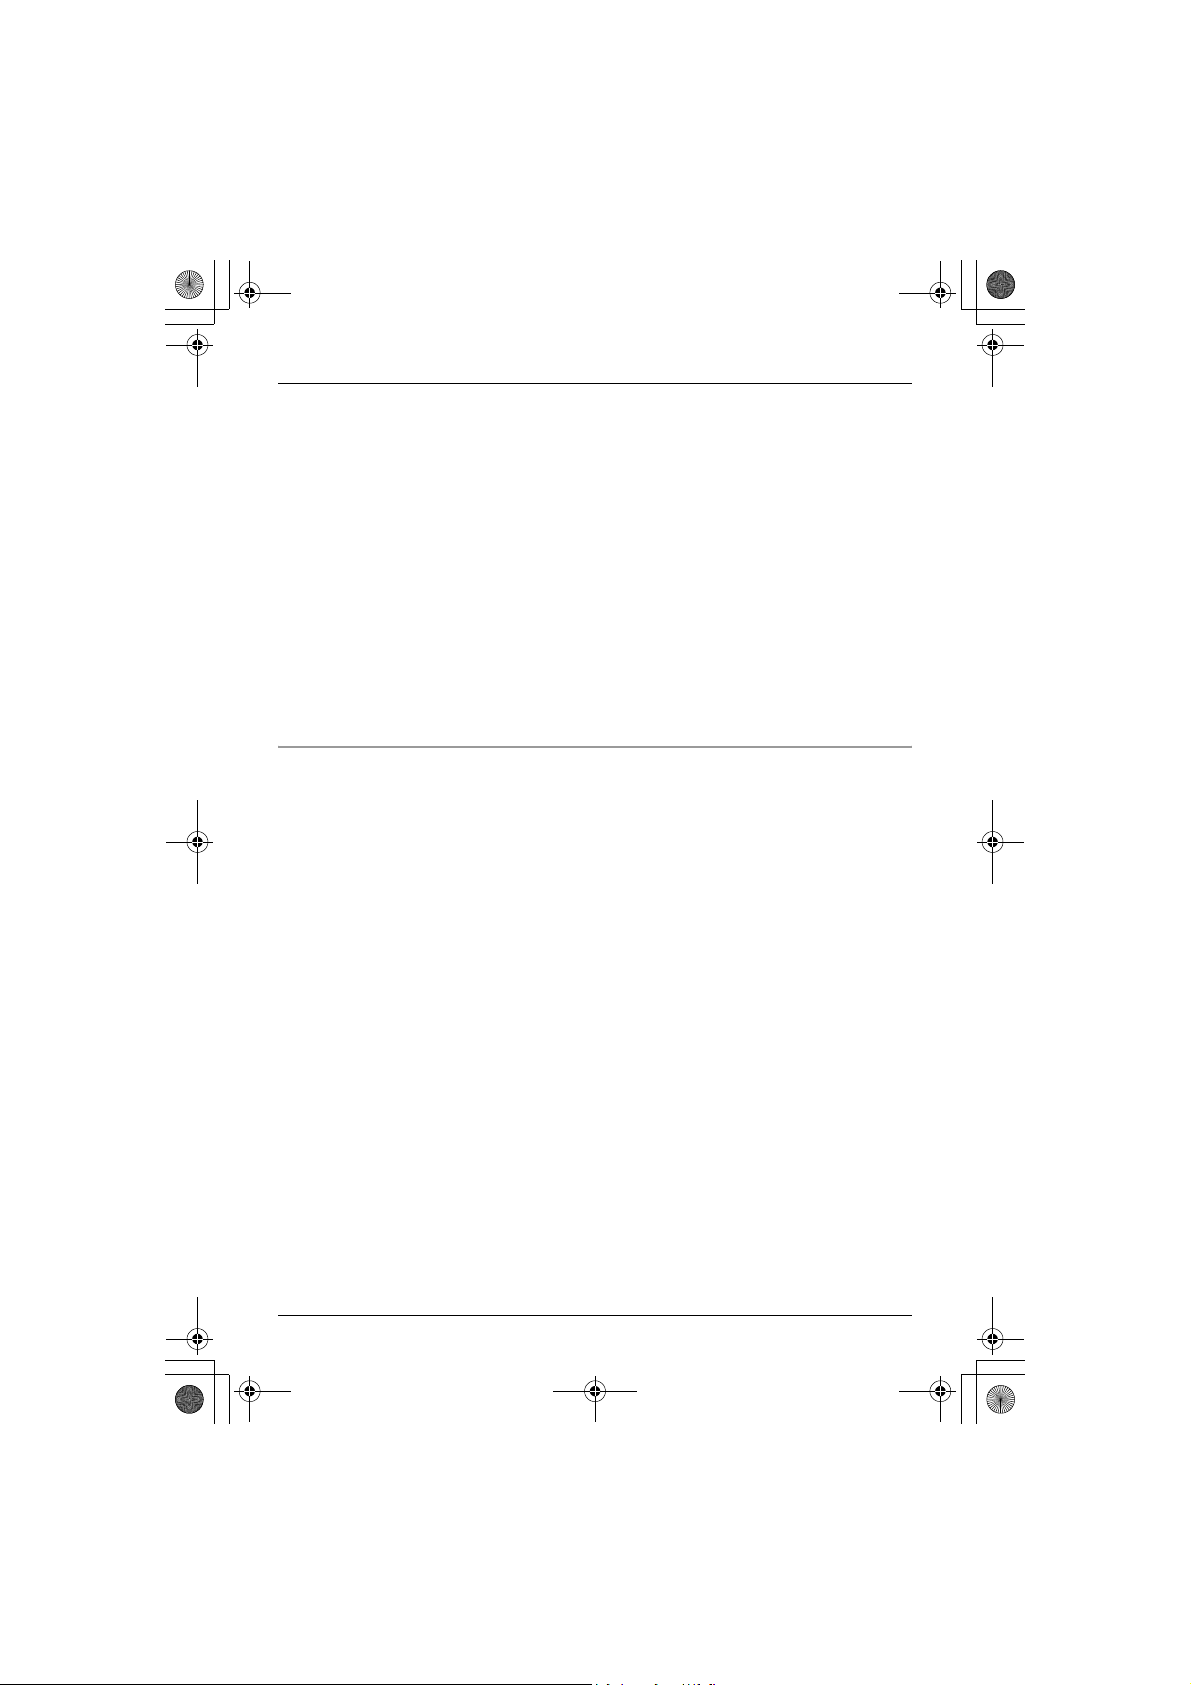
Time settings
Alarm
An alarm will sound for 3 minutes at the set time once or daily. Set the date and time
beforehand (page 16).
1 {j/OK} i “Handset Setup” i {>}
2 “Time Settings” i {>}
3 “Alarm” i Press {>} 2 times.
4 Select an alarm mode. i {>}
Off Turns alarm off. Press {>} again, then press {ih} to finish.
Once The alarm sounds once at the set time. Enter the desired day and month.
Daily An alarm sounds daily at the set time.
5 Enter the desired hour and minute. i {j/OK}
6 Select the desired ringtone. i {>}
7 “Save” i {>} i {ih}
Note:
L To stop the alarm, press any dial key.
L When in talk or intercom mode, the alarm will not sound until the call has ended.
L If you select “Once”, the setting will change to “Off” after the alarm sounds.
18
Page 19
TGA715FX_717FX(e-e).book Page 19 Wednesday, February 28, 2007 2:47 PM
Answering System Features
Answering System Features
Answering system
Applicable for:
KX-TG7120/KX-TG8120/KX-TG9120
You can operate your base unit answering system using this handset.
1 {j/OK}
2 Press {^} or {V} to select “Answer System”. i {>}
3 Press {^} or {V} to select the desired item in the answering system menu. i {>}
L In some cases, you may need to select from sub-menu. i {>}
L To exit the operation, press {ih}.
Answering
system menu
Play New Msg. — Play new messages
Play All Msg. — Play all messages
Record
Greeting
Answer On — Turn answering system on
Answer Off — Turn answering system off
Play Greeting — Play greeting message
Erase Message Erase All Erase all messages
Settings
*1 Refer to your base unit operating instructions for further details.
*1
Sub-menu Feature (default setting)
– To repeat the message, press {<} or {1}.
– To skip the message, press {>} or {2}.
– To stop the message, press {9}.
– To erase the message, press {*}{4}.
– To repeat the message, press {<} or {1}.
– To skip the message, press {>} or {2}.
– To stop the message, press {9}.
– To erase the message, press {*}{4}.
— Record greeting message
– To stop recording, press {j/OK}.
– To stop the message, press {9}.
Erase Greeting Erase greeting message
——
19
Page 20
TGA715FX_717FX(e-e).book Page 20 Wednesday, February 28, 2007 2:47 PM
Useful Information
Useful Information
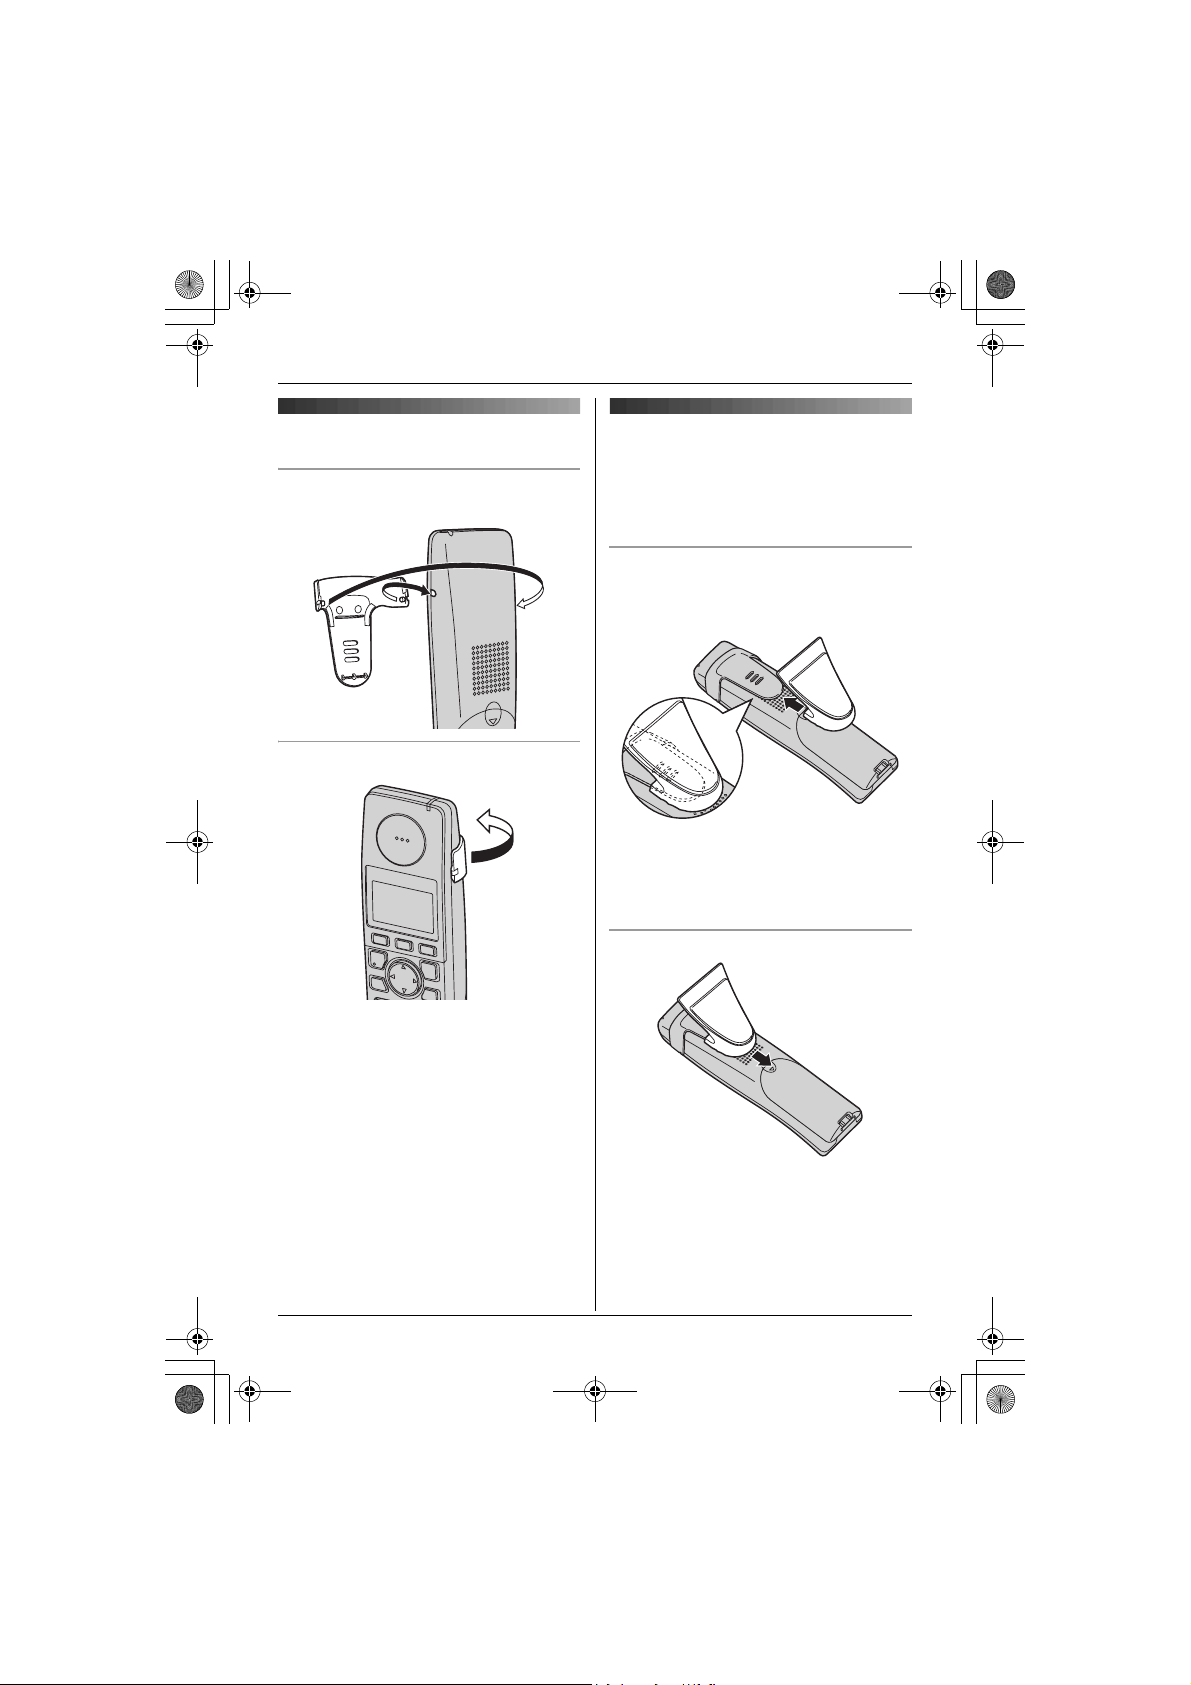
Using the belt clip
Attaching the belt clip
Removing the belt clip
Using the shoulder rest
attachment
The shoulder rest attachment allows handsfree phone conversations.
Attaching the shoulder rest attachment
Attach the included belt clip to the handset
beforehand (page 20). Slide the shoulder
rest attachment to the belt clip until it clicks.
Note:
L If the charger is mounted on a wall,
remove the shoulder rest attachment
before charging the handset.
Removing the shoulder rest attachment
L The pictured model is KX-TGA715.
20
Page 21
TGA715FX_717FX(e-e).book Page 21 Wednesday, February 28, 2007 2:47 PM
Useful Information
Character entry
The dial keys are used to enter characters and numbers. Each dial key has multiple
characters assigned to it. The available character entry modes are Alphabet (ABC), Numeric
(0-9), Greek (F), Extended 1 (G), Extended 2 (H), and Cyrillic (I). When in these
entry modes except Numeric, you can select which character is entered by pressing a dial
key repeatedly.
– Press {<} or {>} to move the cursor.
– Press dial keys to enter characters and numbers.
– Press {C/T} to erase the character or number highlighted by the cursor.
Press and hold {C/T} to erase all characters or numbers.
– Press {*} to switch between uppercase and lowercase.
– To enter another character located on the same dial key, press {>} to move the cursor to
the next space, then press the appropriate dial key.
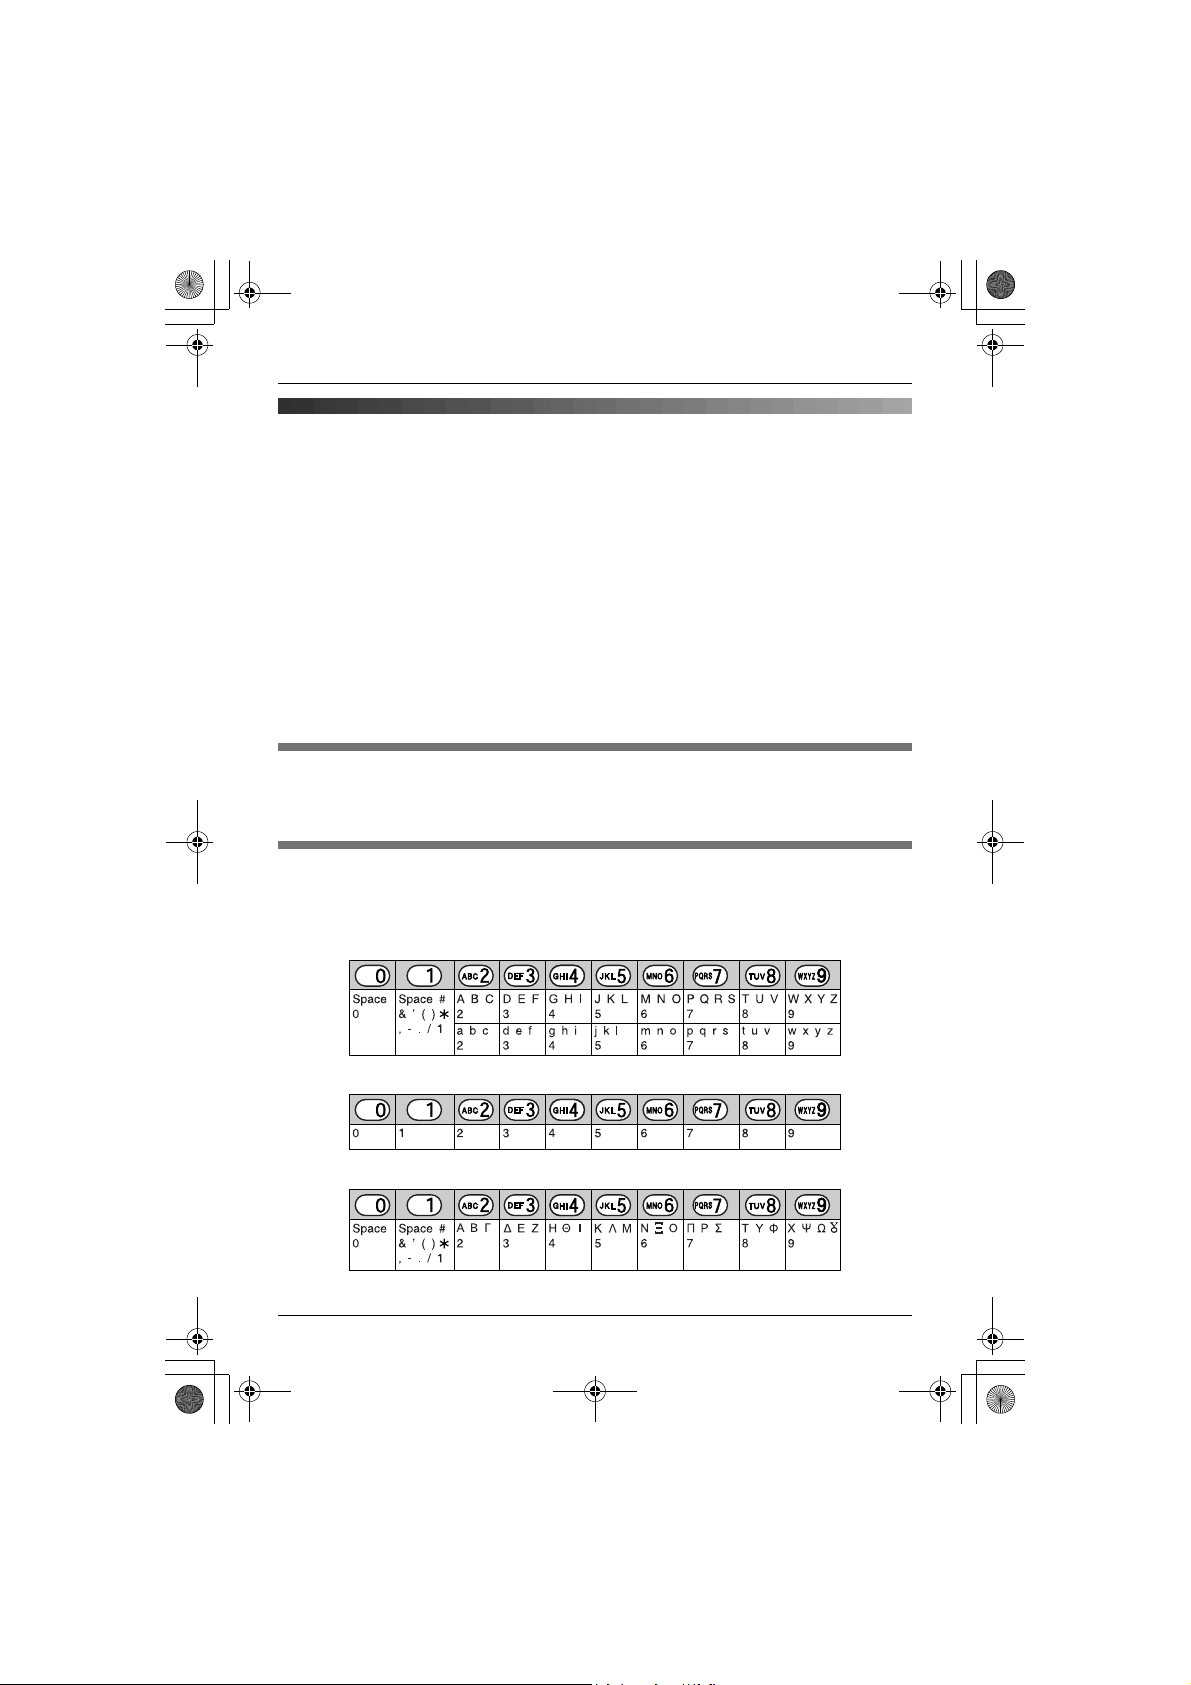
Character entry modes
Several character entry modes can be used when entering text. The characters that can be
entered depend on the entry mode.
Characters available in each character entry mode
When the unit displays the character entry screen:
{k} i Select a character entry mode. i {>}
Alphabet character table (ABC)
Numeric entry table (0-9)
Greek character table (M)
21
Page 22
TGA715FX_717FX(e-e).book Page 22 Wednesday, February 28, 2007 2:47 PM
Useful Information
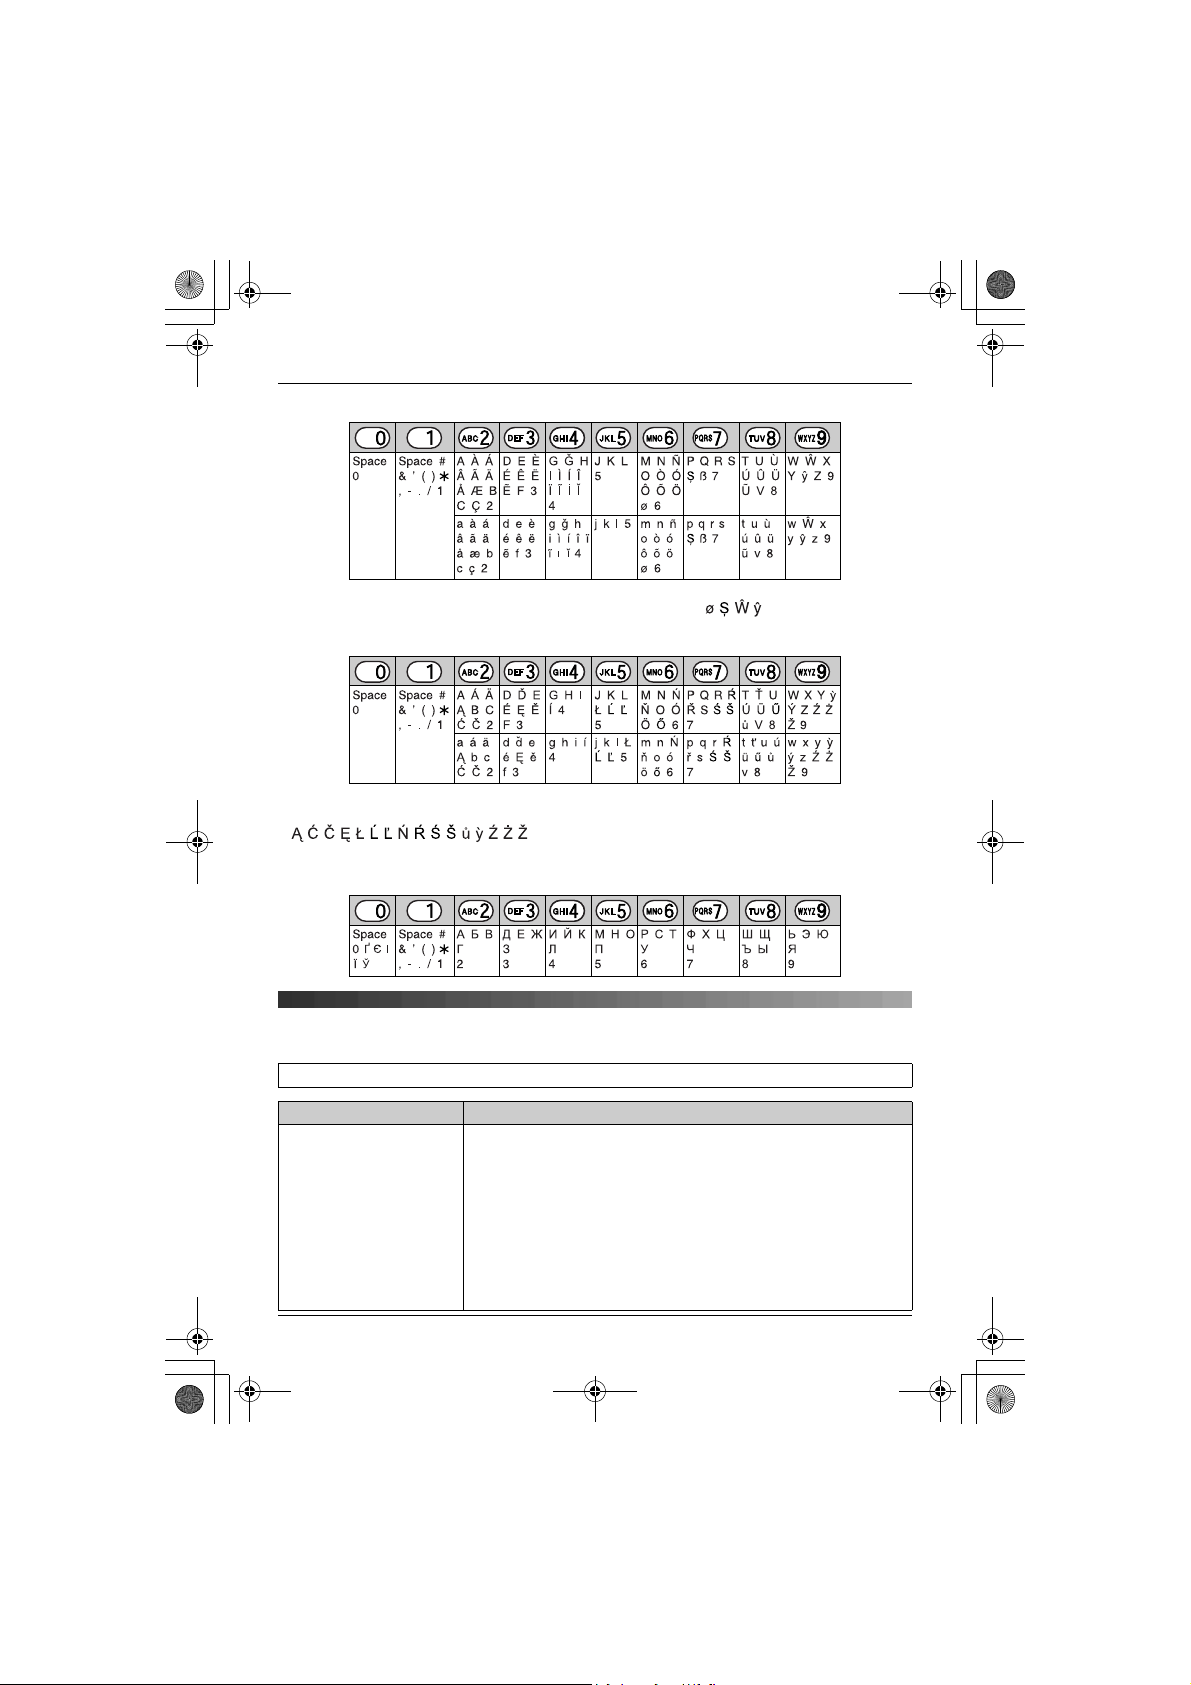
Extended 1 character table (N)
L The following are used for both uppercase and lowercase:
Extended 2 character table (O)
L The following are used for both uppercase and lowercase:
Cyrillic character table (P)
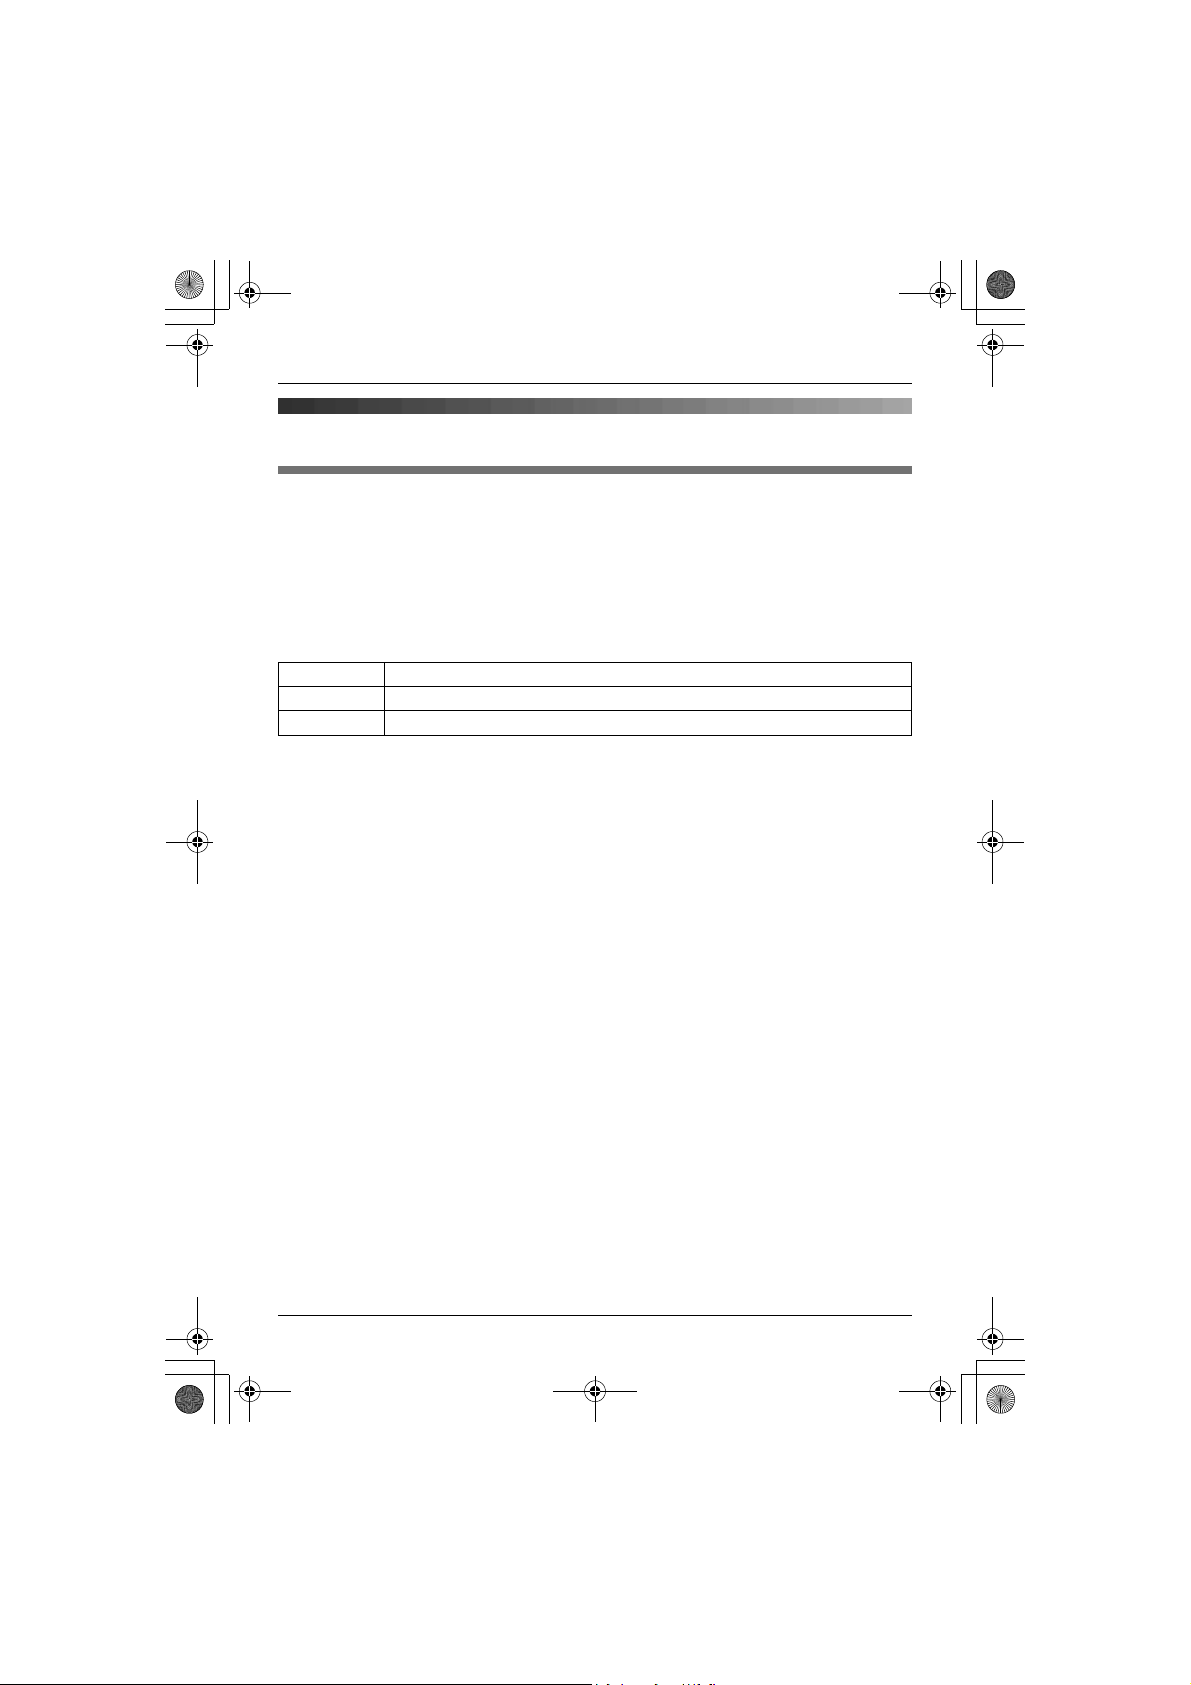
Troubleshooting for accessibility features
For other troubleshooting information, please refer to your base unit operating instructions.
Problem Cause & solution
The handset does not
announce the displayed
phone number.
22
L The handset ringer volume is turned off. Adjust it (page 16).
L The voice announce feature is turned off. Turn it on (page 12).
L While you are on an outside call, the handset does not
announce phonebook information when searching the
phonebook.
L For KX-TG9120 users only
If audible call is set for the displayed phone number, the
handset will not announce the phone number. Only the
selected ring tone is heard.
Page 23
TGA715FX_717FX(e-e).book Page 23 Wednesday, February 28, 2007 2:47 PM
Note:
Specifications
■ Standard:
DECT (Digital Enhanced Cordless
Telecommunications),
GAP (Generic Access Profile)
■ Number of channels:
120 Duplex Channels
■ Frequency range:
1.88 GHz to 1.90 GHz
■ Duplex procedure:
TDMA (Time Division Multiple Access)
■ Channel spacing:
1,728 kHz
■ Bit rate:
1,152 kbit/s
■ Modulation:
GFSK (Gaussian Frequency Shift Keying)
■ RF transmission power:
Approx. 250 mW
■ Voice coding:
ADPCM 32 kbit/s
■ Power source:
220–240 V, 50 Hz
■ Power consumption, Charger:
Standby: Approx. 0.8 W
Maximum: Approx. 5.0 W
■ Operating conditions:
5 °C–40 °C, 20 %–80 % relative air humidity
(dry)
■ Dimensions:
Charger: Approx. 61 mm × 87 mm × 95 mm
Handset (KX-TGA715): Approx. 179 mm ×
48 mm × 34 mm
Handset (KX-TGA717): Approx. 179 mm ×
48 mm × 38 mm
■ Mass (weight):
Charger: Approx. 90 g
Handset (KX-TGA715): Approx. 154 g
Handset (KX-TGA717): Approx. 164 g
L Specifications are subject to change.
L The illustrations used in these operating
instructions may differ slightly from the
actual product.
Useful Information
23
Page 24

TGA715FX_717FX(e-e).book Page 24 Wednesday, February 28, 2007 2:47 PM
Copyright:
This material is copyrighted by Panasonic Communications Co., Ltd., and may be reproduced
for internal use only. All other reproduction, in whole or in part, is prohibited without the written
consent of Panasonic Communications Co., Ltd.
© 2006 Panasonic Communications Co., Ltd. All Rights Reserved.
24
Page 25

TGA715FX_717FX(tr-tr).book Page 1 Wednesday, February 28, 2007 3:02 PM
Model No. KX-TGA715FX
İşletme Talimatları
İlave ahize
KX-TGA717FX
KX-TGA715
Bu birim, aşağıda belirtilen Panasonic Dijital Kablosuz Telefonlarla kullanılan bir
ilave mobil cihazdır:
KX-TG7100/KX-TG7120/KX-TG7150/KX-TG7170
KX-TG8100/KX-TG8120
KX-TG9120
Bu birimi, kullanılabilmesi için önce ana birime kaydetmeniz gerekir.
İlk kullanımdan önce pilleri yaklaşık 7 saat şarj ediniz.
Lütfen üniteyi kullanmadan önce bu işletme talimatlarını okuyunuz ve gerektiğinde başvurmak üzere
saklayınız.
Page 26

TGA715FX_717FX(tr-tr).book Page 2 Wednesday, February 28, 2007 3:02 PM
İçindekiler
Hazırlık
Giriş .................................................................3
Aksesuar bilgileri...............................................4
Önemli bilgi ......................................................5
Ses iletim kulaklığı (yalnızca KX-TGA717) ...... 6
Kumanda düğmeleri .........................................7
Ekranlar ...........................................................8
Bağlantılar ........................................................8
Pilin takılması/değiştirilmesi .............................9
Pilin şarj edilmesi ............................................. 9
Bu işletme talimatlarında kullanılan simgeler . 10
Ekran dili ........................................................ 11
Mobil cihazın ana birime kaydedilmesi ..........11
Erişilebilirlik özellikleri
Konuşulan numarayı görüntüleme (Sesli
anons) ............................................................ 12
Temel İşlemler
Çağrı yapma/cevaplama ................................13
Mobil cihaz telefon rehberi ............................. 13
Arayan kişi listesi ........................................... 14
Çok birimli Kullanım İşlemleri......................... 15
Mobil cihaz/ana birim ayarları
Mobil cihaz/ana birim ayarları ........................16
Zaman ayarları ................................................18
Telesekreter Sistemi Özellikleri
Telesekreter sistemi .......................................19
Yararlı Bilgiler
Kemer klipsini kullanma .................................20
Omuz desteği ek parçasının kullanılması ...... 20
Karakter girişi..................................................21
Erişilebilirlik özellikleri için sorun giderme...... 22
Özellikler ........................................................23
(2)
Page 27

TGA715FX_717FX(tr-tr).book Page 3 Wednesday, February 28, 2007 3:02 PM
Hazırlık
Giriş
Bir Panasonic dijital kablosuz telefon satın aldığınız için teşekkür ederiz.
Uyumluluk Beyanı:
L
Panasonic Communications Co., Ltd., bu donanımın Radyo ve Telekomünikasyon Terminal
Donanımları (R&TTE) Direktifi 1999/5/EC’nin temel şartlarına ve diğer ilgili hükümlerine uygun
olduğunu beyan eder.
Bu kılavuzda açıklanan ilgili Panasonic ürünleri için Uyumluluk Beyanını aşağıdaki siteden
indirebilirsiniz:
http://www.doc.panasonic.de
İletişim Adresi:
Panasonic Services Europe
a Division of Panasonic Marketing Europe GmbH
Panasonic Testing Centre
Winsbergring 15, 22525 Hamburg, Germany
Not:
L
Herhangi bir sorun çıktığında, öncelikle donanımı satın aldığınız yere başvurmalısınız.
Telefonunuz
Hazırlık
KX-TGA715
(Büyük düğmeli tip
mobil cihaz)
KX-TGA717
(Ses iletim tipi mobil
cihaz)
(3)
Page 28

TGA715FX_717FX(tr-tr).book Page 4 Wednesday, February 28, 2007 3:02 PM
Hazırlık
Aksesuar bilgileri
Birlikte verilen aksesuarlar
No. Aksesuar parçaları Miktar
1
AC Adaptörü (Parça No. PQLV209CE) 1
2
Şarj cihazı (Parça No. PQLV30045) 1
3
Şarj edilebilir piller AAA (R03) boyutunda
(Parça No. HHR-55AAAB ya da HHR-4EPT)
4
Mobil cihaz kapağı
5
Kemer klipsi 1
6
Omuz desteği1
*1 Mobil cihaz kapağı mobil cihaza takılı olarak verilir.
123456
İlave/yedek aksesuarlar
Şatış bilgileri için en yakın Panasonic satıcısı ile irtibata geçiniz.
No. Model No. Açıklaması
1
KX-TCA94EX Kulaklık
1
*1
2
1
Not:
L
Pilleri değiştirirken, yalnızca 2 adet tekrar şarj edilebilir, AAA (R03) boyutunda ve 750 mAh kapasiteli
nikel metal hidrit (Ni-MH) pil kullanınız. Tekrar şarj edilebilir Panasonic piller (Model No. P03P)
kullanmanızı öneriyoruz.
L
Tekrar şarj edilebilir Panasonic piller dışındaki pillerin kullanılmasından doğabilecek ünite hasarı ya
da performans kaybı konusunda sorumluluk kabul edemiyoruz.
(4)
Page 29

TGA715FX_717FX(tr-tr).book Page 5 Wednesday, February 28, 2007 3:02 PM
L
Telefon hattı kablo fişine sıvı (deterjan,
Önemli bilgi
Genel
L
Yalnızca bu ürünle birlikte gelen, sayfa 4’de
belirtilen AC adaptörünü kullanınız.
L
AC adaptörünü standart 220–240 V AC priz
dışında hiçbir AC prize takmayınız.
L
Aşağıdaki durumlarda bu ürünle arama
yapılamaz:
– mobil cihaz pillerinin şarj edilmesi
gerektiğinde veya tükenmesi halinde.
– elektrik kesilmesi durumunda.
L
Şarj cihazını veya mobil cihazı pil(ler)i
değiştirmek dışında açmayınız.
L
Bu ürün acil yardım/yoğun bakım tıbbi
cihazlarının yakınında veya kalp pili takanlar
tarafından kullanılmamalıdır.
L
Ünitenin üzerine bir şey düşmemesine ve içine
sıvı dökülmemesine dikkat edilmelidir. Bu
ürünü aşırı duman, toz, mekanik titreşim ve
çarpmaya maruz bırakmayınız.
Ortam
L
Bu ürünü su yakınında kullanmayınız.
L
Bu ürün radyatör ve ocak gibi ısı
kaynaklarından uzak tutulmalıdır. Ayrıca,
sıcaklığı 5 °C’den düşük veya 40 °C’den
yüksek olan odalara da konulmamalıdır.
L
AC Adaptörü ana kesinti cihazı olarak
kullanılmaktadır. AC prizinin ürünün yakınına
takılmasını ve kolayca erişilebilir olmasını
sağlayınız.
Uyarı:
L
Elektrik çarpması riski ile karşı karşıya
kalmamak için, cihazı yağmura veya herhangi
bir aşırı neme maruz bırakmayınız.
L
Üründen duman, anormal koku veya ses
çıkması durumunda ürünün fişini prizden
çekiniz. Bu tür durumlar yangın veya elektrik
çarpmasına yol açabilir. Artık duman
çıkmadığından emin olduktan sonra, yetkili
servis merkezini arayınız.
temizleyici vb.) dökmeyin ya da fişin
ıslanmasına izin vermeyin. Aksi halde yangın
çıkabilir. Telefon hattı kablo fişi ıslandığında
fişi derhal duvardaki telefon prizinden çıkarın
ve kullanmayın.
Pil uyarısı
L
Sayfa 4’te belirtilen pilleri kullanmanızı tavsiye
ederiz.
kullanınız.
L
Eski pillerle yeni pilleri birlikte kullanmayınız.
L
Pilleri ateşe atmayınız, patlayabilirler. Özel
elden çıkarma talimatları için yerel atık
yönetimi kurallarını öğreniniz.
L
Pilleri açmayınız ya da zarar vermeyiniz.
Pillerden açığa çıkacak olan elektrolit koroziftir
ve deri ya da gözde yanıklara ya da
yaralanmalara yol açabilir. Yutulması halinde
elektrolit zehirleyici olabilir.
L
Pilleri kullanırken dikkatli olunuz. Yüzük,
bilezik ya da anahtar gibi iletken maddelerin
pillerle temas etmesine izin vermeyiniz. Aksi
takdirde meydana gelebilecek kısa devre
pillere ve/veya iletken maddenin ısınmasına ve
yanıklara yol açabilir.
L
Pilleri bu işletme talimatlarında verilen bilgilere
uygun olarak şarj ediniz.
L
Pilleri şarj etmek için sadece ürünle birlikte
gelen ana birimi (veya şarj cihazını) kullanınız.
Ana birimi (veya şarj cihazını) kurcalamayınız.
Bu talimatlara uyulmaması pillerin akmasına
veya patlamasına neden olabilir.
Kullanılmayan Elektrikli ve Elektronik
Aletlerin Elden Çıkarılmasına İlişkin Bilgi
(bireysel kullanıcılar)
Ürünlerde ve/veya ürünle birlikte gelen
Hazırlık
Yalnızca şarj edilebilir pilleri
(5)
Page 30

TGA715FX_717FX(tr-tr).book Page 6 Wednesday, February 28, 2007 3:02 PM
Hazırlık
dokümanlarda yer alan bu simge, ömrü sona
ermiş elektrikli ve elektronik ürünlerin genel ev
çöpüne karıştırılmaması gerektiğini ifade eder.
Uygun biçimde toplanmaları, işlenmeleri ve geri
dönüştürülmeleri için lütfen bu tür ürünleri, bunlar
için öngörülen ve ücretsiz olarak kabul edilen
toplama noktalarına götürün. Ayrıca bazı
ülkelerde eski ürününüzü, yeni eşdeğer bir ürün
satın aldığınız yerel satıcınıza teslim
edebilirsiniz.
Ürünün doğru bir şekilde elden çıkarılması,
değerli kaynakları korumaya yardımcı olacak ve
yanlış biçimde atık gidermenin insan sağlığına ve
çevreye verebileceği olası negatif etkileri
önleyecektir. Çevrenizdeki en yakın toplama
noktasına ilişkin daha ayrıntılı bilgi almak için
lütfen yerel yetkililere başvurun.
Ürünlerin uygun biçimde elden çıkarılmaması
durumunda, ilgili ülkenin yasal düzenlemelerine
bağlı olarak cezalar uygulanabilir.
Avrupa Birliği dahilindeki kurumsal
kullanıcılar için
Elektrikli ve elektronik aletlerinizi elden çıkarmak
istiyorsanız, ayrıntılı bilgi için lütfen satıcınıza
veya tedarikçinize başvurun.
Avrupa Birliği dışındaki ülkelerde atık
gidermeye ilişkin bilgi
Bu simge yalnızca Avrupa Birliği sınırları
içerisinde geçerlidir.
Bu ürünü elden çıkarmak istiyorsanız, lütfen yerel
yetkililere veya satıcınıza başvurun ve uygun atık
giderme yöntemi konusunda bilgi alın.
Ses iletim kulaklığı (yalnızca
KX-TGA717)
Mobil cihazda, telefon görüşmeleriniz sırasında
sesleri oluşturmak için titreşimleri kullanan bir
ses iletim kulaklığı bulunmaktadır.
Uygun şekilde çalışması için ses iletim
kulaklığını, kulağınızın yakınına gelecek şekilde
yüzünüze doğru dayayınız.
Normal olarak ses kulak kanalına girer ve kulak
zarını titretir. İnsanlar titreşimi iç kulakta hisseder
ve bunu işitme siniri tarafından alındığı şekilde
anlar.
Ses iletim
kulaklığı
Ses iletim kulaklığını yüzünüze dayayınız
(kulağınıza değil). Hangi konumun daha iyi sonuç
verdiğini bulmak için değişik konumları
deneyiniz. Denemeye şakak bölgesiyle
başlayınız.
Ses
Dış kulak
Orta kulak
İşitsel
sinir
İç kulak
(6)
Not:
L
Ses iletim kulaklığını bir işitme cihazı üzerine
yerleştirmeyiniz. Uğuldama ya da farklı
parazitler duyulabilir.
L
Ses iletim kulaklığının verimliliği, kullanıcının
işitme kaybının türüne ve derecesine göre
değişiklik gösterir.
Page 31

TGA715FX_717FX(tr-tr).book Page 7 Wednesday, February 28, 2007 3:02 PM
L
Ses titreşimle oluştuğundan, işitme kabiliyeti
normal olan kişiler, ses iletim kulaklığını
kulaklarına dayayarak mobil cihazı normal bir
telefon gibi kullanabilirler.
L
Ses iletim kulaklığı tozlanır ya da yağlanırsa,
yumuşak ve kuru bir bezle temizleyiniz.
Kumanda düğmeleri
Mobil cihaz (KX-TGA715)
A
C
D
E
F
G
H
B
I
Mobil cihaz (KX-TGA717)
J
K
L
M
N
O
P
Q
R
A
Hoparlör
B
Şarj Kontağı
C
Kulaklık jakı
D{j/OK} (Menü/TAMAM)
E
{k}
F
{C}
G
Navigatör tuşu (
H
{s}
I{R} (Geri arama)
J
Şarj göstergesi
Zil göstergesi
Mesaj göstergesi
K
KX-TGA715
Alıcı
KX-TGA717
Ses iletim kulaklığı
L
Ekran
M
{R}
N
{ih}
O{C/T}
P
Arama tuş takımı
Q{INT} (Dahili çağrı)
R
Mikrofon
*1 Yalnızca KX-TG7120/KX-TG8120/KX-
TG9120 kullanıcıları için
(Telefon rehberi)
(Konuşma)
{^}/{V}/{>}/{<}
(Hoparlörden konuşma)
*1
(Tekrar arama/Duraklama)
(Kapat/Gir)
(Sil/Sustur)
Hazırlık
)
A
B
C
D
E
F
G
H
I
J
K
L
M
N
O
P
Q
R
(7)
Page 32

TGA715FX_717FX(tr-tr).book Page 8 Wednesday, February 28, 2007 3:02 PM
Hazırlık
Ekranlar
Ekran simgeleri
Ekran
simgesi
w
L
k
u
5
[2]
0
*1 Yalnızca KX-TG7120/KX-TG8120/KX-
TG9120 kullanıcıları için
*2 Yalnızca sesli posta kullanıcıları için
Anlamı
Bir ana birim kapsamı
alanında
L
Yanıp sönüyorsa: Mobil
cihaz ana birimi arıyor. (ana
birim kapsama alanı
dışındadır, mobil cihaz ana
birime kayıtlı değildir, ana
birim açık değildir)
Mobil cihaz ana birime
erişiyor. (dahili çağrı, ünite
bulma, ana birim ayarlarının
değiştirilmesi, vs.)
Mobil cihaz harici bir görüşme
yapıyor.
Telesekreter sistemi açıktır.*1
(sayfa 19)
Pil şarj seviyesi
Mobil cihaz numarası
(Bekleme ekranı ayarı, sayfa
16)
Yeni sesli mesaj alındı
L
Hat başka bir mobil cihaz
tarafından kullanılıyor.
L
Telesekreter sistemi başka
bir mobil cihaz veya ana
birim tarafından
kullanılıyor.
*1
Bağlantılar
AC adaptörünü şarj cihazına bağlayınız ve
kabloyu gösterildiği şekilde düzenleyiniz. Şarj
cihazı, gerekirse, duvara monte edilebilir.
Çengel
25 mm
Vidalar
Yalnızca verilen AC adaptörünü
kullanınız.
Not:
L
AC adaptörü daima prizde tutulmalıdır.
(Kullanım sırasında adaptörün ısınması
normaldir.)
L
AC adaptörü, dikey duran veya zemine monte
edilmiş bir AC prizine takılmalıdır. AC
adaptörünü tavana monte edilmiş AC prizine
takmayınız, aksi taktirde adaptörün ağırlığı
prizden çıkmasına neden olabilir.
*2
Konum
L
Azami uzaklık ve parazitsiz görüşme için ana
birimi aşağıda belirtilen şekilde yerleştiriniz:
–TV, radyo, kişisel bilgisayar ya da başka
telefonlar gibi elektrikli cihazlardan uzak bir
yere.
– kolayca erişilebilecek, yüksek ve merkezi bir
yere.
(220–240 V,
50 Hz)
(8)
Page 33

TGA715FX_717FX(tr-tr).book Page 9 Wednesday, February 28, 2007 3:02 PM
Hazırlık
Pilin takılması/değiştirilmesi
Önemli:
L
Lütfen sadece sayfa 4, 5 bölümünde belirtilen
şarj edilebilir pilleri kullanınız.
L
Piller değiştirilirken, sayfa 4, 5 bölümünde
belirtilen şarj edilebilir Panasonic pillerin
kullanılmasını tavsiye ederiz.
L
Pillerin uçlarını (S, T) kuru bir bezle siliniz.
L
Pilleri takarken, pil terminallerine (S, T) veya
ünite bağlantılarına dokunmamaya çalışın.
1
Mobil cihaz kapağının üzerindeki çentiğe
sıkıca bastırarak ok yönünde itiniz.
L
Pilleri değiştirirken, eski pillerin önce pozitif
S
) terminalini çıkarınız.
(
2
Pillerin önce negatif (T) terminalini takınız.
Mobil cihaz kapağını kapatınız.
Pilin şarj edilmesi
İlk kullanımdan önce mobil cihazı 7 saat kadar
süreyle şarj cihazının üzerine yerleştiriniz.
Şarj sırasında pil simgesi aşağıdaki gibi görünür.
5
Piller tam olarak dolduğunda,
görünmeye devam eder.
L
Mobil cihaz şarj cihazına yerleştirildiğinde şarj
gösterge lambaları yanar.
L
Resimde görülen model KX-TGA715’dir.
Not:
L
Mobil cihaz bir ana birimde kayıtlı değilken şarj
cihazına yerleştirildiğinde mobil cihaz
ekranında “
Bekleyiniz) mesajı görüntülenebilir.
L
Şarj etme sırasında mobil cihazın ısınması
normaldir.
L
Üniteyi hemen kullanmak istiyorsanız pilleri en
az 15 dakika şarj ediniz.
L
Mobil cihazın şarj kontaklarını ayda bir defa
yumuşak, kuru bir bezle temizleyiniz. Aksi
takdirde piller gerektiği gibi şarj edilemeyebilir.
Ünite yağ, toz veya aşırı neme maruz
kalıyorsa, daha sık temizleyiniz.
Please Wait...
ekranda
Şarj Kontağı
” (Lütfen
(9)
Page 34

TGA715FX_717FX(tr-tr).book Page 10 Wednesday, February 28, 2007 3:02 PM
Hazırlık
Pil şarj seviyesi
Pil simgesi Pil şarj seviyesi
5
6
7
Panasonic Ni-MH pil performansı (verilen
piller)
Çalışma Çalışma süresi
Sürekli kullanımda KX-TGA715:
Sürekli bekleme
modunda
Not:
L
Pillerin ilk şarj işleminde tam kapasiteye
ulaşmaması normaldir. Pil maksimum
kapasiteye birkaç kez tam olarak şarj/deşarj
(kullanım) edildikten sonra ulaşır.
L
Gerçek pil performansı, mobil cihazın ne kadar
sıklıkla kullanılıp kullanılmadığına (bekleme)
bağlıdır.
L
Pilin ömrü, zaman içerisinde kullanım
koşullarına ve çevre ısısına bağlı olarak daha
kısa olabilir.
L
Mobil cihaz tam olarak şarj edildikten sonra
şarj cihazı üzerinde bırakıldığında pillere
herhangi bir zarar gelmez.
L
Piller değiştirildikten sonra pilin gücü doğru
şekilde gösterilmeyebilir. Bu durumda, mobil
cihazı şarj cihazı üzerine yerleştiriniz ve en az
7 saat süreyle şarj ediniz.
Yüksek
Orta
Düşük
Yanıp sönüyorsa: Şarj
edilmesi gerekir.
Azami 12 saat
KX-TGA717:
Azami 10 saat
Azami 150 saat
Bu işletme talimatlarında
kullanılan simgeler
Simge Anlamı
{j
/OK
i
“”
}{j
/OK} tuşuna basınız.
Bir sonraki işleme devam
edin.
{^}
ya da
ekranda tırnak içerisinde
gösterilen kelimeleri seçiniz
El Ünit. Ayarı
(örn., “
{V}
tuşuna basarak
”).
(10)
Page 35

TGA715FX_717FX(tr-tr).book Page 11 Wednesday, February 28, 2007 3:02 PM
Hazırlık
Ekran dili
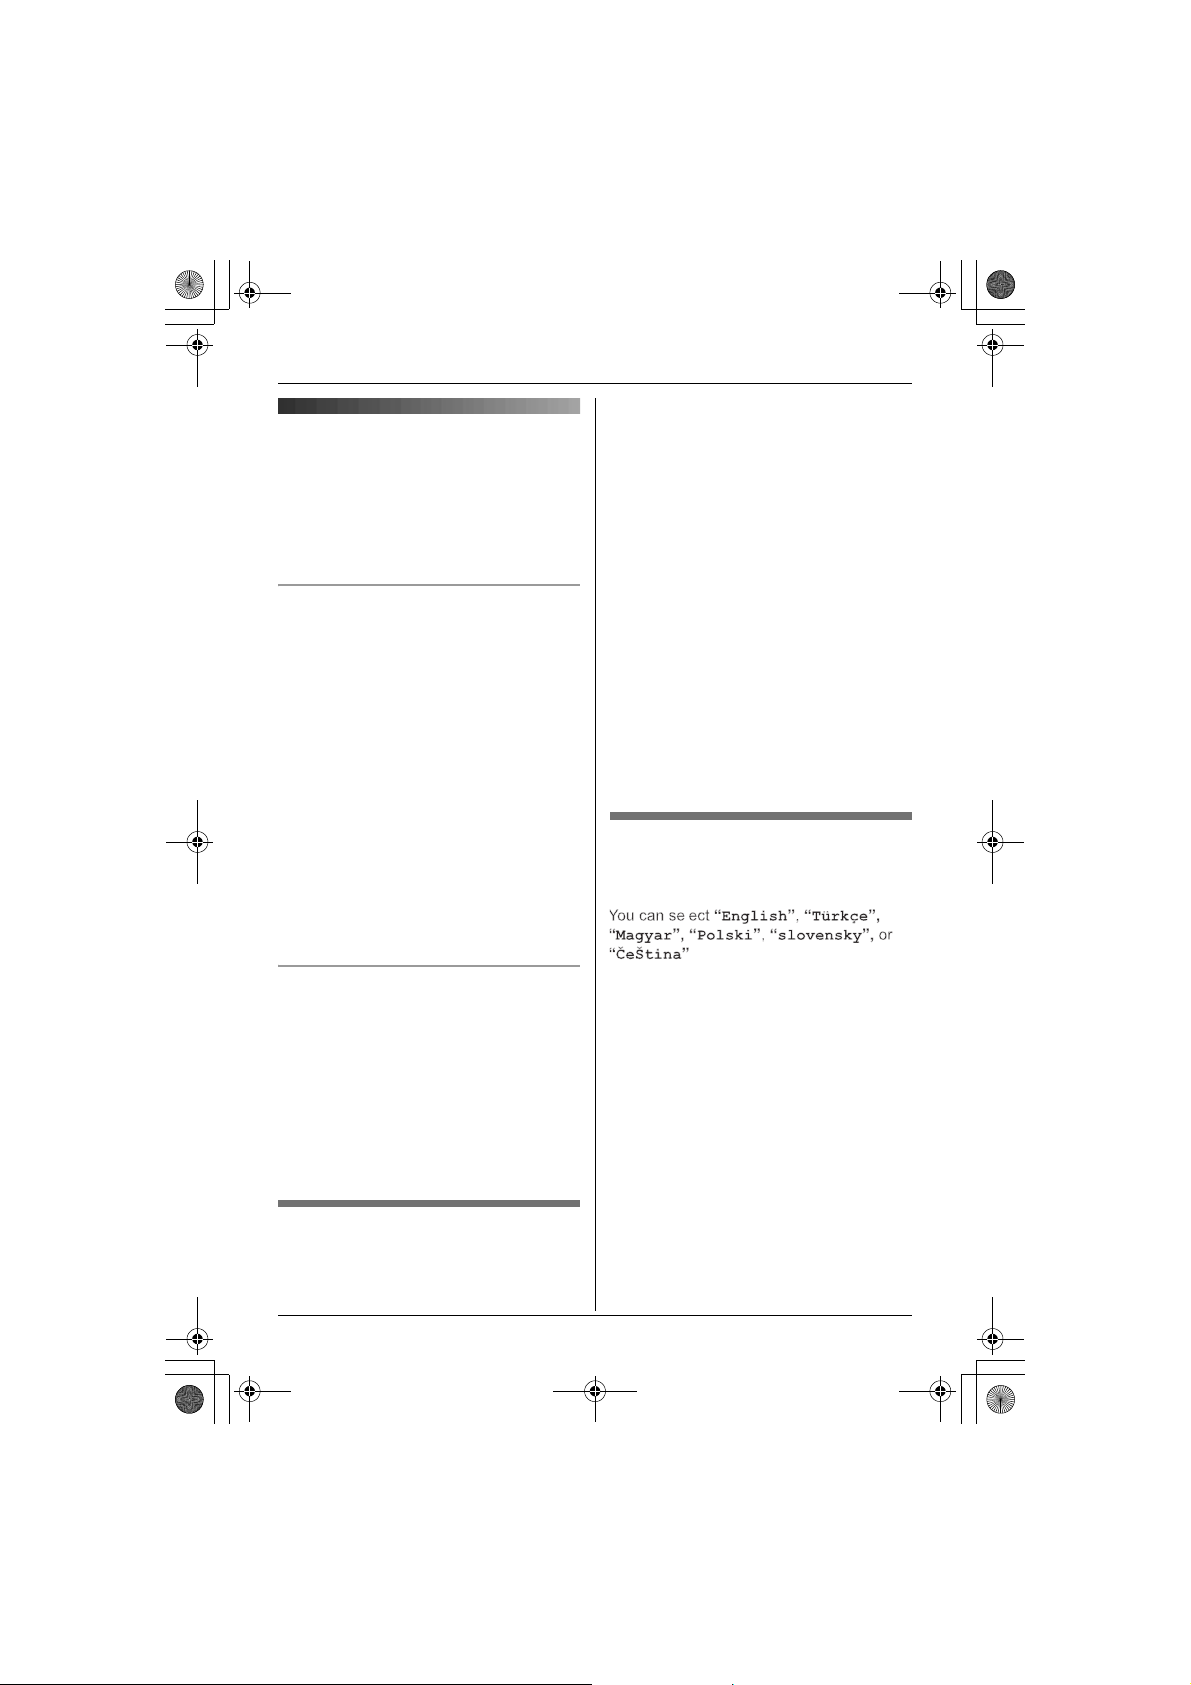
17 ekran dili sunulmaktadır.
Ekran dili İngilizce olarak hazırlanmıştır. Bu
işletim talimatlarında gösterilen ekran örnekleri
Türkçe olarak gösterilir. Ekran dilini istediğiniz
dile dönüştürmek için sırasıyla
{j
/OK} tuşuna, 3 kez
{V}
tuşuna, {>} tuşuna,
kez
tuşuna basınız, istenen dili seçmek için
tuşuna ve sonra
Ekran dilini değiştirmek için
1
{ih} i {j
2
Seçmek için
Ünit. Ayarı
3
Seçmek için
“
Ekran Ayarları”. i {>
4
Seçmek için
“
Dil Seç”. i {>
5
İstenen dili seçmek için
basın.
Not:
L
Sesli anons dilini değiştirmek için sayfa 12’ye
bakınız.
{ih}
/OK
{^}
veya
”. i {>}
{^}
veya
{^}
veya
i {>} i {ih}
{ih}
{^}
tuşuna, {>} tuşuna, 2
tuşuna basınız.
}
{V}
tuşuna basınız “El
{V}
{V}
}
{^}
tuşuna,
{V}
tuşuna, {>}
tuşuna basınız
}
tuşuna basınız
veya
{V}
{>}
tuşuna
Mobil cihazın ana birime
kaydedilmesi
Kaydetme:
KX-TG7100/KX-TG7120/KX-TG7150/KXTG7170/KX-TG8100/KX-TG8120/KX-TG9120
Mobil cihazın açık olduğundan emin olunuz. Açık
değilse, mobil cihazı açmak için
basıp birkaç saniye basılı tutunuz.
1
Mobil cihazı bekleme moduna geçirmek için
mobil cihazı kaldırıp
2
Ana birimdeki
kadar, kayıt sinyali duyulana dek basılı
durumda tutunuz.
3
Mobil cihazı ana birimin üzerine yerleştiriniz.
Kayıt sinyali çalmaya devam eder. Mobil cihaz
hala ana birimin üzerindeyken, bir onaylama
sinyali duyuluncaya ve
sönmesi kesilinceye kadar bekleyiniz.
Not:
L
Bir hata sinyali duyulursa ya da w simgesi
hala yanıp sönüyorsa, mobil cihazı manuel
olarak kaydediniz (sayfa 15).
L
2 adımda tüm kayıtlı mobil cihazların zili
çalmaya başlarsa, durdurmak için
basınız. Tekrar 1. adımdan başlayınız.
L
İlk kullanımdan önce pilleri yaklaşık 7 saat şarj
ediniz.
L
Telesekreter sistemi, yalnızca KX-TGA715/
KX-TGA717, KX-TG7120/KX-TG8120/KXTG9120’ye kaydedildiğinde kullanılabilir.
L
KX-TGA715/KX-TGA717, SMS özelliklerini
desteklemez.
L
KX-TGA914 (Kablosuz kamera) ile birlikte KXTG9120 kullananlar için
KX-TGA715/KX-TGA717, kamera
görüntüleme özelliklerini desteklemez.
L
KX-TGA915 (USB adaptörü) ile birlikte KXTG9120 kullananlar için
KX-TGA715/KX-TGA717, internet arama
özelliklerini desteklemez.
{x}
tuşuna basınız ve 3 saniye
{ih}
{ih}
tuşuna basın.
w
simgesinin yanıp
{x}
tuşuna
tuşuna
(11)
Page 36

TGA715FX_717FX(tr-tr).book Page 12 Wednesday, February 28, 2007 3:02 PM
Erişilebilirlik özellikleri
Erişilebilirlik özellikleri
Konuşulan numarayı
görüntüleme (Sesli anons)
Sesli anons özelliği, mobil cihazın görüntülenen
numarayı sesli olarak bildirmesini sağlar.
Kimlik anonsu/Liste anonsu)
Çağrı Kimlik anonsu
Telefon numarası bilgisinin görüntülendiği bir
çağrı aldığınızda, mobil cihaz görüntülenen
telefon numarasını mobil cihaz hoparlöründen
anons eder.
L
Arayanın telefon numarasının anons edilmesi
için önce Çağrı Kimlik servisine kaydolmanız
gerekir. Ayrıntılı bilgi için servis sağlayıcınızla/
telefon şirketinizle temas kurunuz.
L
Telefondayken bir çağrı aldığınızda, Çağrı
Kimliği ve Çağrı Bekletme Çağrı Kimliği
servislerine abone olsanız da 2. çağrının
telefon numarası anons edilmez.
L
Anons zil sesi şiddetinde (sayfa 16) duyulur.
L
Bu özellik açık ya da kapalı (sayfa 12) olarak
ayarlanabilir.
(Çağrı
Sesli anonsun ses seviyesinin
ayarlanması
Liste anonsu
ayarlayabilirsiniz. Çağrı Kimliği anonsu ses
seviyesi, zil sesi şiddeti ayarlandığında ayarlanır
(sayfa 16).
1
{j
/OK
2
“
El Ünit. Ayarı” i {>}
3
“
Diğer Seçenek” i {>}
4
“
Sesli Anons” i {>}
5
“
AlıcıSesAyar” i {>}
6
İstenen ses seviyesini seçiniz.
L
Sesli anons özelliğini kapatmak için, ses
seviyesini “
7
{>} i {ih}
Not:
L
Çağrı Kimliği anonsu mobil cihaz zil sesi
şiddetinde duyulur (sayfa 16). Sesli anons zil
sesi şiddeti “
mobil cihaz, zil sesi şiddetine bakmaksızın
telefon numarasını anons etmez.
için ses seviyesini
}
KAPALI
” olarak seçiniz.
KAPALI
” olarak ayarlandığında,
Liste anonsu
Siz
tekrar arama listesini, çağrı listesini
telefon rehberini
telefon numaralarını hoparlörden anons eder.
L
Görüntülenen numarada bir P(duraklatma)
varsa, mobil cihaz her P için 0,5 saniye ekler;
numarada diğer semboller bulunuyorsa
(örneğin,
ve bir sonraki numarayı anons eder.
görüntülerken, mobil cihaz
;
, #, vb.) mobil cihaz sembolleri atlar
ve
(12)
Sesli anons için dil seçilmesi
6 adet sesli anons dili bulunur.
1
{j
/OK
}
2
“
El Ünit. Ayarı” i {>}
3
“
Diğer Seçenek” i {>}
4
“
Sesli Anons” i {>}
5
“
Dil Seç” i {>}
6
İstediğiniz dili seçiniz. i {>} i
Not:
L
Ekran dilini değiştirmek için sayfa 11’e bakınız.
{ih}
Page 37

TGA715FX_717FX(tr-tr).book Page 13 Wednesday, February 28, 2007 3:02 PM
Temel İşlemler
Temel İşlemler
Çağrı yapma/cevaplama
Özellik Çalışma
Açma
Kapama
Arama yapma Telefon numarasını çeviriniz.
Çağrıları yanıtlama
Aramayı sonlandırma
Alıcı/hoparlör ses seviyesi Çağrı sırasında
Tekrar arama listesiyle bir
arama yapma
Numaranın tekrar arama
listedinden silinmesi
Sesinizin susturulması Görüşme sırasındayken, {C/T} tuşuna basınız. Görüşmeye
{R}
tuşu (geri arama özelliğini
kullanmak için)
{ih}
tuşuna 1 saniye kadar basınız.
{ih}
tuşuna 2 saniye kadar basınız.
i {C}/{s}
{C}
{ih}
{^}
veya
{V}
tuşuna basınız.
{R} i
basınız.
{R} i
basınız.
{ih}
devam etmek için, tekrar
{R}
bilgi için servis sağlayıcınızla/telefon şirketinizle temas kurunuz.
İstenen numarayı seçmek için
i {C}/{s}
İstenen numarayı seçmek için
i {>} i “Sil” i {>} i “EVET” i {>} i
{
C/T} tuşuna basınız.
isteğe bağlı telefon özelliklerine erişim için kullanılır. Ayrıntılı
{^}
{^}
veya
veya
{V}
{V}
tuşuna
tuşuna
Mobil cihaz telefon rehberi
Özellik Çalışma
Girişlerin eklenmesi (en fazla
50 ad ve telefon numarası)
Arama yapma
İlk harfe göre tarama (dizin
tarama)
Girişlerin düzenlenmesi
{k} i {j
(maks. 16 karakter) giriniz.
{j
/OK} i Kişinin telefon numarasını (maks. 24 rakam) giriniz.
i {j
L
Bir ad girmek için, bkz. sayfa 21.
{k} i
basınız.
{k} i
basınız (sayfa 21).
{V}
tuşuna basınız.
L
Karakter giriş modunu değiştirmek için:
{R} i
{k} i
basınız.
düzenleyiniz.
düzenleyiniz.
/OK} i “
/OK} i “
İstenen girişi görüntülemek için
i {C}/{s}
Aradığınız harfi içeren rakam tuşuna ({0} ile {9} arası)
Karakter giriş modunu seçiniz. i {>
İstenen girişi görüntülemek için
i {j
i {j
i {j
Yeni Giris” i {>} i
i
Kaydet” i {>} i {ih}
{^}
i
İstenen girişi görüntülemek için
/OK} i “
Düzelt” i {>} i
/OK} i Telefon numarasını
/OK} i “
{^}
Kaydet” i {>} i {ih}
Kişinin ismini
ya da
{V}
}
ya da
{V}
İsmi
tuşuna
{^}
ya da
tuşuna
(13)
Page 38

TGA715FX_717FX(tr-tr).book Page 14 Wednesday, February 28, 2007 3:02 PM
Temel İşlemler
Özellik Çalışma
Bir kaydı silme
Tüm kayıtları silme
Bir kaydı kopyalama
Tüm kayıtları kopyalama
Zincirleme arama Görüşme sırasındayken,
{k} i
İstenen girişi görüntülemek için
i {j
basınız.
i {ih}
{k} i {j
{>} i “EVET” i {>} i {ih}
{k} i
basınız.
telefon rehberi kaydını göndermek istediğiniz mobil cihaz
numarasını giriniz.
tuşuna basınız.
{k} i {j
cihaz telefon rehberi kaydını göndermek istediğiniz mobil cihaz
numarasını giriniz.
tuşuna basınız.
seçmek için
tuşlamak için
/OK} i “
/OK} i “
İstenen girişi görüntülemek için
i {j
/OK} i “
/OK} i “
{^}
veya
{>}
tuşuna basınız.
Sil” i {>} i “EVET” i {>}
Tümünü Sil” i {>} i “EVET” i
Kopyala” i {>} i
i “Tamam
i
” görüntülendiğinde
Tümünü Kopyala” i {>} i
“
Tamam
” görüntülendiğinde
{k}
tuşuna basınız. i İstenen girişi
{V}
tuşuna basınız. i Numarayı
Arayan kişi listesi
Son 50 aramaya ait telefon numaraları, arayan kişi listesine kaydedilecektir.
Özellik Çalışma
Arayan kişi listesine bakmak
ve geri arama
Geri aramadan önce arayan
telefon numarasının
değiştirilmesi
Çağrı bilgisinin mobil cihaz
telefon rehberine kaydedilmesi
Bir kaydı silme
Tüm kayıtları silme
{j
/OK} i “
aramadan başlayarak tarama yapmak için
eski aramadan başlatarak tarama yapmak için ise
basınız.
{j
/OK} i “
görüntülemek için
i “Düzenle ve Ara” i {>} i
i {C}/{s}
{j
/OK} i “
görüntülemek için
i “Tel. Reh. Ekle” i {>} i
giriniz” bölümünden devam ediniz (Girişlerin eklenmesi).
{j
/OK} i “
görüntülemek için
i “Sil” i {>} i “EVET” i {>} i {ih}
{j
/OK} i “
Tümünü Sil” i {>} i “EVET” i {>} i {ih}
“
Arayan No.’lar” i {>} i
i {C}/{s}
Arayan No.’lar” i {>} i
{^}
ya da
{V}
tuşuna basınız. i {j/OK}
Arayan No.’lar” i {>} i
{^}
ya da
{V}
tuşuna basınız. i {j/OK}
Arayan No.’lar” i {>} i
{^}
ya da
{V}
tuşuna basınız. i {j/OK}
Arayan No.’lar” i {>} i {j
{^}
ya da
{V}
tuşuna
{^}
ya da
{V}
tuşuna
Mobil cihaz
{ih}
Mobil
{ih}
En son
{V}
tuşuna basınız; en
{^}
tuşuna
İstenen girişi
Numarayı düzenleyiniz.
İstenen girişi
Sayfa 13’teki “Kişinin ismini
İstenen girişi
/OK} i
(14)
Page 39

TGA715FX_717FX(tr-tr).book Page 15 Wednesday, February 28, 2007 3:02 PM
Temel İşlemler
Çok birimli Kullanım İşlemleri
Özellik Çalışma
Dahili kullanım: arama Örnek: Mobil cihaz 1’i aradığınızda
Dahili kullanım: cevaplama
Telefonlar arasında çağrı
transferi
Konferans arama
(2 kişi dışarıdan biriyle
konferans araması
gerçekleştirebilir)
Manuel kayıt
Bir mobil cihazın iptal edilmesi
*1 KX-TG7150/7170 konferans arama özelliğini desteklemez.
{x}
tuşuna basıldıktan sonra, bu prosedürün geri kalan kısmı 1 dakika içinde tamamlanmalıdır.
*2
*3 Ana birim PIN numarasını unutursanız, en yakın Panasonic servis merkezine başvurunuz.
*1
{
INT} i {1} (istenen mobil cihaz numarası) tuşuna basınız.
L
Görüşmeniz bitince,
{C}/{s}
L
Örnek: Mobil cihaz 1’e bir çağrı transfer ettiğinizde
Bir gelen arama sırasında, {INT} tuşuna basınız. i {1}
(istenen mobil cihaz numarası) tuşuna basınız.
cevap verdiğinde, transferi tamamlamak için
basınız.
Örnek: Mobil cihaz 1 ile konferans arama yaptığınızda
Bir gelen arama sırasında,
(istenen mobil cihaz numarası) tuşuna basınız.
cevap verdiğinde, konferans arama kurmak için
basınız.
Mobil cihaz:
{j
i “E/Ünit. Kaydet” i {>}
Ana birim:
Ana birimdeki
duyulana dek basılı durumda tutunuz.
Mobil cihaz:
“
sonra ana birim PIN kodunu giriniz (varsayılan: “
{j
L
{j
i “El ünit. İptali” i {>} i
mobil cihazı/cihazları istediğiniz mobil cihaz numarasına basarak
seçiniz.
tuşuna basınız.
Görüşmeniz bitince,
/OK} i “
Baz PIN’i Girin
/OK
}
Mobil cihaz başarıyla kaydedildiğinde, w yanıp sönmeyi
durduracaktır.
/OK} i “
i {j
{ih}
tuşuna basınız.
{ih}
tuşuna basınız.
i
Mobil cihaz 1
{ih}
tuşuna
{
INT} tuşuna basınız. i {1}
El Ünit. Ayarı” i {>} i “Kayıt” i {>}
{x}
tuşuna basınız ve 3 saniye kadar, kayıt sinyali
” ekranda görününceye kadar bekleyiniz,
Ana Ünite Ayarı” i {>} i
/OK} i “
EVET” i {>} i {ih}
i
Mobil cihaz 1
{3}
tuşuna
*2
0000
Giriniz “
İptal etmek istediğiniz
”)*3. i
335
”.
(15)
Page 40

TGA715FX_717FX(tr-tr).book Page 16 Wednesday, February 28, 2007 3:02 PM
Mobil cihaz/ana birim ayarları
Mobil cihaz/ana birim a yarları
Mobil cihaz/ana birim ayarları
Mobil cihaz ayarları
Mobil cihaz özelleştirilirken, geçerli öğe ya da ayar > ile gösterilir.
1
{j
/OK
}
2
Seçmek için
3
Mobil cihaz ayar menüsünde istenen öğeyi seçmek için
4
Alt menüde istenen öğeyi seçmek için
L
Bazı durumlarda ikinci bir alt menüden seçim yapmanız gerekebilir. i {>
5
İstenen ayarı seçmek için
sağ sütunundaki talimatı izleyiniz.
L
İşlemden çıkmak için,
Mobil cihaz ayarları
menüsü
Saat Ayarları Tarih/Saat Gir
Zil Ayarları Zil.Ses Yükslğ
Ekran Ayarları Bekleme Ekranı
Kayıt E/Ünit. Kaydet
Diğer Seçenek Yeni msj. ikazı
{^}
veya
{V}
tuşuna basınız “
{^}
ya da
{ih}
tuşuna basınız.
El Ünit. Ayarı
{^}
ya da
{^}
ya da
{V}
tuşuna basınız. i {>
{V}
tuşuna basınız, sonra {>} tuşuna basınız ya da tablonun
Alt menü Alt menü 2 Özellik (fabrika ayarı)
— Tarih ve saati ayarlayınız
Alarm
—Alarmı ayarlayın: sayfa 18
— Mobil cihaz zil sesi şiddeti
Harici Zil Sesi
Dahili Zil Sesi
—Harici çağrılar için zil sesleri
— Dahili çağrılar için zil sesleri
— Bekleme modu ekranı
Dil Seç
Kontrast
— Ekran dili (“
— Ekran kontrastı (Seviye 3)
— Manuel kayıt: sayfa 15
*5
Tus Sesleri
Oto. Konusma
— Yeni mesaj alarmı (“
—Tuş tonları açma/kapama
—Otomatik konuşma açma/
Sesli Anons AlıcıSesAyar
Dil Seç
”. i {>
}
{V}
tuşuna basınız. i {>
}
}
(Maksimum)
Zil Sesi 1
(“
Zil Sesi 3
(“
KAPALI
(“
”)
11
AÇIK
”)
(“
kapama (“
KAPALI
Sesli anons ses seviyesi
Orta
”): sayfa 12
(“
Sesli anons dili (“
sayfa 12
*1
*2*3
”)
*3
”)
*4
English
English
”): sayfa
KAPALI
*6
”)
}
”)
”):
(16)
Page 41

TGA715FX_717FX(tr-tr).book Page 17 Wednesday, February 28, 2007 3:02 PM
Mobil cihaz/ana birim ayarları
*1 Zil sesi kapatıldığında, mobil cihaz çalar:
– alarm için minimum seviyede
– dahili aramalar için minimum seviyede
– ünite bulma için maksimum seviyede
*2 Melodili zil sesi tiplerinden birini seçerseniz, arayan siz cevap vermeden telefonu kapatırsa zil sesi
tipi birkaç saniye çalmaya devam eder. Telefona cevap verdiğinizde çevir sesi duyabilirsiniz ya da
hatta kimse olmayabilir.
*3 Bu üründeki önceden kayıtlı melodiler © 2006 Copyrights Vision Inc. şirketinin izniyle kullanılmıştır.
KAPALI
*4 “
*5 Yalnızca KX-TG7120/KX-TG8120/KX-TG9120 kullanıcıları için
*6 Otomatik konuş özelliği çağrıları, mobil cihazı ana birim ya da şarj cihazı üzerinden kaldırarak
Ana birim ayarları
Bu mobil cihazı kullanarak ana birim ayarlarını yapabilirsiniz, diğer ayrıntılar için ana birim kullanım
talimatlarına başvurunuz.
” seçildiğinde sadece geçerli tarih ve saat görüntülenir.
El Ünit. Num.
“
Bu özellik, yeni mesaj kaydedildiğinde sizi uyarır.
Mobil cihaz üzerindeki mesaj göstergesi siz tüm yeni mesajları dinleyene kadar yanıp söner.
Mesaj alarmı devredeyken pil çalışma süresi kısalır (sayfa 10).
yanıtlamanıza olanak sağlar.
” seçilirse ve geçerli mobil cihaz numarası 2 ise, “
{C}
tuşuna basmanız gerekmez.
[2]
” görüntülenir.
(17)
Page 42

TGA715FX_717FX(tr-tr).book Page 18 Wednesday, February 28, 2007 3:02 PM
Mobil cihaz/ana birim ayarları
Zaman ayarları
Alarm
Ayarlanan saatte bir kez veya her gün 3 dakika alarm sinyali verecektir. Tarihi ve saati önceden
ayarlayınız (sayfa 16).
1
{j
/OK} i “
2
“
Saat Ayarları” i {>}
3
“
Alarm” i {>}
4
Bir alarm modu seçiniz. i {>
KAPALI
Bir kez
Her Gün
Yinele
5
İstenen saat ve dakikayı giriniz. i {j/OK
6
İstenen zil sesini seçiniz. i {>
7
“
Kaydet” i {>} i {ih}
Not:
L
Alarmı durdurmak için herhangi bir arama tuşuna basınız.
L
Konuşma veya dahili kullanım modundayken, görüşme sona erinceye kadar alarm çalmaz.
L“Bir kez
El Ünit. Ayarı” i {>}
tuşuna 2 kez basınız.
}
Alarmı kapatınız. Tekrar {>} tuşuna basınız sonra da bitirmek için
basınız.
Alarm ayarlanan saatte bir kez çalacaktır. İstenen günü ve ayı giriniz.
Alarm her gün ayarlanan saatte çalacaktır.
}
}
” seçeneğini seçerseniz, alarm çaldıktan sonra ayar “
KAPALI
{ih}
” haline gelir.
tuşuna
(18)
Page 43

TGA715FX_717FX(tr-tr).book Page 19 Wednesday, February 28, 2007 3:02 PM
Telesekreter Sistemi Özellikleri
Telesekreter Sistemi Özellikleri
Telesekreter sistemi
Aşağıdakiler için uygulanabilir:
KX-TG7120/KX-TG8120/KX-TG9120
Ana biriminizin telesekreter sistemini mobil cihazı kullanarak çalıştırabilirsiniz.
1
{j
/OK
}
2
Seçmek için
3
Telesekreter sistemi menüsünde istenen öğeyi seçmek için
Bazı durumlarda, alt menüden seçim yapmanız gerekebilir. i {>
L
L
İşlemden çıkmak için,
Telesekreter
sistemi menüsü
Yeni Msj. Çal
Tüm Msj. Çal
Selamlama
Kayd.
Yanıtlama AÇIK
Yanıtlama Kap.
Selamlama Çal
Mesajı Sil Tümünü Sil
Ayarlar
*1 Diğer ayrıntılar için ana birim kullanım talimatlarına başvurunuz.
{^}
veya
{V}
tuşuna basınız “
{ih}
tuşuna basınız.
Alt menü Özellik (fabrika ayarı)
— Yeni mesajları dinlet
— Tüm mesajları dinlet
—Karşılama mesajı kaydet
— Telesekreter sistemini aç
— Telesekreter sistemini kapat
—Karşılama mesajlarını dinlet
*1
Selamlama Sil
——
Telesekreter
–Mesajı tekrarlamak için
–Mesajı atlamak için
–Mesajı durdurmak için
–Mesajı silmek için
–Mesajı tekrarlamak için
–Mesajı atlamak için
–Mesajı durdurmak için
–Mesajı silmek için
–Kayıt işlemini durdurmak için {j/OK} tuşuna basınız.
–Mesajı durdurmak için
Tüm mesajları sil
Karşılama mesajını sil
”. i {>
}
{^}
ya da
}
{<}
{>}
ya da {2} tuşuna basınız.
{9}
{*}{4}
{<}
{>}
ya da {2} tuşuna basınız.
{9}
{*}{4}
{9}
{V}
tuşuna basınız. i {>
ya da {1} tuşuna basınız.
tuşuna basınız.
tuşuna basınız.
ya da {1} tuşuna basınız.
tuşuna basınız.
tuşuna basınız.
tuşuna basınız.
}
(19)
Page 44

TGA715FX_717FX(tr-tr).book Page 20 Wednesday, February 28, 2007 3:02 PM
Yararlı Bilgiler
Yararlı Bilgiler
Kemer klipsini kullanma
Kemer klipsini bağlama
Kemer klipsini çıkarma
Omuz desteği ek parçasının
kullanılması
Omuz desteği ek parçası ahizesiz telefon
görüşmesi yapma olanağı sağlar.
Omuz desteği ek parçasının takılması
Ürünle birlikte verilen kemer klipsini mobil cihaza
önceden takınız (sayfa 20). Omuz desteği ek
parçasını kemer klipsine oturana kadar
kaydırınız.
Not:
L
Şarj cihazı duvara monte edilmişse, mobil
cihaz şarj edilmeden önce omuz desteği ek
parçasının çıkarılması.
Omuz desteği ek parçasının çıkarılması
L
Resimde görülen model KX-TGA715’dir.
(20)
Page 45

TGA715FX_717FX(tr-tr).book Page 21 Wednesday, February 28, 2007 3:02 PM
Karakter girişi
Yararlı Bilgiler
Harf ve numara girmek için çevirme tuşları kullanılmaktadır. Her tuş üzerinde birden fazla karakter
bulunmaktadır. Kullanılabilir karakter girişi modları Alfabe (ABC), Nümerik (0-9), Yunanca (
Genişletilmiş 1 (
çevirme tuşuna ard arda basarak girilecek karakteri seçebilirsiniz.
– İmleci hareket ettirmek için
– Karakterleri ve numaraları girmek için çevirme tuşlarına basınız.
–{C/T} tuşuna basarak, imleç tarafından işaretlenmiş karakteri ya da numarayı siliniz.
Tüm numaraları ve karakterleri silmek için
– Büyük harf ve küçük harf arasında geçiş yapmak için
–Aynı çevirme tuşu üzerinde bulunan diğer bir karakteri girmek için, imleci bir sonraki boşluğa hareket
ettirmek için
G
), Genişletilmiş 2 (H) ve Kiril'dir (I). Nümerik hariç bu giriş modlarında, bir
{<}
ya da {>} tuşuna basınız.
{C/T}
tuşuna basın.
{*}
tuşuna basınız.
{>}
tuşuna basınız ve daha sonra uygun çevirme tuşuna basınız.
F
),
Karakter giriş modları
Metin girerken çeşitli karakter giriş modları kullanılabilir. Girilebilen karakterler giriş moduna bağlıdır.
Her karakter giriş modunda bulunan karakterler
Birim üzerinde karakter giriş ekranı görüntülenirse:
{k} i
Karakter giriş modunu seçiniz. i {>
Alfabe karakter tablosu (ABC)
Nümerik giriş tablosu (0-9)
}
Yunanca karakter tablosu (
M
)
(21)
Page 46

TGA715FX_717FX(tr-tr).book Page 22 Wednesday, February 28, 2007 3:02 PM
Yararlı Bilgiler
Genişletilmiş 1 karakter tablosu (N)
L
Aşağıdakiler hem büyük hem de küçük harf için kullanılmaktadır:
Genişletilmiş 2 karakter tablosu (O)
L
Aşağıdakiler hem büyük hem de küçük harf için kullanılmaktadır:
Kiril karakter tablosu (P)
Erişilebilirlik özellikleri için sorun giderme
Diğer sorun giderme bilgileri için lütfen ana birim işletme talimatlarına bakınız.
Sorun Neden & çözüm
Mobil cihaz görüntülenen
telefon numarasını anons
etmiyor.
(22)
L
Mobil cihazın zil sesi şiddeti kapalı konuma getirilmiş. Ayarlayınız
(sayfa 16).
L
Sesli anons özelliği kapalı. Açınız (sayfa 12).
L
Harici bir görüşme yaparken, telefon rehberinde arama yapıldığında
mobil cihaz telefon rehberi bilgisini sesli olarak bildirmiyor.
L
Yalnızca KX-TG9120 kullanıcıları için
Görüntülenen telefon numarası için duyulabilir bir çağrı ayarlanırsa,
mobil cihaz telefon numarasını anons etmez. Yalnızca seçilen zil
sesi duyulur.
Page 47

TGA715FX_717FX(tr-tr).book Page 23 Wednesday, February 28, 2007 3:02 PM
Not:
L
Özellikler
■
Standart:
DECT (Digital Enhanced Cordless
Telecommunications: Dijital Geliştirilmiş
Kablosuz İletişim)
GAP (Generic Access Profile: Jenerik Erişim
Profili)
■
Kanalların sayısı:
120 Dupleks Kanal
■
Frekans aralığı:
1,88 GHz –1,90 GHz
■
Çift prosedür:
TDMA (Time Division Multiple Access: Zaman
Dilimli Çoklu Erişim)
■
Kanal aralığı:
1.728 kHz
■
Bit oranı:
1.152 kbit/s
■
Modülasyon:
GFSK (Gaussian Frequency Shift Keying: Gauss
Tipi Frekans Kaydırma)
■
RF iletim gücü:
Yaklaşık 250 mW
■
Ses kodlaması:
ADPCM 32 kbit/s
■
Güç kaynağı:
220–240 V, 50 Hz
■
Güç tüketimi, Şarj cihazı:
Bekleme: Yaklaşık 0,8 W
Maksimum: Yaklaşık 5,0 W
■
İşletme şartları:
5 °C–40 °C, 20 %–80 % bağıl hava nemi (kuru)
■
Boyutlar:
Şarj cihazı:
Mobil cihaz (KX-TGA715):
48 mm
Mobil cihaz (KX-TGA717):
48 mm
■
Kütle (ağırlık):
Şarj cihazı:
Mobil cihaz (KX-TGA715):
Mobil cihaz (KX-TGA717):
Yaklaşık 61 mm × 87 mm × 95 mm
×
34 mm
×
38 mm
Yaklaşık 90
Yaklaşık 179 mm ×
Yaklaşık 179 mm ×
g
Yaklaşık 154
Yaklaşık 164
g
g
Teknik özellikler değiştirilebilir.
L
Bu işletme talimatlarında kullanılan resimler
gerçek üründen belli ölçüde farklı olabilir.
Yararlı Bilgiler
(23)
Page 48

TGA715FX_717FX(tr-tr).book Page 24 Wednesday, February 28, 2007 3:02 PM
Telif Hakkı:
Bu materyalin telif hakkı Panasonic Communications Co., Ltd.’ye aittir ve sadece dahili kullanım için
çoğaltılabilir. Panasonic Communications Co., Ltd.’nin yazılı izni olmadan başka herhangi bir şekilde
kısmen veya tamamen çoğaltılması yasaktır.
© 2006 Panasonic Communications Co., Ltd. Tüm hakları saklıdır.
(24)
Page 49

TGA715FX_717FX(pd-pd).book Page 1 Monday, March 19, 2007 1:07 PM
Dodatkowa słuchawka bezprzewodowa DECT
Model KX-TGA715FX
Instrukcja obsługi
KX-TGA717FX
KX-TGA715
Niniejsze urządzenie to dodatkowa słuchawka przeznaczona do użytku razem
znastępującymi cyfrowymi telefonami bezprzewodowymi Panasonic:
KX-TG7100/KX-TG7120/KX-TG7150/KX-TG7170
KX-TG8100/KX-TG8120
KX-TG9120
Aby móc korzystać zurządzenia, należy najpierw zarejestrować je w bazie.
Przed rozpoczęciem użytkowania należy ładować akumulatory przez około 7 godzin.
Prosimy o zapoznanie się z niniejszą instrukcją obsługi przed uruchomieniem urządzenia oraz
o zachowanie jej na przyszłość.
Page 50

TGA715FX_717FX(pd-pd).book Page 2 Monday, March 19, 2007 1:07 PM
Spis treści
Przygotowanie
Wprowadzenie ................................................. 3
Elementy wyposażenia .....................................4
Ważne informacje ............................................5
Wibracyjna wkładka słuchawkowa przewodząca
drgania głosowe ...............................................6
Wskaźniki kontrolne i przyciski ........................ 7
Wyświetlacz ..................................................... 8
Podłączanie .....................................................8
Instalacja/wymiana akumulatorów ................... 9
Ładowanie akumulatorów ................................9
Symbole używane w instrukcji obsługi ........... 10
Język komunikatów wyświetlacza ..................10
Rejestrowanie słuchawki w bazie ..................11
Ułatwienia dostępu
Odczytywanie numeru wyświetlonego na ekranie
LCD (głosowa identyfikacja numeru) .............12
Podstawowe funkcje obsługi
Wykonywanie i odbieranie połączeń ..............14
Książka telefoniczna słuchawki...................... 14
Lista abonentów wywołujących...................... 15
Łączenie wielu urządzeń................................ 16
Ustawienia słuchawki/bazy
Ustawienia słuchawki/bazy ............................17
Ustawienia czasu............................................ 19
Funkcje automatu
zgłoszeniowego
Automat zgłoszeniowy ...................................20
Przydatne informacje
Używanie zaczepu na pasek ......................... 21
Używanie uchwytu naramiennego słuchawki . 21
Wpisywanie znaków........................................ 22
Rozwiązywanie problemów z ułatwieniami
dostępu .......................................................... 24
Specyfikacja ................................................... 25
<2>
Page 51

TGA715FX_717FX(pd-pd).book Page 3 Monday, March 19, 2007 1:07 PM
Przygotowanie
Przygotowanie
Wprowadzenie
Dziękujemy za zakup nowego bezprzewodowego telefonu cyfrowego Panasonic.
Deklaracja zgodności:
L
Panasonic Communications Co., Ltd. oświadcza, że niniejszy sprzęt jest zgodny z zasadniczymi
wymaganiami i innymi odnośnymi postanowieniami Dyrektywy 1999/5/EC w sprawie radiowych
i telekomunikacyjnych urządzeń końcowych (R&TTE).
Deklaracje zgodności produktów Panasonic opisanych w niniejszej instrukcji można pobrać ze
strony:
http://www.doc.panasonic.de
Kontakt:
Panasonic Services Europe
a Division of Panasonic Marketing Europe GmbH
Panasonic Testing Centre
Winsbergring 15, 22525 Hamburg, Germany
Uwaga:
L
W razie problemów należy w pierwszej kolejności skontaktować się z dostawcą sprzętu.
Twój telefon
KX-TGA715
(słuchawka z dużymi
przyciskami)
KX-TGA717
(słuchawka z
wibracyjną wkładką
słuchawkową
przewodzącą drgania
głosowe)
<3>
Page 52

TGA715FX_717FX(pd-pd).book Page 4 Monday, March 19, 2007 1:07 PM
Przygotowanie
Elementy wyposażenia
Elementy wyposażenia
Nr Elementy wyposażenia Ilość
1
Zasilacz sieciowy (Nr art. PQLV209CE) 1
2
Ładowarka (Nr art. PQLV30045) 1
3
Akumulatory o rozmiarze AAA (R03)
(Nr art. HHR-55AAAB lub HHR-4EPT)
4
Pokrywa słuchawki
5
Zaczep na pasek 1
6
Uchwyt naramienny słuchawki 1
*1 Pokrywa słuchawki jest zamontowana na słuchawce.
123456
Wyposażenie dodatkowe/elementy wymienne
Informacje handlowe można uzyskać unajbliższego sprzedawcy sprzętu Panasonic.
Nr Model Opis
1
KX-TCA94EX Zestaw słuchawkowy
1
*1
2
1
Uwaga:
L
Wymieniając akumulatory należy używać wyłącznie 2 akumulatorów niklowo-wodorkowych (Ni-MH)
rozmiaru AAA (R03) o maksymalnej pojemności 750 mAh. Zalecamy używanie akumulatorów marki
Panasonic (Model P03P).
L
Producent nie ponosi odpowiedzialności za jakiekolwiek uszkodzenia urządzenia ani obniżenie
wydajności, jakie mogą wystąpić w wyniku zastosowania akumulatorów innych marek niż Panasonic.
<4>
Page 53

TGA715FX_717FX(pd-pd).book Page 5 Monday, March 19, 2007 1:07 PM
deszczu ani wilgoci.
L
Ważne informacje
Zalecenia ogólne
L
Do zasilania urządzenia należy używać
wyłącznie zasilacza sieciowego wymienionego
na str. 4.
L
Zasilacza sieciowego nie należy podłączać do
innego gniazda zasilającego niż standardowe
gniazdo 220–240 V.
L
Wykonywanie połączeń z tego urządzenia jest
niemożliwe w następujących sytuacjach:
– akumulatory w przenośnej słuchawce
wymagają naładowania lub są niesprawne.
–wystąpiła awaria zasilania.
L
Nie wolno otwierać ładowarki ani słuchawki
winnym celu niż wymiana baterii.
L
Urządzenia nie należy używać w pobliżu
sprzętu medycznego pierwszej pomocy lub
intensywnej opieki medycznej. Nie powinny go
także używać osoby z wszczepionym
rozrusznikiem serca.
L
Należy uważać, aby nie upuścić żadnych
przedmiotów ani nie rozlać żadnych płynów na
urządzenie. Urządzenia nie należy wystawiać
na nadmierne zadymienie, kurz, drgania ani
wstrząsy mechaniczne.
Środowisko
L
Nie należy używać urządzenia w pobliżu
wody.
L
Urządzenia nie należy ustawiać w pobliżu
źródeł ciepła, takich jak grzejniki, kuchenki itp.
Nie należy go również umieszczać
w pomieszczeniach o temperaturze niższej niż
5 °C lub wyższej niż 40 °C.
L
Podstawowym sposobem wyłączania
urządzenia jest odłączenie zasilacza
sieciowego. Z tego powodu należy zadbać
o umieszczenie urządzenia w pobliżu łatwo
dostępnego gniazda zasilającego.
Ostrzeżenie:
L
Aby uniknąć ryzyka porażenia prądem, nie
należy wystawiać urządzenia na działanie
Jeśli z urządzenia zacznie wydostawać się
dym, dziwny zapach lub nietypowe dźwięki,
należy odłączyć przewód zasilający z gniazda.
Taki stan może spowodować pożar lub
porażenie prądem. Po upewnieniu się, że dym
przestał wydobywać się zurządzenia,
skontaktuj się z autoryzowanym punktem
serwisowym.
L
Należy uważać, aby nie rozlać żadnych
płynów (detergentów, środków czyszczących
itp.) na wtyk przewodu telefonicznego ani nie
dopuścić do jego zamoczenia w jakikolwiek
inny sposób. Może to spowodować pożar.
Jeżeli wtyk przewodu telefonicznego ulegnie
zamoczeniu, należy natychmiast odłączyć go
z gniazda linii telefonicznej i przestać używać.
Ostrzeżenia dotyczące baterii
L
Zalecamy używanie akumulatorów
wymienionych na str. 4.
wyłącznie akumulatorów, które można
ładować.
L
Nie otwieraj ani nie przecinaj akumulatorów.
L
Nie wolno wrzucać akumulatorów do ognia,
ponieważ grozi to wybuchem. Należy
sprawdzić lokalne zalecenia odnośnie
likwidacji zużytych materiałów i zastosować
się do nich.
L
Nie wolno otwierać ani uszkadzać
akumulatorów. Uwolniony elektrolit
z akumulatorów powoduje korozję imoże być
przyczyną oparzeń lub uszkodzenia oczu
i skóry. Elektrolit może być toksyczny, jeżeli
dostanie się do przewodu pokarmowego.
L
Należy ostrożnie obchodzić się
z akumulatorami. Nie należy dopuścić do
kontaktu akumulatorów z materiałami
przewodzącymi prąd, takimi jak pierścionki,
bransolety i klucze. Akumulatory lub materiały
przewodzące mogą się rozgrzać
i spowodować oparzenia.
L
Akumulatory należy ładować zgodnie
z informacjami zawartymi w niniejszej
instrukcji obsługi.
L
Do ładowania akumulatorów należy używać
Przygotowanie
Należy używać
<5>
Page 54

TGA715FX_717FX(pd-pd).book Page 6 Monday, March 19, 2007 1:07 PM
Przygotowanie
wyłącznie załączonej w zestawie bazy (lub
ładowarki). Nie należy samodzielnie próbować
rozkręcać bazy (ani ładowarki).
Nieprzestrzeganie tych zaleceń może
spowodować wyciek elektrolitu lub wybuch
akumulatorów.
Informacja dla użytkowników o pozbywaniu
się urządzeń elektrycznych i elektronicznych
(dotyczy gospodarstw domowych)
Przedstawiony symbol umieszczony na
produktach lub dołączonej do nich dokumentacji
informuje, że niesprawnych urządzeń
elektrycznych lub elektronicznych nie można
wyrzucać razem z odpadami gospodarczymi.
W celu właściwego unieszkodliwienia, odzysku
i recyklingu należy dostarczyć te produkty do
wyznaczonego punktu zbiórki odpadów, gdzie
zostaną one nieodpłatnie przyjęte. W niektórych
krajach produkt można oddać lokalnemu
dystrybutorowi podczas zakupu innego
urządzenia.
Prawidłowa utylizacja urządzenia umożliwia
zachowanie cennych zasobów i uniknięcie
negatywnego wpływu na zdrowie i środowisko,
które może być zagrożone przez nieodpowiednie
postępowanie z odpadami. Szczegółowe
informacje o najbliższym punkcie zbiórki można
uzyskać uwładz lokalnych.
Nieprawidłowa utylizacja odpadów zagrożona
jest karami przewidzianymi w odpowiednich
przepisach lokalnych.
Użytkownicy biznesowi w krajach Unii
Europejskiej
W razie konieczności pozbycia się urządzeń
elektrycznych lub elektronicznych, prosimy
skontaktować się z najbliższym punktem
sprzedaży lub z dostawcą, którzy udzielą
dodatkowych informacji.
Pozbywanie się odpadów w krajach poza
Unią Europejską
Taki symbol jest ważny tylko w Unii Europejskiej.
W razie potrzeby pozbycia się niniejszego
produktu prosimy skontaktować się z lokalnymi
władzami lub ze sprzedawcą celem uzyskania
informacji o prawidłowym sposobie
postępowania.
Wibracyjna wkładka
słuchawkowa przewodząca
drgania głosowe
Słuchawka jest wyposażona w wibracyjną
wkładkę słuchawkową przewodząca drgania
głosowe która wykorzystuje zjawisko
przewodnictwa kostnego do wytwarzania
dźwięku podczas rozmów telefonicznych.
W celu zapewnienia właściwego działania
wkładki wibracyjnej należy przyłożyć ją do twarzy
w pobliżu ucha.
Zazwyczaj dźwięk wnika do kanału słuchowego,
powodując drgania błony bębenkowej. Drgania
odczuwane w uchu wewnętrznym są
interpretowane jako odbierane przez nerw
słuchowy.
Dźwięk
Wibracyjna
wkładka
słuchawkowa
przewodząca
drgania głosowe
Ucho
zewnętrzne
Ucho środkowe
Przyłóż wkładkę wibracyjną do twarzy (nie do
ucha). Wypróbuj różne miejsca, aby znaleźć
najbardziej dogodne umiejscowienie słuchawki.
Zacznij od okolicy skroni.
Nerw
słuchowy
Ucho
wewnętrzne
<6>
Page 55

TGA715FX_717FX(pd-pd).book Page 7 Monday, March 19, 2007 1:07 PM
Słuchawka (KX-TGA717)
A
Przygotowanie
J
K
Uwaga:
L
Wibracyjnej wkładki słuchawkowej nie należy
przykładać do aparatu słuchowego. Może to
powodować piski albo inne zakłócenia.
L
Skuteczność działania wibracyjnej wkładki
słuchawkowej zależy od rodzaju i stopnia
uszkodzenia słuchu użytkownika.
L
Ponieważ dźwięk powstaje przez drgania
powietrza, normalnie słyszący użytkownicy
mogą korzystać ze słuchawki, przykładając
wkładkę wibracyjną do ucha, tak jak
w przypadku zwykłego telefonu.
L
Zakurzoną lub zabrudzoną wkładkę
wibracyjną należy wyczyścić miękką, suchą
ściereczką.
Wskaźniki kontrolne
i przyciski
Słuchawka (KX-TGA715)
A
C
D
E
F
G
H
B
I
J
K
L
M
N
O
P
Q
R
C
D
E
F
G
H
B
I
A
Głośnik
B
Styki ładowania
C
Gniazdo słuchawkowe
D{j/OK} (menu/OK)
E
{k}
(książka telefoniczna)
F
{C}
(rozmowa)
G
Przycisk nawigacyjny (
H
{s}
(system głośnomówiący)
I{R} (ponowne przywołanie) (Flash)
J
Kontrolka ładowania
Kontrolka dzwonka
Kontrolka wiadomości
K
KX-TGA715
Wkładka słuchawkowa
KX-TGA717
Wibracyjna wkładka słuchawkowa
przewodząca drgania głosowe
L
Wyświetlacz
M
{R}
(powtórne wybieranie numeru/
pauza)
N
{ih}
(zakończ/włącz, wyłącz
słuchawkę)
O{C/T}
P
Q{INT} (interkom)
R
*1 Tylko w przypadku telefonów KX-TG7120/
(kasowanie/wyciszenie)
Klawiatura
Mikrofon
KX-TG8120/KX-TG9120
{^}/{V}/{>}/{<}
*1
L
M
N
O
P
Q
R
)
<7>
Page 56

TGA715FX_717FX(pd-pd).book Page 8 Monday, March 19, 2007 1:07 PM
Przygotowanie
Wyświetlacz
Ikony wyświetlacza
Ikona
wyświetlacza
w
L
k
u
5
[2]
0
*1 Tylko w przypadku telefonów KX-TG7120/
KX-TG8120/KX-TG9120
*2 Tylko w przypadku korzystania z usługi
poczty głosowej
Znaczenie
Wzasięgu bazy
L
Jeśli ikona miga:
Słuchawka szuka bazy.
(słuchawka jest poza
zasięgiem bazy, nie jest
zarejestrowana w bazie,
brak zasilania bazy)
Słuchawka łączy się
zbazą. (interkom,
przywołanie, zmiana
ustawień bazy itd.)
Ze słuchawki uzyskano
połączenie zewnętrzne.
Włączony jest automat
zgłoszeniowy.
Poziom naładowania
akumulatorów
Numer słuchawki
(wyświetlacz w trybie
gotowości, str. 17)
Odebrano nową
wiadomość głosową
L
Linia jest używana przez
inną słuchawkę.
L
Automat zgłoszeniowy
jest używany przez inną
słuchawkę lub bazę.
*1
(str. 20)
*2
*1
Podłączanie
Podłącz zasilacz sieciowy do ładowarki
i poprowadź kabel w sposób pokazany na
ilustracji. W razie potrzeby ładowarkę można
zamontować na ścianie.
Haczyki
25 mm
Wkręty
Używać wyłącznie zasilacza
dołączonego w zestawie.
Uwaga:
L
Zasilacz sieciowy nie powinien być odłączany.
(Nagrzewanie się zasilacza podczas
użytkowania jest normalnym zjawiskiem.)
L
Zasilacz sieciowy należy podłączyć do
umieszczonego pionowo lub zamontowanego
w podłodze gniazda zasilającego. Zasilacza
nie należy podłączać do gniazda zasilającego
zamontowanego na suficie, ponieważ ciężar
zasilacza może spowodować jego rozłączenie.
Umieszczenie bazy
L
Aby zapewnić maksymalny zasięg i działanie
bez zakłóceń, zalecane jest następujące
umieszczenie bazy:
– z dala od takich urządzeń elektrycznych, jak
telewizory, radia, komputery i inne telefony.
–w łatwo dostępnym miejscu, wysoko
i centralnie.
(220–240 V,
50 Hz)
<8>
Page 57

TGA715FX_717FX(pd-pd).book Page 9 Monday, March 19, 2007 1:07 PM
Przygotowanie
Instalacja/wymiana
akumulatorów
Ważne:
L
Należy używać wyłącznie akumulatorów
załączonych w zestawie, opisanych na str. 4,
5.
L
Przy wymianie akumulatorów zaleca się
używanie akumulatorów marki Panasonic
opisanych na str. 4, 5.
L
Wytrzyj końce akumulatorów (S, T) suchą
ściereczką.
L
Wkładając akumulatory, unikaj dotykania
końców akumulatorów (
urządzenia.
1
Naciśnij mocno wgłębienie na pokrywie
słuchawki i przesuń pokrywę w kierunku
wskazanym strzałką.
L
Przy wymianie akumulatorów wyjmij zużyte
akumulatory, najpierw wysuwając biegun
S
dodatni (
2
Włóż akumulatory, wsuwając najpierw biegun
T
ujemny (
). Zamknij pokrywę słuchawki.
S, T
) lub styków
).
Ładowanie akumulatorów
Umieść słuchawkę w ładowarce przez około 7
godzin przed rozpoczęciem użytkowania.
Podczas ładowania akumulatorów na
wyświetlaczu widoczne są poniższe ikony.
Kiedy akumulatory są wpełni naładowane, na
wyświetlaczu jest widoczna ikona
L
Kontrolka ładowania świeci się, gdy słuchawka
jest umieszczona na ładowarce.
L
Na ilustracji przedstawiono model KXTGA715.
Uwaga:
L
Jeśli słuchawka nie jest zarejestrowana
w bazie, po umieszczeniu słuchawki na
ładowarce na wyświetlaczu słuchawki może
pojawić się komunikat “
L
Nagrzewanie się słuchawki podczas
ładowania jest normalnym zjawiskiem.
L
Jeśli chcesz od razu korzystać zurządzenia,
naładuj akumulatory przynajmniej przez 15
minut.
L
Aby zapewnić właściwe ładowanie
akumulatorów, raz na miesiąc należy
wyczyścić styki słuchawki i ładowarki miękką,
suchą ściereczką. Jeśli urządzenie jest
zatłuszczone, zakurzone lub narażone na
wysoką wilgotność, należy czyścić je częściej.
5
.
Styki ładowania
Please Wait...
”.
<9>
Page 58

TGA715FX_717FX(pd-pd).book Page 10 Monday, March 19, 2007 1:07 PM
Przygotowanie
Poziom naładowania akumulatorów
Ikona
akumulatorów
5
6
7
Wydajność akumulatorów Ni-MH marki
Panasonic (akumulatory załączone
wzestawie)
Obsługa Czas pracy
Ciągłe użytkowanie KX-TGA715:
Ciągle w trybie
gotowości
Uwaga:
L
Jest normalnym zjawiskiem, że akumulatory
nie osiągają pełnej wydajności po pierwszym
naładowaniu. Dopiero po kilku cyklach
ładowania/rozładowania (w trakcie używania)
akumulatory osiągają maksymalną wydajność.
L
Faktyczna wydajność baterii zależy od
kombinacji czasu, kiedy słuchawka jest
używana i kiedy nie jest używana (tryb
gotowości).
L
Czas pracy akumulatorów może ulec
skróceniu w zależności od warunków
użytkowania i temperatury otoczenia.
L
Nawet po pełnym naładowaniu słuchawki
można ją pozostawić na ładowarce bez
jakichkolwiek niekorzystnych skutków dla
akumulatorów.
L
Poziom naładowania akumulatorów może nie
być wyświetlany poprawnie po ich wymianie.
W takim wypadku należy umieścić słuchawkę
na ładowarce na co najmniej 7 godzin.
Poziom naładowania
akumulatorów
W pełni naładowane
Średni
Niski
Kiedy miga: Trzeba
naładować akumulatory.
maks. 12 godzin
KX-TGA717:
maks. 10 godzin
maks. 150 godzin
Symbole używane
w instrukcji obsługi
Symbol Znaczenie
{j
i
“ ” Wybierz na wyświetlaczu
Język komunikatów
wyświetlacza
Dostępne jest 17 języków komunikatów
wyświetlacza.
Język komunikatów wyświetlacza telefonu,
wstępnie ustawiony jest na język angielski.
Przykłady obrazów wyświetlacza przedstawione
w tej instrukcji obsługi odnoszą się do języka
polskiego. Aby zmienić język komunikatów
wyświetlacza na żądany język, naciśnij
naciśnij
{>}
, naciśnij 2 razy
{V}
, naciśnij {>}, wybierz odpowiedni język,
naciśnij
Zmiana języka komunikatów wyświetlacza
telefonu
1
{ih} i {j
2
Naciśnij
/OK
}
Naciśnij {j/OK}.
Przejdź do następnej
operacji.
tekst podany w cudzysłowie
Ustaw. sluch.
(np. “
naciskając przycisk
{V}
.
{j
/OK}, naciśnij 3 razy
{V}
{>}
i na zakończenie naciśnij
/OK
}
{^}
lub
{V}
, aby wybrać “Ustaw.
”)
{^}
lub
{ih}
{^}
, naciśnij {>}, naciśnij
, naciśnij
{ih}
,
.
<10>
Page 59

TGA715FX_717FX(pd-pd).book Page 11 Monday, March 19, 2007 1:07 PM
Przygotowanie
sluch.”. i
3
Naciśnij
“
Ustaw.wyswietl.”. i
4
Naciśnij
jezyk
5
Naciśnij
język.
Uwaga:
L
Zmianę języka głosowej identyfikacji numeru
opisano na str. 13.
{>}
{^}
lub
{V}
, aby wybrać
{^}
lub
{V}
”. i {>}
{^}
i {>} i {ih}
, aby wybrać “Wybierz
lub
{V}
, aby wybrać odpowiedni
{>}
Rejestrowanie słuchawki
wbazie
Słuchawkę można zarejestrować w bazie
następujących modeli telefonów:
KX-TG7100/KX-TG7120/KX-TG7150/KXTG7170/KX-TG8100/KX-TG8120/KX-TG9120
Upewnij się, że słuchawka jest włączona. Jeśli
tak nie jest, włącz słuchawkę, naciskając na kilka
sekund przycisk
1
Podnieś s łuchawkę i naciśnij przycisk
aby przełączyć ją w tryb gotowości.
2
Naciśnij przycisk
sekundy, aż usłyszysz sygnał rejestracji.
3
Umieść słuchawkę na bazie. Nadal będzie
słychać sygnał rejestracji. Nie podnosząc
słuchawki z bazy, poczekaj aż usłyszysz
sygnał potwierdzenia i ikona
migać.
Uwaga:
L
Jeśli słychać sygnał błędu albo ikona w nie
przestaje migać, zarejestruj słuchawkę r ęcznie
(str. 16).
L
Jeśli w punkcie 2 zaczną dzwonić wszystkie
zarejestrowane słuchawki, naciśnij przycisk
{x}
, aby przerwać dzwonienie. Zacznij
ponownie od punktu 1.
L
Akumulatory należy ładować przez około 7
godzin przed rozpoczęciem użytkowania
telefonu.
{ih}
.
{x}
na bazie na około 3
w
przestanie
{ih}
L
Funkcja automatu zgłoszeniowego jest
dostępna tylko w przypadku rejestracji
słuchawki KX-TGA715/KX-TGA717 w bazie
telefonu KX-TG7120/KX-TG8120/KXTG9120.
L
Słuchawka KX-TGA715/KX-TGA717 nie
obsługuje funkcji SMS.
L
Używanie słuchawki w połączeniu z telefonem
KX-TG9120 i KX-TGA914 (kamera
bezprzewodowa)
Słuchawka KX-TGA715/KX-TGA717 nie
obsługuje funkcji monitorowania otoczenia
kamery.
L
Używanie słuchawki w połączeniu z telefonem
KX-TG9120 i KX-TGA915 (adapter USB)
Słuchawka KX-TGA715/KX-TGA717 nie
obsługuje funkcji połączeń przez Internet.
,
<11>
Page 60

TGA715FX_717FX(pd-pd).book Page 12 Monday, March 19, 2007 1:07 PM
Ułatwienia dostępu
Ułatwienia dostępu
Odczytywanie numeru
wyświetlonego na ekranie
LCD (głosowa identyfikacja
numeru)
Funkcja głosowej identyfikacji numeru umożliwia
dźwiękową prezentację numeru telefonu
widocznego na wyświetlaczu.
identyfikacja abonenta wywołującego/
Głosowa identyfikacja zarejestrowanych
numerów)
(Głosowa
Głosowa identyfikacja zarejestrowanych
numerów
Podczas przeglądania
ponownego wybierania
wywołujących
telefonów są wygłaszane przez głośnik
słuchawki.
L
Jeżeli wyświetlony numer zawiera P (symbol
pauzy), w miejscu każdego P wstawiana jest
pauza o długości 0,5 sekundy. Jeżeli numer
zawiera inne symbole (np.
pomijane i urządzenie wygłasza następny
numer.
listy numerów do
,
i
listy abonentów
książki telefonicznej
;
, # itp.), są one
numery
Głosowa identyfikacja abonenta
wywołującego
Jeżeli odebrane zostanie połączenie zewnętrzne
zawierające informację o numerze telefonu,
wyświetlony numer jest wygłaszany przez
głośnik słuchawki.
L
Aby numer telefonu był odczytywany na głos
w przypadku połączeń zewnętrznych, należy
uruchomić usługę identyfikacji abonenta
wywołującego. Więcej informacji można
uzyskać udostawcy usług/operatora.
L
Jeżeli w trakcie rozmowy zostanie odebrane
drugie połączenie, numer 2-go abonenta nie
zostanie zapowiedziany, nawet po
uruchomieniu usługi identyfikacji abonenta
wywołującego i identyfikacji rozmowy
oczekującej.
L
Identyfikacja głosowa ma tę samą głośność co
dzwonek (str. 17).
L
Użytkownik może włączyć lub wyłączyć tę
funkcję (str. 12).
Ustawianie głośności identyfikacji
głosowej
Użytkownik może regulować głośność
identyfikacji zarejestrowanych numerów
Głośność głosowej identyfikacji abonenta
wywołującego odpowiada ustawionej głośności
dzwonka (str. 17).
1
{j
/OK
}
2
“
Ustaw. sluch.” i {>}
3
“
Opcje - Inne” i {>}
4
“
Info. Glosowa” i {>}
5
“
Glosnosc” i {>}
6
Wybierz wymaganą głośność.
L
Aby wyłączyć funkcję identyfikacji
głosowej, wybierz ustawienie
WYŁĄCZONY
“
7
{>} i {ih}
Uwaga:
L
Głosowa identyfikacja abonenta wywołującego
ma tę samą głośność co dzwonek słuchawki
(str. 17). Jeżeli dla identyfikacji głosowej
wybrano ustawienie “
telefonów nie są wygłaszane bez względu na
ustawienie głośności dzwonka.
”.
WYŁĄCZONY
głosowej
.
”, numery
<12>
Page 61

TGA715FX_717FX(pd-pd).book Page 13 Monday, March 19, 2007 1:07 PM
Wybór języka identyfikacji głosowej
Dostępne jest 6 języków głosowej identyfikacji
numeru.
1
{j
/OK
}
2
“
Ustaw. sluch.” i {>}
3
“
Opcje - Inne” i {>}
4
“
Info. Glosowa” i {>}
5
“
Wybierz jezyk” i {>}
6
Wybierz odpowiedni język. i {>} i
{ih}
Uwaga:
L
Zmianę języka komunikatów wyświetlacza
opisano na str. 10.
Ułatwienia dostępu
<13>
Page 62

TGA715FX_717FX(pd-pd).book Page 14 Monday, March 19, 2007 1:07 PM
Podstawowe funkcje obsługi
Podstawowe funkcje obsługi
Wykonywanie i odbieranie połączeń
Funkcja Obsługa
Włączanie zasilania Naciśnij przycisk
Wyłączanie zasilania Naciśnij przycisk
Uzyskiwanie połączeń Wybierz numer telefonu.
Odbieranie połączeń
Rozłączanie się
Głośność wkładki
słuchawkowej/głośnika
Uzyskiwanie połączeń przy
użyciu listy numerów do
ponownego wybierania
Kasowanie numerów z listy
numerów do ponownego
wybierania
Wyciszanie mikrofonu W trakcie rozmowy naciśnij przycisk {C/T}. Aby powrócić do
Przycisk
{R}
ponownego przywołania
FLASH)
(funkcja
{C}
{ih}
W trakcie rozmowy naciśnij przycisk
{R} i
{C}/{s}
{R} i
{>} i “Kasuj” i {>} i “TAK” i {>} i {ih}
rozmowy, naciśnij ponownie przycisk
Przycisk
telefonicznych. Więcej informacji można uzyskać u dostawcy
usług/operatora.
{ih}
na około 1 sekundę.
{ih}
na około 2 sekundy.
i {C}/{s}
{^}
lub
{V}
Naciśnij
{^}
lub
{V}
, aby wybrać odpowiedni numer. i
Naciśnij
{^}
lub
{V}
, aby wybrać odpowiedni numer. i
{
C/T}.
{R}
umożliwia dostęp do opcjonalnych usług
.
Książka telefoniczna słuchawki
Funkcja Obsługa
Rejestrowanie wpisów
(maks. 50 nazwisk
i numerów telefonów)
Uzyskiwanie połączeń
Wyszukiwanie według
pierwszej litery
(przeszukiwanie indeksu)
<14>
{k} i {j
nazwisko lub nazwę (maks. 16 znaków).
{j
/OK} i Wpisz numer telefonu (maks. 24 cyfry). i {j/OK}
i “Zapisz” i {>} i {ih}
L
Wpisywanie nazw opisano na str. 22.
{k} i
{C}/{s}
{k} i
szukanemu znakowi (str. 22).
wyświetlić wymagany wpis.
L
Zmiana trybu wpisywania znaków podczas wyszukiwania:
{R} i
/OK} i “
Naciśnij
Naciśnij przycisk ({0} do {9}) odpowiadający
Wybierz tryb wpisywania znaków. i {>
Nowy wpis” i {>} i
{^}
lub
{V}
, aby wyświetlić wymagany wpis. i
i
Naciśnij
i
{^}
lub
Wpisz
{V}
, aby
}
Page 63

TGA715FX_717FX(pd-pd).book Page 15 Monday, March 19, 2007 1:07 PM
Funkcja Obsługa
{k} i
Naciśnij
{^}
lub
Edytowanie wpisów
Usuwanie pojedynczych
wpisów
Usuwanie wszystkich wpisów
Kopiowanie pojedynczych
wpisów
Kopiowanie wszystkich
wpisów
Wybieranie łańcuchowe W trakcie rozmowy naciśnij przycisk
{j
/OK} i “
i {j
Zapisz” i {>} i {ih}
“
{k} i
{j
/OK} i “
{k} i {j
i {>} i “TAK” i {>} i {ih}
{k} i
{j
/OK} i “
której chcesz przesłać wpis z książki telefonicznej słuchawki.
Gdy na wyświetlaczu pojawi się komunikat “
{ih}
{k} i {j
numer słuchawki, do której chcesz przesłać wpis z książki
telefonicznej słuchawki.
komunikat “
{V}
, aby wybrać odpowiedni wpis. i Naciśnij przycisk {>}, aby
wybrać numer.
Edytuj” i {>} i
/OK} i Popraw numer telefonu. i {j/OK} i
Naciśnij
Kasuj” i {>} i “TAK” i {>} i {ih}
/OK} i “
Naciśnij
Kopiuj” i {>} i
.
/OK} i “
Ukonczono
{V}
{^}
lub
{V}
Skasuj wszystko” i {>} i “TAK
{^}
lub
{V}
Kopiuj wszyst.” i {>} i
i
Gdy na wyświetlaczu pojawi się
”,naciśnij
Podstawowe funkcje obsługi
, aby wyświetlić wymagany wpis. i
Popraw nazwisko lub nazwę.
, aby wyświetlić wymagany wpis. i
, aby wyświetlić wymagany wpis. i
Wpisz numer słuchawki, do
Ukonczono
{ih}
.
{k}. i
Naciśnij
i
”,naciśnij
Wpisz
{^}
lub
”
Lista abonentów wywołujących
Numery telefonów ostatnich 50 abonentów wywołujących są zapisywane na liście abonentów
wywołujących.
Funkcja Obsługa
Przeglądanie listy abonentów
wywołujących
i oddzwanianie
Edytowanie numeru telefonu
abonenta wywołującego
przed oddzwonieniem
Zachowywanie danych
abonenta wywołującego
wksiążce telefonicznej
słuchawki
Usuwanie pojedynczych
wpisów
{j
/OK} i “
{V}
, aby przeglądać listę od najnowszego wywołania, lub przycisk
{^}
, aby szukać od najstarszego wywołania. i
{j
/OK} i “
aby wyświetlić wymagany wpis.
polacz
{j
/OK} i “
aby wyświetlić wymagany wpis.
tel.
nazwę” na str. 14 (Rejestrowanie wpisów).
{j
/OK} i “
aby wyświetlić wymagany wpis.
{>} i “TAK” i {>} i {ih}
Lista wywolan” i {>} i
Lista wywolan” i {>} i
i {j
” i {>} i Popraw numer. i
Lista wywolan” i {>} i
i {j
” i {>} i Kontynuuj od punktu “Wpisz nazwisko lub
Lista wywolan” i {>} i
i {j
Naciśnij przycisk
{C}/{s}
Naciśnij
/OK} i “
{C}/{s}
Naciśnij
/OK} i “
Naciśnij
/OK} i “
{^}
Edytuj i
{^}
Wpisz do k-
{^}
Kasuj” i
lub
lub
lub
{V}
{V}
{V}
<15>
,
,
,
Page 64

TGA715FX_717FX(pd-pd).book Page 16 Monday, March 19, 2007 1:07 PM
Podstawowe funkcje obsługi
Funkcja Obsługa
{j
Usuwanie wszystkich wpisów
/OK} i “
Skasuj wszystko” i {>} i “TAK” i {>} i {ih}
“
Lista wywolan” i {>} i {j
/OK} i
Łączenie wielu urządzeń
Funkcja Obsługa
Interkom: uzyskiwanie
połączeń
Interkom: odbieranie
połączeń
Transfer połączeń między
słuchawkami
Połączenia konferencyjne
(połączenie konferencyjne 2
osób z zewnętrznym
rozmówcą)
Rejestracja ręczna
Odłączanie słuchawki
zsystemu
*1 Model KX-TG7150/KX-TG7170 nie obsługuje funkcji połączeń konferencyjnych.
*2 Po naciśnięciu przycisku
*3 W razie zapomnienia kodu PIN bazy skontaktuj się z najbliższym serwisem Panasonic.
Przykład: połączenie ze słuchawką nr 1
{
INT} i Naciśnij {1} (numer wybranej słuchawki).
L
Po zakończeniu rozmowy naciśnij przycisk
Naciśnij
{C}/{s}
L
Po zakończeniu rozmowy naciśnij przycisk
Przykład: transferowanie połączenia na słuchawkę nr 1
W trakcie rozmowy zewnętrznej naciśnij przycisk {INT}. i
{1}
Naciśnij
słuchawki nr 1 odbierze, naciśnij
połączenia.
*1
Przykład: połączenie konferencyjne ze słuchawki nr 1
W trakcie rozmowy zewnętrznej naciśnij przycisk
{1}
Naciśnij
słuchawki nr 1 odbierze, naciśnij
konferencyjne.
Słuchawka:
{j
/OK} i “
i {>} i “Rejestruj sluch” i {>}
Urządzenie bazowe:
Naciśnij przycisk
sygnał rejestracji.
Słuchawka:
Poczekaj, aż na wyświetlaczu pojawi się “
anastępnie wpisz kod PIN (domyślnie: “
Po pomyślnym zarejestrowaniu słuchawki ikona w na
L
wyświetlaczu przestanie migać.
{j
/OK} i “
Skasuj sluch.” i {>} i
“
usunąć z systemu, naciskając ich numer.
i {>} i {ih}
{x}
pozostałą część tej procedury należy zakończyć wciągu 1 minuty.
.
(numer wybranej słuchawki). i Gdy użytkownik
(numer wybranej słuchawki). i Gdy użytkownik
Ustaw. sluch.” i {>} i “Rejestracja
{x}
na bazie na około 3 sekundy, aż usłyszysz
*2
Ustaw. bazy” i {>} i
{ih}
{3}
Wybierz słuchawki, które chcesz
{ih}
{ih}
w celu transferu
{
INT}. i
, aby ustanowić połączenie
Wpisz PIN bazy
0000
”).*3 i {j/OK
Wpisz “
i {j
/OK} i “
.
.
335
”. i
”,
TAK
”
}
”
<16>
Page 65

TGA715FX_717FX(pd-pd).book Page 17 Monday, March 19, 2007 1:07 PM
Ustawienia słuchawki/bazy
Ustawienia słuchawki/bazy
Ustawienia słuchawki/bazy
Ustawienia słuchawki
Podczas programowania ustawień słuchawki bieżący element lub ustawienie jest oznaczone >.
1
{j
/OK
}
2
Naciśnij
{^}
lub
{V}
, aby wybrać opcję “
3
Naciśnij
{^}
lub
{V}
, aby wybrać wymagany element w menu ustawień słuchawki. i {>
4
Naciśnij
{^}
lub
{V}
, aby wybrać wymagany element w podmenu. i {>
L
W niektórych przypadkach, należy wybrać element w drugim podmenu. i {>
5
Naciśnij
{^}
lub
{V}
polecenia zamieszczone w kolumnie Funkcja w poniższej tabeli.
L
Aby zakończyć, naciśnij przycisk
Menu ustawień
słuchawki
Ustaw.czasu Ustaw Date/Godz
Nastawy dzwonka Glosn. dzwonka
Ustaw.wyswietl. Wyswietl-Gotow.
Rejestracja Rejestruj sluch
, aby wybrać wymagane ustawienie, a następnie naciśnij {>} albo wykonaj
Podmenu Podmenu 2 Funkcja (ustawienie
Alarm
Dzwonek zewn.
Dzwonek wewn.
Wybierz jezyk
Kontrast
Ustaw. sluch.
{ih}
.
”. i {>
}
}
}
fabryczne)
— Ustawianie daty i godziny
— Ustawianie alarmu budzika:
—Poziom dźwięku dzwonka
— Dzwonki dla połączeń
— Dzwonki dla połączeń
—Wyświetlacz w trybie
—Język komunikatów
— Kontrast wyświetlacza
— Rejestracja ręczna:
str. 19
słuchawki (Maksymalny)
zewnętrznych
Rodzaj dzw. 1
(“
wewnętrznych
Rodzaj dzw. 3
(“
gotowości (“
wyświetlacza (“
str. 10
(Poziom 3)
str. 16
WYŁĄCZONY
English
}
*1
*2*3
”)
*3
”)
*4
”)
”):
<17>
Page 66

TGA715FX_717FX(pd-pd).book Page 18 Monday, March 19, 2007 1:07 PM
Ustawienia słuchawki/bazy
Menu ustawień
słuchawki
Opcje - Inne Powiad.-
Podmenu Podmenu 2 Funkcja (ustawienie
fabryczne)
*5
n.wiad.
Brzmienie klaw.
— Sygnalizowanie nowych
wiadomości (“
WYŁĄCZONY
—Włączanie i wyłączanie
”)
sygnałów przycisków
Automat.odbiór
Info. Glosowa Glosnosc
WŁĄCZONY
(“
—Włączanie i wyłączanie
odbioru automatycznego
WYŁĄCZONY
(“
Głośność głosowej
”)
*6
”)
identyfikacji numeru
Średnio
”): str. 12
English
”): str. 13
Wybierz jezyk
(“
Język głosowej identyfikacji
numeru (“
*1 Kiedy dzwonek jest wyłączony, słuchawka dzwoni:
– na minimalnym poziomie głośności w przypadku alarmu
– na minimalnym poziomie głośności w przypadku połączeń wewnętrznych
– na maksymalnym poziomie głośności w przypadku przywołania
*2 Jeśli wybierzesz jedną z melodyjek, będzie ona odgrywana przez kilka sekund, nawet jeśli abonent
wywołujący w międzyczasie przerwie połączenie. Po odebraniu połączenia możesz usłyszeć sygnał
zgłoszenia centrali, oznaczający, że nie ma nikogo na linii.
*3 Melodyjki dostępne w tym urządzeniu są używane za zgodą firmy © 2006 Copyrights Vision Inc.
*4 Po wybraniu ustawienia “
Jeśli wybrano ustawienie “
wyświetlaczu będzie widoczne “
WYŁĄCZONY
Numer sluchawki
” wyświetlana jest tylko aktualna data i godzina.
”, a aktualna słuchawka ma numer 2, na
[2]
”.
*5 Tylko modele KX-TG7120/KX-TG8120/KX-TG9120
Ta funkcja powiadamia użytkownika, że zostały nagrane nowe wiadomości.
Kontrolka wiadomości na słuchawce miga do czasu odsłuchania wszystkich nowych wiadomości.
Gdy włączone jest sygnalizowanie nowych wiadomości, akumulatory szybciej się wyczerpują (str.
10).
*6 Funkcja odbioru automatycznego umożliwia odbieranie połączeń przez podniesienie słuchawki
{C}
z bazy lub ładowarki. Nie ma potrzeby naciskania przycisku
.
Ustawienia bazy
Za pomocą tej słuchawki można skonfigurować ustawienia bazy. Dodatkowe informacje zawiera
instrukcja obsługi bazy.
<18>
Page 67

TGA715FX_717FX(pd-pd).book Page 19 Monday, March 19, 2007 1:07 PM
Ustawienia słuchawki/bazy
Ustawienia czasu
Alarm
Alarm dzwoni przez 3 minuty o wybranej porze w danym dniu lub codziennie. Wcześniej należy
zaprogramować datę igodzinę (str. 17).
1
{j
/OK} i “
2
“
Ustaw.czasu” i {>}
3
“
Alarm” i
4
Wybierz tryb alarmu. i {>
WYŁĄCZONY
Jeden raz
Codziennie
5
Wpisz wymaganą godzinę iminuty. i {j/OK
6
Wybierz wymagany dzwonek. i {>
7
“
Zapisz” i {>} i {ih}
Uwaga:
L
Aby przerwać dzwonienie alarmu, naciśnij dowolny przycisk.
L
Jeśli telefon jest w trybie rozmowy lub interkomu, alarm włączy się dopiero po zakończeniu
połączenia.
L
Jeśli wybrano ustawienie “
WYŁĄCZONY
“
Ustaw. sluch.” i {>}
Naciśnij 2 razy przycisk {>}.
}
Wyłącza alarm. Naciśnij ponownie {>}, a następnie
Alarm zadzwoni raz o zaprogramowanej porze. Wpisz wymagany dzień imiesiąc.
Alarm będzie dzwonił codziennie o zaprogramowanej porze.
}
}
”.
Jeden raz
”, po uaktywnieniu się alarmu ustawienie zmieni się na
{ih}
, aby zakończyć.
<19>
Page 68

TGA715FX_717FX(pd-pd).book Page 20 Monday, March 19, 2007 1:07 PM
Funkcje automatu zgłoszeniowego
Funkcje automatu zgłoszeniowego
Automat zgłoszeniowy
Dotyczy telefonów:
KX-TG7120/KX-TG8120/KX-TG9120
Za pomocą tej słuchawki można obsługiwać automat zgłoszeniowy bazy.
1
{j
/OK
}
2
Naciśnij
{^}
lub
{V}
, aby wybrać opcję “
3
Naciśnij
{^}
lub
{V}
, aby wybrać wymagany element w menu automatu zgłoszeniowego. i {>
Czasami wymagany element znajduje się w podmenu. i {>
L
L
Aby zakończyć, naciśnij przycisk
Menu automatu
zgłoszeniowego
Odtw.nowa.wiad.
Odtw. wszystkie
Nagr.powit.
Aut.zglosz.WŁ
Aut.zglosz.WYŁ
Odtworz.powit.
Skasuj wiadom. Skasuj wszystko
Ustawienia
*1 Dodatkowe informacje zawiera instrukcja obsługi bazy.
*1
Podmenu Funkcja (ustawienie fabryczne)
Skas.powit.
Automat zglosz.
{ih}
.
— Odtwórz nowe wiadomości
– Aby powtórzyć wiadomość, naciśnij
–Aby pominąć wiadomość, naciśnij
–Aby przerwać odtwarzanie wiadomości, naciśnij
przycisk
– Aby skasować wiadomość, naciśnij przycisk
{*}{4}
— Odtwórz wszystkie wiadomości
– Aby powtórzyć wiadomość, naciśnij
–Aby pominąć wiadomość, naciśnij
–Aby przerwać odtwarzanie wiadomości, naciśnij
przycisk
– Aby skasować wiadomość, naciśnij przycisk
{*}{4}
— Nagraj powitanie
– Aby zakończyć nagrywanie, naciśnij przycisk
{j
—Włącz automat zgłoszeniowy
—Wyłącz automat zgłoszeniowy
— Odtwórz powitanie
–Aby przerwać odtwarzanie wiadomości, naciśnij
przycisk
Wykasuj wszystkie wiadomości
Wykasuj powitanie
——
/OK}.
{9}
.
{9}
.
{9}
”. i {>
}
.
.
.
}
}
{<}
lub {1}.
{>}
lub {2}.
{<}
lub {1}.
{>}
lub {2}.
<20>
Page 69

TGA715FX_717FX(pd-pd).book Page 21 Monday, March 19, 2007 1:07 PM
Przydatne informacje
Przydatne informacje
Używanie zaczepu na pasek
Przypinanie zaczepu na pasek
Zdejmowanie zaczepu na pasek
L
Na ilustracji przedstawiono model KXTGA715.
Używanie uchwytu
naramiennego słuchawki
Uchwyt naramienny słuchawki umożliwia oparcie
słuchawki na ramieniu i prowadzenie rozmów
telefonicznych bez konieczności trzymania
słuchawki w ręku.
Montaż podpórki słuchawki
Zamocuj wcześniej dołączony zaczep na pasek
(str. 21). Nasuń uchwyt naramienny słuchawki na
zaczep na pasek aż do zablokowania.
Uwaga:
L
Jeżeli ładowarka jest zamontowana na
ścianie, przed ładowaniem słuchawki należy
zdemontować podpórkę słuchawki.
Zdejmowanie uchwytu naramiennego
słuchawki
<21>
Page 70

TGA715FX_717FX(pd-pd).book Page 22 Monday, March 19, 2007 1:07 PM
Przydatne informacje
Wpisywanie znaków
Litery i cyfry są wpisywane za pomocą przycisków na klawiaturze. Do każdego przycisku przypisane
jest kilka znaków. Dostępne tryby wpisywania znaków to: Alfabetyczny (ABC), Numeryczny (0-9),
F
Grecki (
tych trybach, poza Numerycznym, można wybrać wpisywany znak, naciskając kilkakrotnie
odpowiadający mu przycisk.
– Aby przesunąć kursor, naciśnij
– Naciskaj odpowiednie przyciski, aby wpisać litery i cyfry.
– Aby skasować literę lub cyfrę podświetloną kursorem, naciśnij przycisk {C/T}.
Aby skasować wszystkie litery i cyfry, naciśnij i przytrzymaj przycisk
–Aby przełączyć się między małymi i wielkimi literami, naciśnij przycisk
–Aby wpisać inny znak przyporządkowany temu samemu przyciskowi, naciśnij najpierw
przesunąć kursor na następną pozycję, a następnie naciśnij odpowiedni przycisk.
Tryby wpisywania znaków
Podczas wpisywania tekstu można wielokrotnie zmieniać tryb wpisywania znaków. Dostępne znaki
zależą od wybranego trybu wpisywania znaków.
Znaki dostępne w poszczególnych trybach wprowadzania znaków
Kiedy wyświetlony jest ekran do wpisywania znaków:
{k} i
Tabela znaków alfabetycznych (ABC)
), Znaki dodatkowe 1 (G), Znaki dodatkowe 2 (H) i Cyrylica (I). We wszystkich
{<}
lub {>}.
{C/T}
.
{*}
.
{>}
Wybierz tryb wpisywania znaków. i {>
}
, aby
Tabela znaków numerycznych (0-9)
M
Tabela znaków greckich (
)
<22>
Page 71

TGA715FX_717FX(pd-pd).book Page 23 Monday, March 19, 2007 1:07 PM
Tabela znaków dodatkowych 1 (N)
L
Następujące znaki są używane jako wielka i mała litera:
Tabela znaków dodatkowych 2 (O)
L
Poniższe znaki są używane jako wielka i mała litera:
Tabela znaków cyrylicy (P)
Przydatne informacje
<23>
Page 72

TGA715FX_717FX(pd-pd).book Page 24 Monday, March 19, 2007 1:07 PM
Przydatne informacje
Rozwiązywanie problemów z ułatwieniami dostępu
Informacje dotyczące rozwiązywania innych problemów zawiera instrukcja obsługi bazy.
Problem Przyczyna i rozwiązanie
Wyświetlony numer
telefonu nie jest
wygłaszany przez
słuchawkę.
L
Dzwonek słuchawki jest wyłączony. Ustaw go na odpowiednim
poziomie (str. 17).
L
Funkcja identyfikacji głosowej jest wyłączona. Włącz ją (str. 12).
L
Jeśli trwa rozmowa zewnętrzna, podczas wyszukiwania numeru
wksiążce telefonicznej informacje nie są odczytywane na głos.
L
Tylko w przypadku używania telefonu KX-TG9120
Jeżeli z wyświetlonym numerem telefonu jest powiązana głosowa
identyfikacja abonenta wywołującego, numer telefonu nie jest
zapowiadany przez słuchawkę. Słychać tylko wybrany rodzaj
dzwonka.
<24>
Page 73

TGA715FX_717FX(pd-pd).book Page 25 Monday, March 19, 2007 1:07 PM
Przydatne informacje
Specyfikacja
■
Standard:
DECT (Digital Enhanced Cordless
Telecommunications: cyfrowy rozszerzony
standard telefonii bezprzewodowej),
GAP (Generic Access Profile: ogólny profil
dostępu)
■
Ilość kanałów:
120 kanałów dupleksowych
■
Zakres częstotliwości:
od 1,88 GHz do 1,90 GHz
■
Procedura dupleksowa:
TDMA (Time Division Multiple Access: dostęp
wielokrotny z podziałem czasu)
■
Odstęp pomiędzy nośnymi:
1 728 kHz
■
Szybkość transmisji:
1 152 kbit/s
■
Modulacja:
GFSK (Gaussian Frequency Shift Keying:
kluczowanie częstotliwości z gaussowskim
kształtowaniem impulsów)
■
Moc nadajnika RF:
ok. 250 mW
■
Kodowanie sygnału mowy:
ADPCM 32 kbit/s
■
Zródło zasilania:
220–240 V, 50 Hz
■
Pobór energii, ładowarka:
Stan gotowości: ok. 0,8 W
Maksymalnie: ok. 5,0 W
■
Warunki obsługi:
5 °C–40°C, 20%–80% względnej wilgotności
powietrza (suche pomieszczenie)
■
Wymiary:
Ładowarka:
Słuchawka (KX-TGA715):
×
34 mm
Słuchawka (KX-TGA717):
×
38 mm
■
Ciężar:
Ładowarka:
ok. 61 mm × 87 mm × 95 mm
ok. 90
ok. 179 mm × 48 mm
ok. 179 mm × 48 mm
g
Słuchawka (KX-TGA715):
Słuchawka (KX-TGA717):
Uwaga:
L
Dane techniczne mogą ulec zmianie.
L
Ilustracje zamieszczone w niniejszej instrukcji
obsługi mogą się nieco różnić od faktycznego
wyglądu urządzenia.
ok. 154
ok. 164
g
g
<25>
Page 74

TGA715FX_717FX(pd-pd).book Page 26 Monday, March 19, 2007 1:07 PM
Notatki
<26>
Page 75

TGA715FX_717FX(pd-pd).book Page 27 Monday, March 19, 2007 1:07 PM
Notatki
<27>
Page 76

TGA715FX_717FX(pd-pd).book Page 28 Monday, March 19, 2007 1:07 PM
1999/5/EC
Müţteri Hizmetleri Yardým Hattý Tel No: 444 33 34
N Polska
Dział sprzedaży:
Panasonic Polska Sp. z o. o.
Al.Krakowska 4/6
02-284 Warszawa, Polska
Tel: (22) 338 11 00
Fax: (22) 338 12 00
Infolinia: 0801 351 903
Prawa autorskie:
Wacicielem praw autorskich niniejszego materiau jest Panasonic Communications Co., Ltd.
Kopiowanie jest dozwolone wycznie do uytku wewntrznego. Kopiowanie w jakimkolwiek innym celu,
w caoci lub we fragmentach, jest zabronione bez pisemnej zgody Panasonic Communications Co., Ltd.
© 2006 Panasonic Communications Co., Ltd. Wszelkie prawa zastrzeone.
PQQX15607YA DC0906PW1037
FX-1/2
 Loading...