

Page 1
Model No.
KX-TD500
Digital Super Hybrid System
User Manual
D
I
G
I
T
A
L
S
U
P
E
R
H
Y
B
R
I
D
S
Y
S
T
E
M
R
U
N
O
F
F
L
I
N
E
A
L
A
R
M
Please read this manual before connecting the Digital Super Hybrid System
and save this manual for future reference.
Page 2

2 User Manual
Thank you for purchasing the Panasonic Model KX-TD500, Digital Super Hybrid
System.
Page 3

System Components
User Manual 3
System Components
Model No. Description
Service Unit KX-TD500 Digital Super Hybrid System
Telephone
KX-T7220
KX-T7230
KX-T7235
KX-T7250
KX-T7420
KX-T7425
KX-T7431
KX-T7433
KX-T7436
Digital Proprietary Telephone
Digital Proprietary Telephone with Display
Digital Proprietary Telephone with Large Display
Digital Proprietary Telephone
Digital Proprietary Telephone
Digital Proprietary Telephone
Digital Proprietary Telephone with Display
Digital Proprietary Telephone with Display
Digital Proprietary Telephone with Large Display
Optional
Equipment
KX-T7240
KX-T7440
KX-T7441
DSS Console
DSS Console
DSS Console with Answer and Release buttons
User-supplied
Equipment
Single Line Telephones
Page 4

Cautions
4 User Manual
Cautions
When using the KX-T7200 and KX-T7400 series, keep the following conditions in
mind:
• If there is any trouble, unplug the extension line and connect a known working phone. If the
known working phone operates properly, have the defective phone repaired by a specified
Panasonic Factory Service Center. If the known working phone does not operate properly,
check the Digital Super Hybrid System and the internal extension wiring.
• Keep the unit away from heating appliances and electrical noise generating devices such as
fluorescent lamps and motors.
• The unit should be kept free of dust, moisture and vibration, and should not be exposed to
direct sunlight.
• Do not use benzine, thinner, or any abrasive powder to clean the cabinet. Wipe it with a soft
cloth.
• Do not use any handset other than a Panasonic handset.
When you ship the product
Carefully pack and send it prepaid, adequately insured and preferably in the original carton.
Attach a postage-paid letter, detailing the symptom, to the outside of the carton. DO NOT send
the product to the Executive or Regional Sales offices. They are NOT equipped to make repairs.
Product service
Panasonic Factory Servicenters for this product are listed in the servicenter directory. Consult
with your authorized Panasonic dealer for detailed instructions.
The serial number of this product may be found on the label affixed to the bottom
of the unit. You should note the model number and the serial number of this unit
in the space provided and retain this book as a permanent record of your purchase to
aid in identification in the event of theft.
MODEL No.:
SERIAL No.:
Page 5

Cautions
User Manual 5
WARNING
TO PREVENT FIRE OR SHOCK HAZARD, DO NOT EXPOSE THIS PRODUCT TO
RAIN OR ANY TYPE OF MOISTURE.
Note
If you connect the Panasonic Wireless System (model KX-TD336900) to the Digital Super
Hybrid System, the following features do not work with the Wireless System:
a) Call Forwarding — Follow Me
b) Limited Call Duration (Please refer to Programming Guide)
DATE OF PURCHASE
NAME OF DEALER
DEALER'S ADDRESS
For your future reference
DEALER'S TELEPHONE NO.
Page 6
Cautions
6 User Manual
Accessory Order Information
• Replacement parts and accessories are available through your local authorized parts
distributor.
• For ordering accessories, call toll free: 1-800-332-5368.
W: White, B: Black
Part No. Picture Description Comment
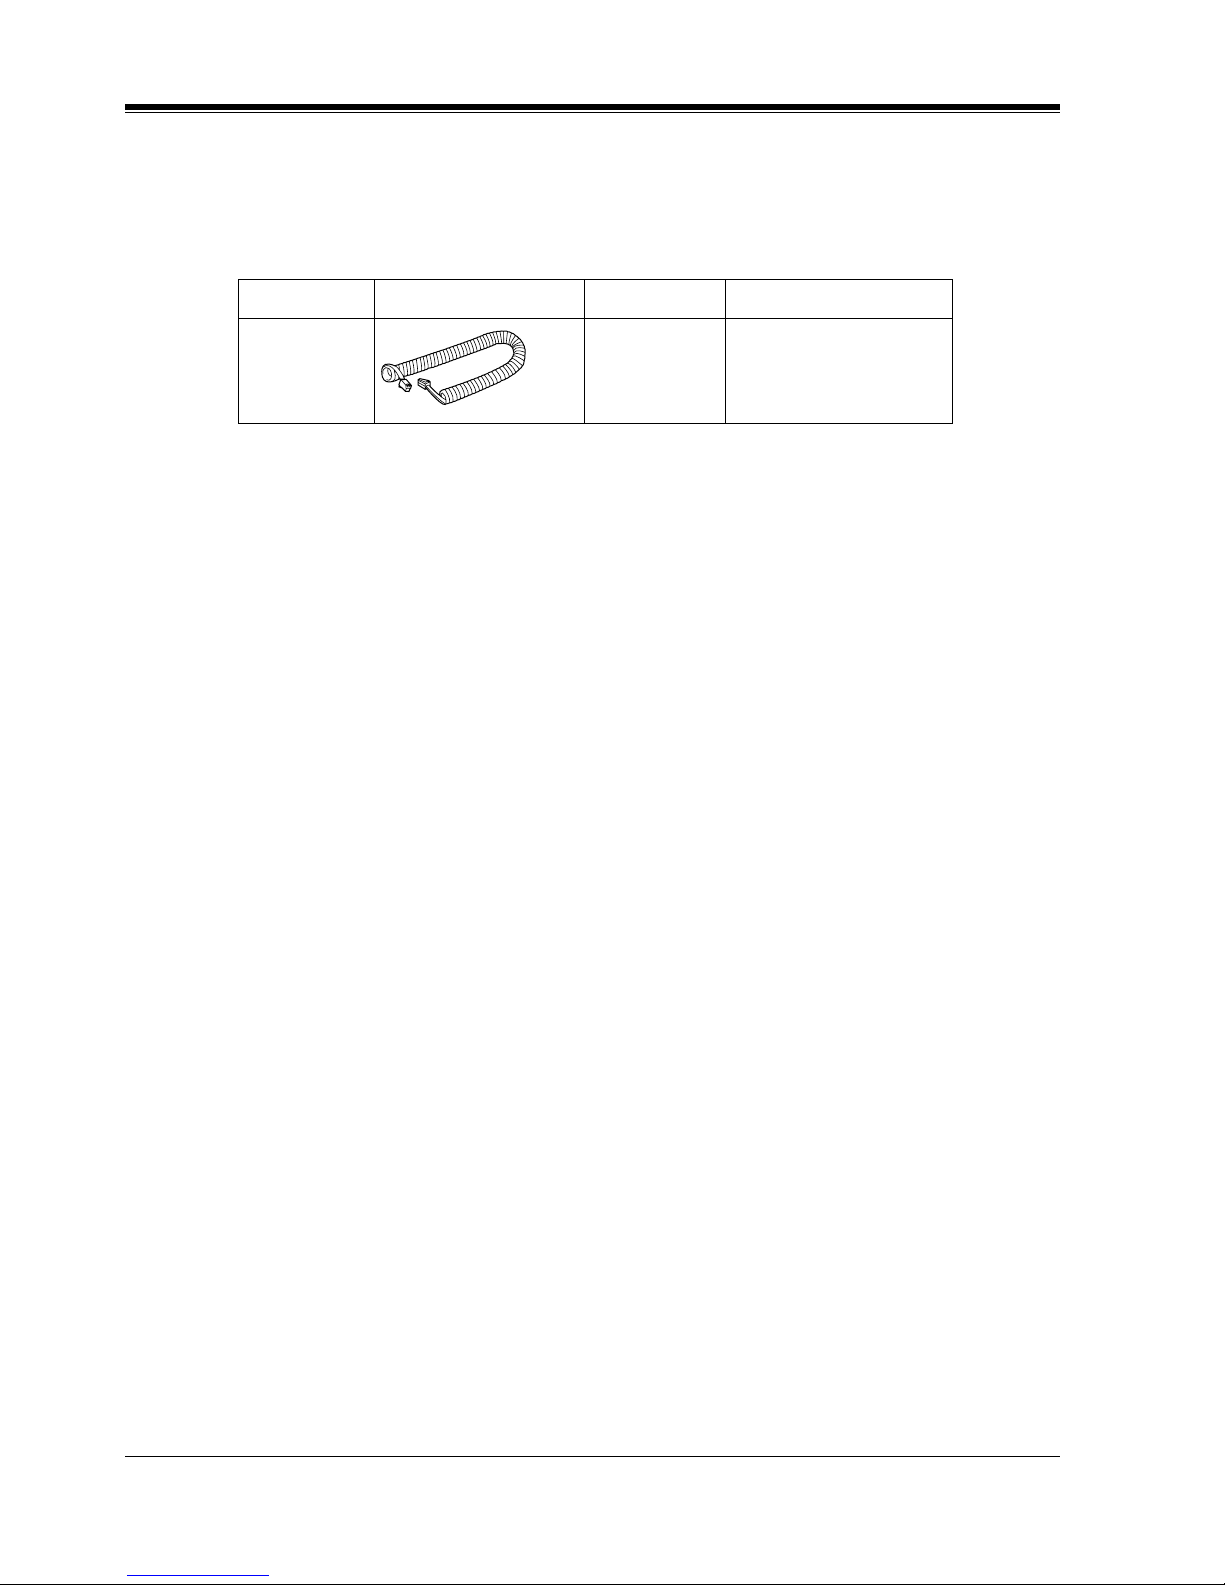
KX-J07W/B
KX-J15W/B
KX-J25W/B
Handset cord
213.36 cm (7 feet)
457.2 cm (15 feet)
762 cm (25 feet)
Page 7

Introduction
User Manual 7
Introduction
Who Should Use This Manual
This manual is designed for users of Digital Super Hybrid System KX- TD500. It is to be used
after the system is installed and System Programming is completed. The focus is Digital
Proprietary Telephones (DPTs); KX-T7220/KX-T7230/KX-T7235/KX-T7250/KX-T7420/
KX-T7425/KX-T7431/KX-T7433/KX-T7436, Digital DSS Consoles; KX-T7240/KX-T7440/
KX-T7441, Single Line Telephones (SLTs) and their features. The step-by-step procedures
required to activate each feature are discussed in detail. Illustrations of the KX-TD500 system
and the required System Programming are provided under separate cover in the Installation
Manual and the Programming Guide.
Construction of This Manual
This manual consists of the following sections:
(Section 1) DPT Overview
Provides configuration information on DPTs. It provides an illustration of each telephone,
identifies their feature buttons, supplies background information on these feature buttons, and
provides initial settings.
(Section 2) Station Programming
Provides the steps required to assign features to DPT flexible buttons and to the DPT system.
(Section 3) User Programming
Provides the steps required to assign some features to the system using a PT.
(Section 4) Station Features and Operation (PT/SLT)
Provides background information on the PT features and lists the steps required to activate each
feature.
(Section 5) DSS Console Features
Provides configuration information on the DSS Console. It gives background information on
the DSS Console features and lists the steps required to activate each feature.
(Section 6) Appendix
Provides Display Examples, a Feature Number List, Tone List, and other information are
explained in this section.
Features and Capabilities
The KX-TD500 System is a sophisticated and powerful system that satisfy just what you
expect of an office communication's system. Some of the remarkable features are listed below.
"*" are only available for the KX-7235 and KX-T7436.
• Automatic Callback Busy (Camp-On) informs you when the selected CO line or the
called party becomes idle.
• Call Log, Incoming (— Option) allows you to confirm the incoming CO call
information on the display. You can also call back the caller by selecting one of the
memorized numbers. This feature is available only for the KX-T7230,KX-T7235,KXT7433 and KX-T7436.
Page 8

Introduction
8 User Manual
• Call Log, Outgoing* redials by selecting one of the last five CO calls you made,
according to the number information on the display.
• Conference, Unattended When you are in a conference with two outside parties, you
can leave the conference and allow the other two parties to continue the conversation.
You can also return to the conference.
• Data Line Security prohibits various tones, such as call waiting tone or hold recall tone,
from sounding at the extension in the data communication mode. It also blocks
overriding by other extensions, such as Executive Busy Override.
• Doorphone and Door Opener (— Option) enables the conversation between you and
a visitor at door. You can also unlock the door a few seconds from your phone.
• Executive Busy Override allows you to enter into an existing conversation at an
extension/CO line.
• Full One-Touch Dialing allows you to have easy access to a desired party or system
feature by pressing just one button.
• Message Waiting allows you to leave a message notification for another extension. The
message waiting lamp (MESSAGE indicator) gives a visual indication that a message
notification has been received.
• Paralleled Telephone Connection allows you to connect your DPT in parallel with an
SLT. Each telephone can have the same extension number so that you can use either
telephone. If the eXtra Device Port (XDP) feature is available through System
Programming, each telephone can be connected to the same extension port but have
different extension numbers so that they can act as completely different extensions.
• System Feature Access Menu* allows you to access various features easily by
following the display on the large LCD and pressing corresponding buttons.
• VPS Integration (— Option) enables forwarding any incoming call to Voice Mail.
Recording or Playing back the message(s) is also available. To use Voice Mail services,
installing a Voice Processing System (VPS) is required.
Terms used in the Descriptions
Feature Numbers
A feature number is an access code for various functions when programming or executing
features using proprietary or single line telephones connected to the system. You can access
available features by dialing the corresponding feature number (and additional number, if
required).
There are two types of feature numbers as follows:
• Flexible feature number
• Fixed feature number
While fixed feature numbers cannot be changed, flexible feature numbers can be changed.
Please refer to the Programming Guide for details. In this manual, the default numbers are used
to describe each operation and illustration. Use the new programmed number if you have
changed a flexible feature number. The lists of fixed numbers and default flexible feature
numbers are shown in Section "6 Appendix."
If you use a dial pulse (DP) type Single Line Telephone (SLT);
It is not possible to access features that have " " or "#" in their feature numbers.
Page 9

Introduction
User Manual 9
Illustration
All illustrations of DPTs used in the operating instructions are KX-T7235's.
Ton es
Various tone types, such as Confirmation tone, Dial tone, Call Waiting tone, etc., are explained
in Section "6 Appendix."
Display
The display examples are in each operation step, if required. The display information list is in
Section "6 Appendix" for your convenience.
Installation Manual References
The required installation instruction titles described in the Installation Manual
are noted for
your reference.
Programming Guide References
The related and required programming titles described in the Programming Guide
are noted for
your reference.
System Programming should be done with PC.
Features Guide References
The related feature titles described in the Features Guide
are noted for your reference.
User Manual References
The operation(s) required to implement the feature described in this User Manual
is (are) noted
for your reference.
Note
• Throughout this manual the term "he" or "she," "his" or "her" may be used.
In order to improve readability rather than continually use he / she we have only used
one of these terms. The term "he" or "she" should be taken as being interchangeable.
About the Other Manuals
Along with this User Manual, the following manuals are available:
Features Guide
Describes every basic, optional and programmable features of the KX-TD500 System in
alphabetical order.
Installation Manual
Provides instructions for installing the hardware and system maintenance.
Programming Guide
Describes step-by-step instruction for performing System Programming using the
Maintenance Console software for a PC.
Page 10

Telephone Company and F.C.C. Requirements and Responsibilities
10 User Manual
Telephone Company and F.C.C. Requirements
and Responsibilities
Telephone Company and F.C.C. Requirements and Responsibility
1. Notification to the Telephone Company
Customers, before connecting terminal equipment to the telephone network, shall upon
request of the Telephone Company, inform the Telephone Company of the particular line(s)
to which such connection is made, the F.C.C. registration number (see the label on the
bottom of the unit) and ringer equivalence number (REN) of the registered terminal
equipment.
The REN is useful in determining the quantity of devices you may connect to your
telephone line and still have all of those devices ring when your telephone number is called.
In most, but not all areas, the sum of the REN's of all devices connected to one line should
not exceed five (5.0). To be certain of the number of devices you may connect to your line,
as determined by the REN, you should contact your local telephone company to determine
the maximum REN for your calling area.
2. Connection to Telephone Line
This unit must not be connected to a coin operated line. If you are on a party line, check
with your local telephone company.
3. Incidence of Harm to the Telephone Lines
Should terminal equipment cause harm to the telephone network, the telephone company
shall, where practical, notify the customer that temporary discontinuance of service may be
required. However, where prior notice is not practical, the telephone company may
temporarily discontinue service forthwith, if such action is reasonable in the circumstances.
In case of such unnotified temporary discontinuance of service, the telephone company
shall:
1) Promptly notify the customer of such temporary discontinuance of service.
2) Afford the customer the opportunity to correct the situation which gave rise to the
temporary discontinuance.
3) Inform the customer of the right to bring a complaint to the Federal Communication
Commission pursuant to the procedures set out in Subpart E of Part 68 of FCC
Telephone Equipment Rules.
4. Compatibility of the Telephone Network and Terminal Equipment
a) Availability of telephone interface information.
Technical information concerning interface parameters and specifications not specified
in FCC Rules, including the number of Ringers which may be connected to a particular
telephone line, which is needed to permit Terminal Equipment to operate in a manner
compatible with Telephone Company communications facilities, shall be provided by
the Telephone Company upon customer's request.
b) Changes in Telephone Company Communications Facilities, Equipment,
Operations and Procedures.
The Telephone Company may make changes in its communications facilities,
equipment, operations or procedures, where such action is reasonably required in the
Page 11

Telephone Company and F.C.C. Requirements and Responsibilities
User Manual 11
operation of its business and is not inconsistent with the rules and regulations in FCC
Part 68.
If such changes can be reasonably expected to render any customer Terminal Equipment
incompatible with Telephone Company Communications Facilities, or require
modification or alteration of such Terminal Equipment, or otherwise materially affect its
use or performance, the customer shall be given adequate notice in writing, to allow the
customer an opportunity to maintain uninterrupted service.
Notify the Telephone Company
Installation must be performed by a qualified professional installer. Before connecting this
equipment to any telephone, call the telephone company and inform them of the following:
• Telephone numbers to which the system will be connected
• Make: Panasonic
• Model: KX-TD500 and KX-TD520
• FCC Registration No.: found on the rear side of the unit
• Ringer Equivalence No.: 0.4B
• Facility Interface Code: 02LS2,02GS2, 02RV2-T, OL13C, 04DU9-BN/1KN/1SN
• Service Order Code: 9.0F, AS.2, 6.0P
• Required Network Interface Jack: RJ21X, RJ11, RJ48C
Note
Allowing this equipment to be operated in such a manner as to not provide for proper answer
supervision is a violation of Part 68 of the FCC's rules.
and:
Proper answer supervision is when:
A. This equipment returns answer supervision to the PSTN when DID calls are:
• Answered by the called station
• Answered by the attendant
• Routed to a recorded announcement that can be administered by the CPE user.
• Routed to a dial prompt
B. This equipment returns answer supervision on all DID calls forwarded to the
PSTN. Permissible exceptions are:
• A call is unanswered
• A busy tone is received
• A reorder tone is received
Note
This equipment has been tested and found to comply with the limits for a Class A digital
device, pursuant to Part 15 of the FCC Rules. These limits are designed to provide reasonable
protection against harmful interference when the equipment is operated in a commercial
environment. This equipment generates, uses, and can radiate radio frequency energy and, if
not installed and used in accordance with the instructions manual, may cause harmful
interference to radio communications. Operation of this equipment in a residential area is likely
Page 12

Telephone Company and F.C.C. Requirements and Responsibilities
12 User Manual
to cause harmful interference in which case the user will be required to correct the interference
at his own expense.
Caution:
Any changes or modifications not expressly approved by the party responsible for compliance
could void the users authority to operate this device.
Page 13

Table of Contents
User Manual 13
Table of Contents
1DPT Overview
1.1 Configuration................................................................................................................20
1.1.1 Configuration...............................................................................................................20
1.1.2 Location of Controls....................................................................................................21
1.1.3 Connection ..................................................................................................................30
1.1.4 Feature Buttons ...........................................................................................................31
1.1.5 Initial Setting for KX-T7400 Series ............................................................................39
1.1.6 Initial Setting for KX-T7200 Series ............................................................................43
1.1.7 LED Indication............................................................................................................46
2 Station Programming
2.1 Station Programming Instructions .............................................................................50
2.1.1 Station Programming Instructions...............................................................................50
2.2 Station Programming...................................................................................................56
2.2.1 Bilingual Display Selection.........................................................................................56
2.2.2 Call Waiting Tone Type Assignment...........................................................................57
2.2.3 Flexible Button Assignment........................................................................................58
2.2.4 Full One-Touch Dialing Assignment ..........................................................................82
2.2.5 Handset / Headset Selection........................................................................................83
2.2.6 Initial Display Selection..............................................................................................84
2.2.7 Intercom Alert Assignment .........................................................................................85
2.2.8 Live Call Screening (LCS) Mode Set..........................................................................86
2.2.9 PDN/SDN Button Delayed Ringing Assignment........................................................87
2.2.10 Phantom Button Ringing On/Off Assignment ..........................................................88
2.2.11 Preferred Line Assignment — Incoming ..................................................................89
2.2.12 Preferred Line Assignment — Outgoing ..................................................................92
2.2.13 Ringing Tone Selection for CO Buttons....................................................................95
2.2.14 Ringing Tone Selection for INTERCOM Button......................................................96
2.2.15 Self-Extension Number Confirmation.......................................................................97
2.2.16 Station Programming Data Default Set .....................................................................98
2.2.17 Station Speed Dialing Number/Name Assignment [KX-T7235/KX-T7431/KX-
T7433/KX-T7436 only].............................................................................................99
3 User Programming
3.1 User Programming Instructions ...............................................................................108
3.1.1 General Programming Instructions ...........................................................................108
3.1.2 Programming Methods..............................................................................................112
3.2 User Programming.....................................................................................................114
3.2.1 [000] Date and Time Set............................................................................................114
3.2.2 [001] System Speed Dialing Number Set .................................................................117
3.2.3 [002] System Speed Dialing Name Set.....................................................................120
3.2.4 [004] Extension Name Set.........................................................................................123
3.2.5 [005] Flexible CO Button Assignment......................................................................126
3.2.6 [006] Caller ID Dial Set ............................................................................................131
3.2.7 [007] Caller ID Name Set..........................................................................................134
3.2.8 [008] Absent Messages Set .......................................................................................137
Page 14

Table of Contents
14 User Manual
3.2.9 [009] Quick Dial Number Set................................................................................... 140
3.2.10 [010] DISA / TIE User Code Set............................................................................ 143
4 Station Features and Operation (PT/SLT)
4.1 Before Operating ....................................................................................................... 148
4.1.1 Before Operating ...................................................................................................... 148
4.2 Basic Operations........................................................................................................ 151
4.2.1 Making Calls ............................................................................................................ 151
4.2.2 Receiving Calls......................................................................................................... 154
4.3 Station Features and Operation ............................................................................... 156
4.3.1 Absent Message Capability ...................................................................................... 156
4.3.2 Account Code Entry ................................................................................................. 159
4.3.3 Alternate Calling — Ring / Voice............................................................................. 163
4.3.4 ANSWER and RELEASE buttons Operation .......................................................... 166
4.3.5 Answering, Direct Trunk.......................................................................................... 168
4.3.6 Automatic Callback Busy (Camp-On) ..................................................................... 170
4.3.7 Background Music (BGM)....................................................................................... 173
4.3.8 Busy Station Signaling (BSS) .................................................................................. 175
4.3.9 Call Forwarding........................................................................................................ 177
4.3.10 Call Forwarding — All Calls to an Incoming Group ............................................. 186
4.3.11 Call Hold ................................................................................................................ 189
4.3.12 Call Park .................................................................................................................194
4.3.13 Call Pickup ............................................................................................................. 197
4.3.14 Call Pickup Deny.................................................................................................... 200
4.3.15 Call Splitting........................................................................................................... 202
4.3.16 Call Transfer ........................................................................................................... 204
4.3.17 Call Waiting............................................................................................................ 211
4.3.18 Call Waiting from Central Office ........................................................................... 216
4.3.19 Calling Line Identification Presentation (CLIP) .................................................... 219
4.3.20 Calling Line Identification Restriction (CLIR) / Calling Name Identification
Restriction (CNIR).................................................................................................. 221
4.3.21 Conference, 3-Party ................................................................................................ 223
4.3.22 Conference, 5-Party ................................................................................................ 228
4.3.23 Conference, Unattended ......................................................................................... 231
4.3.24 CTI (Computer Telephony Integration) Code Entry .............................................. 234
4.3.25 Data Line Security .................................................................................................. 235
4.3.26 Direct Inward System Access (DISA).................................................................... 237
4.3.27 Do Not Disturb (DND) ........................................................................................... 244
4.3.28 Do Not Disturb (DND) Override............................................................................ 248
4.3.29 Doorphone Call ...................................................................................................... 250
4.3.30 Electronic Station Lockout ..................................................................................... 255
4.3.31 Emergency Call ...................................................................................................... 257
4.3.32 End-to-End DTMF Signaling (Tone Through)....................................................... 258
4.3.33 Executive Busy Override........................................................................................ 261
4.3.34 Executive Busy Override Deny .............................................................................. 264
4.3.35 External Feature Access ......................................................................................... 266
4.3.36 External Modem Control ........................................................................................ 268
4.3.37 Flash ....................................................................................................................... 270
4.3.38 Full One-Touch Dialing.......................................................................................... 271
Page 15

Table of Contents
User Manual 15
4.3.39 Handset Microphone Mute......................................................................................273
4.3.40 Hands-free Answerback ..........................................................................................275
4.3.41 Hands-free Operation ..............................................................................................277
4.3.42 Inter Office Calling..................................................................................................279
4.3.43 Live Call Screening (LCS) ......................................................................................282
4.3.44 Lockout....................................................................................................................292
4.3.45 Log-In / Log-Out.....................................................................................................293
4.3.46 Message Waiting .....................................................................................................297
4.3.47 Microphone Mute....................................................................................................302
4.3.48 Night Service On/Off ..............................................................................................304
4.3.49 Off-Hook Call Announcement (OHCA) .................................................................311
4.3.50 Off-Hook Call Announcement (OHCA) —Whisper...............................................316
4.3.51 Off-Hook Monitor ...................................................................................................321
4.3.52 One-Touch Dialing ..................................................................................................323
4.3.53 Operator Call ...........................................................................................................325
4.3.54 Outward Dialing, Trunk Access..............................................................................327
4.3.55 Paging......................................................................................................................333
4.3.56 Paging — Answer ...................................................................................................338
4.3.57 Paging Deny ............................................................................................................340
4.3.58 Paging and Transfer.................................................................................................342
4.3.59 Paralleled Telephone Connection ............................................................................345
4.3.60 PDN Call .................................................................................................................347
4.3.61 Phantom Extension..................................................................................................350
4.3.62 Pickup Dialing (Hot Line).......................................................................................355
4.3.63 Privacy Release........................................................................................................357
4.3.64 Pulse to Tone Conversion........................................................................................359
4.3.65 Quick Dialing ..........................................................................................................360
4.3.66 Redial ......................................................................................................................361
4.3.67 Released Link Operation.........................................................................................364
4.3.68 Ringing Transfer......................................................................................................366
4.3.69 Secret Busy Override...............................................................................................368
4.3.70 Secret Dialing..........................................................................................................370
4.3.71 Station Program Clear .............................................................................................372
4.3.72 Station Speed Dialing..............................................................................................374
4.3.73 System Speed Dialing .............................................................................................376
4.3.74 Timed Reminder (Wake-Up Call) ...........................................................................378
4.3.75 Toll Restriction Override.........................................................................................384
4.3.76 Toll Restriction Override by Account Code Entry..................................................385
4.3.77 Toll Restriction Override for System Speed Dialing...............................................386
4.3.78 Trunk Answer From Any Station (TAFAS) ............................................................387
4.3.79 Two-Way Recording into the Voice Mail ................................................................389
4.3.80 UCD Login Monitor................................................................................................392
4.3.81 UCD Monitor Mode ................................................................................................393
4.3.82 Voice Mail Transfer.................................................................................................395
4.3.83 VPS Integration .......................................................................................................397
4.3.84 Walking COS...........................................................................................................401
4.3.85 Walking Station .......................................................................................................404
4.4 Operator / Manager Service Features ......................................................................406
4.4.1 Operator / Manager Service Features........................................................................406
Page 16

Table of Contents
16 User Manual
4.4.2 Background Music (BGM) — External ................................................................... 407
4.4.3 Call Log Incoming, Log Lock.................................................................................. 411
4.4.4 Live Call Screening (LCS) Password Clear ............................................................. 412
4.4.5 Local Alarm.............................................................................................................. 413
4.4.6 Outgoing Message (OGM) Record/Playback........................................................... 417
4.4.7 Remote DND (Do Not Disturb) Control .................................................................. 426
4.4.8 Remote FWD (Call Forwarding) Cancel — Once ................................................... 430
4.4.9 Remote Station Lock Control................................................................................... 434
4.4.10 Switching COS ....................................................................................................... 436
4.4.11 Timed Reminder, Remote (Wake-Up Call) ............................................................ 439
4.4.12 Trunk Busy-Out Setting.......................................................................................... 449
4.4.13 Trunk Route Control............................................................................................... 455
4.5 Special Display Features ........................................................................................... 458
4.5.1 Special Display Features .......................................................................................... 458
4.5.2 Call Forwarding / Do Not Disturb (KX-T7436 / KX-T7235 only).......................... 459
4.5.3 Call Information Display (KX-T7436 / KX-T7433 / KX-T7235 / KX-T7230 only)461
4.5.4 Call Log, Incoming (KX-T7436 / KX-T7433 / KX-T7235 / KX-T7230 only) ....... 464
4.5.5 Call Log Incoming, Log Lock (KX-T7436 / KX-T7433 / KX-T7235 / KX-T7230 only)
471
4.5.6 Call Log, Outgoing (KX-T7436 / KX-T7235 only)................................................. 473
4.5.7 KX-T7235 Display Features..................................................................................... 474
4.5.8 KX-T7235 Display Features - Call Directory .......................................................... 475
4.5.9 KX-T7235 Display Features - System Feature Access Menu.................................. 477
4.5.10 KX-T7431 / KX-T7433 / KX-T7436 Display Features ......................................... 487
4.5.11 KX-T7431 / KX-T7433 / KX-T7436 Display Features - Call Directory ............... 490
4.5.12 KX-T7431 / KX-T7433 / KX-T7436 Display Features - System Feature Access Menu
496
5 DSS Console Features
5.1 Configuration............................................................................................................. 502
5.1.1 Configuration............................................................................................................ 502
5.1.2 Location of Controls................................................................................................. 503
5.1.3 Feature Buttons......................................................................................................... 505
5.2 DSS Console Features................................................................................................ 506
5.2.1 Station Programming................................................................................................ 506
5.2.2 Account Button (Assignment).................................................................................. 507
5.2.3 Answer Button (Assignment)................................................................................... 508
5.2.4 Conference (CONF) Button (Assignment)............................................................... 509
5.2.5 DAY / NIGHT Button (Assignment)........................................................................ 510
5.2.6 Direct Station Selection (DSS) Button (Assignment) .............................................. 511
5.2.7 FWD/DND Button (Assignment)............................................................................. 512
5.2.8 Group-CO (G-CO) Button (Assignment)................................................................. 513
5.2.9 Group FWD Button (Assignment) ........................................................................... 514
5.2.10 Live Call Screening (LCS) Button (Assignment)................................................... 515
5.2.11 Live Call Screening (LCS) Cancel Button (Assignment)....................................... 516
5.2.12 Message Waiting (MESSAGE) Button (Assignment)............................................ 517
5.2.13 One-Touch Dialing Button (Assignment)............................................................... 518
5.2.14 One-Touch Access Assignment for System Features............................................. 519
5.2.15 Release Button (Assignment) ................................................................................. 520
Page 17

Table of Contents
User Manual 17
5.2.16 SAVE Button (Assignment) ....................................................................................521
5.2.17 Single-CO (S-CO) Button (Assignment) ................................................................522
5.2.18 Tone Through Button (Assignment)........................................................................523
5.2.19 Two-Way Record Button (Assignment) ..................................................................524
5.2.20 Two-Way Transfer Button (Assignment) ................................................................525
5.2.21 Voice Mail (VM) Transfer Button (Assignment) ....................................................526
5.2.22 Direct Station Dialing..............................................................................................530
5.2.23 One-Touch Dialing ..................................................................................................531
5.2.24 One-Touch Access for System Features..................................................................532
5.2.25 Call Transfer............................................................................................................533
5.2.26 ANSWER and RELEASE Buttons Operation ........................................................534
5.2.27 Monitoring an outside line activity .........................................................................536
6 Appendix
6.1 Appendix .....................................................................................................................538
6.1.1 Display Examples......................................................................................................538
6.1.2 Feature Numbers List ................................................................................................546
6.1.3 Tone List....................................................................................................................551
6.1.4 Troubleshooting.........................................................................................................553
Page 18

Table of Contents
18 User Manual
Page 19

DPT Overview
User Manual 19
Section 1
DPT Overview
Note: All illustrations used in the initial setting are
based on model KX-T7235.
Page 20
DPT Overview
20 User Manual
1.1 Configuration
1.1.1 Configuration
Panasonic Digital Proprietary Telephones (DPTs) are available to utilize various features of the
KX-TD500 System, in addition to supporting basic telephone services (making or receiving
calls).
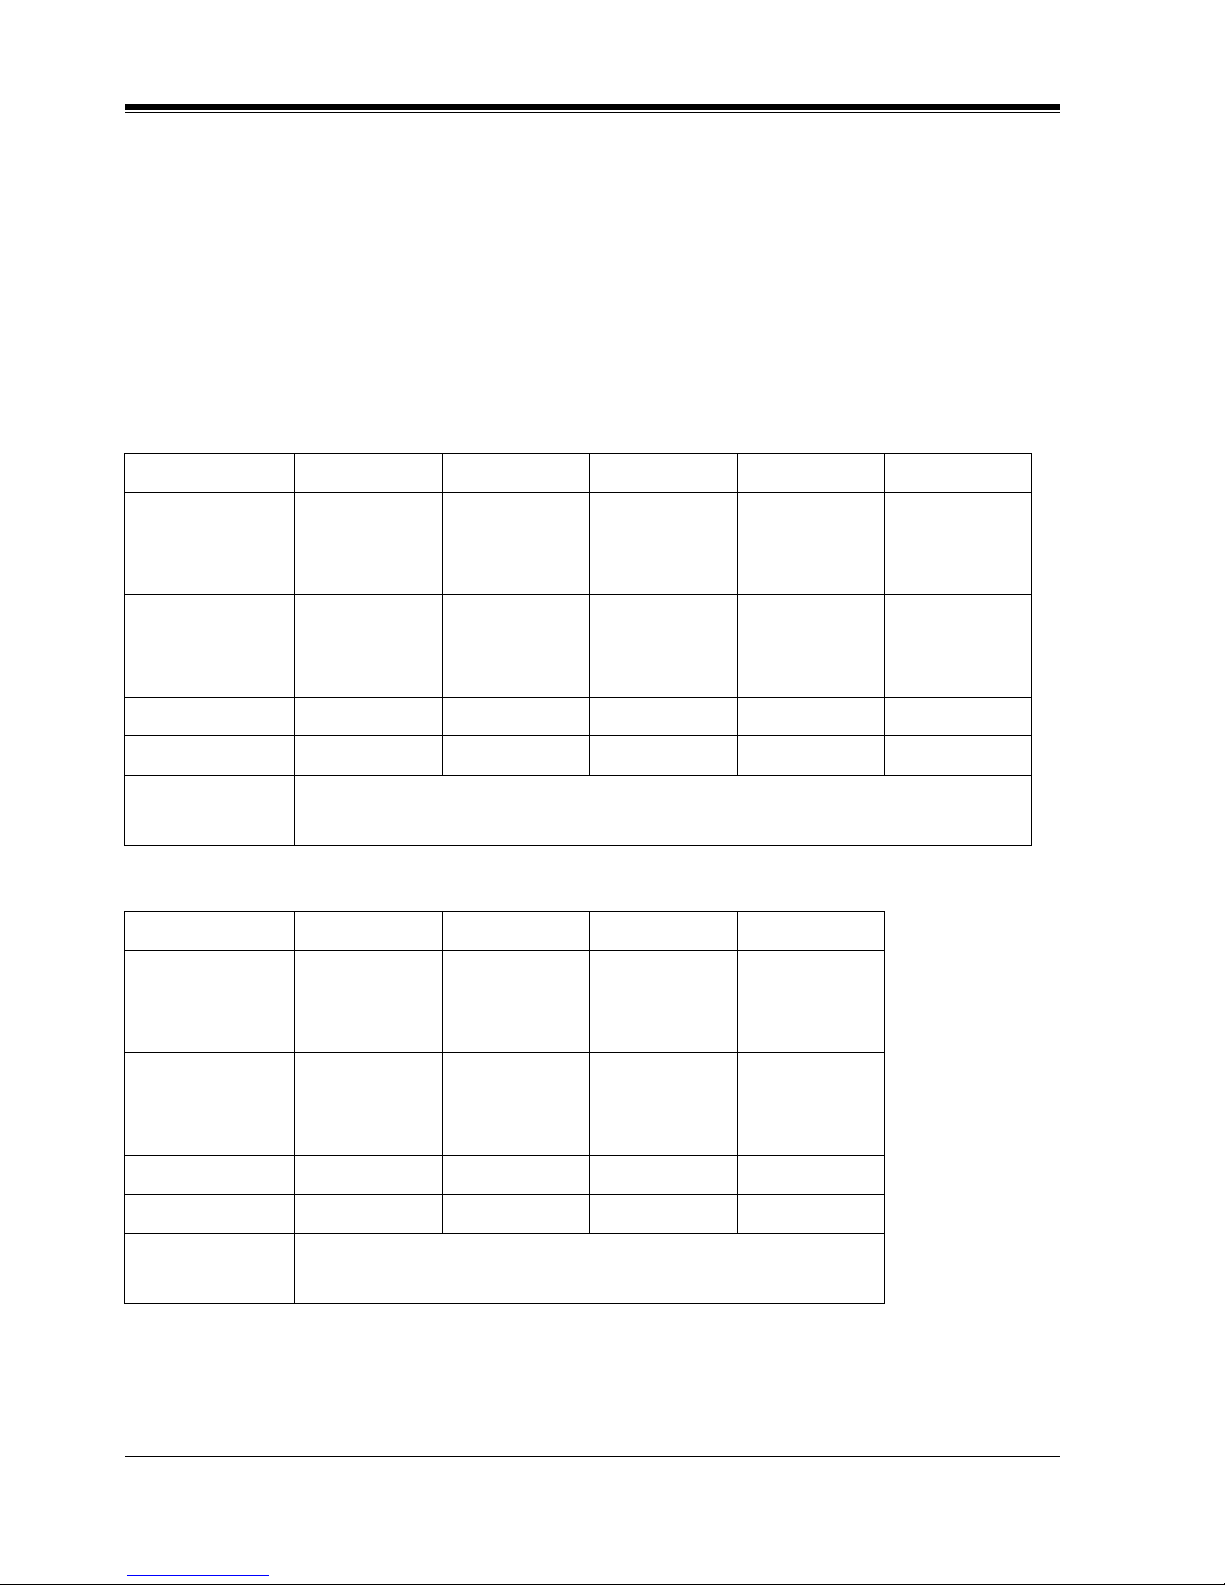
There are the following nine DPT models.
KX-T7400 Series
KX-T7420 KX-T7425 KX-T7431 KX-T7433 KX-T7436
Display
None None
16 char./line,
1-line LCD
Tilt-up,
16 char./line,
3-line LCD
Tilt-up,
24 char./line,
6-line LCD
Soft Buttons
and
Function Buttons
None None None 3 Soft Buttons
3 Soft Buttons/
10 Function
Buttons
Jo g Di al Yes Yes Yes Yes Yes
CO Buttons1224122424
Fixed Feature
Buttons
Please refer to "Fixed Buttons" in Section "1.1.4 Feature Buttons."
KX-T7200 Series
KX-T7220 KX-T7230 KX-T7235 KX-T7250
Display
None
16 char./line,
2-line LCD
Tilt-up,
24 char./line,
6-line LCD
None
Soft Buttons
and
Function Buttons
None 3 Soft Buttons
3 Soft Buttons/
10 Function
Buttons
None
Speakerphone Yes Yes Yes Monitor only
CO Buttons 24 24 12 6
Fixed Feature
Buttons
Please refer to "Fixed Buttons" in Section "1.1.4 Feature
Buttons."
Page 21
DPT Overview
User Manual 21
1.1.2 Location of Controls
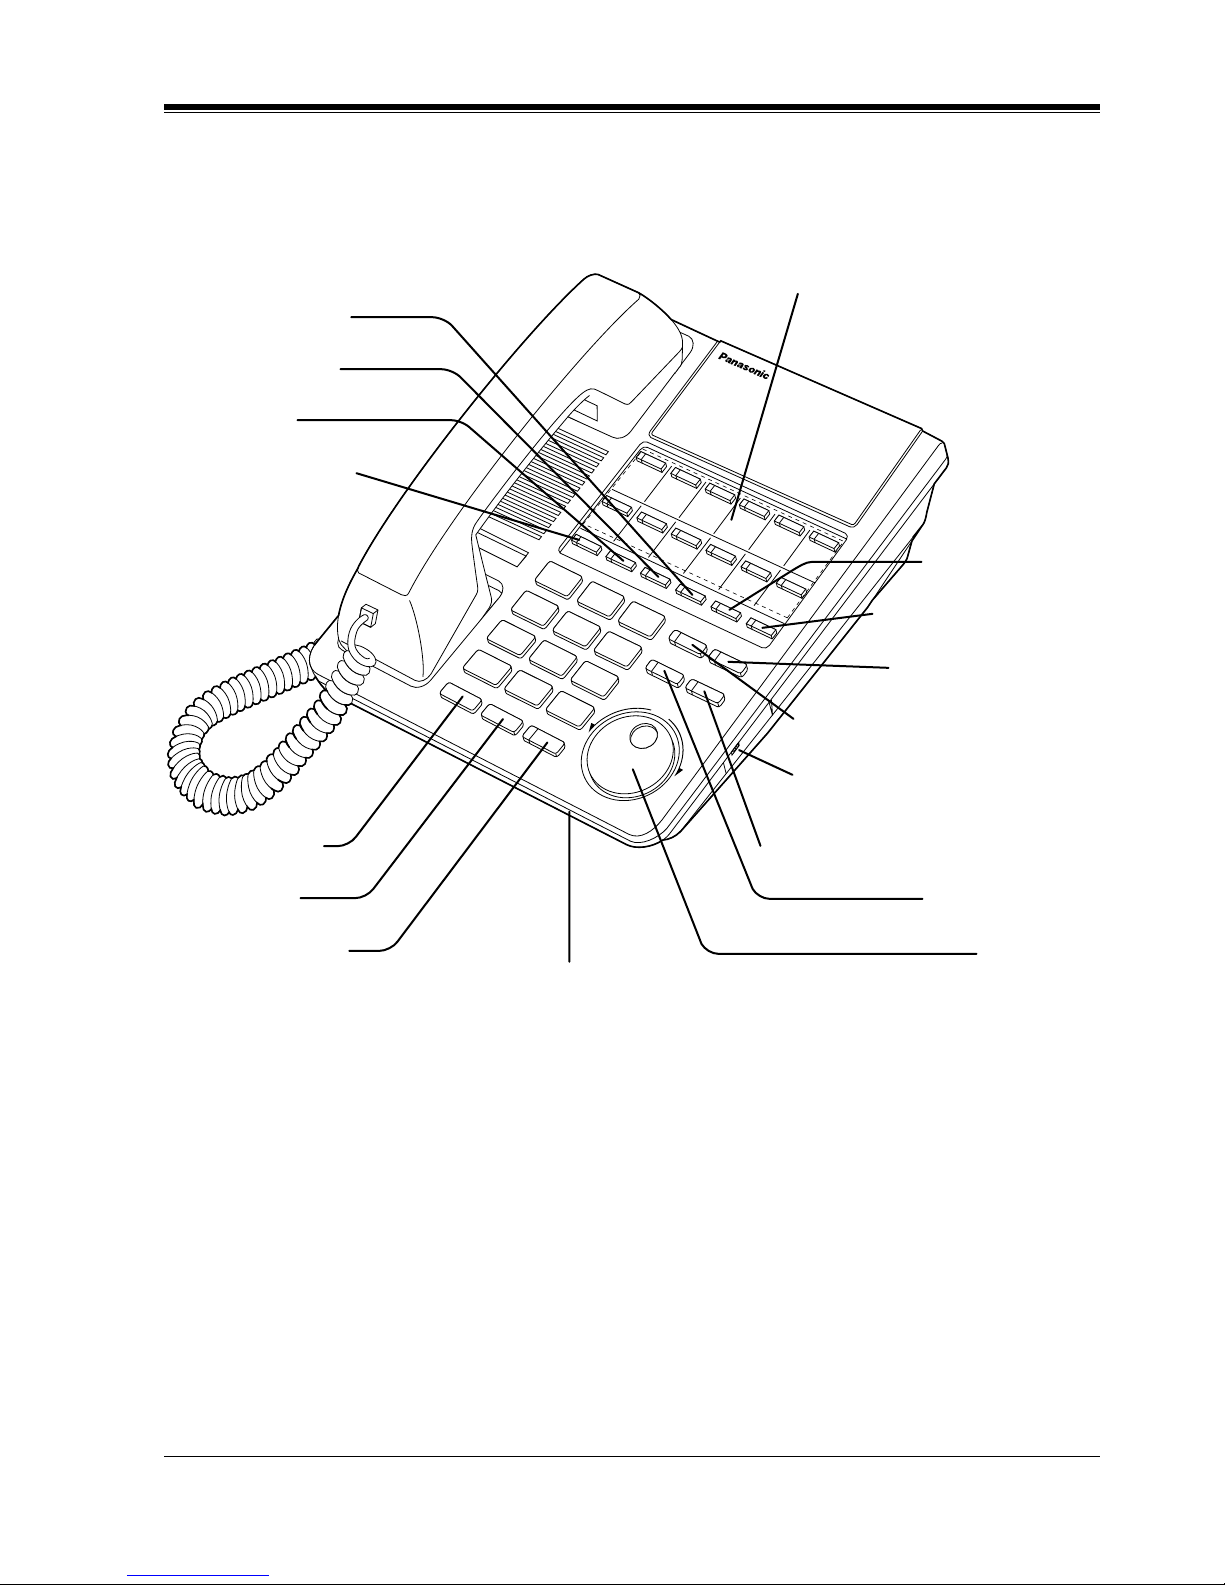
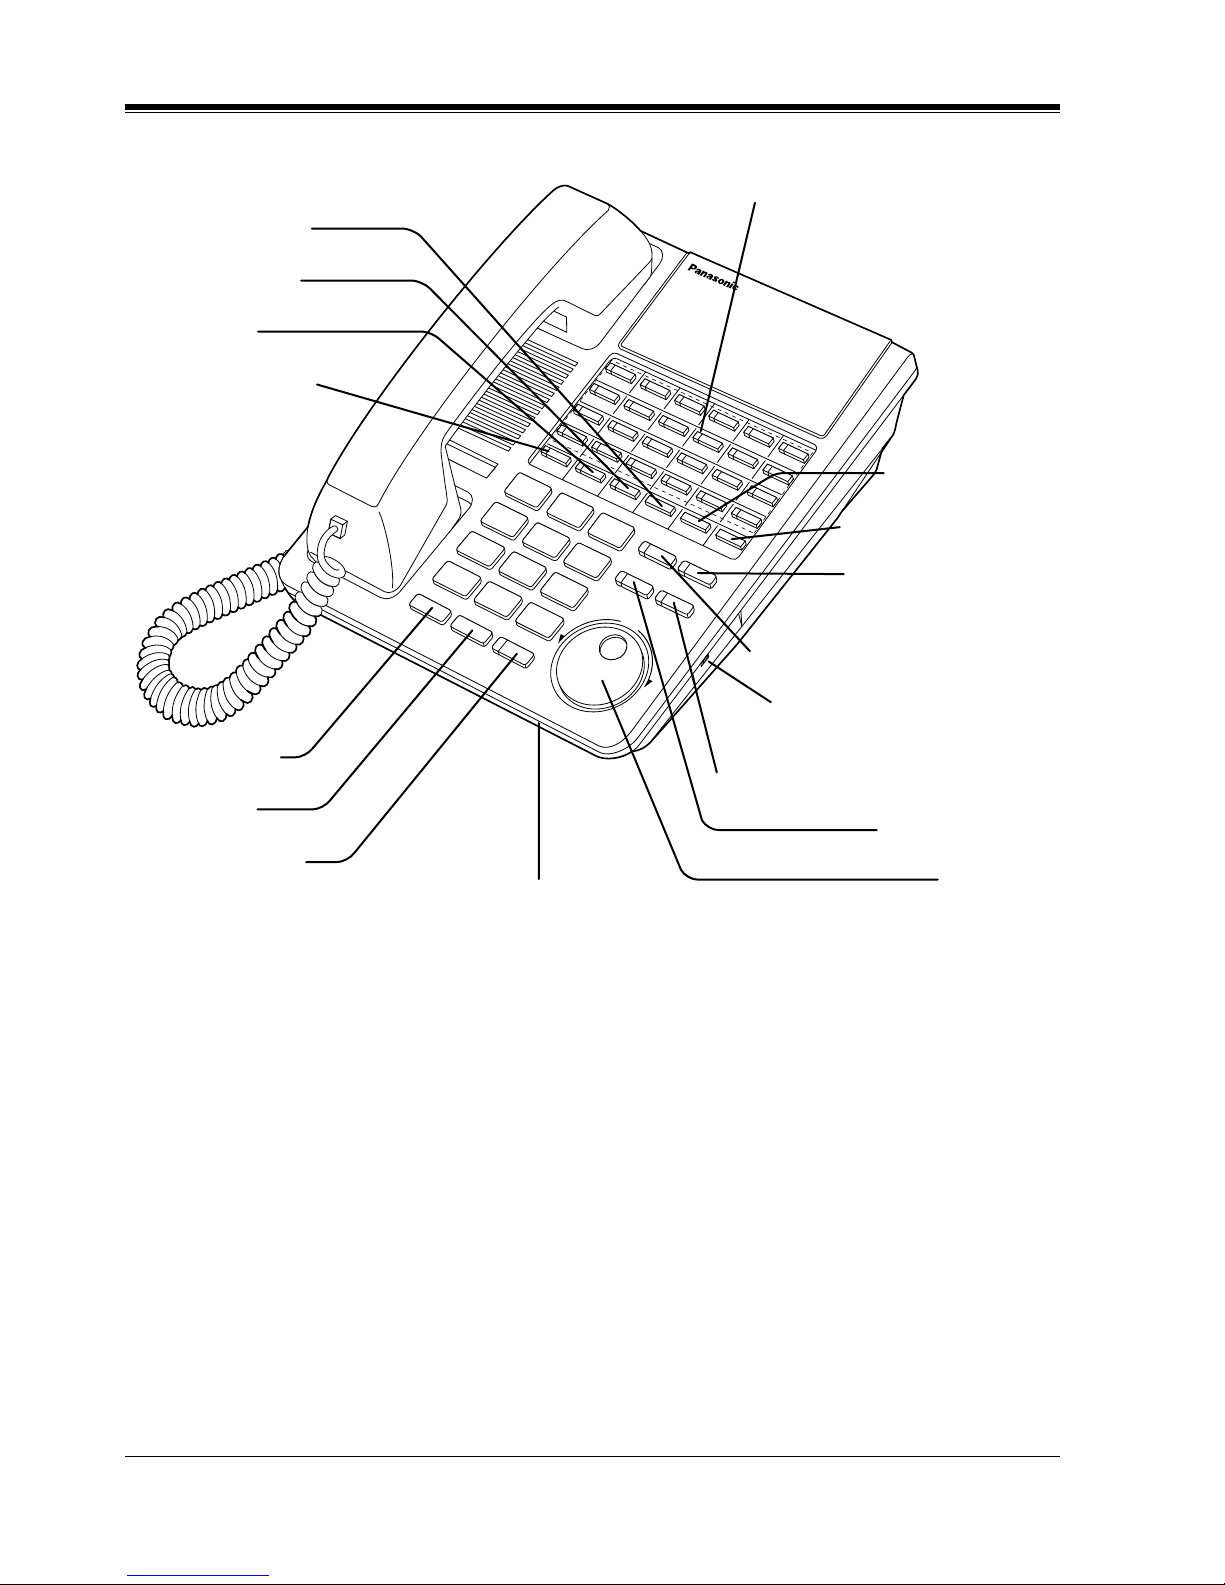
KX-T7420
REDIAL Button
HOLD Button
SP-PHONE Button
Microphone
PROGRAM Button
FWD/DND Button
CONF Button
INTERCOM Button
Flexible CO Buttons
(Outside lines 01 through 12)
PAUSE Button
TRANSFER Button
MESSAGE Button
AUTO DIAL/STORE Button
RINGER Volume Selector
Used to adjust the ringer volume.
AUTO ANSWER/MUTE Button
FLASH Button
Jog Dial
Page 22
DPT Overview
22 User Manual
KX-T7425
AUTO DIAL/STORE Button
RINGER Volume Selector
Used to adjust the ringer volume.
AUTO ANSWER/MUTE Button
FLASH Button
Jog Dial
REDIAL Button
HOLD Button
SP-PHONE Button
Microphone
PROGRAM Button
FWD/DND Button
CONF Button
INTERCOM Button
Flexible CO Buttons
(Outside lines 01 through 24)
MESSAGE Button
PAUSE Button
TRANSFER Button
Page 23

DPT Overview
User Manual 23
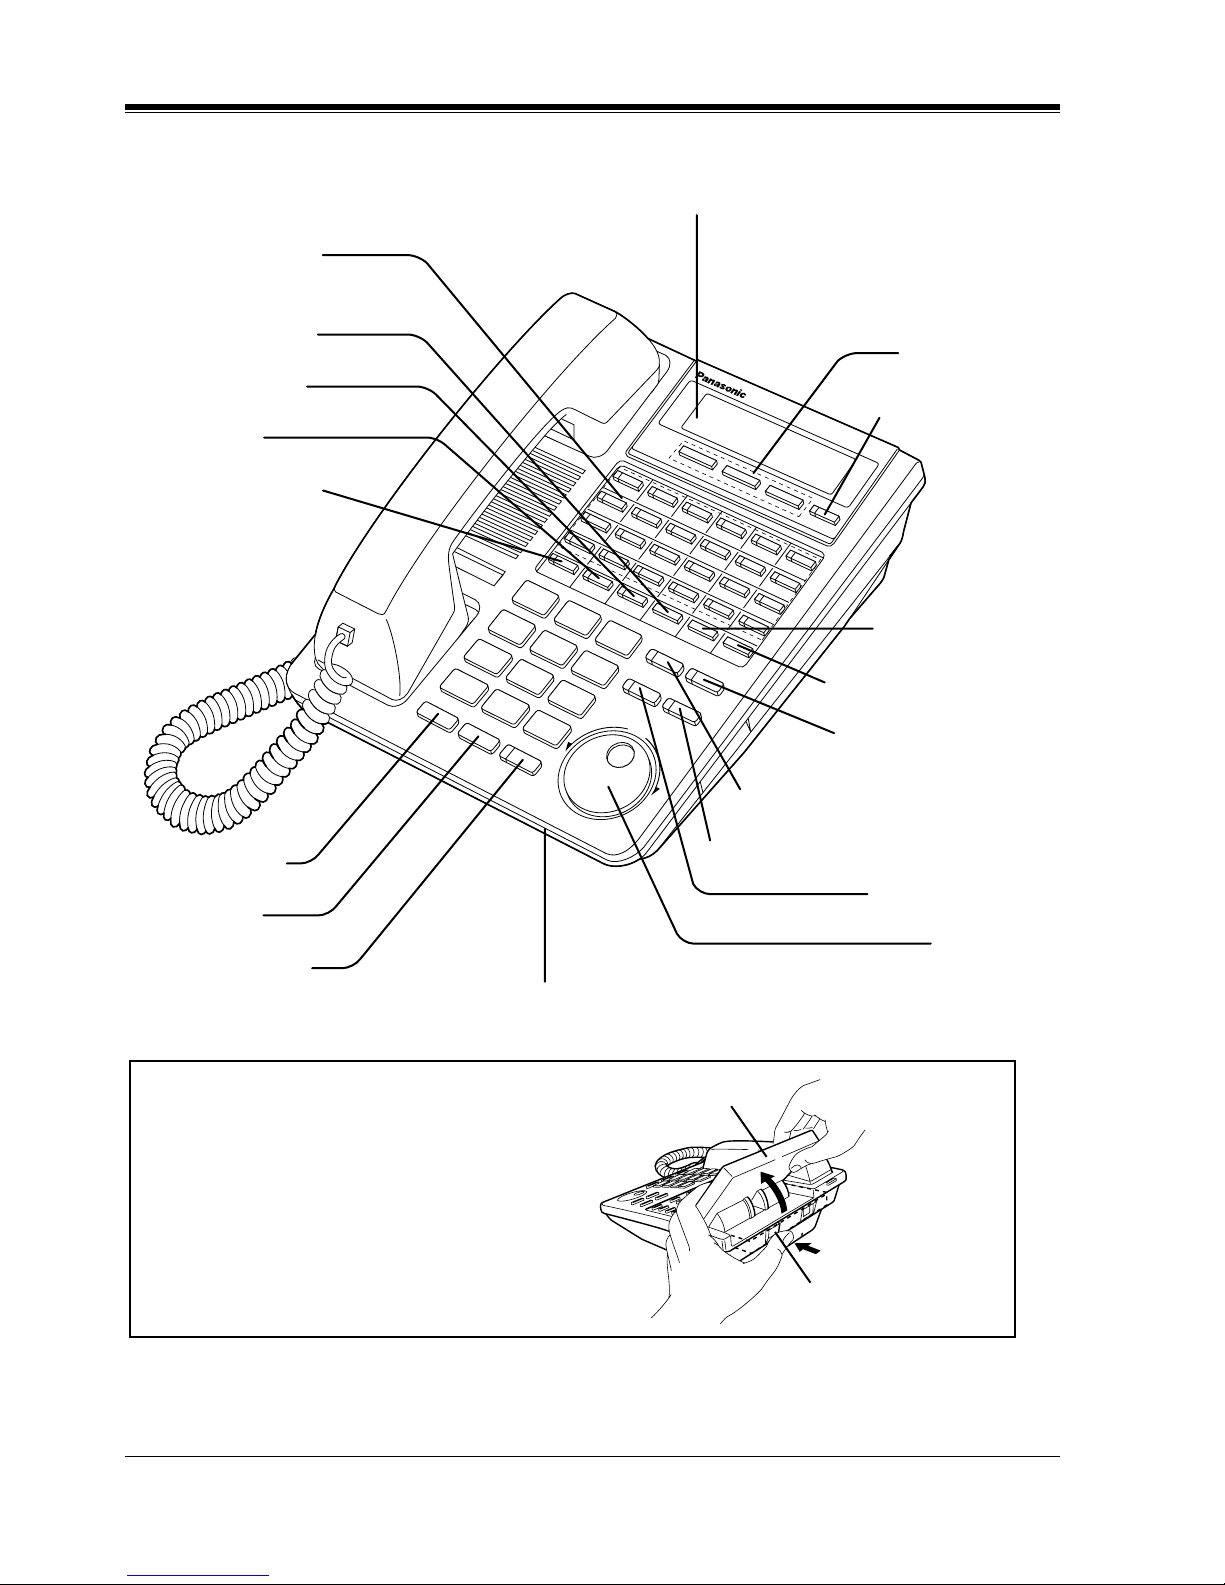
KX-T7431
AUTO DIAL/STORE Button
AUTO ANSWER/MUTE Button
FLASH Button
Jog Dial
REDIAL Button
HOLD Button
SP-PHONE Button
Microphone
Flexible CO Buttons
(Outside lines 01 through 12)
PROGRAM Button
FWD/DND Button
CONF Button
INTERCOM Button
SELECT Button
MODE Button
MESSAGE Button
PAUSE Button
TRANSFER Button
Display (Liquid Crystal Display)
With 16-character/1-line readout:
Shows the date, time, dialed number or name,
call duration time, etc. In Programming mode,
it shows the programming messages.
Page 24
DPT Overview
24 User Manual
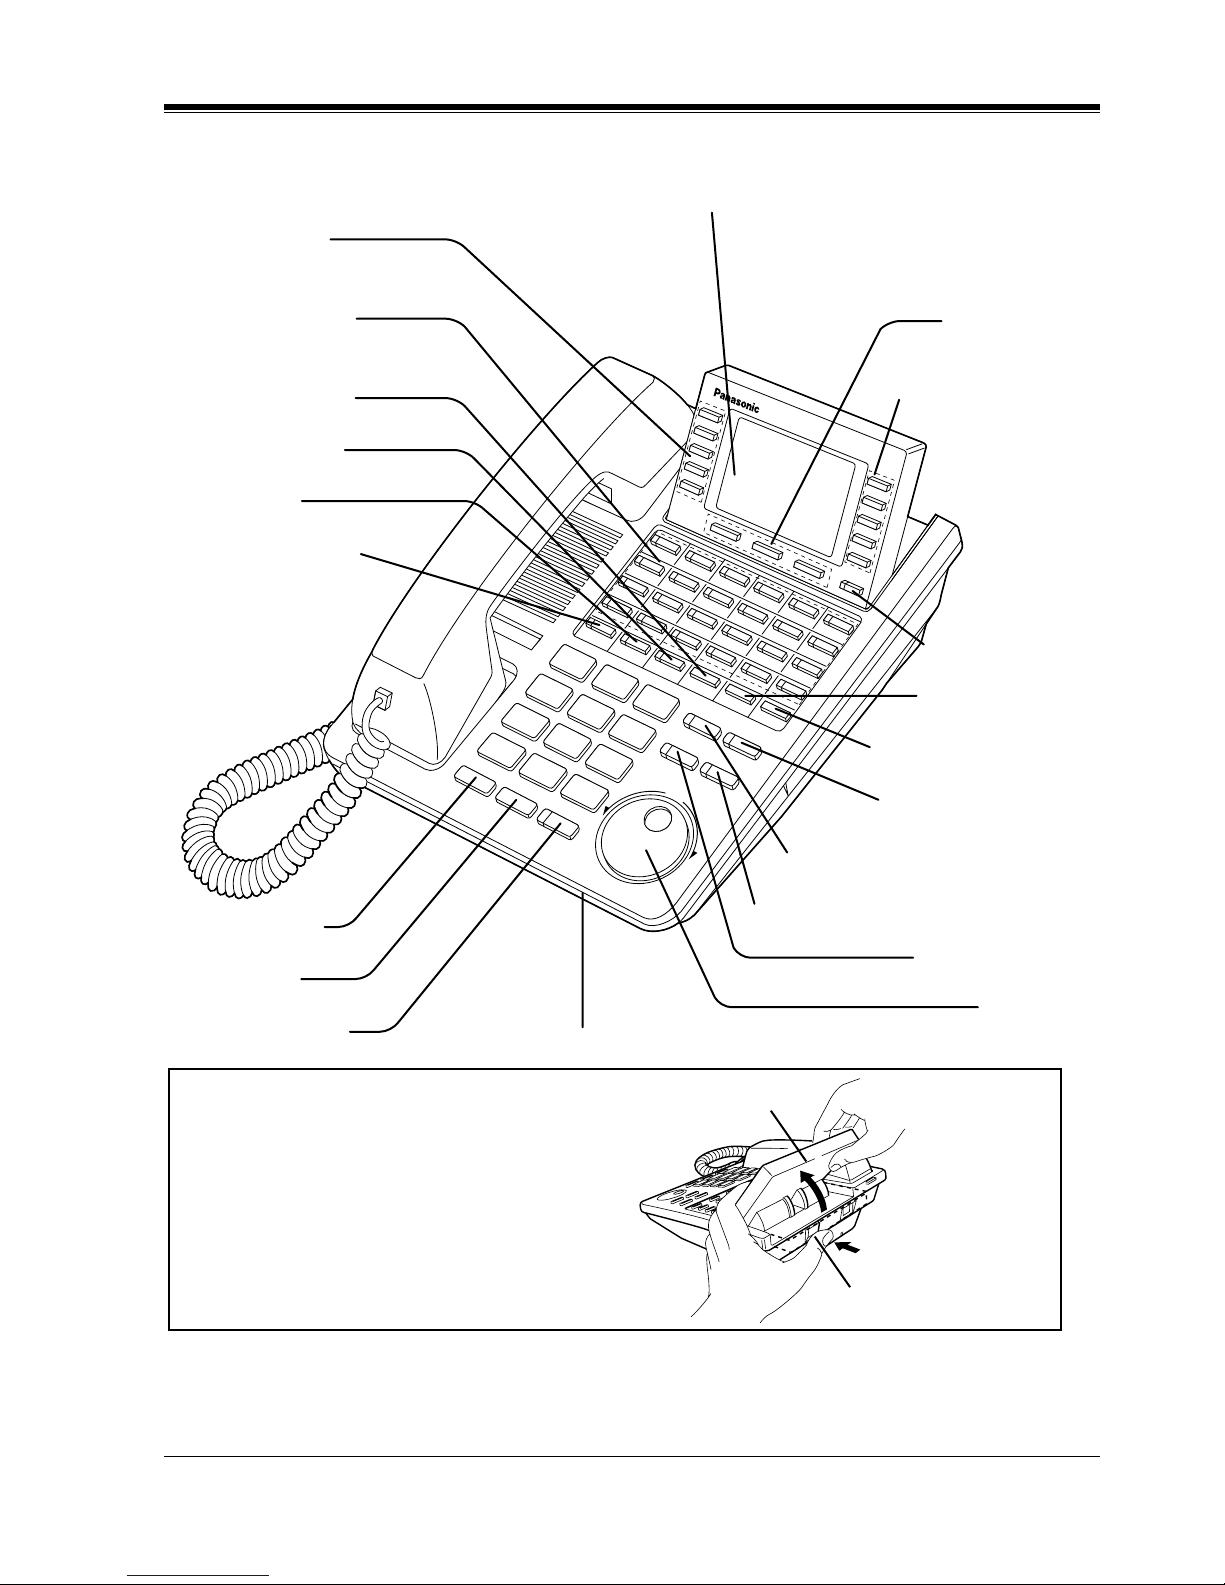
KX-T7433
AUTO DIAL/STORE Button
AUTO ANSWER/MUTE Button
FLASH Button
Jog Dial
REDIAL Button
HOLD Button
SP-PHONE Button
Microphone
Flexible CO Buttons
(Outside lines 01 through 24)
PROGRAM Button
FWD/DND Button
CONF Button
INTERCOM Button
Soft Buttons
(S1 through S3)
SHIFT Button
PAUSE Button
TRANSFER Button
MESSAGE Button
Display (Liquid Crystal Display)
With 16-character/3-line readout:
Shows the date, time, dialed number or
name, call duration time, etc. In
Programming mode, it shows the
programming messages.
To lift or set down the display:
– To lift the display
1 Press the LCD ADJ button.
2 Lift up the display.
– To set down the display
1 Press the LCD ADJ button.
2 Press down the display.
LCD ADJ button
LCD
Page 25
DPT Overview
User Manual 25
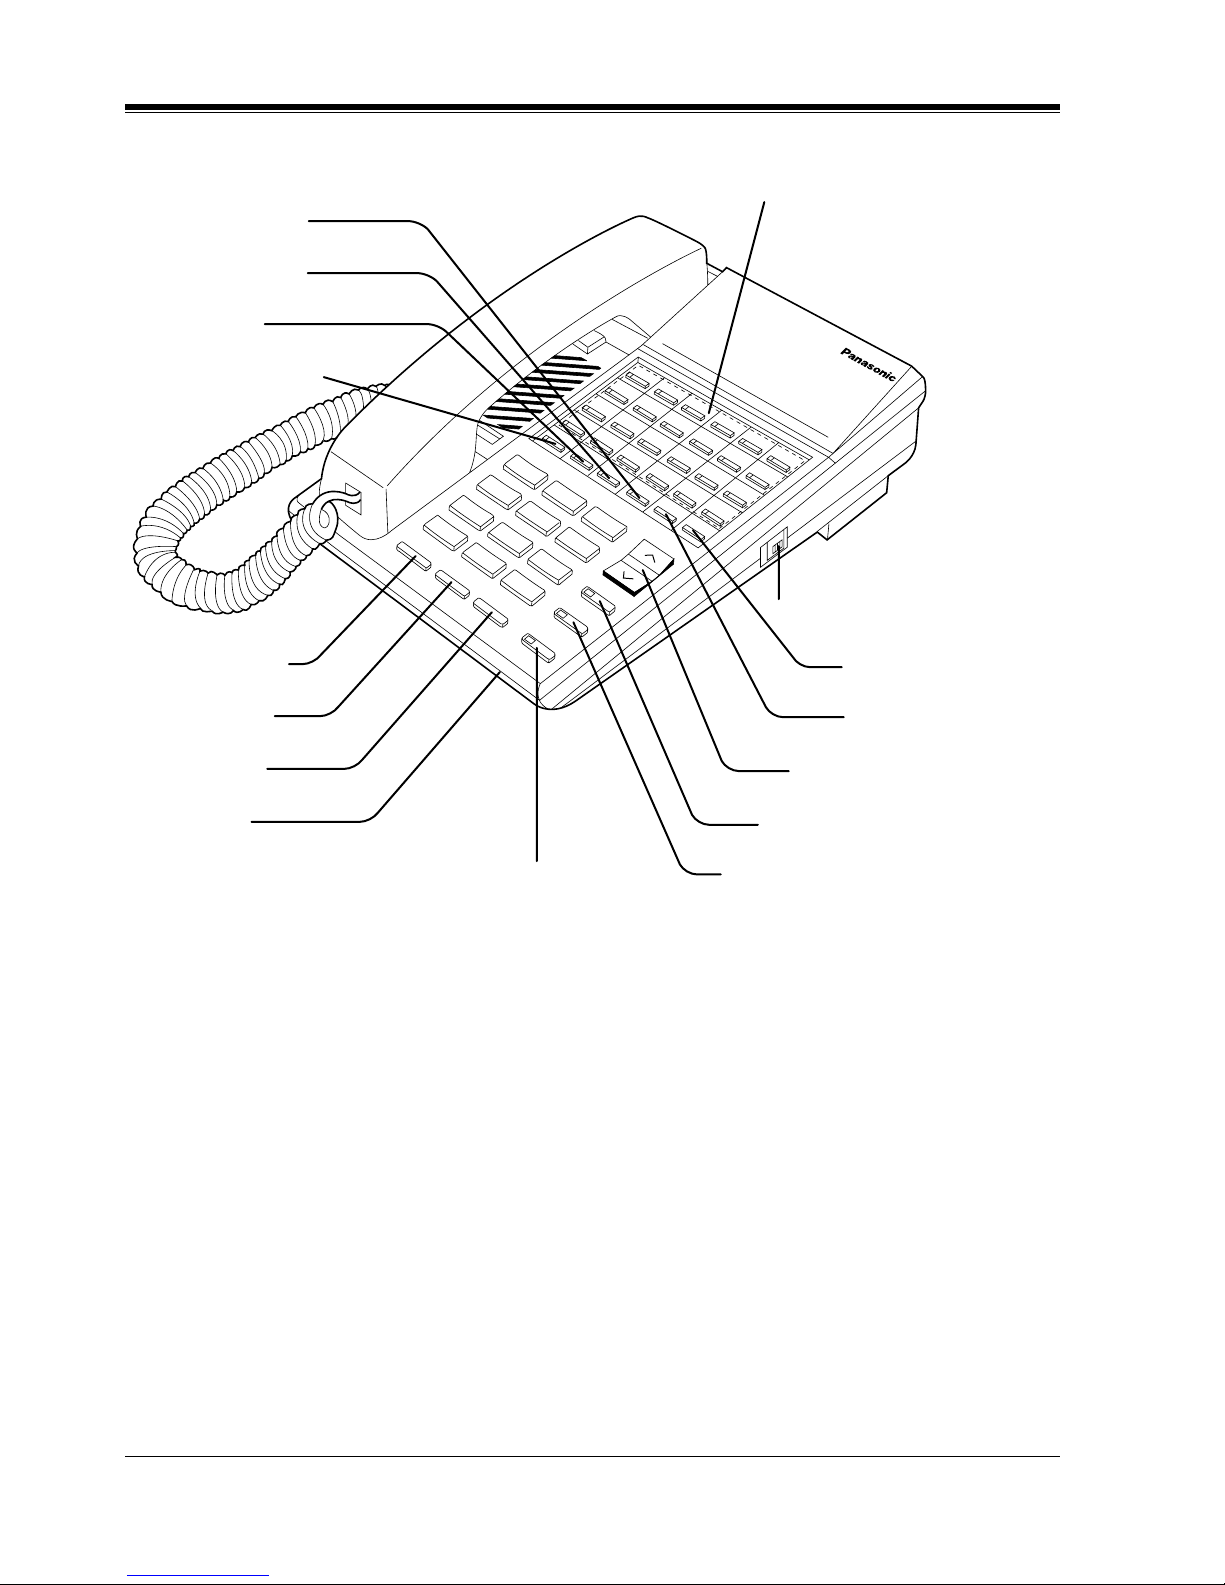
KX-T7436
REDIAL Button
HOLD Button
SP-PHONE Button
Microphone
Function Buttons
(F1 through F5)
Flexible CO Buttons
(Outside lines 01 through 24)
PROGRAM Button
FWD/DND Button
CONF Button
INTERCOM Button
Soft Buttons
(S1 through S3)
Function Buttons
(F6 through F10)
SHIFT Button
PAUSE Button
TRANSFER Button
MESSAGE Button
AUTO DIAL/STORE Button
AUTO ANSWER/MUTE Button
FLASH Button
Jog Dial
Display (Liquid Crystal Display)
With 24-character/6-line readout:
Shows the date, time, dialed number or name,
call duration time, etc. In Programming mode,
it shows the programming messages.
To lift or set down the display:
– To lift the display
1 Press the LCD ADJ button.
2 Lift up the display.
– To set down the display
1 Press the LCD ADJ button.
2 Press down the display.
LCD ADJ button
LCD
Page 26
DPT Overview
26 User Manual
KX-T7220
TRANSFER Button
PROGRAM Button
VOLUME Control Button
AUTO DIAL/STORE Button
AUTO ANSWER/MUTE Button
REDIAL Button
FLASH Button
HOLD Button
Microphone
SP-PHONE Button
MESSAGE Button
FWD/DND Button
CONF Button
INTERCOM Button
Flexible CO Buttons
(Outside lines 01 through 24)
RINGER Volume Selector
Used to adjust the ringer volume.
Page 27
DPT Overview
User Manual 27
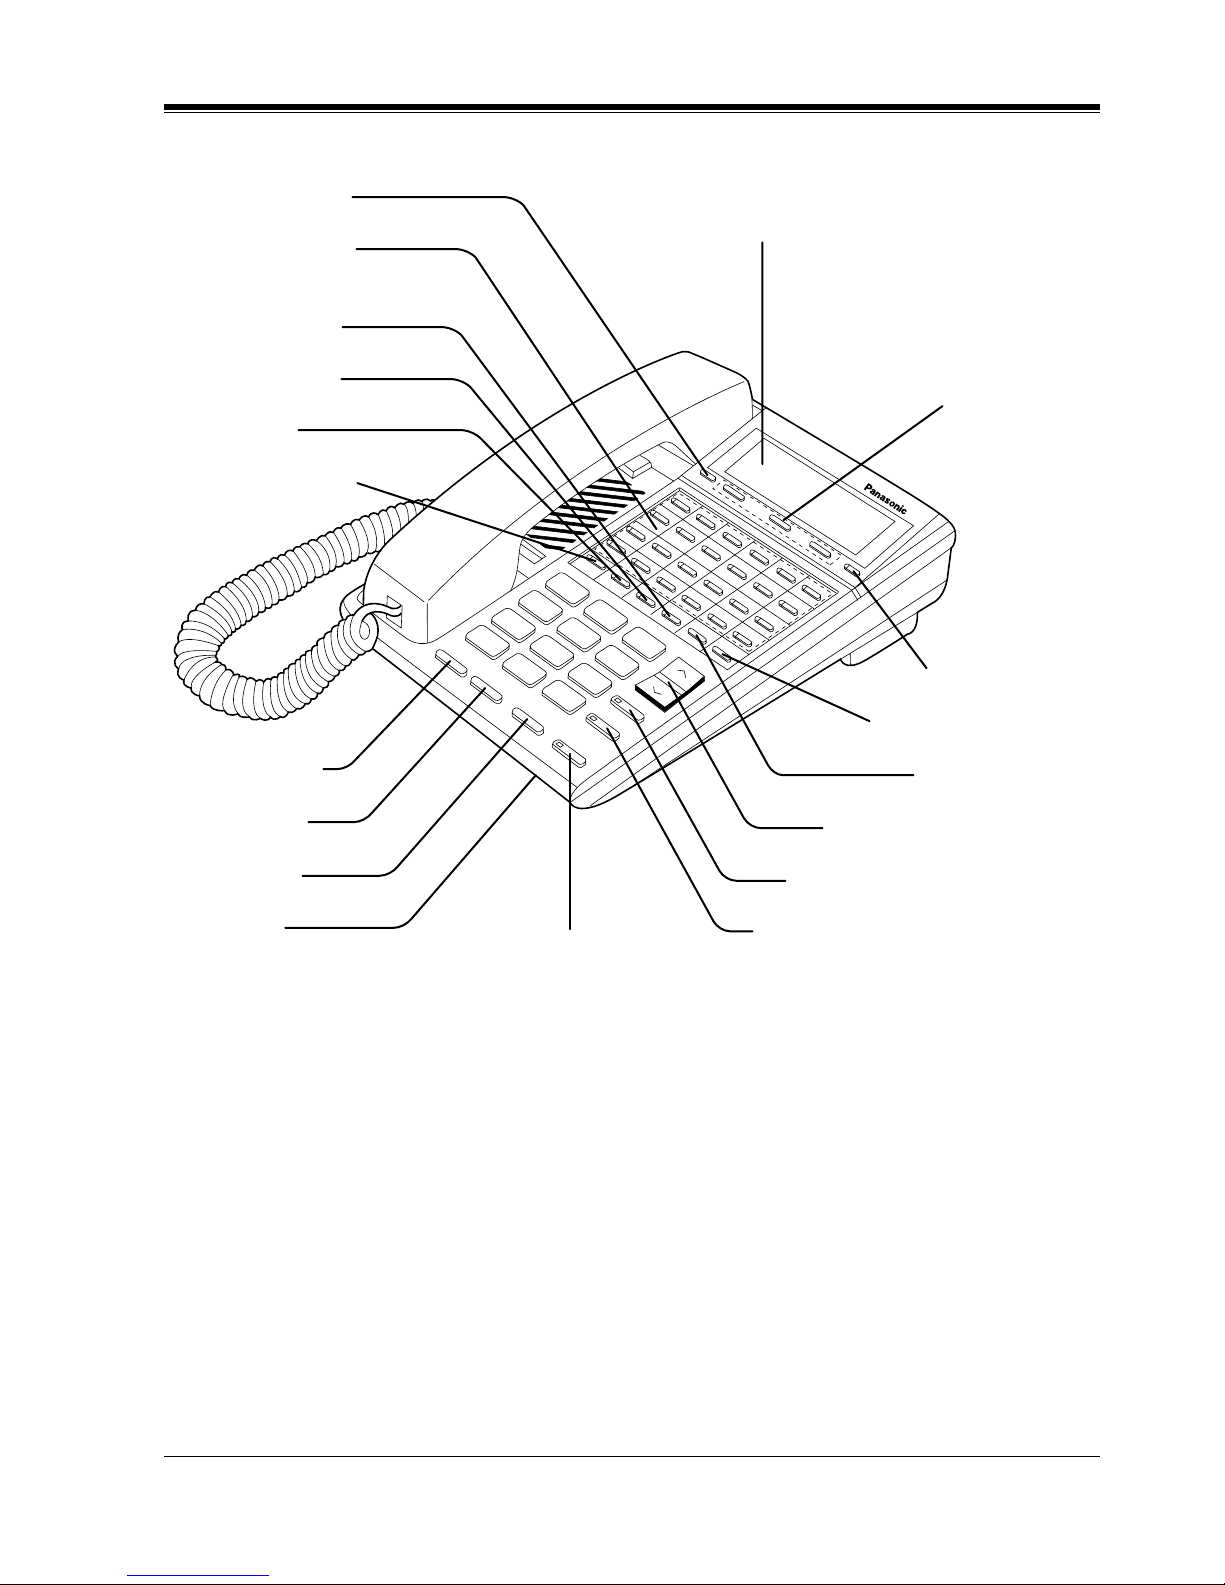
KX-T7230
PROGRAM Button
Flexible CO Buttons
(Outside lines 01 through 24)
MESSAGE Button
FWD/DND Button
CONF Button
INTERCOM Button
REDIAL Button
FLASH Button
HOLD Button
Microphone
SP-PHONE Button
SHIFT Button
TRANSFER Button
PAUSE Button
VOLUME Control Button
AUTO DIAL/STORE Button
AUTO ANSWER/MUTE Button
Soft Buttons
(S1 through S3)
with 16-characters/2-line readout:
Shows the date, time, dialed number or
name, call duration time, etc. In
Programming mode, it shows the
Programming instructions.
Display (Liquid Crystal Display)
Page 28
DPT Overview
28 User Manual
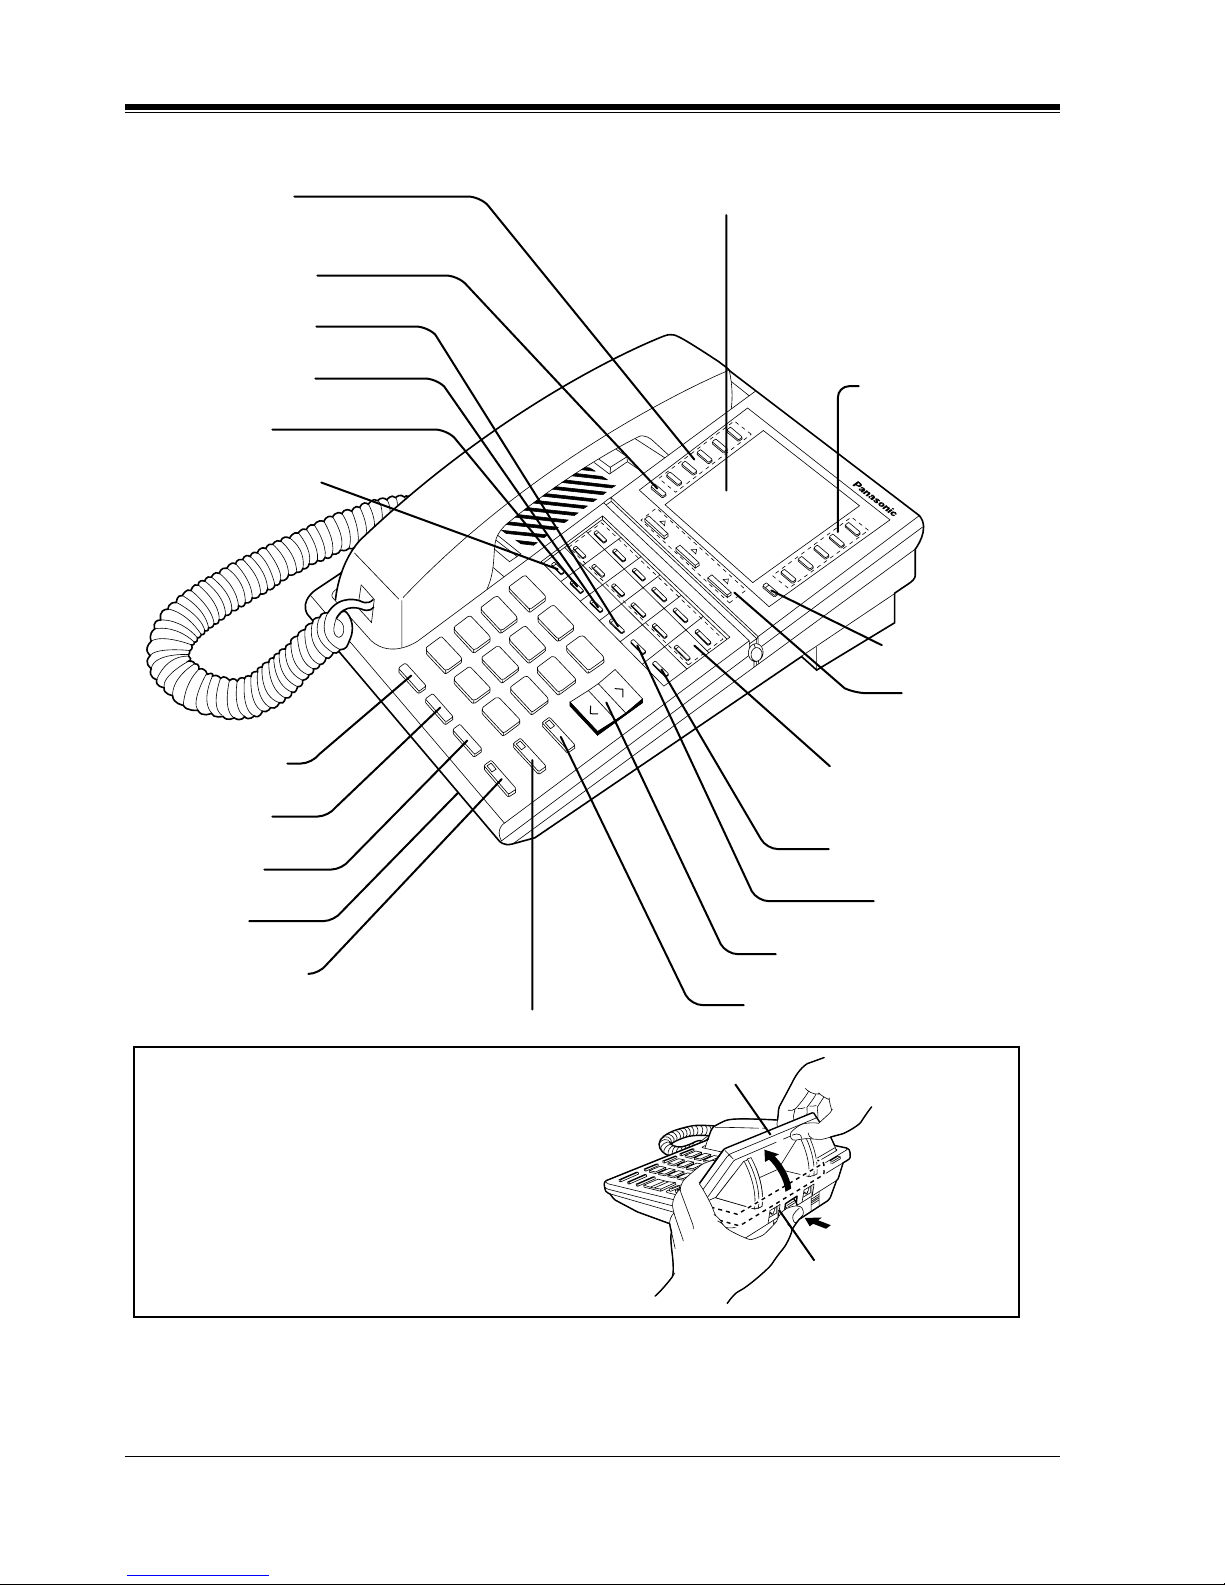
KX-T7235
To lift or set down the display:
– To lift the display
1 Press the LCD ADJ button.
2 Lift up the display.
– To set down the display
1 Press the LCD ADJ button.
2 Press down the display.
LCD ADJ button
LCD
TRANSFER Button
PAUSE Button
VOLUME Control Button
AUTO DIAL/STORE Button
Function Buttons
(F1 through F5)
PROGRAM Button
MESSAGE Button
FWD/DND Button
CONF Button
INTERCOM Button
REDIAL Button
FLASH Button
HOLD Button
Microphone
SP-PHONE Button
AUTO ANSWER/MUTE Button
SHIFT Button
Function Buttons
(F6 through F10)
Soft Buttons
(S1 through S3)
Flexible CO Buttons
(Outside lines 01 through 12)
Display (Liquid Crystal Display)
with 24-characters/6-line readout:
Shows the date, time, dialed number or
name, call duration time, etc. In
Programming mode, it shows the
Programming instructions.
Page 29
DPT Overview
User Manual 29
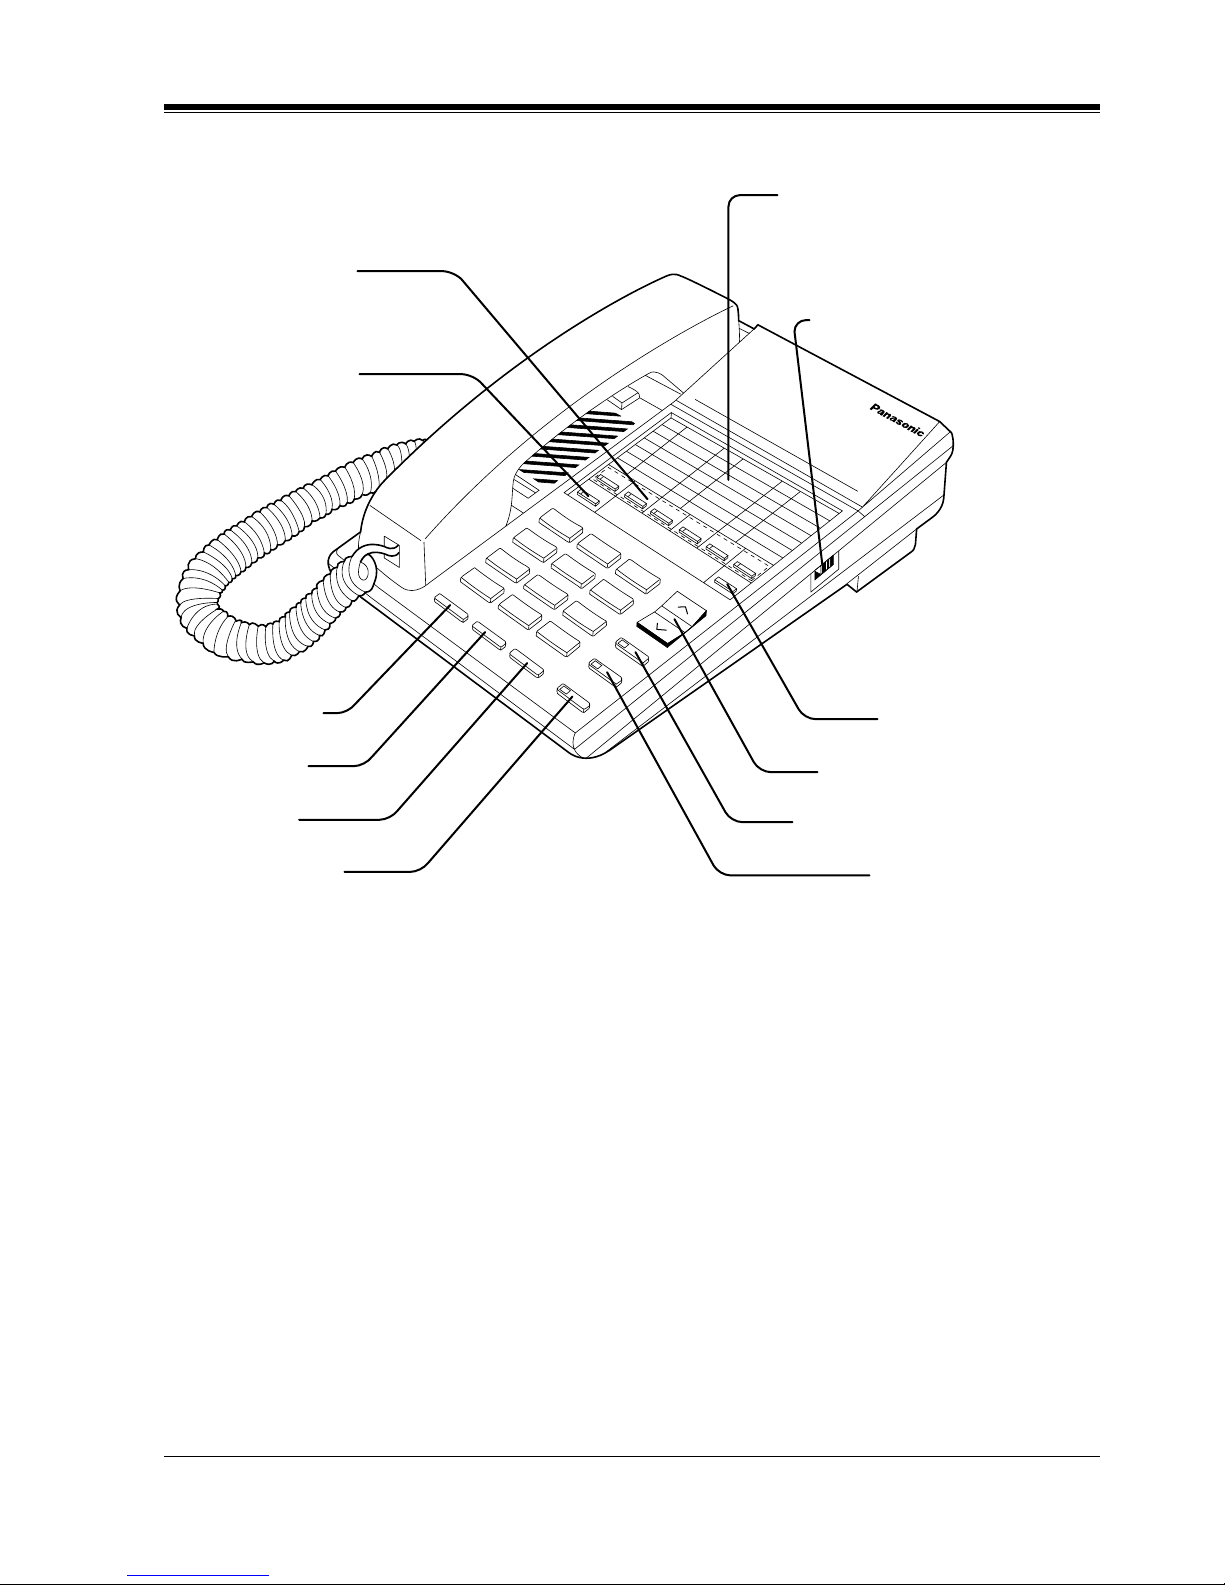
KX-T7250
PROGRAM Button
VOLUME Control Button
AUTO DIAL/STORE Button
TRANSFER Button
Flexible CO Buttons
(Outside lines 01 through 06)
INTERCOM Button
REDIAL Button
FLASH Button
HOLD Button
MONITOR Button
Memory Card
Pull out the card and write down the
names or phone numbers associated
with automatic dialing numbers.
R
IN
G
ER
ONááá
HIGH
LOW
RINGER Volume Selector
Used to adjust the ringer volume.
Page 30
DPT Overview
30 User Manual
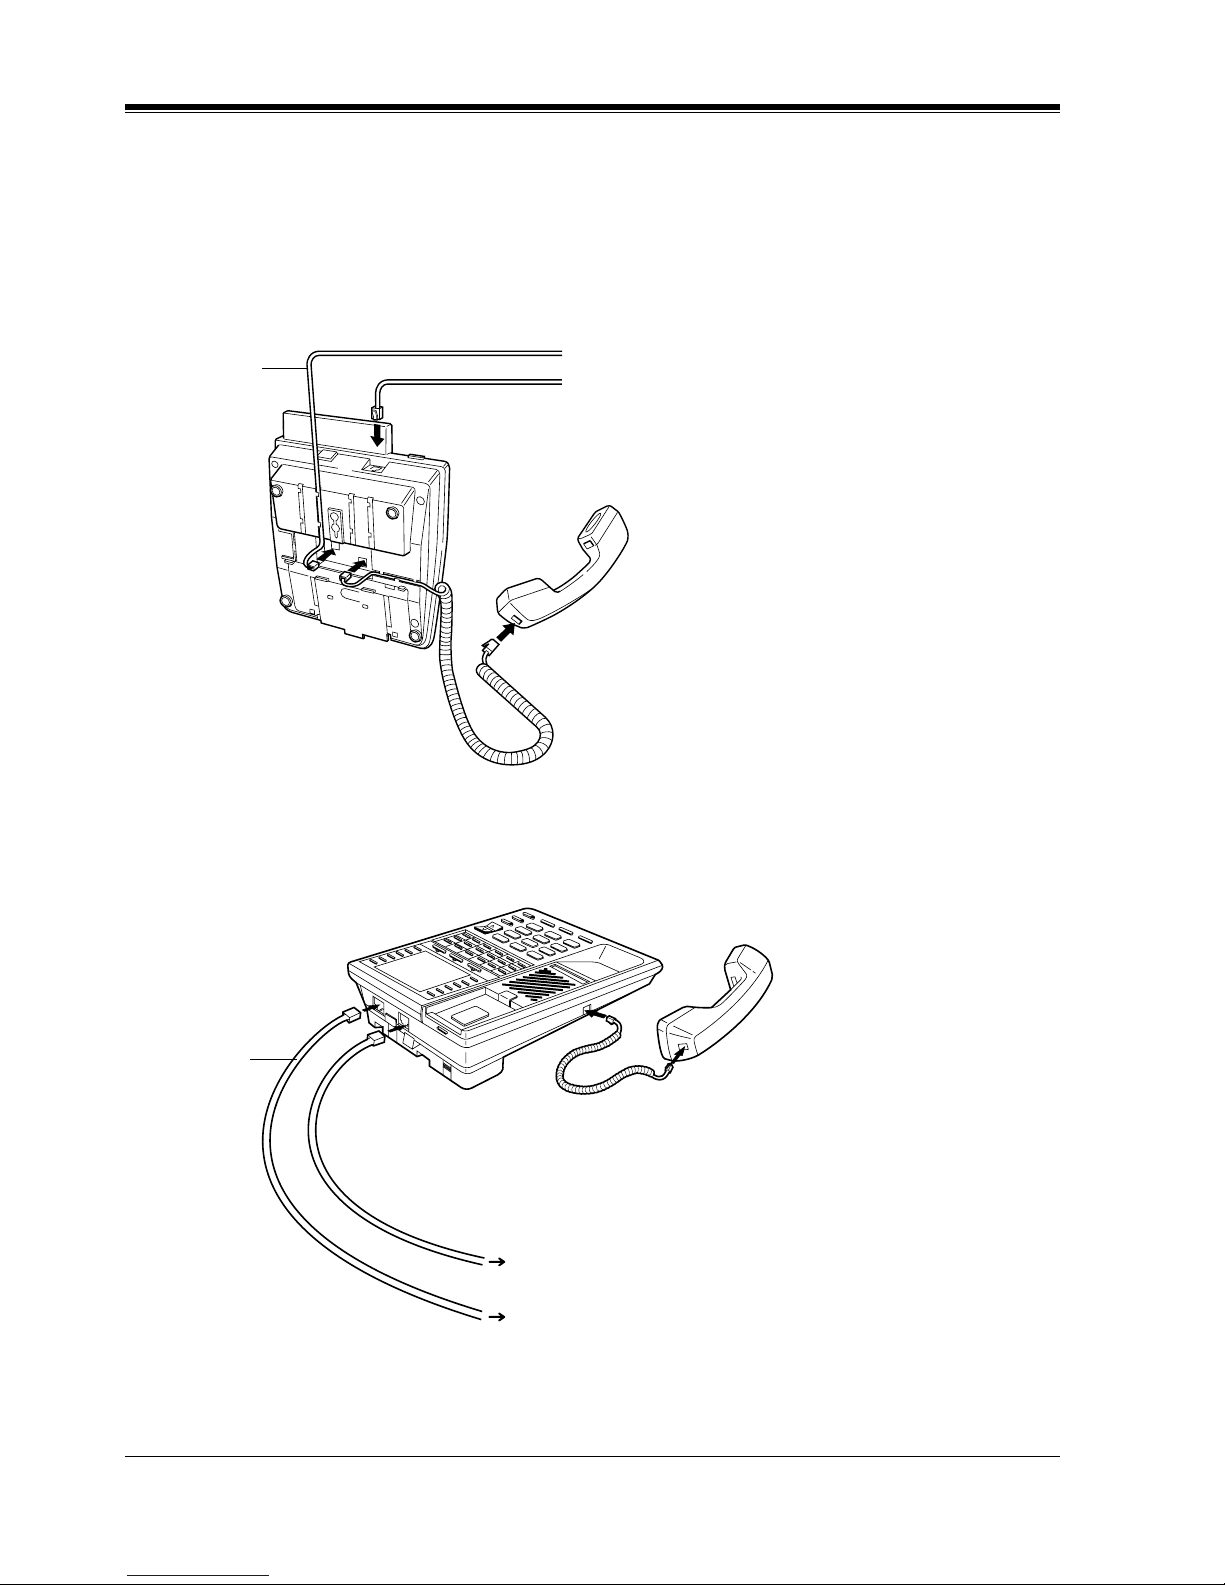
1.1.3 Connection
Connect as shown.
KX-T7400 Series DPTs
KX-T7200 Series DPTs
→ Connect to the KX-TD500 System.
→ Connect to a Single Line Telephone (SLT)
jack, Telephone Answering Machine, or FAX for
XDP* or parallel connections.
* XDP(eXtra Device Port) expands the number of telephones available in the system by allowing an
extension port to contain two telephones. For more details, please consult your dealer.
The included
telephone
line cord
<Back View>
Connect to a Single Line Telephone (SLT) jack, Telephone
Answering Machine, or FAX for XDP* or parallel connections.
Connect to the KX-TD500 System.
The included
telephone
line cord
* XDP(eXtra Device Port) expands the number of telephones available in the system by allowing an
extension port to contain two telephones. For more details, please consult your dealer.
Page 31

DPT Overview
User Manual 31
1.1.4 Feature Buttons
Digital Proprietary Telephones (DPTs) have the following types of Feature Buttons:
• Fixed Buttons
• Flexible Buttons
Fixed Buttons
Fixed buttons have specific functions permanently assigned to them. These default function
assignments cannot be changed. The following table lists the fixed buttons located on each
DPT model.
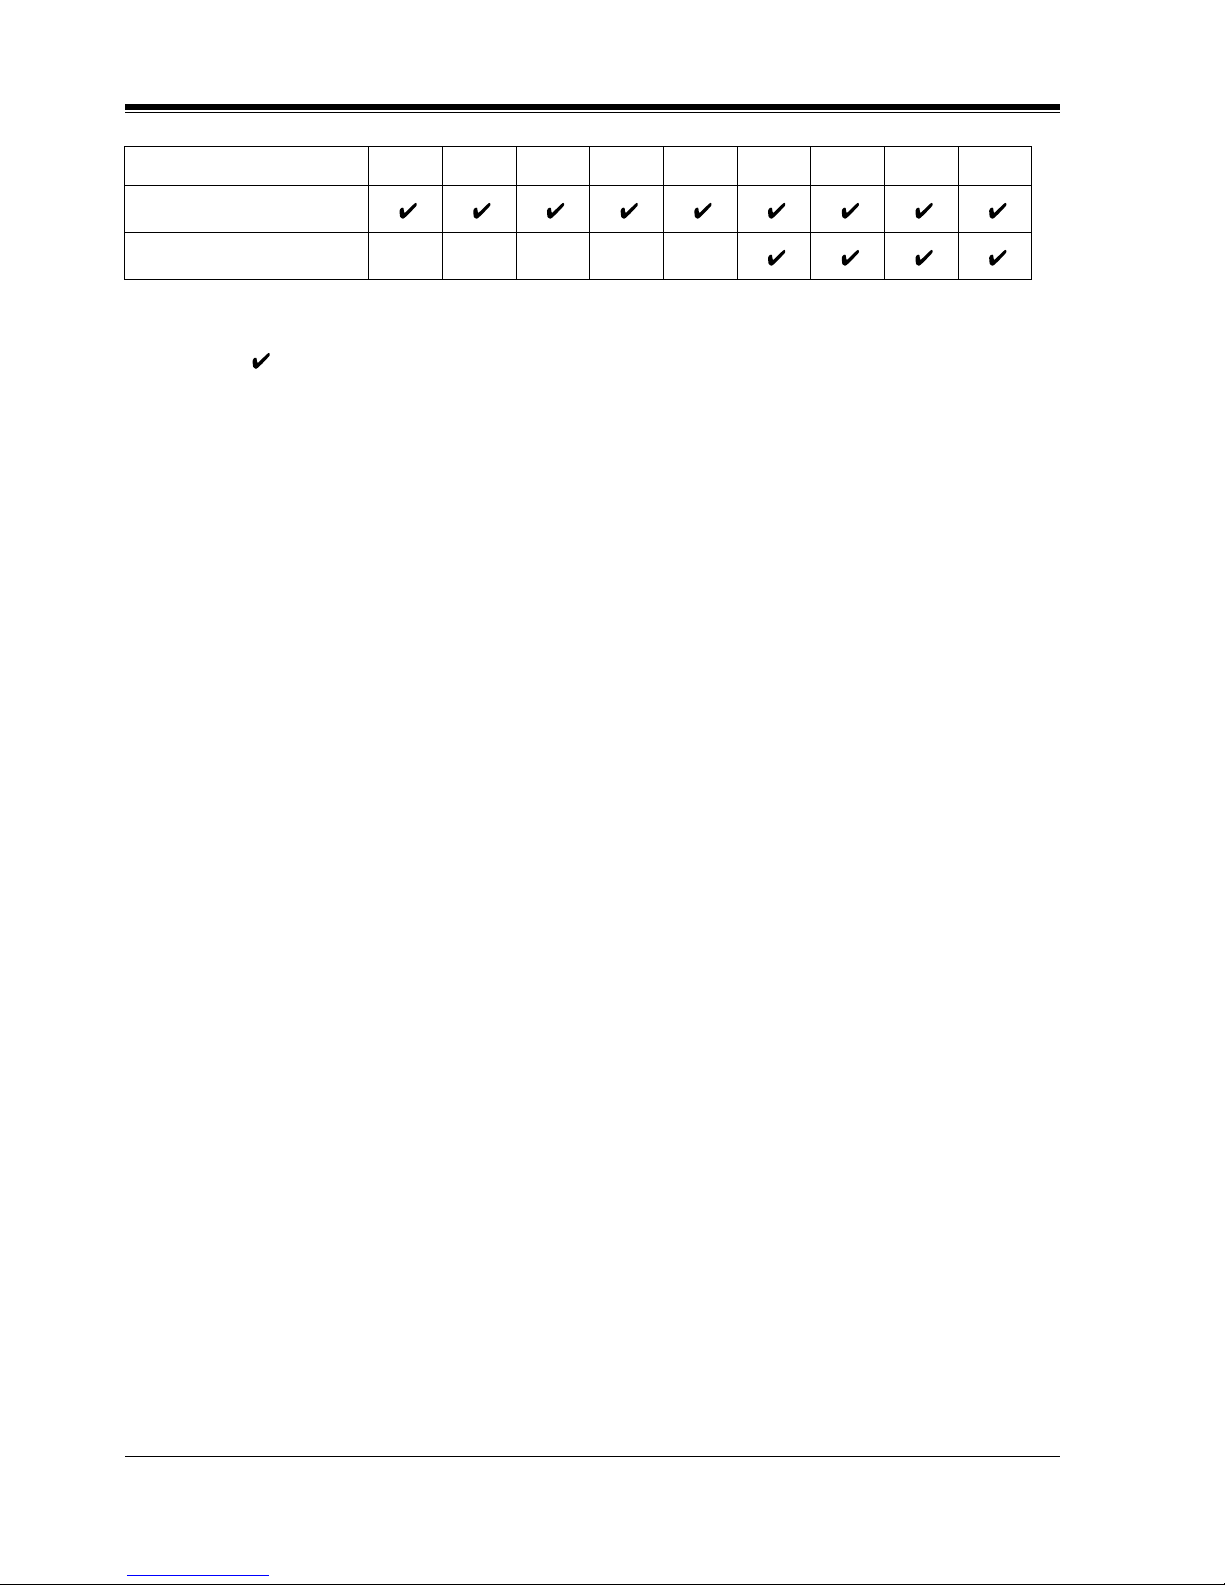
Feature Button T7420 T7425 T7431 T7433 T7436 T7220 T7230 T7235 T7250
AUTO ANSWER/MUTE
AUTO DIAL/STORE
*1
CONF
FLASH
Function
FWD/DND
HOLD
INTERCOM
Jog Dial
MESSAGE
MODE
MONITOR
PAU SE
PROGRAM
REDIAL
SELECT
SHIFT
Soft
SP-PHONE
Page 32
DPT Overview
32 User Manual
" " indicates the button is available.
Usage
AUTO ANSWER/MUTE Button
Used for Hands-free answer back; and it turns the microphone off during a conversation.
AUTO DIAL/STORE Button
Used for System Speed Dialing and storing program changes.
CONF (Conference) Button
Used to establish a 3-party/5-party conference call.
FLASH Button
Sends an External Feature Access signal to the central office or host PBX to access their system
features. If a PBX is not being used, this button can be used to disconnect the current call and
start another call without hanging up.
Function (F1 through F10) Buttons
Used to perform the corresponding displayed function or operation.
FWD/DND (Call Forwarding/Do Not Disturb) Button
Used to program the Call Forwarding feature or set the Do Not Disturb (DND) feature.
HOLD Button
Used to place a call on hold.
INTERCOM Button
Used to make or receive extension calls.
Jog Dial
Used to adjust the volume of the handset receiver, headset, ringer and speaker. It also adjusts
the display contrast. Please refer to Section "1.1.5 Initial Setting for KX-T7400 Series."
For KX-T7431, KX-T7433 and KX-T7436 users, it is also used to select data from the Call
Directory and the System Feature Access Menu.
MESSAGE Button
Used to leave a notification to a busy extension or call back the message notification sender.
MODE Button
Used to shift the display in order to access various features.
MONITOR Button
Used for a hands-free dialing operation.
PAUSE Button
Inserts a pause in speed dial numbers or in One-Touch dial numbers.
PROGRAM Button
Used to enter or exit the Programming mode.
TRANSFER
VOLUME
*1
The button is not provided with an LED (Light Emitting Diode).
Feature Button T7420 T7425 T7431 T7433 T7436 T7220 T7230 T7235 T7250
Page 33

DPT Overview
User Manual 33
REDIAL Button
Used for the Last Number Redialing.
SELECT Button
Used to select the displayed function or to call the displayed phone number.
SHIFT Button
Used to access the next level of Soft Button functions.
Soft (S1 through S3) Buttons
Used to perform the function or operation that appears on the bottom line of the display.
SP-PHONE (Speakerphone) Button
Used for a hands-free speakerphone operation.
TRANSFER Button
Transfers a call to another extension or external destination.
VOLUME Control Button
Used to adjust the volume of the handset receiver, headset, ringer and speaker; it also adjusts
the display contrast. Please refer to Section "1.1.6 Initial Setting for KX-T7200 Series."
Page 34
DPT Overview
34 User Manual
Flexible Buttons
Flexible Buttons do not have specific features permanently assigned to them. Features are
assigned to Flexible Buttons by Station, User or System Programming. "Flexible Button
Assignment" is addressed in "Station Programming." The three types of Flexible Buttons are
as follows:
• Flexible CO buttons (located on PT only)
• Flexible DSS buttons (located on DSS Console only)
• Flexible PF (Programmable Feature) buttons (located on PT / DSS Console only)
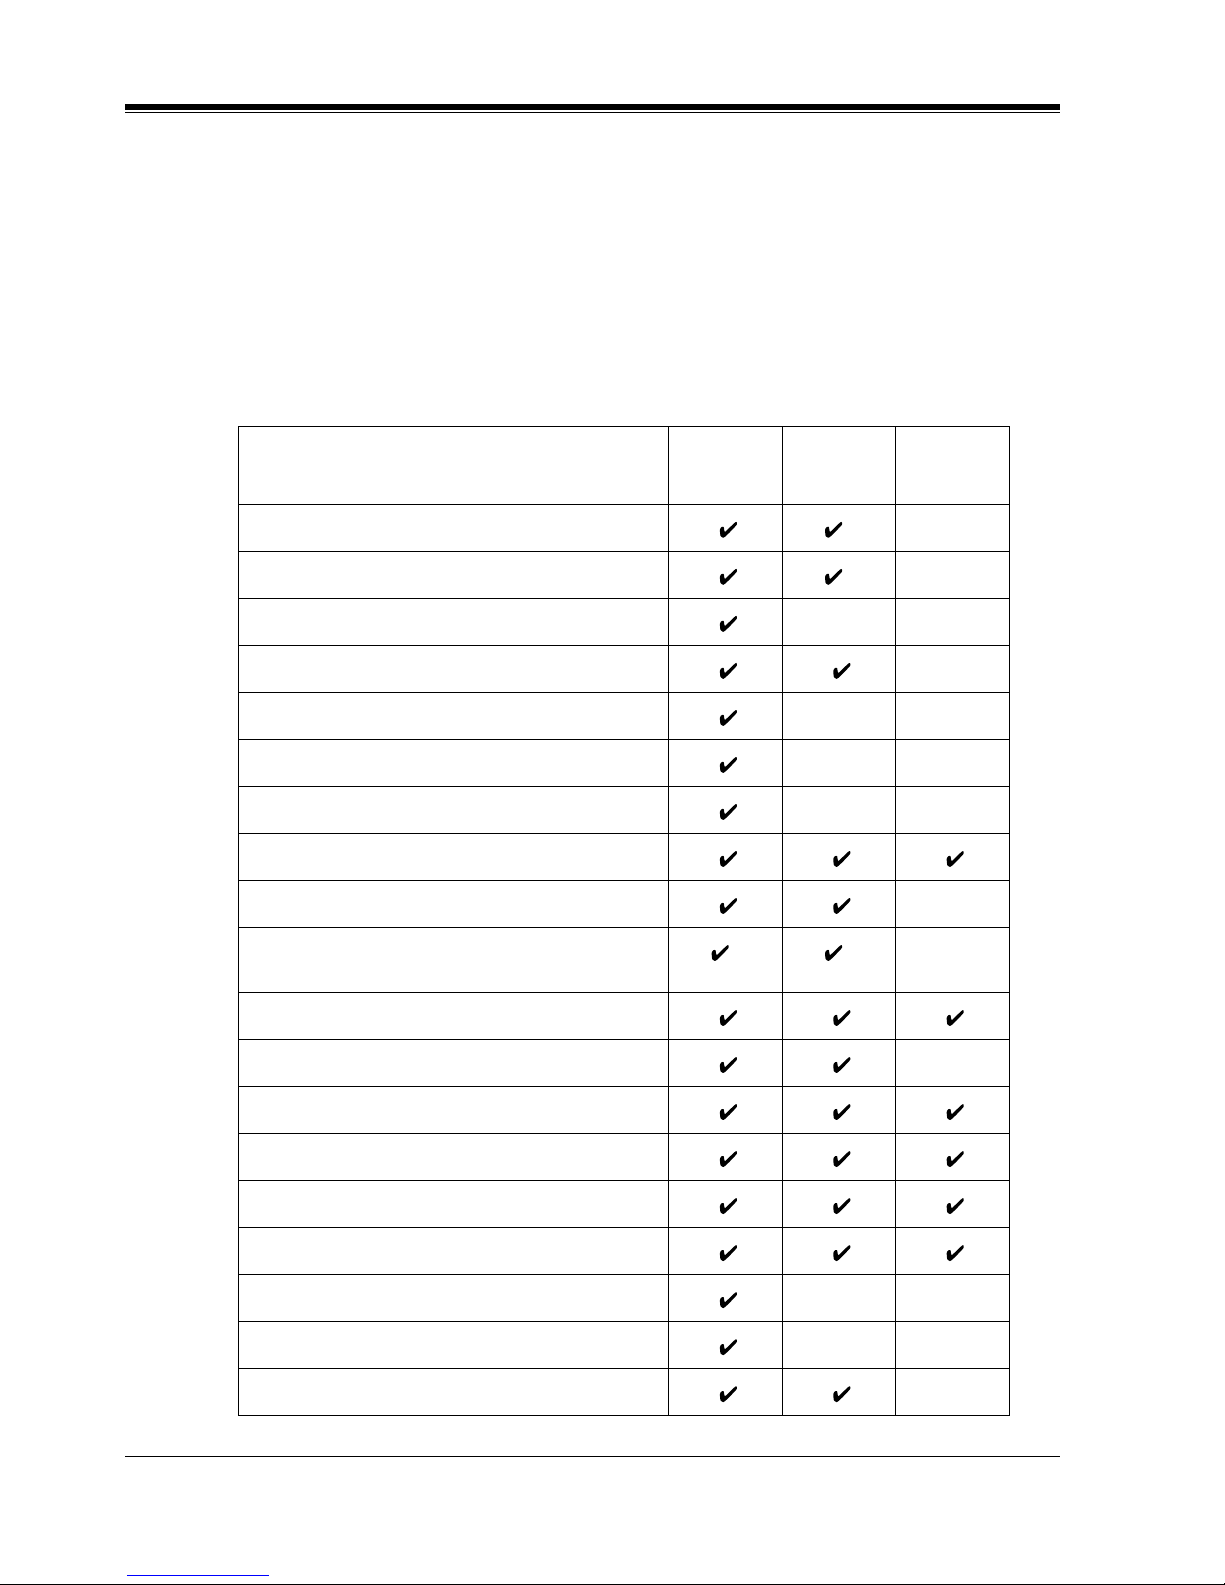
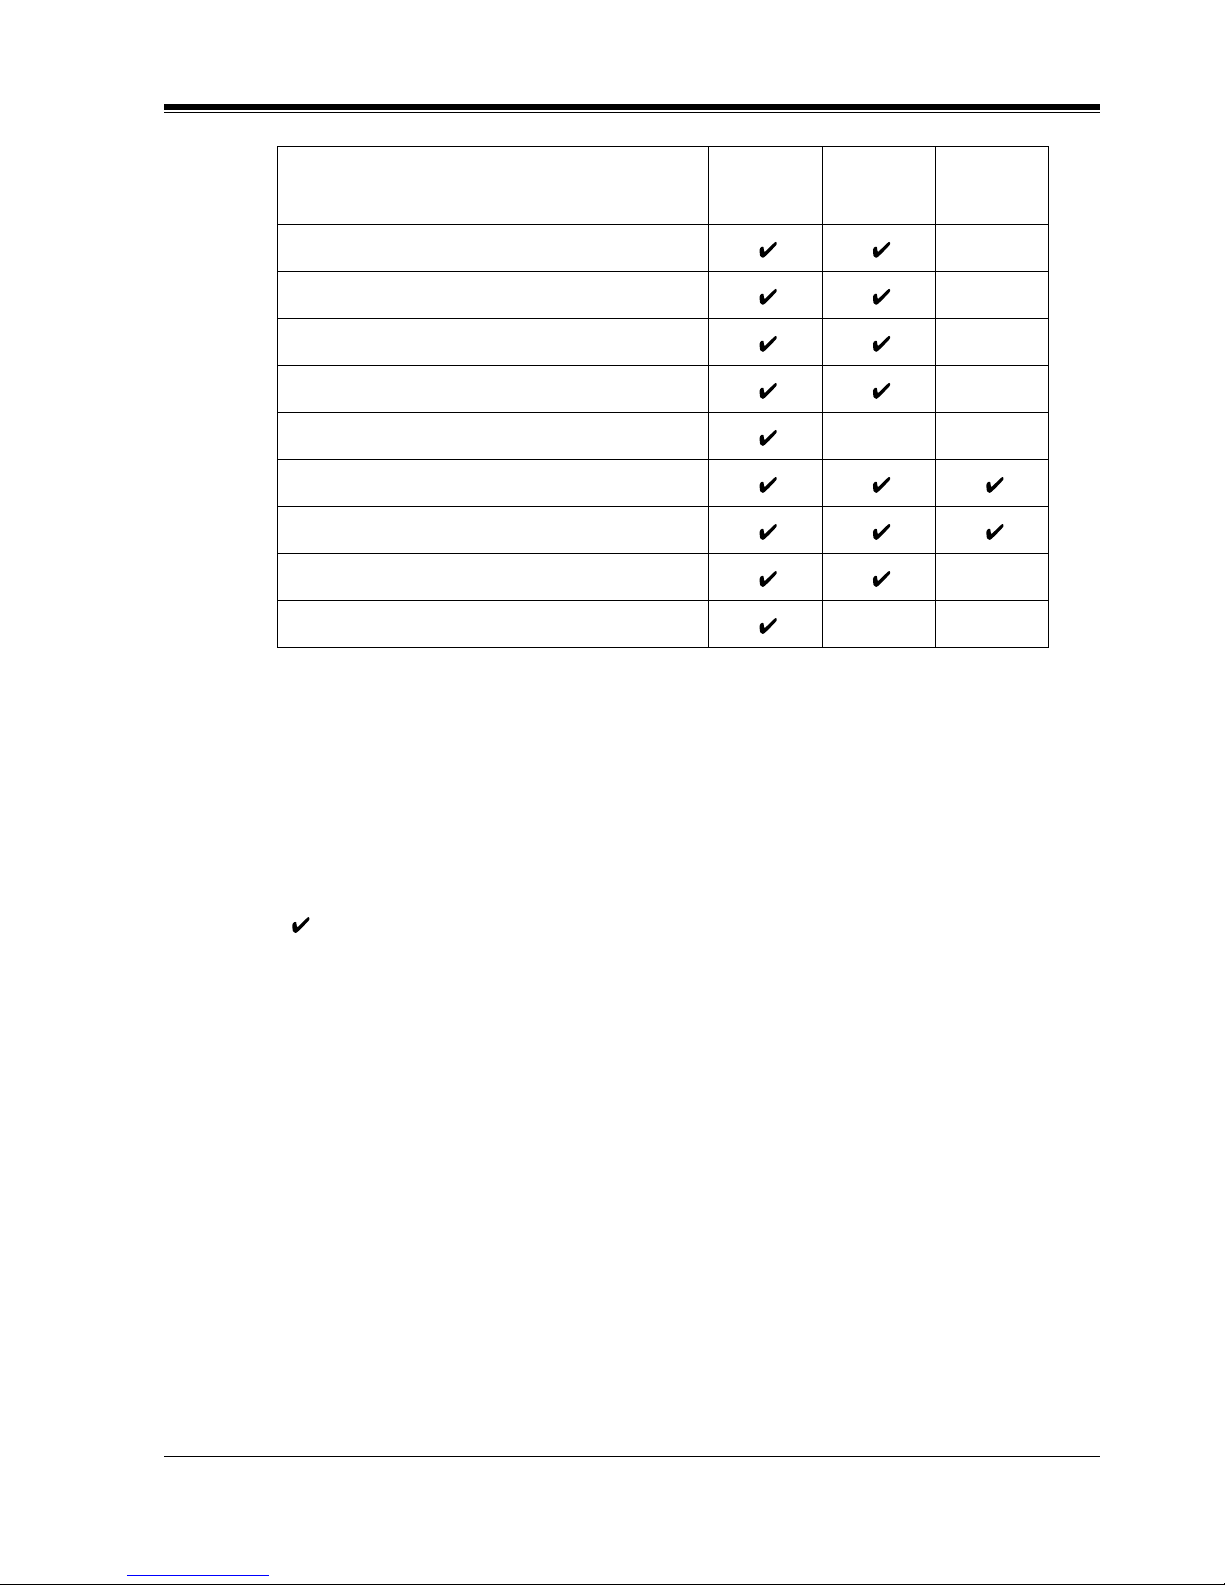
The following table outlines the features that can be assigned to the Flexible Buttons:
Button CO (PT) DSS (DSS) PF (PT/
DSS)
Features to be assigned
Single-CO
*
1
Group-CO
*
1
Loop-CO
DSS (Direct Station Selection)
Phantom
PDN (Primary Directory Number)
SDN (Secondary Directory Number)
ONE-TOUCH (One-Touch Dialing)
MESSAGE (Owner Extension)
MESSAGE-OTHER (Another/Phantom
Extension)
*
2
*
3
FWD/DND (Call Forwarding/Do Not Disturb)
Group FWD
SAVE (Saved Number Redial)
ACCOUNT (Account Code Entry)
CONF (Conference)
VTR (Voice Mail Transfer)
Log-In / Log-Out
Group Log-In / Log-Out
2WAY-REC (Two-Way Record)
†
Page 35
DPT Overview
User Manual 35
" " indicates that the feature is available.
Line Access Buttons
The following three types of CO buttons can be used to seize a CO line when making a CO call.
• Single-CO (S-CO) button
• Group-CO (G-CO) button
• Loop-CO (L-CO) button
Conditions
• A flexible CO button can be assigned as a Line Access Button (S-CO, G-CO or L-CO) by
Station, User or System Programming. Once a flexible CO button is assigned as a Line
Access Button, it provides the line status by lighting patterns and green/red indication.
Please refer to Section "1.1.7 LED Indication."
• You can set S-CO, G-CO and L-CO buttons on one Proprietary Telephone. Incoming and
outgoing calls on the line are shown on the button in the following priority.
S-CO > G-CO > L-CO
2WAY-TRAN (Two-Way Transfer)
†
LCS (Live Call Screening)
†
LCS (Live Call Screening) Cancel
†
DAY/NIGHT (Day/Night Switch)
Alarm
Answer
Release
Tone Thro ugh
Alert
*
1
Available for monitoring the call activity only.
*
2
Can only be assigned by User or System Programming.
*
3
Can only be assigned by System Programming.
† Available when the Digital Super Hybrid System is connected to a Digital Proprietary
Telephone capable Panasonic Voice Processing System (one that supports Digital
Proprietary Telephone [DPT] integration; e.g., KX-TVS100).
Button CO (PT) DSS (DSS) PF (PT/
DSS)
Features to be assigned
Page 36

DPT Overview
36 User Manual
Single-CO (S-CO) button
An S-CO button is a CO line access button. This allows you to access a specific CO line by
pressing an S-CO button. An incoming CO call can be directed to an S-CO button.
Conditions
• The same CO line cannot be assigned to more than one S-CO button on a PT.
• It is possible to assign the same CO line to an S-CO button, a G-CO button and an L-CO
button respectively.
Programming Guide References
• 4.3 Extension Line
– CO Key
• 4.4 DSS Console
– DSS Key
Features Guide References
1.16 Button Features
• Button, Line Access
User Manual References
• 1.1.4 Feature Buttons
• 2.2.3 Flexible Button Assignment
• 3.2.5 [005] Flexible CO Button Assignment
• 4.3.54 Outward Dialing, Trunk Access
Group-CO (G-CO) button
To support efficient utilization of CO lines, a group of CO lines (trunk group) can be assigned
to a CO button. This button is referred to as Group-CO (G-CO) button. Any incoming calls
from any CO line in the same trunk group arrive at the G-CO button. To make a CO call, you
can access an idle CO line in the trunk group by simply pressing the assigned G-CO button.
Conditions
• It is possible to assign the same CO line to an S-CO button, a G-CO button, and an L-CO
button.
• It is necessary to program the extension for making or receiving calls or both in trunk
groups.
Page 37

DPT Overview
User Manual 37
• When your extension is assigned as an incoming call destination for a CO line, you cannot
receive any incoming CO calls unless a G-CO, L-CO or S-CO button associated with the
CO line is assigned.
Programming Guide References
• 4.3 Extension Line
– CO Key
• 4.4 DSS Console
– DSS Key
Features Guide References
1.16 Button Features
• Button, Line Access
User Manual References
• 1.1.4 Feature Buttons
• 2.2.3 Flexible Button Assignment
• 3.2.5 [005] Flexible CO Button Assignment
• 4.3.54 Outward Dialing, Trunk Access
Loop-CO (L-CO) button
All CO lines can be assigned to a flexible CO button on a Proprietary Telephone. The assigned
button serves as an L-CO button. An incoming call on any CO line arrives at the L-CO button,
unless there are S-CO or G-CO buttons associated with the CO line or unless the button is
already in use. To make a CO call, you simply press the dedicated L-CO button. Pressing the
L-CO button provides the same operation as dialing the feature number for "Local CO Line
Access/ARS" (default = 9).
Programming Guide References
• 4.3 Extension Line
– CO Key
Features Guide References
1.16 Button Features
• Button, Line Access
Page 38

DPT Overview
38 User Manual
User Manual References
• 1.1.4 Feature Buttons
• 2.2.3 Flexible Button Assignment
• 3.2.5 [005] Flexible CO Button Assignment
• 4.3.54 Outward Dialing, Trunk Access
Page 39
DPT Overview
User Manual 39
1.1.5 Initial Setting for KX-T7400 Series
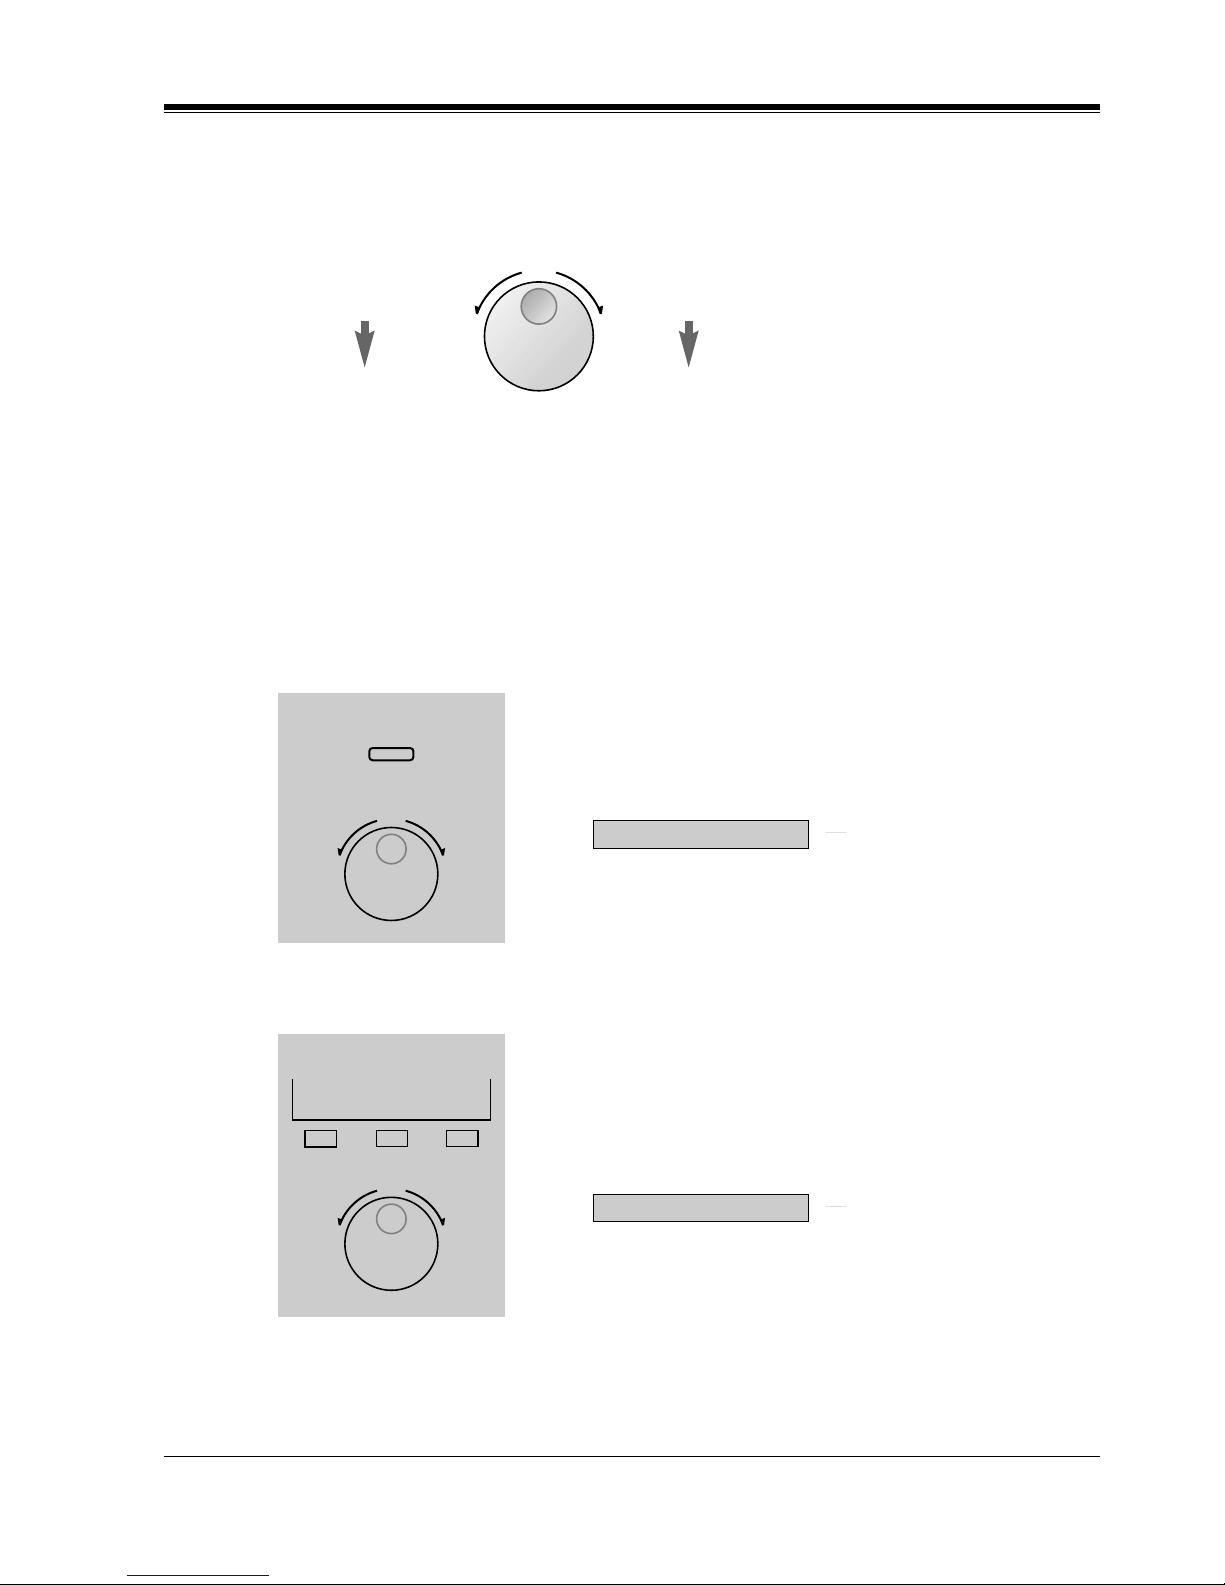
The Jog Dial can be used for the display contrast and the volume control. Rotate the Jog Dial
in either direction as desired. The contrast or the volume level will change as follows.
Display Contrast Adjustment
The MODE button and the Jog Dial for KX-T7431 users, and a Soft button and the Jog Dial
for KX-T7433 and KX-T7436 users are used to adjust the display contrast. The contrast level
is indicated on the display by the number of asterisks.
—KX-T7431
—KX-T7433 and KX-T7436
While on-hook
1. Press the MODE button six times.
• The display shows:
<Example>
2. Rotate the Jog Dial in the desired direction.
While on-hook or during a conversation
1. Press the CONT (S1) button.
2. Rotate the Jog Dial in the desired direction.
• The display shows:
<Example>
Left
(counterclockwise)
Level decreases
Right
(clockwise)
Level increases
1
2
MODE
( contrast level 3)
Contrast:***
1
2
S 1
S 2
S 3
CONT
( contrast level 3)
Contrast:***
Page 40

DPT Overview
40 User Manual
When using the headset
The Panasonic Digital Super Hybrid System supports the use of a headset with a Proprietary
Telephone (PT). When you use the headset (optional), you should switch the selection mode
first. Selection is explained in Section "2.2.5 Handset / Headset Selection."
To change to the headset mode
Press: [PROGRAM] [9] [9] [9] [2] [STORE] [PROGRAM].
Changing the ringing tone of a CO button / INTERCOM button
There are eight ringer frequencies available for each CO (Single-CO, Group-CO, Loop-CO)
button, DN (PDN, SDN) button and INTERCOM button. If you wish to change them, please
refer to Section "2.2.13 Ringing Tone Selection for CO Buttons" or Section
"2.2.14 Ringing Tone Selection for INTERCOM Button."
Volume Control — Handset Receiver/Headset/Ringer/Speaker
Allows you to adjust the following volumes as required.
— Handset Receiver volume (levels 1 through 4)
— Headset volume (levels 1 through 4)
— Ringer volume (levels 0 through 3)
— Speaker volume (levels 1 through 12)
If your Digital Proprietary Telephone is provided with a display (display DPT), the volume
level is indicated on the display by the number of asterisks. For ringer volume adjustment, three
levels (OFF/LOW/HIGH) are available with the KX-T7420 and KX-T7425.
To adjust the handset receiver volume
1. Lift the handset.
2. Rotate the Jog Dial in the desired direction.
• The display shows:
<Example>
• You may also adjust the handset receiver volume
during a conversation using the handset receiver.
1
2
( volume level 3)
Handset:***
Page 41
DPT Overview
User Manual 41
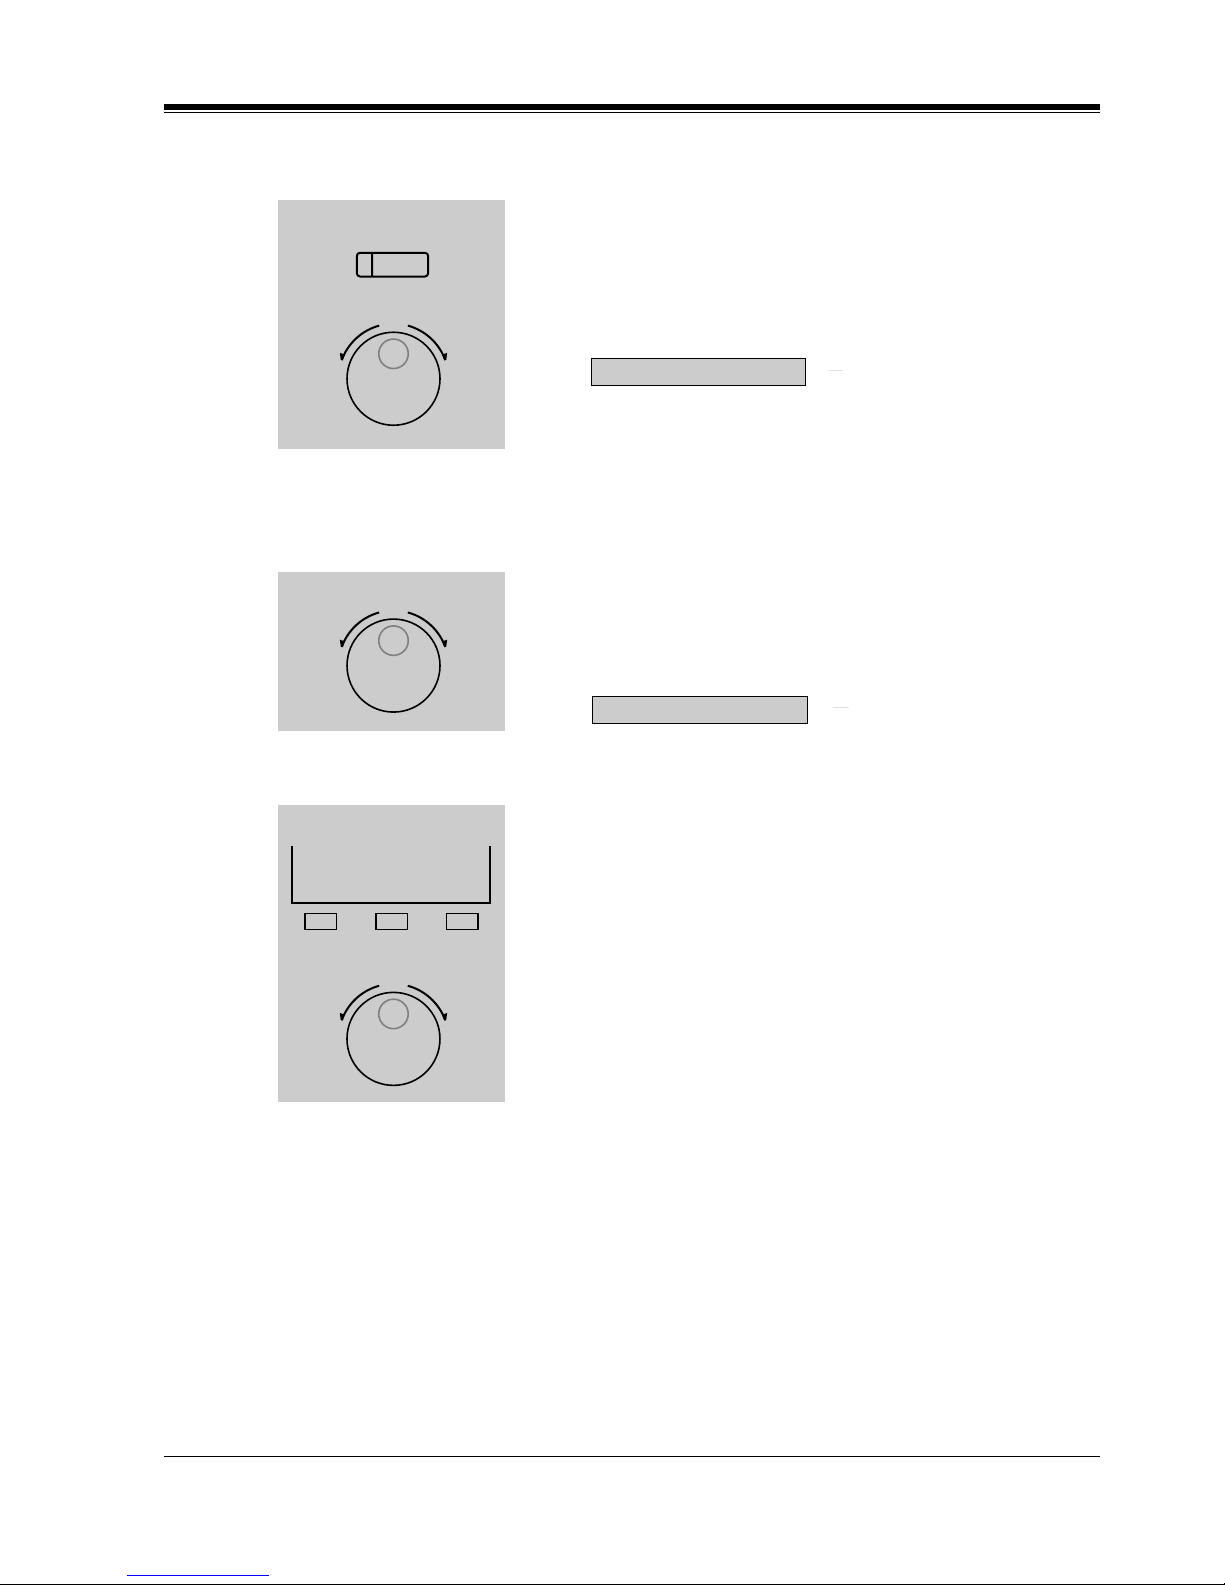
To adjust the headset volume
To adjust the ringer volume
—KX-T7433 and KX-T7436
Be sure the headset is connected.
1. Press the SP-PHONE button.
2. Rotate the Jog Dial in the desired direction.
• The display shows:
<Example>
While the telephone is ringing
1. Rotate the Jog Dial in the desired direction.
• The display shows:
<Example>
While the telephone is idle and on-hook
1. Press the RING (S2) button.
• The telephone will ring.
2. Rotate the Jog Dial in the desired direction.
• The telephone will stop ringing in about 4 seconds.
• When the volume level is 0 (no "*" indication), the
display shows "RNGOFF."
1
2
SP-PHONE
( volume level 3)
Headset:***
1
( volume level 3)
Ringer:***
1
2
S 1
S 2
S 3
RING
Page 42
DPT Overview
42 User Manual
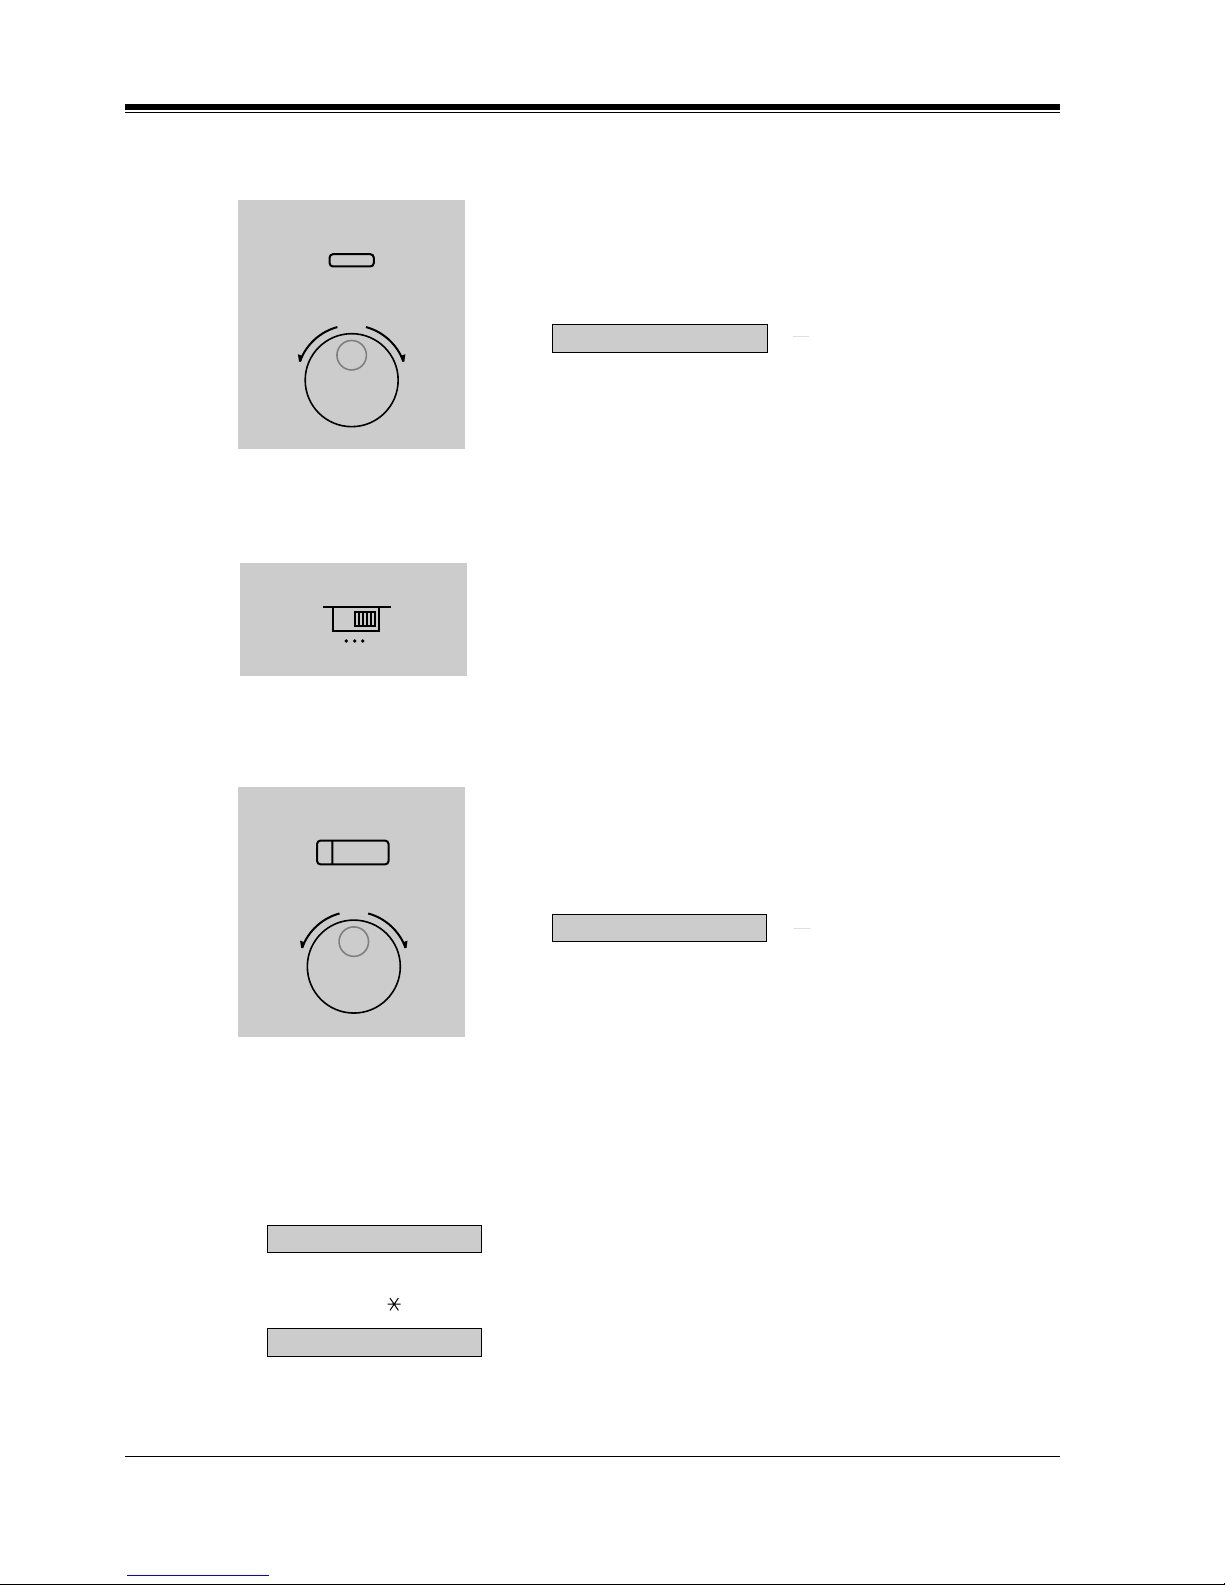
—KX-T7431
—KX-T7420 and KX-T7425
To adjust the speaker volume
Conditions
• If the ringer volume of the KX-T7431 is set to OFF, the display while on-hook is as
follows.
• By pressing " ," the display changes to show your extension number and name.
While the telephone is idle and on-hook
1. Press the MODE button five times.
• The display shows:
<Example>
2. Rotate the Jog Dial in the desired direction.
• The telephone will stop ringing in about 4 seconds.
• When the volume level is 0, no "*" is indicated.
1. Adjust the RINGER Volume Selector lever to the
desired setting (OFF/LOW/HIGH).
1. Press the SP-PHONE button.
2. Rotate the Jog Dial in the desired direction.
• The display shows:
<Example>
• You may also adjust the speaker volume while
listening to background music (BGM On mode),
receiving a voice call, receiving a page or hearing a
call progress tone such as a dial tone.
1
2
MODE
( volume level 3)
Ringer:***
1
OFF HIGH
LOW
1
2
SP-PHONE
( volume level 12)
SP:************
Ring Off 12:00P
101: John Smith
Page 43
DPT Overview
User Manual 43
1.1.6 Initial Setting for KX-T7200 Series
Display Contrast Adjustment (KX-T7230 and KX-T7235 only)
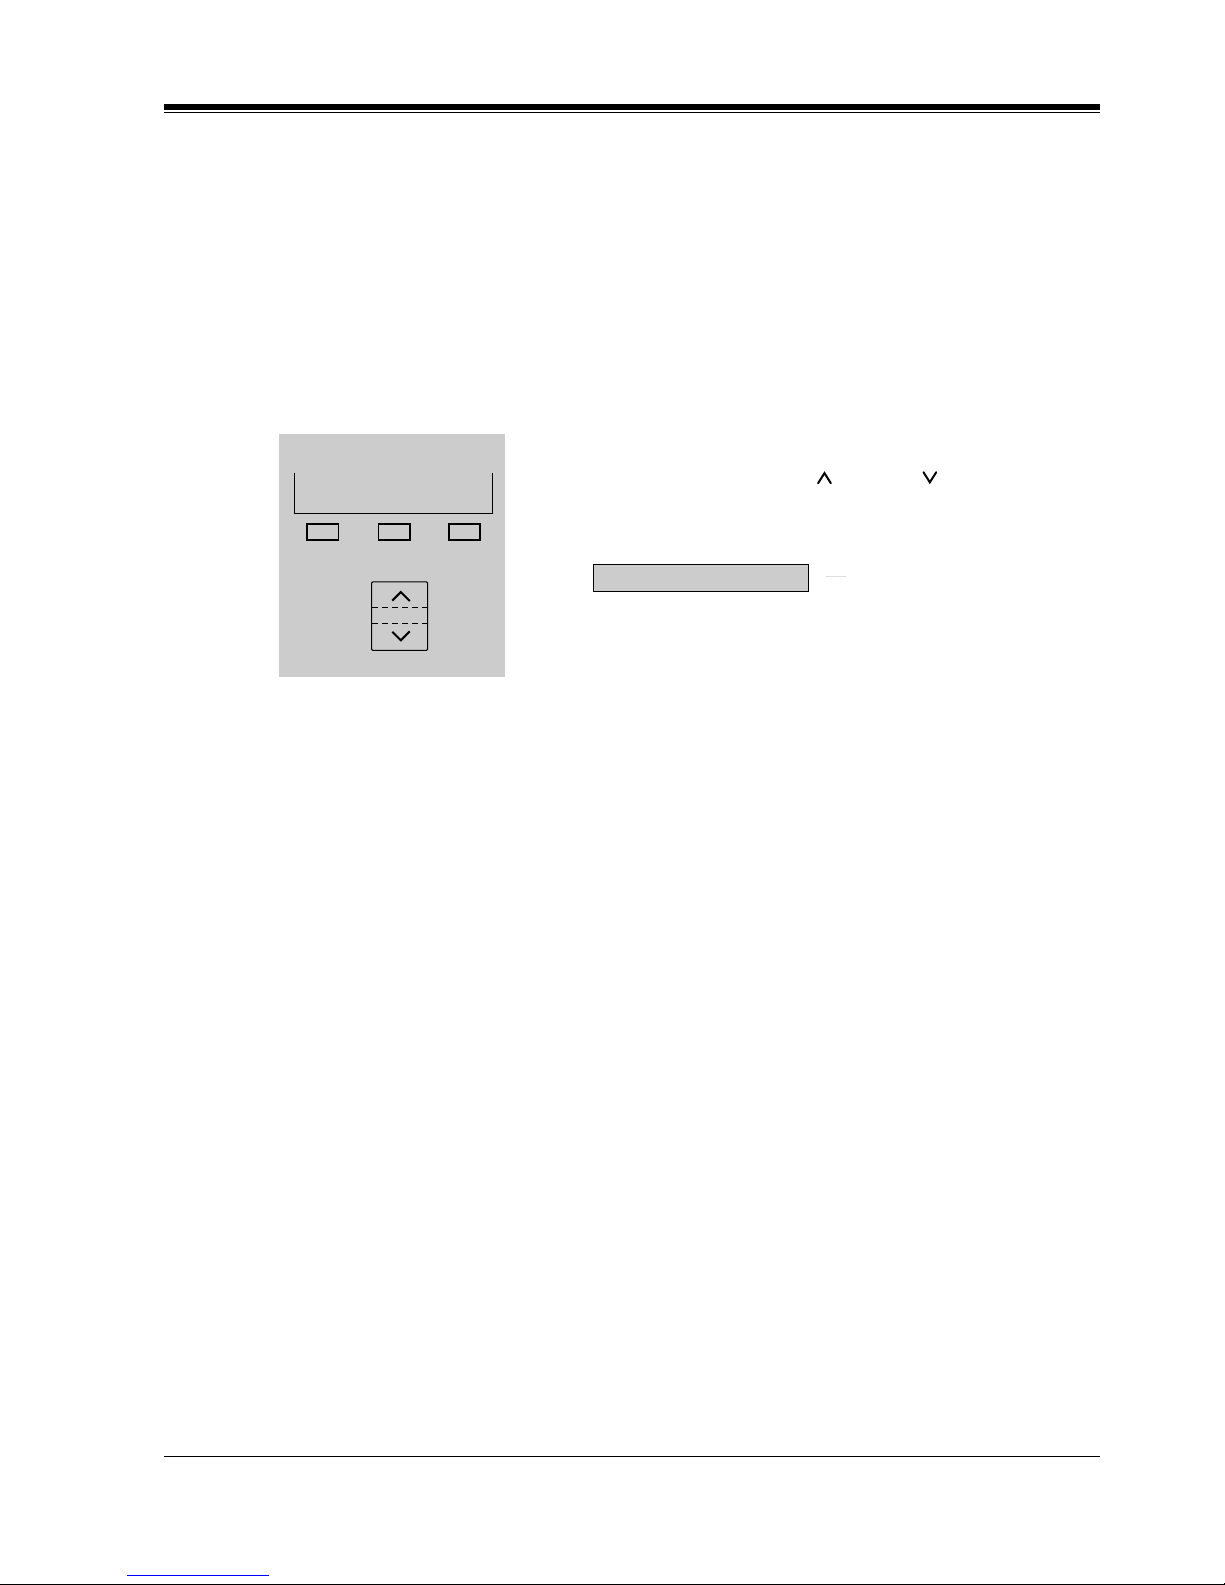
A Soft button and the VOLUME Control button are used to adjust the display contrast. The
contrast level is indicated on the display by the number of asterisks. You can adjust the contrast
level under the following conditions:
a) When on-hook, or
b) During an outside/intercom call.
When using the headset
The Panasonic Digital Super Hybrid System supports the use of a headset with a Proprietary
Telephone (PT). When you use the headset (optional), you should switch the selection mode
first. Selection is explained in Section "2.2.5 Handset / Headset Selection."
To change to the headset mode
Press: [PROGRAM] [9] [9] [9] [2] [STORE] [PROGRAM].
Changing the ringing tone of a CO button / INTERCOM button
There are eight ringer frequencies available for each CO (Group-CO, Loop-CO, Single-CO)
button, DN(PDN, SDN) button and INTERCOM button. If you wish to change them, please
refer to Section "2.2.13 Ringing Tone Selection for CO Buttons" or Section
"2.2.14 Ringing Tone Selection for INTERCOM Button."
Volume Control — Handset Receiver/Headset/Ringer/Speaker
Allows you to adjust the following volumes as necessary:
— Handset Receiver volume (level 1 through 3)
— Headset volume (level 1 through 3)
— Ringer volume (level 0 through 3)
— Speaker volume (level 1 through 12)
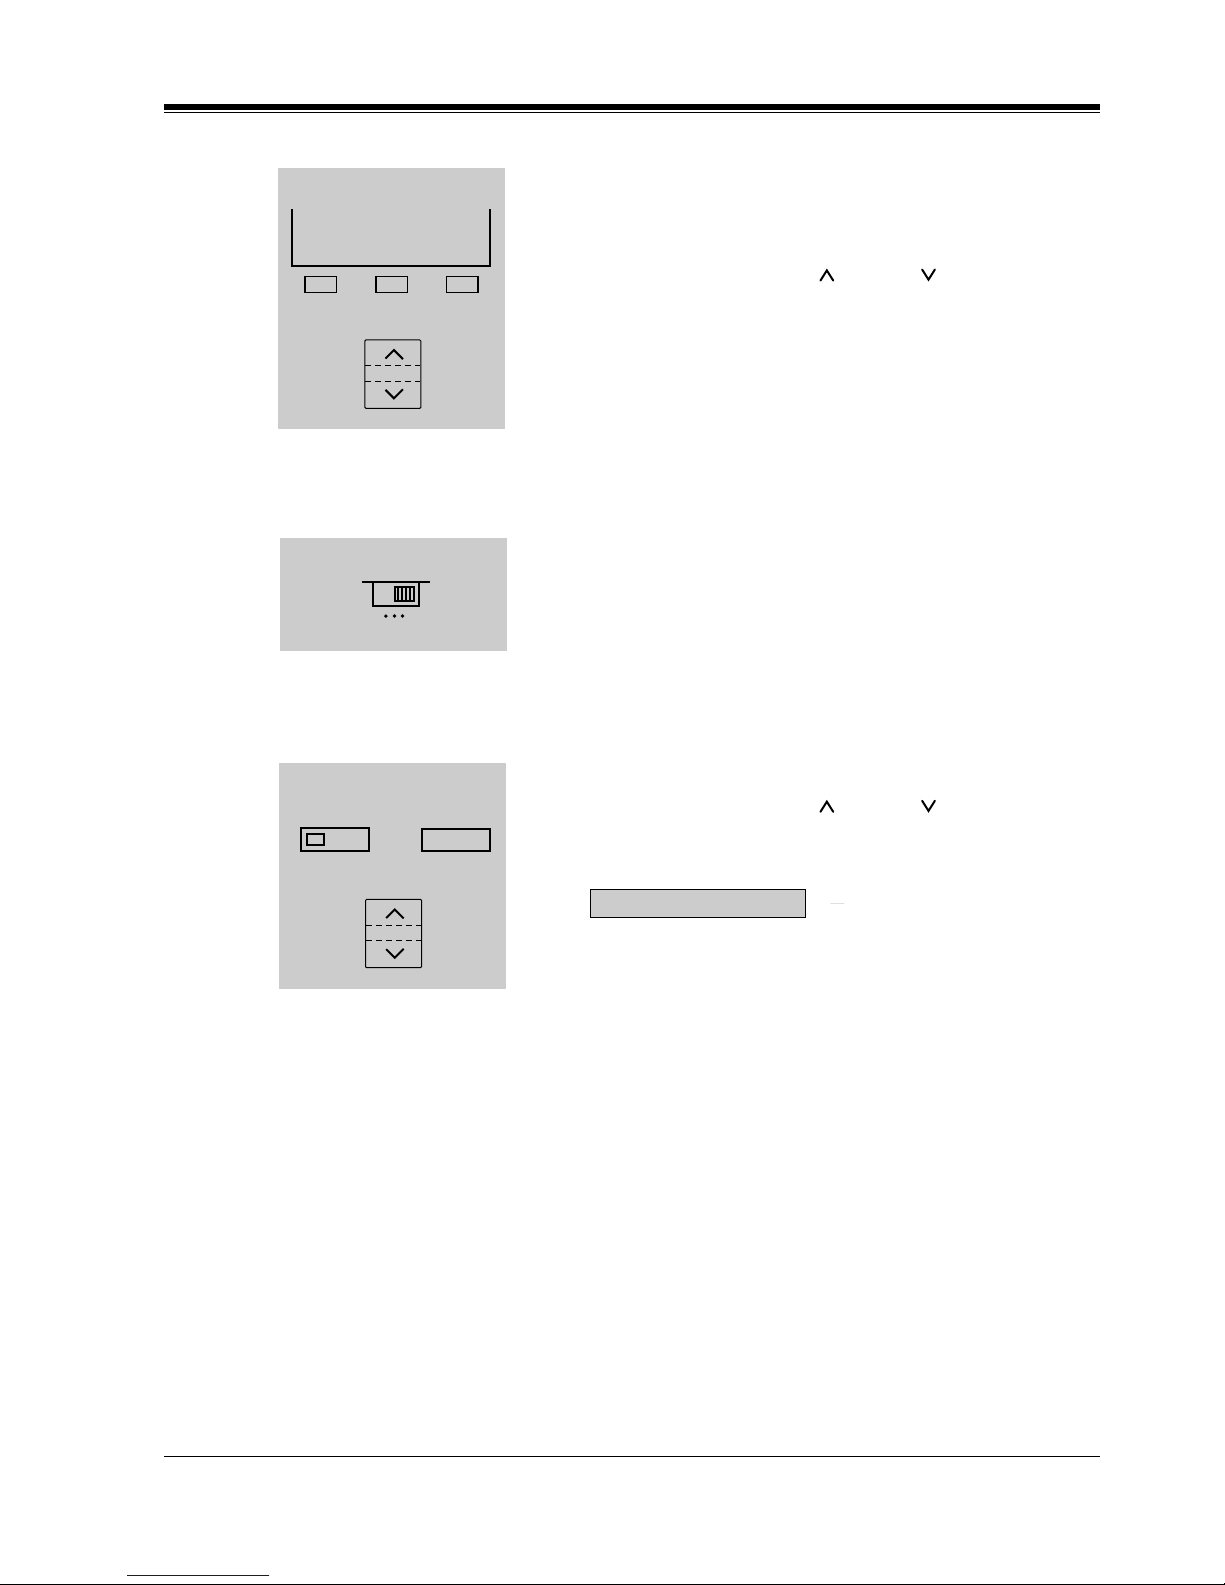
1. Press the CONT (S1) button.
2. Press the VOLUME (UP / DOWN ) Control button.
• The display shows:
<Example>
1
2
S 1
S 2
S 3
CONT
VOLUME
( contrast level 3)
Contrast:***
Page 44
DPT Overview
44 User Manual
If your Digital Proprietary Telephone is provided with a display (display DPT), the volume
level is indicated on the display by the number of asterisks. For ringer volume adjustment, three
levels (OFF/LOW/HIGH) are available with the KX-T7220 and KX-T7250.
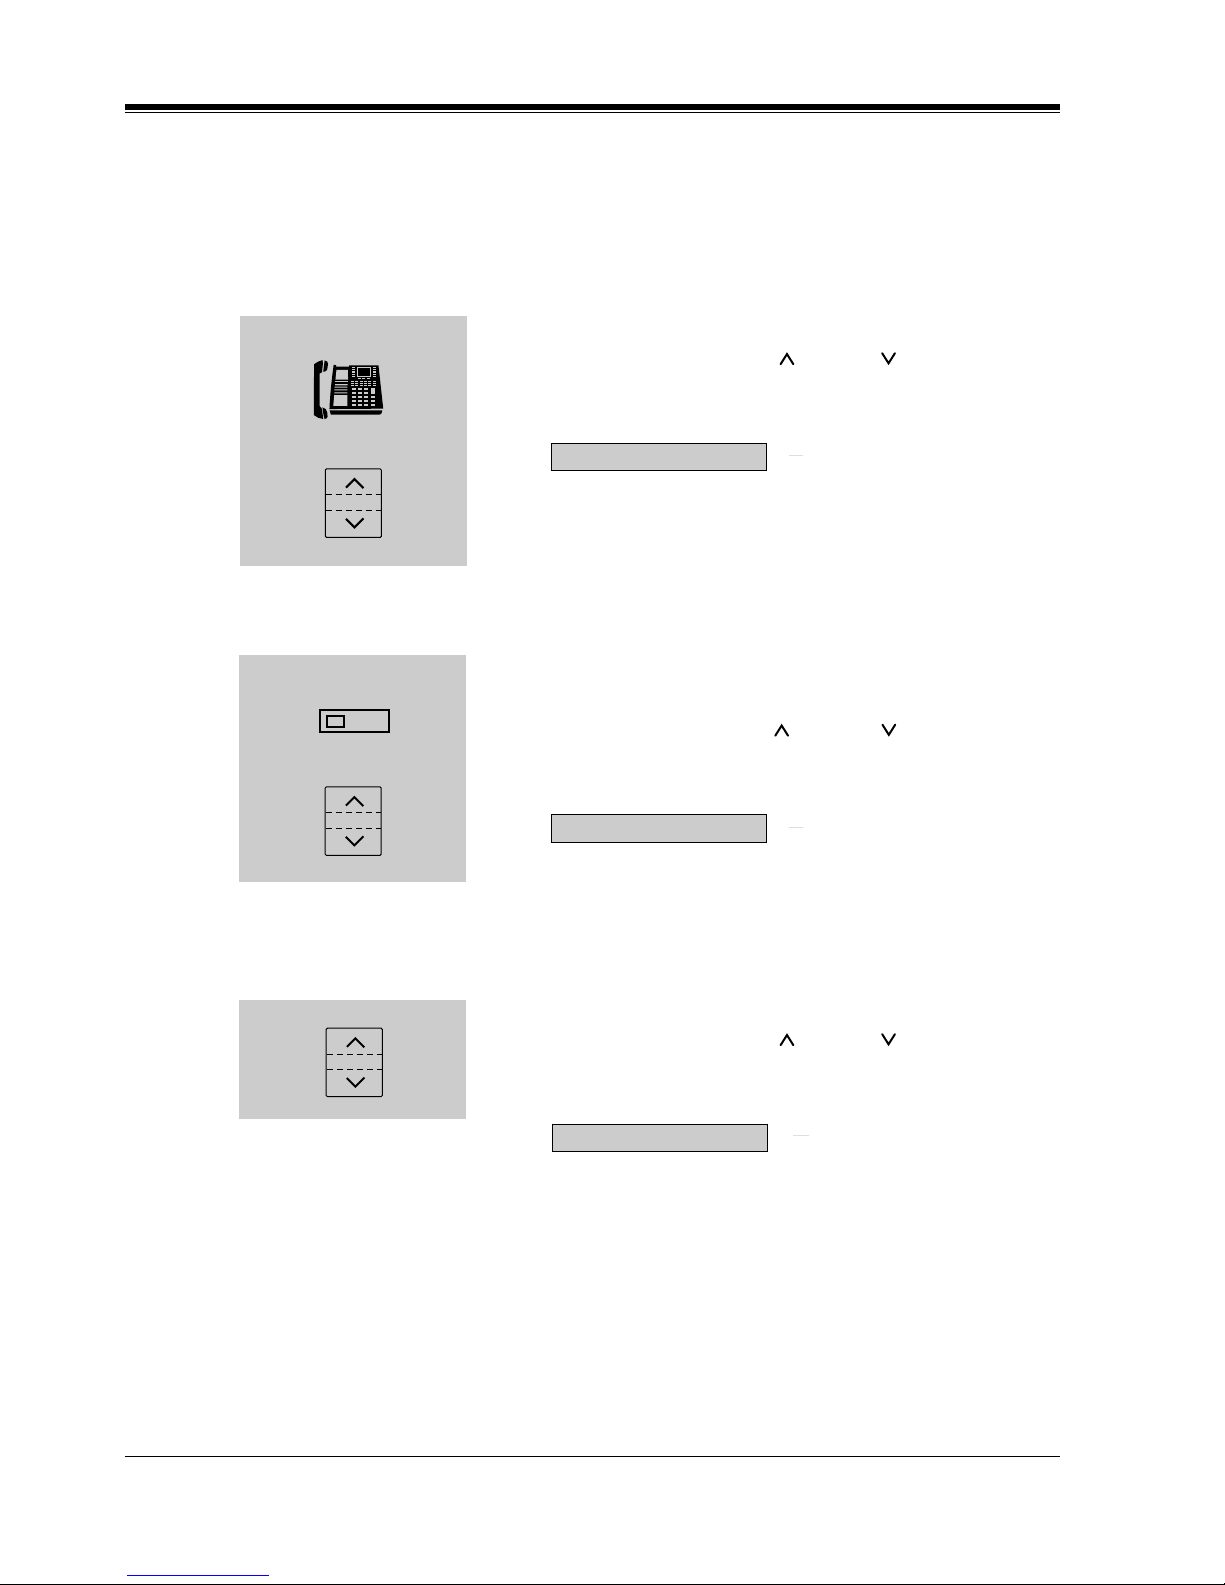
To adjust the handset receiver volume
To adjust the headset volume
To adjust the ringer volume
—KX-T7230 and KX-T7235
1. Lift the handset.
2. Press the VOLUME (UP / DOWN ) Control button.
• The display shows:
<Example>
• You may also adjust the handset receiver volume
during a conversation using the handset receiver.
Be sure the headset is connected.
1. Press the SP-PHONE button.
2. Press the VOLUME (UP / DOWN ) Control button.
• The display shows:
<Example>
While the telephone is ringing;
1. Press the VOLUME (UP / DOWN ) Control button.
• The display shows:
<Example>
1
2
VOLUME
( volume level 3)
Handset:***
SP-PHONE
1
2
VOLUME
( volume level 3)
Headset:***
1
VOLUME
( volume level 3)
Ringer:***
Page 45
DPT Overview
User Manual 45
—KX-T7220 and KX-T7250
To adjust the speaker volume
While the telephone is idle and on-hook;
1. Press the RING (S2) button.
• The telephone will ring.
2. Press the VOLUME (UP / DOWN ) Control button.
• The telephone will stop ringing in about 4 seconds.
• When the volume level is 0 (no "*" indication), the
display shows "RNGOFF."
1. Adjust the RINGER Volume Selector lever to the
desired setting (OFF/LOW/HIGH).
1. Press the SP-PHONE or MONITOR button.
2. Press the VOLUME (UP / DOWN ) Control button.
• The display shows:
<Example>
• You may also adjust the speaker volume while
listening to the background music (BGM On mode),
receiving a voice call, receiving a page or hearing a
call progress tone such as a dial tone.
1
2
VOLUME
S 1
S 2
S 3
RING
1
OFF HIGH
LOW
SP-PHONE
1
2
VOLUME
or
MONITOR
( volume level 12)
SP:************
Page 46
DPT Overview
46 User Manual
1.1.7 LED Indication
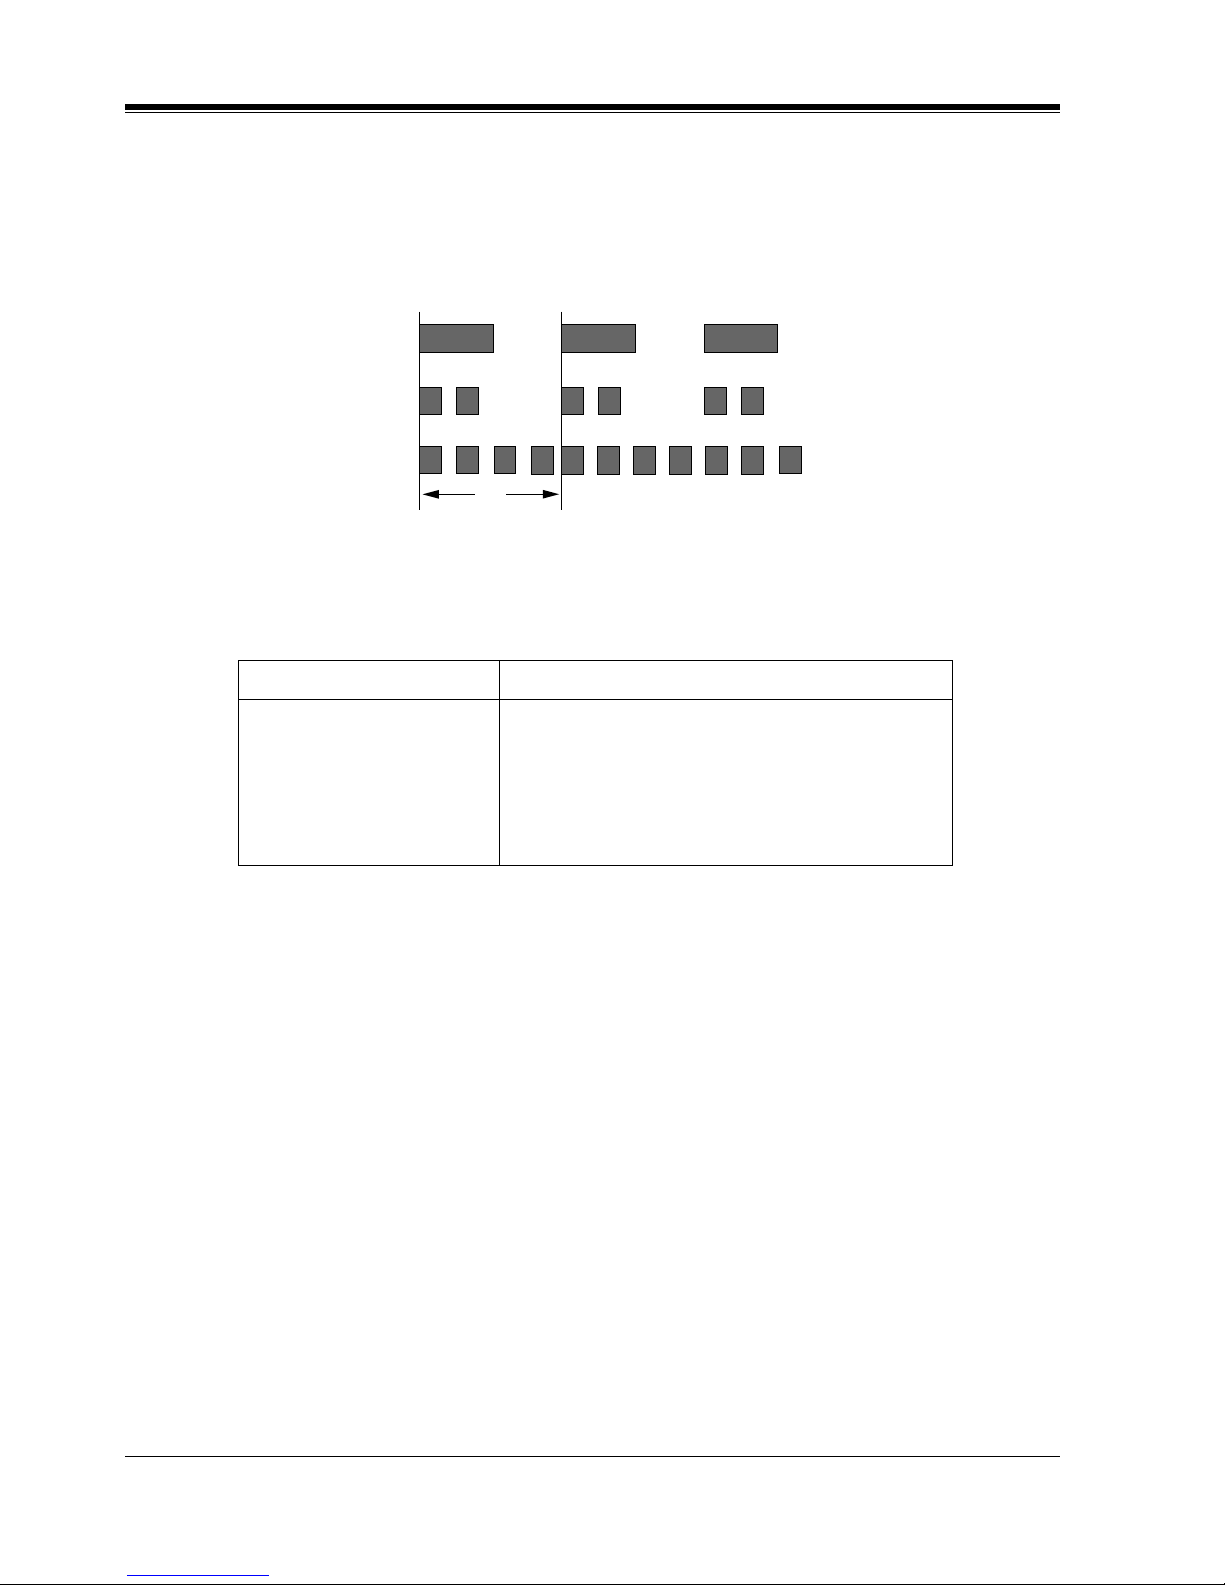
The Light Emitting Diode (LED) buttons indicate the line conditions with lighting patterns.
Flashing light patterns
LED Indication on the INTERCOM Button
The table below shows the lighting patterns for intercom line conditions.
LED Indication on the CO Button
The table below shows the lighting patterns for CO line conditions.
INTERCOM button Intercom Line Condition
Off
Green On
Green slow flashing
Green moderate flashing
Green rapid flashing
Idle
Intercom call / Conference established
Intercom call hold
On exclusive hold / Consultation hold
Incoming intercom/doorphone call
Slow flashing
(60 flash/minute)
Moderate flashing
(120 flash/minute)
Rapid flashing
(240 flash/minute)
1 s
Page 47
DPT Overview
User Manual 47
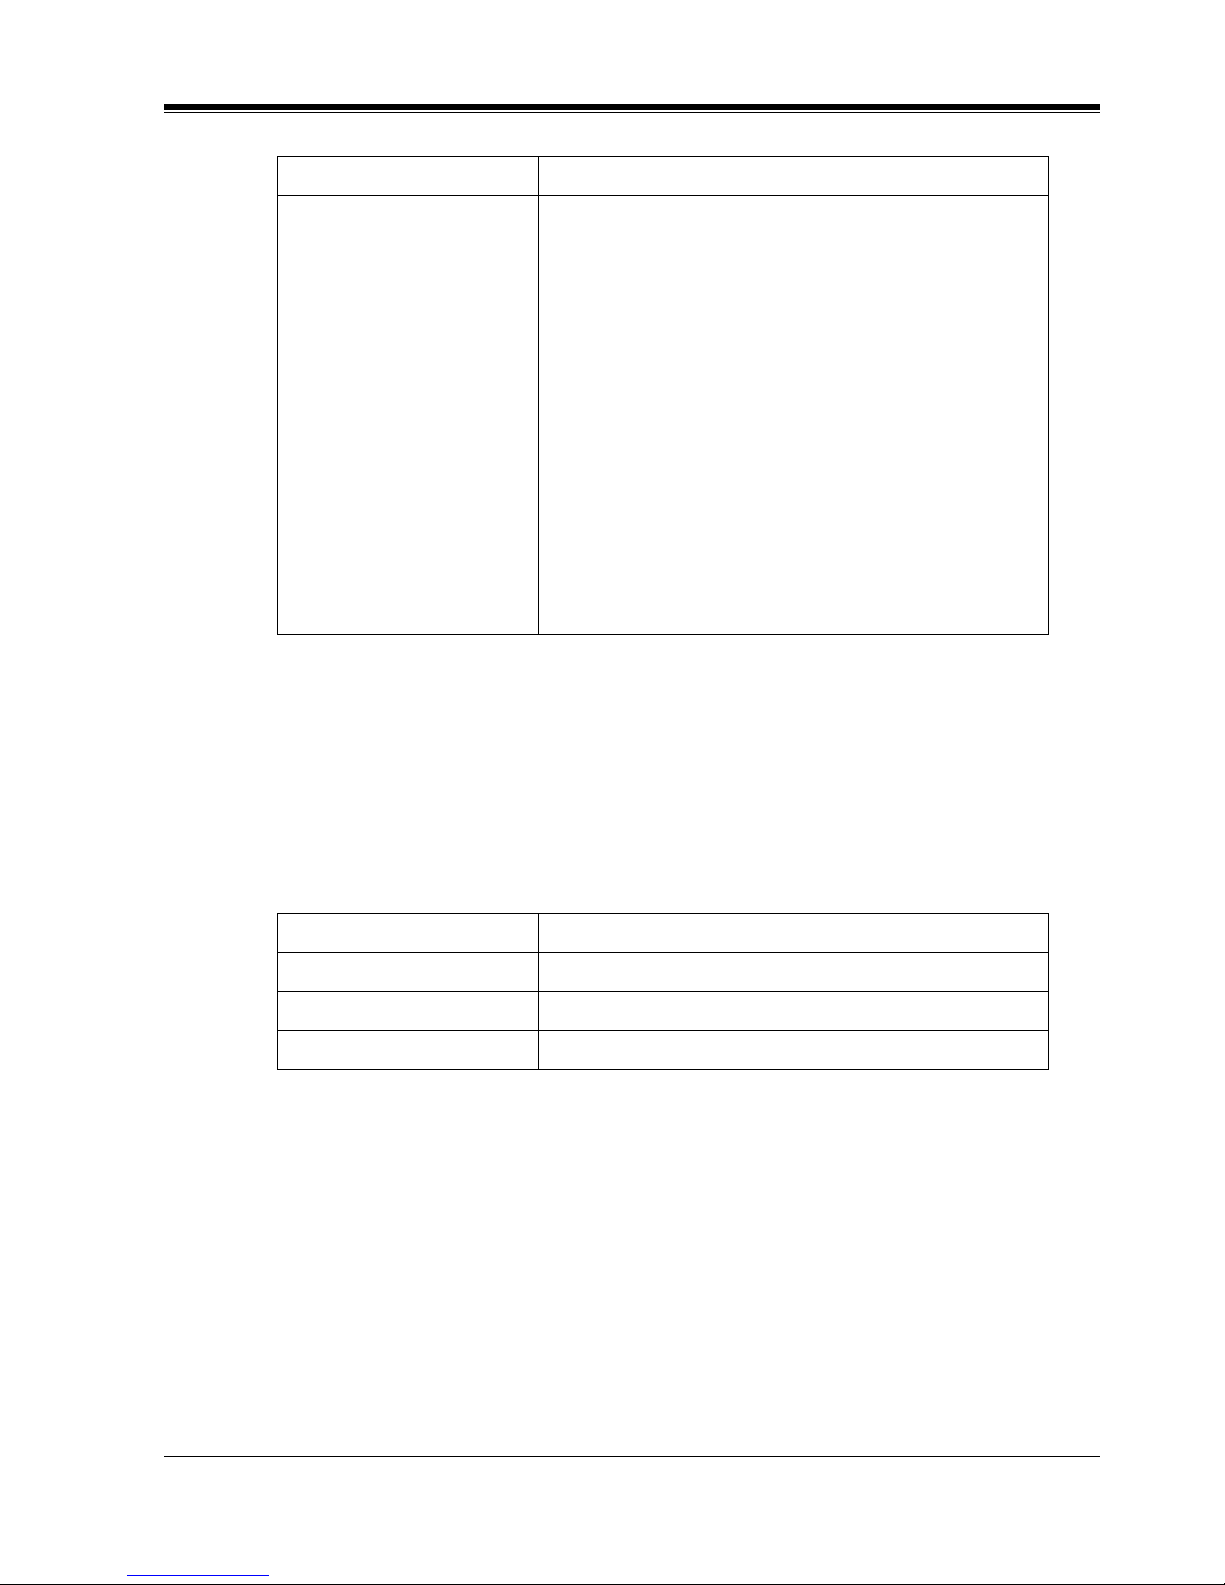
— Items marked with "*" are only available on the Single-CO button.
BLF on DSS Button
The Busy Lamp Field (BLF) indicator button is red when the corresponding extension is busy.
This is available for Direct Station Selection (DSS) buttons on DSS Consoles and for flexible
CO buttons assigned as DSS buttons on Proprietary Telephones.
The following table shows the DSS Button indication and the status of Corresponding
Extension.
CO Button CO Line Condition
Off
Green On
Green slow flashing
Green moderate flashing
Green rapid flashing
Red On
Red slow flashing
Red rapid flashing
Idle
You are using the line.
You have a held call.
You have one of the following:
(1) Exclusive hold,
(2) CO-to-CO line call, or
(3) Conference, unattended
Privacy Release possible* / Hold Recall /
Incoming call (A CO call is coming in on a single
extension).
Other-use
Other-hold*
Incoming call (A CO call is coming in on multiple
extensions simultaneously).
DSS Button indication Status of Corresponding Extension
Off Log-in
Red On Incoming call/You or another extension is using the line.
Red slow flashing Log-out
Page 48

DPT Overview
48 User Manual
Page 49

Station Programming
User Manual 49
Section 2
Station Programming
Note: All illustrations used in this section are based on
model KX-T7235.
Page 50
Station Programming
50 User Manual
2.1 Station Programming Instructions
2.1.1 Station Programming Instructions
Station Programming allows you, the Proprietary Telephone (PT) users, to program certain
features from your telephone individually. To program, you need to switch your telephone to
the Station Programming mode. During programming mode, your telephone is in the busy
condition to both inside and outside callers. If you want to make a normal call handling
operation, you must finish the programming mode.
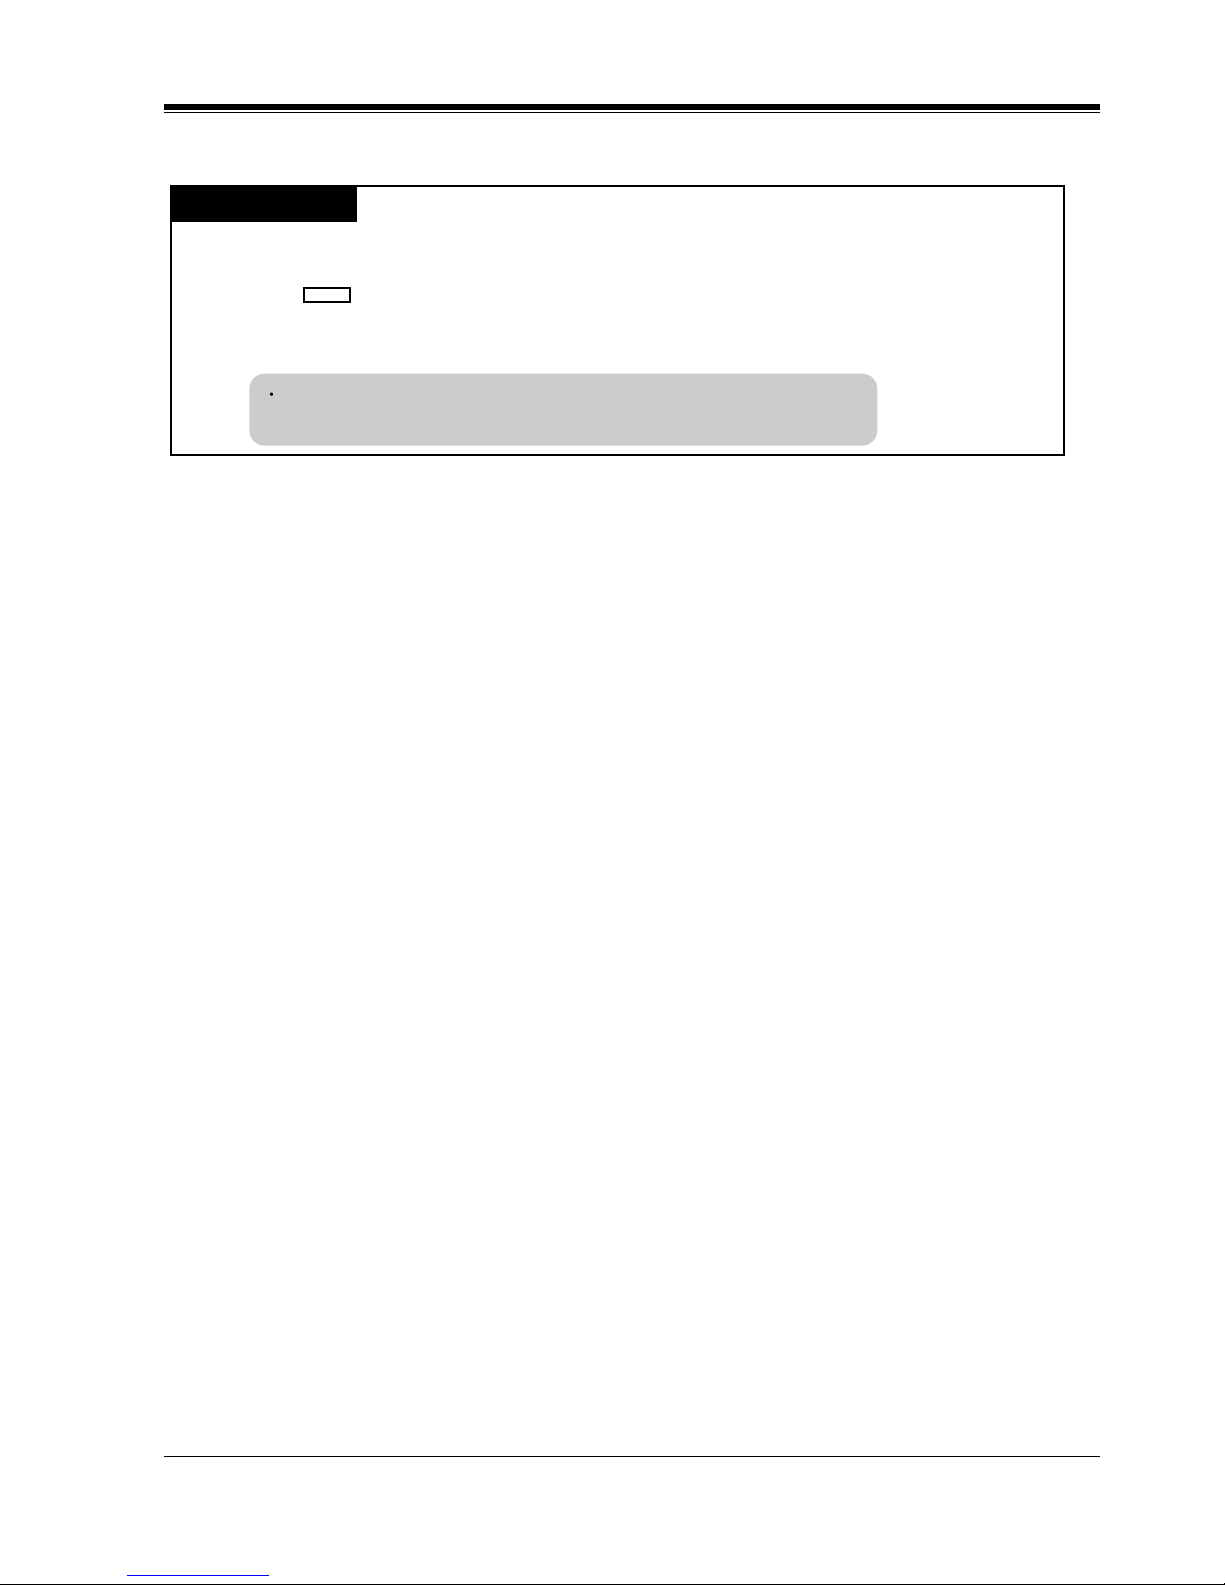
Programming Mode Display
When you enter into the Station Programming mode, the display shows the following message
as the initial programming mode;
We recommend a PT with display for Station Programming to avoid mis-operation.
The display also gives you helpful or stored data information related to your programming
steps. In this section, we note the display example in the programming steps, if required. You
can also refer to the "Display Examples" in Section "6 Appendix."
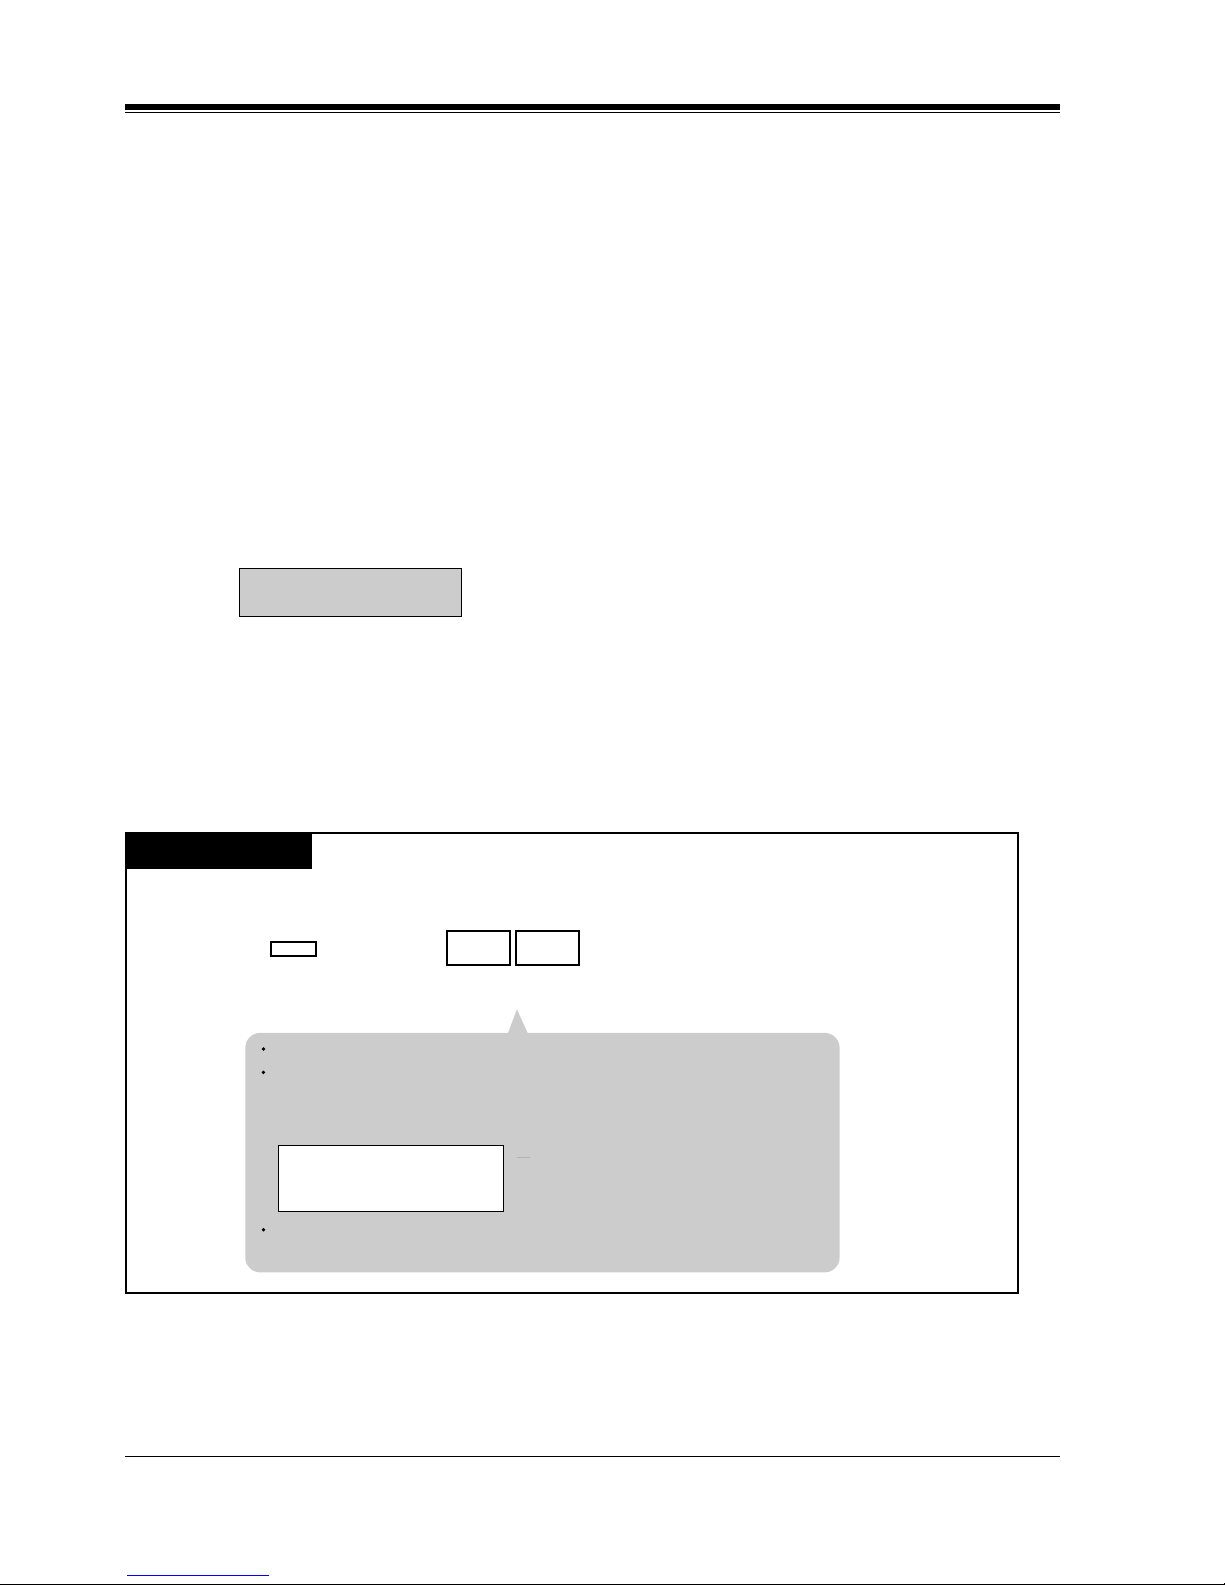
Entering Station Programming mode
PT-PGM Mode
PT
Press PROGRAM.
Dial 99.
PROGRAM
9 9
<PT Display Example>
Be sure that the telephone is idle and on-hook.
PT-PGM Mode
If there is no entry within one minute, the Station Programming mode
is canceled and normal call handling mode resumes automatically.
The STORE indicator lights.
If 99 is not dialed within 5 seconds after the PROGRAM button is
pressed, the Station Programming mode is canceled.
Initial programming
display
Page 51
Station Programming
User Manual 51
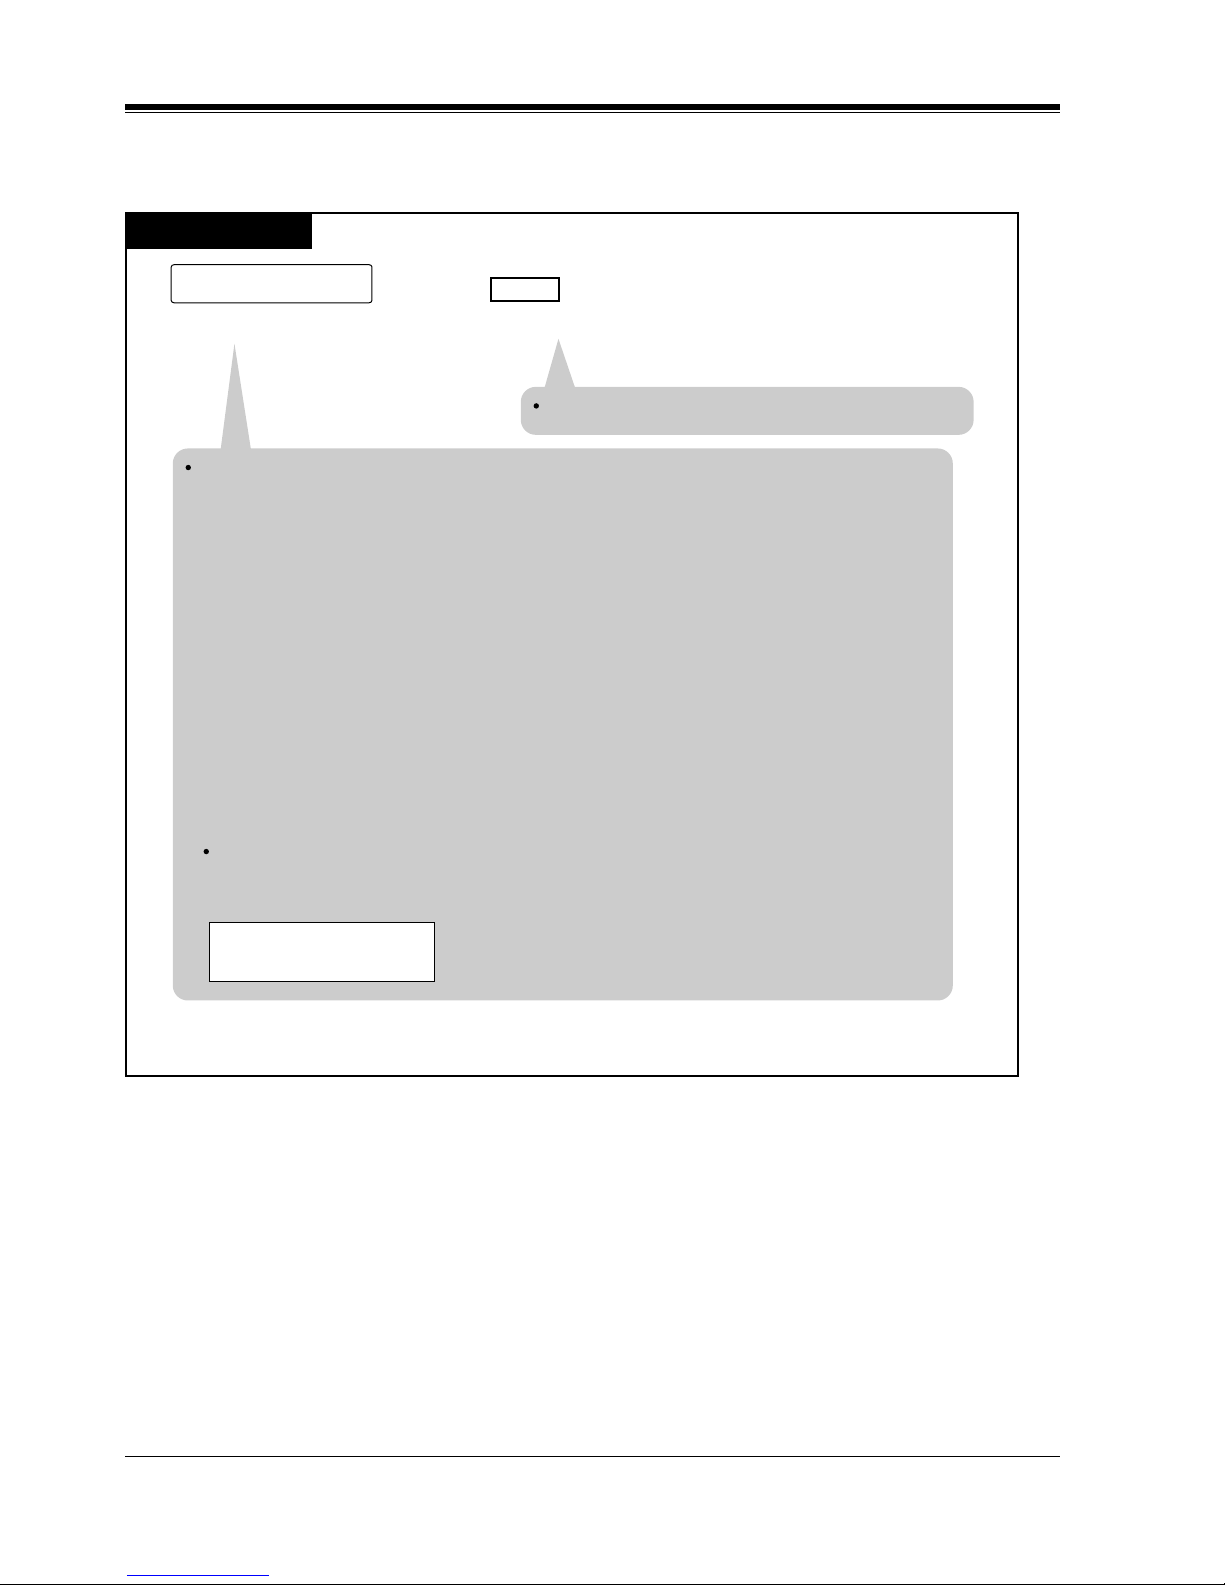
Exiting Station Programming mode
PT
Press PROGRAM.
PROGRAM
To exit the Station Programming mode, press PROGRAM. You are in
the call handling mode.
When the display shows the initial programming mode;
Page 52
Station Programming
52 User Manual
Confirming the assigned function data
— Be sure that you are in the Station Programming mode: Press [PROGRAM] [9] [9].
—To exit the Station Programming mode: Press [PROGRAM].
— If you wish to change the data, follow the programming procedure explained in this section.
* A programming access number is required to program/confirm the function data by Station
Programming.
PT
Press HOLD (END).
Enter the program access number.
program access number
HOLD
Enter the program access number* as follows.
- 1:Preferred Line Assignment
-
Outgoing
- 2:Preferred Line Assignment
-
Incoming
- 3:Full One-Touch Dialing Assignment
- 4:Intercom Alert Assignment
- 5:Call Waiting Tone Type Assignment
- 6:Self-Extension Number Confirmation
- 7:Live Call Screening Mode Set†
-81:Initial Display Selection
-82:Bilingual Display Selection
- 9:Handset/Headset Selection
-01:Remote Station Look Control (
-
Operator / Manager only)
-02:Call Log Lock Control, Incoming (
-
Operator / Manager only)
-03:Live Call Screening Password Control (
-
Operator / Manager only)
- #:Station Programming Data Default Set
The display shows the programmed data.
<PT Display Example>
When you press [5], the display shows:
(- The Call Waiting tone is currently programmed to Tone 1.)
The display shows the initial programming mode.
C.W. Tone1
† Available when the Digital Super Hybrid System is connected to a Digital Proprietary Telephone capable Panasonic
Voice Processing System (one that supports Digital Proprietary Telephone [DPT] integration; e.g., KX-TVS100).
Page 53
Station Programming
User Manual 53
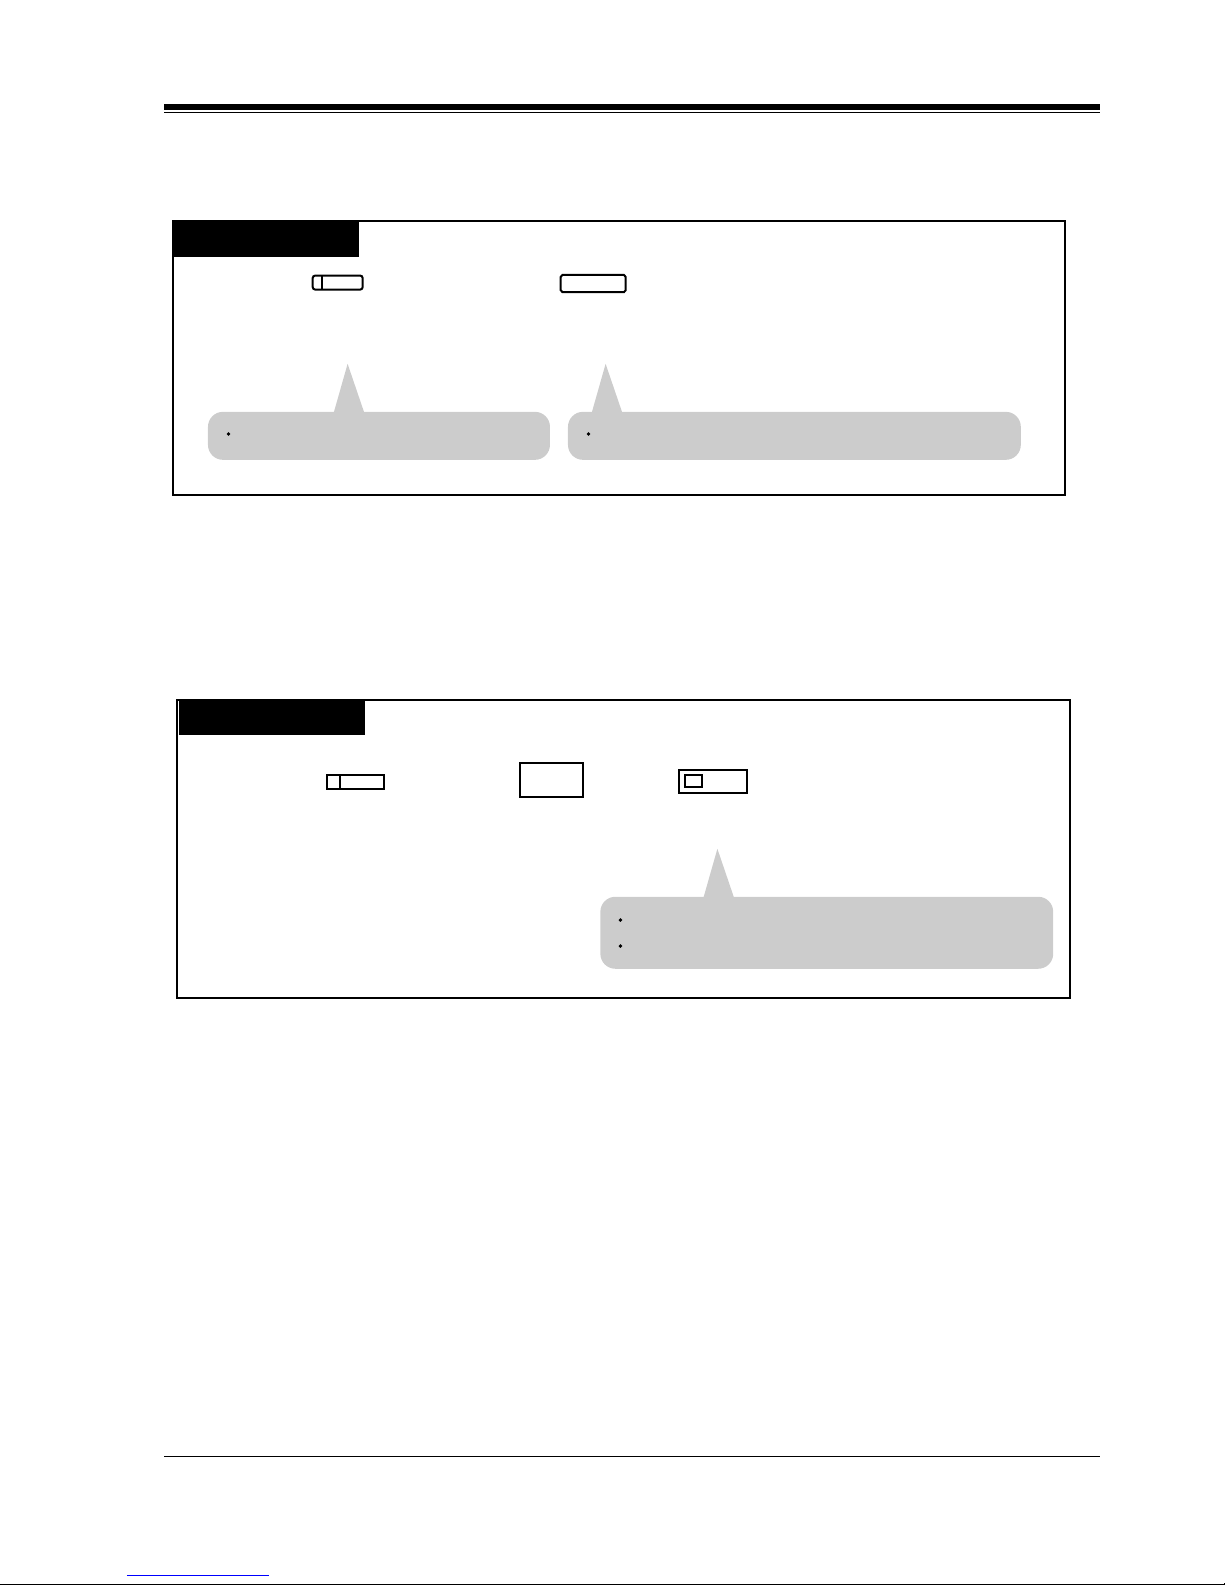
Confirming the assigned data on the Flexible button
—Be sure that you are in the Station Programming mode: Press [PROGRAM] [9] [9].
—To exit Station Programming mode: Press [PROGRAM].
—If you wish to change the data, follow the programming procedure explained in this section.
Clearing the data on the Flexible button
— Be sure that you are in the Station Programming mode: Press [PROGRAM] [9] [9].
— To exit Station Programming mode: Press [PROGRAM].
—The following lists are the buttons and programming access numbers used for Station
Programming. Detailed operating instructions are explained on each page in this section.
The display shows the initial programming mode.The display shows the current status.
PT
Press HOLD (END).
Press the desired Flexible
(CO,DSS,PF) button.
HOLD
PT
Press the desired Flexible
(CO, DSS, PF) button that
you wish to cancel the
assignment.
Dial 2.
Press STORE.
AUTO DIAL
STORE
2
The STORE indicator lights.
The display shows the initial programming mode.
Page 54

Station Programming
54 User Manual
Station Programming Outline [Flexible Button Assignment]
(Station Programming)
Direct Station Selection (DSS) Button
One-Touch Dialing Button
Message Waiting (MESSAGE) Button
FWD/DND Button
SAVE Button
Account Button
Conference (CONF) Button
Log-In / Log-Out Button
Phantom Button
Day / Night Button
Primary Directory Number (PDN) Button
Secondary Directory Number (SDN) Button
Alarm Button
Tone Through Button
Voice Mail (VM) Transfer Button
Two-Way Record Button
*
Two-Way Transfer Button
*
Live Call Screening (LCS) Button
*
Live Call Screening (LCS) Cancel Button
*
Answer Button
Release Button
Single-CO (S-CO) Button
Loop-CO (L-CO) Button
Group-CO (G-CO) Button
(Ringing Tone Selection for CO Button)
(Ringing Tone Selection for ICM Button)
(PDN/SDN Key Delayed Ringing Assignment)
(Phantom Button Ringing On/Off Assignment)
(Station Speed Dialing Number / Name Assignment)
[KX-T7235 / KX-T7436 only]
(Exit)
1
2
3
4
5
6
70
71
72
8
77
90
91
92
93
0
#
PROGRAM
9
9
CO
DSS
PF
CO
CO
73
74
75
78
Group Log-In / Log-Out Button
79
94
95
PDN
Phantom
(F1 - F10)
Phantom
/
SDN
Function
PROGRAM
ICM
ICM
76
* : Available when the Digital Super Hybrid System is connected to a Digital Proprietary Telephone capable Panasonic
Voice Processing System (one that supports Digital Proprietary Telephone [DPT] integration; e.g., KX-TVS100).
Alert Button
97
Group FWD Button
98
Page 55
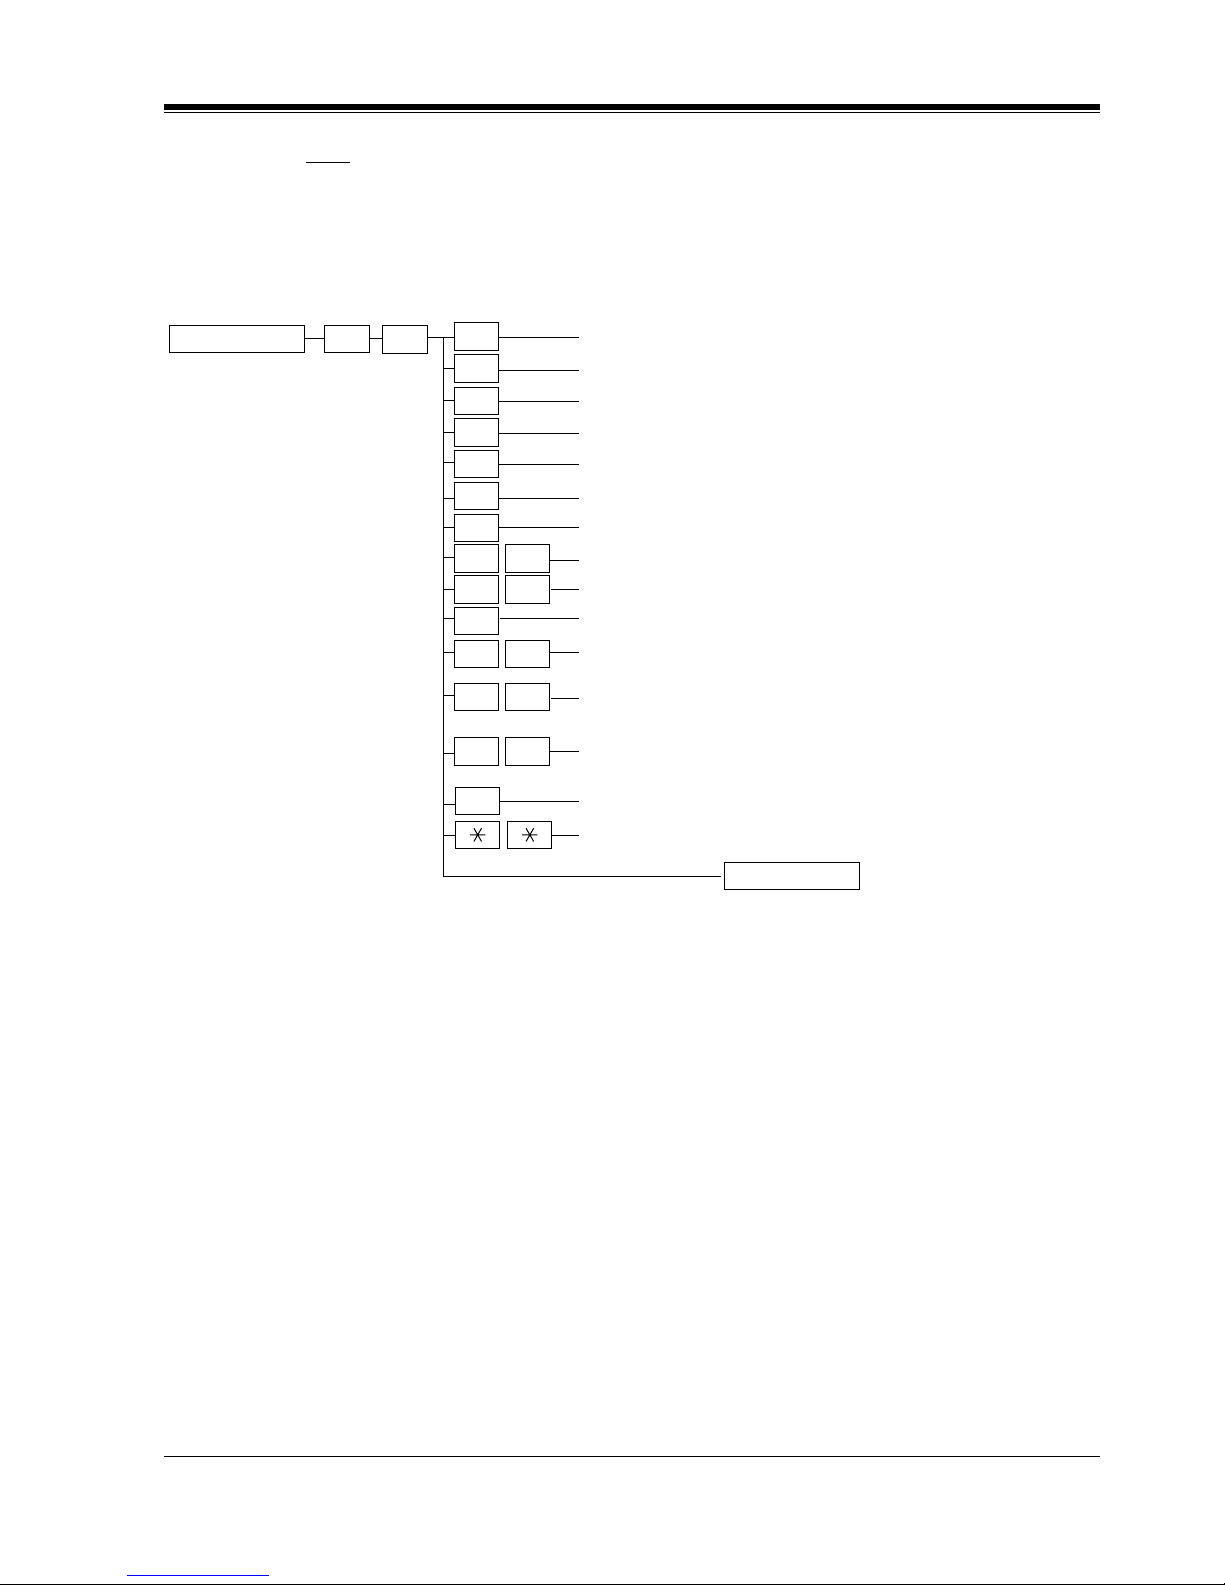
Station Programming
User Manual 55
Note
• Please refer to "Flexible Buttons" in Section "1.1.4 Feature Buttons" for
applicability of CO / DSS / PF buttons.
[Function Assignment]
(Preferred Line Assignment - Outgoing)
(Preferred Line Assignment
-
Incoming)
(Full One-Touch Dialing Assignment)
(Intercom Alert Assignment)
(Call Waiting Tone Type Assignment)
(Self-Extension Number Confirmation)
(Live Call Screening Mode Set)†
(Initial Display Selection)
(Bilingual Display Selection)
(Handset / Headset Selection)
(Remote Station Lock Control)
-
see "Operator / Manager Service Features" (Section 4.4)
(Control of Call Log Incoming, Log Lock)
-
see "Operator / Manager Service Features" (Section 4.4)
(Live Call Screening Password Control)†
-
see "Operator / Manager Service Features" (Section 4.4)
(Station Programming Data Default Set)
(Exit)
1
3
4
5
6
7
0
0
0
#
1
3
2
2
PROGRAM
(Station Speed Dialing Number / Name Assignment)
8
1
8 2
9
PROGRAM
9
9
† Available when the Digital Super Hybrid System is connected to a Digital Proprietary Telephone capable Panasonic
Voice Processing System (one that supports Digital Proprietary Telephone [DPT] integration; e.g., KX-TVS100).
Page 56

Station Programming
56 User Manual
2.2 Station Programming
2.2.1 Bilingual Display Selection
Allows you to select the display in English or French.
— Be sure that you are in the Station Programming mode: Press [PROGRAM] [9] [9].
— To exit the Station Programming mode: Press [PROGRAM].
Conditions
• The default is "English display" mode.
PT
Dial 82.
Press STORE.
Dial 1 or 2.
1 : for the English display
2 : for the French display
AUTO DIAL
STORE
or
1
2
8
2
The STORE indicator lights.
The display shows the current display type.
The display shows the initial programming mode.
Page 57

Station Programming
User Manual 57
2.2.2 Call Waiting Tone Type Assignment
Allows you to select the call waiting tone type (Tone 1 or Tone 2).
— Be sure that you are in the Station Programming mode: Press [PROGRAM] [9] [9].
— To exit the Station Programming mode: Press [PROGRAM].
Conditions
• The tone type patterns are described in Section "6 Appendix."
• The default is "Tone 1."
PT
Dial 5.
Press STORE.
or
Dial 1 or 2.
1 : to select Call Waiting Tone 1
2 : to select Call Waiting Tone 2
AUTO DIAL
STORE
5
1
2
The STORE indicator lights.
The display shows the initial programming mode.
The display shows the current tone type.
Page 58
Station Programming
58 User Manual
2.2.3 Flexible Button Assignment
Each Flexible (CO,DSS,PF) button on your PT and DSS Console can be assigned as various
feature buttons such as an Account Button, FWD/DND Button, etc. The features assignable are
limited by the button type. Please refer to "Flexible Buttons" in Section "1.1.4 Feature
Buttons." The "Flexible CO Button Assignment" by User or System Programming can be used
for this assignment.
Account Button (Assignment)
Allows you to assign a Flexible (CO, DSS, PF) button as an Account button.
— Be sure that you are in the Station Programming mode: Press [PROGRAM] [9] [9].
— To exit the Station Programming mode: Press [PROGRAM].
PT
Press the desired Flexible (CO, DSS,
PF) button you wish to assign as the
Account button.
Dial 6.
Press STORE.
AUTO DIAL
STORE
6
The STORE indicator lights.
The display shows the initial programming mode.
<PT Display Example>
Account
Page 59
Station Programming
User Manual 59
Alarm Button (Assignment)
Allows you to assign a Flexible (CO) button as an Alarm button.
— Be sure that you are in the Station Programming mode: Press [PROGRAM] [9] [9].
— To exit the Station Programming mode: Press [PROGRAM].
Conditions
• Alarm button is available for the Manager only.
PT
Press the desired Flexible (CO)
button you wish to assign as the
Alarm button.
Dial 77.
(CO)
Press STORE.
AUTO DIAL
STORE
7 7
The STORE indicator lights.
The display shows the initial programming mode.
<PT Display Example>
ALARM
Page 60
Station Programming
60 User Manual
Alert Button (Assignment)
Allows you to assign a Flexible (CO) button as an Alert button.
— Be sure that you are in the Station Programming mode: Press [PROGRAM] [9] [9].
— To exit the Station Programming mode: Press [PROGRAM].
PT
Press the desired Flexible (CO)
button you wish to assign as the
Alert button.
Dial 97.
(CO)
Press STORE.
AUTO DIAL
STORE
9 7
The STORE indicator lights.
The display shows the initial programming mode.
<PT Display Example>
ALERT
Page 61

Station Programming
User Manual 61
Answer Button (Assignment)
Allows you to assign a Flexible (CO, DSS, PF) button as an Answer button.
— Be sure that you are in the Station Programming mode: Press [PROGRAM] [9] [9].
— To exit the Station Programming mode: Press [PROGRAM].
PT
Press the desired Flexible
(CO, DSS, PF) button you
wish to assign as the
Answer button.
Dial 94.
Press STORE.
AUTO DIAL
STORE
9 4
The STORE indicator lights.
The display shows the initial programming mode.
<PT Display Example>
Answer
Page 62
Station Programming
62 User Manual
Conference (CONF) Button (Assignment)
Allows you to assign a Flexible (CO, DSS, PF) button as a Conference (CONF) button.
— Be sure that you are in the Station Programming mode: Press [PROGRAM] [9] [9].
— To exit the Station Programming mode: Press [PROGRAM].
PT
Press the desired Flexible (CO,
DSS, PF) button you wish to
assign as the Conference button.
Dial 70.
Press STORE.
AUTO DIAL
STORE
0
7
<PT Display Example>
The STORE indicator lights.
The display shows the initial programming
mode.
Conference
Page 63

Station Programming
User Manual 63
DAY/NIGHT Button (Assignment)
Allows you to assign a Flexible (CO, DSS) button as a DAY/NIGHT button.
— Be sure that you are in the Station Programming mode: Press [PROGRAM] [9] [9].
— To exit the Station Programming mode: Press [PROGRAM].
PT
Press the desired Flexible (CO, DSS)
button you wish to assign as the
DAY/NIGHT button.
Dial 73.
Press STORE.
AUTO DIAL
STORE
37
The STORE indicator lights.
The display shows the initial programming
mode.
<PT Display Example>
DAY/NIGHT
Page 64

Station Programming
64 User Manual
Direct Station Selection (DSS) Button (Assignment)
Allows you to assign a Flexible (CO, DSS) button as a DSS button.
— Be sure that you are in the Station Programming mode: Press [PROGRAM] [9] [9].
— To exit the Station Programming mode: Press [PROGRAM].
Conditions
• DSS buttons are provided on a DSS Console without default setting. You can assign the
desired extension number or feature on each DSS button from the paired PT.
• You cannot enter non-existent extension numbers.
<PT Display Example>
<PT Display Example>
(-xxxx:extension number)
To erase an incorrect entry, press the CLR (S2) button or
the TRANSFER (CLEAR) button.
(The TRANSFER button becomes the CLEAR button in the
Station Programming mode.)
PT
Press the desired Flexible
(CO, DSS) button you wish
to assign as a DSS button.
Dial 1.
Press STORE.
Enter the extension number
(3 or 4 digits).
extension no.
AUTO DIAL
STORE
1
The STORE indicator lights.
The display shows the initial
programming mode.
EXT
CLR
EXT xxxx
CLR
Page 65
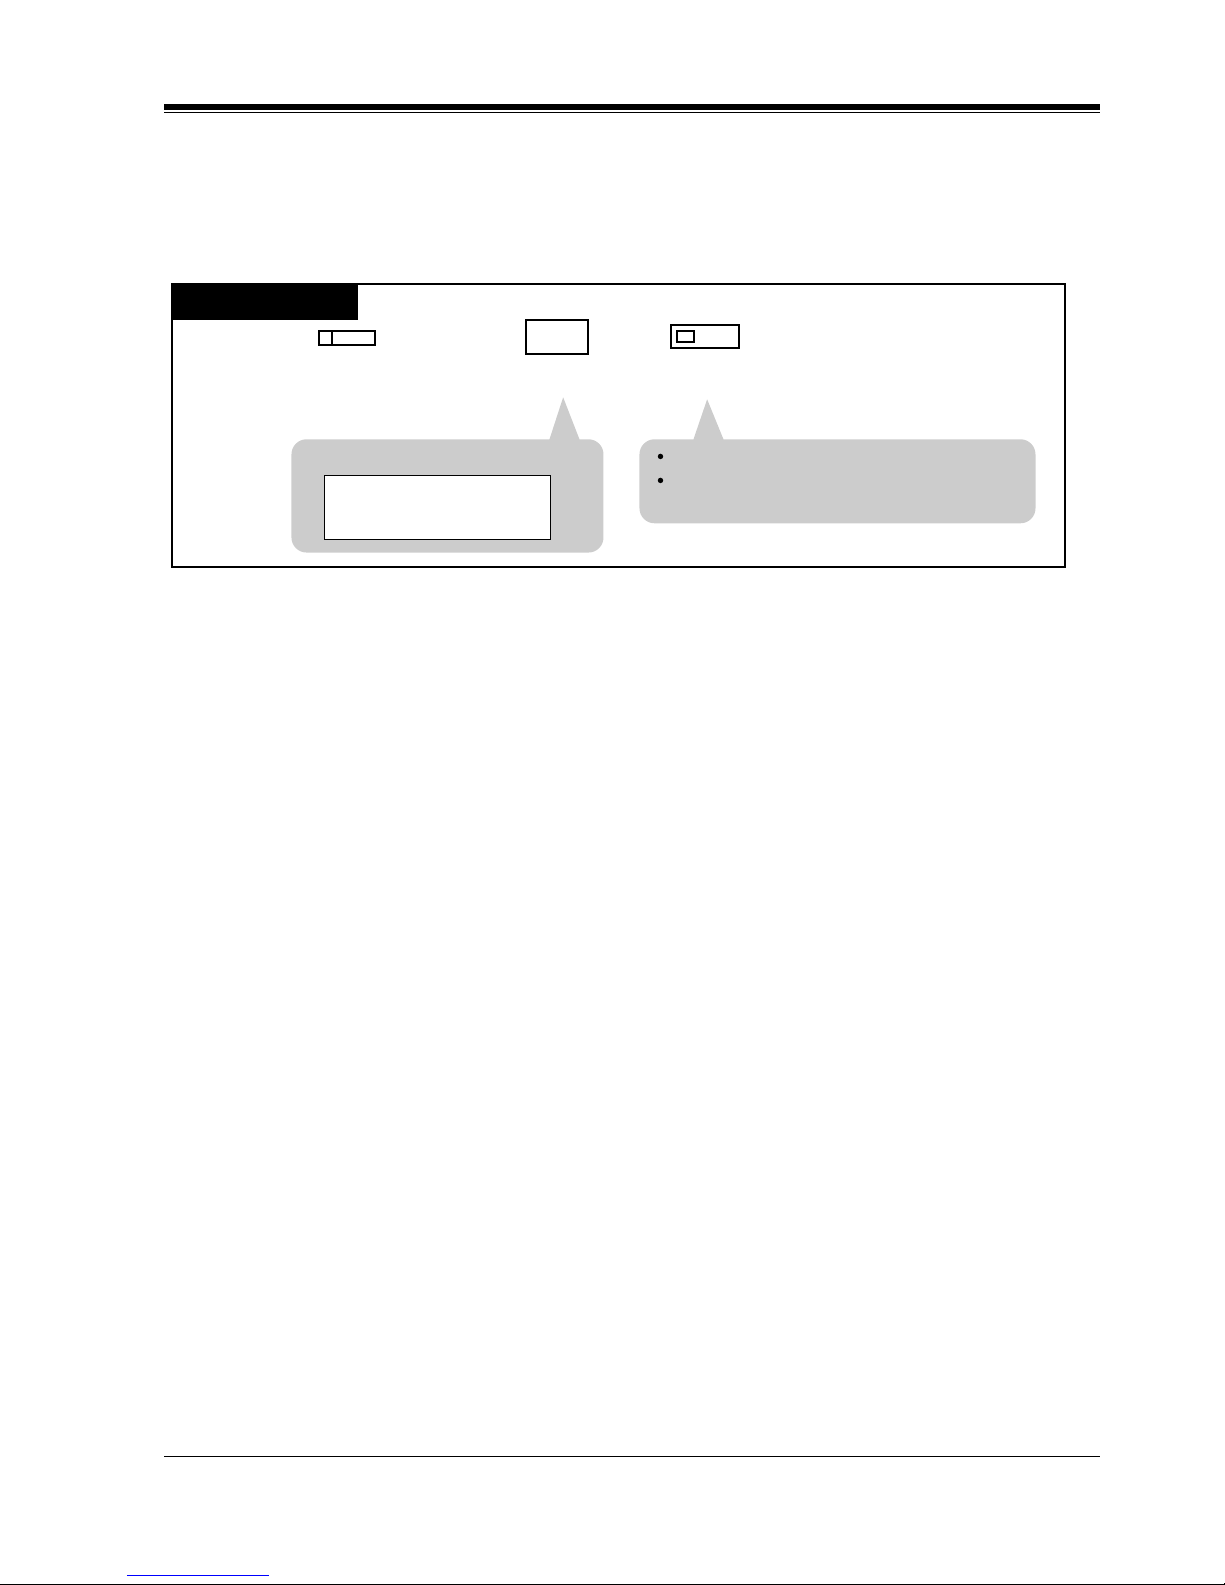
Station Programming
User Manual 65
FWD/DND Button (Assignment)
Allows you to assign a Flexible (CO, DSS, PF) button as an FWD/DND button.
— Be sure that you are in the Station Programming mode: Press [PROGRAM] [9] [9].
— To exit the Station Programming mode: Press [PROGRAM].
PT
Press the desired Flexible (CO,
DSS, PF) button you wish to
assign as the FWD/DND button.
Dial 4.
Press STORE.
AUTO DIAL
STORE
4
The STORE indicator lights.
The display shows the initial programming
mode.
<PT Display Example>
FWD/DND
Page 66
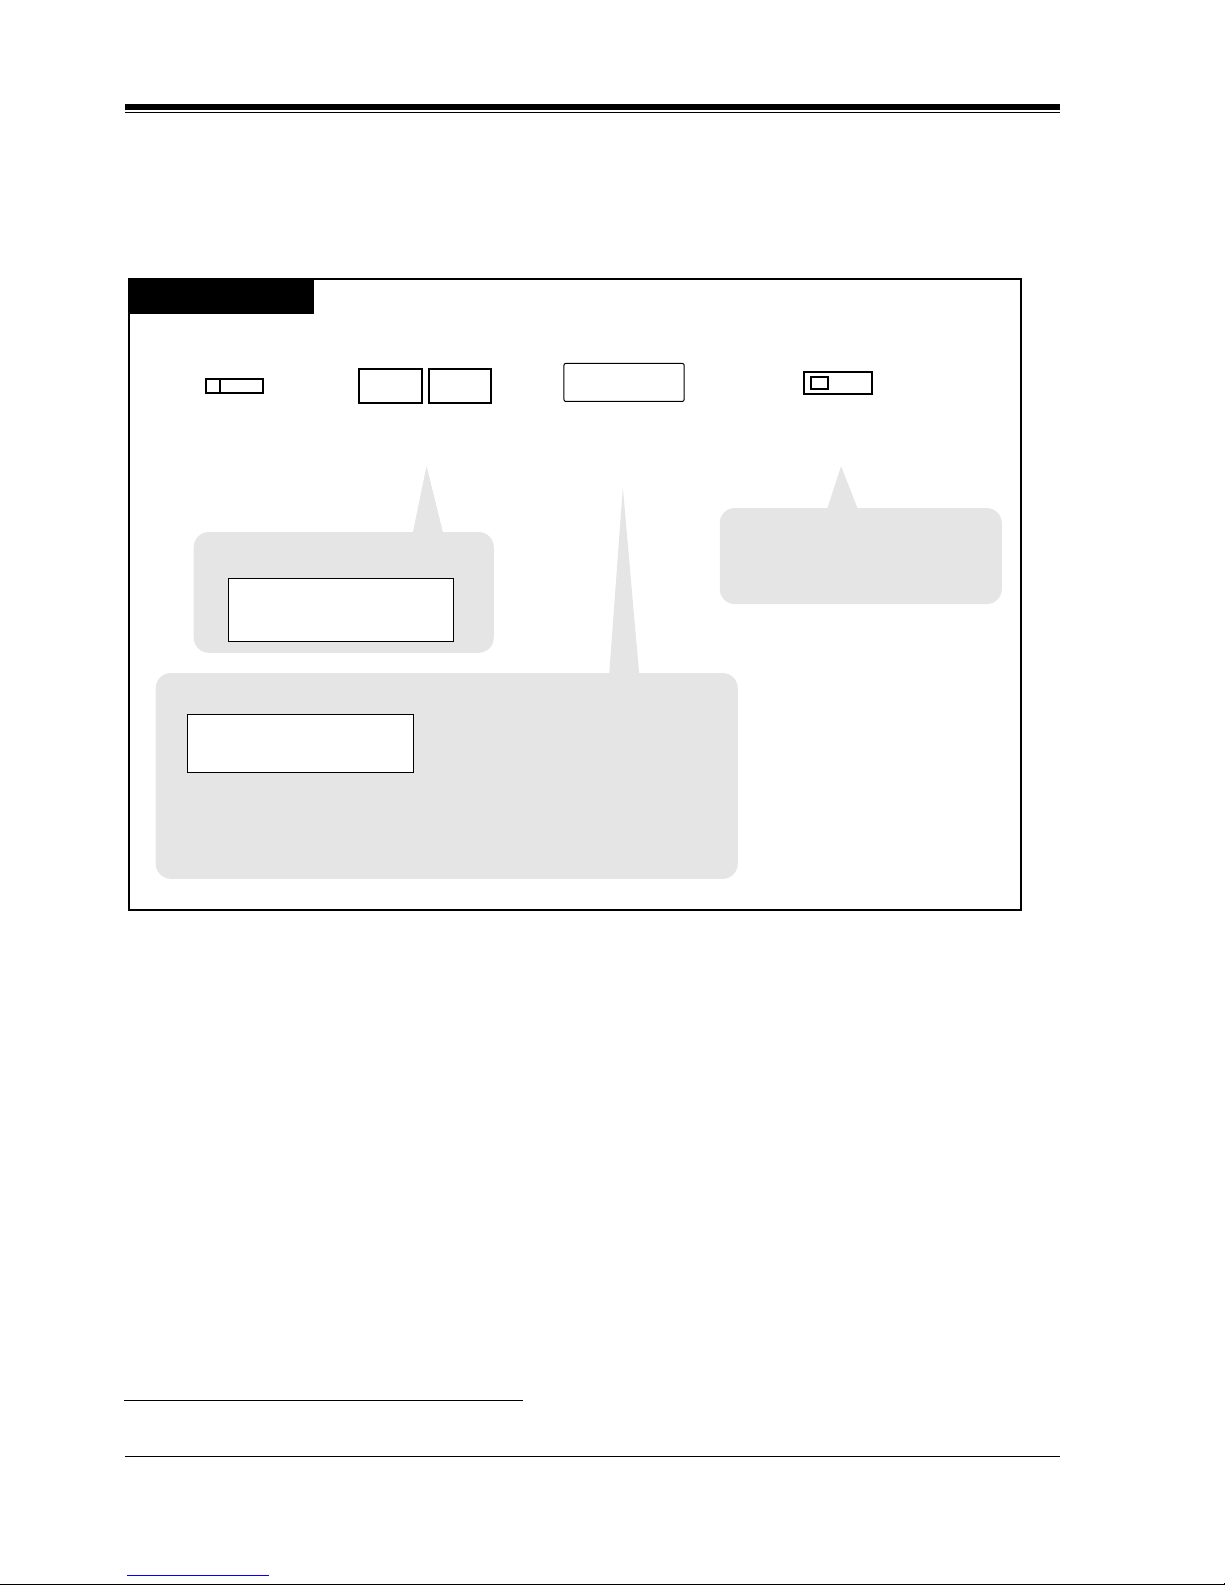
Station Programming
66 User Manual
Group FWD Button (Assignment)
Allows you to assign a Flexible (CO, DSS) button as a Group FWD button.
—Be sure that you are in the Station Programming mode: Press [PROGRAM] [9] [9].
— To exit the Station Programming mode: Press [PROGRAM].
Conditions
• You cannot enter non-existent extension or a floating directory number.
*1
Please refer to "Floating Station" of Section "1.3 System Features" in the Features Guide.
Programming Guide References
• 3.5 Incoming Group
– FDN
– Group Type
*1
A Floating Directory Number (FDN) is a virtual extension number which appears to be an extension.
PT
Dial 98. Enter FDN of Incoming
group (3 or 4 digits).
FDN
Press STORE.
AUTO DIAL
STORE
<PT Display Example>
<PT Display Example>
(-xxxx:Incoming group number)
• To erase an incorrect entry, press the CLR (S2) button or
the TRANSFER (CLEAR) button.
(The TRANSFER button becomes the CLEAR button in the
Station Programming mode.)
G-FWD FDN-
CLR
G-FWD FDN-xxxx
CLR
• The STORE indicator lights.
• The display shows the initial
programming mode.
9 8
Press the desired Flexible
(CO, DSS) button you wish to
assign as the Group FWD button.
Page 67
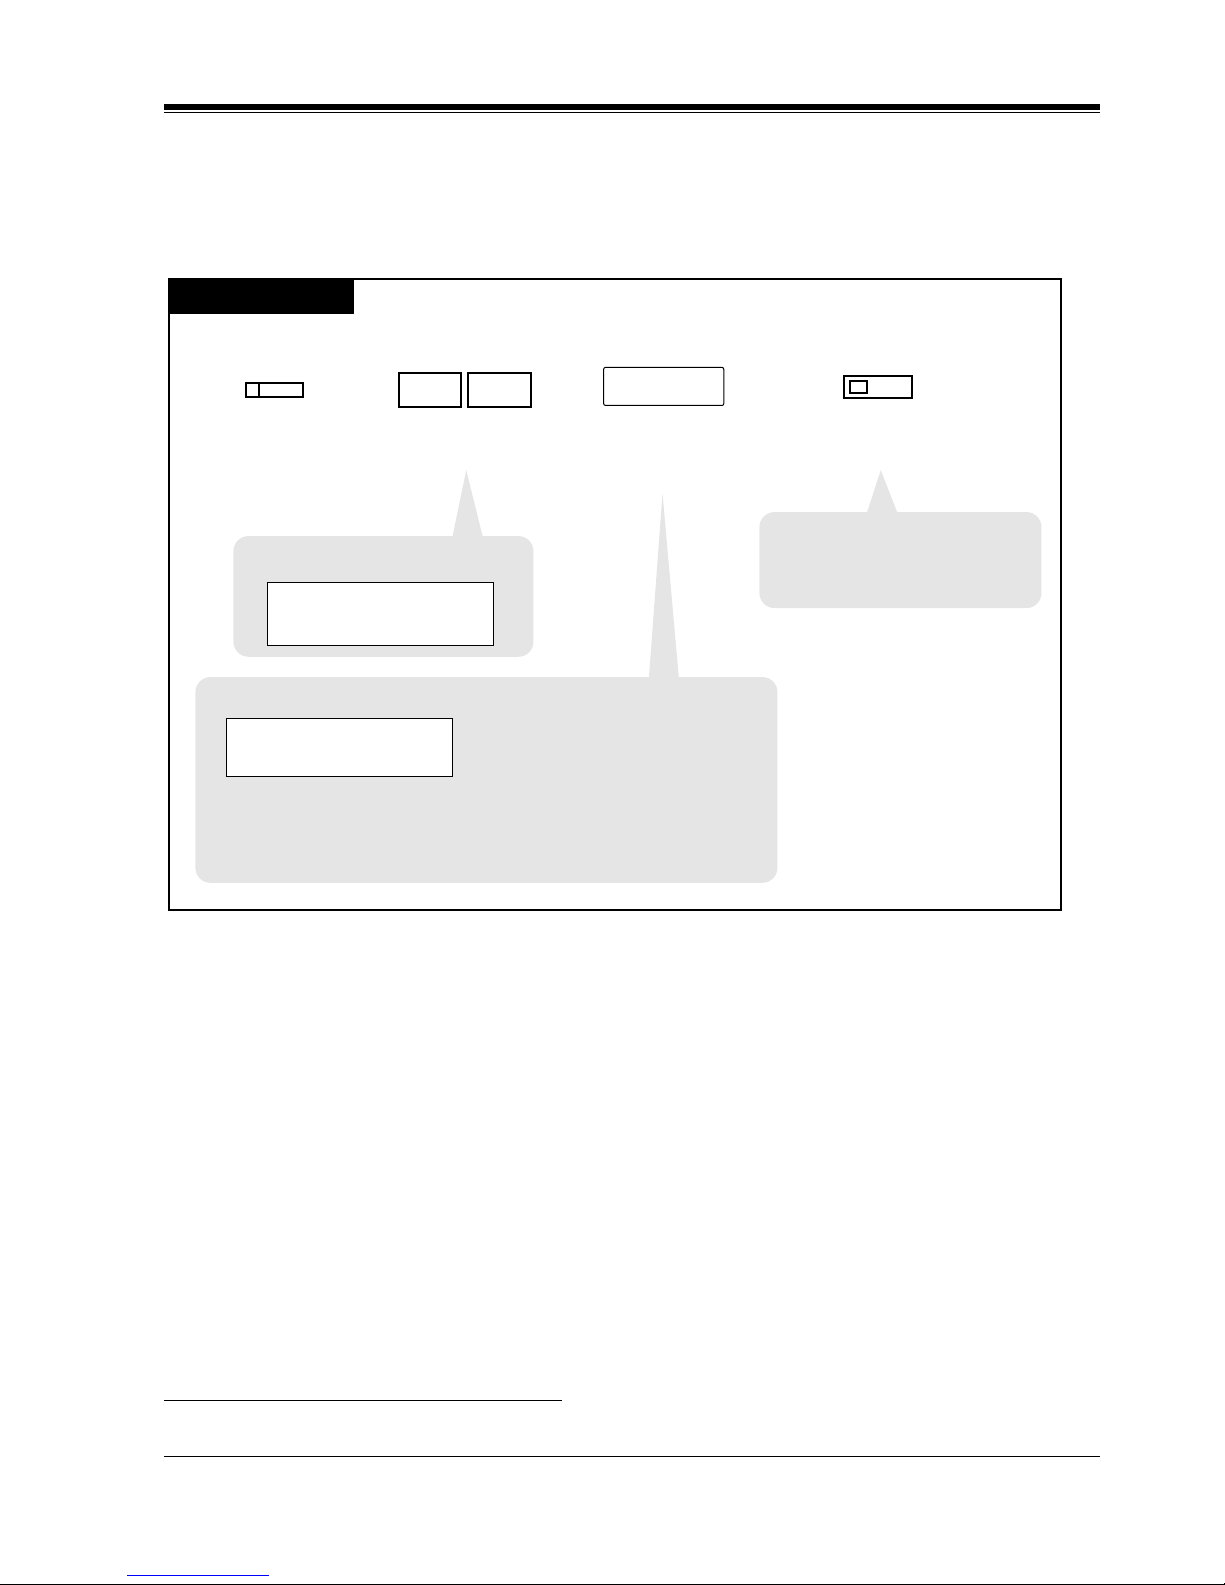
Station Programming
User Manual 67
Group Log-In / Log-Out Button (Assignment)
Allows you to assign a Flexible (CO) button as a Group Log-In / Log-Out button.
— Be sure that you are in the Station Programming mode: Press [PROGRAM] [9] [9].
— To exit the Station Programming mode: Press [PROGRAM].
Conditions
• You cannot enter non-existent extension or a floating directory number.
*1
Please refer to "Floating Station" of Section "1.3 System Features" in the Features Guide.
Programming Guide References
• 3.5 Incoming Group
– FDN
– Group Type
*1
A Floating Directory Number (FDN) is a virtual extension number which appears to be an extension.
•
PT
Dial 79. Enter FDN of Incoming
group (3 or 4 digits).
FDN
Press the desired Flexible
(CO) button you wish to
assign as the Group
Log-In / Log-Out button.
Press STORE.
AUTO DIAL
STORE
<PT Display Example>
<PT Display Example>
(-xxxx:Incoming group number)
To erase an incorrect entry, press the CLR (S2) button or
the TRANSFER (CLEAR) button.
(The TRANSFER button becomes the CLEAR button in the
Station Programming mode.)
G-Login FDN-
CLR
G-Login FDN-xxxx
CLR
• The STORE indicator lights.
• The display shows the initial
programming mode.
7 9
(CO)
Page 68
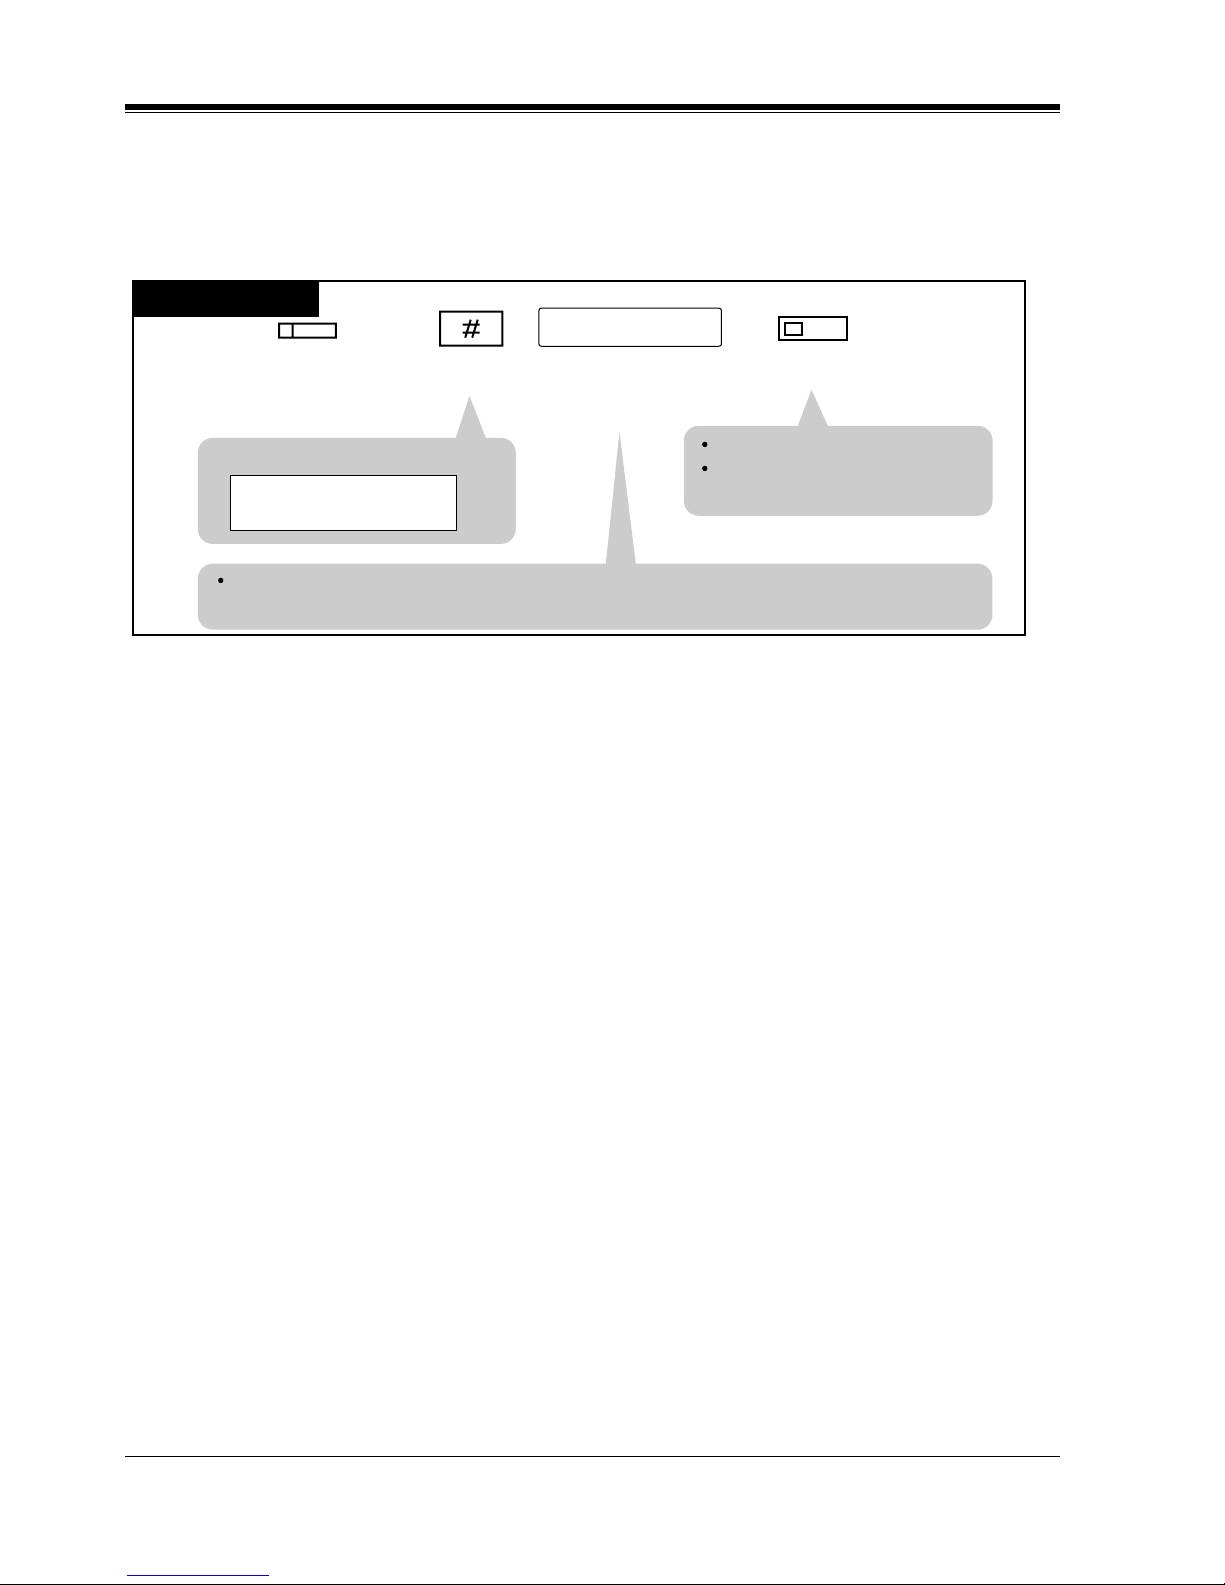
Station Programming
68 User Manual
Group-CO (G-CO) Button (Assignment)
Allows you to assign a Flexible (CO, DSS) button as a Group-CO button.
— Be sure that you are in the Station Programming mode: Press [PROGRAM] [9] [9].
— To exit the Station Programming mode: Press [PROGRAM].
Conditions
• A G-CO button assigned to a DSS button is available for monitoring the call activity only,
not available for making or receiving a call.
PT
Press the desired Flexible
(CO, DSS) button you wish
to assign as a G-CO button.
Dial #.
Press STORE.
Enter the trunk group
number
(01 through 48).
trunk group no.
AUTO DIAL
STORE
The STORE indicator lights.
The display shows the initial
programming mode.
To erase an incorrect entry, press the CLR (S2)button or the TRANSFER (CLEAR)button.
(The TRANSFER button becomes the CLEAR button in the Station Programming mode.)
<PT Display Example>
TRK GRP-
CLR
Page 69
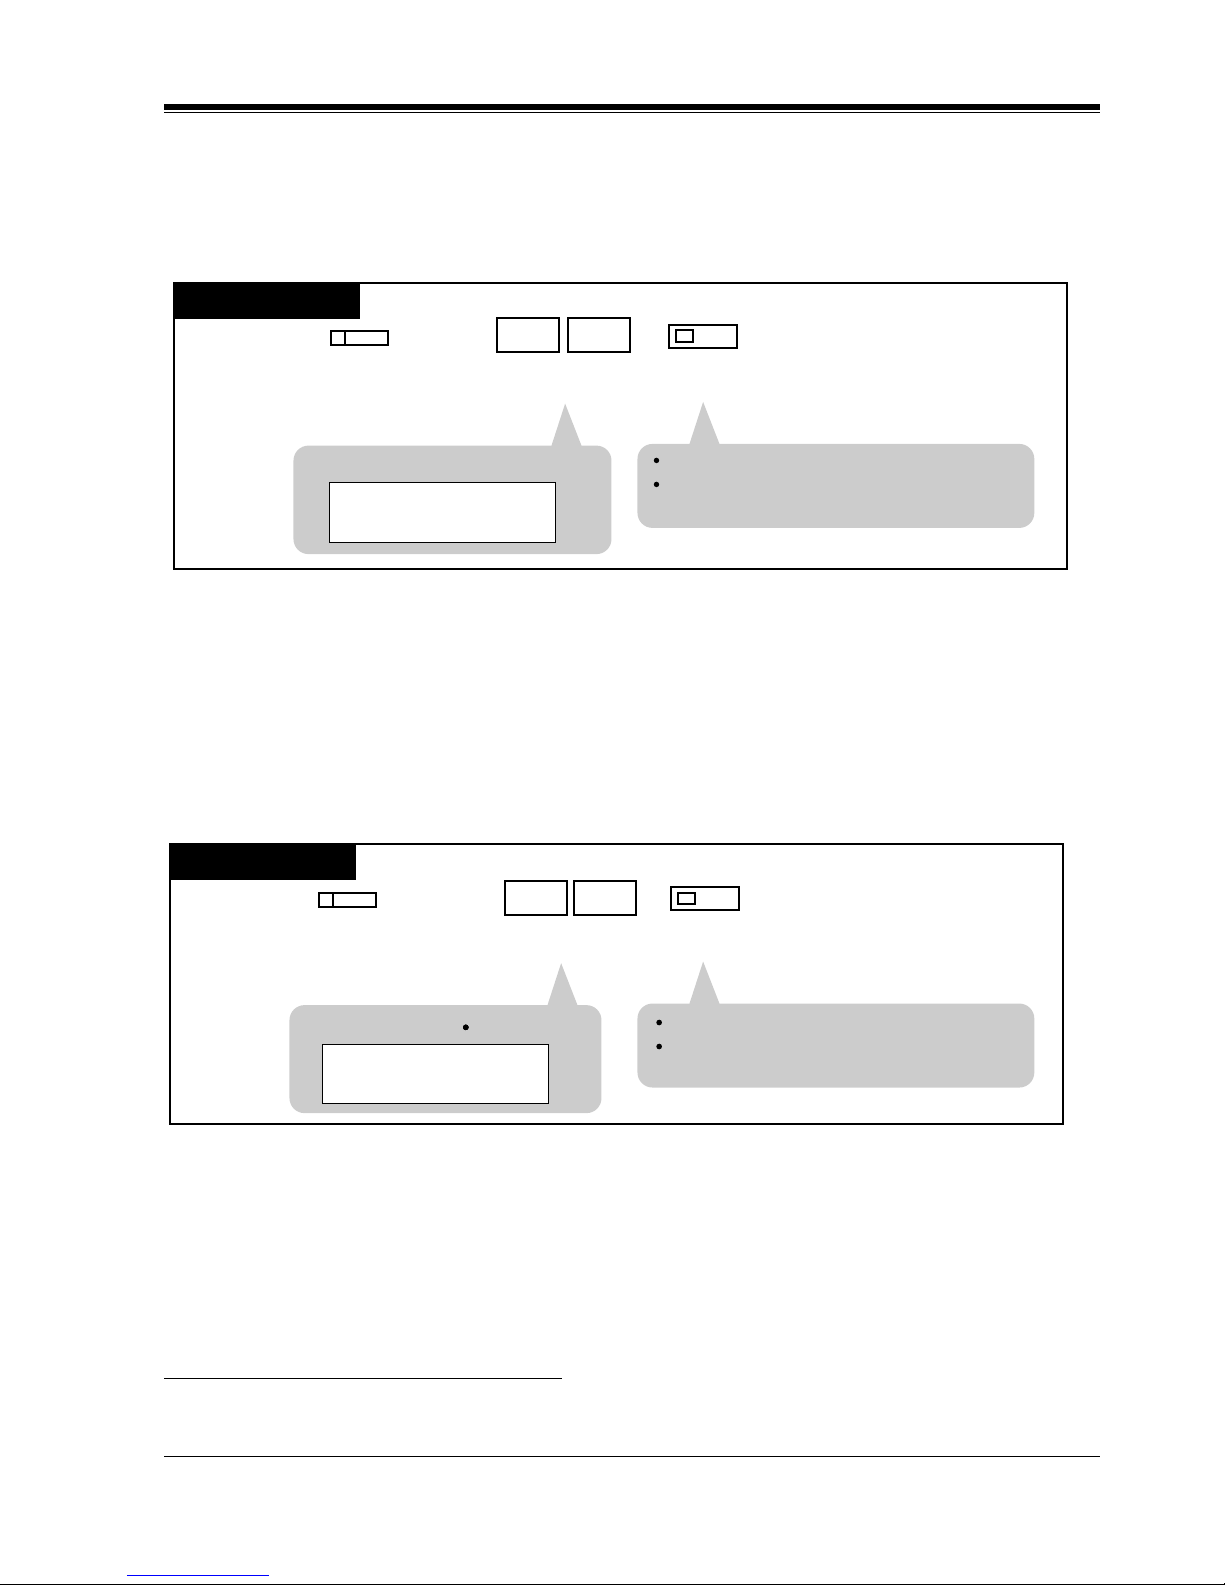
Station Programming
User Manual 69
Live Call Screening (LCS) Button (Assignment)
*1
Allows you to assign a Flexible (CO, DSS) button as a Live Call Screening (LCS) button.
— Be sure that you are in the Station Programming mode: Press [PROGRAM] [9] [9].
— To exit the Station Programming mode: Press [PROGRAM].
Live Call Screening (LCS) Cancel Button (Assignment)
*1
Allows you to assign a Flexible (CO, DSS) button as a Live Call Screening (LCS) Cancel
button.
— Be sure that you are in the Station Programming mode: Press [PROGRAM] [9] [9].
— To exit the Station Programming mode: Press [PROGRAM].
*1
Available when the Digital Hybrid System is connected to a Digital Proprietary Telephone capable Panasonic Voice Processing
System (one that supports Digital Proprietary Telephone [DPT] integration; e.g., KX-TVS100).
PT
Press the desired Flexible (CO,
DSS) button you wish to assign
as the Live Call Screening button.
Dial 92.
Press STORE.
AUTO DIAL
STORE
2
9
<PT Display Example>
The STORE indicator lights.
The display shows the initial programming
mode.
LCS
PT
Press the desired Flexible (CO, DSS)
button you wish to assign as the
Live Call Screening Cancel button.
Dial 93.
Press STORE.
AUTO DIAL
STORE
3
9
The STORE indicator lights.
The display shows the initial programming
mode.
<PT Display Example>
LCS Cancel
Page 70
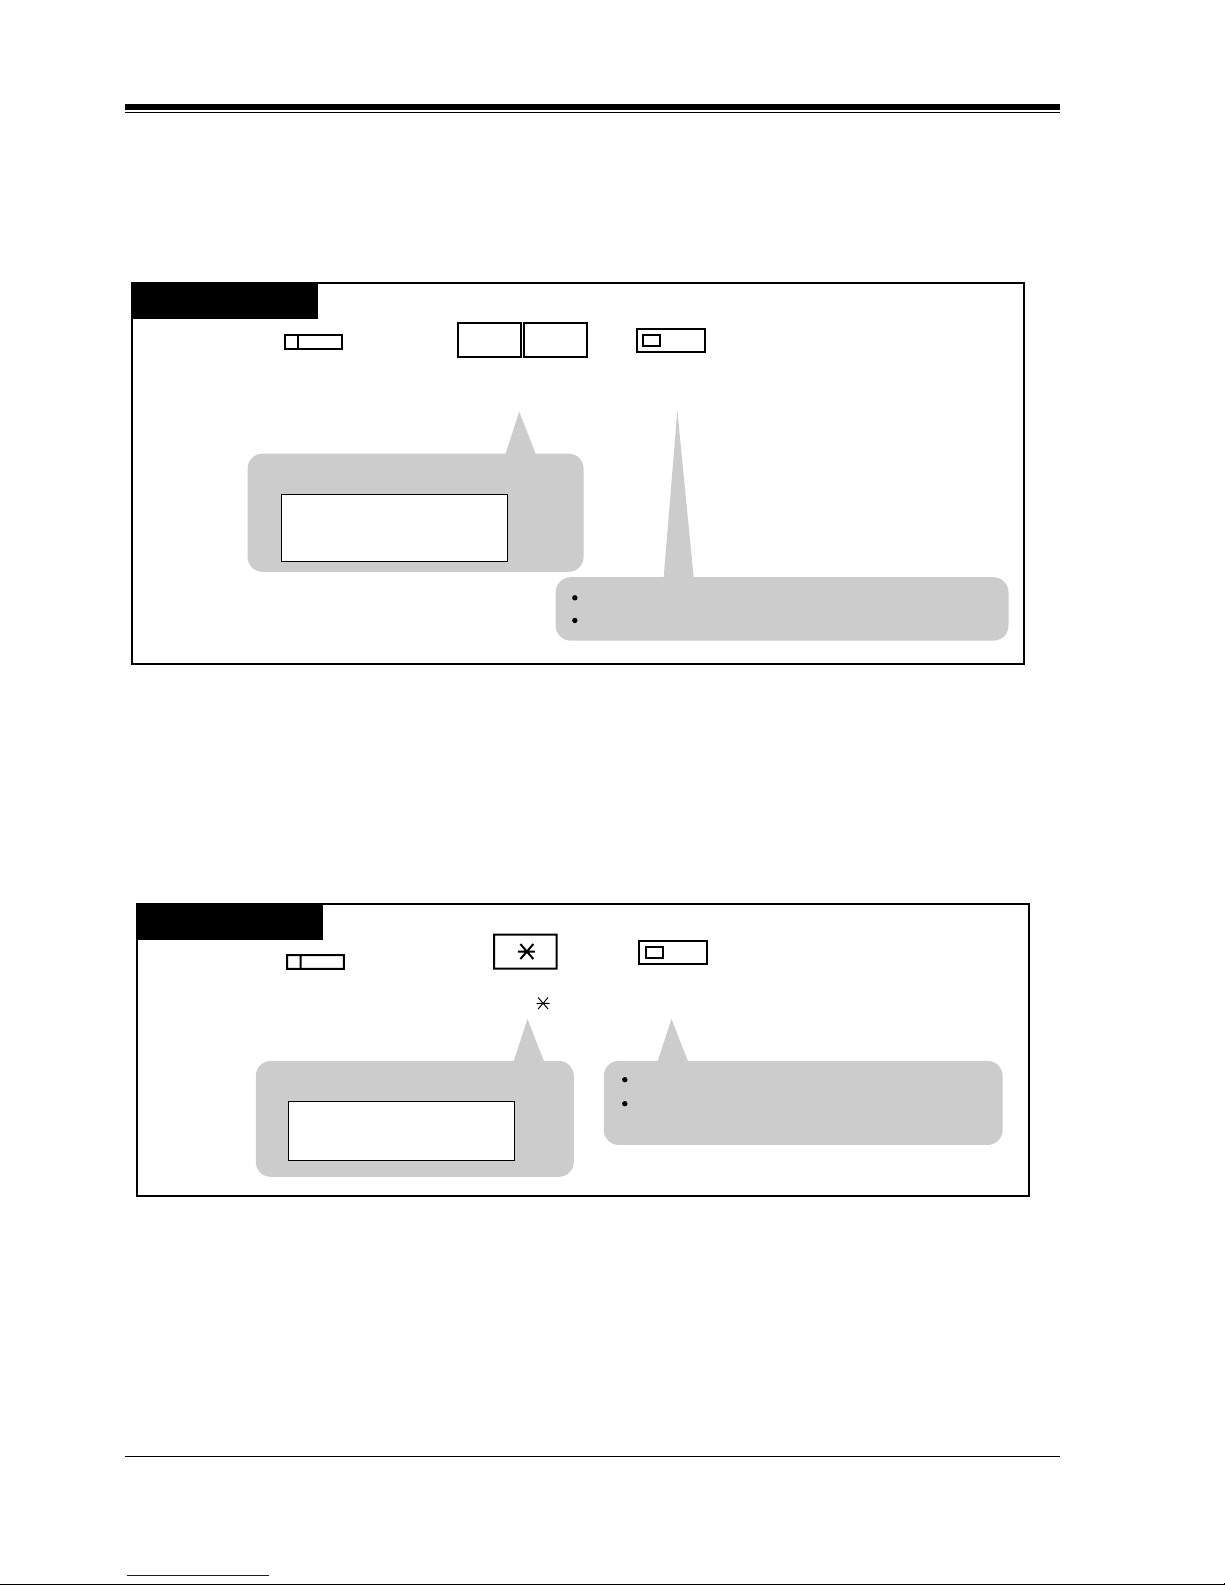
Station Programming
70 User Manual
Log-In / Log-Out Button (Assignment)
Allows you to assign a Flexible (CO) button as a Log-In / Log-Out button.
— Be sure that you are in the Station Programming mode: Press [PROGRAM] [9] [9].
— To exit the Station Programming mode: Press [PROGRAM].
Loop-CO (L-CO) Button (Assignment)
Allows you to assign a Flexible (CO) button as a Loop-CO button.
— Be sure that you are in the Station Programming mode: Press [PROGRAM] [9] [9].
— To exit the Station Programming mode: Press [PROGRAM].
PT
Press the desired Flexible (CO)
button you wish to assign as
the Log-In/Log-Out button.
Dial 71.
Press STORE.
AUTO DIAL
(CO )
STORE
1
7
The STORE indicator lights.
The display shows the initial programming mode.
<PT Display Example>
Login/Logout
PT
Press the desired Flexible
(CO) button you wish to assign
as the L-CO button.
Press STORE.
Dial .
AUTO DIAL
(CO)
STORE
The STORE indicator lights.
The display shows the initial programming
mode.
<PT Display Example>
Loop-CO
Page 71
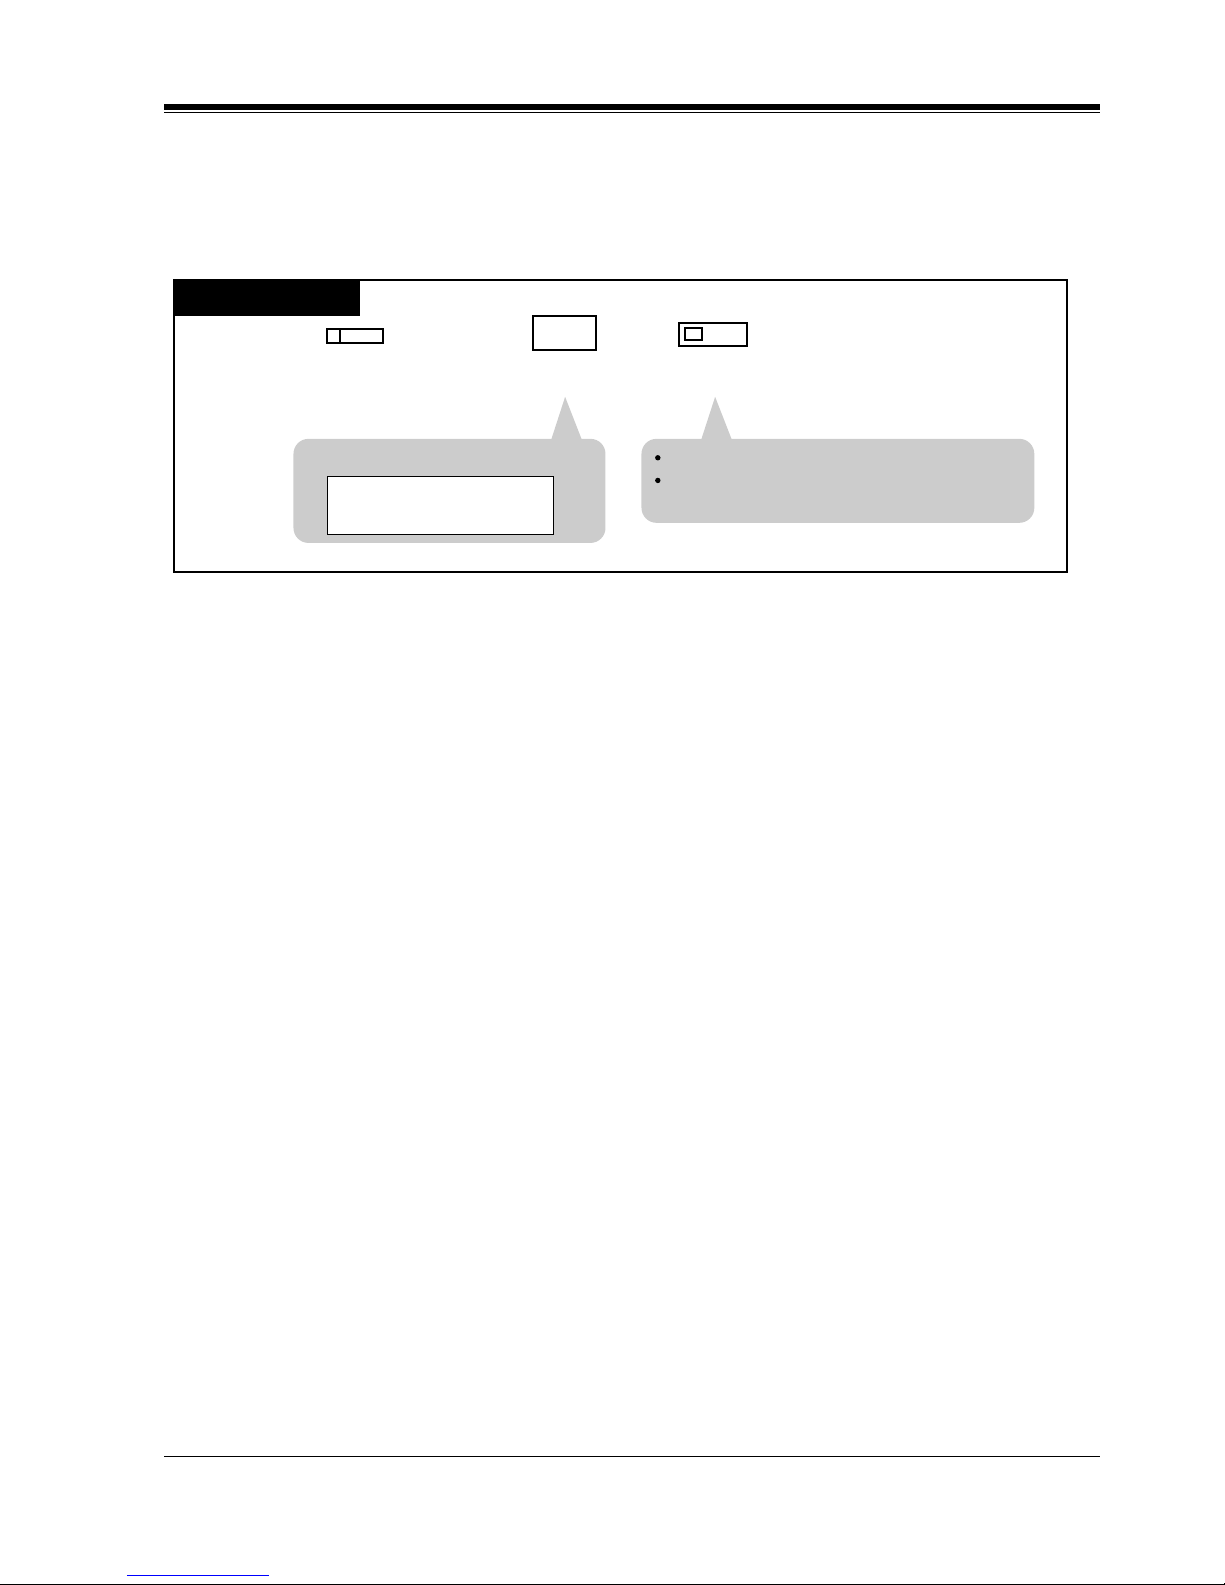
Station Programming
User Manual 71
Message Waiting (MESSAGE) Button (Assignment)
Allows you to assign a Flexible (CO, DSS) button as a Message Waiting (MESSAGE) button.
— Be sure that you are in the Station Programming mode: Press [PROGRAM] [9] [9].
— To exit the Station Programming mode: Press [PROGRAM].
PT
Press the desired Flexible(CO,
DSS) button you wish to assign
as the Message Waiting button,
Dial 3
Press STORE.
AUTO DIAL
STORE
3
The STORE indicator lights.
The display shows the initial programming
mode.
<PT Display Example>
Message Waiting
Page 72
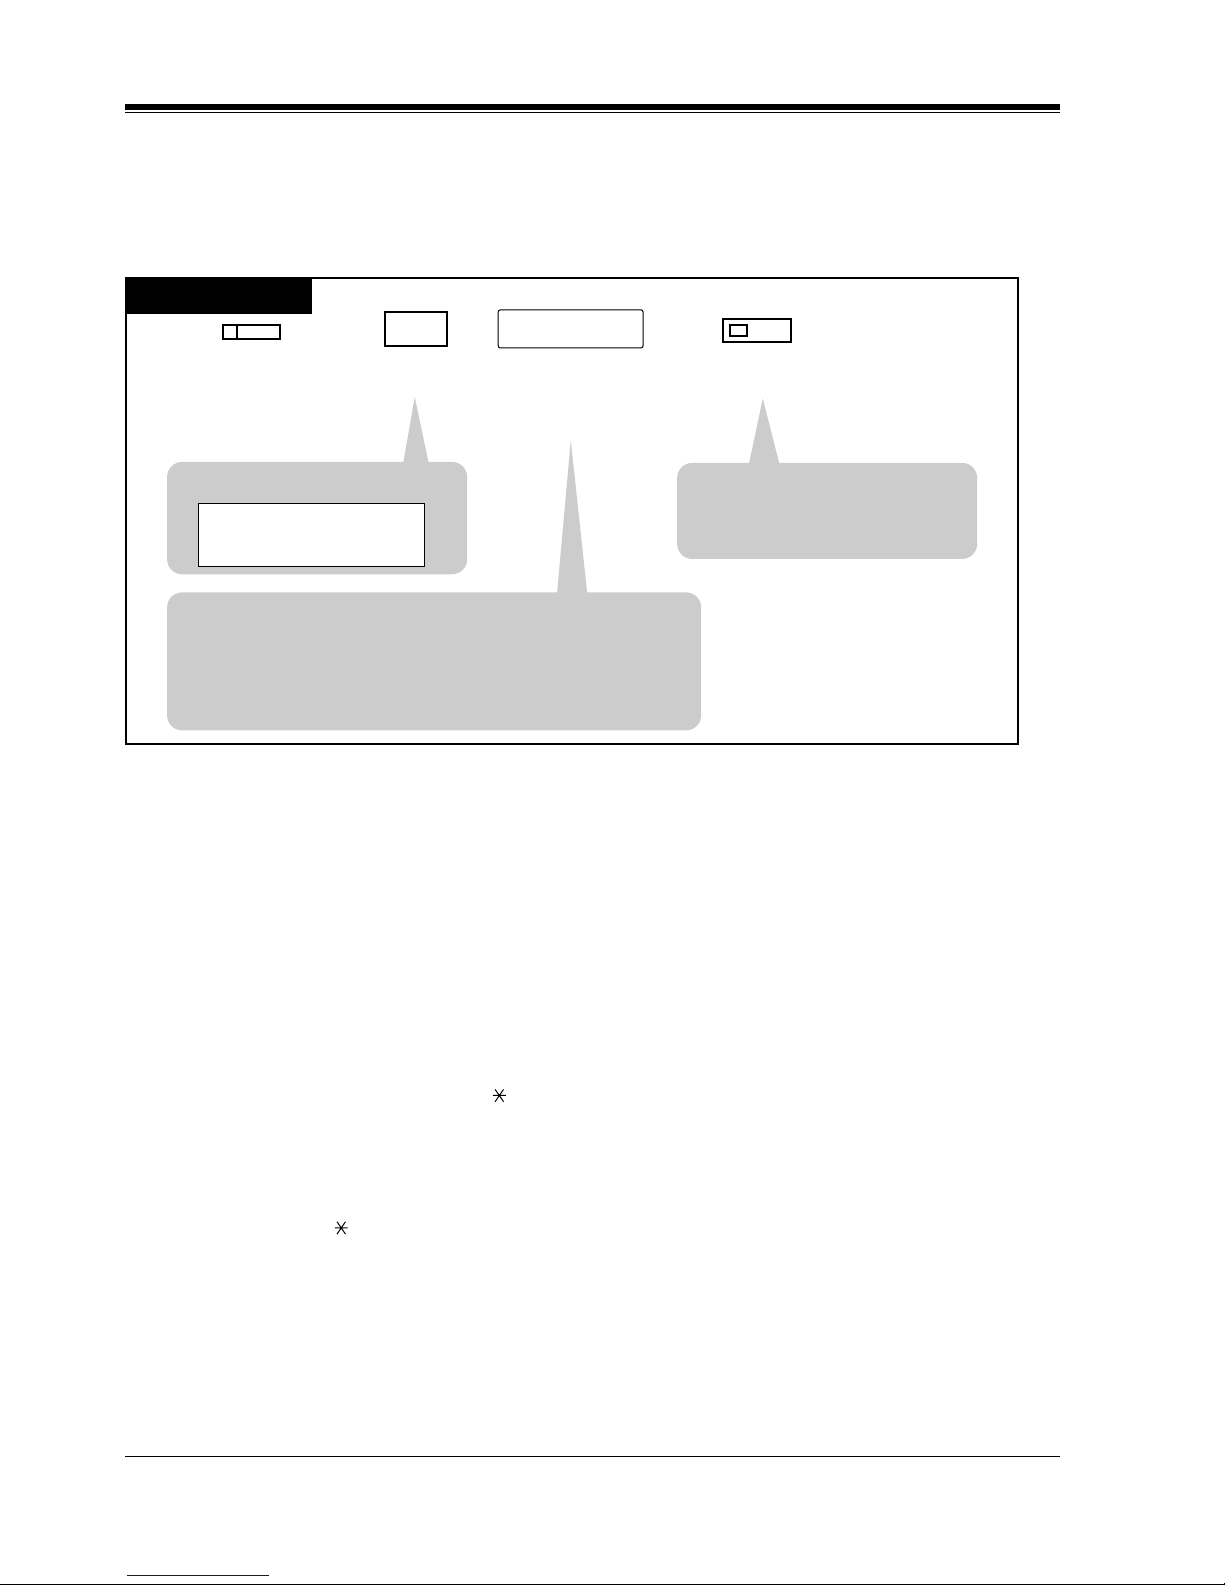
Station Programming
72 User Manual
One-Touch Dialing Button (Assignment)
Allows you to assign a Flexible (CO, DSS, PF) button as a One-Touch Dialing button.
— Be sure that you are in the Station Programming mode: Press [PROGRAM] [9] [9].
— To exit the Station Programming mode: Press [PROGRAM].
Conditions
• The number can be an extension number, telephone number or a feature number. Up to 24
digits can be stored in a One-Touch Dialing button.
• To store the telephone number of an outside party, a line access code (9, or 801 through 848)
must be stored as the leading digit.
• You can store a number consisting of 25 digits or more by dividing it and assigning it in two
One-Touch Dialing buttons. In this case, the line access code should be stored in the first
button.
• You can use 0 through 9, , #, PAUSE, FLASH, CONF and INTERCOM for storing.
FLASH: hook flash
PAUSE: pause
CONF: — (hyphen)
INTERCOM: for secret dialing
#: for changing the dialing mode (Pulse to Tone)
• KX-T7220 and KX-T7250 telephones do not have a PAUSE button. The PROGRAM
button can be used instead of the PAUSE button while programming.
PT
Press the desired Flexible
(CO, DSS, PF) button you
wish to assign as a
One-Touch Dialing button.
Dial 2.
Press STORE.
Enter the desired number
(extension number,
phone number, etc.).
desired number
AUTO DIAL
STORE
2
• The STORE indicator lights.
• The display shows the initial
programming mode.
<PT Display Example>
• Up to 24 digits can be stored.
• To erase an incorrect entry, press the CLR (S2) button or the
TRANSFER (CLEAR)button.
(The TRANSFER button becomes the CLEAR button in the
Station Programming mode.)
CLR
Page 73
Station Programming
User Manual 73
Phantom Button (Assignment)
Allows you to assign a Flexible (CO) button as a Phantom button.
— Be sure that you are in the Station Programming mode: Press [PROGRAM] [9] [9].
— To exit the Station Programming mode: Press [PROGRAM].
Conditions
• The phantom extension numbers must be assigned by System Programming <Section 5.3
Phantom Extension in the Programming Guide> before assigning the Phantom button.
• If you assign the Phantom button to one of the CO buttons (CO 13 through CO 24) on a PT
with 24 CO buttons, such as KX-T7230, and change the telephone to a PT with 12 CO
buttons, such as KX- T7235, you must re-program the setting because CO 13 through CO
24 are not provided with the PT with 12 CO buttons. If you do not change the setting, the
phantom extension call appears on the INTERCOM (ICM type PT) or PDN (DN type PT)
button.
• More than one identical Phantom button cannot be assigned on a single extension.
<PT Display Example>
<PT Display Example>
(-xxxx:Phantom extension number)
To erase an incorrect entry, press the CLR (S2) button or the
TRANSFER (CLEAR) button.
(The TRANSFER button becomes the CLEAR button in the Station
Programming mode.)
Phantom:
CLR
Phantom:xxxx
CLR
PT
Press the desired Flexible
(CO) button you wish to
assign as a Phantom button.
Dial 72.
Press STORE.
Enter the phantom extension
number (3 or 4 digits).
phantom extension no.
AUTO DIAL
STORE
(CO)
7
2
The STORE indicator lights.
The display shows the initial
programming mode.
Page 74
Station Programming
74 User Manual
Primary Directory Number (PDN) Button (Assignment)
Allows you to assign a Flexible (CO) button as a PDN button.
— Be sure that you are in the Station Programming mode: Press [PROGRAM] [9] [9].
— To exit the Station Programming mode: Press [PROGRAM].
Conditions
• A PDN button can be assigned to any one of the flexible CO buttons on a PT by Station,
User or System Programming. Up to three PDN buttons can be assigned to any flexible CO
button on a PT. However, the first PDN button should always be assigned to the CO 01
button regardless of the number of the PDN buttons assigned.
PT
Press the desired Flexible (CO)
button you wish to assign as a
PDN button.
Dial 74.
Press STORE.
AUTO DIAL
(CO)
STORE
4
7
The STORE indicator lights.
The display shows the initial programming mode.
<PT Display Example>
PDN
Page 75
Station Programming
User Manual 75
Release Button (Assignment)
Allows you to assign a Flexible (CO, DSS, PF) button as a Release button.
— Be sure that you are in the Station Programming mode: Press [PROGRAM] [9] [9].
— To exit the Station Programming mode: Press [PROGRAM].
SAVE Button (Assignment)
Allows you to assign a Flexible (CO, DSS, PF) button as a SAVE button.
— Be sure that you are in the Station Programming mode: Press [PROGRAM] [9] [9].
— To exit the Station Programming mode: Press [PROGRAM].
PT
Press the desired Flexible (CO,
DSS, PF) button you wish to
assign as the Release button.
Dial 95.
Press STORE.
AUTO DIAL
STORE
9 5
The STORE indicator lights.
The display shows the initial programming mode.
<PT Display Example>
Release
PT
Press the desired Flexible (CO,
DSS, PF) button you wish to
assign as the SAVE button.
Dial 5.
Press STORE.
AUTO DIAL
STORE
5
The STORE indicator lights.
The display shows the initial programming mode.
<PT Display Example>
Save
Page 76
Station Programming
76 User Manual
Secondary Directory Number (SDN) Button (Assignment)
Allows you to assign a Flexible (CO) button as an SDN button.
— Be sure that you are in the Station Programming mode: Press [PROGRAM] [9] [9].
— To exit the Station Programming mode: Press [PROGRAM].
Conditions
• An SDN button should have its associated PDN button of another extension. This
assignment is available for extensions on which at least one PDN button is already assigned
(DN type PT). Otherwise, the SDN button dose not function.
• Up to three different SDN buttons can be assigned to a PT.
• Up to eight SDN buttons per PDN button can be assigned to eight different PTs respectively.
<PT Display Example>
<PT Display Example>
(-xxxx:extension number)
To erase an incorrect entry, press the CLR (S2) button or
the TRANSFER (CLEAR) button.
(The TRANSFER button becomes the CLEAR button in the
Station Programming mode.)
SDN—
CLR
SDN—xxxx
CLR
PT
Press the desired Flexible
(CO) button you wish to
assign as an SDN button.
Dial 75.
Press STORE.
Enter the extension number
(3 or 4 digits) of the owner
extension.
extension no. of the
owner extension
AUTO DIAL
(CO)
STORE
5
7
The STORE indicator lights.
The display shows the initial
programming mode.
Page 77
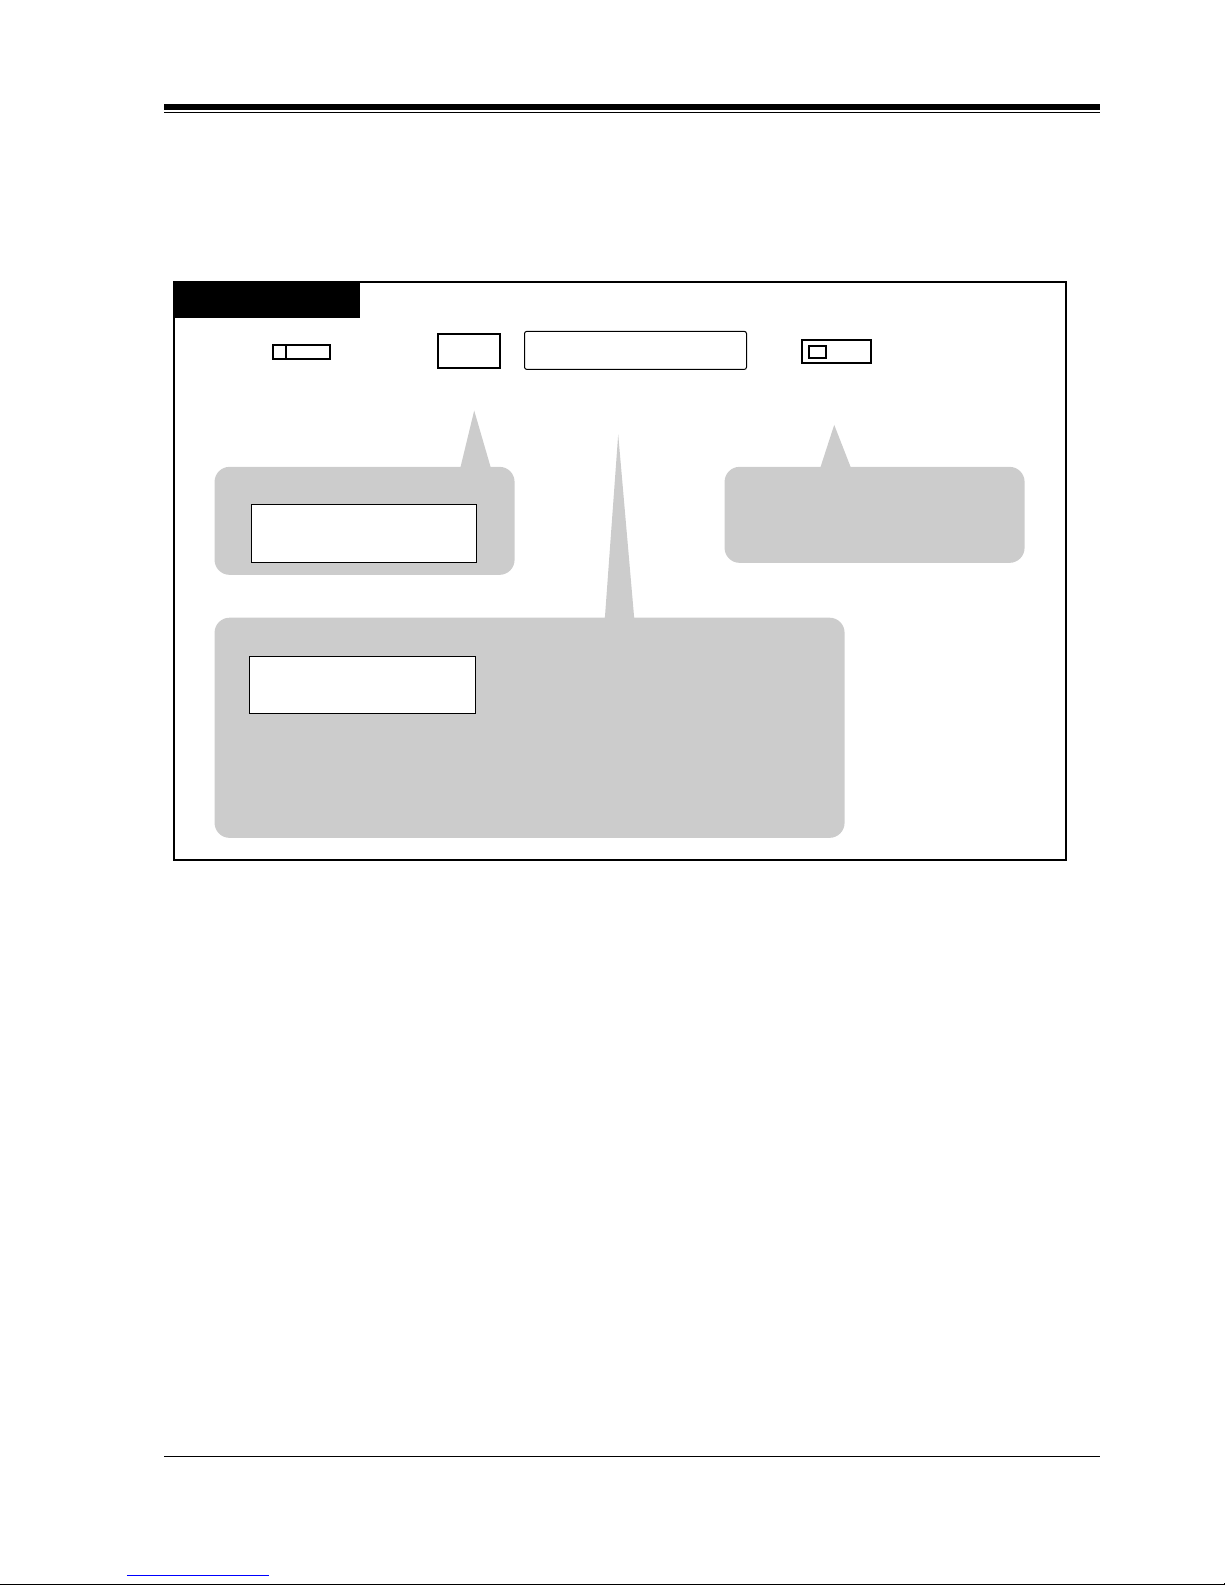
Station Programming
User Manual 77
Single-CO (S-CO) Button (Assignment)
Allows you to assign a Flexible (CO, DSS) button as a Single-CO button.
— Be sure that you are in the Station Programming mode: Press [PROGRAM] [9] [9].
— To exit the Station Programming mode: Press [PROGRAM].
Conditions
• You cannot assign the same CO line to more than one S-CO button on a PT.
• You can assign the same CO line to an S-CO button, a G-CO button and an L-CO button
respectively.
• An S-CO button assigned to a DSS button is available for monitoring the call activity only,
not available for making or receiving a call.
PT
Press the desired Flexible
(CO, DSS) button you wish
to assign as an S-CO button.
Dial 0.
Press STORE.
Enter the trunk port physical
number.
trunk port physical number
AUTO DIAL
STORE
0
• The STORE indicator lights.
• The display shows the initial
programming mode.
<PT Display Example>
<PT Display Example>
(-xxxxx: trunk port physical number)
• To erase an incorrect entry, press the CLR (S2) button or the
TRANSFER (CLEAR) button.
(The TRANSFER button becomes the CLEAR button in the Station
Programming mode.)
CO—
CLR
CLR
CO—xxxxx
Page 78
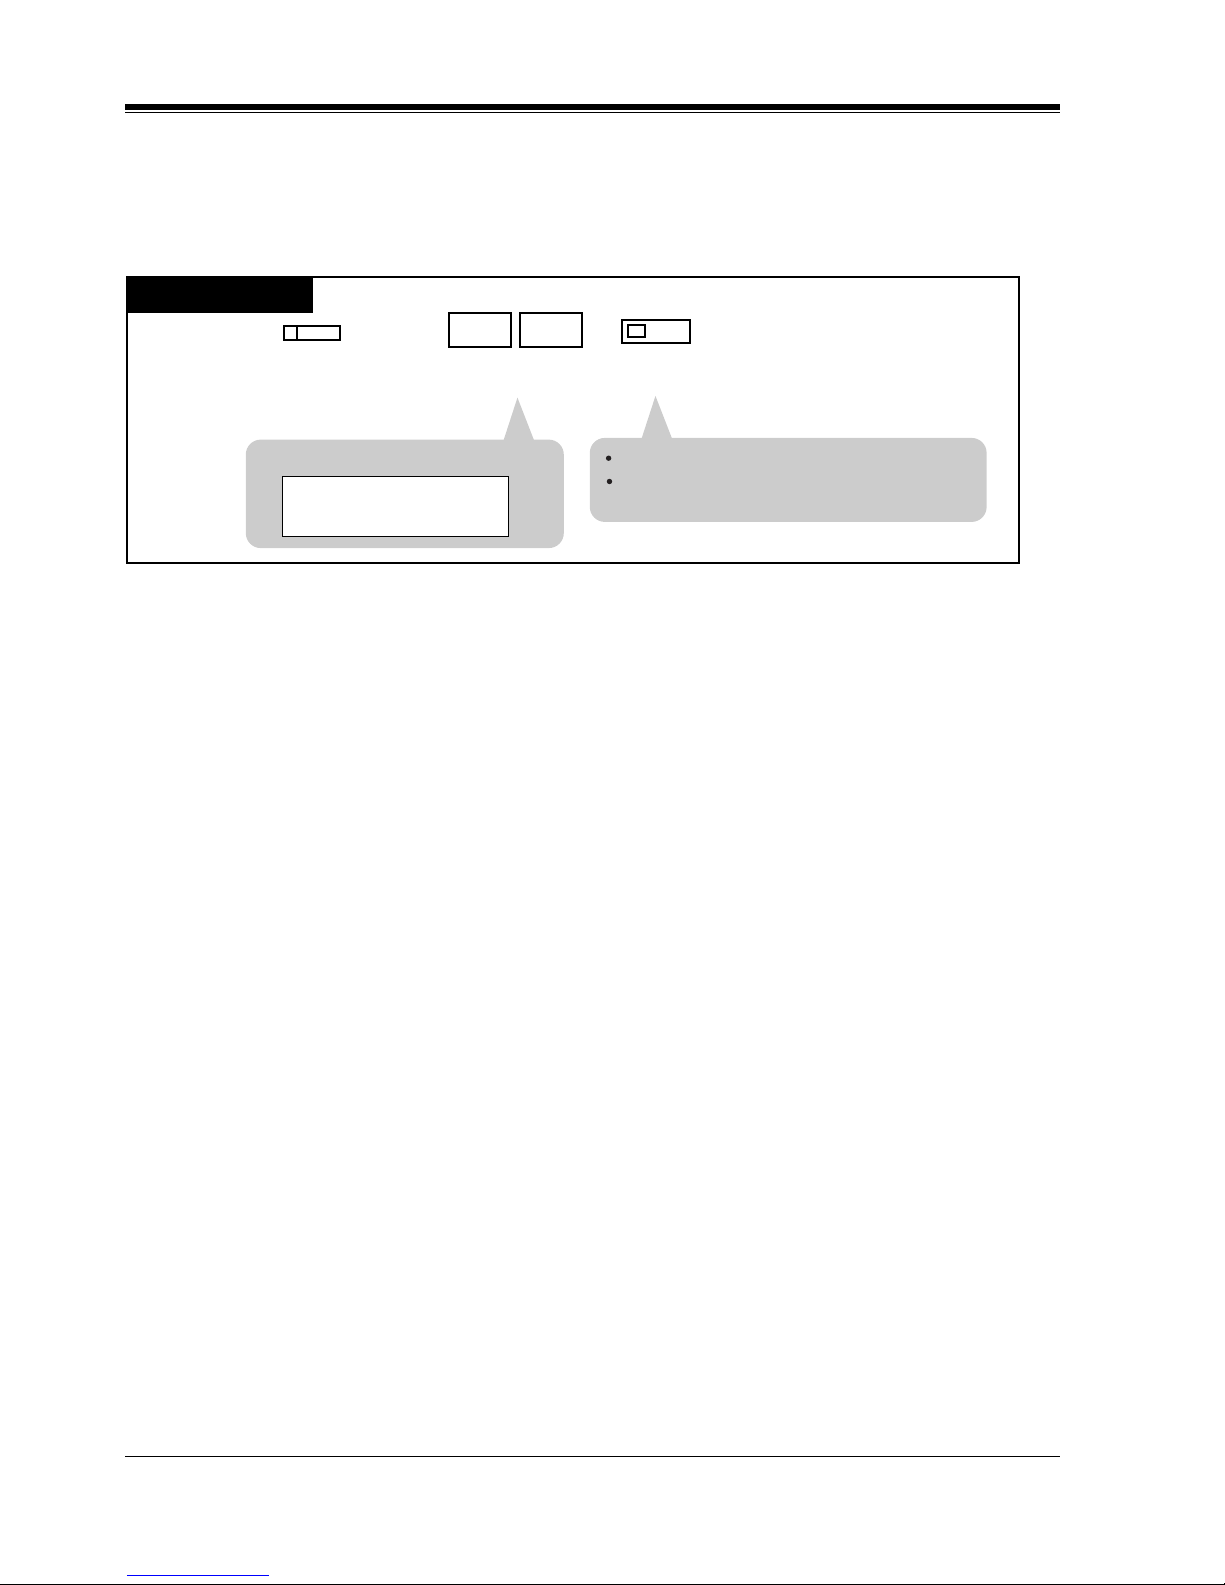
Station Programming
78 User Manual
Tone Through Button (Assignment)
Allows you to assign a Flexible (CO, DSS) button as a Tone Through button.
— Be sure that you are in the Station Programming mode: Press [PROGRAM] [9] [9].
— To exit the Station Programming mode: Press [PROGRAM].
Features Guide References
1.12 Conversation Features
• End-to-End DTMF Signaling (Tone Through)
PT
Press the desired Flexible (CO,
DSS) button you wish to assign
as the Tone Through button.
Dial 78.
Press STORE.
AUTO DIAL
STORE
8
7
<PT Display Example>
Tone Through
The STORE indicator lights.
The display shows the initial programming
mode.
Page 79
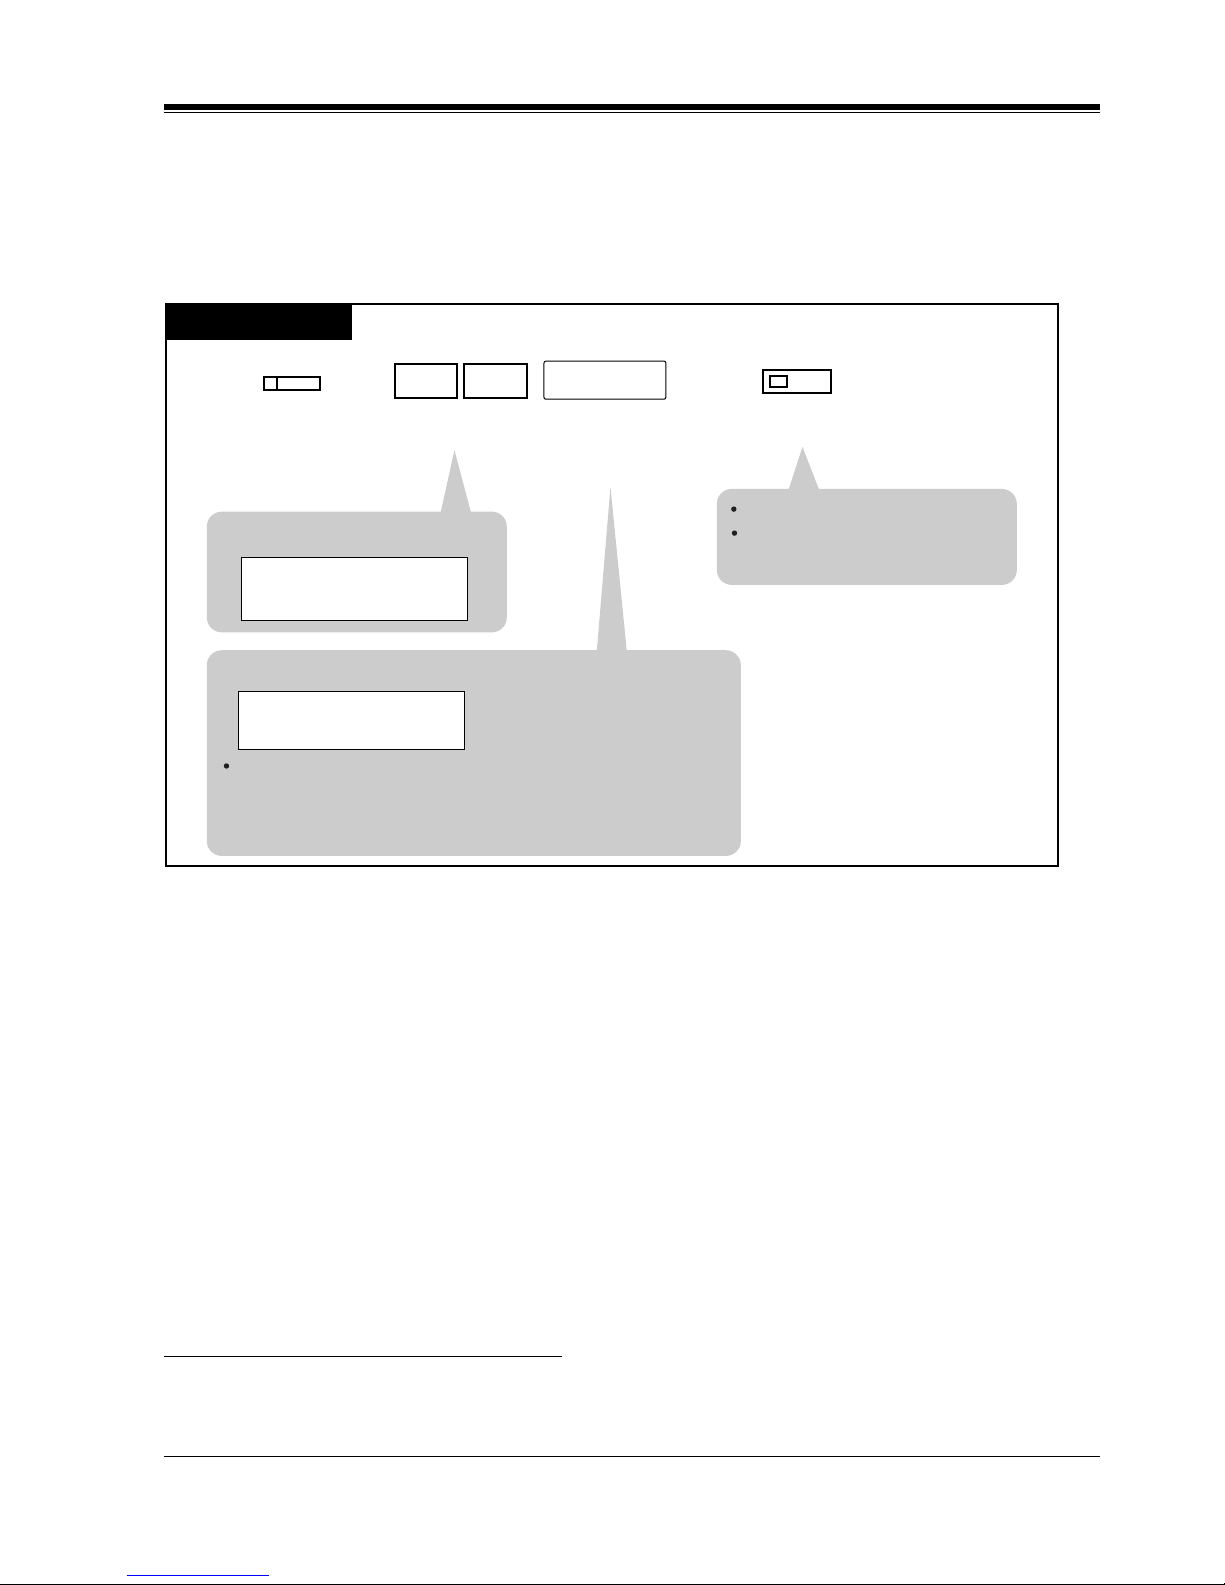
Station Programming
User Manual 79
Two-Way Record Button (Assignment)
*1
Allows you to assign a Flexible (CO, DSS) button as a Two-Way Record button.
This allows you to record a conversation into your own mailbox.
— Be sure that you are in the Station Programming mode: Press [PROGRAM] [9] [9].
— To exit the Station Programming mode: Press [PROGRAM].
Conditions
• You cannot enter a non-existent extension or floating directory number.
*2
Please refer to "Floating Station" of Section "1.3 System Features" in the Features Guide.
• You should use a voice mail extension number that has been assigned by System
Programming. Please refer to Programming Guide References below.
Programming Guide References
• 1.5 VPS (DPT) Port Assignment
– [EXT No.1] DN
– [EXT No.1] Group No.
– [EXT No.2] DN
*1
Available when the Digital Super Hybrid System is connected to a Digital Proprietary Telephone capable Panasonic Voice
Processing System (one that supports Digital Proprietary Telephone [DPT] integration; e.g., KX-TVS100).
*2
A Floating Directory Number (FDN) is a virtual extension number which appears to be an extension.
<PT Display Example>
<PT Display Example>
(-xxxx:VM extension number)
To erase an incorrect entry, press the CLR (S2) button or
the TRANSFER (CLEAR) button.
(The TRANSFER button becomes the CLEAR button in the Station
Programming mode.)
2 WAY-REC:
CLR
2 WAY-REC :xxxx
CLR
PT
Press the desired Flexible
(CO, DSS) button you wish
to assign as the Two-Way
Record button.
Dial 90.
Press STORE.
Enter the Voice Mail
extension number
(3 or 4 digits).
Voice Mail
extension no.
AUTO DIAL
STORE
0
9
The STORE indicator lights.
The display shows the initial
programming mode.
Page 80
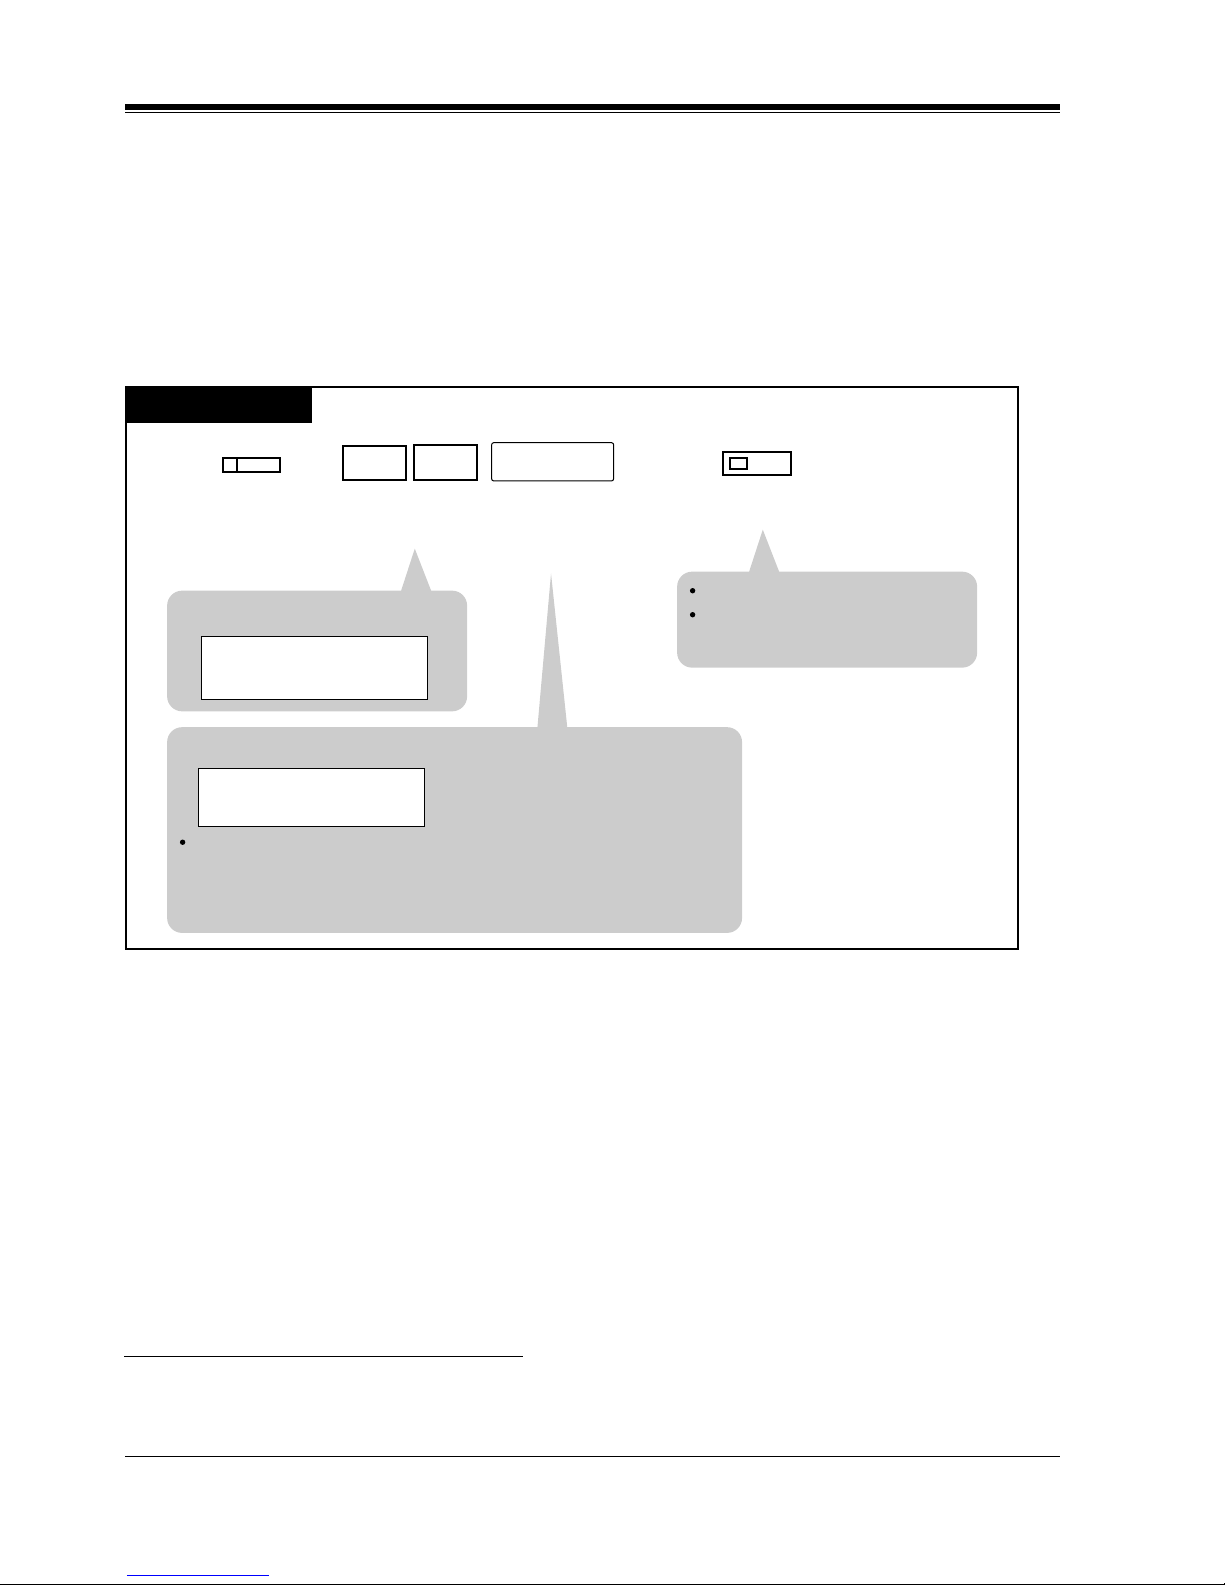
Station Programming
80 User Manual
– [EXT No.2] Group No.
Two-Way Transfer Button (Assignment)
*1
Allows you to assign a Flexible (CO, DSS) button as a Two-Way Transfer button.
This allows you to record a conversation into a desired mailbox.
— Be sure that you are in the Station Programming mode: Press [PROGRAM] [9] [9].
— To exit the Station Programming mode: Press [PROGRAM].
Conditions
• You cannot enter a non-existent extension or floating directory number.
*2
Please refer to "Floating Station" of Section "1.3 System Features" in the Features Guide.
• You should use a voice mail extension number that has been assigned by System
Programming. Please refer to Programming Guide References below.
Programming Guide References
• 1.5 VPS (DPT) Port Assignment
– [EXT No.1] DN
*1
Available when the Digital Super Hybrid System is connected to a Digital Proprietary Telephone capable Panasonic Voice
Processing System (one that supports Digital Proprietary Telephone [DPT] integration; e.g., KX-TVS100).
*2
A Floating Directory Number (FDN) is a virtual extension number which appears to be an extension.
<PT Display Example>
<PT Display Example>
(-xxxx:VM extension number)
To erase an incorrect entry, press the CLR (S2) button or the
TRANSFER (CLEAR) button.
(The TRANSFER button becomes the CLEAR button in the Station
Programming mode.)
2 WAY-TRANS:
CLR
2 WAY-TRANS:xxxx
CLR
PT
Press the desired Flexible
(CO, DSS) button you wish
to assign as the Two-Way
Transfer button.
Dial 91.
Press STORE.
Enter the Voice Mail
extension number
(3 or 4 digits).
Voice Mail
extension no.
AUTO DIAL
STORE
1
9
The STORE indicator lights.
The display shows the initial
programming mode.
Page 81
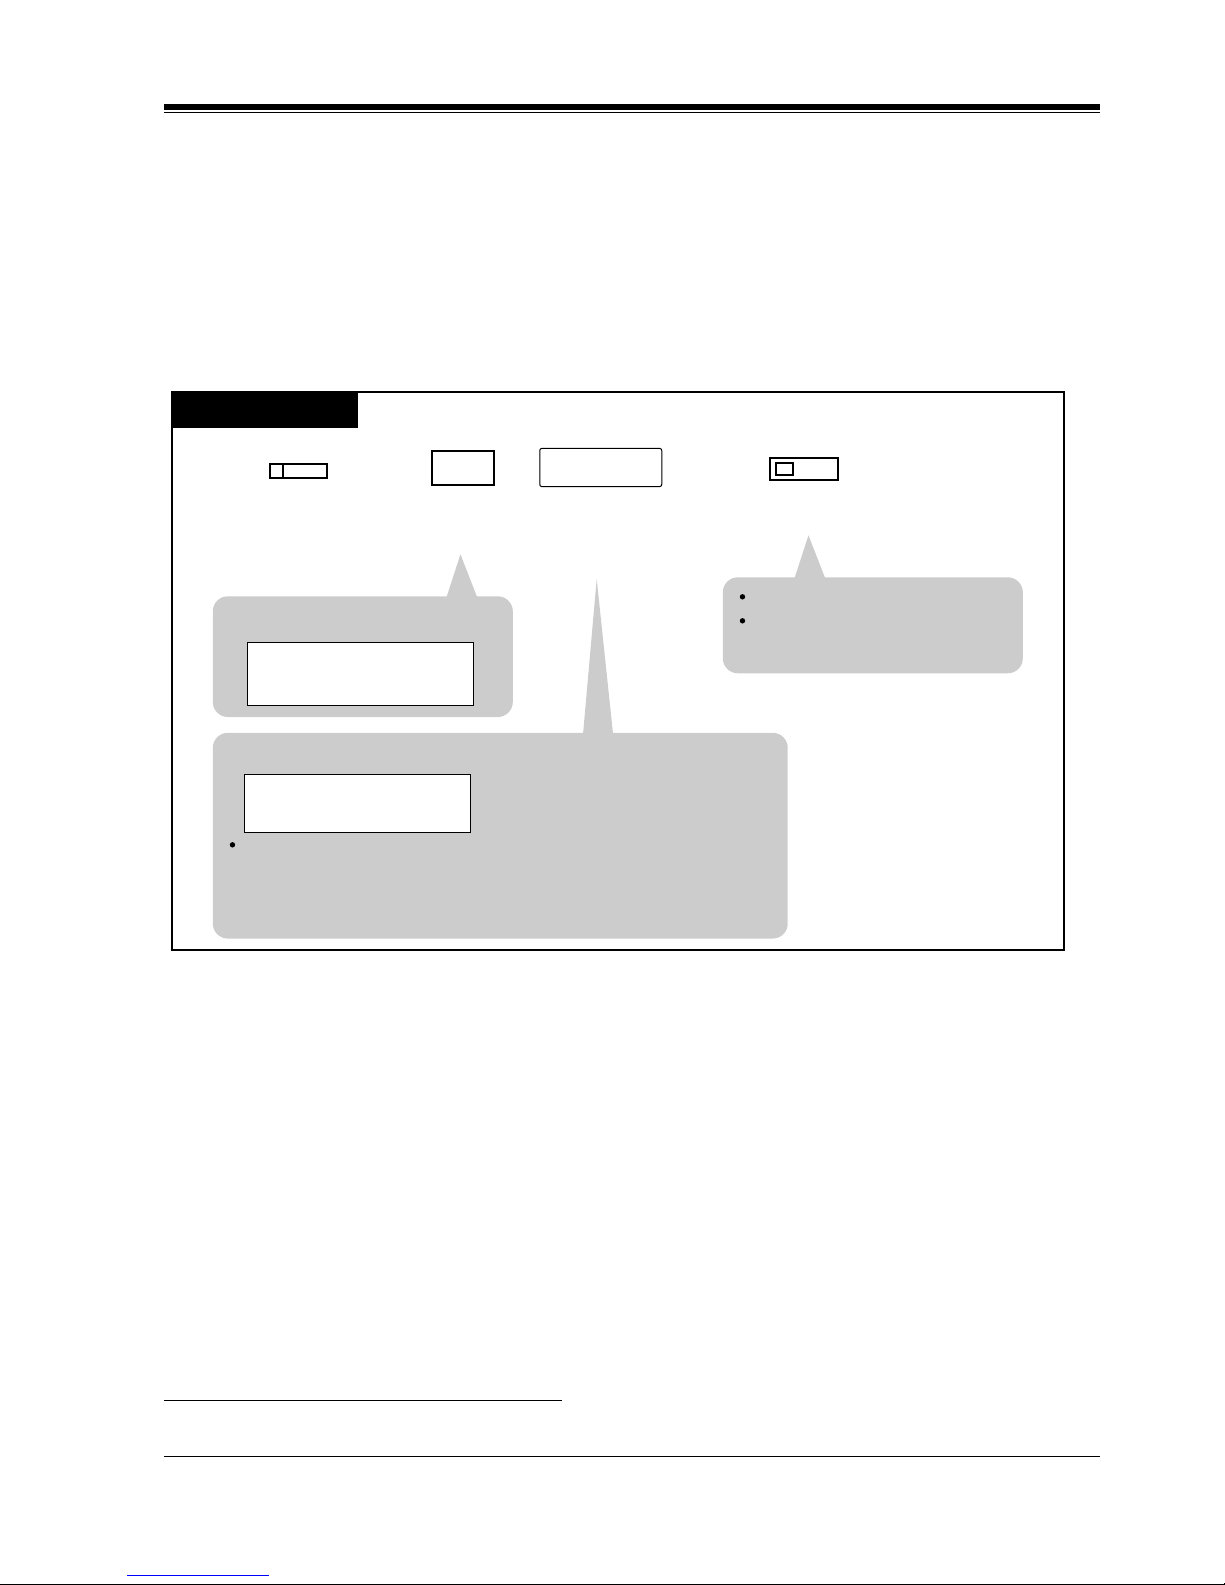
Station Programming
User Manual 81
– [EXT No.1] Group No.
– [EXT No.2] DN
– [EXT No.2] Group No.
Voice Mail (VM) Transfer Button (Assignment)
Allows you to assign a Flexible (CO, DSS, PF) button as a VM Transfer button.
— Be sure that you are in the Station Programming mode: Press [PROGRAM] [9] [9].
— To exit the Station Programming mode: Press [PROGRAM].
Conditions
• You cannot enter non-existent extension or a floating directory number.
*1
Please refer to "Floating Station" of Section "1.3 System Features" in the Features Guide.
Programming Guide References
• 3.3 Extension Group
– FDN
– Group Type
• 5.10 VPS Integration
*1
A Floating Directory Number (FDN) is a virtual extension number which appears to be an extension.
<PT Display Example>
<PT Display Example>
(-xxxx:VM extension number)
To erase an incorrect entry, press the CLR (S2) button or the
TRANSFER (CLEAR) button.
(The TRANSFER button becomes the CLEAR button in the Station
Programming mode.)
VTR-
CLR
VTR-xxxx
CLR
PT
Press the desired Flexible
(CO, DSS, PF) button you
wish to assign as the VM
Transfer button.
Dial 8.
Press STORE.
Enter the Voice Mail
extension number
(3 or 4 digits).
Voice Mail
extension no.
AUTO DIAL
STORE
8
The STORE indicator lights.
The display shows the initial
programming mode.
Page 82
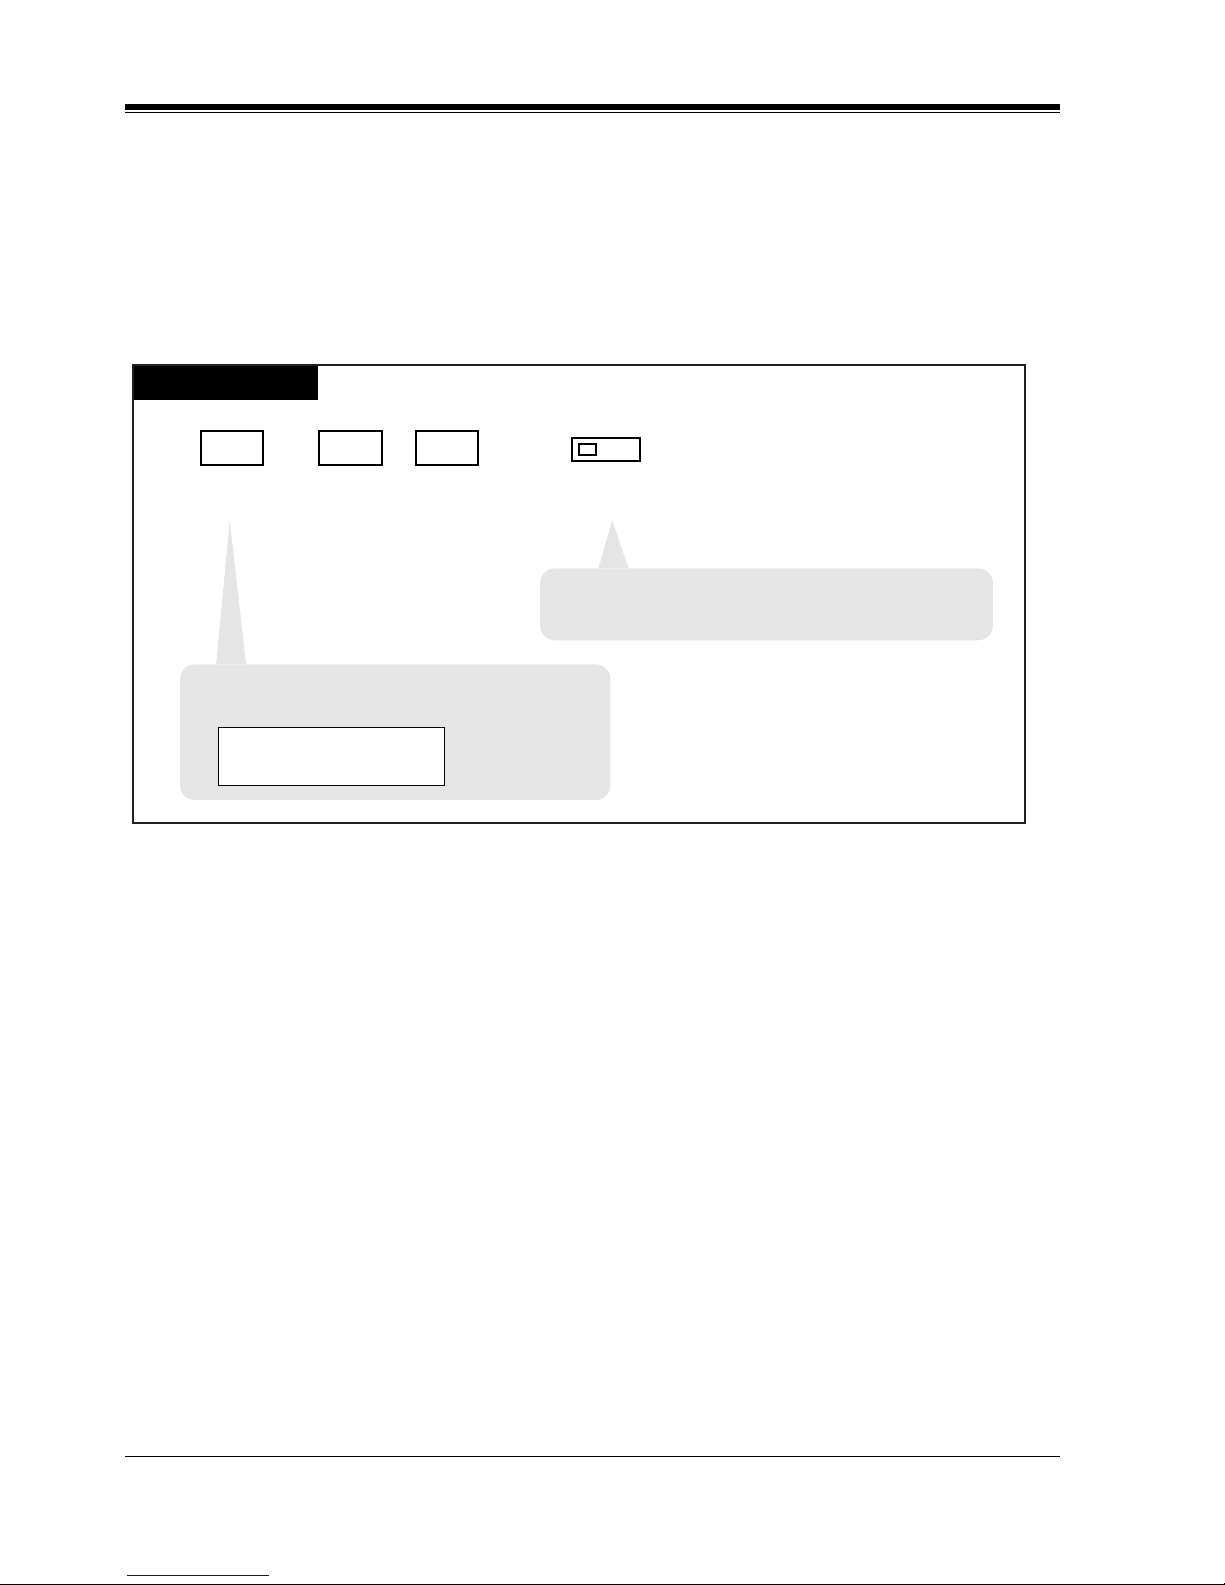
Station Programming
82 User Manual
2.2.4 Full One-Touch Dialing Assignment
Allows you to enable or disable the "Full One-Touch Dialing" function. The "Hands-free
Operation" mode is activated by pressing a One-Touch Dialing button, DSS button, REDIAL
button or SAVE button.
— Be sure that you are in the Station Programming mode: Press [PROGRAM] [9] [9].
— To exit the Station Programming mode: Press [PROGRAM].
Conditions
• The default is "On."
PT
Dial 3.
Press STORE.
or
Dial 1 or 2.
1 : to select the off mode
2 : to select the on mode
AUTO DIAL
STORE
1
3
2
• The STORE indicator lights.
• The display shows the initial programming mode.
• The STORE indicator light turns off.
<PT Display Example>
Hands-free:Off
(–When disabled)
Page 83

Station Programming
User Manual 83
2.2.5 Handset / Headset Selection
Allows you to select the handset mode or headset mode.
— Be sure that you are in the Station Programming mode: Press [PROGRAM] [9] [9].
— To exit the Station Programming mode: Press [PROGRAM].
Conditions
• The default is "Handset."
PT
Dial 9.
Press STORE.
or
Dial 1 or 2.
1 : to select Handset mode
2 : to select Headset mode
1
2
9
AUTO DIAL
STORE
The STORE indicator lights.
The display shows the initial programming mode.
The display shows the
current status.
Page 84
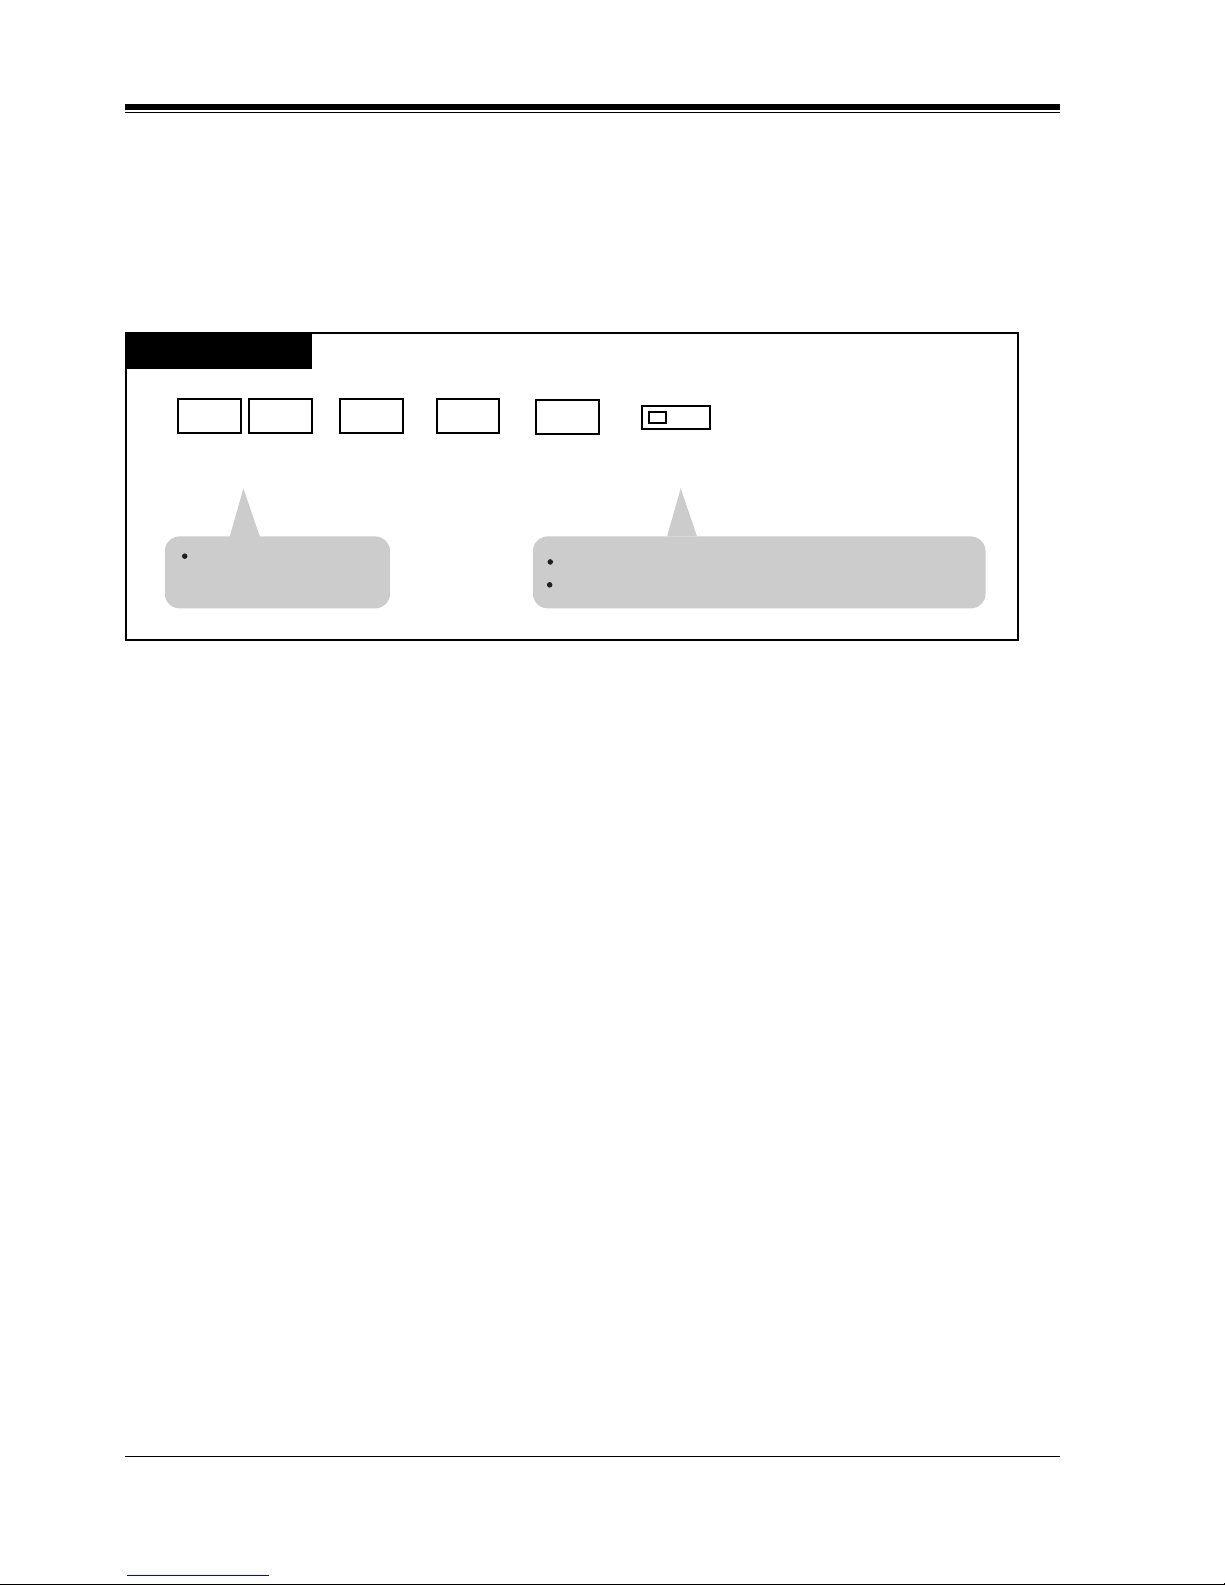
Station Programming
84 User Manual
2.2.6 Initial Display Selection
Allows you to select the initial display, Caller ID, CO line name or DID name which is shown
on the display when a call is received.
— Be sure that you are in the Station Programming mode: Press [PROGRAM] [9] [9].
— To exit the Station Programming mode: Press [PROGRAM].
Conditions
• The default is "Caller ID" mode.
PT
Dial 81.
Press STORE.
or
Dial 1, 2 or 3.
1 : for the Caller ID
2 : for the CO line name
3 : for the DID name
1 1
8
2
AUTO DIAL
STORE
The STORE indicator lights.
The display shows the initial programming mode.
The display shows the
current display type.
or
3
Page 85
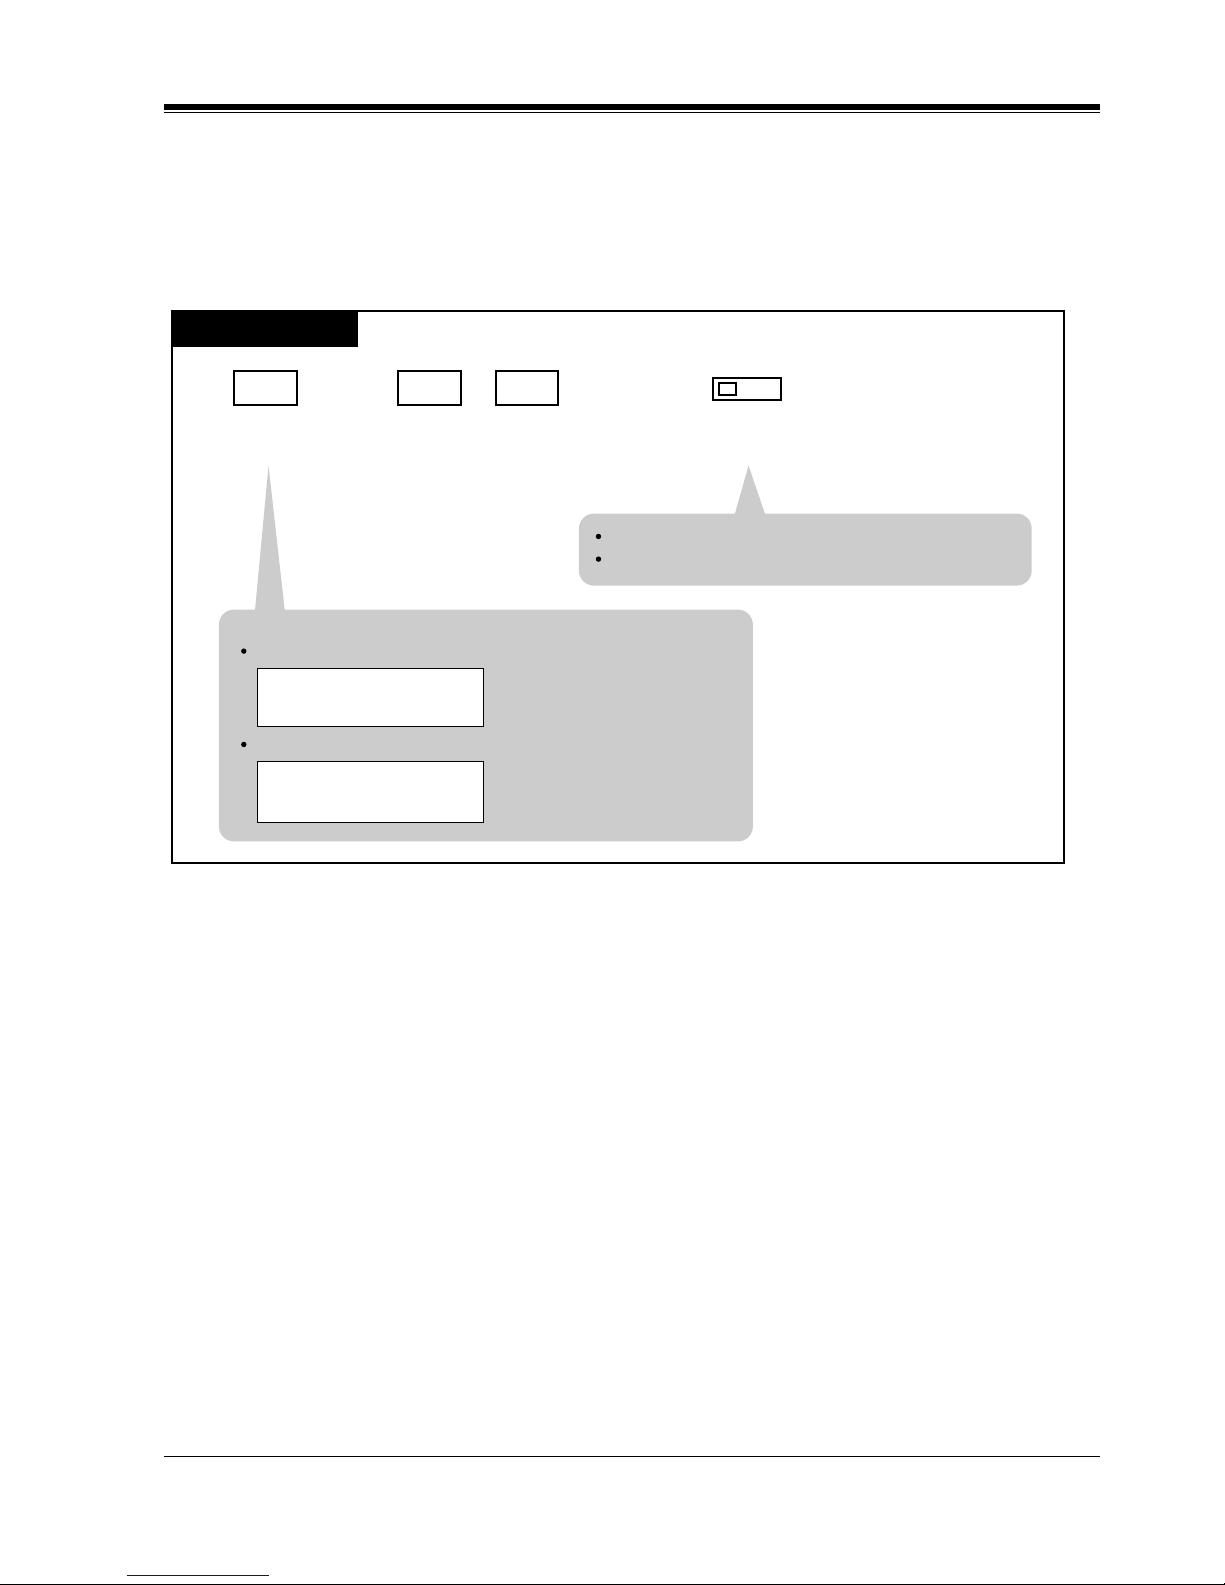
Station Programming
User Manual 85
2.2.7 Intercom Alert Assignment
Allows you to select the alert mode (tone / voice) when receiving an intercom (extension) call.
— Be sure that you are in the Station Programming mode: Press [PROGRAM] [9] [9].
— To exit the Station Programming mode: Press [PROGRAM].
Conditions
• The default is "Ring-Calling (Tone Call)."
PT
Dial 4.
Press STORE.
or
Dial 1 or 2.
1 : to select the Ring-Calling (Tone Call) mode
2 : to select the Voice-Calling mode
14
2
AUTO DIAL
STORE
The STORE indicator lights.
The display shows the initial programming mode.
<PT Display Example>
When Ring-Calling (Tone Call) mode is selected;
When Voice-Calling mode is selected;
Voice Call
Tone Call
Page 86
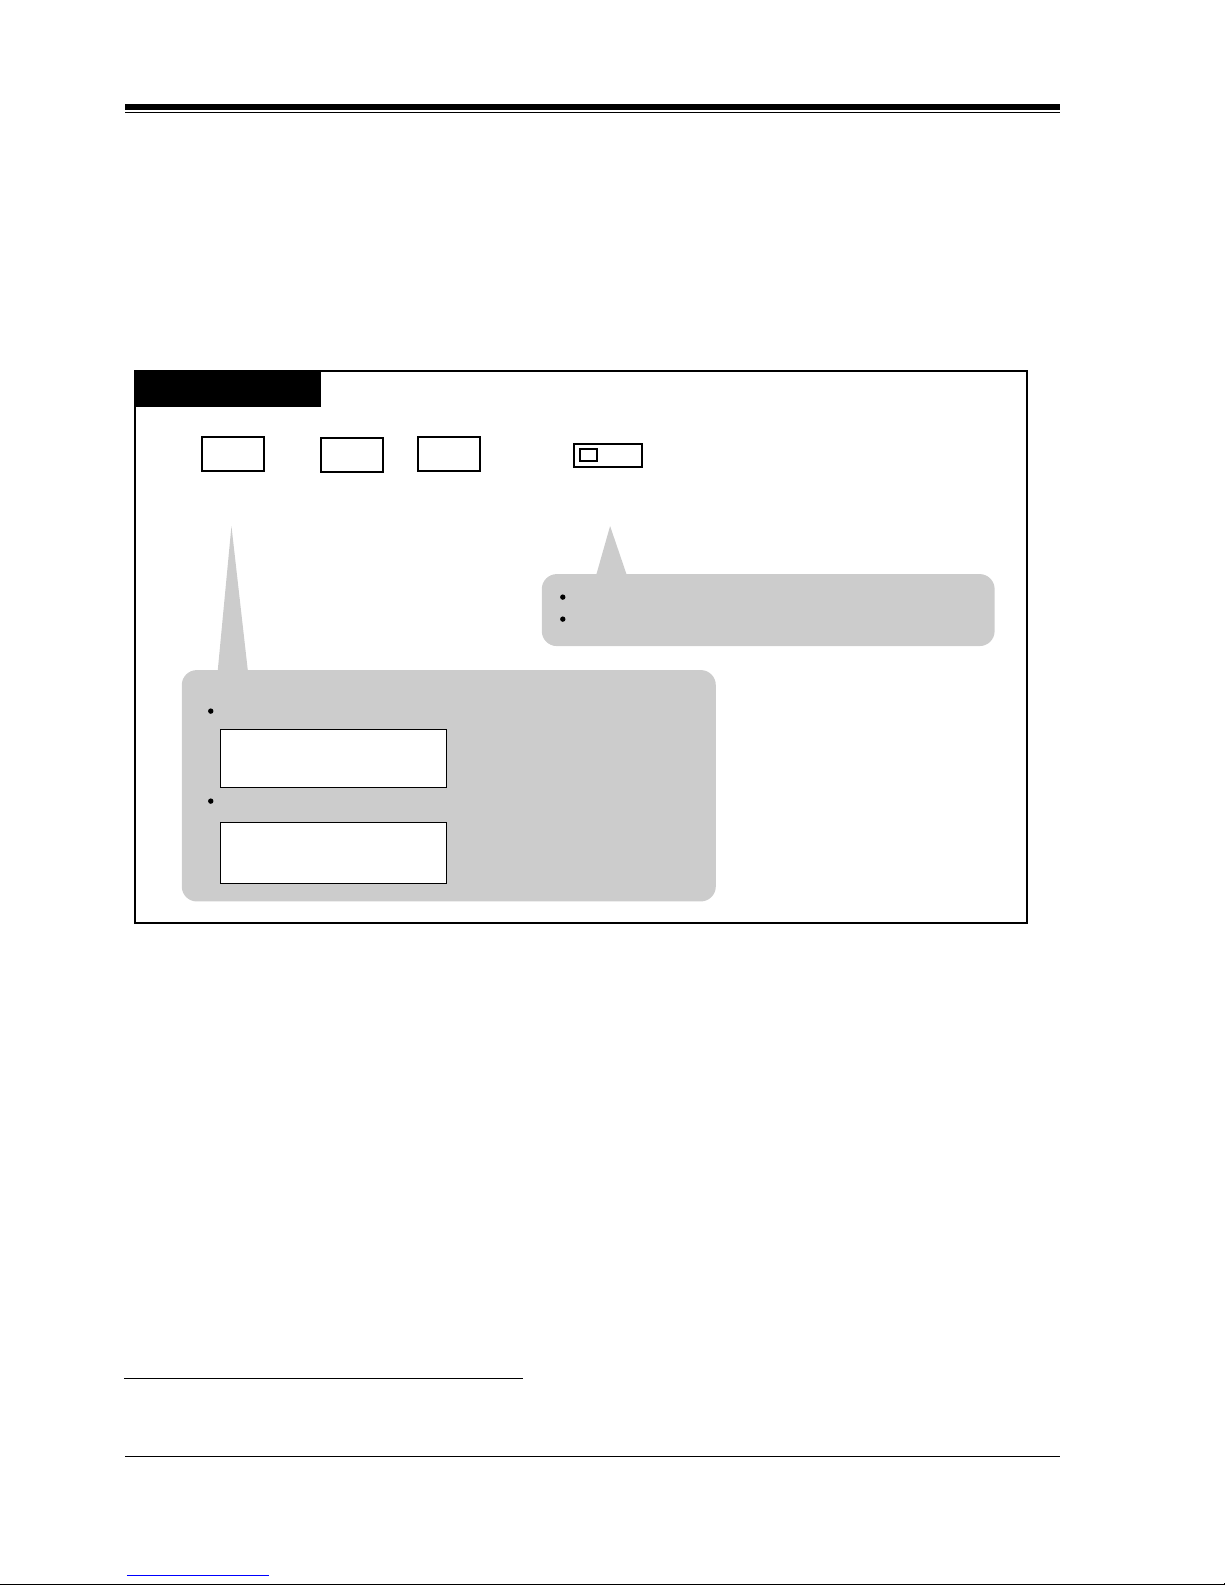
Station Programming
86 User Manual
2.2.8 Live Call Screening (LCS) Mode Set
*1
Assigns whether the recording message is monitored through the built-in speaker (Hands-free
mode) or an alert tone is sent (Private mode) while incoming callers are leaving a message in
the called extension's mailbox.
— Be sure that you are in the Station Programming mode: Press [PROGRAM] [9] [9].
— To exit the Station Programming mode: Press [PROGRAM].
Conditions
• The default is "Hands-free" mode.
*1
Available when the Digital Super Hybrid System is connected to a Digital Proprietary Telephone capable Panasonic Voice
Processing System (one that supports Digital Proprietary Telephone [DPT] integration; e.g., KX-TVS100).
PT
Dial 7.
Press STORE.
or
Dial 1 or 2.
1 : for the Hands-free
2 : for the Private mode
1
7
2
AUTO DIAL
STORE
The STORE indicator lights.
The display shows the initial programming mode.
<PT Display Example>
When the Hands-free mode is selected;
When the Private mode is selected;
Private
Hands-free
Page 87

Station Programming
User Manual 87
2.2.9 PDN/SDN Button Delayed Ringing Assignment
Allows you to assign a delayed ringing function on the PDN/SDN button.
— Be sure that you are in the Station Programming mode: Press [PROGRAM] [9] [9].
— To exit the Station Programming mode: Press [PROGRAM].
Conditions
• If more than one PDN button is assigned on a PT, Delayed Ringing can be set to the first
PDN button (assigned to the CO 01) only. This Delayed Ringing setting applies to all PDN
buttons on the same PT.
<PT Display Example>
<PT Display Example>
If you want to change the delayed ringing type, enter another
type number again.
Immediate Ring
1-ring Delay
PT
Press PDN or SDN
you wish to assign the
delayed ringing function.
Dial 76.
or
Press STORE.
Enter the delayed ringing type
number (0 through 4).
-0: Immediate Ring
-1: 1-ring Delay
-2: 3-ring Delay
-3: 6-ring Delay
-4: No Ring
delayed ringing type no.
6
7
AUTO DIAL
(PDN) (SDN)
STORE
The STORE indicator lights.
The display shows the initial
programming mode.
Page 88
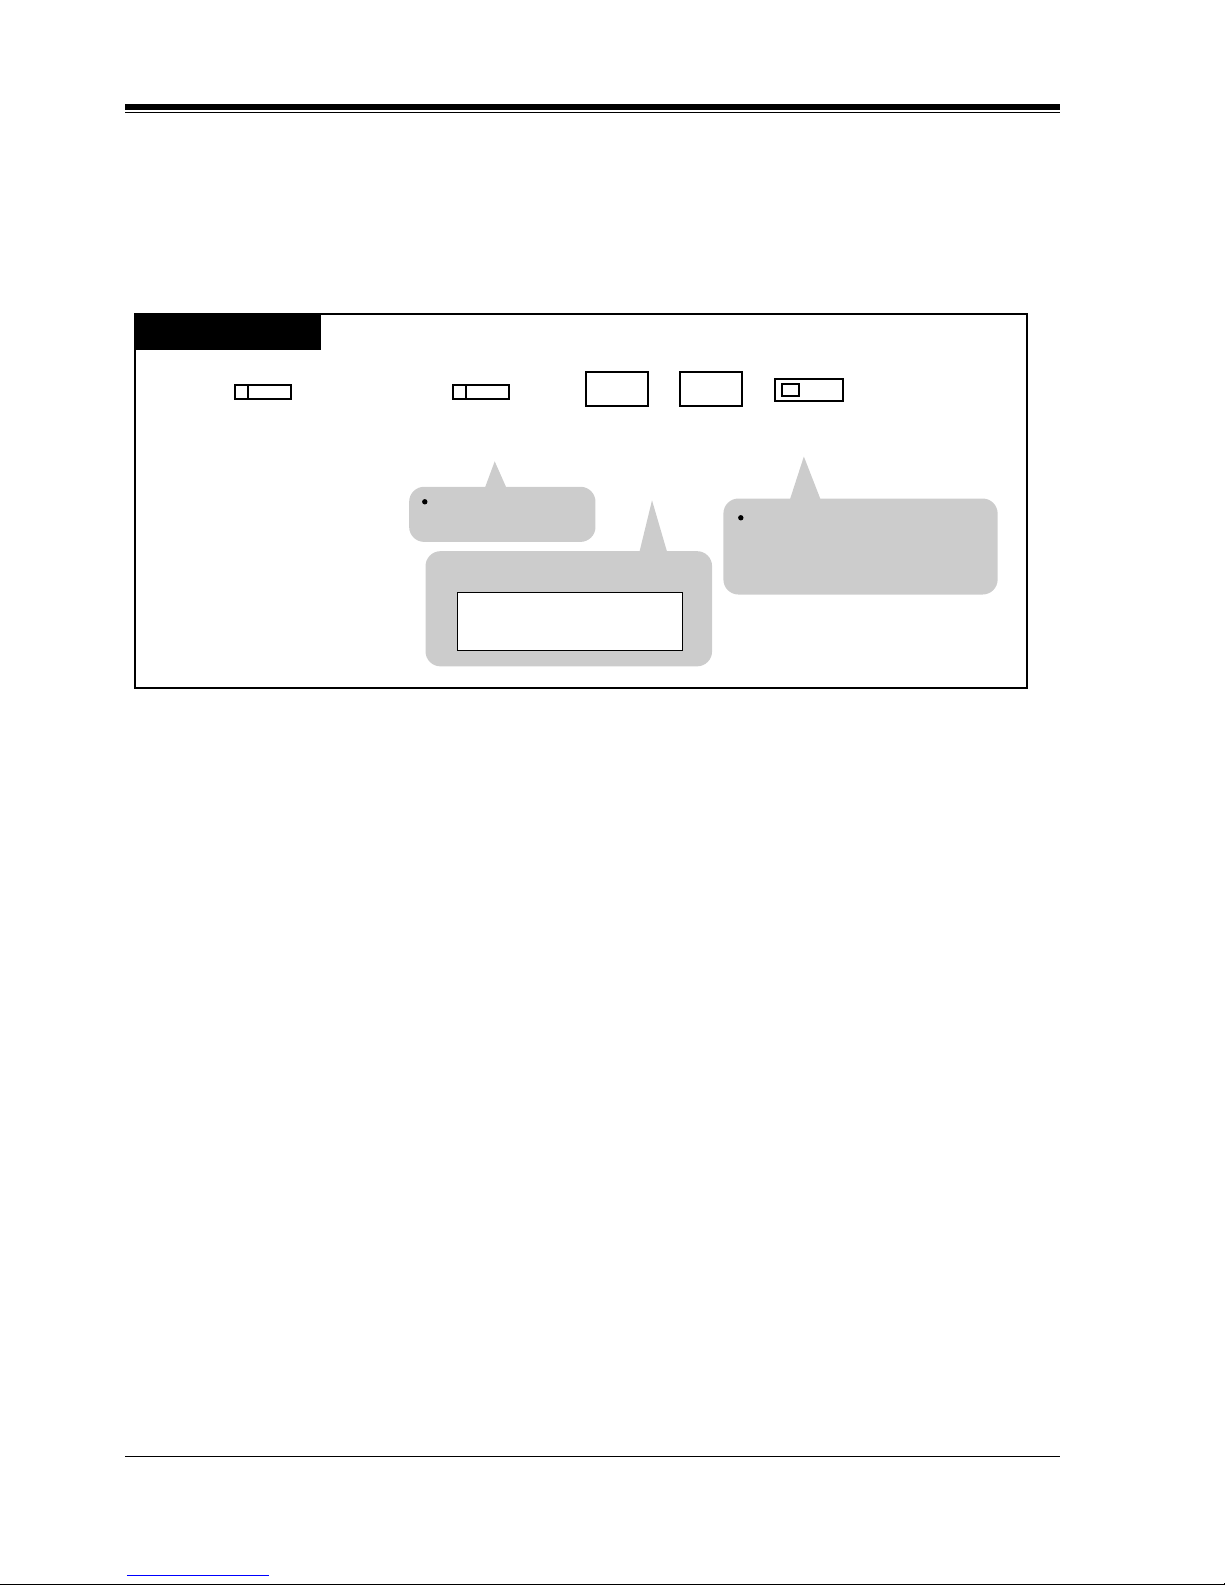
Station Programming
88 User Manual
2.2.10 Phantom Button Ringing On/Off Assignment
Allows you to assign a ringing On/Off function on a Phantom button.
— Be sure that you are in the Station Programming mode: Press [PROGRAM] [9] [9].
— To exit the Station Programming mode: Press [PROGRAM].
<PT Display Example>
Ring On
PT
Press Phantom you
wish to turn On/Off the
ringing.
Dial 1or 2.
-1: Ring Off
-2: Ring On
or
Press STORE.
Press the same Phantom
again.
1
2
AUTO DIAL
(Phantom)
STORE
The STORE indicator lights.
The display shows the initial
programming mode.
The display shows
the current status.
Page 89

Station Programming
User Manual 89
2.2.11 Preferred Line Assignment — Incoming
Allows you to select the method used to answer incoming calls from the following three line
preferences:
a) No Line Preference
b) Ringing Line Preference (— default)
c) Prime Line Preference
Follow the corresponding programming procedure according to your selection.
Page 90
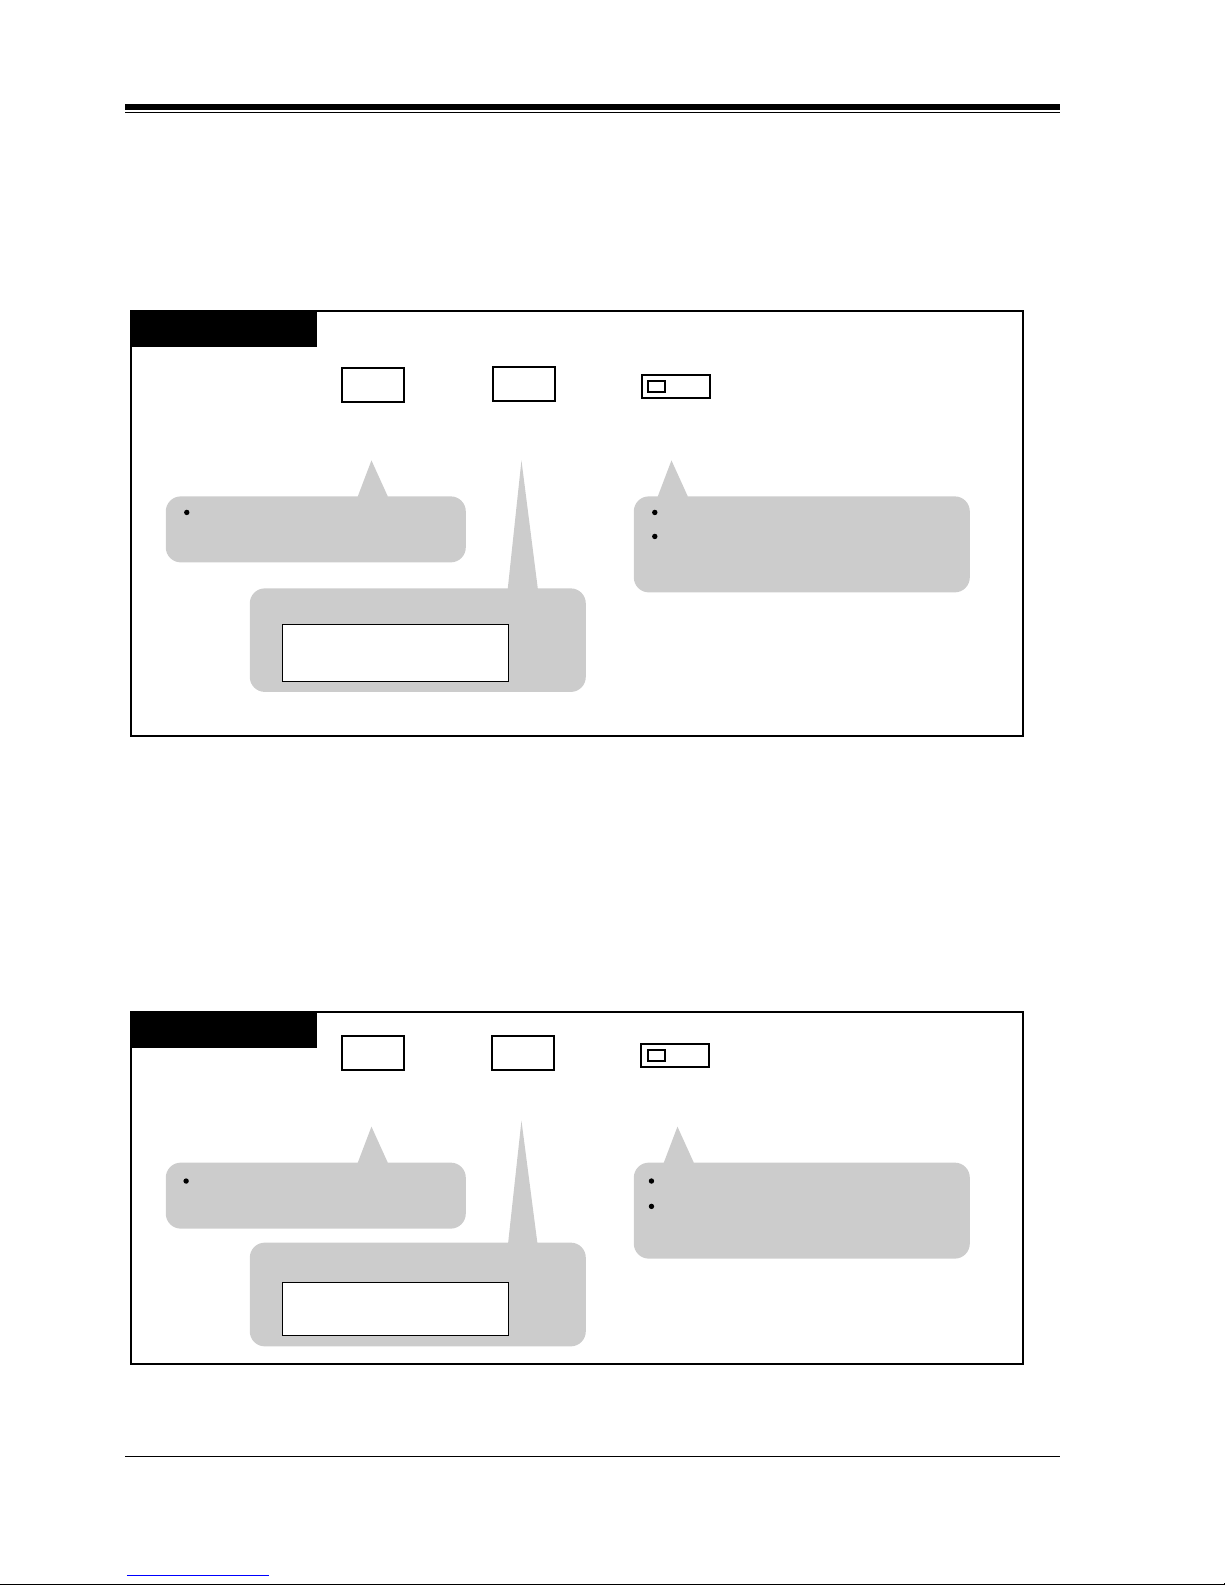
Station Programming
90 User Manual
No Line Preference — Incoming (Assignment)
No line is selected when you go off-hook to answer a call. You must select a line to answer an
incoming call.
— Be sure that you are in the Station Programming mode: Press [PROGRAM] [9] [9].
— To exit the Station Programming mode: Press [PROGRAM].
Ringing Line Preference — Incoming (Assignment)
You are connected to a call ringing on your extension automatically, when you go off-hook to
answer a call.
— Be sure that you are in the Station Programming mode: Press [PROGRAM] [9] [9].
— To exit the Station Programming mode: Press [PROGRAM].
PT
Dial 1.
Press STORE.
Dial 2.
1
2
AUTO DIAL
STORE
The STORE indicator lights.
The display shows the initial
programming mode.
The display shows the current
status.
<PT Display Example>
Pref.In :No
PT
Dial 2.
Press STORE.
Dial 2.
2 2
AUTO DIAL
STORE
The STORE indicator lights.
The display shows the initial
programming mode.
The display shows the current
status.
<PT Display Example>
Pref.In :Ring
Page 91
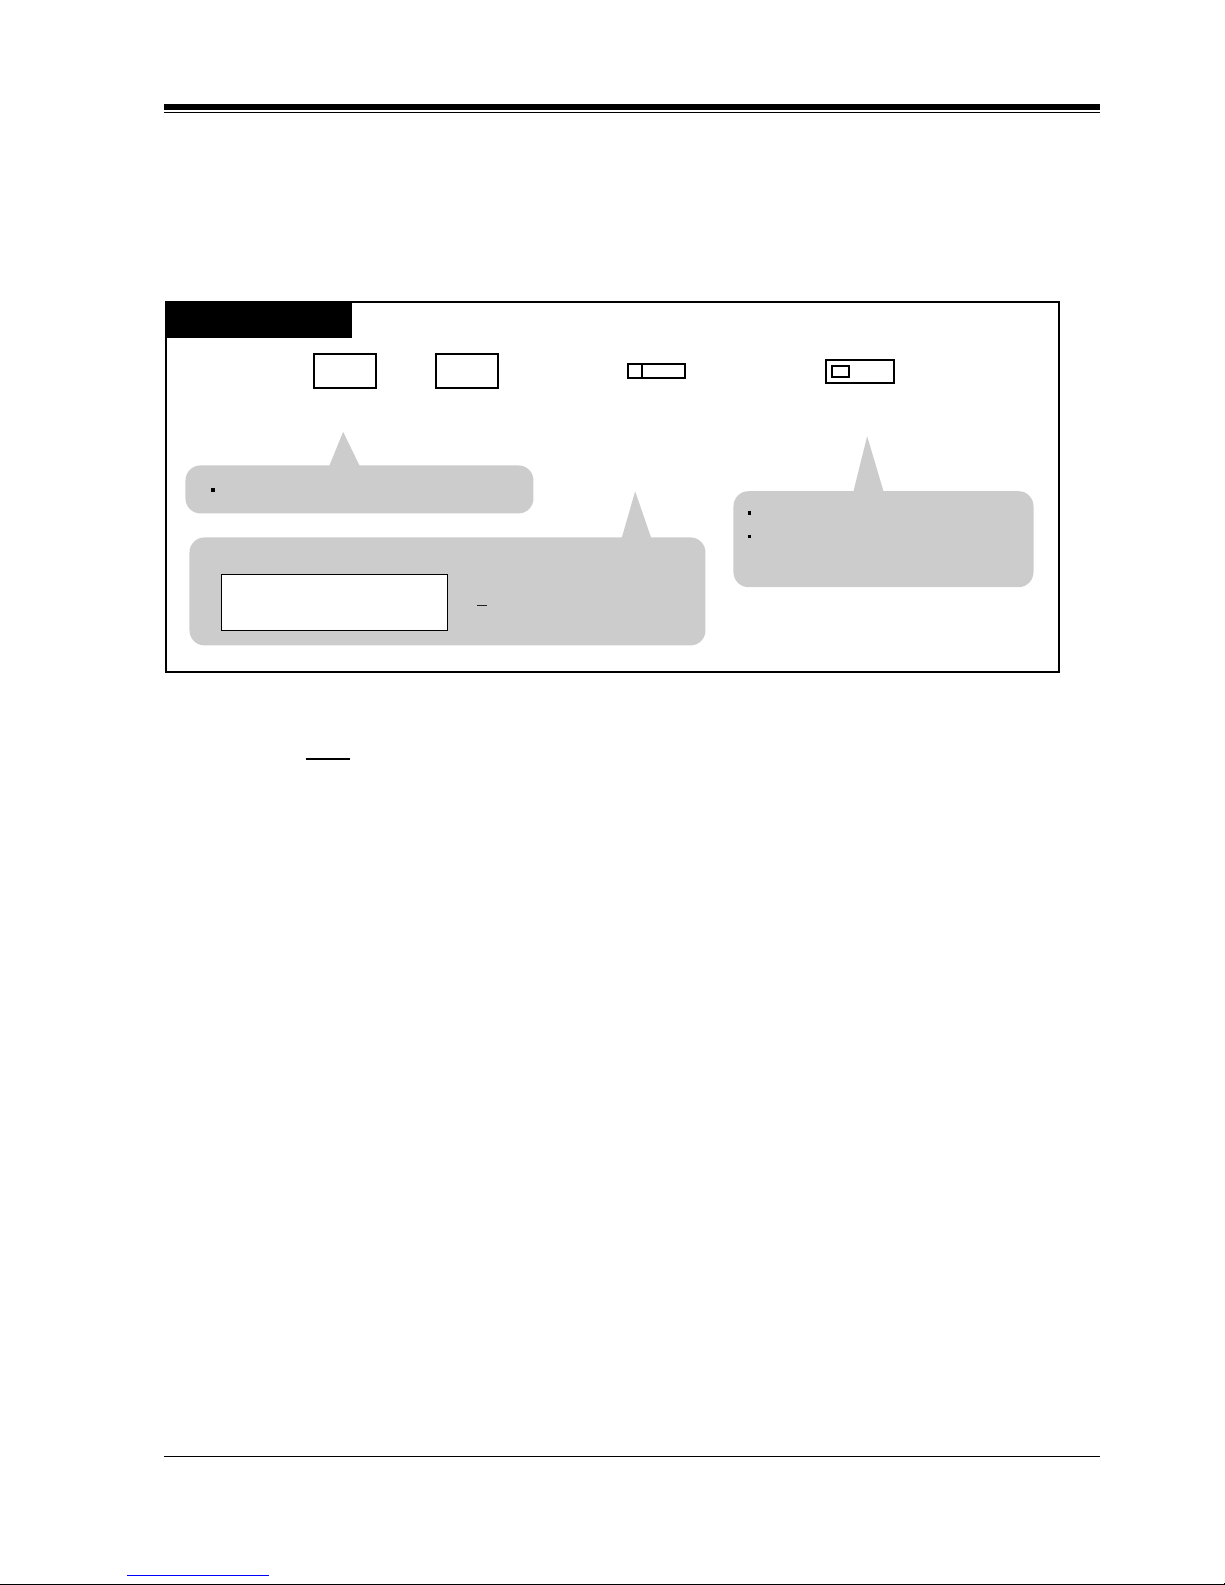
Station Programming
User Manual 91
Prime Line Preference — Incoming (Assignment)
You are connected to a call on the line assigned as the prime line automatically, when you go
off-hook to answer a call.
— Be sure that you are in the Station Programming mode: Press [PROGRAM] [9] [9].
— To exit the Station Programming mode: Press [PROGRAM].
Note
• If your PT is DN type, then you cannot select "ICM."
PT
Dial 3.Dial 2.
Press STORE.
Press the desired line access
button.
(Selection)
ICM, S-CO, G-CO, L-CO, PDN, SDN
32
AUTO DIAL
STORE
The STORE indicator lights.
The display shows the initial
programming mode.
The display shows the current status.
<PT Display Example>
( When ICM is selected)
Pref.In :ICM
Page 92
Station Programming
92 User Manual
2.2.12 Preferred Line Assignment — Outgoing
Allows you to select the desired outgoing line preference to originate calls from the following
three line preferences:
a) No Line Preference
b) Idle Line Preference
c) Prime Line Preference (INTERCOM) (— default
*1
)
Follow the programming procedure according to your selection.
Note
• If "Idle Line Preference," "No Line Preference" or "Prime Line Preference (S-CO, G-
CO or L-CO)" is selected, it is not possible to access any PT features after going offhook. To access these PT features, press the INTERCOM (ICM type PT) or PDN (DN
type PT) button before or after going off-hook.
No Line Preference — Outgoing (Assignment)
When you go off-hook to make a call, you are not connected to any line. You must choose the
line.
— Be sure that you are in the Station Programming mode: Press [PROGRAM] [9] [9].
— To exit the Station Programming mode: Press [PROGRAM].
*1
If PT is DN type, then the default is PDN.
PT
Dial 1.
Press STORE.
Dial 1.
11
AUTO DIAL
STORE
The STORE indicator lights.
The display shows the initial
programming mode.
The display shows the current
status.
<PT Display Example>
Pref.Out:No
Page 93
Station Programming
User Manual 93
Idle Line Preference — Outgoing (Assignment)
When you go off-hook to make a call, you are connected to an idle line automatically.
— Be sure that you are in the Station Programming mode: Press [PROGRAM] [9] [9].
— To exit the Station Programming mode: Press [PROGRAM].
PT
Dial 2.
Press STORE.
Dial 1.
1
2
AUTO DIAL
STORE
The STORE indicator lights.
The display shows the initial
programming mode.
The display shows the current
status.
<PT Display Example>
Pref.Out:Idle
Page 94
Station Programming
94 User Manual
Prime Line Preference — Outgoing (Assignment)
When you go off-hook to make a call, you are connected to a line assigned as the prime line
automatically.
— Be sure that you are in the Station Programming mode: Press [PROGRAM] [9] [9].
— To exit the Station Programming mode: Press [PROGRAM].
Note
• If your PT is DN type, then you cannot select "ICM."
PT
Dial 3.Dial 1.
Press STORE.
Press the desired line access
button.
(Selection)
ICM, S-CO, G-CO, L-CO, PDN, SDN
1
3
AUTO DIAL
STORE
The STORE indicator lights.
The display shows the initial
programming mode.
The display shows the current status.
<PT Display Example>
( When ICM is selected)
Pref.Out:ICM
Page 95
Station Programming
User Manual 95
2.2.13 Ringing Tone Selection for CO Buttons
Allows you to assign a ringer frequency to each CO (S-CO, G-CO, L-CO) or DN (PDN, SDN)
button.
— Be sure that you are in the Station Programming mode: Press [PROGRAM] [9] [9].
— To exit the Station Programming mode: Press [PROGRAM].
Conditions
• The default is Ringing Tone Type 2.
• This feature applies to the following line access buttons:
S-CO, G-CO, L-CO, PDN, SDN
Press CO, PDN or SDN
which you wish to
change the ringing tone.
Press STORE.
Press the same CO,PDN
or SDN again.
Enter the tone type number
(1 through 8).
tone type no.
AUTO DIAL
STORE
The display shows the current
status.
The display shows the selected tone type number and you hear
the selected tone until the STORE button is pressed.
<DPT Display Example>
(-x:tone type number)
If you want to change the tone type, enter another tone type
number.
Tone Type-X
DPT
The STORE indicator lights.
The display shows the initial
programming mode.
Page 96
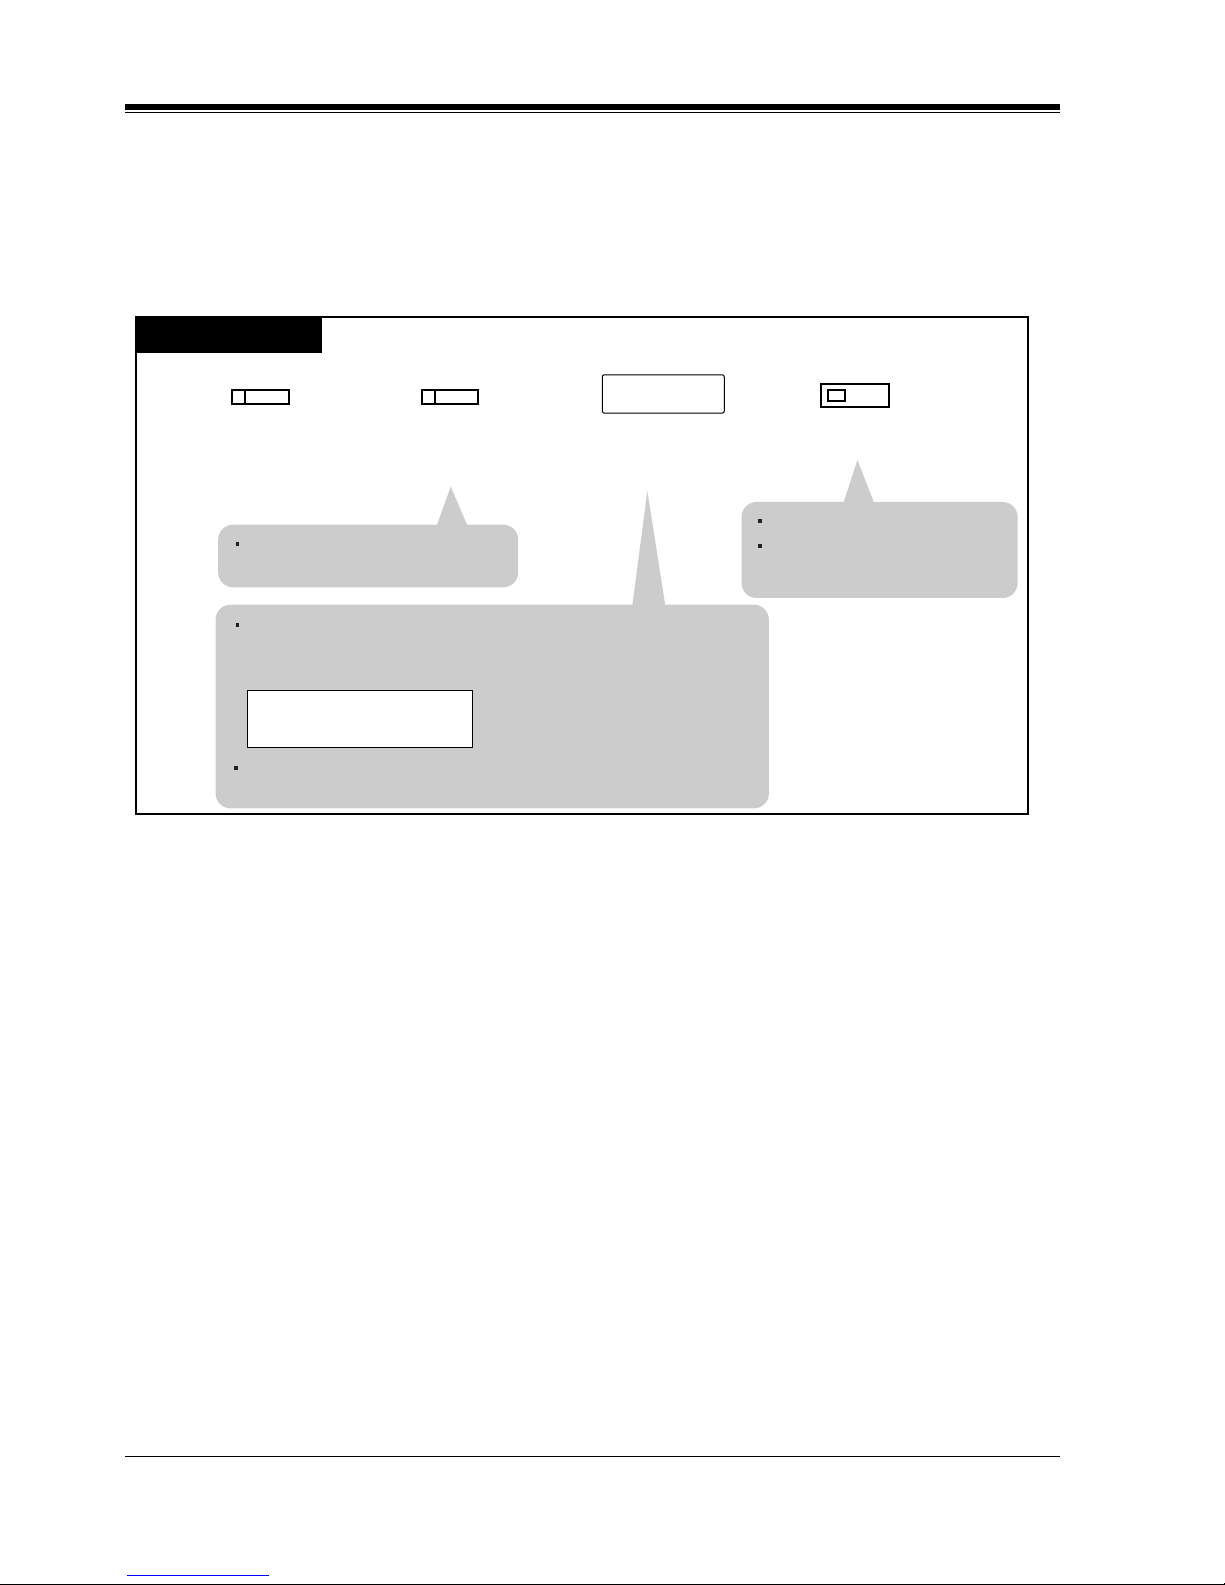
Station Programming
96 User Manual
2.2.14 Ringing Tone Selection for INTERCOM Button
Allows you to assign a ringer frequency to the INTERCOM button.
— Be sure that you are in the Station Programming mode: Press [PROGRAM] [9] [9].
— To exit the Station Programming mode: Press [PROGRAM].
Conditions
• The default is Ringing Tone Type 3.
The display shows the current
status
The display shows the selected tone type number and you hear
the selected tone until the STORE button is pressed.
<DPT Display Example>
(-x:tone type number)
If you want to change the tone type, enter another tone type
number.
Tone Type-X
DPT
Press INTERCOM.
Press STORE.
Press INTERCOM again.
Enter the tone type number
(1 through 8).
tone type no.
INTERCOM INTERCOM
AUTO DIAL
STORE
The STORE indicator lights.
The display shows the initial
programming mode.
Page 97
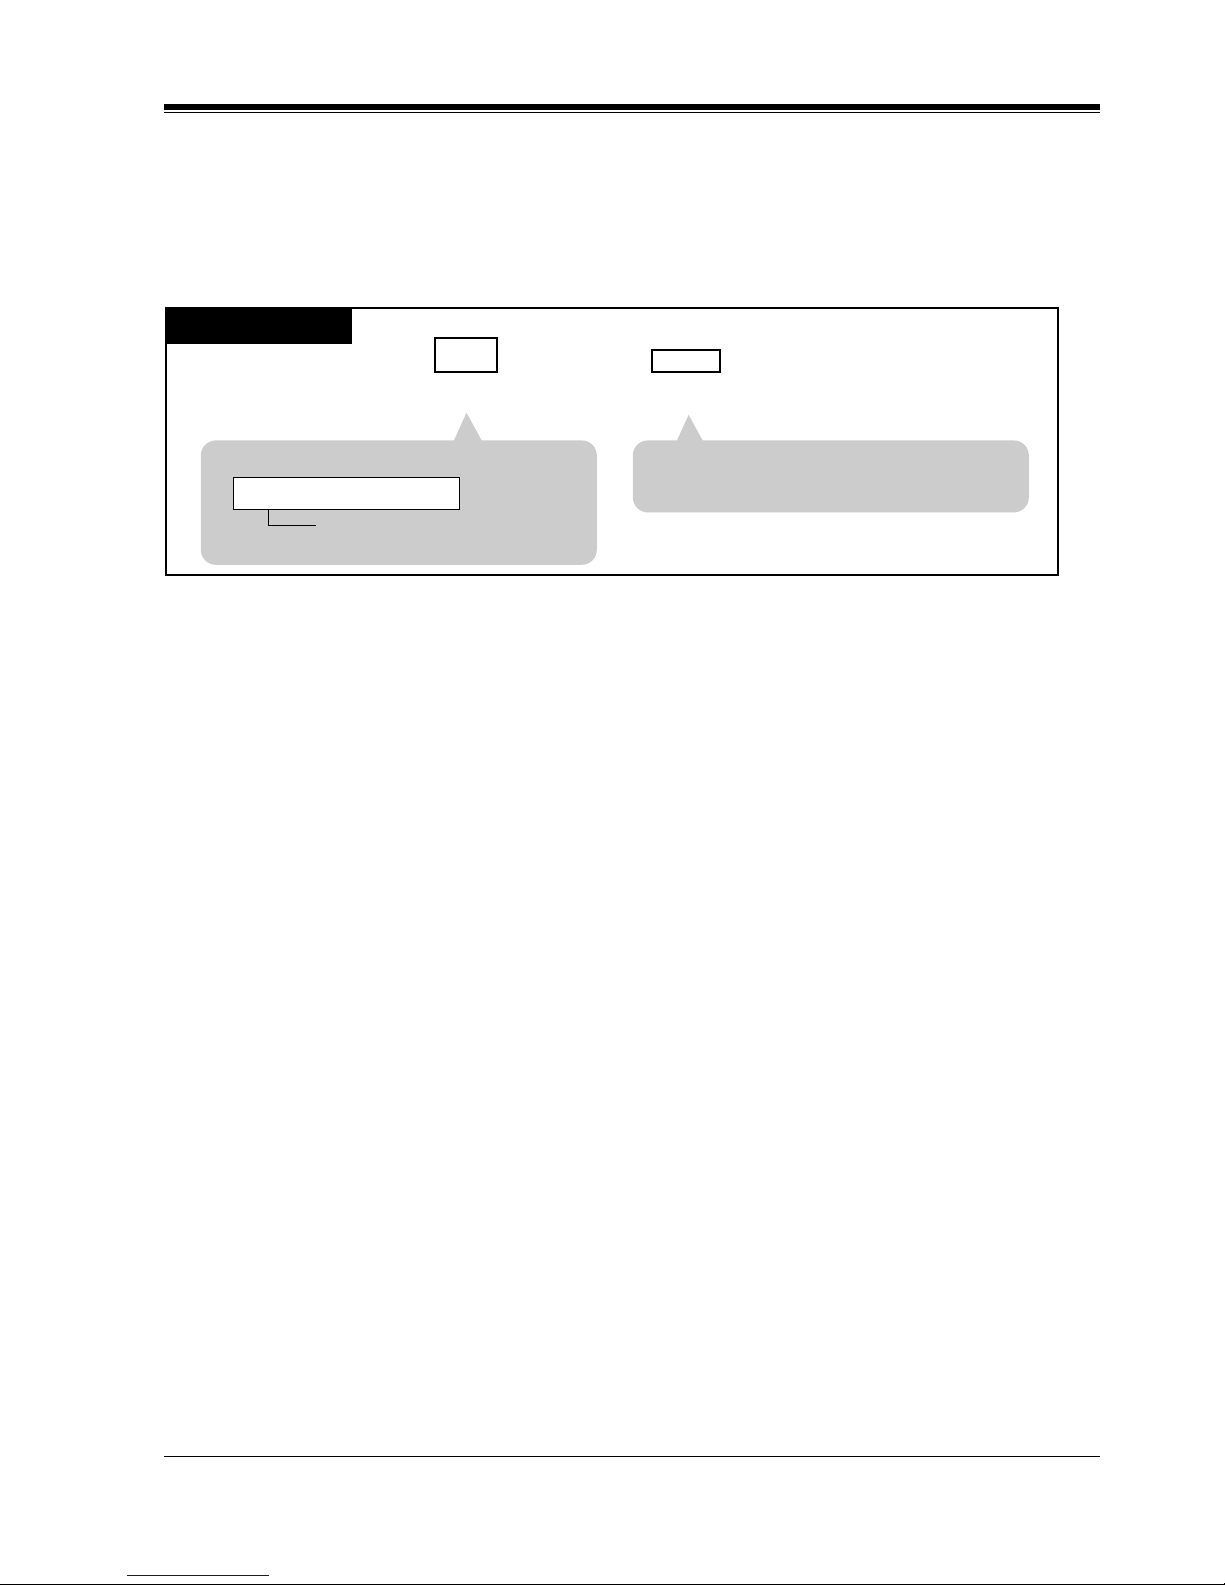
Station Programming
User Manual 97
2.2.15 Self-Extension Number Confirmation
Allows you to display your extension port physical number and extension number.
— Be sure that you are in the Station Programming mode: Press [PROGRAM] [9] [9].
— To exit the Station Programming mode: Press [PROGRAM].
Dial 6.
Press HOLD (END).
6
HOLD
PT
• The display shows the initial programming
mode.
<PT Display Example>
extension port
physical number
10101<=>EXT1001
Page 98
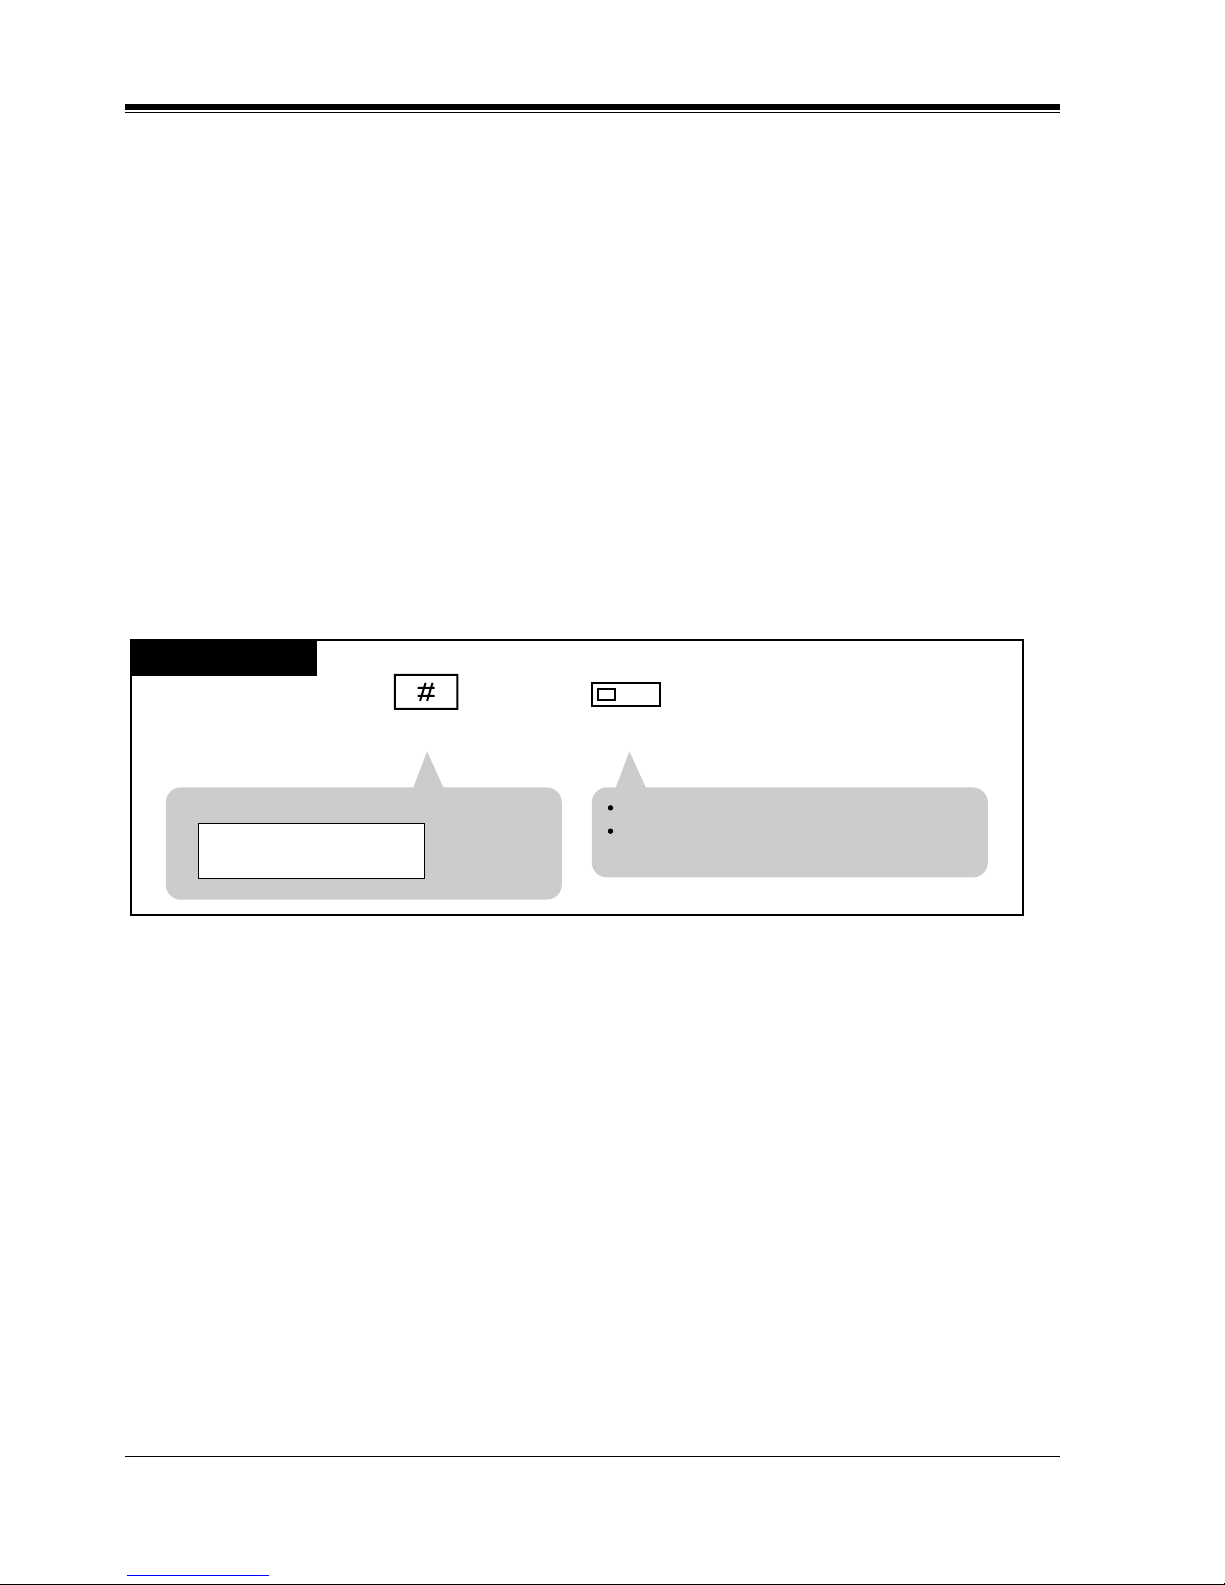
Station Programming
98 User Manual
2.2.16 Station Programming Data Default Set
Allows you to return each of the following items assigned by Station Programming to their
default settings.
a) Bilingual Display Selection (default: English)
b) Call Waiting Tone Type Assignment (default: Tone 1)
c) Full One-Touch Dialing Assignment (default: On)
d) Handset/Headset Selection (default: Handset)
e) Initial Display Selection (default: Caller ID)
f) Intercom Alert Assignment (default: Tone Call)
g) Live Call Screen Mode Set (default: Hands-free)
h) Preferred Line Preference — Incoming (default: Ringing Line)
i) Preferred Line Preference — Outgoing (default: INTERCOM Line)
— Be sure that you are in the Station Programming mode: Press [PROGRAM] [9] [9].
— To exit the Station Programming mode: Press [PROGRAM].
PT
Press STORE.
Dial #.
AUTO DIAL
STORE
The STORE indicator lights.
The display shows the initial programming
mode.
<PT Display Example>
Clear Ready?
Page 99
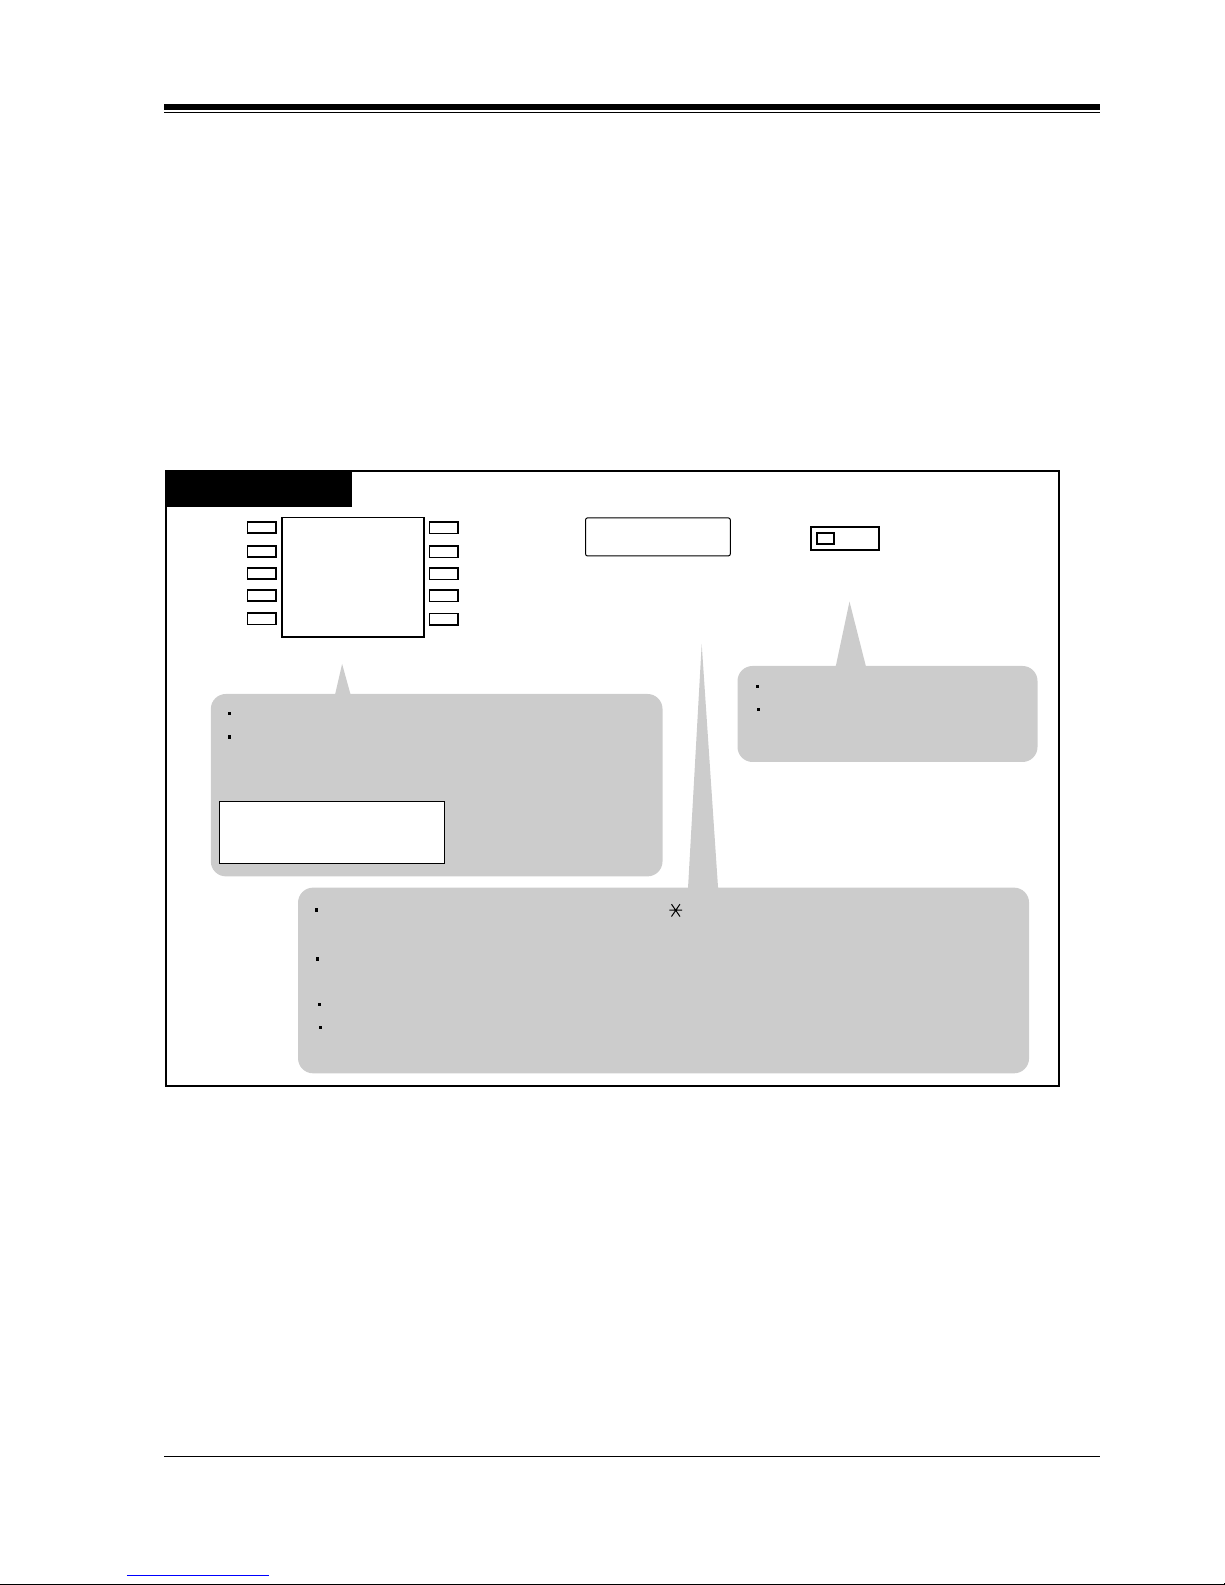
Station Programming
User Manual 99
2.2.17 Station Speed Dialing Number/Name Assignment [KXT7235/KX-T7431/KX-T7433/KX-T7436 only]
Allows you to assign frequently dialed numbers and names to each Function button on your PT.
For KX-T7235 and KX-T7436 users
To store a number
— Be sure that you are in the Station Programming mode: Press [PROGRAM] [9] [9].
— To exit the Station Programming mode: Press [PROGRAM].
7235/7436
Press STORE.
Enter the desired number
(extension number,
phone number, etc.).
desired number
AUTO DIAL
STORE
PT-PGM Mode
F5
F4
F3
F2
F1
F10
F9
F8
F7
F6
Press Function (F1-F10).
The STORE indicator lights.
The display shows the initial
programming mode.
Up to 24 digits, consisting of 0 through 9, , #, FLASH, PAUSE, INTERCOM,
(“[” or “]” : secret) and CONF (-:hyphen), can be stored.
To store the telephone number of an outside party, the line access code (9 or 801
through 848) must be stored as the leading digit.
To erase the line, press the CLR (S2) button.
To store a name, press the NEXT(S3) button and go to step 3 in “To store a name”
as described in the following procedure.
The STORE indicator light turns off.
The display shows the current status.
(If nothing is stored, “Not Stored” is displayed.)
<PT Display Example>
(– Outside number, 123-4567,
is now programmed.)
9-123-4567
CLR NEXT
Page 100
Station Programming
100 User Manual
To store a name
— Be sure that you are in the Station Programming mode: Press [PROGRAM] [9] [9].
— To exit the Station Programming mode: Press [PROGRAM].
* Please refer to "Combination Table 1" and "Combination Table 2" in Section
"2.2.17 Station Speed Dialing Number/Name Assignment [KX-T7235/KX-T7431/KXT7433/KX-T7436 only]" for information on how to enter each character.
Conditions
• Up to 10 characters can be stored.
The display shows the current status.
(If nothing is stored, "Not Stored" is displayed.)
<PT Display Example>
(
-
Name is now
programmed.)
7235/7436
Press STORE.
Press Function (F1-F10). Press NEXT (S3).
Enter the name.*
desired name
AUTO DIAL
STORE
S 1
S 2
S 3
NEXT
PT-PGM Mode
F5
F4
F3
F2
F1
F10
F9
F8
F7
F6
The STORE indicator lights.
The display shows the initial
programming mode.
The STORE indicator light turns off.
The display shows the current status.
Bob Graham
CLR NEXT
 Loading...