

Page 1
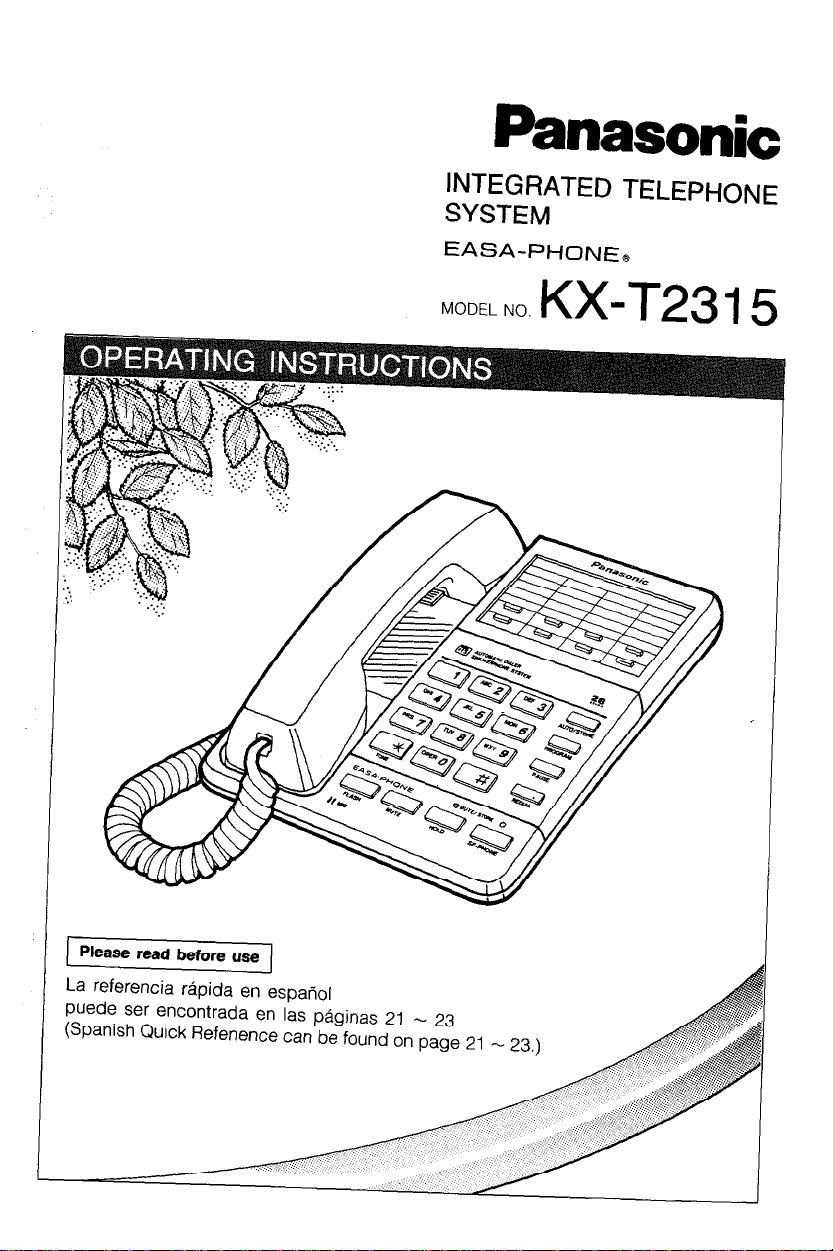
Panasonic
INTEGRATED TELEPHONE
SYSTEM
EASA-PHONEe
MODEL NO.
KX-T23 1 5
Please read before use
La referencia rapida en espariol
puede ser encontrada en las paginas 21 - 23
(Spanish Quick Refenence can be found on page
21 - 23.)
Page 2
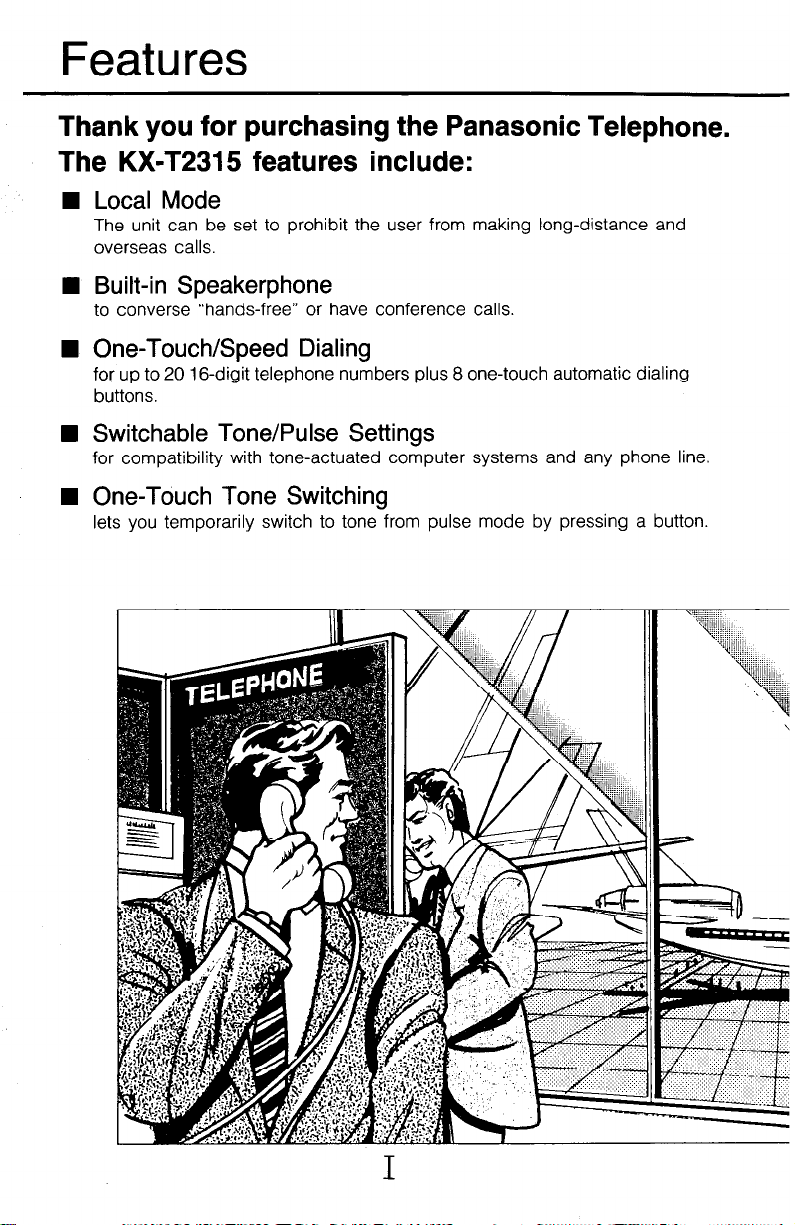
Features
Thank you for purchasing the Panasonic Telephone.
The KX-T2315 features include:
n
Local Mode
The unit can be set to prohibit the user from making long-distance and
overseas calls.
n
Built-in Speakerphone
to converse “hands-free” or have conference calls.
One-Touch/Speed Dialing
n
for up to 20 16-digit telephone numbers plus 8 one-touch automatic dialing
buttons
n
Switchable Tone/Pulse Settings
for compatibility with tone-actuated computer systems and any phone line.
One-Touch Tone Switching
n
lets you temporarily switch to tone from pulse mode by pressing a button.
Page 3
W Electronic Hold
to hold your calling party --- can be released just by lifting the handset of
the unit or any extension.
n Timed Flash (700 ms) Memory
for automatic dialing and special telephone company services, such as call
waiting.
q On-Hook Dialing
Monitor speaker lets you dial without lifting the handset.
Page 4
Precautions
Before using this unit, please read these
operating instructions carefully.
Take special care to follow the warning
indicated on the unit itself as well as the
safety suggestions listed below.
Installations
Environment
Water and Moisture: Do not use this
1)
unit near water - for example, near
a bath tub, washbowl, swimming
pool, or the like. Damp basements
should also be avoided.
Heat: The unit should be situated
2)
away from heat sources such as
radiators and the like. It also should
not be placed in temperatures less
than 41 “F (5°C) or greater than 104°F
(40°C).
Placement
Foreign Material: Care should be
1)
taken so that objects do not fall into
and liquids are not spilled into the
unit. Do not subject this unit to
excessive smoke, dust, mechanical
vibration, or shock.
Magnetism: The unit should be
2)
situated away from equipment or
devices that generate a strong
magnetic field.
Stacking: Do not place heavy objects
3)
on top of this unit.
Surface: Place the unit on a flat level
4)
surface.
If there is any trouble, disconnect the
unit from the telephone line and connect
a known working phone. If the known
working phone operates properly, have
your Panasonic phone repaired by one
of the specified Panasonic Factory
Service Centers. If the known working
telephone does not operate properly,
consult with your telephone company.
Page 5

Important Information
If requested by the Telephone
Company, inform them as follows:
l
FCC Registration No.
(found on the bottom of the unit)
$
l
Ringer Equivalence 1 .O B
:
l
The particular telephone line to
which the equipment is connected.
In the event terminal equipment
causes harm to the telephone network,
the telephone company should notify
the customer, if possible, that service
may be stopped. However, where prior
notice is impractical, the company
may temporarily cease service
providing that they:
Promptly notify the customer.
(4
Give the customer an oppt-tunity
(b)
to correct the problem with their
equipment.
Inform the customer of the right to
(cl
bring a complaint to the Federal
Communication Commission
pursuant to procedures set out in
F.C.C. Rules and Regulations
Subpart E of Part 68.
The Telephone Company may make
changes in its communications
facilities, equipment, operations or
procedures, where such action is
reasonably required in the operation
of its business and is not inconsistent
with the rules and regulations in F.C.C.
Part 68. If such changes can be
reasonably expected to render any
customer terminal equipment
incompatible with telephone company
communications facilities, or require
modification or alteration of such
terminal equipment, or otherwise
materially affect its use or
performance, the customer shall be
given adequate notice in writing, to
allow the customer an opportunity to
maintain uninterrupted service.
WARNING
TO PREVENT FIRE OR SHOCK
HAZARD, DO NOT EXPOSE THIS
PRODUCT TO RAIN OR ANY TYPE
OF MOISTURE.
This telephone *provides
magnetic coupling to hearing
aids
CAUTION:
To assure continued compliance with FCC
rules, do not make any unauthorized
modifications.
“This equipment has been tested and
found to comply with the limits for a Class
B computing device in accordance with
the specifications set forth in Subpart J or
Part 15 of the FCC Rules. If this equipment
does cause interference to radio or
television reception which can be
determined by turning the equipment on
and off, use the equipment in another
location and/or utilize an electrical outlet
different from that used by the receiver.”
Ringer Equivalence No. (REN):
The REN is useful to determine the
quantity of devices you may connect to
your telephone line and still have all of
those devices ring when your telephone
number is called. In most, but not all
areas, the sum of the REN’s of all devices
connected to one line should not exceed
five (5.0). To be certain of the number of
devices you may connect to your line, as
determined by the REN, you should
contact your local telephone company to
determine the maximum REN for your
calling area.
Iv
Page 6
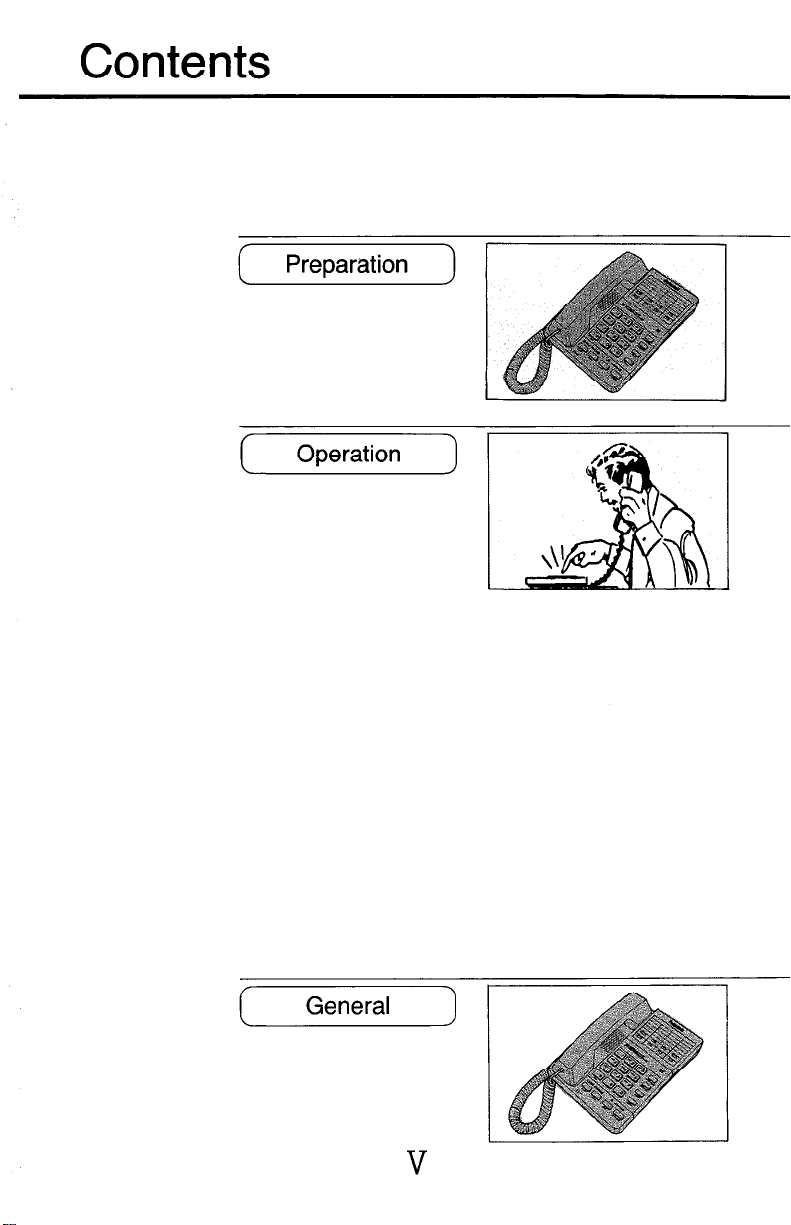
Contents
C
Preparation
Operation
3
(
General
Page 7

Features ................................................
Precautions ..............................................
Important Information
Contents
................................................ V
...................................... IV
I
III
Location of controls and jack
Connection .............................................
Battery Installation
Initial Settings
Making and Receiving Calls
Storing Phone Numbers
Automatic Dialing
Dialing ..............................................
Correcting an Error while Storing
Erasing Stored Number
Confirming a Stored Number
Other Features.. ........................................
Mute Operation ......................................
Tone Button Usage ...................................
Hold ..................................................
Special Phone Company Services
An Outside Line or a Computer Accessed Line
Troubleshooting Guide
Accessory Order Information
.......................................
...........................................
.........................................
....................................
.............................. 1
...............................
..................................
........................
................................
...........................
..........................
...............................
...............
3
4
5
7
10
13
13
14
14
15
16
16
16
17
18
19
20
20
Referencia rapida
Walt Mounting ..........................................
........................................
VI
21
24
Page 8
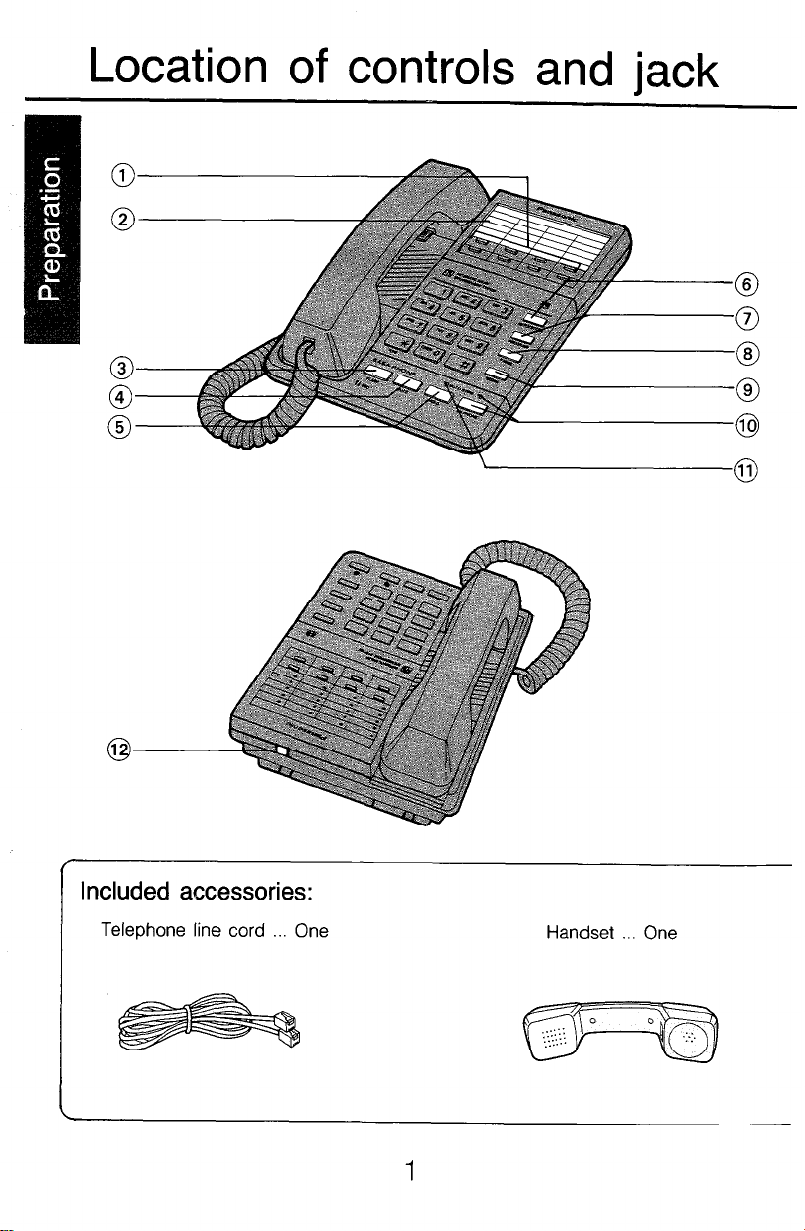
Location of controls and jack
,
Included accessories:
Telephone line cord One
Handset One
1
Page 9
@Direct Call Button
@Memory Card
@Flash Button
@Mute Button
@Hold Button
: It is used when you do not want your voice to be heard
: It is used to put the calling party on hold during a
@Auto/Store Button
@ Program Button
@ Pause Button
@ Redial Button
: They are used to store telephone numbers and
to make call by one-touch dialing.
1 You can also use the reverse side for writing. The
instructions for storing numbers into memory and
dialing are printed on the Memory Card.
: It is used to access some of.the features of your host
PBX, and your telephone company.
by the other party. The voice of the calling party will still
be heard.
conversation.
: It is used to store and dial telephone numbers
in speed dialing mode.
: It is used to program telephone numbers in the
memory.
: It is used to pause the dialing process.
: It is used to redial the last dialed telephone number
@SP-PHONE Button and Indicator
: It is used for on-hook dialing
and hands-free operation.
When this feature is being
used, the indicator lights.
@Mute/Store Indicator
: Lights up when the MUTE or PROGRAM
button is pressed.
@Telephone Line Jack
Handset cord One AA size batteries Three
2
Page 10
Connection
Modular Jack for
single line (RJll C)
W This unit may not be connected to a coin operated line. If you are on a party
line, check with your local telephone company.
W Do not use any handset other than Panasonic handset made for the model
KX-T231 O/KX-T2315.
3
Page 11

Battery Installation
Three AA size batteries (UM-3) serve as the power source to retain the stored
telephone numbers in memory.
Remove the wall mount adaptor.
Open the battery compartment
cover.
Insert the three AA size batteries
observing the correct polarity.
Replace the adaptor.
NOTE:
n To prevent loss of the stored telephone numbers, replace the batteries within
10 minutes after removing the old ones.
W Disconnect the telephone cord before opening the battery compartment
cover.
n Replace all the batteries once a year, or misoperation may occur.
n Do not use Nickel-Cadmium batteries.
BATTERY PRECAUTIONS: The batteries should be used correctly, otherwise,
the unit may be damaged due to battery leakage.
q Do not mix different types of batteries.
q Do not charge, short-circuit, disassemble, heat or dispose in fire.
n Remove all the batteries when replacing.
4
Page 12

Initial Settings
5
Page 13

Dialing Mode Selector
Set to “Tone”.
If dialing can not be done, set to “PULSE”.
Ringer Volume Selector
Set to “HIGH”.
LOW: The ringing sound will be low.
OFF: The telephone will not ring.
Local Call Only Switch
OFF: Local and long distance calls can
be made.
ON : The manual or automatic dialing
operation of a number with more
than 7 digits is not possible.
Use a pencil or a bail-point pen to fill In the
station directory with station name. (You can
use the reverse side for writing, too.)
ORemove the cover using an
instrument with a pointed
end, like a pen.
6
Page 14

Making and Receiving Calls
Lift the handset.
Dial the telephone number.
Speak to the other party.
l
You can switch to the speakerphone at
anytime by pressing the SP-PHONE
button. You can replace the handset on
the cradle.
7
Page 15

Press the SP-PHONE button.
l
The SP-PHONE indicator lights,
Dial the telephone number.
Speak to the other party.
l
You can also switch to the handset at
anytime by lifting the handset.
When finished, Press the
SP-PHONE button again.
l
The SP-PHONE indicator light goes out
n When the other party finds it difficult to hear your voice:
Lower the sound level using the Speaker Volume Control or speak louder.
n Absorbing echoes:
Use in a room which has curtains or carpeting.
n To avoid lost or broken conversation:
If you and caller speak at the same time, parts of your conversation will be
lost. To avoid this, speak alternately.
8
Page 16

Making and Receiving Calls (cont.).
Lift the handset.
Press the SP-PHONE button.
Speak to the calling party.
or
Press the REDIAL button when
the line is busy.
l
Pressing the REDIAL button enables
you to redial once.
9
Page 17

Storing Phone Numbers
n There are 20 memory stations, each station is capable of storing 16 digits
n There are 8 Direct Call buttons, each capable of storing 16 digits.
Each Dialing button serves as a memory station.
Be sure that the handset is on the cradle and the SP-PHONE indicator is off
and the batteries are installed.
n Home Use
Press the PROGRAM button
until the STORE indicator lights.
Press the Station number.
0 Phone numbers can be stored into
memory stations m m to m p[
following the same procedure.
Dial the telephone number.
-
Press the AUTO/STORE button
to store the number into
memory.
After storing all the numbers,
press the PROGRAM button.
l
The STORE indicator goes out.
IO
Page 18

Storing Phone Numbers (cont.)
H Home Use
Press the PROGRAM button
until the STORE indicator lights.
Press the Direct Call button.
Dial the telephone number.
Press the AUTO/STORE button
to store the number into
memory.
After storing all the numbers,
press the PROGRAM button.
l
The STORE indicator goes out.
11
Page 19

W Office Use (PBX)
Press the PROGRAM button
until the STORE indicator lights.
Press the Station number.
l
You may use the Direct call button
instead of pressing the station number.
Enter Line access n u m her for
an example 9.
Press the
PAUSE button.
Dial the telephone number.
Press the AUTO/STORE button.
After storing all the numbers,
press the PROGRAM button.
l
The STORE indicator goes out.
Page 20

Automatic Dialing
Lift the handset, or press the
SP-PHONE button.
Press the AUTO/STORE button.
Press the Station number.
(01 to
20)
Press the Direct Call button.
n
To change a stored number, repeat the steps of “Storing Phone numbers”.
n
If the batteries are not installed, programming and speakerphone operation
can not be done.
13
Page 21

Press the PROGRAM button if
you notice an error.
l
Repeat all the steps of “Storing Phone
Numbers” on the page 10 to reprogram.
Example: To erase the number in memory station m pi :
Be sure that the handset is on the cradle and the SP-PHONE indicator is off
and the batteries are installed.
Press the PROGRAM button
until the STORE indicator lights.
Press the Station number m 121.
Press the AUTO/STORE button.
Press the PROGRAM button.
l
The STORE indicator goes out.
14
Page 22

Automatic Dialing (cont.)
Be sure that the handset is on the cradle and the SP-PHONE indicator is off
and the batteries are installed.
Press the PROGRAM button
until the STORE indicator lights.
Repeat storing the same number
into the same station.
r Press the AUTO/STORE button.
l
The STORE indicator.
Blinks once: The entry is the same as
what was previously stored.
Lights:
The entry is different from
the one that was previously
stored
15
Page 23

Other Features
The MUTE button is useful when you do not want your voice or conversation to
be heard by the other party.
Press the MUTE button.
l
The MUTE indicator lights.
To resume the conversation,
press the MUTE button again.
l
The MUTE indicator goes out.
If you want to change from pulse mode into tone mode during dialing, the TONE
button can be used instead of changing the Dialing Mode selector.
16
Page 24

Hold
The HOLD button is useful to keep a call on hold while having a conversation.
Press the HOLD button while in
conversation.
l
The HOLD indicator blinks slowly.
l
You can replace the handset on to the
n If the handset is off-hook:
Press the HOLD button and start
speaking.
w If the handset is on the cradle:
Lift the handset or
SP-PHONE button
speaking.
press the
and start
n When using another telephone connected on the same line:
Lift the handset of the other
telephone.
If the hold is not released, press the hook
switch of the other telephone for about one
second.
17
Page 25

Special Phone Company Services
The FLASH button can be used for CALL WAITING.
For more details please see the brochure issued by your telephone company.
While having a conversation, another party calls and
a call waiting tone is heard.
Press the FLASH button once.
l
The first conversation is placed on
hold and the second call can be
answered.
Press the FLASH button once
again.
l
The first caller can be answered again
and the second call is placed on hold.
l
If the calling party on hold hangs UP,
the line is terminated.
n You may access some features of your PBX using the FLASH button instead
of the hookswitch.
Press the FLASH button once in the dialing operation. The “Flash” can be
stored into memory in the same way as “Storing Phone Numbers” on page 10.
The memory station can be programmed to automatically access features of
your host PBX. Press the FLASH button once at the position where the
hookswitch operation is required in a dialing operation.
18
Page 26

An Outside Line or a Computer Accessed Line
The PAUSE function in the dial operation is helpful when accessing an outside
line or a Computer-Accessed long distance service.
If you press the PAUSE button, you can dial the telephone number without waiting
for the line access or the computer tone.
One pause is required when waiting for an outside dial tone.
Example (PBX):
9
-1 ( Phone No. ]
F!
Line Access No.
Some PBXs require the “PAUSE” during the redial.
Two pauses are required when waiting for a computer access tone.
Example (For MCI, SPRINT, etc.):
Storing telephone numbers into memory stations m m, pj m and m 0
AUTO/STORE
ip Toneor Puke’
hy ‘?%k!$’ -1 I Authorization No. 1 1 AUTO/STORE I
7 Tone Only 1
l
2 or 3 memory stations are required, as one memory cannot store over 16
digits.
l
Pressing the PAUSE button once counts as 1 digit.
l
Pressing the TONE button counts as 1 digit.
(Refer to “Tone Button Usage” on page 16.)
19
Page 27

Troubleshooting Guide
Problem
The unit does not ring. Ringer Volume Selector is set to
l
The caller suddenly can not hear
my voice during a conversation.
l
I suddenly can not hear caller’s
voice during a conversation.
Redialing or Programming OperatiOn
does not function.
Hands-free operation does not
function after pressing the
SP-PHONE button.
Cause & Remedy
“OFF”. Set to “HIGH” or “LOW”.
Look at the STORE indicator.
If it is blinking slowly, press the
HOLD button to resume the
conversation.
Batteries may have become weak.
Replace all the batteries.
Accessory Order Information
Replacement pans and accessories are available through your local authorized
parts distributor.
For the authorized distributors in your area, call toll free: l-800-447-4700
20
Page 28

Referencia rhpida
Localizackb de 10s controles
Both de llamada directa
Tarjeta de memoria
Bot6n FLASH
Both silenciador
(MUTE)
I
Both del parlante-micrbfono
(SP-PHONE)
Both de retencih
(HOLD)
21
Both de aut/
almacenamiento
(AUTO/STORE)
Both de programa
(PROGRAM)
)t6n de pausa
Both de rediscado
(REDIAL)
Page 29

Conexibn
ord6n de microtelkfono
Toma modular para
linea irnica (FIJI 1 C)
n Esta unidad no puede conectarse a una linea operada con monedas. Si Vd.
est.5 en una linea de usuario, compruebe con su compatiia telef6nica local.
n No utilice ninglin microtekfono diferente del microtelkfono Panasonic hecho
para el modelo KX-T231 OIKX-T231.5.
22
Page 30

Selector de modo de discado
Fijar a “Tone”.
Si no se puede discar, ponga en “PULSE”.
Selector de volumen de timbre
Poner en “HIGH”.
LOW: El sonido de repique serk. bajo.
OFF: El telkfono no repicark
Interruptor de ~610 llamada local
OFF: Puede efectuarse discado normal.
ON: No es posible la operacih de
discado manual o automAtico de un
nlimero con m&s de 7 digitos.
23
Page 31

‘I Mounting
This unit can be mounted on a wall phone plate. If you do not have a modular
wall plate installed, consult your telephone company or an installer.
Turn the handset hook
around.
Remove the attaching stand.
about
7 inches
Insert the cord as shown.
Mount the unit on the wall
phone plate.
Place the handset.
To temporarily place the
handset down during a
conversation, hook as shown
Place the stand back
24
Page 32

If you ship the product
Carefully pack and send it prepaid, adequately insured and preferably in the original
carton.
Attach a postage-paid letter, detailing the complaint, to the outside of the carton.
Do NOT send the product to the Executive or Regional Sales offces. They are NOT
equippped to make repairs.
For your future reference
Serial No. (found on the bottom of the unit)
Name of Dealer
Date of Purchase
Dealer’s Address
c J
Panasonic Company
Division of Matsushita Electric Corporation of America
One Panasonic Way, Secaucus, New Jersey 07094
Panasonic Sales Company (“PSC”)
Division of Matsushita Electric of Puerto Rico, Inc.
San Gabriel Industrial Park, 65th Infantry Avenue, KM 9.5, Carolina, P.R. 00630
Printed in Japan
PQQX6122ZB
SO29OJO
 Loading...