

PANASONIC KX-HNK101EX2 User Manual [fr]

User’s Guide
Text entity: en_us
Model No.

Table of Contents
Welcome to the Panasonic Home
Network System!
Overview .............................................................4
Monitoring ...........................................................5
Peace of mind .....................................................6
Convenience .......................................................7
Damage protection .............................................8
Communication ...................................................9
Overview .............................................................9
Hub (KX-HNB600) ............................................12
Indoor Camera (KX-HNC200, KX-HNC210) .....13
Outdoor Camera (KX-HNC600) ........................14
Window/Door Sensor (KX-HNS101) .................15
Motion Sensor (KX-HNS102) ............................16
Water Leak Sensor (KX-HNS103) ....................17
Glass Break Sensor (KX-HNS104) ...................18
Indoor Siren (KX-HNS105) ...............................19
Smart Plug (KX-HNA101) .................................20
Access Keypad (KX-HNK101) ..........................21
Keychain Remote (KX-HNK102) ......................22
Backup Battery (KX-HNP100) ..........................23
Digital Cordless Handset (KX-HNH100) ...........24
System setup
Usage examples
Using the app
App basics (overview) .......................................32
Using the home screen .....................................33
Displaying the options menu .............................35
Using the shortcuts menu .................................35
Accessing from multiple mobile devices ...........35
Exiting and logging out .....................................37
Confirming system status (overview) ................37
Status notifications ............................................37
Confirming status in the [Home Network] app home
screen ...............................................................39
Device LED indicators ......................................39
Alarm system features (overview) ....................44
Triggering the alarm system .............................44
Arming and disarming the alarm system ..........45
Alarm system settings .......................................46
Alert by phone call ............................................47
Alarm system PIN .............................................49
Smart control features (overview) .....................49
Creating smart control scenarios ......................50
Turning smart control scenarios on and off ......52
Editing smart control scenarios .........................52
Erasing smart control scenarios .......................52
Sensor features (overview) ...............................53
Viewing sensor status .......................................54
Viewing sensor history ......................................55
2
Differences between window sensors and door
sensors .............................................................56
Sensor settings .................................................56
Camera features (overview) .............................57
Viewing the camera list .....................................57
Viewing live camera images .............................57
Recording camera images (manual
recording) ..........................................................58
Taking snapshots ..............................................59
Talking to the camera .......................................59
Playing a lullaby (indoor cameras only) ............59
Viewing the recording list ..................................60
Playing back recordings ....................................61
Erasing recordings ............................................61
Temperature alert (indoor cameras only) .........62
Sound alert (indoor cameras only) ....................62
Camera settings ................................................63
Information about SD cards ..............................66
Backup battery features (overview) ..................67
Configuring power outage notifications .............67
Assigning a device to a backup battery ............68
Keychain remote features (overview) ...............68
Configuring the smart button ............................68
Smart plug features (overview) .........................68
Turning smart plugs on and off .........................69
Confirming smart plug status ............................69
Viewing smart plug history ................................70
Viewing smart plug energy consumption ..........70
Phone features (overview) ................................71
Making calls ......................................................71
Other features available during landline calls ...72
Answering landline calls ...................................73
Using cordless handsets ...................................73
Call logs ............................................................75
Phonebook features ..........................................76
Copying contacts to the hub .............................76
Blocking incoming calls .....................................77
Sound settings ..................................................79
App behavior settings .......................................79
Voicemail settings .............................................80
First ring setting (certain models only) ..............80
Hub PIN setting (certain models only) ..............80
Landline settings ...............................................81
Phone numbers with country codes ..................82
Region setting (certain models only) ................82
Caller ID support ...............................................83
Voicemail support .............................................83
Answering system features (overview) .............84
Turning the answering system on and off .........84
Playing your messages .....................................85
Erasing all messages ........................................85
Greeting message ............................................85
Remote operation features (overview) ..............86

New message alert ...........................................86
Standard remote access ...................................88
Remote commands ...........................................88
Answering system settings ...............................90
System expansion (overview) ...........................91
Registering devices ..........................................92
Deregistering devices .......................................92
Setting device profiles (device names, locations,
and other settings) ............................................92
Device signal strength ......................................96
Notification settings ...........................................96
General settings ................................................98
Login password .................................................99
Quick access ....................................................99
Hub firmware ....................................................99
Network features .............................................100
Setting the hub’s Wi-Fi settings again ............101
Storing your security service account number
(certain models only) ......................................102
Reducing battery consumption (iPhone, iPad
only) ................................................................102
Resetting the app’s settings ............................102
Resetting the hub’s settings ............................103
Copyright information ......................................103
Open source software information ..................104
Software information .......................................104
Troubleshooting
About this document
Table of Contents
3
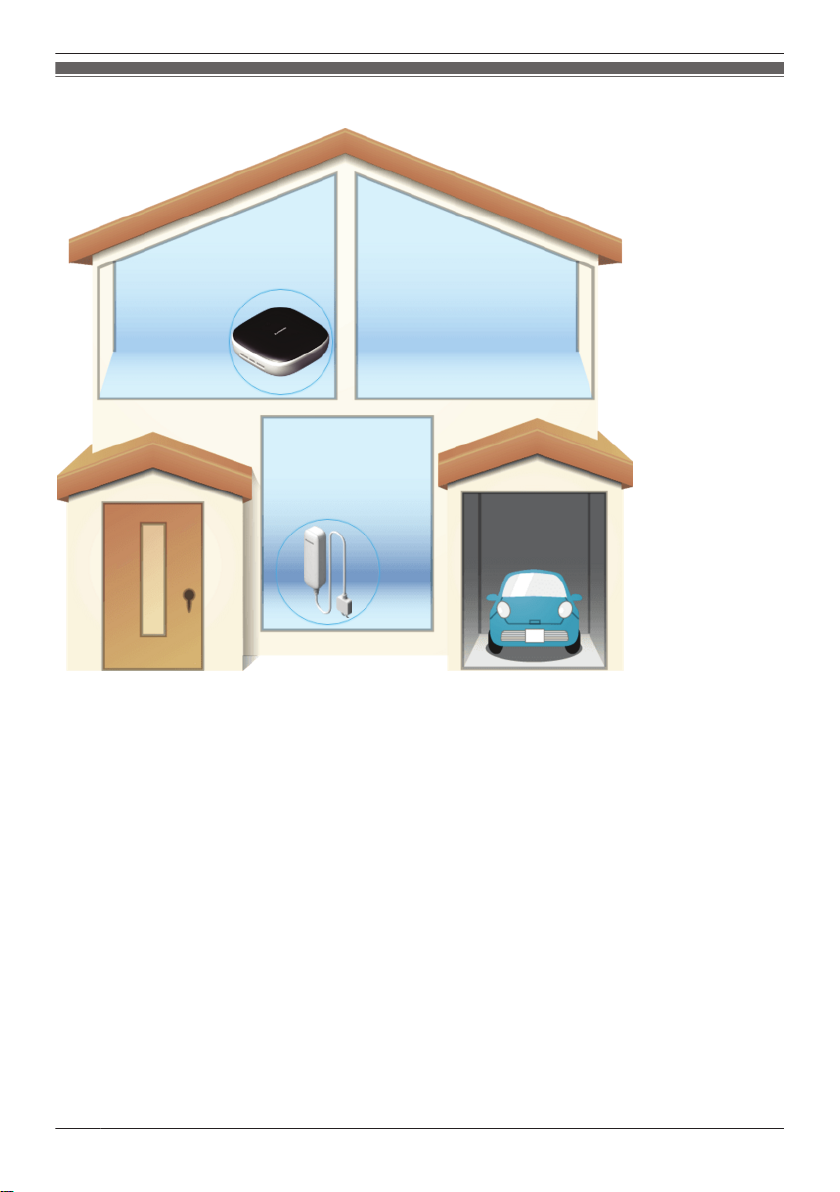
Welcome to the Panasonic Home Network System!
Overview
The Panasonic Home Network System is a wireless network of powerful devices that help you monitor,
control, and manage your home. Its easy-to-use app allows you to stay in charge even when away from
home.
4
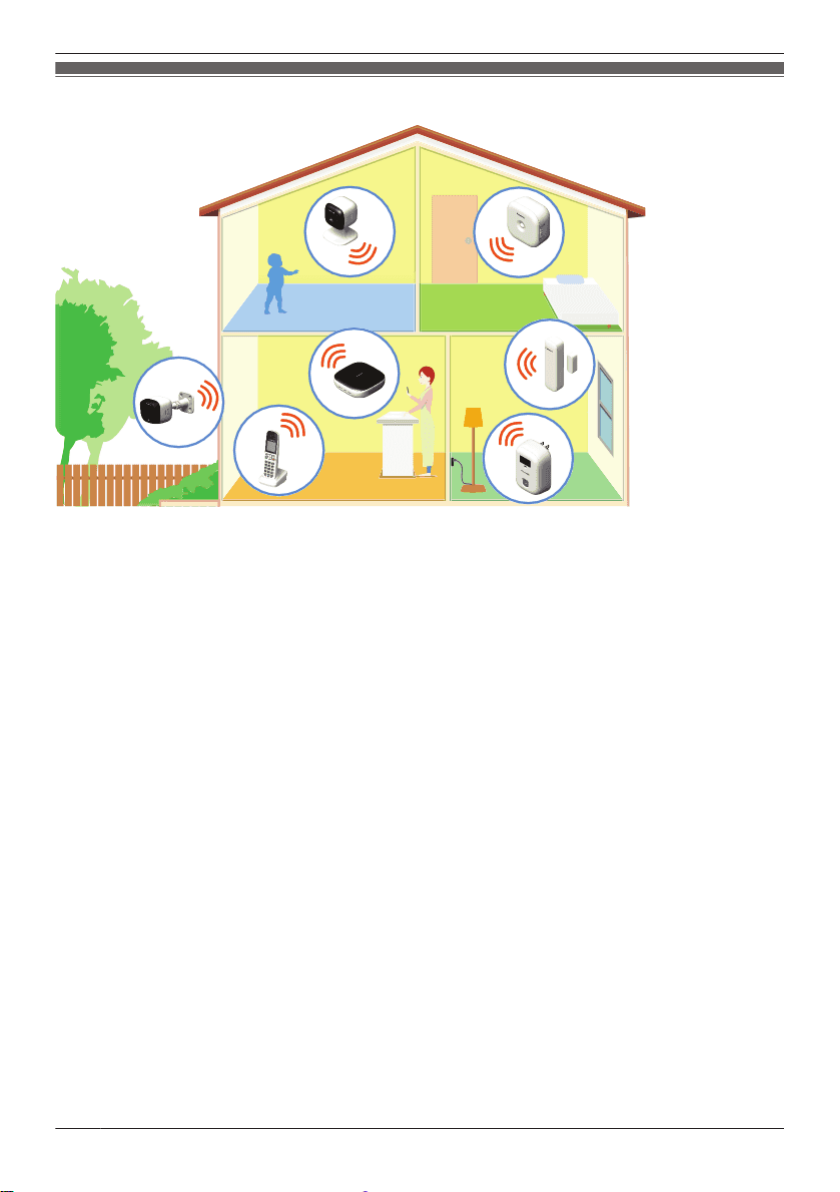
Monitoring
Welcome to the Panasonic Home Network System!
You can use your smartphone or tablet to watch live images from your cameras, even when away from
home. You can even talk to and listen to your cameras.
Select an item to learn more.
5
Welcome to the Panasonic Home Network System!
Peace of mind
You can use a variety of sensors, including motion sensors, window sensors, door sensors, and the
sensor features built in to cameras, to trigger camera recording features, call a pre-programmed phone
number when the alarm system is triggered, sound a siren, or send a notification to your smartphone or
tablet.
Additionally, backup batteries can supply power to your devices in the event of a power failure.
Select an item to learn more.
6
Convenience
Welcome to the Panasonic Home Network System!
You can use your smartphone or tablet to turn on lights or other appliances that are connected to your
smart plugs*1.
By installing keypads near frequently used entrances, you can arm and disarm the system easily on your
way out or as soon as you walk in the door.
Additionally, keychain remotes allow you to quickly arm and disarm the system with a simple press of a
button, with no screen locks or passwords to slow you down.
Select an item to learn more.
*1 Smart plug appearance varies by region.
7
Welcome to the Panasonic Home Network System!
Damage protection
You can use water leak sensors to notify your smartphone or tablet when water is detected.
Select an item to learn more.
8
Communication
Welcome to the Panasonic Home Network System!
You can use your smartphone, tablet, or a cordless handset to make and receive phone calls using your
landline while at home.
Select an item to learn more.
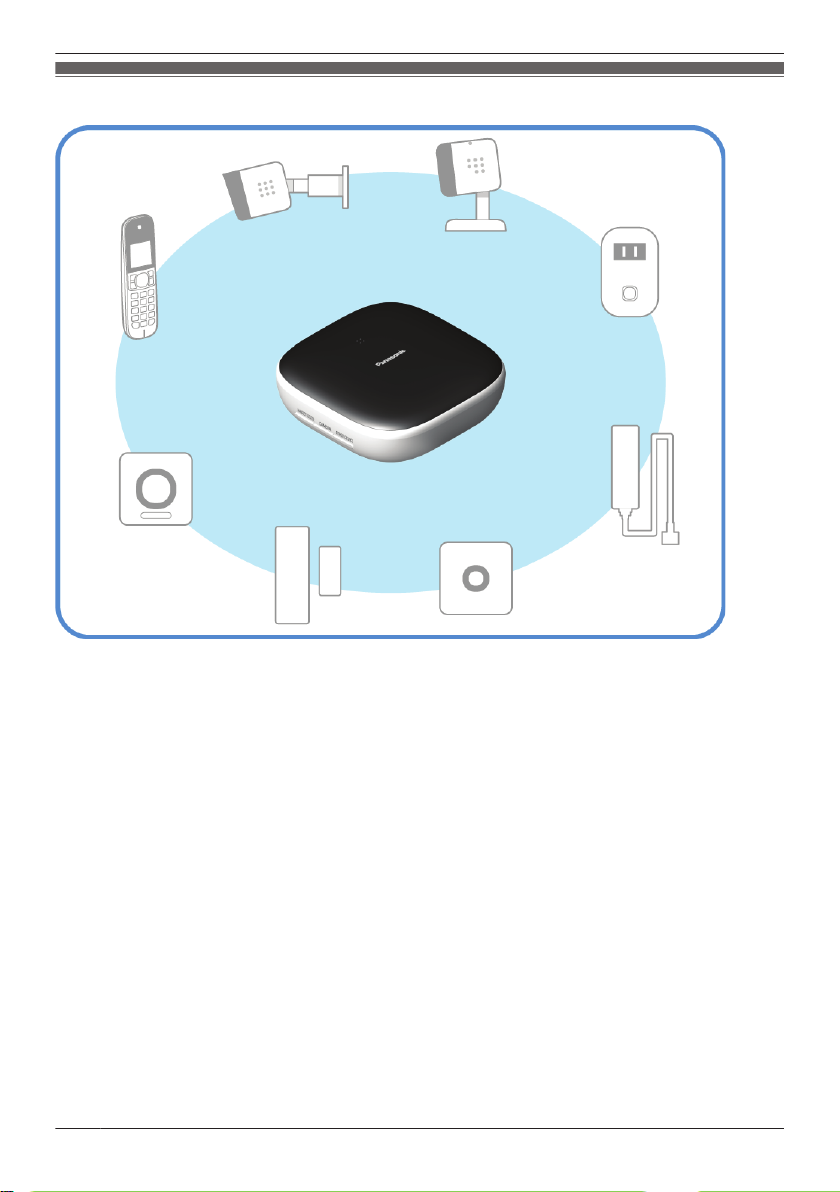
Overview
The Home Network System can be expanded to suit your needs. You can choose a pre-configured
bundle, add individual devices to an existing bundle, or build your own system by selecting the desired
devices.
Maximum number of devices
The maximum number of devices for each device type is listed below.
Note:
R Availability and release dates of devices and bundles may vary by region.
R Device appearance may vary by region.
9
Welcome to the Panasonic Home Network System!
Hub
KX-HNB600
Indoor Camera
KX-HNC200
KX-HNC210
Outdoor Camera
KX-HNC600
1
4
10
Welcome to the Panasonic Home Network System!
Window/Door Sensor
KX-HNS101
Motion Sensor
KX-HNS102
Water Leak Sensor
KX-HNS103
Glass Break Sensor
KX-HNS104
Indoor Siren
KX-HNS105
Smart Plug
KX-HNA101
50
Access Keypad
KX-HNK101
Keychain Remote
KX-HNK102
Backup Battery
KX-HNP100
Digital Cordless Handset
KX-HNH100
6
11
Welcome to the Panasonic Home Network System!
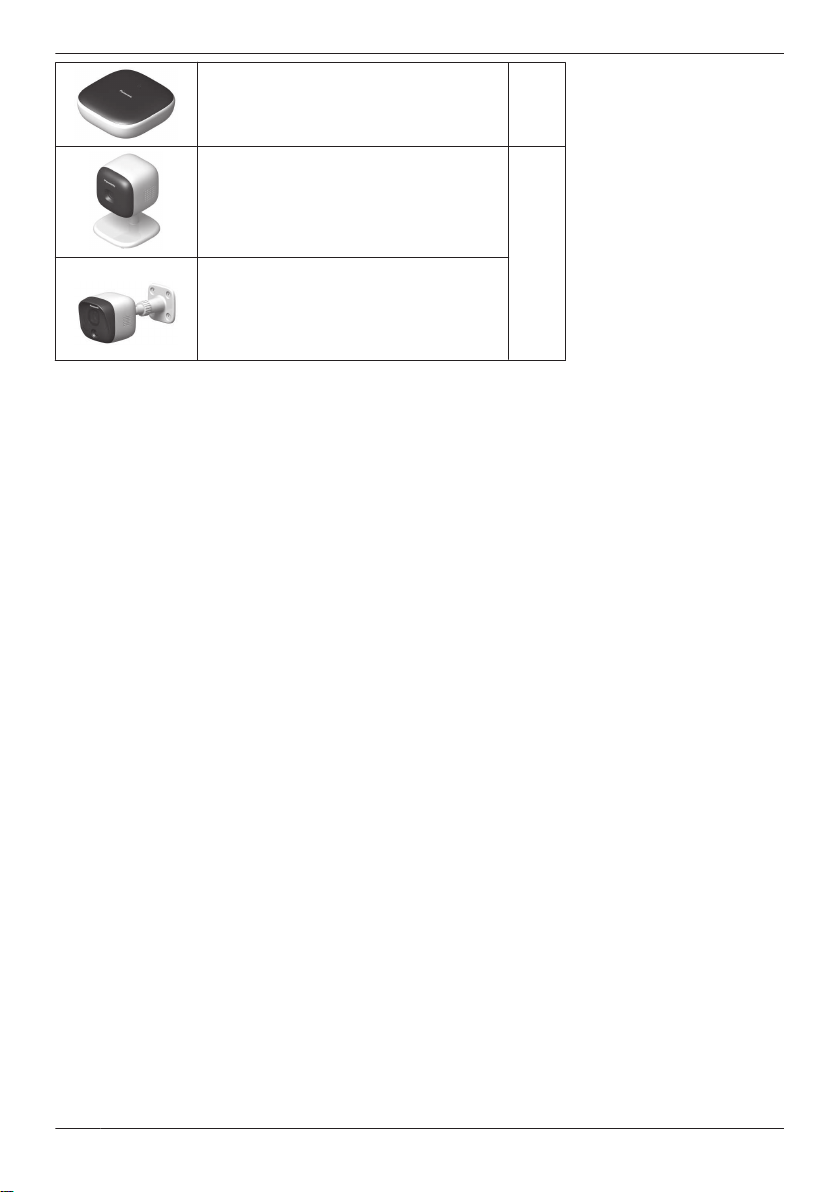
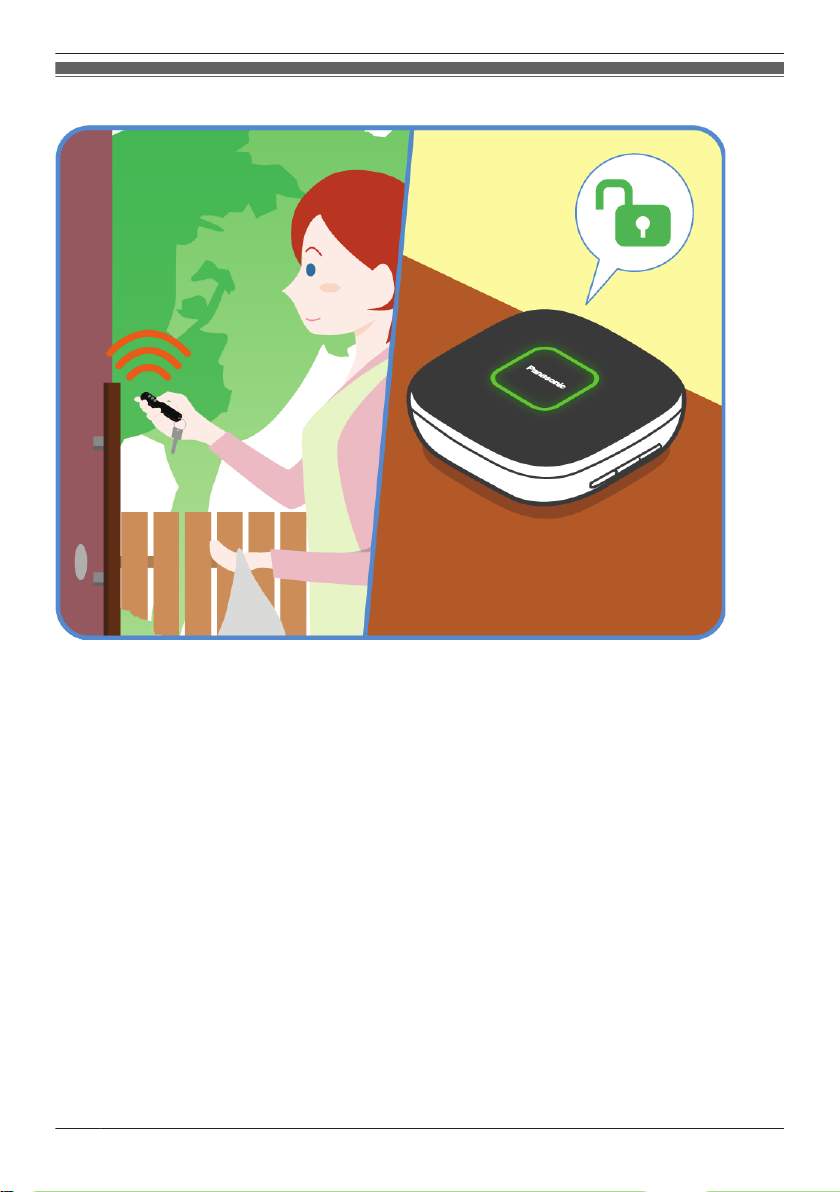
Hub (KX-HNB600)
R Joins all system devices together
R Connects to your landline for making and receiving calls
R Supports SD card connection for recording camera video and audio
12
Welcome to the Panasonic Home Network System!
Indoor Camera (KX-HNC200, KX-HNC210)
R Full-color camera with night vision and built-in microphone for live monitoring and recording
R Built-in motion sensor (visual detection), sound sensor, and temperature sensor can be used to trigger
other actions (camera recording, turning on a light, etc.)
R Built-in microphone and speaker for two-way communication
13
Welcome to the Panasonic Home Network System!
Outdoor Camera (KX-HNC600)
R Full-color camera with night vision and built-in microphone for live monitoring and recording
R Built-in motion detection features (image sensor and infrared sensor) can be used to trigger other
actions (camera recording, turning on a light, etc.)
R Built-in microphone and speaker for two-way communication
R Splash-proof design for outdoor installation
14
Welcome to the Panasonic Home Network System!
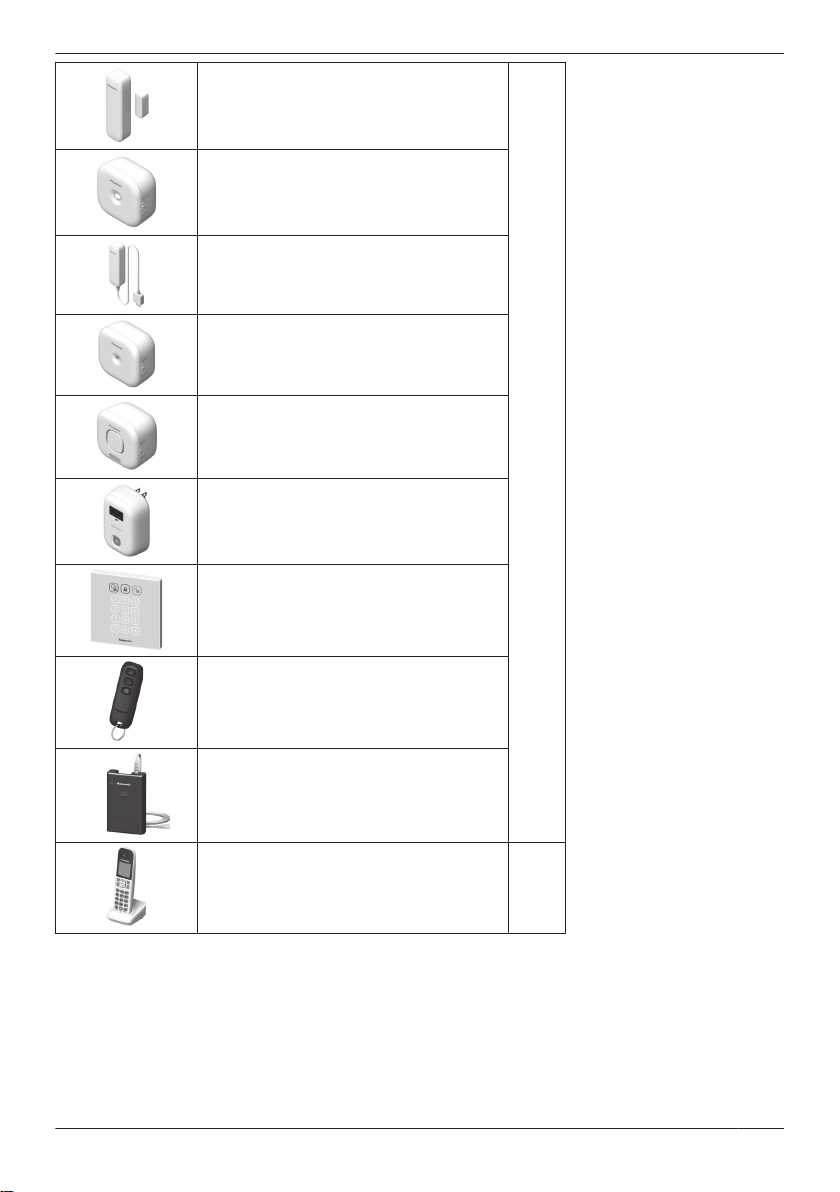
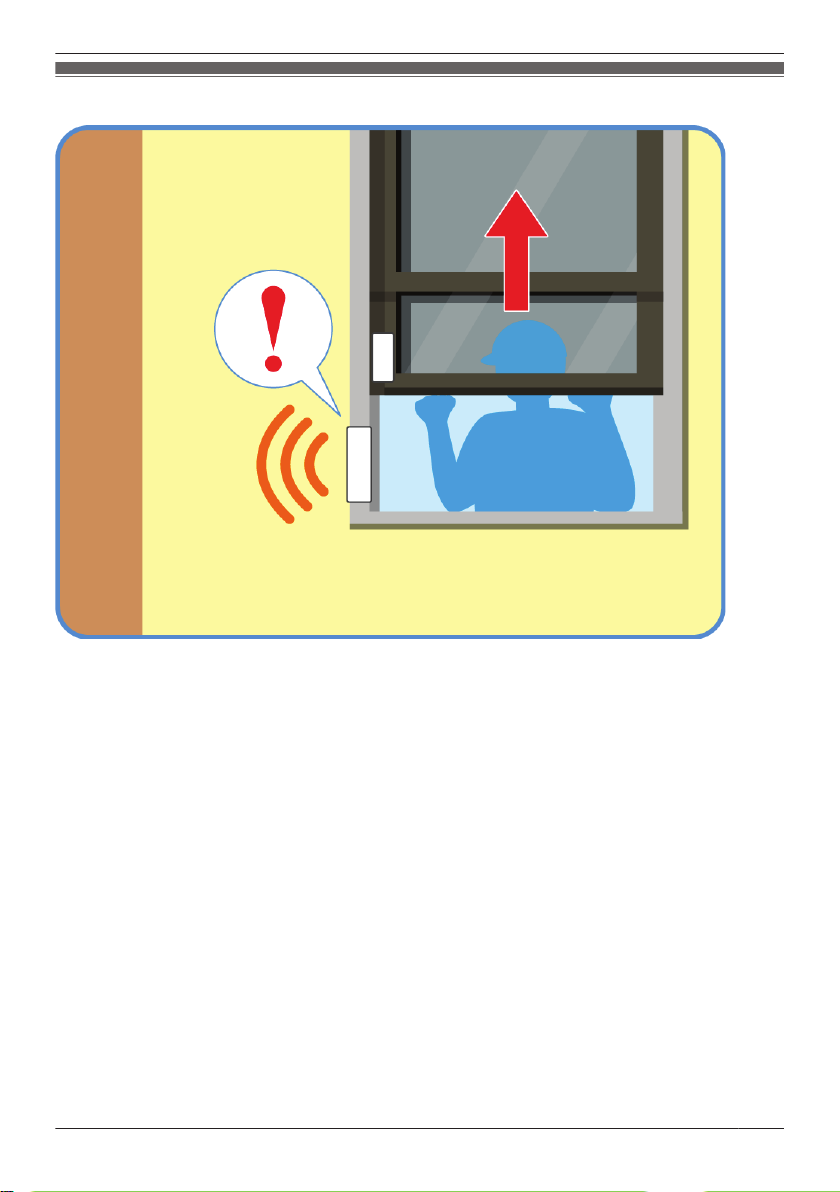
Window/Door Sensor (KX-HNS101)
R Detects when the corresponding window or door is opened
R Can be used to trigger other actions (camera recording, turning on a light, etc.)
15
Welcome to the Panasonic Home Network System!
Motion Sensor (KX-HNS102)
R Uses an infrared sensor (i.e., heat sensor) to detect motion in the surrounding area
R Can be used to trigger other actions (camera recording, turning on a light, etc.)
16
Welcome to the Panasonic Home Network System!
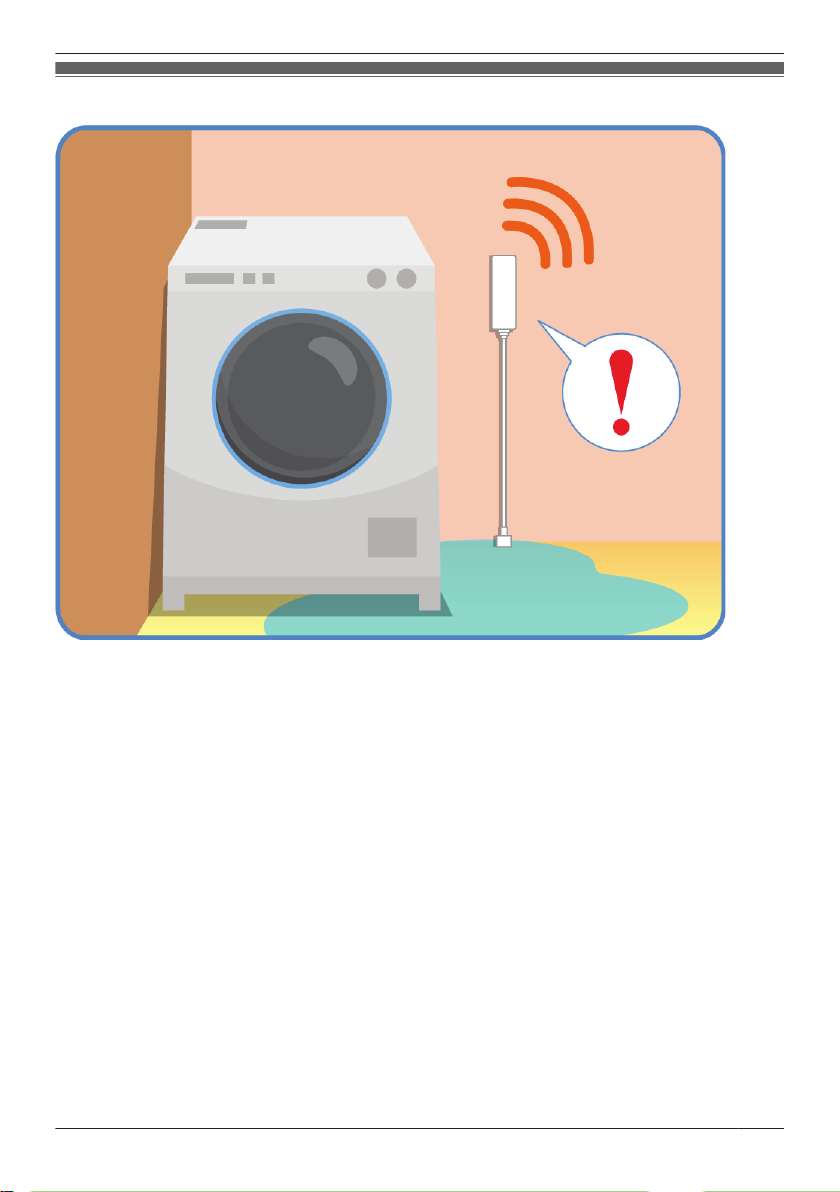
Water Leak Sensor (KX-HNS103)
R Uses a small probe that can detect water
R Can be used to trigger other actions (camera recording, turning on a light, etc.)
17
Welcome to the Panasonic Home Network System!
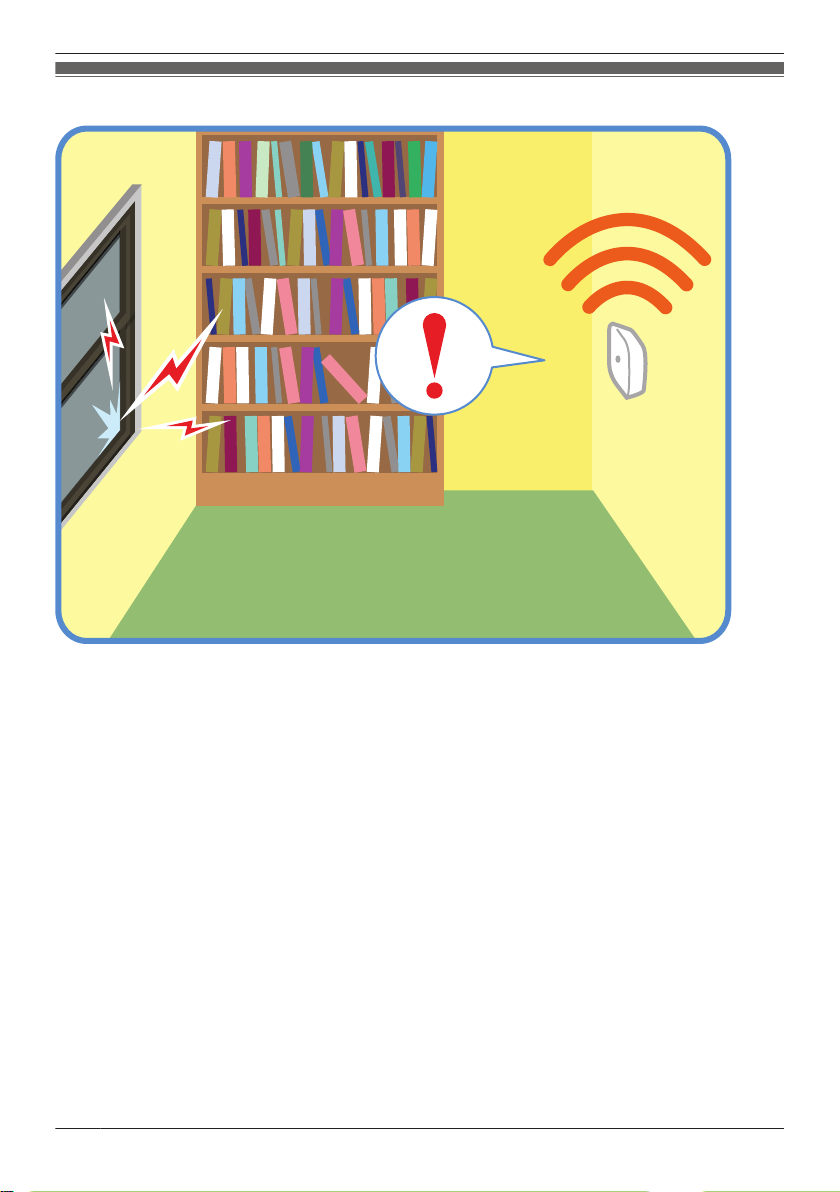
Glass Break Sensor (KX-HNS104)
R Uses a microphone that can detect the unique sound frequencies that are produced when glass breaks
R Can be used to trigger other actions (camera recording, turning on a light, etc.)
18

Welcome to the Panasonic Home Network System!
Indoor Siren (KX-HNS105)
R Uses a loudspeaker and strobe light to alert you when the alarm system is triggered
R You can enable and disable the loudspeaker and strobe light for each siren
19
Welcome to the Panasonic Home Network System!
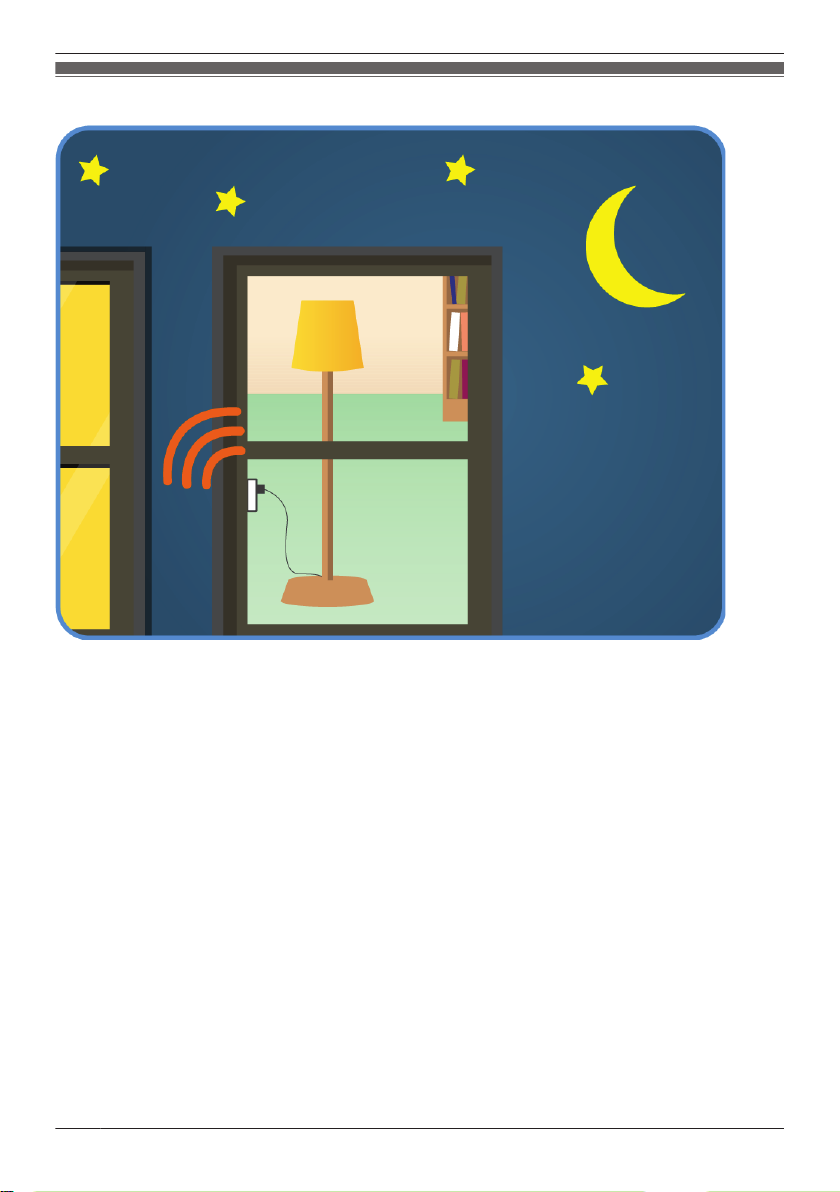
Smart Plug (KX-HNA101)
R Can be turned on and off using the app, when a sensor is triggered, or according to a schedule
R Built-in overcurrent and overwattage detection for added peace of mind
R Power consumption is logged for your reference
20
Welcome to the Panasonic Home Network System!
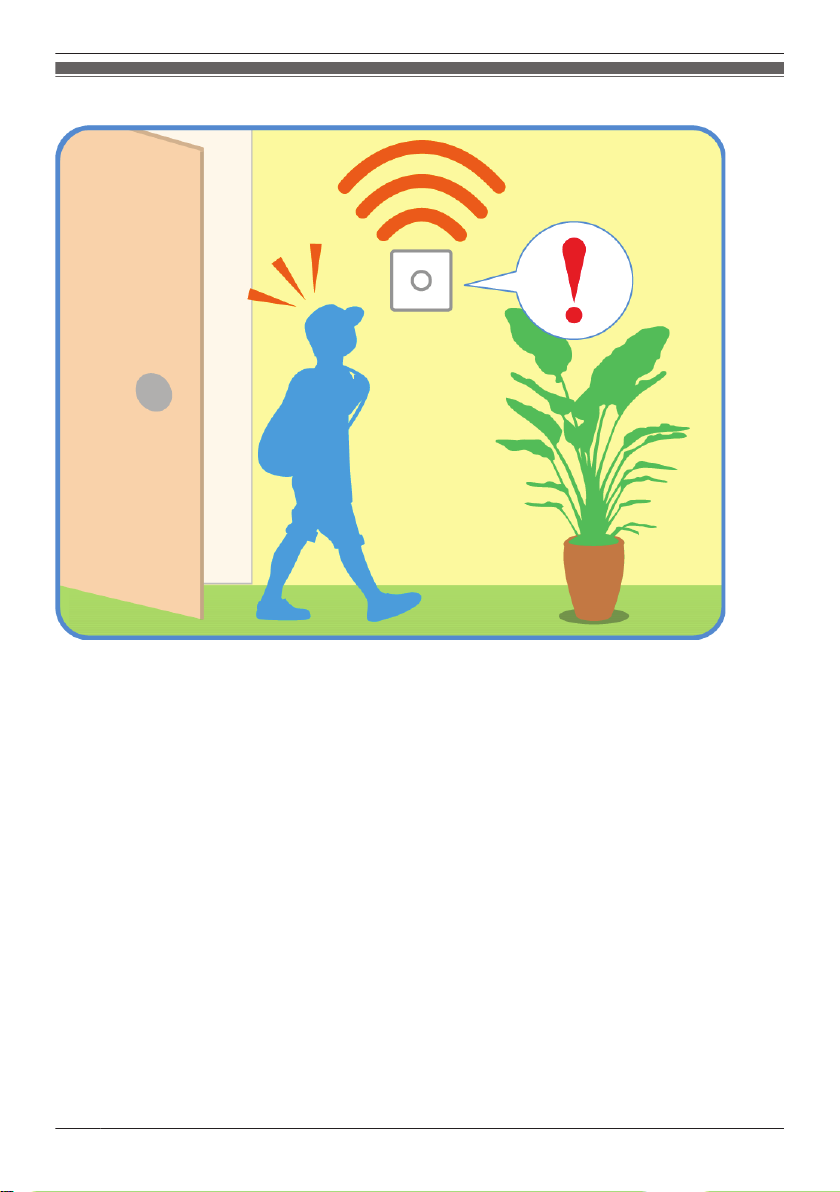
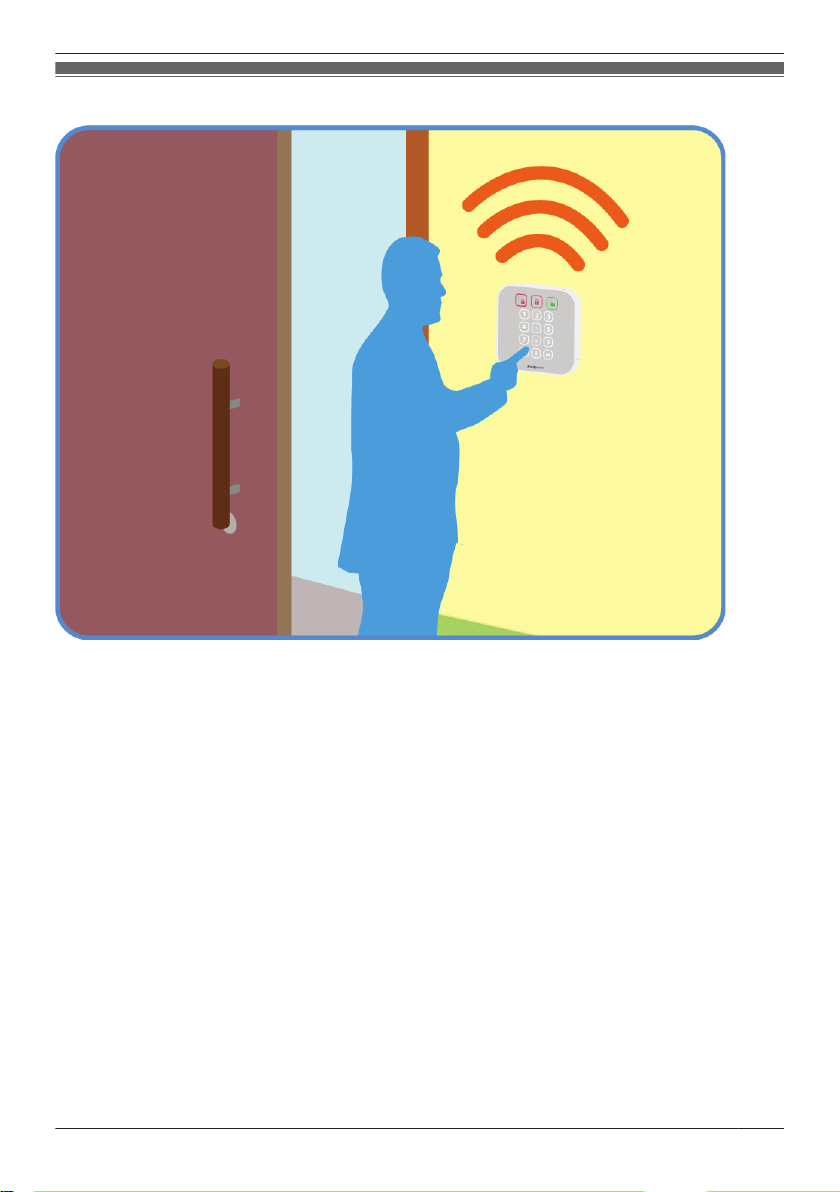
Access Keypad (KX-HNK101)
R Allows you to quickly confirm and change the system’s arm mode
R Can be wall mounted inside your home near the entrances and exits for easy access
21
Welcome to the Panasonic Home Network System!
Keychain Remote (KX-HNK102)
R Allows you to quickly change the system’s arm mode when you come home or are going out
R Can be used to trigger a pre-programmed operation, such as turning on a smart plug or sounding an
alert
R Can be attached to a set of keys for added convenience
22
Welcome to the Panasonic Home Network System!
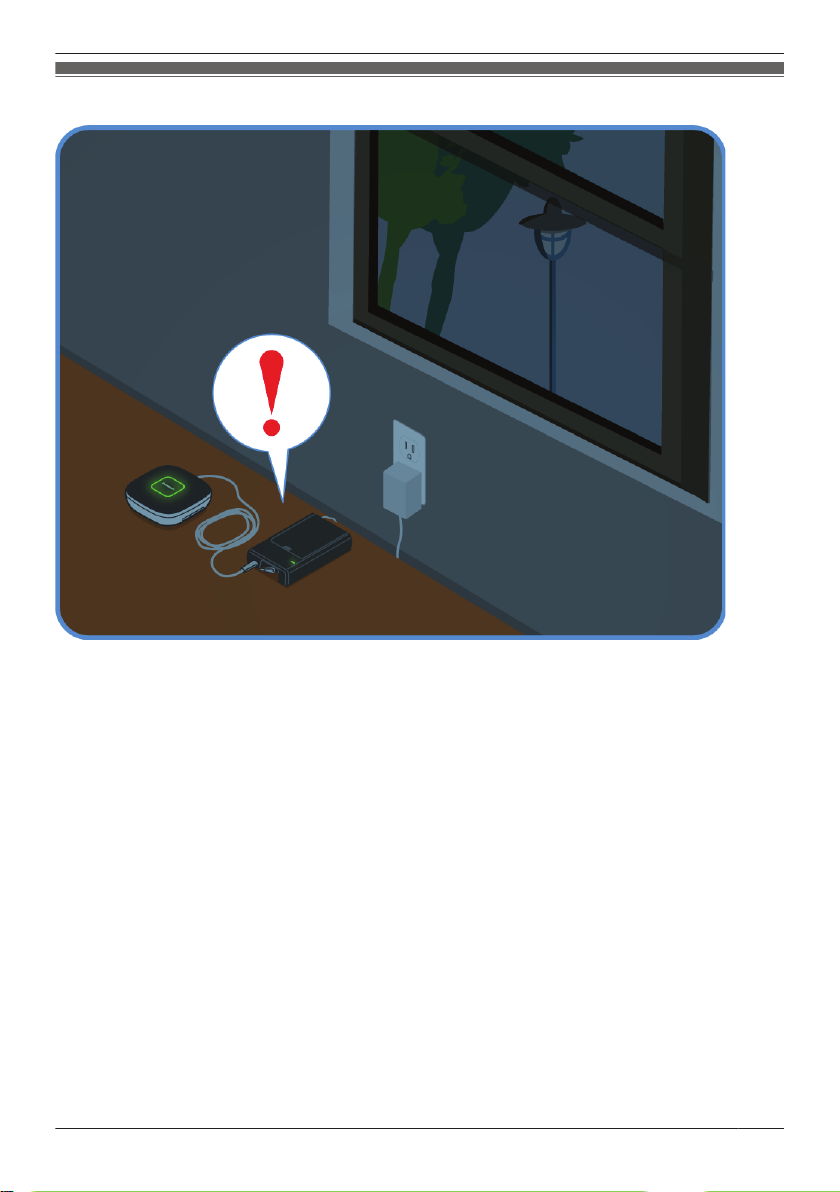
Backup Battery (KX-HNP100)
R Supplies power to your hub or other devices in the event of a power outage
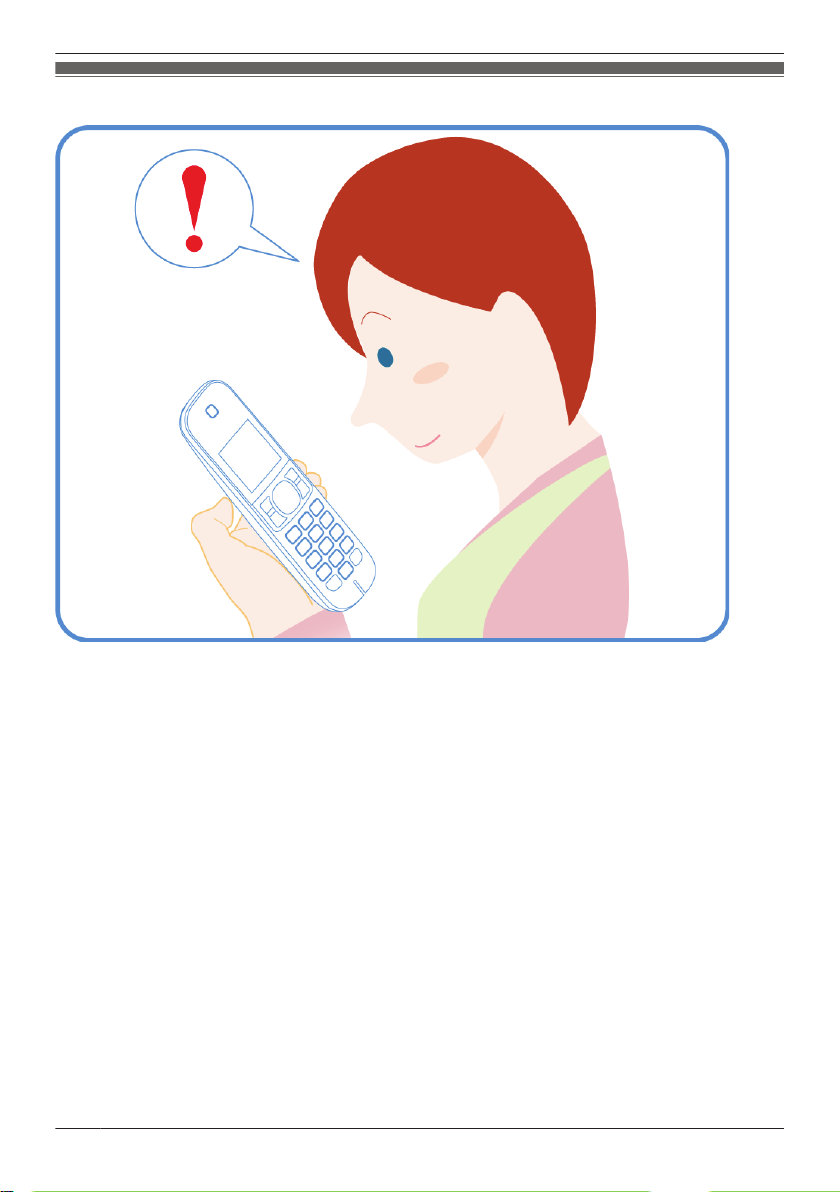
R Can be used to trigger the hub to call a pre-programmed phone number in the event of a power outage
23
Welcome to the Panasonic Home Network System!
Digital Cordless Handset (KX-HNH100)
R Makes and receives calls using your landline
R Can be used to change the system’s arm mode
R Displays system status
24

System setup
There are 4 basic steps you need to perform in order to access the system from your mobile device.
Connections
¯
Download
¯
Initial setup
¯
Register devices Add more mobile devices (smartphones and tablets), cameras,
*1 Refer to the System Setup Guide included with your hub for more information.
Download information is available at the web page listed below.
{{"www.panasonic.net/pcc/support/tel/homenetwork/"|tolink("http://www.panasonic.net/pcc/
support/tel/homenetwork/")}}
Requirements
– Hub (KX-HNB600)
– A wireless router
– A compatible mobile device
Compatible mobile devices
– iPhone 4 and later, iPad (iOS 6.0 and later)
– Android smartphones and tablets (Android 4.0 and later)
– Minimum recommended screen size: 1280´720 (screen content may not be displayed properly on
devices with smaller screens)
Note:
R The [Home Network] app may not function properly depending on the system environment, such as
the model of your mobile device, the peripherals connected to your mobile device, and the apps
installed on your mobile device.
R The following Android devices are not compatible with the [Home Network] app.
– Android devices that are not supported by Google Play
– Android devices with limited hardware features
(Bluetooth, Wi-Fi, and microphone support are required.)
Connect your hub to a power outlet and to your telephone line.
Download the [Home Network] app to your mobile device.
Use the [Home Network] app to configure the hub to connect to your
wireless router, and then register your mobile device to the hub.
sensors, and other devices to the system.
*1
In order to use your mobile device to access the system, you must first configure the hub to access your
wireless router.
Note:
R If your hub is already configured to access your wireless router, you do not need to perform this
procedure again.
R If you have completed this procedure and want to register another mobile device to the hub, see
“Registering other mobile devices to the hub”, Page 28.
R If you experience trouble while performing this procedure, refer to the information in “Sometimes I
cannot access the system while at home”, Page 110.
25
System setup
Before you begin
In this procedure, the hub will enter “temporary access point mode”. In this mode, you can connect your
mobile device directly to the hub using Wi-Fi®, and then use your mobile device to change the hub’s
Wi-Fi settings so that the hub can connect to your wireless router.
Confirm the following before you begin.
– Make sure you have installed the [Home Network] app on your mobile device
– Make sure your wireless router and the hub are turned on and the hub’s LED indicator is lit in yellow
– Make sure the hub is located within range of your wireless router
– Make sure your mobile device is connected to your wireless router
– Make sure your mobile device can connect to the Internet
– Make sure you know the network name (SSID) and password assigned to your wireless router
Note:
R The hub only supports the 2.4 GHz wireless band. Before performing the initial setup, make sure your
mobile device is connected to the wireless router using the SSID that is assigned to the 2.4 GHz band
of your wireless router. When prompted to enter your wireless router’s password, enter the password
that is assigned to the 2.4 GHz band.
Initial setup for iPhone, iPad
1 Start the [Home Network] app by tapping its icon (shown below).
R The end-user license agreement is displayed the first time you start the app.
R If your device is not compatible with the app, a message about incompatibility will be displayed
when you start the app.
2 Tap [Set up the Hub].
R A description of the initial setup procedure is displayed.
3 When prompted, press the Wi-Fi SETUP button on the hub.
R The hub’s LED indicator blinks in yellow.
4 Change your mobile device’s Wi-Fi setting temporarily so that it connects to the hub directly.
R Open your mobile device’s [Settings] app, tap [Wi-Fi], select “KX-HNB600_Panasonic”, enter
“00000000” as the password, and then tap [Join].
R If more than one item named “KX-HNB600_Panasonic” is displayed, wait approximately
10 minutes and perform this procedure from the beginning.
5 Start the [Home Network] app again.
6 If necessary, enter the password required to connect to your wireless router and then tap [Next].
R The hub and your mobile device connect to your wireless router.
R If prompted, follow the on-screen instructions and connect your mobile device to your wireless
router, start the app again, and then tap [Add This Mobile Device].
R If you enter the wrong password, [Setup failed.] is displayed and the hub’s LED indicator lights.
Proceed as follows according to the color of the hub’s LED indicator.
– If the LED indicator is lit in yellow, repeat the initial setup procedure from the beginning.
– If the LED indicator is blinking quickly in green, you must reset the hub’s Wi-Fi settings. See “If
the hub’s LED indicator blinks quickly in green”, Page 27.
R The hub’s MAC address is displayed on this screen. If your wireless router uses MAC address
filtering for extra security, make a note of the hub’s MAC address and add it to your wireless
router’s list of MAC address that are allowed to access the router.
7 When prompted, press the Wi-Fi SETUP button on the hub.
R Your mobile device will be registered to the hub.
26
System setup
8 When prompted, set the password used to log in to the hub while away from home and then tap [OK].
9 When prompted, enter a name for your mobile device and then tap [OK].
R This setting allows you to change the name assigned to your device. It can help you identify your
mobile device when performing certain operations, such as deregistering or making intercom calls
using a cordless handset.
10 When prompted, select whether you want to customize device profiles, i.e., the device name,
location, and other settings for your devices.
R If you choose not to customize the device profiles now, you can change them later if desired (see
“Setting device profiles (device names, locations, and other settings)”, Page 92).
R If you choose to customize the device profiles now, change each setting as desired. When
finished, tap repeatedly until the “completed” message is displayed.
R The app’s home screen is displayed when initial setup is complete.
If the hub’s LED indicator blinks quickly in green
If you enter the wrong Wi-Fi password during the initial setup procedure for iPhone or iPad, [Setup
failed.] is displayed and the hub’s LED indicator blinks quickly in green. In this case, perform the
following.
1 Press and hold the 3 registration buttons on the side of the hub and the Wi-Fi SETUP button on the
back of the hub at the same time (4 buttons total) until the hub’s LED indicator blinks slowly in green
and yellow.
2 Wait for the hub’s LED indicator to light in yellow.
3 Repeat the initial setup procedure ( “Initial setup for iPhone, iPad”, Page 26).
Initial setup for Android devices
1 Start the [Home Network] app by tapping its icon (shown below).
R The end-user license agreement is displayed the first time you start the app.
2 Tap [Set up the Hub].
3 When prompted, press the Wi-Fi SETUP button on the hub.
R The hub’s LED indicator blinks in yellow.
R The app temporarily changes your mobile device’s Wi-Fi setting so that it connects to the hub
directly.
4 If necessary, enter the password required to connect to your wireless router and then tap [Next].
R The hub and your mobile device connect to your wireless router.
R The hub’s MAC address is displayed on this screen. If your wireless router uses MAC address
filtering for extra security, make a note of the hub’s MAC address and add it to your wireless
router’s list of MAC address that are allowed to access the router.
5 When prompted, press the Wi-Fi SETUP button on the hub.
R Your mobile device will be registered to the hub.
6 When prompted, set the password used to log in to the hub while away from home and then tap [OK].
7 When prompted, enter a name for your mobile device and then tap [OK].
R This setting allows you to change the name assigned to your device. It can help you identify your
mobile device when performing certain operations, such as deregistering or making intercom calls
using a cordless handset.
27
System setup
8 When prompted, select whether you want to customize device profiles, i.e., the device name,
location, and other settings for your devices.
R If you choose not to customize the device profiles now, you can change them later if desired (see
“Setting device profiles (device names, locations, and other settings)”, Page 92).
R If you choose to customize the device profiles now, change each setting as desired. When
finished, press your device’s “back” button repeatedly until the “completed” message is displayed.
R The app’s home screen is displayed when initial setup is complete.
In order to access the system from a mobile device, you must first register the mobile device to the hub.
You can register 8 mobile devices to a hub.
Confirm the following before you begin.
– Make sure you have completed the initial setup procedure ( “Initial setup”, Page 25)
– Make sure your mobile device can connect to the Internet
– Make sure your wireless router and the hub are turned on
– Make sure your mobile device and the hub are connected to the same wireless router
1 Using the mobile device that you want to register, download the [Home Network] app and then start
the app.
2 Tap [Add This Mobile Device].
R If the [Home Network] app home screen is displayed ( “Using the home screen”, Page 33), your
mobile device has already been registered to the hub. You do not need to perform this procedure.
3 When prompted, press the Wi-Fi SETUP button on the hub.
R Your mobile device will be registered to the hub.
4 When prompted, enter the password used to log in to the hub while away from home ( “Login
password”, Page 99) and then tap [OK].
5 When prompted, enter a name for your mobile device and then tap [OK].
R This setting allows you to change the name assigned to your device. It can help you identify your
mobile device when performing certain operations, such as deregistering or making intercom calls
using a cordless handset.
6 When prompted, select whether you want to customize device profiles, i.e., the device name,
location, and other settings for your devices.
R If you choose not to customize the device profiles now, you can change them later if desired (see
“Setting device profiles (device names, locations, and other settings)”, Page 92).
R If you choose to customize the device profiles now, change each setting as desired. When
finished, tap
the “completed” message is displayed.
R The app’s home screen is displayed when registration is complete.
Note:
R To register other devices (cameras, sensors, etc.), see “Registering devices”, Page 92.
R 8 mobile devices can be registered to the hub, however, only the first 4 can use phone features. If you
want to use phone features with an additional mobile device, use the procedure described in There are
more than 4 mobile devices registered to the hub. Page 116.
R For privacy, we recommend that you deregister your mobile device from the system (see
“Deregistering devices”, Page 92) before handing it over to a third party (such as when submitting
your mobile device for service, lending it to someone else, selling it, etc.), before registering your
mobile device to another hub, or if you no longer intend to use the mobile device with the system.
(iPhone, iPad) or your device’s “back” button (Android devices) repeatedly until
28

Usage examples
This section describes commonly used system features, the devices required for each example, and
briefly explains the required settings.
While away from home, you can receive a notification on your mobile device if the alarm system is
triggered.
Required devices
R Mobile device (smartphone or tablet) with an Internet connection
R Wireless router
R Hub (KX-HNB600)
R Any device equipped with a sensor that can trigger the alarm system
– Indoor Camera (KX-HNC200, KX-HNC210)
– Outdoor Camera (KX-HNC600)
– Window/Door Sensor (KX-HNS101)
– Motion Sensor (KX-HNS102)
– Glass Break Sensor (KX-HNS104)
Required procedures
R Hub initial setup and mobile device registration
Refer to the System Setup Guide included with your hub.
R Device registration (if you didn’t purchase the device as part of a pre-configured bundle)
Refer to the Installation Guide included with your device.
R Use the [Home Network] app to make sure the desired sensor is enabled for the [Arm: Away] arm
mode.
See “Alarm system settings”, Page 46.
R Use the [Home Network] app to set the arm mode to [Arm: Away].
See “Arming and disarming the alarm system”, Page 45.
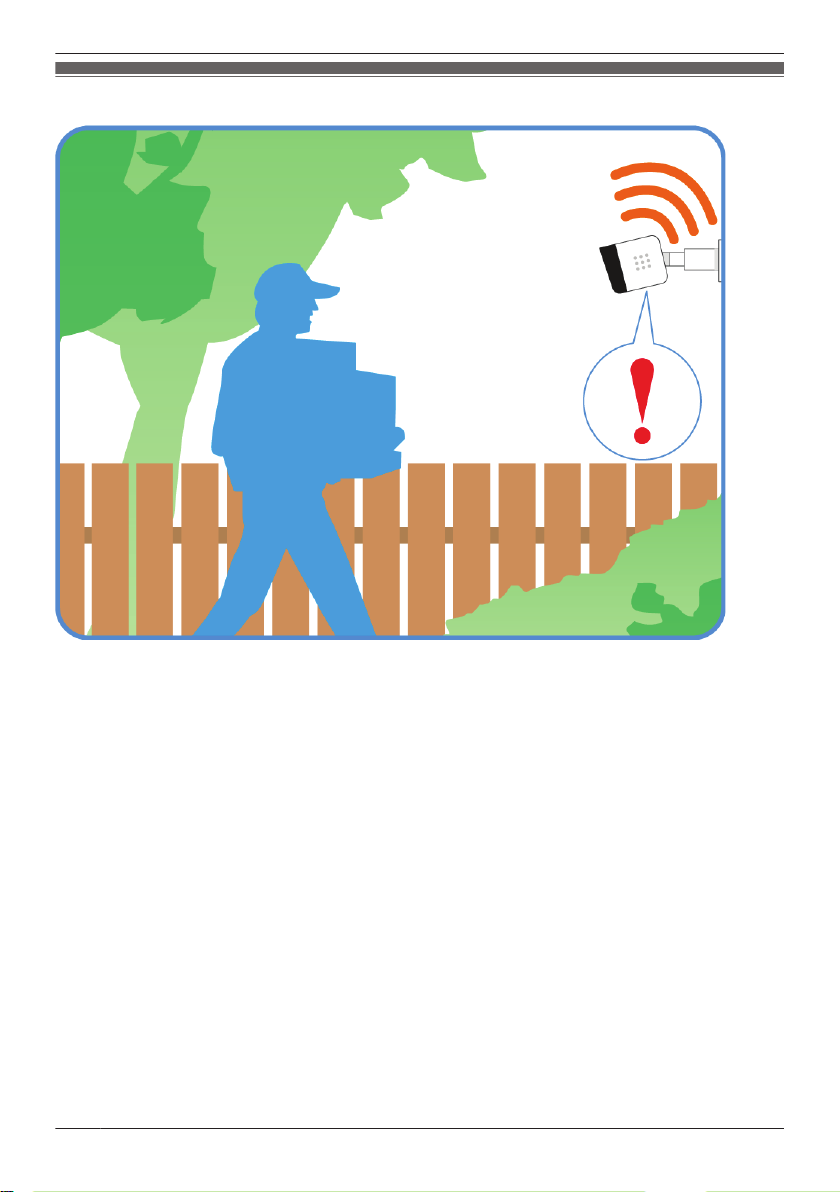
While away from home, you can access the system and view live camera images.
Required devices
R Mobile device (smartphone or tablet) with an Internet connection
R Wireless router
R Hub (KX-HNB600)
R A camera
– Indoor Camera (KX-HNC200, KX-HNC210)
– Outdoor Camera (KX-HNC600)
Required procedures
R Hub initial setup and mobile device registration
Refer to the System Setup Guide included with your hub.
R Camera registration (if you didn’t purchase the camera as part of a pre-configured bundle)
Refer to the Installation Guide included with your camera.
R Use the [Home Network] app to access the desired camera.
See “Viewing live camera images”, Page 57.
You can configure the system to record video from a camera if motion is detected.
Required devices
R Mobile device (smartphone or tablet) with an Internet connection
R Wireless router
R Hub (KX-HNB600)
R An SD card (inserted in the hub)
R A camera
29

Usage examples
– Indoor Camera (KX-HNC200, KX-HNC210)
– Outdoor Camera (KX-HNC600)
Required procedures
R Hub initial setup and mobile device registration
Refer to the System Setup Guide included with your hub.
R Camera registration (if you didn’t purchase the camera as part of a pre-configured bundle)
Refer to the Installation Guide included with your camera.
R Use the [Home Network] app to configure a smart control scenario. Select a sensor as the trigger and
your camera as the target device.
See “Creating a scenario that uses a sensor as the trigger”, Page 51.
R If using the camera’s motion detection features as the trigger, use the [Home Network] app to adjust
the camera’s motion detection features, such as detection sensitivity and detection area, if necessary.
See “Camera settings”, Page 63.
You can configure the system to turn on a light or other electric device when your mobile device connects
to your wireless router, such as when you return home from outside.
Required devices
R Mobile device (smartphone or tablet) with an Internet connection
R Wireless router
R Hub (KX-HNB600)
R Smart Plug (KX-HNA101)
Required procedures
R Hub initial setup and mobile device registration
Refer to the System Setup Guide included with your hub.
R Smart plug registration (if you didn’t purchase the smart plug as part of a pre-configured bundle)
Refer to the Installation Guide included with your smart plug.
R Use the [Home Network] app to configure a smart control scenario. Select [Trigger when Home
Wi-Fi Connects] as the trigger and your smart plug as the target device.
See “Creating a scenario that uses a sensor as the trigger”, Page 51.
You can configure the system to turn on a light or other electric device according to a schedule.
Required devices
R Mobile device (smartphone or tablet) with an Internet connection
R Wireless router
R Hub (KX-HNB600)
R Smart Plug (KX-HNA101)
Required procedures
R Hub initial setup and mobile device registration
Refer to the System Setup Guide included with your hub.
R Smart plug registration (if you didn’t purchase the smart plug as part of a pre-configured bundle)
Refer to the Installation Guide included with your smart plug.
R Use the [Home Network] app to configure a smart control scenario that functions on a schedule.
See “Creating a scenario that uses a schedule as the trigger”, Page 50.
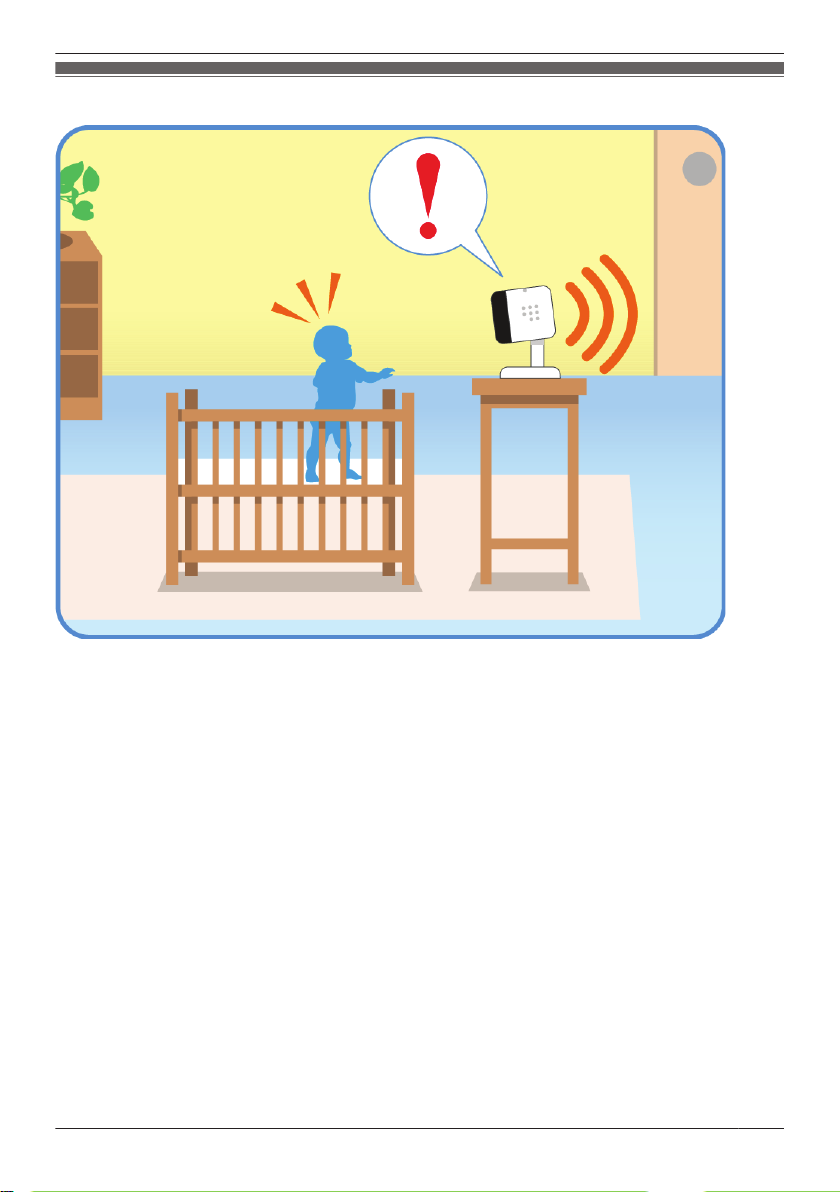
You can configure an indoor camera to notify your mobile device when sound (such as a crying baby) is
detected.
Required devices
R Mobile device (smartphone or tablet) with an Internet connection
30
 Loading...