

Page 1
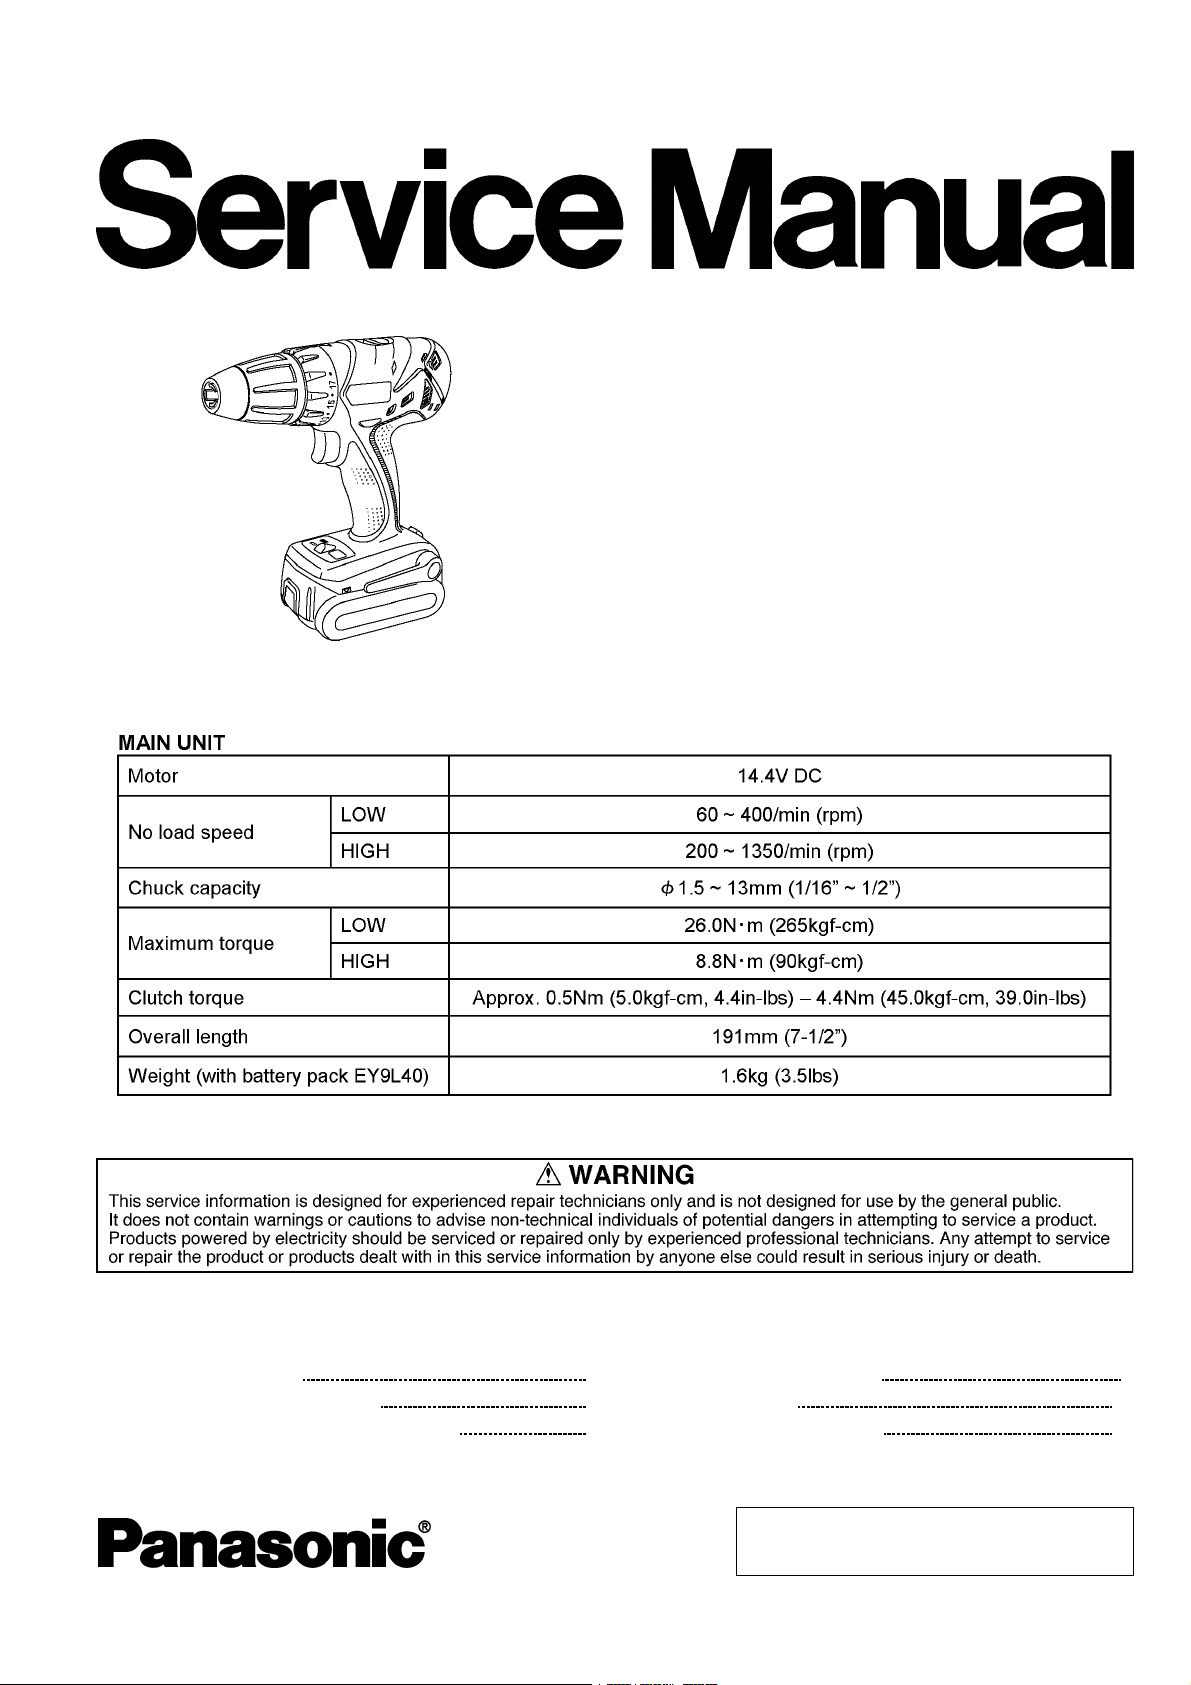
Cordless Drill & Driver
EY7440-U1
ORDER NO. PTD0609U40CE
F16
SPECIFICATIONS
CONTENTS
Page Page
1 SCHEMATIC DIAGRAM 2
2 WIRING CONNECTION DIAGRAM
3 DISASSEMBLY/ASSEMBLY INSTRUCTIONS
4 TROUBLESHOOTING GUIDE 9
2
5 EXPLODED VIEW
6 REPLACEMENT PARTS LIST
3
© 2006 Matsushita Electric Works Ltd. All rights
reserved. Unauthorized copying and distribution is a
violation of law.
11
12
Page 2
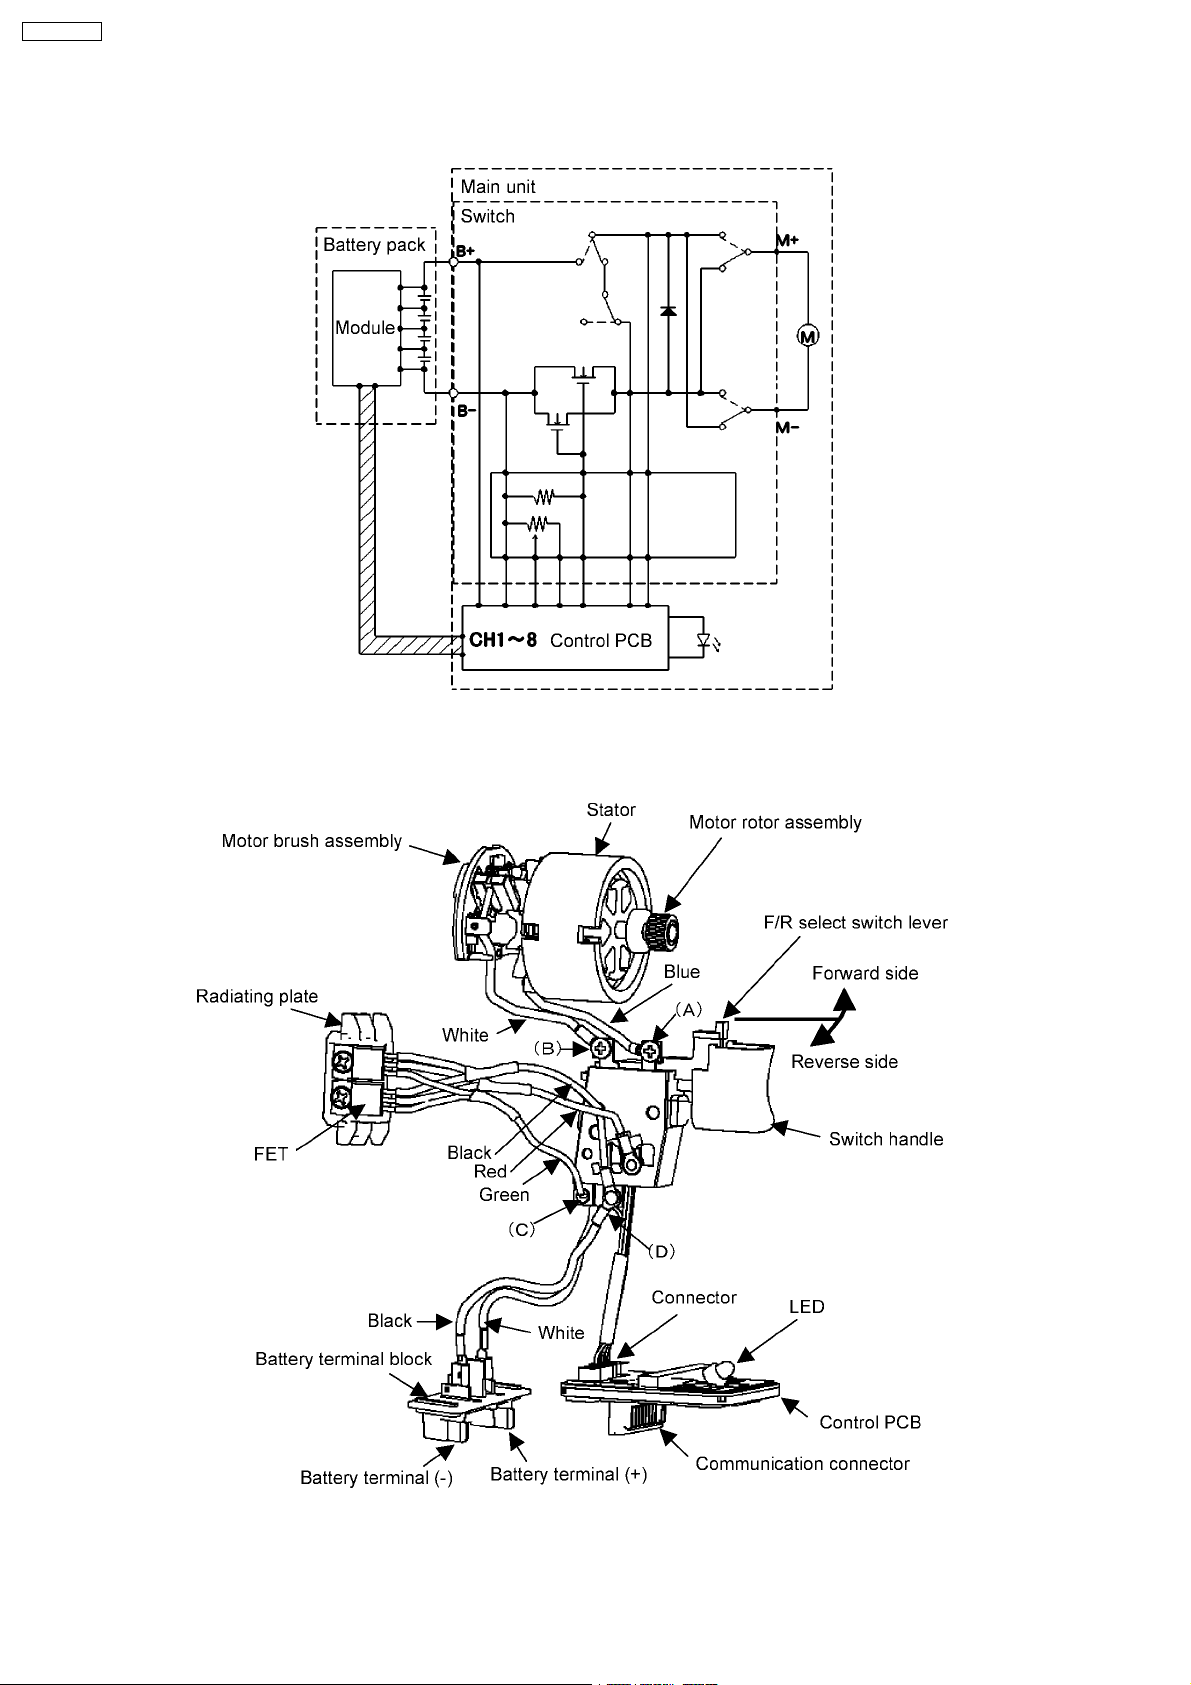
EY7440-U1 /
1 SCHEMATIC DIAGRAM
2 WIRING CONNECTION DIAGRAM
2
Page 3
3 DISASSEMBLY/ASSEMBLY INSTRUCTIONS
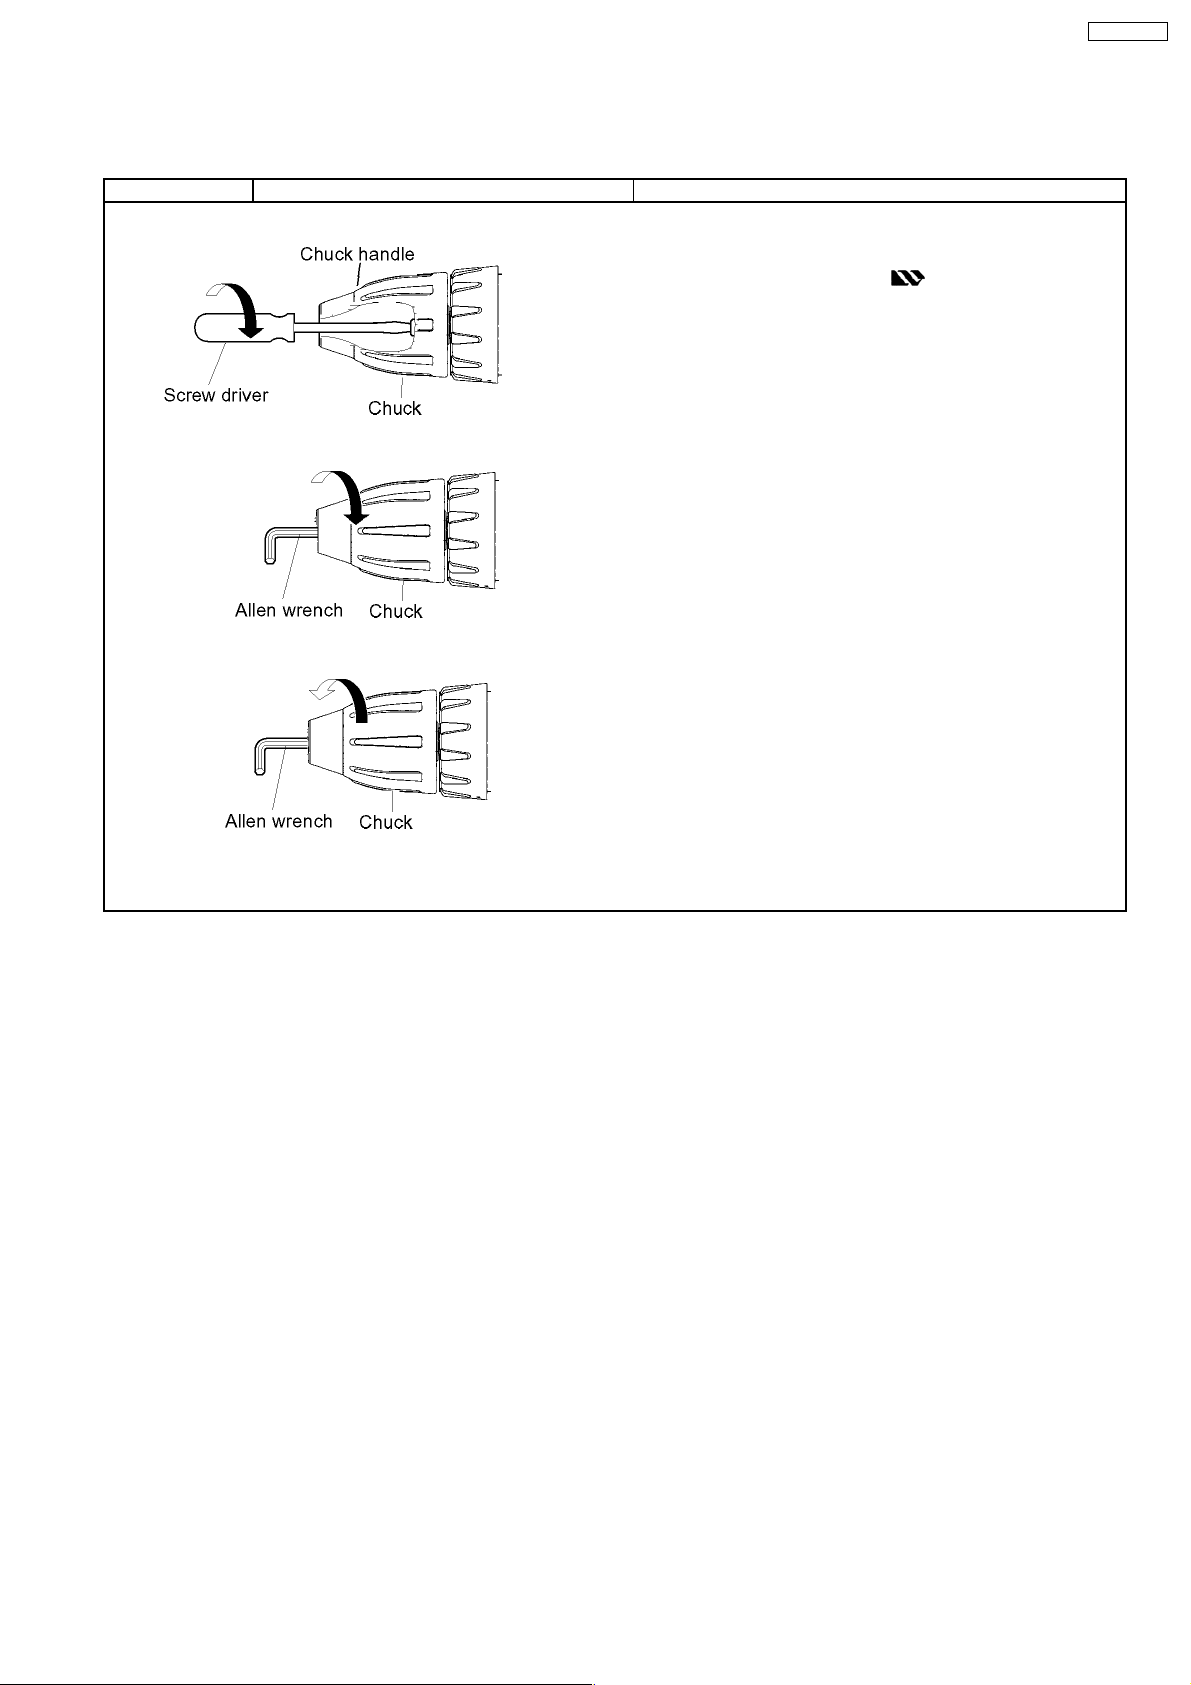
■ HOW TO DISASSEMBLE KEYLESS CHUCK.
Ref. No. 1A Procedure 1A Removal of the Keyless Drill Chuck.
NOTE :
When attaching or removing a bit, disconnect battery pack from
tool.
1. Set the clutch handle to position
2. Turn the lock collar counterclockwise (looking from the front) to
open the chuck jaws.
3. Use a screwdriver to turn the chuck fastening screw inside the
chuck clockwise direction of the arrow, and remove the screw. (See
Fig. 1)
NOTE :
If the chuck fastening screw will not come loose, insert the
Fig. 1
allen wrench into the chuck and lightly tap in the clockwise
direction with a hammer to tighten the chuck, and then loosen
the chuck fastening screw. (See Fig. 2)
Insert the allen wrench into the chuck, and turn
counterclockwise direction in the arrow with holding the unit by
the vise to remove the chuck. (See Fig. 3)
EY7440-U1 /
and select "LOW" position.
Fig. 2
Fig. 3
3
Page 4
EY7440-U1 /
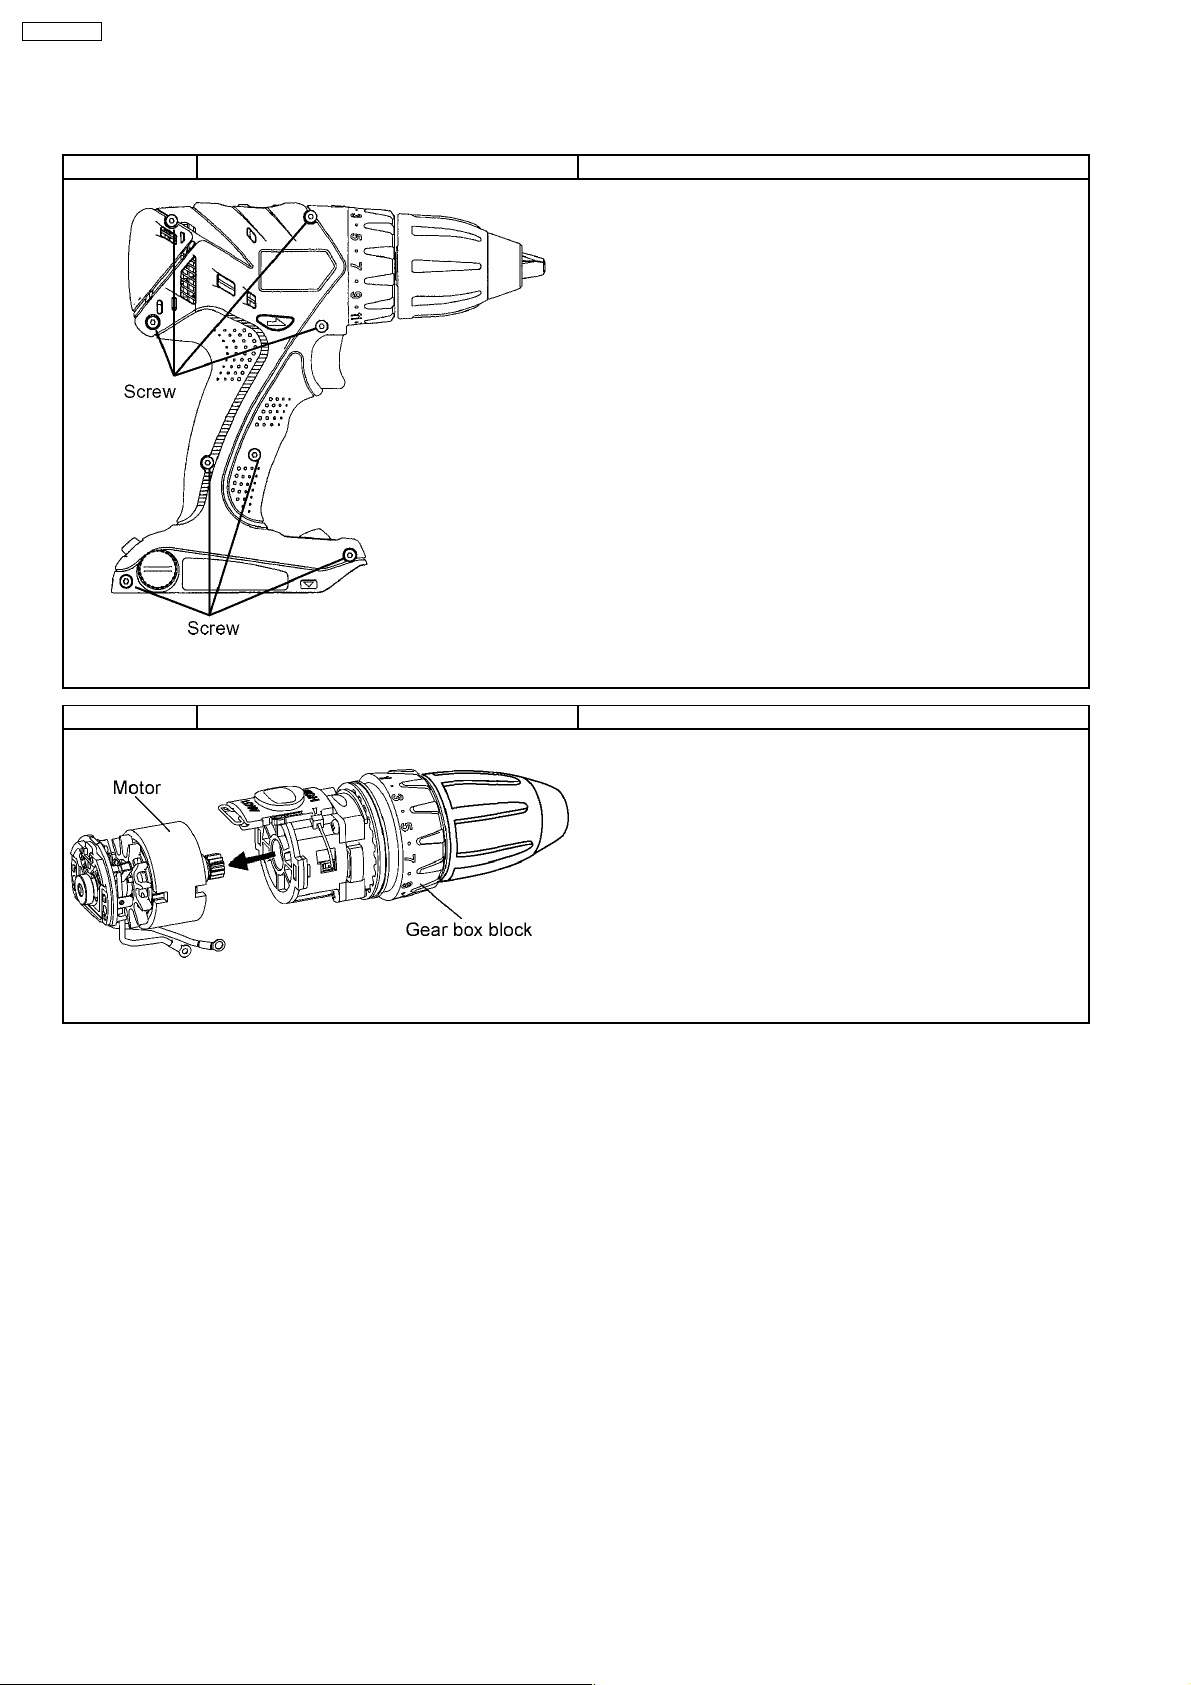
■ HOW TO DISASSEMBLE MAIN UNIT.
Ref. No. 2A Procedure 2A Removal of the Housing.
1. Remove 8 housing screws.
Fig. 4
Ref. No. 2B Procedure 2A →→→→ 2B Removal of the Motor.
(Removal)
1. Take out the motor with the gear box block from housing.
2. Separate the motor from the gear box block by twisting the motor
to unlock tabs.
Fig. 5
4
Page 5

Ref. No. 2C Procedure 2A →→→→ 2B →→→→ 2C Removal or attachment of the Gear Box Block.
(Removal)
1. Turn the thrust plate to remove.
2. The internal parts of gear box block can be removed one after
another. (See Fig. 6)
(Attachment)
1. Start from inserting 6 pins into the driving block as shown in the
Fig. 7.
2. Assemble the other parts in reverse order as shown in the Fig. 6.
NOTE :
Carriers and Ring Gears have their own correct directions for
proper reassembly.
3. Insert 2 pieces of steel ball into each 6 holes of gear case.
4. Set clutch plate and clutch spring.
NOTE :
Clutch plate has its own correct direction for proper reassembly.
EY7440-U1 /
Fig. 7
Fig. 6
5
Page 6

EY7440-U1 /
Ref. No. 2D Procedure 2A →→→→ 2B →→→→ 2C→→→→ 2D Assembly of the Adjusting Screw and the Clutch Handle.
1. Align the mark of adjusting screw with the projection (A) of
driving block.
2. Turn the adjusting screw into the driving block about one rotation
for clockwise direction.
3. Align the
driving block.
4. Set the clutch handle with position 1 on top.
(Aligh the position 1 of clutch handle with the projection (A) of driving
block.)
5. Insert the clutch handle with adjusting the tabs of adjusting screw
to the groove of inside clutch handle.
mark of adjusting screw with the projection (A) of
Fig. 8
Ref. No. 2E Procedure 2A →→→→ 2B →→→→ 2C→→→→ 2D→→→→ 2E Attachment of the H/L Change Handle.
1. Insert the both side of handle spring into the groove of Ring gear
A.
6
Page 7

Ref. No. 2F Procedure 2A →→→→ 2B →→→→ 2C→→→→ 2D→→→→ 2E→→→→ 2F Attachment of the Switch.
1. Insert the connectors into battery terminal and control PCB.
NOTE :
Do not connect (+) and (-) terminal wrongly.
Apply the grease (FLOIL) on the places where insert into the
connectors.
EY7440-U1 /
7
Page 8

EY7440-U1 /
Ref. No. 2G Procedure 2A →→→→ 2B →→→→ 2C→→→→ 2D→→→→ 2E→→→→ 2F→→→→2GAttachment of the Housing.
1. Place the driving block onto the housing A and place the spring
for release lever and the hook release lever.
2. Place the switch assembly, operation panel, click spring and F/R
selector handle onto the housing A.
NOTE :
Make sure that the lead wires are pressed fit firmly.
3. Close the housing A and B with pushing the radiating plate on the
direction of the arrow and tighten 8 housing screws.
NOTE :
Confirm to set the radiating plate properly. If the radiating plate
lean toward the motor brush side, the housing B can not be
closed.
4. Place the H/L change handle into the rail properly.
5. Insert the belt hook into the housing and tighten with hook bolt.
8
Page 9

4 TROUBLESHOOTING GUIDE
(Refer to WIRING CONNECTION DIAGRAM)
EY7440-U1 /
9
Page 10

EY7440-U1 /
10
Page 11

5 EXPLODED VIEW
EY7440-U1 /
11
Page 12

EY7440-U1 /
6 REPLACEMENT PARTS LIST
NOTE:
*B=only available as set
*C=available individually
Ref.No. Part No. Part Name & Description Remarks Per Unit
1 WEY7440K3078 HOUSING AB SET 1
2 WEY6481L0176 CLICK SPRING 1
3 WEYT103L6806 CHUCK FASTENING SCREW 1
4 WEY7440K7918 KEYLESS CHUCK (SH) 1
5 WEY7440H3227 CLUTCH HANDLE 1
6 WEY7000L0637 ADJUSTING SCREW 1
7 WEY7000L0177 CLUTCH SPRING 1
8 WEY7000L0577 CLUTCH PLATE 1
9 WEYT107L0457 CLICK SPRING A 1
10 WEY7440H1557 H/L CHANGE HANDLE 1
11 WEY7440H3247 F/R SELECTOR HANDLE 1
12 WEY7440L1067 DRIVING BLOCK A 1
13 WEY7000L6967 STEEL BALL *C (12PCS/PK) 12
14 WEY7440L1087 DRIVING BLOCK 1
15 WEY7000L1137 CARRIER 1
16 WEY7440L1427 RING GEAR 1
17 WEY7000L1347 PLANET GEAR *B (3PCS/PK) 6
18 WEY7000L0857 THRUST PLATE 1
19 WEY7000L1117 CARRIER 1
20 WEY7440L1767 GEAR CASE 1
21 WEY508Ça9627 TAPPING SCREW *C K3-12 4
22 WEY7440L1457 RING GEAR A 1
23 WEY7000L1127 CARRIER B 1
24 WEY7000L1467 RING GEAR B 1
25 WEY7000L1367 PLANET GEAR B *B (3PCS/PK) 3
26 WEY7000L0887 THRUST PLATE 1
27 WEY7440L3967 MOTOR MOUNTING PLATE 1
28 WEY7440L1187 STATOR 1
29 WEY7440L1467 MOTOR ROTOR ASSEMBLY 1
30 WEY7440L2307 MOTOR BRUSH ASSEMBLY 1
31 WEY6802S6187 SCREW *C B3-5 2
32 WEY7440L2007 SWITCH ASSEMBLY (SH) 1
33 WEY7540L2157 BATTERY TERMINAL BLOCK 1
34 WEY6705L0376 ROLLER SET *B (6PCS/PK) 6
35 WEY7440L2117 CONTROL PCB 1
36 WEY7440K3958 OPERATION PANEL 1
37 WEY7540K3217 BELT HOOK SET 1
38 WEY7540K3187 BELT HOOK 1
39 WEY6470K3186 BELT HOOK BOLT 1
40 WEY7540H0407 HOOK RELEASE LEVER 1
41 WEY7540L0167 SPRING FOR RELEASE LEVER 1
42 WEY7440K9038 TAPPING SCREW *C K3*20 8
- WEY9633K7018 TOOL CASE (SH) 1
- WEY7440K8108 OPERATING INSTRUCTIONS (SH) 1
**Battery Pack is available as an optional accessory. See the nearest sales dealer for details.
***For replacement parts of charger, see the charger service manual.
Charger complete set is available as an optional accessory. See the nearest sales dealer for details.
12
 Loading...