

Panasonic EY6950-U1 User Manual
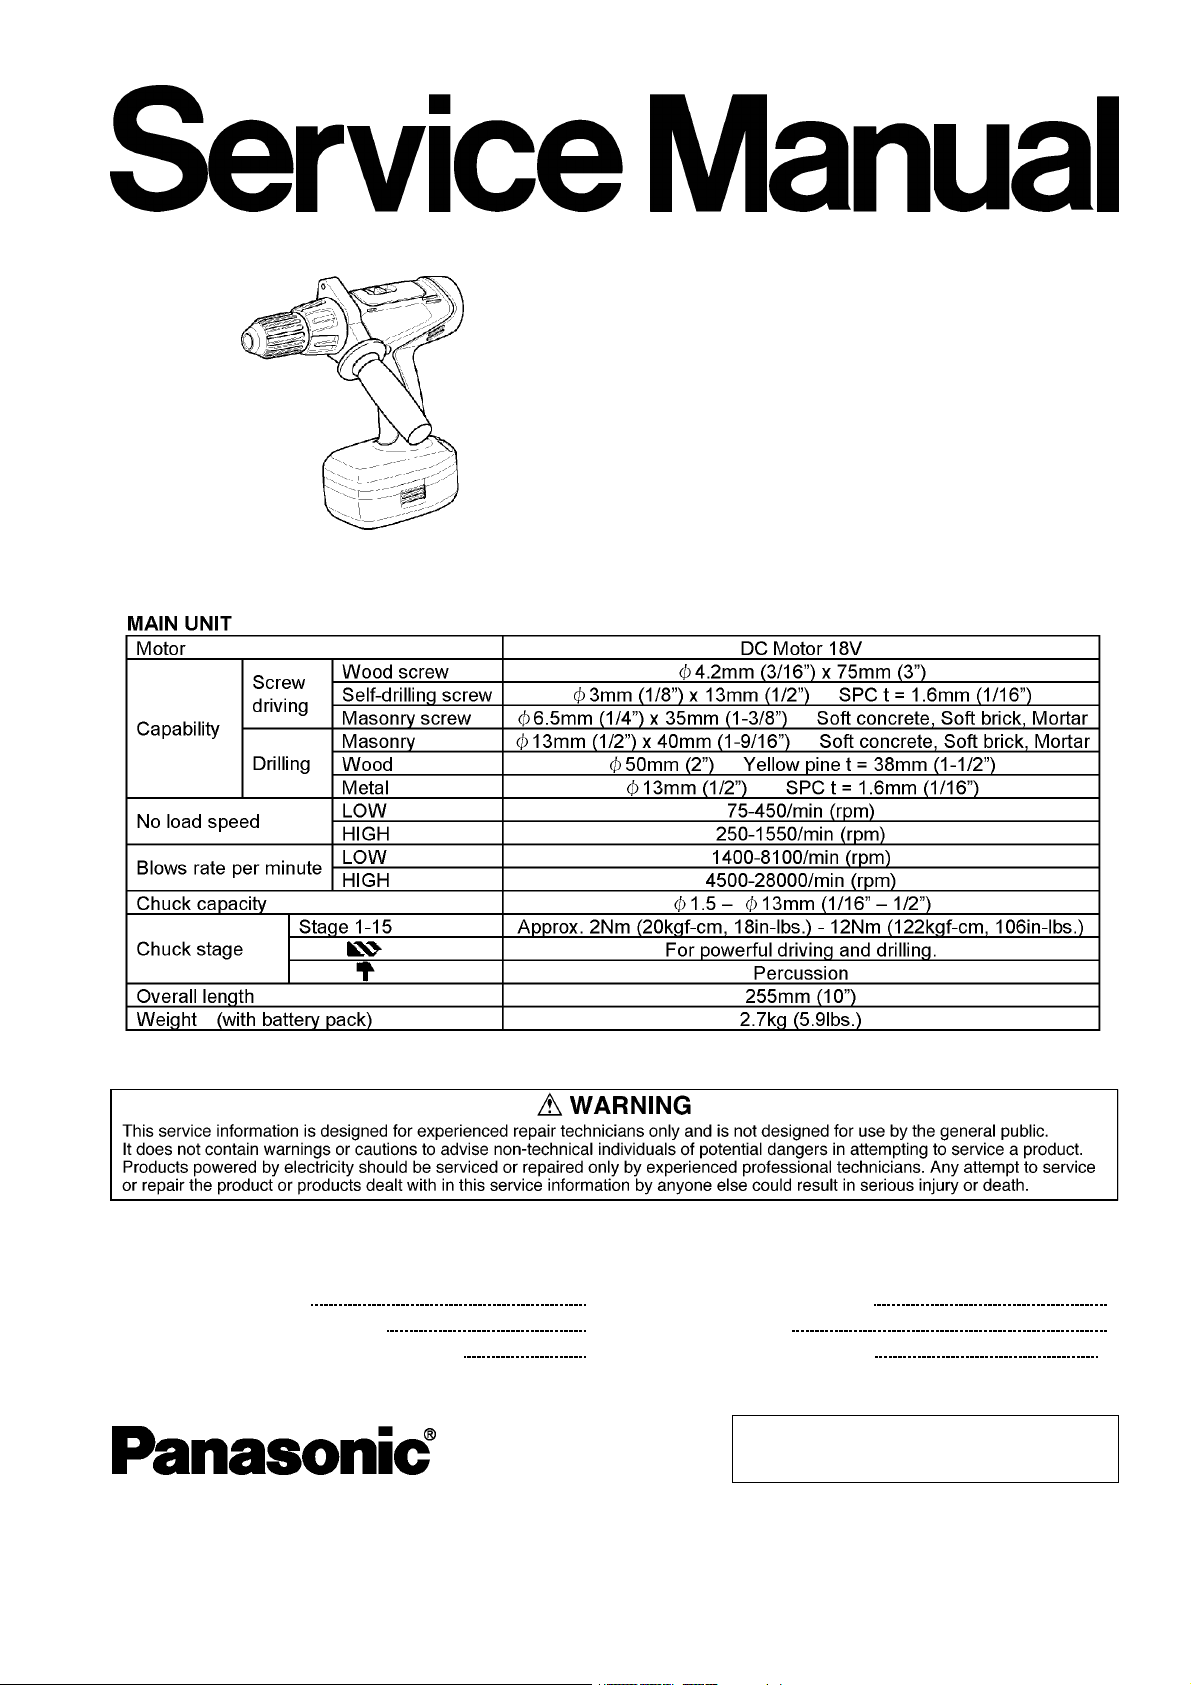
SPECIFICATIONS
ORDER NO.PTD0310U37C1
F16
Cordless Hammer Drill Driver
EY6950-U1
CONTENTS
Page Page
1 SCHEMATIC DIAGRAM 2
2 WIRING CONNECTION DIAGRAM
3 DISASSEMBLY/ASSEMBLY INSTRUCTIONS
4 TROUBLESHOOTING GUIDE 7
2
5 EXPLODED VIEW
3
6 REPLACEMENT PARTS LIST
© 2003 Matsushita Electric Works Ltd. All rights
reserved. Unauthorized copying and distribution is a
violation of law.
10
9
EY6950-U1
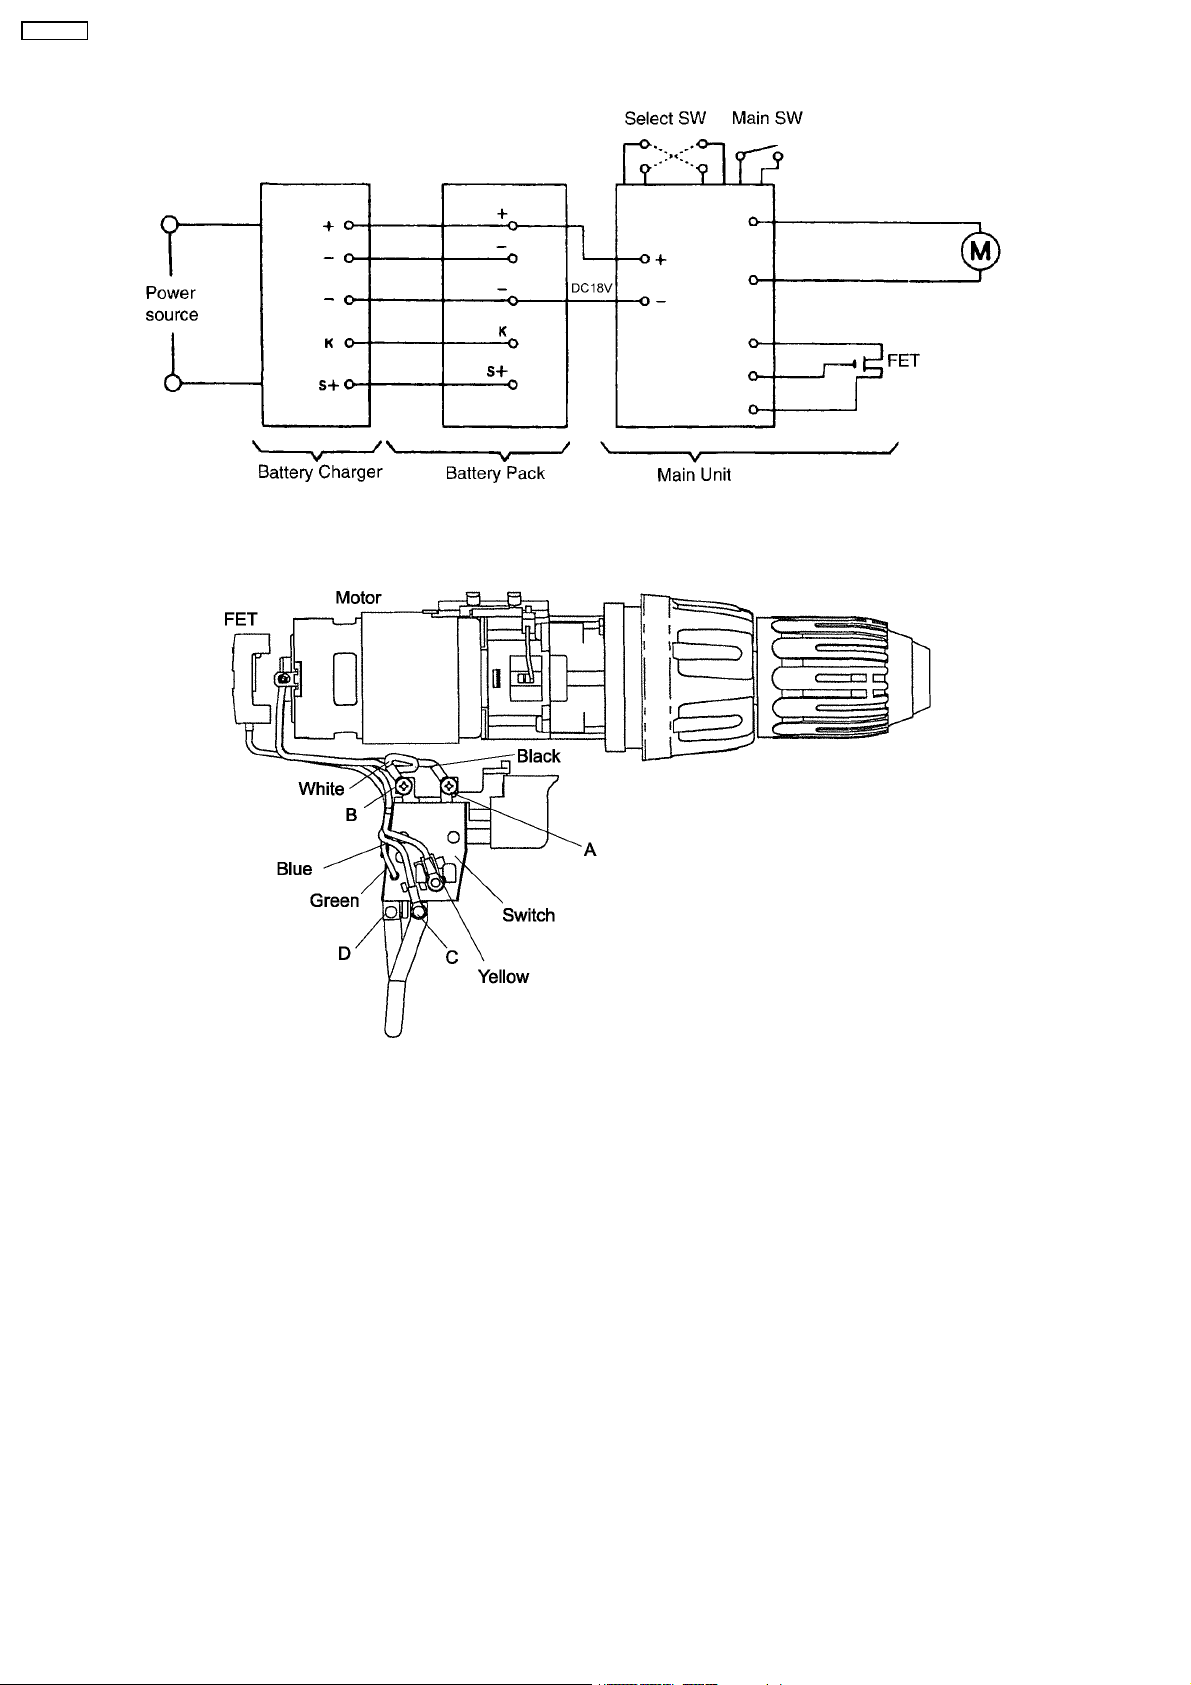
1 SCHEMATIC DIAGRAM
2 WIRING CONNECTION DIAGRAM
2
3 DISASSEMBLY/ASSEMBLY INSTRUCTIONS
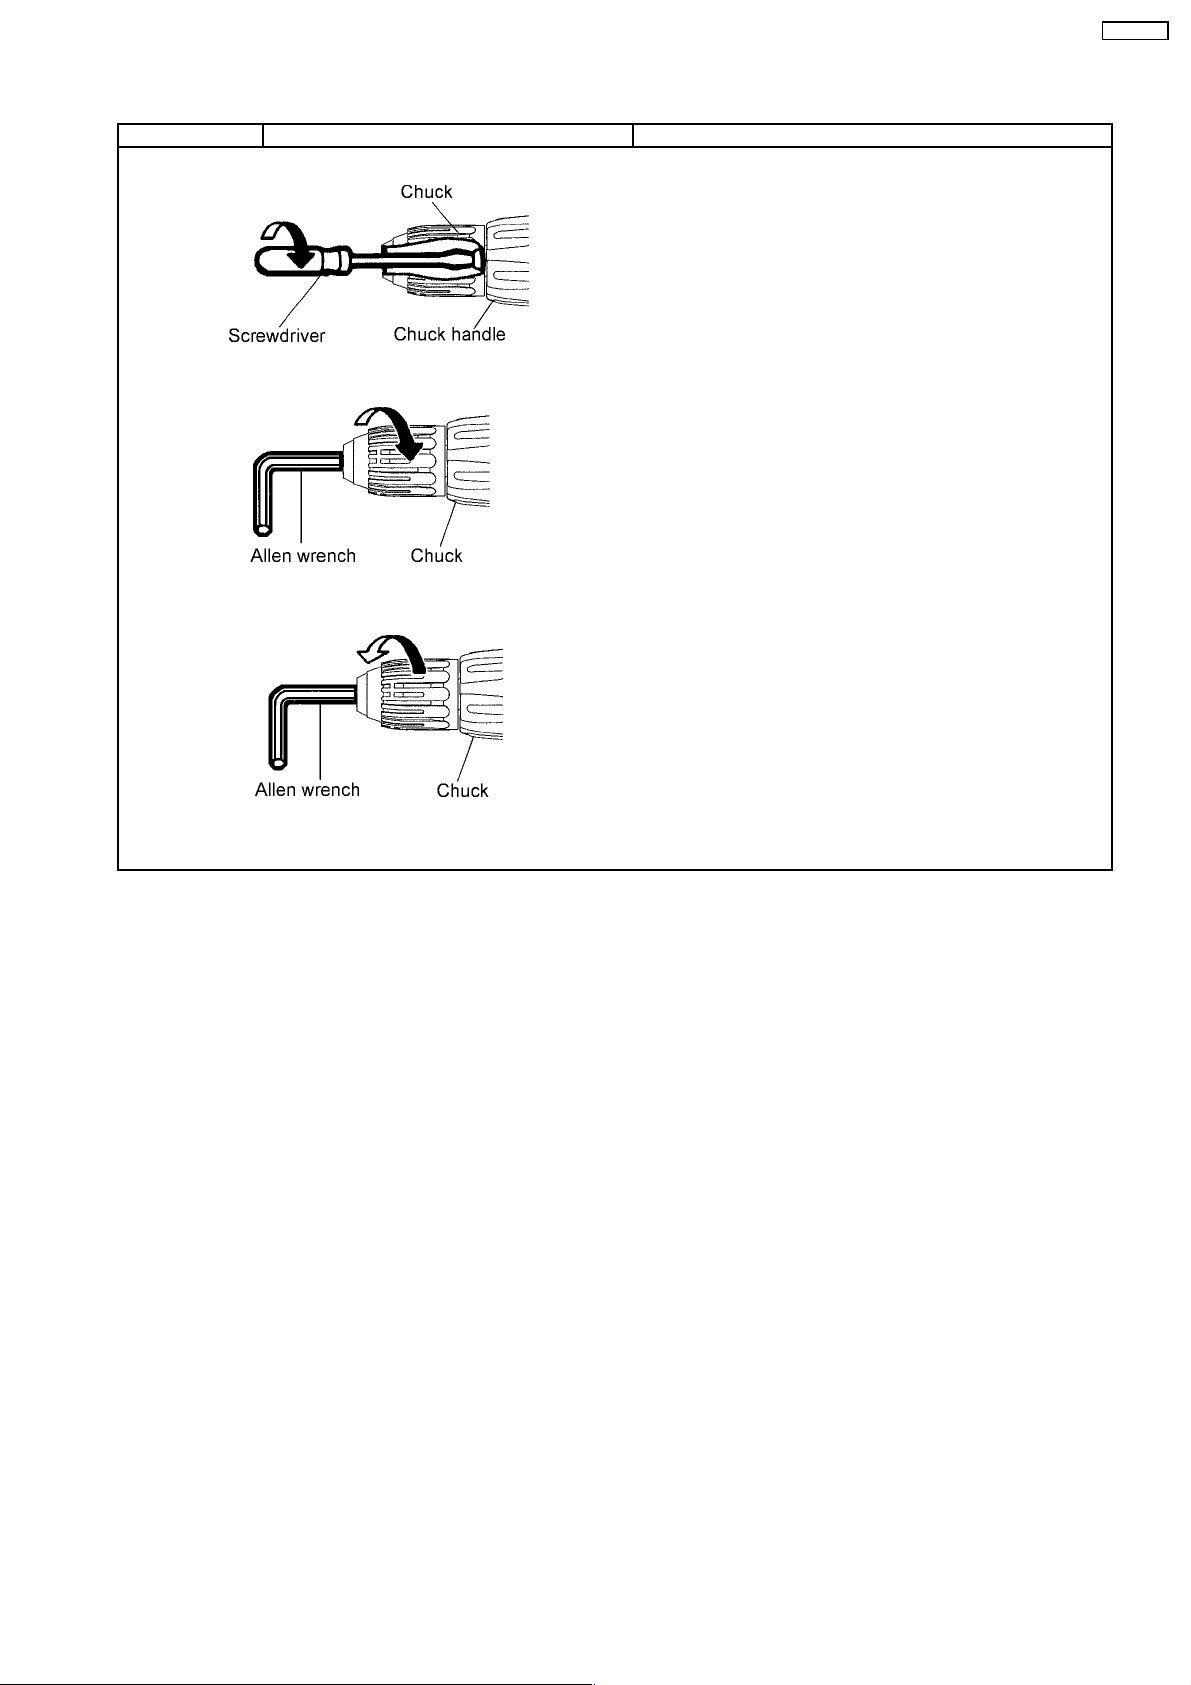
■HOW TO DISASSEMBLE KEYLESS CHUCK.
Ref. No. 1A Procedure 1A Removal of the Keyless Drill Chuck.
1. Set the clutch handle to position 1 and select "LOW" position.
2. Turn the lock collar counterclockwise direction to open the chuck
jaws.
3. Use a screwdriver to turn the chuck fastening screw inside the
chuck clockwise direction of the arrow, and remove the screw. (See
Fig. 1)
NOTE :
If the chuck fastening screw will not come loose, insert the
allen wrench into the chuck and lightly tap in the clockwise
direction with a ham mer to tighten the chuck, and then loosen
the chuck fastening screw. (See Fig. 2)
4.Insert the allen wrench into the chuck, and turn counterclockwise
Fig. 1
Fig. 2
direction in the arrow with holding the unit by the vise to remove
the chuck. (See Fig. 3)
EY6950-U1
Fig. 3
3
 Loading...