

Page 1
Operating Instructions EB-GD96
Digital Cellular Phone
Before operating this equipment please read these instructions
completely.
Page 2

Page 3

Quick Reference
This Quick Reference guide is intended to enable the user to utilize
the most basic features of the phone instantly without having to
search through the extra details which are incorporated into this
manual.
Power On/Off
Press and hold E
Enter Pin Code
Use the keypad to enter the
PIN supplied by your Service
Provider, then press Q
Make a Call
Use the keypad to enter the
area code and phone
number, then press D
Correcting an Error
Press B once to erase the
previous character
Press and hold B to return
to Idle mode
Make Emergency Call
Press 112 D
Redial Last Number
Press DD
End a Call
Press E to end a call
Answer a Call
Press any key except E
or the Navigation key g
International Dialling
Press and hold 0, use e to
select the appropriate code,
then press Q
Add Phonebook Entry to
SIM
Enter area code and phone
number and press A. Press
Q, enter name and press Q
three times
Dial SIM Phonebook
Entry
Press A, then use e to
select the desired name,
then press D
Adjust Ear Volume
Press e during a call
Set Key Guard
Press Q move (left) d
press QQ and the keys will
be locked to avoid accidental
presses
Disable Key Guard
Press Q twice (when Free is
displayed) to remove the Key
Guard
Page 4
Accessories
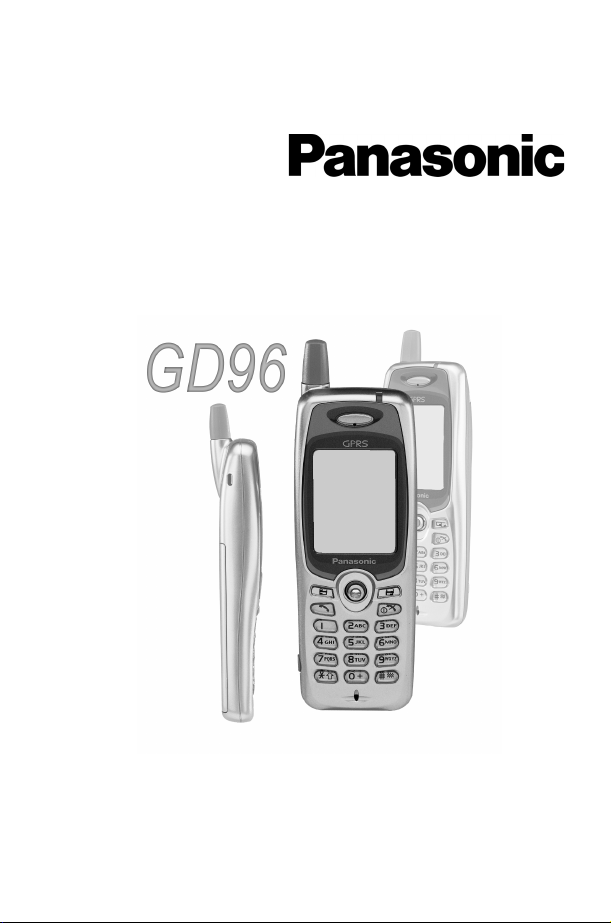
Car
EB-CDD95
Car Charger
Top up your battery in your vehicle by attaching this
accessory to your phone and to the cigarette lighter
socket
EB-HFD95Z
Handsfree Car Kit
Drive safely-install a Handsfree car kit and
remove the need to hold your phone while
driving.
Personal
EB-YKD95
Carry Case
This attractive hip case protects your phone and by
using the belt clip keeps it close at hand.
EB-BSD96
Li-Ion Battery
Double your talk time by having a spare battery.
EB-EMD35
Personal Handsfree
Talk and move while keeping your hands free by
using this accessory. Just place the earpiece in your
ear and the adaptor in the side of the handset - and
talk
Page 5
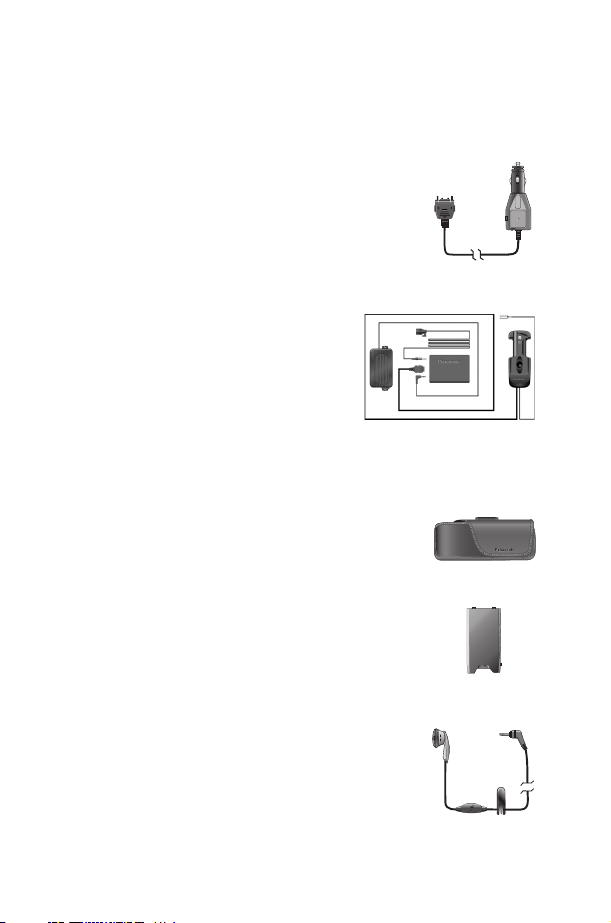
Office
EB-CHD95
Charging Stand
Charge your phone with this free standing charger.
Your phone will be charged in no time.
EB-CAD95UK
Travel Charger
Carry a lightweight portable charger wherever you
go to ensure you always have power to talk
EB-CAD95EU
Travel Charger
EB-RSD95/EB-RSD96
Data Cable
This data cable is used to connect your phone to a
PC, allowing data communication between them.
Identify a Genuine
Panasonic Accessory
Panasonic produces some of the most advanced mobile phones
available. So, as you’d expect from this class leader, the range of
accessories are second to none.
Most genuine Panasonic accessories will have
a label showing an “EB-XX00” model number
and “Matsushita Communications Industrial
U.K. Ltd”
Page 6
Further Information
Contact:
Panasonic UK,
Panasonic House,
Willoughby Road,
Bracknell,
Berkshire RG12 8FP
United Kingdom
Tel: 08705 159159
www.panasonic.co.uk
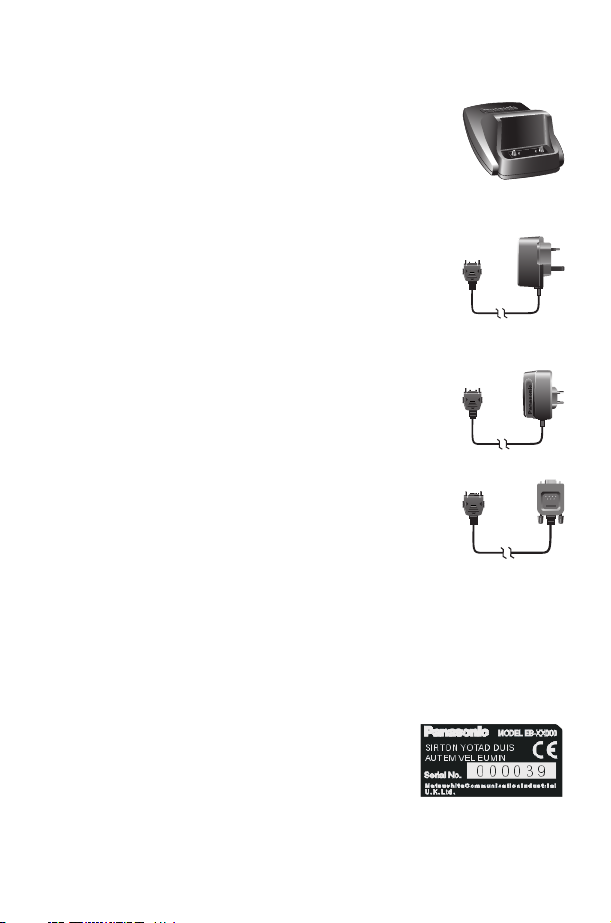
Main Kit Contents:
The GD96 Digital Cellular Telephone Main Kit will
contain the following items:
Digital Cellular Telephone (EB-GD96)
Ni-MH Battery (EB-BSD96)
Travel Charger (EB-CAD95UK)
Printed Material (GD96DPK10)
OperatingInstructions EB-GD96
DigitalCellularPhone
Data Cable (EB-RSD95/EB-RSD96)
Data Connection Software CD(RSD96CD)
Beforeoperatingthisequipment please read these instructions
completely.
Page 7

Getting Started ...................................1
Contents
Fitting the SIM ................................1
Fitting the Battery ..............................2
Charging the Battery .............................2
Getting to Know Your Phone.........................4
Using the Menu System ...........................6
Basic Operation...................................8
Switching the Phone On/Off .........................8
Making a Call.................................8
Automatic Redial ...............................9
Ending a Call .................................9
Answering a Call ...............................9
Caller Identification .............................10
Earpiece Volume Control ..........................10
Locking the Phone .............................10
Using the PIN ................................11
Setting Vibration Alert............................11
Setting Ring and Key Volume .......................11
Phonebook.....................................12
Store a Number ...............................12
Browsing Phonebook ............................13
Retrieve a Number .............................13
Editing Phonebook Entries .........................14
Grouping Phonebook Entries ........................15
Using Alert Profiles .............................15
Hot Key Phone Numbers ..........................16
Service Dial Numbers............................16
Review the Phonebook ...........................17
My Numbers ................................17
Personalising Your Phone ............................18
Add a Start-up Greeting ..........................18
Displaying Animations ...........................18
Changing the Ring Tone ..........................18
Disabling all Tones .............................20
Download Melody..............................21
Setting the Backlight Colour ........................21
Setting the Backlight Time .........................21
Using Voice Commands ..........................21
Selecting Vibration Alert Type .......................23
Changing the Language ..........................23
Restoring the Default Phone Settings ...................23
Phone Security ..................................24
Using Key Guard ..............................24
Changing the Security Codes........................24
Restricting Calls ..............................25
Applications ....................................27
Clock ....................................27
Calculator ..................................29
Currency Convertor .............................30
Short Text Messages ...............................31
Setting the Phone for Text Messages ...................31
Sending a Text Message ..........................31
Receiving Text Messages .........................32
Message Options ..............................32
Creating a User Defined Message .....................33
Manage Messages Lists ..........................33
Message Parameters ............................33
Cell Broadcasts ...............................34
Call Information ..................................36
Recent Numbers ..............................36
Call Duration ................................37
Page 8

Call Charges ................................37
Call Identification ..............................38
Advanced Operation ...............................39
Diverting Calls ...............................39
Holding Calls and Call Waiting .......................39
Call Transfer ................................41
Multi-party Calls...............................41
Changing to a New Network ........................43
Schedule ......................................44
Creating a Reminder ............................44
Viewing Reminders .............................44
Deleting Reminders.............................45
Setting a Holiday Reminder.........................45
Jump to Future Date ............................46
Games .......................................47
Mogular ...................................47
15 Puzzle ..................................48
WAP Browser ...................................49
Server Settings ...............................49
Activating the Browser ...........................50
Navigating Content .............................50
The Browser Menu .............................51
Using Bookmarks ..............................51
Deactivating the Browser ..........................52
Setting the Linger Time ...........................52
Last Status .................................53
Internet E-mail ...................................54
E-mail Setup ................................54
Create a New Message...........................55
Send/Receive Messages ..........................55
Read Messages ..............................56
Store an Address ..............................57
Add a Signature...............................57
Manage Message Stores ..........................57
Additional Features ................................58
Desktop Handsfree .............................58
Voice Memo ................................58
DTMF Tones ................................59
Note Pad ..................................60
Second Clock ................................60
Accessory Related Features ........................61
Text Entry .....................................62
Menu Structure ..................................64
Trouble Shooting .................................65
Important Error Messages .........................66
Important Information...............................68
Safety Considerations ...........................68
Care and Maintenance ..............................70
Glossary of Terms.................................71
Specifications ...................................73
Panasonic GSM Mobile Telephone........................74
Warranty Terms ..............................74
Important..................................75
EU Warranty ....................................76
Personal Record..................................81
Notes ........................................83
Page 9
Getting Started
Getting Started
Thank you for purchasing this Panasonic digital cellular phone. This
phone is designed to operate on the Global System for Mobile
Communications (GSM), GSM900 or GSM1800. Ensure the battery
is fully charged before use.
Before operating this phone please read the “Important
Information” section - see page 68.
These operating instructions detail use of the equipment contained in
the Main Kit. Some services detailed, are network dependent or may
only be available on a subscription basis. Some functions are SIM
dependent. For more information contact your Service Provider.
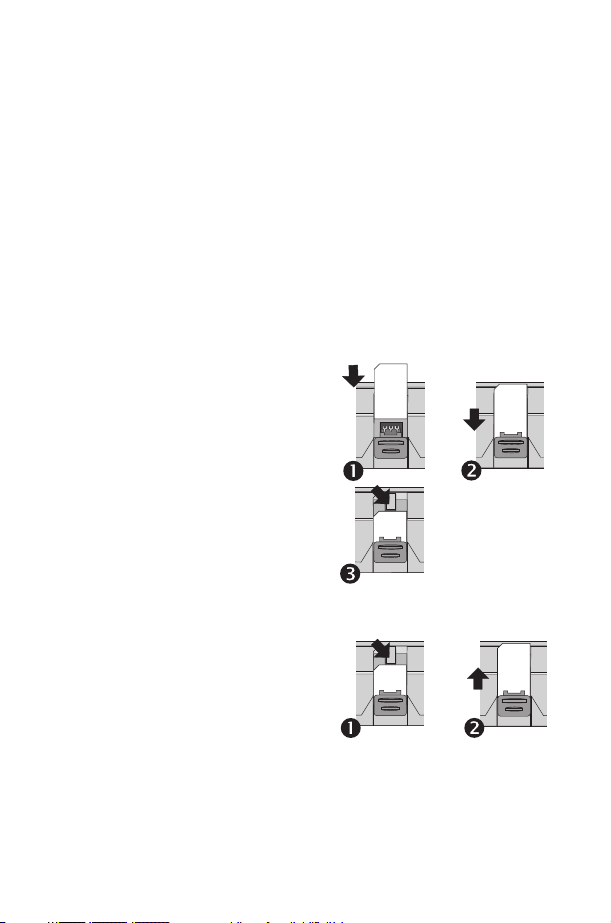
Fitting the SIM
The SIM is inserted into the back of
the phone underneath the battery.
First, remove the battery - see
“Removing the Battery” page 2.
Place the SIM in the recess at the
rear of the phone (1) ensuring the
bevelled corner is positioned in the
top left corner. Slide the SIM fully
down (2) using light pressure until
the SIM retaining clip has clicked into
position (3).
Removing the SIM
Ensure the SIM retaining clip is
pressed down (1) and while holding
this down slide the SIM upwards (2).
Once clear of the SIM recess, the
SIM can be removed.
1
Page 10
Getting Started
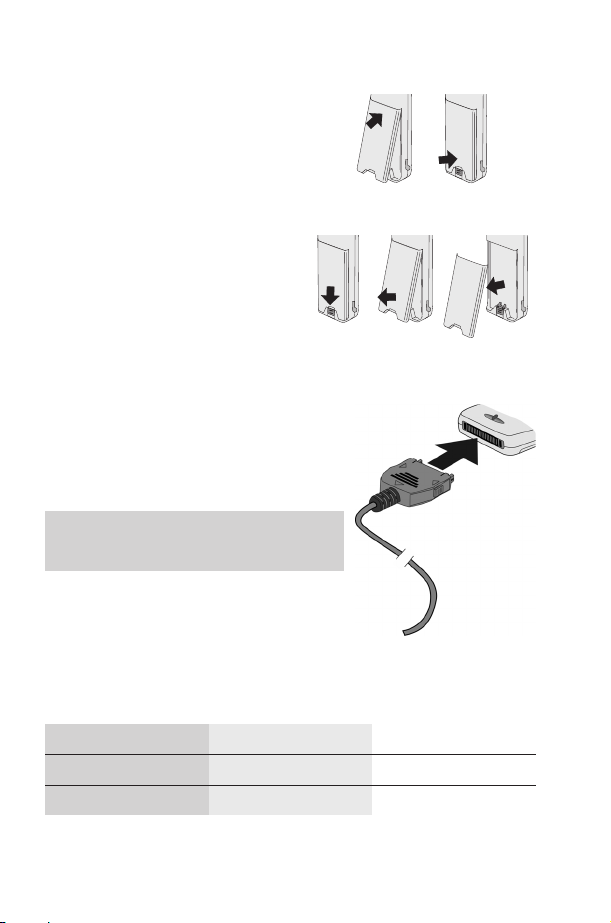
Fitting the Battery
Locate the lugs in the top of the
battery into the rear of the phone (1).
Using light pressure, push the
bottom of the battery into place until
it locks into position (2).
Removing the Battery
Push the battery release latch down
(1). The base of the battery will raise
out of the recess (2). The battery can
now be removed from the phone (3).
Charging the Battery
Connecting the Travel Charger
The battery must be attached to the
phone before the charger is connected.
Ensuring the arrows on the plug are to the
front of the phone insert the charger into
the base of the phone.
Note: DO NOT force the connector as
this may damage the phone and/or the
charger.
Connect the charger to the mains power
supply and switch on. The charging
indicator will light and the battery level
indicator will scroll right to left when
charging.
Operation of Battery Level Indicator
While charging Charging complete
Phone on KH
Phone off K Indicator off
2
Page 11

Getting Started
When charging is complete turn off the mains power supply and
disconnect the charger from the phone. See “Disconnecting the
Travel Charger” below.
Disconnecting the Travel Charger
Turn off the mains power supply and
disconnect the charger.
Squeeze together the two buttons on
the plug of the charger (1) and while
maintaining pressure extract the plug
from the base of the phone (2).
Low Battery Warning
When the battery power is low a warning tone will sound and a
flashing LOW BATTERY message will be displayed. If this occurs
during conversation finish your call immediately. The power will be
automatically shut off shortly after the warning tone. Fully charge the
battery or replace it with a fully charged one. (Calls can be made and
received while the phone is charging)
3
Page 12
Getting Started
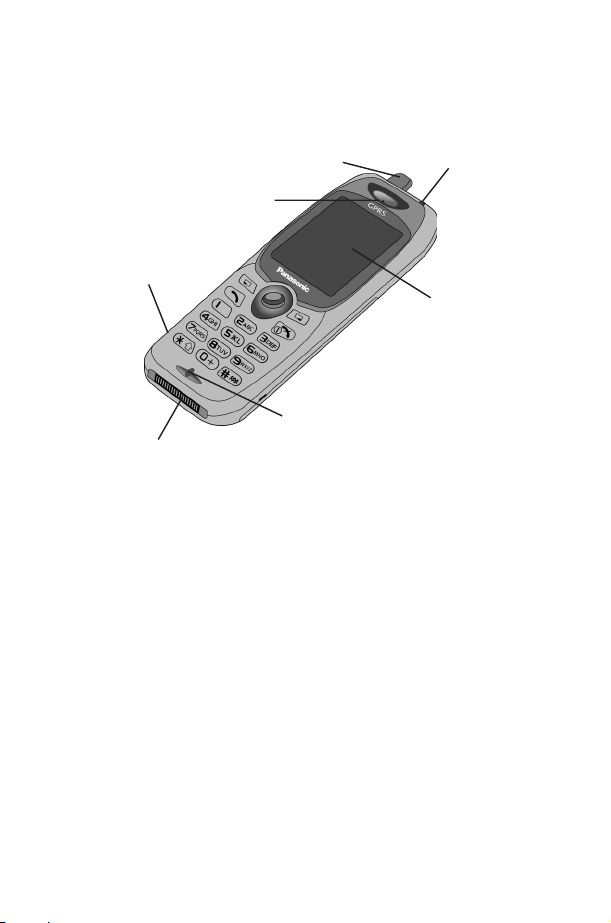
Getting to Know Your Phone
Location of Controls
Antenna
Earpiece
Earphone/Microphone
Socket
Microphone
External Connector
g Navigation key - moving up/down/left/right navigates
through the options in the Main Display area. Pressing this
key activates the function currently displayed in the Main
Option area
B Cancel key - this key is mainly used to cancel the current
operation and return to the previous menu level. In certain
menus it has other functions.
A Primarily used for accessing the Phonebook or switching
character types. Also used for accessing the Browser menu
D Makes a call or recalls recently dialled phone numbers
E Ends a call or switches the phone on/off when pressed and
held
1 Digit keys 0 to 9, * and # – the # key will
switch on and off Discreet Mode
Incoming/Charging
Indicator
Display
4
Page 13
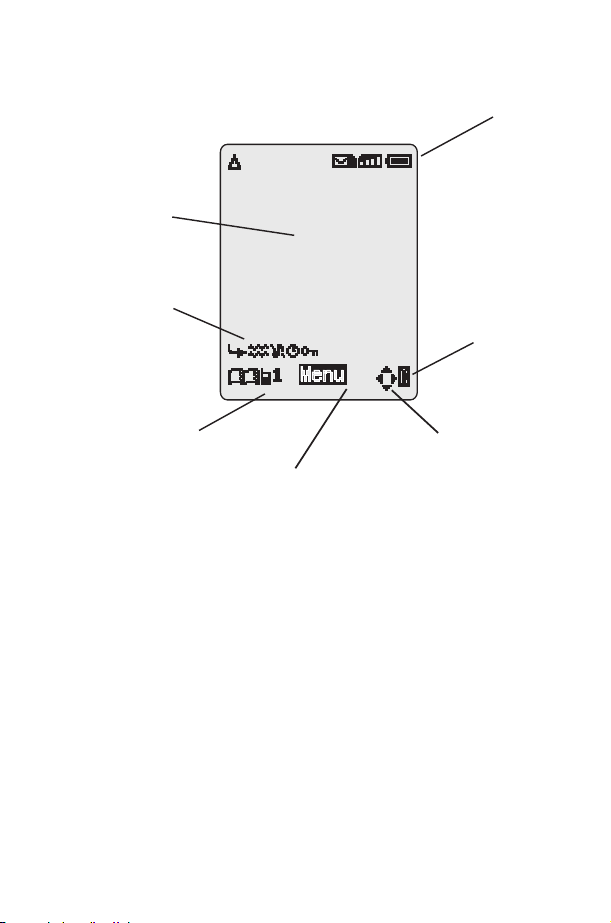
Display Icons
Main Display
Status Icons
Getting Started
Status Icons
Cancel Icon
Information Area
Main Option Area
Navigation Prompt
Status Icons
The status icons are displayed according to the currently activated
functions. The Antenna, Signal and Battery icons are always
displayed when the handset is switched on and connected to a
network.
Y lights when you are registered to a non-home network -
roaming
t lights when call divert is enabled
] lights when vibration alert is enabled
[ lights when all tones or ring volume is off
N flashes when an unread message is stored or lights when
message area is full
O lights when phone lock is enabled
S indicates that it is possible to make emergency calls
T indicates the received GSM signal strength: \ - weak
signal, T - strong signal
5
Page 14

Getting Started
T indicates the received GPRS signal strength: \ - weak
signal, T - strong signal
H indicates the battery level: H - full, G (flashing) - low
battery
Information
Icons are used to indicate the current top level menu, the sub-menu
number, text entry mode, Phonebook source, Phonebook location
number, or the alarm set icon depending on the current mode of
operation.
? indicates alarm is set
> indicates current Phonebook entry is sourced from the
Mobile Phonebook
< indicates current Phonebook entry is sourced from the SIM
Phonebook
Navigation Prompt
p This area indicates the available directions in which the
Navigation key can be pressed according to the current
mode of operation.
Using the Menu System
The menu system provides the means for accessing all the functions
which do not have their own dedicated buttons on the keypad.
The menu functions are selected using the five-way Navigation key.
To Select a Function
Press the Navigation key (Q) and then use it as a joystick to move
around the icons on the screen in any of the four directions (a, b, c,
d). Once a particular menu is highlighted press the Navigation key
(Q), and a submenu is displayed. From any submenu, use e until
the required item is highlighted, then press Q.
Example:
From Idle mode press Q, select Personalise > Display
Setting > Backlight Colour and press Q
6
Page 15

Getting Started
In detail:
1 Press the Navigation key (Q) to enter the menu system
2 Use db to highlight the Personalise menu
3 Press Q to enter the menu
4 Use a three times to highlight the Display Setting menu
5 Press Q to enter the menu
6 Use a twice to highlight the Backlight Colour menu
7 Press Q to enter the menu
8 Use ab to select desired screen colour and press Q
Following some operations the display will automatically clear after
three seconds, if this is not the case press E to return to Idle
mode.
Shortcuts
In addition, once you are familiar with the layout of the menu you can
use the keypad to enter the Menu Number to quickly obtain the
required function. For example, press Q to enter the menu and then
143 to take you directly to the menu for changing the
Backlight Colour.
7
Page 16
Basic Operation
Basic Operation
Switching the Phone On/Off
To switch the phone on or off.
Press and hold E to switch power on
A greeting will be displayed and then the phone will
go into Idle mode.
Press and hold E to switch power off
Making a Call
Ensure that the phone is switched on, the network operator logo is
displayed and the signal strength meter shows network coverage is
available in the current area.
1 Enter area code and phone number
2 Press D
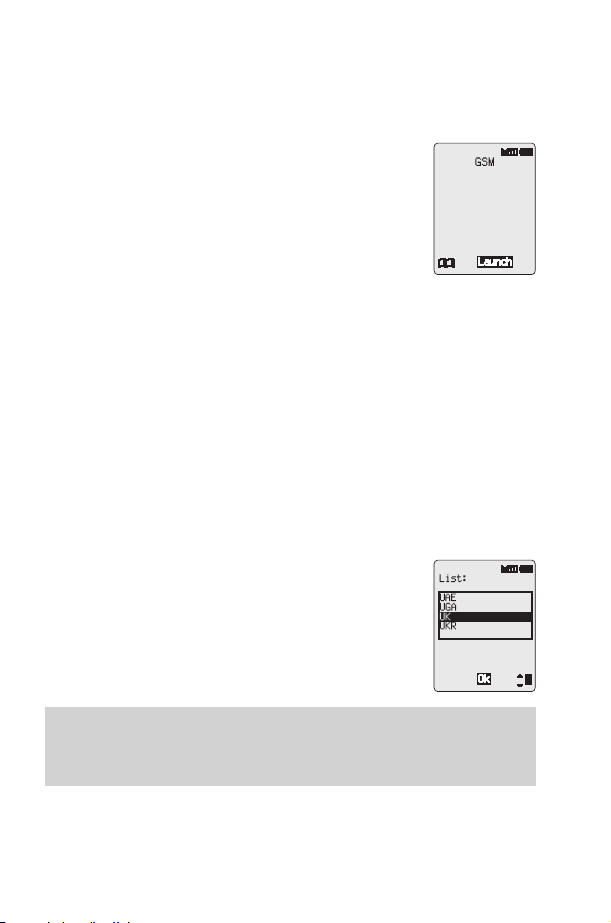
International Dialling
Using the automatic international access code (+) you will be able to
dial international numbers without having to know the code for the
international exchange.
If the international number is known then it can be entered in the
normal fashion followed by the area code and phone number.
1 Press and hold 0 until + is displayed
2 Use e to cycle through the abbreviated
international names and press Q to select the
required code
3 Enter area code and phone number
4 Press D
Note: Many countries include an initial “0” in the area code. This
should, in most cases, be omitted when dialling international
numbers. If you have difficulties making international calls, contact
your Service Provider.
8
Page 17

Basic Operation
Emergency Calls
To make an emergency call the antenna symbol (S) must be present.
Enter 112 D or if no SIM is fitted to the phone press
QaQ
Automatic Redial
When a call is unsuccessful you may want the phone to redial the
number again automatically.
When your connection is unsuccessful, Press Q when Ok is
displayed and a timer will countdown in seconds to the next
redial
To stop redialling, press Q when Cancel is displayed in the
main option area or B when C is displayed in the secondary
option area
When a call is connected a beep will be emitted.
If a call is repeatedly unsuccessful you will not be able to
automatically redial the phone number. In this case you must redial
the phone number manually.
Ending a Call
Press E
Answering a Call
To receive a call the phone must be switched on and the signal
strength meter must be displayed.
Press any key except E or the Navigation key Q to answer
a call
Press E to reject the call
If Q is pressed, you will be given the option to Accept or Reject the
call. Use e to select an option and press Q.
If a call is not answered, or is rejected, the number of unanswered
calls will be displayed.
Press any key to clear the display
9
Page 18
Basic Operation
Caller Identification
This feature allows you to identify incoming calls and accept or reject
them. The caller’s phone number, and name if stored in Phonebook,
will be displayed.
Note: Caller Identification may not always be available.
Earpiece Volume Control
The volume level may be adjusted during a call:
Use a to decrease the volume
Use b to increase the volume
Volume control for Personal Handsfree accessory is adjusted in the
same manner.
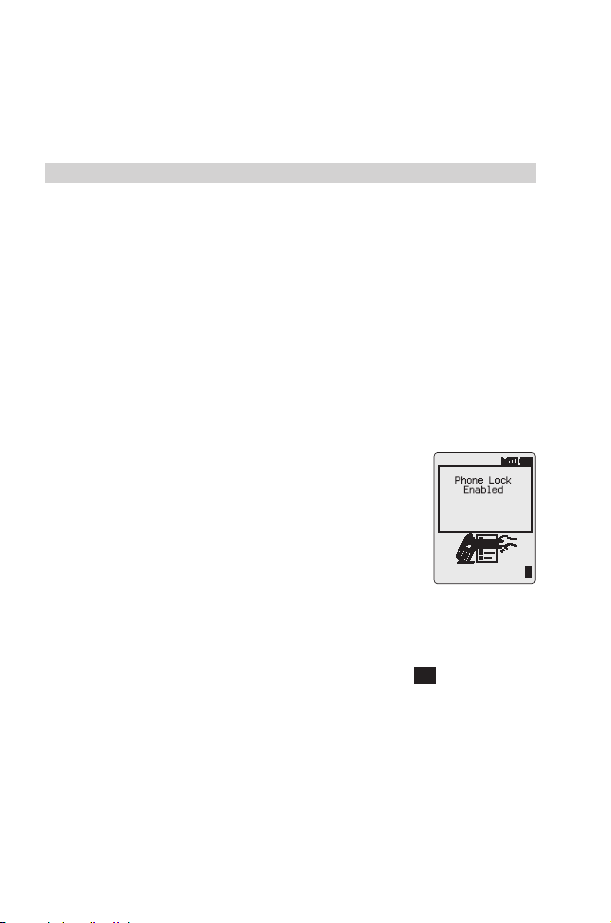
Locking the Phone
With the Phone Lock enabled you will be restricted to answer
incoming calls and make emergency calls only. The Phone Lock
Code is factory set to “0000”.
1 From Idle mode press Q, select Phone Menu
> Security > Phone Lock and press Q
2 Enter the 4-digit code and press Q
The phone will be locked and the lock icon (O) will
be displayed.
Unlocking the Phone
To restore normal operation, enter your Lock Code and press Q.
The lock icon will be removed from the display. However, once you
turn the phone off and on again you will need to re-enter the Lock
Code, and when the correct code has been entered Ok will be
displayed. Press Q.
Disabling Phone Lock
The phone must be unlocked before the phone lock can be disabled.
1 From Idle mode press Q, select Phone Menu > Security >
Phone Lock and press Q
2 Select Disable press Q
3 Enter the 4-digit code and press Q
10
Page 19

Basic Operation
Using the PIN
The PIN (Personal Identification Number) protects your SIM against
unauthorized use. If you enable the PIN, every time the phone is
turned on you will be prompted to enter the PIN.
The PIN2 controls security for the Fixed Dial Store, Call Charge
metering and Barred Dial.
Enabling/Disabling the PIN
1 From Idle mode press Q, select Phone Menu > Security >
PIN and press Q
2 Use a select Enable / Disable or Change the PIN and press
Q
3 Enter PIN (Between 4 and 8 digits) and press Q
Setting Vibration Alert
When vibration alert is switched on the phone will vibrate when a call
is received. Switching on vibration alert will silence the ring volume.
If, however, the ring volume is adjusted after the vibration alert is
switched on, the phone will ring and vibrate when a call is received.
From Idle mode:
Press and hold # to switch on or off. When activated, the
phone will vibrate briefly.
Setting Ring and Key Volume
Changing either the ring volume and key volume is done in the same
manner. If you increase the ring volume above maximum it will set an
escalating ring tone. If you turn the ring volume off, the silent
indicator icon ([) will be displayed.
1 From Idle mode press Q, select Personalise > Tones and
press Q
2 Select Ring Volume or Key Volume and press Q
3 Use e to set the volume level and press Q
11
Page 20
Phonebook
Phonebook
Phone numbers can be stored in two locations. You can store
numbers in the SIM Phonebook (therefore the number of locations,
length of name and number of phone numbers are SIM dependent).
Alternatively you can store phone numbers in the Mobile Phonebook,
this means that if you change the SIM the numbers in the phone are
not lost.
The Mobile Phonebook has the advantage that you can group your
phonebook entries together.
Store a Number
To Store a Number in the SIM Phonebook
1 From Idle mode enter the phone number and
press A
2 To select SIM Phonebook press Q
3 Enter the name – see “Text Entry” page 62,
and press Q twice
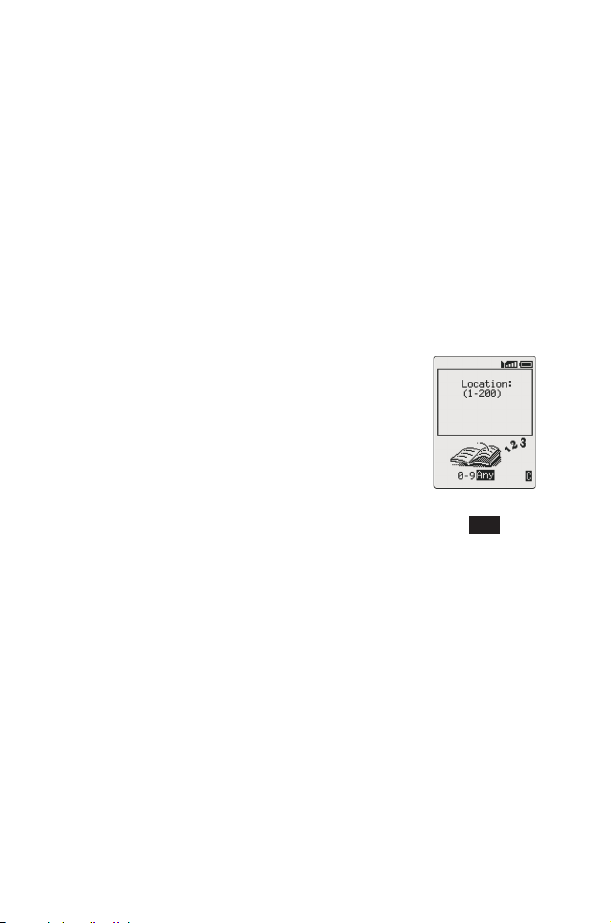
4 Enter location number and press Q
You can choose not to enter a location number and the entry will be
placed in the next available location. Simply press Q when Any is
displayed.
To Store a Number in the Mobile Phonebook
1 From Idle mode enter the phone number and press A
2 Use a to select MobilePhonebook and press Q
3 Enter the name - see “Text Entry” page 62, and press a
4 Confirm phone number and press Q twice
If you wish to store an e-mail address with the current number then
after confirming the number use a, enter the mail address and press
Q twice.
5 Use e to select a group - see “Grouping Phonebook Entries”
page 15 - into which to place the entry and press Q
6 Enter location number and press Q
12
Page 21

Phonebook
You can choose not to enter a location number and the entry will be
placed in the next available location. Simply press Q when Any is
displayed.
Overwrite Protection
If a location is occupied you will be prompted to confirm that you wish
to overwrite the current information.
Press Q to overwrite the selected location
Press B to choose another location number
Note: If you amend an entry stored in your phonebook that has a
Voice Dial Command assigned to it, you will need to delete and
reassign that Voice Dial Command - see “Editing the Voice Dial
Entries” page 23.
Browsing Phonebook
You can search the Phonebook by either Name or Location. The
default setting for browsing is by name. When browsing by name
pressing a lettered key will take you to the first entry starting with that
letter.
1 From Idle mode press Q, select Phonebook > Browse and
press Q
2 Use e to toggle between Names or Location Numbers
display mode and press Q
3 Use e to select the Phonebook you wish to browse and press
Q
Retrieve a Number
From Idle mode:
1 Press A
2 Use e to browse through the Phonebook
Once you have selected a phone number or name, there are a
number of actions that you can perform. To dial the selected number
press D.
Note: The Phonebook you last viewed will be the default when you
next press A. To change the default, use the Phonebook menu to
select a particular phonebook.
13
Page 22

Phonebook
Speed Dial a Number Stored in SIM Phonebook
1 Enter location number – leading zeros may be left out
2 Press #
3 Press D
Editing Phonebook Entries
You can Detail, View, Recall, Edit, Delete or Create in the
Phonebook. To access any of these functions you follow the same
procedure. With a phone number or name displayed:
1 Use e to cycle through Detail, View, Recall, Edit, Delete or
Create
2 Press Q to select an option
Detail
Displays each element of the selected Phonebook entry. Use e to
display the next/previous element of the entry. Each element may be
edited - Press QaQ, edit as required and press Q twice to save
any changes.
View
Displays an individual name and phone number in the names list.
If an e-mail address is present in the Mobile Phonebook this will be
displayed along with the name and number.
Recall
Displays the phone number, enabling you to either change it or call
the number.
Edit
Displays the entry allowing you to make changes as required. Press
Q twice to save any changes.
Delete
Deletes the entry from the Phonebook.
Create
Creates a new entry in the Phonebook
14
Page 23

Phonebook
Grouping Phonebook Entries
The ability to group phonebook entries together is an extra function
of the Mobile Phonebook.
Retrieving a Number from a Group
Groups are used to collect together types of Phonebook entries, for
example business and personal. Each group can be suitably titled for
quick access to the entries contained within.
An alert profile can be attributed to groups, or a phone number, thus
allowing incoming calls to be tailored to indicate the type of caller.
1 From Idle mode press Q, select Phonebook > Group
Setting and press Q or from Idle mode press A twice
2 Use e to select the group and press Q twice
3 Use e to select the entry required and press Q twice to recall
the number.
Retitling Group Names
1 From Idle mode press Q, select Phonebook > Group
Setting and press Q
2 Use e to select the group required and press Q
Use e to select Edit and press Q
3
4 Clear the current title and re-enter - see “Text Entry” page 62
5 Press Q twice to save any changes
Using Alert Profiles
Alert Profile enables you to identify callers with a particular ring tone,
display picture and backlight colour, making it easier to distinguish
between callers or groups of callers.
Creating an Alert Profile
1 From Idle mode press Q, select Phonebook > Alert Profile
and press Q
2 Press Q insert a new profile
3 Use e to select Personal or Group and press Q
4 Recall the phone number / select group from the Phonebook –
see “Retrieve a Number” page 13 and press Q
15
Page 24

Phonebook
5 Press Q
6 Use e to select the ring tone that you wish to use for this profile
and press Q
7 Use e to select the picture and press Q
8 Use e to select the backlight colour and press Q
Hot Key Phone Numbers
It is possible to dial phone numbers from the Phonebook or Service
Dial part of Phonebook very quickly. Some Hot Key Phone numbers
may be reserved by the Service Provider, for example the first three
Hot Key Phone numbers may be linked to Service Dial (network
dependent).
1 Press and hold a Digit key 1 to 9
2 Press D
Setting the Hot Key Dial Source
1 From Idle mode press Q, select Phonebook > Hot Key Dial
and press Q
2 Use e to select SIM Phonebook or MobilePhonebook and
press Q
Service Dial Numbers
Your Service Provider may program some special phone numbers
into your SIM (network dependent). It is not possible to modify the
Service Dial numbers.
1 Press and hold A
2 Press e to browse through the Service Dial list of phone
numbers
The phone number pointed to can only be recalled or dialled.
16
Page 25

Phonebook
Review the Phonebook
The Review function in the Phonebook menu shows how many
locations are available in the Phonebook.
1 From Idle mode press Q, select Phonebook > Review and
press Q
2 Use e to select SIM Phonebook or MobilePhonebook and
press Q
A summary of the selected Phonebook will be displayed.
3 Use e to gain a detailed view of the Phonebook locations.
Occupied locations are shown with “w”.
My Numbers
My Numbers is a convenient part of Phonebook where your voice,
fax and data phone number(s) can be stored and viewed. This
function is SIM dependent.
Adding Numbers
1 From Idle mode press Q, select Phonebook > My Numbers
and press Q twice
2 Use e until Create is displayed and press Q
3 Enter the name - see “Text Entry” page 62, and use a
Note: If using T9®text input then move c before moving a
otherwise an alternative word will be selected
4 Enter the phone number and press Q twice
5 Enter location number and press Q
Viewing Stored Numbers
1 From Idle mode press Q, select Phonebook > My Numbers
and press Q
2 If more than one number is available then use e to cycle
through the listed numbers
17
Page 26

Personalising Your Phone
Personalising Your Phone
Add a Start-up Greeting
A personalised greeting can be programmed for when the phone is
switched on.
1 From Idle mode press Q, select Personalise > Display
Setting > Greeting and press Q
2 Use the text entry facility to add your greeting and press Q
twice - see “Text Entry” page 62
Displaying Animations
Animations can be displayed when the phone is switched on.
1 From Idle mode press Q, select Personalise > Display
Setting > Animation and press Q
2 Use e to cycle through the animated themes available
3 Press Q to select either the desired theme, or disable the
animation
Changing the Ring Tone
The ring tones of the phone can be changed to one of many
pre-defined sounds or to a voice ringer (a voice recording used as a
ring tone).
Each of voice, fax, data and message can have a different ring tone.
Alternatively you can use the Melody Composer to generate your
own ring tone.
Setting up a Pre-defined Ring Tone
You can choose from a selection of tones and
melodies.
1 From Idle mode press Q, select Personalise
> Tones > Ring Type and press Q
2 Use e to select the appropriate call type to be
changed and press Q
3 Use e to select the desired ring tone and press
Q
18
Page 27

Personalising Your Phone
Recording a Voice Ringer
1 From Idle mode press Q, select Personalise > Tones >
Voice Ringer and press Q
2 Use e to select the appropriate voice ringer to be changed and
press Q
3 Press Q and start speaking into the microphone to record
your voice. The recording will stop automatically, or before if
Q is pressed.
4 To playback the recording use e to select the appropriate voice
ringer press Q, select Playback and press Q
Composing a Melody
From Idle mode press Q, select Personalise > Tones >
Melody Composer and press Q
Using the following table as reference, enter the notes (from the
choice of low, middle and high), rests, and the durations of each, to
generate your composition.
At any time during composing press A to play back the
current melody.
Once the composition is complete press Q twice to save it.
19
Page 28

Personalising Your Phone
Key
1 C C# low C low C# high C high C#
2 D D# low D low D# high D high D#
3 E low E high E
4 F F# low F low F# high F high F#
5 G G# low G low G# high G high G#
6 A A# low A low A# high A high A#
7 B low B
8
9
0 rest
*
(duration)
#
(duration)
1st
press
1/8 1/16 1/1 1/2 1/4
1/2 1/1 1/16 1/8 1/4
2nd
press
3rd
press
4th
press
5th
press
6th
press
Editing your Melody
Once the melody has been saved the following operations can be
used for re-editing purposes:
Press B to delete the character to the left of the cursor
Use g to navigate the cursor around the screen
Use the relevant keys to insert new notes/rests
Disabling all Tones
1 From Idle mode press Q, select Personalise > Tones and
press Q
2 Press Q to disable all tones. When Idle mode is resumed the
silent indicator icon ([) will be displayed.
Repeat the process to enable all tones.
20
Page 29

Personalising Your Phone
Download Melody
Melodies may be downloaded to the phone via short text messages.
http://www.panasonicmobile.co.uk/support/ringtones
Downloaded melodies overwrite pre-defined ring tone numbers
16-20.
When a message has been received containing a melody:
1 Press Q to acknowledge receipt of the melody
2 Use e to select the ring tone number to overwrite and press Q
twice
The melody is now stored and can be selected as a pre-defined ring
tone.
Setting the Backlight Colour
1 From Idle mode press Q, select Personalise > Display
Setting > Backlight Colour and press Q
2 Use e to cycle through the colours available
3 Press Q to select the desired colour
Setting the Backlight Time
1 From Idle mode press Q, select Personalise > Display
Setting > Backlight Time and press Q
2 Use e to cycle through the times available
3 Press Q to select the desired time
Using Voice Commands
Before you can use any of the phone’s voice activated functions you
will need to configure the phone so that it will recognize your own
voice and intonation.
21
Page 30

Personalising Your Phone
Voice Dial Entry Setup
This function allows you to recall and dial numbers from your
Phonebook using voice commands.
1 From Idle mode press Q, select Personalise > Voice
Command > Voice Dial and press Q
2 Press Q to add a new Voice Dial entry to the list
3 Browse through the Phonebook to select an entry which you
wish to attribute a voice command to, and press Q twice
Note: Each recording is short in length, so be prepared to speak
once you have initiated the recording.
4 When ready, hold the phone approximately 7” (178mm) from
your mouth, press Q and speak clearly into the microphone
to record the name of the selected Phonebook entry
When the recording has stopped, you will be prompted to repeat the
name.
5 Press Q and repeat the name
Once recording is complete for a second time, the display will
indicate if the recording was successful or not. If unsuccessful,
repeat from step 4.
Recalling Voice Dial Entries
From Idle mode move and hold the navigation key (g)inany
one of the four directions a, b, c or d. Speak clearly the
name you wish to recall (exactly as recorded) and wait
The above procedure will recall the phone number and the recorded
Voice Dial entry is repeated; to initiate the call press D.
Dialling Voice Dial Entries
Using Permission
From Idle mode press Q, select Personalise > Voice
Command > Permission and press Q
With this function enabled a recalled phone number is automatically
dialled without further intervention.
Repeat this process to disable the Permission function returning to
Voice Dial recall only
22
Page 31

Personalising Your Phone
Editing the Voice Dial Entries
You can add to, play or delete any of the Voice Dial entries. With a
Voice Dial entry displayed:
Press Q and use e to select Add, Play or Delete and press
Q to select the desired option
Add
To add a new Voice Dial entry
Play
To listen to the recording of a Voice Dial entry
Delete
To delete an entry
Selecting Vibration Alert Type
The vibration alert facility may be set to vibrate continuously or
intermittently.
1 From Idle mode press Q, select Personalise > Vibration
Alert and press Q
2 Use e to select the type of vibration desired and press Q
Changing the Language
It is possible to change the language that the phone uses for either
the display messages and/or for text entry.
1 From Idle mode press Q, select Personalise > Language
and press Q
2 Use e to select Display Language or Tegic Language (text
entry) that you wish to change and press Q
3 Use e to select the desired language and press Q
Restoring the Default Phone Settings
Any personal settings can be returned to their factory default, with
the exceptions of the Phone Lock code and the Language.
1 From Idle mode press Q, select Personalise > Defaults and
press Q
2 Press Q to restore the default settings
23
Page 32

Phone Security
Phone Security
The phone features a number of security functions that protect
against unauthorized use, and enable you to restrict access to
certain features - see “Using the PIN” page 11. It is recommended
that you memorize your security codes. If you need to make a note of
your security codes, never write them in a way that they can be
recognized by another person. If you forget them contact your dealer
for the Phone Lock Code or your Service Provider for PIN and PIN2.
Using Key Guard
The Key Guard function is used to prevent any keys
from being accidentally pressed e.g. when the phone
is being carried.
From Idle mode press Q, select Key Guard
and press Q twice to enable Key Guard
When a call is received Key Guard will be disabled
temporarily, allowing you to press any key to answer
the call. Emergency calls can still be made - see “Emergency Calls”
page 9.
Note: When making emergency calls with the “Key Guard” enabled,
there will be no audible or visual indication that the number is being
dialled
Disabling Key Guard
When Free is displayed press Q twice
Changing the Security Codes
1 From Idle mode press Q, select Phone Menu > Security and
press Q
2 Use e to select Phone Lock, PIN or PIN2 and press Q
3 Use e to select Change and press Q
4 Enter the current code and press Q
5 Enter the new code and press Q
6 Verify the new code and press Q
24
Page 33

Phone Security
Restricting Calls
Call Barring
The Call Bar function is used to restrict certain outgoing and/or
incoming calls. Call Bar is controlled by a security password that is
supplied by your Service Provider. When updating or checking the
status of Call Bar the phone must be registered with a network.
Different Call Bar restrictions can be used for voice, fax and data
calls. Any combination of call restrictions can be set.
1 From Idle mode press Q, select Phone Menu > Security >
Call Bar and press Q
2 Use e to select Bar Voice, Bar Fax or Bar Data and press Q
twice
3 Use e to the select level of call barring that you wish to apply
and press Q
4 Enter Call Bar password and press Q
Barred Dialling
The Barred Dial function enables you to bar all phone numbers
pre-programmed in the SIM from being dialled on the phone. To use
this function PIN2 is required.
1 From Idle mode press Q, select Phone Menu > Security >
Barred Dial and press Q
2 Enter PIN2 and press Q
Fixed Dial
The Fixed Dial Store is part of Phonebook, but with additional
security. When the security feature Fixed Dial is enabled it is only
possible to make calls with phone numbers that are in the Fixed Dial
Store.
When Fixed Dial is enabled any manually dialled phone numbers
must match a phone number in the Fixed Dial Store.
To store, edit or delete a phone number in the Fixed Dial Store the
Fixed Dial function must be enabled. With Fixed Dial enabled, all
phone numbers can be added, edited or deleted as normal, but you
will be prompted for PIN2.
25
Page 34

Phone Security
“Wild” Numbers
Wild numbers are spaces that can be stored in a phone number. The
“wild” numbers must be filled before the phone number is dialled.
Used in conjunction with Fixed Dial calls can be restricted, for
example, to a specific area by storing the area code of a phone and
when recalled the remainder can be added. The “wild” numbers can
be anywhere within a stored phone number.
1 Press and hold 0 until _ is displayed to enter a wild number
2 When the phone number is recalled pressing a numeric key
will fill in a “wild” number.
26
Page 35

Applications
Applications
Clock
This phone incorporates a clock with date/time, an alarm and a
power on/off feature.
A second clock for dual time is also included - see “Second Clock”
page 60.
Initially Setting the Home Time
1 From Idle mode press Q, select Applications
> Clock Function > Clock Set > Home >
Time Set and press Q
2 Use e to select whether you require Summer
Time setting on or off and press Q
3 Enter the digits for the date in the format
day/month/year and press Q
4 Enter the digits for the time using 24 hour clock and press Q
Setting the Clock Format
1 From Idle mode press Q, select Applications > Clock
Function > Clock Format > Display Format and press Q
2 Use e to cycle through the different clock and/or date formats
3 Press Q to select the desired clock display type
Altering the Time/Date
1 From Idle mode press Q, select Applications > Clock
Function > Clock Set > Home > Time Set and press Q
2 Press and hold B to remove the current date
3 Enter the digits in the format day/month/year
4 Press Q to accept the date
5 Press and hold B to remove the current time
6 Enter the digits using 24 hour clock and press Q
27
Page 36

Applications
Setting the Clock for Summer Time
1 From Idle mode press Q, select Applications > Clock
Function > Clock Set > Home > Summer Time
2 Press Q to set Summer Time On or Off
Setting the Alarm
If you have not already set the clock, you will be prompted to do so
prior to setting the alarm.
There are four separate alarms, each of which may be set
independently.
1 From Idle mode press Q, select Applications > Clock
Function > Alarm Set and press Q
2 Use e to select the alarm to be set and press Q
3 Enter the digits for the time and press Q
4 Use e to select the frequency of the alarm and press Q
5 Use e to select the ring type and press Q
Once the alarm has been set, ? will be displayed when the phone is
in Idle mode.
The alarm is activated in accordance with the current clock (Home or
Second)
Muting the Alarm
When the set time is reached the alarm will sound and the display
will flash with an alarm message. The alarm will sound for 30
seconds. If the alarm is due during a call, it will activate vibration
alert.
To end the alarm:
Press any key
Disabling the Alarm
1 From Idle mode press Q, select Applications > Clock
Function > Alarm Set and press Q
2 Use e to select the alarm to be disabled and press Q twice
3 Use e to select Disabled and press Q
Once disabled, following the same procedure will re-enable the
alarm.
28
Page 37

Applications
Adjusting the Alarm Time
1 From Idle mode press Q, select Applications > Clock
Function > Alarm Set and press Q
2 Use e to select the alarm to be adjusted and press Q
3 Press and hold B to remove the current alarm time
4 Enter the digits for the time and press Q
5 Use e to select the frequency of the alarm and press Q
6 Use e to select the ring type and press Q
Setting a Power On/Off Time
You can set your phone to turn itself on or off automatically at a
specified time using the Power On/Off feature. The procedure for
setting/adjusting the Power On/Off automatically is similar to that for
setting the time on the clock. For either setting or adjusting the time
you need to select Power On Time or Power Off Time in the Clock
Function menu.
Caution: Ensure that the setting of the Alarm or Power On function
will not contravene any regulations whereby it may automatically
power on when in an aircraft or medical facility etc. - see “Important
Information” page 68.
Calculator
The four function calculator will enable you to perform simple
arithmetic calculations (addition/subtraction/multiplication and
division).
1 From Idle mode press Q, select Applications > Calculator
and press Q
2 Enter a number (maximum 10 digits) and it will be displayed on
the lower line
3 Use g to select the arithmetic operation you wish to perform
(b to multiply, c to add, a to divide, d to subtract)
4 Enter a number (maximum 10 digits) and it will be displayed
next to the operation symbol
29
Page 38

Applications
5 If you use g to select another arithmetic operation to perform,
an intermediate calculation will be performed and the result
displayed on the upper line
Press Q to complete the calculation when = is displayed in the
6
main option area
Note: Press and hold 1 to add a decimal point.
Currency Convertor
The currency convertor enables you to convert from/to a home
currency using a conversion rate that you enter.
From Idle mode press Q, select Applications > Currency
and press Q
Entering an Initial Conversion Rate
1 Press Q
2 Enter an abbreviation for the home currency (up to 3
characters) and press Q twice
3 Enter an abbreviation for the foreign currency (up to 3
characters) and press Q twice
4 Enter the currency conversion rate and press Q twice
Note: Press and hold 1 to add a decimal point.
Converting a Value
1 Check the conversion rate is the one you require and press Q
twice
2 Enter the value to be converted and press Q twice
The conversion rate will be retained in the phone once entered. The
next time you use the convertor you can edit the conversion rate /
currency abbreviation while in the Currency /rate display. Press Q,
then use e to select Edit and press Q.
Swapping the Currency Conversion
When you have accepted the conversion rate and are ready to enter
the value to be converted, you can swap the currencies to convert
from the foreign currency into the home currency.
1 Use e to select Swap and press Q
2 Enter the value for conversion and press Q twice
30
Page 39

Short Text Messages
Short Text Messages
You can receive, display, edit and/or send short text messages, of up
to 160 characters to mobile phones on the same network or any
network that has a roaming agreement.
Setting the Phone for Text Messages
Before you can send a message you must enter the Message Centre
number into Parameters (your Service Provider will supply the
Message Centre number).
The Message Centre number may have been preprogrammed, on
your SIM card.
Setting the Message Centre Number
1 From Idle mode press Q, select Messages > Short Message
> Parameters > Message Centre and press Q
2 Enter message centre number in international dial format – see
“International Dialling” page 8
Sending a Text Message
1 From Idle mode press Q, select Messages > Short Message
> Create and press Q
2 Use e to select one of the pre-defined messages to be used as
a basis and press Q twice, or select <Create> and press Q
3 Use g to navigate through the message and add any extra
text (up to a total of 160 characters) – see “Text Entry” page 62
4 Press Q twice
You will be prompted if you wish to send the message, if you do not
wish to send the message press B, the message will be stored.
5 Press Q and enter the destination phone number (or recall a
number from the Phonebook) - see “Retrieve a Number” page
13 and press Q
6 Press Q twice
7 You may be asked if you wish to have delivery confirmation. If
you do not want confirmation use e to select NO then press
Q. If you do, use e to select Yes then press Q
31
Page 40

Short Text Messages
The default setting for delivery confirmation can be enabled/disabled
using the Report parameter in the Short Message > Parameters
menu.
Receiving Text Messages
When a Short Text Message is sent to your phone the message
indicator (N) will flash in the display, with an audible tone or
vibration. This indicates that a new message has been received.
When Read is displayed press Q to read the message. Use g to
navigate through the message and to identify the sender of the
message.
Note: If the message indicator is displayed constantly (does not
flash) this indicates that the message area is full and you will need
to delete old messages in order to be able to receive new messages
in the future.
Message Options
Reply to a Message
When you have received and read a message you may wish to reply
to the sender.
Pressing Q twice will allow you to create a reply message
Delete a Message
1 Press Q
2 Use e to select Delete and press Q to delete the message
To enable the auto-deletion of messages - see “Message
Parameters” page 33.
Edit a Message
1 Press Q
2 Use e to select Edit and press Q to edit the message
Pressing Q twice will give you the option to send the edited
message - see “Sending a Short Text Message” page 31. Press B
if you do not wish to send the message and it will be stored in the
Send List.
32
Page 41

Short Text Messages
Creating a User Defined Message
It is possible to create a user defined message which, once
generated, can be used as any other pre-defined message.
1 From Idle mode press Q, select Messages > Short Message
> User Defined Msg and press Q
2 Edit the message as required and press Q twice
The user defined message is displayed at the top of the list of
pre-defined messages for selection.
Manage Messages Lists
All messages, whether sent or received, will be stored on the SIM
until they are deleted. Selecting a stored message allows it to be
replied to, edited or deleted.
Receive List
Messages received will be stored in the Receive List. A flashing “w”
indicates an unread message.
When reading a message the sender’s information is displayed
below the text. Press e to show the senders ID (if available), the time
the message was sent and the message centre number. Pressing Q
twice allows you to reply to the message.
Send List
When a message has been sent or edited it will be stored in the
Send List.
Review
Review allows you to check usage of the message area.
Message Parameters
From Idle mode press Q, select Messages > Short Message
> Parameters and press Q
The following parameters can be set:
Auto Delete
When set will erase messages automatically:
Received Read - will overwrite the oldest read message
33
Page 42

Short Text Messages
Received Any - will overwrite the oldest message even though it
may not have been read.
Lifetime
This is the duration that your message is stored at the Message
Centre. Delivery attempts will be repeated until the message has
been delivered or the Lifetime expires.
Message Centre
Allows the Message Centre phone number to be edited - see “Setting
the Phone for Text Messages” page 31.
Report
When your message has been delivered a confirmation will be
received if Report is set to Yes.
Protocol
The Message Centre may be able to convert the message to the
format specified by the selected protocol.
Cell Broadcasts
Cell broadcasts are general information that is sent to your phone by
a network operator. The information can include topics like local
traffic reports, weather etc.
Setting Broadcast Topics
You need to specify the topic(s) of information that you wish to
receive as broadcasts before you can receive them.
1 From Idle mode press Q, select Messages > Short Message
> Broadcasts > Topics and press Q
2 Press Q twice to insert a new topic
3 Use e to cycle through the available topics and press Q to
insert the currently displayed topic into your broadcast list
34
Page 43

Short Text Messages
Enabling/Disabling Broadcasts
1 From Idle mode press Q, select Messages > Short Message
> Broadcasts and press Q
2 Select Receive and press Q
Once enabled, following the same procedure will disable broadcasts.
Message List
This is a store for the last received broadcast messages. Messages
can be deleted from here.
Language
The Language in which broadcast messages are displayed can be
changed (network dependent).
35
Page 44

Call Information
Call Information
Recent Numbers
Recently dialled phone numbers will be stored in Last Dialled.
If Caller Identification is available the caller’s phone number for an
answered call will be stored in Answered and an unanswered call
will be stored in Unanswered.
If Caller Identification is not available then calls will still be stored but
will have the date and time attributed to them.
When the store is full the next phone number will overwrite the
oldest.
1 From Idle mode, press D
2 Use e to select Last Dialled, Answered or Unanswered and
press Q
3 Use e to select the phone number (or name) you wish to redial
and press D
You can edit or delete the phone number before dialling – see
“Editing Phonebook Entries” page 14.
If you wish to store the selected number in Phonebook, press A
while the number is displayed – see “Store a Number” page 12.
Calling the Last Dialled Number
To redial your last called phone number press DD
Returning an Unanswered Call
When the display shows that you have received calls but not
answered them.
1 Press Q
2 The last caller’s phone number will be displayed if it is
available
3 Use e to select the phone number you wish to dial
4 Press D
36
Page 45

Call Information
Call Duration
1 From Idle mode press Q, select Phone Menu > Call Service
> Calls and press Q
Note: The Calls function is SIM dependent. If the SIM does not
support this function then items under Calls menu will be found
directly under Call Service menu.
2 Use e to select one of the functions described below, and
press Q
The Last Call function will display the duration and call charge, if
available, of the last call during Idle mode or the current call during a
call. Times are indicated as: hours (0-99), minutes (0-59), seconds
(0-59) - HH:MM:SS.
The All Calls function displays the accumulated duration and call
charge, if available, of Incoming and Outgoing calls. The lock code
or PIN2 is required to reset the timer and call charge.
Call Charges
To maintain control over the cost of calls that are made, the phone
can be set to restrict use to a finite number of units overall. This
function is SIM dependent.
Setting the Unit Price
Firstly, a price per unit must be entered. This is the cost that the
Service Provider charges for one unit of call time.
1 From Idle mode press Q, select Phone Menu > Call Service
> Service Charges > Price/Unit and press Q
2 Press Q to edit the values
At this point you will be asked to enter your PIN2 or Lock code then
press Q.
3 Enter a currency unit (up to three characters) and press Q
twice
4 Enter a price and press Q twice
37
Page 46

Call Information
Setting the Maximum Unit Level
This function is SIM dependent
1 From Idle mode press Q, select Phone Menu > Call Service
> Service Charges > Max Cost and press Q
2 Press Q twice to edit the values
At this point you will be asked to enter your PIN2 or lock code then
press Q.
3 Enter a value (number of units) which is to be the maximum
permitted, and the corresponding cost will be displayed
4 Press Q twice to accept
Note: The duration of one unit may vary during the day, peak and
off-peak times. Therefore, the call charge can be calculated
accordingly. However, call charge information may not give an
accurate reflection of the tariffs charged by your Service Provider.
Setting a Warning Level
A warning can be set as an indication that the maximum cost is
about to be reached. This function is SIM dependent.
1 From Idle mode press Q, select Phone Menu > Call Service
> Service Charges > Warning at and press Q
2 Press Q twice to edit the value
3 Enter a value (in units) at which time you would like the
warning to sound and press Q twice
Call Identification
In the Call Service menu, the Caller’s ID and Withhold ID functions
allow you to check the status of whether a Caller’s Identification is
sent or can be received. (Withhold ID is Network Dependent)
Note: When checking the status the phone must be registered with
a network.
38
Page 47

Advanced Operation
Advanced Operation
Diverting Calls
Voice, fax and data calls can be diverted using different
circumstances and to different numbers. For example you may wish
voice calls to be diverted to Voicemail in the event that the phone is
switched off.
1 From Idle mode press Q, select Phone Menu > Call Divert
and press Q
2 Use e to select the type of calls to divert and press Q twice
3 Use e to select the circumstances to initiate the divert and
press Q
4 Enter phone number to divert to and press Q twice
When a divert situation is enabled the divert icon (t) is displayed.
When updating or checking the status of Call Divert the phone must
be registered with a network.
Holding Calls and Call Waiting
Holding a Call
During a call:
1 Press Q
2 Use e to select Hold then press Q
Resuming a Call
1 Press Q
2 Use e to select Resume then press Q
Making a Second Call
1 Enter phone number (or recall from Phonebook – see “Retrieve
a Number” page 13)
2 Press D
The first call will be placed on hold.
39
Page 48

Advanced Operation
Receiving a Second Call
A second call can be received, if Call Waiting is switched on. This is
enabled from the Phone Menu > Call Service menu. It is not
possible to have more than one fax or data call. All voice calls must
be ended before you can make or receive a fax or data call.
Accept a Second Call
1 Press Q
2 Use e to select Accept and press Q
The current call will be placed on hold.
Reject a Second Call
1 Press Q
2 Use e to select Reject and press Q
End Current Call and Receive Second Call
1 Press E with a waiting call
2 Press any key except E or g
Operation During Two Calls
Swapping Between Calls
The ! prompt indicates the current call
1 Press Q
2 Use e select Swap and press Q
End Current Call
1 Press Q
2 Use e to select End and press Q
The held call will remain held.
End Both Calls
Press E
40
Page 49

Advanced Operation
Call Transfer
With two calls connected, Call Transfer enables you to connect them
together ending your connection, leaving the other parties to talk
together without you.
When you have two calls:
1 Press Q
2 Use e to select Trans. and press Q
The two calls will be connected to each other and your call will be
ended.
Note: Two call transfer cannot be utilized while in Multi-party mode.
Multi-party Calls
A Multi-party call enables three to five people to be in conversation at
the same time. It is possible to swap between a Multi-party call and
another call in the same way as with two separate calls.
Enabling Multi-party
With two calls connected (one active, one on hold):
1 Press Q
2 Use e to select Merge and press Q
A Multi-party call has been enabled, all three people will be able to
talk to each other.
Adding to Multi-party
You can add to the Multi-party call (up to a maximum of five). Either
by making a call or accepting an incoming call. The call can then be
merged into the Multi-party.
Note: When making a call or accepting an incoming call the
Multi-party call will be placed on hold. The callers in the Multi-party
call can continue to communicate with each other while on hold.
41
Page 50

Advanced Operation
Splitting a Multi-party
You can select an individual from the Multi-party and remove their
connection. This enables you to talk privately without the
participation of the rest of the Multi-party.
During a Multi-party call:
1 Press Q
2 Use e to select Option and press Q
3 Use e to select a caller in the Multi-party
4 Press Q
5 Use e to select Split and press Q
The selected caller will be split from the Multi-party call and the
Multi-party call will be placed on hold (the remaining Multi-party call
callers can still communicate).
Ending Multi-party Calls
You can either select an individual in the Multi-party and end the call
or end the entire Multi-party call. If a call is held, or an other call is
incoming then an individual call cannot be ended.
Ending a Single Connection
During a Multi-party call
1 Press Q
2 Use e to select Option and press Q
3 Use e to select a caller in the Multi-party
4 Press Q
5 Use e to select End and press Q
Ending a Multi-party Call
During a Multi-party call:
Press E to end all the calls at once
42
Page 51

Advanced Operation
Changing to a New Network
When not in your home Country / Region, you may use a network
that you do not directly subscribe to, this is called ROAMING.
National Law may not permit roaming in your home region.
The New Network function is used to manually select a network that
is available in your current location.
1 From Idle mode press Q, select Phone Menu > Network >
New Network and press Q
2 Use e to select one from the list of available networks and
press Q
An S X will be displayed in the information area if you cannot register
with the selected network.
When the Search Mode is set to Automatic the phone will
automatically reselect a new network in order to maintain optimum
network availability. With the Search Mode set to Manual the phone
will only use a selected network. If coverage is lost another network
should be selected.
The Network List is used when the Search Mode has been set to
Automatic. The location numbers in the Preferred Network List show
the search priority.
Selecting Insert stores a new network in the currently displayed
location and then moves other networks down, Edit overwrites the
old network with a new one, and Add stores a new network at the
end of the list.
43
Page 52

Schedule
Schedule
The Scheduler can be used to register reminders for personal events
as well as planning holiday periods. A maximum of 100 reminders
can be set, each of up to 96 characters long.
Caution: Ensure that any settings made in the Scheduler will not
contravene any regulations whereby the phone may automatically
power on when in an aircraft or medical facility etc. - see “Important
Information” page 68
Creating a Reminder
1 From Idle mode press Q, select Schedule and press Q
2 Use the Navigation key (g) to select the date for your
reminder and press Q twice to create a new entry
3 Enter the digits for the time using 24 hour clock and press Q
twice
4 Use e to select the frequency of the reminder and press Q
When selecting Daily, Weekly or Yearly you will be given the option
of using the “Repeat Count”, which allows you to set the frequency
of the alarm.
5 Enter the memo for the reminder – see “Text Entry” page 62,
and press Q twice
6 Use e to select a ring type for the reminder and press Q
Note: To indicate that a reminder has been set, the date will appear
as white numbers on a black or dark background.
Viewing Reminders
When in the Schedule menu, select the required date using
the Navigation key (g) and press A to view reminders for
that date
44
Page 53

Schedule
Deleting Reminders
1 From Idle mode press Q, select Schedule and press Q
2 Use g to select the required date of the reminder and press
A
3 Use e to select the reminder to be deleted and press Q
4 Use e to select Delete press Q twice
Setting a Holiday Reminder
1 From Idle mode press Q, select Schedule and press Q
2 Use the Navigation key (g) to select the day of your holiday
and press Q
3 Use e to select Function and press Q
4 Use e to select Holiday Set and press Q
5 Use e to select Day, Day of the Week and press Q three
times to update the Holiday List
Repeat process for each day of holiday as required
Deleting Holiday Reminders.
To delete holiday reminders:
1 From Idle mode press Q, select Schedule and press Q
2 Use the Navigation key (g) to select the day of your holiday
to be deleted and press Q
3 Use e to select Function and press Q
4 Use e to select Holiday Set and press Q
5 Use e to select Holiday List, select date for deletion press Q
twice
To delete ALL Holiday Reminders select All Clear and press
Q twice
Note: To indicate that a holiday reminder has been set, the date/s
will be encapsulated in a clear box.
45
Page 54

Schedule
Jump to Future Date
1 From Idle mode press Q, select Schedule and press Q
2 Press Q
3 Use e to select Jump press Q
4 Press and hold B to remove the current date
5 Using0-9enter the date (using chosen date format) to which
you want to ‘jump’ to and press Q twice
46
Page 55

Games
Games
Mogular
The object of the game is to hit a character as it appears from a hole,
scoring points for each hit. The holes relate directly to the layout of
the keypad (0 – 9, * and #). By pressing the appropriate
key the character will be hit. A life is lost for each miss.
Play the Game
1 From Idle mode press Q, select Games > Mogular and press
Q
2 Use e to select a skill level and press Q to start the game
3 The game finishes when all lives are lost
Pause the Game
Press A
The score table is displayed
Press B to resume the game
Quit the Game
Press B or E during the game
Clear Best Score
From the skill level display:
Press AaA
47
Page 56

Games
15 Puzzle
A puzzle containing numbered blocks (1 – 15) that, when scrambled,
have to be rearranged into numeric order. There is no time limit, but
the target is get the LOWEST score possible.
Play the Game
1 From Idle mode press Q, select Games > 15 Puzzle and
press Q
2 Press 0 to scramble the numbers in the grid
3 Use g to move the numbered blocks around the grid
arranging them in numerical order
Pause the Game
Press A
An instruction table is displayed
Press B to resume the game
Quit the Game
Press B or E during the game
Clear Best Score
From the initial display (before scrambling the blocks):
Press AaA
48
Page 57

WAP Browser
WAP Browser
The phone’s WAP (Wireless Application Protocol) Browser enables
you to access Internet services supported by the network, such as
news, weather reports, sport etc.
Server Settings
Before you can access Internet services, your SIM must be data
enabled and the relevant configuration information, entered into the
phone.
These settings may have been pre-programmed for you by the
network operator.
Note: Modifying previously entered settings can cause failure of the
Browser.
1 From Idle mode press Q, select Browser > Browser Setting
and press Q
2 Two servers may be setup on the phone. Use e to select one
or other of the server settings and press Q
3 Use e to select Edit and press Q
A list of configuration parameters will be displayed. The parameter
Name will be highlighted and Edit will be displayed.
4 Press Q
5 Enter the name of the WAP server and press Q twice
6 Use e to select each of the other parameters in turn, edit the
information and press Q twice
7 After all parameters have been entered, press B to return to
the previous menu level
8 Select the server setting that you have just edited and press
Q. Use e to select Set and press Q
Record your WAP / GPRS settings in the table at the rear of this
booklet for easy reference.
49
Page 58

WAP Browser
Switching between Circuit Switch and GPRS
1 From Idle mode press Q > Browser > Browser Setting
2 Use e to select a server and press Q
3
Select Edit and press Q
4 Select Bearer Type, press Q and use e to select Circuit
Switch or Packet (GPRS) and press Q
Note: When using GPRS it is possible to remain passively
connected to a server, indefinitely.
Activating the Browser
To activate the Browser:
From Idle mode press Q, select Browser > Start Browser
and press Q
The first time that the browser is activated there will be no content
stored so the Home URL content will be displayed (as defined by the
network operator). From the second time onwards, the last displayed
page will be recalled from cache (Cache is the phone’s memory that
stores content downloaded in the past). When recalling content from
cache the phone remains off-line (not connected to a WAP server).
Navigating Content
Use the Navigation key (g) to scroll through the content on the
screen as follows:
Use e to scroll up/down on the current page
Use d to return to the previous page
Use c to return to the next page (only applicable if returned to
previous page)
When linked text (underlined text) is highlighted press Q to load the
page represented by the link.
indicates a table - with View displayed press Q to view
(
contents of table
) Indicates an image which cannot be displayed
~ Indicates on-line browsing
50
Page 59

WAP Browser
The Browser Menu
The Browser also contains its own menu which is applicable when
content is currently being displayed (either on-line or off-line).
The Browser menu is accessed by pressing A when Menu is
displayed at the bottom left of the display.
This menu is used as follows:
Home Deck Displays the Home URL content as defined by the
Bookmark Use, add, delete and rename bookmarks
Enter URL Type in a URL directly to go to a known site
Reload Will reload and update the current page
Reset Deletes the content in cache and displays the Home
Exit Deactivates the Browser
network operator
URL content
Using Bookmarks
Frequently accessed pages may be bookmarked to save time. This
prevents the need to re-enter the URL each time.
Adding a Bookmark
1 While viewing content press A
2 Use e to select Bookmark
3 Press Q twice to register the bookmark
Recalling Pages Using Bookmarks
1 With content displayed press A
2 Use e to select Bookmark and press Q
3 Use e to select the relevant bookmark from the list, and press
Q
Renaming a Bookmark
1 With content displayed press A
2 Use e to select Bookmark and press Q
3 Use e to select the relevant bookmark from the list, and press
A
4 Press Q
51
Page 60

WAP Browser
5 Press and hold B to remove the bookmark name, then
re-type the name required and press Q twice
Deleting Bookmarks
1 With content displayed press A
2 Use e to select Bookmark then press Q
3 Use e to select the relevant bookmark from the list, and press
A
4 Use e to select Delete and press Q twice
Deactivating the Browser
The Browser can be deactivated as follows:
When browsing on-line press E once to review cache off line
When browsing off-line press E once to return to Idle mode
Setting the Linger Time
The phone will be automatically disconnected from the WAP server
after a set period of non-interaction. This period is defined in seconds
by the Linger Time setting.
1 From Idle mode press Q, select Browser > Browser Setting
and press Q
2 Use e to select one of the server settings and press Q
Use e to select Edit and press Q
3
4 Use e to select Bearer Type and press Q
5 Use e to select Circuit Switch and press Q
6
Use e to select Edit and press Q
7 Use e to select Linger Time and press Q
8 Press and hold B to remove the current linger time, then
re-enter the value required and press Q twice
Note: This function is not required when using GPRS
52
Page 61

WAP Browser
Last Status
If an error should occur when using the Browser, use this function to
inform the network operator of the last status that occurred with the
phone to assist with a diagnosis of the problem.
From Idle mode press Q, select Browser > Last Status and
press Q
53
Page 62

Internet E-mail
Internet E-mail
The E-mail function will send and receive Internet e-mail messages
to the mail server of an Internet Service Provider that supports
POP3/SMTP protocols.
E-mail Setup
Before you can send and receive e-mail messages, your SIM must
be data enabled and a contract must be set up with an Internet
Service Provider and the relevant configuration information, supplied
by the provider, entered into the phone.
1 From Idle mode press Q, select Messages > E-mail and
press Q
2 Use e to select Parameters and press Q
3 Use e to select Server Settings and press Q
Up to three Internet Service Providers may be setup
4 Press Q
A list of configuration parameters will be displayed. The parameter
Profile Name will be highlighted and Edit will be displayed
5 Press Q
6 Enter the name of the Internet Service Provider and press Q
twice
7 Use e to select each of the other parameters in turn, edit the
information and press Q twice
8 After all parameters have been entered, press B to return to
the previous menu level
9 Select the server setting that you have just edited and press
Q. Use e to select Set and press Q
Record your e-mail settings in the table at the rear of this
booklet for easy reference.
For additional information about setting up the Internet E-mail /
GPRS see http://www.panasonicmobile.co.uk/support
54
Page 63

Internet E-mail
Create a New Message
1 From Idle mode press Q, select Messages > E-mail and
press Q
2 Use e to select Create and press Q
3 Enter the relevant details in the To, CC, Subject and Message
fields, using g to navigate between them and press Q to
select each in turn
4 Press Q, use e to select Phonebook Entry press Q
5 Use e to select required address and press Q twice
6 After entering the necessary information press Q twice
7 Press Q
8 Use e to select Save and press Q
Send/Receive Messages
The Send/Receive function is used to both send messages created
on the phone to the server of the Internet Service Provider, and to
check your mailbox on the server for incoming messages and
download them to the phone at the same time.
1 From Idle mode press Q, select Messages > E-mail and
press Q
2 Use e to select Send/Receive and press Q
If there are unsent messages in the Outbox you will be prompted to
send them.
3 Press Q to send any unsent messages.
If there are new messages to download to the phone then you will be
prompted to receive them.
4 Press Q to receive new messages.
If no action is taken the connection will time out after one minute and
return to the E-mail menu.
If any messages are downloaded then, when finished, the phone will
display the new messages allowing them to be viewed, replied to etc.
If no messages are downloaded the phone will display the Inbox
menu, unless there are no messages in this list, then it will return to
the E-mail menu.
55
Page 64

Internet E-mail
Read Messages
From Idle mode press Q, select Messages > E-mail > Inbox
and press Q
The header fields of the most recent messages will be displayed.
Use e to scroll through previous message headers and press Q.
Use e to select View and press Q to read the current message,
using e to scroll through the message.
Message Status
A message can be in one of four states. The current state of each
message is indicated by an appropriate icon:
^ Indicates a message which has been read or sent.
$ Indicates an unread or unsent message
% Indicates that the message has been locked
& Indicates a broken message (either a message too long for
the phone or a message which contains an attachment)
While reading a message any of the following operations may be
performed by pressing Q, using e until the relevant operation is
displayed and pressing Q:
Reply
Compose a reply to the sender of the current message
Forward
Send the current message to a different person other than the
sender
Delete
Remove the current message from the list
Lock
Apply a lock to the message so that it cannot be overwritten when
receiving / creating further messages. A locked message can still be
deleted manually
Recall
To select the mobile phone number of the e-mail sender, to enable
you make a voice call or review the number.
56
Page 65

Internet E-mail
Store an Address
An e-mail address can be stored in the Mobile Phonebook - see
“Store a Number” page 12
Add a Signature
This Signature function enables a pre-defined signature to be added
to your outgoing e-mails. Once the signature has been setup, each
time a new e-mail is created it will have the signature automatically
inserted.
Setup Signature
1 From Idle mode press Q, select Messages > E-mail >
Parameters > Signature and press Q
2 Enter the text for your required signature – see “Text Entry”
page 62 and press Q twice
Manage Message Stores
Once the Inbox and/or Outbox store are full any new messages
received or created will overwrite existing messages from the oldest
first. To prevent messages being overwritten each list should be
maintained deleting any messages which are no longer required.
Important messages can have a lock applied to them so that they
cannot be overwritten when the Send/Receive process is activated.
57
Page 66

Additional Features
Additional Features
Desktop Handsfree
Desktop Handsfree enables you to hold a conversation without
having to hold the phone to your ear.
Note: Do NOT hold the phone to your ear in Handsfree mode.
Swapping Between Handsfree and Handheld Calls
During a Handheld call:
1 Press Q
2 Use e to select H’free and press Q
During a Handsfree call:
Press Q twice to revert to Handheld operation
Answering a Call Handsfree
Pressing and holding D will allow the call to be answered
Handsfree.
Voice Memo
You can record a two-way conversation for up to 18 seconds during
a call. If a different SIM is installed any voice memos will be lost.
Caution: Security of a recorded message is your responsibility. You
MUST ask for the other party’s consent before recording.
Record a Voice Memo
Press Q
Use e to select Memo and press Q
A tone will sound when recording starts. When the recording stops a
tone will sound to you.
If you press Q while recording a voice memo, recording will stop but
no tone will sound to either party.
58
Page 67

Additional Features
Play Back a Voice Memo
From Idle mode press Q, select Applications > Voice Memo
Play > Playback and press Q
To stop playing, press Q twice
The Note Pad function is available during playback - see “Note Pad”
page 60.
Volume Control During Playback
While playing back:
Use e to adjust the volume of the voice memo
Delete Memo
From Idle mode press Q, select Applications > Voice Memo
Play > Delete and press Q twice
DTMF Tones
DTMF tones can be sent during conversation. These are often used
to access voice mail, paging and computerized home banking. For
example, you may need to input a number to remotely access voice
mail messages. A phone number may be stored in the Phonebook
with DTMF tones, allowing the number to be dialled upon recall and
the DTMF number to be sent automatically.
Send DTMF Tones During a Call
Enter digits (0 to 9,+and@)
Pause Dial
Using pauses allows you to send DTMF tones automatically.
1 Enter phone number
2 Press and hold 0 until a P is displayed
3 Enter DTMF digits after the pause, e.g. enter the number to
access voice mail messages.
4 Press D
59
Page 68

Additional Features
When the call is successful DTMF tones will be sent after 3 seconds
or when D is pressed.
If the DTMF tones are unsuccessful then the destination of your call
may require that the length of the tones be increased.
5 From Idle mode press Q, select Personalise > DTMF Length
and press Q
6 Use e to select Long and press Q
Note Pad
During a call you can enter numbers which you may wish to dial
when the call has ended.
During a call:
1 Enter phone number
2 When the call has ended press D to call that number
To store in Phonebook, press A while the number is displayed –
see “Store a Number” page 12.
Second Clock
The Second Clock can either be set to auto-adjusting, whereby the
second time will be automatically set from the code of the current
network, or a specified time difference can be set manually.
Setting Clock Display
1 From Idle mode press Q, select Applications > Clock
Function > Clock Format > Display Pattern and press Q
2 Use e to select either Second Time or Home Time and press
Q
Setting Auto Adjustment
If you travel to a country / region which has a roaming agreement
with your home network, your Second Clock will be automatically
adjusted. However, for countries / regions which have several time
zones in the same area manual adjustment is required.
1 From Idle mode press Q, select Applications > Clock
Function > Clock Set > Second > Auto Adjustment >
Home area and press Q
2 Use e to select your home area and press Q
60
Page 69

Additional Features
Enabling Auto Adjustment
From Idle mode press Q, select Applications > Clock
Function > Clock Set > Second > Auto Adjustment > Auto
Adjustment and press Q
Repeat to disable Auto Adjustment.
Setting Manual Adjustment
1 From Idle mode press Q, select Applications > Clock
Function > Clock Set > Second > Time Difference and
press Q
2 Use e to select the time difference required and press Q to
set the value
Setting Summer Time
From Idle mode press Q, select Applications > Clock
Function > Clock Set > Second > Summer Time and press
Q.
Once enabled, following the same procedure will disable Summer
Time.
Accessory Related Features
When Auto Answer is switched on, and Personal Handsfree is
connected, a call will be answered without pressing any keys. Any
call waiting should be answered in the normal way.
This is also applicable to the Handsfree Car Kit accessory.
See the documentation provided with the relevant Accessory
for operational details.
61
Page 70

Text Entry
Text Entry
The phone provides a means for entering alphanumeric characters to
enter details into the Phonebook, to create text and e-mail messages
etc. This section details the characters that can be entered and the
relevant keys to press.
Text Mode
®
Key
0
1
2
3
4
5
6
7
8
9
*
#
T9
Alternatives +_
Punctuation .@/:;*#+-”,!¡?¿_()[]{}’&%\^~|<>=_£$¥¤§ 1
abc ABCabc
def DEFdef
ghi GHIghi
jkl JKLjkl
mno MNOmno
pqrs PQRSpqrs
tuv TUVtuv
wxyz WXYZwxyz
Shift/Lock* *** *
Space +++ +
Normal
(ABC)
Greek
(ÁÂÃ)
+_ +_
ÁÂÃ
ÄÅÆ
ÇÈÉ
ÊËÌ
ÍÎÏ
ÐÑÓ
ÔÕÖ
×ØÙ
AÄÅÆBCÇaäåæàbc 2
DEÉFdeéèf 3
GHIghiì 4
JKLjkl 5
MNÑOÖØmnñoöøò 6
PQRSpqrsß 7
TUÜVtuüùv 8
WXYZwxyz 9
Extended
(AÄÅ)
Numeric
(0-9)
0+P_
* Press * once to enter a single capital letter (subsequent
characters will be lower case). Pressing * twice acts as a
keyboard CAPS LOCK function and subsequent characters will be
uppercase, until * is pressed for a third time returning to
lowercase character entry.
62
Page 71

Text Entry
T9®Text Input
Using this mode of text entry dramatically reduces the number of key
presses required:
Press a key once for any letter you require on that key. The desired
letter may not be displayed. Continue pressing other keys until the
end of a word is reached; then check that the word has been typed
correctly before continuing on to the next word.
If the combination of letters typed has produced a word which is not
the one you require, press 0 repeatedly until the correct word is
displayed. Continue to the next word.
If the word you require is not in the internal dictionary (i.e. It is a
proper noun or a rarely used word) then it should be entered using
the Normal (U) mode.
Other Text Modes
To access any of the other text entry modes use A to cycle through
until the desired mode is displayed in the Information Area.
When using Normal (U), Greek (V) or Extended (W) text entry
modes, each time a key is pressed in quick succession it will display
the next character available on that key (or if the key is pressed and
held down it will cycle through the available characters). Releasing
the key, or pressing another key will enter the currently displayed
character and the cursor will move to the next position.
Editing Text
Pressing e will move you up or down one text line (or field in
Phonebook). Pressing f will move you left or right one character (or
to the first character of the previous or next word when using T9
entry mode). When the cursor is moved over a character and another
key pressed this will insert the new character immediately before the
selected character. Pressing B will delete the character to the left of
the cursor or delete the current line when pressed and held.
®
text
T9®is a trademark of Tegic Communications Inc.
®
T9
Text Input is licensed under one or more of the following: U.S. Pat. Nos.
5,818,437, 5,953,541, 5,187,480, 5,945,928, and 6,011,554; Canadian Pat.
No. 1,331,057; United Kingdom Pat. No. 2238414B; Hong Kong Standard Pat.
No.HK0940329; Republic of Singapore Pat. No. 51383; Euro.Pat. No. 0 842
463 (96927260.8) DE/DK, FI, FR, IT, NL, PT.ES, SE, GB; and additional
patents are pending worldwide.
63
Page 72

Menu Structure
Menu Structure
From Idle mode pressing Q will display a menu of phone features.
To select a feature press g so that icon of the feature that you
require is highlighted then press Q.
To exit the current menu and return to the previous level press B.
To exit completely out of the menu structure, press and hold B,or
E (except during a call).
During a call a restricted menu will be available.
1 Personalise
Language
Tones
All Tones
Ring Volume
Ring Type
Melody Composer
Voice Ringer
Key Volume
Key Tone Type
Warning Tone
Voice Command
Voice Dial
Permission
Display Setting
Idle Screen
Greeting
Backlight Colour
Animation
Contrast
Backlight Time
Vibration Alert
Auto Answer
DTMF Length
Defaults
2 Games
Mogular
15 Puzzle
3 Phonebook
Browse
Create
Alert Profile
Group Setting
Review
My Numbers
Hot Key Dial
1
Function is Network Dependent
2
Function is SIM Dependent
2
4 Key Guard
5 Browser
Start Browser
Browser Setting
Last Status
6 Messages
Short Message
Receive List
Send List
Create
User Defined Msg
Review
Parameters
Broadcasts
E-mail
Inbox
Outbox
Create
Send/Receive
Review
Parameters
7 Phone Menu
Call Service
2
Calls
*Last Call
*All calls
*Call Waiting
*Caller’sID
*Withhold ID
Connections
Last Connection
All Connections
Call Priority
Service Charges
Cost Left
Price/unit
2
1
2
* Will move up a level if the SIM does not support Calls function
Max Cost
Warning at
Call Meter
Call Divert
Voice calls
Fax Calls
Data Calls
Cancel All
Status
Security
Phone Lock
1
Call Bar
2
PIN
2
PIN2
2
Fixed Dial
Barred Dial
Network
8 Applications
Games
Voice Memo Play
Download Melody
Clock Function
Clock Set
Clock Format
Alarm Set
Power On Time
Power Off Time
Calculator
Currency
9 Schedule
2
1
64
Page 73

Trouble Shooting
Should any problem persist contact your dealer.
Problem Cause Remedy
Phone will not
switch on
Extremely short
battery life for a
new battery
Short battery
life for an old
battery
The charging
indicator does
not light and the
phone cannot
be switched on
when charging
Calls cannot be
made
Calls cannot be
made from
Fixed Dial Store
The network you
are using and the
condition of the
battery can affect
battery life
The battery has
worn out
When the battery
has been deeply
discharged the
phone will take a
short time until
the indicator
lights
The phone is
locked
Outgoing calls
are barred
The phone is not
registered to a
network
Check that the battery is fully
charged and correctly
connected to the phone
Replace with a new one
Leave the phone charging the
battery for a few minutes
before the indicator is lit and
attempting to switch it on
Unlock the phone
Disable the outgoing call
barring, or barred dial
Move to a coverage area and
operate your phone after it
has registered with a network.
Check your SIM supports
Fixed Dial
Check if the Fixed Dial is
switched on
Check the phone number is
stored in the Fixed Dial
Trouble Shooting
65
Page 74

Trouble Shooting
Calls cannot be
received
Emergency
calls cannot be
made
Phone numbers
cannot be
recalled from
Phonebook
The phone is not
switched on
Incoming calls
are barred
The phone is not
registered to a
network
You are not in a
GSM coverage
area
The phone is
locked
Phone number
has been
restricted
Switch the phone on
Disable the incoming call
barring
Move to a coverage area and
operate your phone after it
has registered with a network.
Check that the antenna
symbol S is displayed - move
to a coverage area and
operate your phone when the
antenna symbol is displayed
Unlock the phone
Switch off restriction
Important Error Messages
These are some of the most important error messages which may be
displayed:
Area Not
Allowed
Network Not
Allowed
Security Failure
SIM Blocked /
Contact Service
provider
SIM Error
Roaming in the selected area is not allowed
Roaming with the selected network is not allowed
The network has detected an authentication
failure because your SIM is not registered with
that network - contact your Service Provider
The SIM is blocked because one of the PIN/PIN2
unblocking keys (PUK/PUK2) has been entered
incorrectly ten times - contact your Service
Provider
The phone has detected a problem with the SIM switch the phone off and then back on; if the
message is still displayed contact your Service
Provider
66
Page 75

Trouble Shooting
SIM Invalid
Function
Unavailable
PIN2
Invalidated
Message
Rejected Store
Full
Number Too
Long (Max:20)
Warning Store
Full Continue?
Verification
Failure
Incorrect Lock
Code
Incorrect PIN /
PIN2 / PUK /
PUK2
Auto Redial List
Full
The SIM has failed one or more of the SIM
personalisation checks - contact your Service
Provider
The selected feature is either not supported by
the SIM or is not available with the current
subscription - contact your Service Provider
The PIN2 is blocked permanently because the
wrong PUK2 has been entered ten times,
services controlled by PIN2 cannot be used contact your Service Provider
A message has been received but the message
store is full - to receive messages, delete some
of the currently stored messages or set
messages to Auto Delete
The edited or newly created Phonebook number
is too long for the SIM
The message area is full. Your messages cannot
be stored until some of the currently stored
messages are deleted
On changing the phone lock code, verification of
the new code is incorrect - retry changing the
lock code with correct verification
Disabling or enabling the lock code has failed
due to incorrect entry of the lock code - re-enter
lock code
The entered code is incorrect - re-enter code
correctly
Redial list of unsuccessfully dialled numbers is
full - switch the phone off and then on again
67
Page 76

Important Information
Important Information
We, Matsushita Communication Industrial UK Ltd., declare, that the
EB-GD96 conforms with the essential and other relevant
requirements of the directive 1999/5/EC. A declaration of conformity
to this effect can be found at www.panasonicmobile.co.uk/support
Safety Considerations
The following information should be read and understood as it
provides details which will enable you to operate your phone in a
manner which is both safe to you and your environment, and
conforms to any legal requirements regarding the use of cellular
phones.
This equipment should only be charged with approved
charging equipment. Other usage will invalidate any
approval given to this apparatus and may be dangerous.
The use of approved charging equipment is recommended
to ensure optimum performance and avoid damage to
your phone. Ensure the voltage rating of the Travel
Charger is compatible with the area of use when traveling
abroad.
A Travel Charger (EB-CAD95xx*) is supplied with the
Main Kit. Other recommended equipment for charging Car Charger (EB-CDD95), Handsfree Car Kit
(EB-HFD95Z).
* Where xx identifies the specific AC Adaptor region, e.g. CN, EU, HK, TW, UK.
Switch off your cellular phone when in an aircraft. The use
of cellular phones in an aircraft may be dangerous to the
operation of the aircraft, disrupt the cellular network and
may be illegal. Failure to observe this instruction may lead
to the suspension or denial of cellular phone services to
the offender, or legal action or both.
You are advised not to use the equipment at a refueling
point. You are reminded to observe restrictions on the use
of radio equipment in fuel depots, chemical plants or
where blasting operations are in progress. Never expose
the battery to extreme temperatures (in excess of 60°C) or
charge the battery for much longer than recommended.
68
Page 77

Important Information
You MUST exercise proper control of your vehicle at all
times. Do not hold a phone while you are driving; find a
safe place to stop first. Do not speak into a handsfree
microphone if it will take your mind off the road. Always
acquaint yourself thoroughly with restrictions concerning
the use of cellular phones within the area you are driving
and observe them at all times.
Care must be taken when using the phone in close
proximity to personal medical devices, such as
pacemakers and hearing aids.
For most efficient use hold the phone as you would any
normal phone. Keep the antenna pointed over your
shoulder while in use. Use only the supplied or approved
replacement antenna. Unauthorized antennas,
modifications or attachments may damage the phone and
violate applicable regulations. The use of an unapproved
antenna, modification or attachment may result in the
invalidation of your guarantee – this does not affect your
statutory rights.
This Panasonic mobile phone is designed, manufactured
and tested to ensure that it complies with the
specifications covering RF exposure guidelines applicable
at the time of manufacture, in accordance with EU, USA
FCC, and Australian ACA regulations; or as specifically
stated in the separate declaration leaflet enclosed with this
product.
Please refer to our website for latest information/standards
compliance in your country/region of use.
www.mcuk.panasonic.co.uk/2001/health.html
69
Page 78

Care and Maintenance
Care and Maintenance
Pressing any of the keys may produce a loud tone. Avoid
holding the phone close to the ear while pressing the keys.
Extreme temperatures may have a temporary effect on the
operation of your phone. This is normal and does not
indicate a fault.
Do not modify or disassemble the equipment. There are no
user serviceable parts.
Do not subject the equipment to excessive vibration or
shock.
Avoid contact with liquids. If the equipment becomes wet
immediately remove the power and contact your dealer.
Do not leave the equipment in direct sunlight or a humid,
dusty or hot area.
Keep metallic items that may accidentally touch the
terminals away from the equipment.
Always charge the battery in a well ventilated area, not in
direct sunlight, between +5°C and +35°C. It is not possible
to recharge the battery if it is outside this temperature
range.
70
Do not incinerate or dispose of the battery as ordinary
rubbish. The battery must be disposed of in accordance
with local legislation and may be recycled.
When disposing of any packing materials or old equipment
check with your local authorities for information on
recycling.
Page 79

Glossary of Terms
Glossary of Terms
APN
CHAP
DTMF Tones
GSM
GPRS
Network
Operator
PAP
Password
PIN
PIN2
PUK/PUK2
Registration
Access point name. Directs the user to the
gateway or the required service.
Challenge Handshake Authentication protocol. A
security feature for the GPRS network.
Dual Tone Multi-Frequency tones allow you to
communicate with computerized phone systems,
voice mailboxes etc.
Global System for Mobile Communications. The
name given to the advanced digital technology that
your phone uses.
General Packet Radio Service. The Technology
the phone uses.
The organization responsible for operating a
GSM network.
Password Authentication Protocol. A security
feature for the GPRS network.
Used for the control of the Call Bar. Supplied by
your Service Provider.
Personal Identification Number used for SIM
security. Supplied by your Service Provider. If the
PIN is entered incorrectly 3 times, the PIN will be
blocked.
Personal Identification Number used for the
control of Fixed Dial Store and Call Charge
metering. Supplied by your Service Provider. If
the PIN2 is entered incorrectly 3 times, the PIN2
will be blocked.
PIN/PIN2 Unblocking Key. Used to unblock the
PIN/PIN2. Supplied by your Service Provider. If
the PUK/PUK2 is entered incorrectly 10 times,
the PUK/PUK2 will be blocked.
The act of locking on to a GSM network. This is
usually performed automatically by your phone.
71
Page 80

Glossary of Terms
Roaming
Service
Provider
SIM
WAP
The ability to use your phone on networks other
than your Home network.
The organization responsible for providing access
to the GSM network.
Subscriber Identity Module. A small smart-card
which stores unique subscriber and user-entered
information such as Phonebook and Short
Messages. Supplied by your Service Provider.
Wireless Application Protocol. The
communication standard which enables you to
download resources from the Internet to your
phone.
72
Page 81

Specifications
Specifications
Phone
Type
Temperature range
Charging
Storage
Phone (Including Battery)
Weight 84 g
Dimensions
Height x Width x Depth
Supply Voltage 3.7V DC, 650mAh Li-Ion
Standby Time - Idle Mode (h)
Talk Time (h)
Charge Time (h) Up to 1.6
Note: Charge time will be longer when the phone is turned on.
Battery life is affected by the network you are using and the
condition of the battery.
GSM900 Class 4
GSM1800 Class 1
+5°Cto+35°C
-20°Cto+60°C
125.6 x 45.6 x 14.4mm
Up to 150
Up to 6.6
73
Page 82

Panasonic GSM Mobile Telephone
Panasonic GSM Mobile
Telephone
Warranty Terms
1 This warranty is in addition to and does not in any way affect any statutory or other
rights of consumer purchasers. This warranty applies to the United Kingdom, Isle of
Man & Cannel Islands only, for users in Eire, please contact your retailer or supplier.
The warranty period is 12 months from date of purchase and is applicable to the
original purchaser only.
2 The product is approved for use on GSM mobile telephone system and should only be
used for normal purposes and in accordance with the standard operating instructions.
3 The warranty covers breakdowns due to manufacturing or design faults; it does not
apply to damage, however caused, wear and tear, neglect, incorrect adjustment or
repair, or to any items of a limited natural life.
4 In the event of failure, please take the following action:
Refer to the instruction book in order to identify and possibly correct the problem.
•
If the problem is due to coverage, reception or billing, please contact your air time
•
retailer or service provider whose number can be found from your monthly invoice.
• If you cannot resolve the problem, contact the Panasonic Helpline on 08705
159159. Before you telephone have the following information to hand:
* The model and serial number of your telephone, and its phone number
* Your full address and post code
* A copy of your original invoice, receipt or bill of sale for the purchase of the
telephone.
5 If the problem cannot be resolved over the telephone, arrangements will be made to
repair the telephone. Remove the SIM from the telephone and store it in a safe place.
Please pack the telephone suitable for transit. Including in the packing:
•
The mobile telephone
•
The rechargeable battery
•
AC Adaptor
•
A copy of your invoice, receipt or bill of sale. (Note; it is the customers
responsibility to provide proof of warranty)
6 Panasonic will use reasonable endeavours to ensure your telephone is returned to you
within a maximum of 5 working days from reporting the fault to the Helpline. Please
note that delays in transit may be encountered for Channel Islands, Northern Ireland,
Isle of Man, Scottish Islands and other islands.
7 Your sole and exclusive remedy under this guarantee against us is for the repair, or at
our option the replacement, of the product, or any defective part or parts. No other
remedy, including, but not limited to, incidental or consequential damage or loss of
whatsoever nature shall be available to the purchaser.
8 Rechargeable batteries have a limited natural life, in order to prolong their life they
should only be used and charged as shown in the instruction book. Replacement
batteries may be purchased either from your retailer or the Helpline number shown
overleaf.
74
Page 83

Panasonic GSM Mobile Telephone
Important
Write your mobile telephone number and lock code here:
Telephone number: Lock code:
Your Panasonic GSM mobile telephone has a warranty for 12
months from date of purchase. If you feel your phone is faulty and
your service provider or air time retailer cannot resolve the problem,
please contact the Panasonic Helpline on:
08705 159159
The Helpline operates
9:00 AM - 5:30 PM
Monday - Friday (excluding Bank Holidays)
If faulty, arrangements will be made to repair the telephone and
return it to you.
We will use reasonable endeavours to ensure this is within a
maximum of 5 workings days.
75
Page 84

EU Warranty
EU Warranty
EU/EEA-Wide guarantee is applicable in the EU/EEA and Switzerland.
Panasonic GSM European Service Guarantee Conditions
Dear Customer,
Thank you for buying this Panasonic digital cellular telephone. The Panasonic GSM
European Service Guarantee only applies while traveling in countries other than where the
product was purchased. Your local guarantee is applicable in all other cases. If your
Panasonic GSM telephone requires service while abroad, please contact the local service
company shown on this document.
The Guarantee
The applicable period of the European wide guarantee for GSM is generally 12 months for
the main body and 3 months for the rechargeable battery. With respect to a product used in
a country other than a country of purchase, notwithstanding what is stated in the conditions
below, the customer will benefit, in that country of use, from these guarantee periods of,
respectively, 12 and 3 months, if these conditions are more favorable to him than the local
guarantee conditions applicable in such country of use.
Conditions of Guarantee
When requesting guarantee service the purchaser should present the warranty card
together with proof of purchase, to an authorized service centre.
The guarantee covers breakdowns due to manufacturing or design faults; it does not apply
to other events such as accidental damage, however caused, wear and tear, negligence,
adjustment, modification or repair not authorized by us.
Your sole and exclusive remedy under this guarantee against us is the repair, or at our
option the replacement, of the product, or any defective part or parts. No other remedy,
including, but not limited to, incidental or consequential damage or loss of whatsoever
nature shall be available to the purchaser.
This is in addition to and does not in any way affect any statutory or other rights of consumer
purchasers. This guarantee applies in countries shown on this document at the authorized
service centres detailed for that country.
Service Centres in the UK
Tel. +44 8705 159159
ROI
UK
Service Centres in Ireland
Tel: +353 1 2898333
D
Panasonic Service Center Dresden
SERKO GmbH
Großenhainer Straße 163
01129 Dresden
Tel. +49 (0)351/ 85 88 477
Panasonic Service Center Cottbus
Petsch Kundendienst GmbH
Am Seegraben 21
03058 Gross-Gaglow
Tel. +49 (0)355/ 58 36 36
Panasonic Service Center Leipzig
KES Keilitz-Electronic-Service GmbH
Föpplstraße19
04347 Leipzig
Tel. +49 (0)341/ 244 33 33
Panasonic Service Center Chemnitz
WPS Rundfunk- u. Fernsehservice GmbH
Zietenstraße16
09130 Chemnitz
Tel. +49 (0)371/ 40 10 359
76
Panasonic Service Center Berlin
SERKO GmbH
Schwedter Straße 34a
10435 Berlin
Tel. +49 (0)30/ 44 30 3221
Panasonic Service Center Berlin
RUESS SYSTEMS
Thrasoltstraße11
10585 Berlin
Tel. +49 (0)30/ 342 2013
Panasonic Service Center Rostock
warnow electronic service gmbh
An der Jägerbäk2
18069 Rostock
Tel. +49 (0)381/ 82 016
Panasonic Service Center Hamburg
ELVICE Service GmbH
Spaldingstraße74
20097 Hamburg
Tel. +49 (0)40/ 23 08 07
Panasonic Service Center Rendsburg
FERNSEH-DIENST B&W Service GmbH
Kieler Straße41
24768 Rendsburg
Tel. +49 (0)4331/ 14 11-0
Panasonic Service Center Bremen
COM Elektronik Service GmbH
Rübekamp 50
28219 Bremen
Tel. +49 (0)421/ 691 80 69
Page 85

Panasonic Service Center Hannover
COM Elektronik Service GmbH
Vahrenwalder Straße 311
30179 Hannover
Tel. +49 (0)511/ 37 27 91
Panasonic Service Center Magdeburg
SERKO GmbH
Ebendorfer Chaussee 47
39128 Magdeburg
Tel. +49 (0)391/ 289 90 69
Panasonic Service Center Düsseldorf
VTH GmbH
Kölner Straße 147
40227 Düsseldorf
Tel. +49 (0)211/ 77 90 25
Panasonic Service Center Essen
Bernd van Bevern GmbH
Heinrich-Held-Straße16
45133 Essen
Tel. +49 (0)201/ 84 20 220
Panasonic Service Center Osnabrück
Petsch Kundendienst GmbH
Pagenstecherstraße75
49090 Osnabrück
Tel. +49 (0) 541/ 68 038
Panasonic Service Center Wiesbaden
J. Hemmerling - VAD GmbH
Ostring 7
65205 Wiesbaden
Tel. +49 (0)6122/ 90 91 10
Panasonic Service Center Mannheim
N. Schaaf
Reichenbachstraße 21-23
68309 Mannheim
Tel. +49 (0)621/ 72 787-0
Panasonic Service Center Stuttgart
Hans Beck
Friedrich-List-Straße38
70771 Leinfelden-Echterdingen
Tel. +49 (0) 711/ 94 701-0
Panasonic Service Center Reutlingen
Herbert Geissler
Lichtensteinstraße75
72770 Reutlingen
Tel. +49 (0)7072 / 92 96-0
Panasonic Service Center München
G.Berghofer & W.Kaller GmbH
Helene-Wessel-Bogen 7
80939 München
Tel. +49 (0)89/ 318 907-0
Panasonic Service Center Augsburg
Klaus Bienek
Affinger Straße4
86167 Augsburg
Tel. +49 (0)821/ 70 70 75
Panasonic Service Center Nürnberg
Herbert Geissler GmbH
Friedrich-Ebert-Straße21
90537 Feucht
Tel. +49 (0)9128/ 70 76-0
Panasonic Service Center Eisenach
Blitz Elektro-Elektronik-GmbH
Bahnhofstraße17
99817 Eisenach
Tel. +49 (0)3691/ 29 29 42 8
EU Warranty
A
Service-Zentren in Österreich
Funk Fuchs GmbH & CoKg Unterhart 90
4642 Sattledt
Tel. +43 7244 733
Funktechnik Seissl
Dorf 79
6330 Schwoich
Tel. +43 5372 8217
Elektro Oberndorfer
Linzer Straße 2-4
4840 Vöcklabruck
Tel. +43 7672 72889
Panasonic Austria Handelsges.mbH
Laxenburger Straße 252
1232 Wien
Tel. +43 222/61080
FR
CETELEC
ZI de la Delorme
5 Avenue Paul héroult
13015 MARSEILLE
Tél.:0496157777
Tél.:0491580755
CORDON Electronique
BP 460
ZI Taden
22107 DINAN CEDEX
Tél. : 02.96.85.82.20
Fax : 02.96.85.82.21
EASY REPAIR
26 rue des Cosmonautes
31400 Toulouse
Tél. : 05.62.71.48.14
Fax : 05.62.71.48.15
EASY REPAIR
22 boulevard des Brotteaux
69006 Lyon
Tél. : 04.72.83.02.02
Fax : 04.78.52.40.38
ELECTRONIQUE SERVICE
Avenue Figuières
ZAC Font de la Banquière
34970 LATTES
Tél. : 04.67.15.96.30
Fax : 04.67.20.04.72
GENERAL ELECTRONIQUE
16 rue Joseph Cugnot
Z.I. Bracheux
60000 BEAUVAIS
Tél. : 03.44.89.79.00
Fax : 03.44.05.16.96
Négoce Technique etMaintenance
40 boulevard Bessières
75017 PARIS
Tél. : 01.44.85.21.66
Fax : 01.42.29.60.05
S.B.E.
Z.I. de la Liane
BP 9
62360 SAINT LEONARD
Tél. : 03.21.10.10.21
Fax : 03.21.80.20.10
77
Page 86

EU Warranty
NL
Service-centra in
Nederlands
Panasonic-Centre Nederland
(Servicom bv)
P.O Box 16280
2500 BG
Den-Haag
Nederland
Tel. +31 703314314
Zonweg 60
2516 BM
Den-Haag
Nederland
Tel. +31 703314314
I
Per i Centri Assisitenza in Italia
Servizio Clienti
Tel. +39 02/ 67072556
E
Panasonic España, S.A.
Servicio de Atención a Usuarios:
Tel: 902 15 30 60
DK
For nærmeste servicecenter ring Panasonic
Danmark
Tel. +45 43 20 08 50
S
Firmor i Sverige
Komrep
Rosenlundsgatan 4
411 20 Göteborg
Tel. +46 031-173354
Signalstyrkan
Kungsholmstorg 4
104 22 Stockholm
Tel. +46 08-6542500
CR service
Industribyn 3
232 37 Malmö
Tel. +46 040-430030
SF
Huoltokeskukset Suomessa:
KAUKOMARKKINAT OY
PANASONIC-HUOLLOT Kutojantie 4
02630 Espoo
Puh. +358 09 521 5151 Huolto
Puh. +358 09 521 5155 Varaosat Ja
Tarvikkeet
SETELE OY
Vanha Viertotie 7
00300 Helsinki
Puh. +358 09 549100
PLAY-SHOP SERVICE Keskuskatu 3
00100 Helsinki
Puh. +358 09 27053626
MEGAFIX KY
Louhenkatu 9
74100 Iisalmi
Puh. +358 017 14631
T: MI.M.HAAPOJA
Miilukatu 7
40320 Jyväskylä
Puh. +358 014 677121
OUTOKUMMUN PUHELIN Pohjoisahonkatu
9
83500 Outokumpu
Puh. +358 013 562211
SETELE OY
Rengastie 31
60100 Seinäjoki
Puh. +358 06 4148344
TURUN J-MARKKINAT OY Tuureporinkatu
6
20100 Turku
Puh. + 358 02 2332685
N
Servicesenter i Norge
Norsk Elektronikksenter
Fetveien 1
2007 Kjeller
Tlf: +47 63 80 45 00
Panasonic Norge AS
Østre Aker vei 22
0508 Oslo
Tlf: +47 22 91 68 00
GR
КЭнфсб фечнйкЮт хрпуфЮсйозт
INTERTECH S.A.
International Technologies
БцспдЯфзт 26, 167 77 Еллзнйкь
Tбч. Ихс.: 738 21, 167 10 ЕЛЛЗНЙКП
Фзл. КЭнфсп: (01) 9692.300
ХрпкбфЬуфзмб Вьсейбт ЕллЬдбт:
К. КбсбмбнлЮ 11, 54638 ИЕУУБЛПНЙКЗ
Фзл. КЭнфсп: (031) 245.840-3
P
Centros de Assistência em Portugal
PAPELACO, S.A.
Vale Paraiso - Ferreiras
8200 ALBUFEIRA
ALGARVE
Tel. +351 89 589960
PAPELACO, S.A.
Largo de Santos, 9
1200 LISBOA
Tel. +351 1 3970539
PAPELACO, S.A.
Largo do Tribunal, Lote 11
2400 LEIRIA
Tel. +351 44 28071
78
Page 87

PAPELACO, S.A.
Rua Cidade de Santos, 31R/C
9000 FUNCHAL
MADEIRA
Tel. +351 91 231523
PAPELACO, S.A.
Rua do Outeiro,
Lote 25 - Gemunde
4470 MAIA
PORTO
Tel. +351 2 944 0354/9
PAPELACO, S.A.
Rua Major Leopoldo da Silva,
Lote 3
3500 VISEU
Tel. +351 32 424771
B
Centres de service après-vente en Belgique
BROOTHAERS
Hoevelei 167
2630 AARTSELAAR
Tel. +32 03/887 06 24
HENROTTE
Rue du Campinaire 154
6240 FARCIENNES
Tel. +32 071/39 62 90
PIXEL VIDEOTECH
Rue St Remy 7
4000 LIEGE
Tel. +32 041/23 46 26
DELTA ELECTRONICS
Rue P.d’Alouette 39
5100 NANINNE
Tel. +32 081/40 21 67
ELEKSERVICE FEYS Houthulstseweg 56
8920 POELKAPELLE
Tel. + 32 057/48 96 37
AVS WAASLAND Lavendelstraat 113
9100 ST NIKLAAS
Tel. +32 03/777 99 64
A.V.T.C SA
Kleine Winkellaan 54
1853 STROMBEEK-BEVER Tel. + 32
02/267 40 19
RADIO RESEARCH
Rue des Carmélites 123
1180 BRUXELLES
Tel. +32 02/345 68 56
VIDEO TECHNICAL SERVICE
Av. du Roi Albert 207
1080 BRUXELLES
Tel. +32 02/465 33 10
SERVICE CENTER Kapellestraat 95
9800 DEINZE
Tel. +32 09/386 76 67
TOP SERVICE
Westerloseweg 10
2440 GEEL
Tel. +32 014/54 76 24
TELECTRO SC
Quai des Ardennes 50
4020 Liège
Tel. +32 041/43 29 04
EU Warranty
L
Centres de service après-vente au
Luxembourg
NOUVELLE CENTRAL RADIO
Rue des Jones 15
L - 1818 Howald
Luxembourg - Grand Duché
Tel. +32 40 40 78
CH
Jonh Lay Electronics AG
Littauerboden
6014 Littau
Phone: +41 41 259 9090 Fax: +41 41 252
0202
TR
TEKOFAKS ISTANBUL CENTRE OFFICE
KAÐITHANE CADDESI SEVÝLEN SOKAK NO. 58
80340 ÇAÐLAYAN-ISTANBUL
Tel: 90-212-220 60 70 / 14 Lines
Fax: 90-212-220-60 94
ANKARA BRANCH OFFICE
GÜVEN MAH.FARABI SOKAK NO: 38/6 06690
KAVAKLIDERE- ANKARA
Tel: 90-312-467 30 94/2 Lines pbx
Fax: 90-312 467 85 38
ÝSMÝR BRANCH OFFICE
CUMHURÝYET BULVARI NO:330 K.:6 D.:608 SEVÝL
ÝÞ MERKEZÝ 35520 ALSANCAK-ÝZMÝR
Tel: 90-232-464 29 01 pbx
Fax: 90-232-422 67 44
BURSA BRANCH OFFICE
ÞEHREKÜSTÜ MAHLLESÝ DURAK CADDESÝ NO.:7
BURSA
Tel: 90-224-225 10 46 pbx
Fax: 90-224-223 81 03
ADANA BRANCH OFFICE
REÞATBEY MAH.FUZULÝ CAD.GÜLEK SÝTESÝ A
BLOK NO: 75b 01120 ADANA
Tel: 90-322-458 39 52 pbx
Fax: 90-322-453 21 32
TRABZON BRANCH OFFICE
MARAÞ CAD.MARAÞ APT.NO:51 D.:2 61200
TRABZON
Tel: 90-462-321 33 08
Fax: 90-462-326 37 78
ANTALYA BRANCH OFFICE
ALTINDAÐ MAH. 146 SOKAK ÖZKOÇ
APT.NO:9/1-2A ANTALYA
Tel: 90-242-243 23 70 / 3 Lines
Fax: 90-242-243 23 72
DÝYARBAKIR BRANCH OFFICE
LÝSE CADDESÝ GÖKALP APT.NO: 18/A
DÝYARBAKIR
Tel: 90-412-228 73 00
Fax: 90-412-223 59 00
79
Page 88

EU Warranty
EU/EEA-Wide Guarantee: Conditions applicable in any country other than the country
of original purchase.
A When the purchaser finds the appliance to be defective, he should promptly contact the
proper sales company or national distributor in the EU/EEA country where this
guarantee is claimed, as indicated in the “Product Service Guide” or the nearest
authorized dealer together with this guarantee and proof of date of purchase.
The purchaser will then be informed whether:
(i) the sales company or national distributor will handle the repair service: or
(ii) the sales company or national distributor will arrange for trans-shipment of the
appliance to the EU/EEA country where the appliance was originally marketed; or
(iii) the purchaser may himself send the appliance to the sales company or national
distributor in the EU/EEA country where the appliance was originally marketed.
B If the appliance is a product model which is normally supplied by the sales company or
national distributor in the country where it is used by the purchaser, then the appliance,
together with this guarantee card and proof of date of purchase, should be returned at
the purchaser’s risk and expense to such sales company or distributor, which will
handle the repair service. In some countries, the affiliated sales company or national
distributor will designate dealers or certain service centres to execute the repairs
involved.
C If the appliance is a product model which is not normally supplied in the country where
used, or if the appliance’s internal or external product characteristics are different from
those of the equivalent model in the country where used, the sales company or national
distributor may be able to have the guarantee repair service executed by obtaining
spare parts from the country where the appliance was originally marketed, or it may be
necessary to have the guarantee repair service executed the sales company or national
distributor in the country where the appliance was originally marketed.
In either case, the purchaser must furnish this guarantee card and proof of date of
purchase. Any necessary transportation, both of the appliance and of any spare parts,
will be at the purchaser’s risk and expense, and there may be a consequent delay in the
repair service.
D Where the consumer sends the appliance for repair to the sales company or national
distributor in the country of use of the appliance, the service will be provided on the
same local terms and conditions (including the period of guarantee coverage) as prevail
for the same model appliance in the country of use, and not the country of initial sale in
the EU/EEA. Where the consumer sends the appliance for repair to the sales company
or national distributor in the EU/EEA country where the appliance was originally
marketed, the repair service will be provided on the local terms and conditions
prevailing in the country of initial sale in the EU/EEA.
E Some product models require adjustment or adaptation for proper performance and
safe use in different EU/EEA countries, in accordance with local voltage requirements
and safety or other technical standards imposed or recommended by applicable
regulations. For certain product models, the cost of such adjustment or adaptation may
be substantial and it may be difficult to satisfy local voltage requirements and safety or
other technical standards. It is strongly recommended that the purchaser investigates
these local technical and safety factors before using the appliance in another EU/EEA
country.
F This guarantee shall not cover the cost of any adjustments or adaptations to meet local
voltage requirements and safety or other technical standards. The sales company or
national distributor may be in a position to make the necessary adjustments or
adaptations to certain product models at the cost of the purchaser. However, for
technical reasons it is not possible to adjust or adapt all product models to comply with
local voltage requirements and safety or other technical standards. Moreover, where
adaptations or adjustments are carried out the performance of the appliance may be
affected.
G If in the opinion of the sales company or national distributor in the country where the
appliance is used the purchaser has the necessary adjustments or adaptations to local
voltage requirements and technical or safety standards properly made, any subsequent
guarantee repair service will be provided as above indicated, provided the purchaser
discloses the nature of the adjustment or adaptation if relevant to the repair. (It is
recommended that the purchaser should not send adapted or adjusted equipment for
repair to the sales company or national distributor in the country where the appliance
was originally marketed if the repair relates in any way to the adaptation or adjustment).
H This guarantee shall only be valid in territories subject to the laws of the European
Union and the EEA.
Please keep this guarantee with your receipt.
80
Page 89

Personal Record
Personal Record
E-mail Settings
Use the table below to record your E-mail settings. The list may vary
depending on the Internet Service Provider.
Item Hint Current Setting
Profile Name Service Provider Name
Mail Account Your E-mail Address
SMTP Server
POP3 Server
POP3 Account
Password Reminder of Password
Mail Delivery Leave/Delete Message*
Access Point Phone Number
GPRS APN
Circuit Type Analog or Digital
Authentication
User Name Your name (or alias)
User
Password
Primary DNS IP Address
Secondary
DNS
* This function allows e-mail messages to either be removed from the
server when they have been downloaded to the phone, or they can
be left on the server.
Domain Name or IP
Address
Domain Name or IP
Address
None, Normal (PAP),
Encrypted (CHAP),
Reminder of Password
IP Address
81
Page 90

Personal Record
WAP Settings
Use the table below to record your GPRS/GSM WAP settings.
Item
Name
Home URL
Security Non secure / Secure (Delete One)
Bearer Type
Circuit Switched (GSM)
Circuit Type
Digital Dial
Analogue Dial
User Name
Password
Gateway IP
Linger time
Packet Switched (GPRS)
Access Point
Name
User Name
Password
Gateway IP
Authentication
Provisioning Information
Setting No 1
None/Normal/Secure
(PAP) (Chap)
Provisioning Information
Setting No 2
82
Page 91

Notes
Notes
83
Page 92

Notes
84
Page 93

Notes
85
Page 94

The Serial Number can be found on the outside of the phone
under the battery. For your convenience we recommend that you
note the following details as a record of your purchase.
Part Number
Serial Number
Dealer Name
Purchase Date
BULL CP8 PATENT
© Matsushita Communication Industrial UK Limited 2001
Information in this document is subject to change without notice. No part of
these instructions may be reproduced or transmitted in any form or by any
means without obtaining express permission from Matsushita Communication
Industrial UK Limited
Page 95

Page 96

Printed in UK
www.panasonicmobile.co.uk 02.003
GD96DPK10A
 Loading...