

Panasonic EB-GD67 User Manual

Operating Instructions EB-GD67
Digital Cellular Phone
Before operating this equipment please read these instructions completely.


Important Information
Important Information
We, Matsushita Mobile Communications Development of Europe Ltd,
declare, that the EB-GD67 conforms with the essential and other relevant
requirements of the directive 1999/5/EC. A declaration of conformity to
this effect can be found at http://www.panasonicmobile.com/support
Safety Considerations
The following information should be read and understood as it provides
details which will enable you to operate your phone in a manner which is
both safe to you and your environment, and conforms to any legal
requirements regarding the use of cellular phones.
This equipment should only be charged with approved charging
equipment. Other usage will invalidate any approval given to this
apparatus and may be dangerous. The use of approved charging
equipment is recommended to ensure optimum performance
and avoid damage to your phone. Ensure the voltage rating of
the Fast Travel Charger is compatible with the area of use when
travelling abroad.
A Fast Travel Charger (EB-CAD95xx*) is supplied with the Main
Kit. Other recommended equipment for charging -Car Charger
(EB-CDD95)
Note* xx identifies the Charger region, e.g. CN, EU, HK, UK.
Switch off your cellular phone when in an aircraft. The use of
cellular phones in an aircraft may be dangerous to the operation
of the aircraft, disrupt the cellular network and may be illegal.
Failure to observe this instruction may lead to the suspension or
denial of cellular phone services to the offender, or legal action
or both.
Do not incinerate or dispose of the battery as ordinary rubbish.
The battery must be disposed of in accordance with local
legislation and may be recycled.
i
Important Information
It is advised not to use the equipment at a refuelling point. Users
are reminded to observe restrictions on the use of radio
equipment in fuel depots, chemical plants or where blasting
operations are in progress. Never expose the battery to extreme
temperatures (in excess of 60°C).
It is imperative that the driver exercises proper control of the
vehicle at all times. Do not hold a phone while you are driving;
find a safe place to stop first. Do not speak into a Handsfree
microphone if it will take your mind off the road. Always
acquaint yourself thoroughly with restrictions concerning the use
of cellular phones within the area you are driving and observe
them at all times.
Care must be taken when using the phone in close proximity to
personal medical devices, such as pacemakers and hearing aids.
For most efficient use hold the phone as you would any normal
phone. Your GD67 cellular phone is fitted with an internal
antenna, located in the upper portion of the phone, above the
display screen. To avoid deterioration of signal quality or antenna
performance, do not touch or "cup" the antenna area while the
phone is switched on. (See "SAR Statement" page iii)
Unauthorized modifications or attachments may damage the
phone and violate applicable regulations. The use of an
unapproved modification or attachment may result in the
invalidation of your guarantee – this does not affect your
statutory rights.
This Panasonic mobile phone is designed, manufactured and
tested to ensure that it complies with the specifications covering
RF exposure guidelines applicable at the time of manufacture, in
accordance with EU, USA FCC, and Australian ACA regulations;
or as specifically stated in the separate declaration leaflet
enclosed with this product.
Please refer to our website for latest information/standards
compliance in your country/region of use.
http://www.panasonicmobile.com/health.html
ii

SAR Statement
SAR Statement
European union - RTTE
THIS PANASONIC PHONE (MODEL EB-GD67) MEETS THE EU REQUIREMENTS FOR
EXPOSURE TO RADIO WAVES.
Your mobile phone is a radio transmitter and receiver. It is designed and
manufactured not to exceed the limits for exposure to radio frequency (RF)
energy recommended by The Council of the European Union. These limits
are part of comprehensive guidelines and establish permitted levels of RF
energy for the general population. The guidelines were developed by
independent scientific organisations through periodic and thorough
evaluation of scientific studies. The limits include a substantial safety margin
designed to assure the safety of all persons, regardless of age and health.
The exposure standard for mobile phones employs a unit of measurement
known as the Specific Absorption Rate, or SAR. The SAR limit
recommended by The Council of the European Union is 2.0 W/kg.* Tests
for SAR have been conducted using standard operating positions with the
phone transmitting at its highest certified power level in all tested frequency
bands. Although the SAR is determined at the highest certified power level,
the actual SAR level of the phone while operating can be well below the
maximum value. This is because the phone is designed to operate at
multiple power levels so as to use only the power required to reach the
network. In general, the closer you are to a base station antenna, the lower
the power output.
Before a phone model is available for sale to the public, compliance with the
European R&TTE directive must be shown. This directive includes as one
essential requirement the protection of the health and the safety for the
user and any other person. The SAR value for this model phone, when
tested for use at the ear, for compliance against the standard was
0.505 W/kg. While there may be differences between the SAR levels of
various phones and at various positions, they all meet the EU requirements
for RF exposure.
* The SAR limit for mobile phones used by the public is 2.0 watts/kilogram
(W/kg) averaged over ten grams of tissue. The limit incorporates a
substantial margin of safety to give additional protection for the public and
to account for any variations in measurements. SAR values may vary
depending on national reporting requirements and the network band. For
SAR information in other regions please look under product information at
http://www.panasonicmobile.com/health.html
iii
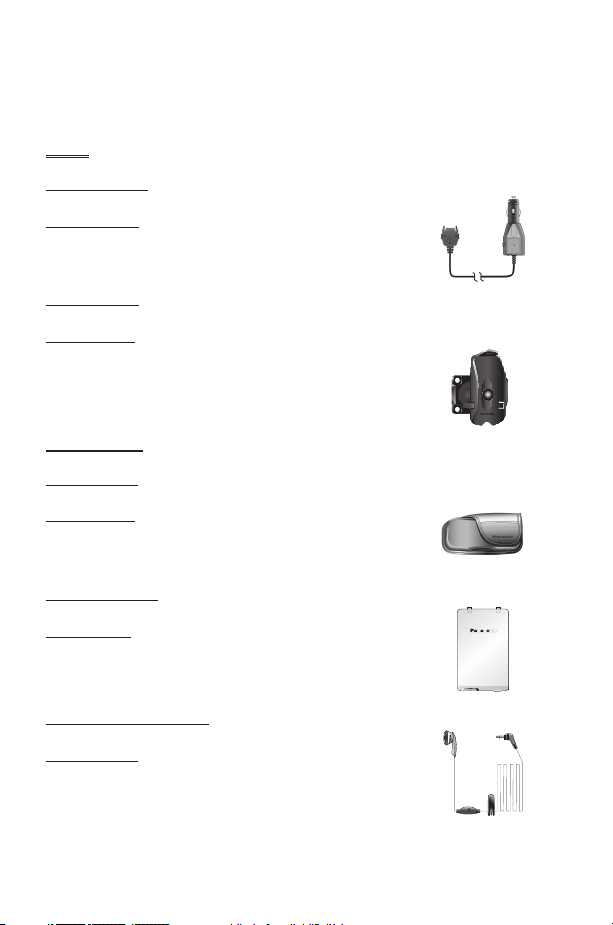
Accessories
Accessories
Car
Car Charger
EB-CDD95
Top up your battery in your vehicle by attaching this
accessory to your phone and to the cigarette lighter socket
Car Holder
EB-KAD67
This compact Car Holder can be mounted in your vehicle,
providing a convenient and attractive means of storing your
phone
Personal
Carry Case
EB-YKD67
This attractive hip case protects your phone and by using
the belt clip keeps it close at hand.
Li-Ion Battery
EB-BSD67
Double your talk time by having a spare battery.
Personal Handsfree
EB-EMD35
Talk and move while keeping your hands free by using this
accessory. Just place the earpiece in your ear and the
adaptor in the side of the handset - and talk
iv
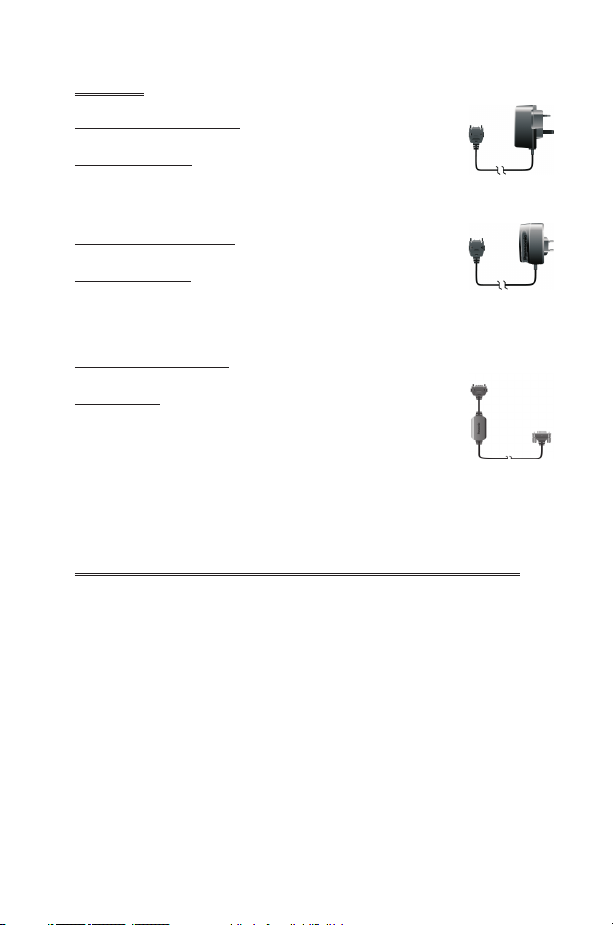
Accessories
Office
Fast Travel Charger
EB-CAD95UK
Carry a lightweight portable charger wherever you go to
ensure you always have power to talk
Fast Travel Charger
EB-CAD95EU
Charge Data Cable
EB-RSD67
This Charge Data Cable is used to connect your phone to a
PC, allowing data communication between them. This
should be used in conjunction with the Free Panasonic
Data Connection Assistant Software.
The software can be downloaded from
http://www.panasonicmobile.com/support/software
Identify a Genuine Panasonic Accessory
Panasonic produces some of the most advanced mobile phones available.
So, as you’d expect from this class leader, the range of accessories are
second to none.
Most genuine Panasonic accessories will have a label showing an
“EB-XXX00” model number
v
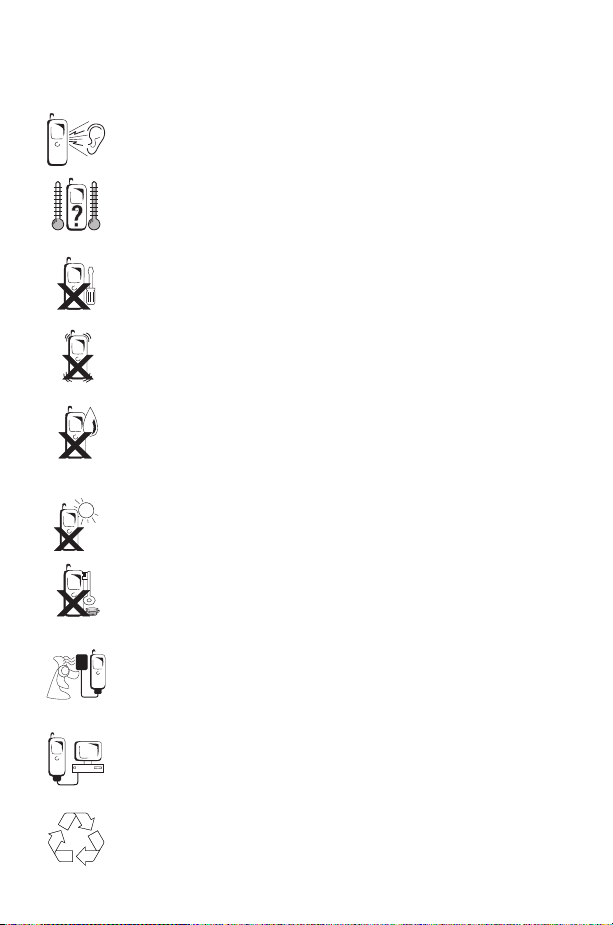
Care and Maintenance
Care and Maintenance
Pressing any of the keys may produce a loud tone. Avoid holding
the phone close to the ear while pressing the keys.
Extreme temperatures may have a temporary effect on the
operation of your phone. This is normal and does not indicate a
fault.
Do not modify or disassemble the equipment. There are no user
serviceable parts.
Do not subject the equipment to excessive vibration or shock.
Avoid contact with liquids. If the equipment becomes wet
immediately remove the power and contact your dealer.
Do not leave the equipment in direct sunlight or a humid, dusty
or hot area.
Keep metallic items that may accidentally touch the terminals
away from the equipment.
Always charge the battery in a well ventilated area, not in direct
sunlight, between +5°C and +43°C. It is not possible to
recharge the battery if it is outside this temperature range.
When connecting the phone to an external source, read the
operating instructions of the equipment for the correct
connection and safety precautions. Ensure the phone is
compatible with the product it is being connected to.
When disposing of any packing materials or old equipment check
with your local authorities for information on recycling.
vi

Quick Reference
Q "Press (F) to select".
Quick Reference
abcd
F
+Hold
F
Menu
A
B
1-0
D
E
M
R
#
Direction which the user can move around the display
screen using the Navigation key.
Press a key once for a particular phone operation.
“Press and hold” a key for a particular phone function.
Representation of screen menu option.
Secondary Softkey
Negative soft key/Back-key
Numeric key pads.
Answer a call or call a dialled number.
To end a call or return to Idle screen or
to switch the phone on or off.
Indicates that a function is SIM Dependent.
Indicates that a function is Network Dependent.
Switches Quiet Mode on and off.
F
+Hold
vii

Important Information ................................i
Contents
Safety Considerations .................................i
SAR Statement ....................................iii
European union - RTTE ...............................iii
Accessories ......................................iv
Car..........................................iv
Personal .......................................iv
Office .........................................v
Identify a Genuine Panasonic Accessory .......................v
Care and Maintenance ................................vi
Quick Reference ...................................vii
Getting to Know Your Phone ............................xi
Location of Controls .................................xi
Getting Started ....................................1
Fitting the SIM & Removing the SIM .........................1
Fitting the Battery and Rear Cover..........................2
Removing the Rear Cover and Battery .......................2
Charging the Battery .................................3
Fitting the IO cover..................................4
Fitting Image-In ....................................4
Operation of Battery Level Indicator.........................5
Low Battery Warning.................................5
The Menu System ..................................5
Display Icons .....................................6
Using the Menu System ...............................7
Selecting a Function .................................7
Basic Operation ....................................9
Switching the Phone On/Off .............................9
Making a Call .....................................9
International Dialling .................................9
Emergency Calls...................................10
Automatic Redial ..................................10
Ending a Call.....................................10
Answering a Call ..................................10
Caller Identification .................................11
Earpiece Volume Control ..............................11
Locking the Phone .................................11
Using the PIN ....................................12
Setting Quiet Mode .................................12
Setting Ring and Key Volume ............................13
Setting the Key Tone Type .............................13
Phonebook ......................................14
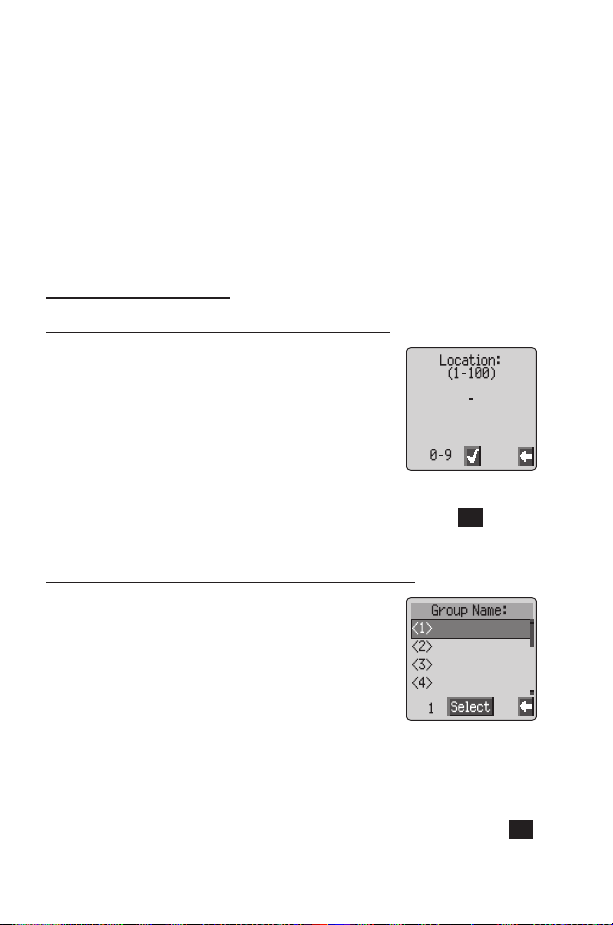
Store a Number ...................................14
Overwrite Protection ................................15
Browsing Phonebook ................................15
Retrieve a Number .................................15
Editing Phonebook Entries .............................16
Grouping Phonebook Entries ............................17
Using Voice Commands...............................19
Voice Dial Entry Setup ...............................19
Recalling Voice Dial Entries .............................19
Dialling Voice Dial Entries..............................20
viii

Editing the Voice Dial Entries ............................20
My Numbers .....................................21
Personalising Your Phone ..............................22
Add a Start-up Greeting...............................22
Displaying Animations ................................22
Idle Screen Image ..................................22
Media Folders ....................................23
Colour Themes ...................................23
Changing the Ring Tone...............................23
Download data (R)................................25
Composing a Melody ................................27
Setting the Backlight Time .............................28
Changing the Language ...............................28
Restoring the Default Phone Settings ........................28
Phone Security....................................29
Enabling Key Guard .................................29
Disabling Key Guard.................................29
Changing the Security Codes ............................29
Restricting Calls ...................................30
Applications .....................................32
Clock ........................................32
Initially Setting the Home Time ...........................32
Setting the Clock Format ..............................32
Altering the Time/Date ...............................33
Setting the Clock for Summer Time ........................33
Setting the Alarm ..................................33
Muting the Alarm ..................................33
Setting a Power On/Off Time............................34
Calculator ......................................35
Currency Convertor ................................35
Text Messages ....................................37
Setting the Phone for Short Text Messages.....................37
Setting the Message Centre Number ........................37
Creating a Text Message ..............................37
Receiving Text Messages ..............................38
Message Options ..................................39
Cut / Copy & Paste Message Text .........................39
Manage Messages Lists ...............................40
Chat SMS ......................................40
Cell Broadcasts ...................................41
Parameters .....................................42
Call Information ...................................44
Recent Numbers ..................................44
Call Duration ....................................45
Call Charges.....................................46
Setting the Unit Price ................................46
Setting the Maximum Unit Level ..........................46
Setting a Warning Level ...............................47
Call Identification ..................................47
Advanced Operation.................................48
Diverting Calls....................................48
Holding Calls and Call Waiting ...........................48
Making a Second Call ................................48
Receiving a Second Call ...............................49
Accept a Second Call ................................49
Reject a Second Call.................................49
End Current Call and Receive Second Call .....................49
ix

Operation During Two Calls ............................49
Call Transfer ....................................50
Multi-party Calls...................................50
Changing to a New Network ............................52
Schedule .......................................53
Creating a Reminder ................................53
Viewing Reminders .................................53
Deleting Reminders .................................54
Setting a Holiday Reminder .............................54
Deleting Holiday Reminders ............................54
Jump to Date ....................................55
Games ........................................56
Downloadable Games (R)............................56
Embedded Games (R)..............................56
WAP Browser ....................................57
Browser Settings ..................................57
Activating the Browser ...............................58
Navigating Content .................................58
The Browser Menu .................................58
Using Bookmarks ..................................59
Deactivating the Browser ..............................61
Setting the Linger Time ...............................61
Additional Features .................................62
Desktop Handsfree .................................62
Voice Memo.....................................62
DTMF Tones ....................................63
Note Pad ......................................64
Second Clock ....................................64
Setting Clock Display ................................64
Accessory Related Features .............................65
Text Entry ......................................66
®
T9
Text Input ...................................67
Other Text Modes .................................67
Editing Text .....................................67
Trouble Shooting ..................................68
Important Error Messages .............................70
Glossary of Terms ..................................72
Specifications ....................................74
Phone (Including Battery)
EU Warranty .....................................75
*
.............................74
Personal Settings ..................................80
Notes.........................................81
Menu Structure ...................................82
Licencing .......................................83
x
Getting to Know Your Phone
Getting to Know Your Phone
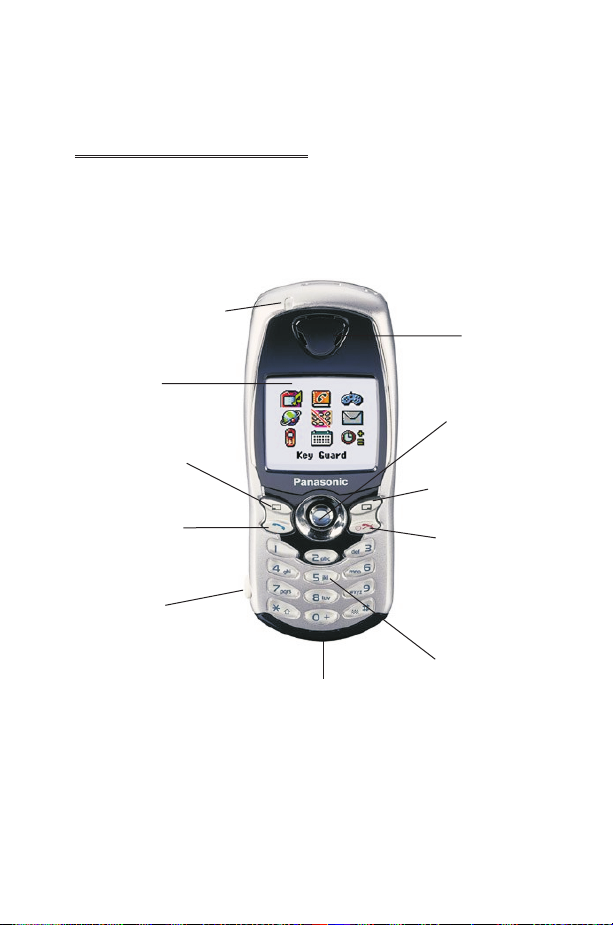
Location of Controls
Charge /Incoming Call
Indicator
Display
Secondary Softkey
Earpiece
Primary softkey
Negative Softkey
Call Key
Earpiece/
Microphone Socket
Power On/Off,
Back-Key
Keypad
Microphone
xi

xii
Getting Started
Getting Started
Thank you for purchasing this Panasonic digital cellular phone. This phone is
designed to operate on GSM networks - GSM900 or GSM1800. It also
supports GPRS for packet data connections. Ensure the battery is fully
charged before use.
Before operating this phone please read the “Important Information”
section - see page i.
These operating instructions detail use of the equipment contained in the
Main Kit.
Some services detailed, are network dependent (R) or may only be
available on a subscription basis. Some functions are SIM dependent (M).
For more information contact the Service Provider. If an item in the Phone
Option is network or SIM dependant and is not available, the items will be
"Greyed-Out". If the highlight bar is moved over a "Greyed-Out" item, the
primary softkey label will be removed.
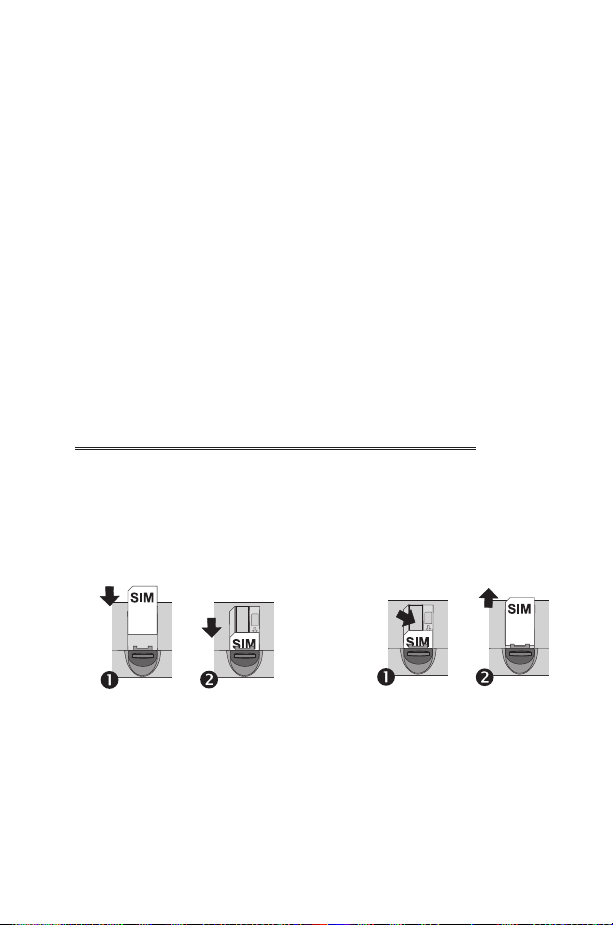
Fitting the SIM & Removing the SIM
The SIM is inserted into the back of the phone underneath the battery.
1
Getting Started
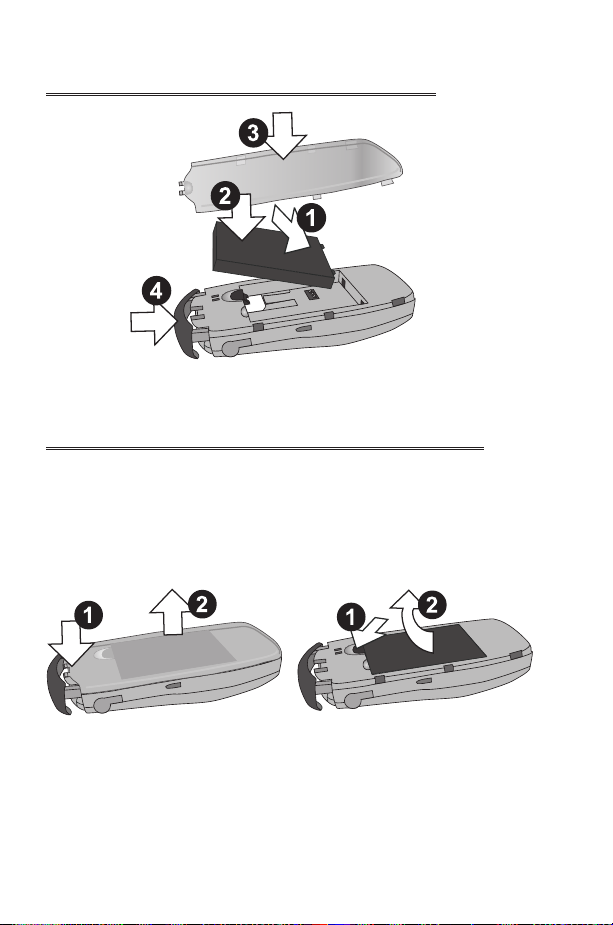
Fitting the Battery and Rear Cover
Removing the Rear Cover and Battery
Ensure the phone is switched off and the charger is disconnected from the
phone before removing the battery.
2
Getting Started
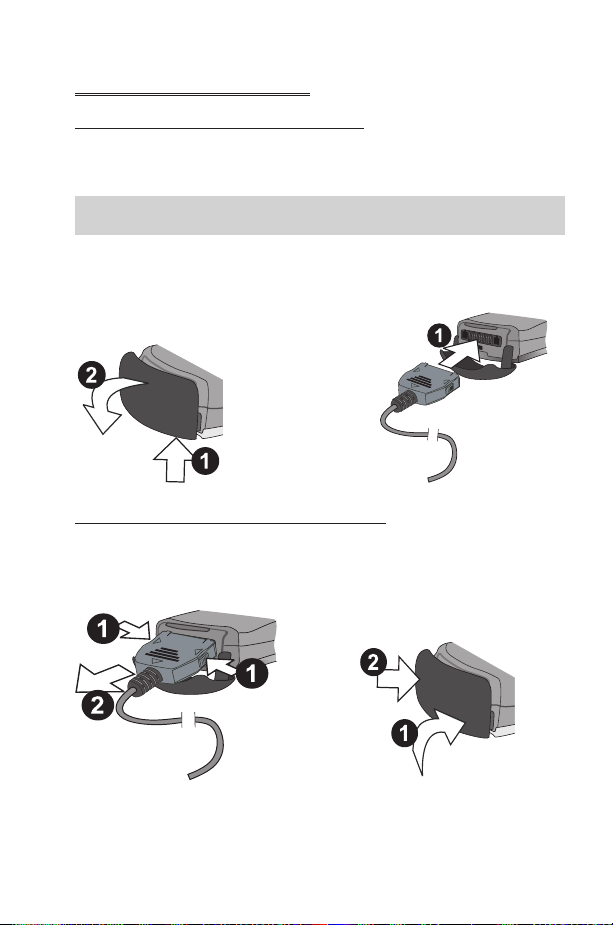
Charging the Battery
Connecting the Fast Travel Charger
The battery must be fitted in the phone before the charger is connected.
Insert the connector into the base of the phone, ensuring the arrows on the
connector are to the front of the phone.
Note: DO NOT force the connector as this may damage the phone and
or the charger.
Connect the charger to the mains power supply. The charging indicator will
light and the battery level indicator will scroll right to left when charging.
Disconnecting the Fast Travel Charger
When charging is complete turn off the mains power supply and disconnect
the charger.
3
Getting Started
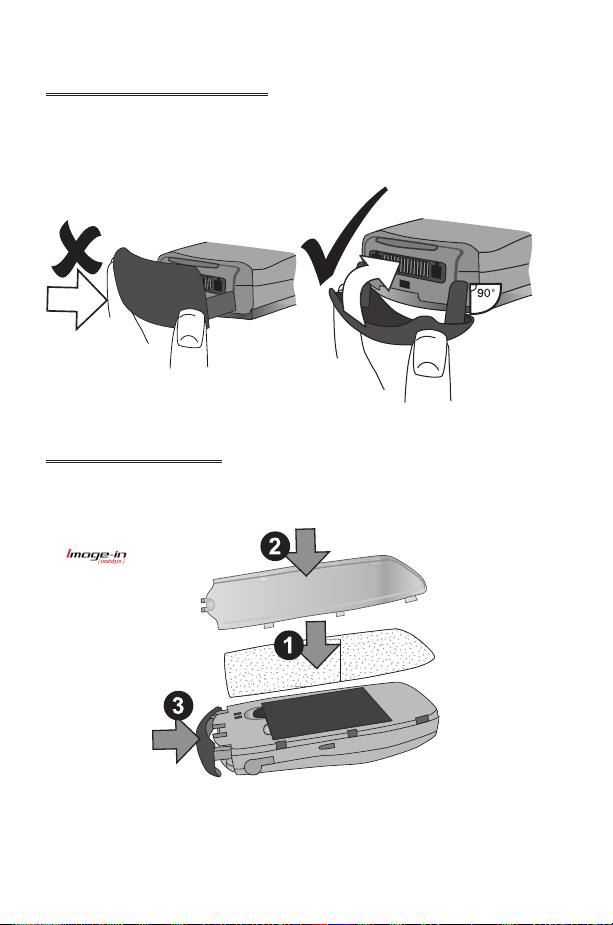
Fitting the IO cover
If excess force is applied to the IO cover, it is possible that the cover can
become detached from the phone.
If the IO over does become detached, it can easily be replaced
Fitting Image-In
Customised image cards may be fitted to the rear of the phone, behind the
transparent rear cover.
4

Getting Started
Operation of Battery Level Indicator
While charging Charging complete
Phone on
Phone off
KH
K
LCD Battery Charge
Indicator off
Low Battery Warning
When the battery power is low, a warning tone will sound, and a flashing
LOW BATTERY message will be displayed. If this occurs during
conversation, finish your call immediately. The power will automatically
shut off after the warning tone. Fully recharge the battery. See “Charging
the Battery” page 3. (Calls can be made and received while the phone is
charging)
It is recommended that the battery is fully discharged between charges to
maintain optimum battery life and performance.
The Menu System
The menu system allows the user to access all the functions of the phone
that are not accessible purely by key strokes. Each menu contains a list of
options. Some menus have further sub menus.
5

Getting Started
Display Icons
Following some operations the display will automatically clear after three
seconds or after pressing any key.
Status Icons
The status icons are displayed according to the currently activated
functions. The Antenna, Signal and Battery icons are displayed when the
handset is switched on and connected to a network.
Information Area
Left Hand
Selection area
Primary Selection
Area
is displayed when you are registered to a non-home network -
Y
Roaming
Indicates Call divert is enabled
t
Indicates Quiet Mode is enabled
]
Indicates All tones or ring volume is off
[
Icon flashes when there is an unread message in the Inbox, or
N
remains permanently lit when store is full
Indicates Phone lock is enabled
O
Indicates it is possible to make emergency calls only
S
T GSM signal strength:\- weak signal,T- strong signal
GPRS signal strength:r- weak signal,q- strong signal
q
Indicates Battery level:H- full,G(flashing) - low battery
H
Indicates Alarm is set
?
Status Icons
Main Display
Right Hand
Selection area
6

Getting Started
Indicates current Phonebook entry is sourced from the Mobile
>
Phonebook
Indicates current Phonebook entry is sourced from the SIM
<
Phonebook
Available directions in which the Navigation key can be pressed
g
Using the Menu System
The menu system provides the means for accessing all the functions which
do not have their own dedicated buttons on the keypad.
The menu functions are selected using the five-way Navigation key.(g)
Selecting a Function
FQ
menu is highlighted,
useeuntil the required item is highlighted,
Example:
From Idle
Status
Useeto choose Enable or Disable,
Enter the lock code, See "Locking the Phone" page 11,
In detail:
Following some operations the display will automatically clear after three
seconds, if this is not the case
andgmove around the icons on the screen. When a particular
FQ
, select Phone Option> Security > Phone Lock >
FQ
FQ
1 Usegto enter the menu system
2 Use
3
FQ
4 Useatwice to highlight the Security menu
5
FQ
6 Useeto select Enable or Disable
7 Enter the Lock Code
to highlight the Phone Option menu
da
to enter the menu
three times to enter the Phone Lock menu
, a submenu is displayed. From any submenu,
FQ
FQ
FQ
FQ
FQ
FE
to return to Idle.
7

Getting Started
Shortcuts (M)
When familiar with the layout of the menu, use the keypad to enter the
Menu Number. This will allow the user to obtain the required function
without having to navigate through the display menus. For example,
Qorg
Enable/Disable menu. Make the choice of disable or Enable
the Lock Code
to enter the menu,then
FQ
731
to take you directly to the
F
FQ
, enter
8
Basic Operation
Basic Operation
New to GD67 is the introduction of the "Pick List", which is used
extensively throughout the phone. Usingeto scroll through the Pick List,
the user can highlight a feature before "checking" a check box, or selecting a
button to the left of the option.
FQ
previous screen.
to confirm selection of a feature and
FB
Switching the Phone On/Off
+ Hold
F
When the phone is switched on a greeting will be displayed and
then the phone will go into Idle
E
Making a Call
Ensure that the phone is switched on, the network operator logo is
displayed and the signal strength meter shows network coverage is available
in the current area.
1 Enter area code and phone number
2
FD
International Dialling
Using the automatic international access code (+)
you will be able to dial international numbers without
having to know the code for the international
exchange.
If the international number is known then it can be
entered in the normal fashion followed by the area
code and phone number.
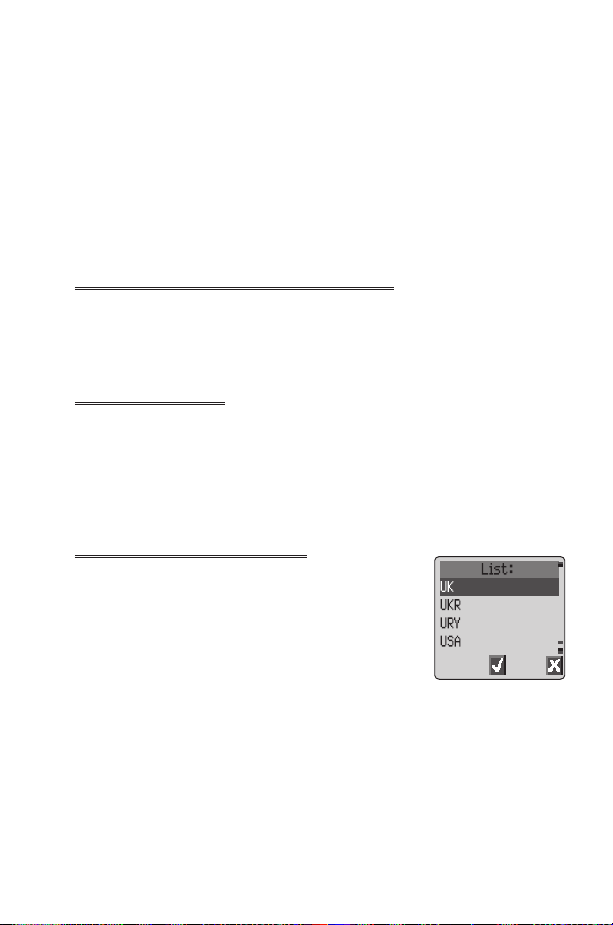
1 From IdleF+ Hold0until “+” is displayed
2 Useeto cycle through the abbreviated international names
3 Enter area code and phone number
4
to choose the required code
Q
FD
to return to the
F
9
Basic Operation
Note: Many countries / regions include an initial “0” in the area code. This
should, in most cases, be omitted when dialling international numbers. If
you have difficulties making international calls, contact your Service
Provider.
Emergency Calls
To make an emergency call the antenna symbol (S) must be present.
Enter 112
FD
or if no SIM is fitted to the phone
F QaQ
Automatic Redial
When your connection is unsuccessful,
whenOkis displayed and a timer will countdown in
seconds to the next redial.
To stop redialling,
displayed in the Primary Selection area.
When a call is connected a beep will be emitted.
If a call is repeatedly unsuccessful,the phone will not automatically redial
the phone number. In this case you must redial the phone number
manually.
FQ
when
FQ
Cancel
Auto Redial
is
00:00:59
Cancel
Ending a Call
FE
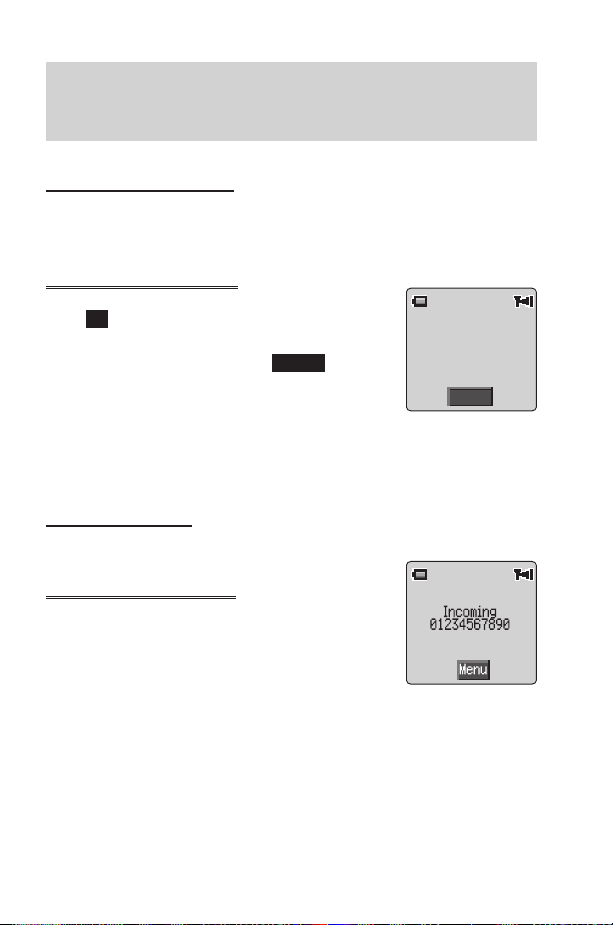
Answering a Call
To receive a call the phone must be switched on and
the signal strength meter must be displayed.
any key exceptEorAto answer a
F
call
FE
FQ
Accept or Reject the call. Useeto select an option and
If a call is not answered, or is rejected, the number of incoming calls missed
will be displayed.
F
to reject a call
during an incoming call, and you will be given the option to
FQ
any key to clear the display
10
Basic Operation
Caller Identification
This feature allows you to identify incoming calls. The caller’s phone
number, and name if stored in Phonebook, will be displayed.
Note: Caller Identification may not always be available.
Earpiece Volume Control
The volume level may be adjusted during a call:
Useato decrease the volume, usebto increase the volume
Note: Volume control for Personal Handsfree accessory is adjusted in the
same manner.
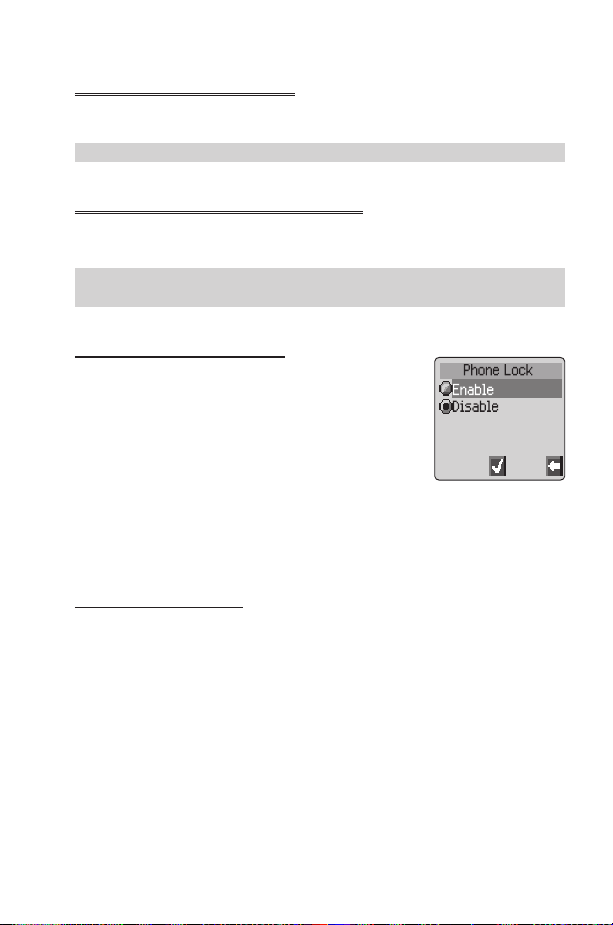
Locking the Phone
With the Phone Lock enabled you will be restricted
to answer incoming calls and make emergency calls
only. The Phone Lock Code is factory set to “0000”.
1 From Idle
> Security > Phone Lock
2 From the pop up menu select status
Q
3 Select Enable
4 Enter the 4-digit code,
The lock icon (O) will now be displayed.
FQ
Unlocking the Phone
Enter your Lock Code
and on again the Lock Code will need to be re-entered. When the correct
code has been entered a tick will appear in the primary selection
area,
FQ
, select Phone Option
FQ
FQ
FQ
FQ
. However, when you turn the phone off
F
11

Basic Operation
Disabling Phone Lock
The phone must be unlocked before the phone lock can be disabled.
1 From Idle
Lock
2 From the pop up menu select status
3 Select Disable
4 Enter the 4-digit code
FQ
, select Phone Option > Security > Phone
FQ
FQ
FQ
FQ
Using the PIN
The PIN protects your SIM against unauthorized use. If you enable the PIN,
every time the phone is turned on you will be prompted to enter the PIN.
The PIN2 controls security for the Fixed Dial Store, Call Charge metering
and Barred Dial.
If either PIN/PIN2 is entered incorrectly 3 times the phone will be locked
and the user will need to enter the PUK/PUK2 code.
Contact your service provider for the PUK/PUK2 code.
Note: If the PUK/PUK2 code is entered incorrectly 10 times, the phone
will cease to operate.
Enabling/Disabling the PIN
1 From Idle
FQ
2 Useaselect Status
3 Select Enable / Disable ,
4 Enter PIN (Between 4 and 8 digits)
FQ
, select Phone Option > Security > PIN
FQ
FQ
FQ
Setting Quiet Mode
When required, the phone can be set up to vibrate when a call is received.
Quiet Mode enables the user to choose between Continuous,
Intermittent vibration alerts and a user defind ring volume when a call is
received.
1 From Idle
2 Select Ring Volume
ZQ
3 select Vibration
4 Choose the vibration setting required; Continuous, Intermittent
or Disable,
12
FQ
, select Personalise > Quiet Mode
FQ
FQ
FQ
, adjust the ring volume as required
FQ

Basic Operation
Note: When activated, the phone will vibrate briefly.
Setting Ring and Key Volume
Changing either the ring volume/key volume is done in the same manner. If
you increase the ring volume above maximum it will set an escalating ring
tone. If you turn the ring volume off, the silent indicator icon ([) will be
displayed.
1 From Idle
2 Select Ring Volume or Key Volume
3 Useeto set the volume level
, select Personalise > Tones
FQ
FQ
FQ
FQ
Setting the Key Tone Type
1 From Idle
Type
2 Useeto select tone type
FQ
FQ
select Personalise > Tones >Key Tone
FQ
13
Phonebook
Phonebook
It is possible to store phone numbers in two locations:
In the SIM Phonebook (M)
In the Mobile Phonebook. This means that if you change the SIM, the
numbers in the phone are not lost
The Mobile Phonebook has the advantage that you can group your
phonebook entries together.
Store a Number
To Store a Number in the SIM Phonebook
1 From Idle enter the phone number and
FA
2 To select SIM Phonebook
3 Enter the name – see “Text Entry” page 66,
FQ
4 Confirm Phone number
5 Enter location number
You can choose not to enter a location number and the entry will be
placed in the next available location. Simply
displayed.
twice
To Store a Number in the Mobile Phonebook
1 From Idle enter the phone number and
FA
2 Useato select Mobile Phonebook and
FQ
3 Enter the name - see “Text Entry” page 66,
Fa
4 Confirm phone number
5 Useeto select a group - see “Grouping Phonebook Entries” page
17 - into which to place the entry
6 Enter location number
A location number does not have to be specified.In this case the entry
will be placed in the next available location. Simply
is displayed.
FQ
FQ
FQ
FQ
FQ
FQ
twice
FQ
when
FQ
Any
when
is
Any
14

Phonebook
Overwrite Protection
If a location is occupied, a prompt will be displayed to confirm that the
current information is to be overwritten.
FQ
FB
Note: If you amend an entry stored in your phonebook that has a Voice
Dial Command assigned to it, you will need to delete and reassign that
Voice Dial Command - see “Editing the Voice Dial Entries” page 20.
to overwrite the selected location
to choose another location number
Browsing Phonebook
You can search the Phonebook by either Name or Location. The default
setting for browsing is by name. When browsing by name pressing a
lettered key will take you to the first entry starting with that letter.
1 From Idle
2 Useeto toggle between Names or Loc. Nos.
3 Useeto select the Phonebook you wish to browse
FQ
, select Phonebook > Browse
FQ
FQ
FQ
Retrieve a Number
1 From Idle
2 Useeto browse through the Phonebook and highlight the
required entry
3 Useeto select recall
Note: The Phonebook you last viewed will be the default when you next
FA
particular phonebook.
Speed Dial a Number Stored in SIM Phonebook
1 From Idle Enter location number – leading zeros may be left out
2
F#
3
FD
FA
FQ
FQ
. To change the default, use the Phonebook menu to select a
15

Phonebook
Editing Phonebook Entries
It is possible to Detail, View, Recall, Edit, Delete or Create information
in the Phonebook. To access any of these functions follow the same
procedure for each one.
With a phone number or name displayed:
1
FA
Delete or Create
2
FQ
Detail
Displays each element of the selected Phonebook entry. Useeto display
the next/previous element of the entry. Each element may be edited -
QaQ
, edit as required
View
Displays an individual name and phone number in the names list.
Recall
Displays the phone number, enabling you to either change it or call the
number.
Edit
Displays the entry allowing you to make changes as required.
twice to save any changes.
Delete
Deletes the entry from the Phonebook.
Useeto cycle through Detail, View, Recall, Edit,
to select an option
FQ
twice to save any changes.
FQ
F
Create
Creates a new entry in the Phonebook
16
 Loading...