

Page 1

Digital Imaging System
Operating Instructions (For PostScript)
DA-MC700
Before operating this machine, please read
these instructions completely and keep these
operating instructions for future reference.
English
Page 2

TRADEMARKS/COPYRIGHTS
The following trademarks and registered trademarks are used throughout this manual.
Microsoft, MS-DOS, Windows, and Windows NT are either registered trademarks or trademarks
of Microsoft Corporation in the United States and/or other countries.
i386, i486, and Pentium are either registered trademarks or trademarks of Intel Corporation.
Adobe, the Adobe logo, Adobe PostScript, Acrobat, Acrobat Reader, and Acrobat logo are either
registered trademarks or trademarks of Adobe Systems Incorporated in the United States and/or
other countries.
Apple, the Apple logo, LaserWriter, Mac, Mac logo, Macintosh, Power Macintosh, and TrueType
are either registered trademarks or trademarks of Apple Computer, Inc. in the United States and/
or other countries.
Novell, Novell Client, Novell Directory Services, Novell Distributed Print Services, Netware,
intraNetware, NDPS, NDS, , IPX, IPX/SPX, NDS Admin, NDS Administrator are either registered
trademarks or trademarks of Novell, Inc., in the United States and/or other countries.
Panasonic Document Imaging Company has made every effort to supply trademark information
about company names, products and services mentioned in this documentation. All third party
and/or other trademarks identified herein are the property of their respective owners.
Copyright © 2001 by Matsushita Graphic Communication Systems, Inc.
All rights reserved.
Copyright protection claimed includes all forms and matters of copyrightable material and
information now allowed by statutory or judicial law or hereinafter granted, including without
limitation, material generated from the software programs that are displayed on the screen such
as styles, templates, icons, screen displays, looks, etc.
Contents are subject to change without notice.
Printed in Japan.
Page 3

Preface
Thank you for purchasing the PostScript Driver Library.
These Operating Instructions contain information on the various types of software included
in the PostScript Printer Driver & Documentation CD-ROM as well as on how to install and
use them. Please read this manual first before you begin to use the software to ensure smooth
operation.
This manual is written with the assumption that you are familiar with the basics of the
Microsoft Windows Operating System and Macintosh, and that you have understood the
operation of the printer with the aid of the Operating Instructions (For Printer). You may also
refer to their respective user manuals regarding the basic knowledge and operation method
of the product. Note that this manual is written for users operating the DP-6000/7000* with a
client computer installed with an English edition operating system only.
After reading, keep these operating instructions handy for a quick reference should you
encounter any difficulties when using the machine.
* DP-6000 USA/Canada only.
i
Page 4

PostScript Driver Library
The following types of software are included in the PostScript Printer Driver &
Documentation CD-ROM.
Types of Software Included
The “Readme.txt” files contain important information. Be sure to read them.
Printer Driver (for Windows 95/98/Me)
Adobe PostScript driver (AdobePS 4.4) for Windows 95/98/Me, including a
PPD file to add Panasonic printer information to the driver. Refer to section
“1.2 Installing the Printer Driver (AdobePS 4.4)” to install the printer driver.
Printer Driver (for Windows NT 4.0)
Adobe PostScript driver (AdobePS 5.1) for Windows NT 4.0, including a PPD
file to add Panasonic printer information to the driver. Refer to section “2.2
Installing the Printer Driver (AdobePS 5.1)” to install the printer driver.
Printer Driver (for Windows 2000)
Microsoft PostScript driver (MS PScript 5) for Windows 2000, including a PPD
file to add Panasonic printer information to the driver. Refer to section “3.2
Installing the Printer Driver (Microsoft PScript 5)” to install the printer driver.
ATM (for Windows 95/98/Me and Windows NT 4.0)
Adobe Type Manager for Windows 95/98/Me and Windows NT 4.0.
Adobe Screen Fonts (for Windows 95/98/Me and Windows NT 4.0)
Includes 136 typefaces of screen fonts which are standard for Adobe PostScript
3. There are 19 TrueType fonts and 117 PostScript fonts. To install these fonts,
open the Fonts folder in Control Panel and from the “File” menu, choose the
appropriate command.
Acrobat Reader (for Windows 95/98/Me, Windows NT 4.0 and Windows 2000)
Adobe Acrobat Reader for Windows 95/98/Me, Windows NT 4.0 and Windows
2000 to view and print PDF (Portable Document Format) files.
ii
Page 5

Printer Driver (for Macintosh)
Adobe PostScript driver (AdobePS 8.5/8.7) for Macintosh. Refer to section “4.3
Installing the Printer Driver (AdobePS 8.5/8.7)” for the details.
PS Utility (for Macintosh)
This is used to specify printer settings from Macintosh. Refer to section “4.6
Panasonic PS Utility” for the details.
ATM (for Macintosh)
Adobe Type Manager for Macintosh.
Adobe Screen Fonts (for Macintosh)
Includes 136 typefaces of screen fonts which are standard for Adobe PostScript
3. There are 19 TrueType fonts and 117 PostScript fonts. In addition, 37
PostScript fonts of the Central European (CE) character set are included. Refer
to section “4.5 Installing the Adobe Screen Fonts” to install the fonts.
Acrobat Reader (for Macintosh)
Adobe Acrobat Reader for Macintosh to view and print PDF files.
iii
Page 6

Contents
Preface........................................................................................................ i
PostScript Driver Library ......................................................................... ii
Contents ................................................................................................... iv
About the Attached CD-ROM................................................................. vi
Using These Operating Instructions ....................................................... vii
Chapter 1 Installing the Printer Driver for Windows 95/98/Me
1.1 About the Software ...................................................................................... 2
1.1.1 Bundled Software ............................................................................ 2
1.1.2 Hardware/Software Requirements................................................... 2
1.2 Installing the Printer Driver (AdobePS 4.4)................................................ 3
1.2.1 Method of Installation ..................................................................... 3
1.2.2 Optional Settings ............................................................................. 7
1.2.3 Features List..................................................................................... 8
1.3 Using Help ................................................................................................. 11
Chapter 2 Installing the Printer Driver for Windows NT 4.0
2.1 About the Software .................................................................................... 14
2.1.1 Bundled Software .......................................................................... 14
2.1.2 Hardware/Software Requirements................................................. 14
2.2 Installing the Printer Driver (AdobePS 5.1).............................................. 15
2.2.1 Method of Installation ................................................................... 15
2.2.2 Optional Settings ........................................................................... 20
2.2.3 Printer Features .............................................................................. 21
2.3 Using Help ................................................................................................. 23
Chapter 3 Installing the Printer Driver for Windows 2000
3.1 About the Software .................................................................................... 26
3.1.1 Bundled Software .......................................................................... 26
3.1.2 Hardware/Software Requirements................................................. 26
iv
3.2 Installing the Printer Driver (Microsoft PScript 5) ................................... 27
3.2.1 Method of Installation ................................................................... 27
3.2.2 Optional Settings ........................................................................... 32
3.2.3 Printer Features .............................................................................. 33
3.3 Using Help ................................................................................................. 36
Page 7

Chapter 4 Installing the Printer Driver for Macintosh
4.1 Configuring the Printer .............................................................................. 38
4.1.1 Enabling Port and Setting Protocol ............................................... 38
4.1.2 Other Settings ................................................................................ 40
4.2 About the Software .................................................................................... 41
4.2.1 Bundled Software .......................................................................... 41
4.2.2 Hardware/Software Requirements................................................. 41
4.3 Installing the Printer Driver (AdobePS 8.5/8.7)........................................ 42
4.3.1 Installing the Printer Driver........................................................... 42
4.3.2 Configuring the Printer Driver ...................................................... 44
4.4 Printer Features .......................................................................................... 47
4.4.1 Printer Specific Options................................................................. 47
4.5 Installing the Adobe Screen Fonts............................................................. 49
Appendix
A Cautions/Limitations.................................................................................. 52
Index...................................................................................................... 54
v
Page 8

About the Attached CD-ROM
The following are files included in CD-ROM “PostScript Printer Driver & Documentation”.
About the attached CD-ROM
CD-ROM for the PS3 (PostScript 3) kit: “PostScript Printer Driver &
Documentation (Macintosh/Windows)”
• AdobePS (Adobe PS printer drivers and PPD files)
(for Windows 95/98/Me, Windows NT 4.0, Windows 2000, Macintosh)
• ATM (Adobe Type Manager)
(for Windows 95/98/Me, Windows NT 4.0, Macintosh)
• SFONT (Adobe PS 3 Screen Font) (TrueType/Type 1)
(for Windows 95/98/Me, Windows NT 4.0, Macintosh)
• ACROBAT (Adobe Acrobat Reader)
(for Windows 95/98/Me, Windows NT 4.0, Windows 2000, Macintosh)
• Manual (in PDF format):
PostScript.pdf: “Operating Instructions (For PostScript)”
• Readme.txt
Manuals Bundled With DP-6000/7000
Several manuals are bundled with DP-6000/7000 machine, including Operating
Instructions (For Copier), Operating Instructions (For Printer), and Operating
Instructions (For Scanner). These manuals explain how to set up, manage, and
use the machine.
vi
Page 9

Using These Operating Instructions
Organization of This Manual
The following is a brief summary of each chapter.
Chapter 1 Installing the Printer Driver for Windows 95/98/Me
This chapter explains the procedure of installing the Adobe printer driver on
Microsoft Windows 95/98/Me operating systems, the necessary settings and the
items that can be set during printing.
Chapter 2 Installing the Printer Driver for Windows NT 4.0
This chapter explains the procedure of installing the Adobe printer driver on
Microsoft Windows NT Workstation operating system version 4.0 and
Microsoft Windows NT
necessary settings and the items that can be set during printing.
Server network operating system version 4.0, the
Chapter 3 Installing the Printer Driver for Windows 2000
This chapter explains the procedure of installing the Microsoft Windows 2000
printer driver on Microsoft Windows 2000 operating system and Microsoft
Windows 2000 Server network operating system, the necessary settings and the
items that can be set during printing.
Chapter 4 Installing the Printer Driver for Macintosh
This chapter explains how to install the printer driver, fonts and utility on the
Macintosh, and at the same time, how to utilize them.
Appendix
This section explains how to download the latest version of the software from
the internet, the points which you have to take note, and the limitations of the
printer.
vii
Page 10
Conventions
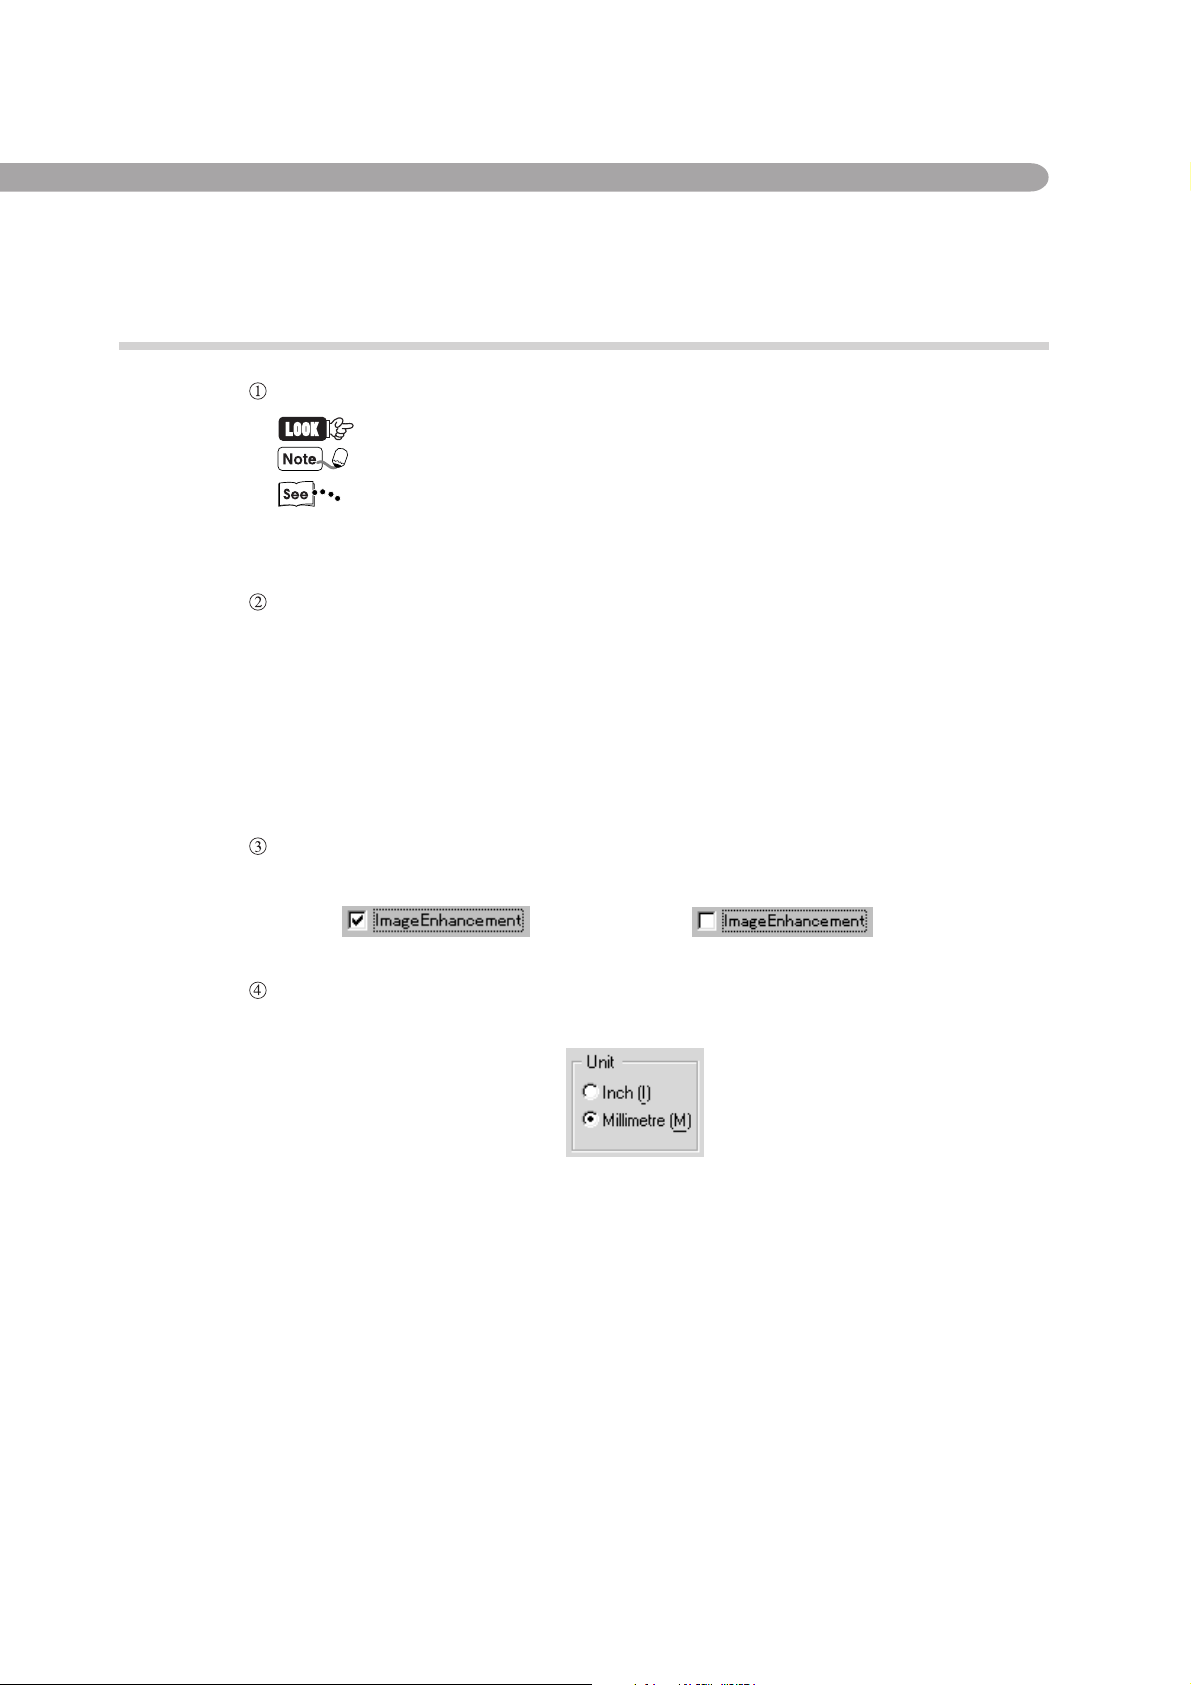
The following icons are used in this manual.
Indicates important information and must be read in detail.
Indicates supplementary information.
Indicates references used in this manual. Manual titles are noted without
double quotes while specific sections like “4.2.2 Hardware/Software
Requirements” are found within double quotes.
The following conventions are used in this manual.
“ ” : Double quotes are used to indicate names of files,
windows, dialog boxes and input contents.
E.g. The “Run” dialog box appears.
Bold face : Boldface characters refer to window menu items,
dialog box items and all kinds of buttons.
E.g. Click OK.
When a checkbox is checked, it indicates ON, otherwise it indicates OFF.
E.g. “Image Enhancement” is on. “Image Enhancement” is off.
The item with the radio button checked is the selected item.
E.g. “Millimetre” is selected.
viii
Page 11

Installing the
Printer Driver for
Windows
95/98/Me
1.1 About the Software................................................................................ 2
1.2 Installing the Printer Driver (AdobePS 4.4) .......................................... 3
1.3 Using Help........................................................................................... 11
Page 12

1.1 About the Software
This section explains the types of software provided and the hardware/software required to
use with the printer when operating on Windows 95,Windows 98 or Windows Me.
1.1.1 Bundled Software
The following items are included in the “Driver PS3\Win9x_Me” folder and
“Utilities\Win9x_Me” folder on the enclosed CD-ROM.
• AdobePS Printer Driver (ver. 4.4x) and PPD files
Adobe PostScript driver and PPD files (for Windows 95/98/Me).
• ATM (Adobe Type Manager) (ver. 4.0)
Helps you to install typefaces, activate and manage your fonts.
• Adobe Screen Fonts (TrueType/PostScript)
Includes 136 screen font typefaces (19 TrueType fonts and 117 PostScript
fonts) which are compatible with the printer fonts. ATM is used to install the
PostScript screen fonts. When using these fonts to print, you are
recommended to use the Adobe PostScript (4.4x) printer driver.
• Acrobat Reader
Enables you to view and print PDF files on all major computing platforms.
• Readme.txt
Contains the cautionary notes on using the printer driver. Be sure to read this.
1.1.2 Hardware/Software Requirements
The operating environment for the Windows 95/98/Me printer driver is as
follows:
Computer System
• i386, i486, or Pentium processor-based personal computer (i486 or Pentium
processor recommended)
• 8 MBytes of available RAM (16 MBytes recommended)
• 6 MBytes of available hard-disk space (8 MBytes required for full driver
installation)
Basic Software
• Windows 95, Windows 98 or Windows Me
2
Page 13

1.2 Installing the Printer Driver
(AdobePS 4.4)
The Adobe printer driver (AdobePS 4.4) can be installed by simply following the
instructions displayed on the dialog boxes. Get ready the enclosed CD-ROM and follow the
procedure below. The following installation procedure is performed in Windows 95.
• Click the Help button for details on the settings and the way of operation.
• Click the Cancel button in the dialog box to end the installation and the Back button to cancel
the setting at that stage and return to the previous dialog box.
1.2.1 Method of Installation
Procedure
Switch on the printer.
1
Installing the Printer Driver for Windows 95/98/Me
Switch on the computer and start Windows 95.
Click the “Start” menu and select Settings, then Printers.
The “Printers” window appears.
You can also double-click the Printers icon on “My Computer” window.
Double-click the “Add Printer” icon on the “Printers” window.
Follow the instructions and click Next.
If the printer is to be connected directly to the computer, select Local
printer. Otherwise, select Network printer.
Here, we select Local printer as an example.
3
Page 14

1.2 Installing the Printer Driver (AdobePS 4.4)
Click Next.
If Network printer is selected, enter the Network path or queue name and
then click Next. You can also click the Browse button and search the
network for the printer.
Click Have Disk.
Steps to are not necessary depending on the network environment
settings you are using.
The “Install From Disk” dialog box is displayed.
Insert the CD-ROM, enter “F:\Driver_PS3\Win9x_Me” and click OK.
In this manual, “F:” is used as a CD-ROM drive, but if you are using a
different drive for the CD-ROM, please specify accordingly.
The “Add Printer Wizard” dialog box is displayed.
4
Page 15

1.2 Installing the Printer Driver (AdobePS 4.4)
From the printers available, select Panasonic DP-6000/7000 PS and
click Next.
Select the port to be used and click Next.
Refer to the printer/scanner kit or the manuals bundled with the printer
that contain information about the printer features for the details of
configuring the port.
1
Installing the Printer Driver for Windows 95/98/Me
Input the printer name. Choose whether you want to use the printer as the
default printer, then click Next.
To change the printer name, enter a name of your choice in the text box.
Otherwise the printer name displayed in the text box will be used.
Select Yes if you want to use the printer as the default printer.
5
Page 16

1.2 Installing the Printer Driver (AdobePS 4.4)
After the printer is installed, specify whether to print the test page by
clicking Yes or No. Then click Finish. If you have selected Yes to print
test page, a test page will be printed after the installation is finished.
The “End User License Agreement” dialog box is displayed.
Click Accept.
The file is copied and installation of the printer driver is completed. Take
out the CD-ROM. If you have selected to test print, a dialog box is
displayed. Click Yes if the test print is printed correctly. If it is not, click
No and follow the instructions on the dialog box.
• Select the Decline button and a dialog box “The installation is
incomplete. If you exit now, the driver may not be installed correctly. Do
you want to exit now?” is displayed.
• Store the CD-ROM properly.
6
Page 17

1.2.2 Optional Settings
1.2 Installing the Printer Driver (AdobePS 4.4)
To configure optional settings installed on the printer, select the “Options” tab
on the “Printer Properties” dialog box. The following shows how to display the
“Options” tab.
Procedure
Click on the printer icon on the “Printers” window.
From the “File” menu, click Properties.
Click the “Options” tab.
1
Installing the Printer Driver for Windows 95/98/Me
Hardware Options
Option Paper Source
Option Output Tray
Memory Configuration
Specify the type of option sheet feeder installed. The options
available are 3 Trays + Multi-Tray*, 4 Trays (default), 3 Trays
(HCF) + Multi-Tray* and 4 Trays (HCF). If the High Capacity
Feeder (HCF) is installed on your printer, select 4 Trays (HCF).
* Multi-Tray is not available in the DP-6000/7000.
Specify the type of option output tray installed on your printer. The
options available are Main Tray (default) and Finisher.
The standard memory for this machine is 96 MBytes and this setting
cannot be changed.
7
Page 18
1.2 Installing the Printer Driver (AdobePS 4.4)
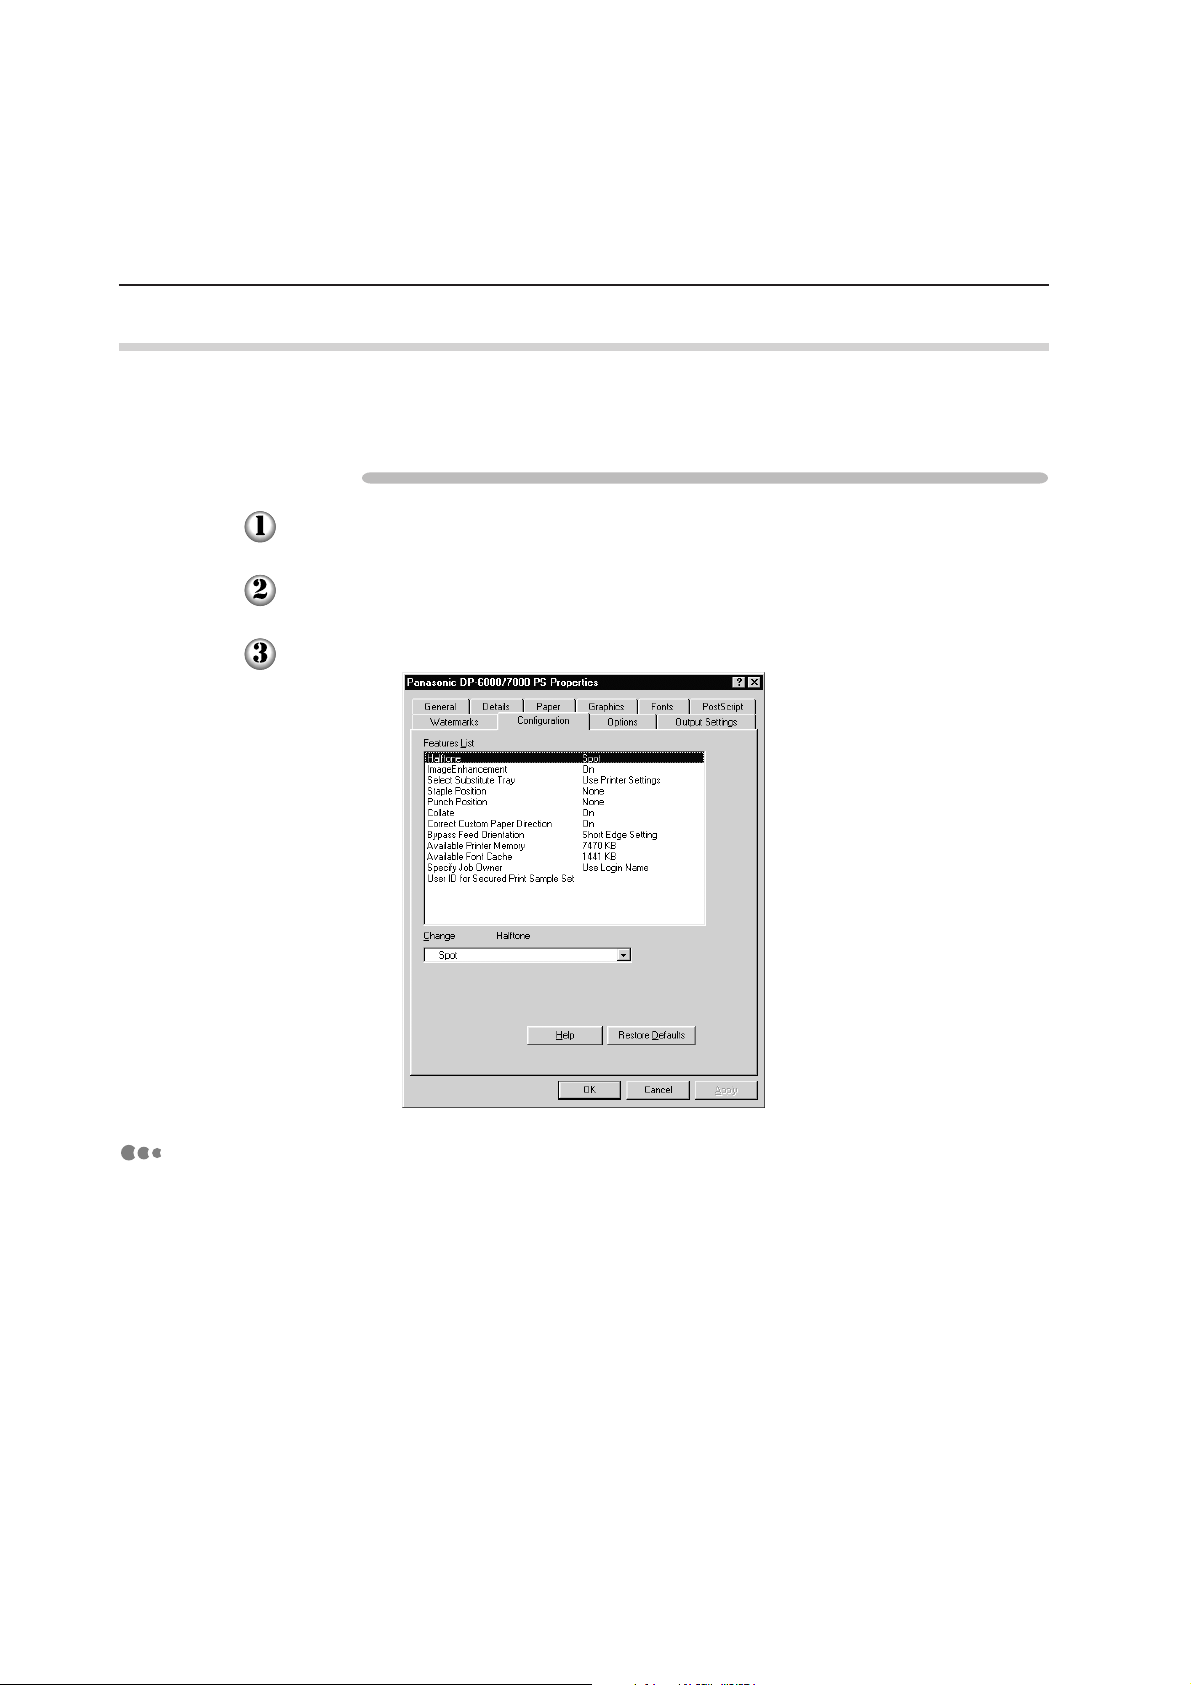
1.2.3 Features List
To do settings for the features list, click the “Configuration” tab on the “Printer
Properties” dialog box.
Procedure
Click on the printer icon on the “Printers” window.
From the “File” menu, click Properties.
Click the “Configuration” tab.
Features List
Halftone
Select here the type of toning pattern you want. The settings that are
selectable in the application may become invalid.
Image Enhancement
Reduce the slipping and jagging of the black and white boundary and
increase the pseudo resolution.
8
Page 19

1.2 Installing the Printer Driver (AdobePS 4.4)
Select Substitute Tray
The following selections are available:
Use Printer Settings
Nearest size (Adjust to Fit)
Nearest size (No Zoom)
Next larger size (Adjust to Fit)
Next larger size (No Zoom)
Abort Job
Staple Position
Specify whether you want the documents to be stapled and where
you want them stapled.
Punch Position
Specify whether you want the documents to be punched and where
you want them punched.
Collate
Specify whether you want the documents to be collated or not.
1
Installing the Printer Driver for Windows 95/98/Me
Correct Custom Paper Direction
When you are using a non-standard paper size, select the paper
direction. Depending on the application, printing may be done
incorrectly on the non-standard sized paper. Select On to avoid this.
Bypass Feed Orientation
Specify Short Edge Setting or Long Edge Setting.
Available Printer Memory
Specify the memory in KB that can be used as the printer memory.
Enter an integer between 0 and 200000.
Available Font Cache
Specify the font cache in KB that can be used. Enter an integer
between 0 and 25600.
9
Page 20

1.2 Installing the Printer Driver (AdobePS 4.4)
Specify Job Owner
The following selections are available:
Use Login Name
Use the Windows Logon Name as a job owner name. The job owner
name will become the “Logon User Name\Host Name”. Up to 31
characters can be used for the logon name. If it exceeds 31
characters, only the first 31 characters will be used.
Input Owner Name
Select this if you wish to specify a custom job owner name. Enter
any job owner name in the “Job Owner Name” edit box. Up to 31
characters can be entered for the job owner name. If it exceeds 31
characters, only the first 31 characters will be used. Its default value
is “Unknown User”.
User ID for Secured Print Sample Set
Specify the user ID for Secured Print or Sample Set with a maximum
of 24 alphanumeric characters. If the user ID is previously specified,
it will be displayed in the edit box. If you are using Secured Print,
you will also be prompted to enter the password. You can enter up to
four digits and each input digit is represented by an asterisk.
10
Page 21

1.3 Using Help
Follow the procedure below to use Help and to define the settings.
Procedure
The button is located at the top right corner of the “Print” or
“Properties” dialog box.
1
Installing the Printer Driver for Windows 95/98/Me
Click . A “?” mark appears next to the mouse pointer. Move the
mouse pointer with the “?” mark to the item which you wish to know
more about and click on it. This will display a pop-up message with
information about that item.
The pop-up message disappears when you click again anywhere on the
screen. You can also click directly on the displayed Help button for
information about the selected tab.
11
Page 22

This page is intentionally left blank.
Page 23

Installing the
Printer Driver for
Windows NT 4.0
2.1 About the Software.............................................................................. 14
2.2 Installing the Printer Driver (AdobePS 5.1) ........................................ 15
2.3 Using Help........................................................................................... 23
Page 24

2.1 About the Software
This section explains the types of software provided and the hardware/software required to
®
use with the printer when operating on Windows
2.1.1 Bundled Software
The following items are included in the “Driver_PS3\NT40” folder and
“Utilities\NT40” folder on the enclosed CD-ROM.
•
AdobePS printer driver (ver. 5.1) and PPD files
Adobe PostScript driver and PPD files (for Windows NT 4.0).
•
ATM (Adobe Type Manager) (ver. 4.0)
Helps you to install typefaces, activate and manage your fonts.
•
Adobe Screen Fonts (TrueType/PostScript)
Includes 136 screen font typefaces (19 TrueType fonts and 117 PostScript
fonts) which are compatible with the printer fonts. ATM is used to install the
PostScript screen fonts. When using these fonts to print, you are
recommended to use the Adobe PostScript (5.1) printer driver.
•
Acrobat Reader
Enables you to view and print PDF files on all major computing platforms.
•
Readme.txt
Contains the cautionary notes on using the printer driver. Be sure to read this.
NT 4.0.
2.1.2 Hardware/Software Requirements
The operating environment for the Windows NT 4.0 printer driver is as follows:
Computer System
•
i486 or Pentium processor-based personal computer (i486 or Pentium
processor recommended)
•
16 MBytes of available RAM (32 MBytes recommended)
•
6 MBytes of available hard-disk space
Basic Software
•
Windows NT Workstation 4.0/Windows NT Server 4.0 (Service Pack 5 or
above)
14
Page 25

2.2 Installing the Printer Driver
(AdobePS 5.1)
The Adobe printer driver (AdobePS 5.1) can be installed by simply following the instructions
displayed on the dialog boxes. Get ready the enclosed CD-ROM and follow the procedure
below.
• Click the Help button for details on the settings and the method of operation.
• Click the Cancel button in the dialog box to end the installation and the Back button to cancel the
setting at that stage and return to the previous dialog box.
2
2.2.1 Method of Installation
Procedure
Start Windows NT 4.0. Click the “Start” menu, select Printers from
“Settings” and then double-click the “Add Printer” icon.
Logon as a member of the “Power User” group or as the
“Administrator”. Refer to the user guide for Windows NT
information on the “Power User” group.
Indicate how the printer is connected to your computer. Then click Next.
If the printer is directly connected to your computer, select My
Computer. Otherwise, select Network printer server.
4.0 for
Installing the Printer Driver for Windows NT 4.0
The “Add Printer Wizard” dialog box changes display.
15
Page 26

2.2 Installing the Printer Driver (AdobePS 5.1)
Select the port in Available ports and click Next.
The “Add Printer Wizard” dialog box is displayed.
Click Have Disk.
16
The “Install From Disk” dialog box is displayed.
Page 27

2.2 Installing the Printer Driver (AdobePS 5.1)
Insert the CD-ROM, enter “F:\Driver_PS3\NT40” and click OK.
In this manual, “F:” is used as a CD-ROM drive, but if you are using a
different drive for the CD-ROM, please specify accordingly.
From the printers available, select DP-6000/7000 PS and click Next.
2
Installing the Printer Driver for Windows NT 4.0
17
Page 28

2.2 Installing the Printer Driver (AdobePS 5.1)
Input the printer name. Choose whether you want to use the printer as the
default printer, then click Next.
To change the printer name, enter a name of your choice in the text box.
Otherwise the printer name displayed in the text box will be used.
Select Yes if you want to use the printer as the default printer.
Choose whether you want to share this printer with the other network
users. Click Next.
If you choose Shared, input a name for the printer in the “Share Name”
text box and then select the operating system of all computers that will be
printing to this printer.
18
Page 29

2.2 Installing the Printer Driver (AdobePS 5.1)
After the printer is installed, specify whether to print the test page by
clicking Yes or No. Then click Finish. If you have selected Yes to print
test page, a test page will be printed after the installation is finished.
The “End User License Agreement” dialog box is displayed.
Click Accept.
2
Installing the Printer Driver for Windows NT 4.0
The file is copied and installation of the printer driver is completed. Take
out the CD-ROM. If you have selected to test print, a dialog box is
displayed. Click Yes if the test print is printed correctly. If it is not, click
No and follow the instructions on the dialog box.
It is necessary to change the settings on the “Device Settings” tab in
order to use the printer’s optional features. Refer to the next section and
make sure you change the settings.
• Select the Decline button and a dialog box “The installation is
incomplete. If you exit now, the driver may not be installed correctly. Do
you want to exit now?” is displayed.
• Store the CD-ROM properly.
19
Page 30

2.2 Installing the Printer Driver (AdobePS 5.1)
2.2.2 Optional Settings
To configure optional settings installed on the printer, select the “Device
Settings” tab on the “Printer Properties” dialog box. The following shows how to
display the “Device Settings” tab.
Procedure
Click on the printer icon on the “Printers” window.
From the “File” menu, click Properties.
Click the “Device Settings” tab.
20
Install able Options
Memory Configuration
The standard memory for this machine is 96 MBytes and this setting
cannot be changed.
Option Paper Source
Specify the type of optional sheet feeder installed on your printer.
Option Output Tray
Specify the type of option output tray installed on your printer.
Page 31

2.2.3 Printer Features
To do settings for the features list, select the “Advanced” tab on the “Printer
Properties” dialog box.
2.2 Installing the Printer Driver (AdobePS 5.1)
Procedure
Click on the printer icon on the “Printers” window.
From the “File” menu, click Document Defaults.
Click the “Advanced” tab.
Click Document Options.
2
Installing the Printer Driver for Windows NT 4.0
Printer Features
Halftone
Select here the type of toning pattern you want. The settings that are
selectable in the application may become invalid.
Image Enhancement
Reduce the slipping and jagging of the black and white boundary and
increase the pseudo resolution.
21
Page 32

2.2 Installing the Printer Driver (AdobePS 5.1)
Output Destination
Specify the type of output tray installed on your printer. The options
available are Main Tray/Finisher Tray 1 and Finisher Tray 2.
Staple Position
Specify whether you want the documents to be stapled and where
you want them stapled.
Punch Position
Specify whether you want the documents to be punched and where
you want them punched.
Bypass Feed Orientation
Specify Short Edge Setting or Long Edge Setting.
Select Substitute Tray
The following selections are available:
Use Printer Settings
Nearest size (Adjust to Fit)
Nearest size (No Zoom)
Next larger size (Adjust to Fit)
Next larger size (No Zoom)
Abort Job
Correct Custom Paper Direction
When you are using a non-standard paper size, select the paper
direction. Depending on the application, printing may be done
incorrectly on the non-standard sized paper. Select On to avoid this.
22
Page 33

2.3 Using Help
Follow the procedure below to use Help and to define the settings.
Procedure
The button is located at the top right corner of the dialog box.
2
Installing the Printer Driver for Windows NT 4.0
Click . A “?” mark appears next to the mouse pointer. Move the mouse
pointer with the “?” mark to the item which you wish to know more about
and click on it. This will display a pop-up message with information
about that item.
The pop-up message disappears when you click again anywhere on the
screen.
23
Page 34

This page is intentionally left blank.
Page 35

Installing the
Printer Driver for
Windows 2000
3.1 About the Software.............................................................................. 26
3.2 Installing the Printer Driver (Microsoft PScript 5).............................. 27
3.3 Using Help........................................................................................... 36
Page 36

3.1 About the Software
This section describes the software provided and the hardware/software required to use with
the printer when operating on Windows 2000.
3.1.1 Bundled Software
The following items included on the enclosed CD-ROM are necessary for usage
of the printer on Windows 2000.
•
Microsoft PScript 5 Driver and PPD files
Microsoft PScript 5 Driver and PPD files (for Windows 2000)
•
Acrobat Reader
Enables you to view and print PDF files on all major computing platforms.
•
Readme.txt
Contains the cautionary notes on using the printer driver. Be sure to read
this.
3.1.2 Hardware/Software Requirements
The operating environment for the Windows 2000 printer driver is as follows:
Computer System
•
i486 or Pentium processor-based personal computer (i486 or Pentium
processor recommended)
•
16 MBytes of available RAM (32 MBytes recommended)
•
6 MBytes of available hard-disk space
Basic Software
•
Windows 2000 Professional
•
Windows 2000 Server
•
Windows 2000 Advanced Server
26
Page 37

3.2 Installing the Printer Driver
(Microsoft PScript 5)
The Microsoft printer driver can be installed by simply following the instructions displayed
on the dialog boxes. Get ready the enclosed CD-ROM and follow the procedure below.
• Click the Help button for details on the settings and the method of operation.
• Click the Cancel button in the dialog box to end the installation and the Back button to cancel
the setting at that stage and return to the previous dialog box.
3.2.1 Method of Installation
Procedure
Start Windows 2000 and click My Computer> Control Panel>Printers.
Then double-click the “Add Printer” icon.
The “Add Printer Wizard” dialog box is displayed.
Click Next.
3
Installing the Printer Driver for Windows 2000
27
Page 38

3.2 Installing the Printer Driver (Microsoft PScript 5)
If the printer is directly attached to your computer, click Local printer.
Otherwise, click Network printer.
Select the port to be used and click Next.
28
Click Have Disk.
The “Install From Disk” dialog box is displayed.
Page 39

3.2 Installing the Printer Driver (Microsoft PScript 5)
Insert the CD-ROM, enter “F:\Driver_PS3\Win2000” and click OK.
In this manual, “F:” is used as a CD-ROM drive, but if you are using a
different drive for the CD-ROM, please specify accordingly.
From the printers available, select Panasonic DP-6000/7000 PS. Click
Next.
3
Installing the Printer Driver for Windows 2000
29
Page 40

3.2 Installing the Printer Driver (Microsoft PScript 5)
Input the printer name. Choose whether you want to use the printer as the
default printer, then click Next. If you do not enter a printer name, the
displayed name is used. Click Yes if you want to use the printer as a
default.
Choose whether you want to share this printer with the other network
users.
If you choose Share as, input a name for the printer in the text box.
Otherwise click Do not share this printer. Click Next.
30
Page 41

3.2 Installing the Printer Driver (Microsoft PScript 5)
Choose whether you want to print a test page by clicking Yes or No.
Click Next.
Click Finish.
3
Installing the Printer Driver for Windows 2000
Copying of the files begins and this completes the installation of the
printer driver. Take out the CD-ROM. If you have selected to test print, a
dialog box is displayed. Click Yes if the test print is printed correctly. If it
is not, click No and follow the instructions on the dialog box.
• It is necessary to change the settings on the “Device Settings” tab in
order to use the printer’s optional features. Refer to the next section and
make sure you change the settings.
• Store the CD-ROM properly.
31
Page 42

3.2 Installing the Printer Driver (Microsoft PScript 5)
3.2.2 Optional Settings
To configure optional settings installed on the printer, select the “Device
Settings” tab on the “Printer Properties” dialog box. The following shows how
to display the “Device Settings” tab.
Procedure
Click on the printer icon on the “Printers” window.
From the “File” menu, click Properties.
Click the “Device Settings” tab.
32
Install able Options
Memory Configuration
The standard memory for this machine is 96 MBytes and this setting
cannot be changed.
Option Paper Source
Specify the type of option sheet feeder installed on your printer.
Option Output Tray
Specify the type of option output tray installed on your printer.
Page 43

3.2.3 Printer Features
You can change settings for the printer features and then print.
Procedure
Click on the printer icon on the “Printers” window.
From the “File” menu, click Printing Preferences.
3.2 Installing the Printer Driver (Microsoft PScript 5)
On the “Layout” tab, click Advanced.
On the “Layout” tab, you can display and change the layout of the
document. For example, when Portrait is selected as the printing
orientation, the document can be changed and printed in Landscape
orientation.
3
Installing the Printer Driver for Windows 2000
33
Page 44

3.2 Installing the Printer Driver (Microsoft PScript 5)
Printer Features
Halftone
Select here the type of toning pattern you want. The settings that are
selectable in the application may become invalid.
Image Enhancement
Reduce the slipping and jagging of the black and white boundary and
increase the pseudo resolution.
Output Destination
Specify the output tray installed on your printer. If the optional
Finisher is installed, the options available are Main Tray/Finisher
Tray 1 and Finisher Tray 2.
Staple Position
Specify whether you want the documents to be stapled and where
you want them stapled.
Punch Position
Specify whether you want the documents to be punched and where
you want them punched.
Bypass Feed Orientation
Specify Short Edge Setting or Long Edge Setting.
34
Page 45

3.2 Installing the Printer Driver (Microsoft PScript 5)
Select Substitute Tray
The following selections are available:
Use Printer Settings
Nearest size (Adjust to Fit)
Nearest size (No Zoom)
Next larger size (Adjust to Fit)
Next larger size (No Zoom)
Abort Job
Correct Custom Paper Direction
When you are using a non-standard paper size, select the paper
direction. Depending on the application, printing may be done
incorrectly on the non-standard sized paper. Select On to avoid this.
3
Installing the Printer Driver for Windows 2000
35
Page 46

3.3 Using Help
Follow the procedure below to use Help and to define the settings.
Procedure
The button is located at the top right corner of the dialog box.
Click . A “?” mark appears next to the mouse pointer. Move the mouse
pointer with the “?” mark to the item which you wish to know more about
and click on it. This will display a pop-up message with information
about that item.
The pop-up message disappears when you click again anywhere on the
screen.
36
Page 47

Installing the
Printer Driver for
Macintosh
4.1 Configuring the Printer ......................................................................... 38
4.2 About the Software.............................................................................. 41
4.3 Installing the Printer Driver (AdobePS 8.5/8.7).................................. 42
4.4 Printer Features.................................................................................... 47
4.5 Installing the Adobe Screen Fonts....................................................... 49
Page 48

4.1 Configuring the Printer
When using AppleTalk protocol to print from Macintosh, select Enable for EtherTalk port
from the touch panel display.
•
Using EtherTalk: The printer is connected to the network.
4.1.1 Enabling Port and Setting Protocol
Here, we use enabling EtherTalk on the touch panel display as an example.
Procedure
Press Settings/Meter Check.
Select Tools Mode.
Enter the access number and select Confirm. The default password is set
as “11111”.
38
Page 49

Select Print/Scan Mode Settings.
Select Port Settings.
4.1 Configuring the Printer
4
Installing the Printer Driver for Macintosh
Select EtherTalk.
Select Port Status and then select Change Settings.
39
Page 50

4.1 Configuring the Printer
Select Enable.
4.1.2 Other Settings
Set the following settings when necessary.
•
Print Mode (Default: PostScript)
•
PJL Switch (Default: On)
•
Apple Talk Receive Buffer (Default: 64 KB)
“Chapter 13 Configuring the Tools Mode Screen” in Operating Instructions (for Printer)
for these items.
40
Page 51

4.2 About the Software
This section explains the types of software provided and the hardware/software required to
use with the printer when operating on Macintosh™.
The “Readme.txt” file contains important notes on using the printer driver and you are
recommended to read it.
4.2.1 Bundled Software
Insert the CD-ROM and double-click the CD icon to display the window. The
following items are included in the folder:
•
AdobePS printer driver (ver. 8.5.1, 8.7 and 8.7.1) and PPD files
Adobe PostScript driver and PPD files (for Macintosh).
•
Adobe Screen Fonts
Contains 117 PostScript fonts and 19 TrueType fonts which are standard for
PostScript 3 printers. In addition, 37 PostScript fonts of the Central European
(CE) character set are included.
•
ATM (Adobe Type Manager)
Helps you to install typefaces, activate and manage your fonts. Two versions of
the ATM, version 4.0.2 and 4.5.2, are included for Macintosh. Use version 4.5.2
if your operating system is 9.0.
•
Acrobat Reader
Enables you to view and print PDF files on all major computing platforms.
•
Readme.txt
Contains the cautionary notes on using the printer driver. Be sure to read this.
4.2.2 Hardware/Software Requirements
The following is the operating environment essential for the printer driver and
utility.
4
Installing the Printer Driver for Macintosh
Computer System
•
For Adobe PS 8.5.1:
Mac OS software version 7.1 or later
For Adobe PS 8.7:
An Apple Power Macintosh computer running System 8.1 or later
For Adobe PS 8.7.1:
Mac OS software version 8.6 through 9.1
•
4 MBytes or more of available RAM (32 MBytes recommended)
•
2.1 MBytes of available hard-disk space (4 MBytes recommended)
41
Page 52

4.3 Installing the Printer Driver
(AdobePS 8.5/8.7)
This section explains how to install and configure the printer driver. Get ready the enclosed
CD-ROM and follow the procedure below. Here we will install the Adobe PS 8.7.1 as an
example.
4.3.1 Installing the Printer Driver
There are two steps to install the printer driver. Firstly, use the installer enclosed
in the CD-ROM to install the printer driver to your Macintosh. Then configure
the printer driver according to the printer used.
Refer also to the “Readme.txt” file.
Follow the installation procedure below to install the Adobe PS Printer Driver.
Procedure
Insert the CD-ROM into the CD-ROM drive. Double-click the CD-ROM
icon on the desktop to display its window.
In the “CD-ROM” window, double-click the “Driver PS3” folder and then
the “AdobePS 871” folder. Double-click the AdobePS Installer. The
following window appears.
42
Click Continue.
The “license agreement” dialog box appears.
Page 53

4.3 Installing the Printer Driver (AdobePS 8.5/8.7)
Read through the agreement carefully and if you have no objections to it,
click Accept and Continue.
The “AdobePS Installer 8.7.1” window appears.
Click Install.
4
Installing the Printer Driver for Macintosh
The installation process begins.
A warning message will appear if you did not quit all other applications
before performing the installation.
After the installation is completed, the following message appears. Click Quit
to quit the program, Continue if you wish to perform additional installations
such as the bundled screen fonts, or Restart to restart Macintosh. To ensure
proper operation, it is recommended that you restart the computer.
Next, proceed to configure the printer driver.
43
Page 54

4.3 Installing the Printer Driver (AdobePS 8.5/8.7)
4.3.2 Configuring the Printer Driver
After the installation is completed, you have to set up your printer driver by
selecting the relevant PostScript Printer Description (PPD) files, and configure
the driver by specifying the options installed on your printer. Certain features
related to the options will only be available if you have indicated that they are
installed.
Procedure
Click and hold down the mouse on the “Apple” icon on the top left hand
corner of the desktop. A drop-down menu appears. Select Chooser. The
“Chooser” window appears.
Select or double-click the AdobePS icon in the left scroll box and then
select Panasonic DP-6000/7000 PS on the right. Click Create.
By clicking Create, the relevant PPD file will be selected and the driver will be
configured automatically. The “Chooser” window reappears after the
configuration is completed.
If the automatic configuration of the printer driver cannot be completed
under a certain condition, a screen prompting you to select a PPD file will
appear. Follow the instructions. Then proceed to
.
44
Page 55

4.3 Installing the Printer Driver (AdobePS 8.5/8.7)
Select Panasonic DP-6000/7000 PS from the “Printer Descriptions” list
box, and click Select.
When the printer is set up, a printer icon will be displayed next to
Panasonic DP-6000/7000 PS in the “Chooser” window.
4
Installing the Printer Driver for Macintosh
If the installed options are not set in the printer driver correctly, click
Setup and proceed to the next step.
If none of them are installed on your printer, you may now send print jobs
to the printer.
45
Page 56

4.3 Installing the Printer Driver (AdobePS 8.5/8.7)
Click Configure.
The window listing the various printer options appears.
If you install Adobe PS 8.5, Help button will be displayed on this screen.
Click Help and the explanation for the respective items will be displayed.
Once you have finished reading, click Done to exit.
Specify options installed on your printer. Then click OK.
Memory Configuration
The standard memory for this machine is 96 MBytes and this setting
cannot be changed.
Option Paper Source
If the HCF is installed on your printer, select 4 Trays (HCF).
Option Output Tray
Select the option output tray installed on the printer.
Click OK again to return to the “Chooser” window.
The setting up of the printer is completed.
46
Page 57

4.4 Printer Features
You can set the printer specific options when printing.
4.4.1 Printer Specific Options
The following procedures show how to set the options.
Procedure
Open the application and select Print from the “File” menu.
Select Printer Specific Options.
Printer Specific Options
Specify the printer options. The items that can be selected vary according to the
printer model and optional settings.
4
Installing the Printer Driver for Macintosh
Halftone
Select here the type of toning pattern you want. The settings that are
selectable in the application may become invalid.
47
Page 58

4.4 Printer Features
Image Enhancement
Reduce the slipping and jagging of the black and white boundary and
increase the pseudo resolution.
Output Destination
Specify the output tray. The output trays change according to the
optional settings.
Collate
Specify whether you want the documents to be collated or not.
Staple Position
Specify whether you want the documents to be stapled and where you
want them stapled.
Punch Position
Specify whether you want the documents to be punched and where
you want them punched.
Bypass Feed Orientation
Specify Short Edge Setting or Long Edge Setting.
Select Substitute Tray
The following selections are available:
Use Printer Settings
Nearest size (Adjust to Fit)
Nearest size (No Zoom)
Next larger size (Adjust to Fit)
Next larger size (No Zoom)
Abort Job
Correct Custom Paper Direction
When you are using a non-standard paper size, select the paper
direction. Depending on the application, printing may be done
incorrectly on the non-standard sized paper. Select On to avoid this.
48
Page 59

4.5 Installing the Adobe Screen
Fonts
This section explains how to install the fonts in the Screen Font folder.
It is recommended to close all other applications before installing the fonts. Otherwise, a
warning message will appear between steps
Procedure
Start Macintosh and insert the CD-ROM into the CD-ROM drive.
Double-click on the “CD-ROM” icon followed by the “Screen Font” folder
and then the “PS3FontsInstaller” icon. The following window appears:
and .
4
Installing the Printer Driver for Macintosh
Click Continue.
The “license agreement” dialog appears.
Read through the agreement carefully and if you have no objections to it,
click Accept.
The “PS3FontsInstaller” dialog appears.
49
Page 60

4.5 Installing the Adobe Screen Fonts
You may select Easy Install or Custom Install.
Easy Install installs all the fonts provided in the “Screen Font” folder.
Custom Install installs the selected fonts only. Simply click on the
triangle arrow beside the four categories of fonts to display the fonts in
each category and then check the fonts to be installed. For example, the
diagram below shows that Arial CE of the “CE TrueType” fonts is
selected.
50
A warning message will appear if you did not quit all other applications
before performing the font installation.
Click Install.
The installation of the fonts begins.
After the installation, you have to restart your Macintosh before the fonts
can be used.
Page 61

Appendix
A Cautions/Limitations ........................................................................ 52
Page 62

A Cautions/Limitations
Take note of the following when operating the machine.
Drivers
The cautionary notes of each of the drivers are listed in “Readme.txt” or “Read
Me First”. Be sure to read these before installation.
Stapling and Hole-punching
To staple or hole-punch, set Collate to ON and select Finisher Tray 2 for the
output destination.
The list below shows the types of paper on which the printer can perform the
stapling function. Also listed below are the stapling options for you to choose.
“ ” indicates that the paper in the tray is loaded in the portrait orientation. It does not
refer to the orientation specified on the “Paper” tab dialog box.
•
A3, A4, B4, B5, 8.5x11”, 8.5x13”, 8.5x14”, 11x17” and 8K:
Top Left Corner
Bottom Left Corner
Top Right Corner
Bottom Right Corner
Top Double
Bottom Double
•
A4 , A5 , B5 , 8.5x11” :
Top Left Corner
Bottom Left Corner
Top Right Corner
Bottom Right Corner
Left Double
Right Double
The following are the types of paper used for hole-punching and the possible
options on where to staple.
•
A3, B4, 11x17” :
Top
Bottom
•
A4 , B5 , 8.5x11” :
Left
Right
• The hole-punch/staple position differs according to the orientation of the paper
for paper sizes A4, A5, B5 and 8.5x11”. When you want to make use of the holepunching/stapling feature, make sure that the paper is loaded correctly in the
tray.
• If you have indicated an impossible hole-punch/staple position, the printer may
not print properly.
52
Page 63

Appendix B Cautions/Limitations
Hole-Punching/Stapling Feature for Mixed Size Originals
The stapling/punching function is not available for printing mixed size originals
using the PostScript driver.
Limitations
When the following conditions are indicated, the actual output destination can
only be Finisher Tray 1.
•
Collate is set to OFF and Finisher Tray 2 is selected for the output destination.
Appendix
53
Page 64

Index
A
About the Software
For Macintosh ..................................... 41
For Windows 2000.............................. 26
For Windows 95/98/Me ........................ 2
For WindowsNT4.0............................. 14
Acrobat Reader...................... 2, 14, 26, 41
Adobe Screen Fonts ..................... 2, 14, 41
For Macintosh ......................................iii
For Windows ......................................... ii
Installing.............................................. 49
Adobe Type Manager....... ii, iii, 2, 14, 41
AdobePS 4.4 (Windows 95/98/Me) ........... 3
Installing................................................ 3
AdobePS 5.1 (WindowsNT 4.0) .............. 15
Installing.............................................. 15
AdobePS 8.5/8.7 (Macintosh)............iii, 42
Configuring ......................................... 44
Installing.............................................. 42
AdobePS Installer..................................... 42
E
EtherTalk .................................................. 38
H
Hardware/Software Requirements
For Macintosh ..................................... 41
For Windows 2000.............................. 26
For Windows 95/98/Me ........................ 2
For WindowsNT4.0............................. 14
Help ............................................ 11, 23, 36
I
Installing the Printer Driver
In Macintosh........................................ 42
In Windows 2000 ................................ 27
In Windows 95/98/Me........................... 3
In WindowsNT4.0............................... 15
P
B
Bundled Software
For Macintosh ..................................... 41
For Windows 2000.............................. 26
For Windows 95/98/Me ........................ 2
For WindowsNT 4.0............................ 14
C
Cautions/Limitations ................................ 52
Configuring the Printer Driver
In Macintosh........................................ 44
PostScript Driver Library...........................ii
PostScript Fonts............................ 2, 14, 41
PPD files.......................................2, 14, 26
Printer Driver.............................................iii
Printer Features ........................................ 34
T
TrueType fonts ............................. 2, 14, 41
54
Page 65

U.S.A. only
WARRANTY
PANASONIC DOCUMENT IMAGING COMPANY MAKES NO WARRANTIES, GUARANTEES OR
REPRESENTATIONS, EXPRESSED OR IMPLIED, TO CUSTOMER WITH RESPECT TO THIS
PANASONIC MACHINE, INCLUDING BUT NOT LIMITED TO, ANY IMPLIED WARRANTY OF
MERCHANTABILITY OR FITNESS FOR A PARTICULAR PURPOSE.
PANASONIC DOCUMENT IMAGING COMPANY ASSUMES NO RISK AND SHALL NOT BE SUBJECT
TO LIABILITY FOR ANY DAMAGE, INCLUDING, BUT NOT LIMITED TO DIRECT, INDIRECT, SPECIAL,
INCIDENTAL OR CONSEQUENTIAL DAMAGES OR LOSS OF PROFITS SUSTAINED BY THE
CUSTOMER IN CONNECTION WITH THE USE OR APPLICATION OF THIS PANASONIC MACHINE.
SEE YOUR DEALER FOR DETAILS OF DEALER’S WARRANTY.
For Service Call:
Panasonic Document Imaging Company
A Business Unit of Matsushita Electric Corporation of America
Two Panasonic Way
Secaucus, New Jersey 07094
Panasonic Canada Inc.
5770 Ambler Drive
Mississauga, Ontario L4W 2T3
DZRQ000051 S1001
October 2001
Printed in Japan
 Loading...