

Panasonic CS-C12CKPG, CS-C9CKPG, CU-C12CKP6G, CS-A9CKPG, CU-A12CKP6G User Manual
...
®
Before using your air conditioner, please read
this operating instructions carefully and keep it
for future reference.
Room Air Conditioner
OPERATING INSTRUCTIONS
Before using your air-conditioner, please read this operating instructions
carefully and keep it for future reference.
C
OOLING MODEL
CS-C9CKPG CU-C9CKP6G
CS-C12CKPG CU-C12CKP6G
H
EAT-PUMP MODEL
CS-A9CKPG CU-A9CKP6G
CS-A12CKPG CU-A12CKP6G
:-
Indoor Outdoor
:-
Indoor Outdoor
ENGLISH ....................... P. 1 – P. 11
ESPAÑOL ...................... P. 12 – P. 22
Please register your product at
www.panasonic.com/register
For assistance, please call; (866)-292-7292, for
Hawaii residents call (808)-488-7779.
F563841
Thank you for purchasing our Panasonic Room Air
Conditioner.
CONTENTS
:Features ..................................................... 1
:Safety Precautions .................................... 2
■ Installation Precautions
■ Operation Precautions
:Name of Each Part ................................ 3~4
■ Indoor Unit
■ Outdoor Unit
■ Accessories
■ Remote Control
:Preparation Before Operation .................. 5
■ Indoor Unit
■ Remote Control
:How to Operate ...................................... 5~6
:Setting the Timer ....................................... 7
:Convenience Operation ............................ 7
■ Powerful Mode Operation
■ Economy Mode Operation
■ Quiet Mode Operation
:Care and Maintenance .............................. 8
■ Cleaning the Indoor Unit and Remote Control
■ Cleaning the Air Filter
■ Cleaning the Front Panel
■ Air Purifying Filters
■ Pre-season Inspection
■ When the Air Conditioner is Not Used for an
Extended Period of Time
■ Recommended Inspection
:Helpful Information ................................... 9
:Energy Saving and Operation Hints ........ 9
:Troubleshooting ...................................... 10
■ Normal Operation
■ Abnormal Operation
■ Call the Dealer Immediately
:
Product Specification and Reference
...... 11
FEATURES
● Illuminating Button
For your convenience to operate the unit in the dark.
(Refer page 4)
● Automatic Operation
Sense indoor temperature to select the optimum
mode.
(Refer page 5)
● Quiet Mode
To provide quiet operation.
(Refer page 7)
● Economy Mode
To reduce electrical power consumption.
(Refer page 7)
● Powerful Mode
Reaches the desired room temperature quickly.
(Refer page 7)
● Removable Front Panel
For quick and easy cleaning (washable).
(Refer page 8)
● Air Purifying Filter
This new filter helps trap small airborne particles
such as dust, pollen and tobacco smoke.
(Refer page 8)
● Solar Refreshing Deodorizing Filter
Used to remove unpleasant odor and deodorize the
air in the room.
(Refer page 8)
● Auto Restart Control
Restart the unit automatically after power failure.
(Refer page 9)
! Warning
1) Operate your air conditioner from a stable 115 volts AC
supply.
2) Use a 15 Amps (CS-C9CKPG/CU-C9CKP6G, CSA9CKPG/CU-A9CKP6G) or 20 Amps (CS-C12CKPG/
CU-C12CKP6G, CS-A12CKPG/CU-A12CKP6G) time
delay fuse or a circuit breaker.
3) Disconnect from the main before servicing this
appliance.
4) Do not repair by yourself.
In case of malfunction of this appliance, do not repair by
yourself. Contact the sales dealer or service dealer for
a repair.
5) Turn off the power (Isolation from main power supply).
Switch off the breaker, or switch off the power
disconnecting means to isolate the equipment from the
main power supply in case of an emergency.
POWER SUPPLY
Time Delay Fuse: Rated Volts:
15 Amps : CS-C9CKPG/
CU-C9CKP6G,
CS-A9CKPG/
CU-A9CKP6G
20 Amps : CS-C12CKPG/
CU-C12CKP6G,
CS-A12CKPG/
CU-A12CKP6G
115 V
Note:
Before using your air conditioner, please read
this operating instructions carefully and keep it
for future reference.
1
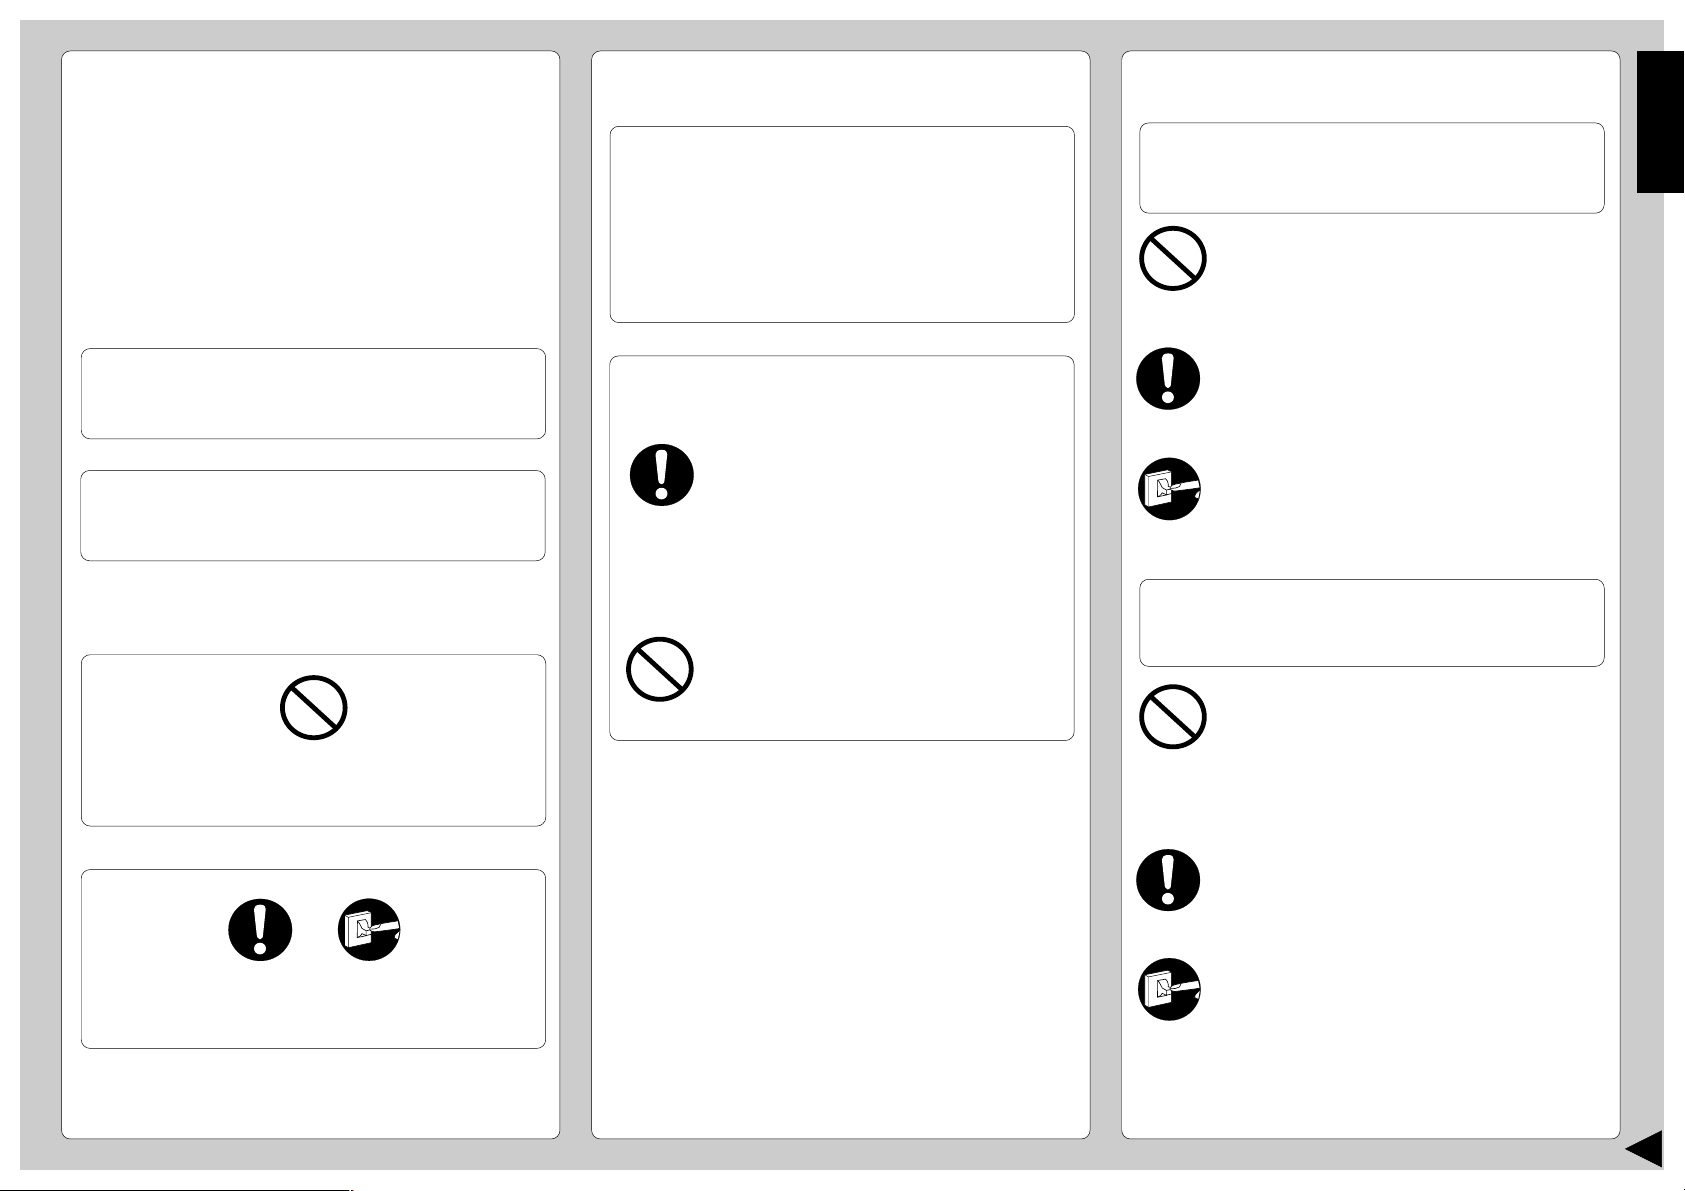
SAFETY PRECAUTIONS
Before operating, please read the following
“Safety Precautions” carefully.
● To prevent personal injury, injury to others and
property damage, the following instructions must be
followed.
● Incorrect operation due to failure to follow instructions
will cause harm or damage, the seriousness of which
is classified as follow:
■ Installation Precautions
! Warning
● Do not install, remove and reinstall the unit by
yourself.
Improper installation will cause leakage, electric
shock or fire. Please engage an authorized dealer
or specialist for the installation work.
ENGLISH
■ Operation Precautions
! Warning
This sign warns of death or serious injury.
● Do not operate with wet hands.
● Do not insert finger or other objects into the
indoor or outdoor units.
● Do not expose directly to cold air for a long
period of time.
! Warning
This sign warns of death or serious injury.
! Caution
This sign warns of damage to property.
● The instructions to be followed are classified by the
following symbols:
This symbol (with a white background) denotes an
action that is PROHIBITED.
F
F
O
! Caution
● This room air conditioner must be
earthed.
Improper grounding could cause
electric shock.
● Ensure that the drainage piping is
connected properly.
Otherwise, water will leak out.
● Do not install the unit in a
potentially explosive atmosphere.
Gas leak near the unit could cause
fire.
● Use specified power cord.
● If abnormal condition (burnt smell, etc.)
F
F
O
occurs, switch off the power supply.
! Caution
This sign warns of injury.
● Do not wash the unit with water.
● Do not use for other purposes such as
preservation.
● Do not use any combustible equipment at
airflow direction.
● Do not sit or place anything on the outdoor
unit.
● Switch off the power supply before cleaning.
● Ventilate the room regularly.
● Pay attention as to whether the installation
rack is damaged after a long period of usage.
These symbols (with a black background) denote
actions that are COMPULSORY.
O
used for a long period.
2
● Switch off the power supply if the unit is not
F
F
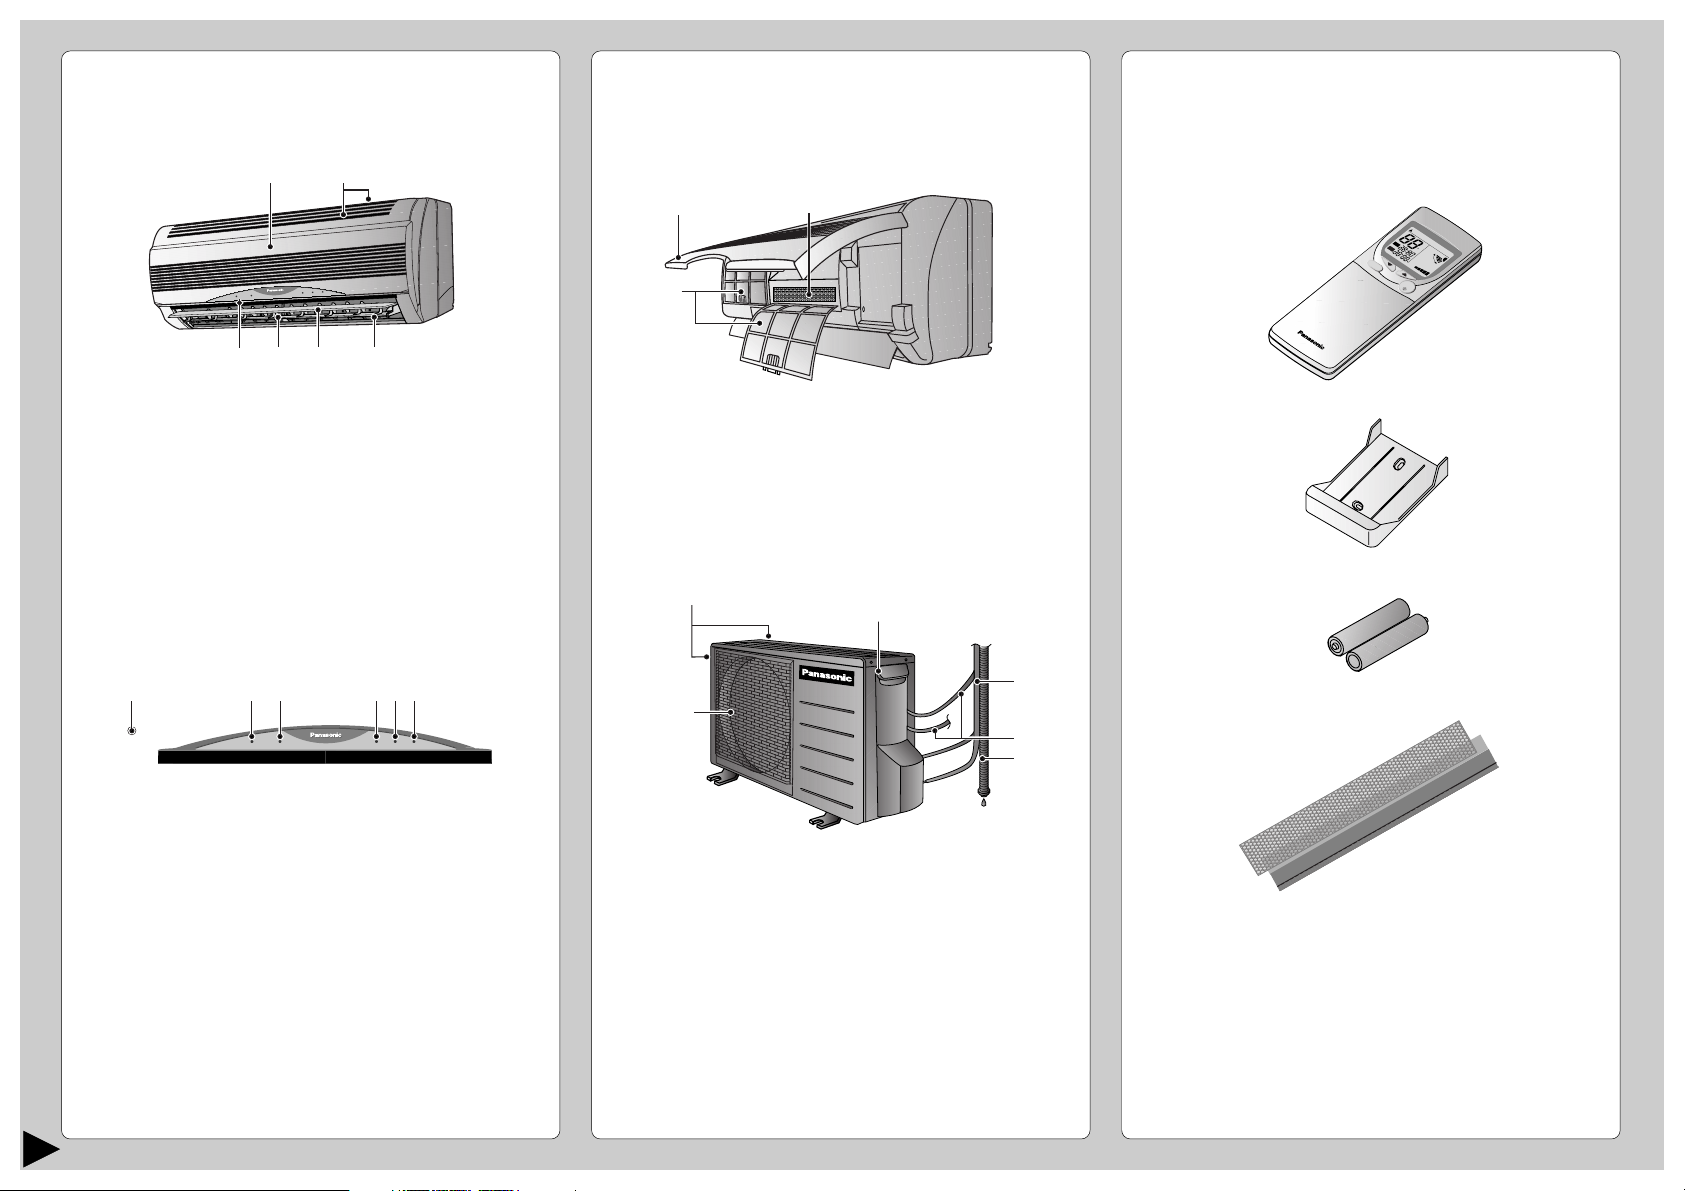
NAME OF EACH PART
AUT
AUT
HEA
T
DR
AN
COOL
AN
AUT
■ Indoor Unit
1
L
L
U
U
F
F
L
L
R
R
U
U
E
E
F
F
W
W
R
R
O
O
E
E
P
P
W
W
O
O
P
P
Y
Y
M
M
O
O
Y
Y
N
N
M
M
O
O
O
O
C
C
N
N
E
E
O
O
C
C
E
E
6
1 Front Panel
2 Air Intake Vent
3 Air Outlet Vent
4 Vertical Airflow Direction Louver
5 Horizontal Airflow Direction Louver
(manually adjusted)
6 Indicator Panel
123 654
POWERFULPOWERFUL
ECONOMYECONOMY POWERPOWER
POWERFULPOWERFUL
ECONOMYECONOMY
2
R
R
E
E
M
M
I
I
R
R
T
T
E
E
M
M
I
I
T
T
T
T
E
E
I
I
U
U
T
T
Q
Q
E
E
I
I
U
U
Q
Q
R
R
E
E
W
W
R
R
O
O
E
E
P
P
W
W
O
O
P
P
345
POWERPOWER
● Indoor Unit
■ Accessories
(when the front panel is opened)
● Remote Control
1
2
1 Front Panel
3
A
U
T
O
H
E
A
T
C
ON
O
O
L
A
O
U
F
D
F
T
R
F
O
YFA
N
A
U
Q
FA
TEMP
T
U
O
N
IE
T
MODE
OFF/ON
A
E
I
R
C
S
O
S
tep
N
W
O
I
M
N
Y
1
G
O
N
O
C
H
E
C
K
R
E
S
E
T
SLEEP
2
F
F
FA
N
S
P
E
E
D
3
TIM
S
ET
E
R
C
A
C
N
L
O
C
C
E
K
L
+
B
A
T
T
E
R
Y
● Remote Control Holder
2 Air Filters
3 Air Purifying Filter
■ Outdoor Unit
● Two RO3 (AAA) dry-cell batteries or equivalent
1
6
QUIETQUIET
TIMERTIMER
QUIETQUIET
TIMERTIMER
2
3
● Air Purifying Filter
4
5
1 Auto Operation Button
(when the front panel is opened)
2 Economy Mode Indicator – GREEN
3 Powerful Mode Indicator – ORANGE
4 Power Indicator – GREEN
5 Quiet Mode Indicator – ORANGE
6 Timer Mode Indicator – ORANGE
3
1 Air Intake Vents
2 Ground Terminal
(Inside cover)
3 Piping
4 Conduit
5 Drain Hose
6 Air Outlet Vents
(Air Purifying Filter)
(Solar Refreshing Deodorizing Filter)
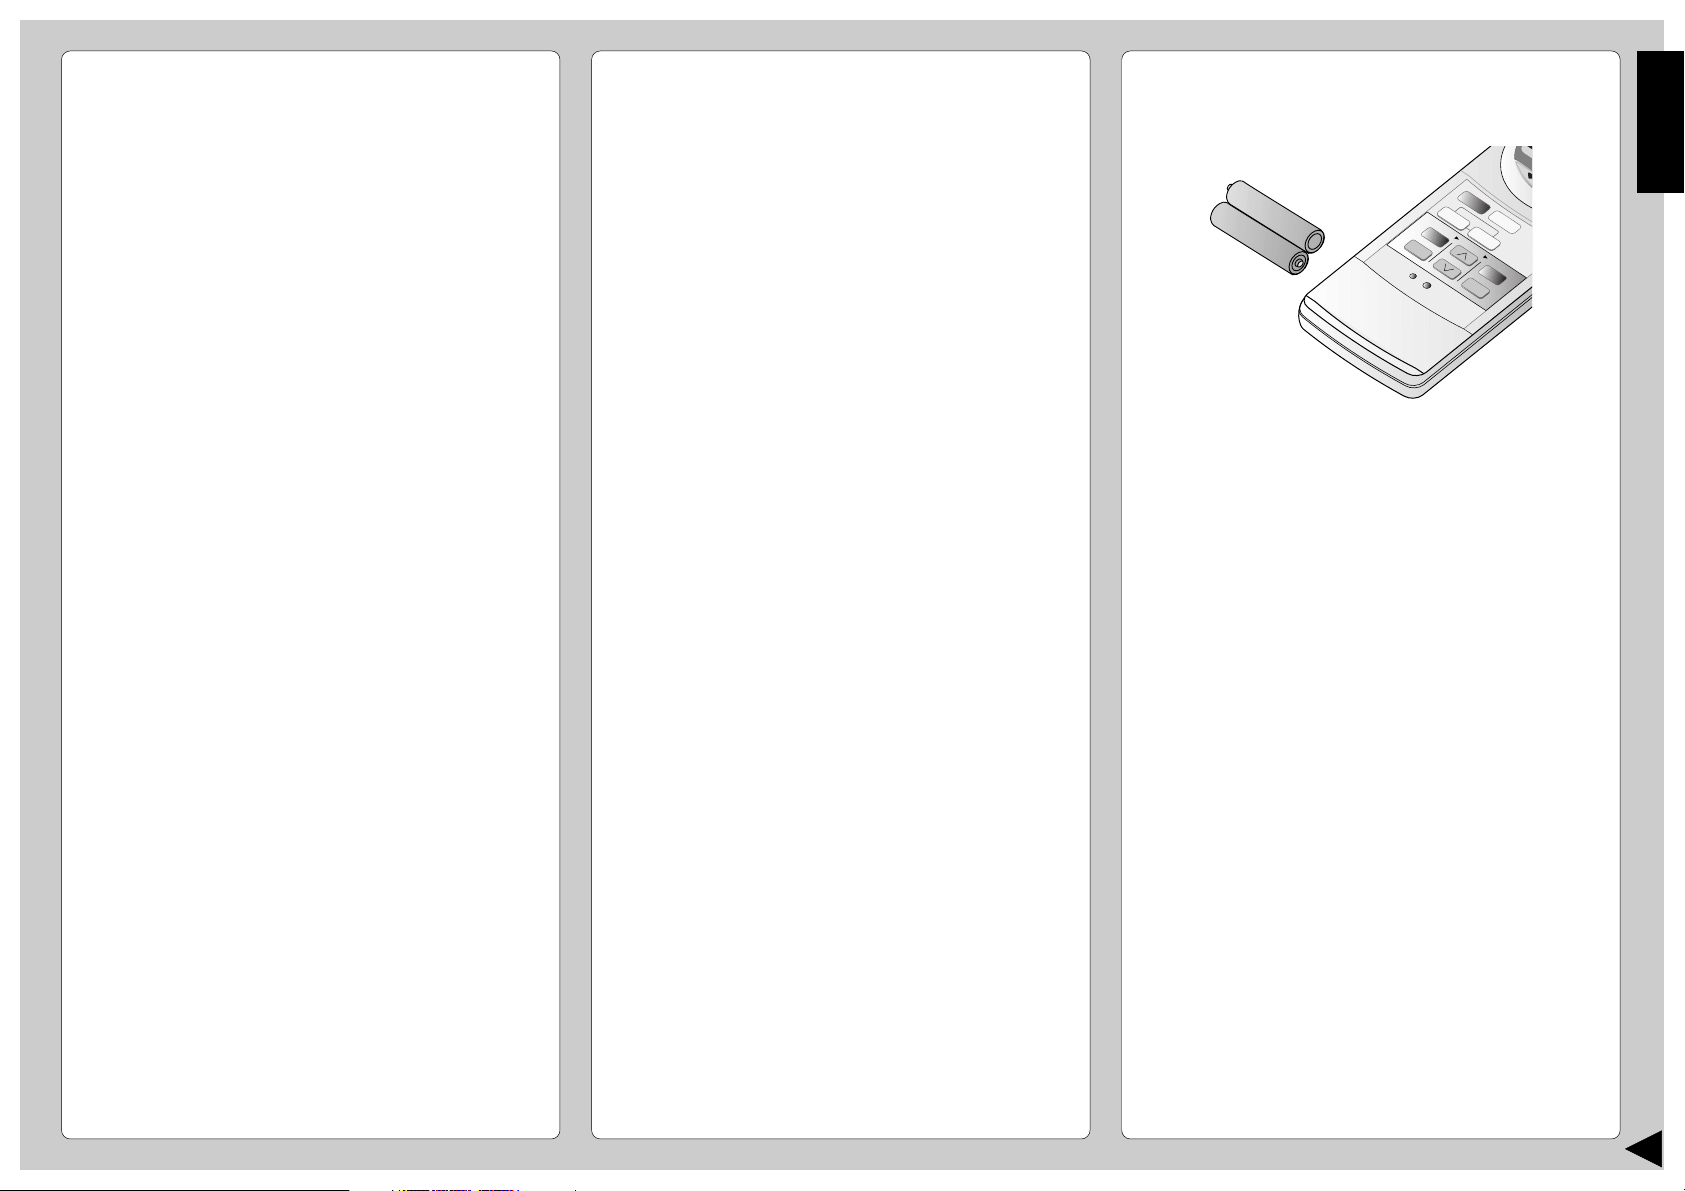
● How to Insert the Batteries
AUTO
O
F
AUTOHEAT
DRY
FANCOOL
FAN
AUTO
AUTO
A
IR
S
W
IN
G
1
O
C
H
E
C
K
R
E
S
E
T
2
FF
T
I
M
C
L
O
C
K
3
E
R
CANCEL
1 Slide down the remote control cover completely
to remove it.
2 Insert the batteries
– Be sure the direction is correct
– 12:00 on display - flashing
• Set the current time (CLOCK) immediately to
prevent battery exhaustion.
ENGLISH
3 Re-install the remote control cover by inserting it
in the side groves and pushing inward.
● About the batteries
• Can be used for approximately one year.
● Observe the following when replacing the
batteries
• Replace with new batteries of the same type.
• Do not use rechargeable batteries (Ni-Cd).
• Remove the batteries if the unit is not going to be
used for a long period.
4
PREPARATION BEFORE OPERATION
CHECK
AUTO
AUTO H EAT DRY FANCOOL
FAN
AUTO
RESET CLOCK
FAN SPEED
AIR SWING
OFF
CANCEL
ON
SET
1
2
3
TIMER
AUTO
MANUAL
1
2
O
F
F
ON
HEAHEAT
DRDRY
FANANCOOLCOOL
C
H
E
C
K
TEMP
AUTAUTO
A
U
T
AUTO
FA
N
AN
A
U
T
AUTO
R
E
S
E
T
C
L
O
C
K
AIR SWING
O
FF
CANCEL
1
2
3
TIMER
O
F
F
/O
N
QUIET
AUTO
MANUAL
E
C
O
N
O
M
Y
P
O
W
E
R
F
U
L
O
N
SET
FAN SPEED
MODE
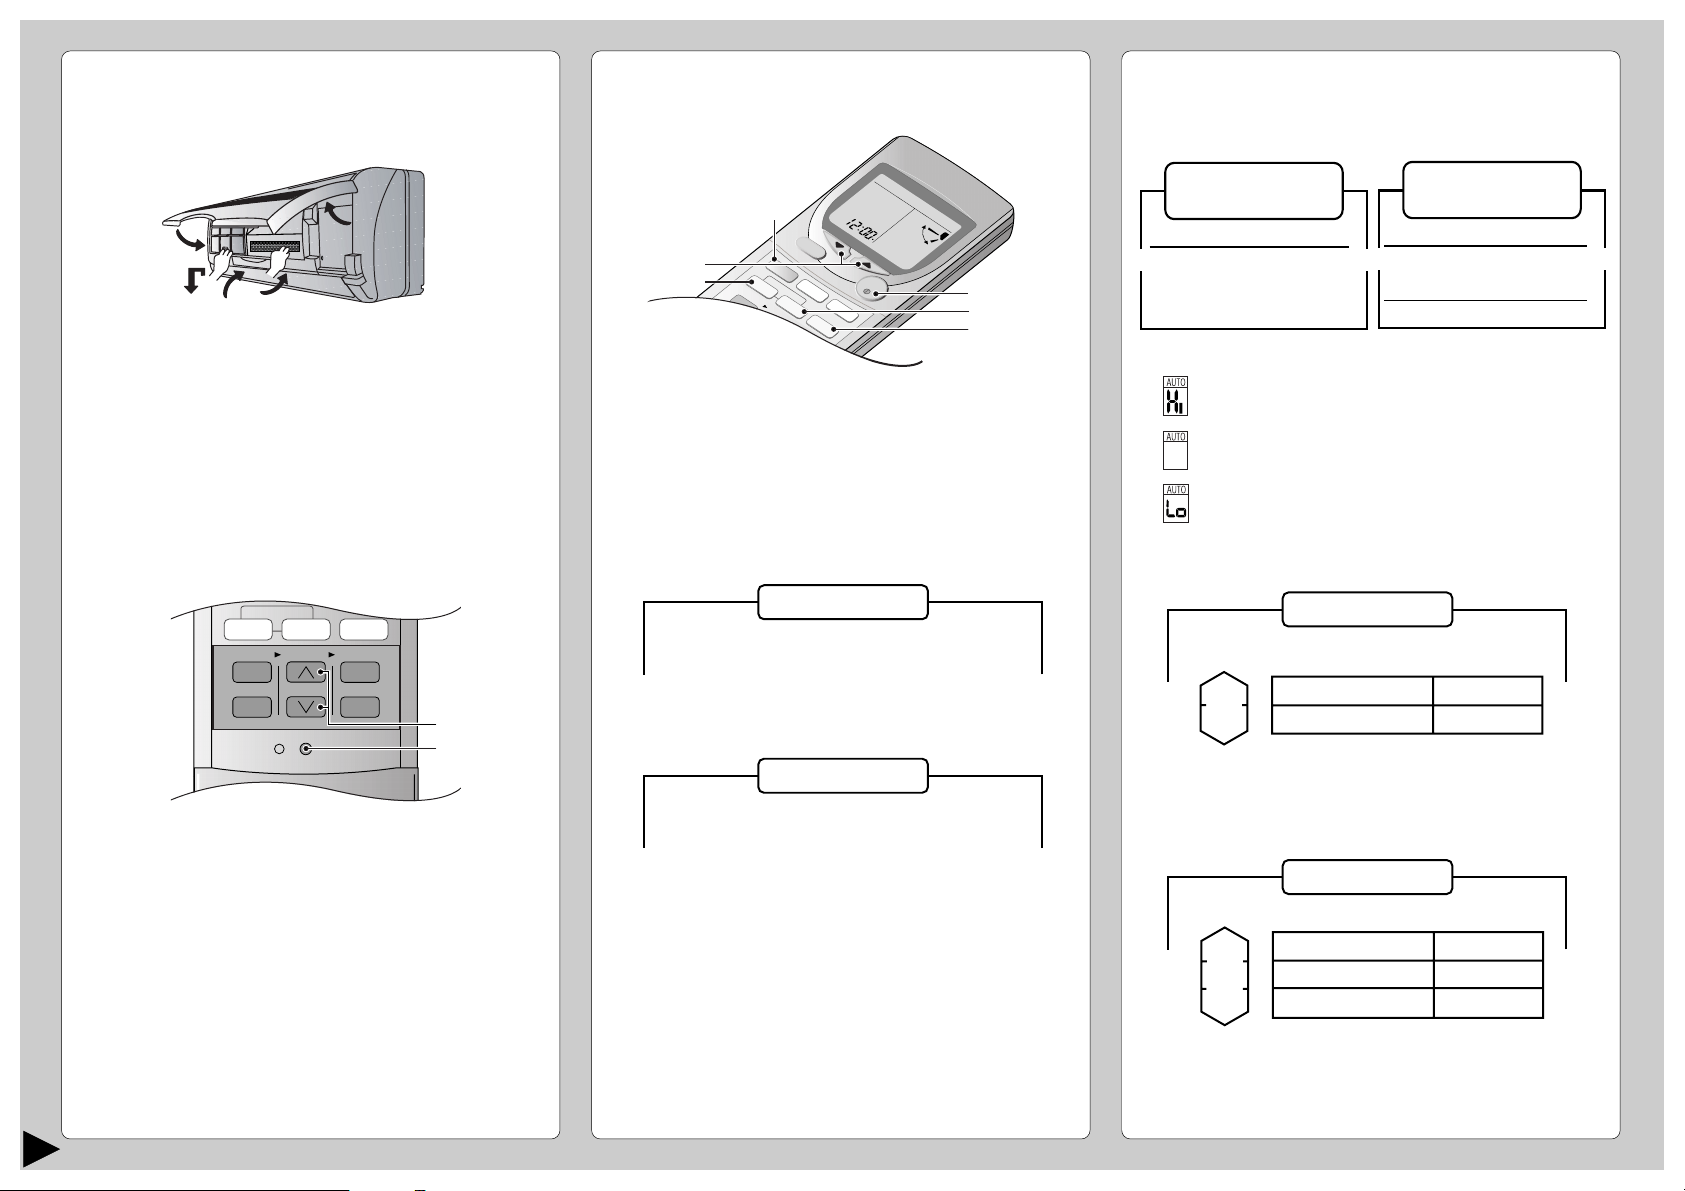
■ Indoor Unit
HOW TO OPERATE
■ Setting Temperature
• Press 3 to increase or decrease the temperature.
• The temperature can be set between 60°F ~ 86°F.
• Recommended temperature:
1
5
2
4
3
1 Open the front panel
2 Remove the air filters
3 Fit the air purifying filters in place
4 Insert the air filters
5 Close the front panel
■ Remote Control – To set the current time
1 Press 1.
2 Then press 2 to increase or decrease the time.
3 Press 1 again.
Set time on display will light up.
5
2
3
5
1
6
4
■ To start the operation
• Press 1.
• POWER indicator (green) on the indoor unit will light
up.
• To stop, press once more.
■ Setting Mode
• Press 2 to select:-
Cooling Model
AUTO – Automatic Operation
COOL – Cooling Operation
DRY – Soft Dry Operation
FAN – Air Circulation Operation
Heat Pump Model
AUTO – Automatic Operation
HEAT – Heating Operation
COOL – Cooling Operation
DRY – Soft Dry Operation
Cooling Model
COOL –> 75°F ~ 78°F
DRY –> 2°F ~ 4°F
lower than the
room temperature
Heat Pump Model
COOL –> 75°F ~ 78°F
DRY –> 2°F ~ 4°F
lower than the
room temperature
HEAT –> 68°F ~ 75°F
• During AUTO Operation, press 3 to select:-
• Operation with 4°F higher than the standard
temperature.
• Operation with the standard temperature.
• Operation with 4°F lower than the standard
temperature.
● Standard Temperature
Cooling Model
Indoor
temperature
73°F
Operation
Cooling
Soft Dry
Standard
temperature
77°F
72°F
• Once the Automatic Operation is selected, the indoor
temperature sensor operates automatically to select
the desired operation mode with Cooling or Soft Dry.
• After the operation mode has been selected, the
mode does not change.
Heat Pump Model
Indoor
temperature
73°F
68°F
Operation
Cooling
Soft Dry
Heating
Standard
temperature
77°F
72°F
70°F
• At the beginning of the automatic operation, Heating,
Cooling or Soft Dry is automatically selected according
to the indoor temperature.
• The operation mode changes every hour, when
necessary.
■ Setting the Fan Speed
• Press 4 to select:-
FAN – Low Fan Speed
FAN – Medium Fan Speed
FAN – High Fan Speed
AUTO
FAN – Automatic Fan Speed
The speed of the indoor fan is adjusted
automatically according to the operation.
The indoor fan stops occasionally during
cooling operation.
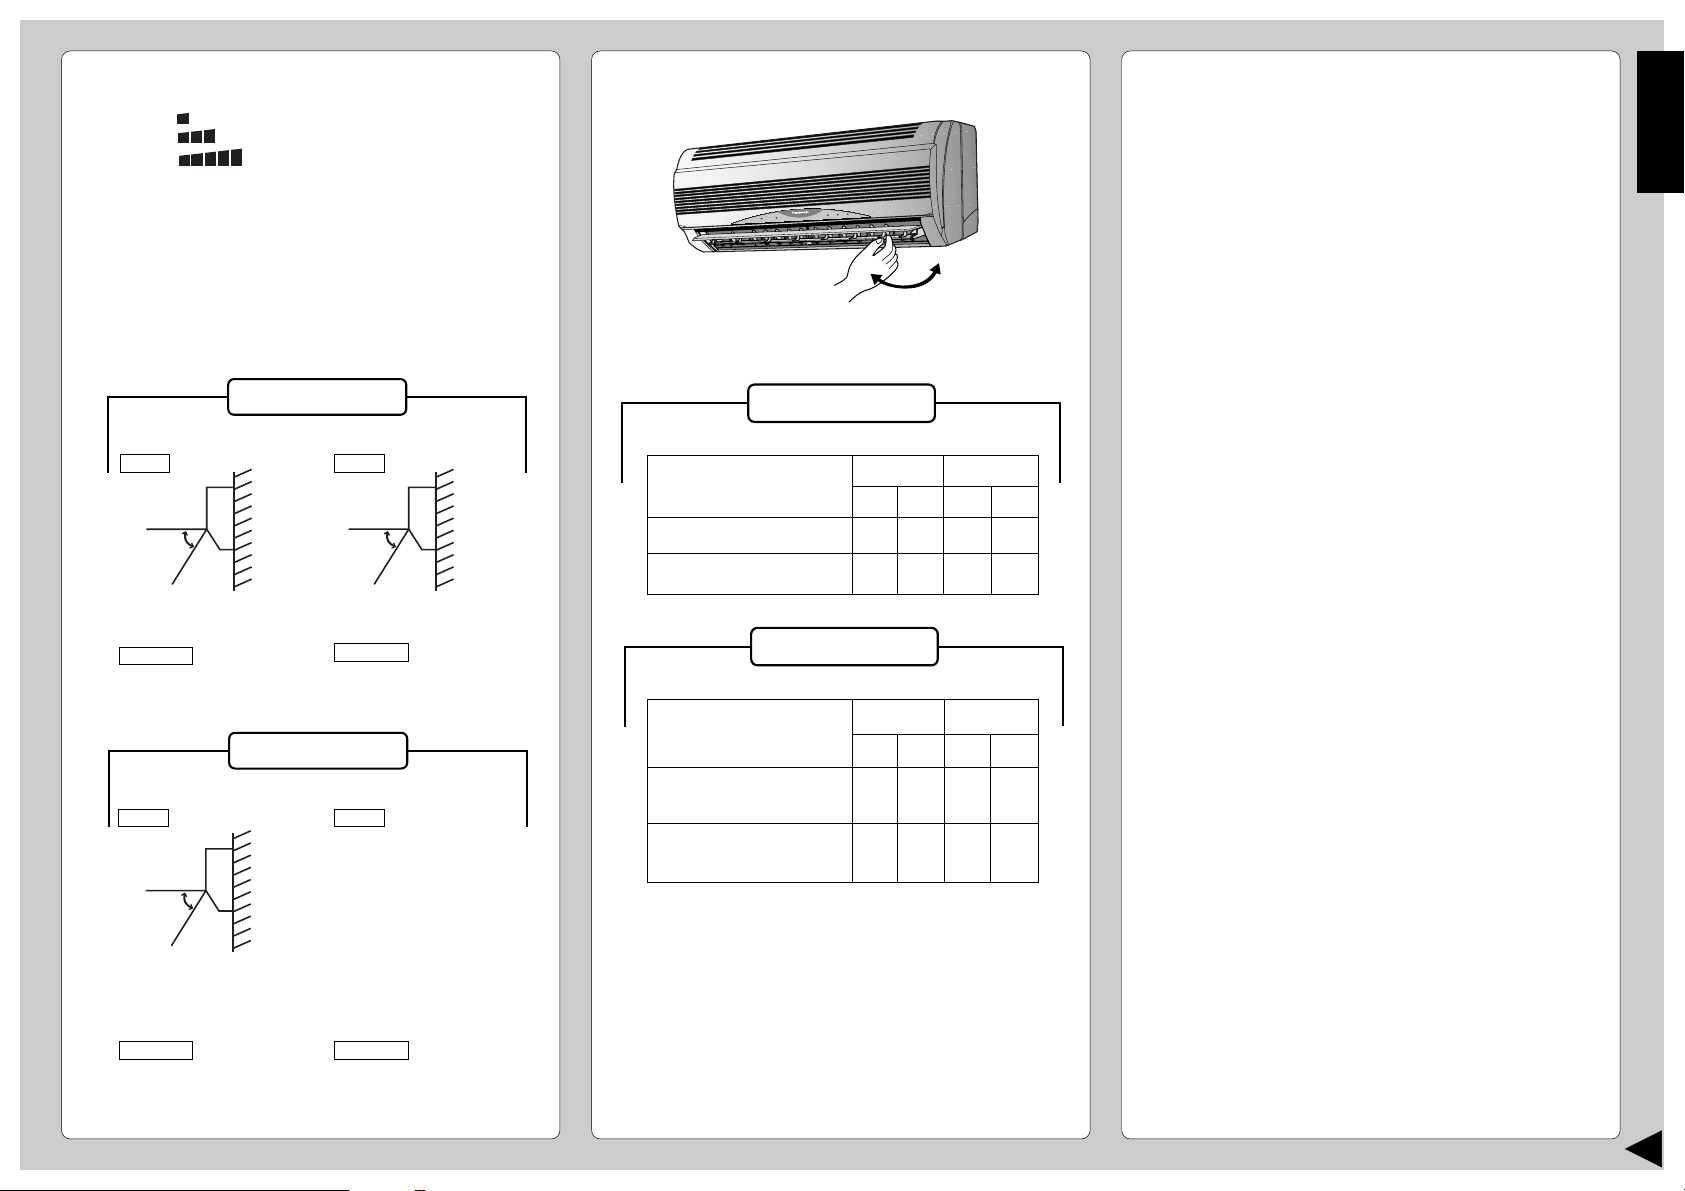
■ Setting the Horizontal Airflow Direction
R
R
E
E
M
M
I
I
R
R
T
T
E
E
M
M
I
I
T
T
T
T
E
E
I
I
U
U
T
T
Q
Q
E
E
I
I
U
U
Q
Q
R
R
E
E
W
W
R
R
O
O
E
E
P
P
W
W
O
O
P
P
L
L
U
U
F
F
L
L
R
R
U
U
E
E
F
F
W
W
R
R
O
O
E
E
P
P
W
W
O
O
P
P
Y
Y
M
M
O
O
Y
Y
N
N
M
M
O
O
O
O
C
C
N
N
E
E
O
O
C
C
E
E
• Adjust it manually
● Operation Details
COOL – Cooling Operation
• To set the room temperature at your preference
cooling comfort.
AUTO – Automatic Operation
• Sense indoor temperature to select the optimum
mode.
• Temperature is not displayed on the remote control
during AUTO operation.
ENGLISH
■ Setting the Vertical Airflow Direction
• Press 5 or 6 to select:-
Cooling Model
COOL / DRY Operation
AUTO
36° 61°
Swing up/down
Automatically
MANUAL
Five stages of adjustment
can be made between
14 ~ 36 angle.
FAN Operation
AUTO
Move up/down
Automatically
MANUAL
Five stages of adjustment
can be made between
0 ~ 61 angle.
Heat Pump Model
COOL / DRY Operation
AUTO
36°
Swing up/down
Automatically
MANUAL
Five stages of adjustment
can be made between
14 ~ 36 angle.
HEAT Operation
AUTO
– When the discharge air
temperature is low such
as at the start of heating
operation, the air blows
in a horizontal direction.
As the temperature
rises, the hot air blows
in a downward direction.
– To stop this operation,
press MANUAL.
MANUAL
Five stages of adjustment
can be made between
0 ~ 61 angle.
● Use this air conditioner under the following
conditions:
Cooling Model
(Unit in °F)
DBT: Dry Bulb Temp
WBT: Wet Bulb Temp
Maximum Temperature
Minimum Temperature
Indoor Outdoor
WBT
73.4
51.8
DBT
109.4
60.8
DBT
89.6
60.8
WBT
78.8
51.8
Heat Pump Model
(Unit in °F)
DBT: Dry Bulb Temp
WBT: Wet Bulb Temp
Maximum Temperature-Cooling
(Maximum Temperature-Heating)
Minimum Temperature-Cooling
(Minimum Temperature-Heating)
Indoor Outdoor
DBT
WBT
DBT
89.6
73.4
(–)
51.8
(–)
109.4
(75.2)
60.8
(23)
(86)
60.8
(60.8)
WBT
78.8
(64.4)
51.8
(21.2)
● Notes
• If the unit is not going to be used for an extended
period of time, turn off the main power supply. If it is
left at the ON position, approximately 2.5 W of
electricity will be used even if the indoor unit has been
turned off with the remote control.
• If operation is stopped, then restart immediately, the
unit will resume operation only after 3 minutes.
DRY – Soft Dry Operation
• A very gentle Cooling Operation, prior to
dehumidification. It does not lower the room
temperature.
• During Soft Dry operation, the indoor fan operates at
Low fan speed.
HEAT – Heating Operation
(for Heat Pump Model only)
• Heat is obtained from outdoor air to warm up the
room. When the outdoor ambient air temperature
falls, the heating capacity of the unit might be
reduced.
• Defrosting Operation
Depending on the outdoor temperature, the operation
occasionally stops to melt the frost on the outdoor
unit.
FAN – Air Circulation Operation
(for Cooling Model only)
• When the room temperature reaches the set
temperature, operation commences at Low airflow
volume. It stops when the room temperature drops to
4°F below the set temperature.
(It is useful when using a heater).
• Hi fan speed will not operate when using the air
circulation Fan mode.
6
AUTO
AUTOHEAT DRY FANCOOL
FAN
AUTO
MODE
POWERFUL
ECONOMY
FAN SPEED
AIR SWING
OFF
CANCEL
ON
SET
1
2
3
TIMER
OFF/ON
QUIET
AUTO
MANUAL
3
6
4
1
7
5
2
8
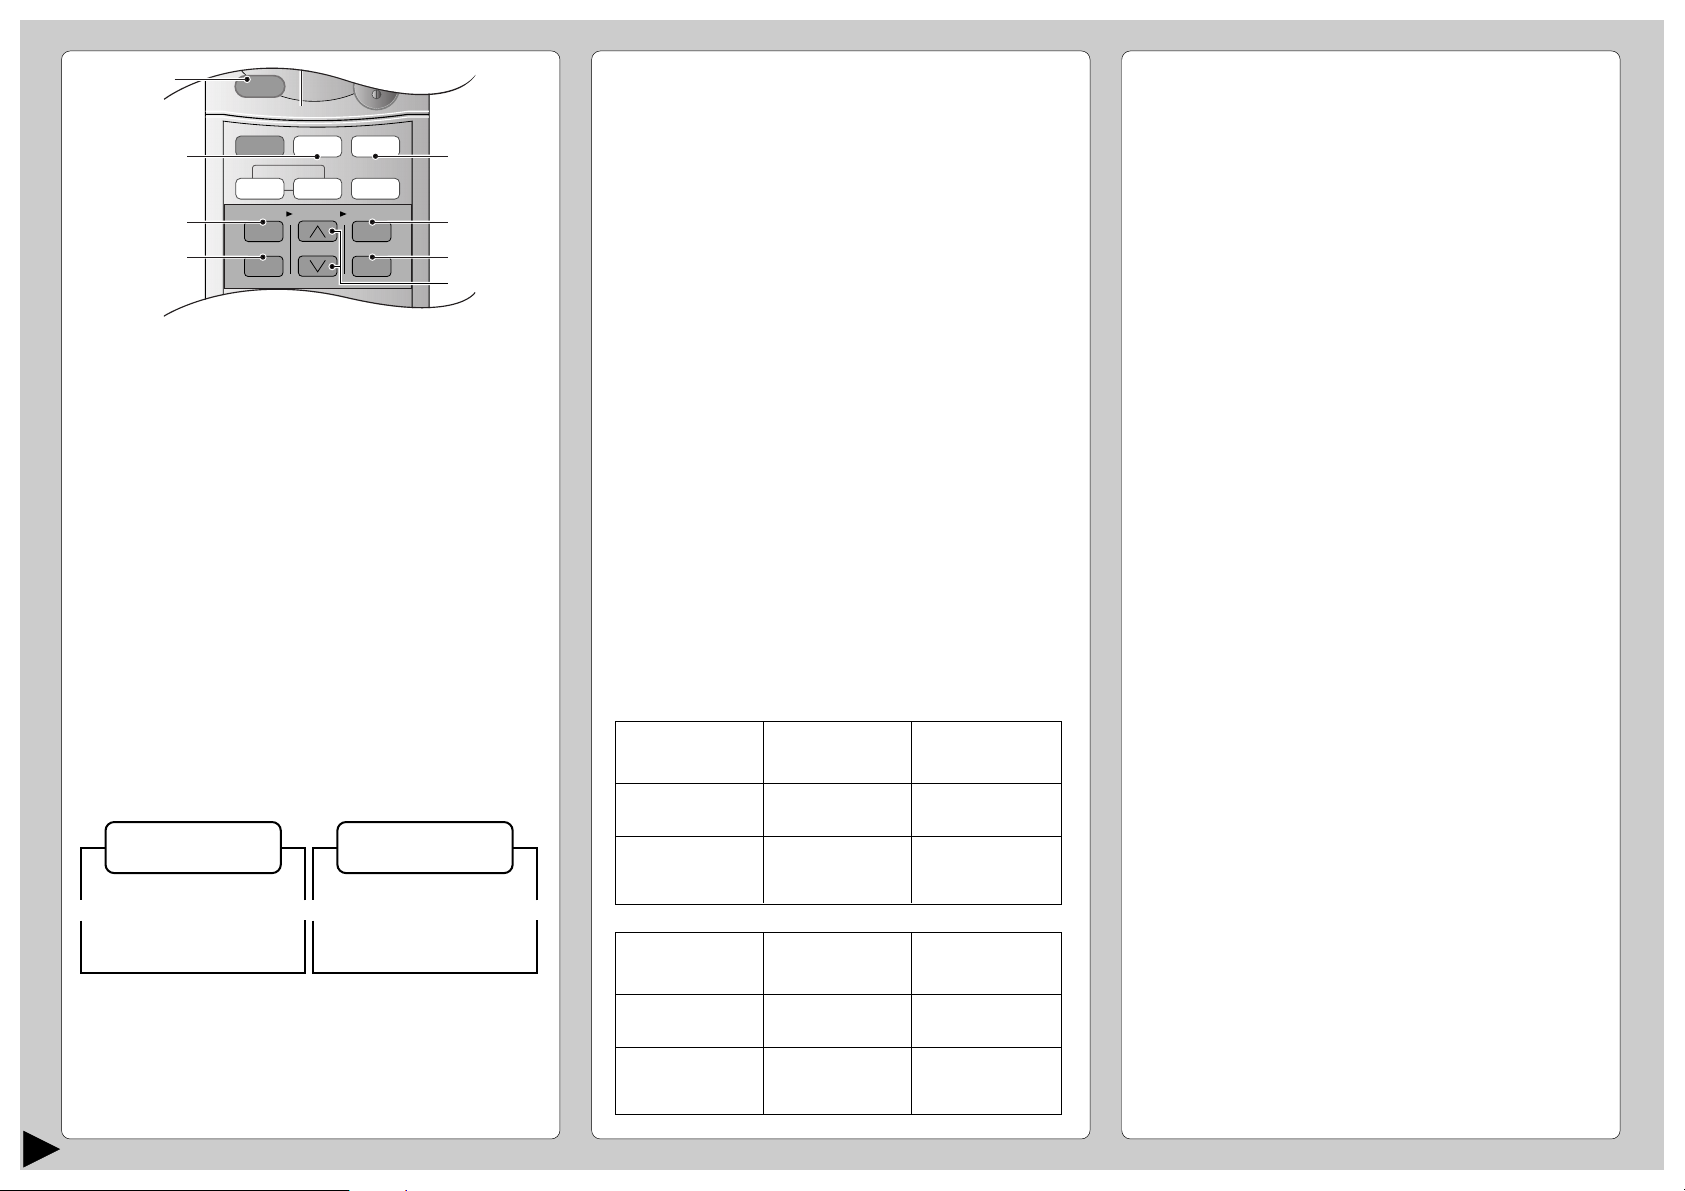
SETTING THE TIMER
Ensure that the current time is correct before setting
the timer. The timer cannot be set if the time display
is flashing.
■ ON-TIMER Operation
To start the air conditioner operation automatically.
• Press 1 to set the operation.
• Press 2 to increase or decrease the time.
• Then press 3.
• To cancel this operation, press 4.
■ OFF-TIMER Operation
To stop the air conditioner operation automatically.
• Press 5 to set the operation.
• Press 2 to increase or decrease the time.
• Then press 3.
• To cancel this operation, press 4.
CONVENIENCE OPERATION
■ Powerful Mode Operation
To obtain the set temperature quickly.
• Press 6.
* Powerful mode indicator (orange) on the indoor
unit will light up.
* Powerful mode will operate for 15 minutes only.
• To cancel this operation, press once more.
■ Economy Mode Operation
To save electrical power consumption.
Please use this mode when the room has reached
your desired temperature.
• Press 7.
* Economy mode indicator (green) on the indoor unit
will light up.
• Press once more to cancel this operation.
●
Economy/Powerful Mode Operation Details
• Economy and Powerful operation cannot be
selected simultaneously.
• The changes of the temperature and airflow volume
are automatic.
• The remote control display remains unchanged.
• If operation mode button is pressed, economy or
powerful operation will be cancelled.
• During FAN – Air circulation operation, the powerful
and economy operation are not available.
(for Cooling Model only)
■ Quiet Mode Operation
To provide quiet operation.
• Press 8.
Quiet mode indicator on the indoor unit will light up.
*
• To cancel this operation, press once more.
Operation Details
●
• Air flow sound will reduce during operation.
● Timer Mode Operation Details
• When the ON-Timer is set, operation will start
before the actual set time. This is to enable the
room temperature reaches the set temperature at
the set time.
Cooling Model
COOL,DRY, –> 15 minutes
AUTO in advance
• Once the ON/OFF Timer is set, operation will
start/stop at the set time everyday.
• The current time is not displayed when the timers
are set.
• When both timers are used together, the TIMER
mode indicator on the indoor unit remains lit even
when the operation is stopped by the OFF-TIMER.
7
Heat Pump Model
COOL,DRY, –>15 minutes
HEAT, AUTO–>30 minutes
in advance
in advance
Economy Mode
Operation
COOL / DRY
HEAT
(for Heat Pump
model only)
Powerful Mode
Operation
COOL / DRY
HEAT
(for Heat Pump
model only)
Temperature
1°F higher
than set temp.
1°F lower
than set temp.
Temperature
5°F lower
than set temp.
5°F higher
than set temp.
Airflow
volume
Super Low
Automatic
Airflow
volume
Super High
Automatic
 Loading...