

Page 1
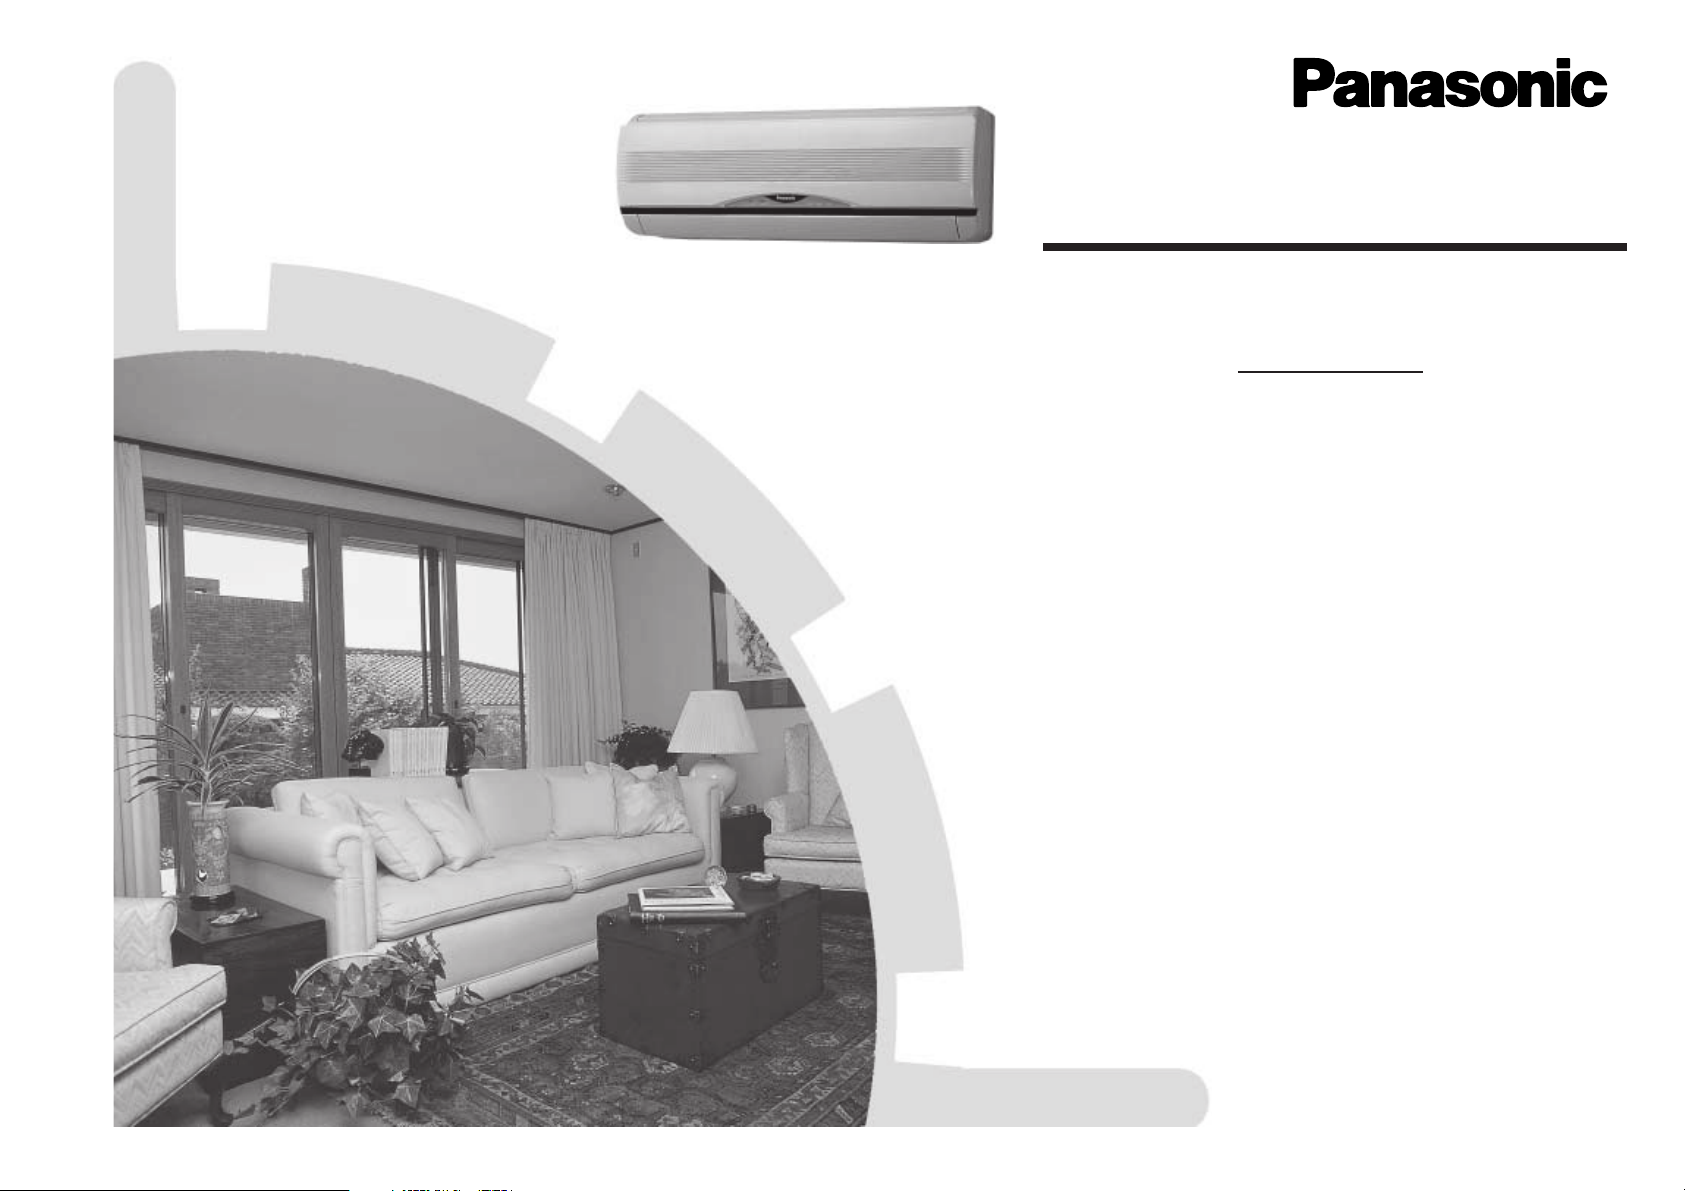
®
Before using your air-conditioner, please read
this operating instructions carefully and keep it
for future reference.
Room Air Conditioner
OPERATING INSTRUCTIONS
Before using your air-conditioner, please read this operating instructions
carefully and keep it for future reference.
C
OOLING MODEL
CS-C18BKP CU-C18BKP6
CS-C24BKP CU-C24BKP6
:-
Indoor Outdoor
ENGLISH ...................... P. 1 – P. 11
ESPAÑOL ..................... P.12 – P. 21
For assistance, please call; 1-800-211-PANA(7262) or
send e-mail to:
consumerproducts@panasonic.com or refer to
www.panasonic.com
F563385
Page 2

Thank you for purchasing our Panasonic Room Air
Conditioner.
CONTENTS
:Features ..................................................... 1
:Safety Precautions .................................... 2
■ Installation Precautions
■ Operation Precautions
:Name of Each Part ................................ 3~4
■ Indoor Unit
■ Outdoor Unit
■ Accessories
■ Remote Control
:Preparation Before Operation .................. 5
■ Indoor Unit
■ Remote Control
:How to Operate ...................................... 5~6
:Setting the Timer ....................................... 7
:Convenience Operation ............................ 7
■ Sleep Mode Operation
■ Economy Mode Operation
■ Powerful Mode Operation
:Care and Maintenance .............................. 8
■ Cleaning the Indoor Unit and Remote Control
■ Cleaning the Air Filter
■ Cleaning the Front Panel
■ Air Purifying Filters
■ Pre-season Inspection
■ When the Air Conditioner is Not Used for an
Extended Period of Time
■ Recommended Inspection
:Helpful Information ................................... 9
:Energy Saving and Operation Hints ........ 9
:Troubleshooting ...................................... 10
■ Normal Operation
■ Abnormal Operation
■ Call the Dealer Immediately
Note:
Before using your air conditioner, please read
this operating instructions carefully and keep it
for future reference.
FEATURES
● Self-illuminating Button
For your convenience to operate in the dark.
(Refer page 4)
● Automatic Operation
Sense indoor temperature to select the optimum
mode.
(Refer page 5)
● Sleep Mode
Prevent the room from getting too hot or too cold
while you are sleeping.
(Refer page 7)
● Economy Mode
To reduce electrical power consumption.
(Refer page 7)
● Powerful Mode
Reaches the desired room temperature quickly.
(Refer page 7)
● Removable Front Panel
For quick and easy cleaning. (washable)
(Refer page 8)
● Catechin Air Purifying Filter
Filter that can trap dust, tobacco smoke and tiny
particles in the room. It can also prevent growth of
bacteria and viruses trapped in this filter.
(Refer page 8)
● Solar Refreshing Deodorizing Filter
Used to remove unpleasant odour and deodorize the
air in the room.
(Refer page 8)
● Auto Restart Control
Restart the unit automatically after power failure.
(Refer page 9)
● Blue Coated Condenser At Outdoor Unit
This is the most advanced anti-rust coating.
! Warning
1) Operate your air conditioner from a stable 208/230 volts
AC supply.
2)
Plug into a separate 15 amps (CS-C18BKP/CU-C18BKP6) or
20 amps (CS-C24BKP/CU-C24BKP6) grounded outlet only.
3) Use of extension cords.
Avoid using extension cords. If there are no alternatives,
ensure that the cord is a UL listed 3-wire grounding type,
rated 250 volt with a minimum current-carrying rating of 15
amps (CS-C18BKP/CU-C18BKP6) or 20 amps
(CS-C24BKP/CU-C24BKP6), number 14 (CS-C18BKP/
CU-C18BKP6), number 12 (CS-C24BKP/CU-C24BKP6)
or a heavier wire.
4) Use a 15 amps (CS-C18BKP/CU-C18BKP6) or 20 amps
(CS-C24BKP/CU-C24BKP6) time delay fuse or a circuit
breaker.
5) Do not switch off by unplugging the power plug while it is
operating. Turn off the air conditioner by using remote
control, before unplugging.
6) Remove power plug or disconnect from the main before
servicing this appliance.
7) Do not repair by yourself.
In case of malfunction of this appliance, do not repair by
yourself. Contact the sales dealer or service dealer for a
repair.
8) Turn off the power (Isolation from main power supply).
Pull off the power plug from the receptacle, or switch off the
breaker, or switch off the power disconnecting mean to
isolate the equipment from the main power supply in case of
an emergency.
! Caution
DISCONNECT THE MAIN PLUG FROM THE SUPPLY
SOCKET WHEN NOT IN USE, WHERE SUPPLY
CONNECTION IS VIA MAIN PLUG.
POWER SUPPLY
Time Delay Fuse: Line Cord Plug:
15 Amps (CS-C18BKP/
20 Amps (CS-C24BKP/
Rated Volts: Socket Type:
CU-C18BKP6)
CU-C24BKP6)
208/230 V
(CS-C18BKP/
CU-C18BKP6)
(CS-C24BKP/
CU-C24BKP6)
1
Page 3

SAFETY PRECAUTIONS
Before operating, please read the following
“Safety Precautions” carefully.
● To prevent personal injury, injury to others and
property damage, the following instructions must be
followed.
● Incorrect operation due to failure to follow instructions
will cause harm or damage, the seriousness of which
is classified as follow:
! Warning
This sign warns of death or serious injury.
■ Installation Precautions
! Warning
● Do not install, remove and reinstall the unit by
yourself.
Improper installation will cause leakage, electric
shock or fire. Please engage an authorized dealer
or specialist for the installation work.
! Caution
ENGLISH
■ Operation Precautions
! Warning
This sign warns of death or serious injury.
● Do not share outlet.
● Do not insert plug to operate the unit. Do not
pull out plug to stop the unit.
● Do not operate with wet hands.
● Do not damage or modify the power cord.
● Do not insert finger or other objects into the
indoor or outdoor units.
● Do not expose directly to cold air for a long
period.
! Caution
This sign warns of damage to property.
● The instructions to be followed are classified by the
following symbols:
This symbol (with a white background) denotes an
action that is PROHIBITED.
FF
O
These symbols (with a black background) denote
actions that are COMPULSORY.
● This room air conditioner must be
earthed.
Improper grounding could cause
electric shock.
● Ensure that the drainage piping is
connected properly.
Otherwise, water will leak out.
● Do not install the unit in a
potentially explosive atmosphere.
Gas leak near the unit could cause
fire.
● Plug in properly.
● Use specified power cord.
FF
O
● If abnormal condition (burnt smell, etc.)
occurs, switch off and unplug the power
supply.
! Caution
This sign warns of injury.
● Do not pull the cord to disconnect the plug.
● Do not wash the unit with water.
● Do not use for other purposes such as
preservation.
● Do not use any combustible equipment at
airflow direction.
● Do not sit or place anything on the outdoor
unit.
● Switch off the power supply before cleaning.
● Ventilate the room regularly.
● Pay attention as to whether the installation
rack is damaged after long period of usage.
OFF
● Switch off the power supply if the unit is not
used for a long period.
2
Page 4
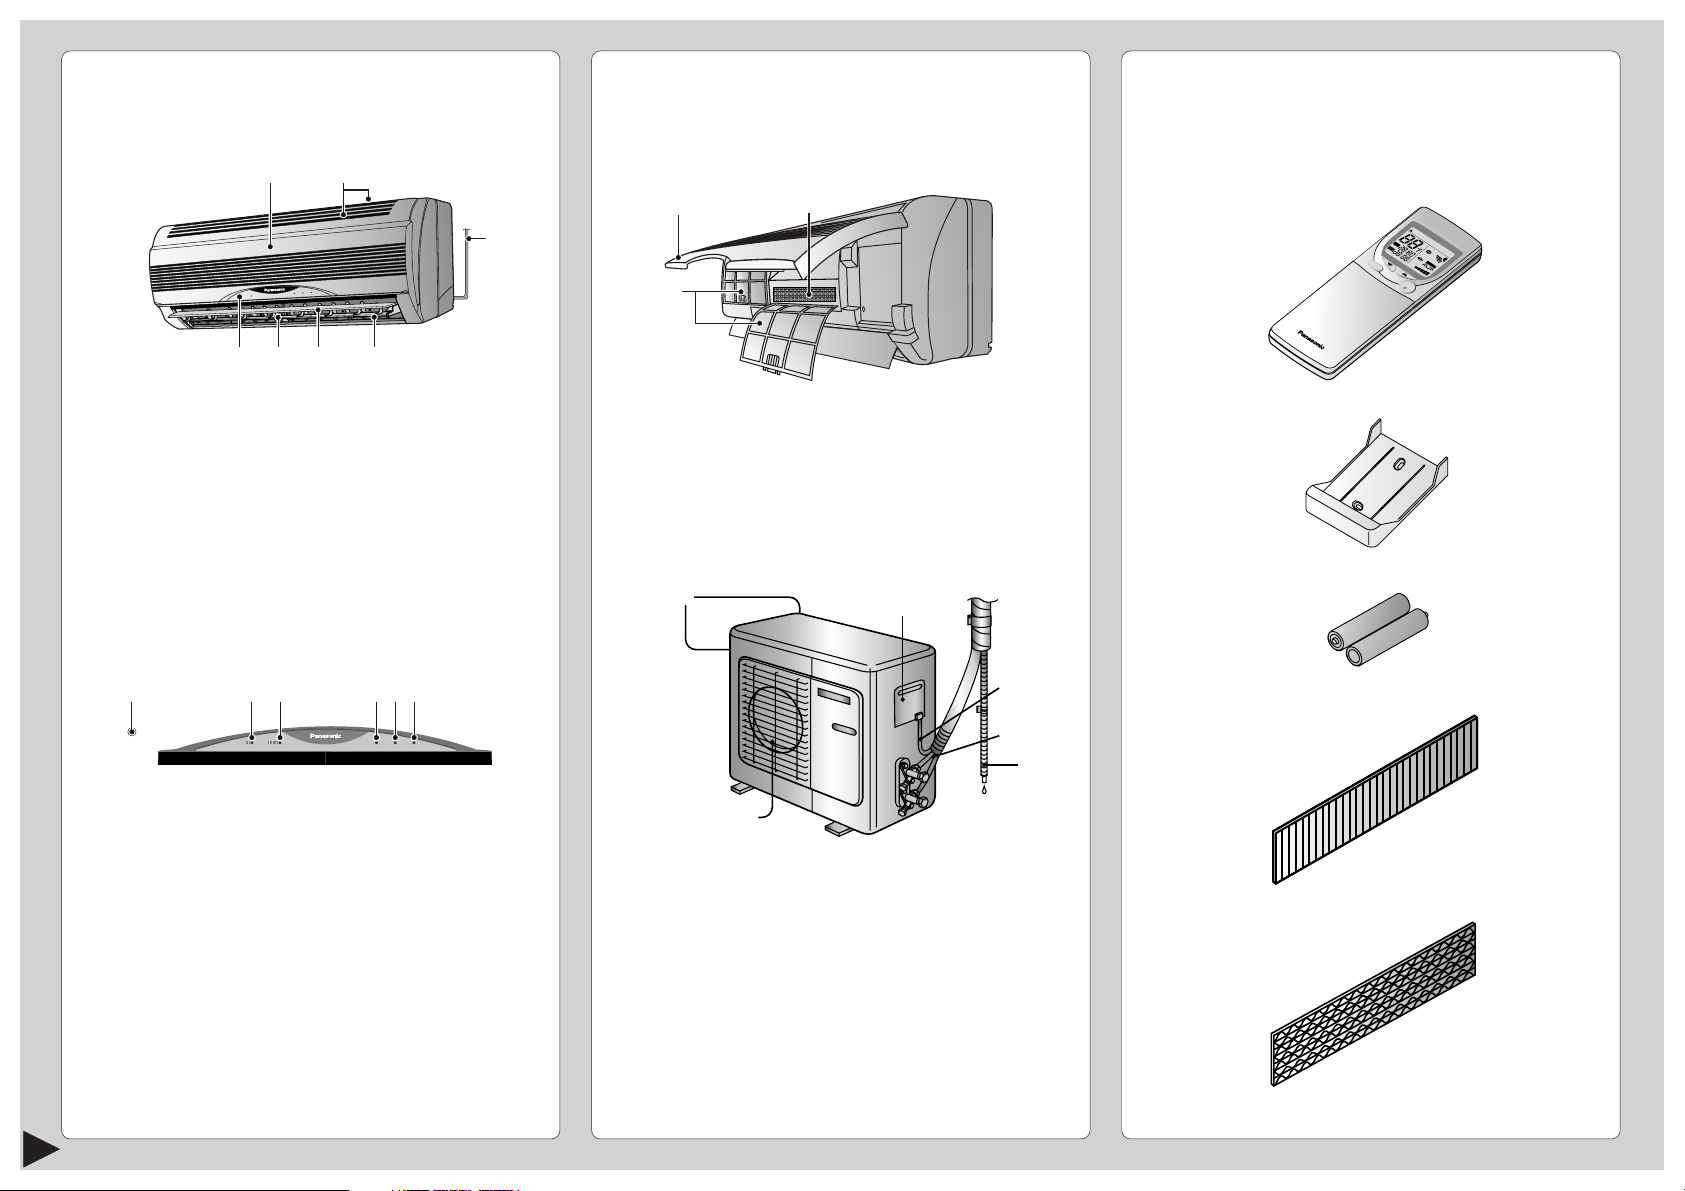
NAME OF EACH PART
UT
UT
DR
AN
COOL
UT
UT
■ Indoor Unit
1
1 Front Panel
2 Air Intake Vent
3 Power Supply Cord
4 Air Outlet Vent
5 Vertical Airflow Direction Louver
6 Horizontal Airflow Direction Louver
7 Indicator Panel
123 654
POWERFULPOWERFULECONOMYECONOMY POWERPOWER
POWERFULPOWERFULECONOMYECONOMY POWERPOWER
2
4576
● Indoor Unit
■ Accessories
(when the front panel is opened)
● Remote Control
1
3
2
1 Front Panel
3
AUT
O
COOL
O
N
OFF
AUT
DR
O
YFAN
AUT
O
AUT
POWERFUL
FAN
TEMP
M
A
IR
Step
1
ON
OFF
C
H
E
TIMER
C
K
R
E
S
E
T
CANCEL
C
L
O
C
K
+
B
A
T
T
E
R
Y
O
O
DE
O
F
E
F
C
/
O
S
O
N
N
W
O
IN
M
Y
G
S
LEE
P
2
FAN SPEED
3
SET
● Remote Control Holder
2 Air Filters
3 Air Purifying Filter
■ Outdoor Unit
1
SLEEPSLEEP
TIMERTIMER
SLEEPSLEEP
TIMERTIMER
2
4
3
● Two RO3 (AAA) dry-cell batteries or equivalent
● Air Purifying Filter
5
1 Auto Operation Button
(when the front panel is opened)
2 Economy Mode Indicator – GREEN
3 Powerful Mode Indicator – ORANGE
4 Power Indicator – GREEN
5 Sleep Mode Indicator – ORANGE
6 Timer Mode Indicator – ORANGE
3
6
1 Air Intake Vents
2 Ground Terminal
(Inside cover)
3 Piping
4 Connecting Cable
5 Drain Hose
6 Air Outlet Vents
(Catechin Air Purifying Filter)
(Solar Refreshing Deodorizing Filter)
Page 5

NAME OF EACH PART
CHECK
TEMP
AUTO
ON
OFF
AUTO DRY FANCOOL
FAN
AUTO
AUTO
RESET CLOCK
MODE
SLEEP
ECONOMY
FAN SPEED
AIR SWING
OFF
CANCEL
ON
SET
1
2
3
TIMER
OFF/ON
POWERFUL
#
!
$
%
^
$
*
&
3
5
8
7
9
0
6
4
(
AUTO
OF
AUTOHEAT
DRY
FANCOOL
FAN
AUTO
AUTO
SLE
● How to Insert the Batteries
ENGLISH
■ Remote Control
1
2
● Remote Control Signal.
● Notes for Remote Control.
• Make sure it is not obstructed.
• Maximum distance : 10 m (32.8 ft.).
• Signal received sound.
One short beep or one long beep.
• Do not throw or drop.
• Do not get it wet.
• Certain type of fluorescent lamps may affect
signal reception. Consult your dealer.
1 Signal Transmitter
2 Operation Display
3 Powerful Mode Operation Button
4 Room Temperature Setting Button
(self-illuminating button)
2
PO
W
ERFU
L
MODE
AIR SWING
AUTO
ECONOMY
1
MANUAL
ON
OFF
2
CANCEL
SET
FAN SPEED
3
1.5V
CHECK
1.5V
TIMER
RESET
CLOCK
5 Operation Mode Selection Button
6 Economy Mode Operation Button
1
7 Vertical Airflow Direction Button
8 ON-Timer Button
1 Slide down the remote control cover completely
9 OFF-Timer Button
2 Insert the batteries
0 Reset Point
(Press with fine-tipped object to clear the memory)
! OFF/ON Button
(self-illuminating button)
@ Sleep Mode Operation Button
# Fan Speed Selection Button
$ Horizontal Airflow Direction Button
% Timer Set Button
^ Timer Cancellation Button
& Time-Setting Button
* Clock Button
( Remote Control Cover
– Be sure the direction is correct
– 12.00 at display - flashing
• Set the current time (CLOCK) immediately to
prevent battery exhaustion.
● About the batteries
• Can be used for approximately one year.
● Observe the following when replacing the
batteries
• Replace with new batteries of the same type.
• Do not use rechargeable batteries (Ni-Cd).
• Remove the batteries if the unit is not going to be
used for a long period.
4
Page 6

PREPARATION BEFORE OPERATION
CHECK
AUTO
AUTO H EAT DRY FANCOOL
FAN
AUTO
RESET CLOCK
FAN SPEED
AIR SWING
OFF
CANCEL
ON
SET
1
2
3
TIMER
1
2
OFF
ON
HEAT
DRY
FANCOOL
CHECK
TEMP
AUTO
AU
T
UTO
FA
N
AN
AU
T
UTO
AUTUTO
R
ESET
CLO
C
K
AIR SWING
OFF
CANCEL
1
2
3
TIMER
OFF/ON
POW
ERFUL
ECONOMY
SLEEP
ON
SET
FAN SPEED
MODE
■ Indoor Unit
HOW TO OPERATE
■ Setting Temperature
• Press 3 to increase or decrease the temperature.
• The temperature can be set between 60°F ~ 86°F.
• Recommended temperature:
2
1
6
3
5
4
1 Connect the power supply cord to an independent
power supply
2 Open the front panel
3 Remove the air filters
4 Fit the air purifying filters in place
5 Insert the air filters
6 Close the front panel
■ Remote Control
– To set the current time
2
3
5
1
6
4
■ To start the operation
• Press 1.
• POWER indicator (green) on the indoor unit will light
up.
• To stop, press once more.
■ Setting Mode
• Press 2 to select:-
AUTO – Automatic Operation
COOL – Cooling Operation
DRY – Soft Dry Operation
FAN – Air Circulation Operation
COOL
75°F ~ 78°F
2°F ~ 4°F
DRY
Lower than the
room temperature
• During AUTO Operation, press 3 to select:-
• Operation with 4°F higher than the standard
temperature.
• Operation with the standard temperature.
• Operation with 4°F lower than the standard
temperature.
● Standard Temperature
Indoor
temperature
73°F
Operation
Cooling
Soft Dry
Standard
temperature
77°F
72°F
1 Press 1.
2 Then press 2 to increase or decrease the time.
3 Press 1 again.
5
Set time at display will light up.
• Once the Automatic Operation is selected, the
indoor temperature sensor operates automatically
to select the desired operation mode with Cooling
or Soft Dry.
• After the operation mode has been selected, the
mode does not change.
Page 7

■ Setting the Fan Speed
• Press 4 to select:-
FAN – Low Fan Speed
FAN – Medium Fan Speed
FAN – High Fan Speed
AUTO
FAN – Automatic Fan Speed
The speed of the indoor fan is adjusted
automatically according to the operation.
The indoor fan stops occasionally during
cooling operation.
■ Setting the Horizontal Airflow Direction
• Press 6 to select:-
Horizontal
Airflow
Direction
Remote
Control
Indoor
Unit
● Operation Details
COOL – Cooling Operation
• To set the room temperature at your preference
cooling comfort.
AUTO – Automatic Operation
• Sense indoor temperature to select the optimum
mode.
• Temperature is not displayed on the remote control
during AUTO operation.
ENGLISH
■ Setting the Vertical Airflow Direction
• Press 5 to select:-
AUTO
AUTO
• Swing up/down automatically.
AUTO
AUTO
• Swing left/right automatically.
● Notes
• If the unit is not going to be used for an extended
period of time, turn off the main power supply. If it is
left at the ON position, approximately 2.5 W of
electricity will be used even if the indoor unit has been
turned off with the remote control.
• If operation is stopped, then restart immediately, the
unit will resume operation only after 3 minutes.
DRY – Soft Dry Operation
• A very gentle Cooling Operation, prior to
dehumidification. It does not lower the room
temperature.
• During Soft Dry operation, the indoor fan operates at
Low fan speed.
FAN – Air Circulation Operation
• When the room temperature reaches the set
temperature, operation commences at Low airflow
volume. It stops when the room temperature drops to
4°F below the set temperature.
(It is useful when using a heater).
6
Page 8

AUTO
AUTO H EAT DRY FANCOOL
FAN
AUTO
MODE
SLEEP
ECONOMY
FAN SPEED
AIR SWING
OFF
CANCEL
ON
SET
1
2
3
TIMER
OFF/ON
POWERFUL
3
6
4
1
7
5
2
8
SETTING THE TIMER
Ensure that the current time is correct before setting the
timer. The timer cannot be set if the time display is
flashing.
■ ON-TIMER Operation
To start the air conditioner operation automatically.
• Press 1 to set the operation.
• Press 2 to increase or decrease the time.
• Then press 3.
• To cancel this operation, press 4.
■ OFF-TIMER Operation
To stop the air conditioner operation automatically.
• Press 5 to set the operation.
• Press 2 to increase or decrease the time.
• Then press 3.
• To cancel this operation, press 4.
● Timer Mode Operation Details
• When the ON-Timer is set, operation will start
before the actual set time. This is to enable the
room temperature reaches the set temperature at
the set time.
CONVENIENCE OPERATION
■ Sleep Mode Operation
To obtain a comfortable room temperature while
sleeping:-
• Press 6.
• Sleep mode indicator on the indoor unit will light up.
• To cancel this operation, press once more.
● Sleep Mode Operation Details
• When the room temperature reaches the set
temperature, the airflow volume will change to low
automatically.
• Sleep Mode Operation time is 8 hours.
• When used together with the timer, the timer has a
priority.
Temperature
S
T
e
e
m
t
p
t
e
i
r
n
a
g
t
u
r
e
Sleep
Operation
button is
pressed.
0~1 hour
Approx.
1°F
increase.
Sleep shift
operation
starts.
← 1 hour →
after approx. 8 hours of sleep shift
operation, it will stop automatically.
Approx. 1°F
increase.
• Cooling or Soft Dry
Operation for sleep shift
operation will start to
avoid overcooling.
Time
■ Economy Mode Operation
To save electrical power consumption.
Please use this mode when the room has reached
your desired temperature.
• Press 7.
* Economy mode indicator (green) on the indoor unit
will light up.
• Press once more to cancel this operation.
■ Powerful Mode Operation
To obtain the set temperature quickly.
• Press 8.
* Powerful mode indicator (orange) on the indoor
unit will light up.
* Powerful mode will operate for 15 minutes only.
• To cancel this operation, press once more.
●
Economy / Powerful Mode Operation Details
• Economy and Powerful operation cannot be
selected simultaneously.
• The changes of the temperature and airflow volume
are automatic.
• The remote control display remains unchanged.
• If sleep button or operation mode button is pressed,
economy or powerful operation will be cancelled.
• During FAN – Air circulation operation, the powerful
and economy operation are not available.
Airflow
volume
Super Low
Super High
Economy Mode Operation
Powerful Mode Operation
Temperature
1°F higher
than set temp.
5°F lower
than set temp.
COOL, DRY, 15 minutes
AUTO in advance
• Once the ON-Timer is set, operation will start at the
set time everyday.
• The current time is not displayed when the timers
are set.
• When both timers are used together, the TIMER
mode indicator on the indoor unit remains lit even
when the operation is stopped by the OFF-TIMER.
7
Page 9

CARE AND MAINTENANCE
ENGLISH
■ Cleaning the Indoor Unit and Remote Control
• Wipe gently with a soft, dry cloth.
• Do not use water hotter than 104˚F or polishing fluid
to clean the unit.
■ Cleaning the Air Filter
(Recommendation:- If the unit is operated in a dusty
environment, clean the filters every two weeks,
continuous use of this dirty filters will reduce cooling
efficiency)
1 Remove dirt using a vacuum cleaner.
2 Wash back of the air filter with water.
3 If badly soiled, wash it with soap or a mild household
detergent.
4 Let it dry and reinstall it.
Be sure the “FRONT” mark is facing you.
* Damaged air filter.
Consult the nearest authorized dealer.
Part No.: CWD001049.
• Do not use benzene, thinner, scouring powder or
clothes soaked in caustic chemical to clean the
unit.
■ Cleaning the Front Panel
(Must be removed before washing)
1 Raise the front panel higher than the horizontal and
pull to remove it.
2 Gently wash with water and a sponge.
• Do not press the front panel too hard when washing.
• When use kitchen cleaning fluid (neutral detergent),
rinse throughly.
• Do not dry the front panel under direct sunlight.
3 To fix the front panel, raise the front panel
horizontally, match the protruding portion on the
indoor unit to the fulcrum and push into place.
Fulcrum
■ Air Purifying Filters
1
Raise the
front panel
Solar Refreshing
Deodorizing Filter
Catechin Air
Purifying Filter
Remove the air filters
2
● Solar Refreshing Deodorizing Filter
• Used to remove unpleasant odour and deodorize
the air in the room.
• Reusable.
• Vacuum, place under direct sunlight for 6 hours and
fit it back in place.
(Recommended : every 6 months)
● Catechin Air Purifying Filter
• The filter is coated with catechin to prevent growth
of bacteria and viruses.
• Reusable.
• Vacuum and fit it back in place
(Recommended : every 6 months)
• Recommended to change these filters every 3 years.
Do not reuse damaged filters.
Consult the nearest authorized dealer to purchase a
new filter.
Catechin Air Purifying Filter No.: CZ-SF70P
Solar Refreshing Deodorizing Filter No.: CZ-SFD70P
• If you operate the air conditioner with dirty filters:-
– Air is not purified
– Cooling capacity decreases
– Foul odour is emitted
■ Pre-season Inspection
● Is the discharged air cold?
Operation is normal if 15 minutes after the start of
operation, the difference between the air intake and
outlet vents temperature is:-
COOL – 14°F or above
● Are the air intake or outlet vents of the indoor or
outdoor units obstructed?
● Are the remote control batteries weak?
If the remote control display appears weak, replace
the batteries.
■ When the Air Conditioner is Not Used for an Extended Period of Time
1 To dry the internal parts of the indoor unit, operate
the unit for 2 - 3 hours using:-
FAN operation
2 Turn off the power supply and unplug.
Note: If the unit is not switched off by the remote
control, it will start operating when you plug in
(because the unit is equipped with Auto Restart
Control).
3 Remove the remote control batteries.
■ Recommended Inspection
• After used over several seasons, the unit will
become dirty and thus decreases the unit’s
performance. Depending on the operation
conditions, a dirty unit may produce odour and dust
may pollute dehumidification system. Therefore, a
seasonal inspection is recommended in addition to
regular cleaning. (Consult an authorized dealer).
Protruding portion on indoor unit
8
Page 10

HELPFUL INFORMATION
■ Auto Operation Button
POWERFULPOWERFULECONOMYECONOMY POWERPOWER
POWERFULPOWERFULECONOMYECONOMY POWERPOWER
• Raise the front panel and press.
● Automatic Operation
• If the remote control fails to function or has been
misplaced, press the Auto Operation button to start
the Automatic operation.
• The Automatic operation will be activated
immediately once the Auto operation button is
pressed. However, temperature cannot be adjusted
in this operation.
• The power indicator on the indoor unit will blink until
the operation mode is selected automatically.
• To cancel this operation, press once more.
● Remote Control Signal Receiving Sound
• To switch off the beep (Signal Receiving Sound),
press the Auto Operation button for 10 seconds
continuously or longer.
“Beep”, “beep” sound will be heard at the tenth
seconds.
Note: “Beep” sound will be heard at the fifth
seconds;
However please press continuously until you
heard “beep”, “beep” sound.
• Repeat the above steps if you want to switch on the
Signal Receiving Sound.
SLEEPSLEEP
TIMERTIMER
SLEEPSLEEP
TIMERTIMER
■ Auto Restart Control
• If power is resumed after a power failure, the
operation will restart automatically after 3 - 5 1/2
minutes.
• Operation will be restarted automatically under the
previous operation mode and airflow direction when
power is resumed as the operation is not stopped
by the remote control.
■ Timer Setting
• When power failure occurs, the timer setting will be
cancelled. Once power is resumed, reset the timer.
■ Thunder and Lightning
• This air conditioner is equipped with a built-in surge
protective device. However, in order to further
protect your air conditioner from being damaged by
abnormally strong lightning activity, you may switch
off the main power supply and unplug from power
socket.
ENERGY SAVING AND OPERATION HINTS
■ Setting the Temperature
• Approximately 10% of electricity can be saved.
• Set the temperature 2°F higher than the desired
temperature.
■ Air Filters and Air Purifying Filters
• Clean the air filters every 2 weeks and the Air
Purifying Filters every 6 months.
• Dirty filters may reduces cooling efficiency.
■ Keep All Doors and Windows Closed
• Otherwise, cooling performance will be reduced
and electricity cost is wasted.
■ Outdoor Unit
• Do not block the air outlet vents. Otherwise, it will
lower the cooling performance.
■ Timer and Sleep Mode
• To prevent wastage of electricity, use sleep mode
when sleeping or Timer when going out.
■ Avoid Direct Sunlight
• Keep curtains or drapes closed to avoid direct
sunlight during cooling operation.
● (This is for Servicing purposes only.)
Note: If you press this button continuously for 5 to 10
seconds, Test Run operation will be performed. A
“beep” sound will be heard at the fifth seconds
indicating the Test Run starts to operate.
9
Page 11

TROUBLESHOOTING
ENGLISH
■ Normal Operation
Is it okay?
• Air conditioner has been restarted, but does not
operate for 3 minutes.
• A sound like water flowing can be heard.
• It seems that fog is coming out from the air
conditioner.
• The room has a peculiar odour.
• During Automatic Vertical Airflow setting,
indoor fan stops occasionally.
• The outdoor unit emits water or steam.
■ Abnormal Operation
Check the following points before calling for repairs or
service.
If the malfunction persists, please contact your nearest
servicenter.
For assistance, please call: 1-800-211-PANA (7262) or
send e-mail to: consumer products@panasonic.com
This is the answer
• This is to protect the air conditioner. Wait until the air
conditioner begins to operate.
• This is the sound of refrigerant flowing inside the air
conditioner.
• Condensation occurs when the airflow from the air
conditioner cools the room.
• This may be a damp smell emitted by the wall,
carpet, furniture or clothing in the room.
• This is to remove smell emitted by the surroundings.
• In COOL/DRY operation, moisture in the air
condenses into water on the cool surface of outdoor
unit piping that causes dripping.
■ Call the Dealer Immediately
If the following conditions occur, turn off and unplug the
main power supply, and then call your authorized
Panasonic dealers or servicenter.
Service information can be obtained 24 hours/day by
calling
1-800-211 PANA (7262).
To expedite the repair of your air conditioner:
• Please have your proof of purchase.
• List all symptoms the unit is exhibiting.
• Abnormal noise is heard during operation.
• Water or foreign material gets into the remote
control by mistake.
• Water leak from the indoor unit.
• Switches or buttons do not operate properly.
• The circuit breaker switches off frequently.
• Power supply cord and plug become unusually
warm.
Is it okay?
• The air conditioner does not operate.
• Air conditioner produces loud noise during
operation.
• The air conditioner does not cool effectively.
Please check
• Has the circuit breaker been tripped?
• Has the power plug been removed from the wall
outlet?
• Is the timer being used correctly?
• Is the installation work slanted?
• Is the front grille closed properly?
• Has the temperature been set incorrectly?
• Are the filters dirty?
• Are the intake or outlet vents of the outdoor unit
obstructed?
• Are all windows and doors closed?
10
Page 12

PRODUCT SPECIFICATIONS
ESPECIFICACIONES DEL PRODUCTO
Model
Modèlo
COOLING CAPACITY Btu/h
CAPACIDAD DE ENERIAMIENTO
ELECTRICAL RATING Phase
CLASIFICACION DE Fase
LA ÉLECTRICIDAD
EER (Btu/Watt.h)
EER (Btu/W-h)
MOISTURE REMOVAL (Pints/h)
DÉSHUMIDIFICACION (pinte/h)
ROOM AIR CIRCULATION (Cf/min)
CIRCULACION DE AIRE (pie3/min)
DIMENSIONS Indoor
DIMENSIONES
NET WEIGHT Indoor
PESO NETO
GROSS WEIGHT
PESO BRUTO
• Specifications are subject to change without notice for further improvement.
• Las especificaciones estan sujetas a cambios por mejoras sin previo aviso.
Frequency (Hz)
Fréqcuencia (Hz)
Voltage (V)
Voltaje (V)
Current (Amps)
Corriente (Amps)
Input (Watts)
Potencia (W)
Outdoor
Outdoor
Indoor
Outdoor
REFERENCE
REFERENCIA
Model Number
Numero de modelo :
Serial Number :
(Located on the side of unit)
Numero de serie :
(Localizado en el costado de la unidad)
Dealer’s Name :
Nombre del distribuidor:
: _________________________
__________________________
Dealer’s Address
Nombre del comerciante:
Dealer’s Tel :
Telefono del comerciante :
Date of Purchase :
Fecha de adquisicion :
___________________________
CS-C18BKP
CS-C24BKP
Height
Alto
Width
Ancho
Depth
Protundidad
Height
Alto
Width
Ancho
Depth
Protundidad
kg(Ib)
kg(libras)
kg(Ib)
kg(libras)
kg(Ib)
kg(libras)
kg(Ib)
kg(libras)
CU-C18BKP
CU-C24BKP6
cm(inches)
cm(poulgadas)
cm(inches)
cm(poulgadas)
cm(inches)
cm(poulgadas)
cm(inches)
cm(poulgadas)
cm(inches)
cm(poulgadas)
cm(inches)
cm(poulgadas)
: _____________________
__________________________
______________________
Panasonic Consumer Electronics Company,
Division of Matsushita Electric Corporation
of America
One Panasonic Way
Secaucus, New Jersey 07094
Panasonic Sales Company,
Division of Matsushita Electric of Puerto Rico, Inc.,
Ave. 65 de lnfanteria, Km. 9.5
San Gabriel Industrial Park
Carolina, Puerto Rico 00985
Panasonic Room Air Conditioner
Limited Warranty
Panasonic Consumer Electronics Company or Panasonic Sales Company (collectively referred to as “the Warrantor”) will repair this
product with new or refurbished parts in case of defects in material or workmanship, free of charge, in the USA or Puerto Rico in
accordance to the following (All time periods start from the date of the original purchase).
SEALED REFRIGERATING SYSTEM (compressor and interconnecting tube): FIVE (5) YEARS - PARTS AND LABOR
ALL OTHER COMPONENTS: ONE (1) YEAR - PARTS AND LABOR
In- home service in the USA can be obtained during the warranty period by contacting a Panasonic Service Company (PASC)
Factory Servicenter listed in the Servicenter Directory. Or call toll free, 1-800-211-PANA(7262), to locate a PASC authorized
Servicenter. In-home service in Puerto Rico can be obtained during the warranty period by calling the Panasonic Sales Company
telephone number listed in the Servicenter Directory.
Note: If the unit is installed at the other than normal window height and/or has been custom-installed (e.g. through the
wall), the customer is responsible for removing the unit from its installation prior to the performance of in-home
service.
This warranty is extended only to the original purchaser. A purchase receipt or other proof of date of the original purchase is required
for service and parts replacement under this warranty.
This warranty only covers failures due to defects in materials and workmanship and does not cover normal wear or cosmetic damage.
The warranty does not cover damages which occur in shipment, or failures which are caused by products not supplied by the
warrantor, or failures which result from accident, misuse, abuse, neglect, mishandling, misapplication, faulty installation,
maladjustment of customer controls, improper maintenance, alteration, modification, power line surge, lightning damage, improper
voltage supply, commercial use such as hotel, office, restaurant, or other business or rental use of the product, or service by anyone
other than a PASC Factory Servicenter or a PASC authorized Servicenter, or damage that is attributable to acts of God.
LIMITS AND EXCLUSIONS
There are no express warranties except as listed above.
THE WARRANTOR SHALL NOT BE LIABLE FOR INCIDENTAL OR CONSEQUENTIAL DAMAGES RESULTING FROM THE USE
OF THIS PRODUCT, OR ARISING OUT OF ANY BREACH OF THIS WARRANTY. ALL EXPRESS AND IMPLIED WARRANTIES,
INCLUDING THE WARRANTIES OF MERCHANTABILITY, ARE LIMITED TO THE APPLICABLE WARRANTY PERIOD SET
FORTH ABOVE.
Some states do not allow the exclusion or limitation of incidental or consequential damages, or limitations on how long an implied
warranty lasts, so the above exclusions or limitations may not apply to you.
This warranty gives you specific legal rights and you may also have other rights which vary from state to state. If a problem with this
product develops during or after the warranty period, you may contact your dealer or Servicenter. If the problem is not handled to your
satisfaction, then write to the Consumer Affairs Department at the company address indicated above.
SERVICE CALLS WHICH DO NOT INVOLVE DEFECTIVE MATERIALS OR WORKMANSHIP AS DETERMINED BY THE
WARRANTOR, IN ITS SOLE DISCRETION, ARE NOT COVERED. COSTS OF SUCH SERVICE CALLS ARE THE
RESPONSIBILITY OF THE PURCHASER.
[For assistance, please call: 1-800-211-PANA (7262) or send e-mail to consumerproducts@panasonic.com]
Please affix your proof of purchase here for future reference.
Favor de pegar la prueba de su compra aqui para su futura referencia.
© 2001 Matsushita Electrical Co, Ltd. All Right Reserved.
© 2001 Matsushita Electrical Co, Ltd. Derechos Reservados.
21
F563385
Printed in Malaysia
P0111-1
 Loading...