

Page 1
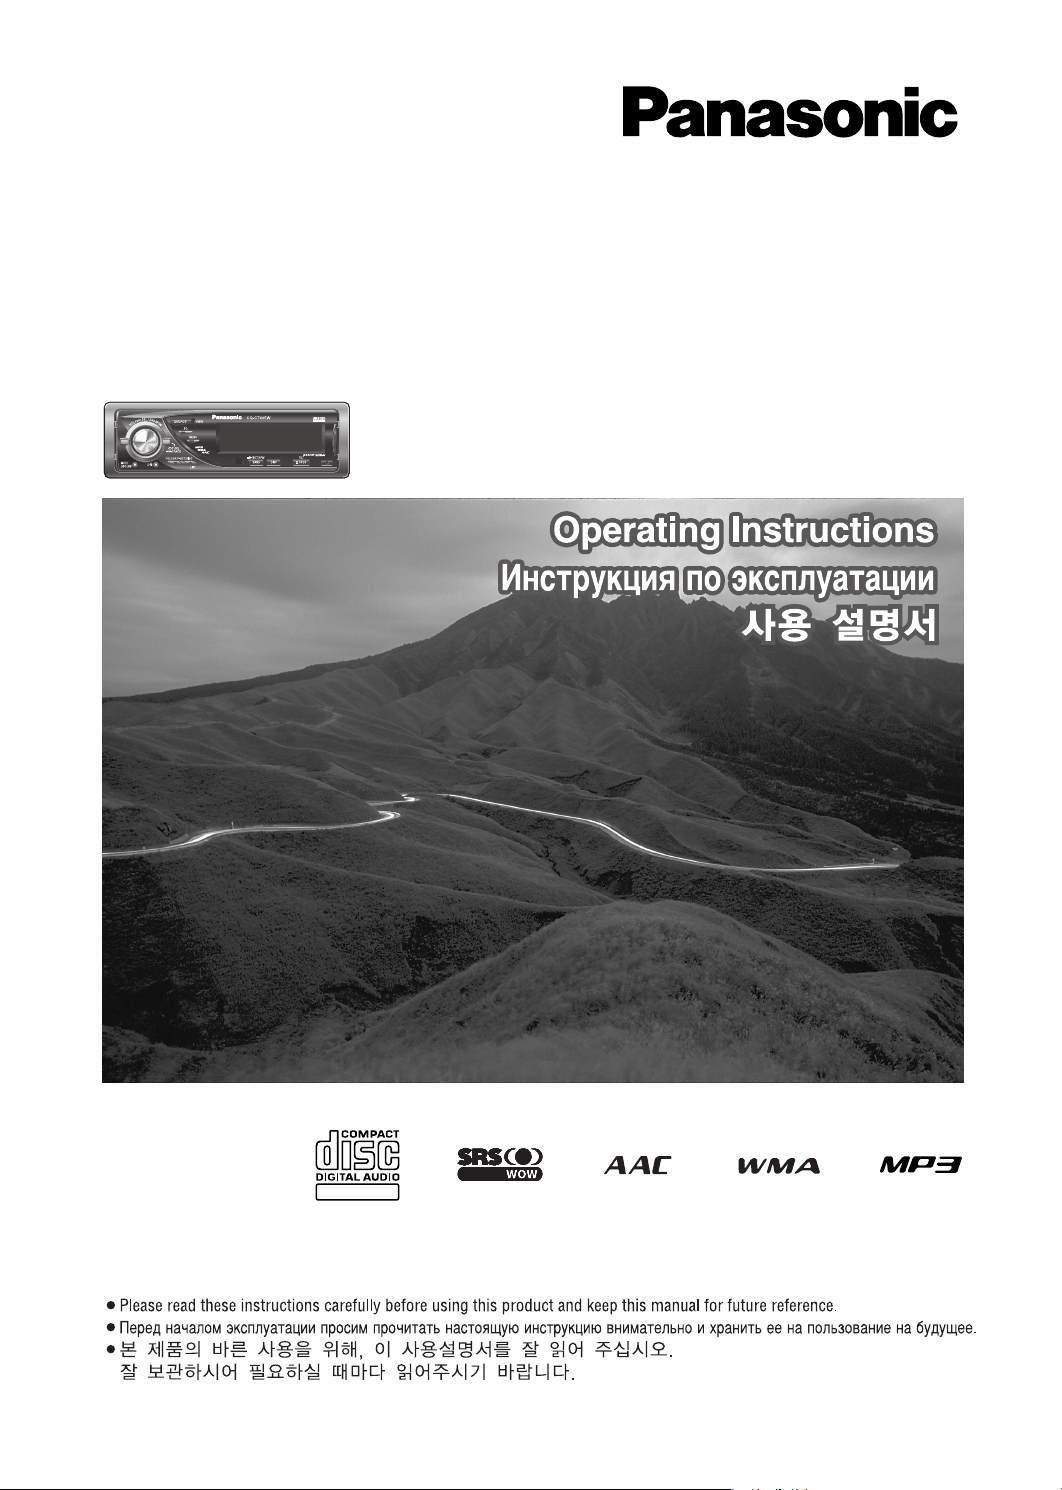
TEXT
AAC WMA MP3 CD Player/Receiver
AAC WMA MP3 CD-ÔÎÂÂ/ÂÒË‚Â
AAC WMA MP3 CD 플레이어/라디오
Model: CQ-C7405W
L
E
/
S
S
R
H
S
S
U
W
P
SOURCE
O
L
W
O
V
SQ
TUNE
TRACK
FOLDER/P-SET/DISC
MUTE
D・M
SBC-SW
CQ-C7405W
PWR
MENU
TILT/SET/APM
/
LIST
OPENDISPBAND
Page 2
Safety Information
■
Read the operating instructions for the unit and all other components of your car audio system carefully before using the
system. They contain instructions about how to use the system in a safe and effective manner. Panasonic assumes no
responsibility for any problems resulting from failure to
observe the instructions given in this manual.
This pictograph intends to alert you to the presence of important operating instructions and
Warning
installation instructions. Failure to heed the
instructions may result in severe injury or death.
Warning
Observe the following warnings when using
this unit.
❑
The driver should neither watch the display nor
operate the system while driving.
Watching the display or operating the system will distract
the driver from looking ahead of the vehicle and can cause
accidents. Always stop the vehicle in a safe location and use
the parking brake before watching the display or operating
the system.
❑
Use the proper power supply.
This product is designed for operation with a negative
grounded 12 V DC battery system. Never operate this product with other battery systems, especially a 24 V DC battery
system.
❑
Keep batteries and insulation film out of reach of
infants.
Batteries and insulation film can be ingested, so keep them
out of the reach of infants. If an infant ingests a battery or
insulation film, please seek immediate medical attention.
❑
Protect the Deck Mechanism.
Do not insert any foreign objects into the slot of this unit.
❑
Do not disassemble or modify the unit.
Do not disassemble, modify the unit or attempt to repair the
product yourself. If the product needs to be repaired, consult
your dealer or an authorized Panasonic Service Center.
❑
Do not use the unit when it is out of order.
If the unit is out of order (no power, no sound) or in an
abnormal state (has foreign objects in it, is exposed to
water, is smoking, or smells), turn it off immediately and
consult your dealer.
❑
The remote control unit should not lie about in the
car.
If the remote control unit lies about, it could fall on the floor
while driving, get wedged under the brake pedal, and lead to
a traffic accident.
❑
Refer fuse replacement to qualified service personnel.
When the fuse blows out, eliminate the cause and have it
replaced with the fuse prescribed for this unit by a qualified
service engineer. Incorrect replacement of the fuse may lead
to smoke, fire, and damage to the product.
■
This manual uses pictographs to show you how to use the
product safely and to alert you to potential dangers resulting
from improper connections and operations. The meanings of
the pictographs are explained below. It is important that you
fully understand the meanings of the pictographs in order to
use this manual and the system properly.
This pictograph intends to alert you to the presence of important operating instructions and
Caution
installation instructions. Failure to heed the
instructions may result in injury or material damage.
Observe the following warnings when
installing.
❑
Disconnect the lead from the negative (–) battery
terminal before installation.
Wiring and installation with the negative (–) battery terminal
connected may cause electrical shock and injury due to a
short circuit.
Some cars equipped with the electrical safety system have
specific procedures of battery terminal disconnection.
FAILURE TO FOLLOW THE PROCEDURE MAY LEAD TO THE
UNINTENDED ACTIVATION OF THE ELECTRICAL SAFETY
SYSTEM RESULTING IN DAMAGE TO THE VEHICLE AND
PERSONAL INJURY OR DEATH.
❑
Never use safety-related components for installation, grounding, and other such functions.
Do not use safety-related vehicle components (fuel tank,
brake, suspension, steering wheel, pedals, airbag, etc.) for
wiring or fixing the product or its accessories.
❑
Installing the product on the air bag cover or in a
location where it interferes with airbag operation is
prohibited.
❑
Check for piping, gasoline tank, electric wiring, and
other items before installing the product.
If you need to open a hole in the vehicle chassis to attach or
wire the product, first check where the wire harness, gasoline tank, and electric wiring are located. Then open the hole
from outside if possible.
❑
Never install the product in a location where it interferes with your field of vision.
❑
Never have the power cord branched to supply other
equipment with power.
❑
After installation and wiring, you should check the
normal operation of other electrical equipment.
The continuation of their using in abnormal conditions may
cause fire, electrical shock or a traffic accident.
❑
In the case of installation to an airbag equipped car,
confirm warnings and cautions of the vehicle manufacturer before installation.
❑
Make sure the leads do not interfere with driving or
getting in and out of the vehicle.
❑
Insulate all exposed wires to prevent short circuiting.
2
CQ-C7405W
Page 3
Caution
Observe the following cautions when using this
unit.
❑
Keep the sound volume at an appropriate level.
Keep the volume level low enough to be aware of road and
traffic conditions while driving.
❑
Do not insert or allow your hand or fingers to be
caught in the unit.
To prevent injury, do not get your hand or fingers caught in
moving parts or in the disc slot. Especially watch out for
infants.
❑
This unit is designed for use exclusively in automobiles.
❑
Do not operate the unit for a prolonged period with
the engine turned off.
Operating the audio system for a long period of time with the
engine turned off will drain the battery.
❑
Do not expose the unit to direct sunlight or excessive heat.
Otherwise these will raise the interior temperature of the
unit, and it may lead to smoke, fire, or other damage to the
unit.
❑
Do not use the product where it is exposed to water,
moisture, or dust.
Exposure of the unit to water, moisture, or dust may lead to
smoke, fire, or other damage to the unit. Make especially
sure that the unit does not get wet in car washes or on rainy
days.
Observe the following cautions when
installing.
❑
Refer wiring and installation to qualified service
personnel.
Installation of this unit requires special skills and experience.
For maximum safety, have it installed by your dealer.
Panasonic is not liable for any problems resulting from your
own installation of the unit.
❑
Follow the instructions to install and wire the product.
Not following the instructions to properly install and wire the
product could cause an accident or fire.
❑
Take care not to damage the leads.
When wiring, take care not to damage the leads. Prevent
them from getting caught in the vehicle chassis, screws, and
moving parts such as seat rails. Do not scratch, pull, bend or
twist the leads. Do not run them near heat sources or place
heavy objects on them. If leads must be run over sharp
metal edges, protect the leads by winding them with vinyl
tape or similar protection.
❑
Use the designated parts and tools for installation.
Use the supplied or designated parts and appropriate tools
to install the product. The use of parts other than those supplied or designated may result in internal damage to the unit.
Faulty installation may lead to an accident, a malfunction or
fire.
❑
Do not block the air vent or the cooling plate of the
unit.
Blocking these parts will cause the interior of the unit to
overheat and will result in fire or other damage.
❑
Do not install the product where it is exposed to
strong vibrations or is unstable.
Avoid slanted or strongly curved surfaces for installation. If
the installation is not stable, the unit may fall down while
driving and this can lead to an accident or injury.
❑
Installation Angle
The product should be installed in a horizontal position with
the front end up at a convenient angle, but not more than
30˚.
The user should bear in mind that in some areas there may
be restrictions on how and where this unit must be installed.
Consult your dealer for further details.
❑
Wear gloves for safety. Make sure that wiring is
completed before installation.
❑
To prevent damage to the unit, do not connect the
power connector until the whole wiring is completed.
❑
Do not connect more than one speaker to one set of
speaker leads. (except for connecting to a tweeter)
Observe the following cautions when handling
the battery for the remote control unit.
●
Use only specified battery (CR2025).
●
Match the polarity of the battery with the (+) and (–) marks
in the battery case.
●
Replace dead battery as soon as possible.
●
Remove the battery from the remote control unit when not
using it for an extended period of time.
●
Insulate the battery (by placing them in a plastic bag or covering them with vinyl tape) before disposal or storage.
●
Dispose of the battery according to the local regulations.
●
Do not disassemble, recharge, heat or short the battery. Do
not throw a battery into a fire or water.
In case of battery leakage
●
Thoroughly wipe the battery liquid off the battery case and
insert new battery.
●
If any part of your body or clothing comes into contact with
battery liquid, wash it with plenty of water.
●
If battery liquid comes into contact with your eyes, wash
them with plenty of water and get immediate medical attention.
English
Safety Information
CQ-C7405W
3
Page 4

Safety Information (continued)
Caution
THIS PRODUCT IS A CLASS ILASER PRODUCT.
USE OF CONTROLS OR ADJUSTMENTS OR PERFORMANCE
OF PROCEDURES OTHER THAN THOSE SPECIFIED HEREIN
MAY RESULT IN HAZARDOUS RADIATION EXPOSURE.
DO NOT OPEN COVERS AND DO NOT REPAIR BY YOURSELF.
REFER SERVICING TO QUALIFIED PERSONNEL.
Before Reading These Instructions
Panasonic welcomes you to our constantly growing family of electronic products owners.
We endeavor to give you the advantages of precise electronic and mechanical engineering, manufactured with carefully
selected components, and assembled by people who are proud of the reputation their work has built for our company. We
know this product will bring you many hours of enjoyment, and after you discover the quality, value and reliability we have
built into it, you too will be proud to be a member of our family.
The instruction manual consists of 2 books. One is “Operating Instructions” describing the operations of the main unit. The other is
“System Upgrade Guidebook” describing the optional devices such as CD changer.
4
CQ-C7405W
Page 5
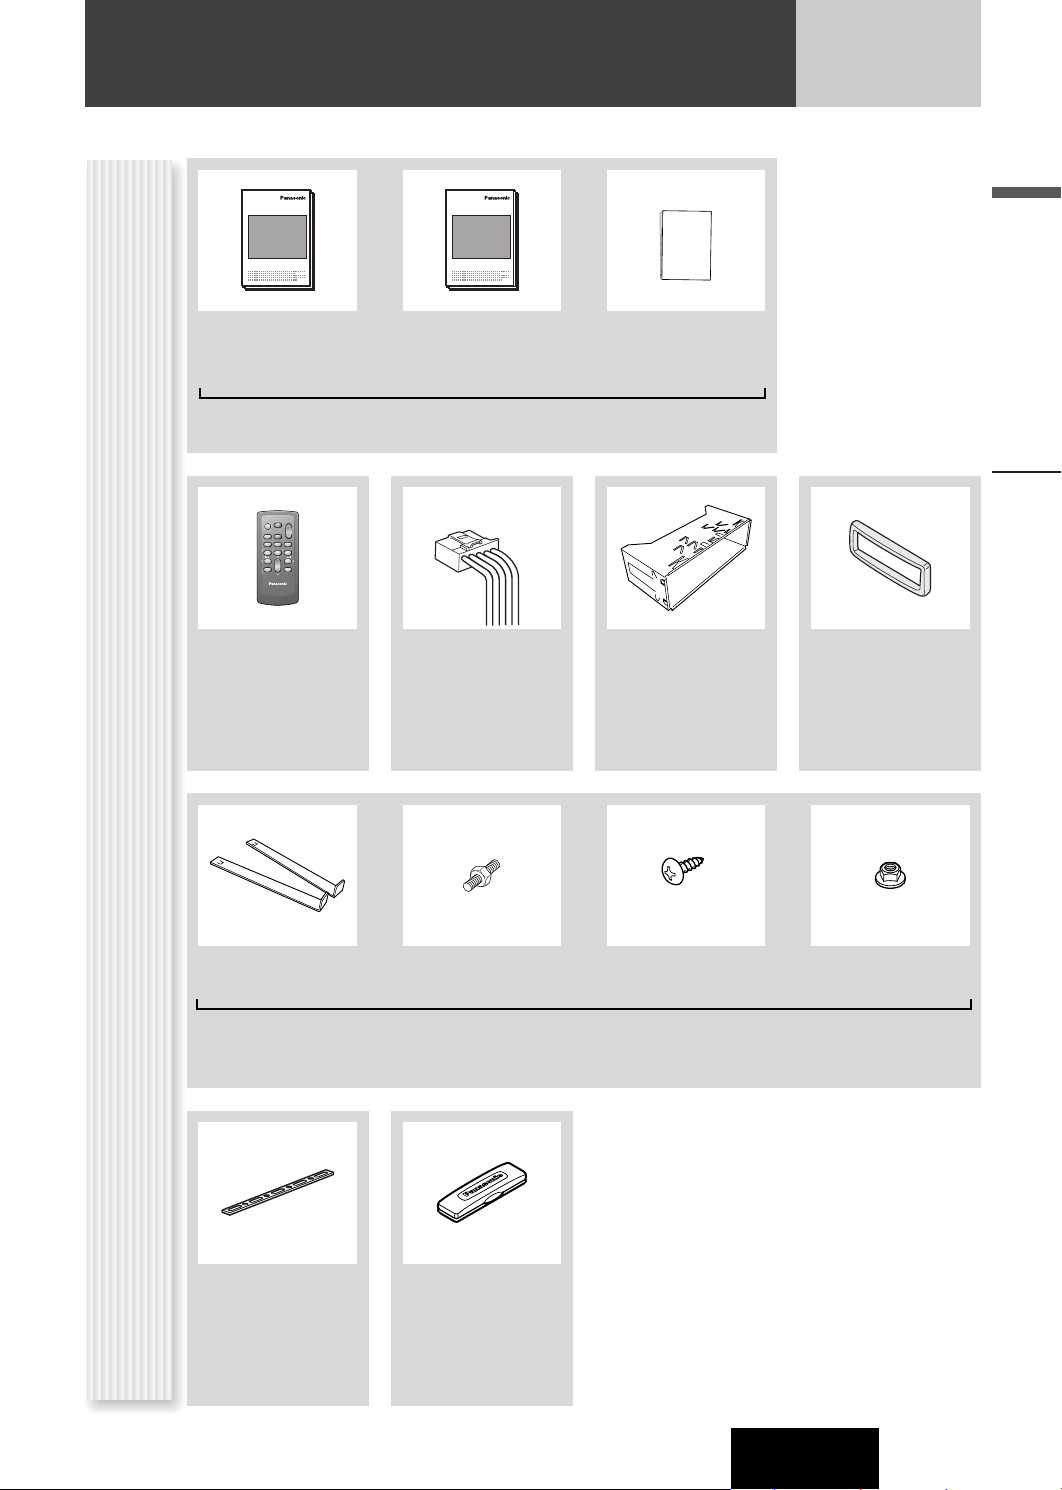
Before Reading These Instructions (continued)
XXXXXXXXXXXXXXX
XXXXXXXXXXXXXXXXX
XXXXXXXXXXXXXX
XXXXXXXXXXXXXXXX
OO-OOOOO
Operating
Instructions
(YFM284C664CA)
POWER
SOURCE
MENU
SEL
SEL
SRC
SRC
VOL
VOL
SET
BAND MUTE
BAND MUTE
2 31
231
RANDOM
SCAN REPEAT
5
64
5
64
97
97
8
8
TUNE TUNE
0
0
DISP
DISP
#
#
NUMBER
CAR AUDIO
Remote Control Unit
(including a battery)
(CR2025)
(EUR7641010)
Q'ty: 1
XXXXXXXXXXXXXXX
XXXXXXXXXXXXXXXXX
XXXXXXXXXXXXXX
XXXXXXXXXXXXXXXX
OO-OOOOO
System Upgrade
Guidebook
(YFM284C665CA)
Instruction kit
Q'ty: 1 set
(YGAJ021011)
Q'ty: 1
Installation
Instructions
(YFM294C092CA)
Mounting Collar
(FX0214C384ZB)
Q'ty: 1
English
Trim PlatePower Connector
(YEFC051013)
Q'ty: 1
Accessories
Lock Cancel Plate Mounting Bolt
Rear Support Strap
(YFG044C002ZA)
Q'ty: 1
(5 mmø)
Removable Face
Plate Case
(YFC054C089CA)
Q'ty: 1
Tapping Screw
(5 mmø x 16 mm)
Hex. Nut
(5 mmø)
(YEP0FZ5739)
Q'ty: 1 set
Notes:
¡ The number in parenthesis underneath each accessory
part name is the part number for maintenance and
service.
¡ Accessories and their parts numbers are subject to
modification without prior notice due to improvements.
¡ Mounting Collar and Trim Plate are mounted on the
main unit at shipment.
Safety Information, Before Reading These Instructions
CQ-C7405W
5
Page 6
Features
Compatible with the AAC format
This unit has newly become compatible with AAC-formatted
files in addition to the existing MP3 and WMA files.
Note: Some of AAC files (such as SD-Jukebox type) are not
playable.
Hands-Free Phone System
Connection of the optional Hands-Free Phone System (HandsFree Kit featuring Bluetooth
users to talk on a handsfree cellular phone if the phone
supports Bluetooth.
Note: This unit is designed only for receiving calls. It
cannot send calls.
Bluetooth
The Bluetooth word mark and logo are owned by the
Bluetooth SIG, Inc. and any use of such marks by
Matsushita Electric Industrial Co.,Ltd. is under license.
Other trademarks and trade name are those of their
respective owners.
®
®
technology: CY-BT100N) allows
Expansion Module (hub unit)
Connection of the Expansion Module (hub unit, CY-EM100N)
allows users to connect up to 4 optional devices shown below.
Note: A hub unit is not required to connect only one optional
component.
Sound Control
SQ (Sound Quality)
You have six preset modes (FLAT, ROCK, POP, VOCAL, JAZZ,
CLUB). You can customize your settings for these and save
them for instant recall.
SQ7
This is 7-band equalizer with 60, 160, 400, 1 k, 3 k, 6 k, and 16
kHz. Each band is adjustable between – 12 dB and 12 dB in
steps of 2 dB.
D·M
You can assign your favorite broadcasting station to the
[D·M] button. As the result of doing that, your favorite
broadcasting station can be received even if the unit is in
the CD mode or other modes.
(a page 18)
Customize
Initially stored moving images and still images are editable to
taste. IMAGE STUDIO* allows you to process images from a
digital camera or other devices without difficulty. (a page 30)
* This software is downloadable from Panasonic Web site
(http://panasonic.co.jp/pas/en/software/customize/index.html)
W
ide array of components for system upgrade
Various optional components allow users to obtain availability
of wide range of system upgrade. Upgrading the system
delivers relaxed AV space in a car. For further information, refer
to the separate System Upgrade Guidebook.
¡ DVD Changer
The optional adapter (Conversion Cable for DVD/CD
Changer: CA-CC30N) allows you to connect the optional Panasonic DVD changer unit (CX-DH801W).
¡ CD Changer
The optional adapter (Conversion Cable for DVD/CD
Changer: CA-CC30N) allows you to connect the optional Panasonic CD changer unit (CX-DP880).
®
¡ iPod
The optional adapter (
allows you to connect the optional iPod series.
iPod is a trademark of Apple Computer, Inc., registered in
the U.S. and other countries.
Direct Cable for iPod: CA-DC300N
)
6
CQ-C7405W
Page 7
Contents
English 2
¡Safety Information 2
¡Before Reading These Instructions 4
¡Features 6
¡Controls Layout 8
Common
¡Preparation (Clock adjustment etc.) 10
¡General 12
¡Sound Control 16
êêÛÛÒÒÒÒÍÍËËÈÈ
38
74
¡Radio 18
Each
As Needed
¡CD Player 20
Source
¡MP3/WMA/AAC Player 22
¡Audio Setting 26
¡Function Setting (Security Function Setting etc.) 27
¡Display Setting 28
¡Customize the Display (Customize Function) 30
¡Troubleshooting 32
¡Error Display Messages 35
¡Notes on Discs 36
¡Maintenance/Fuse 36
¡Specifications 37
CQ-C7405W
7
Page 8
Controls Layout
OPENDISPBAND
CQ-C7405W
TILT/SET/APM
SQ
MENU
TUNE
TRACK
MUTE
SBC-SW
FOLDER/P-SET/DISC
LIST
SOURCE
PWR
/
V
O
L
P
U
S
H
S
E
L
/
S
R
S
W
O
W
D・M
Note: This instruction manual explains operations for use with the buttons on the main unit. (Different operations excluded)
SQ Sound Quality (a page 17)
TUNE
(a page 18)
TRACK (FILE)
(a page 20, 22)
VOL
(a page 13)
Main Unit
PUSH SEL Select
(a page 26)
SRS WOW
(a page 16)
SOURCE Source
PWR Power
(a page 12, 14)
MUTE (a page 13)
SBC-SW Super Bass
Control-Subwoofer
(a page 17)
P-SET Preset (a page 19)
DISC (a System Upgrade
Guidebook, page 8, 10)
FOLDER (a page 22)
LIST (a System Upgrade
Guidebook, page 12)
D·M Direct Memory
(a page 18)
MENU (a page 27, 28)
Remote Control
Sensor
DISP Display
(a page 15)
BAND (a page 18)
/5Pause/Play
y
(a page 20, 22)
APM Auto Preset Memory
(a page 19)
u OPEN (eject)
(a page 13)
TILT
(a page 13)
Release
(a page 12)
8
Opens
When Face Plate
CQ-C7405W
Disc slot
Page 9
0
T
R
Number Buttons
0 to 9
9
–
SEL Select
#
Number
NUMBE
RANDOM
4
SCAN
5
RANDOM
SCAN
POWER
SRC (SOURCE)
BAND
REPEA
REPEAT
6
7
9
Remote Control UnitOperations executable only with main unit/
TUNE
Pause/Play
SET
Auto Preset
APM
Memory
TRACK (FILE)
MENU
POWER
SOURCE
MENU
SEL
SEL
SRC
SRC
SET
BAND MUTE
BAND MUTE
RANDOM
TUNE TUNE
#
#
NUMBER
VOL
VOL
2 31
231
SCAN REPEAT
5
64
5
64
97
97
8
8
0
0
DISP
DISP
VOL Volume
}:Up
{:Down
MUTE
SBC-SW Super Bass
Control-Subwoofer
DISP Display
English
8
0
(Preset)
P·SET
DISC (FOLDER)
Although most of the functions of this unit are executable
with both the main unit and remote control, the following
functions are excluded.
Operations executable only with main uni
t
¡ Face panel’s opening, closing, tilting, and removal
actions (a page 13)
¡ Disc ejection (a page 13)
¡ SRS WOW on, off, and adjustment (a page 16)
¡ SQ on, off, and adjustment (a page 17)
¡ Direct memory setting and calling (a page 18)
Operations executable only with remote control
¡Preset station calling with one-touch operation
(a page 19)
¡ Direct access to tracks on CDs (a page 21, 23)
¡ Random and repeat play with one-touch operation
(a page 21, 23)
¡ Scan playback (a page 21, 23)
CAR AUDIO
Controls Layout
operations executable only with remote control
CQ-C7405W
9
Page 10
Preparation
q
w
2
3
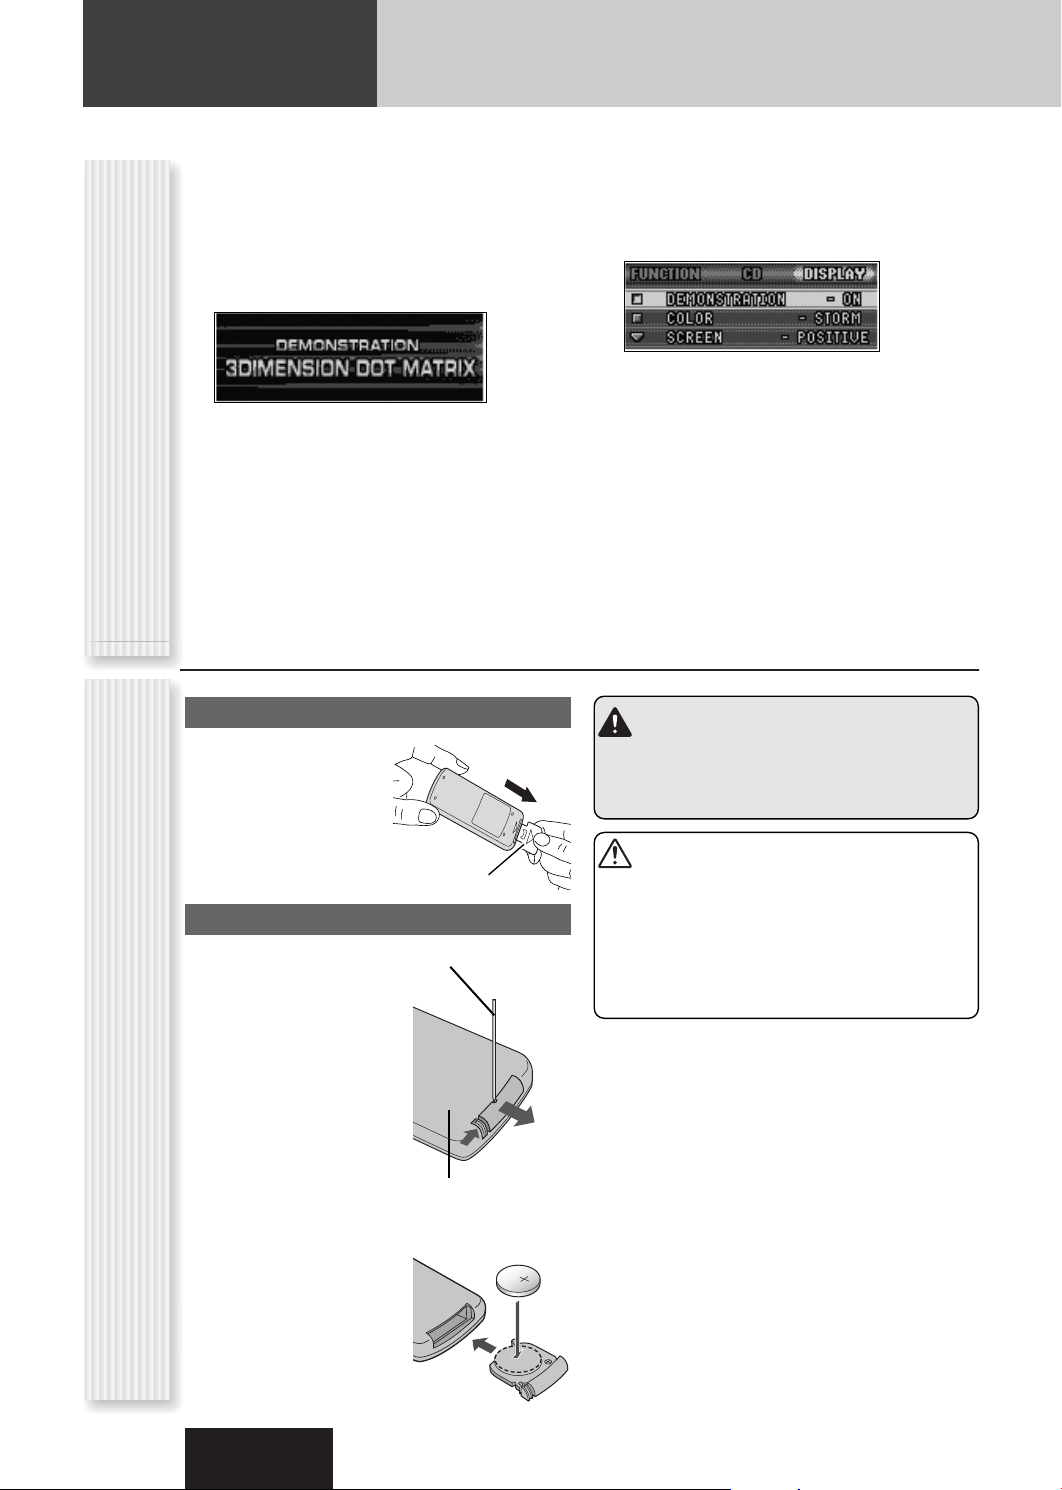
For the first use, the following screen may appear
repeatedly.
Set your car's ignition switch to the ACC
1
or On position.
The demonstration screen appears.
Press [SOURCE] (PWR: POWER).
2
Press [MENU] to display the menu
3
display.
For using the remote control, hold down [SEL]
(MENU) for 2 sec. or more.
Press []] or [[] to display the
Cancellation of demonstration screenRemote Control Preparation
4
DISPLAY menu.
Preparation Before Initial Use
Pull the insulation film out
from the backside of
remote control gently.
Turn [VOL] to select
5
“DEMONSTRATION”.
For using the remote control, use [{] or [}].
Press [PUSH SEL] to select “OFF”.
6
For using the remote control, use [BAND] (SET).
Press [MENU] to close the menu
7
screen.
For using the remote control, hold down [SEL]
(MENU) for 2 sec. or more.
Note: This unit is operable as usual even if the
demonstration screen is activated. The demonstration
screen automatically appears if no operation is executed
for 1 minute.
Warning
Keep batteries and insulation film out of reach of
infants. If an infant ingests a battery, please seek
immediate medical attention.
Battery Replacement
q Remove the battery holder
with the remote control unit
placed on a flat surface.
q Stick your thumbnail into
the groove, and push the
holder in the direction of
the arrow, and at the
same time.
w Pull it out in the direction
of the arrow using a
tough pointed object.
w Put a battery in the case
with (+) side facing up.
e Put the case back.
Insulation film
Tough pointed object
Back side
Cautions
¡Remove and dispose of an old battery immediately.
¡Do not disassemble, heat or short a battery. Do not
throw a battery into a fire or water.
¡Follow local regulations when disposing of a battery.
¡Improper use of a battery may cause overheating, an
explosion or ignition, resulting in injury or a fire.
Note: Battery Information:
Battery Type: Panasonic lithium battery (CR2025)
(Included in the remote control)
Battery Life: Approximately 6 months under normal use
(at room temperature)
10
CQ-C7405W
Page 11
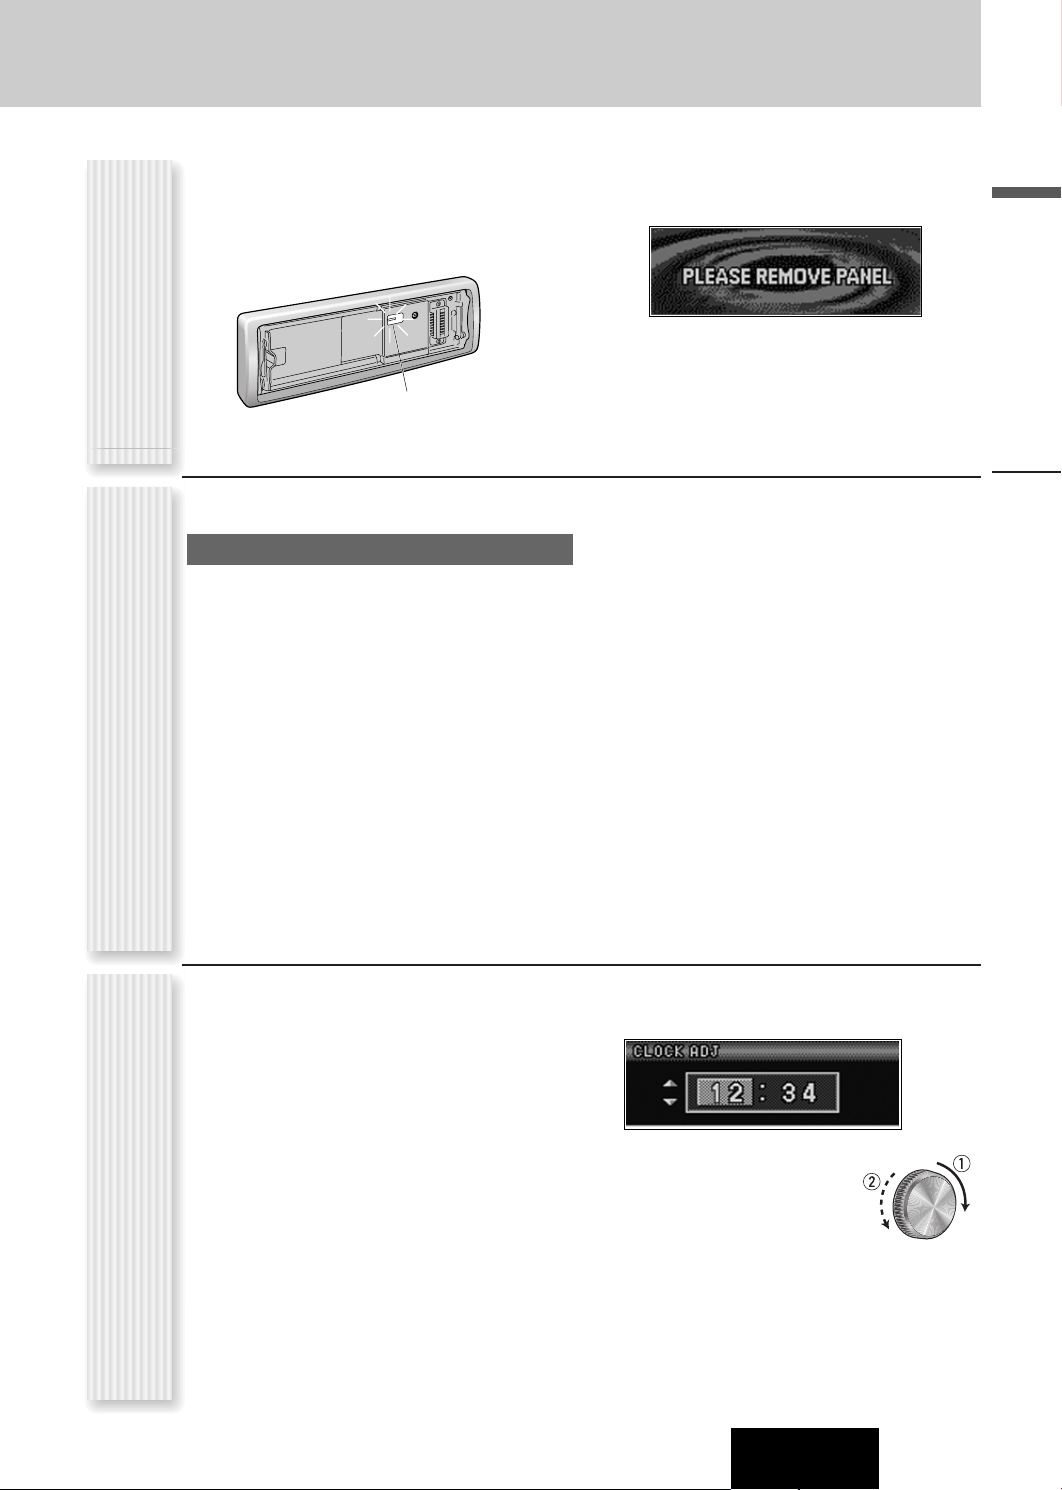
The following functions are activated when the Security
Function is ON. (a page 27)
¡ The security indicator lights up when removing the
face plate.
Setting
¡ The alarm sounds and the message appears on the
screen to warn you to remove the face plate at ACC
off.
English
Security Function
You may need to set the following depending on the
devices to be connected.
Using Subwoofer
¡ Subwoofer level adjustment (a page 26)
¡ Subwoofer low pass filter (a page 26)
Other SettingsClock adjustment
Security Indicator
Preparation
Note: Adjust the clock when “ADJUST” appears on the
display.
Press [MENU] to display the menu
1
display.
For using the remote control, hold down [SEL]
(MENU) for 2 sec. or more.
Press []] or [[] to display the
2
DISPLAY menu.
Turn [VOL] to select “CLOCK ADJ”.
3
For using the remote control, use [{] or [}].
Press [PUSH SEL], and the clock
4
adjustment screen appears.
For using the remote control, use [BAND] (SET).
Adjust the setting value.
5
:
Adjusting minutes
[[]
[]]
:
Adjusting hours
q
:
Forward
w
:
Backward
Press [PUSH SEL], and the menu
6
screen resumes.
For using the remote control, use [BAND] (SET).
Press [MENU] to close the menu screen.
7
For using the remote control, hold down [SEL]
(MENU) for 2 sec. or more.
CQ-C7405W
11
Page 12
General
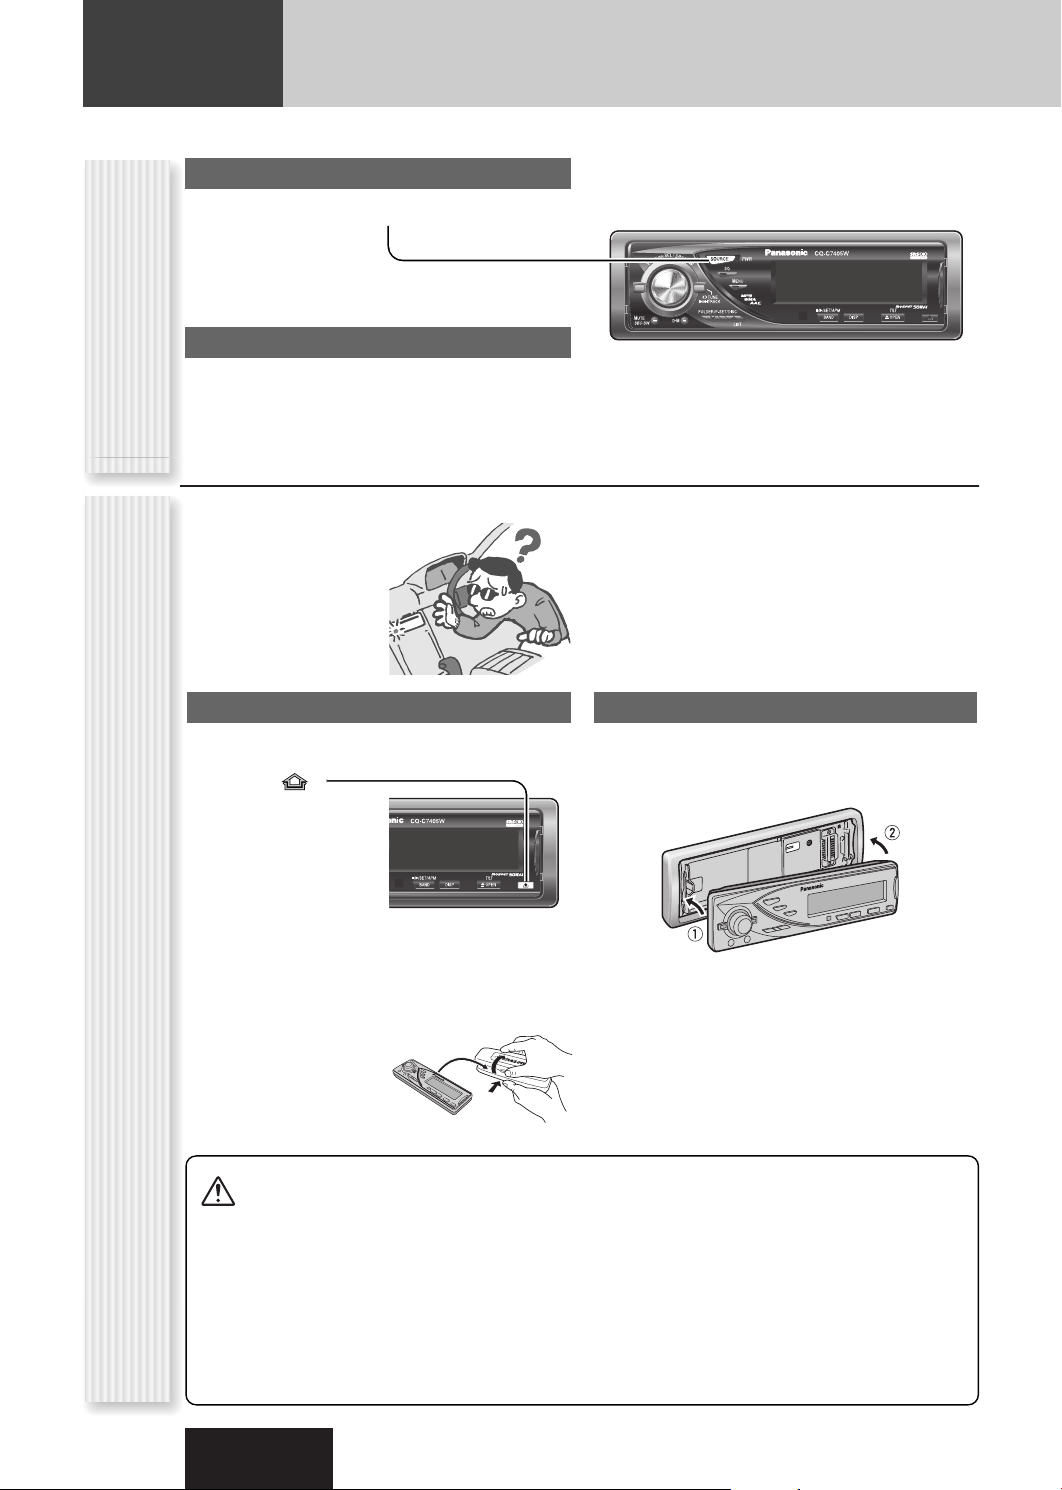
This chapter explains how to turn on or off the power, how to adjust the volume, etc.
Power on
Press [SOURCE] (PWR: POWER).
Power off
(PWR: POWER)
Power On/off
Hold down [SOURCE] (PWR: POWER) until
you hear a beep, then release it.
You can remove the face
plate to prevent it from
being stolen.
Removing
Turn off the power (a page 12)
1
Press []
2
(Release).
(The face plate disengages with a click
when it is removed.)
CQ-C7405W
L
E
/
S
S
R
H
S
S
U
W
P
SOURCE
PWR
O
L
W
O
V
MUTE
SBC-SW
SQ
MENU
TUNE
TRACK
FOLDER/P-SET/DISC
D・M
LIST
CQ-C7405W
/
TILT/SET/APM
OPENDISPBAND
Mounting
Slide the left side of the face plate in
1
place.
TILT/SET/APM/
OPENDISPBAND
12
The face plate automatically closes after a lapse of 5
seconds while it is open.
The power is automatically turned off while the unit
is active.
(ANTI-THEFT SYSTEM)
Put the face
3
plate in the case.
Face Plate Removing/Mounting
Cautions
¡ It is recommended to remove or mount the face
plate when the plate is at the closed position.
Do not remove or mount the face plate when the
plate is in motion.
¡ This face plate is not waterproof. Do not expose it to
water or excessive moisture.
¡ Do not remove the face plate while driving your car.
CQ-C7405W
Press the right end of the face plate
2
until “click” is heard.
¡ Do not place the face plate on the dashboard or
nearby areas where the temperature rises to high
levels.
¡ Do not touch the contacts on the face plate or on the
main unit, since this may result in poor electrical
contacts.
¡ If dirt or other foreign substances get on the con-
tacts, wipe them off with clean and dry cloth.
¡ To avoid damaging the face plate, do not push it
down or place objects on it while it is open.
Page 13
Open/Eject
Press [u OPEN].
When a disc is already loaded, the disc will automatically
be ejected.
¡ To avoid damaging the face plate, do not push it
down or place objects on it while it is open.
¡ Do not pinch your finger or hand in the face plate.
¡ Do not insert foreign objects into the disc slots.
(OPEN/CLOSE, TILT)
¡ For the following cases, the face plate automatical-
ly closes. Use caution not to catch your finger.
¡ After a lapse of 20 seconds
¡ When a disc is inserted
¡ When the face plate is removed (a page 12)
Face Plate Motion (Open/Close, Tilt)
¡ When ACC is set to off
Close
Press [u OPEN].
Cautions
L
E
/
S
S
R
H
S
S
U
W
P
SOURCE
PWR
O
L
W
O
V
MUTE
SBC-SW
SQ
MENU
TUNE
TRACK
FOLDER/P-SET/DISC
D・M
LIST
CQ-C7405W
/
TILT/SET/APM
OPENDISPBAND
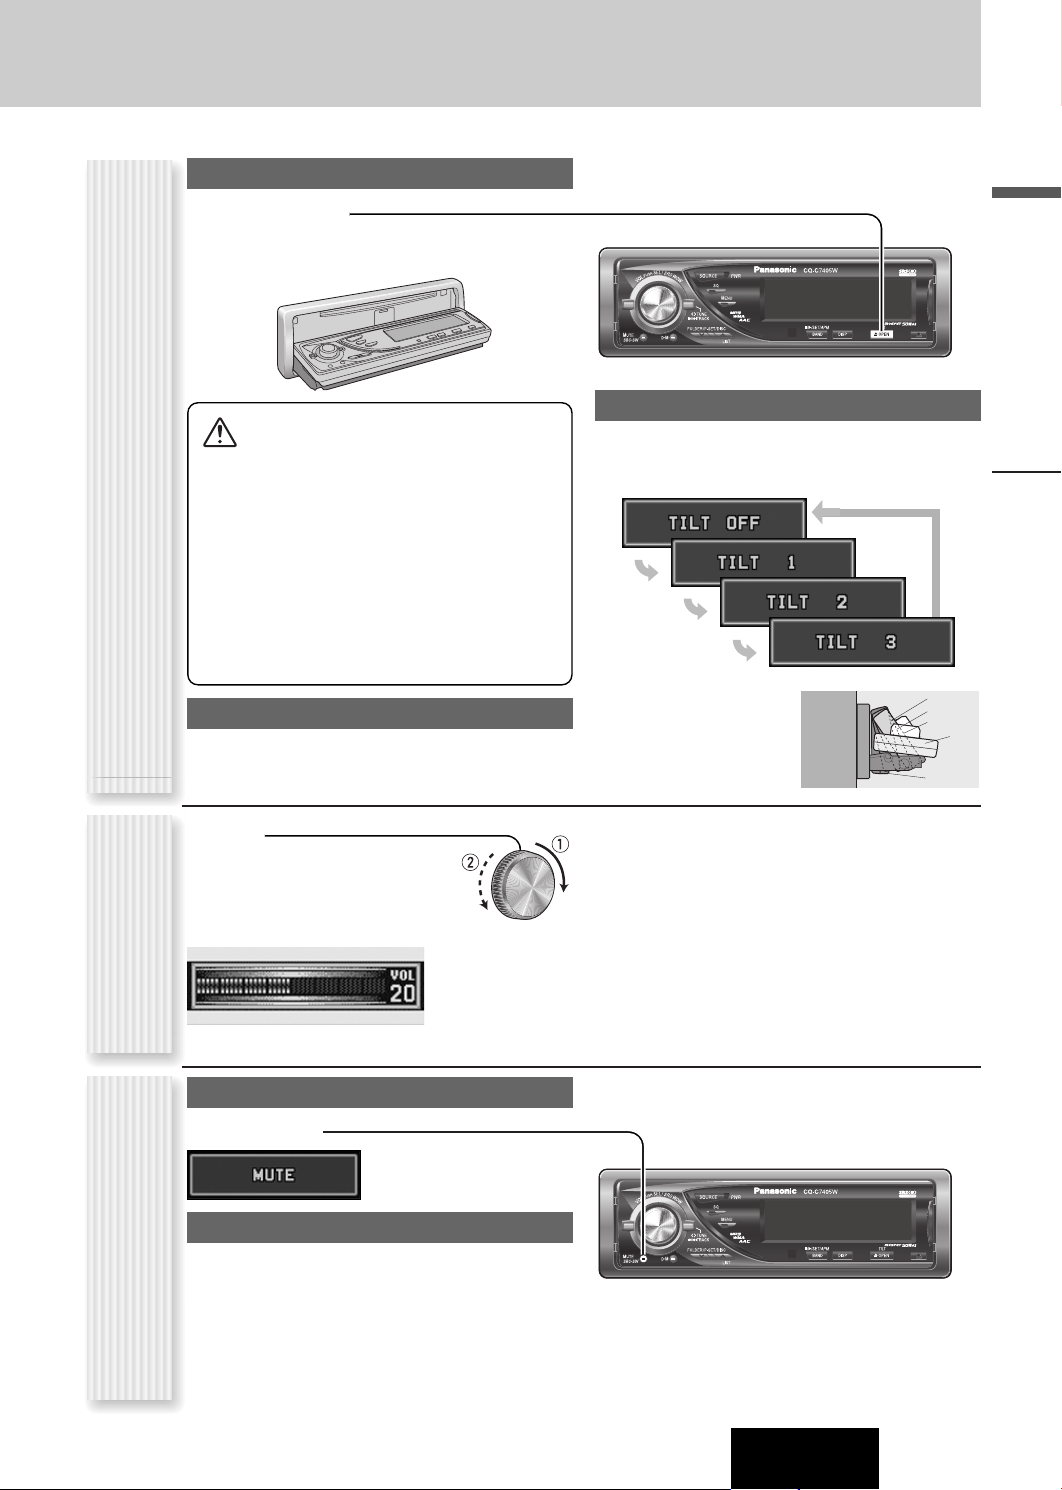
Tilt
The display angle changes among 4 levels as follows
every time you hold down [u OPEN] (TILT) for 1 sec.
or more and release.
Note: The last selected
angle is memorized even
after turning off the power.
TILT 1
TILT 2
TILT 3
OPEN
TILT OFF
English
General
q Up
w Down
Setting Range: 0 to 40
Default: 13
(VOLUME)
Volume Adjustment
Volume off (down)
Press [MUTE].
Cancel
Press [MUTE] again.
Note:
MUTE (ATT: ATTENUATION)
Volume-down range can be specified.
(apage 27)
Temporary Volume Off (Down)
Notes:
¡ The volume level can be set independently for each
source. (For radio, one volume setting for AM, one
volume setting for all FMs)
¡ The volume is not adjustable while an error or the
menu screen is present on the monitor.
¡ This unit memorizes individual volume levels for each
source. Make volume adjustments of each source
appropriately to prevent large volume fluctuation when
the source is changed.
L
E
/
S
S
R
H
S
S
U
W
P
SOURCE
PWR
O
L
W
O
V
MUTE
SBC-SW
SQ
MENU
TUNE
TRACK
FOLDER/P-SET/DISC
D・M
LIST
CQ-C7405W
/
TILT/SET/APM
OPENDISPBAND
CQ-C7405W
13
Page 14
General (continued)
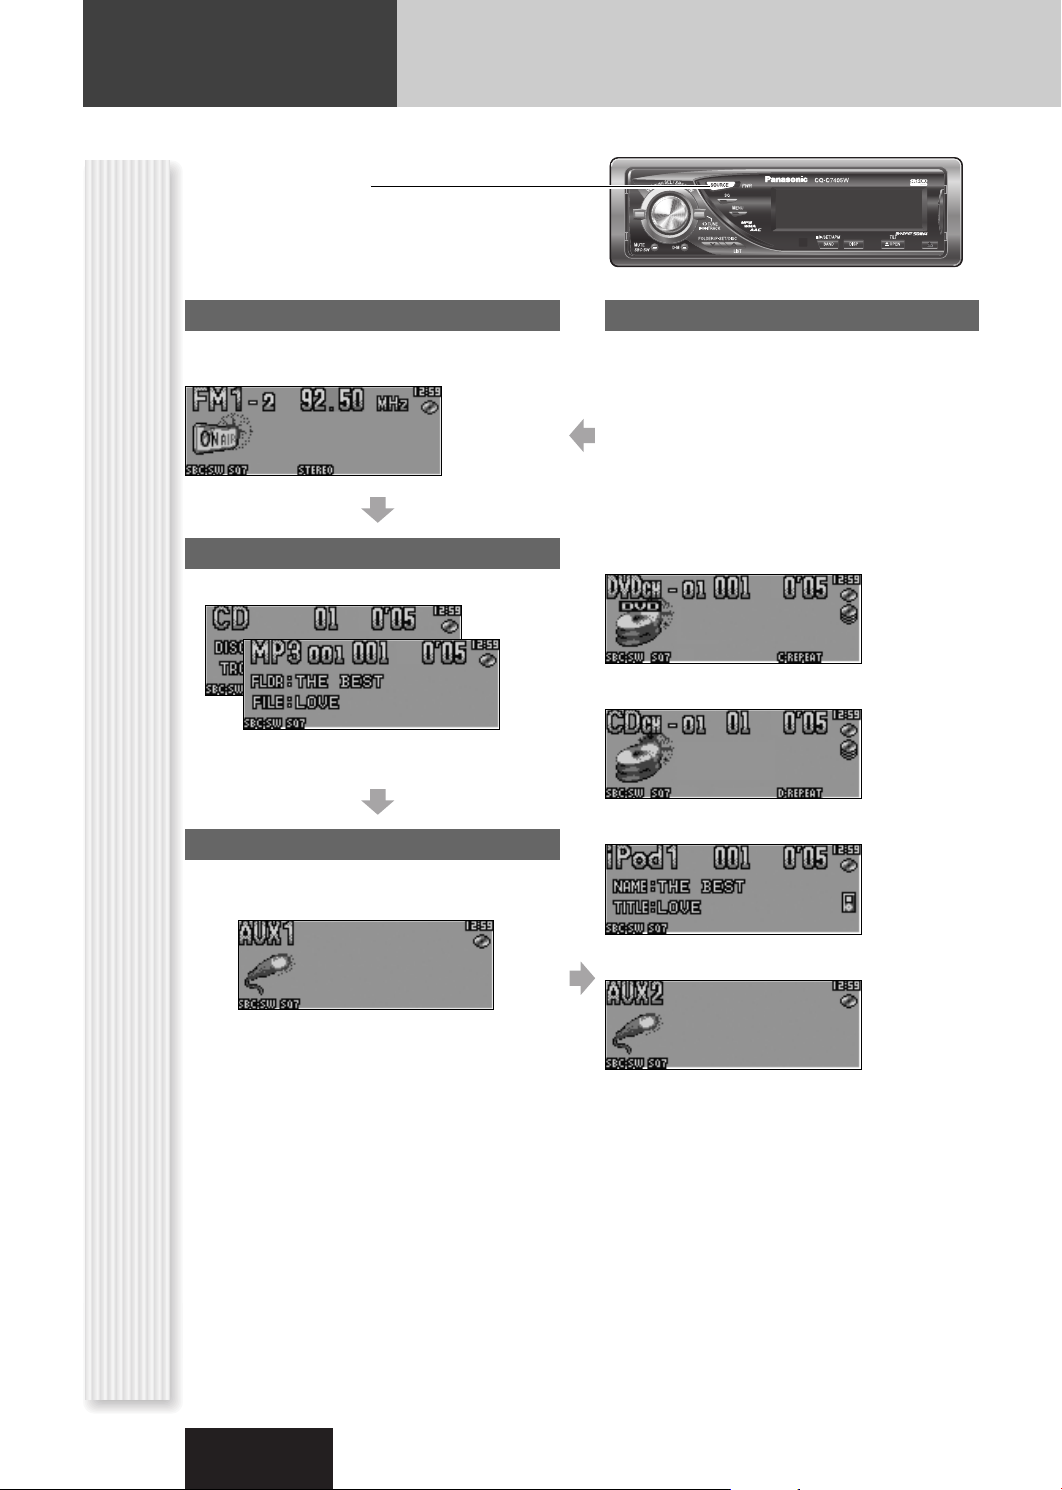
The source changes as follows every time
[SOURCE] is pressed.
Radio
FM1, FM2, FM3, AM (a page 18)
Player
When loading CD (a page 20)
When loading a disc containing compressed
audio files (a page 22)
L
E
/
S
S
R
H
S
S
U
W
P
SOURCE
PWR
O
L
W
O
V
MUTE
SBC-SW
SQ
MENU
TUNE
TRACK
FOLDER/P-SET/DISC
D・M
LIST
CQ-C7405W
/
TILT/SET/APM
OPENDISPBAND
System-up Connector
Device connected to the System-up Connector of this
unit
When optional devices are connected:
Shift to connected devices
When an expansion module is connected:
The devices connected to the ports 1 to 4 are activated
in sequence after shifting to AUX2 (devices connected
to the AUX terminal of the expansion module).
When connecting DVD Changer
When connecting CD Changer
(SOURCE)
AUX 1
Source Selection
Device connected to the AUX terminal of the this unit
When connecting iPod
When connecting Expansion Module
Note: For information about connectable devices, refer
to the System Upgrade Guidebook or the instruction
manual for each device.
14
CQ-C7405W
Page 15

The display changes as follows every time [DISP]
(DISPLAY) is pressed.
Note: The graphic pattern and still image are selectable.
(a page 29)
At power-on:
L
E
/
S
S
R
H
S
S
U
W
P
SOURCE
PWR
O
L
W
O
V
MUTE
SBC-SW
SQ
MENU
TUNE
TRACK
FOLDER/P-SET/DISC
D・M
LIST
CQ-C7405W
/
TILT/SET/APM
OPENDISPBAND
English
Folder hierarchy (Compressed Audio Player mode only)
Ordinary display + graphic pattern
Only graphic pattern
(DISP: DISPLAY)
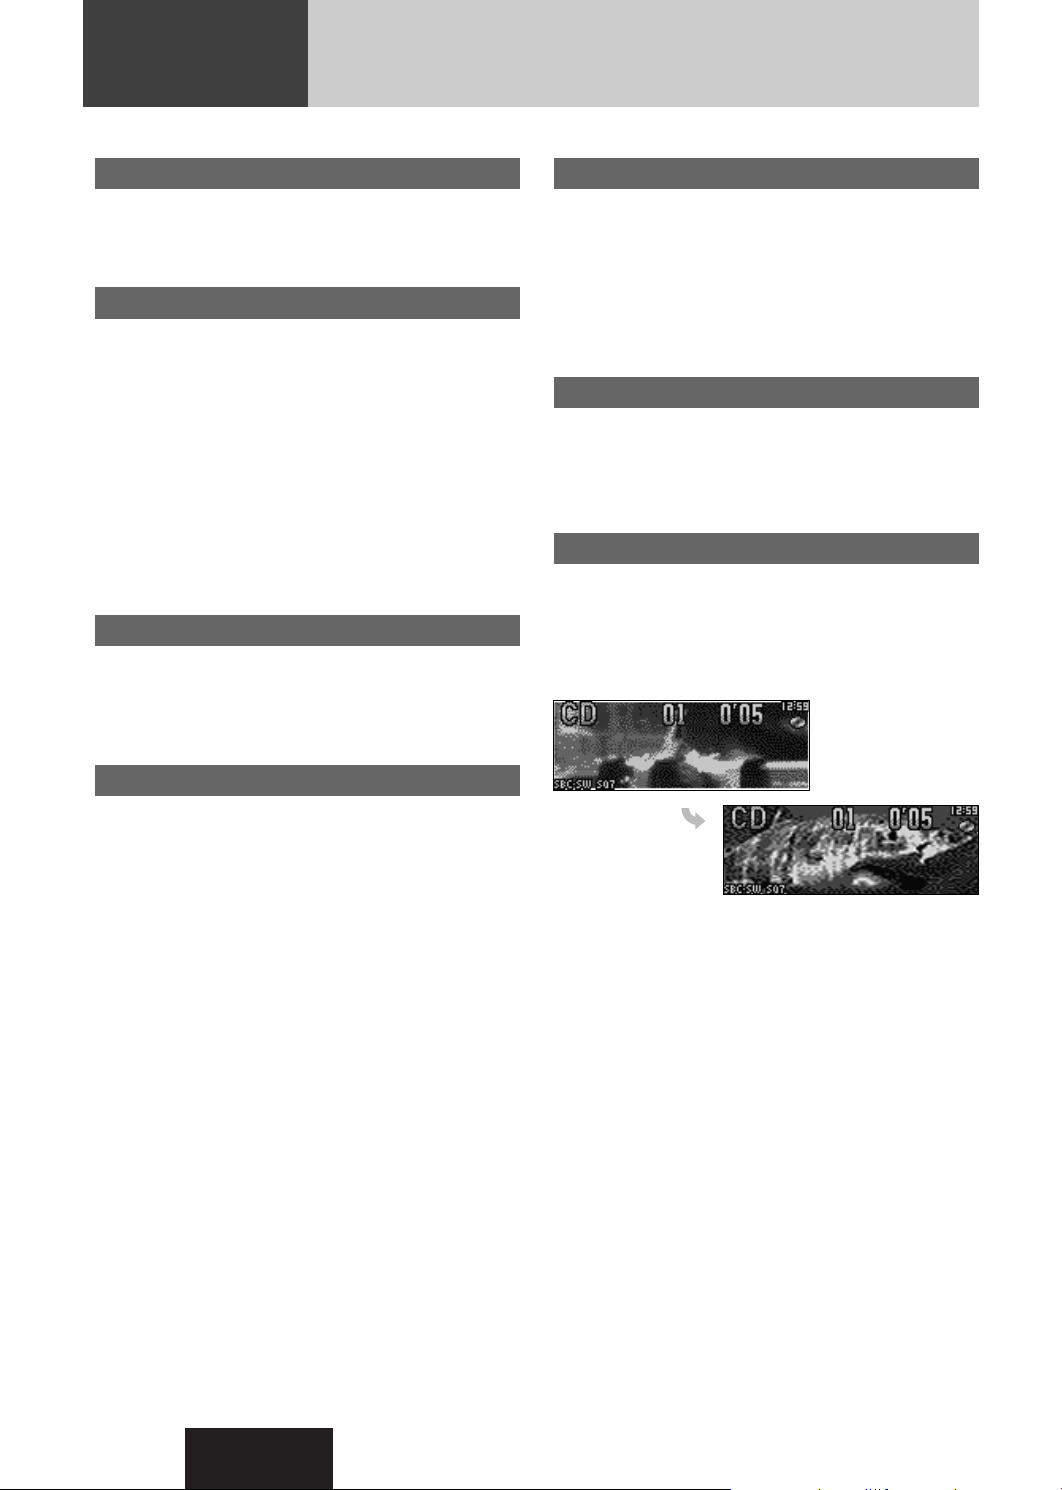
Display Change
Note: The graphic equalizer of 19 bands (S.A.) is
selectable when selecting a graphic pattern.
Mode
Display OFF
All displays disappear in 5 seconds.
Ordinary display + clock
General
Only still image
Ordinary display + still image
At power-off:
Clock display (default)
Off
CQ-C7405W
15
Page 16

Sound Control
SQ
MENU
TUNE
TRACK
MUTE
SBC-SW
FOLDER/P-SET/DISC
LIST
SOURCE
PWR
V
O
L
P
U
S
H
S
E
L
/
S
R
S
W
O
W
D・M
SQ
MENU
TUNE
TRACK
MUTE
SBC-SW
FOLDER/P-SET/DISC
LIST
SOURCE
PWR
V
O
L
P
U
S
H
S
E
L
/
S
R
S
W
O
W
D・M
SRS and SQ that provide users with simple adjustment of sound quality are described on this page. Audio Setting (a page 26) allows
users to adjust each speaker and the optional subwoofer in more detail (regarding BASS, TREBLE, BALANCE, FADER, SUB.W, LPF,
HPF, REAR).
SRS WOW™ is 3-D sound technology based on the HRTF
(Head Related Transfer Function) theory. Unlike
conventional audio systems, “natural 3-D sound field”,
“rich bass”, and “crisp and clear sound” can be obtained
at the same time in a wide area in front of speakers.
Holding down [VOL] (SRS WOW) for 2 sec. or more
toggles SRS WOW on and off.
L
E
/
S
S
R
H
S
S
U
W
P
SOURCE
PWR
O
L
W
O
V
MUTE
SBC-SW
SQ
MENU
TUNE
TRACK
FOLDER/P-SET/DISC
D・M
LIST
CQ-C7405W
/
TILT/SET/APM
OPENDISPBAND
SRS WOWSRS WOW Setting
Note: If you enable SRS WOW, the following functions
are automatically disabled:
SQ, BASS/TREBLE, BALANCE/FADER, HPF, SBC-SW
You can make a fine adjustment to SRS WOW.
Set the SRS WOW mode to on.
1
Hold down [SQ] for 2 sec. or more to
2
display “WOW MENU”.
Turn [VOL] to select a function to be
3
adjusted.
For using the remote control, use [}] or [{].
Press [PUSH SEL] to adjust.
4
(SRS WOW Menu Display)
For using the remote
control, use [BAND]
(SET).
Lights when SRS WOW is activated.
SRS TruBass
®
: Deep bass enhancement by application of the
bass reproduction technique of a pipe organ
(default)
: No enhancement
SRS FOCUS
®
Sound image movement in a vertical direction to make
sound crisp
: high (default)
: low
: off
®
SRS
: Surround function on (default)
: Surround function off
is a trademark of SRS Labs, Inc.
WOW technology is incorporated under license
from SRS Labs, Inc..
Press [DISP:DISPLAY] to close the
5
menu screen.
16
CQ-C7405W
Page 17
The equalizer curve is selectable from among preset 6
types (FLAT, ROCK, POP, VOCAL, JAZZ, and CLUB)
depending on your listening category.
Note: SQ is not changeable when SRS WOW is enabled.
(a page 16)
L
E
/
S
S
R
H
S
S
U
W
P
SOURCE
PWR
O
L
W
O
V
MUTE
SBC-SW
SQ
MENU
TUNE
TRACK
FOLDER/P-SET/DISC
D・M
LIST
CQ-C7405W
/
TILT/SET/APM
OPENDISPBAND
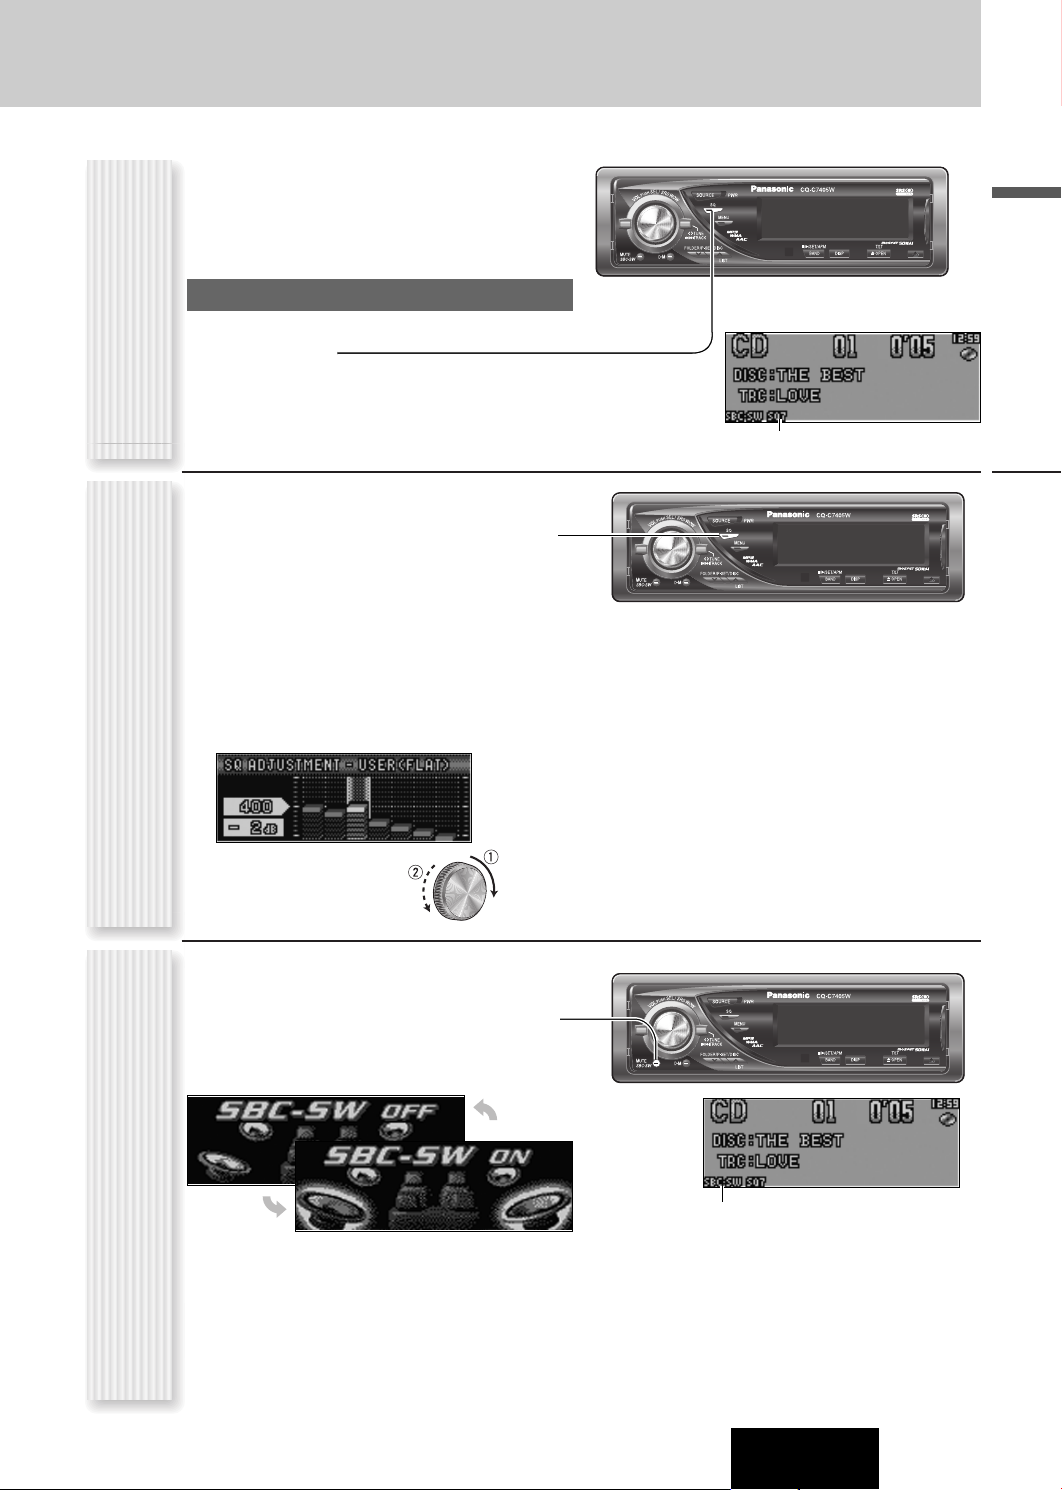
SQ changeover
The SQ category is changed every time [SQ] (SOUND
QUALITY) is pressed.
Note: Setting of SQ, bass/treble and volume are
(SQ: SOUND QUALITY)
influenced one another. If the influence mentioned above
SQ Selection Based on Genre
causes distortion to the audio signal, readjust bass/treble
or volume. (a page 26)
SQ is adjustable in accordance with your taste.
Hold down [SQ] (SOUND QUALITY) for 2
1
sec. or more to display “SOUND QUALITY
MENU” when SRS WOW is disabled.
Press [PUSH SEL].
2
The targeted SQ preset appears.
For using the remote control, use [BAND] (SET).
Adjust each band.
3
(USER)
Band: 60, 160, 400, 1 k, 3 k, 6 k, 16 k (Hz)
SQ adjustment
[]] [[]: Band selection
q w: Level up/down
Lights when SQ is activated.
L
E
/
S
S
R
H
S
S
U
W
P
SOURCE
PWR
O
L
W
O
V
MUTE
SBC-SW
SQ
MENU
TUNE
TRACK
FOLDER/P-SET/DISC
D・M
LIST
CQ-C7405W
/
TILT/SET/APM
OPENDISPBAND
“USER” appears in the category name after adjustment.
Note: If [PUSH SEL] is held down for 2 sec. or
more on the “SQ ADJUSTMENT” display, the preset
data that is called up can be turned into the default.
Press [
4
PUSH SEL
].
The screen of Step 1 appears again.
For using the remote control, use [BAND] (SET).
Press [DISP:DISPLAY].
5
The regular screen appears again.
English
Sound Control
The rear speaker can be used as a substitutional
subwoofer when a subwoofer is not connected.
Holding down [SBC-SW]for 2 sec. or more
toggles SBC-SW on and off.
Off (default)
Notes:
Substitutional Subwoofer
¡ If ON is selected, the settings of subwoofer level
(SBC-SW: SUPER BASS CONTROL-SUBWOOFER)
adjustment and subwoofer low pass filter are activated. (a page 26)
¡ SBC-SW is not changeable when SRS WOW is
enabled. (a page 16)
On
L
E
/
S
S
R
H
S
S
U
W
P
SOURCE
PWR
O
L
W
O
V
MUTE
SBC-SW
SQ
MENU
TUNE
TRACK
FOLDER/P-SET/DISC
D・M
LIST
CQ-C7405W
/
TILT/SET/APM
OPENDISPBAND
Lights when SBC-SW is activated.
CQ-C7405W
17
Page 18
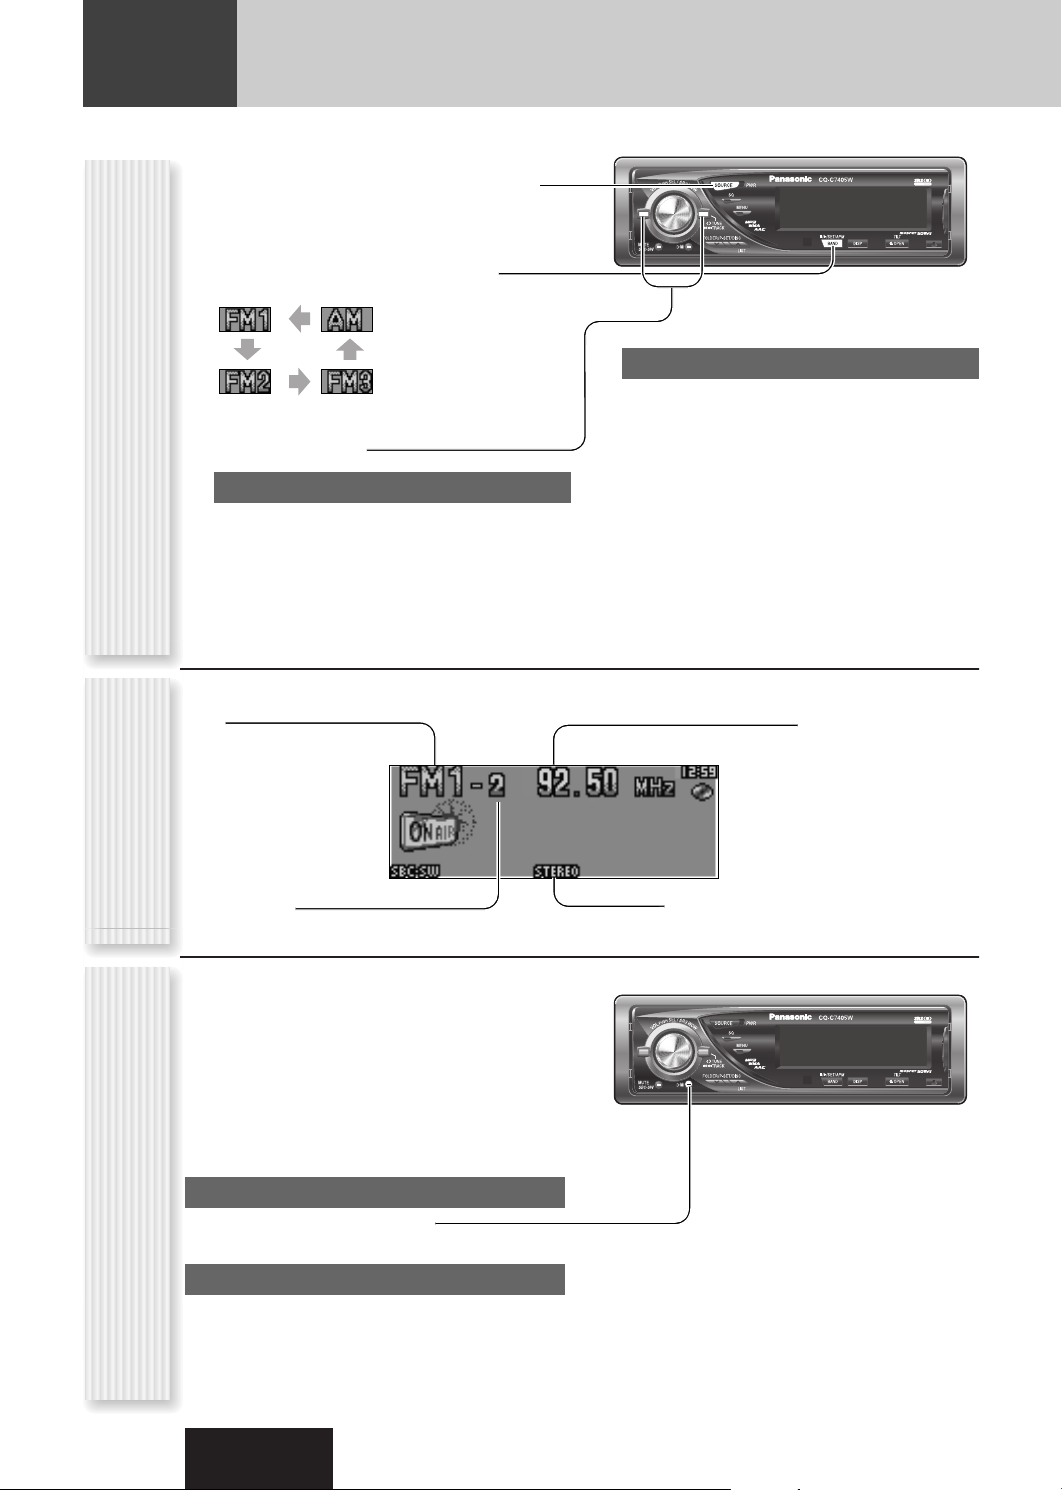
Radio
This chapter explains how to listen to the radio.
Press [SOURCE] to select the radio
1
mode.
Press [BAND] to select a band.
2
Select a station.
3
Operation Flow
Frequency adjustment
[]] (TUNE): Lower
[[] (TUNE): Higher
Note: Hold down for 0.5 sec. or more and release
for station search.
Band
L
E
/
S
S
R
H
S
S
U
W
P
SOURCE
PWR
O
L
W
O
V
MUTE
SBC-SW
SQ
MENU
TUNE
TRACK
FOLDER/P-SET/DISC
D・M
LIST
CQ-C7405W
/
TILT/SET/APM
OPENDISPBAND
Preset station selection
[{] (P-SET: Preset): Lower preset number
[}] (P-SET: Preset): Higher preset number
Notes:
¡ Direct selection can be executed with [1] to [6]
buttons on remote control.
¡ A preset station is selectable by turning [VOL]
while the preset list screen is present on the
monitor.
¡ The volume is not adjustable while the preset list
screen is present on the monitor.
Frequency
18
Radio Mode Display
Preset Number
You can assign your favorite broadcasting station to
the [D·M] button. As the result of doing that, your
favorite broadcasting station can be received even if
the unit is in the CD mode or other modes. (Default:
FM 87.50 MHz)
Note: For the use of an FM transmitter, it is useful
for users to register applicable frequencies on D·M
(DIRECT MEMORY).
D·M station Calling
Press [D.M] (DIRECT MEMORY).
Direct Memory
D·M station Setting
q Select a station you would like to preset.
w Hold down [D.M] (DIRECT MEMORY) for 2 sec.
or more.
CQ-C7405W
Lights while receiving an FM stereo signal.
L
E
/
S
S
R
H
S
S
U
W
P
SOURCE
PWR
O
L
W
O
V
MUTE
SBC-SW
SQ
MENU
TUNE
TRACK
FOLDER/P-SET/DISC
D・M
LIST
CQ-C7405W
/
TILT/SET/APM
OPENDISPBAND
Note: If the unit is turned off during receiving a broadcasting station via D·M, the unit starts again receiving
the broadcasting station via D·M by turning on the unit.
Page 19
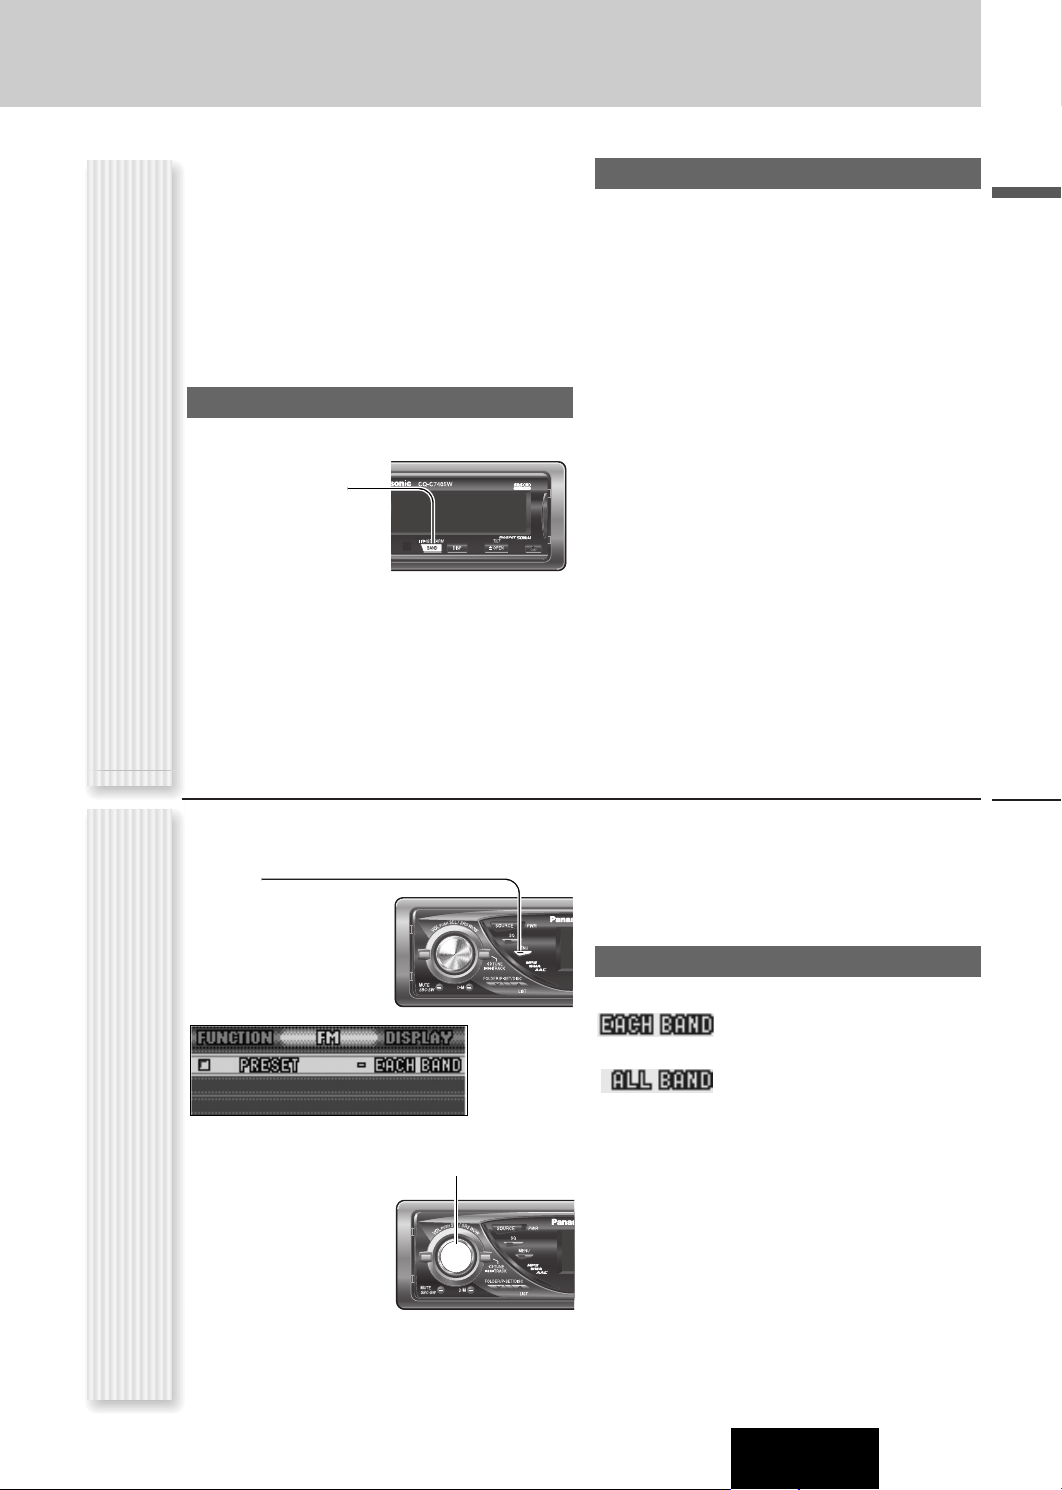
Up to 6 stations can be preset in AM, FM1, FM2, and FM3
respectively.
Preset stations can be simply called up by pressing [}]
(P-SET) or [{] (P-SET).
Notes:
¡ Direct selection can be executed with [1] to [6] but-
tons on remote control.
¡ You can switch between 6 and 18 for FM presetting
stations. (EACH BAND/ALL BAND)
¡ Preset stations are changeable. (Preset Swap)
Auto Preset Memory (APM)
Stations with good receiving conditions automatically
preset.
Select a band.
1
Hold down
Station Preset
2
[BAND] (APM)
for 2 sec. or
(APM: AUTO PRESET MEMORY P-SET: PRESET)
more.
The preset stations under best receiving conditions
are received for 5 sec. each after presetting the stations (SCAN). To stop scanning, press [}] or [{].
Note: New stations overwrite existing saved stations.
CQ-C7405W
Manual station preset
Tune in to a station.
1
Hold down [}] or [{] for 2 sec. or
2
more.
Turn [VOL] to select a preset number.
3
Hold down [PUSH SEL] for 2 sec. or
4
more, and the frequency is stored at the
selected preset number.
Notes:
¡ In step 2, a station can be registered by holding down
the numeric button [1] to [6] for 2 sec. or more.
TILT/SET/APM/
OPENDISPBAND
(DISPLAY).
¡ The operation above allows users to replace the cur-
rent station with the station preset in the selected
number while selecting a preset station. (Preset Swap)
¡ To stop presetting stations, press
[DISP]
English
Press [MENU] to display the menu dis-
1
play.
For using the remote
control, hold down
[SEL] (MENU) for 2
sec. or more.
Press [PUSH SEL] to adjust.
2
For using the remote
Radio Menu Display
control, use [BAND]
(SET).
Press [MENU] to close the menu
3
screen.
L
E
/
S
S
R
H
S
S
U
W
P
SOURCE
PWR
O
L
W
O
V
MUTE
SBC-SW
SQ
MENU
TUNE
TRACK
FOLDER/P-SET/DISC
D・M
LIST
For using the remote control, hold down [SEL]
(MENU) for 2 sec. or more.
PRESET
Preset range for FM bands
Radio
: Individual setting for FM1-3 each
(default)
: Setting of FM1-3 together
L
E
/
S
S
R
H
S
S
U
W
P
SOURCE
PWR
O
L
W
O
V
MUTE
SBC-SW
SQ
MENU
TUNE
TRACK
FOLDER/P-SET/DISC
D・M
LIST
CQ-C7405W
19
Page 20
CD Player
Cautions
¡ This unit does not support 8 cm discs.
¡ Do not use irregularly shaped discs. (a page 36)
¡ Do not use discs that have a seal or label attached.
¡ To avoid damaging the face plate, do not push it down or
place objects on it while it is open.
¡ Do not pinch your finger or hand in the face plate when the
face plate is in motion.
¡ Do not insert foreign matter into the disc slots.
When a disc is already loaded, press [SOURCE] to
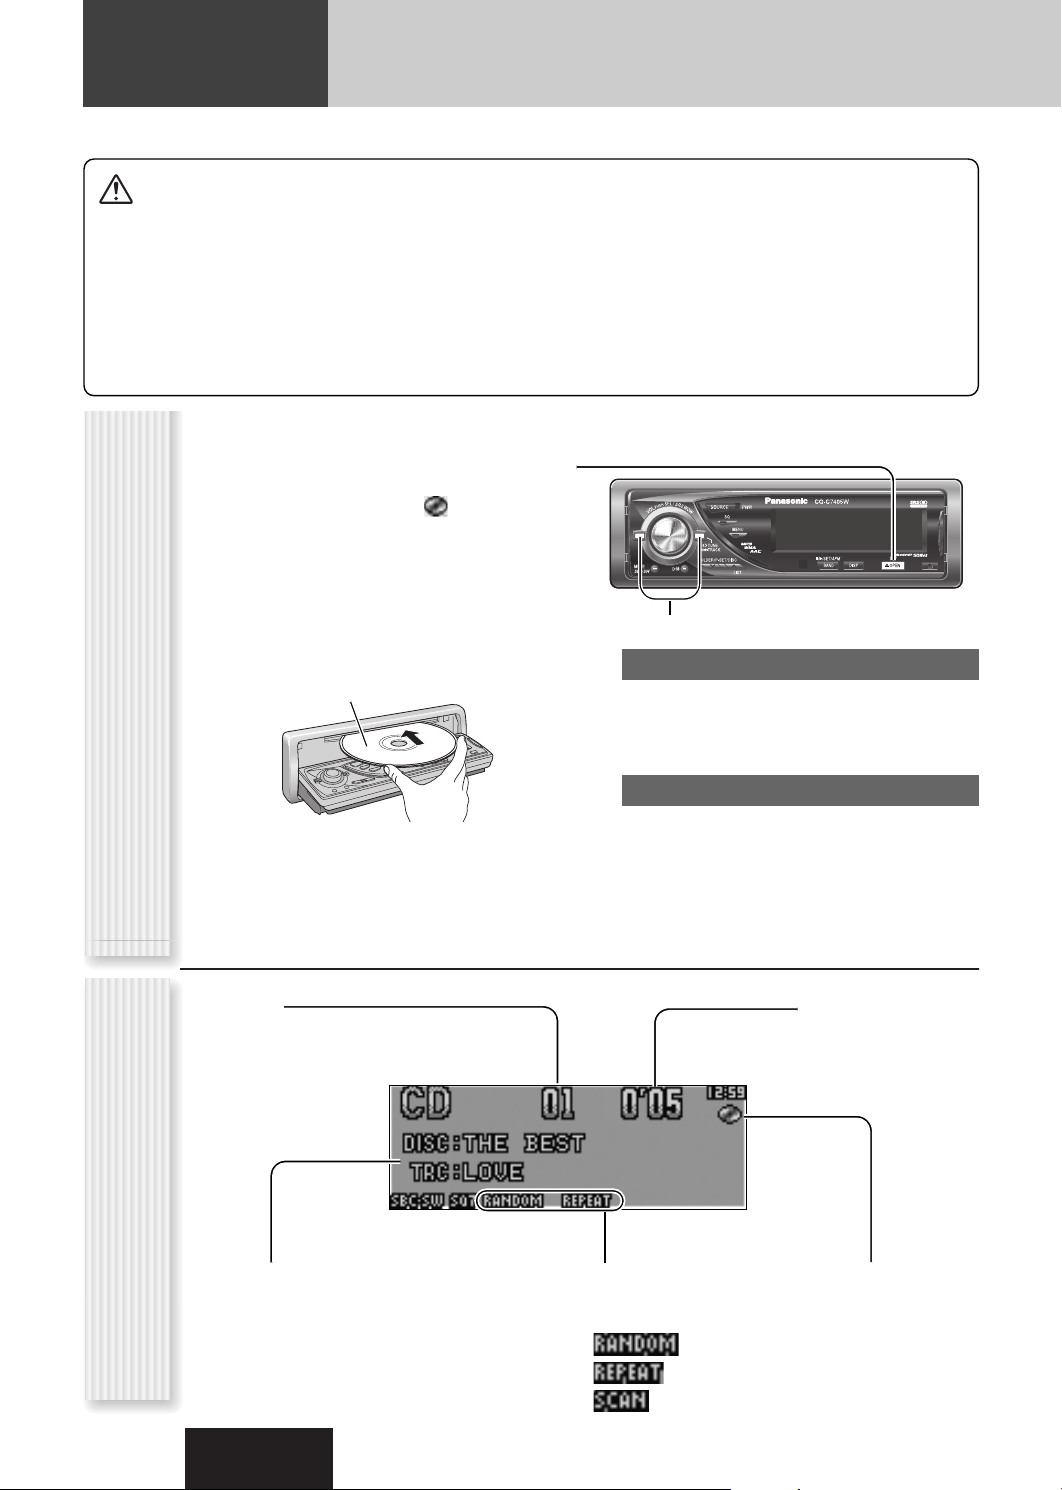
select the CD mode.
Press [u OPEN] to open the face plate.
1
When a disc is already loaded ( lights), the disc
will automatically be ejected.
Load a disc with the printed side facing
2
up.
The face plate closes automatically, and the unit recognizes the disc and starts playing automatically,
too.
Printed side
Operation FlowCD Mode Display
¡ Refer to the section on “Notes on CD/CD Media (CD-ROM,
CD-R, CD-RW)” (a page 36).
¡ This unit does not support a MIX mode CD (a CD containing
both CD-DA and compressed audio data). In case of using
such a CD, problems may occur such as anacoustic playback.
L
E
/
S
S
R
H
S
S
U
W
P
SOURCE
PWR
O
L
W
O
V
MUTE
SBC-SW
Select a desired portion.
3
SQ
MENU
TUNE
TRACK
FOLDER/P-SET/DISC
D・M
LIST
CQ-C7405W
/
TILT/SET/APM
OPENDISPBAND
Track selection
[7] (TRACK): Next track
[6] (TRACK): Preceding track (press twice)
Note: Hold down for fast forward/reverse.
Pause
Press [BAND] (
Press again to cancel.
Press [u OPEN] to eject the disc.
4
Note: The panel automatically closes after 20 sec-
onds.
).
5
/
h
20
Track number Time
CD-TEXT display
Notes:
¡ For scrolling text, hold down [
DISP: DISPLAY]
Play Mode indicators
Lights when each mode is
activated.
Lights when the disc is
loaded.
for 2 sec. or more.
¡ “NO TEXT” is displayed when there is no information
on the disc.
CQ-C7405W
Page 21

Random and Repeat play can be set.
Press [MENU] to display the menu dis-
1
play.
For using the remote
control, hold down
[SEL] (MENU) for 2
sec. or more.
Turn [VOL] to select a function to be
2
L
E
/
S
S
R
H
S
S
U
W
P
SOURCE
PWR
O
L
W
O
V
MUTE
SBC-SW
SQ
MENU
TUNE
TRACK
FOLDER/P-SET/DISC
D・M
LIST
adjusted.
For using the remote
control, use [}] or
[{].
Press [PUSH
3
(RANDOM, REPEAT)
SEL] to adjust.
L
E
/
S
S
R
H
S
S
U
W
P
SOURCE
PWR
O
L
W
O
V
MUTE
SBC-SW
SQ
MENU
TUNE
TRACK
FOLDER/P-SET/DISC
D・M
LIST
For using the remote control, use [BAND] (SET).
Press [MENU] to close the menu
4
screen.
For using the remote control, hold down [SEL]
(MENU) for 2 sec. or more.
Random, Repeat Play (CD Menu Display)
RANDOM
: Off (default)
: Random playback
REPEAT
: Off (default)
: Playing the current track repeatedly
TEXT (CD-TEXT)
: Enabled (default)
: Disabled
English
Play Mode Selection
One-touch operation is available for selecting a track
playing style by use of [RANDOM] or [REPEAT].
RANDOM
Press [RANDOM].
Press again to cancel.
REPEAT
Press [REPEAT].
Press again to cancel.
SCAN play
You can find your favorite track by playing first 10 sec. of
Functions Only by
each track.
Remote Control Unit
Press [SCAN].
Press again to cancel.
Direct Access
A track can be directly selected.
Example: track number 5
Press [#] (NUMBER).
1
Press [5].
2
Press [SET].
3
Note: To suspend direct selection, press [DISP]
(DISPLAY).
CQ-C7405W
CD Player
21
Page 22

MP3/WMA/AAC Player
This unit can play MP3, WMA, and AAC files.
When a disc is already loaded, press [SOURCE] to
select the compressed audio mode.
Press [u OPEN] to open the face plate.
1
When a disc is already loaded ( lights), the disc
will automatically be ejected.
Load a disc with the printed side facing
2
up
The face plate closes automatically, and the unit recognizes the disc and starts playing automatically,
too. (It may take several minutes to start for a disc
that has a lot of files.)
L
E
/
S
S
R
H
S
S
U
W
P
SOURCE
PWR
O
L
W
O
V
MUTE
SBC-SW
Select a desired portion.
3
SQ
MENU
TUNE
TRACK
FOLDER/P-SET/DISC
D・M
LIST
Folder selection
[}] (FOLDER): Next folder
[{] (FOLDER): Preceding folder
CQ-C7405W
/
TILT/SET/APM
OPENDISPBAND
Printed side
Operation FlowCompressed Audio Player Mode Display
File number
Folder number
File type indicator
File selection
[7] (TRACK): Next file
[6] (TRACK): Preceding file (press twice)
Note: Hold down for fast forward/reverse.
Pause
Press [BAND] (
Press again to cancel.
Press [u OPEN] to eject the disc.
4
Note: The panel automatically closes after 20 sec-
onds.
).
5
/
h
Time
22
Information Display
Notes:
¡ For scrolling text, hold down [
DISP: DISPLAY]
for 2 sec. or more.
¡ “NO TEXT” is displayed when there is no information
on the disc.
CQ-C7405W
Play Mode indicators
Lights when each mode is
activated.
(Folder Random)
(Folder Repeat)
(Folder Scan)
Lights when the disc is
loaded.
Page 23

Notes:
¡ Refer to the pages 24 and 25 for cautions.
¡ This unit does not support a MIX mode CD (a CD containing both CD-DA and compressed audio files). In case of using such a
CD, problems may occur such as anacoustic playback.
Random and Repeat play can be set.
Press [MENU] to display the menu dis-
1
play.
For using the remote
control, hold down
[SEL] (MENU) for 2
sec. or more.
L
E
/
S
S
R
H
S
S
U
W
P
O
L
W
O
V
MUTE
SBC-SW
FOLDER/P-SET/DISC
D・M
TUNE
TRACK
SOURCE
PWR
SQ
MENU
LIST
FOLDER RANDOM
: Off (default)
: Random playback (folder)
REPEAT
: Off (default)
: Playing the current file repeatedly
Turn [VOL] to select a function to be
2
adjusted.
For using the remote
(RANDOM, REPEAT)
control, use [}] or
[{].
Press [PUSH
3
SEL] to adjust.
L
E
/
S
S
R
H
S
S
U
W
P
SOURCE
PWR
O
L
W
O
V
MUTE
SBC-SW
SQ
MENU
TUNE
TRACK
FOLDER/P-SET/DISC
D・M
LIST
FOLDER REPEAT
: Off (default)
: Playing the current folder repeatedly.
TEXT
For using the remote control, use [BAND] (SET).
Menu Display)
screen.
Press [MENU] to close the menu
4
For using the remote control, hold down [SEL]
(MENU) for 2 sec. or more.
RE-MASTER
The high-range signal lost through MP3/WMA/AAC
compression is reproduced to more closely recreate the
pre-compressed sound.
Notes:
¡ At high bit rates, the Re-master function may have
Random, Repeat Play (Compressed Audio Player
little effect.
¡The Re-master function is only effective for playback
of MP3/WMA/AAC data.
RANDOM
: Off (default)
: Digital sound enhancer activated (default)
: Digital sound enhancer inactivated
: Random playback (disc)
: Folder name/File name (default)
Album/Title/Artist (tag information)
:
: No display
English
Play Mode Selection
One-touch operation is available for selecting a file
playing style by use of [RANDOM] or [REPEAT].
RANDOM, REPEAT
Press the button. Press again to cancel.
FOLDER RANDOM, FOLDER REPEAT
Hold down the button for 2 sec. or more. Hold
down again to cancel.
SCAN play
Functions Only by
You can find your favorite file by playing first 10 sec. of
Remote Control Unit
each file.
SCAN (All files)
Press [SCAN]. Press again to cancel.
FOLDER SCAN (1st file in each folder)
Hold down [SCAN] for 2 sec. or more. Hold down
again to cancel.
Direct Access
A file in the current folder can be directly selected.
Example: file number 5
Press [#] (NUMBER).
1
Press [5].
2
Press [SET].
3
Notes:
¡ For folder selection, enter a number after pressing [#]
(NUMBER) twice.
¡ To suspend direct selection, press [DISP]
(DISPLAY).
CQ-C7405W
MP3/WMA/AAC Player
23
Page 24

MP3/WMA/AAC Player (continued)
Each of MP3 (MPEG Audio Layer-3), WMA (Windows Media™ Audio), and AAC (Advanced Audio Coding) is a format
for compressed audio file. These formats allow users to save all the files contained in approximately 10 pieces of
existing CDs on one piece of CD-R/RW.
Note: Each of encoding software is not included with this unit.
Setting at file making
Common
¡
High bit rate and high sampling frequency are recommended
for high quality sounds.
¡
Selecting VBR (Variable Bit Rate) is not recommended
because playing time is not displayed properly and sound
may be skipped.
¡
The playback sound quality differs depending on the encoding circumstances. For details, refer to the user manual of
your own encoding software and writing software.
¡
Be sure to put an extension compatible with the format.
MP3
¡
It is recommended to set the bit rate to “128 kbps or more”
and “fixed”.
Compression formats
WMA
¡
It is recommended to set the bit rate to “64 kbps or more”
and “fixed”.
¡
Do not set the copy protect attribute on the WMA file to
enable this unit to play back.
AAC
¡
It is recommended to set the bit rate to “128 kbps or more”
and “Stereo”.
¡
Files with the extension of “.m4a” encoded using iTunes ver-
sion 6 are playable on this unit. Some of the files using
other encoders are not playable.
¡
Files encoded using Apple Lossless Encoder are not
playable.
¡
Files with copyright protection are not playable.
24
Cautions as to compressed audio filesCautions as to the display
* WMA 9 Professional/LossLess/Voice are not supported.
Caution
Never put an extension indicating compressed audio (such as “.mp3”, “.wma”, and “.m4a”) to
files other than compressed audio files. This may not only produce noise from the speaker
damage, but also damage your hearing.
Display Information
¡ Common
Folder name,
File name
¡ MP3
Album name,
Title name/artist name
(ID3 tag)
of this unit
Displayable characters
¡ Displayable length of file name/folder name: within 64
characters. (Unicoded file and folder names are
reduced by half in the number of displayable characters.)
¡ Name files and folders in accordance with the stan-
dard of each file system. Refer to the instructions of
CQ-C7405W
¡ WMA
¡ AAC
Album name,
Title name/artist name
(WMA tag)
Album name,
Title name/artist name
(AAC tag)
Sampling frequencyVBRBit rateCompression method
32, 44.1, 48 kHzYes32 k – 320 kbpsMPEG 1 audio layer 3 (MP3)
16, 22.05, 24 kHzYes8 k – 160 kbpsMPEG 2 audio layer 3 (MP3)
12, 11.205, 8 kHzYes8 k – 160 kbpsMPEG 2.5 audio layer 3 (MP3)
32, 44.1, 48 kHzYes32 k – 192 kbpsWindows Media Audio Ver. 2, 7, 8, 9*
Yes24 k – 320 kbpsMPEG 4 AAC LC
writing software for details.
¡ ASCII character set and special characters in each lan-
guage can be displayed.
ASCII character set
8, 11.205, 12, 16, 22.05,
24, 32, 44.1, 48 kHz
A to Z, a to z, digits 0 to 9, and the following symbols:
(space) ! ” # $ % & ’ ( ) * + , - . / : ; < = > ? @ [ \ ] ˆ
_ ` { | } ~
Notes:
¡ Characters may be garbled depending on encoding
software to be used
¡ Undisplayable characters and symbols will be convert-
ed into an asterisk (
).
*
Page 25

Compressed audio file writing
¡ Do not save an audio file (CD-DA file) and a com-
pressed audio file on the same disc. Failure to
observe this may result in difficulty in playing.
¡ If compressed audio files formatted with two or
more types are saved on the same disc, each format
shall have a different folder.
¡ Do not write files other than compressed audio files.
¡ Playability may depend on the combination of writing
software and disc writer to be used.
¡ This unit does not support the play list function.
¡ Write files in a disc-at-once manner unless otherwise
needed.
¡ You can shorten the duration between data read and
playback by decreasing the quantity of files or folders,
or the depth of the hierarchy.
Supported file systems
ISO 9660 Level 1/Level 2/Level 3, Joliet, Romeo
Note: Apple HFS, UDF 1.50, Mix CD and CD Extra are
not supported.
Cautions as to disc making
Folder selection order/file playback order
Maximum number of files/folders
¡ Maximum number of files: 511 (files + folders)
¡ Maximum number of files in one folder: 255
¡ Maximum depth of trees: 8
¡ Maximum number of folders: 255 (Root folder is
included.)
2
3
Root Folder
(Root Directory)
q
4
w
5
6
7
e
r
8
Folder Selection
File Selection
q
t
y
1 8
–In the order
–In the order
(Max.)
y
1
Tree 1 Tree 2 Tree 3 Tree 4 Tree 8
Notes:
¡ This unit counts the number of folders irrespective of
the presence or absence of a compressed audio file.
¡ If the selected folder does not contain any com-
pressed audio file, the nearest compressed audio file
in the order of playback will play.
¡ Playback order of this unit may be different from that
of other compressed audio players even if the same
disc is used
¡ “ROOT” appears when displaying the root folder
name.
English
Copyright
It is prohibited by copyright laws to copy, distribute and
deliver copyrighted materials such as music without the
approval of copyright holder except enjoying yourself
personally.
No warranty
Above description complies with our investigations as of
Common
October 2006. It has no warranty for reproducibility and
displayability of MP3/WMA/AAC.
iTunes is a trademark of Apple Computer, Inc.,
registered in the U.S. and other
countries/regions.
Windows Media, and the
Windows logo are trademarks
or registered trademarks of
Microsoft Corporation in the
United States and/or other
countries/regions.
MPEG Layer-3 audio coding technology licensed
from Fraunhofer IIS and Thomson.
CQ-C7405W
MP3/WMA/AAC Player
25
Page 26

Audio Setting
Adjustment to each speaker and an optional subwoofer
1
Press [
SEL
PUSH
: Select] to
display the
AUDIO menu
display.
For using the remote control, use [SEL] (MENU).
Press [PUSH SEL
2
mode to be adjusted.
For using the remote control, use [SEL] (MENU).
Turn [VOL]
3
clockwise or
counterclockwise
to adjust.
For using the remote
control, use [}] or [{].
Note: Only the VOLUME, SUB.W, LPF, and REAR are
adjustable when SRS WOW is enabled. (a page 16)
VOLUME
Main volume adjustment
(Setting range: 0 to 40, Default: 13)
q : Up
AUDIO Menu Display
w : Down
: Select]
to select a
BALANCE / FADER
Balance adjustment
(Setting range: L (left)15 to R (right) 15 and Center,
Default: Center)
q : Right enhanced
w : Left enhanced
BALANCE / FADER
Fader adjustment
(Setting range: R (rear) 15 to F (front) 15 and Center,
Default: Center)
q : Front enhanced
w : Rear enhanced
SUB WOOFER
Subwoofer level adjustment
-
∞),
-
(Setting range : mute (
dB
Default: 0
q : Up
w : Down
)
6 dB to +6 dB, 2 dB Step,
LPF
Low Pass Filter
(Setting range: 80 Hz, 120 Hz, 160 Hz, Default: 80 Hz)
q : Up
w : Down
Subwoofer output range
Other speakers output ranges
26
BASS / TREBLE
Bass adjustment
-
(Setting range:
Bass 0 dB)
q : Up
w : Down
12 dB to +12 dB, 2 dB Step, Default:
BASS / TREBLE
Treble adjustment
-
(Setting range:
Treble 0 dB)
q : Up
w : Down
Note: Do not activate SQ and Bass/Treble at same time
to avoid causing sound distortion.
CQ-C7405W
12 dB to +12 dB, 2 dB Step, Default:
HPF
High Pass Filter
(Setting range: Filter OFF, 90 Hz, 135 Hz, 180 Hz, 225 Hz,
Default: Filter OFF)
q : Up
w : Down
REAR (SRS WOW)
Rear Level Adjustment
(Setting range: 0 to –15, Default: –10)
q : Up
w : Down
Note: The rear level is adjustable only when SRS WOW
is enabled. (a page 16)
Page 27

Function Setting
Adjustment to display on the FUNCTION menu
Press [MENU] to display the menu dis-
1
play.
For using the remote
control, hold down
[SEL] (MENU) for 2
sec. or more.
Press []] or [[] to display the FUNC-
2
TION menu.
Turn [VOL] to select a function to be
3
adjusted.
For using the remote
control, use [}] or
[{].
Press [PUSH
4
SEL] to adjust.
For using the remote control, use [BAND] (SET).
Press [MENU] to close the menu
5
screen.
For using the remote control, hold down [SEL]
(MENU) for 2 sec. or more.
FUNCTION Menu Display
MUTE KEY
Setting [MUTE] buttons’ functions
L
E
/
S
S
R
H
S
S
U
W
P
SOURCE
PWR
O
L
W
O
V
MUTE
SBC-SW
SQ
MENU
TUNE
TRACK
FOLDER/P-SET/DISC
D・M
LIST
: Volume off (default)
: Volume down by 10 steps
: Volume down by 5 steps
English
EXT.MUTE (External Mute)
Volume adjustment when an interruption such as car
navigation signal occurs
: Volume off (default)
: Volume down by 10 steps
: Volume down by 5 steps
: No change in volume
(External muting display)
L
E
/
S
S
R
H
S
S
U
W
P
SOURCE
PWR
O
L
W
O
V
MUTE
SBC-SW
SQ
MENU
TUNE
TRACK
FOLDER/P-SET/DISC
D・M
LIST
SECURITY
Setting the security function (a page 11)
: ON (default)
: OFF
BUILT-IN AMP
You can toggle the integrated amplifier on and off.
: Amplifier on (default)
: Amplifier off (when the external amplifier is used)
Audio Setting, Function Setting
lights when disactivated.
CQ-C7405W
27
Page 28

Display Setting
Adjustment to display on the DISPLAY menu
Press [MENU] to display the menu
1
display.
For using the remote
control, hold down
[SEL] (MENU) for 2
sec. or more.
Press []] or [[] to display the
2
DISPLAY menu.
Turn [VOL] to select a function to be
3
adjusted.
For using the remote
control, use [}] or
[{].
Press [PUSH
4
SEL] to adjust.
For using the remote control, use [BAND] (SET).
Adjust the setting value.
5
Press [PUSH SEL].
6
For using the remote control, use [BAND] (SET).
DISPLAY Menu Display
Press [MENU] to close the menu
7
screen.
For using the remote control, hold down [SEL]
(MENU) for 2 sec. or more.
DEMONSTRATION
MUTE
SBC-SW
MUTE
SBC-SW
COLOR
(Setting range: 10 types, default: STORM)
L
E
/
S
S
R
H
S
S
U
W
P
SOURCE
PWR
O
L
W
O
V
S
H
S
U
P
L
O
V
SQ
MENU
TUNE
TRACK
FOLDER/P-SET/DISC
D・M
L
E
/
D・M
S
R
S
W
O
W
SOURCE
TUNE
TRACK
FOLDER/P-SET/DISC
LIST
PWR
SQ
MENU
LIST
The illumination color changes as follows.
Turn [VOL] to make a selection.
STORM: The color varies in conjunction with time.
LEVEL: The peripheral color decoration lights up and
goes out according to the bass volume.
FIRE: Red
ORANGE: Amber
SKY: Blue
OCEAN: Aquablue
FOREST: Green
SUN: Yellow
SNOW: White
CUSTOM: You can create your favorite color.
LEVEL ADJ
When LEVEL is setting in COLOR types, you can make a
fine adjustment in the LEVEL ADJ display.
[]][[]: Function selection
Turn [VOL] to make a selection.: Item selection
Color selection
The illumination color changes.
(Setting range: FIRE, ORANGE, SKY, OCEAN, FOREST,
SUN, default: FIRE)
Volume setting according to lighting
(Setting range: LEVEL1, LEVEL2, LEVEL3, default: LEVEL
1)
If the peripheral color decoration keeps lighting because
the bass part is contained abundantly, select LEVEL 1,
and for the opposite case, select LEVEL 3.
28
Switching by [PUSH SEL].
ON: Demonstration screen at no operation
(default)
OFF: Regular screen
CQ-C7405W
Page 29

CUSTOM ADJ
When CUSTOM is setting in COLOR types, you can make
a fine adjustment in the CUSTOM display.
(Setting range: 0 to 100, default: R50, G50, B50)
You can adjust each color.
[]][[]: RGB selection
Turn [VOL] to make a selection.: Adjustment (0 to 100)
CONTRAST
(Setting range: 1 to 5, Default: Contrast 3)
Turn [VOL] to make a selection.
English
SCREEN
Press [PUSH SEL] to select.
: white background (default)
: black background
GRAPHIC PATTERN
(Default: All)
Turn [VOL] to make a selection.
All: Sequential display from pattern A to C.
Pattern A-C
S.A.: 19-band display (Spectrum analyzer)
STILL IMAGE
DISPLAY Menu Display (continued)
(Default: All)
Turn [VOL] to make a selection.
All: Sequential display from pattern 1 to 10
No.1-10
CLOCK ADJ
Note: Adjust the clock when “ADJUST” appears on the
display.
[[] : Adjusting minutes
[]] : Adjusting hours
q : Forward
w : Backward
Notes:
¡ The graphic pattern and still image are changeable.
(a page 30)
¡ If corrupted data is selected, “DISPLAY FILE INCOM-
PLETE” appears. (a page 31)
Display Setting
CQ-C7405W
29
Page 30

Customize the Display (Customize Function)
You can edit the moving images and still images that are initially stored in the unit. You also can use the data that is downloaded from
the Panasonic Web site and the data that is stored with a digital camera or other devices and processed with exclusive software,
IMAGE STUDIO. See “Notes on Customize function” (a page 31) as well.
Note: Visit Panasonic Web site (http://panasonic.co.jp/pas/en/software/customize/index.html) for details.
Preparation:
Put the CD-R/RW that contains data to
be customized in hand.
If there is a disc inside, take out the
1
disc.
Press [SOURCE]
2
to select the CD
mode.
Hold down [PUSH SEL] for 4 sec. or
3
MUTE
SBC-SW
L
E
/
S
S
R
H
S
S
U
W
P
O
L
W
O
V
TUNE
TRACK
FOLDER/P-SET/DISC
D・M
more to display the menu screen.
Load a CD-R/RW that contains data.
4
Note:
¡ It may take time for the unit to identify the CD-
R/RW.
¡ Discs recorded by the packet writing software are
not supported.
Select an item to be customized.
5
SOURCE
Select a file.
6
qw[]][[]: Select
[PUSH SEL]: Confirm
PWR
SQ
MENU
LIST
Notes:
¡ Files are automatically identified by their exten-
sions, and target files are displayed.
¡ If “BACK” is selected, the screen of step 5
appears.
For a moving image file or still image
7
file, select where to save the file.
qw[}][{]:Select
[PUSH SEL]: Confirm
Notes:
¡ New data overwrites existing data.
¡ If “BACK” is selected, the screen of step 6
appears.
Confirm the changed item.
8
30
CUSTOMIZE Menu Display
qw: Select
[PUSH SEL]:Confirm
Note: To exit the customize menu, hold down
[PUSH SEL] for 4 sec. or more.
GRAPHIC PATTERN
Moving image (graphic pattern) data (a page 29)
STILL IMAGE
Still image data (a page 29)
OPENING MESSAGE
Moving image at power on
CLOSING MESSAGE
Moving image at power off
CQ-C7405W
qw: Select
[PUSH SEL]: Confirm
Customization is performed. Do not turn off the
power in mid-operation. (It takes approx. 1 minutes
to complete this operation for a 168 kB moving
image.) After completion of this operation, the
screen of step 5 appears.
Note: If “NO” is selected, the screen of step 5
appears.
Press [u OPEN] to eject the disc.
9
Hold down [PUSH SEL] for 4 sec. or
10
more.
The CD mode comes back.
Page 31

Note on Download Service
The download service may be suspended or stopped
without advance notice. The download service is not
available in some areas. Please visit the site below for
further information.
Panasonic Web site: (http://panasonic.net)
Notes on IMAGE STUDIO
¡ This download service is not available in some areas.
For details, please access the Panasonic website.
¡ IMAGE STUDIO is available only by downloading from
the address below. It is not bundled with this unit.
¡ Refer to the downloaded operating manual for how to
use IMAGE STUDIO.
Notes on File
¡ The customize-specific file is downloadable from the
URL below. You can create exclusive files stored with
a digital camera or other devices by using exclusive
software, IMAGE STUDIO that can be accessed from
the same URL.
¡ Do not change the extension. Otherwise, the data can-
not be recognized.
At Customizing
¡ If customizing is interrupted on account of turning off
the power, stopping the engine, removing the face
plate or other reasons, you may lose the data. In such
a case, try customizing again.
¡ The default image exists on the Panasonic Web site. If
you would like to restore it, download the image from
the site.
Download site:
http://panasonic.co.jp/pas/en/software/
customize/index.html
Error Display Messages
NO FILES DETECTED
No customize-specific data on the disc
a Load a disc that contains customize-specific
data.
CUSTOMIZING FAILED
Customize failed
a Check to see whether or not the extension is cor-
rect and file contents are appropriate.
English
At Disc Making
¡ Save only customize-specific data.
¡ Save all data in the root directory. Files contained in a
folder cannot be recognized.
¡ Follow the table below with regard to the number of
files that are saved to a disc. Files beyond the speci-
Notes on Customize Function
fied capacity are not readable.
¡ Discs recorded by the packet writing software are not
supported.
Type Extension Max. number
GRAPHIC PATTERN .pfm 10
STILL IMAGE .pfs 15
OPENING MESSAGE .pfo 5
CLOSING MESSAGE .pfe 5
DISPLAY FILE INCOMPLETE
Intended moving image or still image is damaged.
a Customize it again and overwrite the file with
new one.
Customize the Display (Customize Function)
CQ-C7405W
31
Page 32
Troubleshooting
If You Suspect Something Wrong
Check and take steps as described below.
If the described suggestions do not solve the problem, it is
recommended to take the unit to your nearest authorized Panasonic
Service Center. The product should be serviced only by qualified
personnel. Please refer the checking and the repair to professionals.
Panasonic shall not be liable for any accidents arising out of neglect of
checking the unit or your own repair after your checking.
Never take measures especially for those other than indicated by italic letters in “Possible Solution” described below because those are
too dangerous for users to handle themselves.
Warning
¡ Do not use the unit in an irregular condition, for
example, without sound, or with smoke or a foul
smell, which can cause ignition or electric shock.
Immediately stop using the unit and consult your
dealer.
¡ Never try to repair the unit by yourself because it is
dangerous to do so.
Common
Problem
No power to the
unit
Sound is not
generated.
Noise
Possible causeaPossible solution
The power cord (battery, power and ground) is connected in the wrong way.
a Check the wiring.
Fuse blows out.
a Eliminate the cause of fuse blowout and replace the fuse with new one.
Consult your dealer.
MUTE is set to ON.
a Set MUTE to OFF.
The wiring of speaker lines are not correct, or a break or poor contact arises.
a Check the wiring in accordance with the wiring diagram. (Installation
Instructions)
There is an electromagnetic-wave generator such as a cellular phone near the unit or
its electrical lines.
a Keep an electromagnetic-wave generator such as a cellular phone away from
the unit and the wiring of the unit. In case that noise cannot be eliminated
due to the wiring harness of the car, consult your dealer.
The contact of the ground lead is poor.
a Make sure that the ground lead is connected to an unpainted part of the chas-
sis securely.
32
Noise is made in
step with engine
revolutions.
CQ-C7405W
Alternator noise comes from the car.
a Change the wiring position of the ground lead.
a Mount a noise filter on the power supply.
Page 33

Problem
Possible causeaPossible solution
Some operations
are not executable.
No sound from
speaker(s)
The speaker
channels are
reversed between
right and left.
The sound field is
Common (continued)
not clear in the
stereo mode.
Central sound does
not settled.
Some operations are not executable in particular modes such as menu mode.
a Read the operating instructions carefully and cancel the mode. If the unit is
still out of order, consult your dealer.
English
BALANCE/FADER setting is not appropriate.
a Readjust BALANCE/FADER.
There is a break, a short circuit, poor contact or wrong wiring regarding the speaker
wiring.
a Check the speaker wiring.
The speaker wiring is confused between right and left.
a Perform the speaker wiring in accordance with the wiring diagram.
The plus and minus terminals at right and left channels of speakers are connected
reversely.
a Perform the speaker wiring in accordance with the wiring diagram.
Radio
The power fails
unintentionally.
Poor reception or
noise
The number of auto
preset stations is
less than 6.
Preset stations
cannot be stored.
The safety device works.
a Consult your dealer, or your nearest Panasonic Service Center.
Troubleshooting
Antenna installation or wiring of antenna cable is faulty.
a Check whether the antenna mounting position and its wiring are correct. In
addition, check to see whether the antenna ground is securely connected to
the chassis.
No power is supplied to the antenna amplifier (when using a film antenna, etc.).
a Check the wiring of the antenna battery lead.
The number of receivable stations is less than 6.
a Move to an area where receivable stations number is maximum, and try pre-
setting.
The contact of the battery lead is poor, or the battery lead is not always powered.
a Make sure that the battery lead is connected securely, and preset stations
again.
CQ-C7405W
33
Page 34
Troubleshooting (continued)
CD
Problem
No playback or
disc ejected
Sound skipping or
noise
Sound skipping
due to vibration
Disc unejectable
Possible causeaPossible solution
The disc is inserted upside down.
a Insert a disc correctly.
There is a flaw or foreign material on the disc.
a Remove the foreign material, or use a flawless disc.
There is a flaw or foreign material on the disc.
a Remove the foreign material, or use a flawless disc.
The unit is not sufficiently secured.
a Secure the unit to the console box.
The unit is tilted at over 30˚ in the front-to-end direction.
a Make the angle 30˚ or less.
Something such as a peeled label obstructs the disc coming out.
a Press and hold the [
open (disc forced ejection). In case that the disc forced ejection does not
work, consult your dealer.
The microcontroller in the unit operates abnormally due to noise or other factors.
a Unplug the power cord and plug it again. In case the unit is still out of order,
consult your dealer.
u
OPEN] for more than 2 seconds when the face plate is
No playback or
disc ejected
The CD-R/RWs that
are playable on other
devices are not
playable on this unit.
Sound skipping or
noise
Compressed audio
Noise is heard with
“RE-MASTER” at
“ON”
No response to
unit
pressing buttons
Remote control
The disc has unplayable formatted data.
a Check the file format.
The playability of some CD-R/RWs may depend on the combination of media,
recording software and recorder to be used even if these CD-R/RWs are playable on
other devices such as a PC.
a Make CD-R/RWs in different combination of media, recording software and
recorder after referring to the description about the compressed audio player.
There is a flaw or foreign material on the disc.
a Remove the foreign material, or use a flawless disc.
Playing VBR (Variable Bit Rate) files may cause sound skipping.
a Play Non-VBR files.
With some CDs, noise may be heard in the treble range when playing compressed
audio files into which the CD tracks were encoded with “RE-MASTER” enabled.
a If noise is heard, set “RE-MASTER” to “OFF”.
The battery is inserted in the wrong direction. A wrong battery is inserted.
aInsert a correct battery in the correct direction.
The battery is weak.
aReplace the battery with new one.
The aiming direction of the remote control unit is wrong.
aAim the remote control unit at the sensor of the unit and press buttons.
The sensor is exposed to direct sunlight. (The remote control unit may not be
operable when the sensor is exposed to direct sunlight. In such a case, the
system is not faulty.)
aBlock off sunlight to the sensor.
34
CQ-C7405W
Page 35

Error Display Messages
Display
CD/Compressed audio
(After 5 seconds)
To next file automatically
Possible causeaPossible solution
The disc is dirty, or is upside down.
a Check the disc.
The disc has scratches.
a Check the disc.
No operation by some cause.
a Unplug the power cord and plug it again. In case the unit is still out of order,
consult your dealer. (a Installation Instructions)
The player for some reason cannot read the file you are trying to play. (File recorded
in an unsupported file system, compression scheme, data format, file name extension, damaged data, etc.)
a Select a file that the player can read. Check the type of data recorded on the
disc. Create a new disc if necessary.
A WMA file can be copyrighted.
a The file protected by copyright is not playable.
No disc.
English
Error Display Messages
Note: Refer to the System Upgrade Guidebook for error messages regarding optional products.
Troubleshooting,
CQ-C7405W
35
Page 36

Notes on Discs
TEXT
If you use commercial CDs, they must have
either of these labels shown at right.
Some copy-protected music CDs are not
playable.
How to hold the disc
¡ Do not touch the underside of the disc.
¡ Do not scratch on the disc.
¡ Do not bend the disc.
¡ When not in use, keep the disc in a case.
Do not leave discs in the following places:
¡ In direct sunlight
¡ Near car heaters
¡ Dirty, dusty and damp areas
¡ On seats and dashboards
Disc cleaning
Use a dry, soft cloth to wipe from the center outward.
<Correct> <Wrong>
Notes on CD/CD Media (CD-ROM, CD-R, CD-RW)
Notes on
Do not write on the disc label with a ballpoint
pen or other hard-point pens.
¡ You may have trouble playing back some CD-R/RW discs recorded on CD recorders (CD-R/RW drives), either due
to their recording characteristics or dirt, fingerprints, scratches, etc. on the disc surface.
¡ CD-R/RW discs are less resistant to high temperatures and high humidity than ordinary music CDs. Leaving them
inside a car for extended periods may damage them and make playback impossible.
¡ Some CD-R/RWs can not be played back successfully thanks to incompatibility among writing software, a CD
recorder (CD-R/RW drive) and the discs.
¡ This player cannot play the CD-R/RW discs if the session is not closed.
¡ This player cannot play the CD-R/RW discs which contains other than CD-DA or compressed audio data.
CD-Rs/RWs
¡ Be sure to observe the instructions of CD-R/RW disc for handling it.
Protective films or sheets
Disc with adhered stickers
or tape
Printed side
Irregularly shaped discsLabels created by a printer,
Discs with cracks, scratches
or parts missing
36
Maintenance/Fuse
Your product is designed and manufactured to ensure the minimum of maintenance. Use a soft cloth for
routine exterior cleaning. Never use benzine, thinner, or other solvents.
Unit
Cleaning the
If the fuse blows out, consult your dealer, or your nearest authorized Panasonic Service Center.
Warning
Fuse
¡Use fuses of the same specified rating (15 A). Using substitutes or fuses with higher ratings, or connecting the
unit directly without a fuse could cause fire or damage to the unit. If the replaced fuse fails, contact your
nearest authorized Panasonic Service Center.
CQ-C7405W
Page 37

Specifications
Power Supply DC 12 V (11 V – 16 V), Test Voltage 14.4 V, Negative Ground
Tone Controls (Bass/Treble)
Equalizer Center Frequency
Variable Range of Equalizer-12 dB to 12 dB (2 dB step)
Current Consumption Less than 2.2 A (CD mode, 0.5 W 4-Speaker)
Maximum Power Output
Power Output 18 W x 4 CH (1 kHz, 1 %, 4 Ω)
Speaker Impedance 4 – 8 Ω
General
CD Player
Pre-amp output voltage
Subwoofer-output voltage
Pre-amp output impedance
Subwoofer-output impedance
Dimensions (Main Unit)
Weight (Main Unit) 1.6 kg
Sampling Frequency 8 times oversampling
DA Converter 4 DAC System
Pick-Up Type Astigma 3-beam
Light Source Semiconductor laser
Wavelength 790 nm
Frequency Response 20 Hz – 20 kHz (±1 dB)
Signal to Noise Ratio 96 dB
Total Harmonic Distortion
Wow and Flutter Below measurable limits
Channel Separation 85 dB
Bass; ±12 dB at 60 Hz, Treble; ±12 dB at 16 kHz
60, 160, 400, 1 k, 3 k, 6 k, 16 k Hz
50 W x 4 (at 1 kHz)
5 V (CD mode, 1 kHz, 0 dB)
5 V (CD mode, 1 kHz, 0 dB)
60 Ω
60 Ω
178(W) x 50(H) x 155(D) mm
0.01 % (1 kHz)
English
FM
Frequency Range 87.50 MHz – 108.00 MHz
Usable Sensitivity 6 dB/µV(S/N 30 dB)
Stereo Separation 30 dB (at 1 kHz)
Radio
Notes:
¡Specifications and design are subject to modification without notice due to improvements.
¡Some figures and illustrations in this manual may be different from your product.
AM
Frequency Range 531 kHz – 1 602 kHz
Usable Sensitivity 28 dB/µV (S/N 20 dB)
Notes on discs, Maintenance/Fuse, Specifications
CQ-C7405W
37
Page 38

Memorandum
110
CQ-C7405W
Page 39

Memorandum
CQ-C7405W
111
Page 40

CQ-C7405W
Matsushita Electric Industrial Co., Ltd.
Web Site : http://panasonic.net
YFM284C664CA NY1006-1116 Printed in China
Page 41

Before Installation/è‰ ÏÓÌÚ‡ÊÓÏ/
설치하시기 전에
Consult a professional for installation.
●Verify the radio using the antenna and speakers before installation.
иУ ‚УФУТЫ ПУМЪ‡К‡ ТОВ‰ЫВЪ У·‡˘‡Ъ¸Тfl Н ТФВˆЛ‡ОЛТЪЫ.
●иВВ‰ ПУМЪ‡КУП ФУ‚Вfl˛Ъ ‡‰ЛУФЛВПМЛН Т ФУПУ˘¸˛
‡МЪВММ˚ Л „УПНУ„У‚УЛЪВОВИ.
설치에 관해서는 전문가에게 상담해 주십시오.
●설치하기 전에 안테나 및 스피커를 사용하여 라디오를 확인해 주십시오.
Before Wiring/è‰ ÏÓÌÚ‡ÊÓÏ ˝ÎÂÍÚÓÔÓ‚Ó‰ÓÍ
배선을 하기 전에
Exclusively operated with 12 V battery with
negative (–) ground.
Connect the power lead (red) last.
Connect the battery lead (yellow) to the positive (+) terminal of
the battery or fuse block terminal (BAT).
Strip about 5 mm of the lead ends for connection.
Apply insulating tape to bare leads.
Secure loosened leads.
/
AAC WMA MP3 CD Player/Receiver
AAC WMA MP3 CD-ÔÎÂÂ/ÂÒË‚Â
AAC WMA MP3 CD 플레이어/라디오
EnglishкЫТТНЛИ
●Mounting angle side to side : horizontal
front to rear : 0 – 30°
●м„УО ПУМЪ‡К‡ ‚ ФУФВВ˜МУИ ФОУТНУТЪЛ : ЙУЛБУМЪ‡О¸
장착 각도 좌우 각도: 수평
●
전후 각도: 0 - 30
●Mounting space
●èÎÓ˘‡‰¸ ÔÓ‰ ÏÓÌÚ‡Ê
장착 장소
●
‚ ФУ‰УО¸МУИ ФОУТНУТЪЛ : 0–30°
°
0 – 30°
53 mm
182 mm
4.5 mm – 6.0 mm
Remove mounting collar q and trim plate u from the main
unit temporarily, which are already mounted at shipment.
ЗВПВММУ ТМЛП‡˛Ъ Т „О‡‚МУ„У ·ОУН‡ ФЛ·У‡ ПУМЪ‡КМЫ˛ ‡ПЫ q Л
У·‡ПОВМЛВ u, ТПУМЪЛУ‚‡ММ˚В ФЛ УЪ„ЫБНВ.
발송시에 장착되어 있는 장착 칼라 q 및 트림 플레이트 u 를
임시로 본체로부터 탈착해 주십시오.
к‡·УЪ‡ВЪ ЪУО¸НУ Т ФЛЪ‡МЛВП УЪ 12 V {B} ·‡Ъ‡ВЛ
Т УЪЛˆ‡ЪВО¸МУИ (–) БВПОВИ.
иУ‰ТУВ‰ЛМfl˛Ъ ТЛОУ‚УИ ‚˚‚У‰МУИ ФУ‚У‰ (Н‡ТМ˚И) ФУТОВ‰МЛП.
иУ‰ТУВ‰ЛМfl˛Ъ ‚˚‚У‰МУИ ФУ‚У‰ (КВОЪ˚И) Н ФУОУКЛЪВО¸МУПЫ (+) ‚˚‚У‰Ы
·‡Ъ‡ВЛ ЛОЛ НОВППВ ·ОУН‡ ФО‡‚НЛı ФВ‰Уı‡МЛЪВОВИ (BAT).
л НУМˆУ‚ ‚˚‚У‰М˚ı ФУ‚У‰У‚ ТМЛП‡˛Ъ ЛБУОflˆЛ˛ М‡ ‰ОЛМВ УНУОУ 5
mm {ПП} ‰Оfl ТУВ‰ЛМВМЛfl.
з‡ У·М‡КВММ˚В ‚˚‚У‰М˚В ФУ‚У‰‡
М‡НО‡‰˚‚‡˛Ъ ЛБУОflˆЛУММЫ˛ ОВМЪЫ.
оЛНТЛЫ˛Ъ УТО‡·ОВММ˚В ‚˚‚У‰М˚В ФУ‚У‰‡.
음극 (–) 접지의 12볼트 배터리로만 작동됩니다.
전원 리드선 (적색) 을 마지막으로 접속합니다.
배터리 리드선 (황색)을 배터리의 양극(+) 단자 또는휴즈 블록 단자
(BAT) 에 접속합니다.
접속시에는 리드선 끝부분을 약5 mm 벗겨냅니다.
드러난 리드선에는 절연 테이프를 감아 주십시오.
느슨한 리드선을 고정합니다.
Model: CQ-C7405W
L
E
/
S
S
R
H
S
S
U
W
P
SOURCE
O
L
W
O
V
SQ
TUNE
TRACK
FOLDER/P-SET/DISC
MUTE
D・M
SBC-SW
CQ-C7405W
PWR
MENU
TILT/SET/APM
/
LIST
OPENDISPBAND
한국어
Supplied Hardware/СВЪ‡ОЛ, ‚ıУ‰fl˘ЛВ ‚ НУПФОВНЪ‡ˆЛ˛ ФУТЪ‡‚НЛ/
No.
Mounting collar
åÓÌÚ‡Ê̇fl ‡Ï‡
장착 칼라
Mounting bolt (5 mmø)
åÓÌÚ‡ÊÌ˚È ·ÓÎÚ (5 mm {ÏÏ} ø)
장착 볼트 (5 mmø)
Lock cancel plate
иО‡ТЪЛМ‡ ТМflЪЛfl ТЪУФУВМЛfl
로크 캔슬 플레이트
Tapping Screw (5 mm ø x 16 mm)
ë‡ÏÓ̇ÂÁ‡˛˘ËÈ ‚ËÌÚ (5mm{ÏÏ} ø x 16 mm)
태핑 나사 (5 mmø x 16mm)
Item No. Diagram
FX0214C384ZB ✽
Diagram
✽
✽
✽
* w, e, r and t consist of a set. (YEP0FZ5739) * w, e, r Ë t ТУТЪ‡‚Оfl˛Ъ НУПФОВНЪ. (YEP0FZ5739)
Q'ty
Hex. Nut (5 mm ø)
1
тВТЪЛ„‡ММ‡fl „‡ИН‡ (5mm{ПП} ø)
육각 너트 (5 mmø)
Power connector
1
ëËÎÓ‚ÓÈ ‡Á˙ÂÏ
전원 커넥터
Tr im plate
2
й·‡ПОВМЛВ
트림 플레이트
Rear support strap
1
ᇉÌflfl ÓÔÓ̇fl Ô·Ì͇
후부 서포트 스트랩
Installation/åÓÌÚ‡Ê/
How to install the unit/д‡Н ТПУМЪЛУ‚‡Ъ¸ ФЛ·У/장치를 설치하는 방법
Cautions
●
ÇÌËχÌËÂ
● ëΉÛÂÚ Û·Â‰ËÚ¸Òfl, ˜ÚÓ ÏÓÌÚ‡Ê
주의
● 배선을 끝마친 후에 설치해 주십시오.
● Wear gloves for safety.
Make sure that wiring is completed
before installation.
● ëΉÛÂÚ Ì‡‰ÂÚ¸ Ô˜‡ÚÍË ‰Îfl
·ВБУФ‡ТМУТЪЛ.
˝ÎÂÍÚÓÔÓ‚Ó‰ÓÍ Á‡‚¯ÂÌ ‰Ó
ÏÓÌڇʇ ÔË·Ó‡.
● 안전상 장갑을 착용해 주십시오.
1
2
3
부속품의 하드웨어
Item
YGAJ021011
YEFC051013
YFG044C002ZA
* w, e, r 및 t 은 세트입니다.(YEP0FZ5739)
설치
Remove the cable from the battery negative terminal.
йЪТУВ‰ЛМfl˛Ъ Н‡·ВО¸ УЪ УЪЛˆ‡ЪВО¸МУ„У ‚˚‚У‰‡ ·‡Ъ‡ВЛ.
배터리의 음극 단자로부터 케이블을 탈착합니다.
Mounting collar q insertion. Bend mounting tabs.
ЗТЪ‡‚ОВМЛВ ПУМЪ‡КМУИ ‡П˚ q.ᇄ˷‡˛Ú ÏÓÌÚ‡ÊÌ˚ ·ÔÍË.
장착 칼라 q 삽입. 장착 태브를 구부립니다.
Connection of power connector y
иУ‰ТУВ‰ЛМВМЛВ ТЛОУ‚У„У ‡Б˙ВП‡ y
전원 커넥터 y의 접속
Q'ty
1
1
1
1
TEXT
●Please read these instructions carefully before using this product and keep this manual for future reference.
●иВВ‰ М‡˜‡ОУП ˝НТФОЫ‡Ъ‡ˆЛЛ ФУТЛП ФУ˜ЛЪ‡Ъ¸ М‡ТЪУfl˘Ы˛ ЛМТЪЫНˆЛ˛ ‚МЛП‡ЪВО¸МУ Л ı‡МЛЪ¸ ВВ М‡ ФУО¸БУ‚‡МЛВ М‡ ·Ы‰Ы˘ВВ.
●
Matsushita Electric Industrial Co., Ltd.
Web Site: http://panasonic.net
YFM294C092CA NY1006-1116 Printed in China
How to remove the unit/ä‡Í ÒÌflÚ¸ ÔË·Ó/
장치를 탈착하는 방법
q
Bend appropriate tabs to secure the unit
without backlash.
ᇄ˷‡МЛВП ТУУЪ‚ВЪТЪ‚Ы˛˘Лı О‡ФУН ЩЛНТЛЫ˛Ъ
ФЛ·У ·ВБ Б‡БУ.
장착 태브를 적당한 만큼
구부려 장치가 헐겁지 않도
록 고정시킵니다.
e
w
Remove the face plate.
ëÌËχ˛Ú ÎËˆÂ‚Û˛ Ô‡ÌÂθ
1
ÔË·Ó‡.
페이스 플레이트를 탈착합니다.
w
4
4
Securing to fire wall
дВФОВМЛВ Н ЪВФОУЛБУОflˆЛУММУИ Ф‡МВОЛ
방화벽에의 고정
Using the rubber bushing (Option)
л ФУПУ˘¸˛ ВБЛМУ‚УИ ‚ЪЫОНЛ (ФУ УФˆЛЛ)
고무 부싱 (옵션품) 의 사용
Rubber Bushing (Option)
кВБЛМУ‚‡fl ‚ЪЫОН‡ (ФУ УФˆЛЛ)
고무 부싱 (옵션품)
Mounting Bolt w
åÓÌÚ‡ÊÌ˚È ·ÓÎÚ w
장착 볼트 w
Rear support bracket
(supplied with car)
ᇉÌËÈ ÓÔÓÌ˚È ÍÓ̯ÚÂÈÌ
(ÔÓÒÚ‡‚ÎflÂÏ˚È Ò ‡‚ÚÓÏÓ·ËÎÂÏ)
후부 서포트 브래킷
(자동차에 부속됨)
To the unit
ä ÔË·ÓÛ
본체에
Using the rear support strap i
ë ÔÓÏÓ˘¸˛ Á‡‰ÌÂÈ ÓÔÓÌÓÈ Ô·ÌÍË i
후부 서포트 스트랩 i 의 사용
3mm
Hexagonal nut t
тВТЪЛ„‡ММ‡fl „‡ИН‡ t
육각 너트 t
4
Tapping screw r
ë‡ÏÓ̇ÂÁ‡˛˘ËÈ ‚ËÌÚ r
태핑 나사 r
Rear support strap i
ᇉÌflfl ÓÔÓ̇fl Ô·Ì͇ i
후부 서포트 스트랩 i
Mounting Bolt w
åÓÌÚ‡ÊÌ˚È ·ÓÎÚ w
장착 볼트 w
To the unit
ä ÔË·ÓÛ
본체에
4
4
e
Clank!
Snapping point
MoПeМЪaО¸М˚И cМЛПoН
ФЫМНЪa
끼우는 위치
q
Main unit securing
4
дВФОВМЛВ „О‡‚МУ„У
·ÎÓ͇
본체의 고정
Tr im plate u mounting
мТЪ‡МУ‚Н‡ У·‡ПОВМЛfl u
5
5
트림 플레이트 u 장착
Battery cable reconnection
иУ‚ЪУМУВ ФУ‰ТУВ‰ЛМВМЛВ Н‡·ВОfl Н ·‡Ъ‡ВВ
6
6
배터리 케이블 재접속
q Screw the mounting bolt w into the main unit.
w Secure to the fire wall.
e
Snap the right and left springs into each hole.
q ᇂÂÚ˚‚‡˛Ú mÓÌÚ‡ÊÌ˚È ·ÓÎÚ w ‚„·‚Ì˚È ·ÎÓÍ.
w дВФОВМЛВ Н ЪВФОУЛБУОflˆЛУММУИ Ф‡МВОЛ.
e
Ç‚Ó‰flÚ Ô‡‚Û˛ Ë ÎÂ‚Û˛ ÔÛÊËÌ˚ ‚ ÓÚ‚ÂÒÚËfl ÔÓ‰ ÌËı.
q 장착 볼트 w 를 돌려 본체에 고정시킵니다.
w 방화벽에 고정시킵니다.
e 좌우 스프링을 각 구멍에 끼웁니다.
Caution
When this unit is installed in dashboard,
ensure that there is sufficient air flow
around the unit to prevent damage from
overheating, do not block any ventilation
holes on the unit.
ÇÌËχÌËÂ
иЛ ПУМЪ‡КВ М‡ТЪУfl˘В„У ЫТЪУИТЪ‚‡ М‡ Ф‡МВО¸
ФЛ·УУ‚ ТОВ‰ЫВЪ У·ВТФВ˜ЛЪ¸ ‰УТЪ‡ЪУ˜М˚И ФУЪУН
‚УБ‰Ыı‡ ‚УНЫ„ МВ„У ‚У ЛБ·ВК‡МЛВ В„У
ФУ‚ВК‰ВМЛfl ЛБ-Б‡ ФВ„‚‡, ФЛ˜ВП МВ
ТОВ‰ЫВЪ Б‡Н˚‚‡Ъ¸ ‚ВМЪЛОflˆЛУММ˚В УЪ‚ВТЪЛfl
ЫТЪУИТЪ‚‡.
주의
본 제품을 계기반에 설치할 경우에는 과열에 의
한 손상을 방지하기 위하여 공기의 흐름이 가능
한 충분한 공간을 장치 주위에 확보하고 장치의
환기부를 차단하지 않도록 주의해 주십시오.
q
w
w
q
Remove the trim plate u.
лМЛП‡˛Ъ У·‡ПМВМЛВ
2
트림 플레이트 u 를
탈착합니다.
Lock release
q Insert the lock cancel plate
3
e until you hear a click.
w Pull the main unit.
лМflЪЛВ ТЪУФУВМЛfl
q ЗТЪ‡‚Оfl˛Ъ ФО‡ТЪЛМЫ ТМflЪЛfl
ТЪУФУВМЛfl e ‰Ó ˘ÂΘ͇.
w TflÌËÚe „Îa‚ÌÛ˛ e‰ËÌˈÛ.
로크를 릴리스합니다.
소리가 날 때까지 로크 캔슬
q
플레이트 e 를 삽입합니다.
본체를 잡아 당깁니다.
w
Pull out the unit with
both hands.
4
Ç˚Ú‡ÒÍË‚‡˛Ú Ó·ÂËÏË
Û͇ÏË ÔË·Ó.
양손으로 장치를 잡아
당깁니다.
u.
Page 42

Wiring/åÓÌÚ‡Ê ˝ÎÂÍÚÓÔÓ‚Ó‰ÓÍ/
Fuse (15 A) Refer fuse replacement to your nearest authorized Panasonic Service
Center. Do not try fuse replacement by yourself.
иО‡‚НЛИ ФВ‰Уı‡МЛЪВО¸ (М‡ 15 Д)
·ОЛК‡И¯ВПЫ ‡‚ЪУЛБУ‚‡ММУПЫ ˆВМЪЫ ЪВıУ·ТОЫКЛ‚‡МЛfl «Panasonic». зВО¸Бfl Т‡ПУПЫ Ф˚Ъ‡Ъ¸Тfl Б‡ПВМЛЪ¸
Antenna
ДМЪВММ‡
안테나
ФО‡‚НЛИ ФВ‰Уı‡МЛЪВО¸.
휴즈 (15 A) 휴즈 교환은 가까운 Panasonic 서비스센터에 의뢰해 주십시오. 절대로 고객
자신이 휴즈를 교환하지 마십시오.
배선
б‡ Б‡ПВМУИ ФО‡‚НУ„У ФВ‰Уı‡МЛЪВОfl ТОВ‰ЫВЪ У·‡˘‡Ъ¸Тfl Н
Caution
To prevent damage to the unit, do not connect the power connector
until the whole wiring is completed.
ЗМЛП‡МЛВ
ЗУ ЛБ·ВК‡МЛВ ФУ‚ВК‰ВМЛfl ФЛ·У‡ МВ ТОВ‰ЫВЪ ФУ‰ТУ‰ВМЛflЪ¸ ТЛОУ‚УИ ‡Б˙ВП ‰У
ФУОМУ„У Б‡‚В¯ВМЛfl ПУМЪ‡К‡ ˝ОВНЪУФУ‚У‰УН.
주의
장치에의 손상을 방지하기 위하여 전 배선이 종료된 후에 전원 커넥터를 접속해 주십시오.
(
Red
(R)/(臂.)/(우)
S.W-OUT
(White)/(
(L)/(ã‚.)/(좌)
(
Red
(R)/(臂.)/(우)
AUX1-IN
(White)/(
ÅÂÎ˚È
(L)/(ã‚.)/(좌)
(
)/(
Red
ä‡ÒÌ˚È
(R)/(臂.)/(우)
PRE-OUT REAR
(White)/(
ÅÂÎ˚È
(L)/(ã‚.)/(좌)
(
)/(
Red
ä‡ÒÌ˚È
(R)/(臂.)/(우)
PRE-OUT FRONT
(White)/(
ÅÂÎ˚È
(L)/(ã‚.)/(좌)
)/(
)/(
ä‡ÒÌ˚È
System up Connector
к‡Б˙ВП ‰Оfl ‡Т¯ЛВМЛfl ТЛТЪВП˚
시스템 업 커넥터
)/
ä‡ÒÌ˚È
(적색)
Subwoofer Output Connector
The RCA cord of an external power amplifier should be connected.
лУВ‰ЛМЛЪВО¸ Н ‚˚ıУ‰Ы Т‡·‚ЫЩВ‡
лУВ‰ЛМfl˛Ъ ¯МЫ RCA ‚МВ¯МВ„У ЫТЛОЛЪВОfl.
서브우퍼 출력 커넥터
)/
ÅÂÎ˚È
외부 전원 앰프의 RCA코드를 접속합니다.
(백색)
)/
(적색)
AUX Input Connector
ê‡Á˙ÂÏ AUX-‚ıÓ‰‡
AUX 입력 커넥터
)/(백색)
)/(적색)
Preamp Out Connector (Rear
ЙМВБ‰У ‰Оfl ФУ‰НО˛˜ВМЛfl ‚˚ıУ‰МУ„У Н‡·ВОfl ФВ‰ЫТЛОЛЪВОfl (Б‡‰МВВ)
프리아웃 커넥터 (리어)
)/(백색)
)/(적색)
Preamp Out Connector (Front
ЙМВБ‰У ‰Оfl ФУ‰НО˛˜ВМЛfl ‚˚ıУ‰МУ„У Н‡·ВОfl ФВ‰ЫТЛОЛЪВОfl (ФВВ‰МВВ)
프리아웃 커넥터 (프론트)
)/(백색)
ACC
BATTERY 15A
)
)
(Red)/(ä‡ÒÌ˚È)/(
Power Lead (ACC or IGN) To ACC power, +12 V DC.
ëËÎÓ‚ÓÈ ‚˚‚Ó‰ÌÓÈ ÔÓ‚Ó‰ (Äëë ËÎË IGN) ä ÔËÚ‡Ì˲ Äëë, +12 V {B} ÔÓÒÚ.Ú.
전원 리드선 (ACC 또는 IGN)을 ACC 전원, +12 V DC에
(Black)/(óÂÌ˚È)/(
Ground Lead To a clean, bare metallic part of the car chassis.
á‡ÁÂÏÎfl˛˘ËÈ ÔÓ‚Ó‰ д˜ЛТЪУИ, У·М‡КВММУИ ПВЪ‡ООЛ˜ВТНУИ ˜‡ТЪЛ ‡‚ЪУПУ·ЛО¸МУ„У ¯‡ТТЛ.
접지 리드선을 자동차 차대의 깨끗하고 페인트가 칠해지지 않은 금속부에
(Yellow)/(ÜÂÎÚ˚È)/(
Battery Lead To the car battery, continuous +12 V DC.
Ç˚‚Ó‰ ·‡Ú‡ÂË ä ‡‚ÚÓÏÓ·ËθÌÓÈ ·‡Ú‡ÂÂ, ÌÂÔÂ˚‚Ì. +12 V {B} ÔÓÒÚ.Ú.
배터리 리드선을 자동차 배터리, 직류 +12 V DC에
(Blue w/white stripe)/(лЛМЛИ ФУ‚У‰ Т ·ВОУИ ФУОУТНУИ)/(
External Amplifier Control Power Lead To an external amplifier. (Max. 100 mA)
лЛОУ‚УИ ‚˚‚У‰МУИ ФУ‚У‰ ‰Оfl ЫФ‡‚ОВМЛfl ‚МВ¯МЛП ЫТЛОЛЪВОВП д ‚МВ¯МВПЫ ЫТЛОЛЪВО˛. (е‡НТ. 100 mA {ПД} )
외부 앰프 컨트롤 전원 리드선을 외부 앰프 (최대 100 mA)에
(Blue)/(лЛМЛИ)/(청색)
Motor Antenna Relay Control Lead To Motor Antenna. (Max. 100 mA) (This lead is not intended for use with a
switch actuated power antenna)
З˚‚У‰МУИ ФУ‚У‰ ВОВИМУ„У ЫФ‡‚ОВМЛfl ‡МЪВММУИ Т ПУЪУМ˚П ФЛ‚У‰УП д ‡МЪВММВ Т ПУЪУМ˚П ФЛ‚У‰УП.
(е‡НТ. 100 mД {ПД})
(щЪУЪ ‚˚‚У‰МУИ ФУ‚У‰ МВ ФВ‰М‡БМ‡˜ВМ ‰Оfl ФЛПВМВМЛfl Т ‡МЪВММУИ Т ПУЪУМ˚П ФЛ‚У‰УП, ‚НО˛˜‡ВПУИ ФВВНО˛˜‡ЪВОВП)
모터 안테나 중계 컨트롤 리드선을 모터 안테나 (최대 100 mA)에 (이 리드선은 스위치로 작동하는 전원 안테나와의 사용을 목적
으로 하지 않습니다.)
(Orange)/(é‡ÌÊ‚˚È)/(주황색)
External Mute Lead
To the Navi Mute Lead of the Panasonic Car Navigation system or car telephone mute lead.
Ç̯ÌËÈ ‚˚‚Ó‰ÌÓÈ ÔÓ‚Ó‰ ‰Îfl ÔË„ÎÛ¯ÂÌËfl Á‚Û͇
д ‚˚‚У‰Ы Navi Mute ‡‚ЪУПУ·ЛО¸МУИ М‡‚Л„‡ˆЛУММУИ ТЛТЪВП˚ «Panasonic» ЛОЛ ‚˚‚У‰Ы ‰Оfl ФЛ„ОЫ¯ВМЛfl Б‚ЫН‡ ‰Оfl
‡‚ЪУПУ·ЛО¸МУ„У ЪВОВЩУМ‡.
외부 뮤트 리드선
Panasonic 카 네비게이션 시스템의 네비 뮤트 리드선 또는 카폰의 뮤트 리드선에.
적색
검정색
황색
)
)
)
백색 줄무늬의 청색
)
System Upgrade Example: Connecting with a CD changer/иЛПВ ФУ‚˚¯ВМЛfl ЩЫМНˆЛЛ ТЛТЪВП˚: лУВ‰ЛМВМЛВ Т CD-˜ВИМ‰ВКУП
시스템 업그레이드 예: CD 체인저와의 접속
CX-DP880
CQ-C7405W
CHANGER IN
(
)/(
Red
Conversion Cable for DVD/CD Changer
дУМ‚ВТЛУММ˚И Н‡·ВО¸ ‰Оfl DVD/CD-˜ВИМ‰КВ‡.
DVD/CD 체인저용 변환 케이블
CA-CC30N
(Option)
(ÔÓ ÓÔˆËË)
(
옵션품)
)/(적색)
ä‡ÒÌ˚È
(R)/(臂.)/(우)
System up
Connector
к‡Б˙ВП ‰Оfl
‡Т¯ЛВМЛfl ТЛТЪВП˚
시스템 업 커넥터
(White)/(
(L)/(ã‚.)/(좌)
DIN Cord
òÌÛ DIN
DIN 코드
ÅÂÎ˚È
)/(백색)
(Option)
(ÔÓ ÓÔˆËË)
옵션품)
(
Ground Lead
á‡ÁÂÏÎfl˛˘ËÈ ÔÓ‚Ó‰
접지 리드선
Battery Lead
ŇڇÂÈÌ˚È ÔÓ‚Ó‰
배터리 리드선
RCA Cord
òÌÛ RCA
RCA 코드
FRONT SP
REAR SP
+
Rear Left + (Green)
ᇉМЛИ ОВ‚˚И + (бВОВМ˚И)
좌측 후부+ (녹색)
-
Rear Left – (Green w/black stripe)
ᇉМЛИ ОВ‚˚И – (бВОВМ˚И ФУ‚У‰ Т ˜ВМУИ ФУОУТНУИ)
좌측 후부 – (검정 줄무늬의 녹색)
+
Rear Right + (Violet)
ᇉМЛИ Ф‡‚˚И + (оЛУОВЪУ‚˚И)
우측 후부 + (자색)
-
Rear Right – (Violet w/black stripe)
ᇉМЛИ Ф‡‚˚И – (оЛУОВЪУ‚˚И ФУ‚У‰ Т ˜ВМУИ ФУОУТНУИ)
우측 후부 – (검정 줄무늬의 자색)
+
Front Left + (White)
è‰ÌËÈ Î‚˚È + (ÅÂÎ˚È)
좌측 전면 + (백색)
-
Front Left – (White w/black stripe)
è‰ÌËÈ Î‚˚È
좌측 전면 – (검정 줄무늬의 백색)
+
Front Right + (Gray)
è‰ÌËÈ Ô‡‚˚È + (ëÂ˚È)
우측 전면 + (회색)
-
Front Right – (Gray w/black stripe)
иВВ‰МЛИ Ф‡‚˚И – (лВ˚И ФУ‚У‰ Т ˜ВМУИ
ФУОУТНУИ)
우측 전면 – (검정 줄무늬의 회색)
–(ЕВО˚И ФУ‚У‰ Т ˜ВМУИ ФУОУТНУИ)
Final Installation/éÍÓ̘‡ÚÂθÌ˚È ÏÓÌÚ‡Ê/
최종 설치
Lead Connections
Connect all wires, making sure that each connection is insulated and
secure. Bundle all loose wires and fasten them with tape so they will not
fall down later. Now insert the unit into the mounting collar.
Congratulations! After making a few final checks, you’re ready to enjoy
your new auto stereo system.
èÓÍ·‰Í‡ ˝ÎÂÍÚÓÔÓ‚Ó‰ÍË
иУ‰Ъ‚ВК‰‡fl ЛБУОflˆЛ˛ Л М‡‰ВКМУТЪ¸ ‚ТВı ТУВ‰ЛМВМЛИ, ТУВ‰ЛМfl˛Ъ ‚ТВ
ФУ‚У‰˚. й·‚flБ˚‚‡˛Ъ ‚ТВ Т‚У·У‰М˚В ФУ‚У‰˚ ОВМЪУИ ‰Оfl
ФВ‰УЪ‚‡˘ВМЛfl Лı УЪФ‡‰ВМЛfl. ЗТЪ‡‚Оfl˛Ъ ‡ФФ‡‡Ъ ‚ ПУМЪ‡КМЫ˛ ‡ПЫ.
리드선 접속
모든 배선을 접속한 다음 접속부는 절연하고 고정시킵니다. 또한 느슨
한 배선을 모아 테이프로 감싸서 떨어지지 않도록 한 후에 장치를 장착
칼라에 삽입합니다.
축하합니다! 몇가지 최종 확인을 한 후에 카 스테레오 시스템을 즐기실
수 있습니다.
Final Check/éÍÓ̘‡ÚÂθ̇fl ÔÓ‚Â͇/
최종 확인
1. Make sure that all wires are properly connected and insulated.
2. Make sure that the main unit is securely held in the mounting collar.
3. Turn on the ignition to check the unit for proper operation.
If you have difficulties, consult your nearest authorized professional
installer for assistance.
1. м·ВК‰‡˛ЪТfl, ˜ЪУ ‚ТВ ФУ‚У‰˚ Ф‡‚ЛО¸МУ ТУВ‰ЛМВМ˚ Л ЛБУОЛУ‚‡М˚.
2.
м·ВК‰‡˛ЪТfl, ˜ЪУ ‡ФФ‡‡Ъ М‡‰ВКМУ Б‡ЩЛНТЛУ‚‡М М‡ ПУМЪ‡КМУИ ‡ПВ.
3. ÇÍβ˜‡˛Ú ‚˚Íβ˜‡ÚÂθ Á‡ÊË„‡ÌËfl ‰Îfl ÔÓ‚ÂÍË ÌÓχθÌÓÈ ‡·ÓÚ˚
‡ÔÔ‡‡Ú‡.
иЛ ‚УБМЛНМУ‚ВМЛЛ ФУ·ОВП ТОВ‰ЫВЪ У·‡ЪЛЪ¸Тfl Н ‡‚ЪУЛБУ‚‡ММУПЫ
ФУЩВТТЛУМ‡О¸МУПЫ ПУМЪ‡КМЛНЫ Б‡ ФУПУ˘¸˛.
1. 모든 배선이 올바르게 접속되고 절연되었는지를 확인합니다.
2. 본체가 장착 칼라에 확실히 장착된지를 확인합니다.
3. 점화 스위치를 켜고 장치가 올바르게 조작하는지를 확인합니다.
문제점이 있을 경우에는 가까운 설치 전문업자에 상담해 주십시오.
Speaker Connection/еУМЪ‡К ˝ОВНЪУФУ‚У‰УН „УПНУ„У‚УЛЪВОВИ/스피커 접속
Connect as follows.
еУМЪЛЫ˛Ъ ФУ‚У‰НЛ Ъ‡Н, Н‡Н ФУН‡Б‡МУ М‡ ЛТ. МЛКВ.
하기와 같이 접속합니다.
L
R
●Use ungrounded speakers only.
Allowable input : 50 W or more
Impedance : 4 – 8 Ω
●Use of speakers which do not match the specifications can cause
burning, smoking or damage of the speakers.
●Distance between speaker and amplifier: 30 cm or more
●лОВ‰ЫВЪ ФЛПВМflЪ¸ ЪУО¸НУ МВБ‡БВПОВММ˚В „УПНУ„У‚УЛЪВОЛ.
СУФЫТН‡ВП˚И ‚ıУ‰: 50 W {ЗЪ} ЛОЛ ·УОВВ
аПФВ‰‡МТ: йЪ 4
●аТФУО¸БУ‚‡МЛВ „УПНУ„У‚УЛЪВОВИ Т МВФУ‰ıУ‰fl˘ЛПЛ ЪВıМЛ˜ВТНЛПЛ
– 8 Ω {éÏ}
ı‡‡НЪВЛТЪЛН‡ПЛ ПУКВЪ ФЛ‚ВТЪЛ Н У·„У‡МЛ˛ , ‚УБМЛНМУ‚ВМЛ˛ ‰˚П‡ ЛОЛ
ФУ‚ВК‰ВМЛ˛ „УПНУ„У‚УЛЪВОВИ.
●к‡ТТЪУflМЛВ ПВК‰Ы „УПНУ„У‚УЛЪВОflПЛ Л ЫТЛОЛЪВОВП: 30 cm ЛОЛ ·УОВВ
비접지 스피커만을 사용합니다.
●
허용 입력: 50 W 이상
임피던스: 4
사양이 다른 스피커를 사용하면 화재, 발연 또는 스피커 손상의 원인이 됩니다.
●
●스피커와 앰프의 거리: 30 cm 이상
– 8 Ω
Caution
●Do not connect more than one speaker to
one set of speaker leads. (except for connecting to
a tweeter)
ÇÌËχÌËÂ
●
зВО¸Бfl ФУ‰ТУВ‰ЛМflЪ¸ ‰‚‡ Л ·УОВВ „УПНУ„У‚УЛЪВОfl Н У‰МУПЫ
М‡·УЫ ‚˚‚У‰М˚ı ФУ‚У‰У‚ „УПНУ„У‚УЛЪВОfl (Б‡ ЛТНО˛˜ВМЛВП
ТОЫ˜‡fl ФУ‰ТУВ‰ЛМВМЛfl Н „УПНУ„У‚УЛЪВО˛ ‰Оfl
‚УТФУЛБ‚В‰ВМЛfl ‚ВıМЛı ˜‡ТЪУЪ)
주의
●한 세트의 스피커 리드선에 스피커를 하나 이상
접속하지 마십시오. (고음용 확성기 접속을 제외하고)
●Do not use a 3-wire type speaker system
having a common earth lead.
●зВ ТОВ‰ЫВЪ ФЛПВМflЪ¸ ЪВıФУ‚У‰МЫ˛ „УПНУ„У‚УЛЪВО¸МЫ˛ ТЛТЪВПЫ,
Ëϲ˘Û˛ Ó·˘ËÈ Á‡ÁÂÏÎfl˛˘ËÈ ÔÓ‚Ó‰.
공통의 접지선을 사용하는 3-배선식의
●
스피커 시스템을 사용하지 마십시오.
Page 43

System Upgrade Guidebook
аМТЪЫНˆЛfl ФУ ‡Т¯ЛВМЛ˛ ТЛТЪВП˚
Model:
CQ-C7405W
¡ For upgrading your system, read this manual carefully before use. This manual should be retained for future reference after
read.
¡ СОfl ‡Т¯ЛВМЛfl З‡¯ВИ ТЛТЪВП˚ ФУТЛП Ъ˘‡ЪВО¸МУ ˜ЛЪ‡Ъ¸ ‰‡ММЫ˛ ЛМТЪЫНˆЛ˛ ФВВ‰ ЛТФУО¸БУ‚‡МЛВП ‡ФФ‡‡Ъ‡. С‡ММЫ˛
ËÌÒÚÛÍˆË˛ ÒΉÛÂÚ ı‡ÌËÚ¸ ‰Îfl ‰‡Î¸ÌÂÈ¯Â„Ó ÔÓθÁÓ‚‡ÌËfl.
Page 44

Safety Information
■
Read the operating instructions for the unit and all other components of your car audio system carefully before using the
system. They contain instructions about how to use the system in a safe and effective manner. Panasonic assumes no
responsibility for any problems resulting from failure to
observe the instructions given in this manual.
This pictograph intends to alert you to the presence of important operating instructions and
Warning
installation instructions. Failure to heed the
instructions may result in severe injury or death.
Warning
Observe the following warnings when using
this unit.
❑
The driver should neither watch the display nor
operate the system while driving.
Watching the display or operating the system will distract
the driver from looking ahead of the vehicle and can cause
accidents. Always stop the vehicle in a safe location and use
the parking brake before watching the display or operating
the system.
❑
Use the proper power supply.
This product is designed for operation with a negative
grounded 12 V DC battery system. Never operate this product with other battery systems, especially a 24 V DC battery
system.
❑
Keep batteries and insulation film out of reach of
infants.
Batteries and insulation film can be ingested, so keep them
out of the reach of infants. If an infant ingests a battery or
insulation film, please seek immediate medical attention.
❑
Protect the Deck Mechanism.
Do not insert any foreign objects into the slot of this unit.
❑
Do not disassemble or modify the unit.
Do not disassemble, modify the unit or attempt to repair the
product yourself. If the product needs to be repaired, consult
your dealer or an authorized Panasonic Service Center.
❑
Do not use the unit when it is out of order.
If the unit is out of order (no power, no sound) or in an
abnormal state (has foreign objects in it, is exposed to
water, is smoking, or smells), turn it off immediately and
consult your dealer.
❑
The remote control unit should not lie about in the
car.
If the remote control unit lies about, it could fall on the floor
while driving, get wedged under the brake pedal, and lead to
a traffic accident.
❑
Refer fuse replacement to qualified service personnel.
When the fuse blows out, eliminate the cause and have it
replaced with the fuse prescribed for this unit by a qualified
service engineer. Incorrect replacement of the fuse may lead
to smoke, fire, and damage to the product.
■
This manual uses pictographs to show you how to use the
product safely and to alert you to potential dangers resulting
from improper connections and operations. The meanings of
the pictographs are explained below. It is important that you
fully understand the meanings of the pictographs in order to
use this manual and the system properly.
This pictograph intends to alert you to the presence of important operating instructions and
Caution
installation instructions. Failure to heed the
instructions may result in injury or material damage.
Observe the following warnings when
installing.
❑
Disconnect the lead from the negative (–) battery
terminal before installation.
Wiring and installation with the negative (–) battery terminal
connected may cause electrical shock and injury due to a
short circuit.
Some cars equipped with the electrical safety system have
specific procedures of battery terminal disconnection.
FAILURE TO FOLLOW THE PROCEDURE MAY LEAD TO THE
UNINTENDED ACTIVATION OF THE ELECTRICAL SAFETY
SYSTEM RESULTING IN DAMAGE TO THE VEHICLE AND
PERSONAL INJURY OR DEATH.
❑
Never use safety-related components for installation, grounding, and other such functions.
Do not use safety-related vehicle components (fuel tank,
brake, suspension, steering wheel, pedals, airbag, etc.) for
wiring or fixing the product or its accessories.
❑
Installing the product on the air bag cover or in a
location where it interferes with airbag operation is
prohibited.
❑
Check for piping, gasoline tank, electric wiring, and
other items before installing the product.
If you need to open a hole in the vehicle chassis to attach or
wire the product, first check where the wire harness, gasoline tank, and electric wiring are located. Then open the hole
from outside if possible.
❑
Never install the product in a location where it interferes with your field of vision.
❑
Never have the power cord branched to supply other
equipment with power.
❑
After installation and wiring, you should check the
normal operation of other electrical equipment.
The continuation of their using in abnormal conditions may
cause fire, electrical shock or a traffic accident.
❑
In the case of installation to an airbag equipped car,
confirm warnings and cautions of the vehicle manufacturer before installation.
❑
Make sure the leads do not interfere with driving or
getting in and out of the vehicle.
❑
Insulate all exposed wires to prevent short circuiting.
2
CQ-C7405W
Page 45

Caution
Observe the following cautions when using this
unit.
❑
Keep the sound volume at an appropriate level.
Keep the volume level low enough to be aware of road and
traffic conditions while driving.
❑
Do not insert or allow your hand or fingers to be
caught in the unit.
To prevent injury, do not get your hand or fingers caught in
moving parts or in the disc slot. Especially watch out for
infants.
❑
This unit is designed for use exclusively in automobiles.
❑
Do not operate the unit for a prolonged period with
the engine turned off.
Operating the audio system for a long period of time with the
engine turned off will drain the battery.
❑
Do not expose the unit to direct sunlight or excessive heat.
Otherwise these will raise the interior temperature of the
unit, and it may lead to smoke, fire, or other damage to the
unit.
❑
Do not use the product where it is exposed to water,
moisture, or dust.
Exposure of the unit to water, moisture, or dust may lead to
smoke, fire, or other damage to the unit. Make especially
sure that the unit does not get wet in car washes or on rainy
days.
Observe the following cautions when
installing.
❑
Refer wiring and installation to qualified service
personnel.
Installation of this unit requires special skills and experience.
For maximum safety, have it installed by your dealer.
Panasonic is not liable for any problems resulting from your
own installation of the unit.
❑
Follow the instructions to install and wire the product.
Not following the instructions to properly install and wire the
product could cause an accident or fire.
❑
Take care not to damage the leads.
When wiring, take care not to damage the leads. Prevent
them from getting caught in the vehicle chassis, screws, and
moving parts such as seat rails. Do not scratch, pull, bend or
twist the leads. Do not run them near heat sources or place
heavy objects on them. If leads must be run over sharp
metal edges, protect the leads by winding them with vinyl
tape or similar protection.
❑
Use the designated parts and tools for installation.
Use the supplied or designated parts and appropriate tools
to install the product. The use of parts other than those supplied or designated may result in internal damage to the unit.
Faulty installation may lead to an accident, a malfunction or
fire.
❑
Do not block the air vent or the cooling plate of the
unit.
Blocking these parts will cause the interior of the unit to
overheat and will result in fire or other damage.
❑
Do not install the product where it is exposed to
strong vibrations or is unstable.
Avoid slanted or strongly curved surfaces for installation. If
the installation is not stable, the unit may fall down while
driving and this can lead to an accident or injury.
❑
Installation Angle
The product should be installed in a horizontal position with
the front end up at a convenient angle, but not more than
30˚.
The user should bear in mind that in some areas there may
be restrictions on how and where this unit can be installed.
Consult your dealer for further details.
❑
Wear gloves for safety. Make sure that wiring is
completed before installation.
❑
To prevent damage to the unit, do not connect the
power connector until the whole wiring is completed.
❑
Do not connect more than one speaker to one set of
speaker leads. (except for connecting to a tweeter)
Observe the following cautions when handling
the battery for the remote control unit.
●
Use only specified battery (CR2025).
●
Match the polarity of the battery with the (+) and (–) marks
in the battery case.
●
Replace dead battery as soon as possible.
●
Remove the battery from the remote control unit when not
using it for an extended period of time.
●
Insulate the battery (by placing them in a plastic bag or covering them with vinyl tape) before disposal or storage.
●
Dispose of the battery according to the local regulations.
●
Do not disassemble, recharge, heat or short the battery. Do
not throw a battery into a fire or water.
In case of battery leakage
●
Thoroughly wipe the battery liquid off the battery case and
insert new battery.
●
If any part of your body or clothing comes into contact with
battery liquid, wash it with plenty of water.
●
If battery liquid comes into contact with your eyes, wash
them with plenty of water and get immediate medical attention.
English
Safety Information
Refer to safety information of optional devices as well.
CQ-C7405W
3
Page 46

Before Reading These Instructions
This book is an instruction manual that explains how to
operate your purchased head unit and its remote control
as an accessory when the head unit is connected to
About
optional devices.
(Remote Control Unit a Operating Instructions)
this Book
Monitor: CY-VM1500EX (Option)
Head Unit: CQ-C7405W
iPod
(a Page 12)
DVD Changer
CX-DH801W
(Option) (a Page 8)
Head Unit
CQ-C7405W
System Upgrade Sample
System-up Connector
Only 1 unit
Up to
4 units
Hands-Free Phone System:
CY-BT100N (Option)
(a Page 14)
Expansion Module (hub unit):
CY-EM100N (Option) (a Page 6)
CD Changer
(CX-DP880, option)
Conversion Cable for DVD/CD
Changer
(CA-CC30N, option)
iPod
Direct Cable for iPod
(CA-DC300N, option)
Expansion Module
(CY-EM100N, option)
Cellular Phone
Notes:
CY-BT100U
CY-BT100U
¡ Refer to individual instruction and instal-
lation manuals for each device for detailed
installation and wiring.
¡ A hub unit is not required to connect only
one optional component.
4
CQ-C7405W
Hands-Free Kit featuring
Bluetooth
(CY-BT100N, option)
®
technology
Page 47

Contents
English 2
¡Safety Information 2
¡Before Reading These Instructions 4
Common
êêÛÛÒÒÒÒÍÍËËÈÈ
18
34
¡General 6
¡Disc Changer 8
¡iPod Control 12
¡Hands-Free Phone System 14
Each Source
¡Troubleshooting 16
As Needed
CQ-C7405W
5
Page 48

General
DVD Changer
The optional adapter (Conversion Cable for DVD/CD
Changer: CA-CC30N
Panasonic DVD changer unit (CX-DH801W). For details,
refer to the operating instructions for the DVD changer
unit. (a page 8, 10)
) allows you to connect the optional
CD Changer
The optional adapter (Conversion Cable for DVD/CD
Changer: CA-CC30N
Panasonic CD changer unit (CX-DP880). For details, refer
to the operating instructions for the CD changer unit.
(a page 8)
®
iPod
The optional adapter (
) allows you to connect the optional iPod series.
DC300N
(a page 12)
The iPod equipped with a dock connector is exclusively
connectable. Further information about the controllable
iPod is described below.
Controllable iPod/software version
) allows you to connect the optional
Direct Cable for iPod: CA-
¡ 3rd generation iPod/ver. 2.3
¡ 4th generation iPod/ver. 3.1.1
¡ 5th generation iPod/ver. 1.1.2 (Video playback is not
supported.)
¡ iPod Photo/ver. 1.2.1
¡ iPod mini/ver. 1.4.1
¡ iPod nano/ver. 1.2
* Operation check has been completed with software
available at the end of October, 2006. We do not guaran-
Connectable Devices
tee the operation with our future products or upgraded
software.
iPod is a trademark of Apple Computer, Inc., registered in
the U.S. and other countries.
Hands-Free Phone System
You can connect the optional Hands-Free Phone System
(Hands-Free Kit featuring Bluetooth
CY-BT100N). For details, refer to the operating
instructions for the Hands-Free Phone System.
(a page 14)
®
technology:
Expansion Module (hub unit)
You can connect the optional Expansion Module (hub
unit) (CY-EM100N). Connection of the Expansion Module
allows you to simultaneously connect optional devices
mentioned before as well as other AV devices. For
details, refer to the operating instructions for the
Expansion Module.
Connectable devices
¡ CD changer (max. 1)
¡ iPod (max. 2)
¡ Hands-Free Phone System (max. 1)
Note: Market conditions regarding optional devices vary
with countries and regions. For further information,
consult your dealer.
Note: This unit is designed only for receiving calls.
It cannot send calls.
Bluetooth
The Bluetooth word mark and logo are owned by the
Bluetooth SIG, Inc. and any use of such marks by
Matsushita Electric Industrial Co.,Ltd. is under
license. Other trademarks and trade name are those
of their respective owners.
6
CQ-C7405W
®
Page 49

The source changes as follows every time
[SOURCE] is pressed.
L
E
/
S
S
R
H
S
S
U
W
P
SOURCE
PWR
O
L
W
O
V
MUTE
SBC-SW
SQ
MENU
TUNE
TRACK
FOLDER/P-SET/DISC
D・M
LIST
CQ-C7405W
/
TILT/SET/APM
OPENDISPBAND
Radio
FM1, FM2, FM3, AM (a Operating Instructions)
Player
When loading CD (a Operating Instructions)
When loading a disc containing compressed
audio files (a Operating Instructions)
(SOURCE)
AUX 1
Source Selection
Device connected to the AUX terminal of the this unit
System-up Connector
Device connected to the System-up Connector of this
unit
When optional devices are connected:
Shift to connected devices
When an expansion module is connected:
The devices connected to the ports 1 to 4 are activated
in sequence after shifting to AUX2 (devices connected
to the AUX terminal of the expansion module).
When connecting DVD Changer (a page 8, 10)
When connecting CD Changer (a page 8)
When connecting iPod (a page 12)
English
General
When connecting Expansion Module
CQ-C7405W
7
Page 50

Disc Changer
(When CDs or MP3 discs are loaded)
Connected an optional CD changer or an optional DVD changer can be controlled by this unit.
Load a magazine (discs).
1
When a magazine is already loaded, press
L
E
/
S
S
R
H
S
S
U
W
P
O
L
O
V
[SOURCE] to select the CD changer mode.
MUTE
D・M
The unit recognizes the magazine and starts playing
SBC-SW
automatically.
Select a desired portion.
2
Disc selection
[}] (DISC): Next disc
[{] (DISC): Preceding disc
Folder up/Down
Only for DVD Changer
Hold down for 2 sec. or more.
[}] (FOLDER): Next folder
[{] (FOLDER): Preceding folder
Operation FlowCD Changer Mode Display
Track/File selection
[7]: Next track/file
[6]: Preceding track/file (press twice)
Note: Hold down for fast forward/reverse.
W
FOLDER/P-SET/DISC
TUNE
TRACK
SOURCE
PWR
SQ
MENU
LIST
CQ-C7405W
/
TILT/SET/APM
OPENDISPBAND
Track/file
Disc number
Changer indicator
(CD changer)
(DVD changer)
Pause
Press [BAND] (y / 5).
Press again to cancel.
Play Mode indicators
lights when each mode is
activated.
(Disc Random, Only for CD changer)
(Disc Repeat)
(Disc Scan, Only for CD changer)
(Folder Repeat, Only for MP3 files)
Time
lights when the changer is
connected.
8
CQ-C7405W
Page 51

Notes:
¡ When CX-DP880 or CX-DH801W is connected, a CD-RW
disc is playable.
¡ Trouble may occur while playing CD-Rs. Refer to the section
on “Notes on CD/CD Media (CD-ROM, CD-R, CD-RW)”.
(a Operating Instructions)
¡ This unit does not support the following through the CD
changer.
¡MP3 playback.
English
Random and Repeat play can be set.
Press [MENU] to display the menu dis-
1
play.
L
E
/
S
S
R
H
S
S
U
W
P
O
For using the remote
control, hold down
[SEL] (MENU) for 2
sec. or more.
L
W
O
V
MUTE
SBC-SW
FOLDER/P-SET/DISC
D・M
SOURCE
PWR
SQ
MENU
TUNE
TRACK
LIST
RANDOM
¡ CD-DA
RANDOM playback of the selected disc (DVD changer)
RANDOM playback of all discs in the magazine (CD
changer)
¡ MP3 disc
RANDOM playback of the selected folders
: Off (default)
: Random playback
DISC RANDOM (Only for CD changer)
: Off (default)
Turn [VOL] to select a function to be
2
adjusted.
For using the remote
(RANDOM, REPEAT)
control, use [}] or
[{].
Press [PUSH
3
SEL] to adjust.
For using the remote control, use [BAND] (SET).
Press [MENU] to close the menu
4
screen.
For using the remote control, hold down [SEL]
Random, Repeat Play (Disc Changer Menu Display)
(MENU) for 2 sec. or more.
L
E
/
S
S
R
H
S
S
U
W
P
SOURCE
PWR
O
L
W
O
V
MUTE
SBC-SW
SQ
MENU
TUNE
TRACK
FOLDER/P-SET/DISC
D・M
LIST
: Random playback (from selected disc)
REPEAT
: Off (default)
: Playing the current track/file repeatedly
DISC REPEAT (Only for CD-DA disc)
: Off (default)
: Playing the current disc repeatedly
FOLDER REPEAT (Only for MP3 disc)
: Off (default)
: Playing the current folder repeatedly
Play Mode Selection
One-touch operation is available for selecting a track
playing style by use of [RANDOM] or [REPEAT].
RANDOM, REPEAT
Press the button. Press again to cancel.
DISC RANDOM, DISC REPEAT, FOLDER REPEAT
Hold down the button for 2 sec. or more.
Hold down again to cancel.
SCAN play
Functions Only by
You can find your favorite file by playing first 10-sec. of
each file.
Remote Control Unit
SCAN (CD changer: All tracks, DVD changer:
from selected disc)
Press [SCAN]. Press again to cancel.
DISC SCAN (1st file in each disc, only for CD
changer)
Hold down [SCAN] for 2 sec. or more. Hold down
again to cancel.
Direct Access
A disc can be directly selected.
Example: disc number 5
Press [#] (NUMBER).
1
Press [5].
2
Press [SET].
3
Note: To suspend direct
selection, press [DISP] (DISPLAY).
CQ-C7405W
(When CDs or MP3 discs are loaded)
Disc Changer
9
Page 52

Disc Changer
(when DVDs or VCDs are loaded)
Connected an optional DVD changer (CX-DH801W) can be controlled by this unit.
Load a magazine (discs).
1
When a magazine is already loaded, press
[SOURCE] to select the DVD changer mode.
The unit recognizes the magazine and starts playing
automatically.
2
Notes:
¡ For DVD operations other than the above (i.e. DVD
menu, closed caption, etc.), use the remote control unit supplied with the DVD changer.
¡ The remote control unit supplied with the DVD
changer does not work properly when you aim it
at this unit.
Operation FlowDVD Changer Mode Display
¡ When using the remote control unit supplied with
the DVD changer, aim it at the monitor display
(CY-VM1500EX).
L
E
/
S
S
R
H
S
S
U
W
P
SOURCE
PWR
O
L
W
O
V
MUTE
SBC-SW
SQ
MENU
TUNE
TRACK
FOLDER/P-SET/DISC
D・M
LIST
CQ-C7405W
/
Select a desired portion.
Disc selection
[}] (DISC): Next disc
[{] (DISC): Preceding disc
Chapter/Track selection
[7]: Next chapter/Next track
[6]: Preceding chapter/ Preceding track
(press twice)
Note: Hold down for fast forward/reverse.
Pause
TILT/SET/APM
OPENDISPBAND
Chapter number
Disc number
Changer indicator
Disc type
Press [BAND] (y / 5).
Press again to cancel.
Play Mode indicators
lights when each mode is
activated.
(Disc Repeat)
(Chapter Repeat)
(Title Repeat)
Time
lights when the changer is
connected.
10
CQ-C7405W
Page 53

Repeat play can be set.
Press [MENU] to display the menu dis-
1
play.
L
E
/
S
For using the remote
control, hold down
[SEL] (MENU) for 2
sec. or more.
Turn [VOL] to select a function to be
2
S
R
H
S
S
U
W
P
SOURCE
PWR
O
L
W
O
V
MUTE
SBC-SW
SQ
MENU
TUNE
TRACK
FOLDER/P-SET/DISC
D・M
LIST
adjusted.
(REPEAT)
3
For using the remote
control, use [}] or
[{].
Press [PUSH
L
E
/
S
S
R
H
S
S
U
W
P
SOURCE
PWR
O
L
W
O
V
MUTE
SBC-SW
SQ
MENU
TUNE
TRACK
FOLDER/P-SET/DISC
D・M
LIST
SEL] to adjust.
For using the remote control, use [BAND] (SET).
Press [MENU] to close the menu
4
Repeat Play (DVD Changer Menu Display)
screen.
For using the remote control, hold down [SEL]
(MENU) for 2 sec. or more.
For a DVD insertion
¡
CHAPTER REPEAT
: Off (default)
: Playing the current chapter repeatedly.
TITLE REPEAT
: Off (default)
: Playing the current title repeatedly.
Note: The unit may not operate for some DVDs.
For a VCD insertion
¡
REPEAT
: Off (default)
: Playing the current track repeatedly
DISC REPEAT
: Off (default)
: Playing the current disc repeatedly
Notes:
¡ The unit may not operate for some VCDs.
¡ The unit may not operate for a disc with the play back
function activated.
English
Play Mode Selection
One-touch operation is available for selecting a chapter
playing style by use of [REPEAT].
CHAPTER REPEAT, REPEAT
Press the button. Press again to cancel.
TITLE REPEAT, DISC REPEAT
Hold down the button for 2 sec. or more. Hold
down again to cancel.
Functions Only by Remote Control Unit
Direct Access
A disc can be directly selected.
Example: disc number 5
Press [#] (NUMBER).
1
Press [5].
2
Press [SET].
3
Note: To suspend direct selection, press [DISP]
(DISPLAY).
CQ-C7405W
Disc Changer (when DVDs or VCDs are loaded)
11
Page 54

iPod Control
Connection of the optional iPod adapter (Direct cable for iPod) (CA-DC300N) allows users to operate the iPod including file selection
and file sequence change with the buttons on this unit.
Connect the iPod.
1
Press [SOURCE] to select the iPod
2
mode. Playback starts.
Note: If playback does not start, press [BAND]
(y / 5).
Select a desired portion.
3
File Selection
[7]: Next file
Operation FlowPlaying Mode selectioniPod Mode Display
[6]: Beginning of the current file
For the previous file, press twice.
Note: Hold down for fast forward/reverse.
The type with which playback data is classified is
selectable.
Press [}] (LIST) to call up the play
1
mode selection screen.
Turn [VOL] to select the play mode.
2
: Playback by playlist
: Playback by artist
: Playback by album
For using the remote control, use [}] or [{].
Note: When the []] button is pressed, the regular
screen appears.
Press [PUSH SEL] to determine the
3
selection.
For using the remote control, use [BAND] (SET).
L
E
/
S
S
R
H
S
S
U
W
P
SOURCE
PWR
O
L
W
O
V
MUTE
SBC-SW
SQ
MENU
TUNE
TRACK
FOLDER/P-SET/DISC
D・M
LIST
Pause
Press [BAND] (y / 5).
Press again to cancel.
L
E
/
S
S
R
H
S
S
U
W
P
SOURCE
PWR
O
L
W
O
V
MUTE
SBC-SW
Turn [VOL] to select the portion to play.
4
Notes:
¡ For selecting ARTIST, the ALBUM selection
screen appears after selecting an artist name.
¡ When the []] button is pressed, the previous
screen appears.
Press [PUSH SEL] to determine the
5
selection.
For using the remote control, use [BAND] (SET).
Notes: Files without an album name or an artist
name are not playable in the playing mode of the
album or artist display respectively.
SQ
MENU
TUNE
TRACK
FOLDER/P-SET/DISC
D・M
LIST
CQ-C7405W
/
CQ-C7405W
/
TILT/SET/APM
OPENDISPBAND
TILT/SET/APM
OPENDISPBAND
12
Current file
iPod number
(iPod 1)
(iPod 2)
CQ-C7405W
Play Mode indicators
lights when each mode is activated.
(Random)
(Repeat)
Time
lights when the direct cable
for iPod (CA-DC300N) is
connected.
*Even when the iPod itself is
not connected, this
indicator will also light.
This indicates that the main
unit normally operates.
(Album Random)
Page 55

Notes:
¡ The iPod equipped with a dock connector is exclusively con-
nectable. Further information about the controllable iPod is
described below.
Controllable iPod/software version
¡3rd generation iPod/ver. 2.3
¡4th generation iPod/ver. 3.1.1
¡5th generation iPod/ver. 1.1.2 (Video playback is not
supported.)
¡iPod Photo/ver. 1.2.1
¡iPod mini/ver. 1.4.1
¡iPod nano/ver. 1.2
* Operation check has been completed with software available at the end of October, 2006. We do not guarantee the
operation with our future products or upgraded software.
¡ The shuffle function of iPod corresponds to the RANDOM
function of this unit.
¡
Please make sure to detach the iPod after turning off the car engine
(turning the ACC to OFF). The iPod may not shut down while still
connected, which may result in battery depletion.
¡
Please do not connect iPod accessories such as an iPod remote
control or headphones while connecting iPod with the unit. The
unit may not operate correctly.
¡ Connect this unit after turning down the volume of the iPod.
¡ “NO iPod” appears until the iPod is recognized after con-
necting the iPod, turning on the power of the main unit, or
performing source selection on the main unit side. This indicates there is nothing wrong with the main unit.
¡ We do not guarantee all the operations of connectable
devices.
English
Random and Repeat play can be set.
Press [MENU] to display the menu dis-
1
play.
For using the remote
control, hold down
[SEL] (MENU) for 2
sec. or more.
Turn [VOL] to select a function to be
2
L
E
/
S
S
R
H
S
S
U
W
P
SOURCE
PWR
O
L
W
O
V
MUTE
SBC-SW
SQ
MENU
TUNE
TRACK
FOLDER/P-SET/DISC
D・M
LIST
adjusted.
(RANDOM, REPEAT)
For using the remote
control, use [}] or
[{].
Press [PUSH
3
L
E
/
S
S
R
H
S
S
U
W
P
SOURCE
PWR
O
L
W
O
V
MUTE
SBC-SW
SQ
MENU
TUNE
TRACK
FOLDER/P-SET/DISC
D・M
LIST
SEL] to adjust.
For using the remote control, use [BAND] (SET).
Random, Repeat Play (iPod Menu Display)
Press [MENU] to close the menu
4
screen.
For using the remote control, hold down [SEL]
(MENU) for 2 sec. or more.
RANDOM (Shuffle)
: Off
: From all available files
ALBUM RANDOM
: Off
: From files in the selected album
REPEAT
: Off
: Playing the current file repeatedly
Note: All files are played back even at REPEAT-off
setting. (ALL REPEAT)
TEXT
Text display
: Name/Title (default)
: Album/Title
: Disabled
Note: The title may not be displayed correctly if it is
longer than 250 alphanumeric characters.
iPod Control
Play Mode Selection
One-touch operation is available for selecting a track
playing style by use of [RANDOM] or [REPEAT].
RANDOM, REPEAT
Press the button. Press again to cancel.
ALBUM RANDOM
Hold down the button for 2 sec. or more. Hold
Functions Only by
down again to cancel.
Remote Control Unit
CQ-C7405W
13
Page 56

Hands-Free Phone System
Be sure to read “Safety Information” in the Operating Instructions for the Hands-Free Phone System before use.
Connecting Hands-Free Phone System
Connect the Hands-Free Phone System (CY-BT100N) and
establish the pairing. Refer to the operating instructions
for the Hands-Free Phone System for further information.
Note: This unit is designed only for receiving calls.
It cannot send calls.
Switch unit
Status indicator (Blue LED)
lights: Call waiting/Talking
stays out: Not connected
blinks rapidly: Receiving a call
blinks slowly:
Pairing/Reconnecting
Preparation
Press [Hang-on] on Hands-Free Phone
1
System and pick up the phone.
The phone is in the incoming state.
Adjust the volume if necessary.
2
Press [Hang-up] on the Hands-Free
3
Phone System and hung up the phone.
Adjust the ring volume
The ring volume is adjustable from this unit.
(Setting range: OFF/LOW/MID/HIGH, Default: MID)
[}]:
up
[{]:
down
Operation Flow
Notes:
¡ The ring volume is adjustable only when receiving
calls.
¡ The ring volume is adjustable only when the phone
ring comes out of the main unit.
¡ The ring volume is also adjustable by turning [VOL].
[Hang-on]/Blue LED
[Hang-up]/Red LED
L
E
/
S
S
R
H
S
S
U
W
P
SOURCE
PWR
O
L
W
O
V
MUTE
SBC-SW
SQ
MENU
TUNE
TRACK
FOLDER/P-SET/DISC
D・M
LIST
CQ-C7405W
/
TILT/SET/APM
OPENDISPBAND
Reject calls
Pressing [Hang-up] allows users to reject a call when
the call is coming in.
Bluetooth disconnection/reconnection
Pressing [Hang-up] allows users to temporarily
disconnect when the phone is in the waiting state.
Pressing [Hang-up] allows users to reconnect when the
Bluetooth unit is temporarily disconnected.
14
CQ-C7405W
Page 57

Notes:
¡ This item is not selectable by pressing [SOURCE], but
activated by receiving an incoming call.
¡ Only outline is described here. Refer to the operating
instructions for the Hands-Free Phone System for further
information.
Note: Speaker output is adjustable only when receiving
calls.
¡ The mute function is automatically canceled when receiving
a call even at mute-on setting.
¡ This unit is not operable when receiving a call at power-off
setting.
¡ We do not guarantee all the operations of connectable
devices.
English
Press [
1
SEL
display the
AUDIO menu
display.
For using the remote control, use [BAND] (SET).
Press [PUSH SEL
2
mode to be adjusted.
For using the remote control, use [BAND] (SET).
Turn [VOL]
3
clockwise or
counterclockwise
to adjust.
For using the remote
control, use [}] or
[{].
Speaker Setting
Note: If no operation takes place for more than 10 seconds in the audio menu (2 sec. in Main volume adjustment), the display returns to the regular mode.
(Hands-Free Phone System Menu Display)
PUSH
: Select] to
: Select]
to select a
Hands-Free SPEAKER
Speaker selection
: Sound from both speakers (default)
: Sound from left speaker
: Sound from right speaker
Note: Sound comes only from the front speakers.
CQ-C7405W
Hands-Free Phone System
15
Page 58

Troubleshooting
If You Suspect Something Wrong
Check and take steps as described below.
If the described suggestions do not solve the problem, it is
recommended to take the unit to your nearest authorized Panasonic
Service Center. The product should be serviced only by qualified
personnel. Please refer the checking and the repair to professionals.
Panasonic shall not be liable for any accidents arising out of neglect of
checking the unit or your own repair after your checking.
Never take measures especially for those other than indicated by italic letters in “Possible Solution” described below because those are
too dangerous for users to handle themselves.
Display
Display
The disc is dirty, or is upside down.
The disc has scratches.
a Eject the magazine.
(After 5 seconds)
To next disc automatically
¡Check the disc.
¡Load the disc again.
No operation by some cause.
a Eject the magazine. If failure persists, press the reset switch on the disc
changer. If normal operation is not restored, consult your dealer or the nearest Panasonic Service Center to ask for repairs.
Warning
¡ Do not use the unit in an irregular condition, for
example, without sound, or with smoke or a foul
smell, which can cause ignition or electric shock.
Immediately stop using the unit and consult your
dealer.
¡ Never try to repair the unit by yourself because it is
dangerous to do so.
Possible causeaPossible solution
Possible causeaPossible solution
DISC Changer
Note: Messages in the action and display sections of the error chart vary with changers. Refer to the operating
instructions for the Disc changer for details.
An error arises in the DVD changer.
a Check the DVD changer. (“REGION ERROR” etc.)
No disc is in the CD Changer (magazine).
a Insert discs into the changer (magazine).
The changer has become disconnected from the unit in the changer mode.
a Verify the wiring.
16
CQ-C7405W
Page 59

Display
Possible causeaPossible solution
The iPod cable was disconnected in the iPod mode.
a Reconnect the iPod cable.
iPod Control
Your iPod has no playable music.
a Download playable music to your iPod.
English
CQ-C7405W
Troubleshooting
17
Page 60

Memorandum
50
CQ-C7405W
Page 61

Memorandum
CQ-C7405W
51
Page 62

Matsushita Electric Industrial Co., Ltd.
Web Site: http://panasonic.net
YFM284C665CA NY1006-1116 Printed in China
 Loading...