

Page 1
WMA MP3 CD Player/Receiver
WMA MP3 CD-плеер/ресивер
WMA MP3 單片 CD /收音機
WMA MP3 CD 플레이어 / 라디오
Model: CQ-C3305W
Operating InstructionsOperating Instructions
Инструкция по эксплуатацииИнструкция по эксплуатации
操作說明書操作說明書
사용 설명서사용 설명서
• Please read these instructions carefully before using this product and keep this manual for future reference.
• Перед использованием данного изделия внимательно прочитайте эти инструкции и сохраните их
для последующего использования.
• 使用本產品之前,請仔細閱讀這些說明書,並妥善保管本操作說明書以備將來使用。
• 본 제품의 바른 사용을 위해, 이 사용설명서를 잘 읽어 주십이오.
잘 보관하시어 필요하실 때마다 읽어주시기 바랍니다.
Page 2
CQ-C3305W
2
CQ-C3305W
3
English
Safety Information
Read the operating instructions for the unit and all other
components of your car audio system carefully before using
the system. They contain instructions about how to use the
system in a safe and effective manner. Panasonic assumes
no responsibility for any problems resulting from failure to
observe the instructions given in this manual.
This manual uses pictographs to show you how to use the
product safely and to alert you to potential dangers resulting
from improper connections and operations. The meanings of
the pictographs are explained below. It is important that you
fully understand the meanings of the pictographs in order to
use this manual and the system properly.
Warning
This pictograph intends to alert you to the
presence of important operating instructions
and installation instructions. Failure to heed the
instructions may result in severe injury or death.
Caution
This pictograph intends to alert you to the presence
of important operating instructions and installation
instructions. Failure to heed the instructions may
result in injury or material damage.
Warning
Observe the following warnings when using
this unit.
The driver should neither watch the display nor
operate the system while driving.
Watching the display or operating the system will distract
the driver from looking ahead of the vehicle and can cause
accidents. Always stop the vehicle in a safe location and use
the parking brake before watching the display or operating
the system.
Use the proper power supply.
This product is designed for operation with a negative
grounded 12 V DC battery system. Never operate this
product with other battery systems, especially a 24 V DC
battery system.
Protect the Deck Mechanism.
Do not insert any foreign objects into the slot of this unit.
Do not disassemble or modify the unit.
Do not disassemble, modify the unit or attempt to repair the
product yourself. If the product needs to be repaired, consult
your dealer or an authorized Panasonic Service Center.
Do not use the unit when it is out of order.
If the unit is out of order (no power, no sound) or in an
abnormal state (has foreign objects in it, is exposed to
water, is smoking, or smells), turn it off immediately and
consult your dealer.
The remote control unit should not lie about in the
car.
If the remote control unit lies about, it could fall on the fl oor
while driving, get wedged under the brake pedal, and lead to
a traffi c accident.
Refer fuse replacement to qualifi ed service
personnel.
When the fuse blows out, eliminate the cause and have it
replaced with the fuse prescribed for this unit by a qualifi ed
service engineer. Incorrect replacement of the fuse may lead
to smoke, fi re, and damage to the product.
Observe the following warnings when
installing.
Disconnect the lead from the negative (–) battery
terminal before installation.
Wiring and installation with the negative (–) battery terminal
connected may cause electrical shock and injury due to a
short circuit.
Some cars equipped with the electrical safety system have
specifi c procedures of battery terminal disconnection.
FAILURE TO FOLLOW THE PROCEDURE MAY LEAD TO THE
UNINTENDED ACTIVATION OF THE ELECTRICAL SAFETY
SYSTEM RESULTING IN DAMAGE TO THE VEHICLE AND
PERSONAL INJURY OR DEATH.
Never use safety-related components for
installation, grounding, and other such functions.
Do not use safety-related vehicle components (fuel tank,
brake, suspension, steering wheel, pedals, airbag, etc.) for
wiring or fi xing the product or its accessories.
Installing the product on the air bag cover or in a
location where it interferes with airbag operation is
prohibited.
Check for piping, gasoline tank, electric wiring, and
other items before installing the product.
If you need to open a hole in the vehicle chassis to attach
or wire the product, fi rst check where the wire harness,
gasoline tank, and electric wiring are located. Then open the
hole from outside if possible.
Never install the product in a location where it
interferes with your fi eld of vision.
Never have the power cord branched to supply
other equipment with power.
After installation and wiring, you should check the
normal operation of other electrical equipment.
The continuation of their using in abnormal conditions may
cause fi re, electrical shock or a traffi c accident.
In the case of installation to an airbag-equipping
car, confi rm warnings and cautions of the vehicle
manufacturer before installation.
Make sure the leads do not interfere with driving or
getting in and out of the vehicle.
Insulate all exposed wires to prevent short
circuiting.
Caution
Observe the following cautions when using this
unit.
Keep the sound volume at an appropriate level.
Keep the volume level low enough to be aware of road and
traffi c conditions while driving.
This unit is designed for use exclusively in automobiles.
Do not operate the unit for a prolonged period with
the engine turned off.
Operating the audio system for a long period of time with the
engine turned off will drain the battery.
Do not expose the unit to direct sunlight or
excessive heat.
Otherwise these will raise the interior temperature of the unit,
and it may lead to smoke, fi re, or other damage to the unit.
Do not use the product where it is exposed to water,
moisture, or dust.
Exposure of the unit to water, moisture, or dust may lead to
smoke, fi re, or other damage to the unit. Make especially sure
that the unit does not get wet in car washes or on rainy days.
Set the volume level to low enough before the AUX
connection is completed.
Failure to observe this, the loud noise may come out and
damage your speakers and your hearing. Direct connection
of the speaker/headphone output of an external device
without any attenuator may distort sound or damage the
connected external device.
Observe the following cautions when installing.
Refer wiring and installation to qualifi ed service personnel.
Installation of this unit requires special skills and experience.
For maximum safety, have it installed by your dealer.
Panasonic is not liable for any problems resulting from your
own installation of the unit.
Follow the instructions to install and wire the product.
Not following the instructions to properly install and wire the
product could cause an accident or fi re.
Take care not to damage the leads.
When wiring, take care not to damage the leads. Prevent
them from getting caught in the vehicle chassis, screws, and
moving parts such as seat rails. Do not scratch, pull, bend
or twist the leads. Do not run them near heat sources or
place heavy objects on them. If leads must be run over sharp
metal edges, protect the leads by winding them with vinyl
tape or similar protection.
Use the designated parts and tools for installation.
Use the supplied or designated parts and appropriate tools to
install the product. The use of parts other than those supplied
or designated may result in internal damage to the unit. Faulty
installation may lead to an accident, a malfunction or fi re.
Do not block the air vent or the cooling plate of the unit.
Blocking these parts will cause the interior of the unit to
overheat and will result in fi re or other damage.
Do not install the product where it is exposed to
strong vibrations or is unstable.
Avoid slanted or strongly curved surfaces for installation.
If the installation is not stable, the unit may fall down while
driving and this can lead to an accident or injury.
Installation Angle
The product should be installed in a horizontal position with
the front end up at a convenient angle, but not more than 30˚.
The user should bear in mind that in some areas there may
be restrictions on how and where this unit must be installed.
Consult your dealer for further details.
Wear gloves for safety. Make sure that wiring is
completed before installation.
To prevent damage to the unit, do not connect the
power connector until the whole wiring is completed.
Do not connect more than one speaker to one set of
speaker leads. (except for connecting to a tweeter)
Safety Information
Caution
THIS PRODUCT IS A CLASS I LASER PRODUCT.
USE OF CONTROLS OR ADJUSTMENTS OR PERFORMANCE
OF PROCEDURES OTHER THAN THOSE SPECIFIED HEREIN
MAY RESULT IN HAZARDOUS RADIATION EXPOSURE.
DO NOT OPEN COVERS AND DO NOT REPAIR BY YOURSELF.
REFER SERVICING TO QUALIFIED PERSONNEL.
Page 3
CQ-C3305W
4
CQ-C3305W
5
English
Pyсский 28
中 文 54
한국어 80
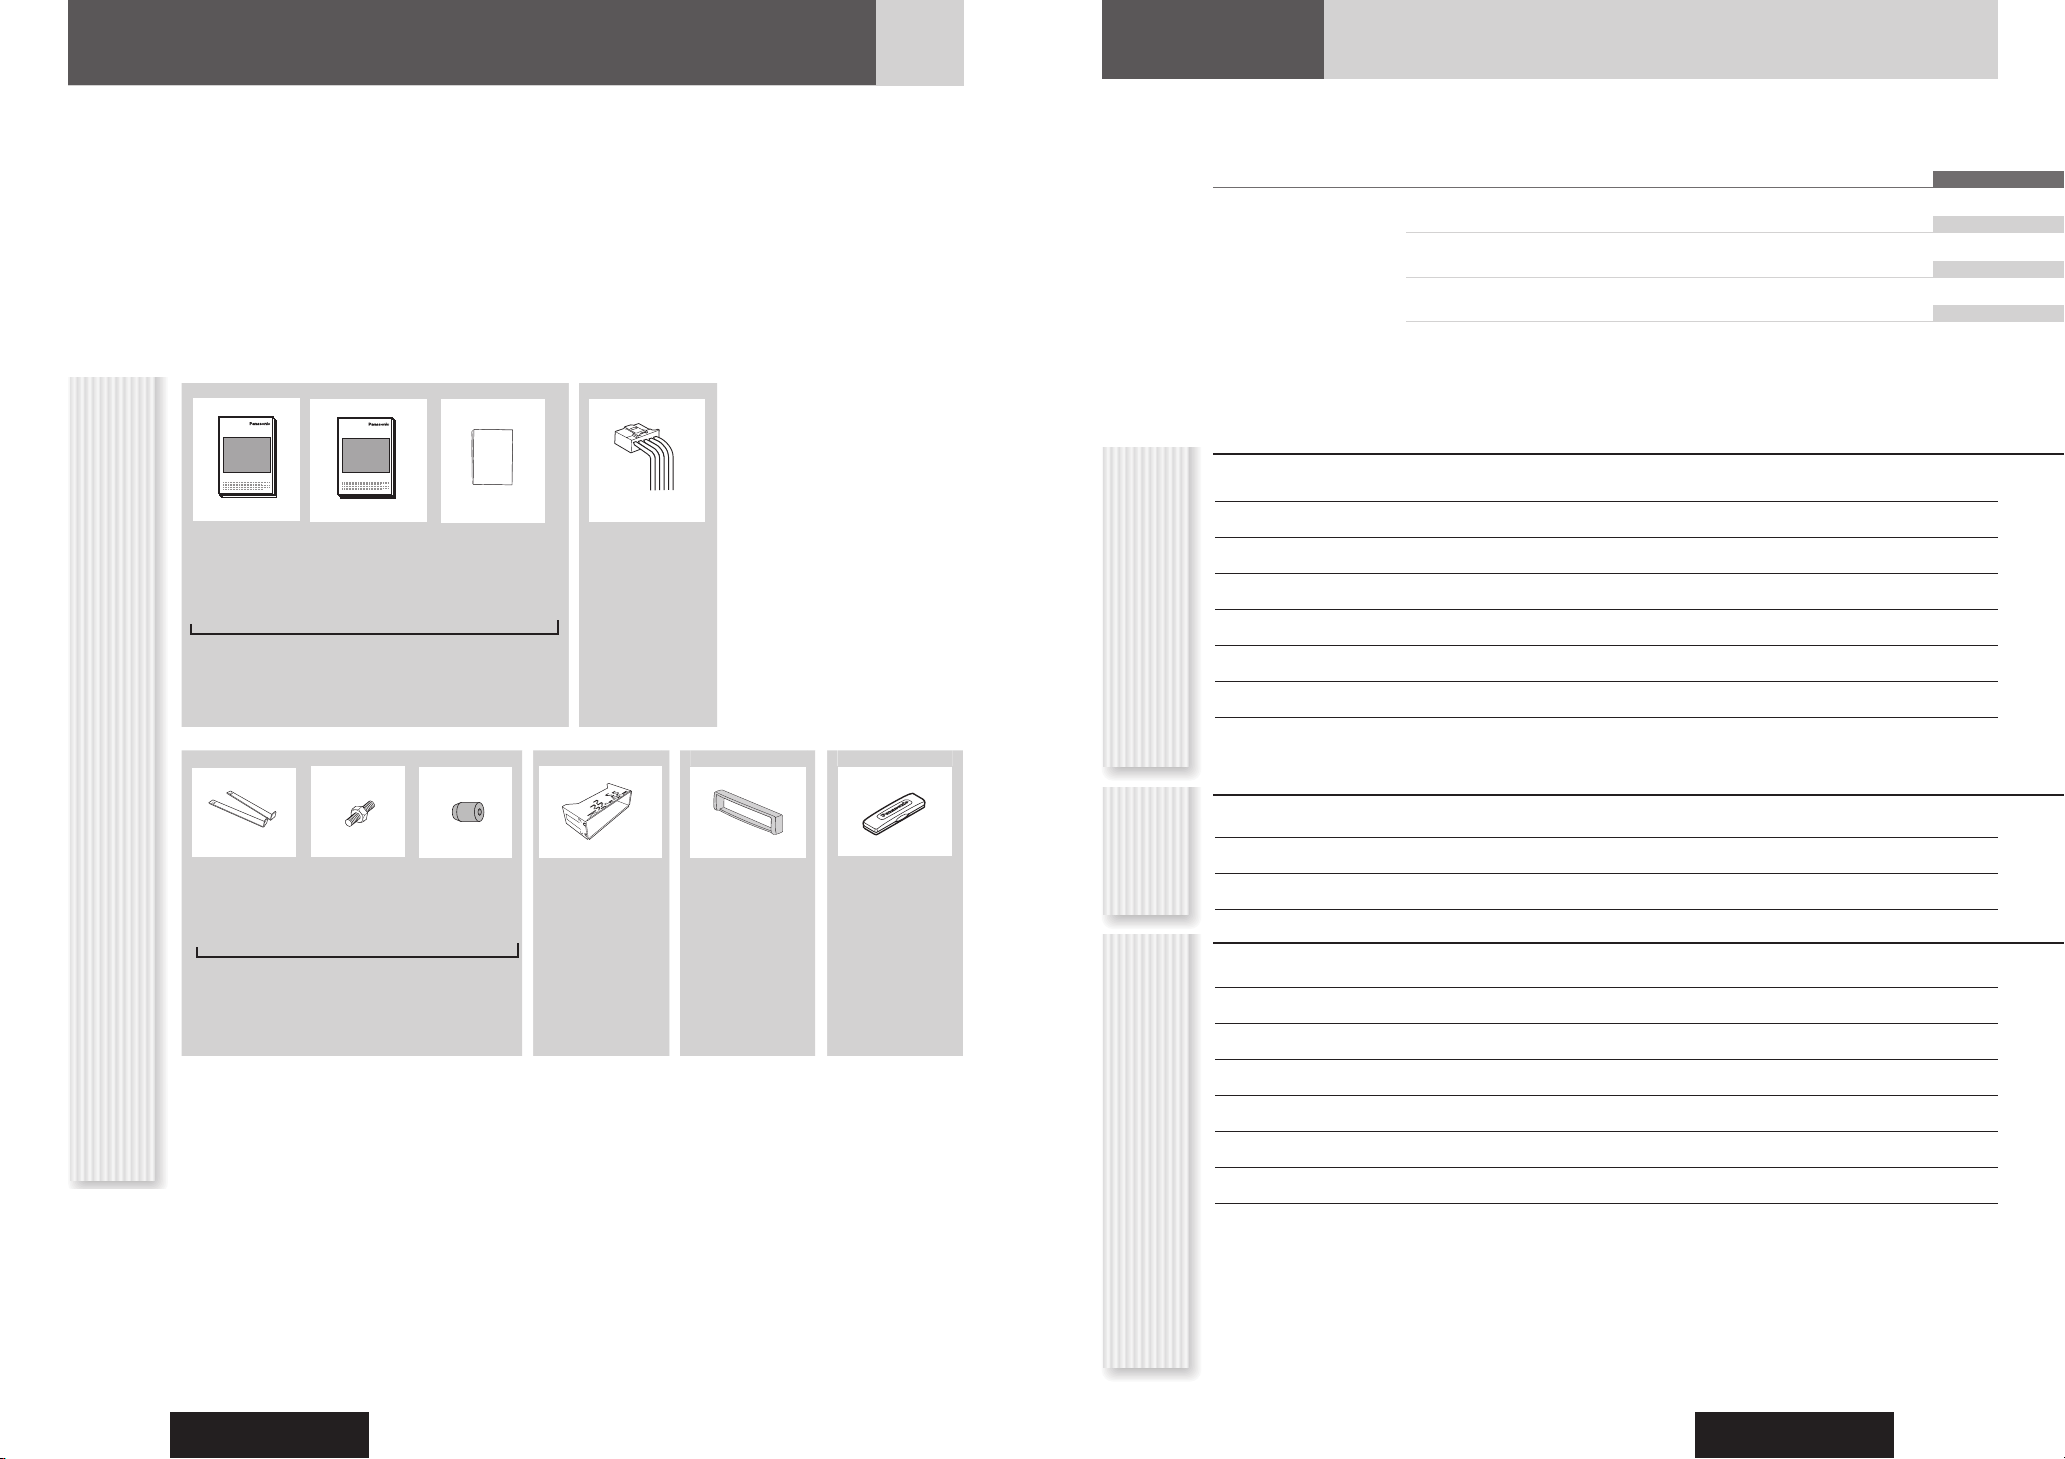
Operating
Instructions
(YEFM285931)
System
Upgrade
Guidebook
(YEFM262786)
Installation
Instructions
(YEFM294305)
Power
Connector
Instruction kit
Q’ty: 1 set
(YGAJ021009)
Q’ty: 1
Accessories
Lock Cancel
Plate
Mounting
Bolt
(5 mm )
Rubber
Bushing
Mounting
Collar
Trim Plate Removable
Face Plate
Case
(YEP0FZ5698)
Q’ty: 1 set
(YEFX0217263A)
Q’ty: 1
(YEFC051011)
Q’ty: 1
(YEFA131839A)
Q’ty: 1
Notes:
• The number in parenthesis underneath each accessory part name is the part number for maintenance and service.
• Accessories and their parts numbers are subject to modifi cation without prior notice due to improvements.
• Mounting Collar and Trim Plate are mounted on the main unit at shipment.
Before Reading These Instructions
Panasonic welcomes you to our constantly growing family of electronic products owners.
We endeavor to give you the advantages of precise electronic and mechanical engineering, manufactured with carefully
selected components, and assembled by people who are proud of the reputation their work has built for our company. We
know this product will bring you many hours of enjoyment, and after you discover the quality, value and reliability we have
built into it, you too will be proud to be a member of our family.
The instruction manual consists of 2 books. One is “Operating Instructions” describing the operations of the main unit. The
other is “System Upgrade Guidebook” describing the optional devices such as CD changer.
Contents
• Safety Information 2
• Before Reading These Instructions 4
• Features 6
• Controls Layout 7
• Preparation (Clock Adjustment etc.) 8
• General 9
• Sound Control 11
• Radio 12
• CD Player 14
• MP3/WMA Player 16
• Audio Setting 20
• Function Setting 21
• Troubleshooting 22
• Error Display Messages 25
• Notes on Discs 26
• Maintenance/Fuse 26
• Specifi cations 27
CommonEach
Source
As Needed
OO-OOOOO
XXXXXXXXXXXXXXX
XXXXXXXXXXXXXXXXX
XXXXXXXXXXXXXX
XXXXXXXXXXXXXXXX
XXXXXXXXXXXXXXX
XXXXXXXXXXXXXXXXX
XXXXXXXXXXXXXX
XXXXXXXXXXXXXXXX
OO-OOOOO
Page 4
CQ-C3305W
6
CQ-C3305W
7
English
Features
Hands-Free Phone System
Connection of the optional Hands-Free Phone System (HandsFree Kit featuring Bluetooth
®
technology: CY-BT100N) allows
users to talk on a handsfree cellular phone if the phone supports
Bluetooth.
Note: This unit is designed only for receiving calls. It cannot
send calls.
Bluetooth
®
The Bluetooth word mark and logo are owned by the
Bluetooth SIG, Inc. and any use of such marks by
Matsushita Electric Industrial Co., Ltd. is under license.
Other trademarks and trade name are those of their
respective owners.
Expansion Module (Hub Unit)
Connection of the Expansion Module (hub unit, CY-EM100N)
allows users to connect up to 4 optional devices shown below.
Wide Array of Components for System Upgrade
Various optional components allow users to obtain availability of
wide range of system upgrade. Upgrading the system delivers
relaxed AV space in a car. For further information, refer to the
separate System Upgrade Guidebook.
• CD Changer
The optional adapter (Conversion Cable for DVD/CD
Changer: CA-CC30N) allows you to connect the optional
Panasonic CD changer unit (CX-DP880N).
• iPod
The optional adapter (Direct Cable for iPod: CA-DC300N)
allows you to connect the optional iPod series.
iPod is a trademark of Apple Computer, Inc., registered in
the U.S.A. and other countries.
• Hands-Free Phone System
SQ (Sound Quality)
SQ is a function that can call up various sound types at the touch
of button in accordance with your listening music type.
AUX (AUX1) Input Terminal
The AUX input terminal is equipped on the front panel.
Your mobile audio player and other devices are connectable to
this unit without any diffi culty.
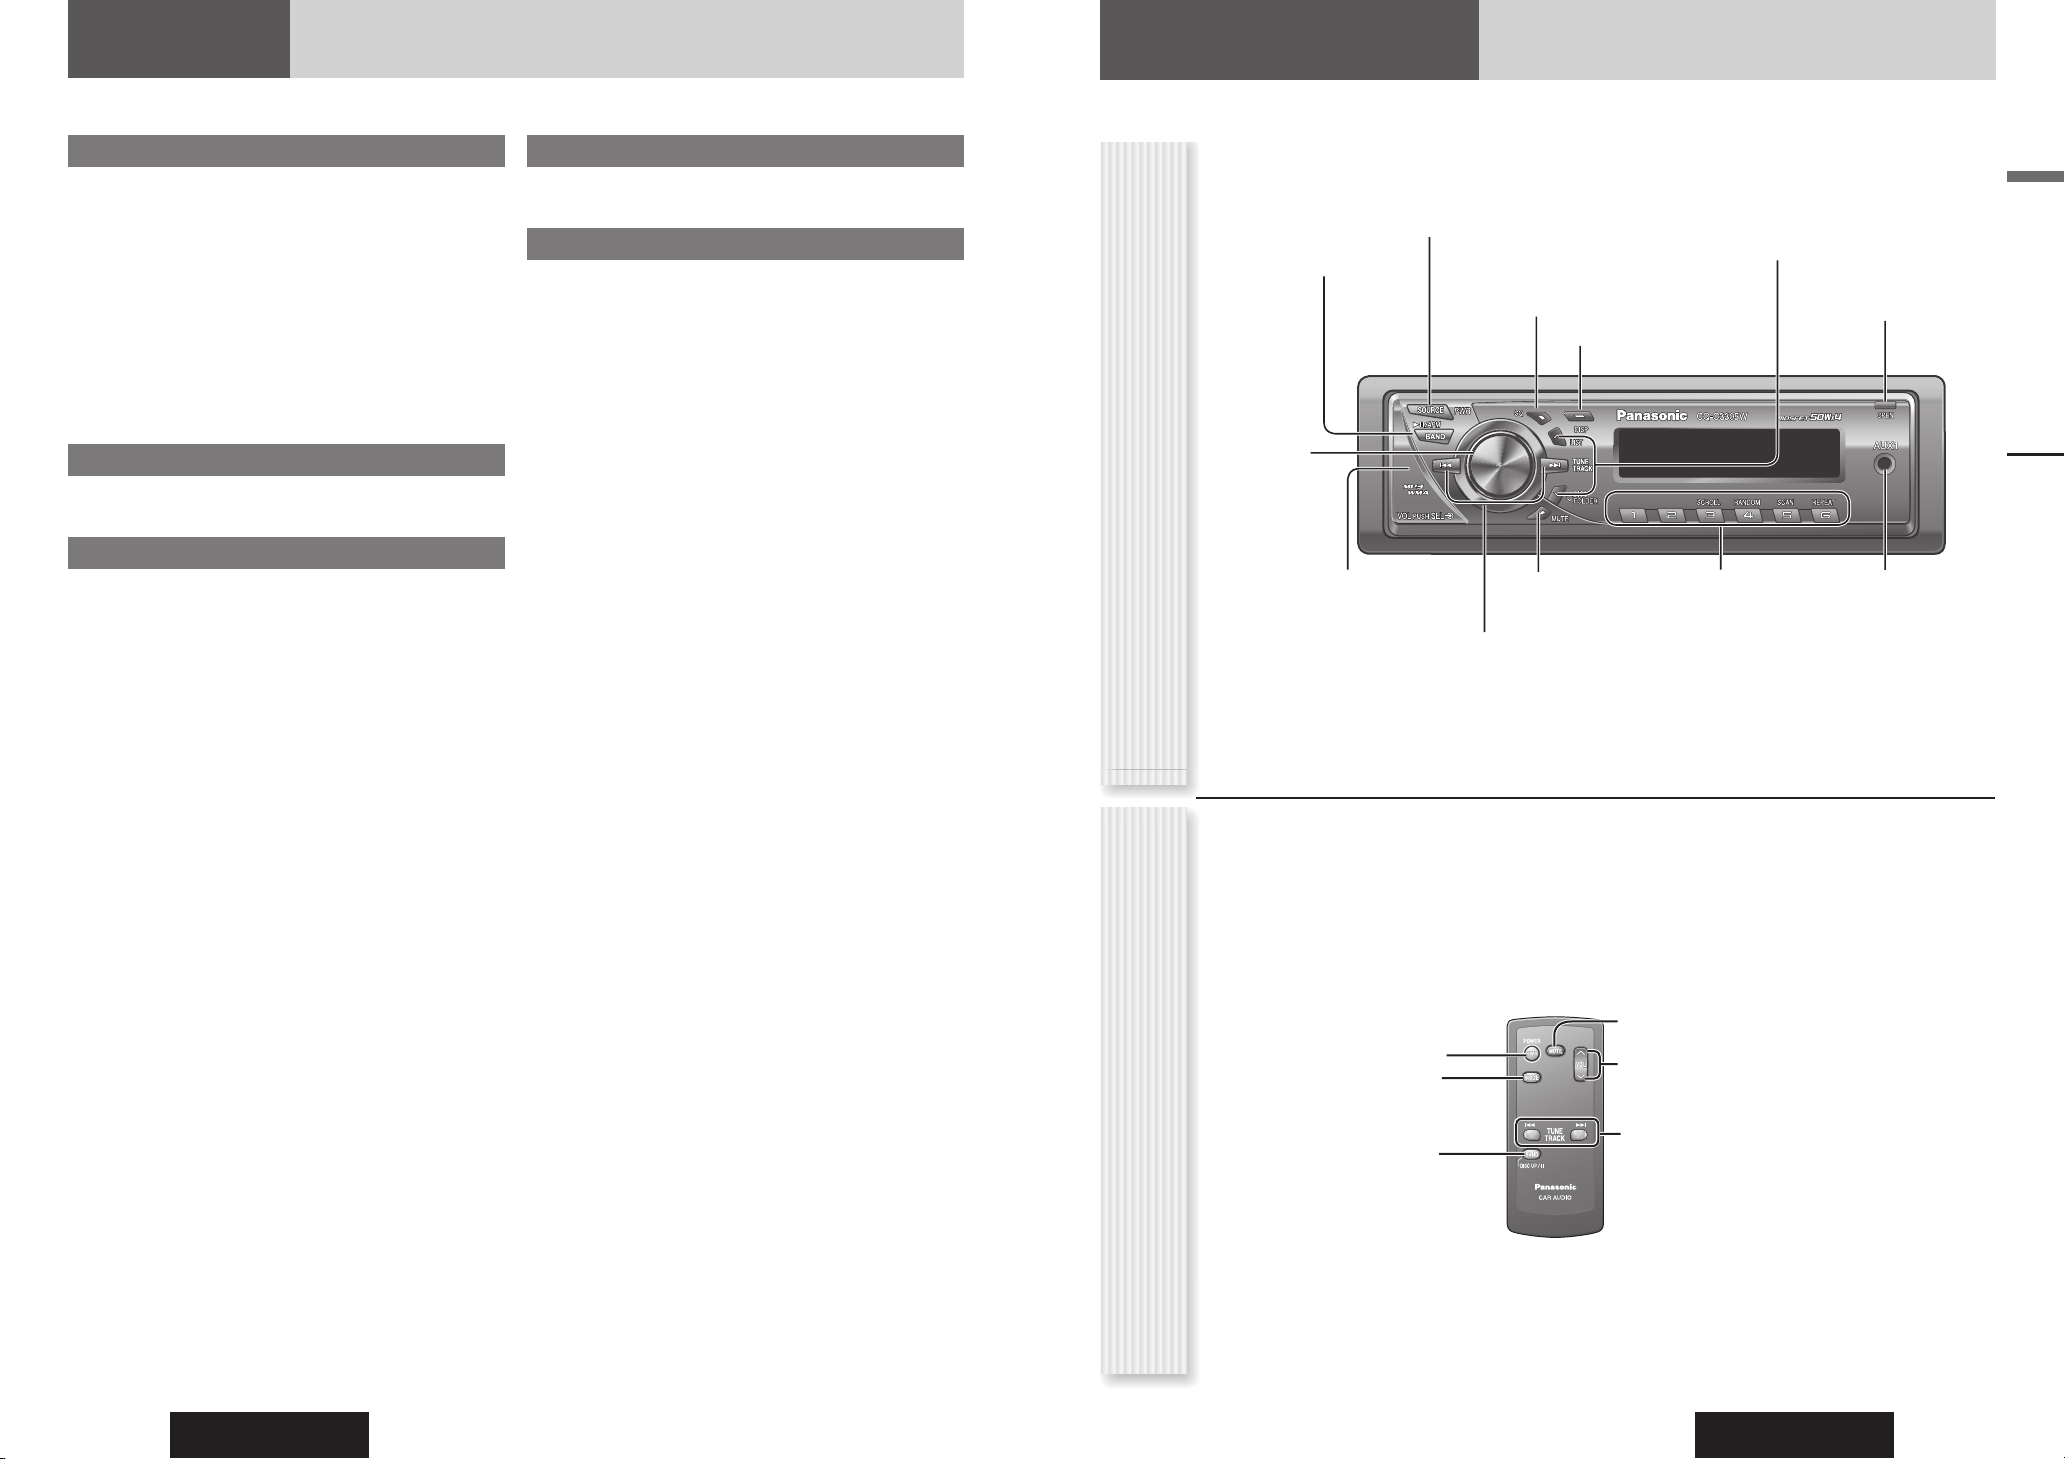
Controls Layout
Note:
This instruction manual explains operations for use with the buttons on the main unit. (Different operations excluded)
Main Unit
VOL
Volume
(
page 10)
PUSH SEL
Select
(
page 20, 21)
LIST (
P 16 of System Upgrade Guidebook)
DISC (
P 12 of System Upgrade Guidebook)
FOLDER (
page 16)
MUTE
(
page 10)
Remote control sensor
SQ
Sound Quality ( page 11)
SOURCE
(
page 10)
PWR
Power (
page 9)
TUNE
(
page 12)
TRACK
(FILE) (
page 14, 16)
BAND
(
page 12)
Play/Pause
(
page 14, 16)
APM
Auto Preset Memory
(
page 13)
OPEN
(
page 14, 16)
DISP
Display (
page 9)
Features, Controls Layout
AUX1
( page 10)
1
to 6 ( page 12)
3 (SCROLL)
(
page 15, 17)
4 (RANDOM)
(
page 15, 17)
5 (SCAN)
(
page 15, 17)
6 (REPEAT)
(
page 15, 17)
Notes:
• Remote Control Unit for CQ-C3305W is option (CA-RC80N).
• The optional remote control is available from your local dealer.
(CA-RC80N)
Power
Mode
(Source)
Tune
Track selection
Fast forward/fast reverse
(CA-RC80N)
Mute/attenuation
Volume
Band
Pause
Remote Control Unit (Option)
Page 5
CQ-C3305W
8
CQ-C3305W
9
English
Preparation
Preparation, General
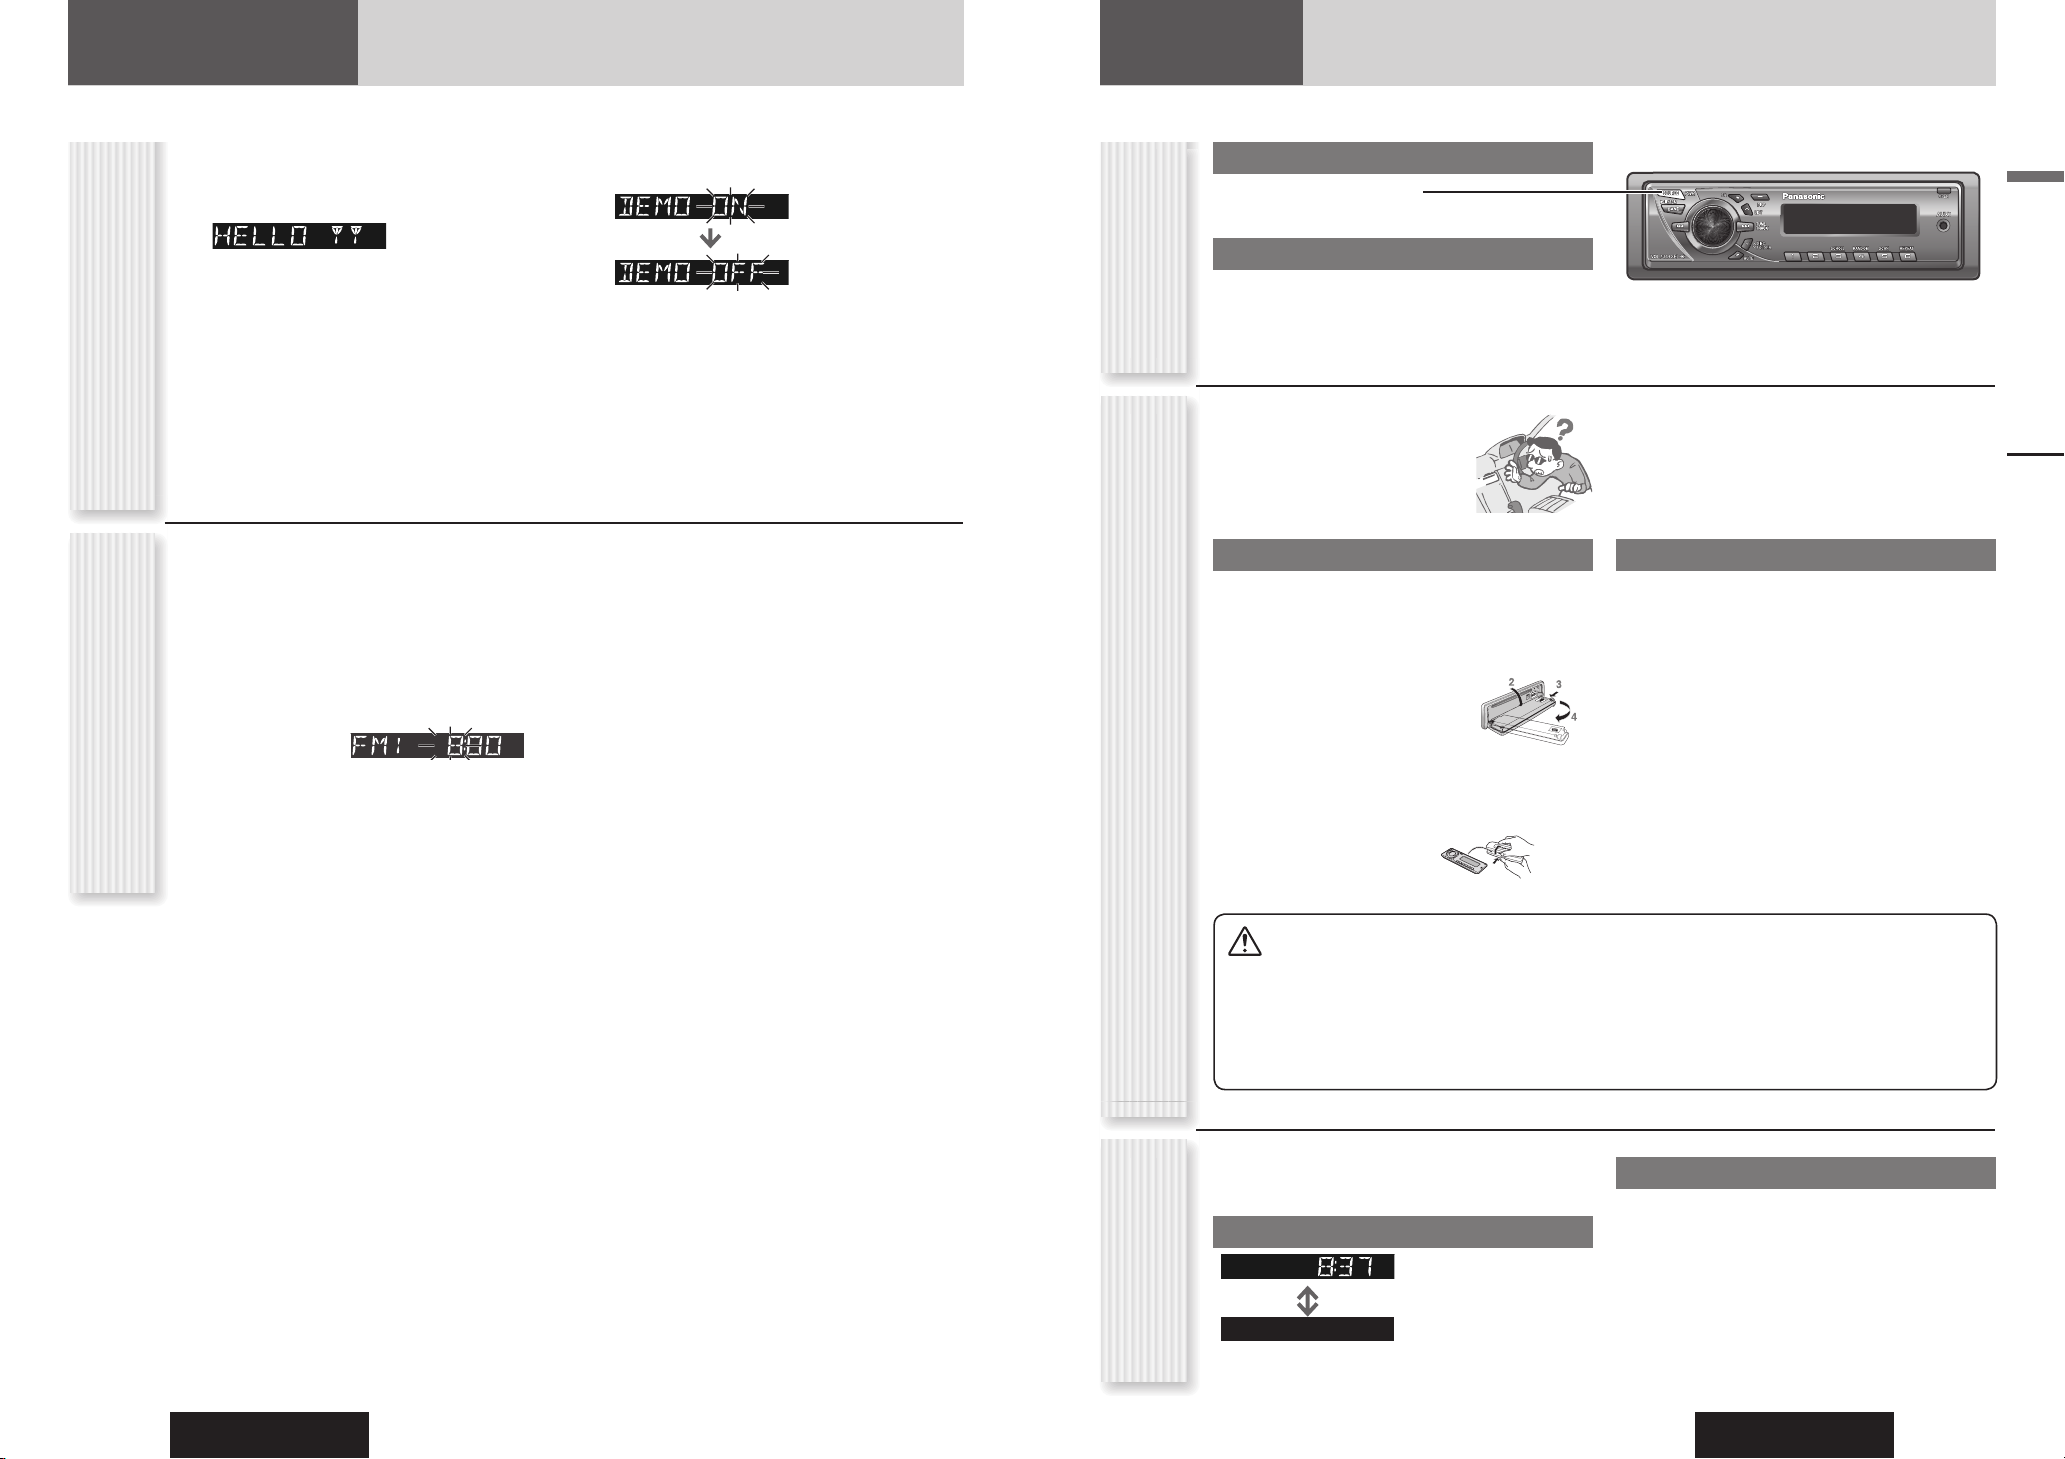
The demonstration message appears for initial use.
1
Set your car’s ignition switch to the
ACC or ON position.
2
Press [PWR] (Power).
3
Hold down [VOL] (PUSH SEL: Select)
for 2 sec. or more to open the menu.
4
Press [VOL] (PUSH SEL: Select) to
select the Demonstration setting.
(“DEMO” is displayed)
5
Tu r n [VOL] counterclockwise.
Notes:
• To return to the regular mode, press [DISP].
•
Refer to the section on “Function Setting” (page 21).
• When “NO DISC” is displayed, the Demonstration
cannot be cancelled.
Cancellation of
Demonstration
The 24-hour system is used for the clock.
1
Press [PWR] (Power).
2
Press [DISP].
3
Hold down [DISP] for 2 sec. or more.
4
Adjust the hour and press [DISP].
[]: Forward
[]: Backward
5
Adjust the minute and press [DISP] to
confi rm the adjustment.
[]: Forward
[]: Backward
Notes:
• Adjust the clock when “ADJUST” appears on the
display.
• Hold down [] or [] to change numbers
rapidly.
• When “NO DISC” is displayed, the clock cannot be
adjusted.
General
This chapter explains how to turn on or off the power, how to adjust the volume, etc.
Power on
Press [PWR] (Power).
Power off
Hold down [PWR] (Power) for 1 sec. or
more.
You can remove the face plate to
prevent it from being stolen.
Removing
1
Turn off the power. ( above)
2
Press [OPEN]. The face plate will be
opened.
3
Push the face plate to
the left.
4
Pull it out toward you.
5
Put the face plate in
the case.
Cautions
• This face plate is not waterproof. Do not expose it to
water or excessive moisture.
• Do not remove the face plate while driving your car.
• Do not place the face plate on the dashboard or
nearby areas where the temperature rises to high.
• Do not touch the contacts on the face plate or on
the main unit, since this may result in poor electrical
contacts.
• If dirt or other foreign substances get on the
contacts, wipe them off with clean and dry cloth.
• To avoid damaging the face plate, do not push it
down or place objects on it while it is open.
Power On/off
(PWR: Power)
Face Plate Removing/Mounting
(Anti-Theft System)
Display Change
(DISP: Display)
Clock Adjustment
The display changes as follows every time [DISP] is
pressed.
At power-off:
Clock display (Default)
Display off
Mounting
1
Fit the face plate with its left hole on the
left pin provided on the main unit.
2
Fit the other hole on the other pin
applying slight pressure.
At power-on:
When the power is set to ON, refer to the description for
each source mode.
Page 6
CQ-C3305W
10
CQ-C3305W
11
English
General, Sound Control
SQ Selection Based on Genre
SQ (Sound Quality)
The equalizer curve is selectable from among 4 types
(FLAT, ROCK, POP and VOCAL) depending on your
listening category.
SQ changeover
The SQ category is changed every time [SQ] (Sound
Quality) is pressed.
(FLAT) fl at frequency response:
does not emphasize any part.
(Default)
(ROCK) speedy and heavy sound:
exaggerates bass and treble.
(POP) wide-ranged and deep sound:
slightly emphasizes bass and treble.
(VOCAL) clear sound:
emphasizes middle tone and slightly
emphasizes treble.
Press [DISP] to return to the regular mode.
Notes:
• Setting of SQ, bass/treble and volume are infl uenced
one another. If such an infl uence mentioned above
causes distortion to the audio signal, readjust bass/
treble or volume. (
page 20)
• Please refer to page 20 for the adjustment to each
speaker.
· Bass adjustment
· Treble adjustment
· Balance adjustment
· Fader adjustment
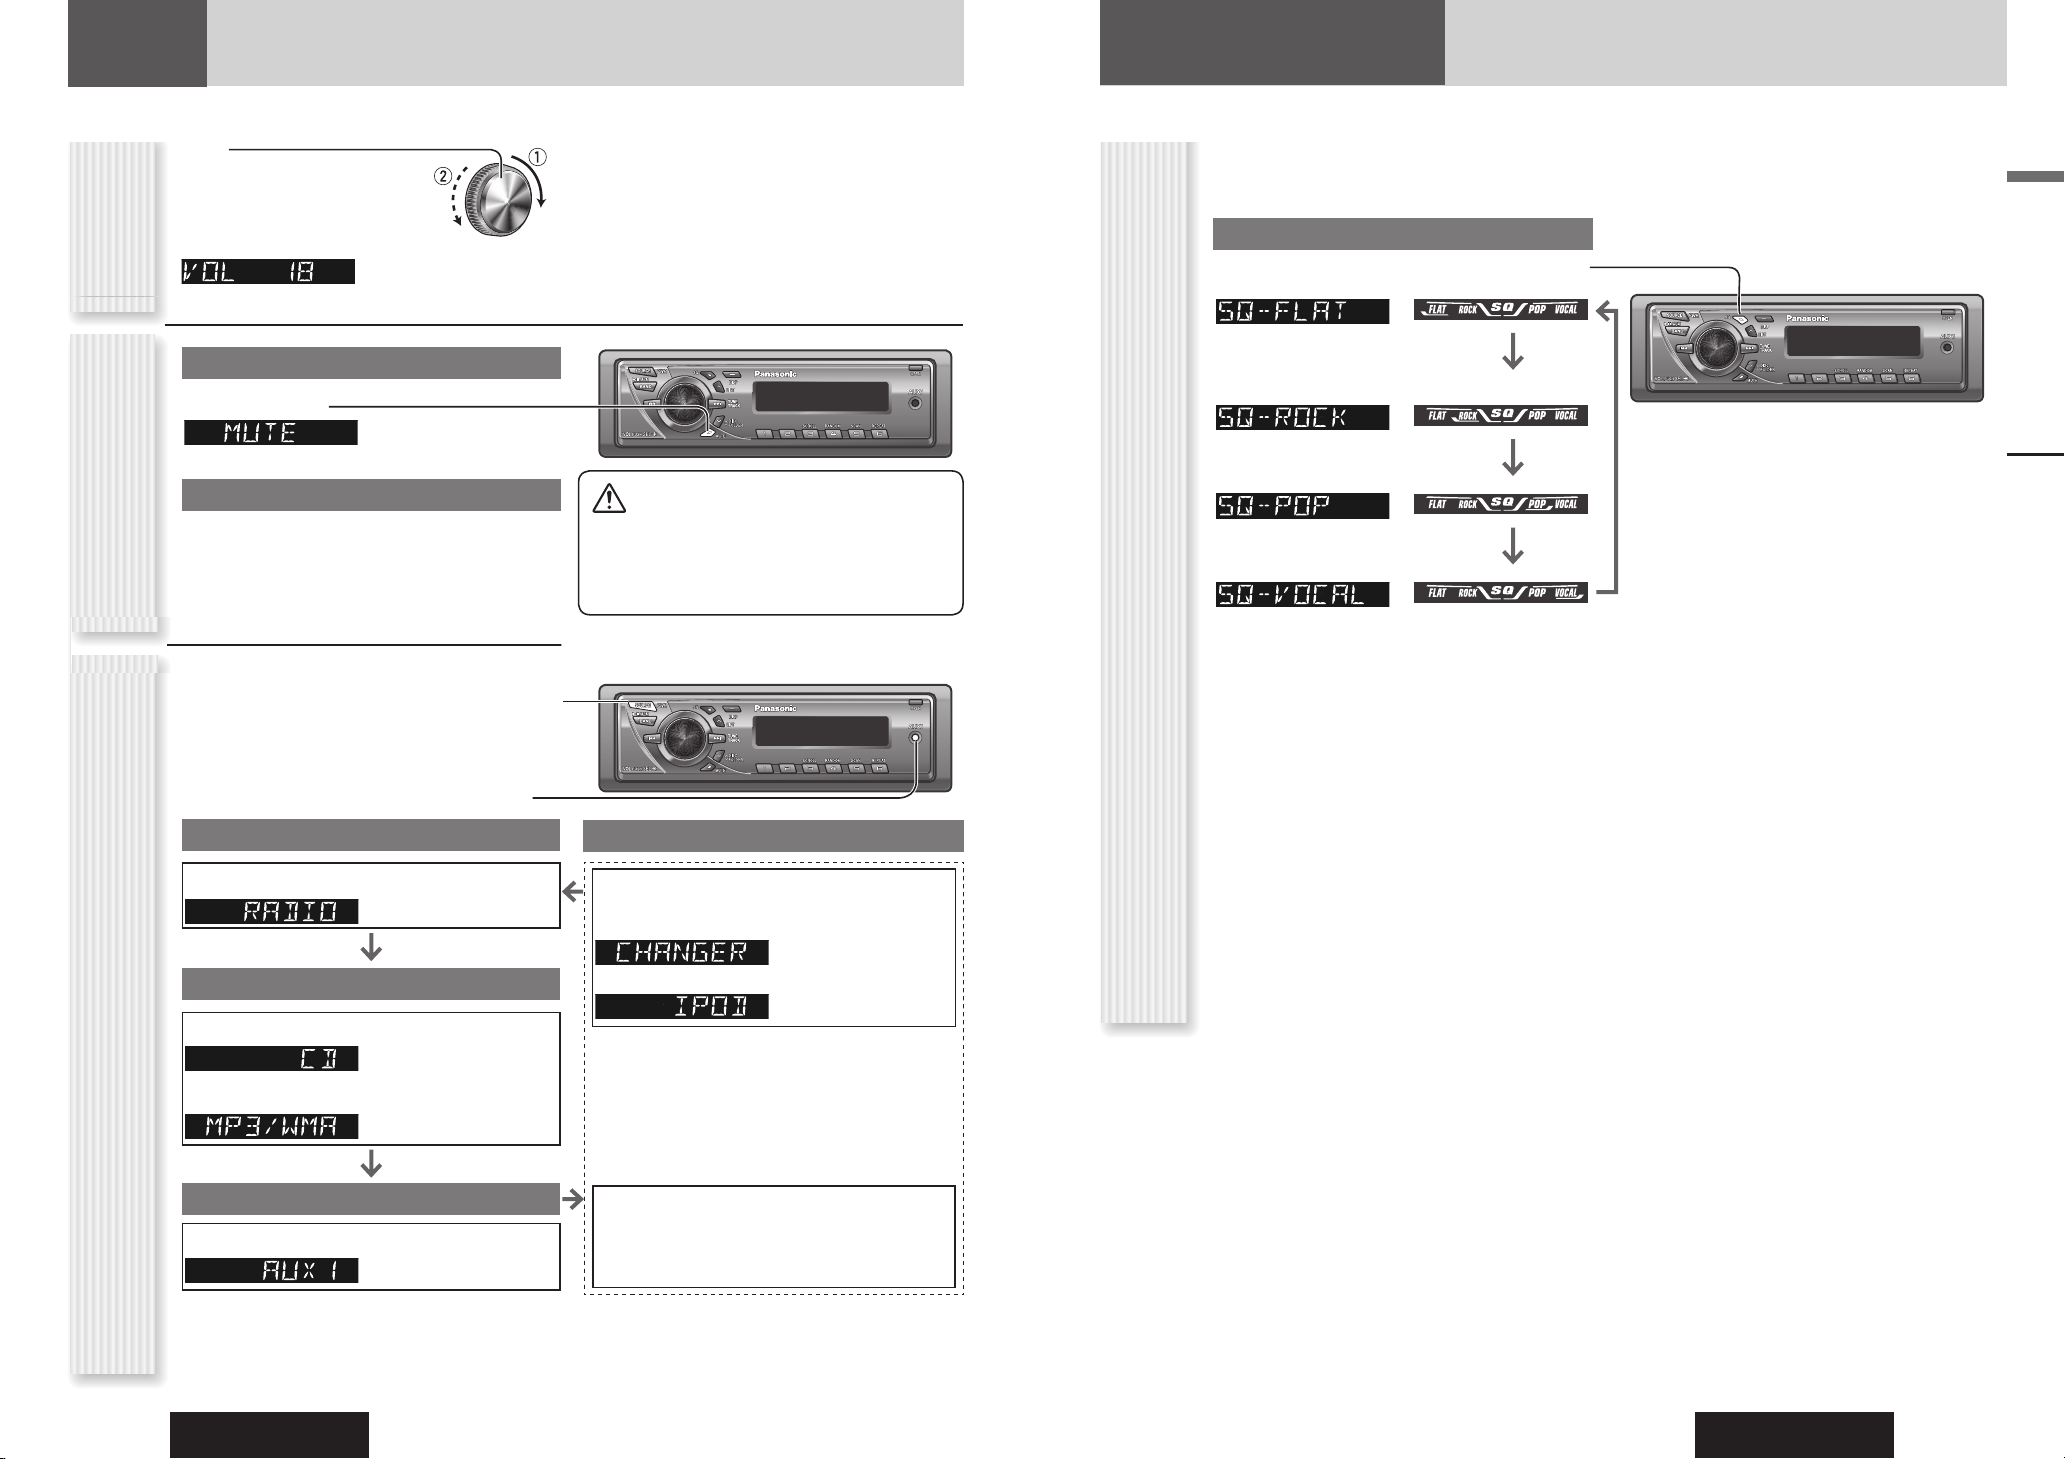
Source Selection
(SOURCE)
The source changes as follows every time [SOURCE]
is pressed.
AUX1 (AUX1 in) (3.5 mm stereo)
From line output of external sound/audio device (ex.
Silicon-audio player, HDD player, etc.)
General
Volume off (down)
Press [MUTE].
Cancel
Press [MUTE] again.
Note: You can select mute or attenuation. ( page 21)
Up
Down
Setting Range: 0 to 40
Default: 18
Note: The volume level can be set independently for
each source. (For radio, one volume setting for AM, one
volume setting for all FMs)
Volume
Adjustment
(VOLUME)
Temporary Volume Off
(Down)
MUTE (ATT: Attenuation)
Radio
FM1, FM2, FM3, AM ( page 12)
Player
When loading CD ( page 14)
When loading MP3/WMA disc ( page 16)
AUX1
Device connected to the AUX1 terminal of this unit
Sound Control
Caution
• Set the volume level to low enough before the
AUX connection is completed.
Failure to observe this, the loud noise may come
out and damage your speakers and your hearing.
When an optional device is connected:
Shift to connected device
When connecting CD changer
When connecting iPod
OR
When an expansion module is connected:
The devices connected to the ports 1 to 4 are activated
in sequence after shifting to AUX2 (device connected
to the AUX terminal of the expansion module).
System-up Connector
Note:
For information about connectable devices, refer
to the System Upgrade Guidebook or the instruction
manual for each device.
Page 7
CQ-C3305W
12
CQ-C3305W
13
English
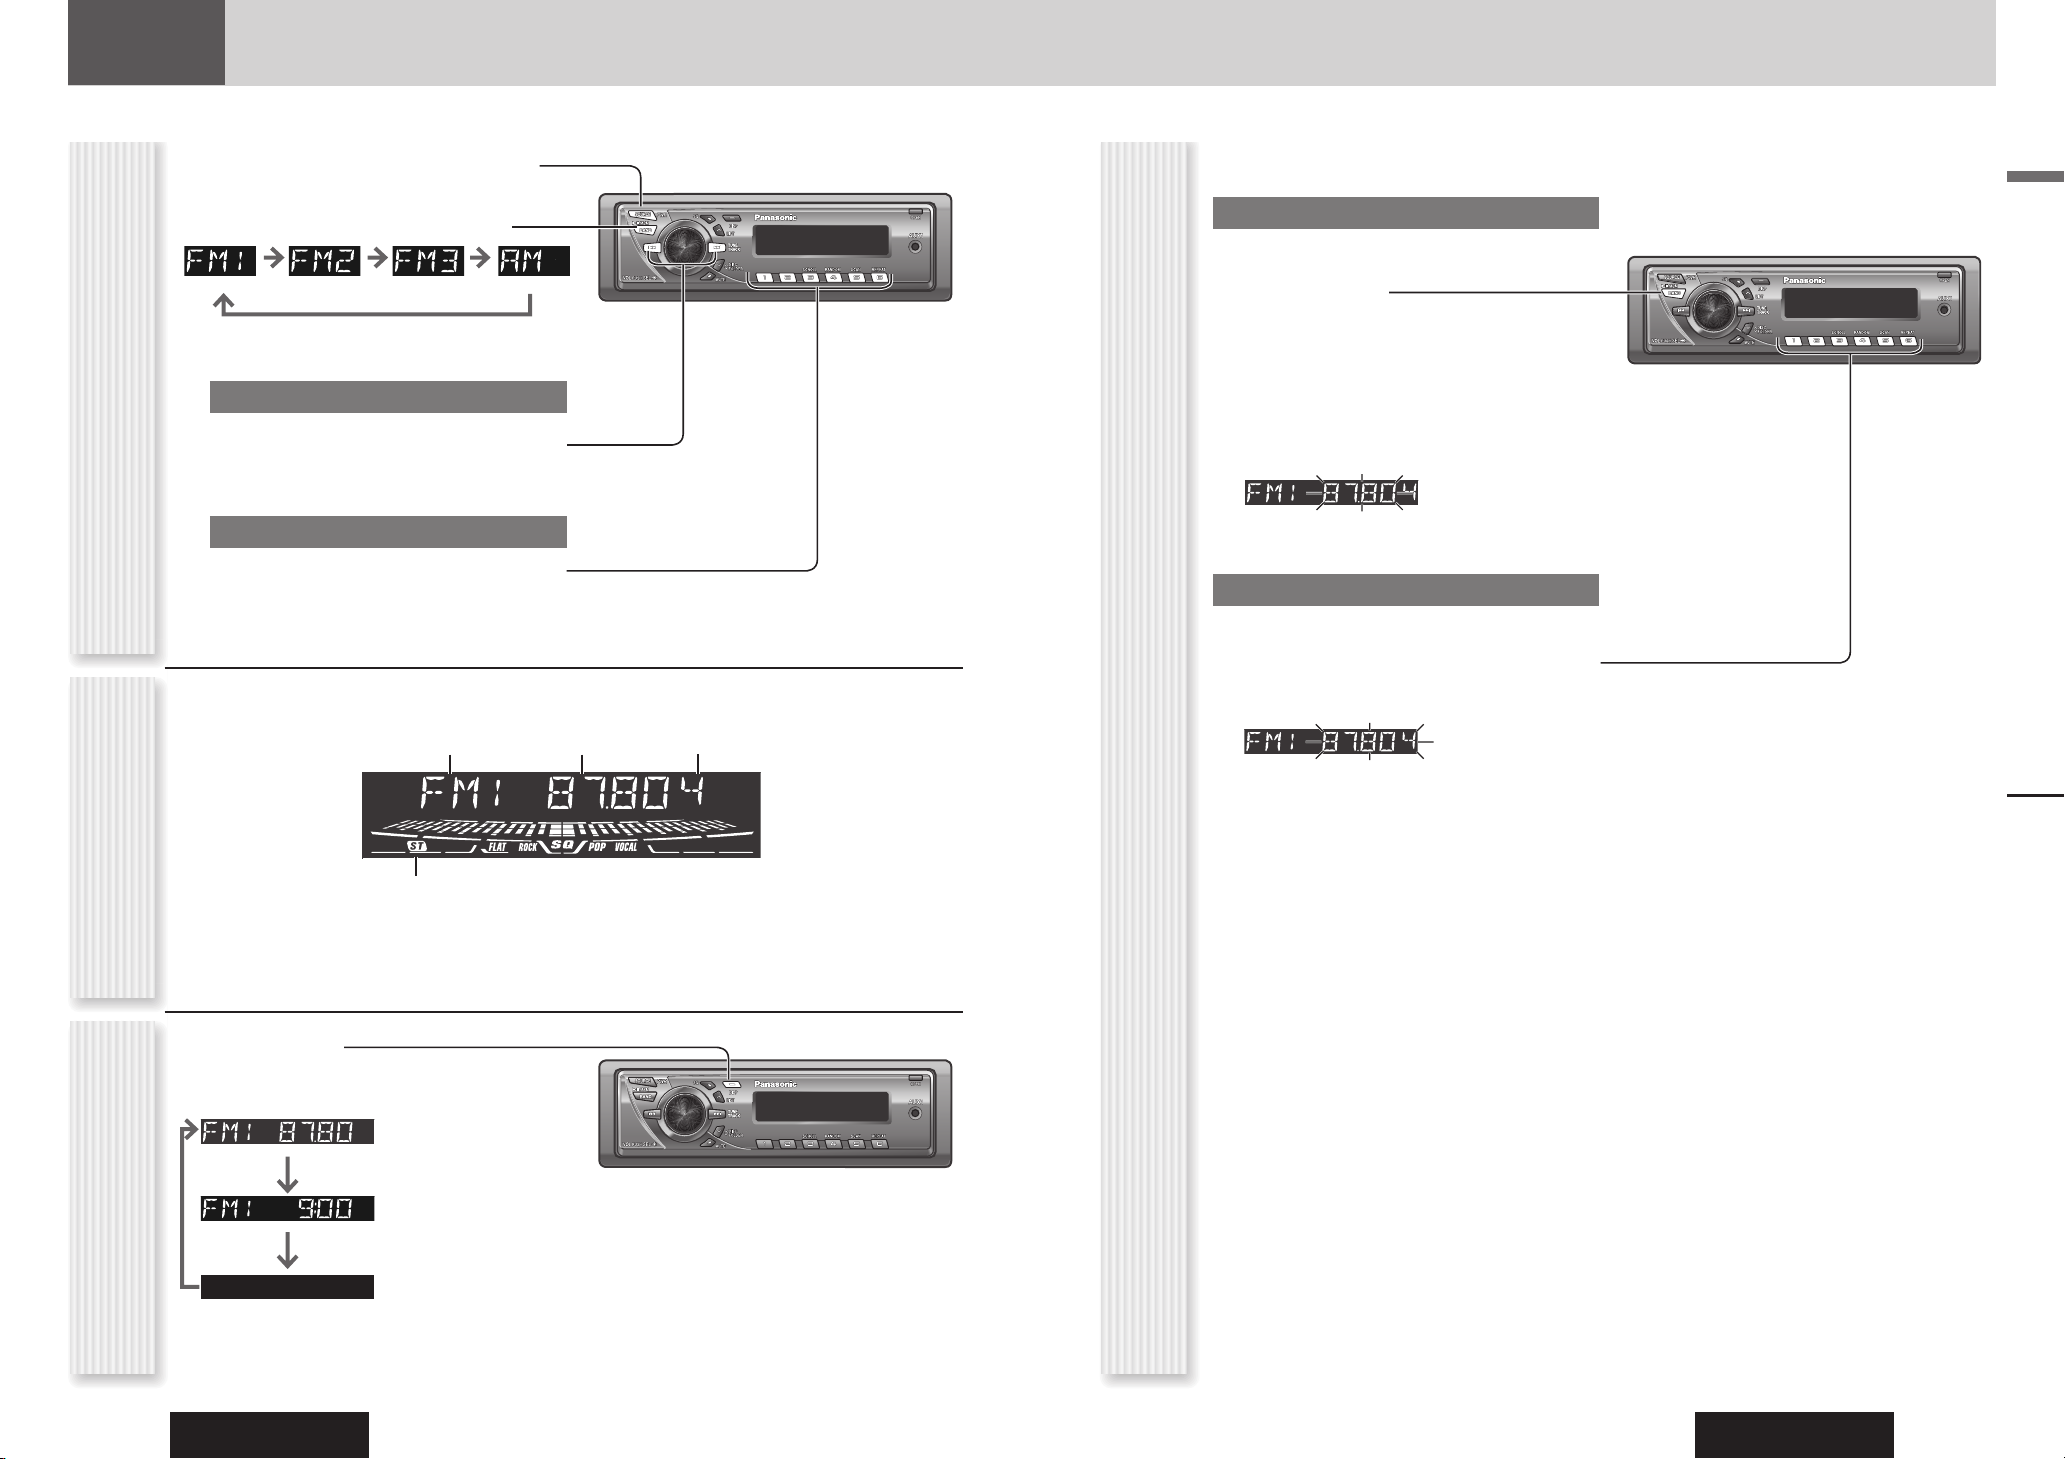
1
Press [SOURCE] to select the radio
mode.
2
Press [BAND] to select a band.
3
Select a station.
Frequency Adjustment
[] (TUNE): Higher
[] (TUNE): Lower
Note: Hold down for 0.5 sec. or more and release
for station search.
Preset Station Selection
Press the numeric button [1] to [6].
Radio
This chapter explains how to listen to the radio.
Band Preset NumberFrequency
Lights while receiving an FM stereo signal.
Operation FlowRadio Mode Display
Radio
Up to 6 stations can be preset in AM, FM1, FM2, and FM3
respectively.
Auto Preset Memory (APM)
Stations with good receiving conditions automatically
preset.
1
Select a band.
2
Hold down [BAND] (APM) for 2 sec. or
more.
The preset stations under best receiving conditions
are received for 5 sec. each after presetting the
stations (SCAN). To stop scanning, press the
numeric button [1] to [6].
Note: New stations overwrite existing saved stations.
Manual Station Preset
1
Tune in to a station.
2
Hold down the numeric button [1] to [6]
for 2 sec. or more.
Station Preset
(APM: Auto Preset Memory)
Display Change
(DISP: Display)
Press [DISP].
Frequency
Clock time
Display Off
Page 8
CQ-C3305W
14
CQ-C3305W
15
English
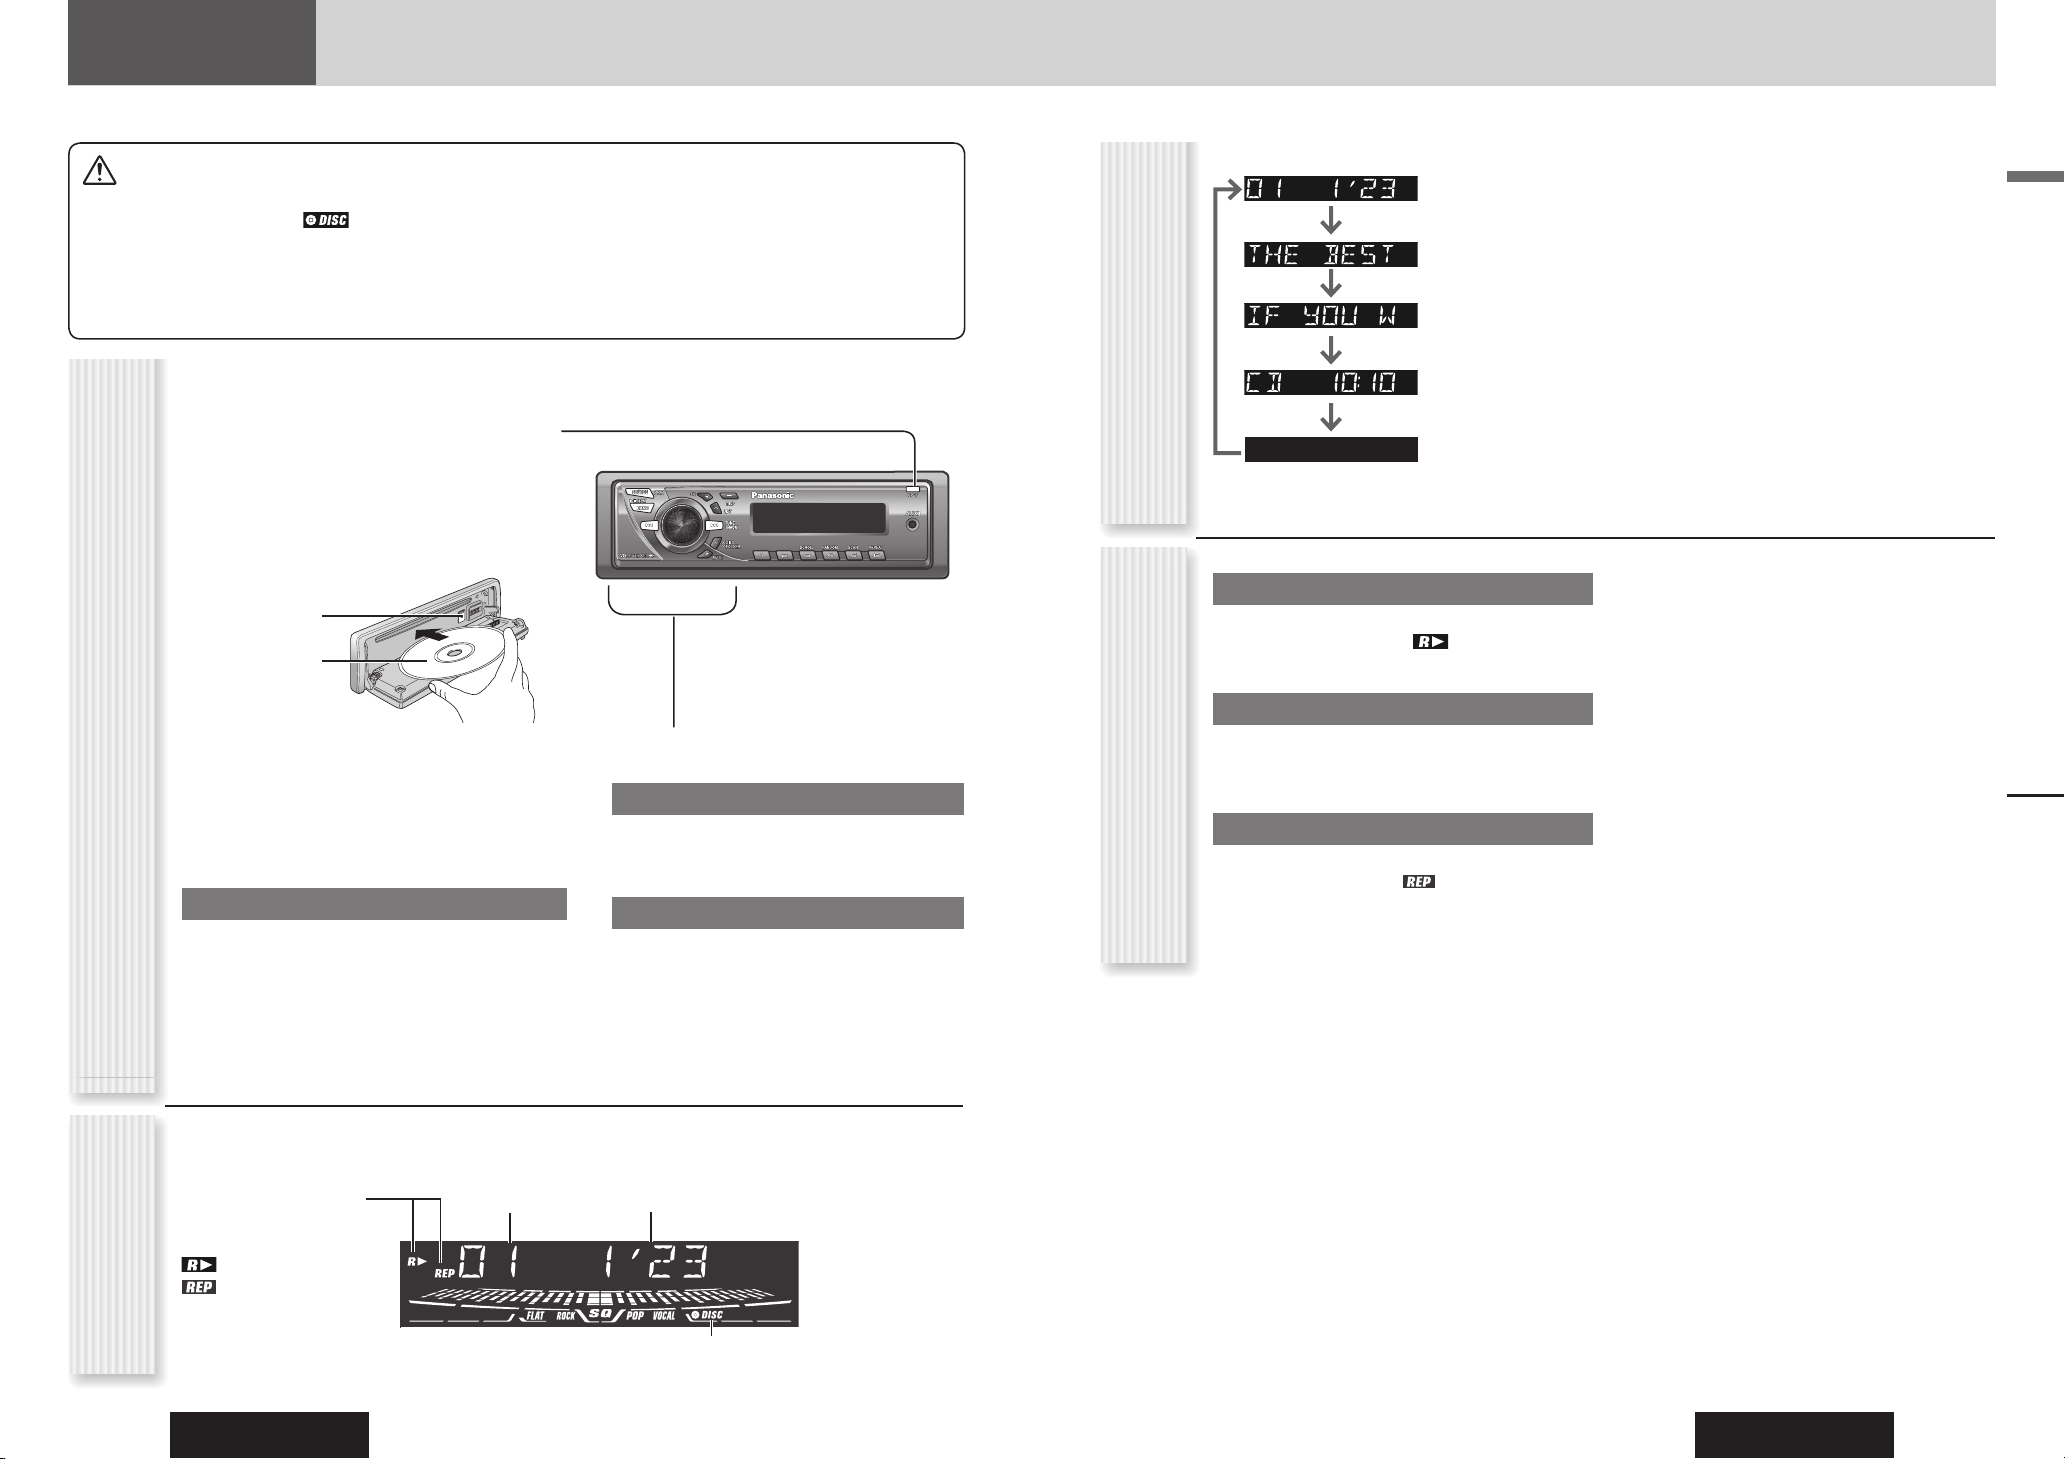
Random Play
All the available tracks are played in a random sequence.
Press [4] (RANDOM). lights.
Press again to cancel.
Scan Play
The fi rst 10 seconds of each track is played in sequence.
Press [5] (SCAN).
Press again to cancel.
Repeat Play
The current track is repeated.
Press [6] (REPEAT). lights.
Press again to cancel.
Cautions
• This unit does not support 8 cm discs.
• Do not insert a disc when
indicator lights
because a disc is already loaded.
• Do not use irregularly shaped discs. (
page 26)
• Do not use discs that have a seal or label attached.
• To avoid damaging the face plate, do not push it down or
place objects on it while it is open.
• Do not pinch your fi nger or hand in the face plate.
• Do not insert foreign matter into the disc slots.
• Refer to the section on “Notes on CD/CD Media (CD-ROM,
CD-R, CD-RW)” (
page 26).
• A disc which has both CD-DA data and MP3/WMA data on it
may not be reproduced normally.
Random, Scan, Repeat Play
(RANDOM, SCAN, REPEAT)
CD Player
CD Player
When a disc is already loaded, press [SOURCE] to
select the CD mode.
1
Press [OPEN] to open the face plate.
2
Load a disc with the printed side facing
up.
Note: It may take some time to start playing.
Printed side
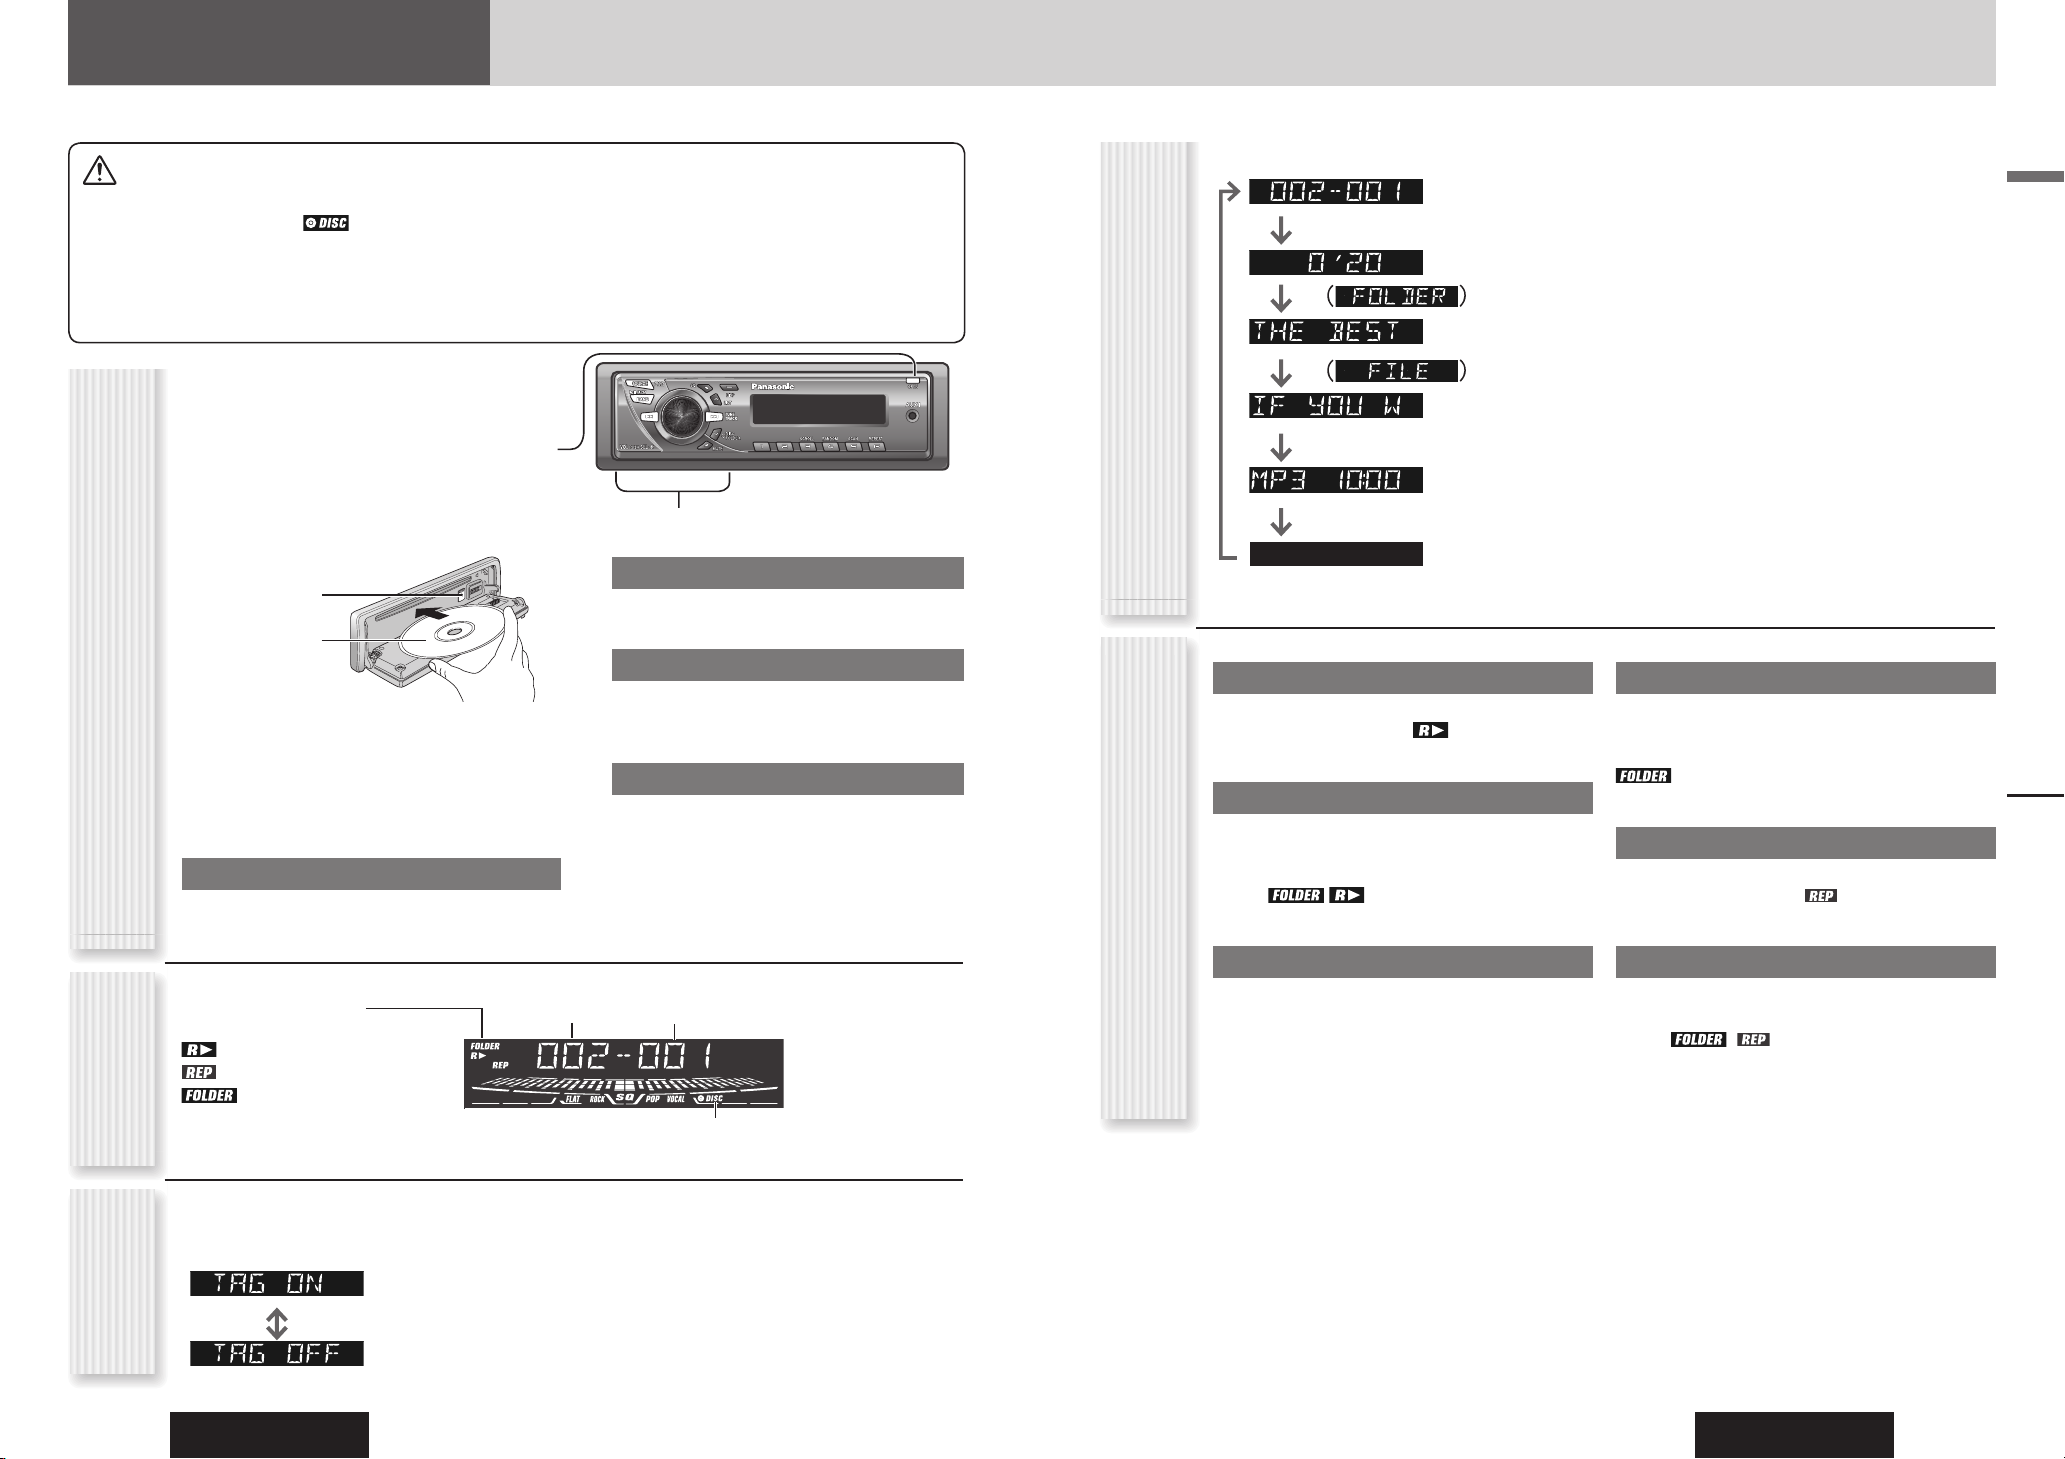
Operation Flow
Track number Time
Play Mode indicators
Lights when each mode is
activated.
Random play
Repeat play
Lights when the disc is loaded.
CD Mode Display
4
Select a desired portion.
Track Selection
[] (TRACK): Next track
[] (TRACK): Preceding track (press twice)
Note: Hold down for fast forward/reverse.
Pause
Press [].
Press again to cancel.
Display Change
(DISP: Display)
Press [DISP].
Track/play time
Disc title
Track title
Clock time
Display off
3
Close the face plate manually.
Notes:
• The unit recognizes the disc and starts playing
automatically.
• The power will be turned on automatically when a disc
is loaded.
Disc Eject
Press [OPEN].
Press [] and take the disc out.
Close the face plate manually.
Notes:
• To have another circle scroll while a title is displayed,
press [3] (SCROLL). If the number of displayed
characters is 8 or less, the characters do not scroll.
• “NO TEXT” is displayed when there is no information
on the disc.
[] (Eject)
Page 9
CQ-C3305W
16
CQ-C3305W
17
English
Random, Scan, Repeat Play
(RANDOM, SCAN, REPEAT)
MP3/WMA Player
MP3/WMA Player
4
Select a desired portion.
Folder Selection
[] (FOLDER): Next folder
[] (FOLDER): Preceding folder
File Selection
[] (TRACK): Next fi le
[] (TRACK): Preceding fi le (press twice)
Note: Hold down for fast forward/reverse.
Pause
Press [].
Press again to cancel.
Operation Flow
MP3/WMA
Mode Display
Folder number
File number
Notes:
• To have another circle scroll while a text is displayed,
press [3] (SCROLL). If the number of displayed
characters is 8 or less, the characters do not scroll.
• “NO TEXT” is displayed when there is no information
on the disc.
• ID3/WMA tag information is displayed for the album
name and title/artist name.
Play Mode indicators
Lights when each mode is activated.
Random play
Repeat play
Folder Random, Folder
Repeat, Folder Scan
Lights when the disc is loaded.
*ID3/WMA
Tag Setting
Random Play
All the available fi les are played in a random sequence.
Press [4] (RANDOM). lights.
Press again to cancel.
Folder Random Play
All the fi les in the current folder are played in a random
sequence.
Hold down [4] (RANDOM) for 2 sec. or
more. lights.
Hold down again to cancel.
Scan Play
The fi rst 10 seconds of each fi le is played in sequence.
Press [5] (SCAN).
Press again to cancel.
Folder Scan Play
From the next folder, the fi rst 10 seconds of the fi rst fi le
in each folder is played in sequence.
Hold down [5] (SCAN) for 2 sec. or more.
lights.
Hold down again to cancel.
Repeat Play
The current fi le is repeated.
Press [6] (REPEAT). lights.
Press again to cancel.
Folder Repeat Play
The current folder is repeated.
Hold down [6] (REPEAT) for 2 sec. or
more. lights.
Hold down again to cancel.
Display Change
(DISP: Display)
When a disc is already loaded, press [SOURCE] to
select the MP3/WMA mode.
1
Press [OPEN] to open the face plate.
2
Load a disc with the printed side facing up.
Note: It may take some time to start playing.
3
Close the face plate manually.
Notes:
• The unit recognizes the disc and starts playing
automatically.
• The power will be turned on automatically when a disc
is loaded.
Disc Eject
Press [OPEN].
Press [] and take the disc out.
Close the face plate manually.
Folder/File
Play time
(Data reading)
Folder name/Album
name*
(Data reading)
File name/title and artist
name*
Clock time
Display off
Cautions
• This unit does not support 8 cm discs.
• Do not insert a disc when
indicator lights
because a disc is already loaded.
• Do not use irregularly shaped discs. (
page 26)
• Do not use discs that have a seal or label attached.
• To avoid damaging the face plate, do not push it down or
place objects on it while it is open.
• Do not pinch your fi nger or hand in the face plate.
• Do not insert foreign matter into the disc slots.
• Refer to the section on “Notes on CD/CD Media (CD-ROM,
CD-R, CD-RW)” (
page 26).
• A disc which has both CD-DA data and MP3/WMA data on it
may not be reproduced normally.
• Refer to the section on “Notes on MP3/WMA” (
page 18).
Press [DISP].
Hold down [3] (SCROLL) for 2 sec. or
more.
(Default)
When a folder name is displayed:
TAG ON: The album title is displayed.
TAG OFF: The folder name is displayed.
When a fi le name is displayed:
TAG ON: The title/artist name is displayed.
TAG OFF: The fi le name is displayed.
Printed side
[] (Eject)
Page 10

CQ-C3305W
18
CQ-C3305W
19
English
Windows Media, and the
Windows logo are trademarks,
or registered trademarks of
Microsoft Corporation
in the United States
and/or other
countries/regions.
• You are recommended to minimize the chances of
making a disc that contains both CD-DA fi les and
MP3/WMA fi les.
• If CD-DA fi les are on the same disc as MP3 or WMA
fi les, the songs may not play in the intended order,
or some songs may not play at all.
• When storing MP3 data and WMA data on the same
disc, use different folders for each data.
• Do not record fi les other than MP3/WMA fi les and
unnecessary folder on a disc.
• The name of an MP3/WMA fi le should be added by
rules as shown in the following descriptions and also
comply with the rules of each fi le system.
• The fi le extension “.mp3” or “.wma” should be
assigned to each fi le depending on the fi le format.
• You may encounter trouble in playing MP3/WMA
fi les or displaying the information of MP3/WMA
fi les recorded with certain writing software or CD
recorders.
• This unit does not have a play list function.
• Although Multi-session recording is supported, the use
of Disc-at-Once is recommended.
Supported fi le systems
ISO 9660 Level 1/Level 2, Apple Extension to ISO 9660,
Joliet, Romeo
Note: Apple HFS, UDF 1.50, Mix CD and CD Extra are
not supported.
Recording MP3/WMA Files on a CD-media
Compression formats
(Recommendation: “Points to Remember When Making MP3/WMA Files” on the previous page)
Compression method Bit rate VBR Sampling frequency
MPEG 1 audio layer 3 (MP3) 32 k – 320 kbps Yes 32, 44.1, 48 kHz
MPEG 2 audio layer 3 (MP3) 8 k – 160 kbps Yes 16, 22.05, 24 kHz
Windows Media Audio Ver. 7, 8, 9* 32 k – 192 kbps Yes 32, 44.1, 48 kHz
* WMA 9 Professional/LossLess/Voice are not supported.
Folder Selection Order/File Playback Order
Copyright
It is prohibited by copyright laws to copy, distribute and
deliver copyrighted materials such as music without
the approval of copyright holder except enjoying
yourself personally.
No warranty
Above description complies with our investigations
as of September 2006. It has no warranty for
reproducibility and displayability of MP3/WMA.
Notes on MP3/WMA (continued)
MP3/WMA Player
MP3/WMA Player
What is MP3/WMA?
MP3* (MPEG Audio Layer-3) and WMA (Windows MediaTM
Audio) are the compression formats of digital audio.
The former is developed by MPEG (Motion Picture
Experts Group), and the latter is developed by Microsoft
Corporation. Using these compression formats, you
can record the contents of about 10 music CDs on a
single CD media (This fi gures refer to data recorded on
a 650 MB CD-R or CD-RW at a fi xed bit rate of 128 kbps
and a sampling frequency of 44.1 kHz).
*
MPEG Layer-3 audio coding technology licensed from
Fraunhofer IIS and Thomson.
Note: MP3/WMA encoding and writing software is not
supplied with this unit.
Points to Remember When Making MP3/WMA Files
Common
• High bit rate and high sampling frequency are
recommended for high quality sounds.
• Selecting Variable Bit Rate (VBR) is not recommended
because playing time is not displayed properly and
sound may be skipped.
• The playback sound quality differs depending on
the encoding circumstances. For details, refer to
the instructions of your own encoding software and
writing software.
MP3
• It is recommended to set the bit rate to “128 kbps or
more” and “fi xed”.
WMA
• It is recommended to set the bit rate to “64 kbps or
more” and “fi xed”.
• Do not set the copy protect attribute on the WMA fi le
to enable this unit to play back.
Display Information
Displayed items
• CD-TEXT
Disc title
Track title
• MP3 (ID3 tag)
Album name
Title name/artist name
• MP3/WMA
Folder name
File name
• WMA (WMA tag)
Album name
Title name/artist name
Displayable characters
• Displayable length of fi le name/folder name: within
32 characters. (Unicoded fi le and folder names
are reduced by half in the number of displayable
characters.)
• Name fi les and folders in accordance with the standard
of each fi le system. Refer to the instructions of writing
software for details.
• ASCII character set and special characters in each
language can be displayed.
• Some Cyrillic characters in the Unicode can be
displayed.
ASCII character set
A to Z, a to z, digits 0 to 9, and the following symbols:
(space) ! ” # $ % & ’ ( ) * + , - . / : ; < = > ? @ [ \ ] ˆ _
` { | } ~
Special Characters
À Á Â Ã Å à á â ã å
Ä ä
Ò Ó Ô Õ Ö ò ó ô õ ö
Ù Ú Û Ü ù ú û ü
Notes:
• With some software in which MP3/WMA format fi les
have been encoded, the character information may not
be displayed properly.
• Undisplayable characters and symbols will be
converted into an asterisk (
).
• It is recommended that the length of the fi le name is
less than 8 (excluding the fi le extension).
Caution
Never assign the “.mp3”, or “.wma” fi le
name extension to a fi le that is not in
the MP3/WMA format. This may not only
produce noise from the speaker damage,
but also damage your hearing.
Notes on MP3/WMA
Maximum number of fi les/folders
• Maximum number of fi les: 999
• Maximum number of fi les in one folder: 255
• Maximum depth of trees: 8
• Maximum number of folders: 255 (Root folder is
included.)
Notes:
• You can shorten the duration between data read and
playback by decreasing the quantity of fi les or folders,
or the depth of the hierarchy.
• This unit counts the number of folders irrespective of
the presence or absence of an MP3/WMA fi le.
• If the selected folder does not contain any MP3/WMA
fi les, the nearest MP3/WMA fi les in the order of
playback will be played.
• Playback order may be different from other MP3/WMA
players even if the same disc is used.
• “ROOT” appears when displaying the root folder name.
Root folder
(Root Directory)
Folder Selection
In the order
Tree 1 Tree 2 Tree 3 Tree 4 Tree 8
(Max.)
File Selection
In the order
1
2
4
3
5
6
8
7
1
8
Page 11

CQ-C3305W
20
CQ-C3305W
21
English
Function Setting
Audio Setting, Function Setting
1
Hold down [VOL]
(PUSH SEL: Select) for
2 sec. or more to open
the menu.
2
Press [VOL] (PUSH SEL: Select) to
select a mode to be adjusted.
3
Tu r n [VOL] clockwise
or counterclockwise to
adjust.
Notes:
• The sequence and contents of setting items may
depend on the conditions of devices to be connected.
For further information, refer to the System Upgrade
Guidebook or the instruction manuals for the devices
to be connected.
• To return to the regular mode, press [DISP].
•
If no operation takes place for more than 5 seconds in
function setting, the display returns to the regular mode.
Demonstration
You can set up the monitor to display or hide the
demonstration screen.
: On (Default)
: Off
Note: Button operation with either the main unit or
remote control allows users to cancel the demonstration
screen for 20 seconds and enable the selected operation
even in the demo-on mode.
Key Color Selection
You can select key color.
Default: GREEN (Green)
Variety: GREEN (Green), RED (Red)
: Green (Default)
: Red
Level Meter Display Patterns (PATTERN)
Variety: 4 types, OFF
: Off
: Pattern 1 (Default)
: Pattern 2
: Pattern 3
: Pattern 4
Mute/Attenuation
You can select mute or attenuation.
: Volume down by
10 steps
: Volume off (Default)
AUX1 Skip
If AUX1 is not used, the AUX1 mode is skipped when
selecting the source.
: On (Skip disabled.)
(Default)
: Off (Skip enabled.)
Function Menu Display
Audio Setting
1
Press [VOL] (PUSH SEL:
Select) to open the menu.
2
Press [VOL] (PUSH SEL: Select) to
select a mode to be adjusted.
3
Tu r n [VOL] clockwise
or counterclockwise to
adjust.
Notes:
• The sequence and contents of setting items may
depend on the conditions of devices to be connected.
For further information, refer to the System Upgrade
Guidebook or the instruction manuals for the devices
to be connected.
• To return to the regular mode, press [DISP].
• If no operation takes place for more than 5 seconds in
audio setting (2 seconds in the volume adjustment),
the display returns to the regular mode.
• The volume can also be adjusted directly using [VOL]
on the main unit. (
page 10)
• Please refer to page 11 for SQ selection.
Volume Adjustment
(Setting range: 0 to 40, Default: 18)
: Up
: Down
Bass Adjustment
(Setting range: 12 dB to 12 dB, 2 dB Step, Default:
Bass 0 dB)
: Up
: Down
Treble Adjustment
(Setting range: 12 dB to 12 dB, 2 dB Step, Default:
Treble 0 dB)
: Up
: Down
Note: Setting of SQ, bass/treble and volume are
infl uenced one another. If such an infl uence mentioned
above causes distortion to the audio signal, readjust
bass/treble or volume.
Balance Adjustment
(Setting range: L (left) 15 to R (right) 15 and Center,
Default: Center)
: Right enhanced
: Left enhanced
Fader Adjustment
(Setting range: R (rear) 15 to F (front) 15 and Center,
Default: Center)
: Front enhanced
: Rear enhanced
Adjustment to each speaker
Audio Menu Display
Page 12

CQ-C3305W
22
CQ-C3305W
23
English
Troubleshooting
If You Suspect Something Wrong
Check and take steps as described below.
If the described suggestions do not solve the problem, it is
recommended to take the unit to your nearest authorized
Panasonic Service Center. The product should be serviced only
by qualifi ed personnel. Please refer the checking and the repair
to professionals. Panasonic shall not be liable for any accidents
arising out of neglect of checking the unit or your own repair
after your checking.
Never take measures especially those other than indicated by
italic letters in “Possible solution” described below because
those are too dangerous for users to handle themselves.
Problem Possible cause Possible solution
No power to the unit
The power cord (battery, power and ground) is connected in the wrong way.
Check the wiring.
Fuse blows out.
Eliminate the cause of fuse blowout and replace the fuse with new one.
Consult your dealer.
Sound is not
generated.
MUTE is set to ON.
Set MUTE to OFF.
The wiring of speaker lines are not correct, or a break or poor contact arises.
Check the wiring in accordance with the wiring diagram. (Installation
Instructions)
Noise
There is an electromagnetic-wave generator such as a cellular phone near the unit
or its electrical lines.
Keep an electromagnetic-wave generator such as a cellular phone away
from the unit and the wiring of the unit. In case that noise cannot be
eliminated due to the wiring harness of the car, consult your dealer.
The contact of the ground lead is poor.
Make sure that the ground lead is connected to an unpainted part of the
chassis securely.
Noise is made in
step with engine
revolutions.
Alternator noise comes from the car.
Change the wiring position of the ground lead.
Mount a noise fi lter.
Common
Troubleshooting
Problem Possible cause Possible solution
Some operations are
not executable.
Some operations are not executable in particular modes such as menu mode.
Read the operating instructions carefully and cancel the mode. If the unit is
still out of order, consult your dealer.
No sound from
speaker(s)
Balance/Fader setting is not appropriate.
Readjust Balance/Fader.
There is a break, a short circuit, poor contact or wrong wiring regarding the
speaker wiring.
Check the speaker wiring.
The speaker channels
are reversed between
right and left.
The speaker wiring is confused between right and left.
Perform the speaker wiring in accordance with the wiring diagram.
The sound fi eld is not
clear in the stereo
mode.
Central sound does not
settled.
The plus and minus terminals at right and left channels of speakers are connected
reversely.
Perform the speaker wiring in accordance with the wiring diagram.
The power fails
unintentionally.
The safety device works.
Consult your dealer, or your nearest Panasonic Service Center.
Poor reception or
noise
Antenna installation or wiring of antenna cable is faulty.
Check whether the antenna mounting position and its wiring are correct. In
addition, check to see whether the antenna ground is securely connected to
the chassis.
No power is supplied to the antenna amplifi er (when using a fi lm antenna, etc.).
Check the wiring of the antenna power lead.
The number of auto
preset stations is less
than 6.
The number of receivable stations is less than 6.
Move to an area where receivable stations number is maximum, and try
presetting.
Preset stations cannot
be stored.
The contact of the battery lead is poor, or the battery lead is not always powered.
Make sure that the battery lead is connected securely, and preset stations
again.
Common (continued)Radio
Warning
• Do not use the unit in an irregular condition, for example,
without sound, or with smoke or a foul smell, which can
cause ignition or electric shock. Immediately stop using
the unit and consult your dealer.
• Never try to repair the unit by yourself because it is
dangerous to do so.
Page 13

CQ-C3305W
24
CQ-C3305W
25
English
Problem Possible cause Possible solution
No playback or disc
ejected
The disc is inserted upside down.
Insert a disc correctly.
There is a fl aw or foreign material on the disc.
Remove the foreign material, or use a fl awless disc.
Sound skipping or
noise
There is a fl aw or foreign material on the disc.
Remove the foreign material, or use a fl awless disc.
Sound skipping due to
vibration
The unit is not suffi ciently secured.
Secure the unit to the console box.
The unit is tilted at over 30˚ in the front-to-end direction.
Make the angle 30˚ or less.
Disc unejectable
Something such as a peeled label obstructs the disc coming out.
Consult your dealer.
The microcontroller in the unit operates abnormally due to noise or other factors.
Unplug the power cord and plug it again. In case the unit is still out of
order, consult your dealer.
Troubleshooting, Error Display Messages
No playback or disc
ejected
The disc has unplayable formatted data.
Refer to the description about MP3/WMA for playable sound data except
CD-DA (i.e. music CD).
The CD-R/RWs that
are playable on
other devices are not
playable on this unit.
The playability of some CD-R/RWs may depend on the combination of media,
recording software and recorder to be used even if these CD-R/RWs are playable
on other devices such as a PC.
Make CD-R/RWs in different combination of media, recording software and
recorder after referring to the description about MP3/WMA.
Sound skipping or
noise
There is a fl aw or foreign material on the disc.
Remove the foreign material, or use a fl awless disc. For MP3/WMA, refer
to the description about MP3/WMA.
Playing Variable Bit Rate (VBR) fi les may cause sound skipping.
Play Non-VBR fi les.
CDMP3/WMA
Troubleshooting
Problem Possible cause Possible solution
No response to
pressing buttons
The battery is inserted in the wrong direction. A wrong battery is inserted.
Insert a correct battery in the correct direction.
The battery is weak.
Replace the battery with new one.
The aiming direction of the remote control unit is wrong.
Aim the remote control unit at the sensor of the unit and press buttons.
The sensor is exposed to direct sunlight. (The remote control unit may not be
operable when the sensor is exposed to direct sunlight. In such a case, the
system is not faulty.)
Block off sunlight to the sensor.
Remote control unit
Display Possible cause Possible solution
The disc is dirty or upside down.
Check the disc.
The disc has scratches.
Check the disc.
(After 5 seconds)
No operation by some cause.
Unplug the power cord and plug it again. In case the unit is still out of
order, consult your dealer. (
Installation Instructions)
(After 5 seconds)
To next fi le automatically
The player for some reason cannot read the fi le you are trying to play. (File
recorded in an unsupported fi le system, compression scheme, data format, fi le
name extension, damaged data, etc.)
Select a fi le that the player can read. Check the type of data recorded on the
disc. Create a new disc if necessary.
(After 5 seconds)
To next fi le automatically
A WMA fi le can be copyrighted.
The fi le protected by copyright is not playable.
Note: Refer to the System Upgrade Guidebook for error messages regarding optional products.
CD/MP3/WMA
Error Display Messages
Page 14

CQ-C3305W
26
CQ-C3305W
27
English
Specifi cations
Power Supply DC 12 V (11 V – 16 V), Test Voltage 14.4 V, Negative Ground
Current Consumption Less than 2.1 A (CD mode, 0.5 W 4-Speaker)
Maximum Power Output 50 W x 4 (at 1 kHz), volume control maximum
Power Output
18 W x 4 CH (1 kHz, 1 %, 4 )
Tone Adjustable Range Bass: ±12 dB (at 100 Hz), Treble: ±12 dB (at 10 kHz)
Speaker Impedance
4 – 8
Pre-amp Output Voltage 2.5 V (CD mode: 1 kHz, 0 dB)
Pre-amp Output Impedance
200
Front AUX input
Input Impedance
Allowable External Input
Connector
10 k
2.0 V
3.5 mm Stereo mini-pin
Dimensions (Main Unit) 178 (W) x 50 (H) x 160 (D) mm
Weight (Main Unit)
1.3
kg
Sampling Frequency 8 times oversampling
DA Converter 1 bit DAC System
Pick-Up Type Astigma 3-beam
Light Source Semiconductor laser
Wave Length 790 nm
Frequency Response 20 Hz – 20 kHz (±1 dB)
Signal to Noise Ratio 96 dB
Total Harmonic Distortion 0.01 % (1 kHz)
Wow and Flutter Below measurable limits
Channel Separation 75 dB
GeneralCD Player
FM
Frequency Range
87.50 MHz – 108.00 MHz
Usable Sensitivity 6 dB/µV (S/N 30 dB)
Frequency Response 30 Hz – 15 kHz (±3 dB)
Alternate Channel Selectivity 75 dB
Stereo Separation 35 dB (at 1 kHz)
Image Rejection Ratio 70 dB
IF Rejection Ratio 100 dB
Signal to Noise Ratio 62 dB
AM
Frequency Range 531 kHz – 1 602 kHz
Usable Sensitivity 28 dB/µV (S/N 20 dB)
Stereo Radio
Notes:
• Specifi cations and design are subject to modifi cation without notice due to improvements.
• Some fi gures and illustrations in this manual may be different from your product.
Notes on Discs, Maintenance/Fuse, Specifi cations
Notes on Discs
If you use commercial CDs, they must have
either of these labels shown at right.
Some copy-protected music CDs are not
playable.
Notes on CD/CD Media
(CD-ROM, CD-R, CD-RW)
• You may have trouble playing back some CD-R/RW discs recorded on CD recorders (CD-R/RW drives), either due
to their recording characteristics or dirt, fi ngerprints, scratches, etc. on the disc surface.
• CD-R/RW discs are less resistant to high temperatures and high humidity than ordinary music CDs. Leaving them
inside a car for extended periods may damage and make playback impossible.
• Some CD-R/RWs can not be played back successfully thanks to incompatibility among writing software, a CD
recorder (CD-R/RW drive) and the discs.
• This player cannot play the CD-R/RW discs if the session is not closed.
• This player cannot play the CD-R/RW discs which contains other than CD-DA or MP3/WMA data.
• Be sure to observe the instructions of CD-R/RW disc for handling it.
Notes on
CD-Rs/RWs
Maintenance/Fuse
Your product is designed and manufactured to ensure the minimum of maintenance. Use a dry, soft cloth for routine
exterior cleaning. Never use benzine, thinner, or other solvents.
Cleaning the
Unit
If the fuse blows out, consult your dealer, or your nearest authorized Panasonic Service Center.
Fuse
Warning
• Use fuses of the same specifi ed rating (15 A). Using substitutes or fuses with higher ratings, or connecting
the unit directly without a fuse could cause fi re or damage to the unit. If the replaced fuse fails, contact
your nearest authorized Panasonic Service Center.
How to hold the disc
• Do not touch the underside of the disc.
• Do not scratch on the disc.
• Do not bend the disc.
• When not in use, keep disc in the case.
Do not leave discs in the following places:
• In direct sunlight
• Near car heaters
• Dirty, dusty and damp areas
• On seats and dashboards
Disc cleaning
Use a dry, soft cloth to wipe from the center outward.
Labels created by a printer,
Protective fi lms or sheets
Irregularly shaped discs
<Correct>
<Wrong>
Disc with adhered
stickers or tape
Discs with cracks, scratches
or parts missing
Do not write on the disc label with a ballpoint
pen or other hard-point pens.
Printed side
TEXT
Page 15

CQ-C3305W
106
CQ-C3305W
107
Memorandum
Memorandum
Page 16

Printed in ChinaYEFM285931A FT1106-1116
Matsushita Electric Industrial Co., Ltd.
Web Site: http://panasonic.net
■보증서
모델명 CQ-C3305W
고객란
고객 성명: 님
고객 주소: 우편번호
시 구(읍, 면) 동(리)
전화 번호: ( ) -
구입 년월일
판매점 명, 주소, 전화 번호:
전화 번호: ( ) 제품의 시리얼 번호:
년 월 일
보 증 기 간
(구입일부터)
1 년간
※구입일과 구입처(판매점)를 분명히 재하여, 고객에게 전달하시기 바랍니다. 차후의 A/S수리와
관련하여 매우 중요하오니 반드시 보관하시기 바랍니다.
※당사에서는 제품의 시리얼 번호를 전산 처리하여 관리하고 있습니다 . 보증서에 시리얼 번호를
기록 하여 두시기 바랍니다 .
제조년월
Panasonic Car Audio 세풍전자공업주식회사
한국총대리점 본사: 서울특별시 영등포구 양평동5가 56-2
전화: (02)2633-0856(대표전화)
고객상담실: (02)2633-0878
홈페이지: www.sepung.co.kr
Page 17

System Upgrade Guidebook
Инструкция по расширению системьı
• For upgrading your system, read this manual carefully before use. This manual should be retained for future reference after
read.
• Для расширения Вашей системы просим тшательно читать данную перед использованием аппарата.
Данную инсрукцию следует хранить для дальнейшего польэования.
Model: CQ-C5305W/CQ-C3305W
Page 18

CQ-C5305W/C3305W
2
CQ-C5305W/C3305W
3
English
Safety Information
Read the operating instructions for the unit and all other
components of your car audio system carefully before using
the system. They contain instructions about how to use the
system in a safe and effective manner. Panasonic assumes
no responsibility for any problems resulting from failure to
observe the instructions given in this manual.
This manual uses pictographs to show you how to use the
product safely and to alert you to potential dangers resulting
from improper connections and operations. The meanings of
the pictographs are explained below. It is important that you
fully understand the meanings of the pictographs in order to
use this manual and the system properly.
Warning
This pictograph intends to alert you to the
presence of important operating instructions
and installation instructions. Failure to heed the
instructions may result in severe injury or death.
Caution
This pictograph intends to alert you to the presence
of important operating instructions and installation
instructions. Failure to heed the instructions may
result in injury or material damage.
Warning
Observe the following warnings when using
this unit.
The driver should neither watch the display nor
operate the system while driving.
Watching the display or operating the system will distract
the driver from looking ahead of the vehicle and can cause
accidents. Always stop the vehicle in a safe location and use
the parking brake before watching the display or operating
the system.
Use the proper power supply.
This product is designed for operation with a negative
grounded 12 V DC battery system. Never operate this
product with other battery systems, especially a 24 V DC
battery system.
Keep batteries and insulation fi lm out of reach of
infants.
Batteries and insulation fi lm can be ingested, so keep them
out of the reach of infants. If an infant ingests a battery or
insulation fi lm, please seek immediate medical attention.
Protect the Deck Mechanism.
Do not insert any foreign objects into the slot of this unit.
Do not disassemble or modify the unit.
Do not disassemble, modify the unit or attempt to repair
the product yourself. If the product needs to be repaired,
consult your dealer or an authorized Panasonic Service
Center.
Do not use the unit when it is out of order.
If the unit is out of order (no power, no sound) or in an
abnormal state (has foreign objects in it, is exposed to
water, is smoking, or smells), turn it off immediately and
consult your dealer.
The remote control unit should not lie about in the
car.
If the remote control unit lies about, it could fall on the fl oor
while driving, get wedged under the brake pedal, and lead to
a traffi c accident.
Refer fuse replacement to qualifi ed service
personnel.
When the fuse blows out, eliminate the cause and have it
replaced with the fuse prescribed for this unit by a qualifi ed
service engineer. Incorrect replacement of the fuse may lead
to smoke, fi re, and damage to the product.
Observe the following warnings when
installing.
Disconnect the lead from the negative (–) battery
terminal before installation.
Wiring and installation with the negative (–) battery terminal
connected may cause electrical shock and injury due to a
short circuit.
Some cars equipped with the electrical safety system have
specifi c procedures of battery terminal disconnection.
FAILURE TO FOLLOW THE PROCEDURE MAY LEAD TO THE
UNINTENDED ACTIVATION OF THE ELECTRICAL SAFETY
SYSTEM RESULTING IN DAMAGE TO THE VEHICLE AND
PERSONAL INJURY OR DEATH.
Never use safety-related components for
installation, grounding, and other such functions.
Do not use safety-related vehicle components (fuel tank,
brake, suspension, steering wheel, pedals, airbag, etc.) for
wiring or fi xing the product or its accessories.
Installing the product on the air bag cover or in a
location where it interferes with airbag operation is
prohibited.
Check for piping, gasoline tank, electric wiring, and
other items before installing the product.
If you need to open a hole in the vehicle chassis to attach
or wire the product, fi rst check where the wire harness,
gasoline tank, and electric wiring are located. Then open the
hole from outside if possible.
Never install the product in a location where it
interferes with your fi eld of vision.
Never have the power cord branched to supply
other equipment with power.
After installation and wiring, you should check the
normal operation of other electrical equipment.
The continuation of their using in abnormal conditions may
cause fi re, electrical shock or a traffi c accident.
In the case of installation to an airbag-equipping
car, confi rm warnings and cautions of the vehicle
manufacturer before installation.
Make sure the leads do not interfere with driving or
getting in and out of the vehicle.
Insulate all exposed wires to prevent short
circuiting.
Caution
Observe the following cautions when using this
unit.
Keep the sound volume at an appropriate level.
Keep the volume level low enough to be aware of road and
traffi c conditions while driving.
This unit is designed for use exclusively in automobiles.
Do not operate the unit for a prolonged period with
the engine turned off.
Operating the audio system for a long period of time with the
engine turned off will drain the battery.
Do not expose the unit to direct sunlight or
excessive heat.
Otherwise these will raise the interior temperature of the
unit, and it may lead to smoke, fi re, or other damage to the
unit.
Do not use the product where it is exposed to water,
moisture, or dust.
Exposure of the unit to water, moisture, or dust may lead to
smoke, fi re, or other damage to the unit. Make especially sure
that the unit does not get wet in car washes or on rainy days.
Set the volume level to low enough before the AUX
connection is completed.
Failure to observe this, the loud noise may come out and
damage your speakers and your hearing. Direct connection
of the speaker/headphone output of an external device
without any attenuator may distort sound or damage the
connected external device.
Observe the following cautions when
installing.
Refer wiring and installation to qualifi ed service personnel.
Installation of this unit requires special skills and experience.
For maximum safety, have it installed by your dealer.
Panasonic is not liable for any problems resulting from your
own installation of the unit.
Follow the instructions to install and wire the product.
Not following the instructions to properly install and wire the
product could cause an accident or fi re.
Take care not to damage the leads.
When wiring, take care not to damage the leads. Prevent
them from getting caught in the vehicle chassis, screws, and
moving parts such as seat rails. Do not scratch, pull, bend
or twist the leads. Do not run them near heat sources or
place heavy objects on them. If leads must be run over sharp
metal edges, protect the leads by winding them with vinyl
tape or similar protection.
Use the designated parts and tools for installation.
Use the supplied or designated parts and appropriate tools to
install the product. The use of parts other than those supplied
or designated may result in internal damage to the unit. Faulty
installation may lead to an accident, a malfunction or fi re.
Do not block the air vent or the cooling plate of the
unit.
Blocking these parts will cause the interior of the unit to
overheat and will result in fi re or other damage.
Do not install the product where it is exposed to
strong vibrations or is unstable.
Avoid slanted or strongly curved surfaces for installation.
If the installation is not stable, the unit may fall down while
driving and this can lead to an accident or injury.
Installation Angle
The product should be installed in a horizontal position with
the front end up at a convenient angle, but not more than
30˚.
The user should bear in mind that in some areas there may
be restrictions on how and where this unit must be installed.
Consult your dealer for further details.
Wear gloves for safety. Make sure that wiring is
completed before installation.
To prevent damage to the unit, do not connect the
power connector until the whole wiring is completed.
Do not connect more than one speaker to one set of
speaker leads. (except for connecting to a tweeter)
Observe the following cautions when handling
the battery for the remote control unit.
[CQ-C5305W\
• Use only specifi ed battery (CR2025).
• Match the polarity of the battery with the () and () marks
in the battery case.
• Replace a dead battery as soon as possible.
• Remove the battery from the remote control unit when not
using it for an extended period of time.
• Insulate the battery (by placing them in a plastic bag or
covering them with vinyl tape) before disposal or storage.
• Dispose of the battery according to the local regulations.
• Do not disassemble, recharge, heat or short the battery. Do
not throw a battery into a fi re or water.
In case of battery leakage
• Thoroughly wipe the battery liquid off the battery case and
insert new battery.
• If any part of your body or clothing comes into contact with
battery liquid, wash it with plenty of water.
• If battery liquid comes into contact with your eyes, wash
them with plenty of water and get immediate medical
attention.
Safety Information
Refer to safety information of optional devices as well.
Page 19

CQ-C5305W/C3305W
4
CQ-C5305W/C3305W
5
English
Рyccкий 22
42
62
Contents
• Safety Information 2
• Before Reading These Instructions 4
• General 6
• CD Changer 10
• iPod Control 14
• Hands-Free Phone System 18
• Troubleshooting 20
CommonEach SourceAs Needed
This book is an instruction manual that explains how to
operate your purchased head unit and its remote control
as an accessory when the head unit is connected to
optional devices.
(Remote Control Unit
Operating Instructions)
Head units to be targeted
• CQ-C5305W
(Notation in this book: [CQ-C5305W\)
• CQ-C3305W
(Notation in this book: [CQ-C3305W])
System Upgrade Sample About this Book
Before Reading These Instructions
iPod
Hands-Free Phone System:
CY-BT100N (Option)
(
page 18)
Head Unit:
CQ-C5305W/C3305W
Monitor:
CY-VM1500EX (Option)
Conversion Cable for DVD/CD
Changer
(CA-CC30N, option)
System-up Connector
Note: Refer to individual instruction and installation
manuals for each device for detailed installation and
wiring.
Head Unit:
CQ-C5305W/C3305W
Hands-Free Kit featuring Bluetooth
®
technology
(CY-BT100N, option)
iPod
( page 14, 16)
Direct Cable for iPod
(CA-DC300N, option)
Only 1 unit
Up to 4 units
Expansion Module
(CY-EM100N, option)
CD Changer
(CX-DP880N, option)
Expansion Module (Hub Unit):
CY-EM100N (Option) ( page 6)
Cellular Phone
CD Changer:
CX-DP880N (Option)
(
page 10, 12)
CY-BT100U
CY-BT100U
Page 20

CQ-C5305W/C3305W
6
CQ-C5305W/C3305W
7
English
General
Connectable Devices
General
CD Changer
The optional adapter (Conversion Cable for DVD/CD
Changer: CA-CC30N) allows you to connect the optional
Panasonic CD changer unit (CX-DP880N). For details,
refer to the operating instructions for the CD changer
unit. (
page 10, 12)
Note:
• This unit does not support a DVD changer due to
shortage of displayable digit number or other causes.
iPod
The optional adapter (Direct Cable for iPod: CA-DC300N)
allows you to connect the optional iPod series. (
page
14, 16)
The iPod equipped with a dock connector is exclusively
connectable. Further information about the controllable
iPod is described below.
Controllable iPod/software version
• 3rd generation iPod/ver. 2.3
• 4th generation iPod/ver. 3.1.1
• 5th generation iPod/ver. 1.2 (Video playback is not
supported.)
• iPod photo/ver. 1.2.1
• iPod mini/ver. 1.4.1
• iPod nano/ver. 1.2
* Operation check has been completed with software
available at the end of September, 2006. We do not
guarantee the operation with our future products or
upgraded software.
iPod is a trademark of Apple Computer, Inc., registered in
the U.S.A. and other countries.
Hands-Free Phone System
You can connect the optional Hands-Free Phone System
(Hands-Free Kit featuring Bluetooth
®
technology:
CY-BT100N). For details, refer to the operating
instructions for the Hands-Free Phone System.
(
page 18)
Note: This unit is designed only for receiving calls.
It cannot send calls.
Bluetooth
®
The Bluetooth word mark and logo are owned by the
Bluetooth SIG, Inc. and any use of such marks by
Matsushita Electric Industrial Co.,Ltd. is under license.
Other trademarks and trade name are those of their
respective owners.
Expansion Module (Hub Unit)
You can connect the optional Expansion Module (hub
unit) (CY-EM100N). Connection of the Expansion Module
allows you to simultaneously connect optional devices
mentioned before as well as other AV devices. For details,
refer to the operating instructions for the Expansion
Module.
Connectable devices
• CD changer (max. 1)
• iPod (max. 2)
• Hands-Free Phone System (max. 1)
Note: Market conditions regarding optional devices vary
with countries and regions. For further information,
consult your dealer.
Source Selection
(SOURCE)
The source changes as follows every time [SOURCE]
is pressed.
Radio
CD or MP3/WMA/AAC Player
AUX1
Sources connected to the
Expansion Module (CY-EM100N,
option)
AUX2
Sound source
connecting to the
AUX input terminal of
Expansion Module
Port 1 (ex. iPod 1)
Port 2 (ex. iPod 2)
Port 3 (ex. CD changer)
Port 4 (ex. Bluetooth hands-free kit)
• This item is not selectable by pressing
[SOURCE], but activated by receiving an
incoming call.
Notes:
• Sources change in the order of the port number
of each connected source.
• Unconnected ports are skipped.
Radio
CD or MP3/WMA/AAC Player
AUX1
Source connected to the System-up Connector
(ex. CD changer)
Shift to connected
device
When an Expansion Module is
Connected to System-up Connector
When an Optional Device is
Connected to System-up Connector
\CQ-C5305W]
Page 21

CQ-C5305W/C3305W
8
CQ-C5305W/C3305W
9
English
General
Source Selection
(SOURCE)
The source changes as follows every time [SOURCE]
is pressed.
Radio
CD or MP3/WMA Player
AUX1
Sources connected to the
Expansion Module (CY-EM100N,
option)
AUX2
Sound source
connecting to the
AUX input terminal of
Expansion Module
Port 1 (ex. iPod 1)
Port 2 (ex. iPod 2)
Port 3 (ex. CD changer)
Port 4 (ex. Bluetooth hands-free kit)
• This item is not selectable by pressing
[SOURCE], but activated by receiving an
incoming call.
Notes:
• Sources change in the order of the port
number of each connected source.
• Unconnected ports are skipped.
When an Expansion Module is
Connected to System-up Connector
[CQ-C3305W]
General
Source Selection
(SOURCE)
The source changes as follows every time [SOURCE]
is pressed.
Radio
CD or MP3/WMA Player
AUX1
Source connected to the System-up Connector
(ex. CD changer)
Shift to connected
device
When an Optional Device is
Connected to System-up Connector
[CQ-C3305W]
Page 22

CQ-C5305W/C3305W
10
CQ-C5305W/C3305W
11
English
CD Changer
Operation Flow
CD Changer
1 Load a magazine (discs).
When a magazine is already loaded, press
[SOURCE] to select the CD changer mode.
The unit recognizes the magazine and starts playing
automatically.
2 Select a desired portion.
Disc Selection
[] (DISC): Next disc
[] (DISC): Preceding disc
Track Selection
[] (TRACK): Next track
[] (TRACK): Preceding track (press twice)
Note: Hold down for fast forward/reverse.
Random, Scan, Repeat Play
(RANDOM, SCAN, REPEAT)
Connected an optional CD changer can be controlled by this unit.
CD Changer Mode
Display
Notes:
• Trouble may occur while playing CD-Rs. Refer to the section
on “Notes on CD/CD Media (CD-ROM, CD-R, CD-RW)”. (
Operating Instructions)
• This unit does not support the following through the CD
changer.
• CD-RW playback. (except when CX-DP880N is
connected)
• MP3/WMA/AAC playback.
• CD text display.
• Pausing does not function in the CD changer mode.
Random Play
All the available tracks are played in a random sequence.
Press [4] (RANDOM). lights.
Press again to cancel.
Disc Random Play
All the available tracks on the current disc are played in
a random sequence.
Hold down [4] (RANDOM) for 2 sec. or
more. lights.
Hold down again to cancel.
Scan Play
The fi rst 10 seconds of each track is played in sequence.
Press [5] (SCAN).
Press again to cancel.
Disc Scan Play
From the next disc, the fi rst 10 seconds of the fi rst track
of all the discs is played in sequence.
Hold down [5] (SCAN) for 2 sec. or more.
lights.
Hold down again to cancel.
Repeat Play
The current track is repeated.
Press [6] (REPEAT). lights.
Press again to cancel.
Disc Repeat Play
The current disc is repeated.
Hold down [6] (REPEAT) for 2 sec. or
more. lights.
Hold down again to cancel.
Functions Only by Remote Control Unit
Direct Access
A disc can be directly selected.
Example: disc number 5
1
Press [#] (NUMBER).
2
Press [5].
3
Press [SET].
Notes:
• To suspend direct selection, press [DISP].
• Random, Disc Random, Scan, Disc Scan, Repeat and
Disc Repeat plays are canceled once [#] is pressed.
Display Change
(DISP: Display)
Play Mode indicators
Lights when each mode is activated.
Random play
Repeat play
Disc Random, Disc Repeat, Disc Scan
Disc numberTime
Tra ck
Press [DISP].
Track/time/disc number
(Default)
Clock time
Display off
Lights when the changer is
connected.
\CQ-C5305W]
Page 23

CQ-C5305W/C3305W
12
CQ-C5305W/C3305W
13
English
CD Changer
Operation Flow
1 Load a magazine (discs).
When a magazine is already loaded, press
[SOURCE] to select the CD changer mode.
The unit recognizes the magazine and starts playing
automatically.
2 Select a desired portion.
Disc Selection
[] (DISC): Next disc
[] (DISC): Preceding disc
Track Selection
[] (TRACK): Next track
[] (TRACK): Preceding track (press twice)
Note: Hold down for fast forward/reverse.
Random, Scan, Repeat Play
(RANDOM, SCAN, REPEAT)
Connected an optional CD changer can be controlled by this unit.
CD Changer Mode
Display
Notes:
• Trouble may occur while playing CD-Rs. Refer to the section
on “Notes on CD/CD Media (CD-ROM, CD-R, CD-RW)”. (
Operating Instructions)
• This unit does not support the following through the CD
changer.
• CD-RW playback. (except when CX-DP880N is
connected)
• MP3/WMA playback.
• CD text display.
• Pausing does not function in the CD changer mode.
Random Play
All the available tracks are played in a random sequence.
Press [4] (RANDOM). lights.
Press again to cancel.
Disc Random Play
All the available tracks on the current disc are played in
a random sequence.
Hold down [4] (RANDOM) for 2 sec. or
more. lights.
Hold down again to cancel.
Scan Play
The fi rst 10 seconds of each track is played in sequence.
Press [5] (SCAN).
Press again to cancel.
Disc Scan Play
From the next disc, the fi rst 10 seconds of the fi rst track
of all the discs is played in sequence.
Hold down [5] (SCAN) for 2 sec. or more.
lights.
Hold down again to cancel.
Repeat Play
The current track is repeated.
Press [6] (REPEAT). lights.
Press again to cancel.
Disc Repeat Play
The current disc is repeated.
Hold down [6] (REPEAT) for 2 sec. or
more. lights.
Hold down again to cancel.
Display Change
(DISP: Display)
Play Mode indicators
Lights when each mode is activated.
Random play
Repeat play
Disc Random, Disc Repeat,
Disc Scan
Disc numberTimeTra ck
Press [DISP].
Track/time/disc number
(Default)
Clock time
Display off
Lights when the changer is
connected.
[CQ-C3305W]
CD Changer
Page 24

CQ-C5305W/C3305W
14
CQ-C5305W/C3305W
15
English
iPod Control
Operation Flow
iPod Control
Repeat, Shuffl e Play
Connection of the optional direct cable for iPod (CA-DC300N) allows users to operate the iPod including fi le selection and fi le
sequence change with the buttons on this unit.
1 Connect the iPod.
2 Press [SOURCE] to select the iPod
mode. Playback starts.
Note: If playback does not start, press [BAND]
().
3 Select a desired portion.
File Selection
[]: Next fi le
[]: Beginning of the current fi le
For the preceding fi le, press twice.
Notes:
• Hold down for fast forward/reverse.
• When fast forward comes to the end of a fi le
or fast reverse comes to the beginning of a fi le,
regular playback starts even if the fast forward or
reverse button is pressed.
Playing Mode Selection
(LIST)
iPod Mode Display
Lights when the direct cable
for iPod (CA-DC300N) is
connected.
1 Press [] (LIST) to activate the
Playing Mode Selection mode.
2 Tu r n [VOL] clockwise or
counterclockwise to adjust.
PLAYLIST: Playback by playlist (Default)
ARTIST: Playback by artist
ALBUM: Playback by album
3 Press [VOL] (PUSH SEL:
Select) to determine the
selection.
Notes:
• The iPod equipped with a dock connector is exclusively
connectable. Further information about the controllable
iPod is described below.
Controllable iPod/software version
• 3rd generation iPod/ver. 2.3
• 4th generation iPod/ver. 3.1.1
• 5th generation iPod/ver. 1.2 (Video playback is not
supported.)
• iPod photo/ver. 1.2.1
• iPod mini/ver. 1.4.1
• iPod nano/ver. 1.2
* Operation check has been completed with software
available at the end of September, 2006. We do not
guarantee the operation with our future products or
upgraded software.
• Please make sure to detach the iPod after turning off the
car engine (turning the ACC to OFF). The iPod may not shut
down while still connected, which may result in battery
depletion.
• Please do not connect iPod accessories such as an iPod
remote control or headphones while connected with the unit.
The unit may not operate correctly.
• Connect this unit after turning down the volume of the iPod.
• “NO IPOD” appears until the iPod is recognized after
connecting the iPod, turning on the power of the main unit,
or performing source selection on the main unit side. This
indicates there is nothing wrong with the main unit.
• We do not guarantee all the operations of connectable
devices.
4 Tu r n [VOL] clockwise or
counterclockwise to select
a portion to be played.
5 Press [VOL] (PUSH SEL:
Select) to determine the
selection.
Note: To select playing mode in
step 2, press [] (LIST).
Notes:
• To return to the regular mode, press [DISP].
• Files without an album name or an artist name are not
playable in the playing mode of the album or artist
display respectively.
iPod number, 1 (iPod 1)/2 (iPod 2),
Lights when the Expansion Module
(CY-EM100N) is connected.
Display Change
(DISP: Display)
Repeat Play
The current fi le is repeated.
Press [6] (REPEAT). lights.
Press again to cancel.
Note: The All Repeat Play function of iPod is always
activated and cannot be canceled from this unit.
Shuffl e
The shuffl e function of iPod corresponds to the
RANDOM function of this unit.
Songs
All the available fi les are played in a random sequence.
Press [4] (RANDOM). lights.
Press again to cancel.
Albums
All the playable albums are played in a random
sequence.
Hold down [4] (RANDOM) for 2 sec. or
more. blinks.
Hold down again to cancel.
Pause
Press [BAND] ().
Press again to cancel.
Play Mode indicators
Lights when each mode is activated.
Repeat play
Shuffl e play (songs)
Blinks when each mode is activated.
Shuffl e play (albums)
Press [DISP].
Current fi le/all
fi les/iPod number
(Default)
Time/iPod number
(Data reading)
Album name/title
name
(Data reading)
Artist name/title name
Clock time
Display off
Notes:
• To have another circle scroll while a text is displayed,
press [3] (SCROLL). If the number of displayed
characters is 8 or less, the characters do not scroll.
• “NO TEXT” is displayed when there is no information.
• The title may not be displayed correctly if it is longer
than 250 alphameric characters.
\CQ-C5305W]
File indicator (Current fi le/All fi les)
A number up to 999 is displayable.
Page 25

CQ-C5305W/C3305W
16
CQ-C5305W/C3305W
17
English
iPod Control
Operation Flow
Repeat, Shuffl e Play
Connection of the optional direct cable for iPod (CA-DC300N) allows users to operate the iPod including fi le selection and fi le
sequence change with the buttons on this unit.
1 Connect the iPod.
2 Press [SOURCE] to select the iPod
mode. Playback starts.
Note: If playback does not start, press [BAND]
().
3 Select a desired portion.
File Selection
[]: Next fi le
[]: Beginning of the current fi le
For the preceding fi le, press twice.
Notes:
• Hold down for fast forward/reverse.
• When fast forward comes to the end of a fi le
or fast reverse comes to the beginning of a fi le,
regular playback starts even if the fast forward or
reverse button is pressed.
Playing Mode Selection
(LIST)
iPod Mode Display
Lights when the direct cable for iPod
(CA-DC300N) is connected.
1 Press [] (LIST) to activate the
Playing Mode Selection mode.
2 Tu r n [VOL] clockwise or
counterclockwise to adjust.
PLAYLIST: Playback by playlist (Default)
ARTIST: Playback by artist
ALBUM: Playback by album
3 Press [VOL] (PUSH SEL:
Select) to determine the
selection.
Notes:
• The iPod equipped with a dock connector is exclusively
connectable. Further information about the controllable
iPod is described below.
Controllable iPod/software version
• 3rd generation iPod/ver. 2.3
• 4th generation iPod/ver. 3.1.1
• 5th generation iPod/ver. 1.2 (Video playback is not
supported.)
• iPod photo/ver. 1.2.1
• iPod mini/ver. 1.4.1
• iPod nano/ver. 1.2
* Operation check has been completed with software
available at the end of September, 2006. We do not
guarantee the operation with our future products or
upgraded software.
• Please make sure to detach the iPod after turning off the
car engine (turning the ACC to OFF). The iPod may not shut
down while still connected, which may result in battery
depletion.
• Please do not connect iPod accessories such as an iPod
remote control or headphones while connected with the unit.
The unit may not operate correctly.
• Connect this unit after turning down the volume of the iPod.
• “NO IPOD” appears until the iPod is recognized after
connecting the iPod, turning on the power of the main unit,
or performing source selection on the main unit side. This
indicates there is nothing wrong with the main unit.
• We do not guarantee all the operations of connectable
devices.
4 Tu r n [VOL] clockwise or
counterclockwise to select
a portion to be played.
5 Press [VOL] (PUSH SEL:
Select) to determine the
selection.
Note: To select playing mode in
step 2, press [] (LIST).
Notes:
• To return to the regular mode, press [DISP].
• Files without an album name or an artist name are not
playable in the playing mode of the album or artist
display respectively.
iPod number, 1 (iPod 1)/2 (iPod 2),
Lights when the Expansion Module (CY-EM100N) is connected.
Display Change
(DISP: Display)
Repeat Play
The current fi le is repeated.
Press [6] (REPEAT). lights.
Press again to cancel.
Note: The All Repeat Play function of iPod is always
activated and cannot be canceled from this unit.
Shuffl e
The shuffl e function of iPod corresponds to the
RANDOM function of this unit.
Songs
All the available fi les are played in a random sequence.
Press [4] (RANDOM). lights.
Press again to cancel.
Albums
All the playable albums are played in a random
sequence.
Hold down [4] (RANDOM) for 2 sec. or
more. blinks.
Hold down again to cancel.
Pause
Press [BAND] ().
Press again to cancel.
Play Mode indicators
Lights when each mode is activated.
Repeat play
Shuffl e play (songs)
Blinks when each mode is activated.
Shuffl e play (albums)
Press [DISP].
Current fi le/all fi les/iPod
number (Default)
Time/iPod number
(Data reading)
Title name
(Data reading)
Album name
(Data reading)
Artist name
Clock time/iPod number
Display off
Notes:
• To have another circle scroll while a text is displayed,
press [3] (SCROLL). If the number of displayed
characters is 8 or less, the characters do not scroll.
• “NO TEXT” is displayed when there is no information.
• The title may not be displayed correctly if it is longer
than 250 alphameric characters.
[CQ-C3305W]
iPod Control
File indicator (Current fi le/All fi les)
A number up to 999 is displayable.
Page 26

CQ-C5305W/C3305W
18
CQ-C5305W/C3305W
19
English
Hands-Free Phone System
Preparation
Hands-Free Phone System
Connecting Hands-Free Phone System
Connect the Hands-Free Phone System (CY-BT100N)
and establish the pairing. Refer to the instruction
manual for the Hands-Free Phone System for further
information.
Note: This unit is designed only for receiving calls. It
cannot send calls.
Audio Setting
Adjust the Ring Volume
Tu r n [VOL] clockwise or
counterclockwise to adjust
the ring volume when a call
is coming in.
: Up
: Down
Notes:
• The volume level adjusted here is linked to the talk
volume.
• Depending on the model of a cellular phone, the ring
tone comes from the main unit of the phone but
may be inaudible. In that case, the volume cannot be
adjusted during an incoming phone call.
Operation Flow
[Hang-up]/Red LED
Be sure to read “Safety Information” in the Operating Instructions for the Hands-Free Phone System before use.
Status indicator (Blue LED)
Lights: Call waiting/Talking
Stays out: Not connected
Blinks rapidly: Receiving a call
Blinks slowly:
Pairing/Reconnecting
Notes:
• Only outline is described here. Refer to the operating
instructions for the Hands-Free Phone System for further
information.
• We do not guarantee all the operations of connectable
devices.
Speaker Selection
(Setting range: LEFT, BOTH, RIGHT, default: BOTH)
SP LEFT: Sound from left speaker
SP BOTH: Sound from both speakers
(Default)
SP RIGHT: Sound from right speaker
Notes:
• The volume can also be adjusted directly using [VOL]
on the main unit. (
Operating Instructions)
• To return to the regular mode, press [DISP].
• If no operation takes place for more than 5 seconds
in audio setting (2 seconds in the volume adjustment)
the display returns to the regular mode.
1 Press [Hang-on] on the Hands-Free
Phone System and pick up the phone.
The phone is in the incoming state.
2 Adjust the volume if necessary.
3 Press [Hang-up] on the Hands-Free
Phone System and hung up the phone.
Notes:
• “CONNECT” is displayed when information of the
calling party cannot be acquired.
• To have another circle scroll while a telephone number
is displayed, press [3] (SCROLL). If the number of
displayed characters is 8 or less, the characters do not
scroll.
Bluetooth Hands-Free Kit Mode
This mode is not selectable by pressing [SOURCE],
but activated by receiving an incoming call. (To pick up
the phone, press [Hang-on] on the Bluetooth handsfree kit.)
“HANDS-FREE” is scrolled when a call is coming in.
The telephone number of the calling party is
displayed.
Operation Flow (continued)
Reject Calls
Pressing [Hang-up] allows users to reject a call when
the call is coming in.
Bluetooth Disconnection/Reconnection
Pressing [Hang-up] allows users to temporarily
disconnect when the phone is in the waiting state.
Pressing [Hang-on] allows users to reconnect when
the Bluetooth unit is temporarily disconnected.
1 Press [VOL] (PUSH SEL:
Select) to open the menu.
2 Press [VOL] (PUSH SEL:
Select) to select a mode
to be adjusted.
3 Tu r n [VOL] clockwise
or counterclockwise to
adjust.
Volume Adjustment
(Setting range: 0 to 40, Default: 18)
\CQ-C5305W]
: Up
: Down
[CQ-C3305W]
: Up
: Down
Switch Unit
[Hang-on]/Blue LED
Page 27

CQ-C5305W/C3305W
20
CQ-C5305W/C3305W
21
English
Troubleshooting
CD Changer ControliPod Control
If You Suspect Something Wrong
Check and take steps as described below.
If the described suggestions do not solve the problem, it is
recommended to take the unit to your nearest authorized
Panasonic Service Center. The product should be serviced only
by qualifi ed personnel. Please refer the checking and the repair
to professionals. Panasonic shall not be liable for any accidents
arising out of neglect of checking the unit or your own repair
after your checking.
Never take measures especially those other than indicated by
italic letters in “Possible solution” described below because
those are too dangerous for users to handle themselves.
Warning
• Do not use the unit in an irregular condition, for example,
without sound, or with smoke or a foul smell, which can
cause ignition or electric shock. Immediately stop using
the unit and consult your dealer.
• Never try to repair the unit by yourself because it is
dangerous to do so.
Display Possible cause Possible solution
The disc is dirty or upside down.
Check the disc.
(After 5 seconds)
The next disc
automatically
The disc has scratches.
Eject the magazine.
• Check the disc.
• Load the disc again.
No operation by some cause.
Eject the magazine. If failure persists, press the reset switch on the CD
changer. If normal operation is not restored, consult your dealer or the
nearest Panasonic Service Center to ask for repairs.
No disc is in the CD Changer (magazine).
Insert discs into the CD changer (magazine).
The changer has become disconnected from the unit in the changer mode.
Verify the wiring.
Note: Messages in the action and display sections of the error chart vary with changer. Refer to the operating
instructions for the CD changer for details.
\CQ-C5305W] [CQ-C3305W]
CD Changer ControliPod Control
If You Suspect Something Wrong
Check and take steps as described below.
If the described suggestions do not solve the problem, it is
recommended to take the unit to your nearest authorized
Panasonic Service Center. The product should be serviced only
by qualifi ed personnel. Please refer the checking and the repair
to professionals. Panasonic shall not be liable for any accidents
arising out of neglect of checking the unit or your own repair
after your checking.
Never take measures especially those other than indicated by
italic letters in “Possible solution” described below because
those are too dangerous for users to handle themselves.
Warning
• Do not use the unit in an irregular condition, for example,
without sound, or with smoke or a foul smell, which can
cause ignition or electric shock. Immediately stop using
the unit and consult your dealer.
• Never try to repair the unit by yourself because it is
dangerous to do so.
Display Possible cause Possible solution
The disc is dirty or upside down.
Check the disc.
(After 5 seconds)
The next disc
automatically
The disc has scratches.
Eject the magazine.
• Check the disc.
• Load the disc again.
No operation by some cause.
Eject the magazine. If failure persists, press the reset switch on the CD
changer. If normal operation is not restored, consult your dealer or the
nearest Panasonic Service Center to ask for repairs.
No disc is in the CD Changer (magazine).
Insert discs into the CD changer (magazine).
The changer has become disconnected from the unit in the changer mode.
Verify the wiring.
Note: Messages in the action and display sections of the error chart vary with changer. Refer to the operating
instructions for the CD changer for details.
Display Possible cause Possible solution
The iPod cable was disconnected in the iPod mode.
Reconnect the iPod cable.
Your iPod has no playable music.
Download playable music to your iPod.
Display Possible cause Possible solution
The iPod cable was disconnected in the iPod mode.
Reconnect the iPod cable.
Your iPod has no playable music.
Download playable music to your iPod.
Troubleshooting
Page 28

CQ-C5305W/C3305W
83
CQ-C5305W/C3305W
82
Memorandum
Memorandum
Page 29

Printed in ChinaYEFM262786A FT1106-1116
Matsushita Electric Industrial Co., Ltd.
Web Site: http://panasonic.net
 Loading...