

Page 1
Operating Instructions <Operations and Settings>
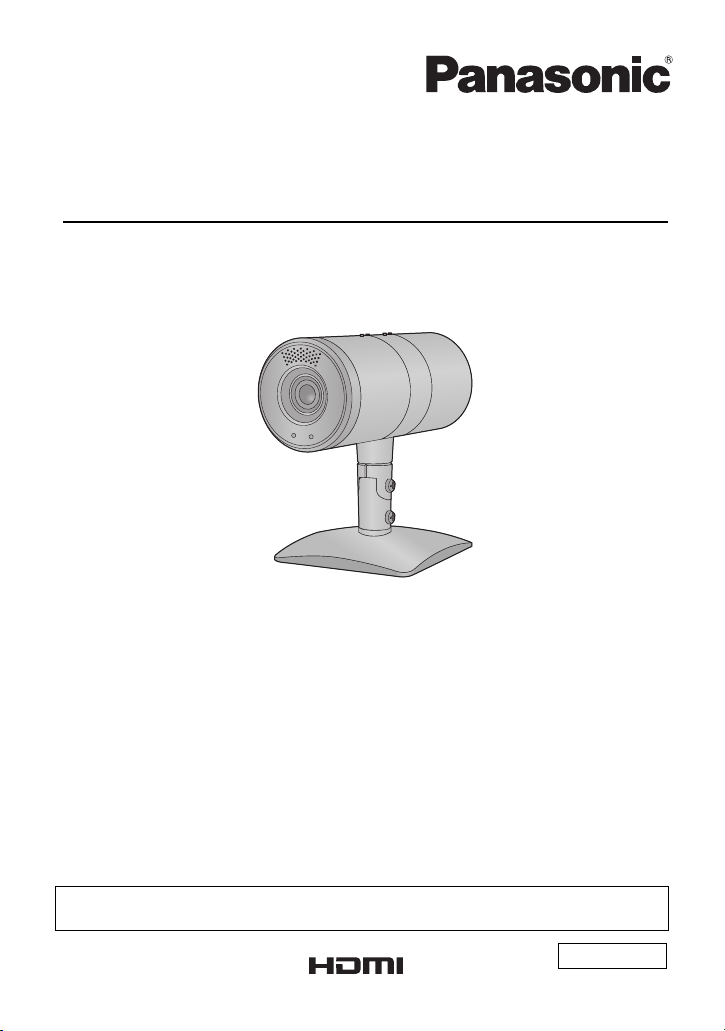
HD Integrated Camera
Model No. AW-HE2P
AW-HE2E
Please read these instructions carefully before using this product, and save this manual for
future use.
This manual describes the operations of the unit in detail.
For the assembly and basic operations of the unit, please refer to <Basics>.
ENGLISH
F1012KY0 VQT4N23
Page 2

Contents
Read this first!...........................................3
Controller ...................................................4
Operations available using
the controller ......................................... 4
Names and Functions of
Main Parts ............................................ 4
Before Operating With
the Controller ........................................ 5
Display/Hide the Color Bar ................... 5
Turning On the Unit / Setting the Unit to
Standby Mode ........................................... 6
Operating on the web setting
screen ................................................... 6
Operating with the wireless remote
controller ............................................... 6
Operating using the controller .............. 7
Using the Camera Menu ........................... 9
Operating using the wireless
remote controller .................................. 9
Operating using the controller ............ 10
Zoom, Pan/Tilt ......................................... 12
Operating on the Web
setting screen ..................................... 12
Operating using the wireless remote
controller .............................................13
Operating using the controller ............ 14
Setting the White Balance ...................... 15
Setting using the Web
setting screen ..................................... 15
Operating using the wireless remote
controller .............................................17
Operating using the controller ............ 17
Adjust the Brightness.............................19
Setting using the Web setting
screen ................................................. 19
Operating using the wireless remote
controller .............................................19
Operating using the controller ............ 20
PinP (Picture in Picture) Function......... 21
Displaying PinP .................................. 21
Switching the Control Mode ............... 22
Changing the PinP Retrieval
Position ............................................... 23
Zooming in and out on a PinP
image ..................................................24
Changing the PinP
Display Position .................................. 25
Using the Preset Memory ...................... 26
Operating Using the Web
setting screen ..................................... 26
Operating using the wireless remote
controller ............................................ 27
Operating using the controller ............ 27
Using the Web setting screen/
Camera Menu to Configure Settings..... 28
Basic screen ....................................... 29
Image screen ..................................... 30
User mng. screen ............................... 37
Network screen .................................. 39
Maintenance screen ........................... 41
Setting Using the Camera Menu ........ 44
Troubleshooting ..................................... 45
Precautions when using
a computer ......................................... 50
About copyright...................................... 56
- 2 -
Page 3

Read this first!
∫ Starting the web setting screen (Live screen/Setup screen)
For the system requirements and the startup of the web setting screen, please refer to
“Operating Instructions <Basics>”.
∫ Regarding photos and illustrations in this manual
Please note that product profile sketches, illustrations, menu screens, etc. in this manual
differ slightly from the real thing.
∫ References made in this manual
References made are as per below:
≥ Pages for reference are indicated by an arrow, for example: l 00
≥ AW-RP 50N, AW-RP50 E # [AW-RP50]
≥ Remote Camera Controller # [Controller]
∫ Regarding personal computer screenshots
Descriptions are provided using screenshots from Windows 7.
∫ Regarding operations using the controller (AW-RP50)
These operating instructions describe a portion of the operations using AW-RP50. Refer to
the AW-RP50 operating instructions while reading this manual.
- 3 -
Page 4
Controller
POWER ALARM F1 CAMERA
OSD
R/B GAIN R/B PED
SYSTEMSETUPCAMERA
SCENE/MODE
DETAIL
DELETESTORE
PAGEMENU F2 EXIT
USER2USER1
PT ACTIVE
PAN/TILT
AUTOIRIS
AUTO
HILOW
PTZ/FOCUS SPEEDFOCUS/PUSH OAF
TELE
ZOOM
WIDE
CAMERA STATUS / SELECTION
PRESET MEMORY / MENU
GAIN/PED
F2
F1
123
AWB/ABB4SHUTTER
5
12345
678910
1
2
3
4
5
6
78
9
10
11
12
14
13
15
17 16
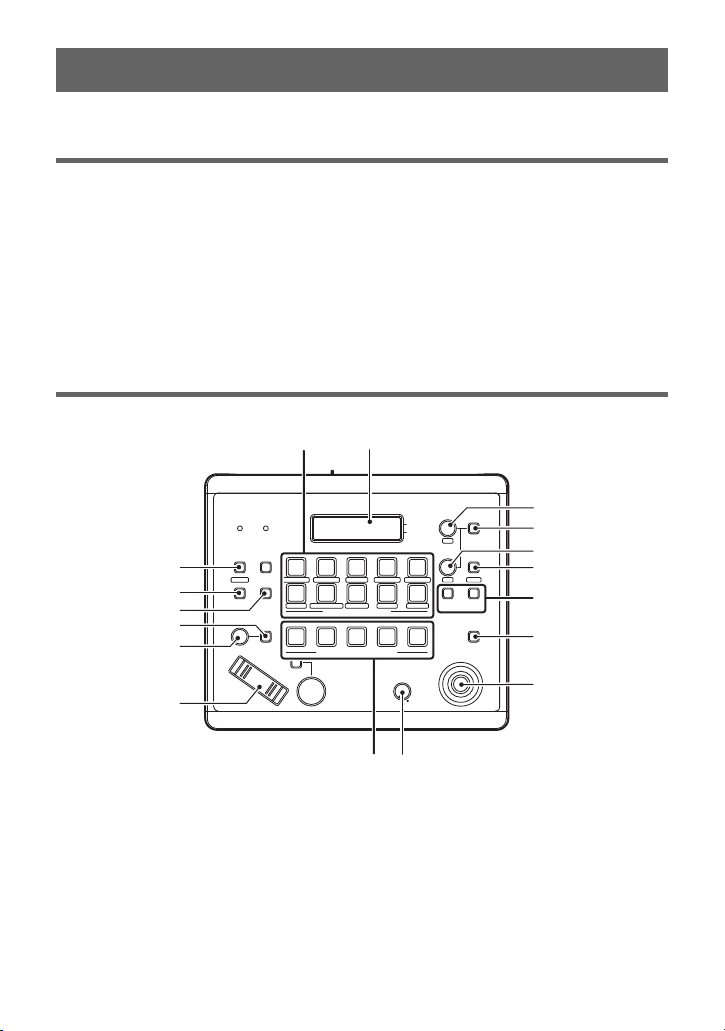
This unit can be operated using a controller (AW-RP50: optional).
Operations available using the controller
The controller (AW-RP50) can perform the following operations.
j Switch between Power ON and Standby
modes
j Camera menu operations
j Zoom operations
j Pan/tilt operations
j White Balance Setting
j Brightness adjustment
≥ For details on operating methods, refer to the description in each item.
Names and Functions of Main Parts
Buttons and dials used for operating this unit are described.
j Preset memory registration/retrieval/
deletion
j USER button operations
(POWER OFF/AWB)
j Display/hide the color bar
1 MENU button
Press this when using the PRESET
MEMORY/MENU button to call up the
controller menu.
2STORE button (l 27)
Press this to register the preset memory
data.
3 DELETE button (l 27)
Press this to delete the preset memory data.
4 IRIS-AUTO button (l 20)
Switches brightness adjustment between
auto mode and manual mode.
5IRIS dial (l 20)
Adjust the brightness manually.
6 ZOOM button (l 14)
- 4 -
Page 5

7 PRESET MEMORY/MENU buttons
Calls up the preset menu or controller menu.
8 LCD panel
9 F1 dial
Operates the camera menu or controller
menu of the unit.
10 CAMERA OSD button (l 10)
Displays the camera menu of the unit.
11 F2 dial
Operates the controller menu.
12 EXIT button
Operates the controller menu to return to the
previous screen.
13 USER button (USER1/USER2)
(l 8, 18)
Used to register a portion of the functions of
the controller menu.
14 PT ACTIVE button (l 14)
Press this when operating the PAN/TILT
lever.
15 PAN/TILT lever (l 14)
16 PTZ/FOCUS SPEED dial (l 14)
Changes the zoom, pan/tilt speed.
17 CAMERA STATUS/SELECTION
buttons 1 to 5
Selects the camera to be operated.
Before Operating With the Controller
Press CAMERA STATUS/SELECTION button 1 to 5 to select the camera.
Display/Hide the Color Bar
Switches the image displayed on the HDMI output monitor or web setting screen to the
camera image/color bar.
1 Press the MENU button to light the button.
2 Press the PRESET MEMORY/MENU 7 button (SCENE/MODE) to light
the button.
≥ The SCENE/MODE menu is displayed on the LCD panel.
3 Turn the F2 dial to select [CAM]
(camera image) or [BAR] (color
bars).
4 Press the F2 dial to set .
≥ You can also switch between camera image display and color bar display by pressing the
MODE button on the wireless remote controller or with the web setting screen.
≥ The color bar display varies depending on the system frequency setting.
- 5 -
Page 6
Turning On the Unit / Setting the Unit to Standby Mode
You can turn on the unit or set it to standby mode on the web setting screen or by the
wireless remote controller or the controller.
≥ When the AC adapter is connected, the unit is automatically set to standby mode and the
status display lamp of the unit lights orange.
≥ When the unit is turned on, the status display lamp lights up green.
≥ Before turning on the unit, turn on all devices connected to the unit.
≥ After putting the unit into standby mode, turn off all devices connected to the unit.
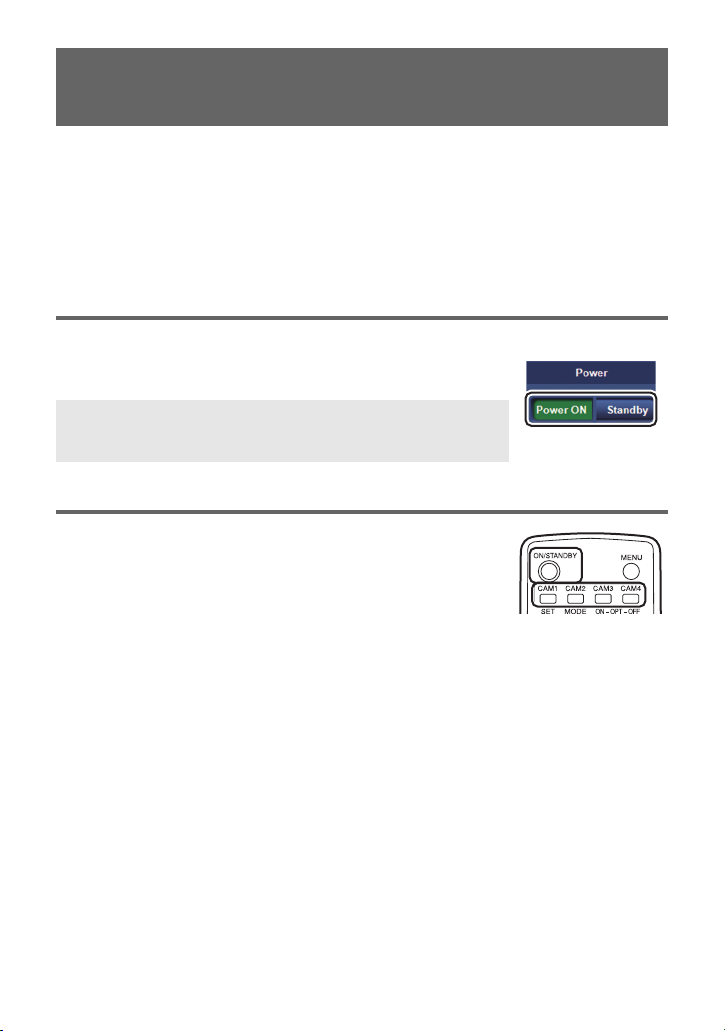
Operating on the web setting screen
1 Start the web setting screen.
2 Click [Power ON] or [Standby].
Power ON: Turns on the unit.
Standby: Sets the unit to standby mode.
Operating with the wireless remote controller
1 Press one of the CAM1 to CAM4 buttons to select
a camera.
2 Press and hold the ON/STANDBY button for
2 seconds.
≥ Every time you press the button for 2 seconds, you can switch the unit from on to standby
mode or vice versa.
≥ When there is more than one camera, repeat steps 1 and 2.
- 6 -
Page 7
Operating using the controller
∫ Operate each unit
1 Hold down CAMERA STATUS/SELECTION button 1 to 5.
≥ The upper row of the LCD panel displays the camera name, and the lower row displays
[POWER ON] or [POWER OFF].
2 Rotate the F2 dial while holding down CAMERA STATUS/SELECTION
button 1 to 5 and select [ON] or [OFF], and press the F2 dial.
ON: Turn on the power of the selected camera.
OFF: Switch the selected camera to Standby mode.
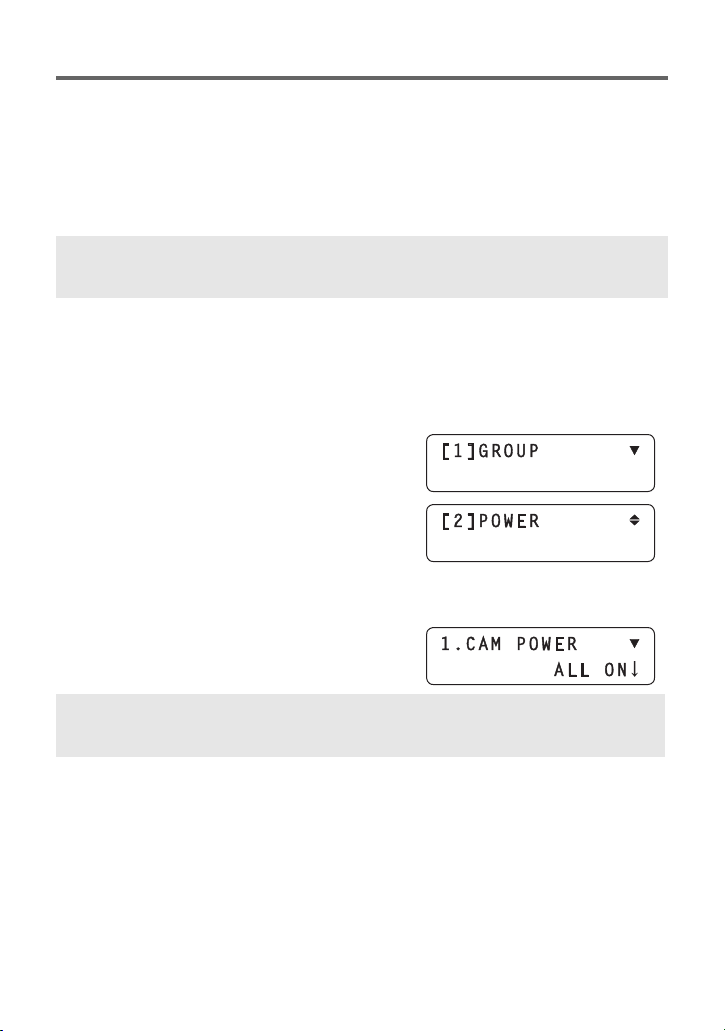
∫ Operate Multiple Cameras
1 Press the MENU button to light the button.
2 Press the PRESET MEMORY/MENU 8 button (CAMERA) to light the
button.
≥ The CAMERA menu is displayed on the LCD
panel.
3 Turn the F1 dial to display the
[POWER] menu, and press the F1
dial.
4 (when operating all cameras)
Turn the F2 dial to select [ALL ON] or
[ALL OFF], and press the F2 dial.
ALL ON: Turn on the power of all cameras.
ALL OFF: Switch all cameras to Standby mode.
- 7 -
Page 8
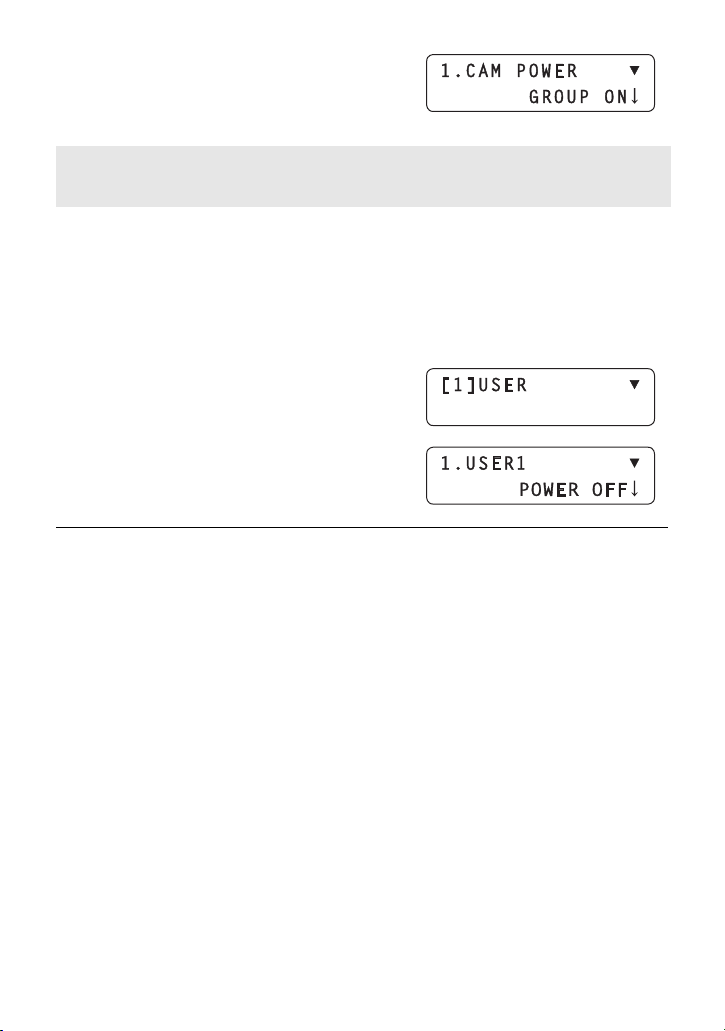
(when operating selected groups)
Turn the F2 dial to select [GROUP
ON] or [GROUP OFF], and press the
F2 dial.
GROUP ON: Turn on the power of the camera in the selected group.
GROUP OFF: Switch the camera in the selected group to Standby mode.
∫ Switch to Standby Mode With the USER Button
Registering [POWER OFF] to the USER buttons (USER1, USER2) and holding down the
USER button will switch all connected cameras to Standby mode.
Register to the USER button
1) Press the MENU button to light the button.
2) Press the PRESET MEMORY/MENU 9 button (SETUP) to light the button.
≥ The SETUP menu is displayed on the LCD panel.
3) Press the F1 dial.
4) Turn the F1 dial to display [USER1] or [USER2].
5) Rotate the F2 dial to select [POWER OFF] and
press the F2 dial.
≥ When the power is turned on, the zoom level, pan/tilt, and PinP display revert to their pre-
standby settings. (POWER ON preset)
≥ To turn off the power, hold down the power button until the status display lamp goes out.
Press the power button to turn the power on. (The power cannot be turned on from the web
setting screen, the wireless remote controller or the controller)
- 8 -
Page 9
Using the Camera Menu
You can operate the camera menu of the unit with the wireless remote controller or the
controller.
The menu screen is displayed on the HDMI output monitor.
Operating using the wireless remote controller
1 Press one of the CAM1 to CAM4 buttons to select a camera.
2 Press and hold the MENU button for 2 seconds.
≥ The camera menu is displayed.
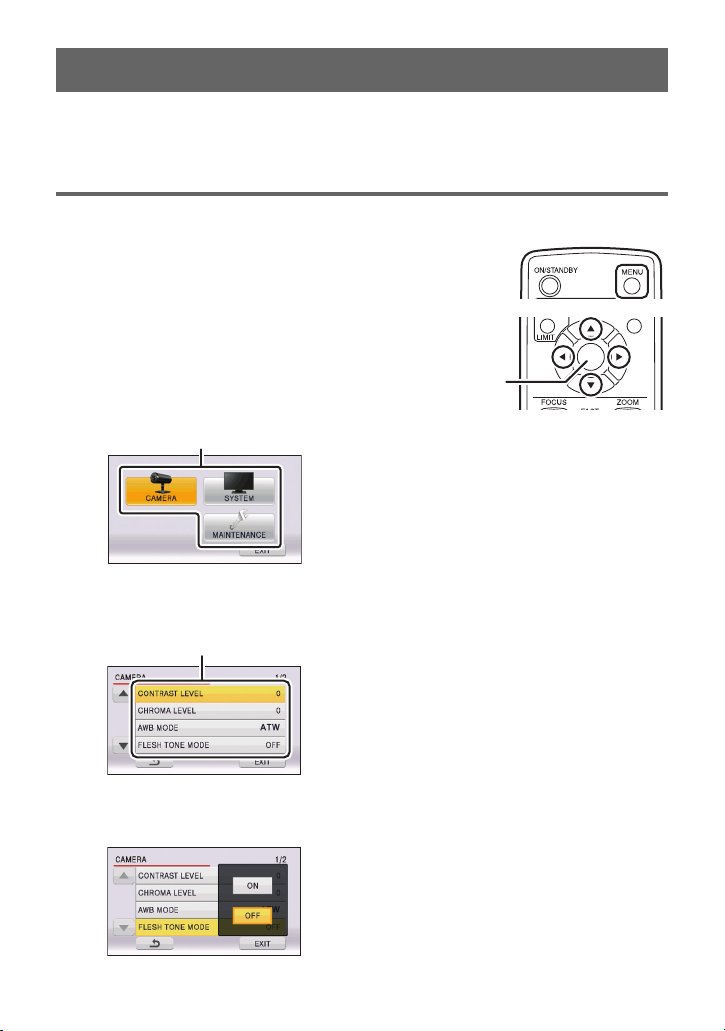
3 Press the 3/4/2/1 buttons and select the
top menu A, and press the enter button B.
4 Press the 3/4 buttons and select the submenu C, and press the 1
button or the enter button.
5 Press the 3/4/2/1 buttons to select an item and press the enter
button to set.
- 9 -
Page 10
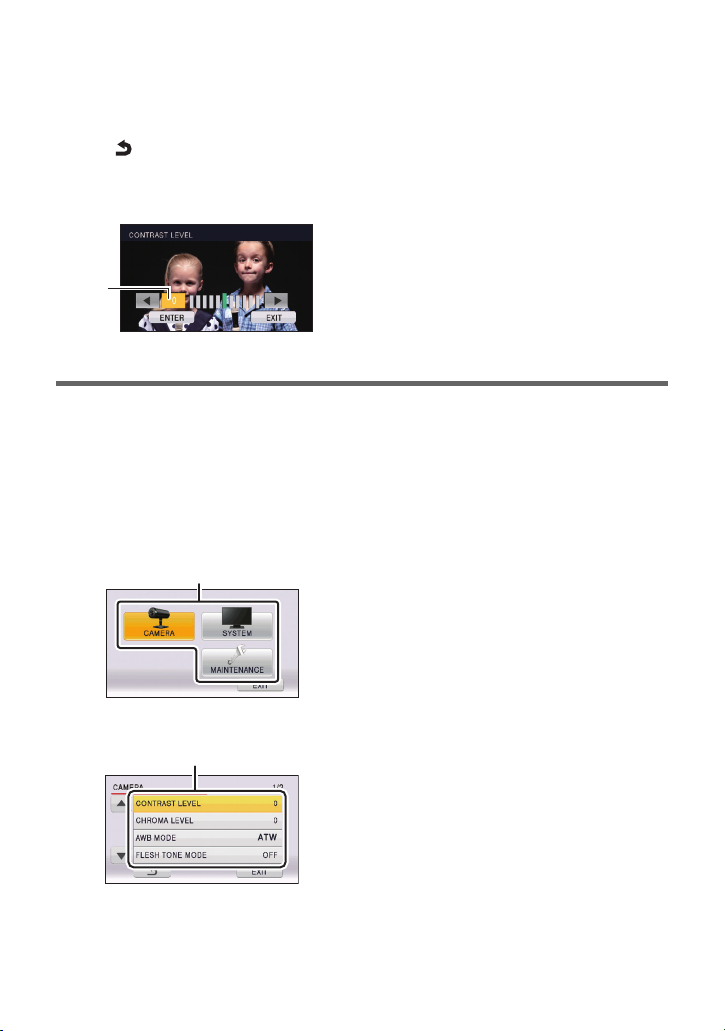
6 Press the 3/4/2/1 buttons to select [EXIT] and press the enter
button to complete the menu settings.
≥ The MENU button can also be pressed to complete the menu settings.
To get back to the previous screen
Select [ ] and then press the enter button.
To adjust the level
Select setting level D and press the 2/1 buttons.
Operating using the controller
1 Press CAMERA STATUS/SELECTION button 1 to 5 and select the
camera.
2 Press and hold the CAMERA OSD button for 2 seconds to light the
button.
≥ The camera menu is displayed.
3 Rotate the F1 dial to select top menu A and press the F1 dial.
4 Rotate the F1 dial to select submenu B and press the F1 dial.
- 10 -
Page 11
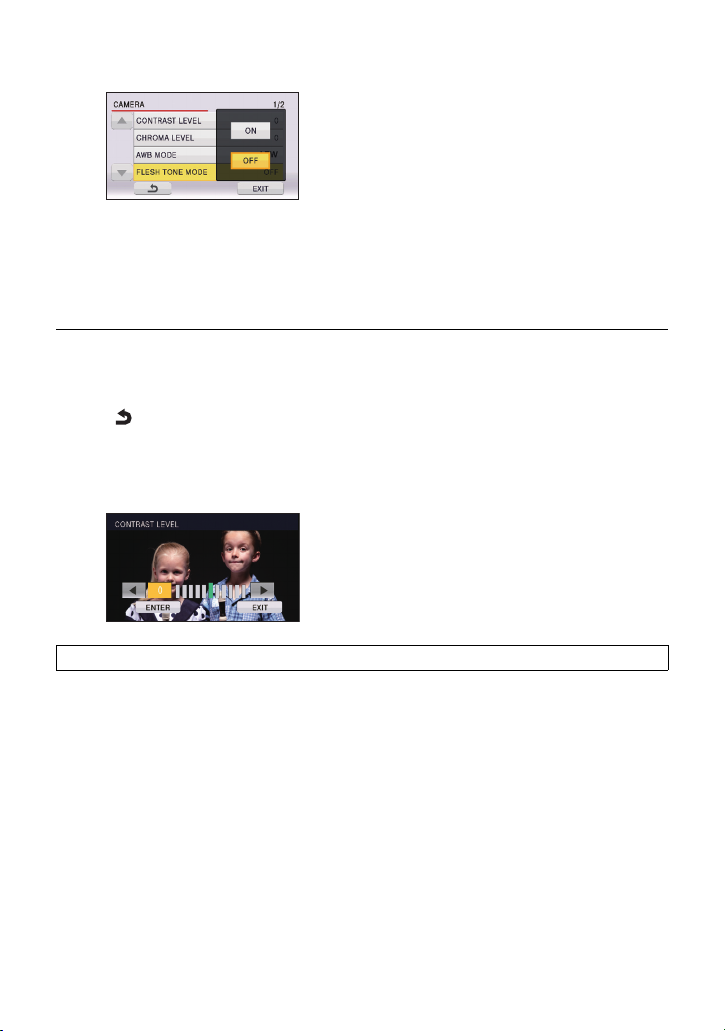
5 Rotate the F1 dial to select each item and press the F1 dial to set it.
6 Press and hold the CAMERA OSD button for 2 seconds to complete
the menu settings.
≥ Turn the F1 dial and select [EXIT], and press the F1 dial to complete the menu settings.
In this case, the CAMERA OSD button on/off and the camera menu display/non-display
may not match.
≥ Switching the camera that is operated when the camera menu is displayed may result in
the CAMERA OSD button on/off and the camera menu display/non-display not matching.
To get back to the previous screen
Select [ ] and then press the F1 dial.
To adjust the level
Rotate the F1 dial to adjust the contrast level.
≥ Press the F1 dial to set the level.
For detailed description of the respective camera menu items, refer to page 28.
- 11 -
Page 12
Zoom, Pan/Tilt
∫ About the zoom
≥ The i.Zoom can magnify up to approximately twice as large as the natural size while the
digital zoom can magnify up to four times as large as the natural size.
(i.Zoom: This zoom function allows you to maintain high-definition picture quality.)
≥ For information on the enabling/disabling of the digital zoom, refer to page 36.
∫ Pan/Tilt
≥ Camera images can be moved horizontally, vertically, and diagonally.
≥ Pan/tilt cannot be performed when the zoom level is k1.
Operating on the Web setting screen
≥ Open the Live screen
≥ While the PinP is displayed, set the control mode to the Main screen. (l 22)
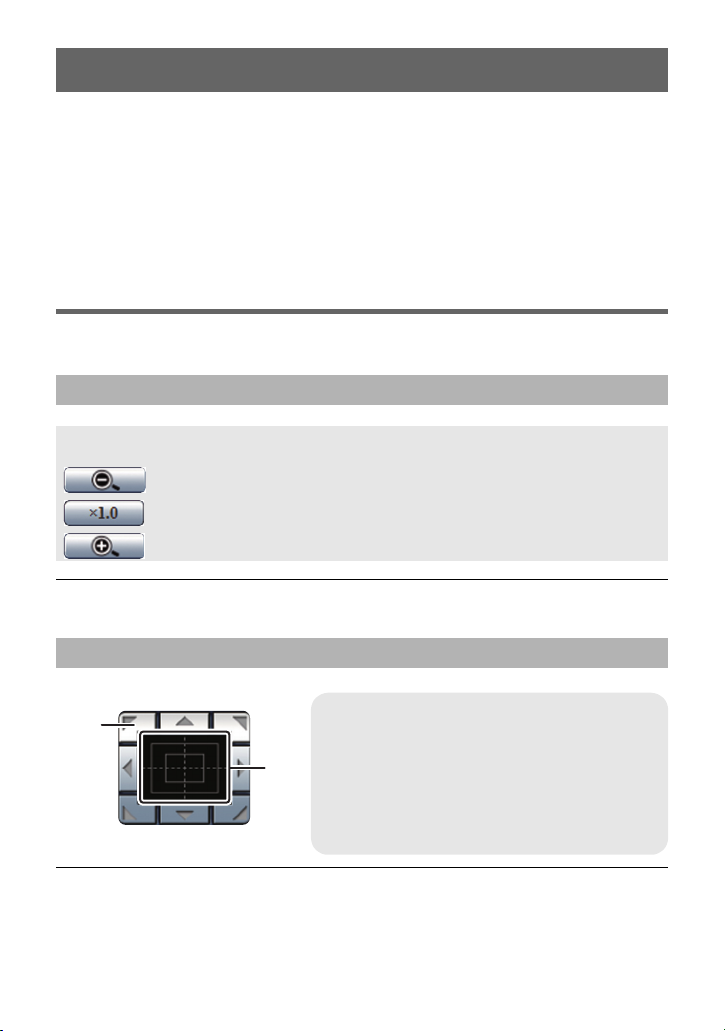
Zoom operations
Zoom button
: Wide-angle recording (zoom out)
: Set the zoom level to k1
: Close-up recording (zoom in)
≥ The zoom speed is the same as the high-speed zoom of the wireless remote controller.
(The zoom speed cannot be changed)
Pan/tilt operations
≥ Dragging and dropping from the control pad area to an area outside the control pad will
mean pan/tilt operations cannot be stopped. In this case, click within the control pad area
to stop operations.
Control pad/button
A Control button:
Click to perform pan/tilt operations.
B Control pad:
Click or drag to perform pan/tilt operations.
The closer to the edge of the pad, the faster
the panning/tilting speed is.
- 12 -
Page 13
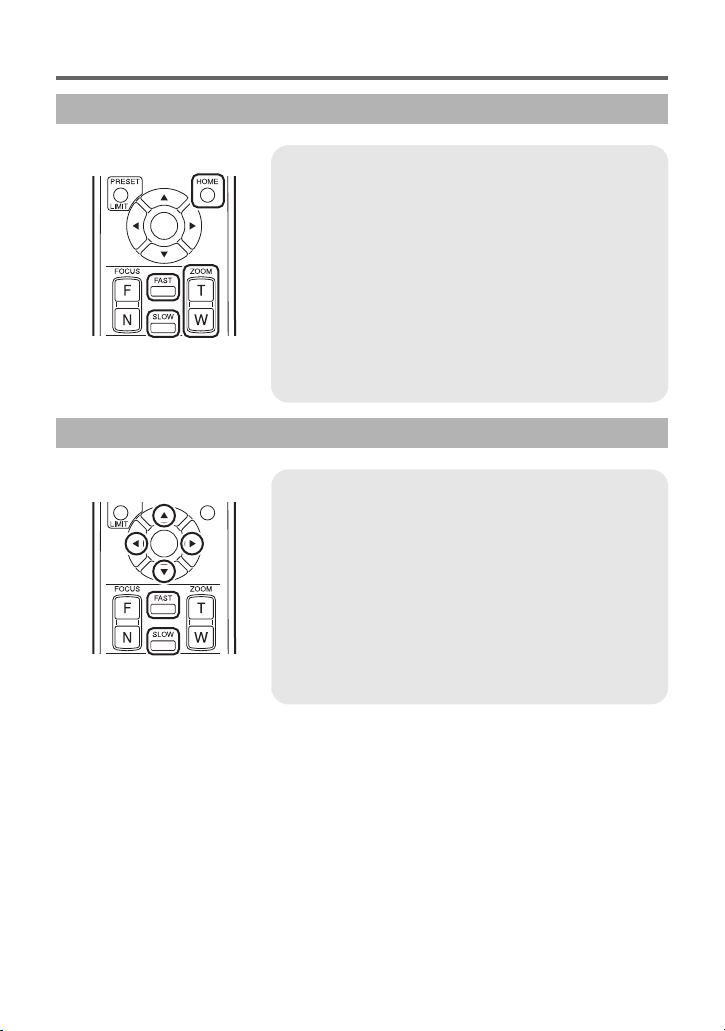
Operating using the wireless remote controller
Zoom operations
ZOOM button
T button: Close-up recording (zoom in)
W button: Wide-angle recording (zoom out)
FAST button/SLOW button
Press the FAST button to increase the zoom speed, and
press the SLOW button to decrease the speed.
≥ If you turn off the unit, high-speed zoom is cancelled.
HOME button
If you press and hold this button for 2 seconds, the zoom
level changes to k1.
Pan/tilt operations
3/4/2/1 button
Pan/tilt left, right, up and down.
≥ Press the 3 or 4 button and the 2 or 1 button
simultaneously to move in a diagonal direction. (This is
the same operation as the diagonal button of the
control buttons in the web setting screen)
FAST button/SLOW button
To increase the pan/tilt speed, press the FAST button. To
decrease the speed, press the SLOW button.
≥ If you turn off the unit, high-speed pan/tilt is cancelled.
- 13 -
Page 14

Operating using the controller
Zoom operations
Press the ZOOM button.
TELE side: Close-up recording (zoom in)
WIDE side: Wide-angle recording (zoom out)
≥ The zooming speed changes depending on the extent to which the button is pressed.
Pan/tilt operations
≥ Hold down the PT ACTIVE button to light up the button.
Move PAN/TILT Lever Up/Down/Left/Right/Angle.
≥ The pan/tilt speed will change depending on the angle that the lever is moved.
≥ The PTZ/FOCUS SPEED dial can be used to change the zoom speed and pan/tilt speed.
- 14 -
Page 15
Setting the White Balance
ATW
AWB A
AWB B
When coloration (white balance) is unnatural due to a light source or the like, set it manually.
≥ This adjustment must be performed when using the unit for the first time or when the unit
has not been used for a prolonged period.
≥ It must be performed when the lighting conditions or brightness has changed.
The following modes are available on the unit:
Icon Mode/Recording conditions
Auto White Balance adjustment
Sunny mode:
Indoor applications with the same conditions as sunny, outdoor applications
Cloudy mode:
Indoor applications with the same conditions as cloudy, outdoor application
Indoor mode 1:
Incandescent light, video lights like in the studio, etc.
Indoor mode 2:
Color fluorescent lamps, sodium lamps in gymnasiums etc.
Manual adjustment mode:
Register a setting suited to a shooting location (White Balance Setting) and
retrieve the setting.
≥ The White Balance Setting cannot be performed when color bars are
displayed.
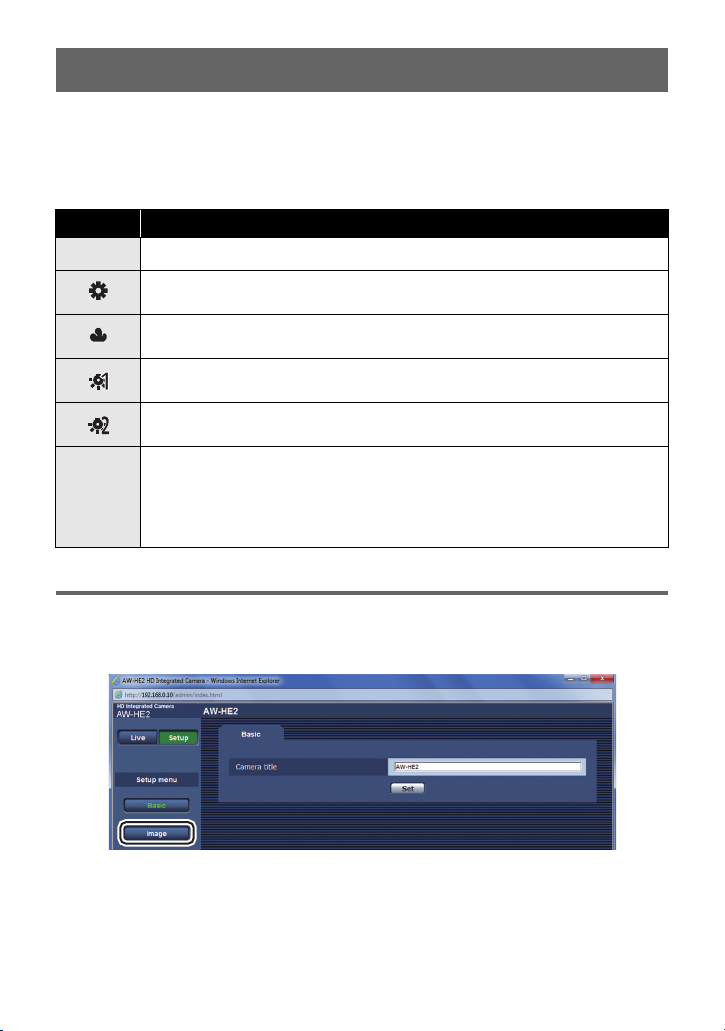
Setting using the Web setting screen
1 Open the Setup screen.
2 Click [Image].
- 15 -
Page 16
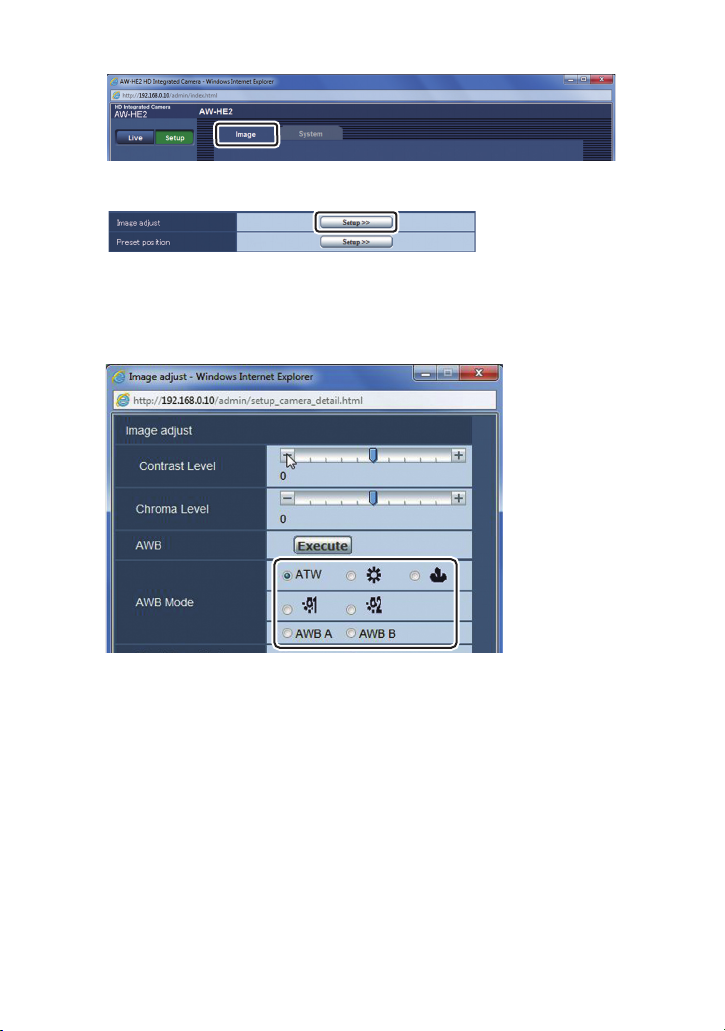
3 Click the [Image] tab on the Image screen.
4 Click [Setup] (Image adjust).
≥ The Image adjust screen opens in a separate window.
5 Select your desired [AWB Mode].
≥ Select a suitable mode by looking at the coloration on the screen.
≥ When [AWB A] or [AWB B] is selected, the registered setting is retrieved.
∫ Performing the White Balance Setting
1 Set the mode to either [AWB A] or [AWB B].
2 Fill the screen with a white subject.
≥ Do not shoot shiny or very bright objects.
3 Click [Execute] for [AWB].
≥ When [OSD Status] is set to [On], [AWB OK] is displayed on the screen and adjustment is
completed.
≥ When the white balance cannot be set, the error message [AWB NG] is displayed on the
screen. When this occurs, use another mode.
- 16 -
Page 17
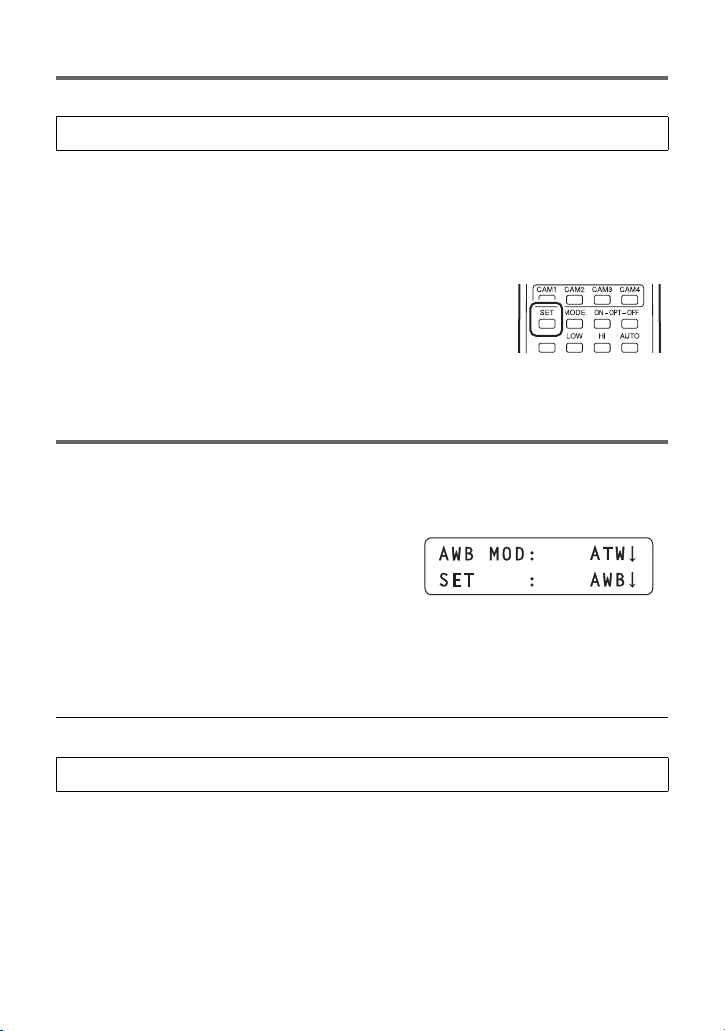
Operating using the wireless remote controller
Select the menu. (l 9)
[CAMERA] # [AWB MODE] # desired setting
∫ Performing the White Balance Setting
1 Set the mode to either [AWB A] or [AWB B].
≥ After setting the mode, end the camera menu.
2 Fill the screen with a white subject.
≥ Do not shoot shiny or very bright objects.
3 Press and hold the SET button of the wireless remote
controller for 2 seconds.
≥ When [OSD Status] is set to [On], [AWB OK] is displayed on the
screen and adjustment is completed.
≥ When the white balance cannot be set, the error message [AWB
NG] is displayed on the screen. When this occurs, use another
mode.
Operating using the controller
1 Press the MENU button to light the button.
2 Press the PRESET MEMORY/MENU 4 button (AWB/ABB) to light the
button.
≥ The AWB/ABB menu is displayed on the LCD
panel.
3 Rotate the F1 dial to select the white balance mode.
≥ [ATW], [AWB A], [AWB B], [3200K] (equivalent to “Indoor mode 1”), and [5600K]
(equivalent to “Sunny mode”) can be selected from the controller menu.
4 Press the F1 dial to set .
≥ When selecting modes other than those above, use the camera menu settings. (l 9)
[CAMERA] # [AWB MODE] # desired setting
- 17 -
Page 18
∫ Set the white balance
1 Set the mode to either [AWB A] or [AWB B].
2 Fill the screen with a white subject.
≥ Do not shoot shiny or very bright objects.
3 Turn the F2 dial to select [AWB], and press the F2 dial.
≥ When [OSD Status] is set to [On], [AWB OK] is displayed on the screen and adjustment is
completed.
≥ When the white balance cannot be set, the error message [AWB NG] is displayed on the
screen. When this occurs, use another mode.
∫ Set the white balance with the USER button
1 Set the mode to either [AWB A] or [AWB B].
2 Fill the screen with a white subject.
≥ Do not shoot shiny or very bright objects.
3 Press the USER button registered with [AWB].
≥ When [OSD Status] is set to [On], [AWB OK] is displayed on the screen and adjustment is
completed.
≥ When the white balance cannot be set, the error message [AWB NG] is displayed on the
screen. When this occurs, use another mode.
≥ Refer to the following for registering to the USER button.
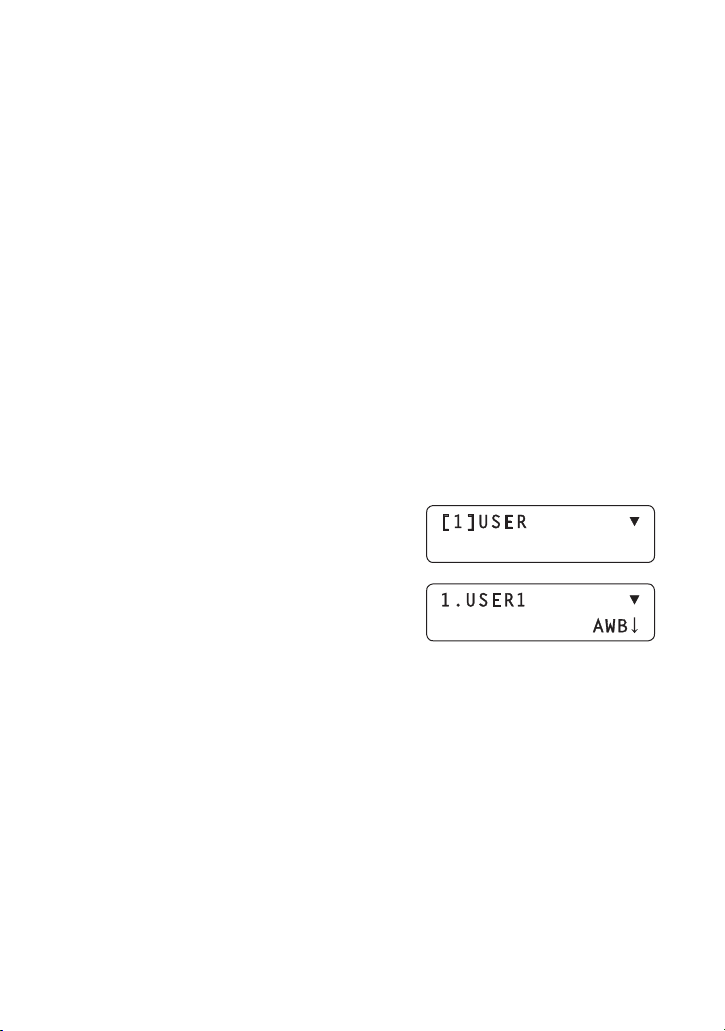
Register to the USER button
1) Press the MENU button to light the button.
2) Press the PRESET MEMORY/MENU 9 button (SETUP) to light the button.
≥ The SETUP menu is displayed on the LCD panel.
3) Press the F1 dial.
4) Turn the F1 dial to display [USER1] or [USER2].
5) Rotate the F2 dial to select [AWB] and press the
F2 dial.
- 18 -
Page 19

Adjust the Brightness
Adjust the brightness of the image.
This unit can be used by switching between auto mode and manual mode.
Auto mode:
Brightness is adjusted automatically to suit the area of shooting.
Manual mode:
Adjust the brightness when taking images in areas that are too bright (or too dark).
≥ [Contrast Level] and [Back Light COMP.] cannot be set in manual mode.
Setting using the Web setting screen
≥ Open the Live screen
: Switches to auto mode.
: Switches to manual mode.
: Adjusts the image darker in manual mode.
: Adjusts the image brighter in manual mode.
Operating using the wireless remote controller
A/IRIS button:
Switches to auto mode.
M/IRIS button:
Switches to manual mode.
IRIS_ button:
Adjusts the image brighter in manual mode.
IRIS` button:
Adjusts the image darker in manual mode.
- 19 -
Page 20

Operating using the controller
IRIS
The unit switches between auto mode and manual mode each time the IRIS-AUTO
button is pressed.
≥ Auto mode is on when the IRIS-AUTO button lights up, and manual mode is on when it
turns off.
IRIS dial:
The image becomes darker when rotating the dial toward A in
manual mode.
The image becomes brighter when rotating the dial toward B in
manual mode.
≥ Holding down the IRIS dial in manual mode, adjusts the
image to the darkest setting.
- 20 -
Page 21

PinP (Picture in Picture) Function
You can cut a portion of a camera image and displays it on a small screen (PinP: Picture in
Picture) in the main screen.
≥ You can change the PinP retrieval position, perform zoom operations for a PinP image,
and change the PinP display position.
A PinP
B Main screen
Displaying PinP
Operating Using the Web setting screen
1 Open the Live screen.
2 Select [On] for [PinP Display].
Operating Using the Camera Menu
Select the menu. (l 9)
[CAMERA] # [PinP DISPLAY] # [ON]
Operating using the wireless remote controller
Press the OPT-ON button.
≥ You can show/hide a PinP image by pressing the button.
≥ On a 1920k1080 pixel monitor, a PinP image is displayed in 640k360 pixels.
≥ When the PinP display is switched on, the movement of images on the monitor may no
longer look smooth.
- 21 -
Page 22

Switching the Control Mode
You can switch the control mode to main screen or PinP while a PinP image is displayed.
Main screen control mode:
You can operate the main screen (zoom, pan/tilt).
PinP control mode:
You can change the PinP retrieval position, and perform zoom operations for a PinP image.
(l 23, 24)
≥ When the control mode is set to PinP, the PinP retrieval
frame A is displayed on the HDMI output monitor, and the
zoom level of the main screen is set to k1.
Operating Using the Web setting screen
1 Open the Live screen.
2 Select [Main] or [PinP] of
[Control].
Main: Sets the control mode to the Main screen.
PinP: Sets the control mode to PinP.
Operating using the wireless remote controller
Press the OPT-OFF button.
≥ The control mode changes each time you press the button.
≥ If you change the control mode from PinP to the Main screen or hide the PinP display, the
zoom magnification and pan/tilt position return to their original states.
≥ The PinP retrieval frame does not appear while the camera menu is displayed.
- 22 -
Page 23

Changing the PinP Retrieval Position
≥ Set the control mode to PinP. (l 22)
Operating Using the Web setting screen
1 Open the Live screen.
2 Click or drag the control pad/buttons.
≥ The operation method is the same as the pan/tilt operations.
(l 12)
≥ The PinP retrieval frame moves and the retrieval position
changes.
≥ When [Home] is selected for [Preset] and [Move] is clicked,
the PinP retrieval position moves to the center of the screen,
and the PinP display zoom level is set to k1.
Operating using the wireless remote controller
Press the 3/4/2/1 button.
≥ The operation method is the same as for pan/tilt operations.
(l 13)
≥ To increase the movement speed, press the FAST button. To
decrease the movement speed, press the SLOW button.
≥ The PinP retrieval frame moves and the retrieval position
changes.
≥ If you press and hold the HOME button for 2 seconds, the PinP
retrieval position moves to the center of the screen and the
PinP display zoom level changes to k1.
≥ The PinP retrieval position can be changed within a screen with an aspect ratio of 16:9
even when [Format] is set to [480p (576p)]*and [Down CONV. Mode] is set to [SideCut].
* When [System Frequency] is [59.94Hz(NTSC)], you can select [480p], and when it is set to
[50Hz(PAL)], you can select [576p].
- 23 -
Page 24

Zooming in and out on a PinP image
≥ Set the control mode to PinP. (l 22)
Operating Using the Web setting screen
1 Open the Live screen.
2 Operate the zoom buttons.
≥ The operations are the same as the main
screen zoom operations. (l 12)
≥ When [Home] is selected for [Preset] and [Move] is clicked, the PinP retrieval position
moves to the center of the screen, and the PinP display zoom level is set to k1.
Operating using the wireless remote controller
Press the ZOOM button.
≥ The operations are the same as the Main screen zoom
operations. (l 13)
≥ To zoom faster, press the FAST button. To zoom slower, press the
SLOW button.
≥ If you press and hold the HOME button for 2 seconds, the PinP
retrieval position moves to the center of the screen and the PinP
display zoom level changes to k1.
≥ The PinP retrieval frame becomes smaller to suit the zoom level.
- 24 -
Page 25

Changing the PinP Display Position
You can change the PinP display position to the Upper Right , Lower Right , Upper Left , or
Lower Left area of the main screen.
Operating Using the Web setting screen
1 Open the Live screen.
2 Pull down [PinP Position]
and select your desired
display position.
Operating Using the Camera Menu
Select the menu. (l 9)
[CAMERA] # [PinP POSITION] # Desired display position
- 25 -
Page 26

Using the Preset Memory
You can save desired settings to the preset memory and call them when needed. (Up to 9)
≥ You can save the following settings:
j Zoom level
j Contrast
j PinP display/non-display
j PinP retrieval position
j PinP display zoom level
j PinP display position
j Pan/tilt positions
Operating Using the Web setting screen
1 Open the Live screen.
2 Select one of the numbers [1] to
[9] from the [Preset] pull-down
menu.
3 Click [Set].
≥ The current settings are saved in the preset memory. (When the selected number is
already taken, the current settings replace the old ones.)
To call the settings in the preset memory
Select one of the numbers [1] to [9], and then click [Move].
≥ If you select [Home] and then click [Move] while the control mode is set to the Main screen,
the zoom level changes to k1.
≥ If you select [Home] and then click [Move] while the control mode is set to PinP, the PinP
retrieval position moves to the center of the screen, and the zoom level changes to k1.
j White balance
j Control mode
j Digital zoom enablement/disablement
j Auto mode/manual mode for adjusting
brightness
j Brightness adjustment value
≥ You can also perform the operations from the Setup screen. (l 33)
- 26 -
Page 27

Operating using the wireless remote controller
Press one of the buttons 1 to 9 while pressing the
PRESET button.
≥ The current settings are registered in the preset memory. (When a
number for which settings are already registered is chosen, those
settings are overwritten)
To call the settings in the preset memory
Press one of the buttons 1 to 9.
Operating using the controller
The preset memories of the unit are registered in preset numbers 1 to 9 of the controller
(page number 1, internal page number 1 to 9).
≥ Press CAMERA STATUS/SELECTION button 1 to 5 and select the camera.
1 Press the STORE button to light the button.
2 Hold down the PRESET MEMORY/MENU button 1 to 9.
≥ The current settings are registered in the preset memory. (When a number for settings that
have already been registered is selected, those settings are overwritten)
≥ The button registered with the preset memory lights up.
To call the settings in the preset memory
Press the PRESET MEMORY/MENU button 1 to 9.
≥ When the STORE button or DELETE button are lit up, the preset memory cannot be read.
Press the button to turn off the button.
≥ Retrieving a preset memory will display the present number in the upper right side of the
LCD panel.
To delete the preset memory
1) Press the DELETE button to light the button.
2) Hold down the PRESET MEMORY/MENU button 1 to 9.
≥ The selected number preset memory will be deleted and the button will turn off.
- 27 -
Page 28

Using the Web setting screen/Camera
Menu to Configure Settings
You can configure the unit’s settings on web setting screen (the Setup screen)/camera menu.
This section mainly provides instructions for the web setting screen (the Setup screen),
but some of the items can also be set from the camera menu.
≥ Refer to page 9 for basic operations of the camera menu.
≥ For those items that can only be set in the camera menu, refer to page 44.
1 Open the Setup screen.
2 To open your desired screen, click one of the options A to E.
A Basic screen (Basic settings) (l 29)
B Image screen (Picture quality settings, System settings) (l 30)
C User mng. screen (User management settings) (l 37)
D Network screen (Network settings) (l 39)
E Maintenance screen (Maintenance settings) (l 41)
- 28 -
Page 29

Basic screen
[Camera title]
Enter the name of the unit, and click [Set].
≥ You can enter up to 20 single-byte characters.
≥ You can enter the following characters:
Single-byte numeric
characters
Single-byte alphabetical
characters (upper and
lower cases)
Symbols . @ _
≥ The entered name appears on the camera title part at the top of the web setting screen.
0123456789
ABCDEFGHIJKLMNOPQRSTUVWXYZ
abcdefghijklmnopqrstuvwxyz
- 29 -
Page 30

Image screen
You can adjust the picture quality, save preset memories, configure the system settings, etc..
A [Image] tab
B [System] tab
C Camera image (when a tally light-up signal is received, a red frame is displayed over the
camera image)
D [Setup] (Image adjust)
E [Setup] (Preset position)
- 30 -
Page 31

Adjusting the picture quality on the Image adjust screen
1 Click the [Image] tab on the Image screen.
2 Click [Setup] (Image adjust).
≥ The Image adjust screen opens in a separate window.
[Contrast Level]
Adjust the contrast.
_] and [`] to adjust the level.
Click [
[`5] to [_5]
∫ Setting Using the Camera Menu
1 Select the menu.
[CAMERA] # [CONTRAST LEVEL]
2 Adjust the contrast level. (l 10, 11)
3 (When performing the operations using the wireless
remote controller)
Press the enter button A.
(When performing the operations using the controller)
Press the F1 button.
- 31 -
Page 32

[Chroma Level]
You can adjust the color depth.
_] and [`] to adjust the level.
Click [
[`5] to [_5]
∫ Setting Using the Camera Menu
1 Select the menu.
[CAMERA] # [CHROMA LEVEL]
2 Adjust the level. (l 10, 11)
3 (When performing the operations using the wireless
remote controller)
Press the enter button A.
(When performing the operations using the controller)
Press the F1 button.
[AWB/AWB Mode]
Please refer to page 15.
[Flesh Tone Mode]
This function enables human skin to appear smooth and more beautiful in images.
[Off]/[On]
∫ Setting Using the Camera Menu
[CAMERA] # [FLESH TONE MODE] # [ON]
[DRS]
It is possible to expand the dynamic range by compressing the video signal level of the highly
illuminated area that gets washed out with standard recording.
[Off]/[On]
∫ Setting Using the Camera Menu
[CAMERA] # [DRS] # [ON]
≥ If there are extremely dark or bright parts or the brightness is insufficient, the effect may not
be clear.
- 32 -
Page 33

[Back Light COMP.]
This makes the image brighter to prevent darkening of a backlit subject.
[Off]/[On]
∫ Setting Using the Camera Menu
[CAMERA] # [BACKLIGHT COMPENS.] # [ON]
Using the preset memory on the Preset position screen
1 Click the [Image] tab on the Image screen.
2 Click [Setup] (Preset position).
≥ The Preset position screen opens in a separate window.
A Operations are the same as the preset memory operations for the Live screen. (l 26)
B Operations are the same as the operations for the Live screen. (l 12, 19, 21)
- 33 -
Page 34

Configuring the System Settings on the System Screen
Click the [System] tab on the Image screen.
≥ The System screen opens.
≥ After changing settings, click [Set].
[Format]
You can change the resolution of the HDMI output.
* When [System Frequency] is [59.94Hz(NTSC)], you can select [480p], and when it is set to
[50Hz(PAL)], you can select [576p].
[1080p]/[1080i]/[720p]/[480p (576p)]
*
∫ Setting Using the Camera Menu
[SYSTEM] # [FORMAT] # desired setting
- 34 -
Page 35

[Down CONV. Mode]
The down-conversion mode is selected here.
≥ Only enabled when [Format] is [480p (576p)]*.
* When [System Frequency] is [59.94Hz(NTSC)], you can select [480p], and when it is set to
[50Hz(PAL)], you can select [576p].
[Squeeze]/[SideCut]/[LetterBox]
[Squeeze]: Used when the aspect ratio of the
[SideCut]: Used when the monitor aspect ratio is
[LetterBox]: Used when the monitor aspect ratio is
monitor is 16:9. If the aspect ratio of the
monitor is 4:3, the width of an image is
squashed in and the image is elongated
vertically.
4:3. Based on the vertical length,
portions that extend off the sides of the
screen are cut off, and the angle of view
is adjusted.
4:3. Based on the width, the top and
bottom of the image are blackened, and
the angle of view is adjusted.
∫ Setting Using the Camera Menu
[SYSTEM] # [DOWN CONV. MODE] # desired setting
≥ When the camera menu is being displayed, [SideCut] display becomes [LetterBox] display.
[System Frequency]
You can change the system frequency.
≥ When you press [Set] after setting the option, a message confirming that you want to
reboot the unit is displayed. Press [OK] to restart the unit.
[59.94Hz(NTSC)]/[50Hz(PAL)]
∫ Setting Using the Camera Menu
[SYSTEM] # [SYSTEM FREQ] # desired setting
≥ A message confirming whether you wish to restart the unit is displayed. Select [YES] to
restart the unit.
- 35 -
Page 36

[Digital Zoom]
You can enable/disable the digital zoom (zoom level maximum: k4).
[Off]/[On]
∫ Setting Using the Camera Menu
[SYSTEM] # [D.ZOOM] # desired setting
≥ The larger the digital zoom magnification, the more the image quality is degraded.
[Tally Enable]
“Enable” or “Disable” is set here for the function which turns on/ turns off the tally lamp using
the tally control signal.
[Off]/[On]
∫ Setting Using the Camera Menu
[SYSTEM] # [TALLY] # desired setting
[OSD Status]
You can select whether to show/hide messages such as [AWB OK], which is displayed when
performing the white balance setting ([AWB A]/[AWB B]).
[Off]/[On]
∫ Setting Using the Camera Menu
[SYSTEM] # [OSD STATUS] # desired setting
[IR ID]
You can set the camera’s remote control ID.
≥ This function’s default setting is [CAM1].
[IR Control]
You can enable/disable the wireless remote controller.
[CAM1]/[CAM2]/[CAM3]/[CAM4]
[Off]/[On]
- 36 -
Page 37

User mng. screen
You can register users who can access the unit from a PC or AW-RP50.
≥ Enter and set all of [User name], [Password], [Retype password] and [Access level], and
then click [Set].
[User auth.]
You can set whether to authenticate users when the web setting screen appears.
≥ Click [Set] to complete the setting.
[Off]/[On]
≥ If [On] has been selected as the [User auth.] setting, control will no longer be exercised
from the AW-RP50.
[User name]
You can register user names.
≥ You can register up to 9 users.
≥ You can enter single-byte alphanumeric characters and single-byte symbols.
≥ You can enter up to 32 characters.
- 37 -
Page 38

[Password/Retype password]
You can set an authentication password that a user is asked to enter when the web setting
screen or the Setup screen appears.
After entering a password in the [Password] field, re-enter the password in the [Retype
password] field to prevent input errors.
≥ Single-byte alphanumeric characters and single-byte symbols can be entered.
≥ From 4 to 32 characters can be entered.
To protect security, create a password made up of alphanumeric characters and
symbols, and change the password periodically.
[Access level]
You can set the access level of registered users.
[1. Administrator]: A user can perform all operations for the unit.
[2. Camera control]: A user can perform only the Live screen operations.
[1. Administrator]/[2. Camera control]
[User check]
Display registered user names and access levels.
E.g. In the case of admin [1]
admin: User name
[1]: Access level
≥ Click [Delete] to delete displayed user registration items.
- 38 -
Page 39

Network screen
You can configure the network settings for the unit.
≥ After changing settings, click [Set].
[DHCP]
You can set whether to use the DHCP function. To prevent computers that do not use DHCP
function and other network cameras from using the same IP address, set the DHCP server.
For details on the server settings, consult your network administrator.
[Off]/[On]
[IP address]
Input the unit’s IP address here when the DHCP function is not going to be used. Input an
address that will not duplicate an existing IP address which has been set for a personal
computer or another network camera.
≥ This function’s default setting is [192.168.0.10].
≥ Multiple IP addresses cannot be used even when the DHCP function is used.
For details on the DHCP server settings, consult your network administrator.
- 39 -
Page 40

[Subnet mask]
Input the unit’s subnet mask here if the DHCP function is not used.
≥ This function’s default setting is [255.255.255.0].
[Default gateway]
Input the unit’s default gateway here if the DHCP function is not used.
≥ This function’s default setting is [192.168.0.1].
≥ Multiple IP addresses cannot be used for the default gateway even when the DHCP
function is used.
For details on the DHCP server settings, consult your network administrator.
[DNS]
[Auto]: The DNS server address is to be acquired automatically.
[Manual]: The DNS server address is to be acquired manually.
≥ If [Manual] is selected, the DNS settings must be established.
≥ If [Auto] is selected when the DHCP function is going to be used, the DNS server address
is acquired automatically. For further details, consult your system administrator.
[Auto]/[Manual]
[Primary server address/Secondary server address]
Input the IP address of the DNS server if the [Manual] setting has been selected for [DNS].
For details on the IP address of the DNS server, consult your system administrator.
[HTTP port]
The port number is allocated here separately. (1 to 65535)
≥ The following port numbers are used by the unit therefore cannot be used.
20, 21, 23, 25, 42, 53, 67, 68, 69, 110, 123, 161, 162, 554, 995, 10669, 10670,
59000 to 59999, 60000 to 61000
- 40 -
Page 41

Maintenance screen
You can perform such operations as displaying the unit information, restoring the unit’s
default settings.
A [Information] tab
B [Other] tab
To display the unit information on the Information screen
Click the [Information] tab on the Maintenance screen.
≥ The model number ([Model no.]), MAC address ([MAC address]), and firmware version
([Firmware version]) of the unit, and the user who last logged into the Setup screen
([Access log]) are displayed.
∫ To check the firmware version on the camera menu
[MAINTENANCE] # [FIRMWARE VERSION]
- 41 -
Page 42

To configure the settings on the Other Screen
Click the [Other] tab on the Maintenance screen.
≥ The Other screen opens.
[Reset to the default (Except the network settings)]
You can restore the unit’s default settings. (The settings for the Network screen, the User
mng. screen and the system frequency do not change)
Click [Execute].
≥ A confirmation message is displayed. Click [OK].
∫ Setting Using the Camera Menu
[MAINTENANCE] # [INITIAL SET]
≥ A confirmation message is displayed. Select [YES].
- 42 -
Page 43

[CAM/BAR]
Change the image displayed on the HDMI output monitor or the web setting screen.
[Camera]/[Colorbar]
Select your desired item and click [Execute].
[Camera]: The camera image is displayed.
[Colorbar]: Color bars are displayed.
≥ You can also switch the display between the camera image and the color bars by pressing
the MODE button on the wireless remote controller or the controller.
≥ The color bar type differs depending on the system frequency setting.
[Guideline]
You can set whether to show/hide the guideline display.
[Off]/[On]
Select your desired item and click [Execute].
∫ Setting Using the Camera Menu
[MAINTENANCE] # [GUIDE LINES] # desired setting
[Operation time]
You can check the operation time of the unit.
∫ Setting Using the Camera Menu
[MAINTENANCE] # [OPERATION TIME]
- 43 -
Page 44

Setting Using the Camera Menu
≥ The following items can only be set from the camera menu:
[OSD OFF WITH TALLY]
You can set whether to show the menu screen and the status display of the White Balance
Setting when the unit receives a tally light-up signal.
[SYSTEM] # [OSD OFF WITH TALLY] # desired setting
[ON]: Hides the display.
[OFF]: Shows the display.
[UPDATE]
You can update the firmware of the unit.
≥ After contacting the store of purchase, save the latest firmware on to a microSD card
(always check the precautions of the store of purchase before following any
instructions).
1 Insert a microSD card containing an update file into the card insertion portion.
2 Select the menu.
[MAINTENANCE] # [UPDATE]
≥ Follow the on-screen instructions to update.
≥ Do not turn off the unit while it is updating.
≥ Do not perform any operations while it is updating.
[IMAGE RESOLUTION]
You can set the resolution of the camera image displayed on the web setting screen.
[ON]/[OFF]
[640k360]/[320k180]
[SYSTEM] # [IMAGE RESOLUTION] # desired setting
≥ When displaying camera images of this unit in the web setting screen of other devices,
camera images in the web setting screen of this unit will be displayed at 320k180/10fps.
- 44 -
Page 45

Troubleshooting
∫ It is not a malfunction in following cases
Object seems to be
warped.
When the flash is fired
during shooting, only
the top or bottom of the
screen becomes lighter.
≥ Object seems to be warped slightly when the object
moves across the image very fast, but this is because the
unit is using MOS for the image sensor. This is not a
malfunction.
≥ With a MOS image sensor, the shooting timing differs
slightly between the top left and bottom right of the
screen. This means that when the flash is fired, the
bottom of the screen will become lighter in the field
concerned and the top will become lighter in the next
field.
This is normal and not indicative of any problem.
Power
Problem Check points
This unit cannot be
turned on.
≥ When the status display lamp is off, power is not supplied
or the unit is turned off.
j Correctly connect the AC adapter, the AC cable, and
the USB cable.
j Press the power button of the unit.
≥ When using the wireless remote controller, select the unit
by pressing one of the CAM1 to CAM4 buttons, and then
press and hold the ON/STANDBY button for 2 seconds.
≥ If you turn off the unit with the power button of the unit,
the unit cannot be turned on by the web setting screen,
the wireless remote controller or controller. Press the
power button to turn on the unit.
- 45 -
Page 46

Wireless remote controller
Problem Check points
Cannot operate. ≥ Check if the status display lamp is lit green and the unit is
turned on.
≥ Before operating, select the unit by pressing one of the
CAM1 to CAM4 buttons.
≥ When strong light from a fluorescent lamp, a plasma
monitor, the sun, etc. is shining on the wireless remote
control signal light-sensing area, the unit may not
respond.
≥ If the status display lamp does not blink even when you
operate near the wireless remote control signal lightsensing area, the batteries of the wireless remote
controller are depleted. Replace the batteries.
≥ Set [IR Control] to [On] on the web setting screen. (l 36)
Controller
Problem Check points
Cannot operate. ≥ Check whether the status display lamp lights up green
and the unit is turned on.
≥ Before operations, press CAMERA STATUS/
SELECTION button 1 to 5 to select the camera.
≥ It may be necessary to upgrade the version of the
controller so that the controller will support the unit.
Consult with your dealer.
Web setting screen
Problem Check points
The web setting screen
cannot be accessed.
≥ Check the system requirements of the web setting
screen.
≥ Use a category 5 or above LAN cable.
≥ When the LAN lamp is not lit, the LAN is not connected
correctly or the connected network is not operating
correctly. Check for a loose contact of the LAN cable and
check the wiring.
- 46 -
Page 47

Web setting screen
Problem Check points
The web setting screen
cannot be accessed.
≥ Turn on the unit or set it to Standby mode.
≥ Check if a valid IP address is set for the unit.
≥ After changing the IP address of the unit, enter [http://
Post-change IP address/] into the address bar of the web
browser.
≥ Make sure that you do not access a wrong IP address.
j [When using Windows]
Execute the Windows command prompt, ping [The IP
address set for the unit]. If a reply comes back from the
unit, there are no operational problems.
If a reply does not come back, restart the unit and
change the IP address using the Easy IP Setup
Software.
j [When using Mac OS X]
Using the Mac OS X terminal, execute ping -c 10 [The
IP address set for the unit]
If a reply comes back from the unit, there are no
operational problems.
If a reply does not come back, perform the following
steps.
1) Press the INIT button to initialize the network
settings of this unit.
2) Start the web setting screen to configure the network
settings.
j For information on how to start the web setting screen,
please read the “Operating Instructions <Basics>.”
≥ Make sure that the HTTP port number is not set to 554.
For information on the HTTP port numbers supported by
the unit, refer to page 40.
≥ Check if the set IP address is not overlapping with that of
another device, and the set address match the network/
subnet of the connection destination.
j [When the personal computer is connected to the unit
within the same subnet]
Set the IP addresses of this unit and the computer to a
common subnet. Further, cancel the “Use proxy server”
setting on the web browser. When accessing this unit in
the same subnet, it is recommended that you set the
address of this unit as a “Remove from proxy” address.
j [When the unit and personal computer are connected
to different subnets]
Check if the default gateway value set for the unit is
correct.
- 47 -
Page 48

Web setting screen
Problem Check points
The settings on the web
setting screen or the
image on the camera is
not updated or displayed
properly.
≥ The unit’s ports may be filtered by the firewall or other
function of the anti-virus software.
Change the HTTP port number of the unit to a port
number which will not be filtered.
[When using Windows]
≥ Press the [F5] key on the personal computer keyboard
and update the display.
≥ Follow the steps below to delete the temporary Internet
files.
1) In Internet Explorer, click [Tools] # [Internet Options].
2) Click the [General] tab, and click the [Delete...] button
in [Browsing history].
3) In the [Delete Browsing History] dialog box, select
[Temporary Internet files], and click the [Delete] button.
4) Click the [OK] button.
≥ If, in the Temporary Internet Files settings, the check
[Every time I visit the webpage] setting is not selected for
[Check for newer versions of stored pages], the web
setting screen may not be displayed properly. Follow the
steps below.
1) In Internet Explorer, click [Tools] # [Internet Options].
2) Click the [General] tab, and click the [Settings] button in
[Browsing history].
3) In the [Temporary Internet Files and History settings]
dialog box, turn [Every time I visit the webpage] of
[Check for newer versions of stored pages] on.
4) Click the [OK] button.
[When using Mac OS X]
≥ Press the [Command] + [R] key on the personal computer
keyboard and update the display.
≥ Follow the steps below to delete the temporary Internet
files.
1) In Safari, select [Safari] # [Empty Cache...].
2) Click the [Empty] button in [Are you sure you want to
empty the cache?] pop-up.
- 48 -
Page 49

Video
Problem Check points
No pictures are
displayed or the pictures
are disturbed.
The picture is flipped
vertically.
Multiple color bands
(color bars) are
displayed.
The menu screen is
displayed.
Something is wrong with
the coloring of the
pictures.
When fine lines or
cyclical patterns are
shot, flickering is seen
or coloring is added to
them.
≥ Check if the unit is correctly connected with other
devices.
≥ If your system is configured in such a way that a
displayed image is automatically switched in conjunction
with your camera selection, select the correct camera.
≥ Check if [Format], [Down CONV. Mode], and [System
Frequency] are set correctly. (l 34, 35)
≥ Turn the middle ring portion by 180° so that the internal
stereo microphones are facing up.
≥ Switch to the camera picture. (l 5, 43)
≥ To close the camera menu, press the MENU button of the
wireless remote controller.
≥ Press and hold the CAMERA OSD button of the controller
for 2 seconds to exit the camera menu.
≥ Set the white balance to ATW (auto). If colors do not
appear correct even in ATW mode, perform the White
Balance Setting. (l 15)
≥ This phenomenon occurs because the pixels are
arranged systematically on each image sensor. It is
noticeable when the spatial frequency of a subject and
the pixel pitch are brought into proximity so change the
camera angle or take other such action.
- 49 -
Page 50

Precautions when using a computer
When using a computer, the symptoms described below may occur.
If any of them occurred, follow the instructions to solve each problem.
(The instructions describe solutions for administrators.)
≥ Descriptions in this document are based on operation check by Panasonic Corporation.
Possible symptoms may vary depending on platforms or operating system versions, etc.
When using Windows
Operating procedures and screen are described using Windows 7 and Internet Explorer 9.0.
∫ When accessing the web browser, the Pop-up Blocker is displayed
and you cannot log in.
≥ Follow procedures A and B below.
A Set the popup to [Always allow] using the information bar.
1) Click [Options for this site] on the information bar.
2) Click [Always allow].
B Add the IP address of the camera to trusted sites, and perform the security setting.
1) In Internet Explorer, click [Tools] # [Internet Options].
2) Click the [Security] tab, and select [Trusted
sites].
3) Select [Low] for [Security level for this zone].
≥ If the lower setting is selected, the security level
of personal computer will go down.
4) Click [Sites].
- 50 -
Page 51

5) Enter [http:// the IP address for the unit/] in
[Add this website to the zone:], and click
[Add].
≥ Make sure [Require server verification (https:)
for all sites in this zone] is unchecked.
6) Click [Close].
∫ An unnecessary status bar or
scroll bar is displayed on the popup window
1) In Internet Explorer, click [Tools] # [Internet Options].
2) Click the [Security] tab, and select the [Internet].
3) Click [Custom Level...].
4) Select [Enable] for [Allow script-initiated windows without size or position constraints]
under [Miscellaneous].
5) Click [OK].
6) When the warning window is displayed, click [Yes].
- 51 -
Page 52

∫ Easy IP Setup Software does not display the detected IP address.
Check the firewall settings. If firewall is activated, set the web browser or Easy IP
Setup Software to the [Allow a program through Windows Firewall] setting.
1) Open the control panel, and click [System and Security].
2) Click [Allow a program through Windows
Firewall] of [Windows Firewall].
3) Select the [Internet Explorer] or [EasyIPSetup]
line, and then click the [Change settings] button.
Check [Internet Explorer] or [EasyIPSetup].
4) Click the [OK] button.
∫ When starting the Easy IP Setup Software, a message is displayed to
request the password of administrator.
When exiting the Easy IP Setup Software, the message [This
program may have not been installed correctly] is displayed.
Turn off User Account Control from the control panel.
1) Open the control panel, and click [System and Security].
2) Click [Change User Account Control settings] on the [Action Center] window.
3) Slide the gauge of the slide bar to the [Never
notify] position, and click the [OK] button.
- 52 -
Page 53

∫ The [Program Compatibility Assistant] is displayed after exiting the
Easy IP Setup Software.
This symptom happens only when the software has been used for the first time.
Select [This program installed correctly].
Restrictions
≥ On the setup pages for some products
The display positions of setting items and setting values may not be correspondent.
≥ When using Windows 7 with some products
2 web browser windows may be displayed at the same time.
- 53 -
Page 54

∫ The screens of the browser are not displayed properly.
Check the character size of the screenshot by clicking [Display] of [Personalize].
1) Right-click on the desktop.
2) Click [Personalize].
3) Click [Display].
4) Select [Smaller-100% (default)] for the
character size of the screenshot, click the
[Apply] button, and reboot the personal
computer.
Restrictions
≥ When two browser windows are open and one is being displayed on another, the back
window may come to the front when the mouse pointer is placed.
≥ When accessing the unit from the web browser, another window may open, and pop-up
may be displayed.
- 54 -
Page 55

∫ Screen is deformed. Or when activating the compatibility view, part
TENTATIVE
of the screen is not displayed or a pop-up window appears to say
that the screen is not displayed again.
Check [Display all websites in Compatibility View] on the [Compatibility View settings]
screen.
1) In Internet Explorer, click [Tools].
2) Click [Compatibility View settings].
3) Check [Display all websites in Compatibility
View], and click [Close].
∫ Network disconnection occurs when the personal computer enters
the sleep mode.
After canceling the sleep mode, reload the screen as necessary.
When using Mac
The web setting screen does not appear as a pop-up even when the IP
address is input from Safari and the unit is accessed.
In Safari, select [Safari] # [Block Pop-Up Windows], and then remove its check mark.
- 55 -
Page 56

About copyright
Recording of pre-recorded tapes or discs or other published or broadcast material for
purposes other than your own private use may infringe copyright laws. Even for the purpose
of private use, recording of certain material may be restricted.
≥ Distributing, copying, disassembling, reverse compiling, reverse engineering, and also
exporting in violation of export laws of the software provided with this unit are expressly
prohibited.
≥ HDMI, the HDMI Logo, and High-Definition Multimedia Interface are trademarks or
registered trademarks of HDMI Licensing LLC in the United States and other countries.
≥ Microsoft
trademarks of Microsoft Corporation in the United States and/or other countries.
≥ Microsoft product screen shot(s) reprinted with permission from Microsoft Corporation.
≥ Mac, Mac OS and Safari are registered trademarks of Apple Inc., in the United States and
other countries.
≥ Other names of systems and products mentioned in these instructions are usually the
registered trademarks or trademarks of the manufacturers who developed the system or
product concerned.
®
, Windows® and Internet Explorer® are either registered trademarks or
- 56 -
Page 57

Web Site: http://panasonic.net
©Panasonic Corporation 2012
 Loading...