How it Works
Log In / Sign Up
Buy Points
How it Works
FAQ
Contact Us
Questions and Suggestions
Users
Oursson
Loading...
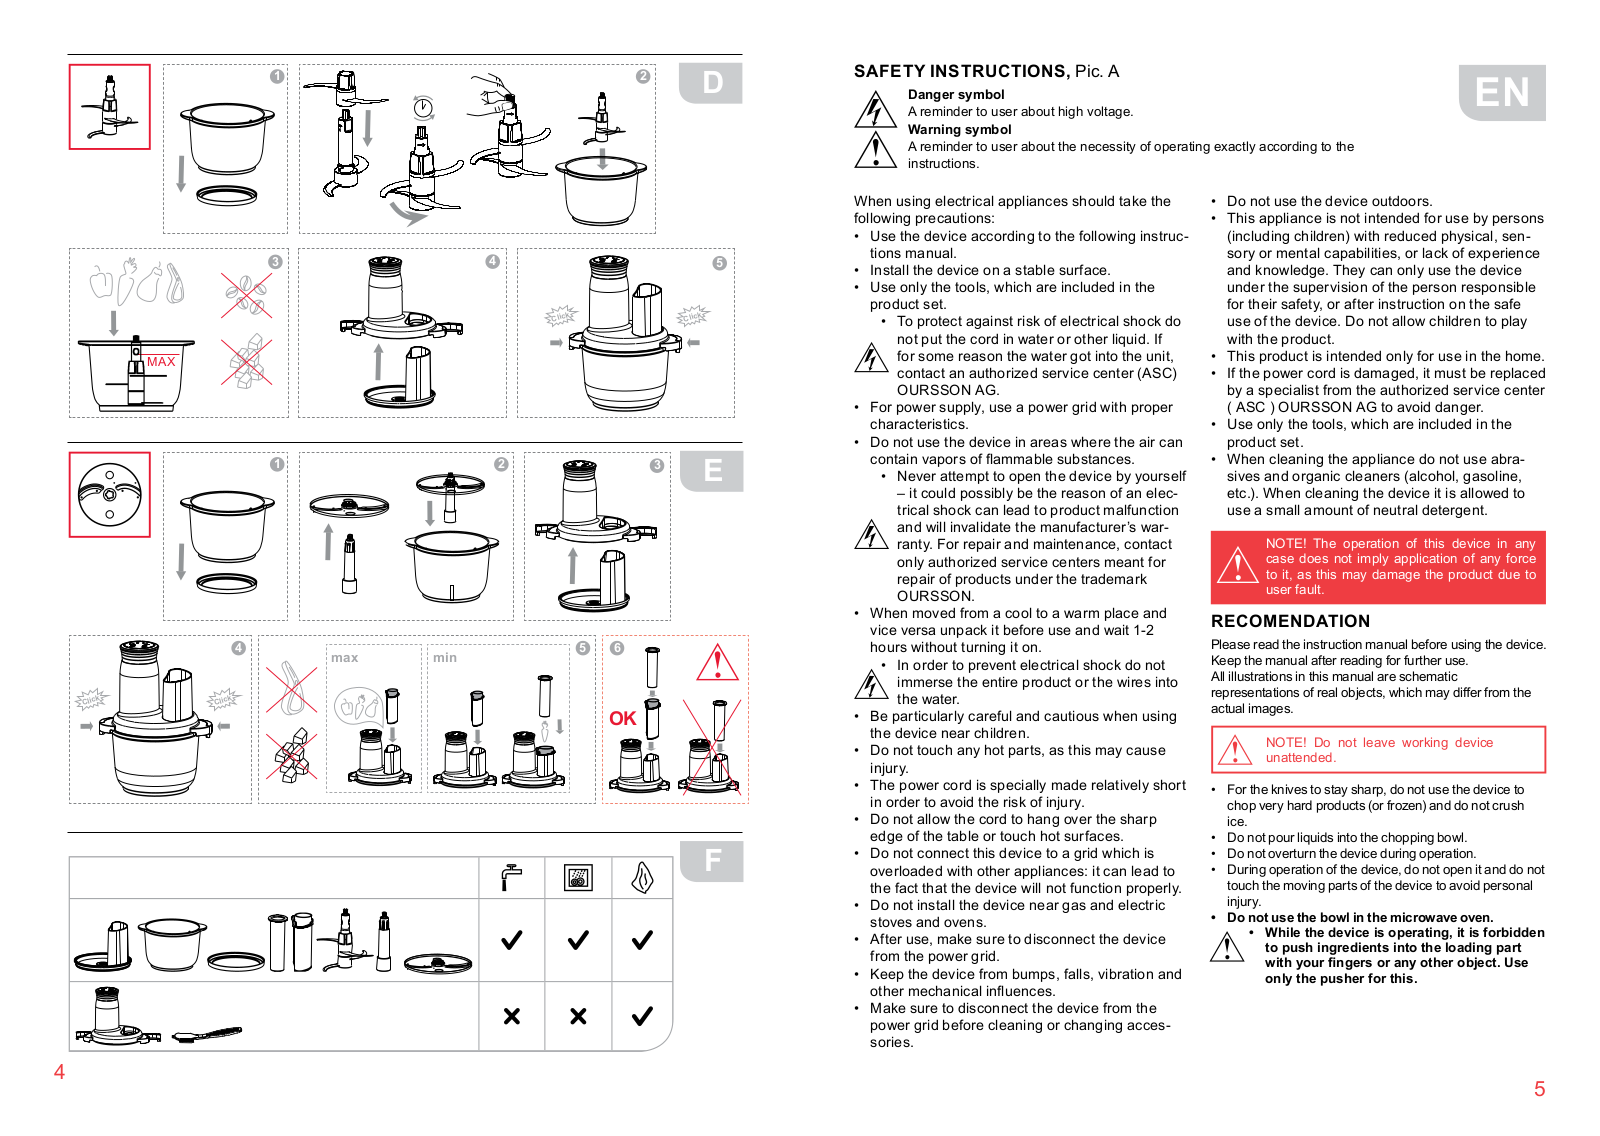
A
AG3202
AM6240
AM6240/DC
AM6240/GA
AM6240/OR
2
AM6240/RD
2
AM6244
AM6244-RD
AM6244-WH
AM6250/DC
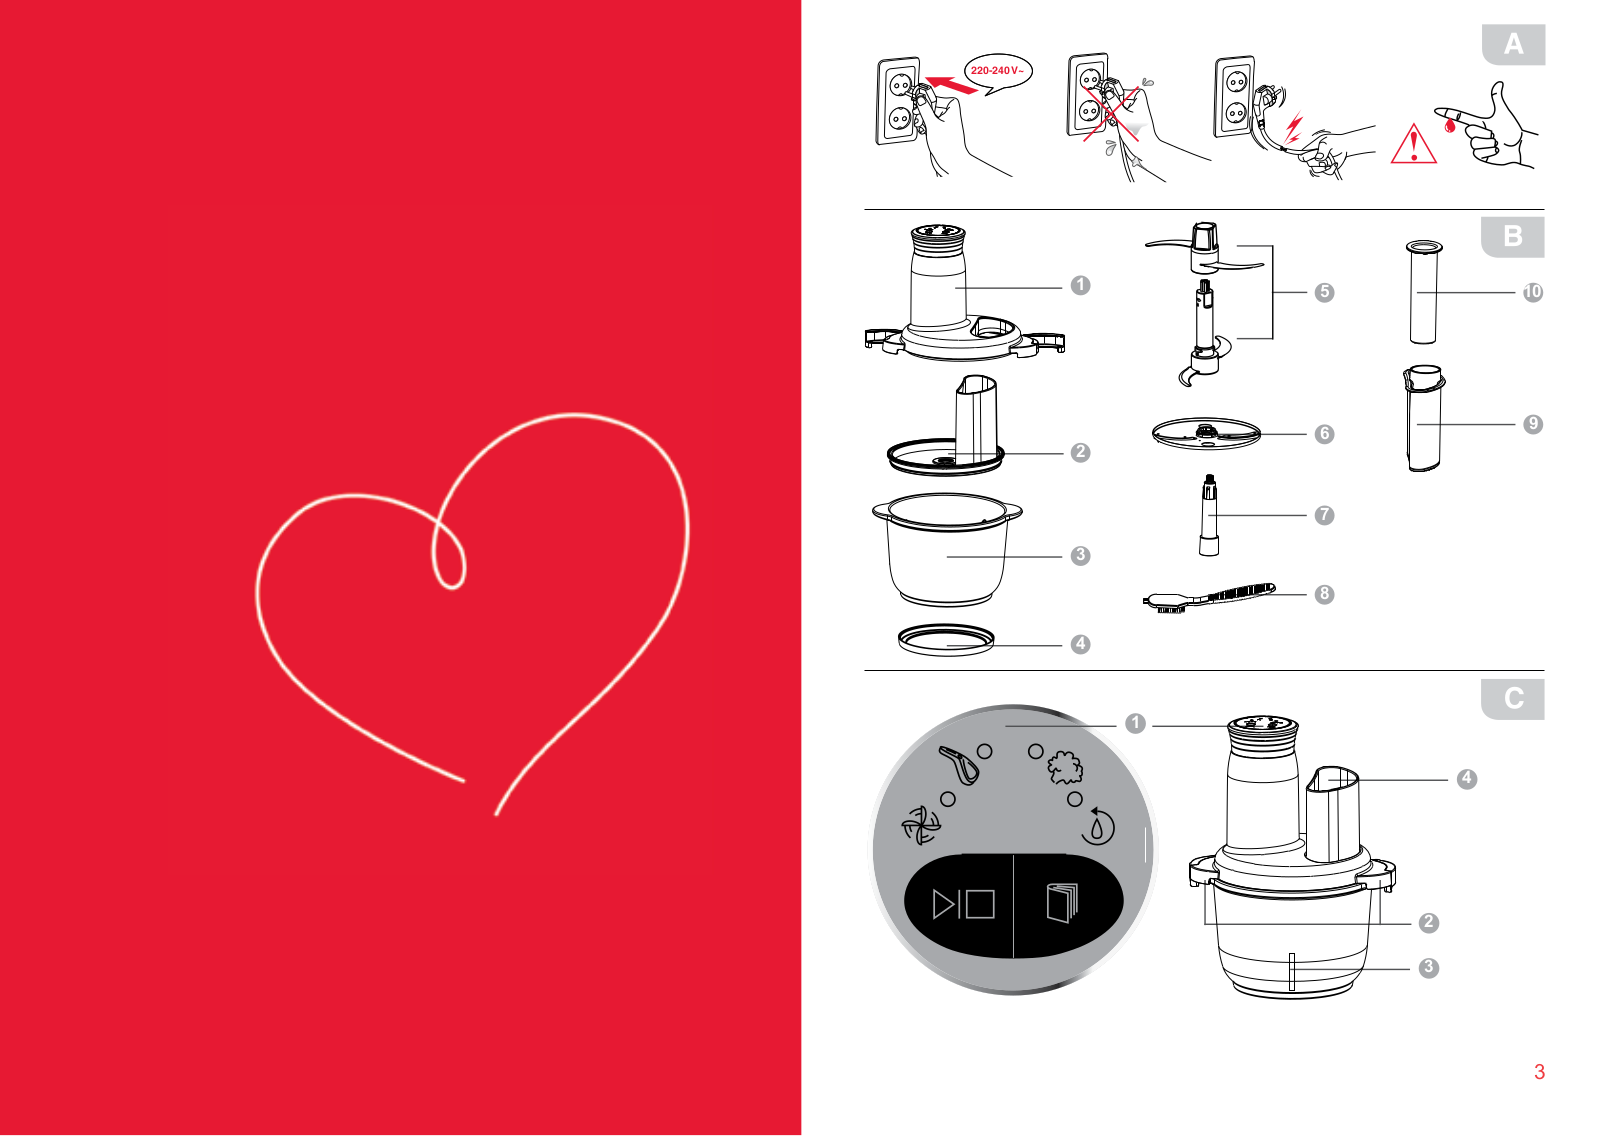
B
BL0640G
BL0640G-GA
BL0642G
BL0642G-DC
BL0642G-GA
2
BL0642G-IV
BL0642G-OR
BL0642G-RD
BL0643T
BL0643T-DC
BL0643T-RD
BL1060HGD
BL 1060 HGD-RD
BM0800J
BM0800J-DC
BM0800J/GA
BM0800J-OR
BM0800J-WH
BM0801J
BM 0801 J-GA
BM0801J-OR
BM 0801 J-RD
BM1000JY
BM1000JY-BS
BM1000JY-WS
BM1023JY
C
CH2010
CH3010
CH3030
CH3040
CM0400G
CM0400G-OR
CM1583D
D
DH0620D
DH0620D-GA
DH0620D-OR
DH2303D
DH2400D-OR
DH3501D-RD
DH5000D
DW4001TD
E
EG1510S
2
EG1510S/DC
2
EG1510S/OR
EG2000S
EG2000S-BL
EG2000S/GA
EG2000S/RD
EG2010S
EG2010S/DC
EK1530W
EK1530W-DC
EK1530W-IV
EK1530W-RD
EK1710P
EK1716P
EK1716P-OR
EK1732W
EK1732W-IV
EK1733WD
EK1744GD-RD
EK1752M
EK1760M
2
EK1760M-OR
EK1770MD
EK1771MD
EK1775MD
EK1775MD/GA
EK1775MD-IV
EK1775MD-OR
EK 1775 MD -RD
2
EM1500
EM1500-GA
EM1500-RD
EM1505
2
EM1900/DC
F
FE0205D
2
FE0205D-GA
FE0205D-OR
Loading...
Loading...
Nothing found
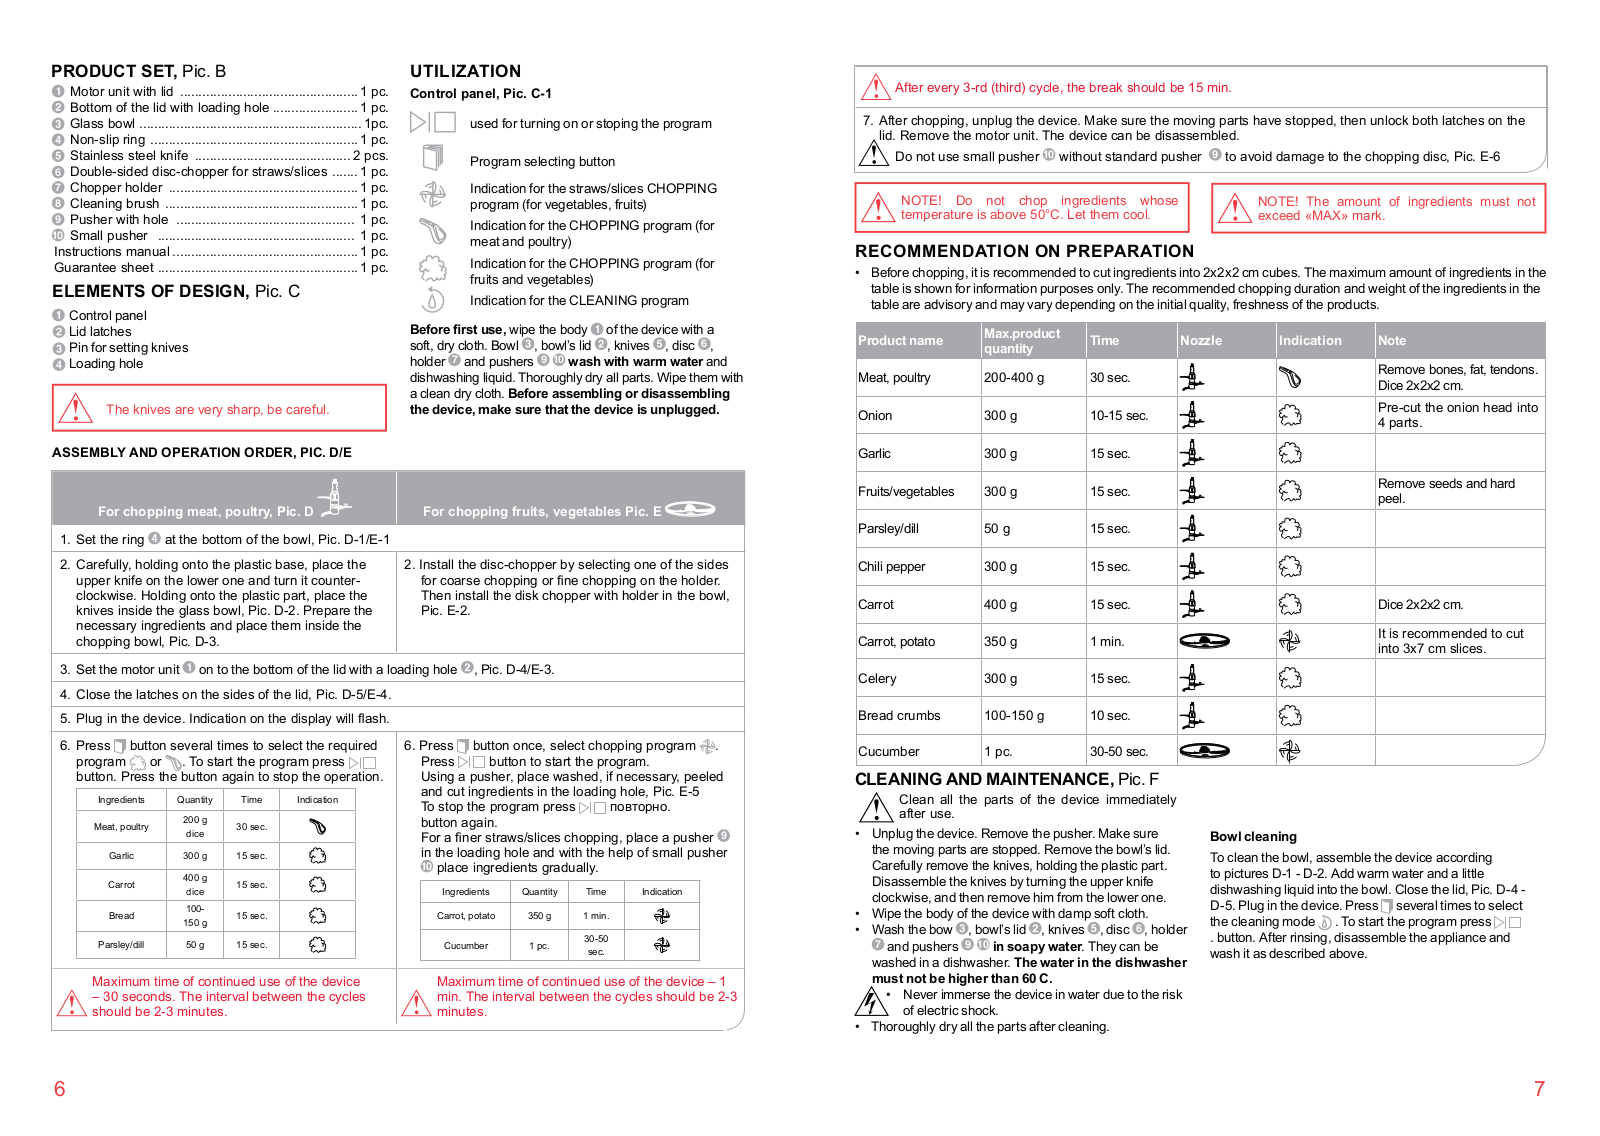
CH3040
User Manual [ru]
11 pgs
3.54 Mb
0
Table of contents
Loading...
Oursson CH3040 User Manual [ru]
...
Oursson User Manual [ru]
Download
Specifications and Main Features
Frequently Asked Questions
User Manual
Download
Loading...
+
7
hidden pages
Unhide
You need points to download manuals.
1 point = 1 manual.
You can buy points or you can get point for every manual you upload.
Buy points
Upload your manuals
 Loading...