

Page 1
User Guide/ Guía del Usuario:
7-MINUTE GRILL/ Parrillera de 7 Minutos
www.oster.com
For product questions contact:
Jarden Consumer Service
USA : 1.800.334.0759
Canada : 1.800.667.8623
www.oster.com
©2016 Jarden Products, Inc. doing business as
Jarden Consumer Solutions. All rights reserved.
Distributed by Sunbeam Products, Inc. doing business as
Jarden Consumer Solutions, Boca Raton, Florida 33431.
Para preguntas sobre los productos llame:
Jarden Consumer Service
EE.UU.: 1.800.334.0759
Canadá: 1.800.667.8623
www.oster.com
©2016 Jarden Products, Inc. operando bajo el nombre de Jarden
Consumer Solutions. Todos los derechos reservados. Distribuido
por Sunbeam Products, Inc. operando bajo el nombre de Jarden
Consumer Solutions, Boca Raton, Florida 33431.
P.N. 184494
Impreso en China Printed in China
GCDS-OST46269-BB CKSTCG20K-CKSTCG21K-TECO Series_16ESM1
Safety
Seguridad
How to use
Cómo usar
Cleaning
Cuidado y Limpieza
Warranty
Garantía
CKSTCG20K-CKSTCG21K-TECO Series_16ESM1.indd 24-1 6/22/16 8:53 AM
Page 2
www.oster.com
www.oster.com
IMPORTANT SAFEGUARDS
When using electrical appliances, basic safety precautions should always be followed,
including the following:
1. Read all instructions before using.
2. Make sure the voltage in your outlet is the same as the voltage indicated on the
appliance’s rating label.
3. To protect against electrical shock, do not immerse UNIT or CORD in water or other
liquid.
4. Do not touch hot surfaces. Use handles.
5. This appliance should not be used by children.
6. Extreme caution must be exercised when any appliance is used near children.
7. Unplug from wall outlet when not in use and before cleaning. Allow to cool before
cleaning or storing this appliance.
8. Never yank the cord to disconnect the cooking unit from the outlet. Instead, grasp the
plug and pull to disconnect.
9. Do not operate any appliance with a damaged CORD or PLUG or after the appliance
malfunctions or has been damaged in any manner. Return appliance to the nearest
authorized Oster service facility for examination, repair or adjustment. Do not attempt
to replace or splice a damaged cord.
10. The use of accessories or attachments not recommended by the manufacturer may
cause re, electrical shock or injury.
11. Do not use outdoors or for commercial purposes.
12. Do not use appliance for other than intended use.
13. Do not let the electrical cord hang over the edge of the table or countertop, or touch
hot surfaces.
14. Do not place on or near a hot gas or electric burner or heated oven.
15. Use on a heat-resistant, at level surface only.
16. Use extreme caution when moving any appliance containing hot food, water, oil or
other liquids.
17. To disconnect, remove plug from outlet.
18. Always unplug after use. The appliance will remain on unless unplugged.
19. The cooking plates may contain hot steam built up during the cooking cycle, make sure
to keep away from the cooking plates when opening the cover. Escaping steam can
cause burns.
20. When using this appliance, provide adequate ventilation above and on all sides for air
circulation. Do not allow this appliance to touch curtains, wall coverings, clothing, dish
towels or other ammable materials during use.
SAVE THESE INSTRUCTIONS
THIS UNIT IS INTENDED FOR
HOUSEHOLD USE ONLY
EXTENSION CORD USE
A short power supply cord is provided to reduce the hazards resulting from entanglement or
tripping over a longer cord. An extension cord may be used with care; however, the marked
electrical rating should be at least as great as the electrical rating of the appliance. The
extension cord should not be allowed to drape over the counter or tabletop where it can be
pulled on by children or tripped over.
2
3
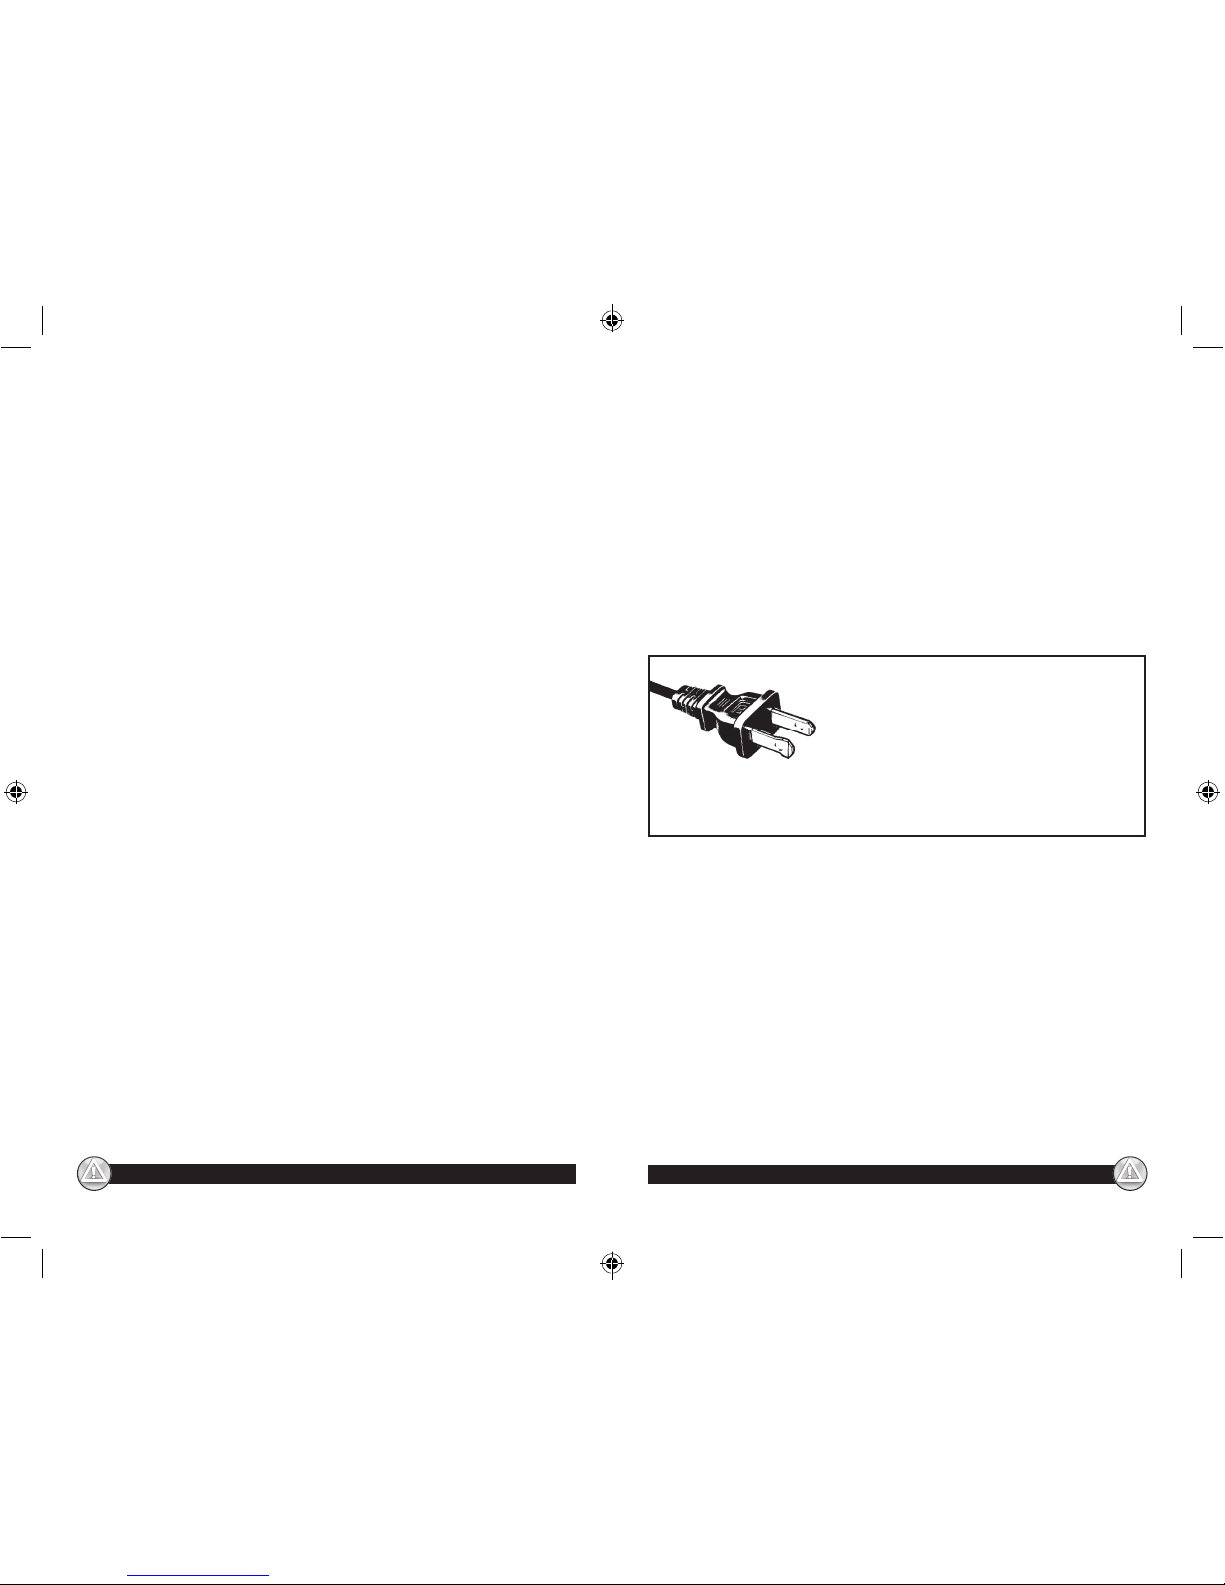
POLARIZED PLUG
This appliance has a polarized plug, (one blade is wider than
the other). As a safety feature to reduce the risk of electrical
shock, this plug is intended to t in a polarized outlet only
one way. If the plug does not t fully in the outlet, reverse the
plug. If it still does not t, contact a qualied electrician. Do
not attempt to defeat this safety feature or modify the plug in any way. If the plug ts loosely
into the AC outlet or if the AC outlet feels warm do not use that outlet.
CKSTCG20K-CKSTCG21K-TECO Series_16ESM1.indd 2-3 6/22/16 8:53 AM
Page 3
www.oster.com
www.oster.com
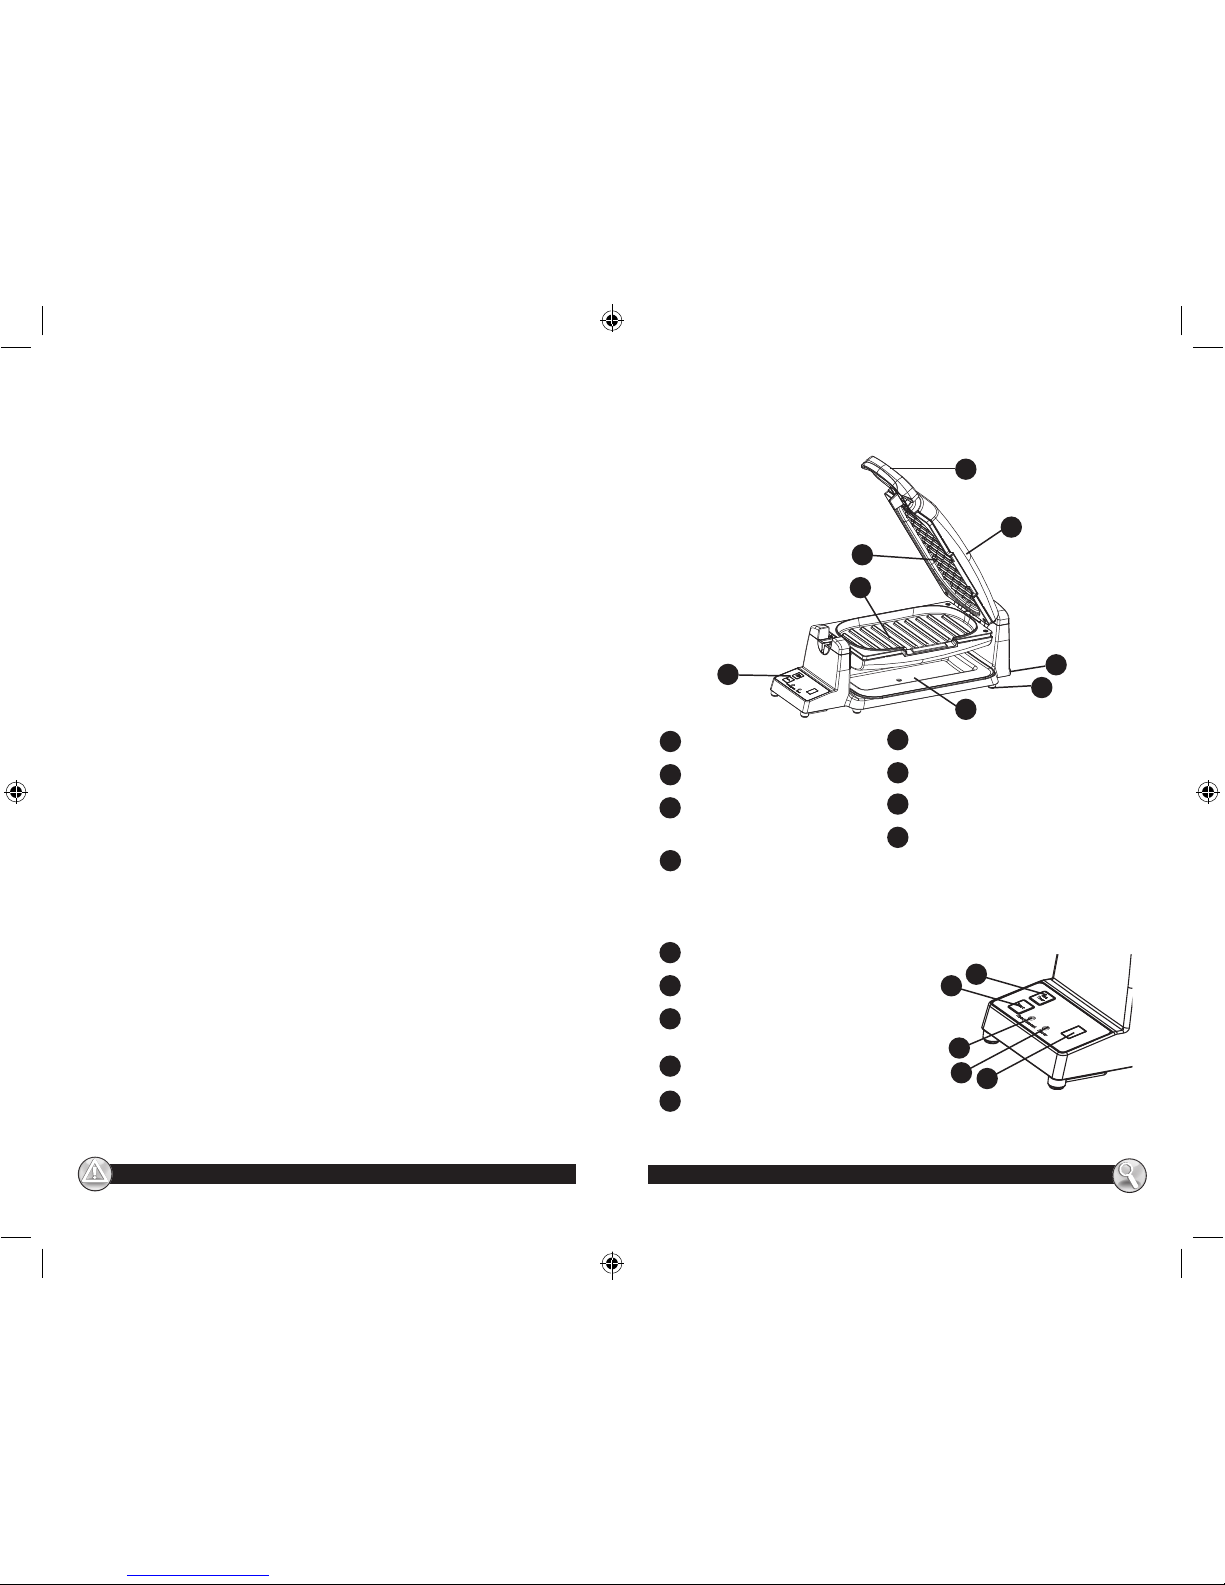
LEARNING ABOUT YOUR
OSTER® 7 MINUTE GRILL
a
g
Cool touch handle
Cover
Top Titanium Infused
DuraCeramic® cooking plate
Bottom Titanium Infused
DuraCeramic® cooking plate
Removable drip tray
Cord wrap (underneath unit)
Skid-resistant feet
Timer control
b
h
c
d
e
f
a
b
f
g
e
c
h
d
Thank you for purchasing the Oster® 7 Minute Grill. Before you use this
product for the rst time, please take a few moments to read these instructions
and keep it for reference. Pay particular attention to the Safety Instructions
provided. Please review the product service and warranty statements. To learn
more about Oster® products, please visit us at www.oster.com or call us at
1-800-334-0759.
Congratulations on your purchase of a Titanium Infused DuraCeramic™
appliance! This appliance features a Titanium Infused DuraCeramic™ non-stick
natural ceramic coating which is 8X more durable than other non-stick coatings.
This means there’s no aking or peeling o to worry about. Furthermore, the
ultra-durable ceramic coating cooks faster than other non-stick coatings, saving
time and energy. The natural Titanium Infused DuraCeramic™ non-stick coating
also oers greater health and benets as it’s free of PTFE and PFOA. 8X More
Durable – Titanium Infused DuraCeramic™!
4
5
Timer control
LED display
Red Power indicator light
Green Ready to Cook indicator
light
Start Timer button
Set Timer button
i
i
j
k
l
m
j
k
l
m
CKSTCG20K-CKSTCG21K-TECO Series_16ESM1.indd 4-5 6/22/16 8:53 AM
Page 4
www.oster.com
www.oster.com
HOW TO:
Before First Use
• Remove and peel o any promotional materials and
packaging materials, and check that the cooking plates are
clean and free of dust.
• Clean the grill and drip tray as instructed in the Care and
Cleaning section.
• Place unit on a at, level surface allowing enough space
around the unit for heat to ow without causing damage to
walls or cabinets.
• When using your 7-Minute Grill for the rst time, you may
notice smoke and a slight odor. This is normal when heating
the appliance for the rst time and there is no reason for
concern.
Using Your 7-Minute Grill
1. Unwrap power cord from cord wrap underneath the base of
the unit.
2. Slide drip tray in place below the bottom cooking plate.
Tip: The grill must be in the horizontal position for the drip
tray to t into position.
3. Plug the unit into a standard electrical outlet.
4. The red Power indicator light illuminates. The unit starts
preheating.
5. Once the preheating temperature is reached, the green
Ready to Cook indicator light illuminates. The LED display
shows “0”
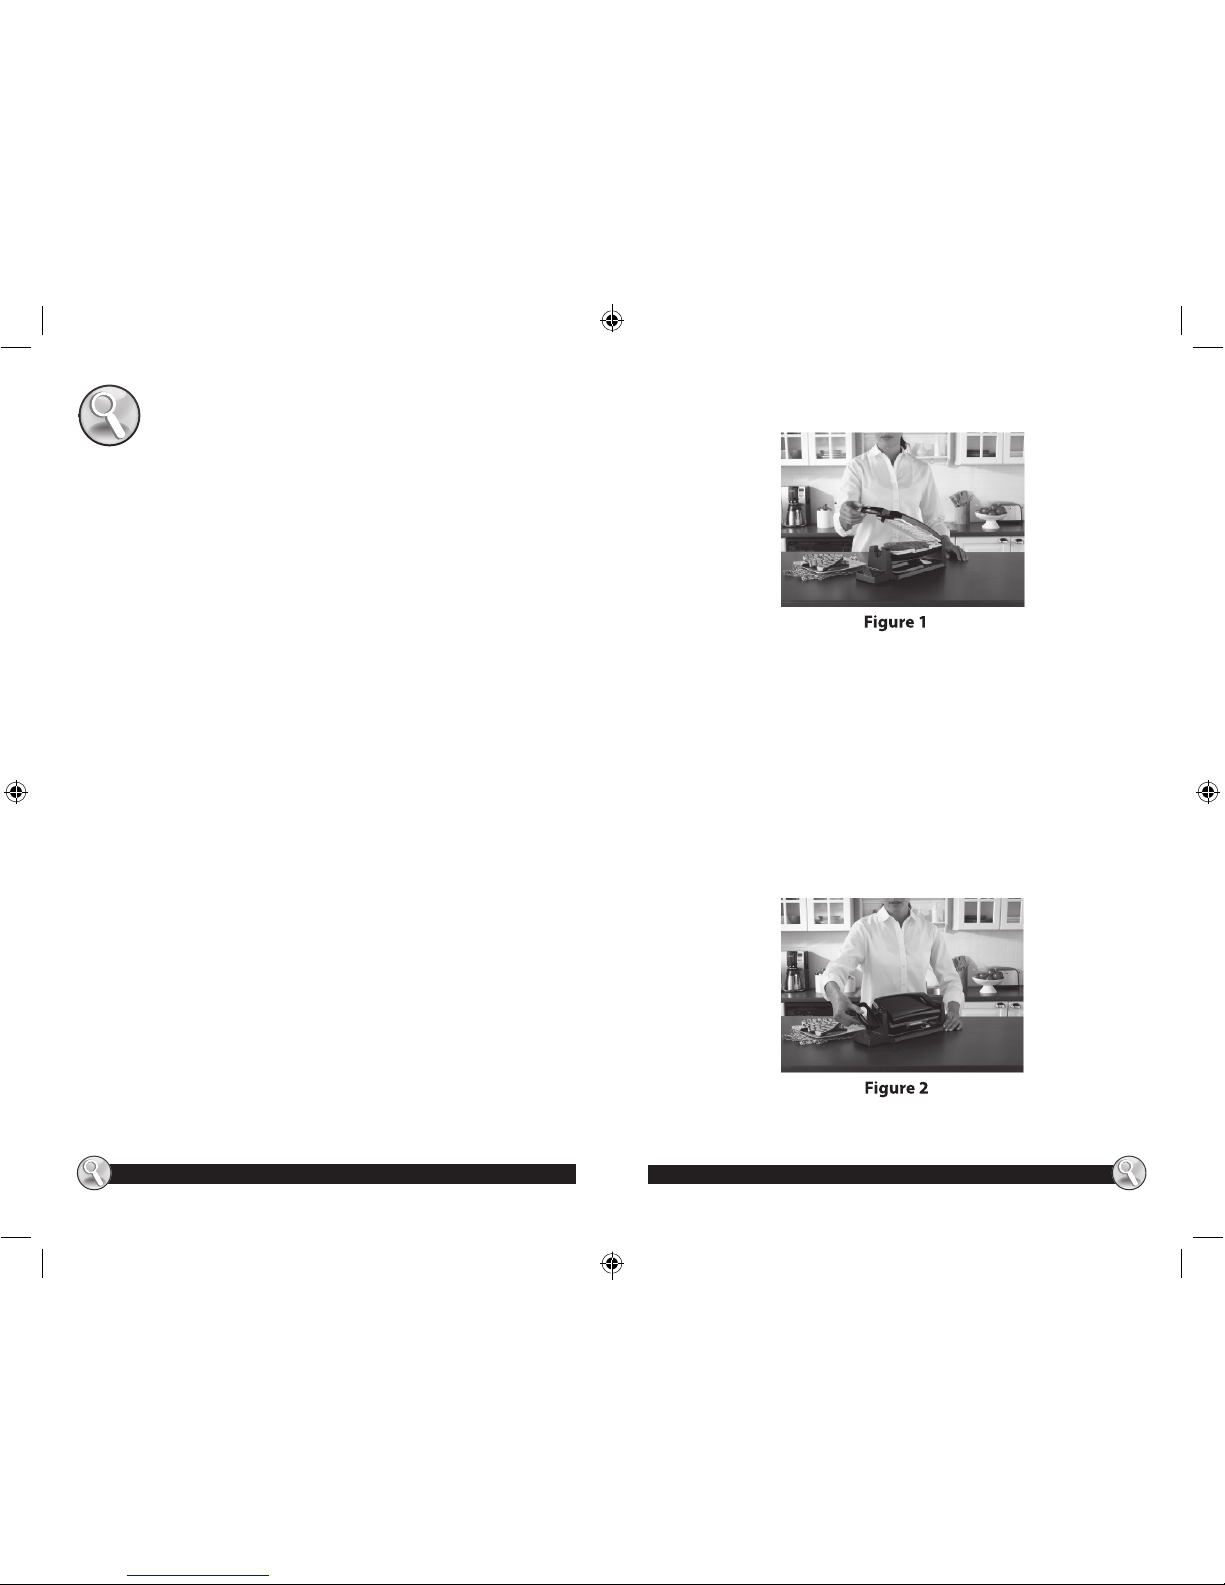
6. Using the handle, lift the cover to the open position (Figure 1).
7. Carefully place food to be cooked onto bottom cooking plate.
Note: You can cook up to 2 servings in this grill; for example, 2
hamburgers. Make sure you do not overload the grill.
8. Using the handle, close the cover. Thick foods may cause grill
to not fully shut. If this happens, thin food item so top
cooking plate can be closed.
9. Turn the handle to the right (clockwise) to change the grill to
the vertical position (Figure 2). As you turn the handle, the
cover is locked and cannot be opened until the grill is placed
back in the horizontal position.
Note: If cooking foods with llings, like a grilled cheese
sandwich, it is recommended to cook in the horizontal position
to prevent the lling from being released out of the plates.
6 7
CKSTCG20K-CKSTCG21K-TECO Series_16ESM1.indd 6-7 6/22/16 8:53 AM
Page 5

www.oster.com
www.oster.com
Setting the Timer
1. Press the Set Timer button to select a cooking time from 1 to 7
minutes. The unit beeps once for each minute increment.
2. Use suggested cooking times in the Grilling Chart.
3. Once you have selected desired cooking time, press the Start
button. The timer starts the countdown process to 0.
Note: As the timer counts down, the LED display shows each
number ashing to let you know that the cooking cycle
countdown is in progress.
4. If you need to change the selected cooking time: press and
hold the Start button to reset the timer and repeat steps 1 - 3
to select a new cooking time.
5. Once the cooking cycle ends, the unit beeps 4 times.
6. To check your food, turn the handle to the left
(counterclockwise) to change the grill to the horizontal
position and carefully lift the cover by the handle.
Warning: The cooking plates may contain hot steam built up
during the cooking cycle, make sure to keep away from the
cooking plates when opening the cover. Escaping steam can burn.
7. Carefully open the cover. If additional cooking time is needed,
close the cover and set the time. If food is cooked as desired,
remove using a plastic utensil like a spatula or tongs.
Important: Always use heat-resistant plastic, silicone or wood
utensils to avoid scratching the nonstick ceramic coating. It is
suggested not to use metal skewers, tongs, forks or knives
that may damage the nonstick ceramic coating.
8. To empty the drip tray, allow it to cool completely before
removing it from the bottom of the unit.
9. Remove the plug from electrical outlet.
Tips & Recommendations
· Do not overll the cooking plates.
· If the rst time you cook your food, it is not cooked to your
liking, you can adjust the time as instructed under “Setting the
Timer” section.
· To prevent heat loss, do not open the cover frequently.
· Some frozen foods may need to be thawed before cooking
on the grill (please refer to any notes in the cooking chart if
this is needed).
COOKING CHART
FOOD AMOUNT WEIGHT
GRILL
POSITION
TIME
MEATS (Fresh)
Beef Hamburger 1 or 2 5 oz., each Vertical 4 to 5 minutes to medium
(160⁰ F)
Turkey Burger 1 or 2 5 oz., each Vertical 4 to 5 minutes to medium
(160⁰ F)
Boneless steak 1 8 oz Vertical 6 to 7 minutes to medium
(160⁰ F)
Boneless Chicken
Breast
1 7 oz Vertical 6 to 7 minutes (170⁰ F)
Boneless Pork
Chop
1 5 ½ oz Vertical 6 to 7 minutes (160⁰ F)
Sausage Patties 3 1 ½ oz.,ea Vertical 6 to 7 minutes (165⁰ F)
Sausage Links 4 1 oz.,ea Vertical 6 to 7 minutes (165⁰ F)
Hot dogs 2 1 ½ oz.,ea Vertical 4 to 5 minutes (165⁰ F)
MEATS (Frozen)
Beef Hamburger 1 5 ¼ oz Vertical 6 to 7 minutes to
medium rare
VEGETABLES
Zucchini 2 to 3 strips or 4 to 5
slices
½-inch thick horizontal 4 to 5 minutes
Yellow squash 2 to 3 strips or 4 to 5
slices
½-inch thick horizontal 4 to 5 minutes
Onion slices 2 ½-inch thick horizontal 6 to 7 minutes
Asparagus spears 4 to 6 Medium to large horizontal 4 to 5 minutes
Green or red
pepper
1 medium ½-inch slices or
strips
horizontal 4 to 5 minutes
8
9
CKSTCG20K-CKSTCG21K-TECO Series_16ESM1.indd 8-9 6/22/16 8:53 AM
Page 6

www.oster.com
www.oster.com
CARE & CLEANING
Your Titanium Infused DuraCeramic™ 7-Minute Grill should be cleaned
after every use.
CLEANING AND CARE
• CAUTION: Make sure your 7-Minute Grill is unplugged and allow it to cool
completely before cleaning.
NOTE: To protect the Titanium Infused DuraCeramic™ coating, do not run
cold water over cooking surface immediately after use.
• Wipe the cooking plates with a damp, soft cloth, sponge or paper towel to
remove food residue.
• Do not use abrasive cleaners or scouring pads that can scratch or damage
the non-stick ceramic coated plates.
• Do not use hard, sharp utensils. If the grill plates are very dirty, use mild
soapy water. Rinse with hot water on a sponge or towel and dry the
plates carefully.
• Wipe exterior surfaces with a soft, damp cloth. If further cleaning is
needed, you can clean it with water and mild detergent. Dry thoroughly.
• Remove and empty drip tray after each use and wash the tray in warm,
soapy water. Avoid the use of scouring pads or harsh detergents as they
may damage the surface. Rinse and dry thoroughly with a clean, soft cloth.
• CAUTION: Never immerse grill, cord or plug in water or any other liquid.
• DO NOT place in the dishwasher.
• NEVER clean or rinse the appliance under running water.
For proper care of your Titanium Infused DuraCeramic™ coated 7-Minute
Grill, follow the following steps if stubborn stains appear:
1. Sprinkle some baking soda on the stained area.
2. Add enough water to moisten the baking soda, making a paste like
texture.
3. Let sit for a few minutes (for tougher stains let sit up to an hour).
4. Lightly scrub with a plastic scouring pad or damp cloth and dry thoroughly.
5. Repeat if necessary.
Should any stubborn stains appear, they will not aect the performance and
non-stick quality of the Titanium Infused DuraCeramic™ coating.
Storage
For your convenience, the power cord can be stored using the cord wrap
underneath the unit. Simply insert it into the clips to keep it in place.
11
FOOD AMOUNT WEIGHT
GRILL
POSITION
TIME
FRUIT
Pineapple slices 2 ½-inch slices horizontal 3 to 4 minutes
Peach halves 2 Medium peach
stone removed
horizontal 4 to 5 minutes
FISH
Salmon llet 1 6 ½ oz horizontal 4 to 5 minutes (145⁰F)
SANDWICHES
Grilled Cheese 1 2 oz cheese horizontal 2 to 3 minutes
Grilled Ham and
Cheese
1 1 ½ oz cheese
And 1 ½ oz ham
horizontal 2 to 3 minutes
Our lives are busy and hectic but the Oster® 7 Minute Grill can help you
cook and serve freshly made, healthy meals for you and those you love…
in under 7 minutes. Visit www.oster.com for delicious and inspiring recipes
that are quick and easy to make.
10
CKSTCG20K-CKSTCG21K-TECO Series_16ESM1.indd 10-11 6/22/16 8:53 AM
Page 7

www.oster.com
www.oster.com
1 Year Limited Warranty
Sunbeam Products, Inc. doing business as Jarden Consumer Solutions or if
in Canada, Sunbeam Corporation (Canada) Limited doing business as Jarden
Consumer Solutions (collectively “JCS”) warrants that for a period of one year
from the date of purchase, this product will be free from defects in material
and workmanship. JCS, at its option, will repair or replace this product or
any component of the product found to be defective during the warranty
period. Replacement will be made with a new or remanufactured product or
component. If the product is no longer available, replacement may be made
with a similar product of equal or greater value. This is your exclusive warranty.
Do NOT attempt to repair or adjust any electrical or mechanical functions on
this product. Doing so will void this warranty.
This warranty is valid for the original retail purchaser from the date of initial
retail purchase and is not transferable. Keep the original sales receipt. Proof
of purchase is required to obtain warranty performance. JCS dealers, service
centers, or retail stores selling JCS products do not have the right to alter,
modify or any way change the terms and conditions of this warranty.
This warranty does not cover normal wear of parts or damage resulting from
any of the following: negligent use or misuse of the product, use on improper
voltage or current, use contrary to the operating instructions, disassembly,
repair or alteration by anyone other than JCS or an authorized JCS service
center. Further, the warranty does not cover: Acts of God, such as re, ood,
hurricanes and tornadoes.
What are the limits on JCS’s Liability?
JCS shall not be liable for any incidental or consequential damages caused by
the breach of any express, implied or statutory warranty or condition.
Except to the extent prohibited by applicable law, any implied warranty or
condition of merchantability or tness for a particular purpose is limited in
duration to the duration of the above warranty.
JCS disclaims all other warranties, conditions or representations, express,
implied, statutory or otherwise.
12
JCS shall not be liable for any damages of any kind resulting from the purchase,
use or misuse of, or inability to use the product including incidental, special,
consequential or similar damages or loss of prots, or for any breach of contract,
fundamental or otherwise, or for any claim brought against purchaser by any
other party.
Some provinces, states or jurisdictions do not allow the exclusion or limitation
of incidental or consequential damages or limitations on how long an implied
warranty lasts, so the above limitations or exclusion may not apply to you.
This warranty gives you specic legal rights, and you may also have other
rights that vary from province to province, state to state or jurisdiction to
jurisdiction.
How to Obtain Warranty Service
In the U.S.A.
If you have any question regarding this warranty or would like to obtain
warranty service, please call 1-800-334-0759 and a convenient service center
address will be provided to you.
In Canada
If you have any question regarding this warranty or would like to obtain
warranty service, please call 1-800-667-8623 and a convenient service center
address will be provided to you.
In the U.S.A., this warranty is oered by Sunbeam Products, Inc. doing business as
Jarden Consumer Solutions located in Boca Raton, Florida 33431. In Canada, this
warranty is oered by Sunbeam Corporation (Canada) Limited doing business as
Jarden Consumer Solutions, located at 20 B Hereford Street, Brampton, Ontario
L6Y 0M1. If you have any other problem or claim in connection with this product,
please write our Consumer Service Department.
PLEASE DO NOT RETURN THIS PRODUCT TO ANY OF THESE ADDRESSES
OR TO THE PLACE OF PURCHASE.
13
CKSTCG20K-CKSTCG21K-TECO Series_16ESM1.indd 12-13 6/22/16 8:53 AM
Page 8

www.oster.com
www.oster.com
14
15
MEDIDAS DE SEGURIDAD IMPORTANTES
Cuando se utilizan aparatos eléctricos, siempre se deben seguir precauciones básicas de
seguridad, incluyendo las siguientes:
1. Lea todas las instrucciones antes de utilizar el producto.
2. Asegúrese de que el voltaje de su tomacorriente sea igual al voltaje indicado en la
etiqueta de clasicación eléctrica del producto.
3. A n de protegerse contra una descarga eléctrica, no sumerja la UNIDAD ni el CABLE en
agua ni en ningún otro líquido.
4. No toque las supercies calientes. Utilice las asas.
5. Este producto no debe ser utilizado por los niños.
6. Se debe tomar extrema precaución cuando el producto es utilizado cerca de los niños.
7. Desenchufe el aparato del tomacorriente cuando no esté en uso y antes de limpiarlo.
Permita que el producto se enfríe antes de limpiar o almacenarlo.
8. Nunca de un tirón al cable para desconectarlo del tomacorriente. En lugar de darle un
tirón, sujete y tire del enchufe para desconectarlo.
9. No utilice un producto que tenga un CABLE o ENCHUFE dañado o después de presentar
un problema de funcionamiento o que se haya dañado de manera alguna. Devuelva
el aparato al centro de servicio autorizado de Oster más cercano para su examinación,
reparación o ajuste. No intente reemplazar o cortar un cable dañado.
10. El uso de accesorios no recomendados por el fabricante del producto podría ocasionar
incendio, descarga eléctrica o lesión personal.
11. No utilice a la intemperie ni para propósito comercial.
12. No utilice el aparato para otro n que no sea para el que ha sido diseñado.
13. No permita que el cable cuelgue del borde de la mesa o del mostrador ni que entre en
contacto con supercies calientes.
14. No coloque sobre o cerca de una hornilla de gas o eléctrica ni en un horno caliente.
15. Solamente utilice el producto sobre una supercie plana, resistente al calor.
16. Tome mucha precaución al mover de un lugar a otro un aparato que contenga aceite u
otros líquidos calientes.
17. Para desconectar, retire el enchufe del tomacorriente.
18. Siempre desenchufe después de utilizar. El aparato se mantendrá encendido a no ser
que sea desechufado.
19. Las placas de cocción pueden contener vapor caliente acumulado durante el ciclo de
cocción, asegúrese de mantenerse alejado de las placas de cocción cuando abra la tapa.
El escape de vapor puede causar quemaduras.
20. Cuando utilice este aparato, asegúrese de que haya suciente espacio de ventilación
arriba y en su alrededor para permitir la circulación de aire. No permita que este
aparato entre en contacto con las cortinas, las paredes, la ropa, las toallas de cocina u
otros materiales amables durante el uso.
CONSERVE ESTAS INSTRUCCIONES
ESTA UNIDAD ESTÁ DISEÑADA PARA
USO DOMÉSTICO SOLAMENTE
USO DE UN CABLE DE EXTENSIÓN
Un cable de alimentación corto es provisto para reducir los peligros de enredarse
o tropezar con un cable más largo. Un cable de extensión puede ser utilizado si se
tiene el cuidado debido; sin embargo, la clasicación eléctrica marcada debe ser
por lo menos igual a la clasicación eléctrica del aparato. No se debe permitir que
el cable de extensión caiga sobre el mostrador o la mesa donde pueda ser halado
por los niños o tropezarse sin querer.
ENCHUFE POLARIZADO
Este aparato tiene un enchufe polarizado (un contacto es
más ancho que el otro). Como una característica de seguridad
para reducir el riesgo de descarga eléctrica, este enchufe
está diseñado para entrar en el tomacorriente polarizado de
sólo una manera. Si el enchufe no entra completamente
en el tomacorriente, invierta el enchufe. Si aún no entra, consulte a un electricista calicado.
No intente ignorar esta medida de seguridad ni modicar el enchufe en forma alguna. Si el
enchufe entra holgadamente en el tomacorriente de corriente alterna o si el tomacorriente de
corriente alterna se siente caliente, no utilice ese tomacorriente.
CKSTCG20K-CKSTCG21K-TECO Series_16ESM1.indd 14-15 6/22/16 8:53 AM
Page 9

www.oster.com
www.oster.com
CONOZCA SU PARRILLA DE
7 MINUTOS OSTER®
a
b
f
g
e
c
h
d
16
17
CONTROL DEL RELOJ AUTOMÁTICO
i
j
k
l
m
Gracias por comprar la Parrilla de 7 Minutos Oster®. Antes de usar
este producto por primera vez, por favor tome varios minutos para leer estas
instrucciones y consérvelas para su referencia. Preste atención particular a las
Instrucciones de Seguridad provistas. Por favor revise la información de garantía
y servicio. Para obtener más información acerca de los productos Oster®, por favor
visítenos en www.oster.com o llámenos al 1-800-334-0759.
¡Felicitaciones por su compra de un electrodoméstico DuraCeramic™ con
Titanio Infundido! Este producto cuenta con un revestimiento antiadherente
natural de cerámica DuraCeramic™ con Titanio Infundido, el cual es 8X más
duradero que otros revestimientos antiadherentes. Esto signica que no existe
la preocupación que se descascare o desprenda, Además, el revestimiento
de cerámica de gran durabilidad cocina más rápido que otros revestimientos
antiadherentes, ahorrando tiempo y energía. El revestimiento antiadherente
natural DuraCeramic™ con Titanio Infundido también ofrece grandes benecios
de salud ya que no contiene los químicos PTFE y PFOA. DuraCeramic™ con Titanio
Infundido -- ¡8X Más Duradero!
a
g
Mango frío al tacto
Tapa
Placa de cocción superior
DuraCeramic® con Titanio
Infundido
Placa de cocción inferior
DuraCeramic® con Titanio
Infundido
Bandeja de goteo removible
Dispositivo de enrollado de
cable (debajo de la unidad)
Pies antideslizantes
Control del reloj automático
b
h
c
d
e
f
Pantalla LED
Luz roja indicadora de Funcionamiento
Luz verde indicadora de Listo para
Cocinar (Ready to Cook)
Botón de Inicio del Reloj Automático
(Start Timer)
Botón de ajuste del reloj automático
(Set Timer)
i
j
k
l
m
CKSTCG20K-CKSTCG21K-TECO Series_16ESM1.indd 16-17 6/22/16 8:54 AM
Page 10

www.oster.com
www.oster.com
CÓMO:
Antes del Primer Uso
• Retire y despegue todo material promocional y de empaque,
y verique que las placas de cocción estén limpias y sin
polvo.
• Limpie la parrilla y la bandeja de goteo según las
instrucciones en la sección de Cuidado y Limpieza.
• Coloque la unidad sobre una supercie plana, nivelada
dejando suciente espacio a su alrededor para que uya el
calor sin causar daños a las paredes o los gabinetes.
• Cuando utilice su Parrilla de 7 Minutos por primera vez,
podría notar humo y un ligero olor. Esto es normal cuando el
aparato se calienta la primera vez y no es motivo de
preocupación.
Uso de Su Parrilla de 7 Minutos
1. Desenrolle el cable de alimentación del dispositivo de
enrollado.
2. Deslice la bandeja de goteo en su lugar debajo de la placa de
cocción inferior.
Consejo: La parrilla debe estar en posición horizontal para
que la bandeja de goteo encaje en posición.
3. Enchufe la unidad a un tomacorriente estándar.
4. La luz roja indicadora de funcionamiento se ilumina. La
unidad comienza a precalentar.
5. Una vez que la temperatura de precalentamiento es
alcanzada, la luz verde indicadora de Listo para Cocinar
(Ready to Cook) se ilumina. La pantalla LED muestra “0”.
6. Utiizando el mango, levante la tapa para abrirla (Figura 1).
7. Coloque con cuidado los alimentos a ser cocinados sobre la
placa de cocción inferior.
Nota: Usted puede cocinar hasta 2 porciones en esta parrilla;
por ejemplo, 2 hamburguesas. Asegúrese de no llenar
demasiado la parrilla.
8. Utilizando el mango, cierre la tapa. Los alimentos gruesos
pueden causar que la parrilla no se cierre completamente. Si
esto sucede, corte el alimento a un grosor más no para que
la placa de cocción superior pueda cerrarse.
9. Gire el mango hacia la derecha (en dirección a las agujas del
reloj) para cambiar la parrilla a la posición vertical (Figura 2).
Mientra gira el mango, la tapa se mantiene asegurada y no se
puede abrir hasta que la parrilla sea colocada de nuevo en
posición horizontal.
Nota: Si cocina alimentos con rellenos, como un sandwich
tostado de queso, es recomendado cocinarlo en la posición
vertical para evitar que el relleno se salga de las placas.
18 19
Figura 1
Figura 2
CKSTCG20K-CKSTCG21K-TECO Series_16ESM1.indd 18-19 6/22/16 8:54 AM
Page 11

www.oster.com
www.oster.com
Ajuste del Reloj Automático
1. Presione el botón de Ajuste del Reloj Automático (Set Timer)
para seleccionar un tiempo de cocción de 1 a 7 minutos. La
unidad emite un bip por cada incremento de un minuto.
2. Utilice los tiempos de cocción recomendados en la Tabla de
Cocción.
3. Una vez que haya seleccionado el tiempo de cocción deseado,
presione el botón de Inicio (Start Timer). El reloj automático
comienza el proceso de conteo regresivo hasta llegar al “0”.
Nota: Mientras el reloj automático cuenta en forma regresiva, la
pantalla LED muestra cada número parpadeando para informarle
que el conteo regresivo de la cocción está en progreso.
4. Si usted necesita cambiar el tiempo de cocción
seleccionado: presione y sostenga el botón de Inicio (Start
Timer) para reajustar el reloj automático y repita los pasos 1 a
3 para seleccionar un tiempo nuevo de cocción.
5. Una vez que el ciclo de cocción haya terminado, la unidad
emite 4 bips.
6. Para revisar los alimentos, gire el mango hacia la izquierda (en
dirección contraria a las agujas del reloj) para cambiar la
parrilla a la posición horizontal y cuidadosamente levante la
tapa por el mango.
Advertencia: Las placas de cocción podrían contener
acumulación de vapor durante el ciclo de cocción, asegúrese
de mantenerse alejado de las placas de cocción cuando abra
la tapa. El escape de vapor puede quemar.
7. Abra la tapa cuidadosamente. Si es necesario cocinar los
alimentos por más tiempo, cierre la tapa y ajuste el tiempo de
cocción. Si los alimentos están cocinados a su gusto, retírelos
utilizando un utensilio de plástico tal como una espátula o
pinzas de cocina.
Importante: Siempre utilice utensilios de plástico resistente al
calor, silicona o madera para evitar rayones en el
revestimiento antiadherente de cerámica. Se recomienda no
utilizar pinchos de metal, pinzas, tenedores o cuchillos que
puedan dañar el revestimiento antiadherente de cerámica.
8. Para vaciar la bandeja de goteo, espere a que se enfríe
completamente antes de retirarla de la parte inferior de la
unidad.
9. Retire el enchufe del tomacorriente.
20
21
Consejos y Recomendaciones
· No sobrellene las placas de cocción.
• Si la primera vez que cocina sus alimentos, no están cocinados
a su gusto, puede ajustar el tiempo de cocción según las
instrucciones en la sección de “Ajuste del Reloj Automático”.
• Para evitar pérdida de calor, no abra la tapa con frecuencia.
• Algunos alimentos congelados podrían necesitar ser
descongelados antes de cocinarlos en la parrilla (por favor
consulte las notas en la Tabla de Cocción, si es necesario).
TABLA DE COCCIÓN
ALIMENTO CANTIDAD PESO
POSICIÓN
DE LA
PARRILLA
TIEMPO DE
COCCIÓN
CARNES (Frescas)
Hamburguesa de
carne
1 ó 2 5 oz., cada Vertical 4 a 5 minutos a término
medio (160⁰ F)
Hamburguesa de
pavo
1 ó 2 5 oz., cada Vertical 4 a 5 minutos a término
medio (160⁰ F)
Bistec sin hueso 1 8 oz. Vertical 6 a 7 minutos a término
medio (160⁰ F)
Pechuga de pollo
sin hueso
1 7 oz. Vertical 6 a 7 minutos (170⁰ F)
Chuleta de cerdo
sin hueso
1 5 ½ oz. Vertical 6 a 7 minutos (160⁰ F)
Hamburguesa de
salchicha
3 1 ½ oz., cada Vertical 6 a 7 minutos (165⁰ F)
Salchichas 4 1 oz., cada Vertical 6 a 7 minutos (165⁰ F)
Perros Calientes 2 1 ½ oz., cada Vertical 4 a 5 minutos (165⁰ F)
CARNES (Congeladas)
Hamburguesa de
carne
1 5 ¼ oz. Vertical 6 a 7 minutos a término
medio crudo
CKSTCG20K-CKSTCG21K-TECO Series_16ESM1.indd 20-21 6/22/16 8:54 AM
Page 12

www.oster.com
www.oster.com
23
22
ALIMENTO CANTIDAD PESO
POSICIÓN
DE LA
PARRILLA
TIEMPO DE
COCCIÓN
VEGETALES
Calabacín verde 2 a 3 tiras ó
4 a 5 rebanadas
½ pulgada de
ancho
horizontal 4 a 5 minutos
Calabacín amarillo 2 a 3 tiras ó
4 a 5 rebanadas
½ pulgada de
ancho
horizontal 4 a 5 minutos
Rebanadas de
cebolla
2 ½ pulgada de
ancho
horizontal 6 a 7 minutos
Puntas de
espárragos
4 a 6 Mediano a
grande
horizontal 4 a 5 minutos
Pimiento verde o
rojo
1 mediano Rebanadas o tiras
de ½ pulgada
horizontal 4 a 5 minutos
FRUTA
Rebanadas de piña 2 Rebanadas de ½
pulgada
horizontal 3 a 4 minutos
Mitades de
durazno
2 Durazno
medianossemilla
removida
horizontal 4 a 5 minutos
PESCADO
Filete de salmón 1 6 ½ oz. horizontal 4 a 5 minutos (145⁰F)
SÁNDWICHES
Queso tostado 1 2 oz. de queso horizontal 2 a 3 minutos
Jamón y queso
tostado
1 1 ½ oz. de queso
y 1 ½ oz. de
jamón
horizontal 2 a 3 minutos
Nuestras vidas están ocupadas y agitadas pero la Parrilla de 7 Minutos
Oster® puede ayudarle a cocinar y servir comidas saludables, preparadas
frescas para áquellos que ama…en menos de 7 minutos.
Visite www.oster.com para recetas deliciosas e inspiradoras que son rápidas
y fáciles de preparar.
CUIDADO Y LIMPIEZA
Su Parrilla de 7 Minutos DuraCeramic® con Titanio Infundido se debe
limpiar después de cada uso.
LIMPIEZA Y CUIDADO
• PRECAUCIÓN: Asegúrese de que su Parrilla de 7 Minutos esté
desenchufada y permita que se enfríe completamente antes de limpiarla.
NOTA: Para proteger el revestimiento DuraCeramic™ con Titanio
Infundido, no deje caer agua fría sobre la supercie de cocción
inmediatamente después de utilizar.
• Limpie las placas de cocción con un paño húmedo suave, una esponja o
papel de toalla para remover los residuos de alimento.
• No use limpiadores abrasivos ni estropajos de bras de metal que pueden
rayar o dañar las placas con revestimiento antiadherente de cerámica.
• No use utensilios alados duros. Si las placas de la parrilla están muy
sucias, use agua con detergente suave. Enjuague con una esponja con
agua caliente o toalla y seque las placas cuidadosamente.
• Limpie las supercies exteriores con un paño húmedo suave. Si es
necesario una limpieza adicional, puede limpiarlas con agua y un
detergente suave. Seque completamente.
• Retire y vacíe la bandeja de goteo después de cada uso y lave con agua
caliente jabonosa. Evite el uso de estropajos de metal o detergentes
abrasivos ya que pueden dañar la supercie. Enjuague y seque
completamente con un paño limpio suave.
• PRECAUCIÓN: Nunca sumerja la parrilla, el cable o enchufe en agua ni en
ningún otro líquido.
• NO coloque la parrilla en la máquina lavaplatos.
• NUNCA limpie o enjuague el aparato bajo agua.
Para un cuidado apropiado de su Parrila de 7 Minutos DuraCeramic™ con
Titanio Infundido, siga los siguientes pasos si aparecen manchas difíciles:
1. Esparza un poco de bicarbonato sobre el área manchada.
2. Añada suciente agua para humedecer el bicarbonato y formar una pasta.
3. Deje reposar for varios minutos (para manchas más difíciles, deje
reposar hasta una hora).
4. Restriegue ligeramente con un estropajo de plástico o un paño
húmedo y seque completamente.
5. Repita el proceso si es necesario.
En el caso de que aparezcan manchas difíciles, esto no afectará el rendimiento y
la calidad del revestimiento antiadherente DuraCeramic™ con Titanio Infundido.
Almacenamiento
Para su conveniencia, el cable de alimentación puede ser almacenado en el
dispositivo de enrollado de cable debajo de la unidad. Simplemente insértelo
en las presillas para mantenerlo en su lugar.
CKSTCG20K-CKSTCG21K-TECO Series_16ESM1.indd 22-23 6/22/16 8:54 AM
Page 13

www.oster.com
www.oster.com
24
25
Garantía Limitada de 1 Año
Sunbeam Products, Inc. operando bajo el nombre de Jarden Consumer
Solutions o en Canadá, Sunbeam Corporation (Canada) Limited, operando
bajo el nombre de Jarden Consumer Solutions, (en forma conjunta, “JCS”),
garantiza que por un período de un año a partir de la fecha de compra, este
producto estará libre de defectos de materiales y mano de obra. JCS, a su
elección, reparará o reemplazará este producto o cualquier componente del
mismo que presente defectos durante el período de garantía. El reemplazo
se realizará por un producto o componente nuevo o reparado. Si el producto
ya no estuviera disponible, se lo reemplazará por un producto similar de valor
igual o superior. Ésta es su garantía exclusiva. No intente reparar o ajustar
ninguna función eléctrica o mecánica de este producto. Al hacerlo anulará
ésta garantía.
Esta garantía es válida para el comprador minorista original a partir de la fecha
de compra inicial y la misma no es transferible. Conserve el recibo de compra
original. Para solicitar servicio en garantía se requiere presentar un recibo de
compra. Los agentes y centros de servicio de JCS o las tiendas minoristas que
venden productos de JCS no tienen derecho a alterar, modicar ni cambiar de
ninguna manera los términos y las condiciones de esta garantía.
Esta garantía no cubre el desgaste normal de las piezas ni los daños que se
produzcan como resultado de lo siguiente: uso negligente o mal uso del
producto, uso de voltaje incorrecto o corriente inapropiada, uso contrario a las
instrucciones de operación, desensamble, reparación o alteración por parte de
un tercero ajeno a JCS o a un Centro de Servicio autorizado por JCS. Asimismo,
la garantía no cubre: actos fortuitos tales como incendios, inundaciones,
huracanes y tornados.
¿Cuáles son los límites de responsabilidad de JCS?
JCS no será responsable de daños incidentales o emergentes causados por el
incumplimiento de alguna garantía o condición expresa, implícita o legal.
Excepto en la medida en que lo prohíba la ley aplicable, cualquier garantía o
condición implícita de comerciabilidad o aptitud para un n determinado se
limita, en cuanto a su duración, al plazo de la garantía antes mencionada.
JCS queda exenta de toda otra garantías, condiciones o manifestaciones,
expresa, implícita, legal o de cualquier otra naturaleza.
JCS no será responsable de ningún tipo de daño que resulte de la compra,
uso o mal uso del producto, o por la imposibilidad de usar el producto,
incluyendo los daños incidentales, especiales, emergentes o similares, o la
pérdida de ganancias, ni de ningún incumplimiento contractual, sea de una
obligación esencial o de otra naturaleza, ni de ningún reclamo iniciado contra
el comprador por un tercero.
Algunas provincias, estados o jurisdicciones no permiten la exclusión o
limitación de los daños incidentales o emergentes ni las limitaciones a la
duración de las garantías implícitas, de modo que es posible que la exclusión o
las limitaciones antes mencionadas no se apliquen en su caso.
Esta garantía le otorga derechos legales especícos y es posible que usted
tenga otros derechos que varían de provincia a provincia, estado a estado o
jurisdicción a jurisdicción.
Cómo solicitar el servicio de garantía
En los Estados Unidos
Si tiene alguna pregunta sobre esta garantía o desea recibir servicio de
garantía, por favor llame al 1-800-334-0759 y podrá obtener la dirección del
centro de servicio que le resulte más conveniente.
En Canadá
Si tiene alguna pregunta sobre esta garantía o desea recibir servicio de
garantía, por favor llame al 1-800-667-8623 y podrá obtener la dirección del
centro de servicio que le resulte más conveniente.
En los Estados Unidos, esta garantía es ofrecida por Sunbeam Products, Inc.
operando bajo el nombre de Jarden Consumer Solutions, localizada en Boca
Ratón, Florida 33431. En Canadá, esta garantía es ofrecida por Sunbeam
Corporation (Canada) Limited operando bajo el nombre de Jarden Consumer
Solutions, localizada en 20 B Hereford Street, Brampton, Ontario L6Y 0M1. Si
usted tiene otro problema o reclamo en conexión con este producto, por favor
escriba al Departamento de Servicio al Consumidor.
POR FAVOR NO DEVUELVA ESTE PRODUCTO A NINGUNA DE ESTAS
DIRECCIONES NI AL LUGAR DE COMPRA.
CKSTCG20K-CKSTCG21K-TECO Series_16ESM1.indd 24-25 6/22/16 8:54 AM
 Loading...