


For product questions contact:
Sunbeam Consumer Service
USA : 1.800.334.0759
Canada : 1.800.667.8623
www.oster.com
©2008 Sunbeam Products, Inc. doing business as Jarden Consumer Solutions. All rights reserved. Distributed by Sunbeam Products, Inc. doing business as Jarden Consumer Solutions, Boca Raton, Florida 33431.
Para preguntas sobre los productos llame:
Jarden Consumer Service
EE.UU.: 1.800.334.0759
www.oster.com
©2008 Sunbeam Products, Inc. operando bajo el nombre de Jarden Consumer Solutions. Todos los derechos reservados. Distribuido por Sunbeam Products, Inc. operando bajo el nombre de Jarden Consumer Solutions, Boca Raton, Florida 33431.
SPR-061108REV3
P.N. 127190
Printed in China |
Impreso en China |
Electric Cheese grater
RALLADORA DE QUESO ELÉCTRICA
User Guide/ Guía del Usuario: CG100
Safety
Seguridad
How to use
Cómo usar
Care & Cleaning
Cuidado y Limpieza
FAQs
Preguntas frecuentes
Warranty
Garantía
www.oster.com

IMPORTANT SAFEGUARDS
When using electrical appliances, basic safety precautions should always be followed including the following:
READ ALL INSTRUCTIONS BEFORE USE
•Donotoperateelectriccheesegraterwithadamagedcordorplug, aftertheappliancemalfunctionsorifitisdroppedordamagedinany manner.Refertowarrantysection.
•Toprotectagainstriskofelectricalshock,donotputtheelectriccheese graterinwaterorotherliquid.Thismaycausepersonalinjuryand/or damagetotheproduct.
•Toprotectagainstfire,donotoperatetheunitinthepresenceof explosiveand/orflammablefumes.
•Donotusetheelectriccheesegraterforotherthanintendeduse.
•Forhouseholduseonly.Donotexposetheelectriccheesegrateror chargingunittorainorotherextremeconditions.
•Donotattempttoopentheelectriccheesegraterortherechargingunit. Ithasnoserviceableparts.Yourelectriccheesegraterisguaranteedfor oneyear.Intheeventofamalfunctioninthistimepleasecontactour customerservicesdepartment.
•Useonlythepowersupplyprovidedwiththeappliance.
•Neverremovetheplugfromthesocketbypullingthepowercord. Unplugcheesegraterfromchargingcordbeforedisassemblyor cleaning.
•Makesurethemotorheadissecurely lockedinplacebeforeoperating.
•Unplugthemotorbasewhenitisnotinuse,beforetakingofforputting onpartsandbeforecleaning.
•Closesupervisionisnecessarywhenanyapplianceisusedbyor nearchildren.
•Avoidcontactwithmovingparts.
This Product Is for Household Use Only
Power Cord Instructions
Please follow the instructions below to ensure the safe use of the powercord.
•Donotpull,twist,orotherwiseabusethepowercord.
SAVE THESE INSTRUCTIONS
Thank you for purchasing the OSTER® Cheese Grater. Before you use this product for the first time, please take a few moments to read these instructions and keep it for reference. Pay particular attention to the Safety Instructions provided. Please review the product service and warranty statements.
To learn more about Oster products, please visit us at www.oster.com or call us at 1-800-334-0759.
1 |
www.oster.com |
|
www.oster.com |
2 |
learning about your cheese grater
a
|
|
|
|
On/Off |
|
|
|
|
|
||
|
|
|
|
Button |
|
|
|
|
|
|
h |
|
|
|
|
|
d |
|
b |
|
|
c |
|
|
e |
|
|
||
|
|
|
|
|
f |
|
|
|
|
|
|
|
g |
|
|
|
|
a |
Motor Head |
e Coarse Shredding Drum |
|||
b |
Grater Body |
f Fine Shredding Drum |
|||
c |
Cheese Pusher |
g Cheese Door |
|||
d Top Retainer |
h Shaft Assembly |
||||
 HOW To:
Before using your Cheese Grater for the first time
We recommend you charge your Cheese Grater for at least 24 hours before using it for the first time. Follow recharging instructions below.
Recharging the Cheese Grater
Plug end of the adapter cord into the base of the Grater Body and the other end into an outlet.
We recommend you recharge your cheese grater for approximately 16 hours if the batteries have been completely discharged. When your Cheese Grater is fully charged it can grate and dispense enough cheese for a dinner party of 8 to 10 guests.
3 |
www.oster.com |
|
www.oster.com |
4 |

Disassemble for Cleaning:
1Unplug unit. Holding the Motor Head with one hand and the Grater Body with the other hand, twist the Motor Head clockwise to unlock until the alignment arrow mark matches the unlock symbol. The Motor Head can then be pulled apart by lifting it straight up.
2Lift Top Retainer straight up to remove.
3Remove (clear plastic) Cheese Pusher.
4Open Cheese Door. Place two fingers inside the Shredding Drum and twist counterclockwise to remove.
5Remove shaft assembly.
Re-Assembly:
1Insert two fingers into Shredding Drum. Insert Drum into Grater body and rotate clockwise while pushing until it fits in place.
2Place shaft assembly on grater body aligning it with the top of the drum. Then twist clockwise to lock.
3Replace Cheese Pusher.
4Put Top Retainer in place.
5Place Motor Head so that the alignment arrow mark matches the unlock
symbol. Then twist counterclockwise to lock into place until alignment arrow mark matches the lock symbol.
The Cheese Grater is now ready to be filled.
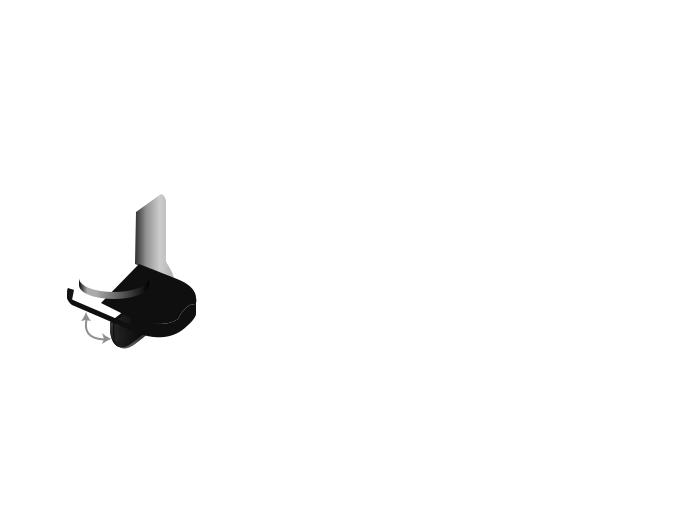
Changing the
Shredding Drum.
1Open Cheese Door. Place two fingers inside the Shredding Drum, twist counterclockwise and pull to remove.
5 |
www.oster.com |
|
www.oster.com |
6 |
 Loading...