


ORU- 2007 GM 1500 Truck, Tahoe, & Yukon Leveling Kit
Bill of Materials, P/N 60008
Part# Qty. Description
60008-1 2 Coilover spacer
.100FNFLZ 6 10-1.25mm flange nut
.100CNUCZ 6 10- 1.5mm loc nut
.100NWHDY 6 10mm flat washer
90003 1 Loctite
Grade 8 nut torque specifications
5/16" nuts 20 ft. lbs. M6 nuts 9 ft. lbs.
3/8" nuts 35 ft. lbs. M8 nuts 23 ft. lbs.
7/16" nuts 60 ft. lbs. M10 nuts 45 ft. lbs.
1/2" nuts 75 ft. lbs. M12 nuts 75 ft. lbs.
9/16" nuts 160 ft. lbs. M14 nuts 120 ft. lbs.
5/8" nuts 175 ft. lbs. M16 nuts 165 ft. lbs.
offroadunlimited.com
page 1
ORU- 2007 GM 1500 Truck, Tahoe, & Yukon Leveling Kit
INSTALLATION NOTES:
• Inspect the contents of the kit and read the entire instructions before proceeding.
• We recommend this installation be performed by a qualified technician.
• Torque all hardware to factory specifications.
• We recommend using red Loctite on all bolts.
• When removing wheels, support vehicle with jack stands.
• Unless otherwise noted, installation begins with driver side of vehicle and is then
repeated on passenger side.
1) On a flat surface, block the rear wheels, raise the driver side front of the
vehicle, support with a jack stand and remove the wheel.
2) Disconnect the sway bar links on both sides (photo 1).
Photo 1
3) If vehicle is equipped with Autoride, disconnect wires from top of shocks and brackets
from control arms.
offroadunlimited.com
page 2

ORU- 2007 GM 1500 Truck, Tahoe, & Yukon Leveling Kit
4) Loosen driver side tie rod nut and strike steering knuckle with a hammer to
free tie rod end (photo 2).
Photo 2
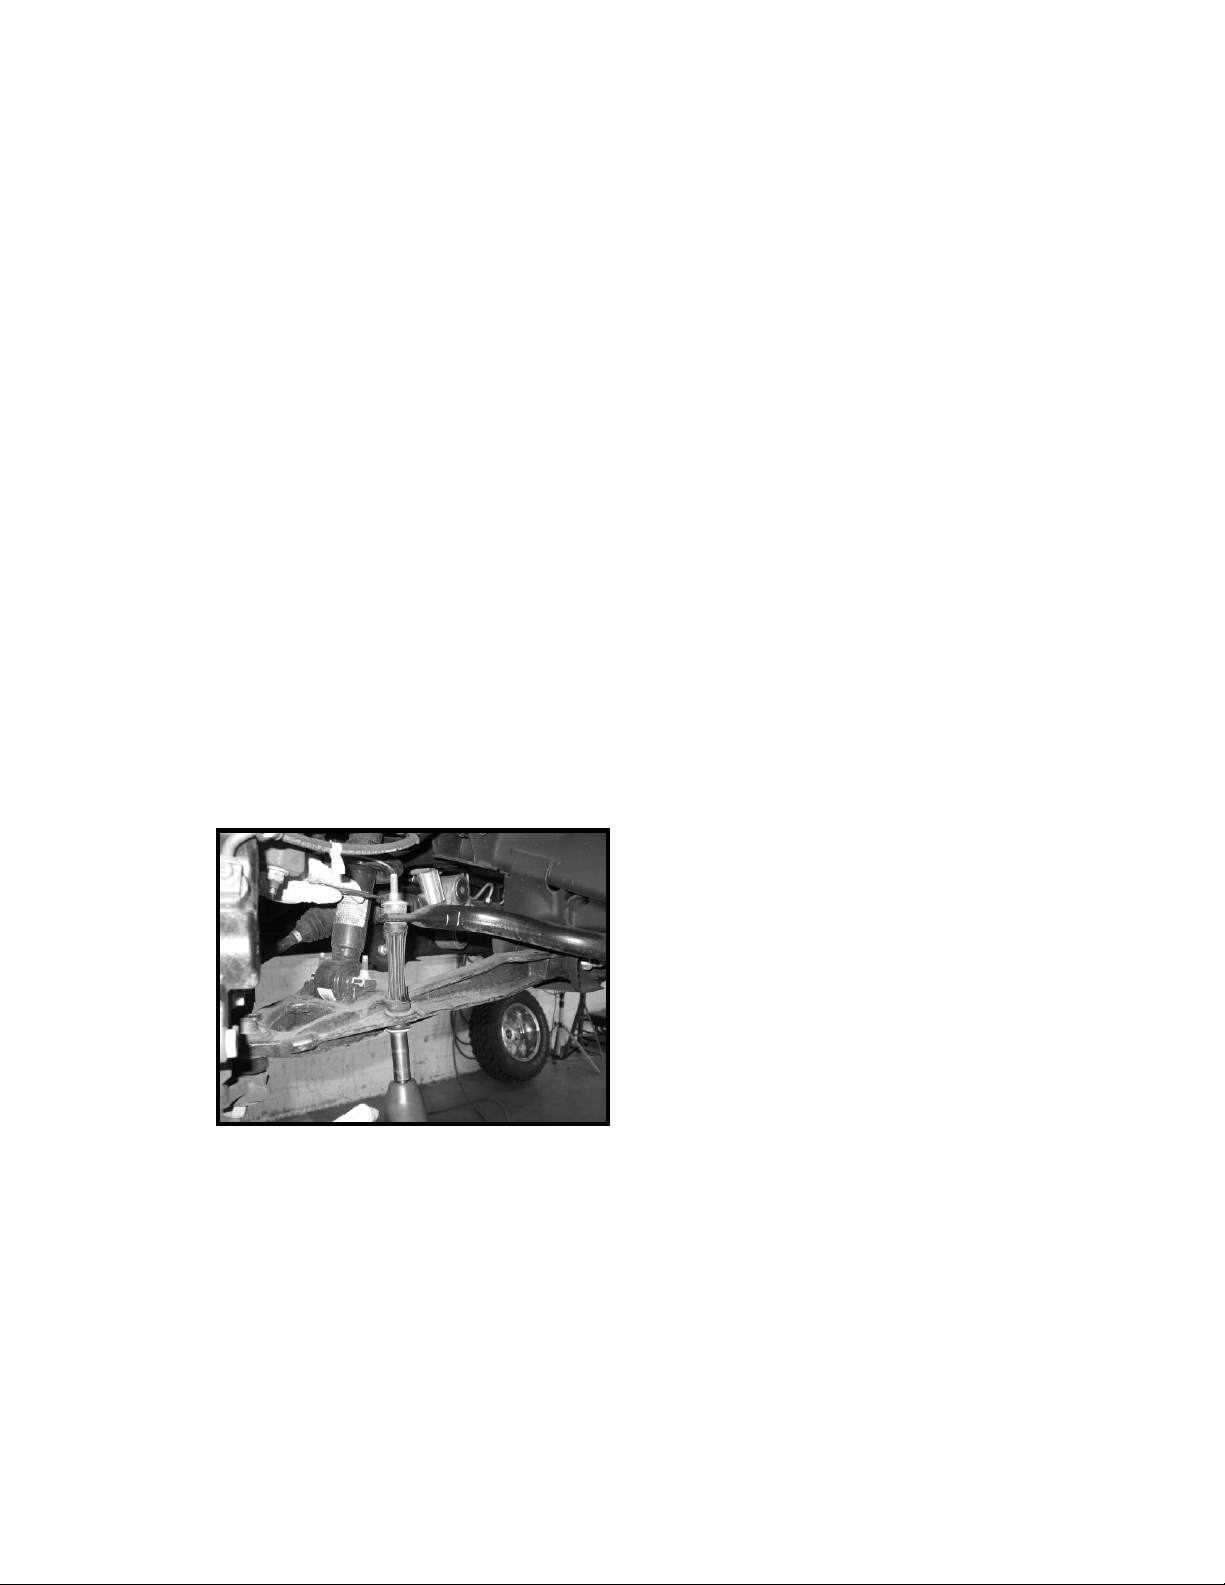
5) Remove lower coilover retaining bolts (photo 3).
Photo 3
6) Disconnect ABS line retainer from upper coilover mounting stud.
offroadunlimited.com
page 3

ORU- 2007 GM 1500 Truck, Tahoe, & Yukon Leveling Kit
joint (photo 4). Support lower control arm with a floor jack, remove nut and slowly lower
the control arm.
7) Loosen upper ball joint nut and strike steering knuckle with a hammer to release ball
Photo 4
8) Remove the 3 upper coilover mounting nuts from the studs (photo 5).
Photo 5
9) Remove coilover assembly.
offroadunlimited.com
page 4

ORU- 2007 GM 1500 Truck, Tahoe, & Yukon Leveling Kit
10) Place coilover on a suitable work surface. Re-install 3 factory retaining nuts on studs
and tighten leaving ¼" space from fully seating (photo 6).
Photo 6
11) Cut the studs flush with the top of the nuts, then remove the nuts (photo 7).
Photo 7
offroadunlimited.com
page 5

ORU- 2007 GM 1500 Truck, Tahoe, & Yukon Leveling Kit
12) Install spacer with new 10-1.5mm loc nuts and flat washers (photo 8). After installing
spacer, be sure there are no studs protruding above the spacer surface. If any stud is
protruding, you must cut/grind it until it is flush.
Photo 8
13) Apply Loctite to studs, place coilover in upper mounting and loosely attach with (3) 10-
1.25mm flange nuts (photo 9).
Photo 9
offroadunlimited.com
page 6

ORU- 2007 GM 1500 Truck, Tahoe, & Yukon Leveling Kit
14) Now it is necessary to rotate the coilover body 180 degrees to correct the angle of the
lower mounting bar pin and allow the bolts to be easily re-installed. This is accomplished
by raising the lower control arm with a jack to provide access to the lower shock body,
applying a penetrating lubricant such as WD-40 and rotating the body with a large pair or
channel locks or other suitable tool (photos 10 & 11).
Photo 10
Photo 11
15) Lower the control arm and install the lower mounting bolts. Tighten the upp er stud flange
nuts.
16) Re-attach upper ball joint and the tie rod end and tighten.
17) Repeat steps on passenger side of vehicle. Re-attach sway bar links, re-check all
fasteners for tightness, and have vehicle professionally aligned.
offroadunlimited.com
page 7

WARRANTY POLICY
ORU (Off Road Unlimited), extends a lifetime warranty on their products to the original purchaser. The warranty covers
defects in material and workmanship. This warranty does not apply to wear items such as brakes, steering components,
u-joints, etc., or to products sold by, but not manufactured by ORU. Application of this warranty is subject to inspection of
the product by ORU and at their sole discretion. ORU is not responsible for shipping charges incurred to submit product
for inspection, or its return if the warranty is declined. This warranty does not cover parts that have been modified, applied
outside the intended application, or subjected to abuse. This warranty applies solely to the ORU product and does not
extend to any incidental damage(s) or incurred cost(s). No other warranties/guarantees are expressed or implied. All
warranty claims must be accompanied by the original receipt, or reasonable facsimile. To apply for warranty
consideration, contact the ORU Customer Service Department at 818-563-1208.
 Loading...