

Page 1

Heart Rate Monitor
with Speed and Distance
Model: SE300
User Manual
1
Page 2

Heart Rate Monitor
with Speed and Distance
Model: SE300
USER MANUAL
PATENT PENDING
CONTENTS
Introduction ...............................................................................3
Training Information .................................................................... 3
How the Heart Rate Monitor Helps You .....................................3
Training Tips ............................................................................ 3
Product Overview ........................................................................ 4
Watch ...................................................................................... 4
LCD ........................................................................................5
Getting Started ............................................................................ 7
Unpacking the Watch ...............................................................7
Wearing the Chest Belt and Watch ............................................ 8
Transmission Signal .................................................................9
Signal Search ........................................................................10
Setting the Keypad Tone / Light Mode ..................................... 11
Activating the Backlight ........................................................... 11
Activating the Keypad Lock ..................................................... 12
Switching Between Operation Modes ......................................12
Clock .........................................................................................12
Alarm ......................................................................................... 13
User Profile ................................................................................ 14
Activity Level .......................................................................... 15
Exercise Profile .........................................................................15
Target Activity ........................................................................ 17
Maximum / Lower / Upper Heart Rate Limit .............................. 17
Heart Rate Alert .....................................................................18
EN
1
Page 3

EN
Calibration, Speed and Targets .................................................18
Calibration .............................................................................18
Unit for Speed and Distance ...................................................20
Speed Limit ............................................................................20
Setting Target(s) ....................................................................21
Using Target Function ............................................................21
Viewing Target Data when Workout is Paused or Stopped ........ 22
About the Smart Training Program ............................................ 23
Using the Smart Training Program ...........................................23
Viewing Data While Smart Training Program is Running ........... 24
Viewing Smart Training Program Memory Records ...................25
Recovery Heart Rate .............................................................. 25
Stopwatch ..................................................................................25
Viewing Data while Stopwatch / Lap is Running ......................... 26
Viewing Overall or Lap Memory Records .................................... 27
About the Fitness / Body Mass Index
Fitness Index .........................................................................28
Body Mass Index ....................................................................29
Viewing Fitness ...................................................................... 30
Care Instructions ....................................................................... 30
Aquatic and Outdoor Activities ................................................31
Batteries ....................................................................................31
Specifications ............................................................................ 33
Warnings ...................................................................................35
About Oregon Scientific ............................................................36
EU-Declaration of Conformity .................................................... 36
........................................28
2
Page 4

INTRODUCTION
Thank you for selecting the Oregon Scientific™ Heart Rate Monitor
Watch (SE300) as your sports fitness product of choice.
IMPORTANT This product is for sport purposes only and it is not
meant to replace any medical advice.
This manual contains important safety and care information, and
provides step-by-step instructions for using this product. Read the
manual thoroughly, and keep it in a safe place in case you need to
refer to it later.
TRAINING INFORMATION
HOW THE HEART RATE MONITOR HELPS YOU
A heart rate monitor is the most important tool in cardiovascular health
and an ideal training partner. It enables you to see and monitor results.
This helps you assess your past performance, maximize your workout
and adapt your future exercise program to achieve your desired goals
in a safer and more effective way.
When you exercise, the chest belt picks up your heartbeat and sends
it to the watch. Now you can view your heart rate and start monitoring
your performance based on your heart rate readings. As you get fitter,
your heart will need to do less work and the speed of your heartbeat
will decrease. The reason for this is as follows:
• Your heart pumps blood to your lungs to obtain oxygen. Then,
the oxygen rich blood will travel to your muscles. The oxygen is
used as fuel and the blood leaves the muscles and returns to
the lungs to begin the process again. As you get fit, your heart is
able to pump more blood with every beat. As a result, your heart
doesn’t have to beat as often to get the necessary oxygen to your
muscles.
EN
TRAINING TIPS
To gain maximum benefit from your training program and to ensure
that you exercise safely, please observe the following guidelines:
• Start with a well-defined training goal, such as to lose weight, keep
fit, improve health or compete in a sporting event.
• Select a training activity you enjoy and vary your training activities
to exercise different muscle groups.
3
Page 5
EN
• Start slowly, and then gradually step up your workout as
you become fitter. Exercise regularly. To maintain a healthy
cardio-vascular system, 20-30 minutes three times a week is
recommended.
• Always allow at least five minutes before and after exercising for
warm-up and cool-down.
• Measure your pulse after training. Then repeat the procedure
again after three minutes. If it does not return to its normal resting
rate, you may have trained too hard.
• Always check with your doctor before starting a vigorous training
program.
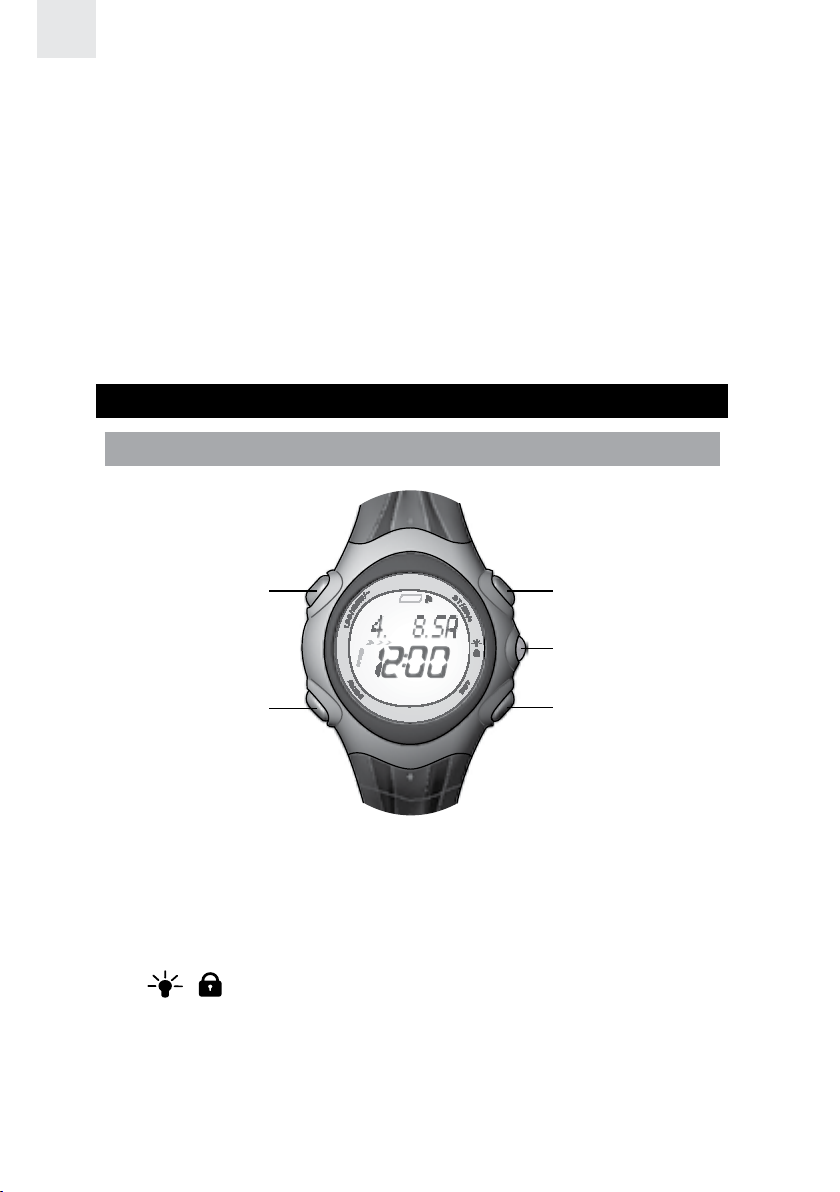
PRODUCT OVERVIEW
WATCH
1 3
4
2
1. LAP / MEM / - : Display training records; decrease setting value;
mark a lap
2. MODE: Switch to another display Mode; press and hold to search
signal
3. ST / SP / + : Start / stop timer; increase setting value
4.
5. SET: Enter setting mode; confirm setting; display different
/ : Turn on backlight for 3 seconds; lock / unlock the
keypad
information during training or memory mode; reset timer /
stopwatch / target countdown function
4
5
Page 6
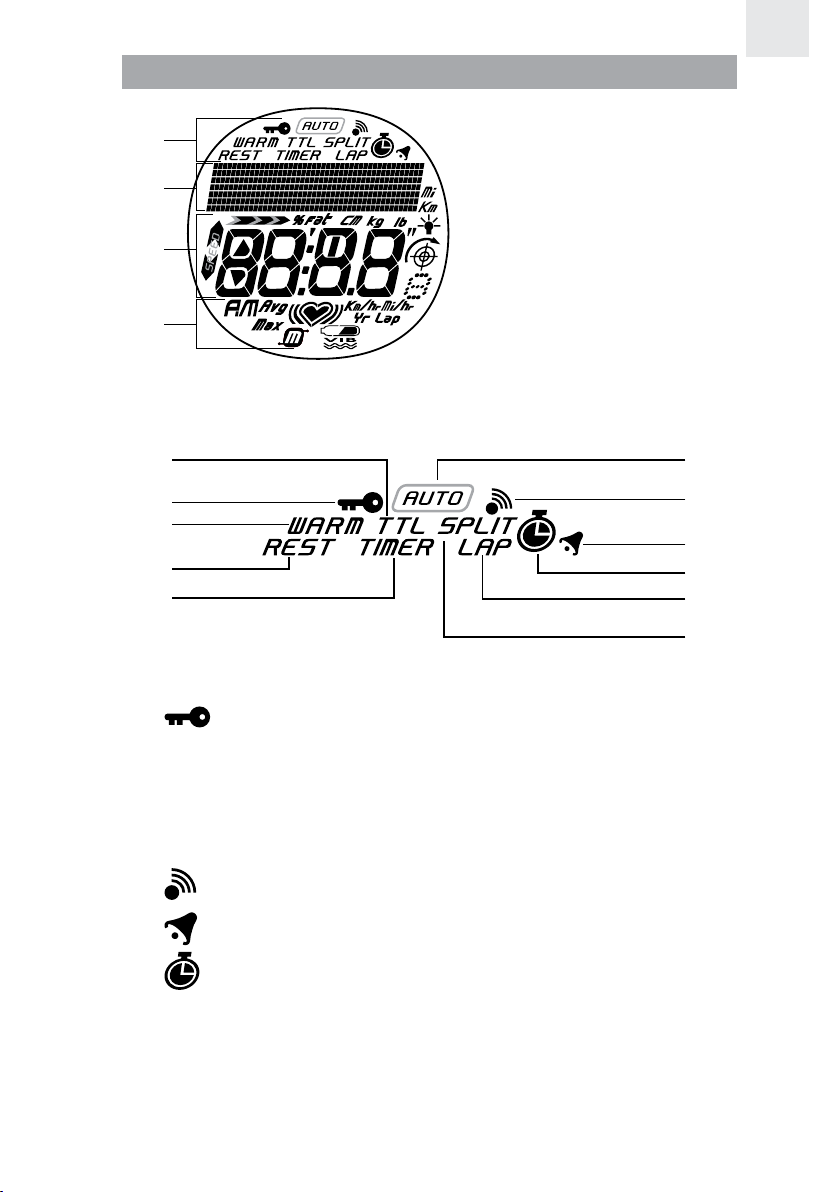
LCD
1 6
EN
1
2
3
4
Area 1
1. Area 1
2. Area 2
3. Area 3
4. Area 4
2
3
4
5
1. TTL: Total exercise time is displayed
2.
3. WARM: Warm-up timer is shown or running
4. REST: Recovery timer is shown or running
5. TIMER: SMART TRAINING PROGRAM is shown or running
6. AUTO: Auto-lap is running
: Keypad lock is enabled
7
8
9
10
11
7.
8.
9.
10. LAP: Shows current lap time or memory lap time
11. SPLIT: Shows and calculates split time
: Key tone is enabled
: Alarm is enabled
: Stopwatch is shown or running
5
Page 7
EN
6
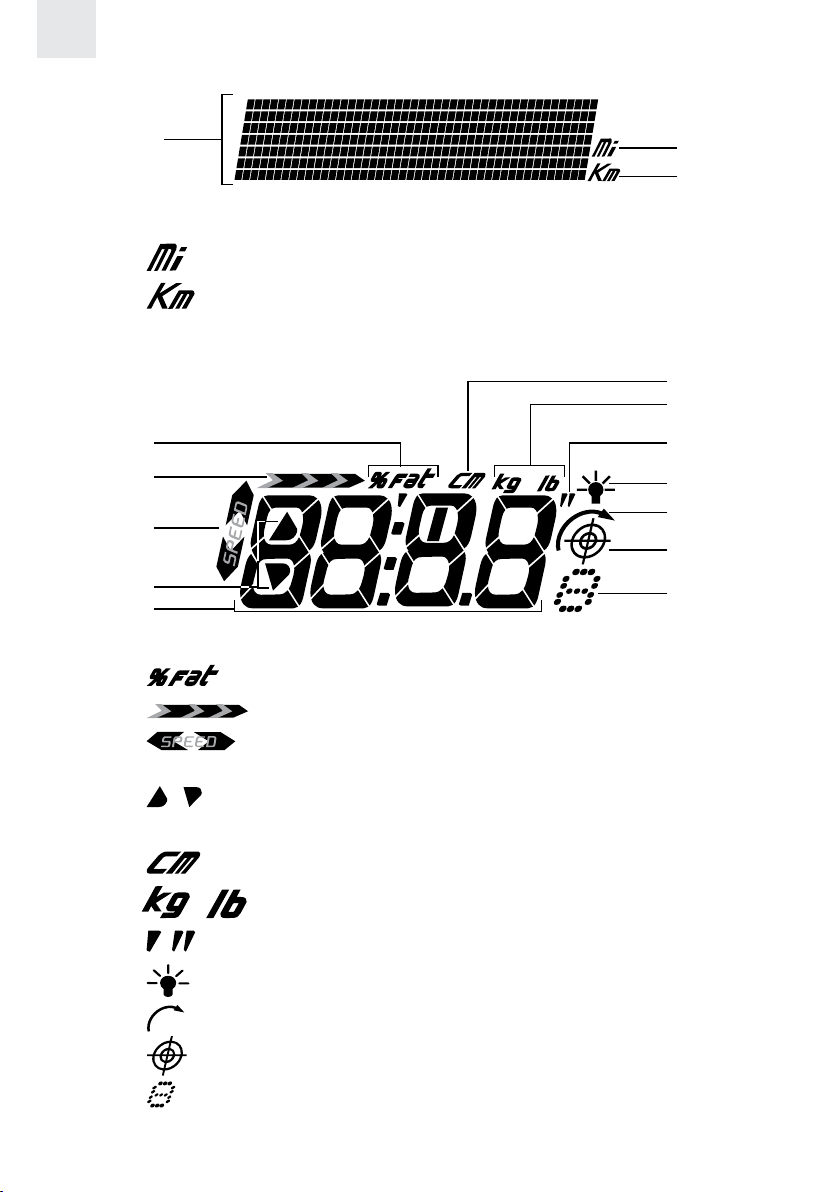
Area 2
1
1. Displays mode and relevant info
2.
3.
Area 3
: Distance in miles
: Distance in kilometers
1
2
3
4
5
1.
2.
3.
zone
4.
5. Displays information
: Percentage of fat burned
: Icon animates when a speed reading is being taken
: Flashes up / down arrow when the speed is out of
/ : Flashes up / down arrow when heart rate is out of zone
2
3
7
8
9
10
11
12
6.
7.
8.
9.
10.
11.
12.
Training Mode - shows number of repeats remaining
: Height unit
/ : Body weight units
/ : Height unit
: Light Mode is enabled
: Repeat function is activated
: Speed Mode is shown or running
: Speed Mode - shows target number;
6
Page 8
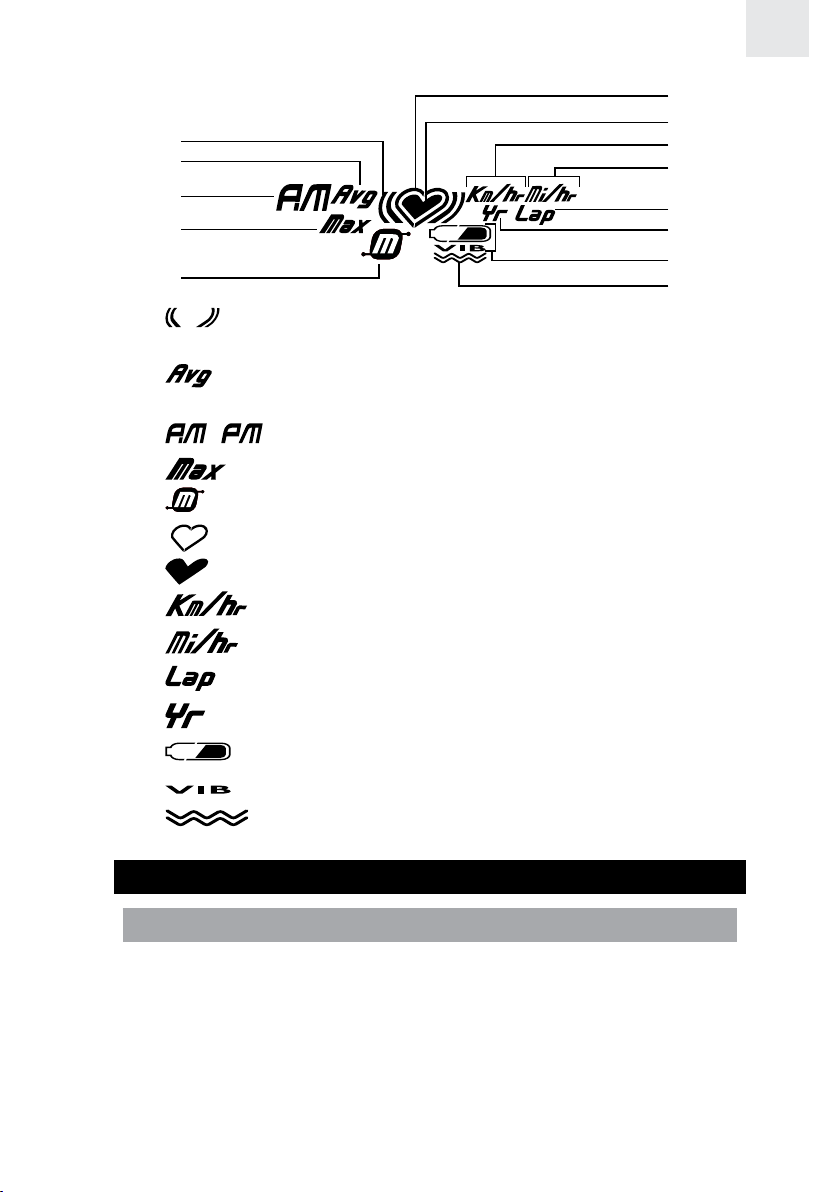
Area 4
6
EN
1
2
3
4
5
1.
2.
3.
4.
5.
6.
7.
8.
9.
10.
: Heart rate is above or below limit; audio heart rate alert is
activated
: Appears when average heart rate / average speed /
average pace is displayed
/ : Appears when the 12-hour clock / alarm is being used
: Maximum value of speed and distance is displayed
: Appears when in memory mode
: Flashes when auto-searching heart rate signal
: Flashes when a signal has been found
: Speed is displayed in Km/hr
: Speed is displayed in Mi/hr
: Displays when lap is taken
7
8
9
10
11
12
13
11.
12.
13.
GETTING STARTED
UNPACKING THE WATCH
In this box, you will find:
• Watch
• Heart rate chest belt
• Adjustable elastic belt
• Storage pouch
• Bike mount
• 2 x CR2032 lithium batteries – already installed
: Appears when setting year of birth
: Battery status
: Battery is too low for vibrate function
: Vibration alert is activated
7
Page 9
EN
To turn on the watch (first-time use only):
Press any key for 2 seconds to activate the LCD.
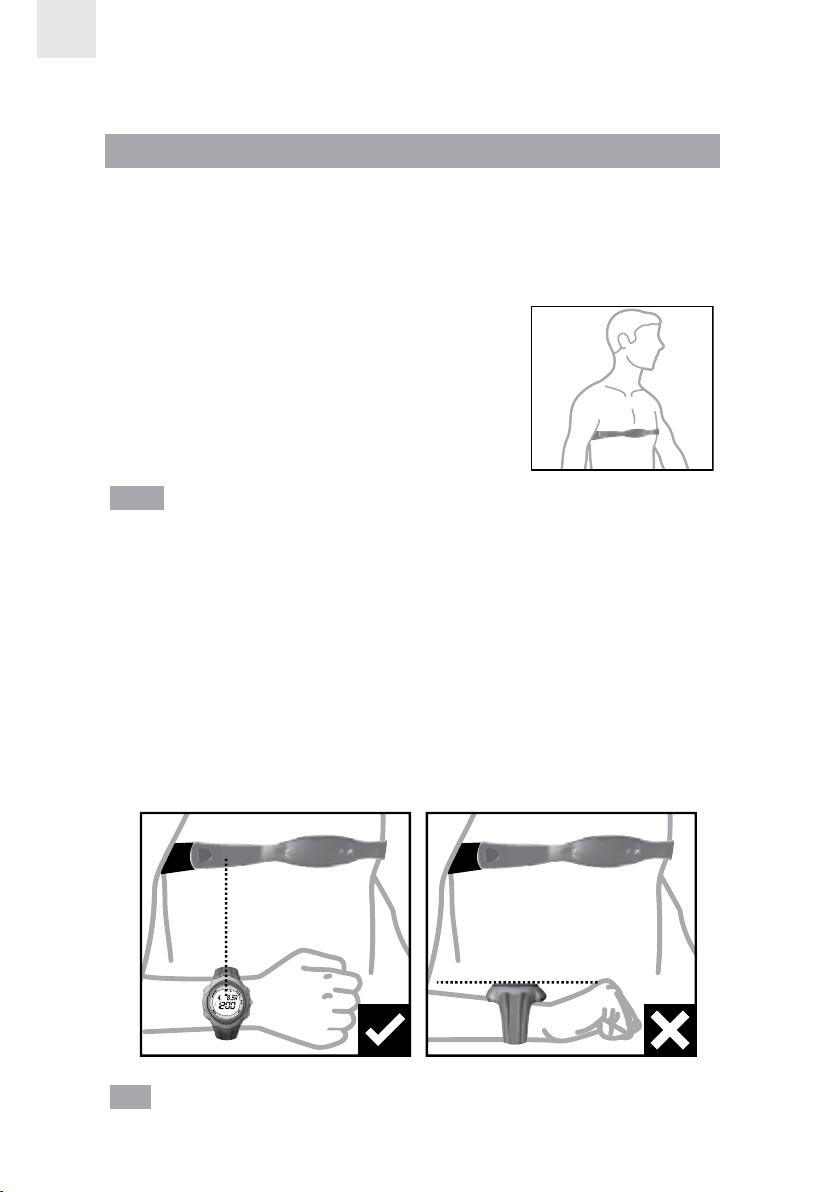
WEARING THE CHEST BELT AND WATCH
CHEST BELT
The heart rate chest belt is used to count your heartbeat and transmit
the data to the watch.
To wear the chest belt:
1. Wet the conductive pads on the underside
of the chest belt with a few drops of water
or a conductive gel to ensure solid contact.
2. Strap the heart rate chest belt across
your chest. To ensure an accurate heart
rate signal, adjust the strap until the belt
sits snugly below your pectoral muscles.
TIPS
• The position of the chest belt affects its performance. Move the
chest belt along the strap so that it falls above your heart.
• Avoid areas with dense chest hair.
• In dry, cold climates, it may take several minutes for the chest
belt to function steadily. This is normal and should improve with
several minutes of exercise.
WATCH
You can wear the receiver watch on your wrist or strap it to a bike or
exercise machine.
TIP To ensure accurate reception, try to keep the watch LCD screen
vertical when running or walking.
8
Page 10
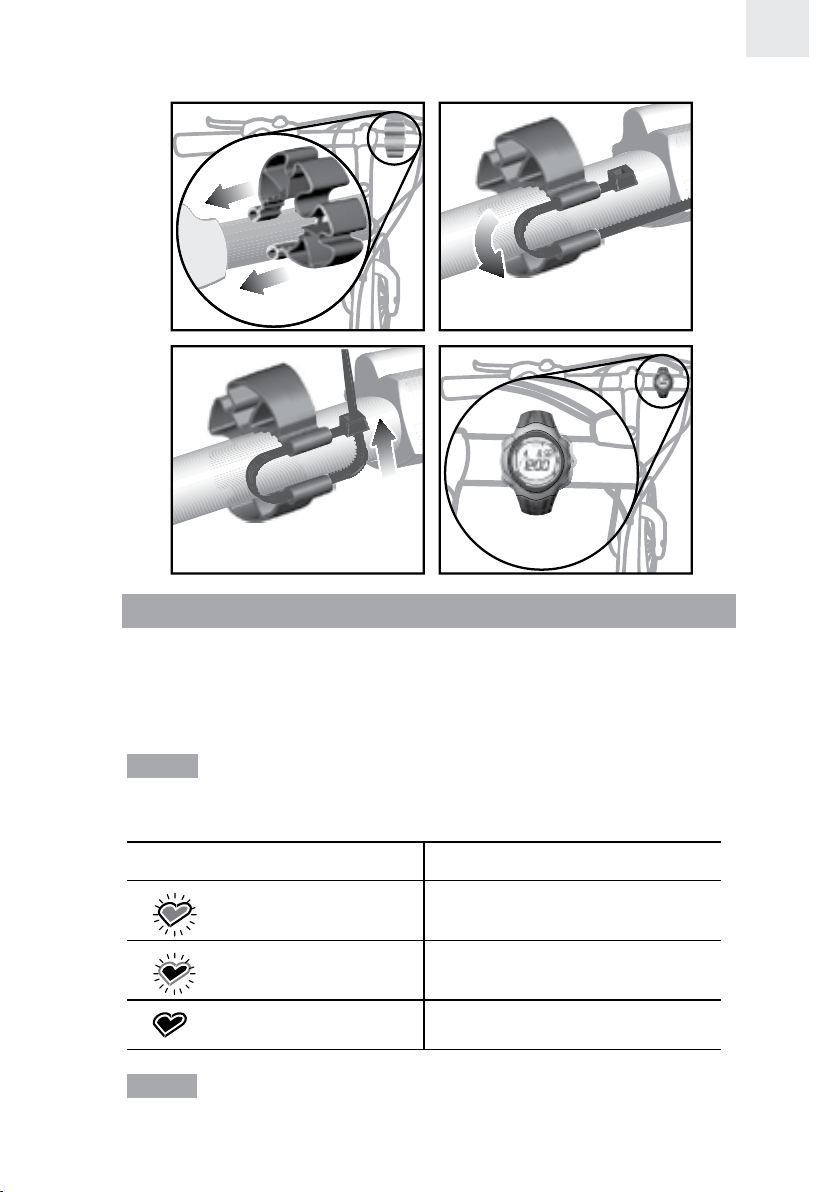
To strap to a bike or exercise machine:
EN
TRANSMISSION SIGNAL
The chest belt and watch have a maximum transmission range of about
62.5 centimeters (25 inches). They are equipped with the latest digital
coding system to reduce signal interference from the environment and
for more accurate readings.
NOTE Whenever the watch is searching for the chest belt signal
(manual or automatic search), make sure that the chest belt is no
further than 10 cm (4 inches) from the watch.
ICON DESCRIPTION
Searching for a signal
The outer heart flashes
A signal has been found
The inside heart flashes
No signal has been found
NOTE If the watch is kept idle without receiving a signal from the
chest belt for 5 minutes, the heart rate and speed functions will be
turned off.
9
Page 11

EN
IMPORTANT If the heart rate icon does not appear on the display
or is not flashing because no signal has been found, force a signal
search. See “Signal Search” section for how to do this.
In the event that you experience a weak signal or your signal is
disrupted by interference in the environment, follow the instructions
below to identify and resolve the situation.
1. The signal is weak – the watch will only show “0”:
• Shorten the distance between the heart rate chest belt and watch.
• Re-adjust the position of the heart rate chest belt.
• Check the batteries. If they are low or exhausted, the range may be less.
• Force a signal search (see “Signal Search” section).
2. Interference from another person’s heart rate monitor – their heart
rate readings appear on your watch, or the watch shows “0”:
• Take the chest belt off for 12 seconds to automatically change
your User ID. (The watch has 4 User ID’s. When the watch
receives the chest belt signal it will tell you which User ID it
has selected. Only products with a digital coding system have
User ID capability.)
NOTE The heart rate readings may interfere with other users if the
distance is less than 84 cm (33 inches).
3. The signal is jammed – the heart rate reading on your watch is flashing:
• There is too much interference in the environment for your
heart rate monitor to function. Move to an area where the
heart rate reading stops flashing.
WARNING Signal interference in the environment can be due to
electromagnetic disturbances. These may occur near high voltage
power lines, traffic lights, overhead lines of electric railways, electric
bus lines or trams, televisions, car motors, bike computers, some
motor driven exercise equipment, cellular phones or when you walk
through electric security gates. Under interference, the heart rate and
speed readings may become unstable and inaccurate.
SIGNAL SEARCH
To force a signal search:
1. Press MODE to enter SPEED, TRAIN or CHRONO Mode.
2. Press and hold MODE for 2 seconds. The signal-searching icon
the outside flashing will appear to confirm a signal search is taking place.
Whenever the watch is searching for the chest belt signal, make sure that
the chest belt is no further than 10 cm (4 inches) from the watch.
with
10
Page 12
The signal search will take approximately 10 seconds. If after 10
seconds the heart icon is not flashing, then your signal search has been
unsuccessful and you need to force another signal search. See the table in
the “Transmission Signal” section for more signal status information.
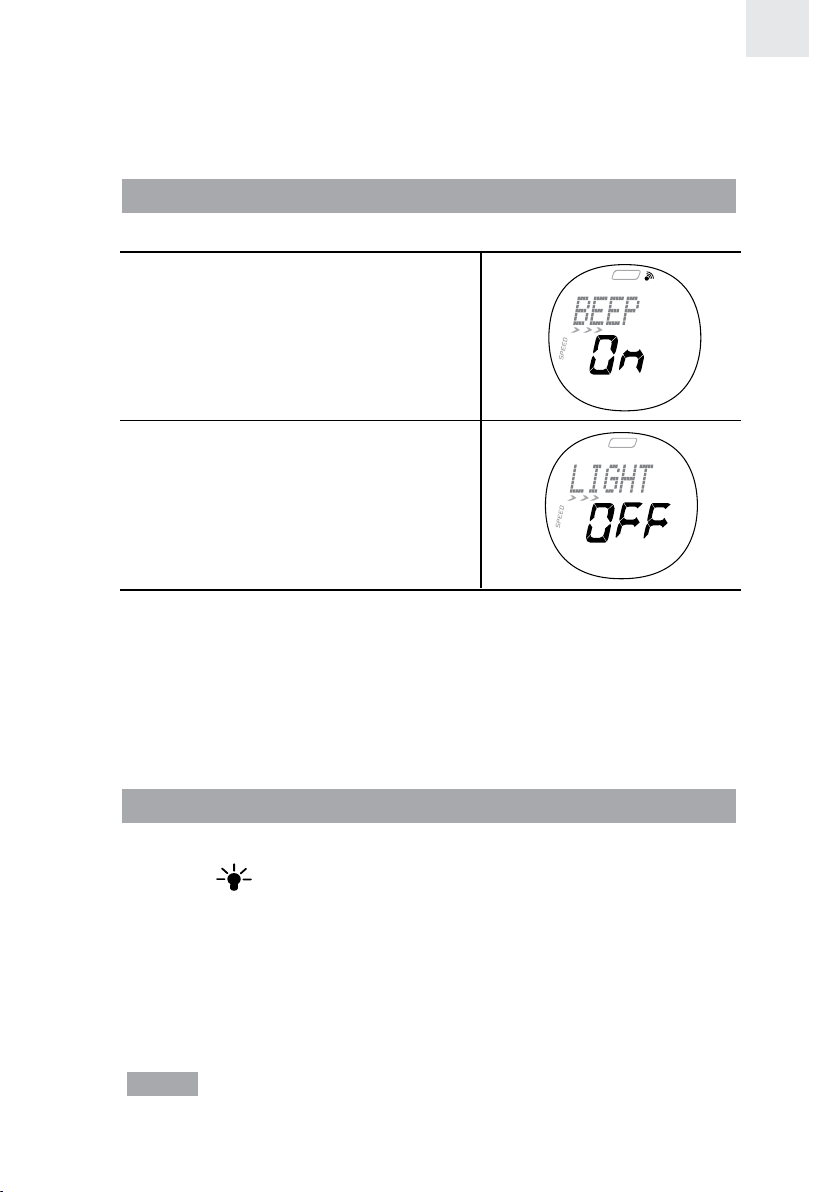
SETTING THE KEYPAD TONE / LIGHT MODE
You can set the watch to have the:
• Keypad “Beep” tone ON or OFF.
• Light Mode ON or OFF
(see “Activating the Backlight”
section).
EN
To set these features:
1. Press MODE to enter TIME Mode.
2. Press SET until you reach the feature you wish to change.
3. Press ST / SP / + or LAP / MEM / - to change the setting.
4. Press SET to confirm the setting and move on to the next one.
ACTIVATING THE BACKLIGHT
To activate when the Light Mode is set to OFF:
• Press
whilst the light is on and it will extend the light time by another 3 seconds.
To activate when the Light Mode is set to ON:
• Press any key to turn ON or extend the backlight for 3 seconds.
To help conserve power the Light Mode ON setting will automatically
switch to OFF after 2 hours.
NOTE The backlight does not work when the low battery icon is
shown and will return to normal once the battery is replaced.
to turn on the backlight for 3 seconds. Press any other key
11
Page 13

EN
ACTIVATING THE KEYPAD LOCK
To turn the keypad lock ON or OFF:
• Press and hold
when the keypad lock is on.
for 2 seconds. appears on the display
SWITCHING BETWEEN OPERATION MODES
Press MODE to switch between the 5 operation modes:
• TIME: Real-time Clock and Alarm
• SPEED: Calibration, Speed and Distance / Time targets
• TRAIN: Warm-up timer / Exercise timer / Rest (recovery) timer
• CHRONO: Stopwatch
• USER: Exercise and User profile
The modes are described in the sections that follow.
NOTE You can run the SMART TRAINING PROGRAM or stopwatch
in the background as you access other modes. The icon for the mode
that is running will flash until you switch back to that mode.
CLOCK
To set real-time clock:
1. Press MODE to switch to
TIME Mode.
2. Press and hold SET until the
first setting flashes.
3. Press ST / SP / + or LAP / MEM / - to change the 12 or 24 hour
clock format setting. Hold down for fast advancement. Press SET
to confirm the setting and move on to the next one.
12
Page 14
4. Repeat step 3 to change other settings:
Hour / Minute / Year / DD:MM or MM:DD date format / Month / Day.
NOTE The clock is programmed with a 50-year auto-calendar, which means
you do not need to reset the days of the week and dates each month.
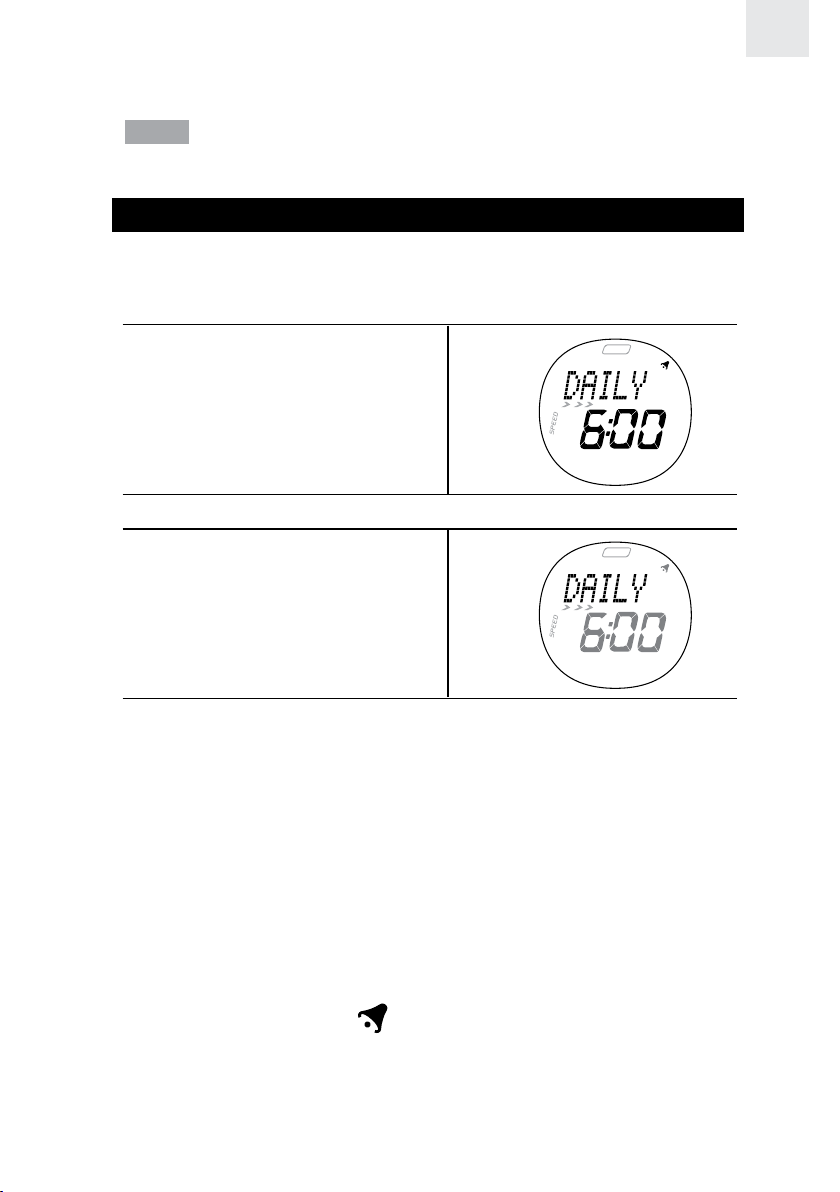
ALARM
Your watch has an alarm that can be set to activate daily (Mon-Sun),
on weekdays (Mon-Fri), or on the weekend (Sat-Sun).
To set alarm:
1. Press MODE to enter
TIME Mode.
2. Press SET to select alarm.
3. Press and hold SET until the
first setting is flashing to enter
the setting mode for the alarm.
EN
4. Press ST / SP / + or LAP / MEM / - to change the Daily, Weekday
or Weekend setting. Hold down for fast advancement. Press SET
to confirm the setting and move on to the next one.
5. Repeat step 4 to change other settings: Hour / Minute.
6. The alarm will automatically be activated once you have finished
setting the alarm time.
To activate / deactivate the alarm:
1. Press MODE to enter TIME Mode.
2. Press SET to select alarm.
3. Press ST / SP / + or LAP / MEM / - to activate or deactivate the
alarm. The alarm icon
To turn the alarm sound off:
Press any key to turn the alarm sound off. The alarm will automatically
reset itself unless you deactivate it.
displays when the alarm is activated.
13
Page 15
EN
USER PROFILE
To access the full benefits of the heart rate monitor set up your user
profile before you exercise. This will automatically generate a fitness
index and body mass index. These calculations along with the calorie
and % fat burned will help you track your progress over time.
To set user profile:
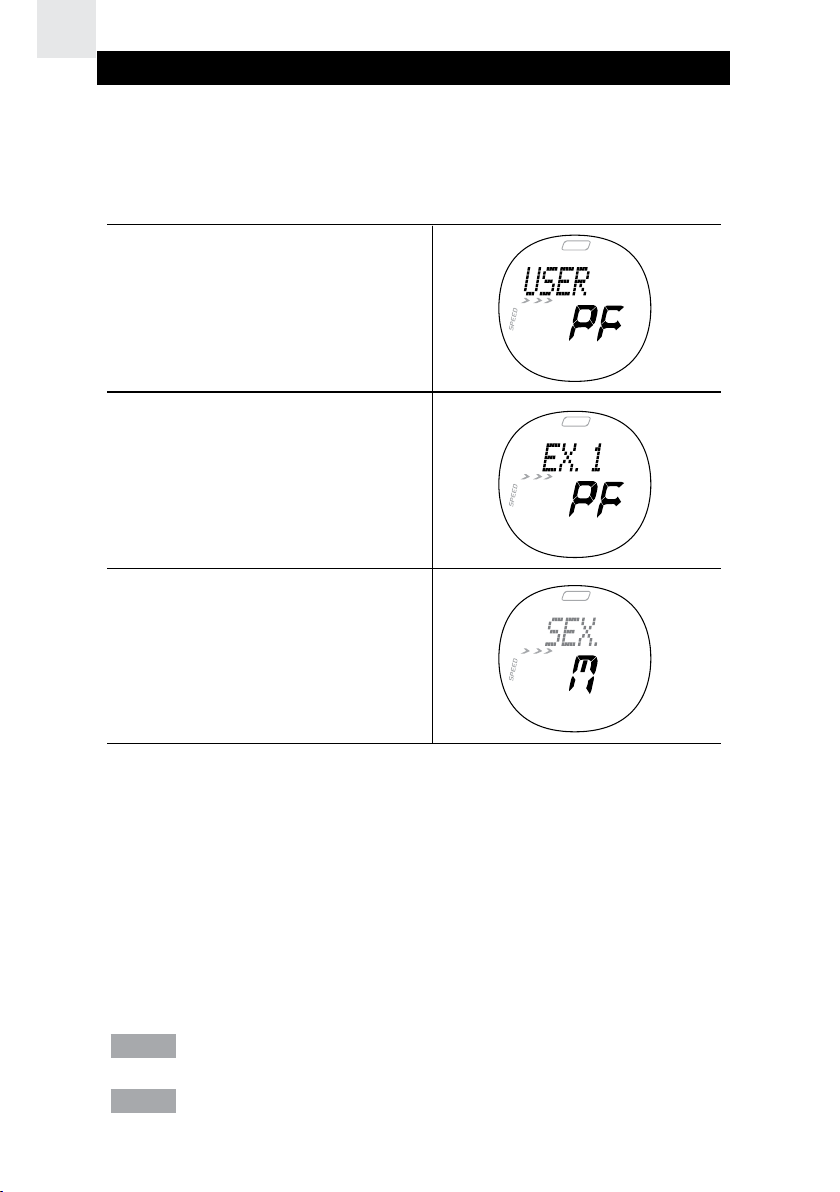
1. Press MODE to enter User
Profile.
2. If this screen appears, press
SET to enter the User Profile.
3. Press and hold SET until the
first setting flashes.
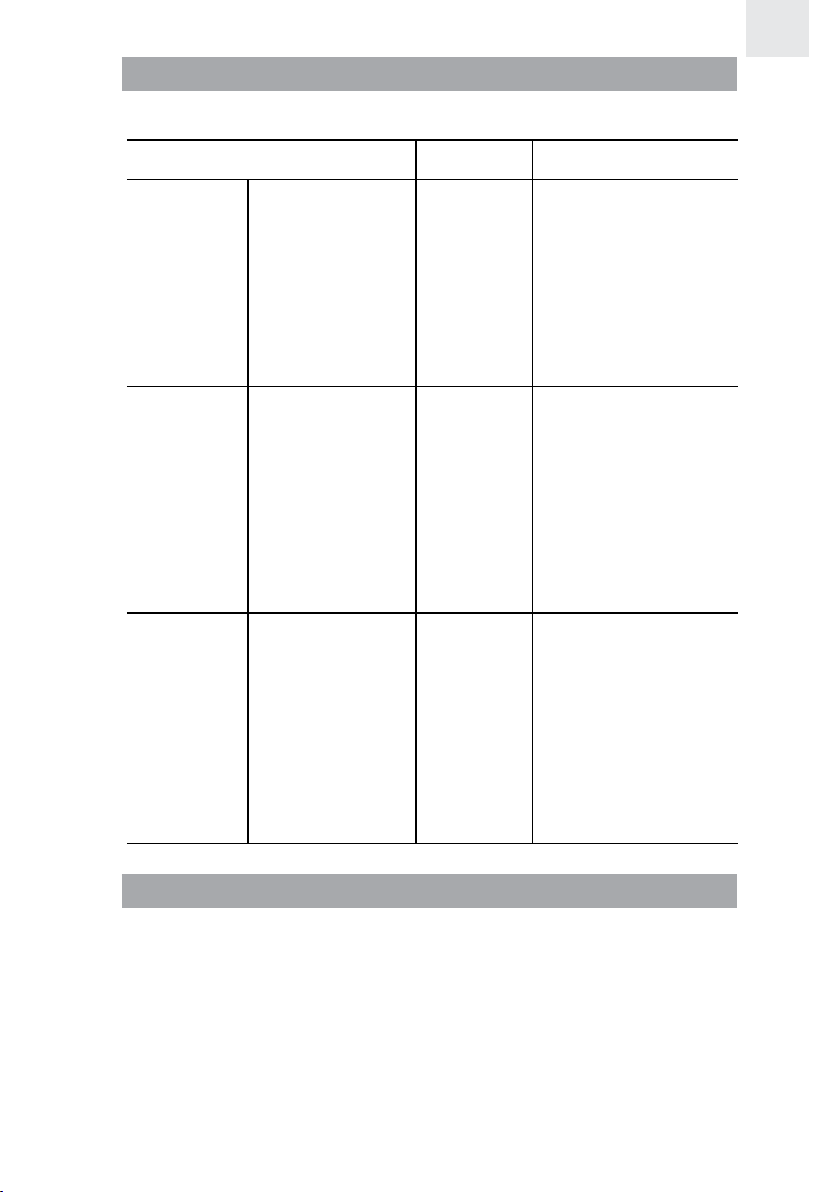
4. Press ST / SP / + or LAP / MEM / - to change the Male or Female
setting. Hold to speed through the options. Press SET to confirm
the setting and move on to the next one.
5. Repeat step 4 to change other settings: Year of Birth / Month of Birth /
Day of Birth / Weight - lbs or Kg option / Weight / Height - feet / inch or
centimeter option / Height / Activity Level - Little, Hobby or Athlete.
Once you complete your user profile, a fitness index and body mass
index is automatically calculated and displayed for you. Refer to the
“About the Fitness / Body Mass Index” section for further information.
NOTE You can display and adjust your user profile at any time.
NOTE You must set up your user profile to use the calorie count and
% fat burned features.
14
Page 16

ACTIVITY LEVEL
The activity level is based on your own self-assessment of the amount
of exercise you regularly perform.
ACTIVITY LEVEL DESCRIPTION
LITTLE Low - You do not usually participate in
programmed recreation sports or exercise.
HOBBY Medium - You are engaged in modest physical
activity (such as golfing, horseback riding, table
tennis, calisthenics, bowling, weight lifting or
gymnastics) 2-3 times a week, totaling 1 hour
per week.
ATHLETE High - You actively and regularly participate in
heavy physical exercise (such as running,
jogging, swimming, cycling, or skipping rope)
or engage in vigorous aerobic exercise
(such as tennis, basketball or handball).
EXERCISE PROFILE
To use the SMART TRAINING PROGRAM you need to set the exercise
profile. You can set 3 different exercise profiles.
Different activities exercise the body in different ways and help you to
achieve a variety of fitness goals. To accommodate this, the exercise
profile can be set to suit different exercise activities. For example, if you
are running, your exercise profile settings are likely to differ from those
you would use when undertaking a weight training activity.
Also, the time you require to warm-up and complete an exercise will vary. That
is why you can change the warm-up and exercise countdown time to suit you.
To set exercise profile:
1. Press MODE to enter
USER Mode.
EN
2. Press SET to enter
Exercise Profile.
15
Page 17
EN
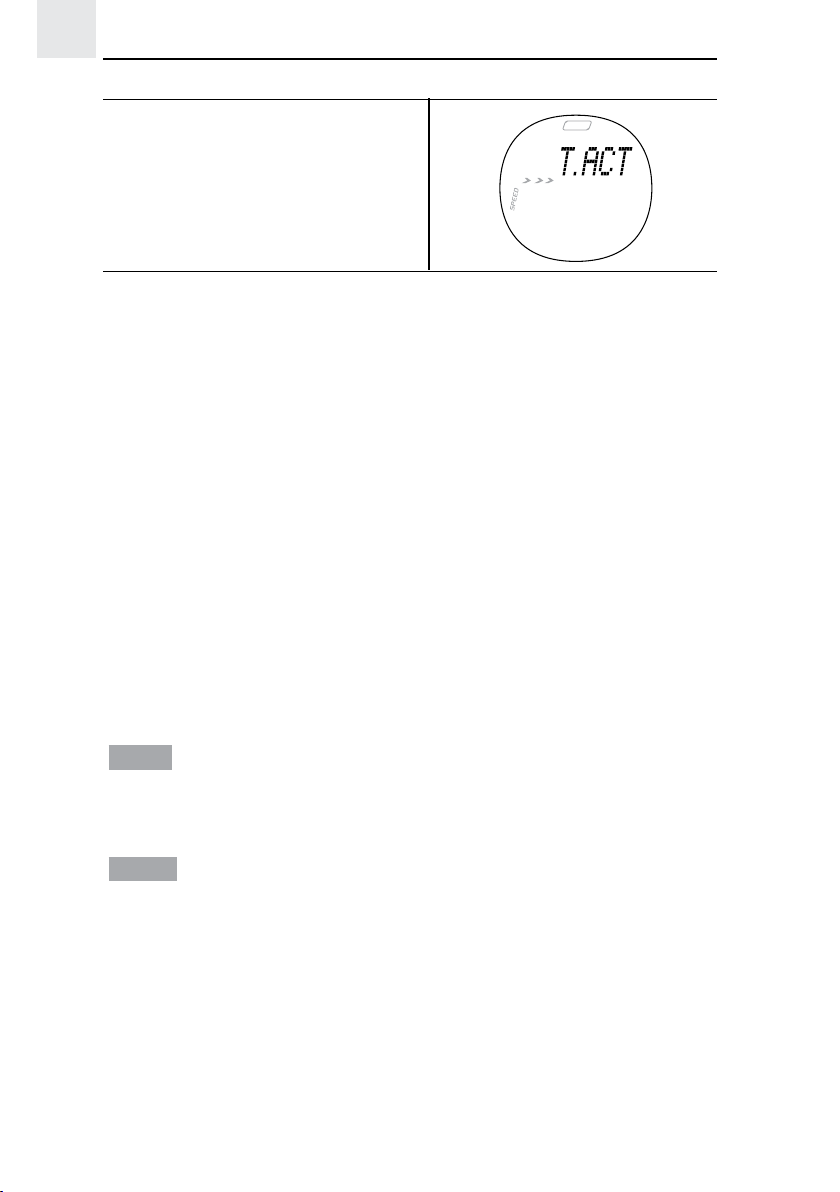
3. Press SET to choose between the 3 exercise profiles.
4. Press and hold SET until the
first setting flashes. The
display will change to “WALK”,
“JOG” or “RUN” after a while.
5. Press ST / SP / + or LAP / MEM / - to change the walk / jog / run
setting. Hold down for fast advancement. Press SET to confirm
the setting and move on to the next one.
6. Repeat step 5 to change other settings:
• Lower Limit Heart Rate
• Upper Limit Heart Rate
• Heart Rate Alert ON or OFF
• Repeat Exercise Timer ON or OFF
• Exercise Timer or Distance / Distance (if Distance is chosen)
• Exercise Timer Hour (if Timer is chosen)
• Exercise Timer Minute (if Timer is chosen)
• Warm-Up Timer (set to 5, 10, 15 mins to activate or 0 to
deactivate timer)
• Rest (Recovery) Timer ON or OFF
NOTE Resume vibration mode will appear after the upper limit heart
rate setting when the battery is low, this warning enables you to resume
vibration mode or turn it OFF to save power.
NOTE Once you have set your user profile and target activity your
lower and upper heart rate limit will be set automatically. However, If
the automatic settings don’t suit you, you can manually change them. if
you change the target activity, they will automatically be updated.
16
Page 18
TARGET ACTIVITY
There are 3 target activity levels:
EN
TARGET ACTIVITY MHR%
WALK Health
Maintenance
JOG Aerobic
Exercise
RUN Anaerobic
Exercise
DESCRIPTION
65-78% This is the lowest
training intensity
level. It is good
for beginners and
those who want to
strengthen their
cardiovascular
systems.
65-85% Increases strength
and endurance. It
works within the
body’s oxygen
intake capability,
burns more
calories, and can
be maintained for a
long period of time.
78-90% Generates speed
and power. It works
at or above the
body’s oxygen
intake capability,
builds muscle,
and cannot be
maintained for a
long period of time.
MAXIMUM / LOWER / UPPER HEART RATE LIMIT
Before you begin any exercise program and to achieve maximum
health benefits from your workout, it is important to know your:
• Maximum heart rate (MHR)
• Lower heart rate limit
• Upper heart rate limit
To manually calculate your own heart rate limits, follow the
instructions below:
17
Page 19
EN
MHR LOWER LIMIT UPPER LIMIT
MHR =
220 - age
MHR x lower target
activity %. E.g.
Target activity is
WALK Lower Limit
= MHR x 65%
MHR x upper
target activity %.
E.g. Target activity
is WALK Upper
Limit = MHR x 78%
HEART RATE ALERT
You can set the heart rate alert in the exercise profile to the following
settings:
ICON DESCRIPTION
Heart rate sound and vibration alert are OFF
Heart rate sound alert is ON
• 1 beep means you have gone below your
lower zone limit
• 2 beeps means you have gone above your
upper zone limit
Heart rate vibration alert is ON
Heart rate sound and vibration alert are ON
When the heart rate alert is activated, a flashing down or up arrow will
appear on the display to show which heart rate limit you have surpassed.
NOTE Using the vibration feature consumes battery life at a faster
rate than the sound alarm.
CALIBRATION, SPEED AND TARGETS
CALIBRATION
Before you use the speed and distance function, you have to set a real
calibration or parameter. To set the real calibration you pre-set a distance
to get a rough estimate of your speed when running this distance. You
have to run the distance and then set the real calibration. You can set the
18
Page 20
calibration for running and / or walking. You can use the watch without
calibration, but the accuracy of speed and distance will be lower. After
calibration, the accuracy of the speed and distance will increase.
To set real calibration:
1. Make sure the transmission between the watch and the chest belt
is well connected.
2. Press MODE to enter SPEED Mode.
3. Press and hold SET to enter setting mode.
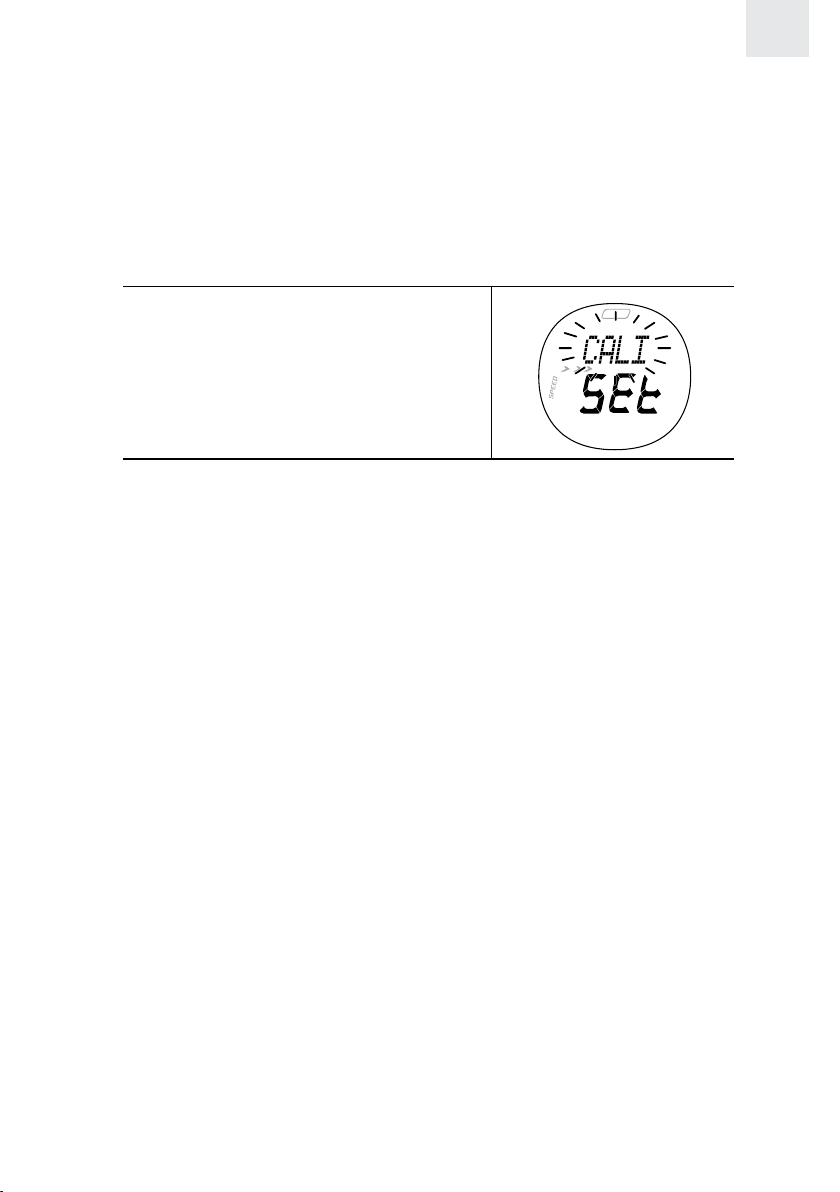
4. Press ST / SP / + or LAP / MEM /
- to select CALIBRATION (Cali)
and press SET to confirm.
5. Press ST / SP / + or LAP / MEM / - to select calibration for walking
or running. It is suggested to do the calibrations for both walking
and running separately. The watch can automatically distinguish if
you are walking or running.
6. Press ST / SP / + or LAP / MEM / - to select real calibration (“SET
CAL” will flash) or input calibration parameter (“SET PAR” will
flash) directly and press SET to confirm.
EN
For first time use, please select real calibration. After calibration, record
the calibration parameters for walking and running respectively so that
in the future, you can manually insert these parameters as opposed
to doing a real calibration again. For example, if you lend the watch
to someone who puts in his/her own calibration, you can simply input
your calibration parameter directly when you use the watch again.
7. Press ST / SP / + or LAP / MEM / - to select the distance you want to walk
or run (400 meters is suggested for each one) and press SET to confirm.
8. Press ST / SP / + to start calibration and immediately start walking
or running.
9. After you have walked or run the desired distance, press ST / SP
/ + to end the calibration.
10. The watch can sense whether your calibration is ok or not. If you receive
a failure message, try running at a slower speed as sometimes the watch
cannot calibrate accurately when you are running too quickly.
11. If the calibration has failed, you can redo it by pressing SET and
repeating steps 8 and 9, or stop it by pressing ST / SP / +.
19
Page 21

EN
NOTE You can stop the calibration at any time by pressing ST / SP /
+ and exit the setting mode by pressing MODE.
NOTE The speed and distance function is only for running or walking,
not for cycling or driving.
NOTE The calibration depends on the body’s walking or running behavior,
even the shoes you are wearing. Therefore, when another person uses the
watch, he/she must re-do the calibration.
NOTE It will take the watch about 10 seconds to return to “0” once you’ve
stopped walking or running.
UNIT FOR SPEED AND DISTANCE
To set unit (Km or Miles):
1. Press MODE to enter SPEED Mode.
2. Press and hold SET to enter setting mode.
3. Press ST / SP / + or LAP / MEM / - to select UNIT setting and
press SET to confirm.
4. Press ST / SP / + or LAP / MEM / - to toggle between Km and Mile.
Press SET to confirm selection.
SPEED LIMIT
Your watch has a real-time measurement for speed. The average
speed can be viewed during the workout. The upper and lower speed
limit can be set before working out with an option to have a speed alert
when exceeding the upper or lower limit.
To set speed limit:
1. Press MODE to enter SPEED Mode.
2. Press and hold SET to enter setting mode.
3. Press ST / SP / + or LAP / MEM / - to select SPEED LIMIT and
press SET to confirm.
4. Press ST / SP / + or LAP / MEM / - to alter lower limit, press SET
to confirm and enter the next setting.
5. Repeat step 4 to set upper limit and speed alert.
NOTE Visual and sound alerts activate every 10 seconds when the
lower or upper speed limits are exceeded. For sound alert, 3 short
beeps indicates being below the lower limit while 4 short beeps
indicates being above the upper limit.
20
Page 22

SETTING TARGET(S)
Before you start exercising you can set different targets (by distance
or by time). There are 9 sets of targets available. When first target is
complete, it will go to the next target automatically and so on until all
targets are complete. This is useful for those who want to do training
for various exercise segments.
To set targets:
1. Press MODE to enter SPEED Mode.
2. Press and hold SET to enter setting mode.
3. Press ST / SP / + or LAP / MEM / -
to select TARGET and press SET to
confirm.
4. Press ST / SP / + or LAP / MEM / - to enable number of targets 1-9
you want to play. Press SET to confirm.
5. Press ST / SP / + or LAP / MEM / - to select “By distance” or “By
time” and press SET to confirm.
6. Press ST / SP / + or LAP / MEM / - to select the target you want to
set and press SET to confirm.
7. Press ST / SP / + or MEM / LAP / - to change the setting value
(distance or minute/second) and press SET to confirm.
8. Repeat step 6 and 7 to set other targets or press MODE to quit
setting mode.
EN
NOTE The distance can be set between 0.10 - 99.99Km and the time
can be set between 00’01”-99’59”.
USING TARGET FUNCTION
To start / stop target function:
1. Press MODE to enter SPEED Mode.
2. Press ST / SP / + to start the first target.
3. You can press ST / SP / + to pause / resume each target OR you
can skip each target by pressing and holding ST / SP / +, 3 short
beeps will indicate skipping a target.
4. When all targets are finished, there will be a long beep and
“FINISH” will flash.
21
Page 23

EN
NOTE You can reset all the targets at any time by pressing and
holding SET.
During the workout you can check the following information by
pressing SET:
• Target distance / time remaining and speed
• Target distance / time remaining and heart rate
• Clock and pace
• Total distance for all targets done and average speed
• Total time and average pace
NOTE The pace is the time (MM’SS”) required to finish one kilometer
or mile.
VIEWING TARGET DATA WHEN WORKOUT IS PAUSED OR
STOPPED
To view the memory for target performance:
1. Press ST / SP / + to pause or stop the target function.
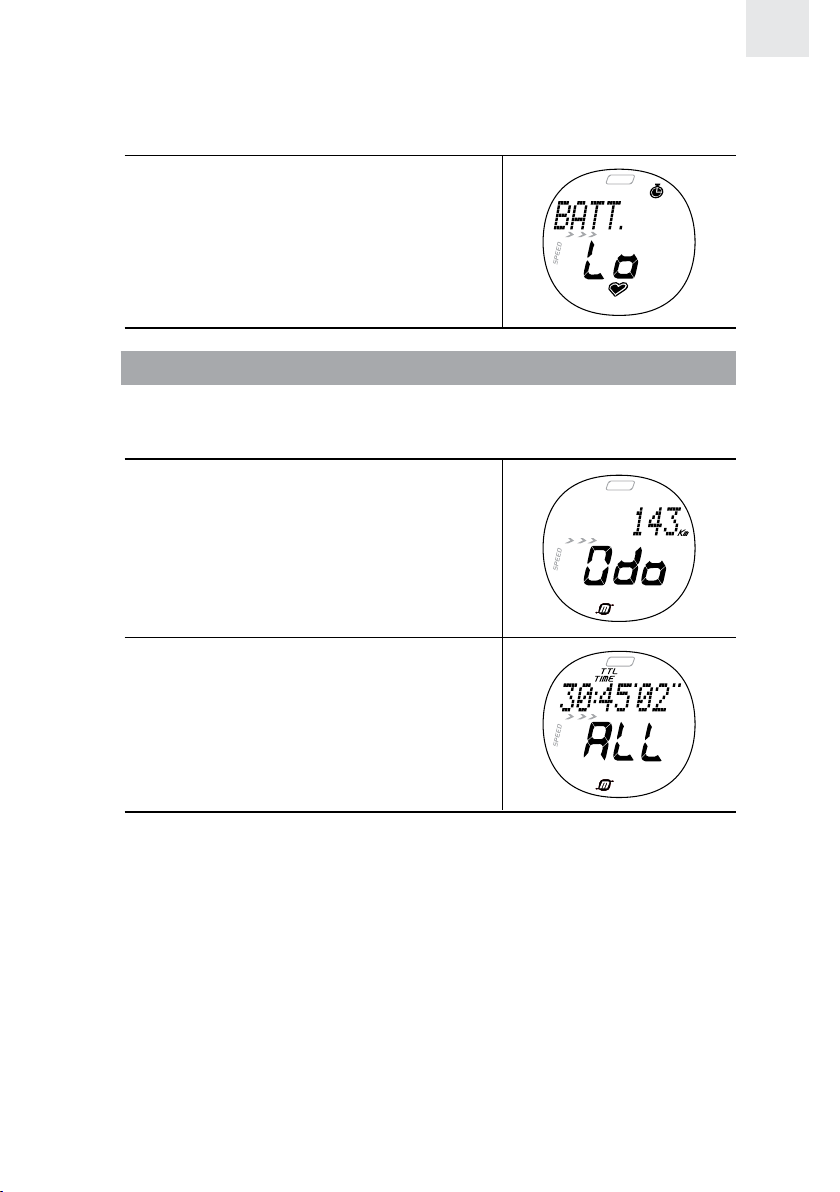
2. Press LAP / MEM / - to enter memory mode. Odometer will be shown.
3. Press SET, “ALL” will flash. Then press ST / SP / + or LAP / MEM
/ - to select viewing overall memory or an individual memory.
4. Press SET to view each data.
For each individual target, the following data can be viewed:
• Time elapsed and average speed
• Distance traveled and average pace
• Average heart rate
For overall performance, the following data can be viewed:
• Total time elapsed and average speed
• Total distance traveled and best pace
• Average pace and average heart rate
NOTE Odometer is the total distance traveled after system reset.
It is shared with SPEED, TRAIN and CHRONO modes. To reset the
odometer press and hold SET.
22
Page 24
ABOUT THE SMART TRAINING PROGRAM
The SMART TRAINING PROGRAM enables you to complete exercise
cycles effectively. It will guide you through from a 5-minute warm-up
(default setting) to the end of your exercise program. In addition to
monitoring your heart rate and altering you whenever you fall out of the
range for the selected training zone, the Program allows you to check
the calories consumed and the % fat burned.
USING THE SMART TRAINING PROGRAM
The SMART TRAINING PROGRAM monitors your exercise performance
once you have entered your user profile and exercise profile.
NOTE You cannot use the SMART TRAINING PROGRAM if you are
running the stopwatch.
To enter the SMART TRAINING PROGRAM:
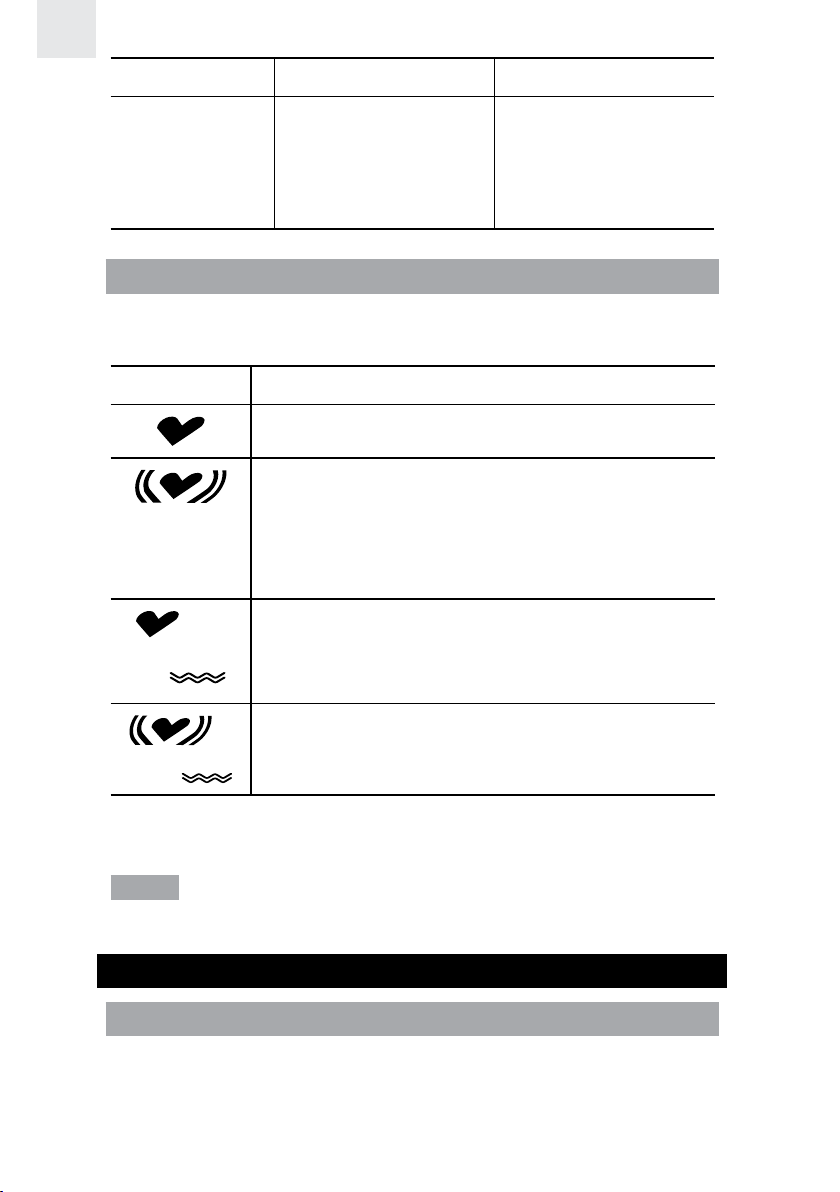
1. Press MODE to enter TRAIN Mode.
EN
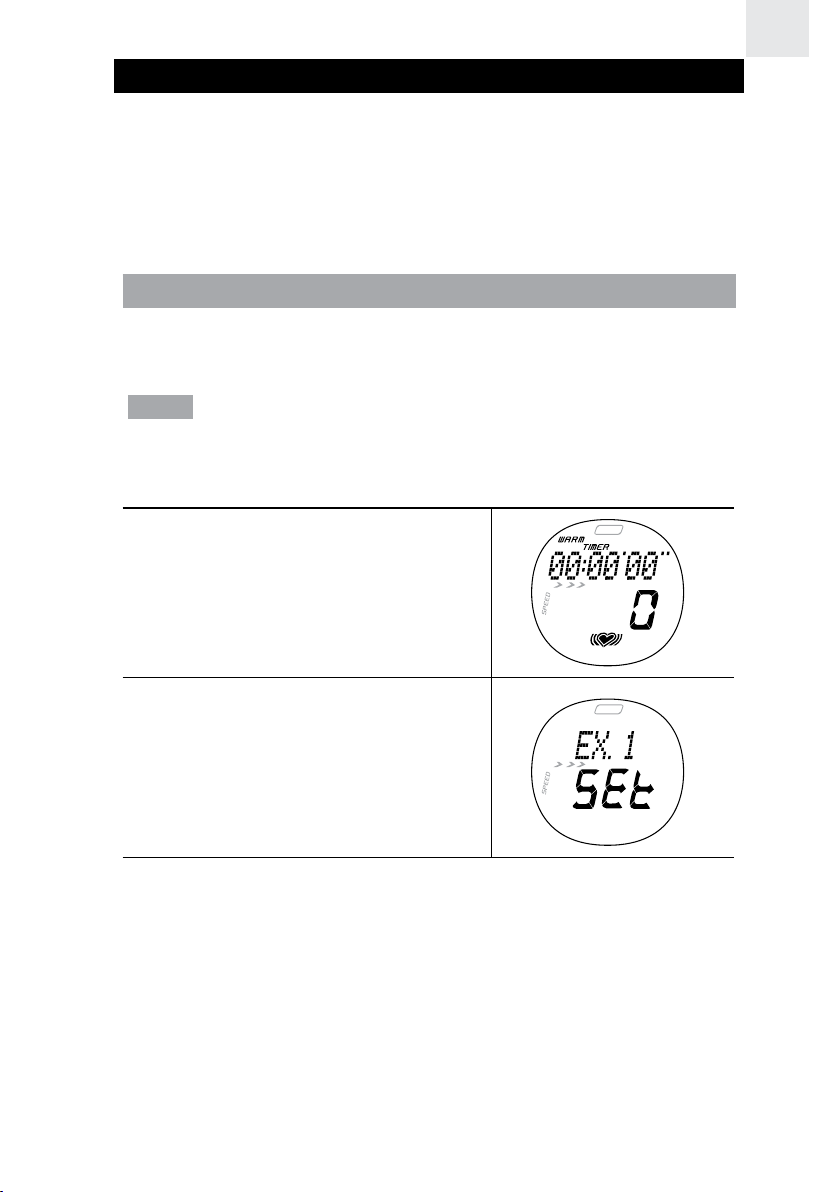
2. Press and hold SET. Then,
press ST / SP / + or LAP / MEM
/ - to select 1 of the 3 exercise
profiles. Press SET to confirm.
3. To start or stop the warm up, exercise or recovery countdown
timer, press ST / SP / +. Once you stop any countdown timer,
you can press ST / SP / + again to resume it. At the end of each
countdown period you will hear a beep.
• 3 short beeps = Warm-up time completed
• 1 long beep = Exercise time or distance completed
• 6 short beeps = Recovery time completed
4. To bypass a timer and move onto the next one, press and hold ST / SP / +.
5. To reset the timer, press and hold SET.
23
Page 25
EN
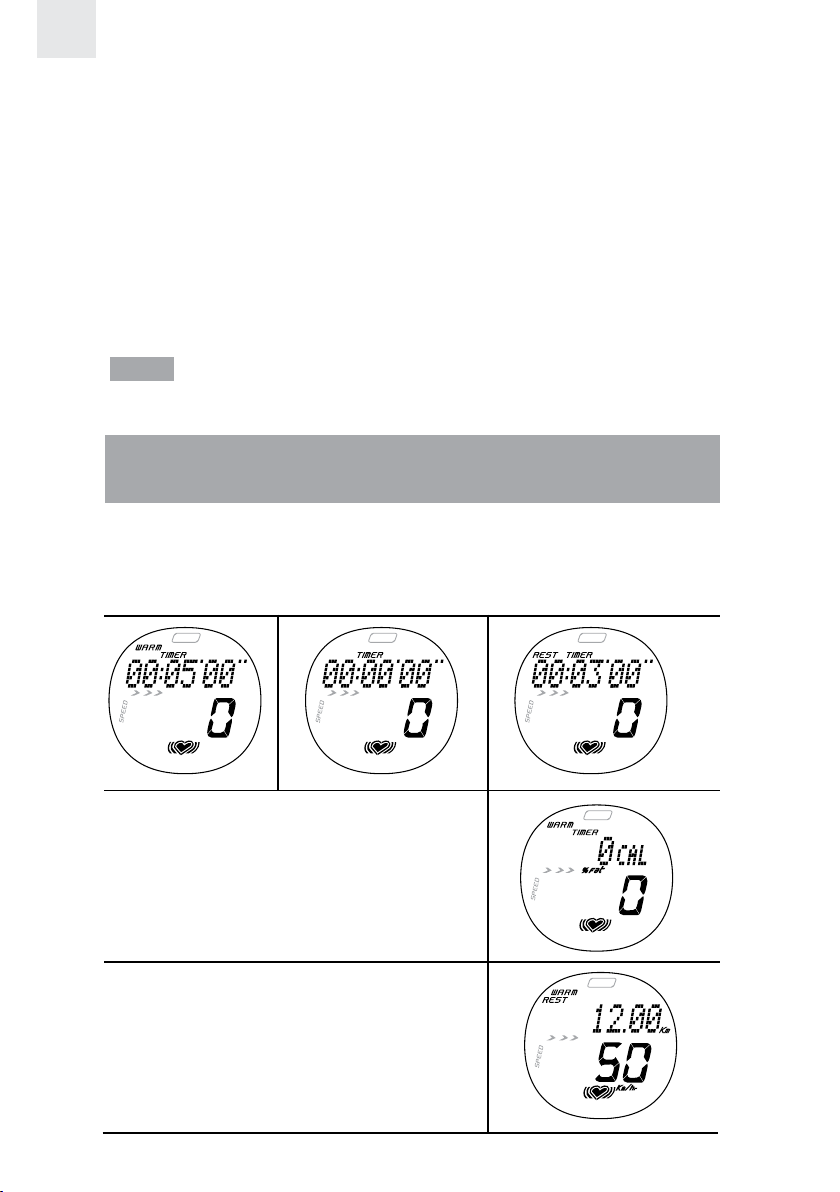
The order of the Timer Mode is:
• Warm-up time
- The warm-up will not display if it has been set “0” in the
exercise profile.
• Exercise time or distance
- The exercise time or distance is set in the exercise profile.
• Rest time
- The rest (recovery) time is automatically set to 3 minutes and
cannot be changed. When the timer reaches “0”, the recovery
heart rate will flash.
NOTE You can enable or disable the recovery timer by selecting On / Off
setting in Exercise profile (please refer to “Set Exercise Profile” - step 6).
VIEWING DATA WHILE SMART TRAINING PROGRAM IS
RUNNING
During warm-up, exercise or rest time countdown, press SET to view
and toggle between the following screen displays:
Remaining warm-up / exercise / rest time with current heart rate:
• Current calorie and % fat burned
• Distance traveled and speed
24
Page 26

• Clock with pace
VIEWING SMART TRAINING PROGRAM MEMORY RECORDS
When the SMART TRAINING PROGRAM has been completed, press
LAP / MEM / - to enter memory mode. The odometer will be displayed,
then press SET to view the following records:
• Total time and maximum heart rate
• Recovery heart rate and average heart rate
• Total calorie and % fat burned
• In zone time: Time spent without exceeding your upper or lower
heart rate
• Above zone time: Time spent exceeding your upper heart rate limit
• Below zone limit: Time spent exceeding your lower heart rate limit
• Average pace and average speed
• Distance and maximum speed
NOTE You cannot use the SMART TRAINING PROGRAM, Stopwatch
and Target function at the same time.
EN
RECOVERY HEART RATE
Your recovery heart rate is a good indication of cardiovascular fitness.
The faster your heart rate recovers after the exercise, the better shape
you are in. The watch uses a time-based recovery method, which
checks your recovery heart rate 3 minutes after exercise.
Compare your recovery heart rate between exercise sessions to track
the effect your exercise is having.
STOPWATCH
The stopwatch function is particularly beneficial to use when you are unsure
how long your activity will take, or when you want to measure the time it
takes to complete a task and your performance over that time. You can also
take lap and split time readings when using the stopwatch function.
25
Page 27
EN
To get the most out of your stopwatch functions complete your user
and exercise profile. If you have not completed the user profile you will
be unable to use the calorie and % fat burned function.
• Press MODE to enter CHRONO Mode. You can now perform the
following functions:
TASK INSTRUCTION
Start stopwatch Press ST / SP / +.
Pause / resume
stopwatch
Reset Press and hold SET.
Save lap
Select exercise
profile for
stopwatch
Turning on / off
auto lap
NOTE The stopwatch begins measurement in min:sec:1/100 sec. After
59 minutes pass, the display will change to hrs:min:sec.
Press ST / SP / +.
Press LAP / MEM / - while the
stopwatch is running.
NOTE Up to 60 laps or 99 hrs:59 mins
total can be stored in the memory.
1. Press and hold SET.
2. Press ST / SP / + or LAP / MEM
/ - to select 1 of the 3 exercise
profiles. Press SET to confirm.
After selecting exercise profile, the
setting AUTO-LAP on/off will appear.
Press ST / SP / + or LAP / MEM / - to
select. Press SET to confirm.
If AUTO-LAP is on, a lap will be taken
automatically once you have traveled
a pre-set distance (e.g. 1.0km).
NOTE If auto-lap function (by distance)
is selected, stopwatch will be paused if
speed is zero.
VIEWING DATA WHILE STOPWATCH / LAP IS RUNNING
While the stopwatch or lap functions are being used, press SET to view
and toggle between the following screen displays:
• Total time / split time and current heart rate
• Lap time and current heart rate
26
Page 28
• Current calories and % fat burned
• Distance and speed
• Clock with pace
If the battery is low when taking a lap,
this screen will appear and no more
laps will be saved.
VIEWING OVERALL OR LAP MEMORY RECORDS
To view memory:
1. The stopwatch must be stopped (press ST / SP / +).
2. Press LAP / MEM / - to enter
memory mode. Odometer will
be displayed.
EN
3. Press SET, “ALL” will flash.
Press ST / SP / + or LAP / MEM / -
to select viewing overall or an
individual lap memory.
4. Press SET to view each record.
For overall memory, the records will appear in the following order:
• Total time and maximum heart rate
• Total time and average heart rate
• Total calories and % fat burned
• In zone time: Time spent without exceeding your upper or lower
heart rate limit
• Above zone time: Time spent exceeding your upper heart rate limit
• Below zone time: Time spent exceeding your lower heart rate limit
27
Page 29

EN
• Average pace and average speed
• Distance and maximum speed
For each individual lap, the records will appear in the following order:
• Lap time and lap number
• Lap time and maximum heart rate
• Split time and average heart rate
• Calorie and % fat burned - per lap
• In zone time - per lap
• Above zone time - per lap
• Below zone time - per lap
• Average pace and average speed
• Distance and maximum speed
ABOUT THE FITNESS / BODY MASS INDEX
FITNESS INDEX
Your watch will generate a fitness index based on your aerobic fitness. This
index is dependent and limited by the body’s ability to deliver oxygen to
the working muscles in training. It is often measured by maximum oxygen
uptake (VO2 Max), which is defined as the highest amount of oxygen that
can be utilized when exercising at an increasingly demanding level. The
lungs, heart, blood, circulatory system, and working muscles are all factors
in determined VO2 Max. The unit of VO2 Max is ml/kg min.
The higher the index, the fitter you are. See the tables below for a
rough guide to what your fitness index means:
Age
FITNESS INDEX FOR MEN
GOOD
AVERAGE
FAIR
Fitness index
28
Page 30
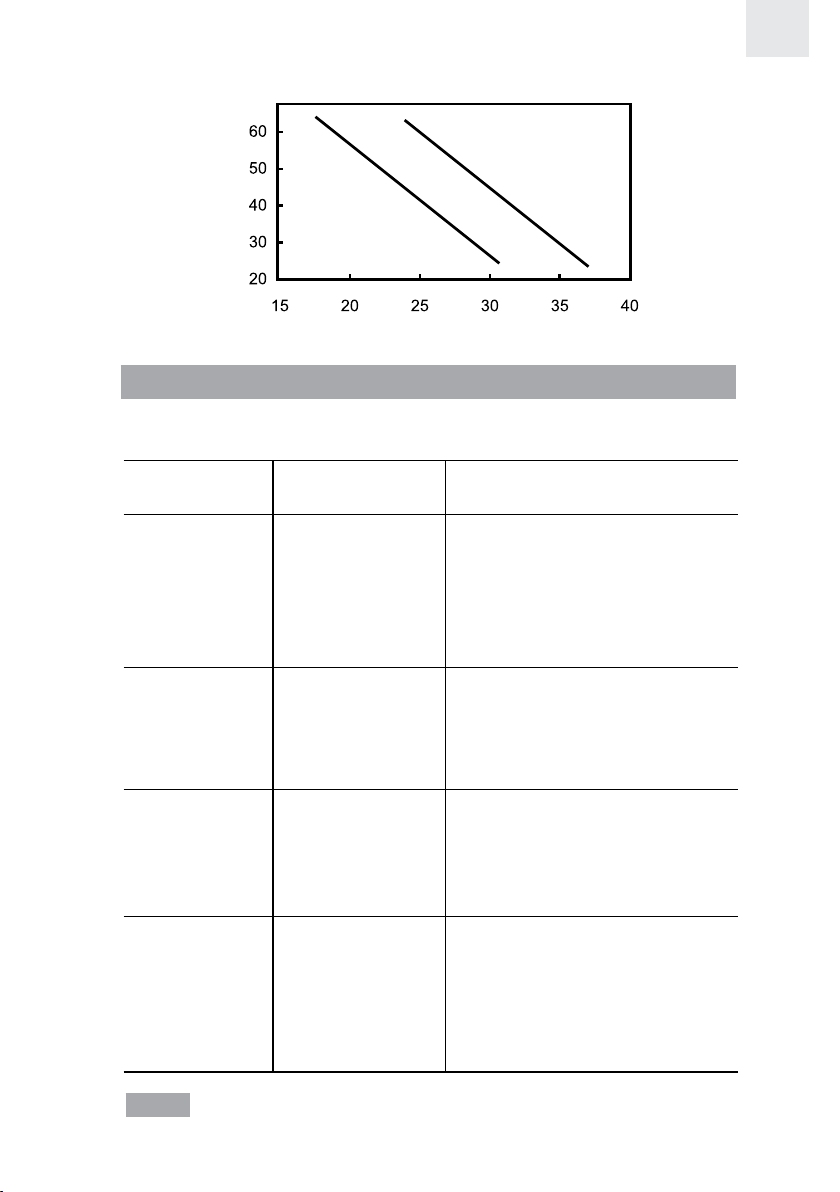
FITNESS INDEX FOR WOMEN
EN
AVERAGE
Age
FAIR
Fitness index
GOOD
BODY MASS INDEX
Your body mass index is a measurement of the relative percentages of
fat and muscle mass in the human body.
HEALTH BMI RANGE DESCRIPTION
INDICATION
Underweight Less than 18.5 Your body weight is currently
lower than average. Work
toward healthy, regular food
intake and exercise routine to
build up your health
to recommended levels.
Recommended 18.5 to 24.9 Your health is at the
recommended level. Maintain
a balanced diet and exercise
to keep your current level of
health.
Overweight 25.0 to 29.9 Your body weight may be
above normal. Increase your
exercise and work out a diet
plan to lower your risk for
serious illness.
Obese 30.0 or greater At this level, you may be at
risk for heart disease, high
blood pressure, and other
illnesses. Consult with your
doctor to develop a proper
health and fitness plan.
NOTE The above BMI information is based on BMI classification from
WHO 2004.
29
Page 31

EN
VIEWING FITNESS
Press MODE to enter USER Mode. Then, press LAP / MEM / - to
display your fitness and body mass index.
NOTE If you have not completed your user profile, these will not
display and “- -” will show on the display.
CARE INSTRUCTIONS
To ensure you receive the maximum benefit from using this product,
please observe the following guidelines:
• Clean the watch and chest belt thoroughly after each training
session. Never store the products when wet.
• Use a soft, slightly moistened cloth. Do not use abrasive or
corrosive cleaning agents, as these may cause damage.
• Avoid pressing the keys with wet fingers, under water, or in heavy rain,
as this may allow water to gain entry into the electrical circuitry.
• Do not bend or stretch the transmitter part of the chest belt.
• Do not subject the product to excessive force, shock, dust, temperature
changes, or humidity. Never expose the product to direct sunlight for
extended periods. Such treatment may result in malfunction.
• Do not tamper with the internal components. Doing so will
terminate the product warranty and may cause damage. The main
unit contains no user-serviceable parts.
• Do not scratch hard objects against the LCD display as this may
cause damage.
• Remove the batteries whenever you are planning to store the
product for a long period of time.
• When replacing batteries, use new batteries as specified in this
user manual.
• Do not dispose this product as unsorted municipal waste. Collection
of such waste separately for special treatment is necessary.
30
Page 32

AQUATIC AND OUTDOOR ACTIVITIES
The watch is water-resistant up to 50 meters. The chest belt is splash
proof, and should not be worn for underwater activities, as the heart
rate transmission cannot occur under water. Refer to the table for
proper guidelines.
EN
SHALLOW
DIVING/
SURFING/
WATER
SPORTS
NO
SNORKELING
/ DEEP
WATER
DIVING
NO
Watch
50 m / 165 ft
RAIN
SPLASHES
ETC
OK
SHOWERING
(WARM/
COOL
WATER
ONLY)
OK
LIGHT
SWIMMING
/ SHALLOW
WATER
OK
When using the watch for aquatic or outdoor sports activities, observe
the following guidelines:
• Do not press the keys under water or with wet fingers.
• Rinse with water and mild soap after use.
• Do not use in hot water.
BATTERIES
Both the watch and the heart rate chest belt use 1 x CR2032 3V battery.
Both are already installed. See the table below for battery warnings.
LOW BATTERY ICON DESCRIPTION
The battery is too low to run the
backlight
The battery is too low to run the
vibration alert
The watch battery is low; the
vibration alert and backlight
cannot be used
The chest belt battery is nearly
too low to send a signal to the
watch
31
Page 33

EN
The batteries typically last one year. We highly recommend that you
contact the retailer or our customer service department if you need to
replace them.
To replace the watch battery:
1. Undo the four screws and remove the back plate.
2. Using a thin blunt instrument, hook the release catch and lift the
clip.
3. Remove the old battery and slide the new battery into the battery
compartment with the +side upwards.
4. Replace the battery clip, back plate and screws.
To replace the chest belt battery:
1. Using a coin, twist the compartment lid counter-clockwise until it
clicks out of place.
2. Remove the old battery and insert the new battery with the +side
upwards.
3. Replace the battery compartment lid by twisting it clockwise until it
is firmly in place.
32
Page 34

IMPORTANT
• Non-rechargeable and rechargeable batteries must be disposed
of properly. For this purpose, special containers are provided for
non-rechargeable and rechargeable battery disposal at communal
collection centers.
• Batteries are extremely dangerous when swallowed! Therefore,
keep batteries and small articles away from children. If a battery
has been swallowed seek immediate medical advice.
• The batteries supplied must not be recharged, reactivated by any
other means, dismantled, put into fire or short-circuited.
SPECIFICATIONS
CLOCK
Time format 12 hr / 24 hr
Date format DD / MM or MM / DD
Year format 2001-2050 (auto-calendar)
Alarm Alarm with daily, weekday or
weekend settings
EN
STOPWATCH
Stopwatch 99:59:59 (HH:MM:SS)
Resolution 1/100sec
Lap counter 60 laps share 99:59:59
Auto lap distance 0.01 to 99.99 km or mile
SMART TRAINING PROGRAM
Warm-up timer Set to 5, 10, 15, or 0 mins
Exercise timer 99:59:00 (HH:MM:SS)
Maximum number of 9
exercise timer repeats By time: 99:59:00 (HH:MM:SS)
By distance: 0.1 to 99.99 km OR
0.1 to 99.99 mile
Rest timer 3 mins fixed time
PERFORMANCE TRACKING
Heart rate (HR) alarm Vibrate / sound / visual
HR measuring range 30-240 bpm (beats per minute)
33
Page 35

EN
Lower HR settable range 30-220 bpm (beats per minute)
Upper HR settable range 80-240 bpm (beats per minute)
Calories calculation 0-9,999 kcal
% fat burned calculation 0-99%
SPEED FUNCTIONS
Speed range 0 to 40.0 km/hr (0 to 24.8 mile/hr)
Distance 0 to 9999.99km (0 to 6211.17 mile)
Distance tolerance Best 8% (approximately)
Odometer 0 to 99999 km (0 to 62111 mile)
Pace 0 to 99’59” (MM’SS”) per km or
mile
Maximum number of target 9
distance / time in SPEED
Mode
Target distance in SPEED 0.10 to 99.99 km or mile
Mode
Target time in SPEED Mode 00’01” to 99’59” (MM:SS)
Lower speed limit 0.1 to 39.9 km/hr or mile/hr
Upper speed limit 0.2 to 40.0 km/hr or mile/hr
(Upper ›= lower + 0.1 km/hr or mile/hr)
TRANSMISSION
Range 62.5 cm (25 inches) - may
decrease with low battery
WATER RESISTANT
Watch 50 meters (not actuating keys)
Chest belt Splash proof
POWER
Watch 1 x CR2032 3V lithium battery
Chest belt 1 x CR2032 3V lithium battery
OPERATING ENVIRONMENT
Operation temperature 5°C-40°C (41°F-104°F)
Storage temperature -20°C-70°C (-4°F-158°F)
34
Page 36

WARNINGS
To ensure you use your product correctly and safely, read these
warnings and the entire user manual before using the product. The
warnings given here provide important safety information and should
be observed at all times.
• Keep your watch water resistant.
• Avoid chemicals (gasoline, chlorine, perfumes, alcohol, hair sprays
etc.)
• Reduce exposure to heat.
• Have your watch serviced by an approved service centre annually.
• The product is a precision instrument. Never attempt to take
this device apart. Contact the retailer or our customer service
department if the product requires servicing.
• Do not touch the exposed electronic circuitry, as there is a danger
of electric shock.
• Take precautions when handling all battery types.
• Remove the batteries before storing the product for a long period
of time.
• Do not use the chest belt in aircrafts or hospitals. The use of radio
frequency products can cause malfunctions in the control devices
of other equipment.
• Do not subject the product to impact or shock.
• Check all major functions if the device has not been used for a long
time. Maintain regular internal testing and cleaning of your device.
• When disposing of this product, do so in accordance with your
local waste disposal regulations.
EN
35
Page 37

EN
ABOUT OREGON SCIENTIFIC
Visit our website (www.oregonscientific.com) to learn more about
Oregon Scientific products such as digital cameras; MP3 players;
children’s electronic learning products and games; projection clocks;
health and fitness gear; weather stations; and digital and conference
phones. The website also includes contact information for our customer
care department in case you need to reach us, as well as frequently
asked questions and customer downloads.
We hope you will find all the information you need on our website,
however if you’re in the US and would like to contact the Oregon
Scientific Customer Care department directly, please visit:
www2.oregonscientific.com/service/default.asp
OR
Call 1-800-853-8883.
For international inquiries, please visit:
www2.oregonscientific.com/about/international.asp
EU-DECLARATION OF CONFORMITY
Hereby, Oregon Scientific, declares that this Heart Rate Monitor
(SE300) is in compliance with EMC directive 89/336/CE. A copy of the
signed and dated Declaration of Conformity is available on request via
our Oregon Scientific Customer Service.
36
Page 38

Pulsómetro
con medición de velocidad y distancia
Modelo: SE300
MANUAL DE USUARIO
PATENTE PENDIENTE
ÍNDICE
Introducción ............................................................................... 3
Información de entrenamiento .....................................................3
Cómo le ayuda el pulsómetro .................................................... 3
Consejos para entrenar ............................................................3
Panorámica general del producto ................................................4
Reloj ........................................................................................4
Pantalla LCD ............................................................................5
Cómo empezar ........................................................................... 8
Desembalar el reloj ..................................................................8
Cómo ponerse la banda pectoral y el reloj .................................8
Señal de transmisión .............................................................. 10
Búsqueda de señal ................................................................. 11
Configuración de Tono keypad / Modo luz ...................................... 12
Activación de la Retroiluminación ............................................ 12
Activación del bloqueo de botones ..........................................13
Alternar entre los modos principales ........................................ 13
Reloj ..........................................................................................13
Alarma .......................................................................................14
Perfil de usuario ........................................................................15
Nivel de actividad ................................................................... 16
Perfil de ejercicio ....................................................................... 16
Actividad objetivo ...................................................................18
Límite de ritmo cardiaco máximo/mínimo/superior ........................ 19
Alerta de ritmo cardiaco .......................................................... 19
1
ES
Page 39

ES
Calibración, Velocidad y Objetivos ............................................ 20
Calibración .............................................................................20
Unidad de velocidad y distancia ..............................................22
Límite de velocidad ................................................................22
Definición de objetivo(s) ..........................................................23
Uso de la función de objetivo ..................................................23
Consultar datos objetivo cuando el ejercicio está en
pausa o detenido
Acerca del programa de entrenamiento inteligente ................... 25
Uso del programa de entrenamiento inteligente ........................25
Ver datos mientras el programa de entrenamiento
inteligente funciona
Consultar registros de memoria del programa de
entrenamiento inteligente
Ritmo cardíaco de recuperación .............................................. 28
Cronómetro ...............................................................................28
Ver datos mientras el Cronómetro / Vuelta funciona ................... 29
Consultar registros de memoria Generales o de Vuelta .................. 30
Acerca del índice de Ejercicio / Masa corporal
Índice de ejercicio ..................................................................31
Índice de masa corporal ..........................................................32
Consultar ejercicio .................................................................. 33
Instrucciones de cuidado ..........................................................34
Actividades acuáticas y al aire libre .........................................34
Pilas ........................................................................................... 35
Ficha técnica .............................................................................37
Avisos .......................................................................................39
Acerca de Oregon Scientific ...................................................... 40
....................................................................24
...............................................................26
......................................................... 27
.......................... 31
Declaración de conformidad UE ............................................40
2
Page 40

INTRODUCCIÓN
Gracias por elegir el reloj Pulsómetro con velocidad y distancia
(SE300) de Oregon Scientific™ como el producto para hacer deporte
y ponerse en forma de su elección.
IMPORTANTE El uso de este producto es únicamente deportivo y no
está diseñado para reemplazar el consejo médico.
Además de ofrecer instrucciones paso a paso para este producto, este
manual contiene importantes instrucciones detalladas de seguridad y
cuidado. Lea detenidamente el manual y guárdelo en un lugar seguro
por si necesita consultarlo.
INFORMACIÓN DE ENTRENAMIENTO
CÓMO LE AYUDA EL PULSÓMETRO
El Pulsómetro es la herramienta más importante para la salud
cardiovascular y un compañero ideal de entrenamiento. Te permite ver
los resulltados. Esta información te permite apreciar tu rendiemineto
pasado, maximizar tu trabajo y adaptarte para futuros ejercicios para
conseguir de esta manera, tus objetivos de una manera más efectiva
y saludable.
Cuando haga ejercicio, la cinta registrará el latido de su corazón y lo
envía al reloj. Ahora podrá consultar su ritmo cardiaco y empezar a
hacer un seguimiento de su rendimiento según sus registros de ritmo
cardiaco. A medida que se ponga más en forma, su corazón tendrá
que hacer menos esfuerzo y la velocidad de su ritmo cardiaco se
reducirá. El motivo es el siguiente:
• Su corazón bombea sangre a sus pulmones para obtener oxígeno.
A continuación, la sangre, rica en oxígeno, va a los músculos.
El oxígeno se utiliza como combustible y la sangre abandona
los músculos y vuelve a los pulmones para volver a iniciar el
proceso. A medida que se vaya poniendo en forma, su corazón
podrá bombear más sangre con cada latido. Como resultado, su
corazón tendrá que latir menos a menudo para obtener el oxígeno
necesario para sus m_úsculos.
ES
CONSEJOS PARA ENTRENAR
Para obtener los máximos beneficios de su programa de entrenamiento,
y para asegurarse de hacer ejercicio sin correr riesgos, observe las
siguientes directrices:
3
Page 41

ES
• Empiece con un objetivo de entrenamiento bien definido, como
por ejemplo perder peso, mantenerse en forma, mejorar su salud
o competir en un evento deportivo.
• Seleccione un tipo de ejercicio que le guste y vaya variando de
tipo para ejercitar distintos grupos de músculo.
• Empiece despacio y vaya subiendo el ritmo gradualmente a medida
que su forma vaya mejorando. Haga ejercicio con regularidad. Se
recomienda hacer ejercicio entre 20 y 30 minutos tres veces por
semana para mantener un sistema cardiovascular sano.
• Asegúrese de destinar cinco minutos al calentamiento y cinco
minutos al enfriamiento cada vez.
• Calcule el pulso después de hacer ejercicio, y a continuación
repita el proceso al cabo de tres minutos. Si no vuelve a su estado
en reposo normal, es posible que haya entrenado a un ritmo
demasiado duro.
• Consulte siempre con su médico antes de iniciar un programa de
entrenamiento fuerte.
PANORÁMICA GENERAL DEL PRODUCTO
RELOJ
1 3
4
2
1. LAP / MEM / - : Muestra registros de entreno; disminuye el valor
de los ajustes; marca una vuelta
2. MODE: Pasa a otro Modo de pantalla; manténgalo pulsado para
buscar una señal
3. ST / SP / +: Inicio / parada del cronómetro; incrementar el valor de
los ajustes
4
5
Page 42

4. / : Encender retroiluminación durante 3 segundos;
1 6
bloquear / desbloquear teclado
5. SET: Introducir modo de ajuste; confirmar ajuste; mostrar distintos
datos durante el modo de entrenamiento o de memoria; reiniciar
temporizador / cronómetro / función de cuenta atrás de objetivo
LCD
1. Área 1
1
2. Área 2
3. Área 3
2
4. Área 4
3
4
Área 1
ES
2
3
4
5
1. TTL: Se muestra el tiempo de ejercicio total
2.
3. WARM: Se muestra el cronómetro de calentamiento, o el
4. REST: Se muestra el cronómetro de recuperación, o el cronómetro
5. TIMER: Se muestra el PROGRAMA DE ENTRENAMIENTO
6. AUTO: El programa de vuelta automática está funcionando
7.
: El bloqueo de botones está activado
cronómetro de calentamiento está en funcionamiento
de recuperación está en funcionamiento
INTELIGENTE, o el PROGRAMA DE ENTRENAMIENTO
INTELIGENTE está funcionando
: Tono keypad activado
5
7
8
9
10
11
Page 43

ES
6
8. : Alarma activada
9.
10. LAP: Muestra el tiempo de la vuelta actual o el tiempo de la vuelta
11. SPLIT: Muestra y calcula intervalos
Área 2
: Se muestra el cronómetro, o el cronómetro está en
funcionamiento
en memoria
1
2
3
1. Muestra el modo y la información relevante
2.
3.
Área 3
1.
2.
3.
4.
5. Muestra información
: Distancia en millas
: Distancia en kilometros
1
2
3
4
5
: Porcentaje de grasas quemadas
: El icono se anima cuando se toma una lectura de
velocidad
: La flecha sube / baja parpadeando si la velocidad
queda fuera de la zona
/ : La flecha sube / baja parpadeando si el ritmo cardíaco
queda fuera de la zona
7
8
9
10
11
12
6.
: Unidad de altura
6
Page 44

7. / : Unidades de peso corporal
6
8.
/ : Unidad de altura
ES
9.
10.
11.
12
Modo de entrenamiento – muestra el número de repeticiones que
Área 4
: Modo Luz activado
: Función de repetición activada
: Se muestra el Modo Velocidad, o el Modo Velocidad está
en funcionamiento
: Modo Velocidad – muestra el número de objetivo;
quedan
7
1
2
3
4
8
9
10
11
12
5
1.
2.
3.
: El ritmo cardíaco está por encima o por debajo del límite;
la alerta de ritmo cardíaco está activada
: Aparece cuando se muestra un ritmo cardíaco / velocidad
/ ritmo medios
/ : Aparece cuando se utiliza el reloj / alarma de 12
horas
13
4.
5.
6.
ritmo cardíaco
7.
8.
9.
10.
11
: Se muestra el valor máximo de velocidad y distancia
: Aparece en modo memoria
: Parpadea cuando recibe señal de búsqueda automática de
: Parpadea cuando encuentra una señal
: La velocidad se muestra en Km/hr
: La velocidad se muestra en Mi/hr
: Aparece cuando se hace una vuelta
: Aparece al introducir el año de nacimiento
7
Page 45

ES
12. : Estado de la pila
vibración
13.
: La pila está casi agotada y no efectúa la función de
: La alerta de vibración está configurada
PARA EMPEZAR
DESEMBALAJE DEL RELOJ
Esta caja contiene:
• Reloj
• Cinta para transportarlo
• Cinturón elástico regulable
• Bolsa de almacenamiento
• Soporte para bicicleta
• 2 pilas de litio CR2032 – ya instaladas
Para poner en marcha el reloj (sólo la primera vez que se usa):
Pulse cualquier botón durante 2 segundos para activar la pantalla LCD.
CÓMO PONERSE LA BANDA PECTORAL Y EL RELOJ
CINTA
La cinta de control de ritmo cardiaco sirve para contar el ritmo cardíaco
y transmitir los datos al reloj.
Para ponerse la cinta:
1. Moje las almohadillas conductivas de
la cara inferior de la cinta con unas cuantas
gotas de agua o un gel conductivo para
garantizar un buen contacto.
2. Póngase la cinta diagonalmente
colgada del cuello. Para asegurarse
que el ritmo cardiaco se mide
correctamente, ajústese la cinta hasta que quede exactamente
por debajo de sus músculos pectorales.
CONSEJOS
• La posición de la cinta afecta al rendimiento del dispositivo. Mueva
la hebilla por la cinta para que quede encima de su corazón.
• Evite las zonas con pelo denso.
8
Page 46

• En climas secos y fríos podrían pasar varios minutos antes de que
funcionara correctamente. Esto es normal y debería mejor al cabo
de unos minutos de ejercicio.
RELOJ
Puede llevar el reloj receptor en la muñeca o colocarlo en una bicicleta
o máquina de ejercicio.
CONSEJO Para garantizar una buena recepción, intente mantener la
pantalla LCD vertical mientras corre o camina.
Para colocarlo a una bicicleta o máquina de ejercicio:
ES
9
Page 47

ES
SEÑAL DE TRANSMISIÓN
La cinta y el reloj tendrán un alcance de transmisión máximo de
unos 62,5 cm (25 pulgadas). Están equipados con el sistema de
codificación digital más moderno para reducir las interferencias del
entorno y obtener lecturas más precisas.
NOTA Si el reloj está buscando la señal de la cinta (sea búsqueda
manual o automática), asegúrese de que la cinta no esté a más de 10
cm (4 pulgadas) del reloj.
ICONO DESCRIPCIÓN
Búsqueda de señal
El corazón exterior
parpadea
Se ha encontrado una señal
El corazón interior
parpadea
\
NOTA Si el reloj no registra ninguna actividad de la cinta durante 5
minutos, las funciones de ritmo cardíaco y velocidad se apagarán.
IMPORTANTE Si el icono de ritmo cardíaco no aparece en la
pantalla ni está parpadeando porque no se ha encontrado ninguna
señal, fuerce una búsqueda de señal. Consulte la sección “Búsqueda
de señal” para ver cómo hacerlo. En caso de experimentar una señal
débil o si su señal es interrumpida por interferencias del entorno, siga
los pasos siguientes para identificar y resolver la situación:
1. La señal es débil – el reloj sólo muestra “0”:
• Reduzca la distancia entre la cinta de control de ritmo
cardíaco y el reloj.
• Reajuste la posición de la cinta de control de ritmo cardíaco.
• Compruebe las pilas. Si están casi gastadas o gastadas, su
cobertura podría reducirse.
• Inicie una búsqueda de señal (consulte la sección “Búsqueda
de señal”).
2. Interferencia del monitor de ritmo cardíaco de otra persona –su
lectura de ritmo cardíaco aparece en el reloj que usted lleva, o el
reloj muestra “0”:
No se ha encontrado ninguna
señal
10
Page 48

• Quítese la cinta durante 12 segundos para modificar
automáticamente su ID de usuario (El reloj tiene 4 IDs.
Cuando recibe la señal de la cinta, le dirá qué usuario ha
seleccionado. Sólo los productos con sistema de codificación
digital tienen Ids de usuario.)
NOTA Las lecturas de ritmo cardíaco podrían interferir con otros
usuarios si la distancia es inferior a 84 cm (33 pulgadas).
3. Hay cruce de señales; la lectura de ritmo cardíaco de su reloj
parpadea:
• Hay demasiadas interferencias en el entorno para que
su monitor de ritmo cardíaco funcione normalmente. Vaya
a un área en la cual la lectura de ritmo cardíaco deje de
parpadear.
AVISO Las interferencias del entorno pueden deberse a interferencias
electromagnéticas. Estas interferencias pueden producirse cerca de
líneas de alta tensión, semáforos, líneas colgadas, líneas ferroviarias,
líneas de trolebús o tranvía, televisores, motores de automóviles,
ordenadores para bicicleta, ciertos equipos de ejercicio propulsados
con motor, teléfonos móviles o al pasar por puertas de seguridad
eléctricas. En caso de interferencias, las lecturas de ritmo cardíaco y
velocidad pueden inestabilizarse y no ser precisas.
ES
BÚSQUEDA DE SEÑAL
Para forzar una búsqueda de señal:
1. Pulse MODE para acceder al modo VELOCIDAD,
ENTRENAMIENTO o CRONO.
2. Pulse MODE y manténgalo pulsado durante 2 segundos. El icono
de búsqueda de señal
para confirmar que se está realizando una búsqueda de señal. Si
el reloj está buscando la señal de la cinta, asegúrese de que la
cinta no esté a más de 10 cm (4 pulgadas) del reloj.
La búsqueda de señal durará unos 10 minutos. Si al cabo de 10
minutos el icono del corazón no está parpadeando, significará que
la búsqueda no ha surtido efecto y que debe forzar otra búsqueda de
señal. Consulte la tabla en la sección de “Señal de transmisión” para
tener más información sobre el estado de la señal.
con el exterior parpadeando aparecerá
11
Page 49

ES
CONFIGURACIÓN DE TONO KEYPAD / MODO LUZ
Puede configurar el reloj de modo que:
• El pitido de los botones esté activado
o desactivado.
• El Modo Luz esté activado o desactivado
(consulte la sección “Activación de la
Retroiluminación).
Para configurar estas funciones:
1. Pulse MODE para acceder al Modo HORA.
2. Pulse SET repetidamente hasta que alcance la función que desea
modificar.
3. Pulse ST / SP / + o LAP / MEM / - para modificar la
configuración.
4. Pulse SET para confirmar un ajuste y pasar al siguiente.
ACTIVACIÓN DE LA RETROILUMINACIÓN
Para activar cuándo el Modo Luz está desactivado:
• Pulse
cualquier otra tecla mientras la luz esté encendida y se alargará 3
segundos más.
Para activar cuándo el Modo Luz está activado:
• Pulse cualquier tecla para encender o alargar la retroiluminación
durante 3 segundos.
Para ahorrar pila, el ajuste activado del Modo Luz se apaga
automáticamente al cabo de 2 horas.
NOTA La iluminación de pantalla no funciona cuando se muestra el
icono de pila casi gastada, pero volverá a la normalidad en cuanto se
cambie la pila.
para iluminar la pantalla durante 3 segundos. Pulse
12
Page 50

ACTIVACIÓN DEL BLOQUEO DE BOTONES
Para activar o desactivar el keypad:
ES
• Pulse
aparecerá_ si el bloqueo de keypad está_ activo.
y manténgalo pulsado durante 2 segundos.
ALTERNAR ENTRE DOS MODOS DE OPERACIÓN
Pulse MODE para alternar entre los 5 modos de operación:
• HORA: Reloj de tiempo real y alarma
• VELOCIDAD: Calibración, Velocidad y Objetivos distancia / tiempo
• ENTRENAMIENTO: Temporizador de Calentamiento, ejercicio y
recuperación.
• CRONO: Cronómetro
• USUARIO: Perfil de usuario y ejercicio
Los modos se describen en las secciones siguientes.
NOTA Puede tener SMART TRAINING PROGRAM o el cronómetro
funcionando mientras accede a otros modos. El icono del modo activo
parpadeará hasta que vuelva a dicho modo.
RELOJ
Para configurar el reloj:
1. Pulse MODE para acceder al
Modo de HORA.
2. Pulse SET y manténgalo
pulsado hasta que el primer
ajuste parpadee.
3. Pulse ST / SP / + o LAP / MEM / - para seleccionar formato de
12 o 24 horas. Mantenga el botón pulsado para que avance más
rápido. Pulse SET para confirmar un ajuste y pasar al siguiente.
13
Page 51

ES
4. Repita el paso 3 para cambiar otros ajustes: Hora / Minuto / Año /
formato de fecha DD:MM o MM:DD / Mes / Día.
NOTA El reloj está programado con un calendario automático de
50 años, lo cual significa que no tendrá que reiniciar los días de la
semana y las fechas todos los meses.
ALARMA
Su reloj tiene una alarma que se puede configurar para que se active
todos los días (Lun-Dom), los días laborables (Lun-Vie) o el fin de
semana (Sáb-Dom).
Para configurar la alarma:
1. Pulse MODE para acceder al
Modo HORA.
2. Pulse SET para seleccionar alarma.
3. Pulse SET y manténgalo
pulsado hasta que el primer
ajuste parpadee para entrar al
modo de configuración de la
alarma.
4. Pulse ST / SP / + o LAP / MEM / - para modificar la configuración
Diaria, Día laborable o Fin de semana. Mantenga el botón pulsado
para que avance más rápido. Pulse SET para confirmar un ajuste
y pasar al siguiente.
5. Repita el paso 4 para cambiar otros ajustes: Hora / Minuto.
6. La alarma se activará automáticamente en cuando acabe de
configurar la hora de la alarma.
Para activar o desactivar la alarma:
1. Pulse MODE para acceder al Modo HORA.
2. Pulse SET para seleccionar alarma.
3. Pulse ST / SP / + o LAP / MEM / - para activar o desactivar la
alarma. Cuando la alarma está activa aparece el icono
.
14
Page 52

Para desactivar el sonido de la alarma:
Pulse cualquier tecla para desactivar el sonido de la alarma. La alarma
se reiniciará automáticamente a no ser que la desactive.
PERFIL DE USUARIO
Para acceder a todos los beneficios del monitor de ritmo cardiaco,
configure su perfil de usuario antes de empezar con el ejercicio. De
este modo se generará automáticamente un índice de forma física
y masa corporal. Estos cálculos, así como las calorías y grasas
quemados a lo largo del tiempo, le permitirán hacer un seguimiento de
su progreso a lo largo del tiempo.
Para configurar el perfil de usuario:
1. Pulse MODE para acceder al
Perfil de usuario.
2. Si aparece esta pantalla, pulse
SET para acceder al perfil de
usuario
ES
3. Pulse SET y manténgalo
pulsado hasta que el primer
ajuste parpadee.
4. Pulse ST / SP / + o LAP / MEM / - para modificar la configuración
Hombre/Mujer. Mantenga el botón pulsado para desplazarse más
rápidamente por las opciones. Pulse SET para confirmar un ajuste
y pasar al siguiente.
5. Repita el paso 4 para cambiar otros ajustes: Año de nacimiento /
Mes de nacimiento / Día de nacimiento / Peso – opción lbs o kg /
Peso / Altura – opción pies / pulgadas o centímetros / Altura / Nivel
de actividad – Poco, hobby o atleta.
15
Page 53

ES
En cuanto complete su perfil de usuario se calcularán y mostrarán
inmediatamente un índice de forma física y un índice de masa
corporal. Consulte la sección “Acerca del índice de forma física / masa
corporal” para más información.
NOTA Puede mostrar y configurar su perfil de usuario en cualquier
momento.
NOTA Deberá configurar su perfil de usuario para poder utilizar la
función de recuento de calorías y porcentaje de grasas quemadas.
NIVEL DE ACTIVIDAD
El nivel de actividad se basa su propia autoevaluación y cuanto jercicio
hace regularmente.
NIVEL DE ACTIVIDAD DESCRIPCIÓN
POCO POCO No suele realizar ejercicio
habitualmente
AFICIONADO Medio – Participa en alguna actividad
(como golf, tenis, halterofilia o gimnasia)
entre 2 y 3 veces por semana.
ATLETA Alto – Participa activamente en
ejercicios físicos duros (como hacer
fúting, nadar) o participa en ejercicios
vigorosos (como tenis, baloncesto o
balonmano).
PERFIL DE EJERCICIO
Para utilizar el PROGRAMA DE ENTRENAMIENTO INTELIGENTE
tendrá que configurar el perfil de ejercicio. Puede configurar 3 perfiles
de ejercicio distintos.
Las distintas actividades ejercitan el cuerpo de distintos modos, y le
permiten alcanzar distintos objetivos de forma física. Por ese motivo el
perfil de ejercicio se puede ajustar de modo que encaje con distintas
actividades físicas. Por ejemplo, si está corriendo, seguramente los
ajustes de su perfil de ejercicio serán distintos de los que usaría si
estuviera realizando una actividad de pesas.
Asimismo, el tiempo que necesita para calentar y completar un ejercicio
también será distinto. Por eso puede cambiar el calentamiento y el
cronómetro del ejercicio para que encaje.
16
Page 54

Para configurar el perfil de ejercicio:
1. Pulse MODE para acceder al
Modo USUARIO.
2. Pulse SET para acceder al Perfil
de ejercicio.
3. Pulse SET para seleccionar entre los 3 perfiles de ejercicio.
4. Pulse SET y manténgalo
pulsado hasta que el primer
ajuste parpadee. Al cabo de
un tiempo, la pantalla pasará a
“WALK”, “JOG” o “RUN”.
ES
5. Pulse ST / SP / + o LAP / MEM / - para modificar el ajuste caminar
/ fúting /correr. Mantenga el botón pulsado para que avance más
rápido. Pulse SET para confirmar un ajuste y pasar al siguiente.
6. Repita el paso 5 para cambiar otros ajustes:
• Límite mínimo de ritmo cardiaco
• Límite máximo de ritmo cardíaco
• Alerta de ritmo cardiaco activada o desactivada
• Temporizador de repetición de ejercicio ON u OFF
• Temporizador de ejercicio o Distancia / Distancia (si se
selecciona Distancia)
• Temporizador de ejercicio por horas (si se selecciona
Temporizador)
• Temporizador de ejercicio por minutos (si se selecciona
Temporizador)
• Temporizador de calentamiento (configurado para que se
active a 5, 10 15 minutos o a 0 para desactivar el temporizador)
17
Page 55

ES
• Temporizador de descanso (Recuperación) ON u OFF
NOTA El modo de vibración aparecerá después del ajuste de límite
superior de ritmo cardíaco cuando la pila esté baja; este aviso le
permite retomar el modo de vibración o desactivarlo para no gastar
tanto la pila.
NOTA En cuanto haya configurado su perfil de usuario y objetivo de
actividad, su límite de ritmo cardíaco superior e inferior se configurarán
automáticamente. Sin embargo, si los ajustes automáticos no le
van bien, puede modificarlos manualmente. Si modifica la actividad
objetivo se actualizarán automáticamente.
ACTIVIDAD OBJETIVO
Hay 3 niveles de actividad objetivo:
ACTIVIDAD OBJETIVO RCM% DESCRIPCIÓN
ANDAR Salud
Mantenimiento
FOOTING Ejercicio
aeróbico
65-78% Este es el nivel de
entrenamiento de
menor intensidad.
Es bueno para
los principiantes
y para quien
desee fortalecer
sus sistemas
cardiovasculares.
65-85% Incrementa
la fuerza y la
resistencia.
Funciona con
la capacidad
de consumo
de oxígeno del
cuerpo, quema
más calorías y
puede mantenerse
durante un largo
periodo de tiempo.
18
Page 56

ES
CORRER Ejercicio
anaeróbico
78-90% Genera velocidad
y potencia.
Funciona con o
por encima de
la capacidad
de consumo
de oxígeno del
cuerpo, construye
músculo y no
puede mantenerse
durante un largo
periodo de tiempo.
LÍMITE DE RITMO CARDIACO MÁXIMO/MÍNIMO/SUPERIOR
Antes de iniciar un programa de ejercicio, y para conseguir los máximos
beneficios de salud de su ejercicio, es importante que conozca su:
• Ritmo cardíaco máximo (RCM)
• Límite mínimo de ritmo cardiaco
• Límite máximo de ritmo cardíaco
Para calcular manualmente sus propios límites de ritmo cardiaco, siga
las instrucciones que aparecen a continuación:
RCM LÍMITE INFERIOR LÍMITE SUPERIOR
RCM = 220
- edad
RCM x actividad
objetivo baja %.
Por ejemplo, si la
actividad objetivo
es CAMINAR Límite
inferior = RCM x
65%
RCM x actividad
objetivo alta %.
Por ejemplo, si la
actividad objetivo
es CAMINAR
Límite superior =
RCM x 78%
ALERTA DE RITMO CARDIACO
En el perfil de ejercicio puede configurar la alerta de ritmo cardíaco
siguiendo los pasos siguientes:
19
Page 57

ES
ICONO DESCRIPCIÓN
Sonido de ritmo cardíaco y
Alerta de sonido de ritmo cardíaco
• 1 pitido significa límite inferior
• 2 pitidos significan límite superior
Vibración de ritmo cardíaco
Sonido de ritmo cardíaco y
Si la alerta de ritmo cardíaco está activada, una flecha hacia arriba
o hacia abajo aparecerá en la pantalla para indicar qué límite se ha
superado.
NOTA Con la función de vibración las pilas se consumen más
rápidamente que con la alarma de sonido.
CALIBRACIÓN, VELOCIDAD Y CALIBRACIÓN DE OBJETIVOS
CALIBRACIÓN
Antes de usar la función de velocidad y distancia tendrá que configurar
un parámetro de calibración real. Para ello preconfigure una distancia
para obtener una estimación sobre su velocidad al recorrer esta
distancia. Tiene que correr esta distancia y a continuación configurar
la calibración adecuada. Puede hacerlo corriendo y/o caminando.
Puede usar el reloj sin calibración, pero la precisión de velocidad y
distancia serán menores. Después de la calibración, la precisión de
velocidad y distancia mejorará.
Para configurar la calibración real:
1. Asegúrese de que la transmisión entre el reloj y la cinta sea
correcta.
2. Pulse MODE para acceder al Modo VELOCIDAD.
3. Pulse SET y manténgalo pulsado para acceder al modo de
configuración.
20
Page 58

4. Pulse ST / SP / + o LAP / MEM / -
para seleccionar CALIBRACIÓN (Cali)
y pulse SET para confirmar.
5. Pulse ST / SP / + o LAP / MEM / - para seleccionar la calibración
para caminar o correr. Recomendamos hacer ambas calibraciones
separadamente. El reloj puede distinguir automáticamente si el
usuario camina o corre.
6. Pulse ST / SP / + o LAP / MEM / - para seleccionar calibración
real (“SET CAL” parpadeará) o introducir directamente un
parámetro de calibración (parpadeará “SET PAR” y pulse SET
para confirmar.
La primera vez que lo use, seleccione calibración real. Después de la
calibración, grabe los parámetros de calibración de caminar y correr
de modo que en futuro pueda introducir los parámetros manualmente
en lugar de realizar una calibración real. Por ejemplo, si le presta el
reloj a alguien que le introduce su propia calibración, sólo tiene que
introducir su parámetro de calibración cuando vuelva a usar el reloj.
7. Pulse ST / SP / + o LAP / MEM / - para seleccionar la distancia
que quiere caminar o correr (se recomiendan 400 m para cada
uno) y pulse SET para confirmar.
8. Pulse ST / SP / + o LAP / MEM / - para seleccionar la calibración
y empiece a caminar o correr.
9. Después de caminar o correr la distancia deseada, pulse ST / SP
/ + para acabar la calibración.
10. El reloj puede sentir si su calibración es correcta o no. Si recibe
un mensaje de error, intente correr a una velocidad más lenta,
ya que a veces el reloj no puede calibrar con precisión si corre
demasiado deprisa.
11. Si la calibración ha fallado, puede volverla a realizar pulsando SET y
repitiendo los pasos 8 y 9, o detenerla pulsando ST / SP / +.
ES
NOTA Puede detener la calibración en cualquier momento pulsando
ST / SP / + y saliendo del modo de ajuste pulsando MODE.
NOTA La función de velocidad y distancia sólo funciona al correr o
caminar, no si se va en bicicleta o en coche.
21
Page 59

ES
NOTA La calibración depende de cómo se camina o corre, incluso
del calzado. Por tanto, si otra persona usa el reloj, tendrá que repetir
la calibración.
NOTA En cuanto deje de caminar o correr el reloj necesitará unos 10
segundos para volver a “0”.
UNIDAD DE VELOCIDAD Y DISTANCIA
Para ajustar la unidad (Km o Millas):
1. Pulse MODE para acceder al Modo VELOCIDAD.
2. Pulse SET y manténgalo pulsado para acceder al modo de
configuración.
3. Pulse ST / SP / + o LAP / MEM / - para seleccionar ajuste de
UNIDAD y pulse SET para confirmar.
4. Pulse ST / SP / + o LAP / MEM / - para alternar entre Km y Milla.
Pulse SET para confirmar su selección.
LÍMITE DE VELOCIDAD
Su reloj tiene un sistema de medición de velocidad en tiempo real.
Durante el ejercicio se puede consultar la velocidad media. Se pueden
configurar el límite superior e inferior de velocidad antes de hacer
ejercicio con la opción de oír una alerta de velocidad si se supera o no
se alcanza los límites.
Para configurar el límite de velocidad:
1. Pulse MODE para acceder al Modo VELOCIDAD.
2. Pulse SET y manténgalo pulsado para acceder al modo de
configuración.
3. Pulse ST / SP / + o LAP / MEM / - para seleccionar LÍMITE DE
VELOCIDAD y pulse SET para confirmar.
4. Pulse ST / SP / + o LAP / MEM / - para modificar el límite inferior,
pulse SET para confirmar y pase al siguiente ajuste.
5. Repita el paso 4 para configurar el límite superior y la alerta de
velocidad.
NOTA Las alertas visuales y de sonido se activan cada 10 segundos
cuando se supera el límite superior de velocidad o no se alcance el
límite inferior. En cuanto a la alerta de sonido, 3 pitidos breves indican
que se está por debajo del límite inferior, mientras que 4 pitidos breves
indican que se está por encima del límite superior.
22
Page 60

DEFINICIÓN DE OBJETIVO(S)
Antes de empezar a hacer ejercicio podrá marcarse distintos objetivos
(en cuanto a la distancia o al tiempo). Hay 9 grupos de objetivos
disponibles. Cuando el primer objetivo se ha completado, pasará
automáticamente al siguiente, y así sucesivamente hasta que se
completen todos los objetivos. Esta función es útil para quienes
quieren entrenar con distintos tipos de ejercicio.
Para definir objetivos:
1. Pulse MODE para acceder al Modo VELOCIDAD.
2. Pulse SET y manténgalo pulsado para acceder al modo de
configuración.
3. Pulse ST / SP / + o LAP / MEM / -
para seleccionar OBJETIVO y pulse
SET para confirmar.
4. Pulse ST / SP / + o LAP / MEM / - para seleccionar cuántos
objetivos quiere (1-9). Pulse SET para confirmar.
5. Pulse ST / SP / + o LAP / MEM / - para seleccionar “Por distancia”
o “Por tiempo” y pulse SET para confirmar.
6. Pulse ST / SP / + o LAP / MEM / - para seleccionar el objetivo que
quiere definir y pulse SET para confirmar.
7. Pulse ST / SP / + o MEM / LAP / - para modificar el valor del ajuste.
(distancia o minutos/segundos) y pulse SET para confirmar.
8. Repita los pasos 6 y 7 para definir otros objetivos o pulse MODE
para salir del modo de ajuste.
ES
NOTA La distancia se puede fijar entre 0,10 – 99,99Km, y el tiempo
entre 00’01’’ - 99’59’’.
USO DE LA FUNCIÓN DE OBJETIVO
Para iniciar / detener la función de objetivo:
1. Pulse MODE para acceder al Modo VELOCIDAD.
2. Pulse ST / SP / + para iniciar el primer objetivo.
3. Puede pulsar ST / SP / + para pausar / retomar cada objetivo O BIEN
saltarse un objetivo pulsando ST / SP / + y manteniéndolo pulsado;
se oirán 3 pitidos breves para indicar que se omite un objetivo.
23
Page 61

ES
4. Cuando todos los objetivos hayan sido finalizados, se emitirá un
pitido largo y “FINISH” parpadeará.
NOTA Puede reiniciar todos los objetivos en cualquier momento
pulsando SET y manteniéndolo pulsado.
Durante el ejercicio, puede pulsar SET para consultar la siguiente
información:
• Distancia objetivo / tiempo restante y velocidad
• Distancia objetivo / tiempo restante y ritmo cardíaco
• Reloj y ritmo
• Distancia total de todos los objetivos finalizados y velocidad
media
• Tiempo total y ritmo medio
NOTA El ritmo es el tiempo (MM’SS’’) necesario para recorrer un
kilómetro o una milla.
CONSULTAR DATOS OBJETIVO CUANDO EL EJERCICIO
ESTÁ EN PAUSA O DETENIDO
Para ver la memoria relativa a resultados sobre objetivos:
1. Pulse ST / SP / + para pausar o detener la función de objetivo.
2. Pulse LAP / MEM / - para acceder al Modo de Alarma. Se mostrará
el odómetro.
3. Pulse SET, “ALL” parpadeará. A continuación pulse ST / SP / + o
LAP / MEM / - para seleccionar visualización de toda la memoria
o una memoria individual.
4. Pulse SET para ver los datos.
Se pueden consultar los datos siguientes de cada objetivo individual:
• Tiempo transcurrido y velocidad media
• Distancia recorrida y ritmo medio
• Ritmo cardíaco medio
Se pueden consultar los datos siguientes del rendimiento total:
• Tiempo total transcurrido y velocidad media
• Distancia total recorrida y ritmo medio
• Ritmo medio y ritmo cardíaco medio
24
Page 62

NOTA El odómetro indica la distancia total recorrida desde la
última vez que se reiniciara el sistema. Está compartido con los
modos VELOCIDAD, ENTRENAMIENTO o CRONO. Para reiniciar el
odómetro, pulse SET y manténgalo pulsado.
ACERCA DEL PROGRAMA DE ENTRENAMIENTO
INTELIGENTE
El PROGRAMA DE ENTRENAMIENTO INTELIGENTE le permite
completar con efectividad ciclos de ejercicio. Le guiará a lo largo del
calentamiento de 5 minutos (ajuste predeterminado) y hasta el final
de su programa de ejercicio. Además de hacer un seguimiento de
su ritmo cardiaco y alertarle si se sale del alcance para la zona de
entrenamiento seleccionada, el programa también le permite consultar
cuántas calorías y qué porcentaje de grasa ha quemado.
USO DEL PROGRAMA DE ENTRENAMIENTO INTELIGENTE
El PROGRAMA DE ENTRENAMIENTO INTELIGENTE hace un
seguimiento de su rendimiento, siempre y cuando haya introducido su
perfil de usuario y su perfil de ejercicio.
ES
NOTA No puede utilizar el PROGRAMA DE ENTRENAMIENTO
INTELIGENTE si el cronómetro funciona.
Para acceder al PROGRAMA DE ENTRENAMIENTO
INTELIGENTE:
1. Pulse MODE para acceder al Modo
ENTRENAMIENTO.
2. Pulse SET y manténgalo pulsado.
A continuación pulse ST / SP / + o
LAP / MEM / - para seleccionar 1
de los 3 perfiles de ejercicio. Pulse
SET para confirmar.
25
Page 63

ES
3. Para iniciar o detener el temporizador de calentamiento, ejercicio
o cuenta atrás de recuperación, pulse ST / SP / +. Si para algún
temporizador, puede volver a pulsar ST / SP / + para retomar la
cuenta. Al final de cada periodo de cuenta atrás oirá un pitido.
• 3 pitidos cortos = Se ha completado el calentamiento
• 1 pitidos largo = Se ha completado el tiempo de ejercicio o la
distancia
• 6 pitidos cortos = Se ha completado el tiempo de recuperación
4. Para omitir un temporizador y pasar al siguiente, pulse ST / SP / +
y manténgalo pulsado.
5. Para reiniciar el temporizador, pulse SET y manténgalo pulsado.
El orden del Modo de Temporizador es:
• Tiempo de calentamiento
- El calentamiento no se muestra se ha configurado en “0” en
el perfil de ejercicio.
• Tiempo o distancia de ejercicio
- El tiempo o distancia de ejercicio se configura en el perfil de
ejercicio.
• Tiempo de recuperación
- El tiempo de descanso (recuperación) es de 3 minutos y no
puede variarse. Cuando el temporizador alcance “0”, el ritmo
cardiaco de recuperación parpadeará.
NOTA Puede activar o desactivar el temporizador de recuperación
seleccionando el ajuste Activado / Desactivado en el perfil de ejercicio
(por favor, consulte “Configuración del Perfil de ejercicio - paso 6”.
VER DATOS MIENTRAS EL PROGRAMA DE ENTRENAMIENTO
INTELIGENTE FUNCIONA
Durante el calentamiento, el ejercicio o la recuperación, puede pulsar
SET para consultar y alternar las siguientes pantallas:
Tiempo restante de calentamiento / ejercicio / recuperación con el
ritmo cardíaco actual:
26
Page 64

• Calorías y % de grasas quemadas
actuales
• Distancia recorrida y velocidad
• Reloj con ritmo
ES
CONSULTAR REGISTROS DE MEMORIA DEL PROGRAMA
DE ENTRENAMIENTO INTELIGENTE
Si se ha pausado o completado el PROGRAMA DE ENTRENAMIENTO
INTELIGENTE, pulse LAP / MEM / - para acceder al modo de memoria:
Se mostrará el odómetro; a continuación, pulse SET para consultar los
registros siguientes:
• Tiempo total y ritmo cardíaco máximo
• Ritmo cardíaco de recuperación y ritmo cardíaco medio
• Porcentaje total de calorías y grasas quemadas
• En la zona de tiempo: Tiempo transcurrido sin superar su límite
superior ni inferior de ritmo cardíaco
27
Page 65

ES
• Tiempo por encima: Tiempo en que se ha superado el ritmo
cardíaco máximo
• Tiempo por debajo: Tiempo en que no se ha alcanzado el ritmo
cardíaco mínimo
• Ritmo y velocidad medios
• Distancia recorrida y velocidad máxima
NOTA No puede utilizar el PROGRAMA DE ENTRENAMIENTO
INTELIGENTE, cronómetro y función objetivo al mismo tiempo.
RITMO CARDÍACO DE RECUPERACIÓN
Su ritmo cardíaco de recuperación es una buena indicación del estado
físico del sistema cardiovascular. Cuanto más rápido se recupera su
corazón después del ejercicio, en mejor forma está su organismo.
El reloj utiliza un método de recuperación basado en el tiempo que
comprueba su ritmo cardíaco de recuperación 3 minutos después del
ejercicio.
Compare su ritmo cardíaco de recuperación entre las sesiones de
ejercicio para hacer un seguimiento del efecto que tiene su ejercicio.
CRONÓMETRO
La función de cronómetro es especialmente útil cuándo no está seguro
de cuánto tiempo le llevará su actividad, o si quiere calcular el tiempo
que le cuesta realizar una tarea y su rendimiento a lo largo de ese
tiempo. También puede tomar registros por vuelta o en intervalos con
la función de cronómetro.
Para sacar el máximo de provecho a su función cronómetro, complete
su perfil de usuario y su perfil de ejercicio. Si no ha completado su
perfil de usuario no podrá utilizar la función de calorías y grasas
quemadas.
• Pulse MODE para acceder al Modo CRONO. Ahora puede realizar
las funciones siguientes:
TAREA INSTRUCCIÓN
Puesta en marcha
del cronómetro
Pausa / retomar
cronómetro
Pulse ST / SP / +.
Pulse ST / SP / +.
28
Page 66

Reinicio Pulse SET y manténgalo pulsado.
ES
Guardar vuelta
Seleccione el perfil
de ejercicio para el
cronómetro
Activar / desactivar
vuelta automática
Pulse LAP / MEM / - mientras el
cronómetro funciona.
NOTA La memoria puede almacenar
hasta 60 vueltas ó 99 hrs:59 mins.
1. Pulse SET y manténgalo pulsado.
2. Pulse ST / SP / + o LAP / MEM
/ - para seleccionar 1 de los 3
perfiles de ejercicio. Pulse SET
para confirmar.
Después de seleccionar el perfil de
ejercicio aparecerá el ajuste VUELTA
AUTOMÁTICA activado/desactivado.
Pulse ST / SP / + o LAP / MEM / - para
elegir. Pulse SET para confirmar.
Si la función de VUELTA
AUTOMÁTICA está activada, se
registrará automáticamente una
vuelta cuando haya recorrido una
distancia predeterminada (como por
ejemplo 1 km).
NOTA Si se selecciona la función de
vuelta automática (por distancia) y la
velocidad es cero, el cronómetro se
detendrá.
NOTA El cronómetro empieza a calcular en min:sec:1/100 seg.
Transcurridos 59, la pantalla cambiará a hrs:min:seg.
VER DATOS MIENTRAS EL CRONÓMETRO / VUELTA
FUNCIONA
Mientras se usan las funciones de cronómetro o vuelta, puede pulsar
SET para consultar y alternar las siguientes pantallas:
• Tiempo total / tiempo de intervalo y ritmo cardíaco actual
• Tiempo de vuelta y ritmo cardíaco actual
• Calorías y % de grasas quemadas actuales
• Distancia y velocidad
• Reloj con ritmo
29
Page 67

ES
Si la pila está casi agotada cuando se
registra una vuelta, aparecerá esta
pantalla y no se guardarán más vueltas.
CONSULTAR REGISTROS DE MEMORIA GENERALES O DE
VUELTA
Para visualizar registros de memoria:
1. El cronómetro tiene que estar parado (pulse ST / SP / +).
2. Pulse LAP / MEM / - para acceder al
Modo de Alarma. Se mostrará el
odómetro.
3. Pulse SET, “ALL” parpadeará. Pulse
ST / SP / + o LAP / MEM / - para
seleccionar visualización de toda
la memoria o una vuelta individual.
4. Pulse SET para ver cada registro.
En el caso de toda la memoria, los registros aparecerán en el orden
siguiente:
• Tiempo total y ritmo cardíaco máximo
• Tiempo total y ritmo cardíaco medio
• Porcentaje total de calorías y grasas quemadas
• En la zona de tiempo: Tiempo transcurrido sin superar su límite
superior ni inferior de ritmo cardíaco
• Tiempo por encima: Tiempo en que se ha superado el ritmo
cardíaco máximo
• Tiempo por debajo: Tiempo en que no se ha alcanzado el ritmo
cardíaco mínimo
30
Page 68

• Ritmo y velocidad medios
• Distancia recorrida y velocidad máxima
En el caso vuelta individual, los registros aparecerán en el orden
siguiente:
• Tiempo de vuelta y número de vuelta
• Tiempo de vuelta y ritmo cardíaco máximo
• Tiempo de intervalo y ritmo cardíaco medio
• Calorías y % de grasas quemadas por vuelta
• En la zona de tiempo – por vuelta
• Tiempo por encima – por vuelta
• Tiempo por abajo – por vuelta
• Ritmo y velocidad medios
• Distancia recorrida y velocidad máxima
ACERCA DEL ÍNDICE DE EJERCICIO / MASA CORPORAL
ÍNDICE DE FORMA FÍSICA
Su reloj genera un índice de forma física según su forma física
aeróbica. El índice depende y viene limitado por la habilidad del
cuerpo de proporcionar oxígeno a los m_úsculos de trabajo durante el
ejercicio. Normalmente se mide con la inspiración máxima de oxígeno
(VO2 Max), que se define como el nivel más alto de ejercicio que se
puede utilizar al hacer ejercicio a un nivel cada vez más exigente.
Los pulmones, corazón, sangre, sistema circulatorio y músculos en
movimiento son factores en la determinación del VO2 Max. La unidad
de medición del VO2 Max es ml/kg min.
Cuanto más alto sea el índice, mejor forma física tiene. Consulte las
tablas que vienen a continuación para ver una guía aproximada de lo
que significa su índice de forma física:
ES
31
Page 69

ES
ÍNDICE DE FORMA FÍSICA PARA HOMBRES
BUENO
MEDIO
ADECUADO
EDAD
Índice de forma física
ÍNDICE DE FORMA FÍSICA PARA MUJERES
BUENO
ADECUADO
Edad
MEDIO
Índice de forma física
ÍNDICE DE MASA CORPORAL
El índice de masa corporal es el cálculo de los porcentajes relativos de
masa muscular y grasas del cuerpo humano.
INDICACIÓN GRUPO DE DESCRIPCIÓN
DE SALUD ÍNDICE DE MASA
CORPORAL
Por debajo del Menos de 18,5 Actualmente su peso corporal
peso está por debajo de la media.
recomendado Esfuércese en comer
regularmente y sano y haga
una rutina de ejercicio para
alcanzar los niveles
recomendados.
32
Page 70

Recomendado Entre 18,5 y 24,9 Está en el nivel recomendado.
Siga una dieta equilibrada y
una rutina de ejercicio para
mantenerse en el nivel actual.
Sobrepeso Entre 25,0 y 29,9 Su peso corporal está por
encima de la media.
Haga más ejercicio y siga una
dieta sana para reducir su
riesgo de enfermedades.
Obeso 30,0 o más A este nivel podría correr el
riesgo de sufrir enfermedades
coronarias, presión alta y otras
enfermedades. Consulte a su
médico para confeccionar un
plan de salud y ejercicio
adecuado.
NOTA La información sobre índice de masa corporal se basa en la
clasificación de la OMS del año 2004.
ES
CONSULTAR EJERCICIO
Pulse MODE para acceder al Modo USUARIO. A continuación pulse
LAP / MEM / - par mostrar su índice de ejercicio y masa corporal.
NOTA Si no ha completado su perfil de usuario, no se mostrará y
”- -”aparecerá en pantalla.
INSTRUCCIONES DE CUIDADO
Para asegurarse de obtener el máximo rendimiento al utilizar este
producto, tenga en cuenta las siguientes directrices:
• Limpie el reloj y la cinta detenidamente después de cada sesión.
No lo guarde nunca mojado.
33
Page 71

ES
• Limpie el producto con un paño suave ligeramente humedecido.
No use detergentes abrasivos ni corrosivos, porque podrían
causar daños a la unidad.
• Evite pulsar los botones con los dedos mojados, debajo del agua o si
llueve mucho, porque podría entrar agua en el circuito eléctrico.
• No doble ni estire el dispositivo transmisor de la cinta.
• No exponga el producto a fuerza extrema, descargas, polvo,
fluctuaciones de temperatura o humedad. En ningún caso exponga el
producto a la luz directa del sol durante periodos largos de tiempo. De
hacerlo podría provocar que el producto se estropeara.
• No manipule los componentes internos. De hacerlo anulará la
garantía de la unidad y podría causar daños. La unidad principal
contiene componentes que el usuario no debe manipular.
• No raye la pantalla LCD con objetos duros, porque podría causar
daños.
• Retire las pilas si va a guardar el producto por un largo periodo de
tiempo.
• Al reemplazar las pilas, introduzca pilas nuevas siguiendo las
especificaciones de este manual de usuario.
• No elimine este producto con la basura normal. Es necesario
desecharlo separadamente para poder tratarlo.
ACTIVIDADES ACUÁTICAS Y AL AIRE LIBRE
El reloj es resistente al agua a hasta 50 metros. La cinta es a prueba
de salpicaduras pero no debería llevarse en actividades bajo el agua,
puesto que la transmisión del ritmo cardíaco no puede producirse bajo
el agua. Consulte la tabla para conocer las instrucciones correctas.
BUCEO A
POCA
PROFUNDIDA
D / TURF/
DEPORTES
ACUÁTICOS
NO
SNORKELING
/ BUCEO
EN AGUAS
PROFUNDAS
NO
Reloj
50 m / 165 ft
SALPICADURAS DE
LLUVIA
etc.
OK
DUCHA
(CALIENTE/
FRÍA
SÓLO
AGUA)
OK
NATACIÓN
LIGERA
/ AGUA
POCO
PROFUNDA
OK
34
Page 72

Si usa el reloj en actividades deportivas acuáticas o al aire libre, tenga
en cuenta las directrices siguientes:
• No pulse los botones debajo del agua ni con los dedos mojados.
• Después de utilizarlo, enjuáguelo con agua y un jabón suave.
• No lo use en agua caliente.
PILAS
Tanto el reloj como la cinta de ritmo cardíaco funcionan con una pila
CR2032 de 3V.
Ambas vienen instaladas. Consulte la tabla que aparece bajo estas
líneas para ver el significado de los iconos de la pila.
ES
ICONO DE PILA
GASTADA
Normalmente las pilas duran un año. Le recomendamos
encarecidamente que se ponga en contacto con el vendedor o el
departamento de atención al público si tiene que cambiarlas. aparece
cuando la pila está casi gastada.
Para reemplazar la pila del reloj:
DESCRIPCIÓN
La pila está demasiado gastada
para la retroiluminación
La pila está demasiado gastada
para la alerta vibratoria
La pila del reloj está casi
gastada; no se pueden
usar la alerta vibratoria ni la
retroiluminación
La pila de la cinta casi está
demasiado gastada para
enviar una señal al reloj
35
Page 73

ES
1. Retire los cuatro tornillos y la placa posterior.
2. Con un instrumento romo, coja la pestaña y levante el clip.
3. Retire la pila vieja e introduzca la pila nueva en el compartimiento
con el lado + hacia arriba.
4. Vuelva a colocar el clip, la cubierta posterior y los tornillos.
Para reemplazar la pila de la cinta:
1. Con una moneda, haga girar la tapa del compartimiento en la
dirección opuesta a las agujas del reloj hasta oír un clic
2. Retire la pila vieja e introduzca la pila nueva en el compartimiento
con el lado + hacia arriba.
3. Vuelva a colocar la tapa del compartimiento haciéndola girar en la
dirección de las agujas del reloj hasta que quede en su sitio.
IMPORTANTE
• Es necesario deshacerse correctamente de las pilas recargables y no
recargables. Para ello dispone de contenedores especiales para pilas
recargables y no recargables en puntos de recogida públicos.
• Es extremadamente peligroso tragar pilas! Por tanto, mantenga
pilas y piezas pequeñas fuera del alcance de los niños. Si se ha
36
Page 74

producido la ingestión de una pila, póngase en contacto con un
médico a la mayor brevedad.
• Las pilas suministradas no deben recargarse, reactivarse de
ning_ún otro modo, desmantelarse, quemarse o cortocircuitarse.
FICHA TÉCNICA
RELOJ
Formato de la hora 12 / 24 hr
Formato de la fecha / MM o MM / DD
Formato del año 1-2050 (calendario automático)
Alarma Con ajuste diario, días laborables o
fin de semana
CRONÓMETRO
Cronómetro 99:59:59 (HH:MM:SS)
Resolución 1/100sec
Contador de vueltas 60 vueltas share 99:59:59
Distancia de vuelta automática 0,01 a 99,99 km o millas
ES
PROGRAMA DE ENTRENAMIENTO INTELIGENTE
Temporizador de calentamiento Ajustado a 10, 5, 15 ó 0 mins
Temporizador de ejercicio 99:59:59 (HH:MM:SS)
Número máximo de 9
repeticiones del temporizador Por hora: 99:59:00 (HH:MM:SS)
de ejercicio Por distancia: 0,1 a 99,99 km O BIEN
0,1 a 99,99 millas
Temporizador de recuperación 3 minutos fijos
SEGUIMIENTO DEL RENDIMIENTO
Alarma de ritmo cardiaco Vibración / sonido / musical
Escala de medición de ritmo 30-240 bpm (bits por minuto)
cardiaco
Alcance ajustable de ritmo 30-220 bpm (bits por minuto)
cardiaco inferior
Alcance ajustable de ritmo 80-240 bpm (bits por minuto)
cardiaco superior
37
Page 75

ES
Cálculo de calorías 0-9,999 kcal
Cálculo de % de grasas 0-99%
quemadas
FUNCIÓN DE VELOCIDAD
Alcance de velocidad 0 a 40,0 km/hr (0 a 24.8 millas/hr)
Distancia 0 a 9999,99 km (0 a 6211,17 millas)
Tolerancia a la distancia Mejor 8% (aproximadamente)
Odómetro 0 a 99.999 km (0 a 6211,17 millas)
Ritmo 0 a 99’59’’ (MM’SS’’) por km o milla
Nº máx de objetivos 9
distancia tiempo en modo
VELOCIDAD
Distancia objetiva en modo 0,10 a 99,99 km o millas
VELOCIDAD
Tiempo objetivo en modo 00’01’’ a 99’59’’ (MM:SS)
VELOCIDAD
Límite de velocidad inferior 0,1 a 39,9 km/hr o millas/hr
Límite de velocidad superior 0,2 a 40,0 km/hr o millas/hr
(Superior = inferior + 0,1 km/hr o
milla/hr)
TRANSMISIÓN
Alcance 62,5 cm (25 pulgadas) - puede
reducirse con pilas gastadas
RESISTENTE AL AGUA
Reloj 50 metros (sin pulsar botones)
Cinta A prueba de salpicones
ALIMENTACIÓN
Reloj 1 pila de litio CR2032 3V
Cinta 1 pila de litio CR2032 3V
ENTORNO DE TRABAJO
Temperatura de trabajo 5°C-40°C (41°F-104°F)
Temperatura de almacenamiento -20°C-70°C (-4°F-158°F)
38
Page 76

AVISOS
Pasa asegurarse de que usa su producto correctamente y sin correr
riesgos, lea estos avisos y el manual de usuario entero antes de
utilizar el producto. Los avisos que se incluyen aquí ofrecen importante
información de seguridad y deberían cumplirse en todo momento.
• Mantenga su reloj resistente al agua!
• Evite los productos químicos (gasolina, clorina, perfumes, alcohol,
esprays de pelo, etc.)
• Evite la exposición al calor.
• Aseg_úrese de que su reloj sea revisado cada año por un centro
de servicio autorizado.
• Este producto es un instrumento de precisión. Nunca intente
desmontarlo, Si necesita reparación, póngase en contacto con el
proveedor o nuestro departamento de atención al cliente.
• No toque los circuitos del dispositivo, ya que existe un peligro de
descarga eléctrica.
• Tenga cuidado cuando manipule las pilas de cualquier tipo.
• Retire las pilas si va a guardar el producto por un largo periodo de
tiempo.
• No use la cinta en aviones ni hospitales. La utilización de productos
de radiofrecuencia pueden provocar mal funcionamiento en los
dispositivos de control y otros equipos.
• No exponga el producto a impactos o descargas.
• Compruebe todas las funciones principales si el dispositivo no
se usa durante un largo periodo de tiempo. Compruebe y limpie
regularmente la parte interior de su dispositivo.
• Al desechar este producto, hágalo seg_ún las regulaciones de
desecho de residuos locales.
ES
39
Page 77

ES
SOBRE OREGON SCIENTIFIC
Visite nuestra página web (www.oregonscientific.com) para
conocer más sobre los productos de Oregon Scientific tales como:
Reproductores MP3, juegos y productos de aprendizaje electrónico
para niños, relojes de proyección, productos para la salud y el deporte,
estaciones meteorológicas y teléfonos digitales y de conferencia.
La página web también incluye información de contacto de nuestro
departamento de Atención al Cliente, en caso de que necesite contactar
con nosotros, a la vez que Preguntas Frecuentes y Descargas de los
programas y controladores necesarios para nuestros productos.
Esperamos que encuentre toda la información que necesite en
nuestra página web. En cualquier caso, si necesita contactar con el
departamento de Atención al Cliente directamente, por favor visite
www.oregonscientific.es la sección “Contáctenos” o llame al 902 338
368. Los residentes en EEUU pueden visitar www2. oregonscientific.
com/service/ default.asp o llamar al 1-800-853-8883.
EU - DECLARACIÓN DE CONFORMIDAD
Por medio de la presente Oregon Scientific declara que el Pulsómetro
con velocidad y distancia (SE300) cumple con los requisitos
esenciales de la directiva EMC 89/336/CE. Tiene a su disposición una
copia firmada y sellada de la Declaración de Conformidad, solicítela al
Departamento de Atención al Cliente de Oregon Scientific.
40
Page 78

Herzfrequenzmesser
mit Geschwindigkeits- und Distanzmessung
Modell: SE300
BEDIENUNGSANLEITUNG
PATENT ANGEMELDET
INHALT
Einleitung ................................................................................... 3
Trainingsinformationen ...............................................................3
So unterstützt Sie der Herzfrequenzmesser ...............................3
Trainingstipps ..........................................................................3
Produktübersicht ......................................................................... 4
Uhr .......................................................................................... 4
LCD-Anzeige ...........................................................................5
Erste Schritte ............................................................................. 8
Auspacken der Uhr .................................................................. 8
Tragen des Brustgurts und der Uhr ............................................8
Übertragungssignal ................................................................10
Signalsuche ........................................................................... 11
Tastenton / Beleuchtungsmodus einstellen ..................................... 12
Hintergrundbeleuchtung aktivieren ..........................................12
Tastensperre aktivieren ..........................................................13
Umschalten zwischen Betriebsmodi ........................................13
Uhr ............................................................................................. 13
Alarm ......................................................................................... 14
Benutzerprofil ............................................................................ 15
Aktivitätsstufe .........................................................................16
Trainingsprofil ........................................................................... 16
Zielaktivität .............................................................................18
Maximale / Untere / Obere Herzfrequenzgrenze ..........................19
Herzfrequenzalarm ................................................................. 19
1
DE
Page 79

DE
Kalibrierung, Geschwindigkeit und Ziele ................................... 20
Kalibrierung ...........................................................................20
Einheit für Geschwindigkeit und Distanz ..................................22
Geschwindigkeitsgrenzwerte ................................................... 22
Ziel(e) einstellen ..................................................................... 23
Zielfunktion verwenden ........................................................... 24
Zieldaten anzeigen, wenn Fitnesstraining unterbrochen oder
beendet wurde
Über das intelligente Trainingsprogramm ................................. 25
.......................................................................24
Das intelligente Trainingsprogramm verwenden .......................25
Daten bei Ausführung des intelligenten
Trainingsprogramms anzeigen
Speicherwerte des intelligenten Trainingsprogramms anzeigen ......28
Erholungsherzfrequenz .......................................................... 28
Stoppuhr ....................................................................................28
Daten bei Ausführung der Stoppuhr / Runde anzeigen ............... 30
Werte des Gesamt- oder Rundenspeichers anzeigen .................... 30
Über den Fitness- / Body-Mass-Index
Fitnessindex ..........................................................................31
Body-Mass-Index ...................................................................33
................................................ 27
....................................... 31
Ihre Fitnesswerte ....................................................................34
Pflegeanleitung ..........................................................................34
Aktivitäten im Freien und im Wasser ........................................ 35
Batterien .................................................................................... 35
Technische Daten ...................................................................... 37
Warnhinweise ............................................................................ 39
Über Oregon Scientific ..............................................................40
EU-Konformitätserklärung .....................................................40
2
Page 80

EINLEITUNG
DE
Wir danken Ihnen, dass Sie sich für den Herzfrequenzmesser
(SE300) von Oregon Scientific
entschieden haben.
WICHTIG Dieses Produkt ist ausschließlich für sportliche Zwecke
geeignet und nicht dafür vorgesehen, den ärztlichen Rat zu ersetzen.
Diese Anleitung enthält wichtige Sicherheits- und Pflegeinformationen
und liefert Schritt-für-Schritt-Anweisungen für die Verwendung dieses
Produkts. Lesen Sie diese Anleitung sorgfältig durch und bewahren
Sie sie zur späteren Einsicht an einem sicheren Ort auf.
TM
als Sport/Fitness-Produkt Ihrer Wahl
TRAININGSINFORMATIONEN
SO UNTERSTÜTZT SIE DER HERZFREQUENZMESSER
Ein Herzfrequenzmesser ist das wichtigste Hilfsmittel für die
Gesundheit Ihres Herz-Kreislauf-Systems und eignet sich als perfekter
Trainingspartner. Er ermöglicht Ihnen, Ihre Ergebnisse anzuzeigen
und zu überwachen. Dies hilft Ihnen dabei, Ihre frühere Leistung zu
beurteilen, Ihr Fitnesstraining zu optimieren sowie Ihr zukünftiges
Trainingsprogramm anzupassen, um Ihre gewünschten Ziele auf
möglichst effektive Weise zu erreichen.
Wenn Sie trainieren, nimmt der Brustgurt Ihren Herzschlag auf und
sendet ihn an die Uhr. Nun können Sie Ihren Herzschlag abrufen und Ihre
Trainingsleistung auf der Grundlage Ihrer Herzschlagwerte überwachen.
Wenn Ihr Fitnessgrad zunimmt, muss Ihr Herz weniger Arbeit verrichten,
und Ihre Herzschlagrate nimmt ab. Die Gründe dafür sind wie folgt:
• Ihr Herz pumpt Blut in Ihre Lunge, um Sauerstoff aufzunehmen.
Das sauerstoffreiche Blut wird sodann zu Ihren Muskeln
transportiert. Der Sauerstoff wird als Kraftstoff genutzt, das Blut
verlässt die Muskeln wieder und kehrt in die Lunge zurück, um
den Vorgang erneut zu beginnen. Wenn sich Ihr Fitnessgrad
erhöht, ist Ihr Herz in der Lage, mit jedem Herzschlag mehr Blut
zu pumpen. Demzufolge muss Ihr Herz weniger oft schlagen, um
den erforderlichen Sauerstoff zu Ihren Muskeln zu befördern.
TRAININGSTIPPS
Um einen maximalen Nutzen aus Ihrem Trainingsprogramm zu ziehen
und sicherzustellen, dass Sie sicher trainieren, beachten Sie bitte die
folgenden Richtlinien:
3
Page 81

DE
• Beginnen Sie mit einem gut definierten Trainingsziel, wie etwa
abzunehmen, fit zu bleiben, Ihre Gesundheit zu verbessern oder
an einer sportlichen Veranstaltung teilzunehmen.
• Wählen Sie eine Trainingsaktivität, die Ihnen gefällt, und variieren
Sie Ihre Übungsktivitäten, um unterschiedliche Muskelgruppen zu
trainieren.
• Beginnen Sie langsam und steigern Sie dann allmählich Ihr
Trainingspensum, wenn sich Ihr Fitnessgrad erhöht. Trainieren
Sie regelmäßig. Zur Erhaltung eines gesunden Herz-KreislaufSystems werden 3x pro Woche je 20 – 30 Minuten empfohlen.
• Sie sollten sich stets zumindest 5 Minuten vor und nach dem
Training aufwärmen bzw. abkühlen.
• Messen Sie Ihren Puls nach dem Trainieren. Wiederholen Sie
diesen Vorgang erneut nach 3 Minuten. Wenn Ihr Puls nicht zur
normalen Ruhezahl zurückkehrt, haben Sie möglicherweise zu
schwer trainiert.
• Ziehen Sie stets Ihren Arzt zu Rate, wenn Sie mit einem
anspruchsvollen Trainingsprogramm beginnen.
PRODUKTÜBERSICHT
UHR
1 3
4
2
1. LAP / MEM / - : Trainingsdaten anzeigen; Einstellungswert
verringern; Runde markieren
2. MODE: Auf anderen Anzeigemodus umschalten; Taste gedrückt
halten, um Signalsuche durchzuführen
3. ST / SP / + : Timer starten / beenden; Einstellungswert erhöhen
4
5
Page 82

4. / : Hintergrundbeleuchtung 3 Sekunden lang einschalten;
1 6
Tasten sperren / entsperren
5. SET: Einstellungsmodus aufrufen; Einstellung bestätigen;
verschiedene Infos beim Training oder Speichermodus anzeigen;
Countdown-Funktion für Timer / Stoppuhr / Ziel zurücksetzen
LCD-ANZEIGE
1. Bereich 1
1
2. Bereich 2
3. Bereich 3
2
4. Bereich 4
3
4
Bereich 1
DE
2
3
4
5
1. TTL: Gesamte Trainingszeit wird angezeigt
2.
3. WARM: Aufwärmtimer wird angezeigt oder ausgeführt
4. REST: Erholungstimer wird angezeigt oder ausgeführt
5. TIMER: INTELLIGENTES TRAININGSPROGRAMM wird
6. AUTO: Autom. Runde wird ausgeführt
7.
8. : Alarm ist aktiviert
: Tastensperre ist aktiviert
angezeigt oder ausgeführt
: Tastenton ist aktiviert
5
7
8
9
10
11
Page 83

DE
6
9. : Stoppuhr wird angezeigt oder ausgeführt
10. LAP: Zeigt aktuelle Rundenzeit oder gespeicherte Rundenzeit an
11. SPLIT: Zeigt und berechnet Splitzeit
Bereich 2
1
1. Zeigt Modus und relevante Infos an
2.
3.
Bereich 3
1.
2.
3.
4.
5. Zeigt Informationen an
: Distanz in Meilen
: Distanz in Kilometern
1
2
3
4
5
: Prozentsatz der Fettverbrennung
: Symbol ist animiert, wenn eine Messung der
Geschwindigkeit durchgeführt wird
: Richtungspfeil (oben / unten) blinkt, wenn sich
Geschwindigkeit außerhalb der Zone befindet
/ : Richtungspfeil (oben / unten) blinkt, wenn sich
Herzfrequenz außerhalb der Zone befindet
2
3
7
8
9
10
11
12
6.
7.
8.
: Einheit für Körpergröße
/ : Einheit für Körpergewicht
/ : Einheit für Körpergröße
6
Page 84

9. : Beleuchtungsmodus ist aktiviert
6
DE
10.
11.
12
Trainingsmodus – zeigt Anzahl der restlichen Wiederholungen an
Bereich 4
: Wiederholfunktion ist aktiviert
: Geschwindigkeitsmodus wird angezeigt oder ausgeführt
: Geschwindigkeitsmodus – zeigt Zielnummer an;
7
1
2
3
4
8
9
10
11
12
5
1.
2.
3.
4.
: Herzfrequenz über oder unter dem Grenzwert; akustischer
Alarm für Herzfrequenz aktiviert
: Erscheint bei Anzeige von durchschnittlicher Herzfrequenz
/ durchschnittlicher Geschwindigkeit / durchschnittlichem Tempo
/ : Erscheint, wenn 12-Stunden-Zeitformat / Alarm
verwendet wird
: Maximalwert für Geschwindigkeit und Distanz wird
angezeigt
13
5.
6.
7.
8.
9.
10.
11
12.
13.
: Erscheint im Speichermodus
: Blinkt bei autom. Suche des Herzfrequenzsignals
: Blinkt, wenn ein Signal gefunden wurde
: Geschwindigkeit wird in km/h angezeigt
: Geschwindigkeit wird in mi/h angezeigt
: Wird angezeigt, wenn Rundenzeit ermittelt wird
: Erscheint bei Einstellung des Geburtsjahres
: Batteriestatus
: Ladung der Batterie ist zu niedrig für Vibrationsfunktion
: Vibrationsalarm ist aktiviert
7
Page 85

DE
ERSTE SCHRITTE
AUSPACKEN DER UHR
In der Schachtel ist folgendes enthalten:
• Armbanduhr
• Herzfrequenz-Brustgurt
• Verstellbarer, elastischer Gurt
• Aufbewahrungstasche
• Fahrradhalterung
• 2 Lithium-Batterien des Typs CR2032 - bereits in den Geräten
installiert
So schalten Sie die Uhr ein (nur bei der ersten Verwendung):
Drücken Sie 2 Sekunden lang auf eine beliebige Taste, um den LCDBildschirm zu aktivieren.
TRAGEN DES BRUSTGURTS UND DER UHR
BRUSTGURT
Der Brustgurt dient dazu, Ihren Herzschlag aufzunehmen und die
Daten an die Uhr zu übertragen.
So passen Sie den Brustgurt an:
1. Befeuchten Sie die Kontaktflächen
an der Unterseite des
Brustgurts mit einigen Tropfen Wasser
oder einem Leitgel, um einen guten
Kontakt zu gewährleisten.
2. Schnallen Sie den Brustgurt
um Ihre Brust. Verstellen Sie den
Gurt zur präzisen Herzfrequenzmessung,
bis er genau unter Ihren Brustmuskeln sitzt.
TIPPS
• Die Position des Brustgurts beeinflusst seine Leistung.
Positionieren Sie den Brustgurt über Ihrem Herzen und ziehen Sie
den elastischen Gurt fest.
• Vermeiden Sie Bereiche mit dichtem Brusthaar.
• In einem trockenen, kalten Klima kann es mehrere Minuten
dauern, bis der Brustgurt zuverlässig funktioniert. Das ist normal
und sollte sich nach einigen Minuten Training verbessern.
8
Page 86

UHR
Sie können die Empfängeruhr entweder an Ihrem Handgelenk
tragen oder sie auf ein Fahrrad oder Trainingsgerät montieren (siehe
Abbildungen).
TIPP Um einen stabilen Empfang zu gewährleisten, versuchen Sie
den LCD-Bildschirm der Uhr beim Laufen oder Gehen senkrecht zu
halten.
So befestigen Sie die Uhr an ein Fahrrad oder Trainingsgerät:
DE
9
Page 87

DE
ÜBERTRAGUNGSSIGNAL
Brustgurt und Uhr verfügen über eine maximale Sendereichweite von
etwa 62,5 cm. Sie sind mit dem neuesten, digitalen Codierungssystem
ausgerüstet, um Störungen durch Signalinterferenzen der Umgebung
zu verringern und präzisere Messwerte zu gewährleisten.
HINWEIS Wenn die Uhr nach dem Signal des Brustgurts sucht
(manuelle oder automatische Suche), stellen Sie bitte stets sicher,
dass der Brustgurt nicht weiter als 10 cm von der Uhr entfernt ist.
SYMBOL BESCHREIBUNG
Ein Signal wird gesucht
Das äußere Herz blinkt
Ein Signal wurde gefunden
Das innere Herz blinkt
HINWEIS Wenn die Uhr 5 Minuten lang unbenutzt bleibt, ohne
ein Signal vom Brustgurt zu empfangen, werden die Funktionen für
Herzfrequenz und Geschwindigkeit ausgeschaltet.
WICHTIG Wenn das Herzfrequenz-Symbol nicht in der Anzeige
erscheint oder nicht blinkt, weil kein Signal gefunden wurde,
veranlassen Sie eine Signalsuche. Die Vorgehensweise entnehmen
Sie bitte dem Abschnitt “Signalsuche”. Sollte das Signal schwach sein
oder durch Umgebungsstörungen unterbrochen werden, folgen Sie
den nachstehenden Anweisungen zur Erkennung und Vermeidung
der Störungen.
1. Das Signal ist schwach - die Uhr zeigt nur “0”an:
• Verkürzen Sie die Distanz zwischen Herzfrequenz-Brustgurt
und Uhr.
• Verstellen Sie die Position des Herzfrequenz-Brustgurts.
• Überprüfen Sie die Batterien. Wenn diese schwach oder leer
sind, kann die Reichweite abnehmen.
• Veranlassen Sie eine Signalsuche (siehe Abschnitt
“Signalsuche”).
2. Störungen durch den Herzfrequenzmesser einer anderen Person -
dessen Herzfrequenz-Messwerte werden auf Ihrer Uhr angezeigt,
oder die Uhr zeigt “0” an:
Es wurde kein Signal
gefunden
10
Page 88

• Schnallen Sie den Brustgurt für etwa 12 Sekunden ab, um
Ihre Benutzer-ID automatisch zu ändern. (Die Uhr verfügt
über 4 Benutzer-IDs. Wenn die Uhr das Signal des Brustgurts
empfängt, weist sie darauf hin, welche Benutzer-ID gewählt
wurde. Nur Produkte mit einem digitalen Codierungssystem
verfügen über eine Funktion zur Auswahl einer Benutzer-ID.)
HINWEIS Die Herzfrequenz-Messwerte können durch andere Benutzer
gestört werden, wenn die Distanz kleiner als 84 cm ist.
3. Das Signal ist blockiert - der Herzfrequenz-Messwert auf Ihrer Uhr
blinkt:
• Es sind zu viele Störungen in der Umgebung vorhanden, um
eine Funktion Ihres Herzfrequenzmessers zu ermöglichen.
Suchen Sie eine Stelle auf, an der der HF- Messwert aufhört
zu blinken.
WARNUNG Signalinterferenzen in der Umgebung können auf
elektromagnetische Störungen zurückzuführen sein. Diese können in der
Nähe von Hochspannungsleitungen, Verkehrsampeln, Oberleitungen
von elektrischen Eisenbahnen, Autobussen oder Straßenbahnen,
Fernsehgeräten, Fahrzeugmotoren, Fahrradcomputern, einigen
motorisierten Trainingsgeräten, Mobiltelefonen oder beim Passieren
von elektrischen Sicherheitsschranken auftreten. Die angezeigten
Herzfrequenz- und Geschwindigkeitswerte können bei Störungen
instabil und ungenau werden.
DE
SIGNALSUCHE
So veranlassen Sie eine Signalsuche:
1. Drücken Sie auf MODE, um den Modus SPEED, TRAIN oder
CHRONO aufzurufen.
2. Halten Sie MODE 2 Sekunden lang gedrückt. Das Symbol für
die Signalsuche
bestätigen, dass eine Signalsuche erfolgt. Wenn die Uhr nach
einem Signal des Brustgurts sucht, stellen Sie bitte stets sicher,
dass der Brustgurt nicht weiter als 10 cm von der Uhr entfernt ist.
Die Signalsuche nimmt etwa 10 Sekunden in Anspruch. Wenn
das Herzsymbol nach Ablauf von 10 Sekunden nicht blinkt, war
Ihre Signalsuche nicht erfolgreich, und Sie müssen eine erneute
Signalsuche veranlassen. Weitere Informationen über den Signalstatus
finden Sie in der Tabelle im Abschnitt “Übertragungssignal”.
mit dem äußeren Blinken erscheint, um zu
11
Page 89

DE
TASTENTON / BELEUCHTUNGSMODUS EINSTELLEN
Sie können die Uhr wie folgt einstellen:
• Tastenton “Beep” ein- oder
ausschalten (ON/OFF).
• Beleuchtungsmodus ein- oder
ausschalten (ON/OFF) (siehe Abschnitt
“Hintergrundbeleuchtung aktivieren”).
So stellen Sie diese Funktionen ein:
1. Drücken Sie auf MODE, um den Modus TIME aufzurufen.
2. Drücken Sie auf SET, bis Sie zur Funktion gelangen, die Sie
ändern möchten.
3. Drücken Sie auf ST / SP / + oder LAP / MEM / -, um die Einstellung
zu ändern.
4. Drücken Sie auf SET, um die Einstellung zu bestätigen und zur
nächsten überzugehen.
HINTERGRUNDBELEUCHTUNG AKTIVIEREN
Aktivieren, wenn Beleuchtungsmodus ausgeschaltet ist (OFF):
• Drücken Sie auf
lang einzuschalten. Drücken Sie bei aktivierter Beleuchtung eine
beliebige andere Taste, um die Beleuchtungszeit um weitere 3
Sekunden zu verlängern.
Aktivieren, wenn Beleuchtungsmodus eingeschaltet ist (ON):
• Drücken Sie eine beliebige Taste, um die Hintergrundbeleuchtung
einzuschalten oder um 3 Sekunden zu verlängern.
Um Strom zu sparen, wechselt die Einstellung des Beleuchtungsmodus
nach 2 Stunden automatisch von ON auf OFF.
HINWEIS Die Hintergrundbeleuchtung funktioniert nicht, wenn das
Symbol für schwache Batterie angezeigt wird; sie kehrt zur normalen
Funktion zurück, sobald die Batterie ersetzt wird.
, um die Hintergrundbeleuchtung 3 Sekunden
12
Page 90

TASTENSPERRE AKTIVIEREN
So schalten Sie die Tastensperre ein oder aus (ON/OFF):
DE
• Halten Sie
Anzeige, wenn die Tastensperre aktiviert ist.
2 Sekunden lang gedrückt. erscheint in der
UMSCHALTEN ZWISCHEN BETRIEBSMODI
Drücken Sie auf MODE, um zwischen den 5 Betriebsmodi umzuschalten:
• TIME: Uhrzeit und Alarm
• SPEED: Kalibrierung, Geschwindigkeit und Distanz / Zeitziele
• TRAIN: Aufwärmtimer / Trainingstimer / Ruhetimer (Erholungstimer)
• CHRONO: Stoppuhr
• USER: Trainings- und Benutzerprofil
Die Modi werden in den nachfolgenden Abschnitten näher beschrieben.
HINWEIS Sie können das INTELLIGENTE TRAININGSPROGRAMM
oder die Stoppuhr im Hintergrund ausführen, wenn Sie auf andere
Modi zugreifen. Das Symbol für den ausgeführten Modus blinkt, bis
Sie wieder auf den ursprünglichen Modus wechseln.
UHR
So stellen Sie die Uhrzeit ein:
1. Drücken Sie auf MODE, um in
den Modus TIME umzuschalten.
2. Halten Sie SET gedrückt, bis die
erste Einstellung blinkt.
3. Drücken Sie auf ST / SP / + oder LAP / MEM / -, um die Einstellung
für das 12- oder 24-Stundenformat der Uhr zu ändern. Taste
gedrückt halten, um rasch vorzublättern. Drücken Sie auf SET,
um die Einstellung zu bestätigen und zur nächsten überzugehen.
13
Page 91

DE
4. Wiederholen Sie den Schritt 3, um weitere Einstellungen zu
ändern: Stunde / Minute / Jahr / Datumsformat TT:MM oder MM:
TT / Monat / Tag.
HINWEIS Die Uhr ist mit einem automatischen 50-Jahres-Kalender
programmiert, d.h. Sie müssen die Daten und Wochentage nicht jeden
Monat korrigieren.
ALARM
Ihre Uhr verfügt über einen Alarm, der so eingestellt werden kann,
dass er täglich (Mo-So), werktags (Mo-Fr) oder am Wochenende (SaSo) aktiviert wird).
So stellen Sie den Alarm ein:
1. Drücken Sie auf MODE, um
den Modus TIME aufzurufen.
2. Drücken Sie auf SET, um den Alarm auszuwählen.
3. Halten Sie SET gedrückt, bis
die erste Einstellung blinkt,
um den Einstellungsmodus für
den Alarm aufzurufen.
4. Drücken Sie auf ST / SP / + oder LAP / MEM / -, um die
Einstellung “Daily” (täglich), “Weekday“ (werktags) oder
“Weekend” (Wochenende) zu ändern. Taste gedrückt halten, um
rasch vorzublättern. Drücken Sie auf SET, um die Einstellung zu
bestätigen und zur nächsten überzugehen.
5. Wiederholen Sie Schritt 4, um weitere Einstellungen zu ändern:
Stunde / Minute.
6. Der Alarm wird automatisch aktiviert, sobald Sie die Einstellung
der Alarmzeit beendet haben.
So aktivieren / deaktivieren Sie den Alarm:
1. Drücken Sie auf MODE, um den Modus TIME aufzurufen.
2. Drücken Sie auf SET, um den Alarm auszuwählen.
14
Page 92

3. Drücken Sie auf ST / SP / + oder LAP / MEM / -, um den Alarm
zu aktivieren oder zu deaktivieren. Das Alarmsymbol
aktiviertem Alarm angezeigt.
So schalten Sie den akustischen Alarm aus:
Drücken Sie eine beliebige Taste, um den akustischen Alarm
auszuschalten. Der Alarm wird automatisch zurückgesetzt, sofern Sie
ihn nicht deaktivieren.
wird bei
BENUTZERPROFIL
Um den größtmöglichen Nutzen aus Ihrem Herzfrequenzmesser zu
ziehen, müssen Sie vor dem Training Ihr Benutzerprofil einrichten. Auf
diese Weise wird automatisch ein Fitnessindex und ein Body-MassIndex erstellt. Diese Berechnungen werden Ihnen gemeinsam mit
dem Kalorienverbrauch und der prozentualen Fettverbrennung dabei
helfen, Ihren mit der Zeit gemachten Fortschritt zu kontrollieren.
So richten Sie das Benutzerprofil ein:
1. Drücken Sie auf MODE, um
das Benutzerprofil aufzurufen.
DE
2. Wenn dieser Bildschirm
erscheint, drücken Sie auf
SET, um das Benutzerprofil
aufzurufen.
3. Halten Sie SET gedrückt, bis
die erste Einstellung blinkt.
4. Drücken Sie auf ST / SP / + oder LAP / MEM / -, um die Einstellung
“Male” (Männlich) oder “Female” (Weiblich) zu ändern. Taste gedrückt
halten, um rasch durch die Optionen zu blättern. Drücken Sie auf SET,
um die Einstellung zu bestätigen und zur nächsten überzugehen.
15
Page 93

DE
5. Wiederholen Sie Schritt 4, um weitere Einstellungen zu ändern:
Geburtsjahr / Geburtsmonat / Geburtstag / Körpergewicht – Option für
Pfund oder kg / Körpergewicht / Körpergröße – Option für Fuß / Zoll
oder Zentimeter / Körpergröße / Aktivitätsstufe - niedrig, mittel oder
Athlet.
Wenn Sie Ihr Benutzerprofil fertiggestellt haben, wird automatisch
ein Fitnessindex und ein Body-Mass-Index für Sie berechnet und
angezeigt. Weitere Informationen finden Sie im Abschnitt “Über den
Fitness- / Body-Mass-Index”.
HINWEIS Sie können Ihr Benutzerprofil jederzeit anzeigen und
anpassen.
HINWEIS Sie müssen Ihr Benutzerprofil einrichten, um die Funktionen
der Kalorienzählung und der prozentualen Fettverbrennung nutzen zu
können.
AKTIVITÄTSSTUFE
Die Aktivitätsstufe basiert auf der persönlichen Beurteilung Ihres
Trainingspensums, das Sie regelmäßig erfüllen.
AKTIVITÄTS- STUFE BESCHREIBUNG
KLEIN Niedrig – Sie absolvieren für gewöhnlich
keine sportlichen Aktivitäten
HOBBY Mittel – Sie nehmen 2-3x pro Woche an
sportlichen Aktivitäten (wie Golf, Tennis,
Fitnessübungen, Gymnastik) teil.
ATHLET Hoch - Sie üben aktiv und regelmäßig,
überdurchschnittlich anstrengende
Sportarten aus (wie Laufen, Joggen,
Radfahren oder Seilspringen), oder
betreiben anderen Leistungssport (wie
Tennis, Basketball oder Handball).
TRAININGSPROFIL
Um das INTELLIGENTE TRAININGSPROGRAMM nutzen zu können,
müssen Sie das Trainingsprofil einrichten. Sie können 3 verschiedene
Trainingsprofile einrichten.
Verschiedene Aktivitäten trainieren den Körper auf unterschiedliche Weise
und helfen Ihnen dabei, verschiedene Fitnessziele zu erreichen. Um diesen
Anforderungen zu entsprechen, kann das intelligente Trainingsprogramm so
eingerichtet werden, dass es zu verschiedenen Trainingsaktivitäten passt.
16
Page 94

Wenn Sie z.B. laufen, werden Sie wahrscheinlich andere Einstellungen
Ihres Trainingsprofils als bei einem Hanteltraining verwenden.
Darüber hinaus wird sich auch Ihre erforderliche Zeit für das Aufwärmen
und die Durchführung eines Trainings ändern. Daher können Sie
auch die Countdown-Zeit für die Aufwärm- und Trainingsphase Ihren
persönlichen Bedürfnissen anpassen.
So richten Sie das Trainingsprofil ein:
1. Drücken Sie auf MODE,
um den Modus USER aufzurufen.
2. Drücken Sie auf SET, um das
Trainingsprofil aufzurufen.
3. Drücken Sie auf SET, um zwischen 3 Trainingsprofilen zu wählen.
DE
4. Halten Sie SET gedrückt, bis die
erste Einstellung blinkt. Die Anzeige
ändert sich sodann nach einiger
Zeit auf “WALK”, “JOG” oder
“RUN”.
5. Drücken Sie auf ST / SP / + oder LAP / MEM / -, um die
Einstellung “Walk” (Gehen) / “Jog“ (Joggen) / “Run“ (Sprinten) zu
ändern. Taste gedrückt halten, um rasch vorzublättern. Drücken
Sie auf SET, um die Einstellung zu bestätigen und zur nächsten
überzugehen.
6. Wiederholen Sie Schritt 5, um weitere Einstellungen zu ändern:
• Untere Herzfrequenzgrenze
• Obere Herzfrequenzgrenze
• Herzfrequenz-Alarm EIN oder AUS (ON/OFF)
• Trainingstimer-Wiederholung EIN oder AUS (ON/OFF)
• Trainingstimer oder -distanz / Distanz (wenn Distanz gewählt
wird)
17
Page 95

DE
• Trainingstimer-Stunde (wenn Timer gewählt wird)
• Trainingstimer-Minute (wenn Timer gewählt wird)
• Aufwärmtimer (auf 5, 10, 15 Min. einstellen, um Timer zu
aktivieren, oder 0, um Timer zu deaktivieren)
• Cool-Down-Timer (Erholungstimer) EIN oder AUS (ON/OFF)
HINWEIS Die Fortsetzung des Vibrationsmodus wird nach
Einstellung der oberen Herzfrequenzgrenze abgefragt, wenn die
Ladung der Batterie niedrig ist; diese Warnung ermöglicht Ihnen,
den Vibrationsmodus weiterhin auszuführen oder auszuschalten, um
Energie zu sparen.
HINWEIS Sobald Sie Ihr Benutzerprofil und die Zielaktivität eingerichtet
haben, wird Ihre untere und obere Herzfrequenzgrenze automatisch
eingestellt. Sollten die automatischen Einstellungen jedoch nicht
Ihren Anforderungen entsprechen, können Sie diese manuell ändern.
Wenn Sie die Zielaktivität ändern, werden die Herzfrequenzgrenzen
automatisch aktualisiert.
ZIELAKTIVITÄT
Es gibt 3 Stufen der Zielaktivität:
ZIELAKTIVTÄT MHF% BESCHREIBUNG
WALK
(GEHEN)
JOG
(JOGGEN)
Erhaltung der
Gesundheit
Aerobes
Training
65-78% Dies ist die
niedrigste Stufe der
Trainingsinten-sität.
Sie ist gut für Anfänger
und diejenigen
geeignet, die Ihr
Herz-Kreislauf-System
stärken wollen.
65-85% Verbessert Kraft
und Ausdauer. Wirkt
innerhalb der Fähigkeit
der Sauerstoffaufnahme des Körpers,
verbrennt mehr Kalorien
und kann über einen
längeren Zeitraum
ausgeübt werden.
18
Page 96

RUN
(LAUFEN)
Anaerobes
Training
78-90% Erzeugt Schnelligkeit
und Kraft. Wirkt an der
Grenze bzw. oberhalb
der Fähigkeit der
Sauerstoffaufnahme des
Körpers, baut Muskeln
auf und kann nicht über
einen längeren Zeitraum
ausgeübt werden.
MAXIMALE / UNTERE / OBERE HERZFREQUENZGRENZE
Um den größtmöglichen Nutzen aus Ihrem Fitnesstraining zu ziehen, ist es
wichtig, vor Beginn Ihres Übungsprogramms folgendes zu kennen:
• Maximale Herzfrequenz (MHF)
• Untere Herzfrequenzgrenze
• Obere Herzfrequenzgrenze
Um Ihre eigenen Herzfrequenzgrenzen manuell zu berechnen, folgen
Sie den nachstehenden Anweisungen:
MHF UNTERE GRENZE OBERE GRENZE
DE
MHF = 220
- Alter
MHF x unterer
Zielaktivitätswert
in %. Z.B. Zielaktivität
ist GEHEN Untere
Grenze = MHF x 65%
MHF x oberer
Zielaktivitätswert in
%. Z.B. Zielaktivität
ist GEHEN Obere
Grenze = MHF x
78%
HERZFREQUENZALARM
Sie können den Herzfrequenzalarm im Trainingsprofil wie folgt
einstellen:
19
Page 97

DE
SYMBOL BESCHREIBUNG
Akustischer Alarm und Vibrationsalarm für
Herzfrequenz sind ausgeschaltet (OFF)
Akustischer Alarm für Herzfrequenz ist
eingeschaltet (ON)
• 1 Signalton steht für die Unterschreitung
Ihrer unteren Zonengrenze
• 2 Signaltöne stehen für die Überschreitung
Ihrer oberen Zonengrenze
Vibrationsalarm für Herzfrequenz ist
eingeschaltet (ON)
Akustischer Alarm und Vibrationsalarm für
Herzfrequenzgrenzen sind eingeschaltet (ON)
Wenn der Herzfrequenzalarm aktiviert ist, erscheint ein blinkender
Richtungspfeil (oben / unten) in der Anzeige; dieser gibt an, welche
Herzfrequenzgrenze Sie über- oder unterschritten haben.
HINWEIS Die Benutzung der Vibrationsfunktion verbraucht die
Kapazität der Batterien schneller als der akustische Alarm.
KALIBRIERUNG, GESCHWINDIGKEIT UND ZIELE
KALIBRIERUNG
Bevor Sie die Geschwindigkeits- und Distanzfunktion nutzen können,
müssen Sie eine Kalibrierung vornehmen oder Parameter einstellen. Um
die Kalibrierung vorzunehmen, legen Sie vorab eine Distanz fest, welche
beim Testlaufen als Basis der Geschwindigkeitsberechnung verwendet
wird. Sie müssen die voreingestellte Distanz zurücklegen und anschließend
die Kalibrierung einstellen. Sie können die Kalibrierung für Laufen und/oder
Gehen einstellen. Sie können die Uhr auch ohne Kalibrierung verwenden,
die Genauigkeit der Geschwindigkeits- und Distanzmessung ist in diesem
Fall jedoch geringer.
So nehmen Sie die Kalibrierung vor:
1. Stellen Sie sicher, dass die Übertragung zwischen Uhr und
Brustgurt optimal funktioniert.
2. Drücken Sie auf MODE, um den Modus SPEED aufzurufen.
3. Halten Sie SET gedrückt, um den Einstellungsmodus aufzurufen.
20
Page 98

4. Drücken Sie auf ST / SP / + oder
LAP / MEM / -, um die KALIBRIERUNG
(Cali) auszuwählen und drücken Sie zur
Bestätigung auf SET.
5. Drücken Sie auf ST / SP / + oder LAP / MEM / -, um die Kalibrierung
für Gehen oder Laufen auszuwählen. Es wird empfohlen, die
Kalibrierungen für Gehen und Laufen getrennt durchzuführen. Die
Uhr kann automatisch unterscheiden, ob Sie gehen oder laufen.
6. Drücken Sie auf ST / SP / + oder LAP / MEM / -, um die Kalibrierung
auszuwählen (“SET CAL” beginnt zu blinken) oder geben Sie die
Kalibrierungsparameter direkt ein (“SET PAR” beginnt zu blinken)
und drücken Sie zur Bestätigung auf SET.
Bei erstmaliger Verwendung wählen Sie bitte die Kalibrierung aus.
Notieren Sie sich die Kalibrierungsparameter nach der Kalibrierung
jeweils für Gehen und Laufen, sodass Sie diese Parameter in Zukunft
manuell eingeben können, anstatt erneut eine Kalibrierung durchführen
zu müssen. Wenn Sie die Uhr z.B. jemanden leihen, der seine eigene
Kalibrierung verwendet, können Sie Ihre Kalibrierungsparameter
einfach eingeben, wenn Sie die Uhr wieder selbst benutzen.
7. Drücken Sie auf ST / SP / + oder LAP / MEM / -, um die Distanz
auszuwählen, die Sie gehen oder laufen möchten (für beide
Varianten werden je 400 m empfohlen) und drücken Sie zur
Bestätigung auf SET.
8. Drücken Sie auf ST / SP / +, um die Kalibrierung zu starten, und
fangen Sie anschließend zu gehen oder laufen an.
9. Nachdem Sie die gewünschte Distanz gegangen oder gelaufen sind,
drücken Sie auf ST / SP / +, um die Kalibrierung zu beenden.
10. Die Uhr kann feststellen, ob Ihre Kalibrierung in Ordnung ist oder
nicht. Wenn Sie eine Fehlermeldung erhalten, versuchen Sie
etwas langsamer zu laufen, da sich die Uhr bei einem zu schnellen
Laufstil manchmal nicht präzise kalibrieren kann.
11. Wenn die Kalibrierung fehlgeschlagen ist, können Sie sie erneut
durchführen, indem Sie auf SET drücken und die Schritte 8 und 9
wiederholen, oder Sie können sie beenden, indem Sie auf ST / SP
/ + drücken.
DE
HINWEIS Sie können die Kalibrierung jederzeit beenden, indem Sie
auf ST / SP / + drücken, und den Einstellungsmodus verlassen, indem
Sie auf MODE drücken.
21
Page 99

DE
HINWEIS Die Geschwindigkeits- und Distanzfunktion ist nur für
das Laufen oder Gehen, jedoch nicht für Radfahrer oder Autofahrer
vorgesehen.
HINWEIS Die Kalibrierung hängt vom Geh- oder Laufverhalten des
Körpers, und sogar von den Laufschuhen ab, die Sie tragen. Wenn
daher eine andere Person die Uhr benutzt, muss diese die Kalibrierung
erneut durchführen.
HINWEIS Es dauert etwa 10 Sekunden, bis die Uhr auf den Wert “0”
zurückkehrt, wenn Sie mit dem Gehen oder Laufen aufhören.
EINHEIT FÜR GESCHWINDIGKEIT UND DISTANZ
So stellen Sie die Einheit ein (km oder Meilen):
1. Drücken Sie auf MODE, um den Modus SPEED aufzurufen.
2. Halten Sie SET gedrückt, um den Einstellungsmodus aufzurufen.
3. Drücken Sie auf ST / SP / + oder LAP / MEM / -, um die Einstellung
UNIT auszuwählen, und drücken Sie zur Bestätigung auf SET.
4. Drücken Sie auf ST / SP / + oder LAP / MEM / -, um zwischen km
und Meilen umzuschalten. Drücken Sie auf SET, um Ihre Auswahl
zu bestätigen.
GESCHWINDIGKEITSGRENZWERTE
Ihre Uhr verfügt über eine Echtzeit-Geschwindigkeitsmessung. Die
durchschnittliche Geschwindigkeit kann während Ihres Fitnesstrainings
angezeigt werden. Die obere und untere Geschwindigkeitsgrenze
kann vor dem Training eingestellt werden, mit der Option, einen
Geschwindigkeitsalarm auszulösen, wenn die obere oder untere
Grenze über- bzw. unterschritten wird.
So stellen Sie die Geschwindigkeitsgrenzwerte ein:
1. Drücken Sie auf MODE, um den Modus SPEED aufzurufen.
2. Halten Sie SET gedrückt, um den Einstellungsmodus aufzurufen.
3. Drücken Sie auf ST / SP / + oder LAP / MEM / -, um SPEED LIMIT
auszuwählen und drücken Sie zur Bestätigung auf SET.
4. Drücken Sie auf ST / SP / + oder LAP / MEM / -, um die untere
Grenze zu ändern, drücken Sie auf SET, um die Einstellung zu
bestätigen und die nächste einzugeben.
5. Wiederholen Sie Schritt 4, um die obere Grenze und den
Geschwindigkeitsalarm einzustellen.
22
Page 100

HINWEIS Optische und akustische Alarme werden alle 10 Sekunden
aktiviert, wenn die untere oder obere Geschwindigkeitsgrenze unter- bzw.
überschritten wird. Beim akustischen Alarm weisen 3 kurze Signaltöne
darauf hin, dass die untere Grenze unterschritten wurde, 4 kurze
Signalstöne geben an, dass die obere Grenze überschritten wurde.
ZIEL(E) EINSTELLEN
Bevor Sie mit dem Training beginnen, können Sie verschiedene Ziele
(nach Distanz oder Zeit) einstellen. Es sind 9 verfügbare Gruppen von
Zielen vorhanden. Wenn das erste Ziel beendet ist, geht das Gerät
automatisch auf das nächste Ziel über, usw., bis alle Ziele erreicht
wurden. Dies ist besonders für jene nützlich, die ihr Training auf
verschiedene Etappenziele aufteilen möchten.
So stellen Sie Ziele ein:
1. Drücken Sie auf MODE, um den Modus SPEED aufzurufen.
2. Halten Sie SET gedrückt, um den Einstellungsmodus aufzurufen.
3. Drücken Sie auf ST / SP / + oder
LAP / MEM / -, um TARGET
auszuwählen und drücken Sie zur
Bestätigung auf SET.
DE
4. Drücken Sie auf ST / SP / + oder LAP / MEM / -, um die Anzahl
der Ziele 1 - 9 festzulegen, die Sie absolvieren möchten. Drücken
Sie zur Bestätigung auf SET.
5. Drücken Sie auf ST / SP / + oder LAP / MEM / -, um “nach Distanz”
oder “nach Zeit” auszuwählen, und drücken Sie zur Bestätigung
auf SET.
6. Drücken Sie auf ST / SP / + oder LAP / MEM / -, um das Ziel
auszuwählen, das Sie einstellen möchten, und drücken Sie zur
Bestätigung auf SET.
7. Drücken Sie auf ST / SP / + oder MEM / LAP / -, um den
Einstellungswert (Distanz oder Minute/Sekunde) zu ändern, und
drücken Sie zur Bestätigung auf SET.
8. Wiederholen Sie die Schritte 6 und 7, um weitere Ziele einzustellen,
oder drücken Sie auf MODE, um den Einstellungsmodus zu
beenden.
HINWEIS Die Distanz kann von 0,10 – 99,99 km und die Zeit von
00’01’’ -99’59’’ eingestellt werden.
23
 Loading...