How it Works
Log In / Sign Up
Buy Points
How it Works
FAQ
Contact Us
Questions and Suggestions
Users
Oregon
Loading...
R
RMR183
3
RMR183U
RMR202
2
RMR202A
3
RMR202 А
RMR203HG
4
RMR203HGA
2
RMR221P
3
RMR232PHN
RMR232PHU
RMR262
2
RMR329P
4
RMR329PA
RMR331ES
3
RMR331ESA
3
RMR331ESU
3
RMR382A
RMR383HG
2
RMR383HGA
2
RMR383HGA_M_OP
RMR391P
6
RMR391PA
5
RMR391PU
6
RMR500A
3
RMR500ES
3
RMR500ESA
4
RMR500ESU
4
RMR602A
RMR603HGA
RMR606HGPA
RMR612HGA
RMR613HGA
RMR616HGA
RMR682
2
RMR682A
RMR683HG
2
RMR683HGA
RMR686P
RMR802
6
RMR802A
4
RMR803
RMR803A
RMR939
2
RMR939P
4
RMR939P R8 OP
RMR966P
3
RMR966PA
RMR966PU
RMS300
5
RMS 300A
5
RMS600
5
RMS600A
RRA200
RRA320P
9
RRA320PN
2
RRA320PN-B
RRA320PNX
2
RRA323P
RRM112
2
RRM112A
RRM116
2
RRM116U
2
RRM 222P
4
RRM222PA
RRM310P
RRM 313 P
2
RRM313PA
RRM320P
8
RRM320PA
6
RRM320PU
6
RRM 326
RRM 326 P
3
RRM612P
2
RRM612PA
4
RRM612PU
4
RRM902
8
RRM902A
4
RRM902U
4
RRM968P
4
RRM968PU
4
RT918
RTGN129
RTGR328N
RTHN129
RX109
S
S18
S40100600
S402022BSC
S402022H0
S402022K0
2
S402028H0
S402028K0
SA218
SA880SSWR
SA880SSX
S+ARCK PS-L03
S+ARCK PS-L03U
S+ARCK PS-M02
S+ARCK PS-M02U
S+ARCK PS-R01
Loading...
Loading...
Nothing found
RMS600
USER MANUAL
12 pgs
1.32 Mb
0
User Manual
2 pgs
2.93 Mb
0
User Manual
12 pgs
1.29 Mb
0
User Manual
92 pgs
8.63 Mb
0
User manual [de]
1 pgs
179.78 Kb
0
Table of contents
Loading...
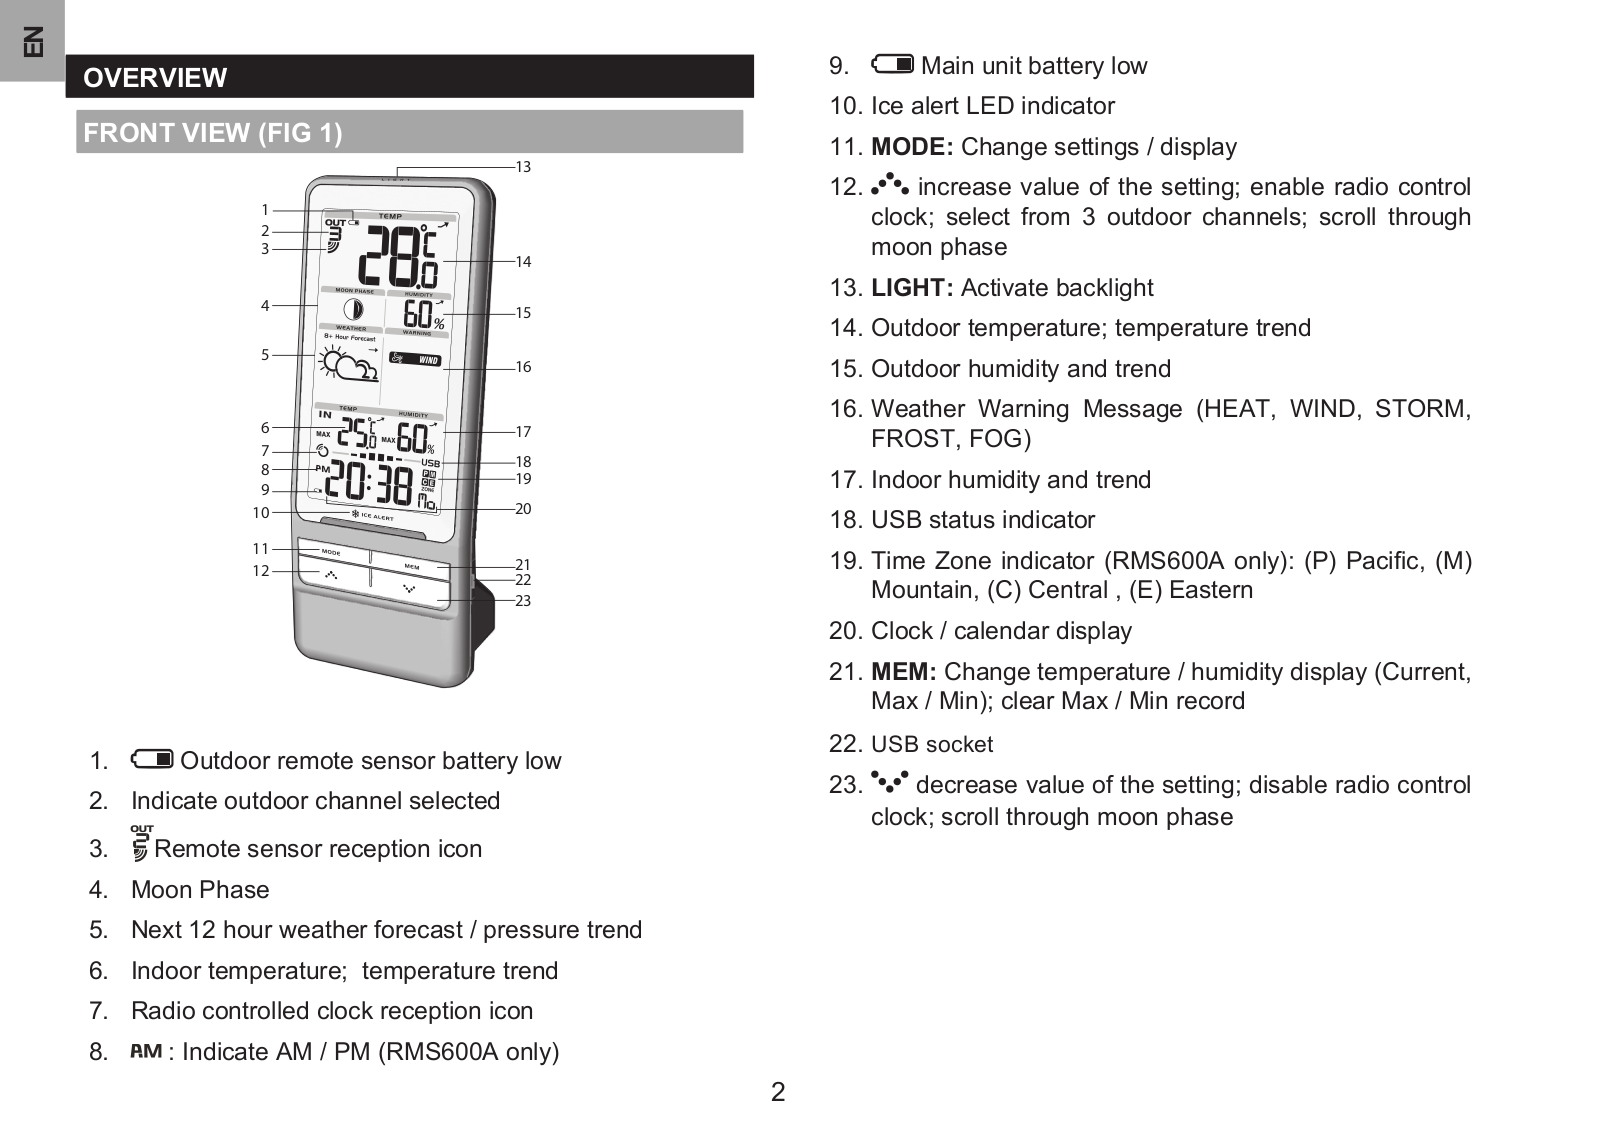
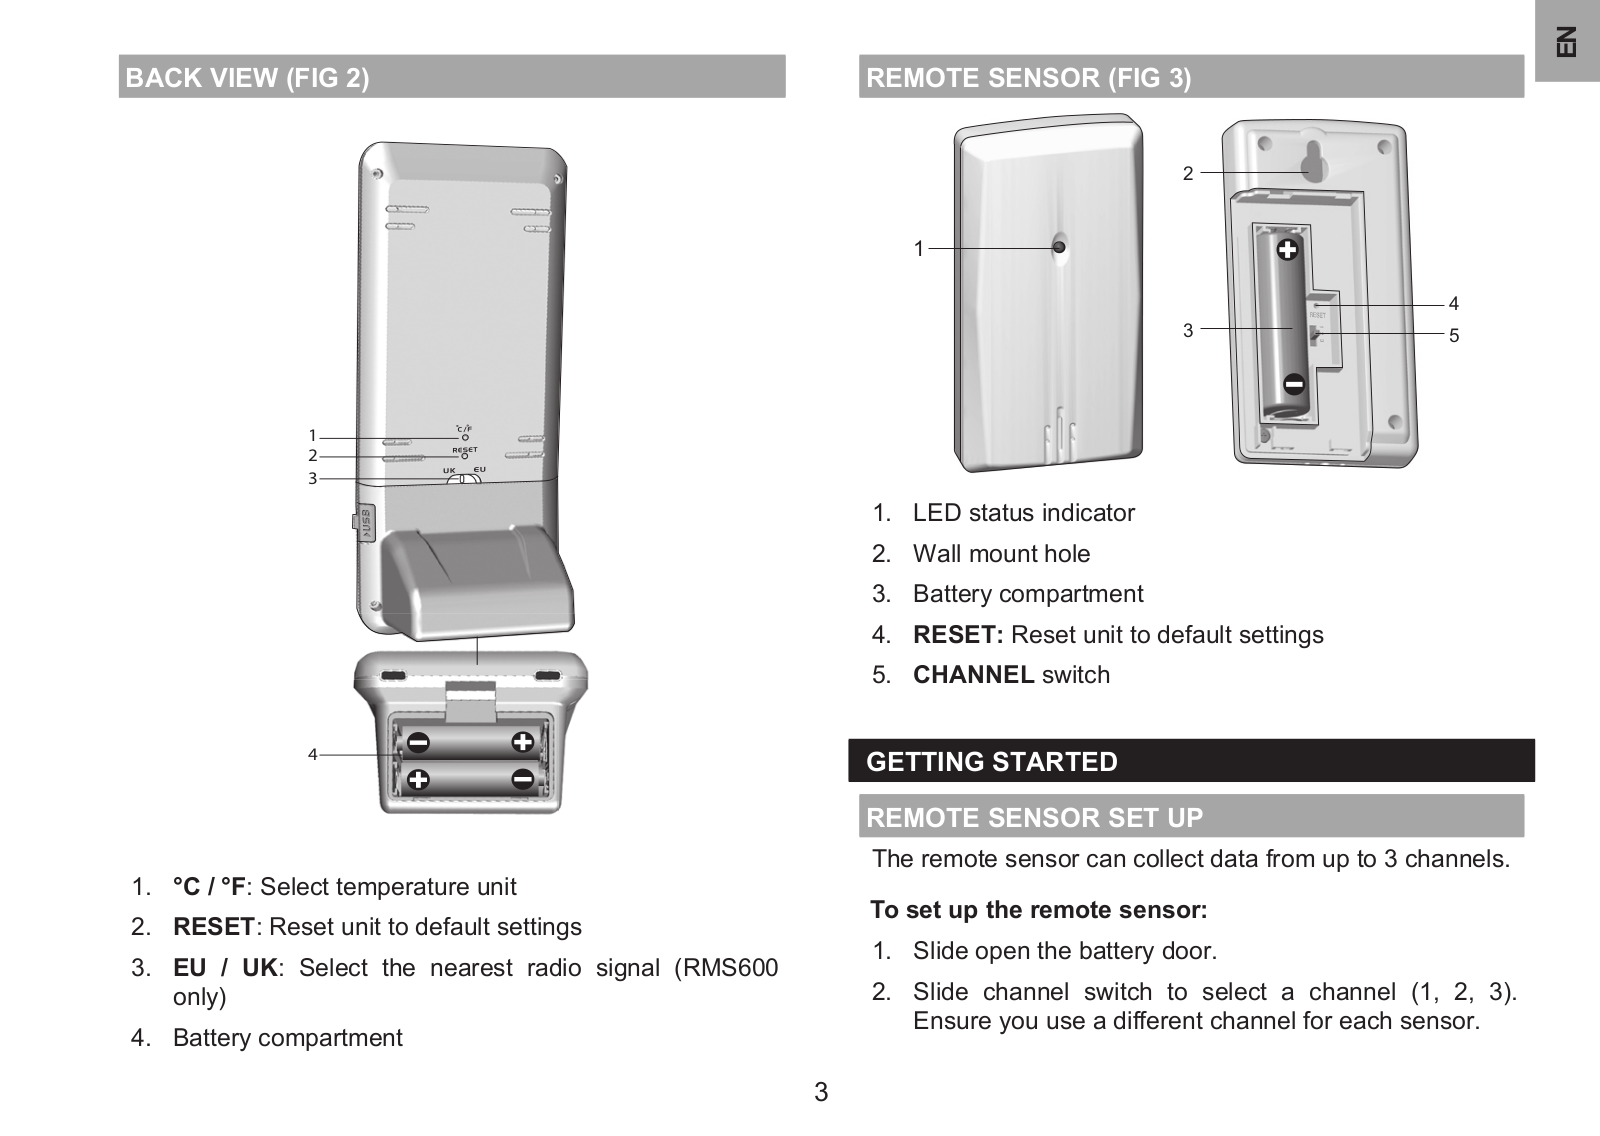
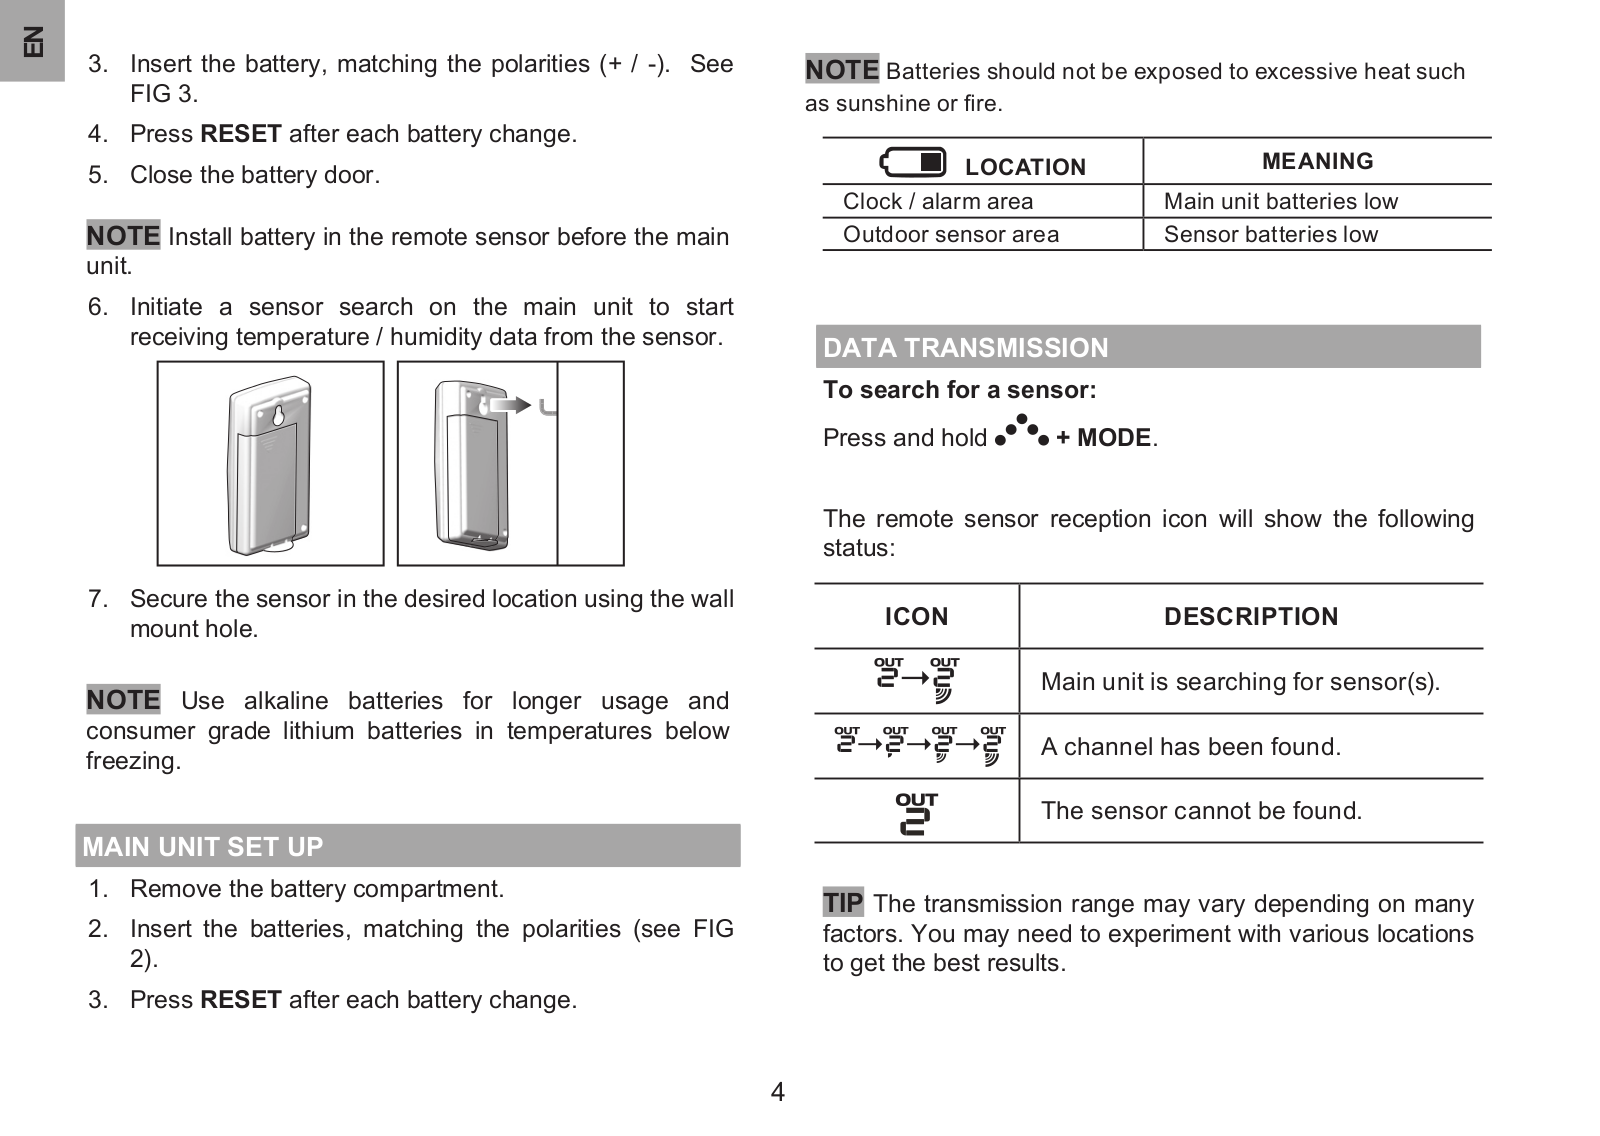
Oregon RMS600, RM600A USER MANUAL
...
Oregon USER MANUAL
Download
Specifications and Main Features
Frequently Asked Questions
User Manual
Download
Page 1
Page 2
Page 3
Page 4
Page 5
Page 6
Page 7
Page 8
Page 9
Page 10
Page 11
Page 12
Loading...
+
hidden pages
Unhide
You need points to download manuals.
1 point = 1 manual.
You can buy points or you can get point for every manual you upload.
Buy points
Upload your manuals
 Loading...