

Page 1
Application Manual
XFNS0843_03
Date: August 16, 2012
Edition: 3rd, August 16, 2012
© 2012 Opticon. All rights reserved.
All information subject to change without notice.
www.OpticonUSA.com
Phone (USA): 1.800.636.0090
Document Part Number (USA): 25-OPL98001-01
Page 2

Application Manual
XFNS0843_03
Contents
Introduction 1
Terminal Devices 1
Setup Instructions 2
Download Software 2
PC Applications 2
Device Firmware 2
USB Drivers 2
Setup Cradle 2
Connect AC power 3
Connect data cable 3
Install Device Application Firmware 3
Setup NetO32 4
Usage Instructions 5
Collect Data 5
Retrieve Data 5
Start NetO32 5
Place OPL9813 in cradle 5
Stop NetO32 5
Data File 6
Basics 6
Record Format 6
Page 3

Application Manual
XFNS0843_03
GPS Strings 9
GPS String Formats 9
Degree Hemisphere (DH) 9
Degree Minute Hemisphere (DMH) 9
Degree Minute Second Hemisphere (DMSH) 9
GPS String Conversion 9
Settings 11
Unique ID 11
Trigger Mode 11
Time Zone 12
GPS String Format 14
GPS Breadcrumb Interval 14
Supported Symbologies 16
Page 4

Application Manual
XFNS0843_03
Introduction
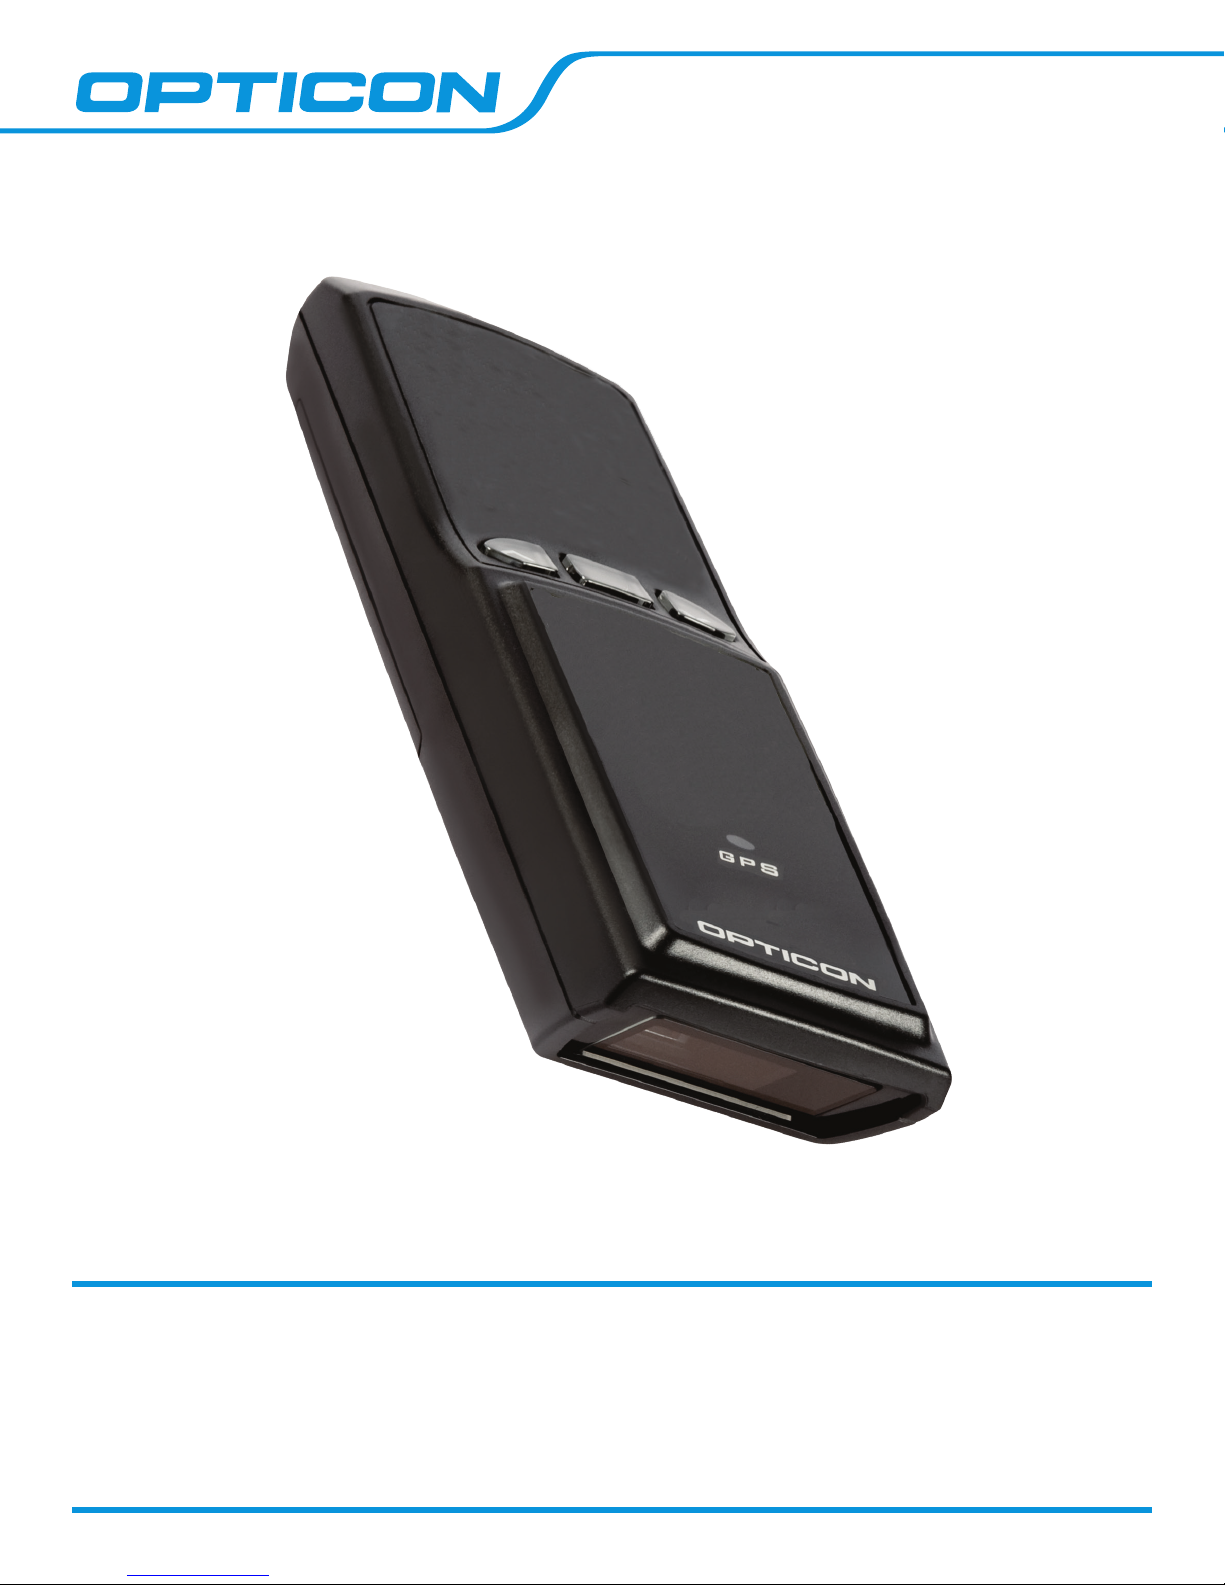
The OPL9813 Default Application XFNS084x is a fully functional scanning and GPS tracking application.
This application allows the user to scan and store any compatible barcode symbol (see Supported
Symbologies) tagged with time, date, GPS coordinates and a unique identication number for the
device. See Settings for complete details. These records are stored in an internal le which can be
downloaded to a PC at any later date.
Terminal Devices
Opticon Terminal devices (such as the OPL98xx series, OPL97xx series, OPH series, etc.) are
effectively mini-computers. Just like a desktop computer, the functions that it can perform depend on
the application installed on the device. These applications completely dene the behavior of the device
for all users, and as such, these types of devices do not have User Manuals in the traditional sense.
What you will nd instead are Application Manuals that fully explain the usage of a given application.
It is appropriate and convenient to think of these Application Manuals as User Manuals for the device
as long as the reader understands that the behavior changes with the installed application and not the
device itself.
— 1 —
Page 5

Application Manual
XFNS0843_03
Setup Instructions
Download Software
PC Applications
The daily usage of the OPL9813 Application XFNS084x requires a free Opticon application called
NetO32. This application can be downloaded form the link below. Download and run the installer.
http://ftp.opticonusa.com/Downloads/NetO32.zip
Initial setup of the OPL9813 Application XFNS084x may require the rmware to be downloaded to the
OPL9813 from an attached PC, if the application was not pre-installed by the factory. This is common
and expected in some situations. To perform the installation of the rmware, you must rst download
and install the free Opticon PC application Appload. You can download this PC application from the link
below. Download and run the installer.
http://ftp.opticonusa.com/Downloads/Appload.zip
Device Firmware
As mentioned above, you may need to download the rmware for this application into your OPL9813
device. This is accomplished via the Appload PC application (see above). The process is simple, but
the rmware le must rst be downloaded. The le can be found at the link below.
http://ftp.opticonusa.com/Downloads/XFNS084x.zip
USB Drivers
If you will be using the OPL9813 companion cradle with its USB connection to your PC, you will need
USB drivers. These can be downloaded from the link below. Simply run the installer (Admin privileges
required) and Windows will take care of the rest.
http://ftp.opticonusa.com/Downloads/USB%20Drivers%20Installer.zip
Setup Cradle
The OPL9813 requires the use of a companion cradle (we will use the Opticon CRD9723 charging +
data cradle in these instructions) to charge, download data and install application rmware onto the
device itself.
— 2 —
Page 6

Application Manual
XFNS0843_03
Connect AC power
The OPL9813 cradle always requires AC power via the provided power adapter. Even when connecting
the cradle to the PC via USB (which does provide some power), this is insufcient to power the cradle.
Connect data cable
The OPL9813 cradle can be connected by either a USB connection or an RS232 connection. Do not
attempt to use the cradle with both data cables connected simultaneously.
USB: Connect the larger square end (USB-B) into the back of the cradle and the wafer-shaped end
(USB-A) into your PC. When this connection is complete, Windows will automatically associate the
device with the USB drivers installed previously. Pay attention to the pop-up messages as they will
provide you with the COM number Windows assigns the device. This will usually be the highest number
available, typically COM4. This is necessary to know for later steps involving NetO32 and Appload.
RS232: Connect the RJ-45 connector to the back of the cradle and the DB-9 connector to the
appropriate plug on your PC. As with USB, it is important to know the COM number associated with this
connection. However, with RS232, Windows does not need to install additional drivers and typically the
COM number is “hard-wired” to COM1.
Install Device Application Firmware
As mentioned above, if there is a need to install the OPL9813 Application XFNS084x onto your device,
use the following process. Note that you must have downloaded and installed the free Opticon PC
application Appload (see above) as well as downloaded the rmware le itself.
• Install the battery into your OPL9813.
• Place the device on the cradle (scan window down, keys facing forward).
• Launch Appload.
• In Appload, navigate to Settings > Port and choose the COM number mentioned above.
• In Appload, navigate to File > Download and browse to the unzipped rmware le XFNS084x.hex.
• Important: Do not remove the OPL9813 from the cradle, power off your PC or disconnect any of
the cables while this process completes. Typical download times are only a few seconds.
• When the process is complete you can remove the OPL9813 from the cradle and put it to work or
congure Settings.
• As soon as the OPL9813 is removed from the cradle, it will begin to emit a series of beeps. This is
your notice that the Serial Number has not yet been programmed into the device’s memory. Scan
the Serial Number barcode from the device’s box to store this data. If a mistake is made, this number
— 3 —
Page 7

Application Manual
XFNS0843_03
can be reset at a later date. See Settings for more information. The device will not exit this mode
until the Serial Number barcode is scanned.
• Repeat this process for any devices you have. Once all are done, you may uninstall Appload and
delete the rmware les as they are not needed for day-to-day operations.
Setup NetO32
NetO32 is a free Opticon PC application used to download data to and from an Opticon terminal device
such as the OPL9813. NetO32 was downloaded and installed previously in this document, so launch
NetO32 from the desktop shortcut or the Start Menu to begin.
• In NetO32 navigate to Tools > Options.
• From the menu on the left select RS232.
• Select the COM Port as mentioned earlier.
• Set the Baudrate to 115200.
• Click Apply.
• From the menu on the left select Download.
• Change the Receiving Directory to a directory of your choice. This is the folder all data les from
the OPL9813 will be stored each time it is placed on the cradle.
• Choose the download behavior from the following list:
• Append: Each new data le is tacked onto the end of any existing data les of the same name.
All data les coming from the OPL9813 with Application XFNS084x installed will be named DATA.
txt. No data is lost with this method.
• Overwrite: Each new data le will delete any existing data les of the same name and replace
them with the new content from the device. All previous data is lost with this method unless the
data le is backed up either manually or by another automated process (not covered by this
manual).
• Unique: Each new data le will be given a new name. For example DATA.txt will be the rst le
name, DATA.000 will be the second, DATA.001 the third, etc. No data is lost with this method.
• Click OK to return to the main application window.
The nal setup in setting up NetO32 is to save these settings. NetO32 does not retain settings after
the application has been closed, but they can be stored and retrieved for later use; select File > Save
to do this. Opticon recommends naming the cong le something specic to your usage such as the
project it is used for or your company name. Since these cong les are stored in the NetO32 install
folder by default, this makes it easier to distinguish your conguration les from NetO32’s own les.
— 4 —
Page 8

Application Manual
XFNS0843_03
Usage Instructions
Collect Data
Collecting Data with the OPL9813 is a very simple process; simply point the device at the barcode
you wish to scan and press the trigger key. The trigger key is the center of the three keys on the face
of the device. It is not necessary to continue to hold the key while aiming the device though this is not
prohibited either. Depending on the Trigger Mode (see Settings), upon a successful scan, the laser
line will either shut off to be triggered again manually at a later time, or remain on in anticipation of
scanning additional barcodes. Note that in multi-scan mode, duplicate barcodes are prohibited.
Each time a barcode is scanned, a record is created in the data le on the device. This record contains
GPS coordinates, time and data, the barcode data and some additional information (see Data File for
more information). This data will be stored on the device until it is downloaded to your PC.
Retrieve Data
Data Retrieval for application XFNS084x has been streamlined a great deal and is typically accomplished
in a matter of seconds.
Start NetO32
Launch the NetO32 application (described previously) and load your conguration settings from the
File menu. See Setup NetO32 for additional information on this topic.
Select Protocol > Start to activate NetO32’s polling process which allows data transfer.
Place OPL9813 in cradle
That’s it. Once the device is placed in the cradle, it will detect that NetO32 is already polling and
respond accordingly. All data from the device will be uploaded into your Receiving Directory and
removed from the device using the settings congured previously.
Stop NetO32
It is good practice to cease NetO32’s polling by selecting Protocol > Stop from the menu when data
retrieval is complete. NetO32 may now be closed safely and the data collection process can begin
again.
— 5 —
Page 9

Application Manual
XFNS0843_03
Data File
Basics
The Data stored on the OPL9813 with application XFNS084x is all kept in a le named DATA.txt on
the device disk. This data will persist up to a week after main battery power has been depleted though
common sense suggests not to test that feature if you can avoid it. This le is essentially a database
of records with each line representing a new record. Each record stores similar data in a consistent
format detailed below.
Record Format
Each record stored maintains the following format. Note that each eld is comma separated. All whitespace is contained wholly within the eld and not part of any delimiter.
123456,12213.244W,4727.568N,18/07/2012 08:48:05,”BREAD CRUMB”:XFNS0843 1 minutes,1
Device Serial Number
[
Device Serial Number
This is the serial number of the device as printed on the safety label on the underside of the OPL9813.
Note that it is possible for the data in the le and the data on the label not to match (intentionally or
otherwise) if the wrong serial number was stored during device setup. See Settings for a method to
correct this.
Longitude
This is the rst of two GPS coordinates. Longitude specically refers to the East/West positioning of
the coordinate. Specic GPS String Formats are described in detail further in this document.
Latitude
As with longitude the format is identical, except that this data represents the North/South positioning
of the coordinate.
Longitude
],[
Latitude
],[
Date/Time
],[
Message
],[
GPS Fix Indicator
],[
]
Data/Time
As expected, this is the date and time the record was stored, whether it is a barcode scan or a GPS
breadcrumb. More on breadcrumbs later.
— 6 —
Page 10

Application Manual
XFNS0843_03
Date is recorded in the dd/mm/yyyy format. Single digits are zero padded.
Time is a 24-hour clock in the hh:mm:ss format. Single digits are zero padded.
Date and Time are separated by a single space. Time is set and maintained automatically by satellite
once a GPS x is established. Leap-year is supported and handled automatically. As a requirement,
Daylight Saving Time is not supported, but this can easily be accounted for. See Time Zone settings
for further information on this.
Message
This eld contains the most varied data.
File Created
“BREAD CRUMB”:XFNS0843 1 minutes
This is the rst message recorded when the DATA.txt record le is rst created. It will always be the
rst record type in a le. After “BREAD CRUMB” follows the application version number, followed
by a single space, followed by a number indicating the GPS Breadcrumb interval. This number is left
padded with spaces up to 2 characters wide so 1 minute would appear as “ 1 minutes” and
10 minutes would appear as “10 minutes”. See the GPS Breadcrumbs setting for further
information.
Fix Attained
“BREAD CRUMB”: 1 minutes
This message is recorded when a GPS x is established. It is a duplicate of the Breadcrumb Set
Record Type. As the File Created type, you will also see the GPS Breadcrumb interval in the same
format. Note that this record is only recorded when breadcrumbs are enabled. See the Breadcrumbs
setting for further information.
Breadcrumb Set
“BREAD CRUMB”: 1 minutes
This message is recorded when the Breadcrumb setting is changed. Note that the time interval (1
in this case) always takes up 2 character spaces in the record, thus a two digit number will not include
a space after the colon. You will also see this record the rst time a GPS Breadcrumb is recorded
when the device rst attains a x. See the GPS Breadcrumbs setting for further information on
breadcrumbs.
Breadcrumbs Disabled
“BREAD CRUMB”:OFF
This record type will be collected when the breadcrumb interval is set to 0, effectively disabling
breadcrumbs. See the GPS Breadcrumbs setting for further information.
— 7 —
Page 11

Application Manual
XFNS0843_03
Breadcrumb
“BREAD CRUMB”
A breadcrumb record is collected each time a set interval elapses, determined by the Breadcrumb
setting. See the GPS Breadcrumbs setting for further information.
Scan
<My Barcode Data>
Any other record in the le is a barcode scan. This section contains the data encoded in the barcode
exactly as it is printed. Note that it is not uncommon that the human readable text printed below many
barcodes will not always match the barcode itself. Non-printable ASCII characters are preserved in the
data le though they may not display properly when viewed, depending on your text editor.
GPS Fix Indicator
This eld is a boolean 1 or 0 indicating whether the device had a GPS x at the time the record was
stored.
— 8 —
Page 12

Application Manual
XFNS0843_03
GPS Strings
GPS String Formats
GPS strings can be represented in a variety of formats. Each format represents the same location on
Earth and the formats can be readily translated from one to another.
GPS coordinates are logged in longitude/latitude pairs within each record in the data le. See the
Record Format section for more information on the data le. Longitude indicates the East/West
positioning and latitude indicates North/South. Subsequently, there is a capital N, S, E or W at the end
of each GPS string (i.e. 122.22073W,47.45946N). The rst portion of the coordinate (whether longitude
or latitude, the same rules apply) can be in one of three formats: Degree, Degree Minute or Degree
Minute Second. The GPS Format setting determines what each coordinate in a given record will look
like. Subsequent changes to the GPS Format setting will not change existing records; the change will
only apply to records collected after the change. All Record Types use the same GPS formatting.
Degree Hemisphere (DH)
Longitude: 122.22073W
Latitude: 47.45946N
Degree Minute Hemisphere (DMH)
This form is also sometimes called NMEA RAW
Longitude: 12213.244W
Latitude: 4727.568N
Degree Minute Second Hemisphere (DMSH)
Longitude: 122:13:14.06W
Latitude: 47:27:34.1N
GPS String Conversion
As mentioned above, GPS strings can be converted from one to another with some simple math.
The Degree format is exactly that, it’s the exact degree position of your location with relation to the
equator for longitude or the Prime Meridian for latitude. The degree of your longitudinal position can
then be anywhere from less than 1 degree to 180 degrees (East or West) and from less than 1 degree
to 90 degrees latitudinal (North or South). One degree is divided into 60 minutes and one minute is
divided into 60 seconds. For the sake of discussion, we can ignore the hemisphere and just focus
— 9 —
Page 13

Application Manual
XFNS0843_03
on the numbers. For the above coordinates, we begin with 122.22073W,47.45946N or otherwise
stated 122 degrees and a fraction for longitude and 47 degrees and a fraction for latitude. This is
Degree format. To convert this to Degree Minute format, we multiply the fraction by 60. This gives us
122 degrees and 13.244 minutes lontitude and 47 degrees and 27.568 minutes latitude or otherwise
12213.244W,4727.568N. To further convert to Degree Minute Second format, we follow the pattern
and multiply the fraction of the minutes by 60. .568 x 60 = 34.08 seconds and .244 x 60 = 14.64. Thus,
we nally have 122:13:14.06W,47:27:34.1N. Conversions back towards the Degree format can be
achieved by dividing by 60 rather than multiplying. For example, 14.64 / 60 = .244 and 13.244 / 60 =
.22073 giving us 122.22073 again.
Example
D 122.22073 degrees
.22073 x 60 = 13.244
D M 122 degrees 13.244 minutes
.244 x 60 = 14.64
D M S 122 degrees 13 minutes 14.64 seconds
14.64 / 60 = 13.244
D M 122 degrees 13.244 minutes
13.244 / 60 = .22073
D 122.22073 degrees
— 10 —
Page 14

Application Manual
XFNS0843_03
Settings
The following are the options available to customize the behavior of the application and device.
To congure any given setting, scan the appropriate barcode immediately following the settings
description. Note: Changing any setting does not change the records already stored on the device;
only new records stored after the change has taken effect. This is by design. It can take approximately
60 seconds for some changes to have full effect on new records.
Device Serial Number
Each OPL9813 running XFNS084x stores a 6 digit number in memory so that data records can identify
the specic unit that recorded the data. Typically this ID number matches the serial number of the unit.
The rst time this application boots after a fresh installation, it will enter a mode which emits an alert
beep indicating that the serial number barcode from the device’s packaging should be scanned.
Typically this is done at the production facility when the application is rst installed.
In the event the stored serial number is incorrect or must be changed, this can be accomplished by
scanning the below barcode, followed by an appropriate 6 digit numeric barcode representing the
device’s serial number.
Reset Serial Number
Trigger Mode
The trigger mode determines the behavior of the scanner upon a successful barcode read. The
rst option is called Single Read Mode and the second is Multiple Read Mode. In both modes,
the trigger key must be pressed to activate the laser but need not be held. Single Read Mode is very
effective in noisy environments or if the good read beep cannot otherwise be heard and the LED
cannot be easily watched as the laser turns off immediately upon a successful scan. Multiple Read
Mode will cause the laser to remain active and scanning until it detects a period of about 6 seconds
with no new barcodes scanned. Note that it is not possible to scan a barcode that has been scanned
previously when in Multiple Read Mode, regardless of which mode the barcode was scanned in. Single
Read Mode will allow any barcode to be scanned at any time.
Single Scan Mode
Multiple-Scan Mode
— 11 —
Page 15

Application Manual
XFNS0843_03
Time Zone
All time zones from GMT -11 to GMT +14 are supported by this application. Note that Daylight Saving
Time is not directly supported given the varied usage of this policy from region to region, but can
be congured manually by changing the time zone setting as appropriate throughout the year. For
example, Phoenix, Arizona does not follow Daylight Saving Time and as such remains at GMT -7 yearround. San Francisco, California on the other hand, switches from GMT -7 to GMT -8 depending on the
time of year. The website www.timeanddate.com is a useful resource for determining time zones.
GMT + 0
GMT - 1
GMT - 2
GMT - 3
GMT - 4
GMT - 5
GMT - 6
GMT - 7
GMT - 8
GMT - 9
GMT - 10
GMT - 11
— 12 —
Page 16

GMT - 12
GMT + 1
GMT + 2
GMT + 3
GMT + 4
Application Manual
XFNS0843_03
GMT + 5
GMT + 6
GMT + 7
GMT + 8
GMT + 9
GMT + 10
GMT + 11
GMT + 12
GMT + 13
GMT + 14
— 13 —
Page 17

Application Manual
XFNS0843_03
GPS String Format
The GPS String Format (see the GPS Strings section for full details) can be changed by scanning
the barcode for the desired string format.
GPS Format: DH
GPS Format: DMH
GPS Format: DMSH
GPS Breadcrumbs
At a pre-determined interval, the OPL9813 will store a GPS Breadcrumb (that is, a time and date
coded set of GPS records not associated with a barcode scan or any other user activity). This GPS
breadcrumb, not relying on user input can be used to track the user of the device at stages where
scanning does not occur throughout the day. As this feature does impact battery life, it can be disabled
by setting the interval to 0. Any full minute increment from 1 minute to 60 minutes can be set. Default
is 15 minutes.
Breadcrumbs: OFF
Breadcrumbs: 1 minute
Breadcrumbs: 5 minute
Breadcrumbs: 10 minute
Breadcrumbs: 15 minute
Breadcrumbs: 20 minute
— 14 —
Page 18
Breadcrumbs: 25 minute
Breadcrumbs: 30 minute
Breadcrumbs: 35 minute
Breadcrumbs: 40 minute
Breadcrumbs: 45 minute
Breadcrumbs: 50 minute
Application Manual
XFNS0843_03
Breadcrumbs: 55 minute
Breadcrumbs: 60 minute
— 15 —
Page 19

Application Manual
XFNS0843_03
Supported Symbologies
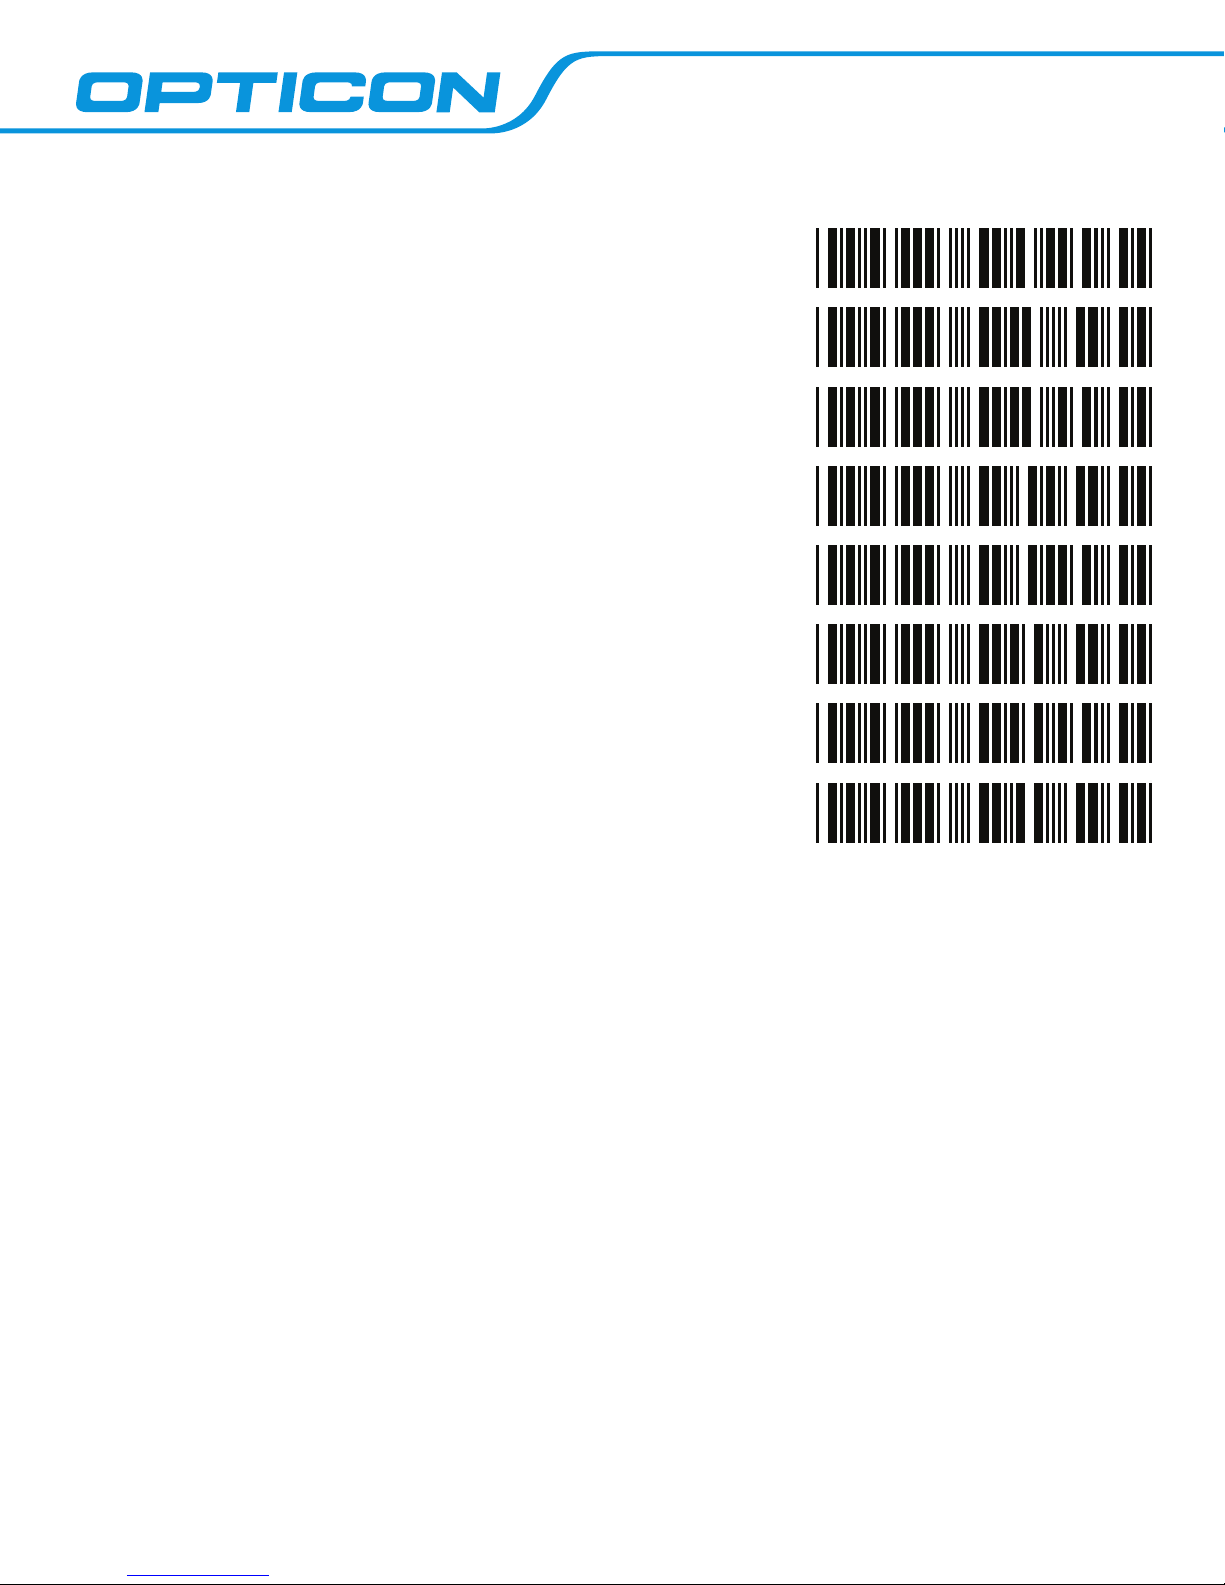
A symbology is a specic form of barcode, much like an alphabet. The barcodes in this document,
for example, are all of the symbology Code 39. The following symbologies are supported by this
application for daily usage.
• UPC/EAN
• Code 39
• Codabar
• Code 2 of 5
• IATA
• MSI/Plessey
• Telepen
• UK/Plessey
• Code 128
• EAN 128
• Code 93
• Code 11
• Korean Postal Authority Code
• GS1 Databar (formerly RSS)
• Composite Codes
— 16 —
 Loading...