

Page 1
OPTI 7FT X 5FT Metal Football Goal
Assembly & User Instructions - Please keep for future reference
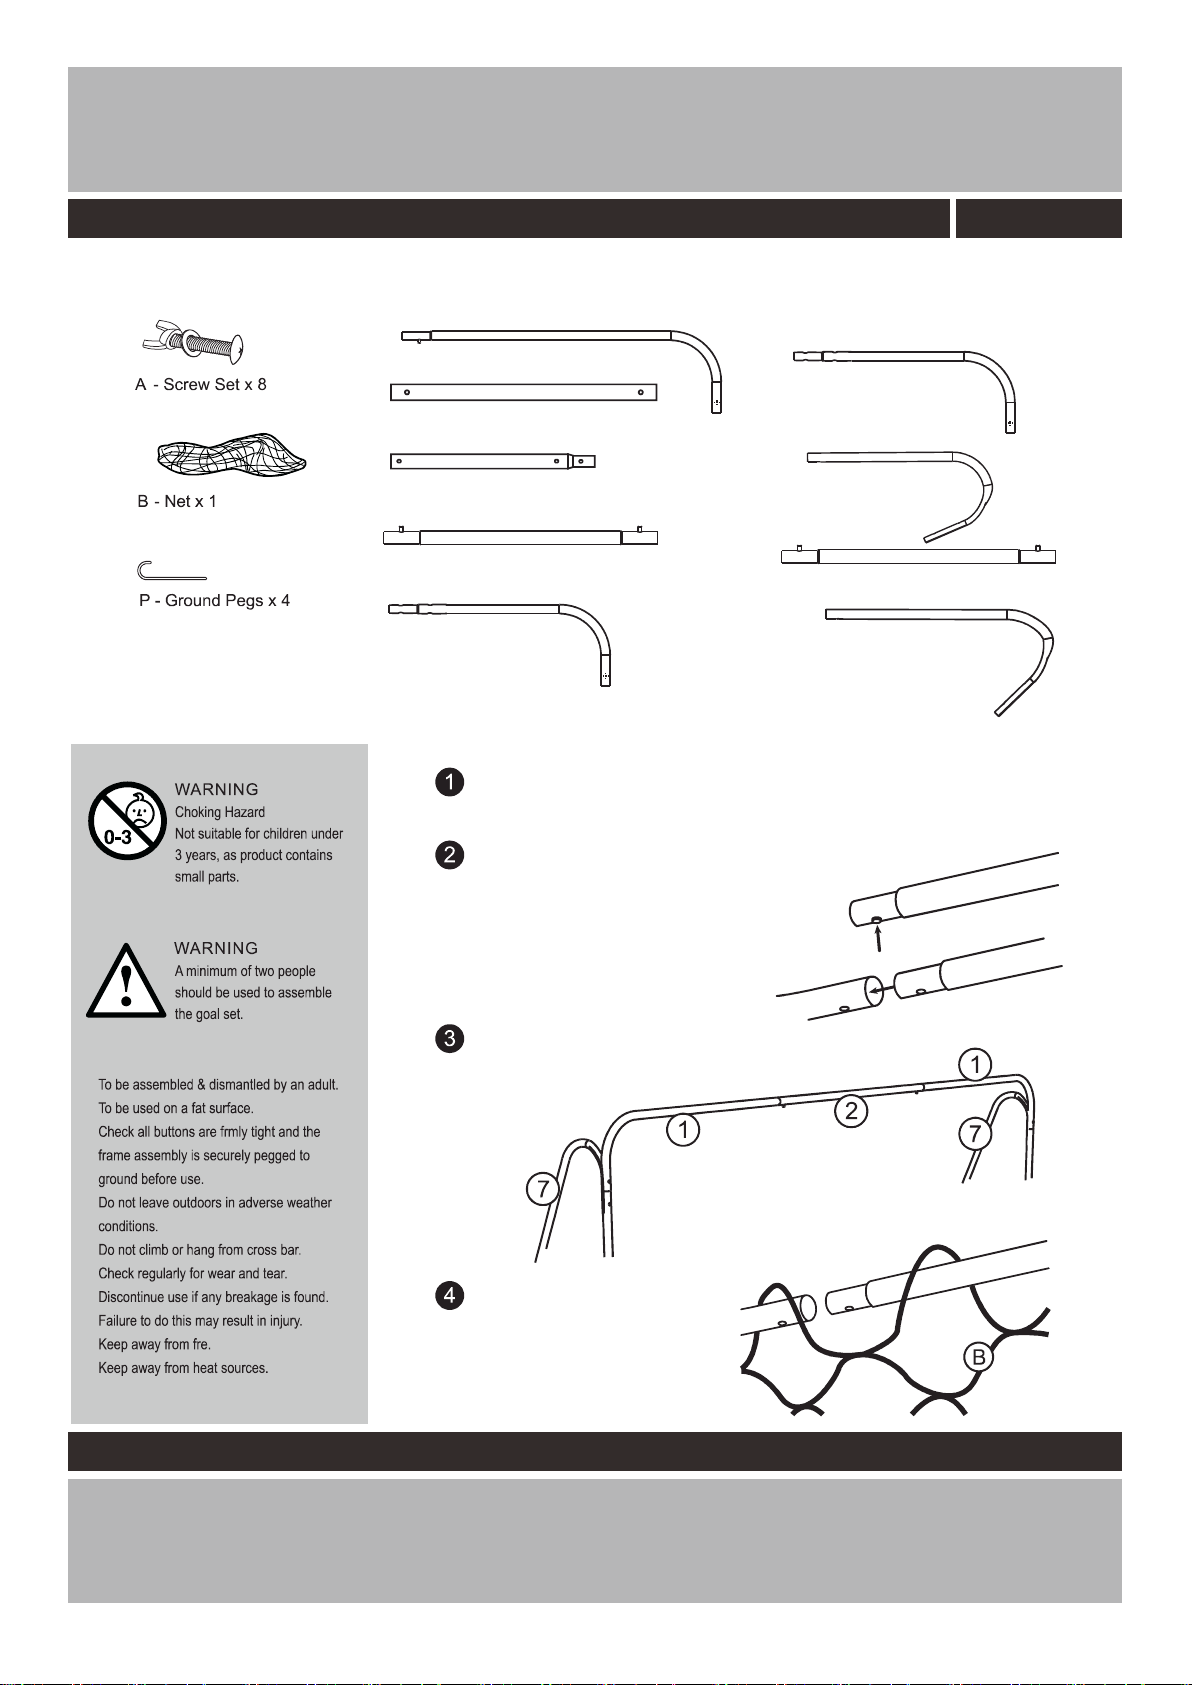
Components - Parts
1 Top. & Bottom curve x 4
2. Middle Straight x 2
3. Top Post Upright x 2
4. Bottom Post Upright x 2
5. Bottom End L/H x 1
Assemble Instructions
Open all packaging and organise all straight and curved poles into numbered groups.
Each pole will have a number on it (1-9) matching the parts list above.
750/8536
6 Bottom End R/H x 1.
7 Top Back Curve x 2.
8 Rear Connector x 2.
9 Bottom Back Curve x 2.
To connect the poles together, slide the
smaller connecting end inside the
corresponding pole end. Some poles will have
a connecting button to lock poles together.
Simply press this button down, while sliding it
inside a connecting pole, as shown.
Note: If this joint feels tight to assemble a little
washing up liquid on the small connecting end
will help slide together.
Follow the numbered diagram below and
assemble top curve (1) to middle straight (2)
to complete to top frame.
IMPORTANT: Attach the net at this
point. As you build each part of the
frame, you will need to thread the
loops at the edge of the net over
each part of the frame poles. The
end result should be the net (B)
hangs from the top bar and down to
the back oor frame.fl
Important – Please read these instructions fully before assembly or using
These instructions contain important information which will help you get the best from your
equipment and ensure safe and correct assembly, use and maintenance.
If you need help or have damaged or missing parts, call the Customer Helpline:0345 6402020
Issue 1 9/26/16
Page 2
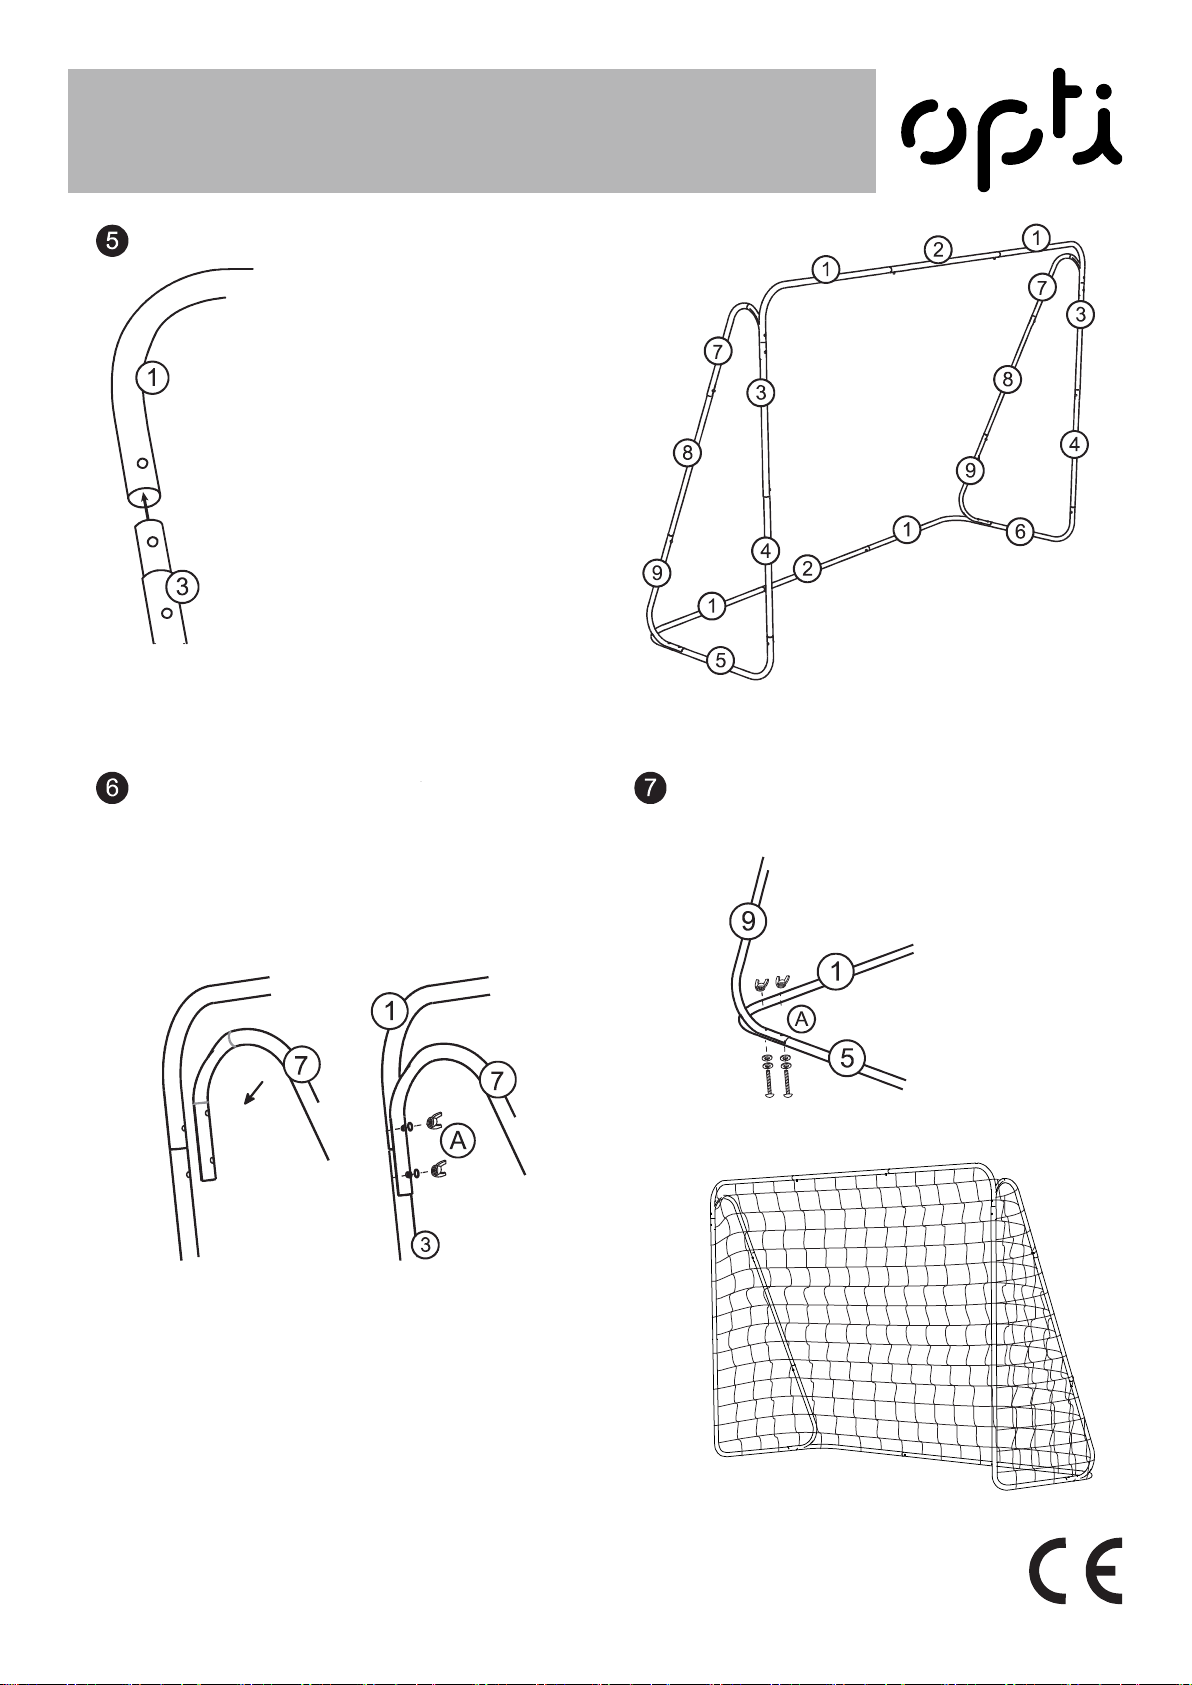
Assemble Instructions
Continue to build the frame using tubes 3 to 6
again remember to thread the net throught the
top and bottom post uprights (3 & 4) also the
bottom curve and middle straight (1 & 2) at the
rear on the oor.fl
Ensure all button clips are seated and secure.
Pre-assemble the top and bottom back curves to the rear
connecting tubes(7 & 8). Then insert this assembly from the front
of the goal, which will push out the net to form the goal shape.
Secure the top back curve (7) to the top post upright (3) using the
screw set (A) Bolt, washer and wingnut as a shown.
Repeat for opposite side.
Secure the bottom back curve (9) using the screw set (A)
throught the two holes in the bottom curve (1) and bottom
end L/H (5). The repeat opperation for the right hand side
of the goal.
Argos Ltd
489 - 499 Avebury Boulevard
Central Milton Keynes
MK9 2NW
Made in China
22
 Loading...