

OPTi 621/7859 Assembly Manual
0
These instructions contain important information which will help you get the best from your
equipment and ensure safe and correct assembly, use and maintenance.
If you need help or have damaged or missing parts, call the Customer Helpline: 0345 6001714
or visit www.argos-support.co.uk
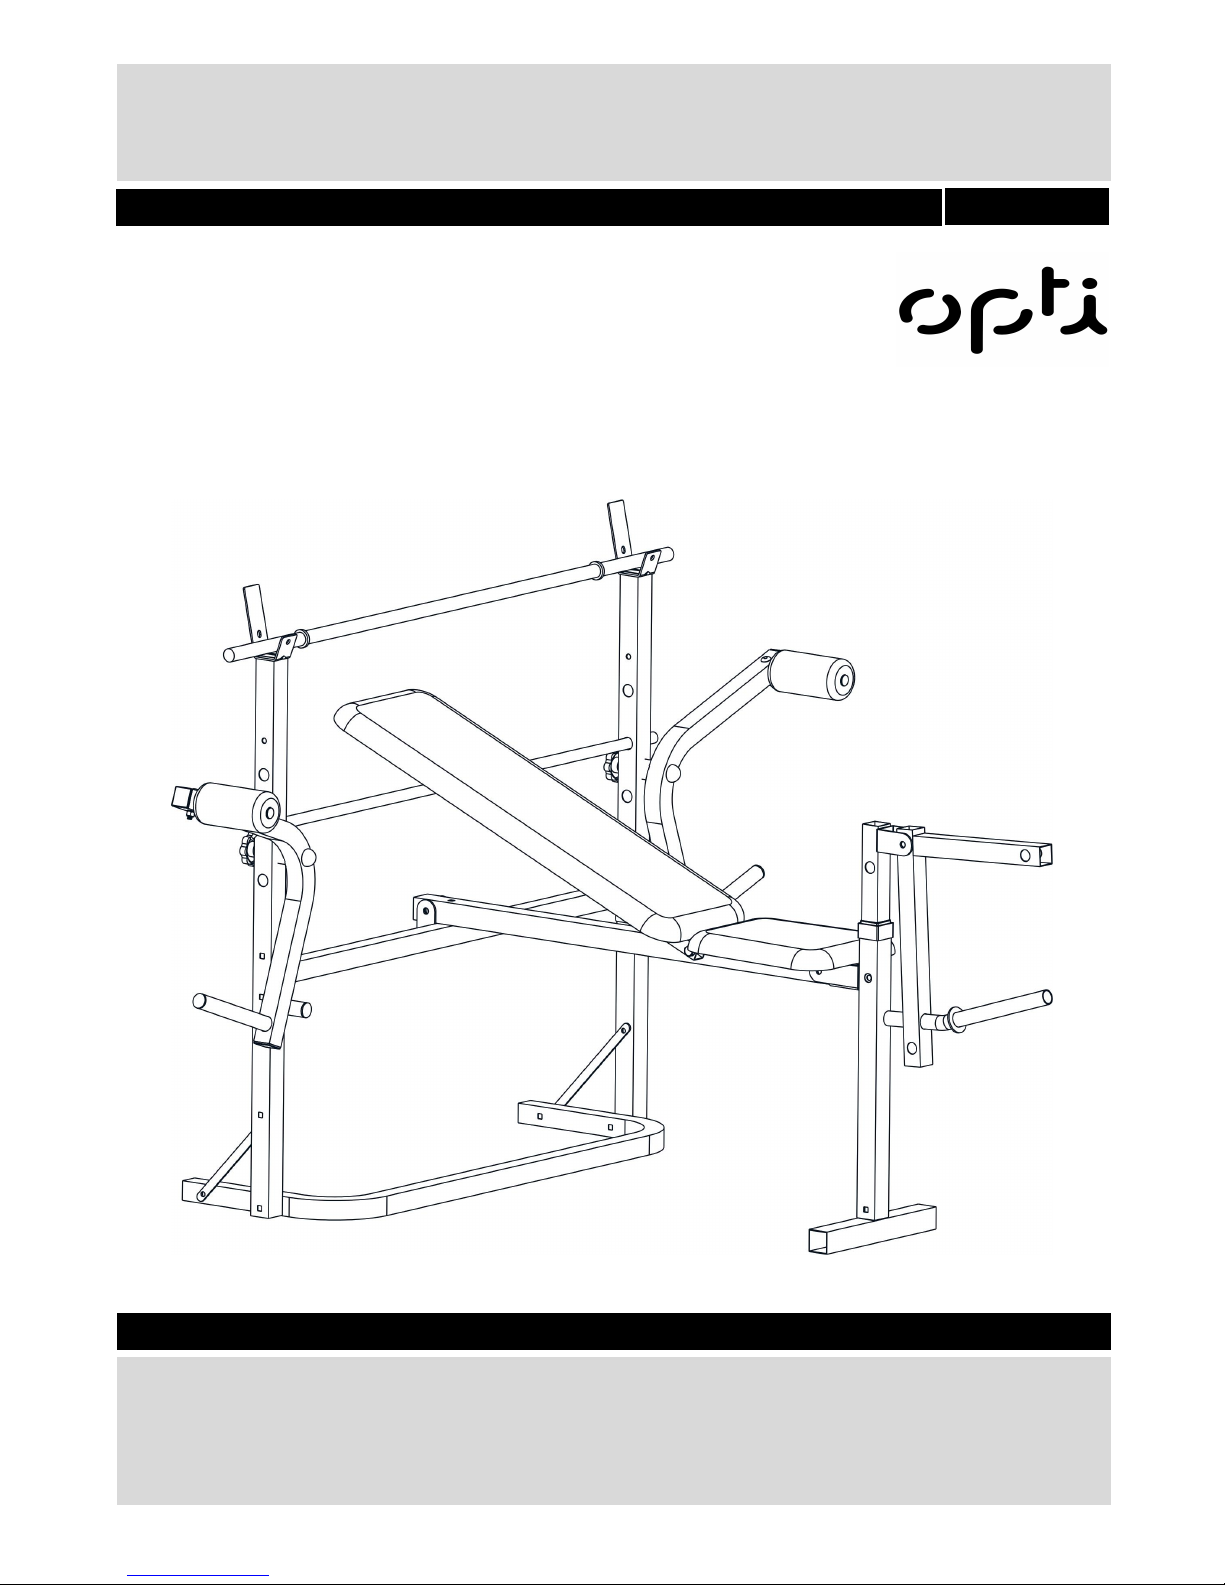
OPTI BUTTERFLY WORKOUT BENCH
Assembly & User Instruction
- Please keep for future reference
621/7859
Important – Please read these instructions fully before assembly or use
1
1
1
Contents
Safety Information 2
错误!未定义书签。
-3
Components - Parts 3-4
错误!未定义书签。
Components - Fixings 5
错误!未定义书签。
Assembly Instructions 6-12
错误!未定义书签。
-10
Workout Area 13 11
Exercise Information 14-22 错误!未定义书签。2-18
Before starting 14
错误!未定义书签。
2
Muscle Chart 15 13
Warming up and Cooling down 16-17 14-15
Using the bench 18-19
To Fold & Store Your Bench 20-22 16
Care and Maintenance 23 19
Exploded Parts Diagram 24 20
Parts List 25

2
Safety Information
This exercise equipment is built for optimum safety. However, certain precautions apply whenever you
operate a piece of exercise equipment.Be sure to read the entire manual before you assemble,operate or
use this equipment. .
• The product must be installed on a stable and level
surface.
• Assemble the item as close to its final position
(in the same room) as possible.
• Make sure you have enough space to layout the
parts before starting.
• Keep children and animals away from the exercise
area, small parts could pose a choking hazard if
swallowed.
• Dispose of all packaging carefully and responsibly.
• Check you have all the components and tools
listed in the parts list, bearing in mind that, for
ease of assembly, some components are
pre-assembled.
• The assembly of this equipment is best carried out
by 2 people.
• It is the responsibility of the owner to ensure that
all users of this product are properly informed as to
how to use this product safely.
• This product is intended for domestic use only.
Do not use in any commercial, rental, or institutional
setting.
•
Use the equipment only for intended use, as
described in this manual. Do not use attachments
not recommended by the manufacturer.
• Keep this equipment indoors, away from
moisture and dust. Do not put the equipment in a
garage, outbuilding, covered patio, or near water.
• Your product is intended for use in clean dry
conditions. You should avoid storage in excessively
cold or damp places as this may lead to corrosion
and other related problems that are outside our
control.
• Keep unsupervised children away from the
equipment.
• Disabled persons should not use the equipment
without a qualified person or doctor in attendance.
• Always wear appropriate workout clothing when
exercising. Do not wear loose or baggy clothing,
as it may get caught in the equipment. Wear
trainers to protect your feet while exercising.
• Do not place any sharp objects around the
equipment.
• Keep hands away from all moving parts.
• If any of the adjustment devices are left projecting,
they could interfere with the user’s movement.
• Before using the equipment to exercise, always
perform stretching exercises to properly warm up.
• Only one person at a time should use the
equipment.
• A spotter is recommended during exercise.
• If the user experiences dizziness, nausea, chest
pain, or other abnormal symptoms stop the
workout and seek immediate medical attention.
• Injuries to health may result from incorrect or
excessive training.
• This product is suitable for a maximum user weight
of: 110kgs.
• The maximum training mass on barbell support is
80kgs(Including bar and weights)
• The maximum training weight on the butterfly arm:
25kg.
• The maximum training mass on leg developer:
35kgs
• This product is fit for 1" weight plates.
• This product conforms to: BS EN ISO 20957-1,
and -4 Class (H) - Home Use
.
Warning: Before beginning any exercise program, consult your Doctor. This is especially important
for persons over the age of 35 or persons with pre-existing health problems. You MUST read all
instructions before using any fitness equipment. Argos and its associates assumes no responsibility
for personal injury or property damage sustained by or through the use of this product.
Important – Please read or use fully before assembly
Assembly
Use
3
MUST read all instructions before using any fitness equipment. Argos assumes no responsibility for
personal injury or property damage sustained by or through the use of this product.
Note: Some of the smaller components may be pre-fitted to larger components. Please check carefully
before contacting Argos regarding any missing components.
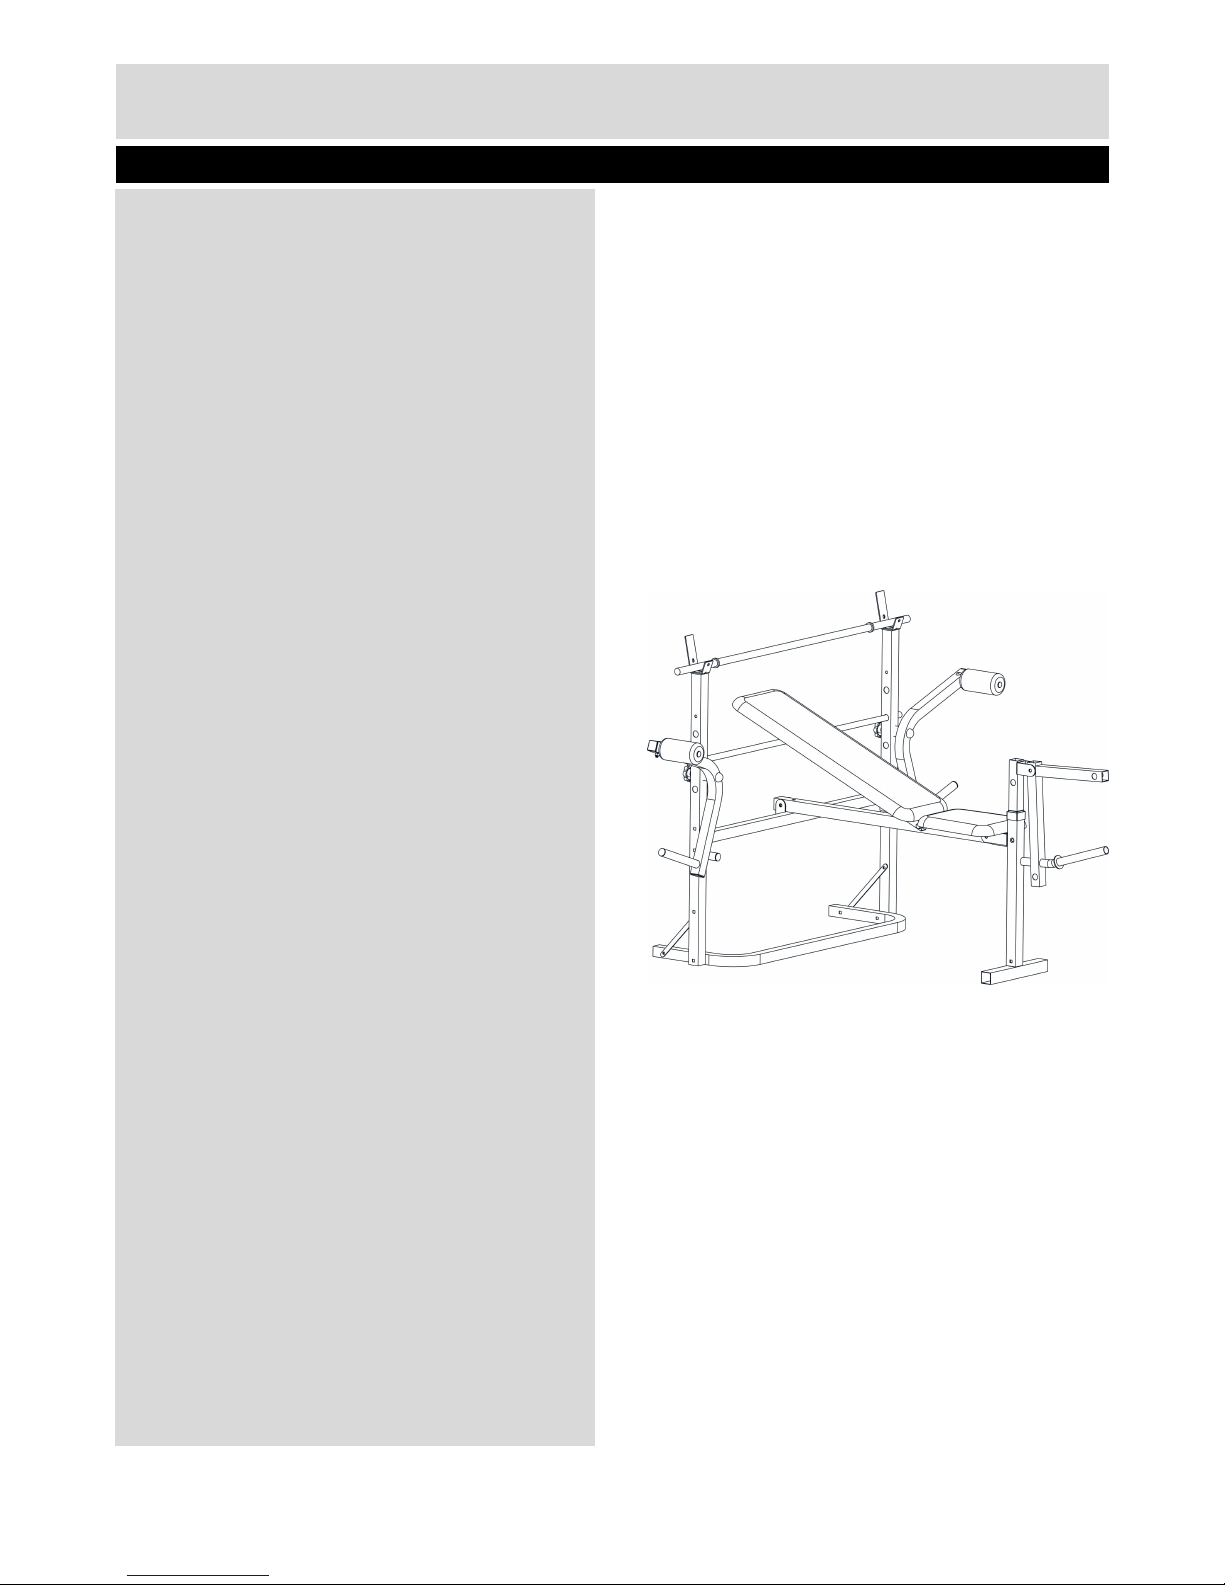
Total weight of the product is 20.3 kg (including weight plates). The overall dimensions after being assembled
are(D) 146 ×(W) 165 ×(H)107cm
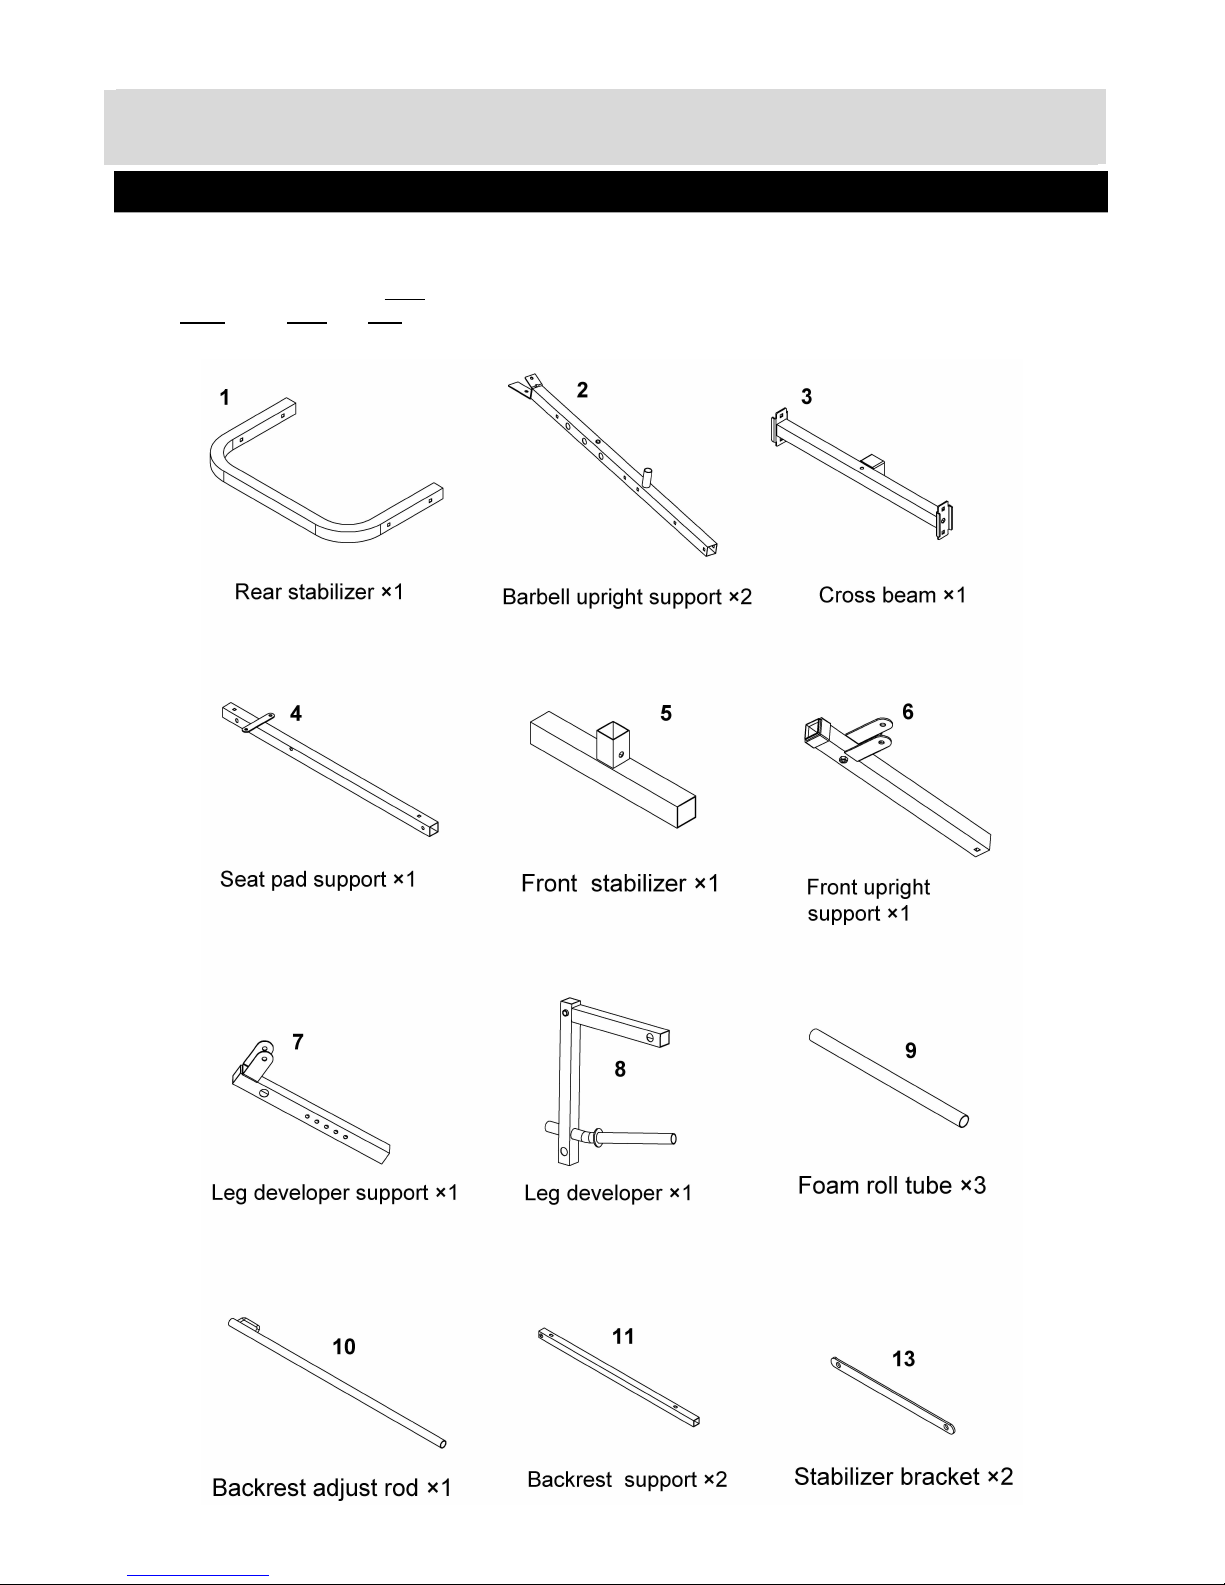
Components - Parts
If you have damaged or missing parts, please call
the Customer Helpline: 0345 6001714.
Please check you have all parts listed below

4
MUST read all instructions before using any fitness equipment. Argos assumes no responsibility for
personal injury or property damage sustained by or through the use of this product.
Note: Some of the smaller components may be pre-fitted to larger components. Please check carefully
before contacting Argos regarding any missing components.
Components - Parts
If you have damaged or missing parts, please call
the Customer Helpline: 0345 6001714.
Please check you have all parts listed below
5
Note:The quantities below are the correct amount to complete the assembly. In some cases more
hardware may be supplied than are required. Some of the fixings are pre-fitted to the larger
components. Please check carefully before contacting Argos regarding any missing fixings.
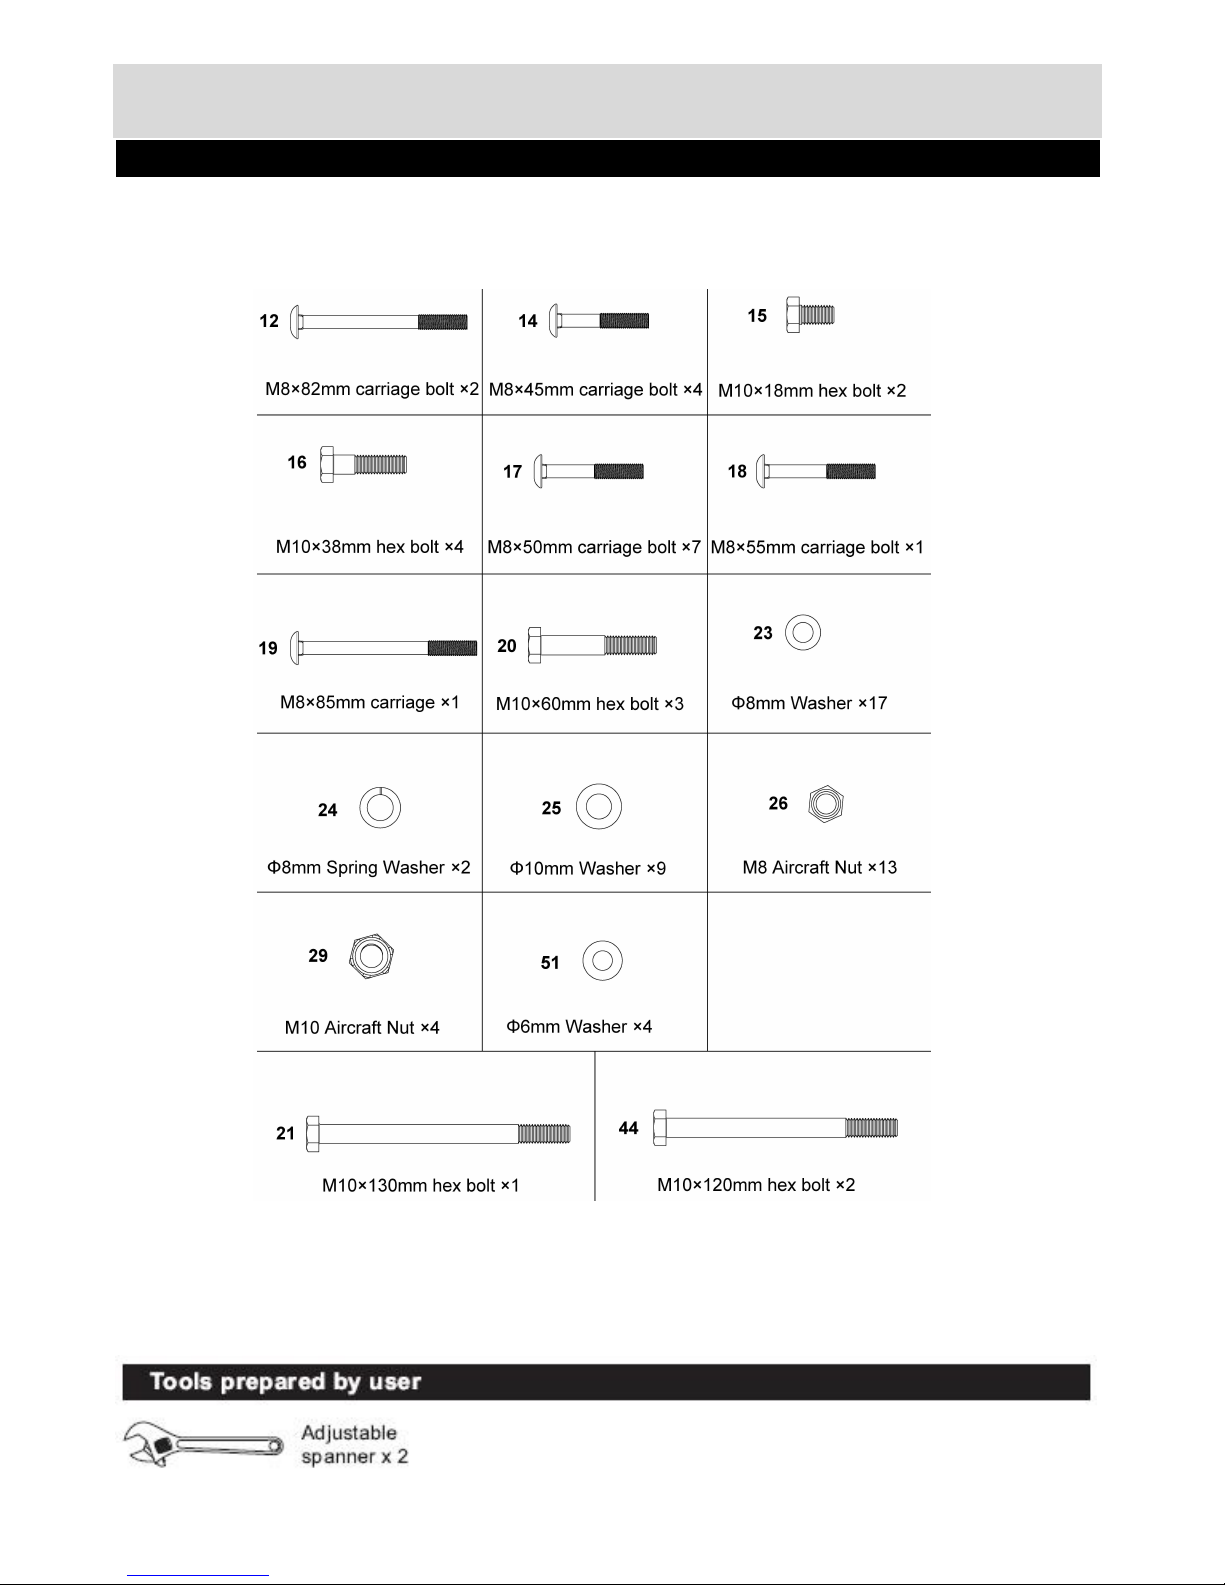
Components - Fixings
Please check you have all fittings listed below
6
Assembly instructions
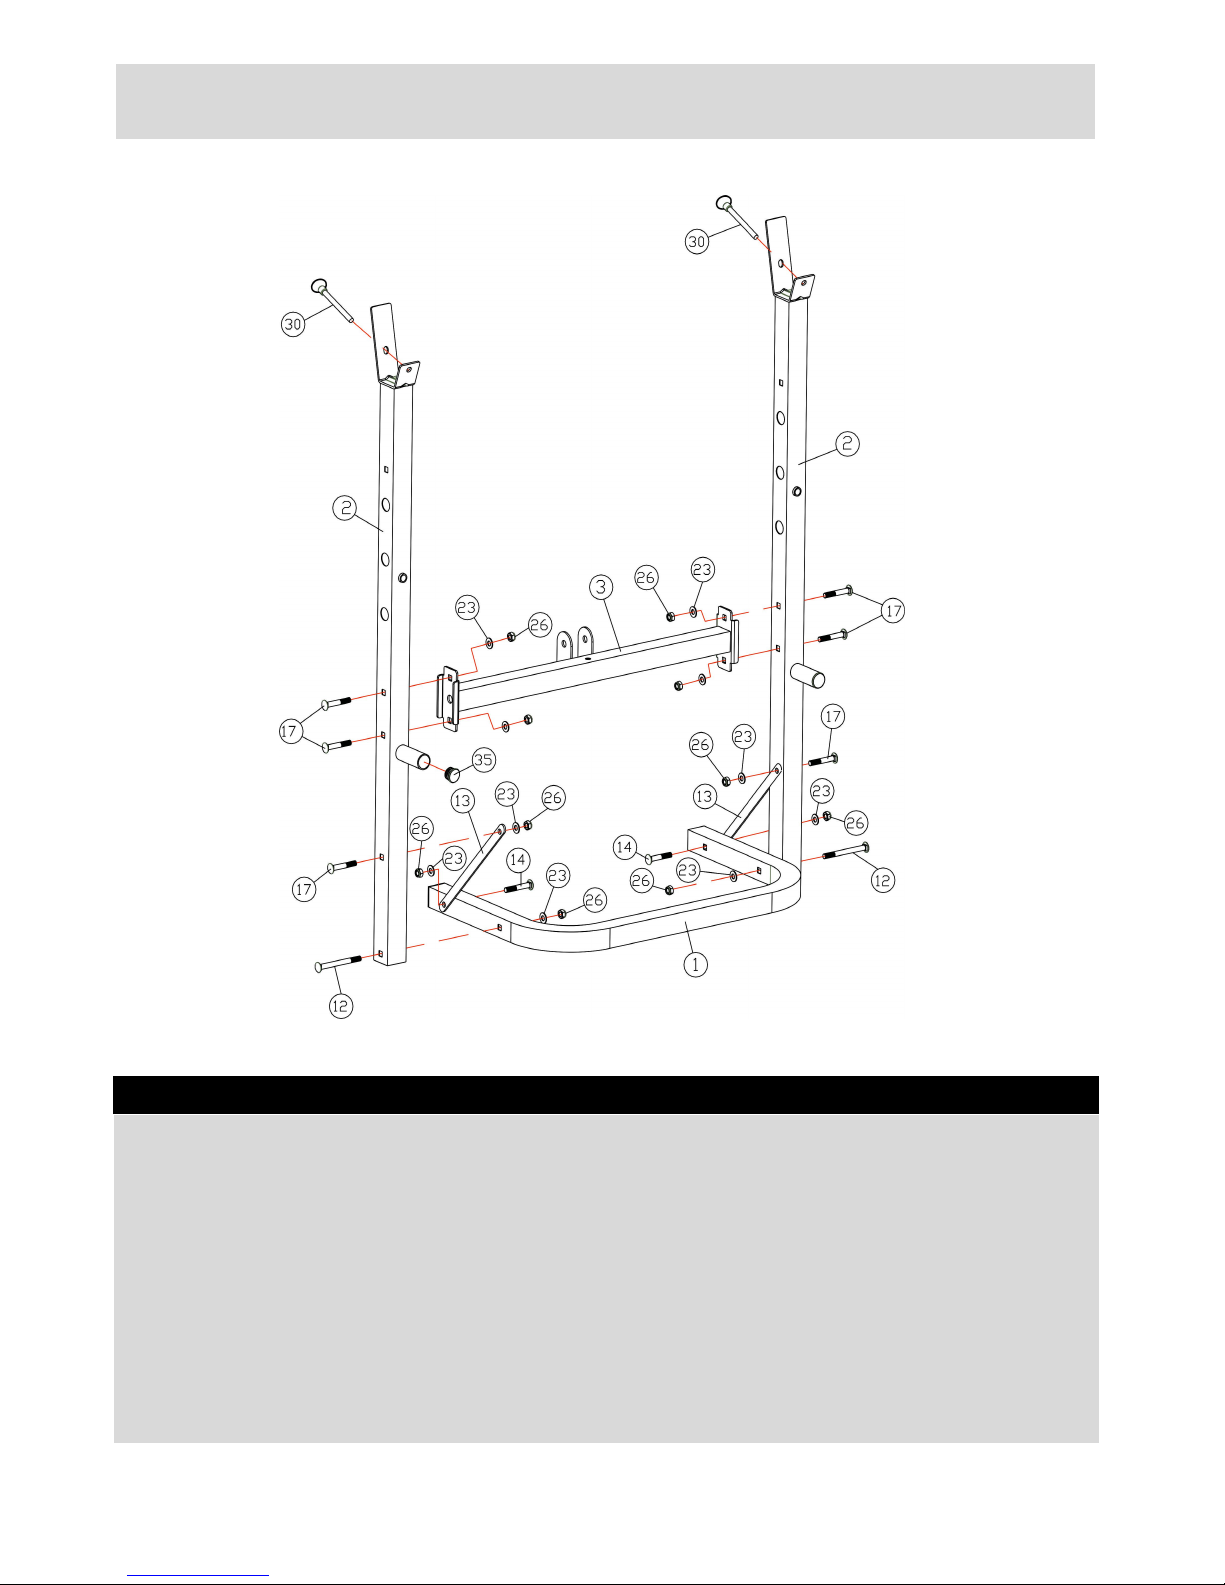
A. Connect both Barbell Upright Supports(#2) by Cross Beam(#3) in mid span, Align the hole and
secure each end of the Cross Beam(#3) with two M8*50MM Carriage Bolts(#17), two Φ8mm
Washers(#23) and two M8 Aircraft Nuts(#26).
B. Place both Barbell Upright Supports(#2) on the outside of the Rear Stabilizer(#1), Align the hole and
secure with two M8*82MM Carriage Bolts(#12), two Φ8mm Washers(#23) and two M8 Aircraft
Nuts(#26).
C. Attach both Stabilizer Brackets(#13) to the outside of the Rear Stabilizer(#1) and to the inside of both
Barbell Upright Supports(#2), Secure both Stabilizer Brackets(#13) with two Barbell Upright
Supports(#2) with two M8*50mm Carriage Bolts(#17), two Φ8mm Washers(#23) and two M8 Aircraft
Nuts(#26), Secure both Stabilizer Brackets(#13) to Rear Stabilizer(#1) with two M8*45MM Carriage
Bolts(#14), two Φ8mm Washers(#23) and two M8 Aircraft Nuts(#26).
Note: Do not tighten the bolt at this step.
Step 1
7
Assembly instructions
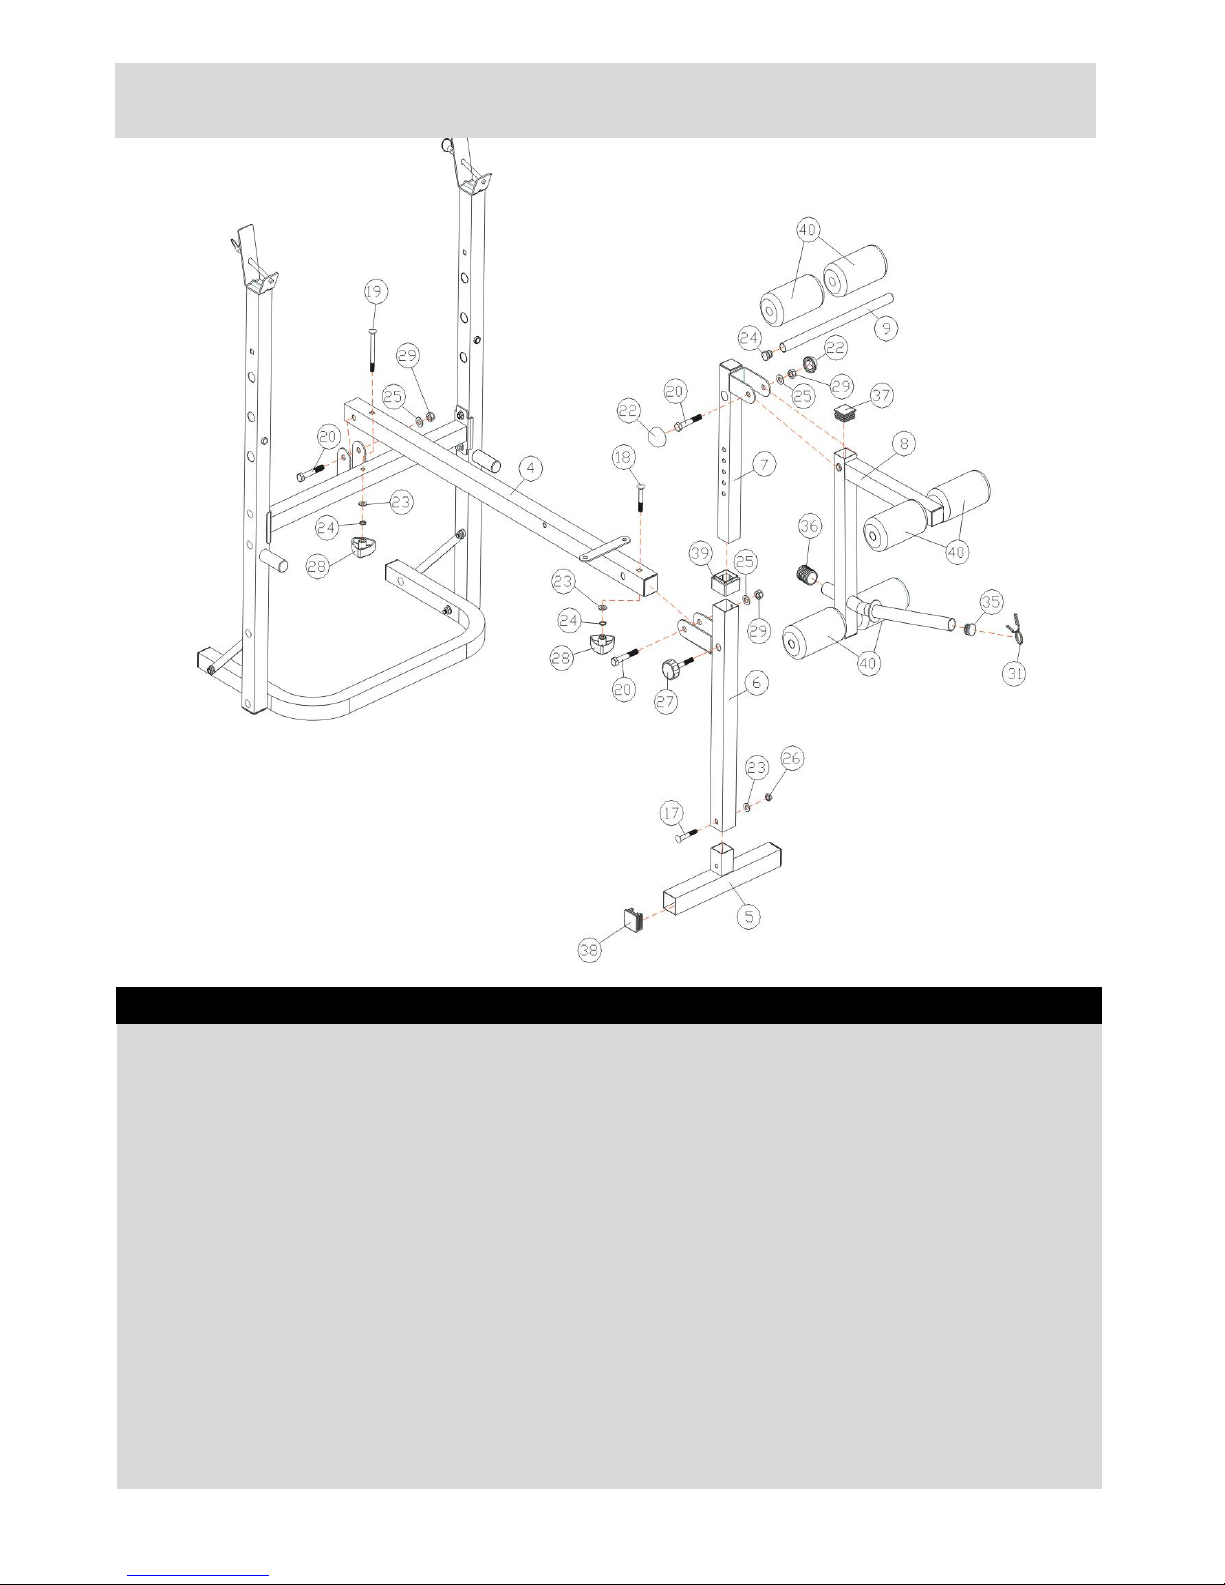
A. Attach rear of Seat Pad Support (#4) to the Cross Beam(#3), Align the side hole and secure with one
M10*60MM Hex Bolt(#20), one Φ10MM Washer(#25) and one M10 Aircraft Nut(#29).Place an
M8*85mm Carriage Bolt(#19) in the upper hole and secure in position using one Φ8mm
Washer(#23),one Φ8mm Spring Washer(#24) and one M8 Triangle Knob(#28). Tighten securely to
lock the frame in position.
B. Attach Front Stabilizer(#5) to the bottom of the Front Upright Support(#6), Align the hole and secure
with one M8*50MM Carriage Bolt(#17),one Φ8MM Washer(#23) and one M8 Aircraft Nut(#26).
C. Attach the Upright Support(#6) to the front of the Seat Pad Support(#4), Align the side hole and
secure with one M10*60MM Hex Bolt(#20), one Φ10mm Washer(#25) and one M10 Aircraft Nut
(#29). Place an M8*55mm Carriage Bolt(#18) in the upper hole and secure in position using one
Φ8mm Washer(#23),one Φ8mm Spring Washer(#24) and one M8 Triangle Knob(#28). Tighten
securely to lock the frame in position.
D. Insert the Leg Developer Support (#7) into the upper openning of the Front Upright Support (#6),
select desired height and secure with one M8 Lock Knob(#27).
E. Attach the Leg Developer(#8) to the Leg Developer Support(#7), Align the hole and secure with
M10*60mm Hex Bolt(#20), oneΦ10mm Washer(#25) and one M10 Aircraft Nut (#29), attach two
Nut Covers(#22) to the hex head of the BOLT and the NUT.
F. Slide three Foam Roll Tubes (#9) into the hole on the Leg Developer Support (#7) and Leg Developer
(#8) with halfway. Attached six Foam Rolls (#40) to each side of the Foam Roll Tube (#9).
Step 2
8
Assembly instructions
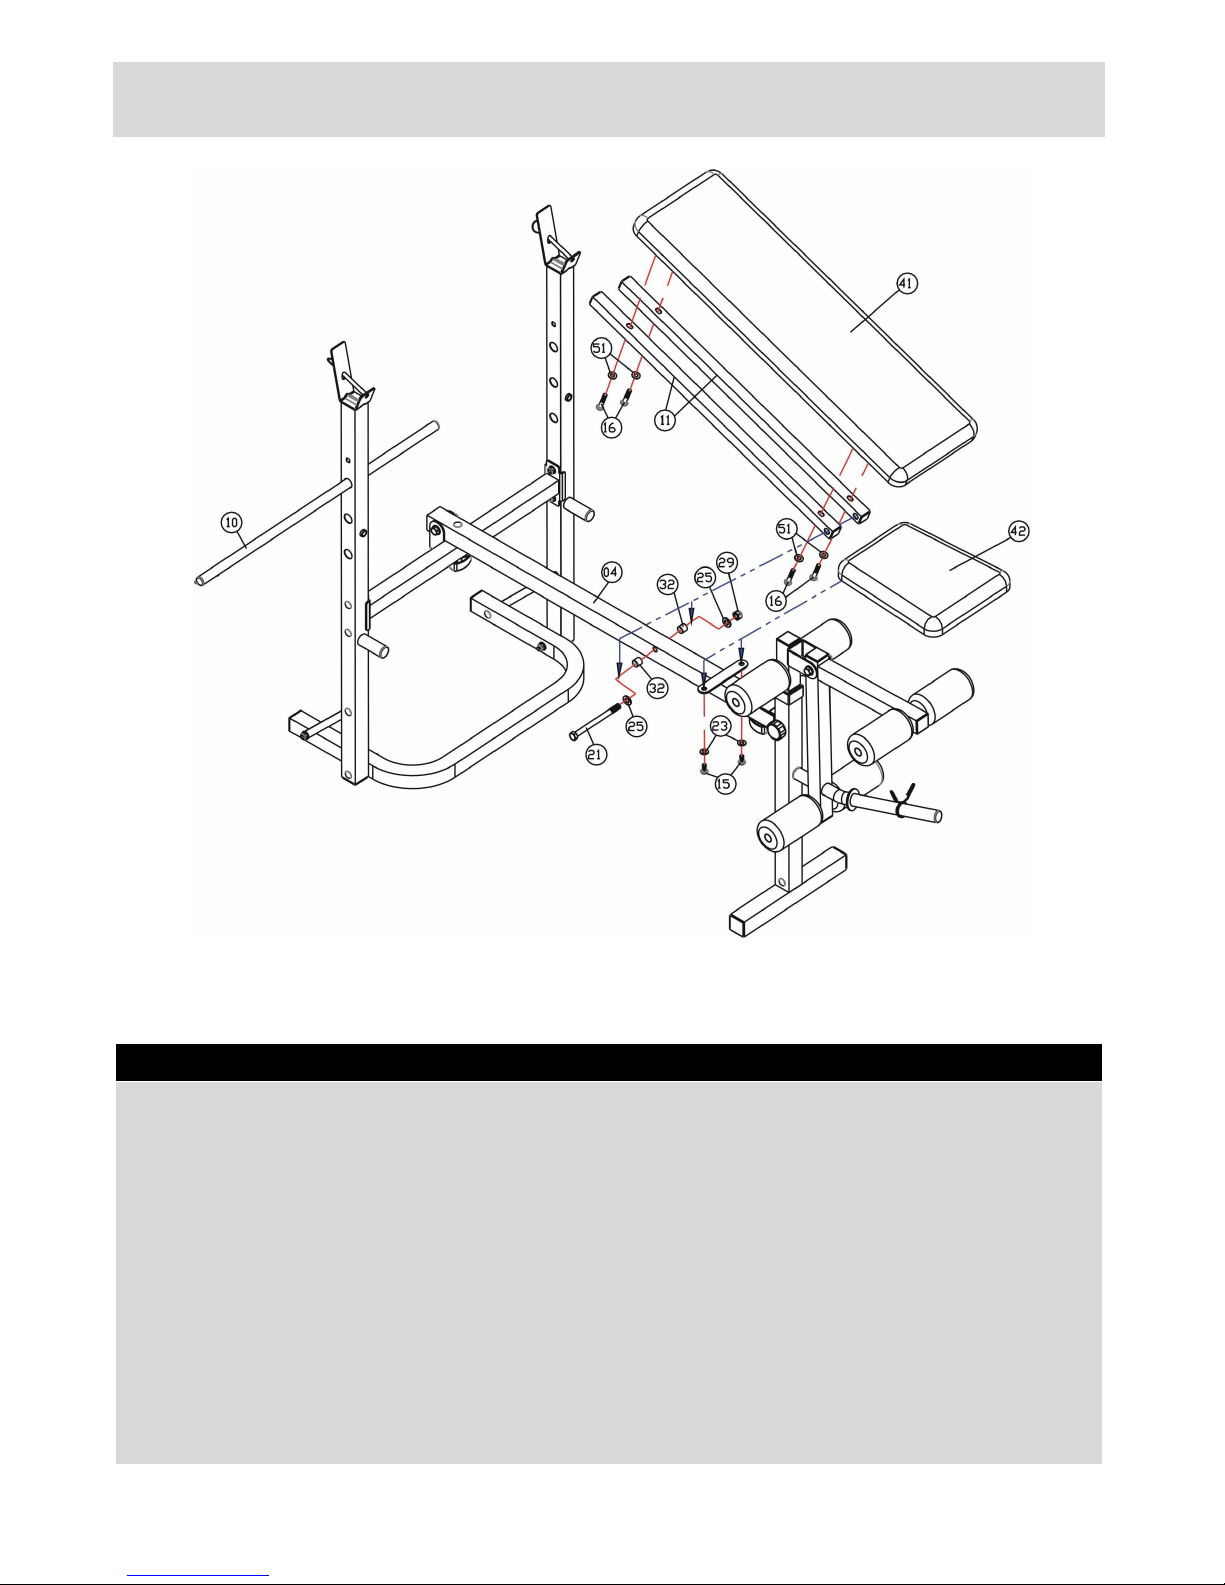
A. Attach the Backrest Support(#11) to the Backrest Pad(#41) align the hole and secure with four
M6*38MM Hex Bolts(#16), and four Φ6mm Washers(#51).
B. Attach the Backrest Support(#11) to the Seat Pad Support(#4), Align the hole and secure with
M10*130MM Hex Bolt(#21), two Φ10mm Washers(#25) and two Bushings(#32). M10 Aircraft Nut(#29)
Securely to remove all free-play but take care NOT too over tightened.
C. Attach the Seat Pad (#42) to the Seat Pad Support (#4), Align the hole and secure with two
M8*18mm Hex Bolts (#15) and two Φ8 Washers (#23).
D. The Backrest can be adjusted into 4 positions for convenient use. (Flat and 3 incline positions).
Please ensure that the Backrest Adjustment Rod (#10) is positioned UNDER the Backrest Support (#11)
and is secured into place in any one of the 3 adjustment holes in the Upright before use.
Securely tighten all bolts and other fixings and your weight training bench is ready to use.
Step 3
 Loading...