

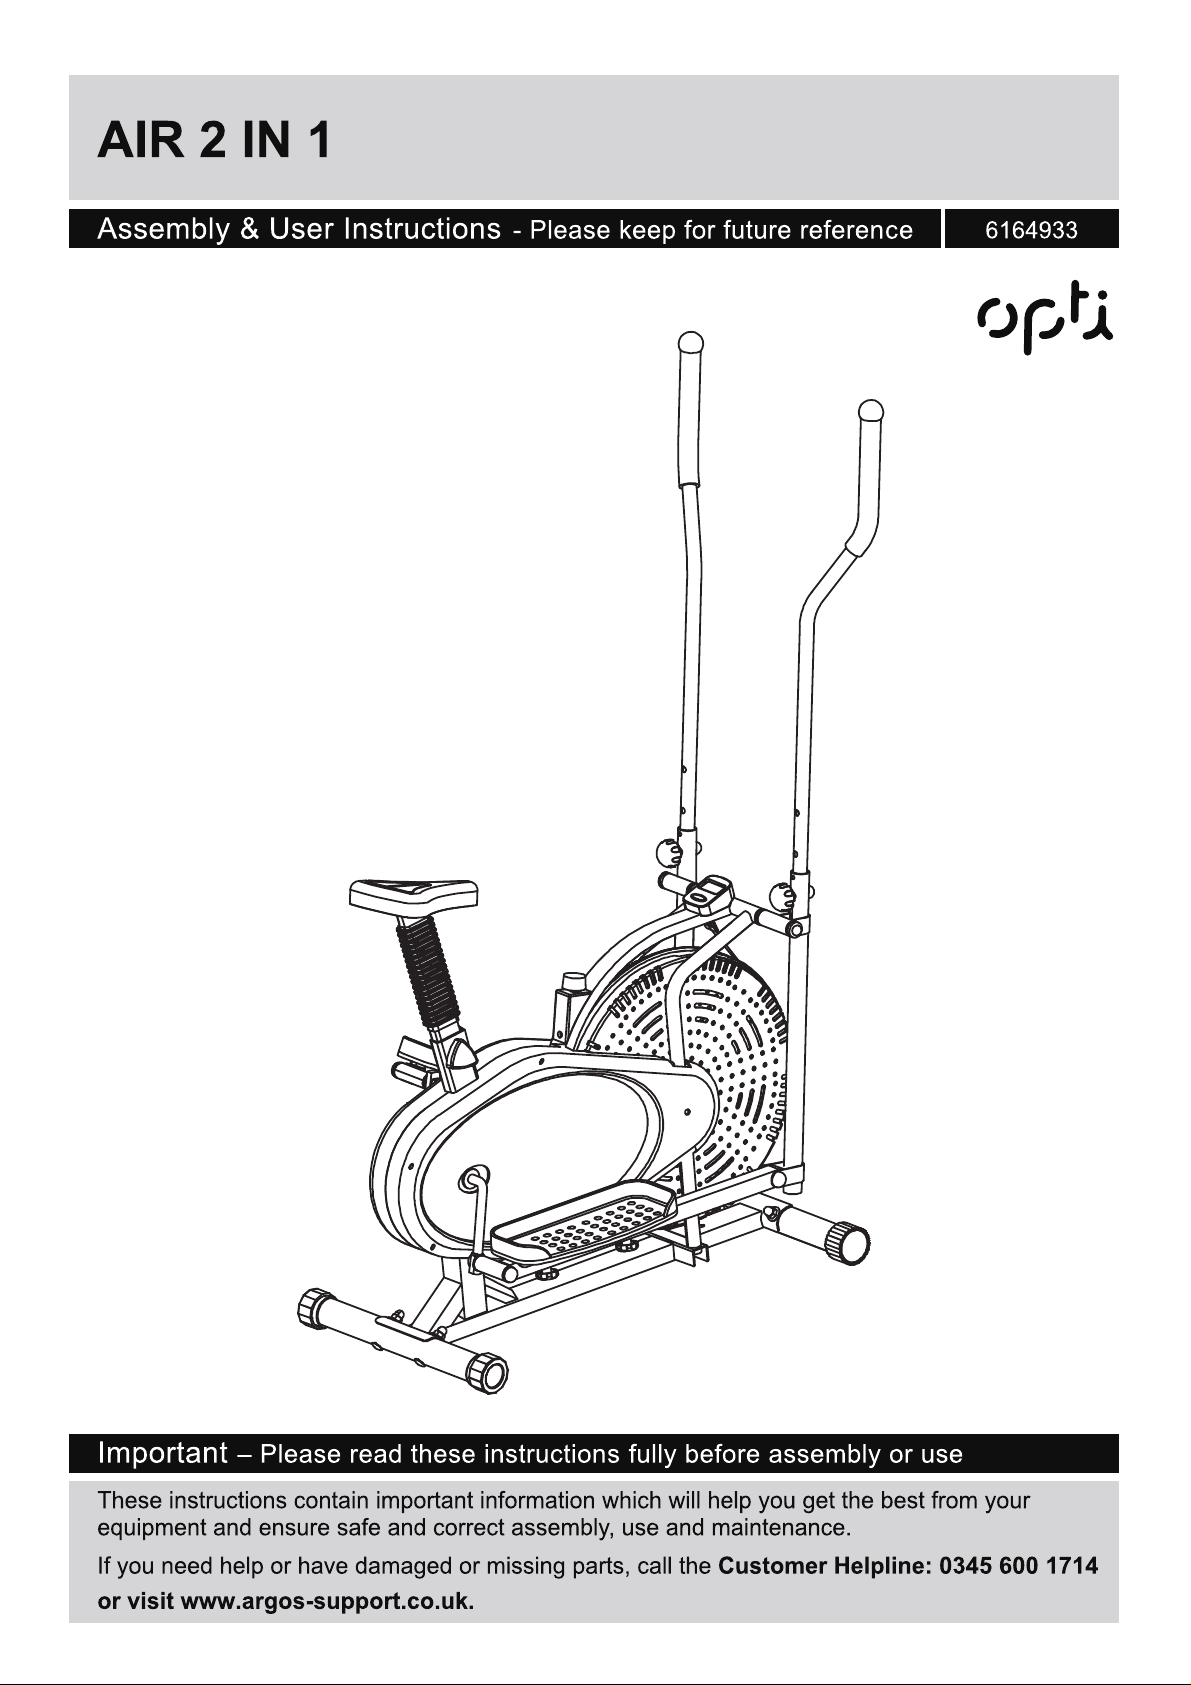
Page 1
Page 2

2-3
6-11
4
5
Workout Area
Exercise Information
Before starting
12
13-17
13
14
15-16
17Console Operation
18
19
20
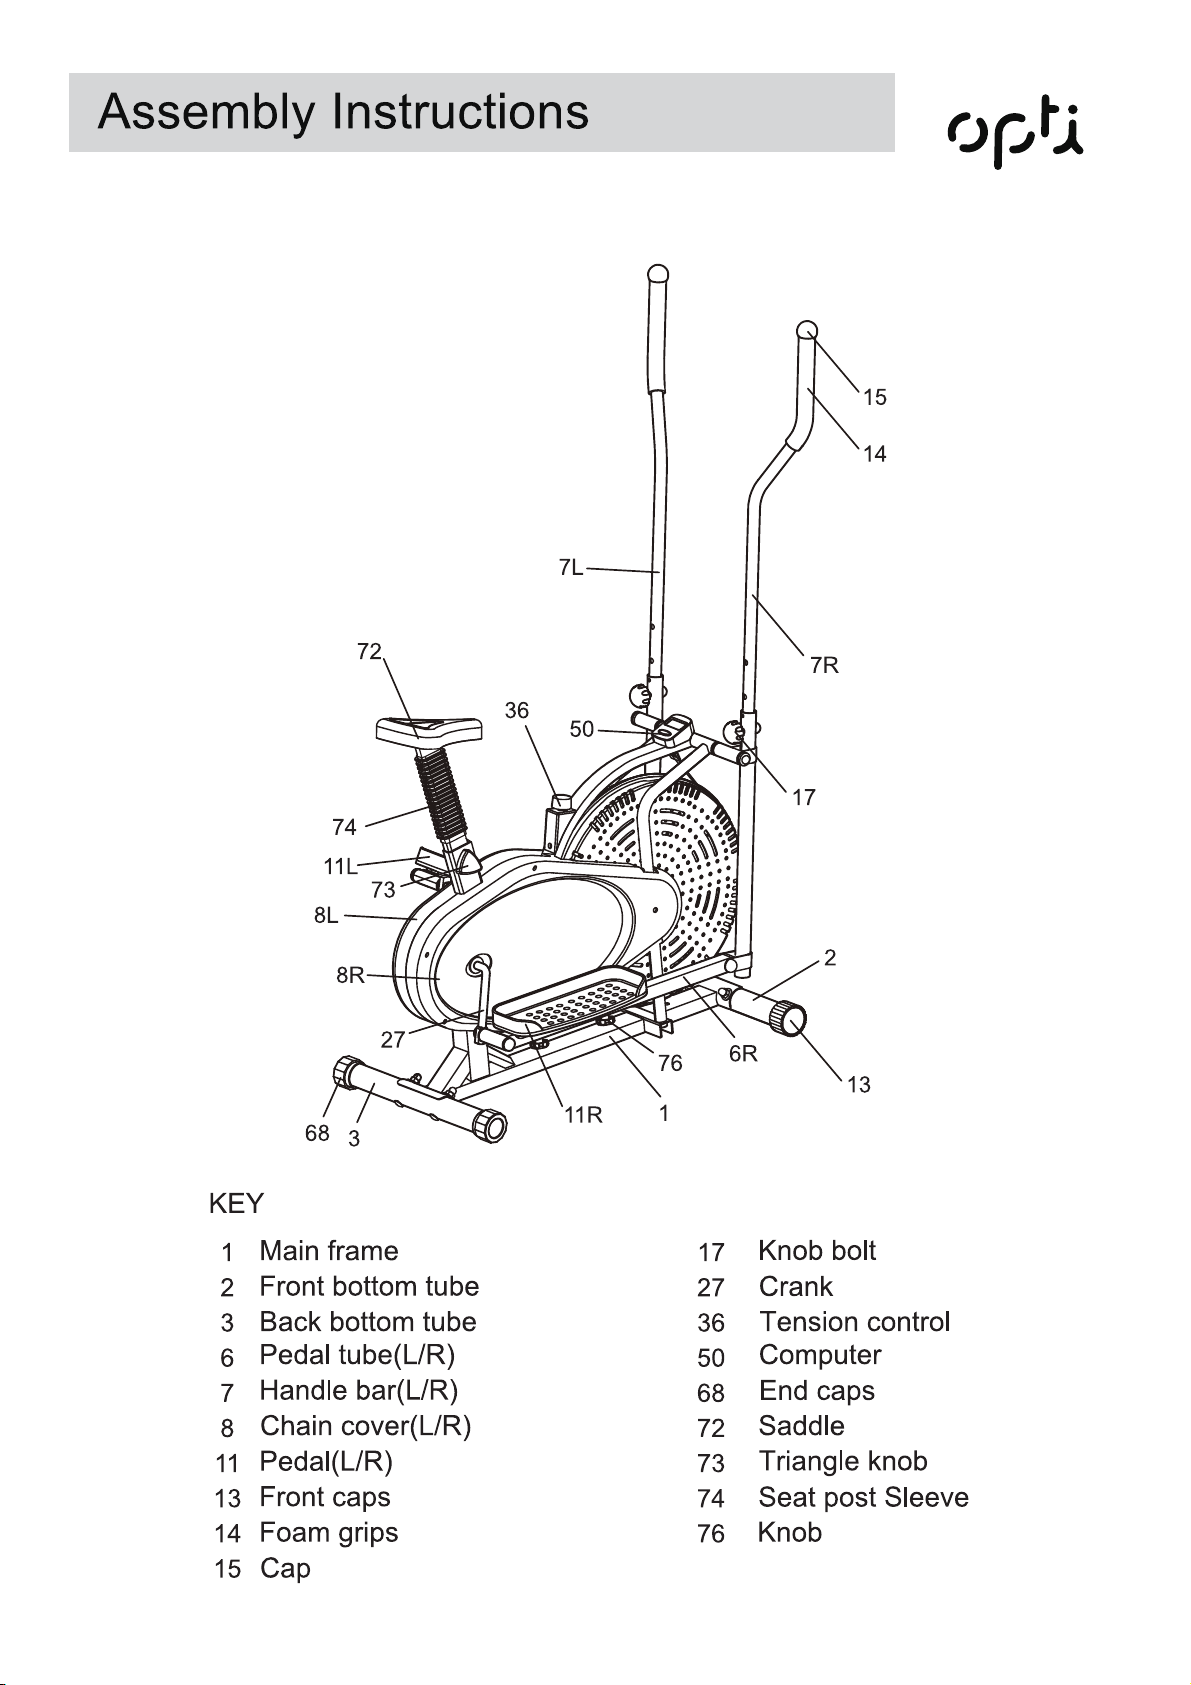
1
Page 3
cross trainer.
cross
To mount and dismount the equipment safely, hold
the handlebar and step on/down the footplatform when
it is in the lowest position.
2
Page 4

3
Page 5
Handlebar Tube
x1 4L.
Handlebar Tube
x1
4
Page 6
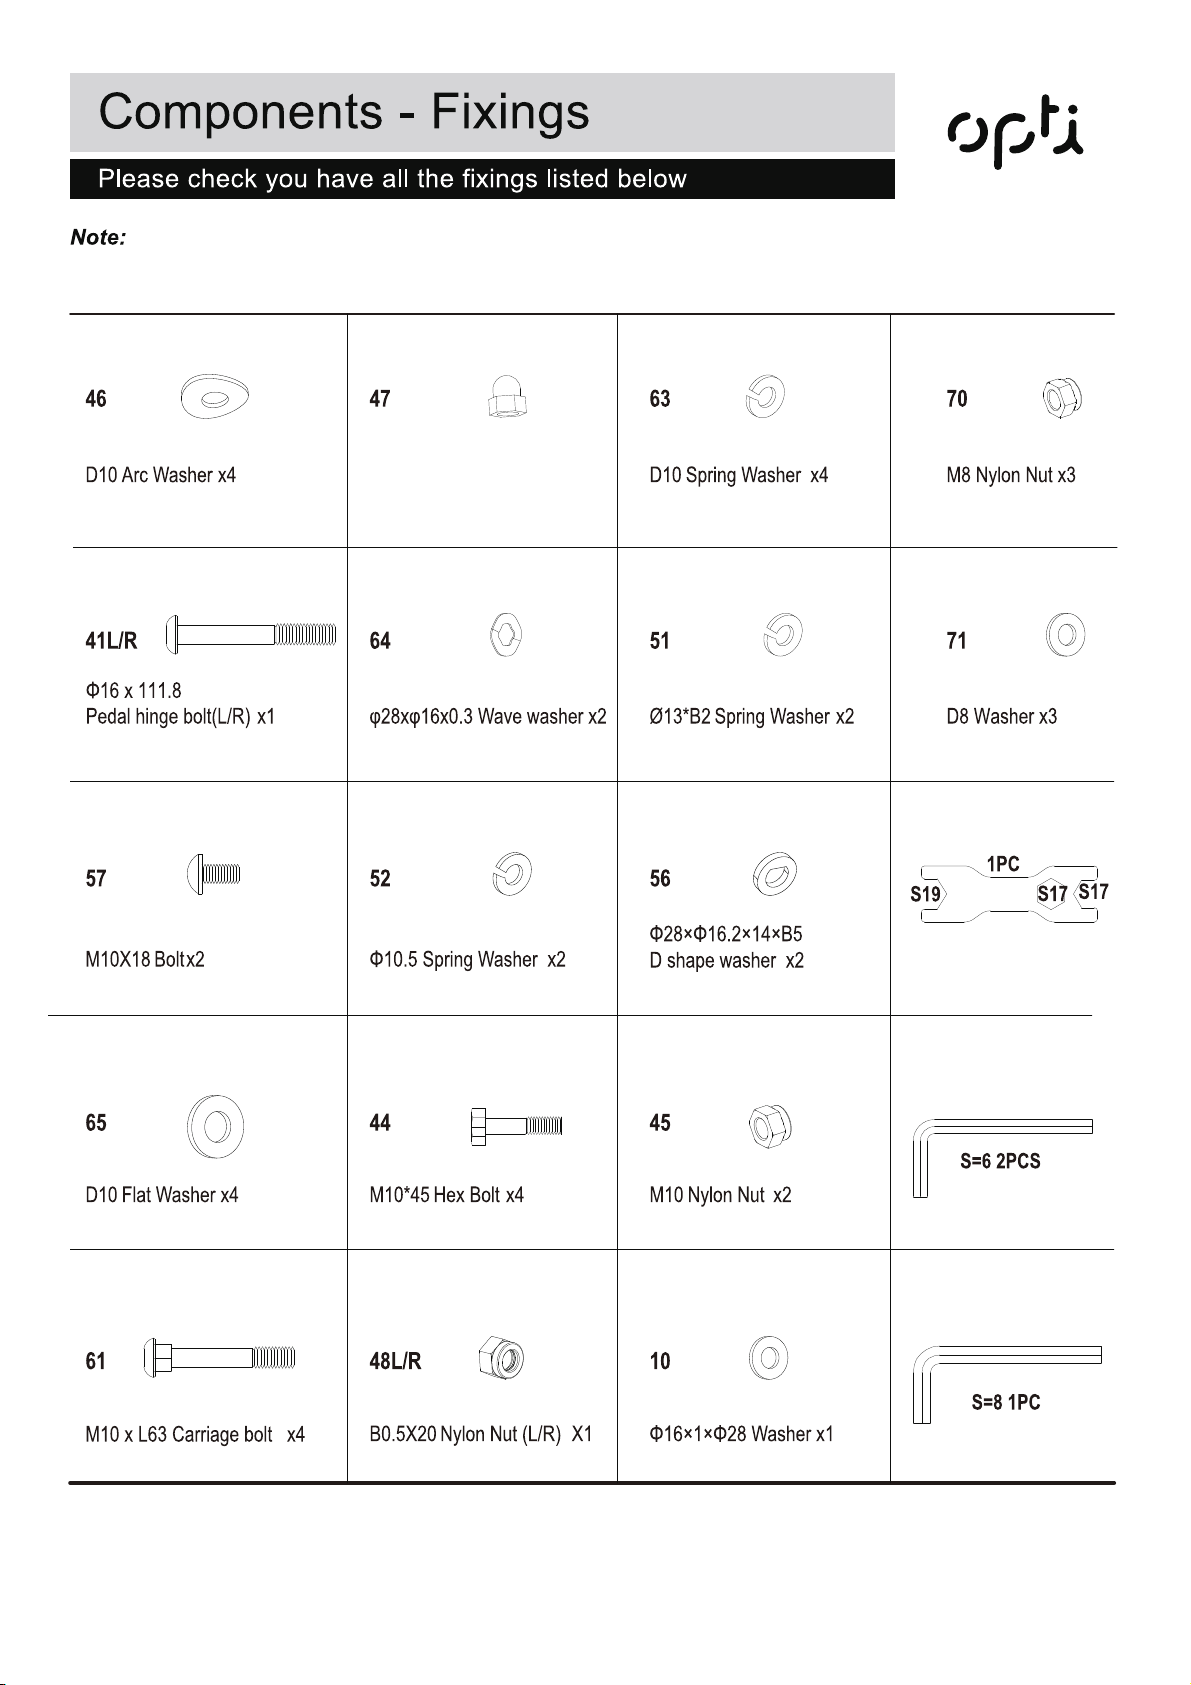
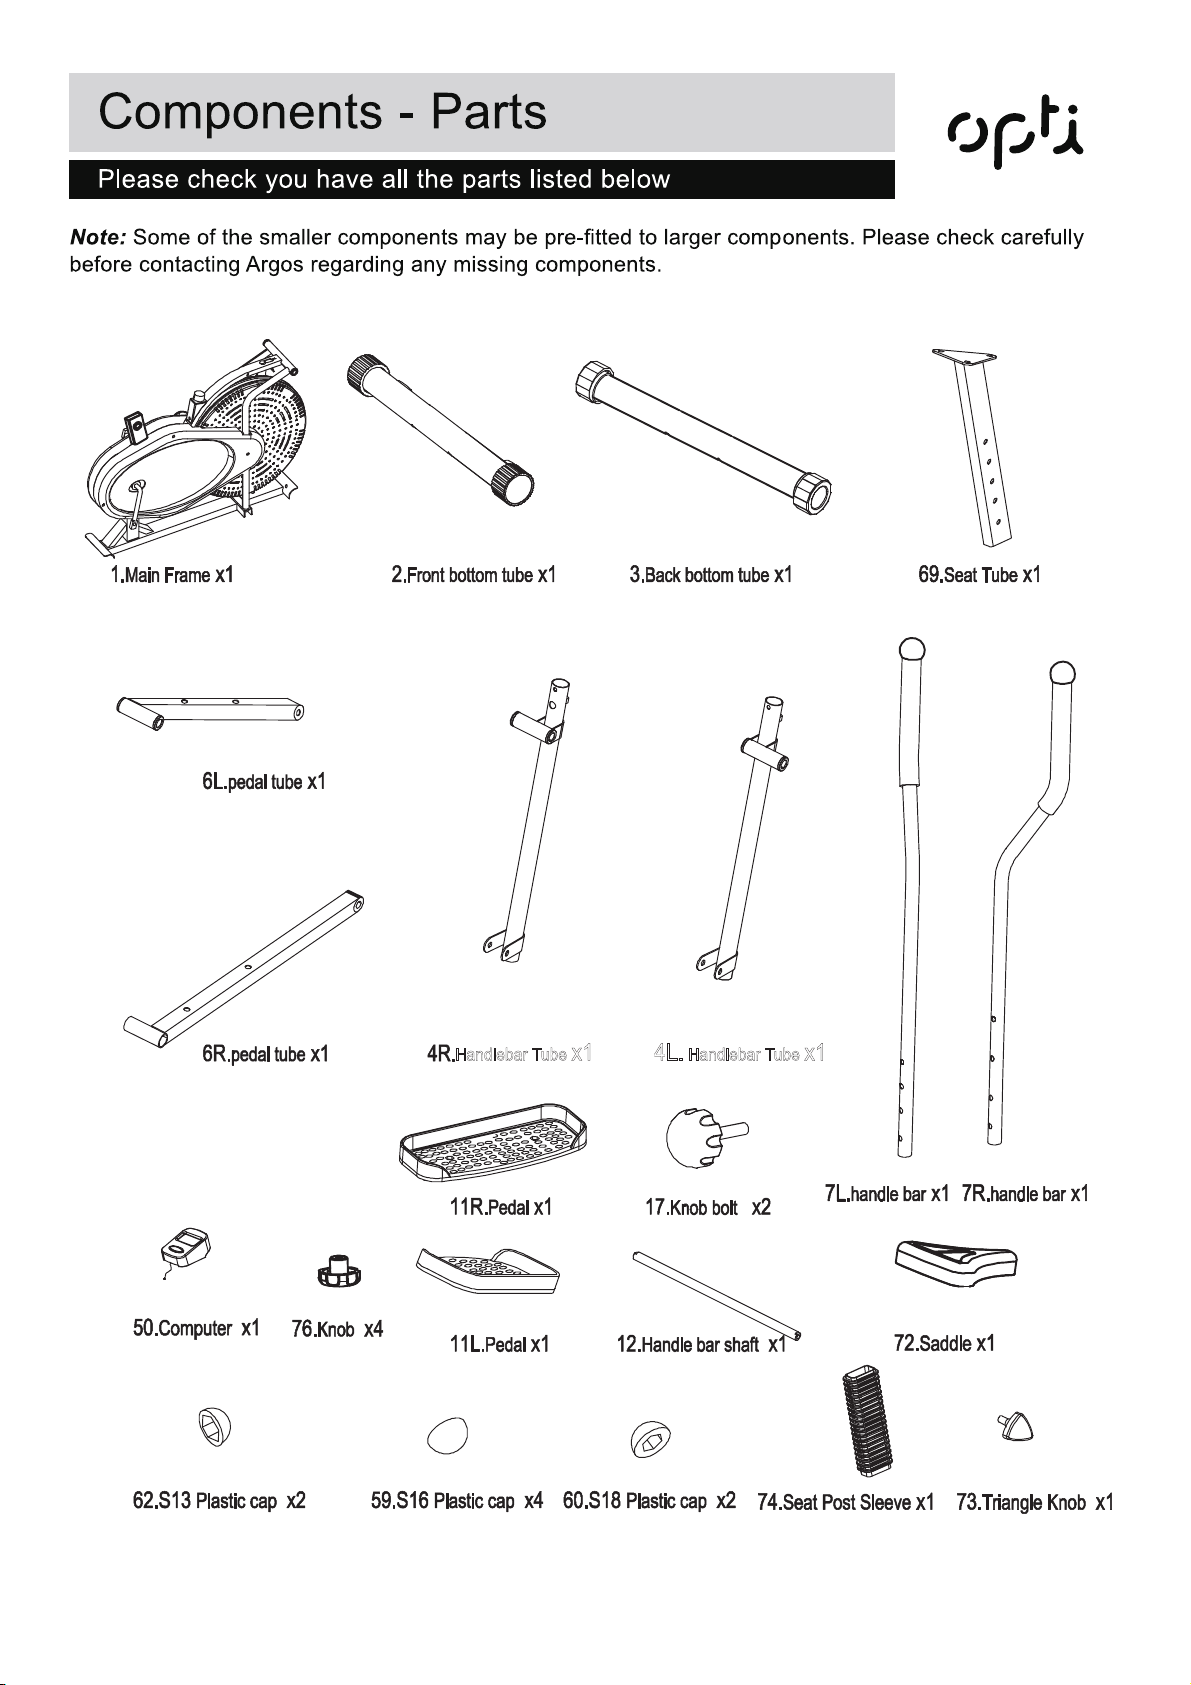
The quantities below are the correct amount to complete the assembly. In some cases more hardware may be
supplied than are required. Some of the fixings are pre-fitted to the larger components. Please check carefully
before contacting Argos regarding any missing fixings.
Dome Nut x4
5
Page 7
Total mass of the product is 25 kg. Total size of the equipment is (width) 63 c
m × (depth) 92 cm × (height) 151 cm.
6
Page 8

Dome
A. Insert the Handle bar shaft (12) through the Left Handlebar Tube (4L), the Main Frame (1)
and the Right Handlebar Tube (4R) as shown in the diagram. Then fix with
Tube
(27) using Wave washer
and attach to the Crank
Cover the hing bolt (41L/R)
with the S18 Plastic Cap (60) x 2. Cover the Bolts (49) and Nuts (45) at the front of the Pedal
tube (6L/R) with S16 Plastic Cap (59) x 4.
Note: To tighten the Pedal Hinge Bolt (41L/R), turn Counter-clockwise for the left side and turn
Clockwise for the right side.
7
Page 9

Insert the Handlebar
(7L/R) to the Handlebar
Tube (4L/R), adjusting
to your desired height
and locking with Knob
(17). Then cover the
nuts with plastic caps
(62).
8
Page 10

9
Page 11

Connect the console(50) wire with sensor (26)wire, after that insert the Console(50) to the Main
frame(1)
10
Page 12

counter-clockwise
When you try
.
clockwise
Using your elliptical trainer
11
Page 13

12
Page 14

Exercise Information
Before starting
Tailor your exercise program according to your physical condition. If you have been inactive for several years,
or are overweight, you must start slowly and increase your time on the equipment; a few minutes per workout
increase is advisable.
Initially, you may be able to exercise only for a few minutes in your target zone, however, your aerobic fitness
will improve over the next six to eight weeks. Don’t be discouraged if it takes longer. It’s important to work at
your own pace.
Please remember these essentials:
• Have your doctor review your training and diet programs to advise you of a workout routine you should adopt.
• Begin your training program slowly with realistic goals.
• Monitor your pulse frequently. Establish your target heart rate based on your age and condition.
• Set up your equipment on a flat even surface with adequate training area, as prescribed in this manual.
Exercise intensity
ts of exercising, it is important to exercise with the proper intensity. The intensity level can
be found by using your heart rate as a guide. For effective aerobic exercise, your heart rate should be maintained
at a level between 65% and 85% of your maximum heart rate as you exercise. This is known as your target zone.
You can find your target zone in the table below.
200
180
85% to Max
160
Cardiovascular
140
120
100
Beats per minute (bpm)
80
25
rst few months of your exercise program, keep your heart rate near the low end of your target zone
as you exercise. After a few months, your heart rate can be increased gradually until it is near the middle of
your target zone as you exercise.
To measure your heart rate, stop exercising but continue moving your legs or
ngers on your wrist. Take a six-second heartbeat
six-second heartbeat count is 14, your head rate is 140 beats per minute.
(A six-seconds count is used because your heart rate will drop rapidly when you
stop exercising.) Adjust the intensity of your exercise until your heart rate is at the
required level.
30 35 40 45 50 55 60 70
nd your heart rate. For example, if your
65% to 85%
55% to 65%
Up to 55%
Age
performance
Intermediate aerobic
Effective fat burning
13
Page 15

Exercise Information
Anterior Deltoid
Posterior Deltoid
Tibialis Anterior
14
Page 16

Exercise Information
Warming up and Cooling down
Each workout should include the following three parts:
1. A warm-up, consisting of 5 to 10 minutes of stretching and light exercise. A proper warm-up increases your
body temperature, heart rate, and circulation in preparation for exercise.
2
raining zone exercise, consisting of 20 to 30 minutes of exercising with your heart rate in your training
. T
zone. (Note: During the first few weeks of your exercise program, do not keep your heart rate in your training
zone for longer than 20 minutes.)
3
cool-down, with 5 to 10 minutes of stretching. This will increase the flexibility of your muscles and will
. A
help to reduce post-exercise muscle soreness.
Exercise Frequency
To maintain or improve your fitness, plan three workouts each week, with at least one day of rest between
workouts. After a few months of regular
desired. Remember, the key to success is make exercise a regular and enjoyable part of your everyday life.
Suggested Stretches
For a correct warm up, see the following basic stretching exercises. Move slowly as you stretch, never
bounce.
exercise, you may complete up to five workouts each week, if
Toe touch stretch
Stand with your knees bent slightly and slowly
bend forward from your hips. Allow your back
and shoulders to relax as you reach down
toward your toes as far as possible.
Hold for 15 counts, then relax.
Repeat 3 times.
Stretches: Hamstrings, back of knees and back.
Hamstring stretch
Sit with one leg extended. Bring the sole of the
opposite foot toward you and rest it against the
inner thigh of your extended leg. Reach toward
your toes as far as possible.
Hold for 15 counts, then relax.
Repeat 3 times for each leg.
Stretches: Hamstrings, lower back and groin.
15
Page 17

Exercise Information
Calf/achilles stretch
With one leg in front of the other, reach forward
and place your hands against a wall. Keep your
back leg straight and your back foot flat on the
floor. Bend your front leg, lean forward and move
your hips toward the wall.
Hold for 15 counts, then relax.
Repeat 3 times for each leg. To cause further
stretching of the achilles tendons, bend your
back leg as well.
Stretches: Calves, achilles tendons and ankles.
Quadriceps stretch
With one hand against the wall for balance,
reach back and grasp one foot with your other
hand. Keeping your bent knee pointing directly
heel towards your buttock until you feel a gentle
stretch in the target area.
Hold for 15 counts, then relax.
Repeat 3 times for each leg.
Stretches: Quadriceps and hip muscles.
Inner thigh stretch
Sit with the soles of your feet together and your
knees outward. Pull your feet toward your groin
area as far as possible.
Hold for 15 counts, then relax.
Repeat 3 times.
Stretches : Quadriceps and hip muscles.
16
Page 18

Exercise Information
Console operation
17
Page 19

1.The safety level of the equipment can only be
maintained if it is examined regularly for
damage and wear e.g. ropes, pulleys and
4. The equipment can be cleaned using a damp
cloth and mild non-abrasive detergent.
Do not
use solvents.
connection points.
2. Lubricate moving parts with light oil periodically
to prevent premature wear. To prevent damage
to the computer, keep liquids away and keep it
out of direct sunlight.
5. Do not
yourself. Should you have any difficulty
with assembly, operation or use of your
exercise product or if you think that you
may have parts missing, contact the
attempt to repair this equipment
Customer Helpline:
3.
Inspect and tighten all parts before using the
0345 600 1714 www.argos-support.co.uk
equipment. Replace defective components
immediately and/or keep the equipment out of
use until repair.
Pay special attention to components most
Guarante
For guarantee purposes, please retain
your purchase receipt.
e:
susceptible to wear.
Information for Users on Disposal of old Equipment and Batteries
These symbols indicate that equipment with these
symbols should not be disposed of as general household
waste. If you want to dispose of the product or battery,
please consider the collection systems or facilities for
appropriate recycling.
Notice: The sign Pb below
the symbol for batteries
indicates that this battery
contains lead.
Battery
Products
18
Page 20

19
Page 21

1
2
3
4L/R
5
6L/R
7L/R
8L/R
9
10
11L/R
12
13
14
15
16
17
18
19
20
21
22
23
24
25
26
27
28
29
30
31
32
33
34
35
36
37
38
Main frame
Front bottom tube
Back bottom tube
Handle tube
Chain 25Hx22L
pedal tube
handle bar
chain cover
Fan cover
Washer Φ16x1xΦ28
Pedal
Handle bar shaft
Front caps
Foam grips
Cap
Plastic bushing
Knob bolt
Plastic roller
Steel bushing
Steel bushing
Nut
Fan wheel axle
Nut
Plastic cover
Nut
Sensor
Crank
Bolt ST4.2x18
Washer
Nut
Collar ball
Collar housing
Nut
Chain
Belt
Tension control
U Sharp Washer
Bolt ST4.2x20
1
1
1
1pr.
1
1pr.
1pr.
1pr.
1
1
1pr.
1
2
2
2
2
2
2
10
4
2
1
5
2
2
1
1
6
1
1
2
2
1
1
1
1
2
2
39
40
41R/L
42
43
44
45
46
47
48L/R
49
50
51
52
53
54
55
56
57
58
59
60
61
62
63
64
65
66
67
68
69
70
71
72
73
74
75
76
Bolt ST4.2x20
Bolt
Pedal hinge bolt Φ16*111.8
Bolt
Nut
Hex Bolt M10X45
Nylon Nut M10
Arc washer D10
Dome nut M10
Nylon nut B0.5X20
Bolt M10X55
Console
Spring washer 13*B2
Spring washer Φ10.5
Chain wheel
Nylon nut
Washer
D shape washer Φ28xΦ16.2x14xB5
Bolt M10X18
Bolt
Plastic cap S16
Plastic cap S18
Carriage bolt M10×L63
Plastic cap S13
Spring washer D10
Wave washer Φ28xΦ16x0.3
Flat washer D10
Nut
magnet
End caps
Seat tube
Nylon nut M8
Washer D8
Saddle
Triangle knob
Seat post Sleeve
Cap
Knob
3
1
1pr.
2
2
4
2
4
4
1pr.
2
1
2
2
1
2
1
2
2
2
4
2
4
2
4
2
4
1
1
2
1
3
3
1
1
1
4
4
20
Page 22

 Loading...