

Page 1
Retain For Future Reference
Topline
TM
USER GUIDE & CODE BOOK
Home Theater
Universal Remote Control
URC-8550
Page 2

BASIC FUNCTIONS
ABOUT YOUR Topline 8…
3
INSTALLING THE BATTERIES…
4
FEATURES AND FUNCTIONS…
6
LANGUAGE SELECTION…
8
SETTING THE CLOCK…
9
SETTING UP YOUR DEVICES…
Setting Up Your TV…
10
Setting Up Your Other Devices…
11
Searching For Your Code
13
Recording Your Codes...
14
REASSIGNING THE DEVICE KEYS…
15
THE SCAN KEY…
16
TELETEXT & FASTEXT…
16
ADVANCED FUNCTIONS
HOME THEATER…
Setting up the Home Theater Key…
17
SEQUENCES…
Home Theater Power Sequence…
19
Installing Other Sequences…
20
Deleting a Sequence…
20
TIMED SEQUENCES…
21
Recording When Your Not Home…
21
Deleting a Timed Sequence…
22
THE SHIFT KEY…
Shifted Functions
22
Sleeptimer…
23
VOLUME LOCK...
25
CHANNEL +/- SIMULATION...
26
CLEAR ALL...
27
TROUBLE SHOOTING...
28
CUSTOMER SERVICE…
Product Support…
29
Key Magic…
30
Telephone Upgrade…
30
SET-UP CODES
Televisions
31
Video Recorders
34
Satellite Receivers
35
Cable Converters
37
Video Accessories
37
CD Players, Mini Disc Players
37
Phonographs
38
Miscellaneous Audio
38
Home Automation
38
Audio Amplifiers
38
Tuners
38
Audio Cassette Players
38
Laser Disc Players
39
Digital Audio Tape
39
Table of Contents
2
Page 3

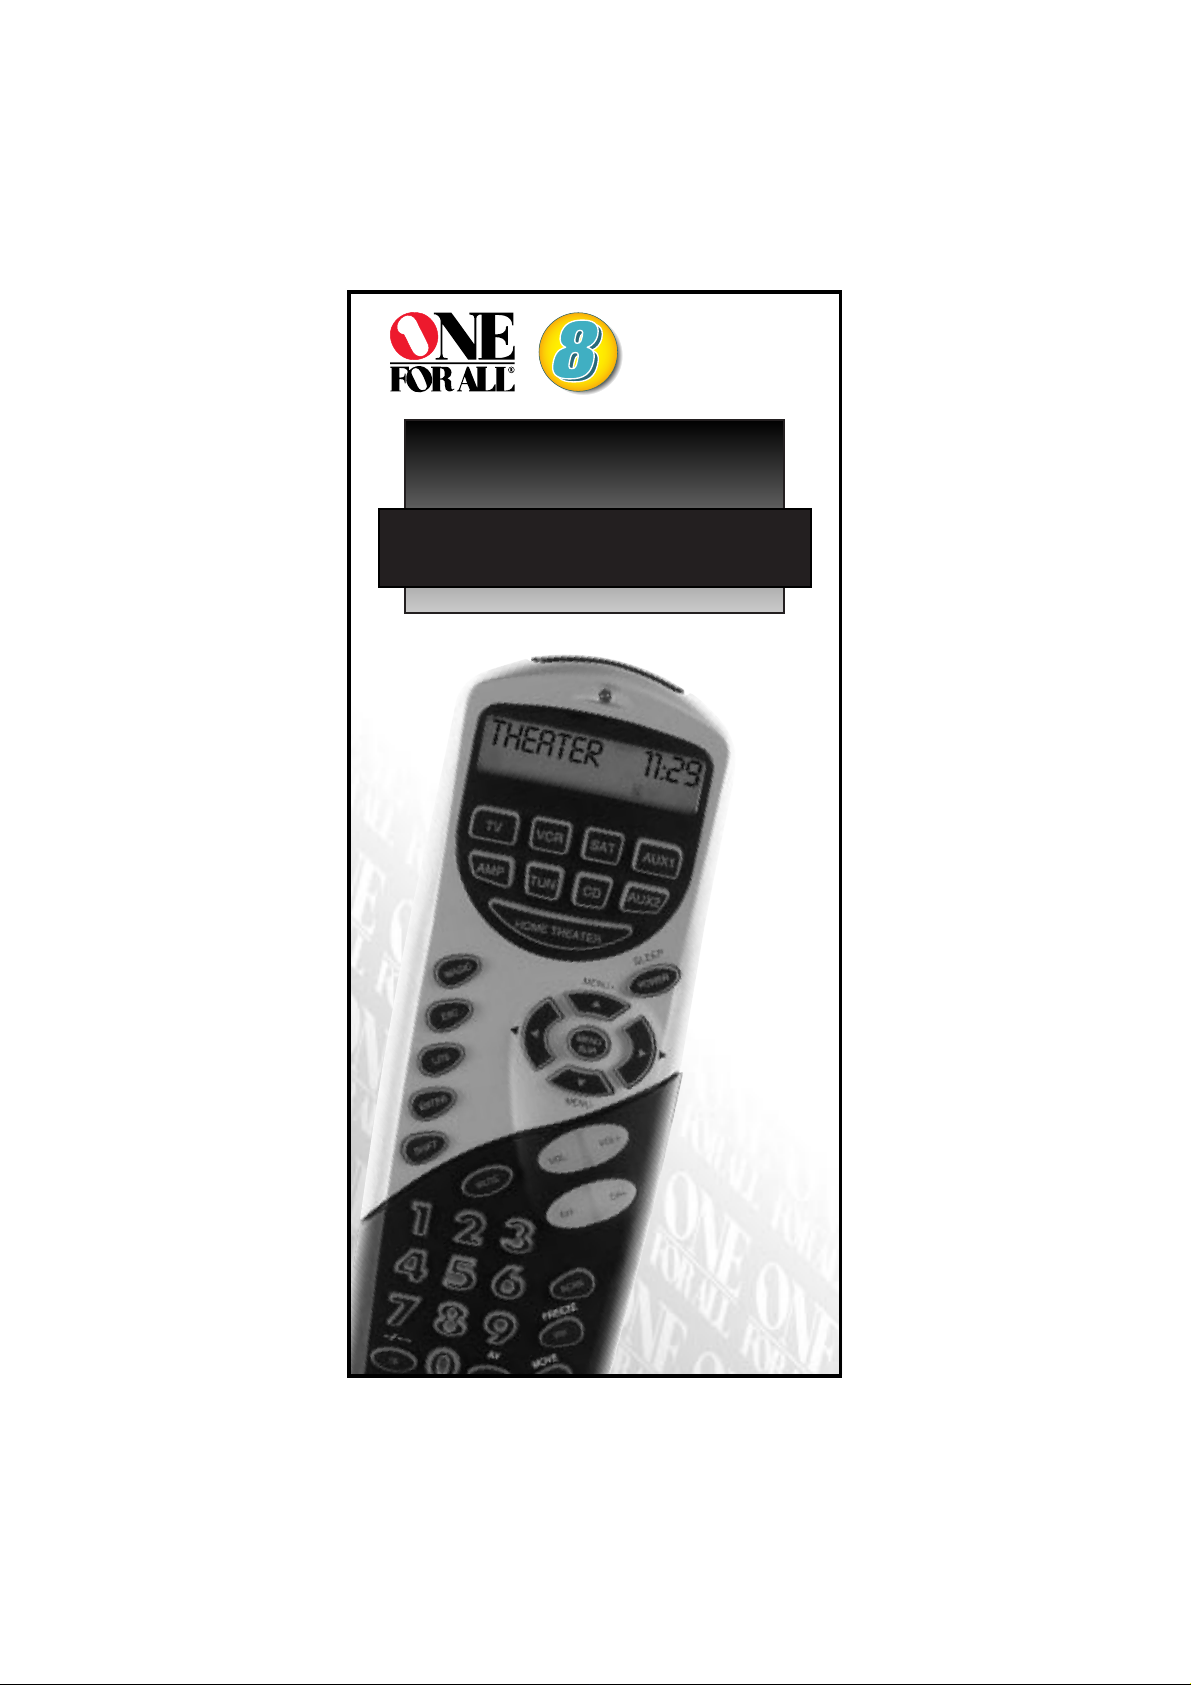
Thank you for purchasing the ONE FOR ALL Topline 8 Home Theater
Universal Remote Control. Your Topline 8 package contains:
• Your Topline 8 remote control
• Your Topline 8 manual
Your User Guide & Codebook is divided into three parts: Basic Functions,
Advanced Functions and Set-Up Codes. You may need this guide again in the
future, so please be sure to keep it.
Your Topline 8 needs four new AAA/LRO3 batteries.
Your ONE FOR ALL Topline 8 is designed to let you use one remote to
operate your Video and Audio equipment; any device designed to be
operated by an infrared signal. This also includes those devices which
operate over 100 kHz. You can choose any combination of 8 devices you
would like to operate. Also, what makes the Topline 8 even more unique is
it allows you to control your home theater system with the touch of a key
by using the Topline 8’s Home Theater mode key. The following pages
explain in simple steps how to customize the Topline 8 your home
entertainment environment.
3
About your Topline 8
Page 4
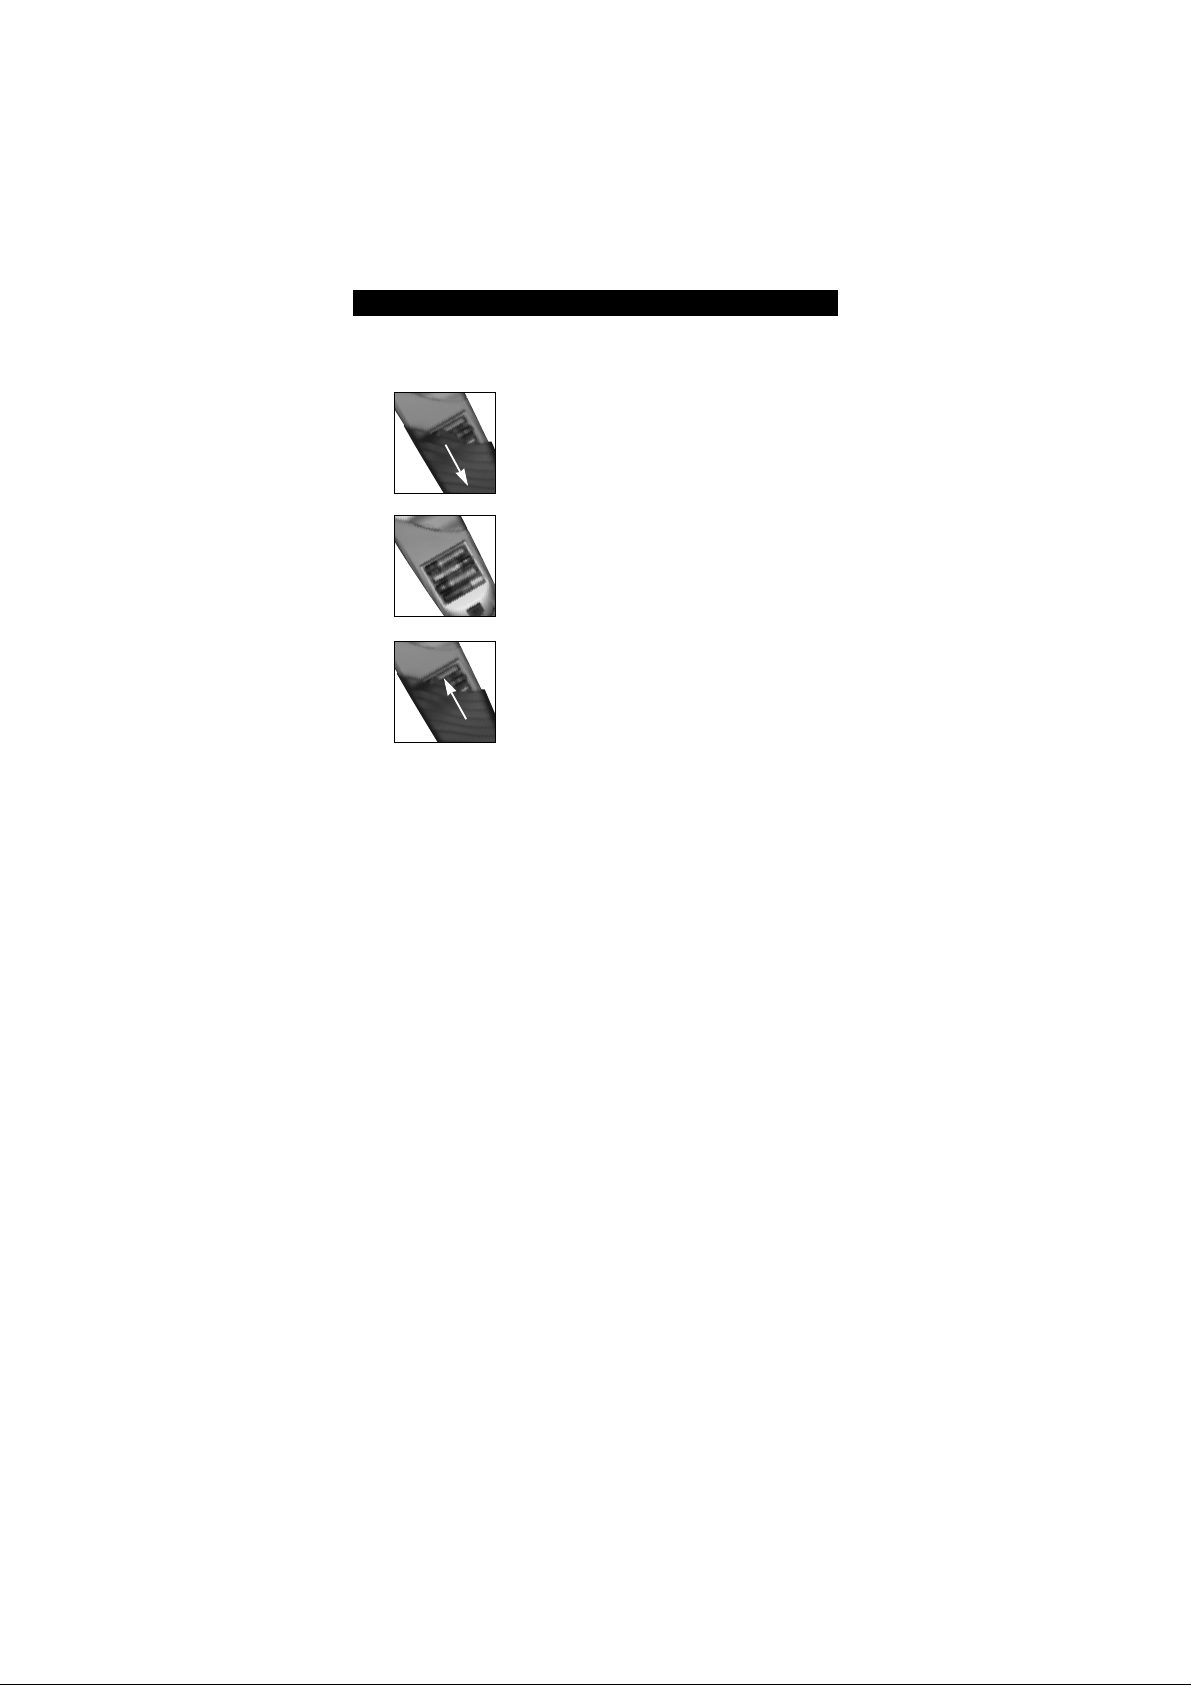
Your Topline 8 requires four (4) new alkaline AAA/LRO3 batteries. To install
the batteries:
Remove the battery cover by pressing down on the
bottom portion and sliding the cover off.
Match the batteries to the + and - marks inside the
battery case, then insert the batteries.
Slide the battery cover back into place.
Once the batteries are inserted all the segments in the display screen will
show. If the display screen is blank or if the screen reads [BATTERY LO], the
batteries are running low and you must replace them with fresh batteries to
ensure proper functioning. The Topline 8’s internal back-up batteries ensure
that programming information is not lost if the batteries are changed;
however, you will need to reset the clock upon changing batteries
Installing the Batteries
4
2
3
1
Page 5
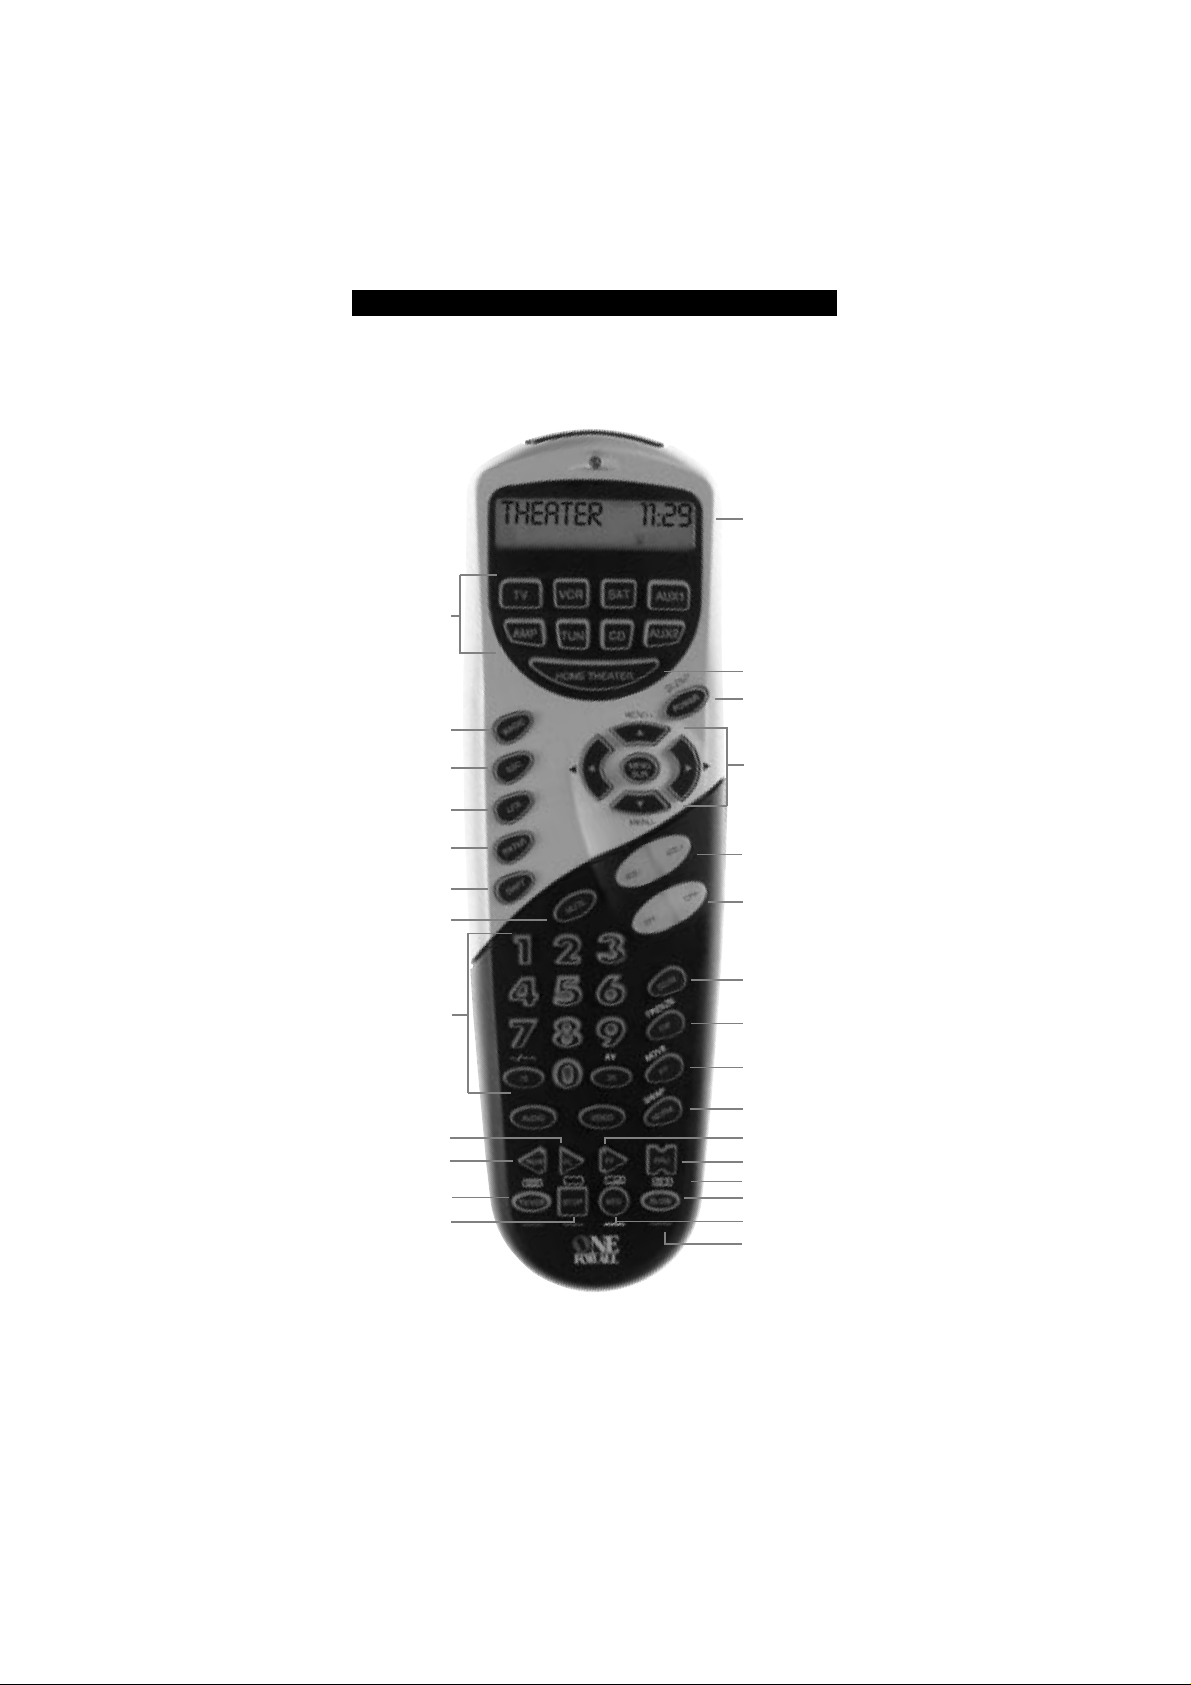
`Device
Keys
TV/VCR
Power
Home
Theater Key
Volume
Scan
Picture-inPicture
Previous
Program
Normalize
Channel
Menu/Surround
Sound Keys
Stop
Pause
Slow
Play
Fast Forward
Record
Rewind
Number
Keys
Magic
ESC
Lite
Enter
Shift
Mute
LCD
Teletext
Fastext
Basic Features
5
Page 6
6
FEATURES AND FUNCTIONS
Key Function
The LCD screen guides you through setting up and
operating your home entertainment equipment.
Device Keys
The TV, VCR, SAT, AMP, TUN, CD, AUX1 and AUX2 keys
select the device to be controlled. For example, pressing
the TV key allows the remote to control the functions of
your Television, after pressing VCR you can operate your
Video, etc. For more detailed information, please see page
10.
Home Theater Key
This key is used to select the Home Theater mode of the
Topline 8. See page 17 for more information.
Power
The Power key controls the same function it did on your
original remote. When SHIFT is pressed first, this key is
also used to access the Sleeptimer of your device (see page
22).
Menu/Surround Sound Keys
If available on your orginal remote, these directional keys
are used to access the menu function, programming
guides or the surround sound of your device.
During set-up and programming your Topline 8, the up
and down keys are used to scroll through the LCD
screens.
Magic
The MAGIC key is used to set up your Topline 8 and to
access the menu and special features.
Esc
The Esc (Escape) key is used to exit the LCD screen and go
back to normal operation.
Lite
The LITE key is used to turn On and Off the Topline 8’s
backlit keypad and LCD. Press the LITE key once to turn on
the backlight feature. The backlight will stay on for
approximately ten seconds each time a key is pressed. To
deactivate the backlight, press the LITE key again.
Enter
The Enter Key is used to make selections on the LCD
menu. It is also used to make selections in your on-screen
programming menus.
Shift
The Shift key accesses advanced features which are
located under the following keys: POWER, NORM, PP, PIP,
VOL+/-, CH+/-, MENU+/-, left, right. This key can also be
used for programming advanced functions on the Topline
8 keypad.
Basic Features
Page 7
7
Key Function
Volume +/-, Channel +/-, Mute
These keys operate just as those on your original remote
control. When SHIFT is pressed first, volume and channel
can be used to control color and brightness (see page 22).
Number Keys
The Number keys (0-9, 10, 20) provide functions just like
your original remote, such as direct access programme
selection. If your original remote uses one/two digit input
switching (-/-- symbol), this function can be obtained by
pressing the -/-- key, which is the same as the 10 key.
If your original remote used an AV key, this can be found
by pressing the 20 key.
Scan
The Scan key allows you to easily browse through the
programmes on your TV, VCR or Satellite. See page 16 for
more details.
PIP
If available on your original remote, the PIP key will access
the Picture-in-Picture feature of your TV, VCR and SAT.
PP (Previous Programme)
Operates the same as the Previous Programme key on
your original remote (can also be called Last Channel or
Recall).
Normalize
If available on your original remote, the Normalize key
returns all settings of your television to their standard levels.
Audio, Video
These keys can be used for programming sequences. See
page 19 for more details.
Video Recorder Keys
After pressing VCR, these keys operate the functions of
your VCR. To prevent accidental recording, the Record key
must pressed twice to start recording.
Teletext/Fastext Keys
After pressing the TV key, the top row of VCR keys are
used to operate the main Teletext functions of your
Television. The symbols below the top row of keys are for
Teletext. Of course, your Television must be Teletext
capable. For an explanation of the teletext symbols, please
refer to page 16.
After pressing the TV key, the bottom row of VCR keys
marked red, green, yellow and blue allow you to access
the Fastext functions of your television. Again, your
television must be fastext capable to operate these
functions. For a more detailed explanation of how
Teletext and Fastext work, please refer to the manual of
your Televison.
Also, some devices require you to use the fastext keys to
operate menu control. If so, these keys will function the
same way as on your orginal remote.
Basic Functions
(red)
(green)
(yellow)
(blue)
-/--
AV
Page 8

8
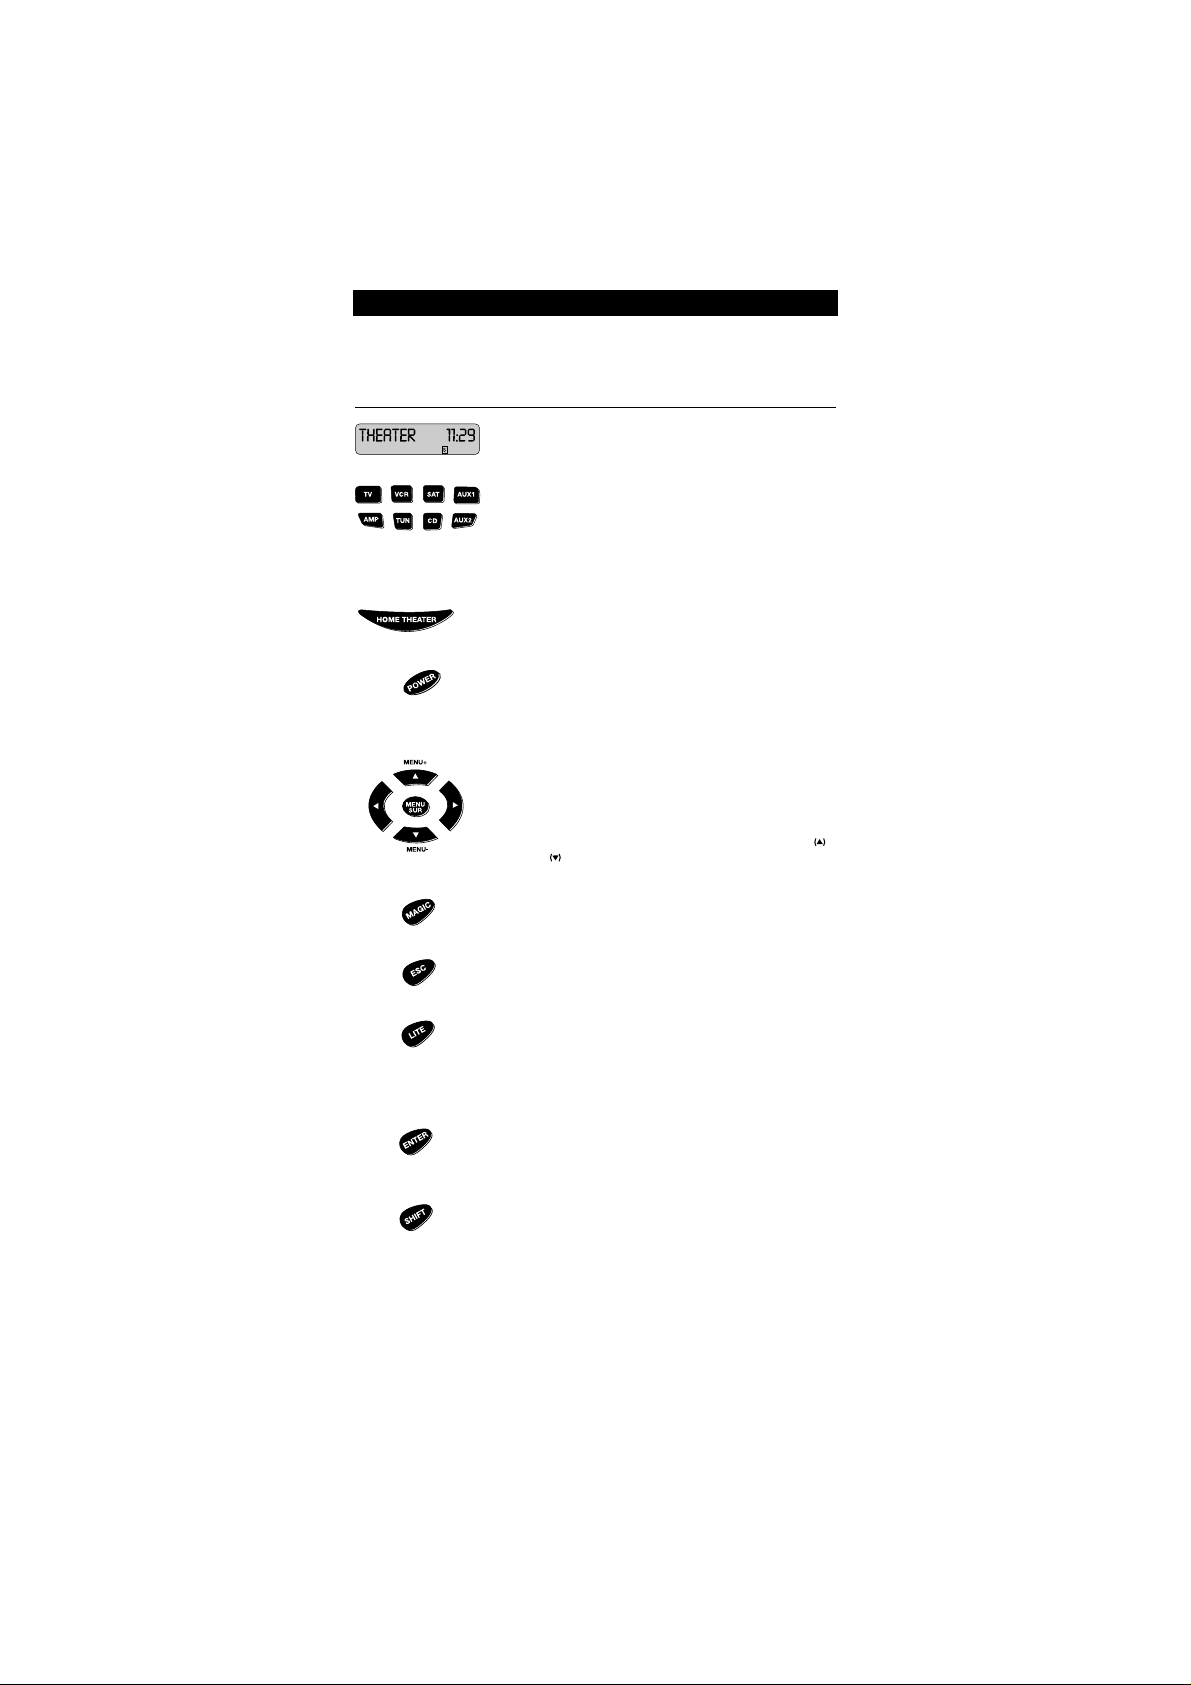
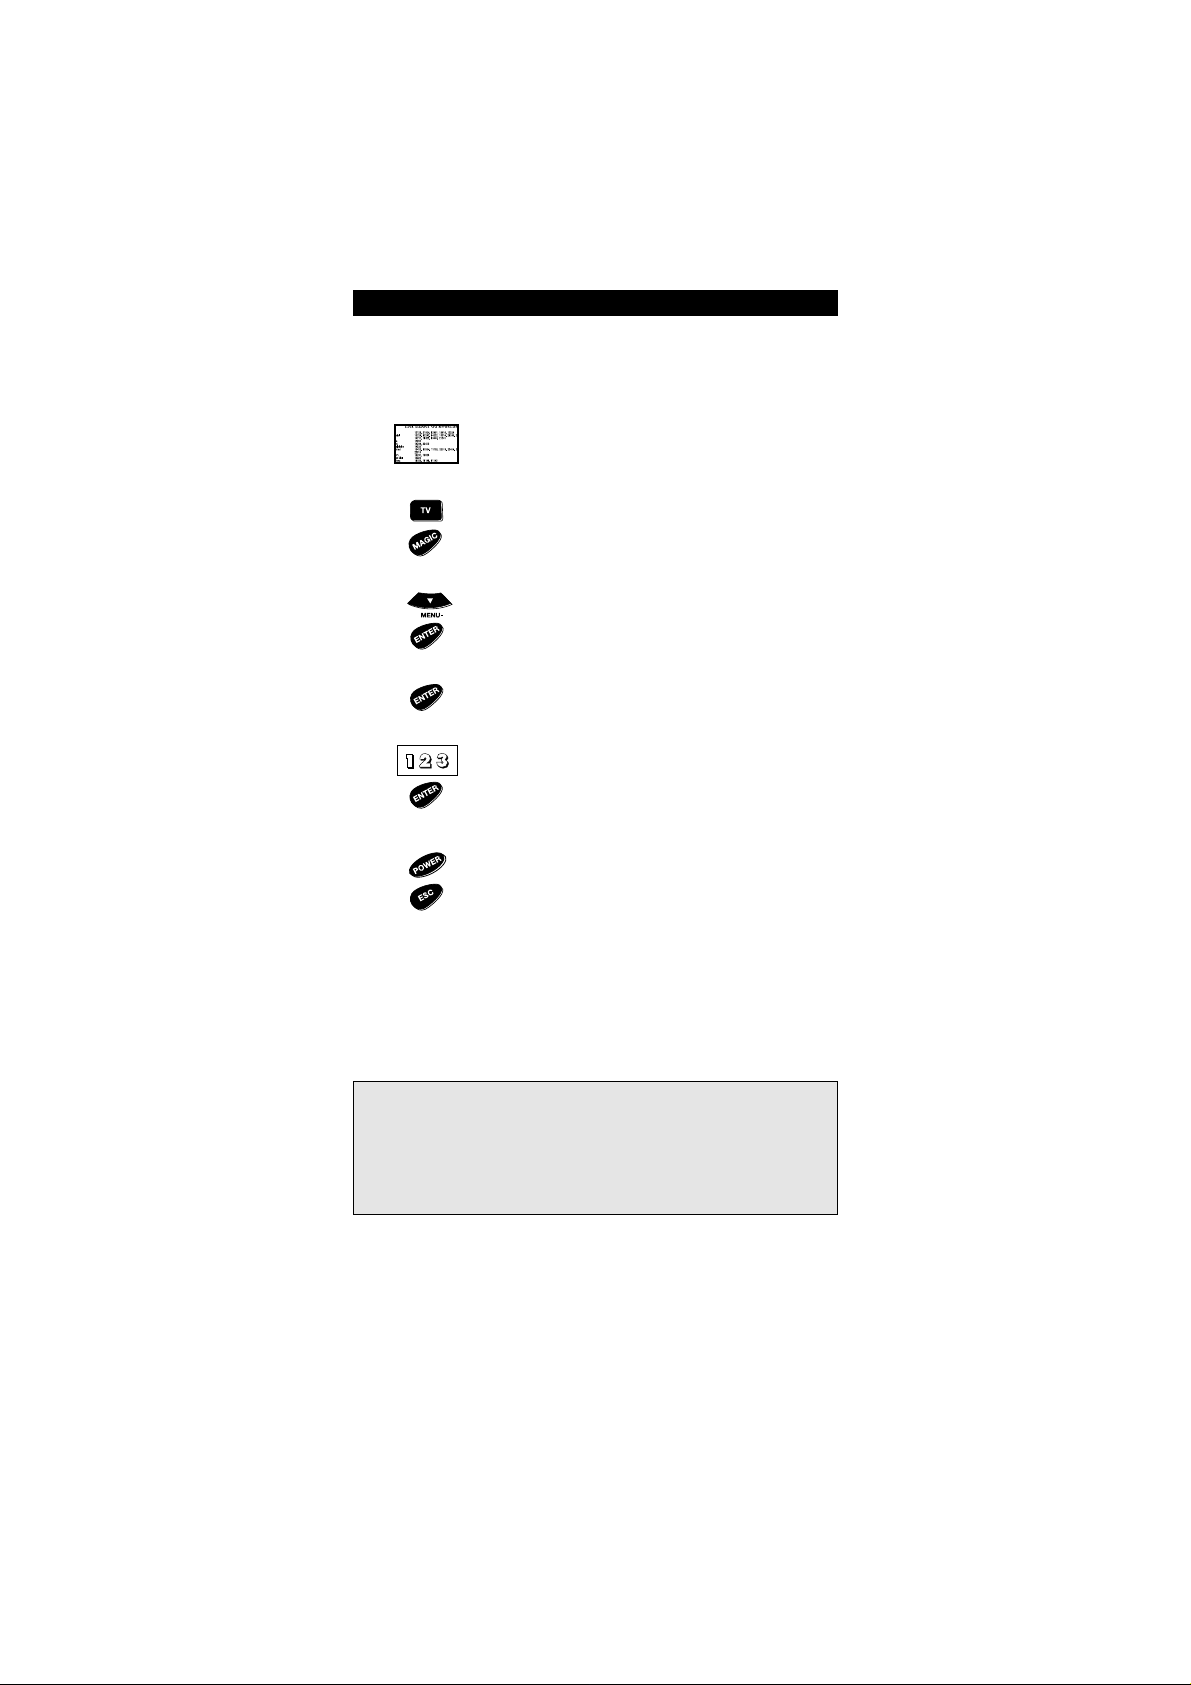
LANGUAGE SELECTION
It is possible to choose between three languages for the text which is
displayed on the LCD of the Topline 8. You can chose between English,
French and German. The default setting is English. To change the language
selection, follow the procedure below.
Press and hold the MAGIC key until the display screen
changes from [DEVICE and the TIME] to [TIMED SEQ].
Press MENU- twice, the display will change to
[CONFIGURE]. Press ENTER and the display will change to
[THEATR SEL].
Press MENU+ two times and the display will read
[LANGUAGE]. Press ENTER.
The display will read [ENGLISH]. Use the Menu- key to
cycle through the language choices. When you get to the
desired language, press ENTER. The display will return to
the main screen.
Basic Functions
Notes:
- If you make a mistake in your selection, press ESC and repeat the
procedure starting with step number 1.
- When you replace the batteries, the language you have selected will stay
programmed.
1
2
4
3
Page 9

9
SETTING THE CLOCK
The Topline 8 comes with both a 24hr clock and a 12hr clock. After installing the
batteries for the first time, the Topline 8 will default to the 24hr clock setting. To
set the clock, follow the procedure below. It is also possible during this
procedure to change to a 12hr clock setting, if desired.
Press and hold the MAGIC key until the display screen
changes from [DEVICE and the TIME] to [TIMED SEQ].
Press MENU- twice, the display will change to
[CONFIGURE]. Press ENTER and the display will change to
[THEATR SEL].
Press MENU- one time and the display will read [TIME
SETUP]. Press ENTER.
The display will read [24HR CLOCK]. If this is the setting
you want, press ENTER, OR if you wish to change to a
12hr clock, press MENU- and the display will read [12HR
CLOCK]. Then press ENTER.
The display will change to [TIME] and the first digit in the
clock will blink. Enter the first digit of the time, then the
next digit will blink. Continue entering the time until all
four digits of the clock have been set.
If you are using a 24hr clock, press ENTER. If you are using
a 12hr clock, the AM/PM will blink. Press MENU- to toggle
between AM and PM. Once this is selected, press ENTER.
The display will then change to the day of the week. Use
the MENU- key to cycle through the days until the proper
day is displayed on the screen, then press ENTER. The
display will return to the main screen [DEVICE and the
TIME] showing the selections you have made.
Basic Functions
Notes:
- If you make a mistake in your selection, press ESC, and repeat the
procedure starting with step number 1.
- When you replace the batteries, you will need to set the clock again.
1
2
3
4
or
()
5
6
7
or
(
)
Page 10
10
SETTING UP YOUR TV
To set up the Topline 8 for your television:
Find your Television code in the Set-Up Code section
(starting on page 31). Codes are listed by brand name. The
most popular code is listed first. Make sure your Television
is switched on; any programme is fine.
Press the TV key, then press and hold the MAGIC key
until the display screen changes from [TV and the TIME] to
[TIMED SEQ].
Press MENU- once, the display will change to [CODE
SETUP]. Press ENTER and the display will change to [DEV
SET UP].
Press ENTER and the display will change to [TV].
Enter your three-digit TV code using the number keys,
then press ENTER.
Aim the Topline 8 at your TV and press POWER. Your
Television should turn off. If your TV turns off, press the
ESC key to return to the main screen [TV and the TIME].
If your TV does not turn off, enter the next code in the
list then press ENTER. Press POWER to see if your TV turns
off. Once your TV turns off, you have found the correct
code. Press the ESC key to return to the main screen [TV
and the TIME].
Write your code in the three boxes on page 14 for easy future reference.
Basic Functions: Setting Up Your Devices
Notes:
- To control your Television, [TV] must be displayed on the screen. This can
be obtained by pressing the TV key.
- To set up more than one device, before pressing the ESC key during step
6, you can press the next device key you want to program and enter the
code for that device.
- If your TV does not respond, try every code listed for your brand during
step 6. If none of the codes listed operate your TV, try the Search Method
described on page 13, even if your brand is not listed at all.
1
2
4
5
3
6
Page 11
11
SETTING UP YOUR OTHER DEVICES
To set up the Topline 8 for your other devices:
Find the code for your device in the Set-Up Code section
(starting on page 31). Codes are listed by brand name. The
most popular code is listed first. Make sure your device is
turned on.
Press the Device key on the Topline 8 for the device you
wish to control. Devices can be found under the following
key (for example to set up a Cable Converter you would
press SAT):
LCD
Device Abbreviation Key
Television TV
Video Recorder VCR
Satellite Receiver SAT
Cable Converter CABLE
Video Accessories VID AC
CD Player CD
Phonographs PHONO
Audio Amplifier AMP
Tuner TUNER
Miscellaneous Audio MISC AU
Home Automation HOM CT
Amplifier AMP
Tuner TUNER
Audio Cassette Player TAPE
Laser Disc Player LP
Digital Audio Tape DAT
Basic Functions
1
2
Page 12
12
Then, press and hold the MAGIC key until the display
screen changes to [TIMED SEQ].
Press MENU- once, the display will change to [CODE
SETUP]. Press ENTER and the display will change to [DEV
SET UP].
Press ENTER. Then, if necessary, use the MENU- key to
locate the device you want based on the chart above (for
example, if you are setting up a Cable Converter, you
would need to press MENU- once until CABLE is displayed
on the screen).
Then, enter your three-digit device code using the
number keys, then press ENTER.
Aim the Topline 8 at your device and press POWER. Your
device should turn off. If your device turns off, press the
ESC key to return to the main screen.
If your device does not turn off, enter the next code in
the list then press ENTER. Next, press POWER to see if
your device turns off. Once your device turns off, you have
found the correct code. Press the ESC key to return to the
main screen.
Write the code for your device(s) in the boxes on page 14 for easy future
reference.
Basic Functions
Notes:
- To control your device, press the device key first.
- Only one device (CD, amplifier, cassette, etc.) can be assigned to a device
key. If your original remote operates more than one device (for example,
a receiver, CD player and cassette player in one remote), you will need to
set up each device separately.
- If your device’s original remote control does not have a power key, press
PLAY instead of POWER during step 7. (Make sure a tape or disc is
inserted.)
- To set up more than one device, before pressing the ESC key during step
7, you can press the next device key you want to program and enter the
code for that device.
- If your Device does not respond, try every code listed for your brand
during step 7. If none of the codes listed operate your Device, try the
Search Method described on page 13, even if your brand is not listed at
all.
4
5
6
7
3
Page 13

13
SEARCHING FOR YOUR CODE
If your device did not respond to the Topline 8 after you have tried all the
codes listed for your brand, try the Search Method described below. The
Search Method may also work if your brand is not listed at all.
For example, to search for the code to operate your TV:
Make sure your TV is switched on, any channel is fine.
Press the TV key, then press and hold the MAGIC key
until the display screen changes from [TV and the TIME] to
[TIMED SEQ].
Press MENU- once, the display will change to [CODE
SETUP]. Press ENTER and the display will change to [DEV
SET UP].
Press MENU- once, the display will change to [DEV
SEARCH]. Press ENTER and the display will change to [TV
and code].
Note: code represents the last 3-digit code which was
entered prior to starting the search. This code will now be
displayed the screen.
Aim the Topline 8 at your TV and press POWER. If your TV
turns off, press ENTER to lock in your code. The display
will then return to the main screen. If your TV does not
turn off, press MENU+. The next available code will be
displayed on the screen. Press POWER again. If your TV
turns off, press ENTER. If your TV does not turn off,
continue pressing MENU+ and POWER until your
Television responds.
Once your TV turns off, press ENTER to lock in your code
and return to the main screen.
Basic Functions
Notes:
- Be patient. You may need to alternate between ENTER and POWER many
times. When you have reached the end of the list, the display will read
(LIST END). Remember you must aim the Topline 8 at your device the
entire time you are searching for your code.
- To search for the code for your other devices, repeat the steps above,
only substitute the appropriate device key in place of “TV” during step 2.
- If you are searching for the code for a VCR, CD Player, Laser Disc Player
or DVD Player, you may want to use PLAY instead of POWER during step
5 (make sure a tape or disc is inserted.).
1
2
4
3
5
6
(
)
+
Page 14

RECORDING YOUR CODES
After you have set up the Topline 8 with your devices, you should r ecord
your codes. If you are not sure which code the Topline 8 responded to, you
can display the code on the LCD for each device you have set up.
For example, to display your TV code:
Press the TV key, then press and hold the MAGIC key
until the display screen changes from [TV and the TIME] to
[TIMED SEQ].
Press MENU
- once, the display will change to [CODE
SETUP]. Press ENTER and the display will change to [DEV
SET UP].
Press MENU- twice, the display will change to [DEV
NUMBER]. Press ENTER and the display will change to [TV
and your code]. Record your code below.
Once you have recorded your TV code in the space
provided below, continue by pressing the next device key
and record the code below.
Press ESC to return to the main screen.
TV CODE
VCR CODE
SAT/CBL CODE
CD CODE
AMP CODE
TUNER CODE
OTHER
OTHER
14
Basic Functions
■■ ■■ ■■
■■ ■■ ■■
■■ ■■ ■■
■■ ■■ ■■
■■ ■■ ■■
■■ ■■ ■■
■■ ■■ ■■
■■ ■■ ■■
1
2
3
4
5
Page 15

REASSIGNING THE DEVICE KEYS
The Topline 8 can operate any combination of eight devices you want (for
example: 2-TVs, 2-VCRs, 1-Satellite, 1-Amplifier, 1-Tuner and 1-CD Player). To
do this, you must reassign the necessary keys.
For example, to place a second TV on the AUX2 key:
Press and hold the MAGIC key until display screen
changes from [DEVICE and the TIME] to [TIMED SEQ].
Press MENU- twice, the display will change to
[CONFIGURE]. Press ENTER and the display will change to
[THEATR SEL].
Press MENU- three times and the display will read [DEV
CHANGE]. Press ENTER.
The display will read [FROM DEV]. Press the DEVICE KEY
you would like to move. In this example, you would press
TV. The display will read [COPY TO]. Then press the
unused DEVICE KEY you would like to replace. In this
example, you would press AUX2. The display will change
to [TV2 and TIME]. Now your second TV can be
programmed under the AUX2 key.
Continue with setting up this device with the appropriate
3-Digit Code as was described in steps 1-7 on page 11.
To reset a device key back to its orginal function repeat the steps above only
press the same device key twice during step 4.
15
Basic Functions
Notes:
- To reassign any device key, follow the instructions above only substitute
the correct device keys during step 4.
- If you have moved a device key which contains more than one type of
device (ie: SAT key contains Satellite and Cable), you will need to refer to
the chart on page 11 during step 4.
1
2
4
5
3
Page 16

SCAN
The Scan key on the Topline 8 allows you to go thr ough every programme
available on your TV, Video or Satellite.
For example, to scan through the programmes on your Television:
Aim the Topline at your TV and press TV, then SCAN.
Your TV will begin to scan through all the programmes
available on your Television, stopping at each programme
for about three seconds. Remember, the Topline 8 must
remain aimed at your TV the entire time you are using
Scan.
When you find a programme you would like to watch,
simply press the SCAN key again to stop the Scan feature.
To use Scan with your Video Recorder or Satellite, simply press the
appropriate device key during step 1 (VCR orSAT), then Scan.
TELETEXT AND FASTEXT
The Topline is designed to operate the basic functions of teletext (text on,
text off, mix and hold/stop).
Symbol Title Description
TEXT Puts the television in the teletext mode.
TV Switches the television back to regular
viewing mode. On some televisions, this
may be done by pressing the TEXT key
several times.
MIX Shows both teletext and regular
television simultaneously. Also used for
subtitling. On some televisions, this
function is accessed by pressing the
TEXT key twice.
HOLD/STOP Stops changing pages.
The keys marked red, green, yellow and blue are used to access the fastext
functions of your television.
16
Note: For a more detailed explanation of teletext and fastext, please refer
to the manual of your television. Remember, different televisions control
teletext and fastext features is different ways. Not all teletext functions
may be available for your particular model.
Basic Functions
Note: Scan may not function with devices which do not have programme
+/- keys on the original remote.
1
2
Page 17

HOME THEATER
The HOME THEATER mode key allows you to bring the most commonly used
functions of your home theater components to one mode key. By doing this
you can configure the keypad to meet your specific home theater needs.
You can define by key grouping, which component should be controlled.
The steps below will guide you through programming the Home Theater
key.
Setting Up the Home Theater Key
For example, to configure the keypad like this:
Example:
Key Grouping: To be controlled by:
Audio (Volume) Keys Tuner
Channel Keys Satellite
Playback (VCR) Keys VCR
PIP Keys TV
Menu/Surround Keys Amplifier
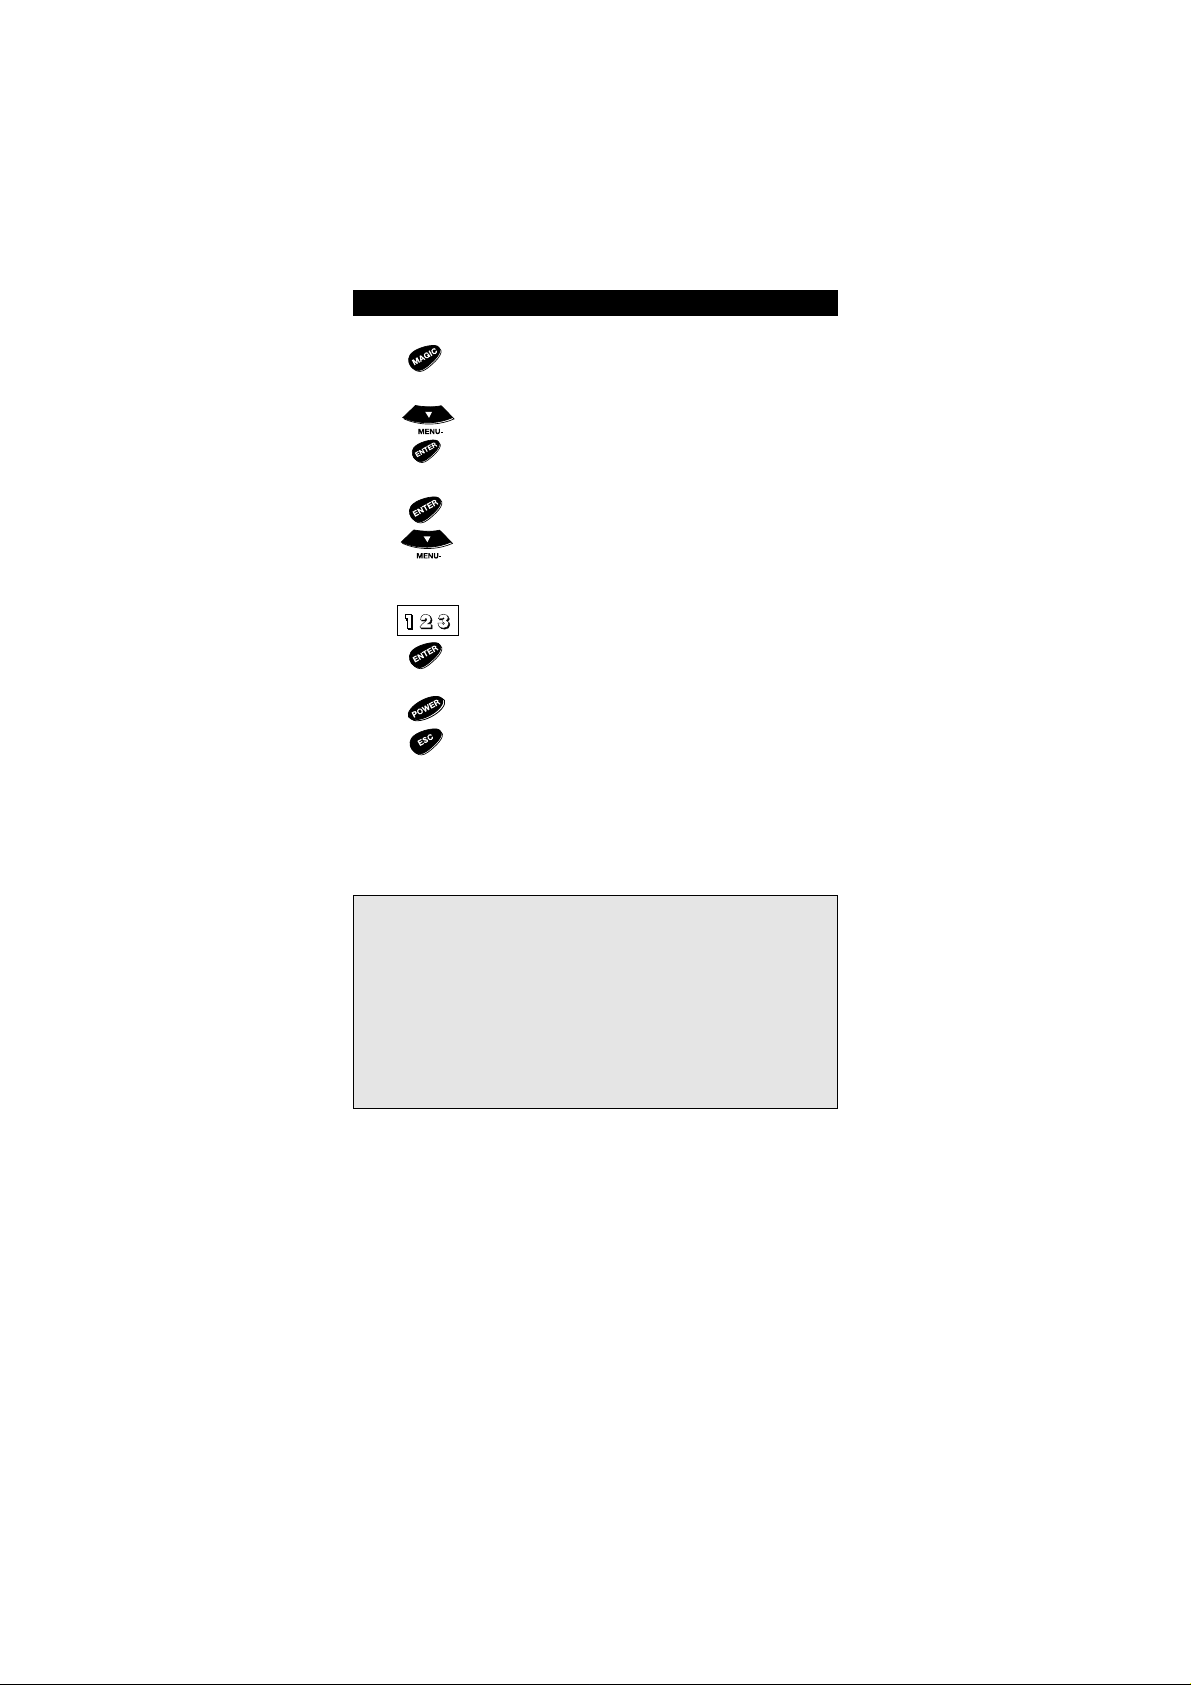
Press and release the HOME THEATER mode key.
Press and hold MAGIC until the display changes from
[THEATER and TIME] to [TIMED SEQ].
Press MENU- two times and the display will read
[CONFIGURE]. Press ENTER and the display will change to
[THEATR SEL]. Press ENTER.
The display will read [AUDIO] which refers to the volume
and mute keys. Press ENTER. The display will change to
[AMP], or if you have redefined the Amp key, it would
read [TV2], [SAT2] and so on.
At this screen you will press the Device Key you want to
be controlled by the volume keys in the Home Theater
Mode. Following the example above, you would press
TUN. Once you have made your selection, press ENTER.
The display will change to [CHANNEL] which refers to the
number keys and CH+/-. Press ENTER. The display will
change to [TV].
At this screen you will press the Device Key you want to
be controlled by the channels keys in the Home Theater
Mode. Following the example above, you would press SAT.
Once you have made your selection, press ENTER.
17
Advanced Functions
Note: The Home Theater key should only be set up after you have all your
devices working with the Topline 8.
2
3
4
1
5
Page 18

The display will change to [PLAY BACK] which refers to
the VCR keys. Press ENTER. The display will change to
[VCR].
At this screen you will press the Device Key you want to
be controlled by the VCR keys in the Home Theater Mode.
Following the example above, you would press VCR. Once
you have made your selection, press ENTER.
The display will change to [PIP]. Press ENTER. The display
will change to [TV].
At this screen you will press the Device Key you want to
be controlled by the PIP keys in the Home Theater Mode.
Following the example above, you would press TV. Once
you have made your selection, press ENTER.
The display will change to [MENU] which refers to the
surround sound functions. Press ENTER. The display will
change to [TV].
At this screen you will press the Device Key you want to
be controlled by the Menu/Surround keys in the Home
Theater Mode. Following the example above, you would
press AMP. Once you have made your selection, press
ENTER. The display will return to the main screen.
Now, whenever the Home Theater key is pressed, the keypad will control
the devices you have selected: The volume keys will control your tuner, the
channel keys will control your satellite, etc.
18
Advanced Functions
Notes:
- To change one or more of the Home Theater selections you have made,
repeat the steps above. During step 4, you can press MENU- to locate the
screen you wish to change.
- If you have placed an extended function on one of these keys using “Key
Magic” and then include this key in your Home Theater selection, the
extended function will be selected NOT the original function of this key.
6
7
8
Page 19

SEQUENCES
POWER SEQUENCE - Turning on your Home
Theater components with one key.
After you have set up the Home Theater key, you can then set up a
Sequence on the Power key which will allow you to turn on all these
components with the touch of a key.
To program the Power Macro:
Press and release the HOME THEATER key, then press and
hold MAGIC until the display screen changes to [TIMED
SEQ].
Press the Menu- key twice until the display changes to
[CONFIGURE]. Press ENTER and the display will change to
[THEATR SEL].
Press the Menu- key four times until the display changes
to [KEY SEQ]. Press ENTER and the display will read [SEL
SEQKEY] (select sequence key).
Press POWER to assign the sequence to this key. The
display will read [ENTER SEQ]. Now enter the sequence for
all the devices you want to turn “ON”. For example:
TUN + POWER + TV + POWER + SAT + POWER + etc.
until you have entered all devices you want to be
included.
While entering the sequence, the display will read [ESC TO
END]. When you have entered the sequence, press ESC to
save. The display will return to [THEATER and the TIME].
To activate the Home Theater Power Sequence, the display
must read [THEATER], then you can just aim the Topline 8
at your devices and press POWER to activate.
19
Advanced Functions
Notes:
- During step 4, it is important to enter the sequence in the order you
want your components to turn on. For example, if you would like your
tuner and amplifier to turn on before your TV, you must enter the
sequence in this order.
- If your original remote requires that you press a number key to turn on
your device, you should do this in place of pressing Power during step 4.
2
x 4
4
5
1
3
Page 20

INSTALLING OTHER SEQUENCES
You can program the Topline 8 to issue a sequence of commands at the
press of a key. For example, you may want to turn on your Satellite and TV
at the same time then set your TV to programme 5. Any sequence of
commands you regularly use can be reduced to one key stroke for your
convenience. The keys labeled Audio and Video are for installing Sequences.
To set up a Sequence:
PRESS: DISPLAY WILL READ:
1. HOLD MAGIC TIMED SEQ
2. MENU- x 2 CONFIGURE
3. ENTER THEATR SEL
4. MENU- x 4 KEY SEQ
5. ENTER SEL SEQKEY (select sequence key)
6. AUDIO (or VIDEO) ENTER SEQ
7. Enter the sequence of commands in the order you want them to activate.
For the example mentioned above, you would press:
SAT + POWER + TV+ POWER + 5 (enter the channel number exactly as
you would on your original remote). While you are entering the
sequence, the display will read [ESC TO END]. Press ESC to save.
The display will return to the main screen.
Deleting A Sequence
To erase any Sequence from a key, repeat steps 1-6 above, then press ESC to
save.
20
Advanced Functions
Notes:
- Once you program a Sequence on a specific key, the sequence will work
regardless of the mode (TV, VCR, SAT, etc.) you are in.
- If your original remote requires that you press a number key to turn on
your device, you should do this in place of pressing Power.
- If you have placed an extended function on a key using “Key Magic” and
then include this key in a Sequence, the extended function will be
included in the Sequence NOT the original function of this key.
- Besides the Audio and Video key, you can install a Sequence on any key
EXCEPT the following: TV, VCR, SAT, AUX1, AMP, TUN, CD, AUX2, HOME
THEATER, MAGIC, ESC, LITE, ENTER, SHIFT, SCAN.
Page 21

21
TIMED SEQUENCES
The Topline 8 is equipped with a special feature which allows you to initiate
your Sequence at a specific time, up to seven days in advance. It will also
allow you to program the sequence to initiate Daily or Weekly. For example,
this feature can be used to record programmes, act as an alarm clock by
turning on your stereo at a certain time, or initiate any other series of
keystrokes you would like to start at a specific time. You can store up to
ten sequences in the memory of the Topline 8 with each sequence having a
maximum number of 15 keystrokes.
For example, to record a programme from your Satellite:
Press and hold MAGIC until the display screen changes
to [TIMED SEQ]. Press ENTER. The display will change to
[ADD SEQ]. Press ENTER again.
The display will change to [START and the TIME] with the
first digit of the clock blinking. Enter the time you
would like to start your recording. (If you have a 12h clock
setting, AM/PM will then blink. Press MENU- to toggle
between AM and PM.) Once this is selected, press ENTER.
The display will change to [ONCE]. Use the MENU- key to
cycle through [ONCE], [DAILY] or [WEEKLY] depending on
when and how often the sequence should record. After
you have made your selection, press ENTER.
If you are recording either Once or Weekly, the display
will change to the day of week you want the sequence to
begin. Use MENU- to cycle through the days of the week
until the proper day is on the screen. Press ENTER to
select.
Enter the sequence of commands in the order you want
them to activate. For example,
SAT + POWER + 27 + VCR + POWER + RECORD + RECORD
This Sequence will turn on your Satellite, change the
channel to 27, turn on the VCR and start the VCR
recording.
While entering the sequence, the display will read [ENTER
SEQ]. Once the Sequence has been entered, press the ESC
key to return to the main screen. A clock symbol will be
displayed at the bottom of the LCD to indicate that there
is a Timed Sequence in memory.
It is important to note for the above example, if you would like to stop the
recording at a certain time, you will need to install another Timed Sequence
to do this.
Advanced Functions
2
3
4
5
1
6
Page 22

To delete a Timed Sequence:
Press and hold MAGIC until the display screen changes
to [TIMED SEQ]. Press ENTER and the display will change
to [ADD SEQ].
Press MENU- once and the display will read [DEL SEQ].
Press ENTER.
The display will then change to [DEL (the Day, W = Weekly
or D = Daily) and the time of the sequence]. If this is the
selection you would like to delete, press ENTER. The
display will read [DELETED] and then go to the next timed
sequence in memory.
Press ESC to save your changes and return to the main
screen.
THE SHIFT KEY
There are many features on the Topline 8 keypad which can be accessed
using the SHIFT key. For example, to use the Swap function of your PIP, you
would press: SHIFT then NORM
The following keys have functions that are shifted:
KEY: SHIFTED FUNCTION:
POWER: SHIFT THEN POWER = SLEEP
VOL +/-: SHIFT THEN VOLUME +/- = COLOUR +/CH +/-: SHIFT THEN CH +/- = BRIGHTNESS +/PIP: SHIFT THEN PIP = FREEZE
PP: SHIFT THEN PP = MOVE
NORM: SHIFT THEN NORM = SWAP
MENU+: SHIFT THEN MENU+ = CENTER+
MENU-: SHIFT THEN MENU- = CENTERMENU LEFT: SHIFT THEN MENU LEFT = DELAYMENU RIGHT: SHIFT THEN MENU RIGHT = DELAY+
22
Advanced Functions
Notes:
- Once you have pressed the SHIFT key, the Topline 8 will remain in the
Shift mode, indicated by the S on the LCD screen, for 5 seconds after the
last key press, or until the SHIFT key is pressed again.
- Remember, in order for you to access the PIP features with the Topline 8,
your original remote control must have had these features.
2
3
4
1
Page 23

SLEEPTIMER
Sleeptimer is a feature which comes built into many TVs and Satellites. It
allows you to set your device to turn off within a certain amount of time.
This feature comes in handy if, for example, you enjoy falling asleep with
your television on.
With the Topline 8, there are two ways to use the sleeptimer. If your TV or
Satellite came with this feature built in, follow the instructions “Device
Sleeptimer” below. If your device did not come with this feature, follow the
instructions “Topline 8 Sleeptimer”.
Device Sleeptimer
If your TV or Satellite has a “Sleeptimer” function built in, you can access
this function with your Topline 8 remote. To do so:
Make sure your TV (or Satellite) is switched on.
Press the DEVICE KEY (TV or SAT).
Point the Topline 8 at your TV (or Satellite) and press and
release SHIFT then POWER. You should see the Sleeptimer
activate on your TV screen. To increase the timer, simply
press power until the timer gets to the desired time.
To deactivate the Sleeptimer, repeat steps 1-3 above. During step 3,
continue pressing Shift then Power until the timer indicates zero minutes.
23
Advanced Functions
Note: Remember, your device must have its own Sleeptimer function in
order for the above instructions to operate. If your device does not have
its own Sleeptimer, follow the instructions outlined below.
1
3
2
Page 24

The Topline 8 Sleeptimer
Your Topline 8 remote comes with an internal Sleeptimer function for those
devices (TV or Satellite) which did not come standard with this function. To
use the Topline 8’s Sleeptimer:
Making your Topline ready for Sleeptimer:
Press and hold MAGIC until the display reads [TIMED
SEQ].
Press the MENU- KEY twice until the display changes to
[CONFIGURE]. Press ENTER and the display will change to
[THEATR SEL].
Press the MENU+ key four times until the display
changes to [SLEEP LOCK]. Press ENTER and the display will
read [DISABLE].
Press MENU- one time to change the display to [ENABLE]
then press ENTER to return to the main screen. It is only
necessary to perform steps 1-4 once. Now to set the timer,
continue will the steps below.
Setting the Topline 8’s Sleeptimer:
It is possible to set the timer for 15, 30, 45 or 60 minutes. To do this, first
make sure your TV (or Satellite) is switched on. Then,
Press SHIFT and then POWER. The display will read [SLEEP
15]. To increase the timer, use the MENU+ key.
Once you have set the timer to the desired time, press
ENTER. The display will read [SLEEP and the time]. Now
set the Topline 8 remote down, pointing it at your device.
When the programmed amount of time has elapsed, the
Topline 8 will send the command for Power, hence
turning off your device.
24
Advanced Functions
Notes:
- To deactivate the Sleeptimer, press Power on the Topline 8.
- Also, it is only necessary to follow steps 1-2 above one time. For
subsequent use of the Sleeptimer, simply begin with “Setting the
Sleeptimer”.
- Remember, when using the Topline 8’s Sleeptimer, you must set the
remote so it is pointing at your device.
2
3
4
1
x 4
1
2
Page 25

VOLUME LOCK
With the Topline 8, you can choose which one of your components will
control your volume. When you originally set up the Topline 8, each
individual component operates its own volume, provided the component has
volume control. You can change this setting so that one component controls
the volume no matter which component the Topline 8 is operating.
For example, to set up the Topline 8 to always contr ol the volume through
your amplifier:
Press and hold MAGIC until the display reads [TIMED
SEQ].
Press the MENU- key twice until the display changes to
[CONFIGURE]. Press ENTER and the display will change to
[THEATR SEL].
Press the MENU- key two times until the display changes
to [VOL LOCK]. Press ENTER and the display will read
[UNLOCK].
Press MENU- one time to change the display to [LOCK]
then press ENTER. Next press the Device Key for the
component that will control the volume. In this example,
to control the volume through your amplifier, you would
press AMP.
To end, press ENTER and the display will return to the
main screen.
Now when you use the volume keys on the Topline 8, your volume will be
controlled by the component you have selected above. For this reason, it is
necessary that this device is turned on.
25
Advanced Functions
Note: To return volume control back to each individual device, repeat steps
1-5 above. During step 4, use the Menu- to choose [UNLOCK], then press
ENTER.
5
2
3
4
1
Page 26

CHANNEL UP/DOWN SIMULATION
If your original remote control did not have channel up/down keys, it is
possible to program the Topline 8 to operate this featur e. By following the
instructions below, you will be able to use the Channel+/- keys on the
Topline 8 to advance though channels 0 through 9.
To turn on the Channel +/- Simulation feature:
Press and hold MAGIC until the display reads [TIMED
SEQ].
Press the Menu- key twice until the display changes to
[CONFIGURE]. Press ENTER and the display will change to
[THEATR SEL].
Press the Menu+ key one time until the display changes
to [CH +/- SIM]. Press ENTER and the display will read
[DISABLE].
Press Menu- one time to change the display to [ENABLE]
then press ENTER.
26
Advanced Functions
Note: To reset the Topline 8 back to the original channel +/- operation,
repeat steps 1-4 above. During step 4, use the Menu- to choose [DISABLE],
then press ENTER.
2
4
1
3
Page 27

CLEAR ALL
If you would like to reset the Topline 8 of all advanced functions, you can
use the CLEAR ALL feature. The CLEAR ALL feature will clear the following
entries you have programmed for: SEQUENCES, TIMED SEQUENCES, VOLUME
LOCK, CH +/- SIMULATION and KEY MAGIC. CLEAR ALL will not erase your
set-up codes.
To clear the memory using the CLEAR ALL feature:
Press and hold MAGIC until the display reads [TIMED
SEQ].
Press the MENU- key twice until the display changes to
[CONFIGURE]. Press ENTER and the display will change to
[THEATR SEL].
Press the MENU+ key three times until the display
changes to [CLEAR ALL]. Press ENTER and the display will
read [CLR ALL].
Press ENTER and the display will read [CONFIRM]. Press
ENTER one more time and the display will return to the
main screen. The Topline 8 is now reset.
27
Advanced Functions
2
3
4
1
x 3
Page 28

28
TROUBLE SHOOTING
Problem:
The LCD screen begins to fade or
text does not appear?
You cannot get the Topline 8 to
operate your device(s)?
Your brand is not listed in the ONE
FOR ALL code section?
The ONE FOR ALL is not performing
commands properly?
You can turn your device off but
you can not turn it on?
You made a mistake when setting
up your Topline 8?
You made a mistake when entering
a Sequence or Timed Sequence?
Problems changing channels?
Video not recording?
Scan does not work on your device?
Your audio components turn on and
off but will not control other
functions?
Your DSS satellite receiver does not
respond to the codes listed in the
manual?
Solution:
Replace the batteries with four new
AAA/LRO3 batteries. The Topline 8
should retain the codes you have
programmed, however, you will
need to reset the clock (see page 9)
A) Try all the codes listed for your brand.
B) Try the Search method (page 13).
C) Make sure the device you are
setting up is able to be operated
with an infrared remote control.
Try the search method on page 13.
You may be using the wrong code.
Start the search method over again
to locate the proper code.
If, on your original remote, you had
to press a number key to turn on
your device, you should do the same
on the Topline 8.
During any set-up procedure, except
for Sequences and Timed Sequences,
the ESC key will return you to the
main screen with out saving.
If you made a mistake when setting
up a Sequence, erase the incorrect
sequence by re-saving a new
Sequence under the same key. If you
made a mistake when entering a
Timed Sequence, return to the Timed
Sequence menu and delete the
incorrect sequence.
Enter the programme number
exactly as you would on your
original remote.
As a safety feature on your ONE FOR
ALL, you must press the Record key
twice .
Make sure your original remote had
a programme +/- key.
Some audio components may need
both a Tuner code and an Amplifier
code to control all the features of
your audio component,
Make sure the DSS Receiver you are
setting up is able to be operated
with an infrared remote control and
not set up to only receive Radio
Frequency.
Page 29

PRODUCT SUPPORT
If you have any questions about the operation of your new ONE FOR ALL
Topline 8 Universal Remote Control, you may call our consumer help-line for
assistance. Before calling, please read this manual carefully to find an
answer to your question. If you cannot find a solution in this manual, please
complete the information below before calling. This way we can better
serve you.
In the UK: phone: 0990 143038
fax: 01252 876844
e-mail: ofahelp@compuserve.com
In Ireland: phone: 1-800 553 118
fax: +31 53 4329816
e-mail: ofahelp@ueic.com
ONE FOR ALL model number: URC-8550
Date of purchase:
------/---------/-------day/ month/ year
Your devices:
TYPE BRAND MODEL NR. REMOTE MODEL NR.
TV Sony KVX-2950B RMT-V131B
29
CUSTOMER SERVICE
Page 30

KEY MAGIC
®
Key Magic is an exclusive ONE FOR ALL feature. The design of the Topline 8
ensures that many functions of your original remote control can be
operated by the Topline 8, even those that do not have their own key on
the Topline 8 keypad. And often used functions can be assigned to a key of
your choice using the Key Magic feature of your Topline 8.
If you have questions about using the Key Magic feature, ring our consumer
help-line and one of our customer service agents will be glad to assist you.
ONE FOR ALL
Telephone Upgradable Technology
Your Topline 8 contains a unique feature which allows new codes to be
added simply by holding it to your telephone. In a matter of seconds, our
magnetic coupling technology quickly and reliably transfers information to
the Topline 8 without complex plugs, adapters or attachments. This means,
as you buy new products in the future, the Topline 8 will never become
obsolete.
Simply ring our Consumer Help-Line and one of our customer service
representatives will assist you through the entire process of upgrading your
Topline 8. To ensure the process goes smoothly, here are a few steps to
follow:
1. Write down the brand name(s) and model number(s) of your device(s)
in the space provided on page 29 before you call.
2. Ring our Consumer Help-Line and explain which device(s) you would
like added to your Topline 8.
3. After our customer service agent records the brand name(s) and model
number(s) of your device(s), he/she will ask that you hold the Topline 8
to the earpiece portion of your telephone (see diagram below). In
doing this, the information needed for your device is transferred
through the telephone into your Topline 8 in a matter of seconds.
Please note, mobile telephones, cordless telephones and speaker
telephones are not recommended.
4. After your Topline 8 has been upgraded by telephone, stay on the line.
Our customer service agent will ensure that your Topline 8 is working
properly with your device(s) and answer any other questions you may
have.
30
CUSTOMER SERVICE
Page 31

31
Set-up Codes - TV
Televisions
A.R. Systems 037
Acura 009
Admiral 087 093 418 213 264
Adyson 217 216
Agazi 264
AGB 516
Agef 087
Aiko 216 009 037 371 035 072 361
191
Aim 037 274
Akai 361 208 371 037 191 035
009 072 218 163
Akiba 218 282 455 037
Akura 218 282 276 009 412 264
037
Alba 218 235 009 418 370 355
371 037 247 431 216
Alcyon 076
Allorgan 206 294 217
Allstar 037
Amplivision 217 400 320
Amstrad 177 009 516 264 218 371
362 412 037
Anglo 009 264
Anitech 009 068 076 264 037
Ansonic 370 292 102 009 037 374
163 323 411 259 247 012
428
Arc en Ciel 399 501 196 109
568 333 198
Arcam 216 399 217
Aristona 037 556 012
Arthur Martin 400
ASA 105 346 070 104 087
Asberg 037 076
Asuka 218 264 216 282
217
Atlantic 037 216 206 320
Atori 009
Auchan 400
Audiosonic 037 109 217 370 337 264
218 428
Audioton 217 264
Ausind 076
Autovox 087 206 237 076 217 247
Ayomi. 238
Baird 109 193 343 190 192 072
Bang & Olufsen 087 565
Basic Line 218 009 374 037 282
Bastide 217
Baur 303 535 512 554 361 505
010 037
Bazin. 217
Beko 370
Beon 037
Best 337 370 421
Bestar 037 370 374
Binatone 217
Black Star 247
Blacktron 282
Blackway 282
Blaupunkt 554 535 191 195 200 213
327 328
Blue Sky 218 282 455 037
Blue Star 282
Bondstec 247
Boots 217
BPL 282
Brandt 501 399 237 333 196 198
287 335 568
Brinkmann 418 037
Brionvega 037 087
Britannia 216 217
Bruns 087
BSR 294
BTC 218
Bush 218 235 009 036 282 037
355 371 374 519
Capsonic 264
Carena 455 037
Carrefour 036 070
Cascade 009
Cathay 037
Centurion 037
Century 087 213 247
CGE 074 084 076 247 276 418
370
Cimline 009 235 218
City 009
Clatronic 218 264 370 371 217 076
037 009 102
Clayton 385
Concorde 009
Condor 216 247 282 320 037 370
009 102 411
Contec 216 009 157 011 036
Continental 501 237 196 198
Edison 399 333 287 487 568
Cosmel 009 337
Crezar 213
Crosley 087 247 074 084 076 213
Crown 009 370 076 421 037 359
Crystal 431
CS Electronics 247 216 218
CTC 247
Cybertron 218
Daewoo 009 037 216 374 218 217
Dainichi 218
Dansai 037 264 035
Dawa 037
Daytron 009 374
Decca 072 516 037 249
217
DeGraaf 208
Desmet 320 037
Dixi 009 037
Domland 394
DTS 009
Dual 217 343 259 519 399
Dual-Tec 217 259
Dumont 087 104 102 213
217 070
Dynatron 037
Elbe 435 238 259 362 292 370
163 037 218 191 411
Elcit 087 247 516 102
Elekta 264 282
Elin 216 037 105 104
Elite 218 037
Elman 102
Elta 009
Emerson 177 213 087 247
Emperor 282
Erres 037 012
Etron 037 009
Euro-Feel 264
Euromann 216 264 037 217 421 370
Europhon 037 516 102 213 217 247
Expert 206 400
Fenner 374 009
Ferguson 073 287 192 190 335 238
193 109
Fidelity 193 216 371
Finlandia 208 346 359
Finlux 105 104 037 346 217 072
076 516 070 087 102
Firstline 294 321 216 037 374 385
247 009 217
Fisher 104 087 217 036 208 370
087 157 361 303 072
Flint 037 455
Forgestone 193
Formenti 087 213 216 320 076
Fortress 093 087
Fraba 370 037
Frontech 247 264 431 217 009
Fujitsu 206 072 217
Funai 264 294
Galaxis 370 418 037
GBC 213 009
Page 32

32
Set-up Codes - TV
GEC 043 072 361 516 037 217
072 349
Geloso 213 009 374
General
Technic 009
Genexxa 218 037 412
Germanvox 213
Goldline 337
Goldstar 037 370 290 009 377 217
247 216 431
Goodmans 036 072 037 009 264 516
290 374 371
Gorenje 370 421
GPM 218
Granada 037 226 356 359 012 072
108 208 217 076 036 339
516
Grandin 282 218 400 037 009 320
455
Grundig 535 195 191 554 487 070
076 237 037
Halifax 264 216 217
Hampton 216 217
Hanseati 037 292 282 361 394 213
320 428 009 294 217 519
Hantarex 009 213 037 296
HCM 264 009 282 412 217 218
037
Hema 217 009
Hifivox 501 196 399 568
HiLine 264 037
Hinari 208 036 037 218 009 163
Hisawa 282 218 400 455
Hitachi 225 036 349 356 473 043
343 196 198 217
Hoshai 218
Hygashi 217 216
Hornyphon 037
Hyper 009 216 217 247
Hypersonic 361
Hypson 037 264 217 282
455 400
ICE 264 217 037 371 218 216
009
Imperial 037 247 370 418 074 084
076 349
Indesit 237 213
Indiana 037
Ingersol 009
Inno Hit 009 072 037 218 290 217
516 247
Interbuy 009 264 247 068
Interfunk 037 012 087 512 275 327
163 361 370 501 568
Intervision 282 217 455 068 037 394
218 102 264 247 431
Irradio 009 037 218 247 290 076
Isukai 218 037 282
ITC 217
ITS 037 371 218 282 264 216
ITT 163 480 349 361 473 339
208
JEC 035
JVC 053 094 190 036 192 193
371 218
Kaisui 009 217 218 282 037 216
455
Kamp 216
Kapsch 206 163 361
Karcher 037 421 282
Kendo 362 235 247 102 037 411
428
Kennedy 206 213 435
Kingsley 216
Kneissel 435 259 292
Kolster 037
Konka 218 371
Korpel 037
Korting 087 421 320
Kyoto 385
Lenco 009 104
Lenoir 009
Lesa 247
Leyco 264 072 037 294
Lifetec 009 264 519
Lloyds 009
Loewe 512 087 037
Logik 011
Luma 206 037
Lux May 037
Luxor 237 290 357 361 356
M Electronic 346 037 109 343 247 105
104 374 009 217 068 480
492 216
Magnadyne 087 247 516 102
Magnafon 516 213 076 102
216
Mandor 264
Manesth 037 235 217 264
320 276 035
Marantz 037
Marelli 087
Mark 037
Matsui 235 177 009 355 011 072
036 037 487 217 294 371
443
McMichael 043
Mediator 037 556 012
Memorex 009
Memphis 337 072 009
Mercury 037
Metz 087 195 535 447 239 213
554 275 367
Minerva 487 535 070 076 554 237
Minoka 412 037 359
Mitsubishi 108 150 512 087 036 237
Mivar 292 290 291 370 216
Motion 076
MTC 370 349
Multistandard 102
Multitech 217 009 216 247 102
Murphy 104 216
National 237
NEC 036 320
Neckermann 037 191 370 505 200 554
556 327 349 087 213 217
411
NEI 037 337 431
Nesco 247
Newtech 037 009 556 343
New World 218
Nicamagic 216
Nikkai 072 218 037 217 264 035
337 216 009
Nobliko 102 076 070 216
Nogamatic 399 501 196 568
Nokia 163 480 349 359 473 361
339 208 594
Nordmende 109 501 287 399 196 343
198 213 568
Novatronic 037 105
Oceanic 163 400 361 294 563
Okano 370 037
Onwa 371
Opera 037
Orbit 037
Orion 235 294 177 320 355 011
037 009 321
Osaki 072 218 217 264 276
Oso 218
Osume 157 072
Otto Versand 010 505 036 093 512 037
556 535 195 349 554 191
361 235 109 213 294
Pael 216
Palladium 370 037 191 505 200 554
556 327 349 087 213 217
Panama 009 217 264 216 037
Panasonic 226 250 126 274 213 361
237 367 037
Panavision 037
Pathe Cinema 238 216 400 320 292
Pathe Marconi 213 501 196 198 333 399
237 568
Page 33

33
Set-up Codes - TV
Pausa 009
Perdio 072 320
Perfekt 037
Philco 087 084 074 418 076 213
247 370
Philharmonic 217
Philips 037 556 012 323 554 191
043 087 193
Phoenix 037 087 320 385
Phonola 037 012 087 193 216
Pioneer 037 343 428
Plantron 037 264
Policom 568
Popp 009
Prandoni-Prince 247 516 361 213 076
Precision 217
Prima 009 264
Prinz 072
Profex 009
Profi-Tronic 037
Proline 321 072 037 012
Prosonic 037 216 370 374
Protech 037 217 009 247 349 102
264 431 337
Pye 037 556 012
Pymi 009
Quasar 247
Quelle 037 010 011 501 512 535
554 361 036 217 247 074
084
Questa 036
Radialva 109
R-Line 037
Radiola 037 556 012 323
Radiomarelli 087 516 247
Radiotone 009 037 428
Rank 070
Rediffusion 361
Revox 037 370
Rex 206 411 259
RFT 087 292 428 072
Roadstar 009 264 218
Robotron 087
Royal Lux 421
RTF 087
Saba 287 213 087 399 163 109
501 516 343 361 498 196
198 335
Sagem 455
Saisho 235 516 177 009 011 217
264
Salora 290 349 356 359 361 516
Sambers 213 516 102
Samsung 037 556 009 217 370 264
090 216 290 072 208
Sandra 216 217
Sansui 037
Sanyo 208 157 292 036 011 370
072 216 217 104 213 339
SBR 037 556 012
Schaub Lorenz 349
Schneider 037 012 217 303 519 394
259 323 343 247 371 218
361
SEG 217 264 009 036
102 362 037
SEI 087 102 010 516 213 294
296 206 037
Seleco 206 226 362 259 411
Sencora 009
Sentra 276 035 218
Sharp 093 157 036 294
Shorai 294
Siarem 087 102 213
Siemens 191 535 554 157 195 200
213 327 328
Sierra 037 556 012
Siesta 370
Silva 216
Silver 036 361
Singer 087 102 400
Sinudyne 177 087 235 102 213 294
296 361
Skantic 357 356
Sogera 320
Solavox 361 072
Sonitron 208 370 339
Sonoko 037 009 264 282 217
Sonolor 208 163 400
Sontec 037 370 294
Sony 010 505 011 036
Sound & Vision 102 218 374
Soundwave 037 320 418
Standard 218 009 217 320 037
Star Lite 037
Stenway 282 218
Stern 206 259
Sunkai 94 355 321 455 218 235
Sunwood 037 009
Superla 516 216
Supertech 009 037
Supra 374 009
Sutron 009
Sydney 216 217
Tandy 218 072 217 247 276 093
Tashiko 036 043 217 216
Tatung 037 072 516 217 249 011
TEC 217 276 009 247 471 335
Technema 320
Teleavia 109 501 196 399
333 490 568
Telecor 037 163 218 217 259
Telefunken 109 501 498 471 399 287
074 084 101 335 262 073
343 037 477
Telegazi 037 163 259 218 264
Telemeister 320
Telesonic 037
Teletech 009 247 337
Teleton 217 275 206 349
Televideon 320 216
Temco 294
Tensai 104 218 037 217 294 320
009 105 374 371 377
Texet 217
Thomson 287 399 109 501 333 471
335 196 198 237 343 037
490 568
Thorn 193 190 238 073 192 074
084 104
Tokai 072 037 337 163
Tokyo 216 035
Tomashi 282
Toshiba 035 508 036 070 102
Towada 349 102
Trans Continens 217
Trident 516 217
Triumph 177 516 346 556
Uher 076 037 206 320 303 374
418
Ultravox 087 102 374 216 213 037
Universum 346 105 535 473 361 200
011 512 294 036 157 070
370 492 480 247
Univox 337 087 037
Vestel 037 217
Vexa 009 037
Videologique 216 218 217
VideoSystem 037
Videotechnic 216 320
Visiola 216
Vision 037 320
Vistar 276 206
Vortec 037
Voxson 087 076 037 418
Waltham 217 276 356 418 287 385
037
Watson 037 320 218 213
Watt Radio 213 102 216
Wega 213 036 087 037
Weltblick 037 320
White
Westinghouse 320 216 037 337
Yamashi 282 455 218 037
Yoko 217 037 218 264 009 431
Page 34

34
Set-up Codes - VIDEO
Yorx 218
Zanussi 206 217
VIDEO
Aiwa 307 000 041 209 352 037
Akai 106 315 053 041 020
Akiba 072
Akura 072 041
Alba 278 072 333 334 209 352
192 020 295
Allorgan 240
Allstar 322
Ambassador 020
Amstrad 000 325 332
Anitech 072 322
ASA 037 081
Asuka 072 037 081 000
Audiosonic 278
Baird 106 278 104 107 041 000
Bang & Olufsen 499
Basic Line 278 209 020 072
Bestar 278 020
Black
Panther Line 278
Blaupunkt 226 154 227 162 081 006
195 403
Bondstec 020
Bosch 154
Brandt 041 187 206 320 493
Brionvega 344
Bush 072 278 315 333 334 209
352
Canon 167
Carena 209 081
Carrefour 045
Catron 020
CGE 041 000
Cimline 072 209
Clatronic 020
Combitech 352
Condor 020 278
Crown 278 072 020 322
Daewoo 278 020 045
Dansai 072
Daytron 278
Decca 000 041 081 008 067
DeGraaf 042 166 081 104 048
Dual 041 081
Dumont 000 081 104 105
ESC 278 240
Elcatech 072
Elin 240
Elta 072
Emerson 072
Etzuko 072
Europhon 020
Ferguson 107 041 320 053 493
Fidelity 000 072
Finlandia 104 081 042 166 000 048
Finlux 000 081 104 042 105
Firstline 072 209 043 037 045 042
Fisher 047 104 046
Flint 209
Frontech 020 322
Fujitsu 000
Funai 000
Galaxy 000
GBC 020
GEC 081
General 020
Goldhand 072
Goldstar 037 000
Goodmans 000 072 240 278 037 020
081 209
Graetz 041 104 240 344
Granada 104 046 048 081 006 240
037 226 042 000
Grandin 072 037 020 000 278
Grundig 007 195 081 347 226 006
403 320
Hanseatic 037 209
Hantor 020
HCM 072
Hinari 004 072 208 209 352 041
322
Hisawa 209 352
Hitachi 042 105 166 041 000 240
081 004 104
Hypson 072 209 278
Impego 020
Imperial 000 240
Ingersol 004
Inno Hit 020 240 278 322
Interbuy 037 072
Interfunk 081 104
Intervision 000 278 037
Irradio 072 037
ITT 106 041 046 344 384 104
240
ITV 278 037
JVC 041 067 008 206 384
Kaisui 072
Kendo 106 209 315 053
Kenwood 041
Korpel 072
Kuba 047
Leyco 072
Loewe Opta 081 006 037 105 004
Logik 004 240 072 106 209
Luxor 106 046 043 072 104
M Electronic 000 037
Manesth 072 045 081 209
Marantz 081 006 295 209
Matsui 209 004 192 295 037 208
240 352 332
Mediator 081
Memorex 104 000 046 037 048 047
Memphis 072
Metz 195 347 081 162 227 226
006
Migros 000
Minerva 195
Mitsubishi 043 067 081
Multitech 000 072 020 104
Murphy 000
National 226 162
NEC 041 067 040
Neckermann 041 208 006 081 344
Nesco 072
Nikkai 020 072 278
Nokia 104 106 041 278 046 344
240 048 042 081
Nordmende 041 384 320 187 494
Oceanic 000 048 106 081 104 041
046
Okano 315 209 072 322
Orion 209 004 208 352 295 333
334
Orson 000
Osaki 000 037 072
Otto Versand 081
Palladium 072 315 037 041 006 209
Panasonic 226 227 162 225
Pathe
Cinema 004 043
Pathe
Marconi 041
Perdio 000
Philco 072
Philips 081 006 403
Phonola 081
Pioneer 067 081 042
Portland 020 278
Prinz 000
Profex 322
Profi-Tronic 081 240
Proline 000
Prosonic 209
Provision 278
Pye 081
Quelle 006 208 081 344
Radialva 037 072 081 048
Page 35

35
Set-up Codes - SAT
Radiola 081
Rex 041 384
RFT 020 403 072
Roadstar 240 072 037 278
Royal 322 072
Saba 041 187 206 320 384 494
Saisho 004 209 208 192
Salora 046 043 106 104
Samsung 240 432
Samurai 020
Sansui 041 067 106
Sanwa 004
Sanyo 104 046 047
Saville 352 278 240
SBR 081
Schaub Lorenz 041 344 106 000 104
Schneider 072 000 037 081 042
SEG 072 240 322 278
SEI-Sinudyne 004 081
Seleco 041 008 384 020 037
Sentron 072
Sentra 020 072
Sharp 048
Shintom 072 104
Shivaki 037
Shorai 004
Siemens 195 006 037 104 007 081
Silva 037
Sinudyne 004 081
Solovox 020
Sonitron 047
Sonoko 278
Sonolor 048
Sontec 037
Sony 033 034 032 106
Standard 278
Starlite 037 104
Sunkai 209 295
Sunstar 000
Suntronic 000
Sunwood 072
Supra 037 240
Symphonic 000 072
Taisho 004 209
Tashiko 000 048 240 081 037
Tatung 000 041 081 053 048
TEC 020
Teleavia 041 187
Telefunken 187 041 320 384 493 494
Teletech 322 072
Tenosal 072
Tensai 000 322 037 072 004
Thomson 041 384 320 206 493 494
Thorn 041 104 037
Tokai 072 037
Toshiba 045 041 384 043 081 403
Towada 322
Towika 072
Triumph 208
TVA 020
Uher 037 240 344
Ultravox 344
Unitech 240
United
Quick Star 278
Universum 000 325 081 240 037 106
195 006
Victor 008 067
Watson 081
Weltblick 037
White
Westinghouse 344
Yamashi 072 278
Yokan 072
Yoko 037 072 020 240
Satellite Receivers
AGS 668
Akai 515 200
Alba 421 515 455 254 362 519
613 713
Aldes 288 362 519 520
Allantide 333
Allsat 067 200 364 183
Allsonic 288 369
Alltech 586
Alpha 668
Altai 396
Amitronica 713
Ampere 368
Amstrad 080 461 252 345 243 338
Ankaro 288 217 369 220 519 713
Anttron 421 183 613
Apollo 421
Arcon 368 217 373
Armstrong 243
ASA 397
ASAT 373 200
AST 351 321
Astacom 668
Aston 458
Astra 108 373 530 539 518 344
513 243
Astro 173 358 520 613 369
Athena 668
Audioton 364 613
Aura 539
Axiel 668
Axis 530 369 366
Barcom 217
Best 217 369
Blaupunkt 173
Boca 243 589 513
Brain Wave 332 692
Broadcast 346
Broco 530 713
BT Satellite 515 668 710
Bush 254 067 328 183 362
Canal Satellite 292
Cambridge 344 515
Channel Master 362
Citycom 394
Clatronic 332
Clemens
Kamphus 502 333
CNT 520
Colombia 668
Columbus 297
Commander 220
Commlink 288
Comtec 288
Condor 369
Connexions 458 396 369
Conrad 589
Contec 394 589 366
Cosat 592
Crown 243 518
Daewoo 373
Dansat 067 183
DDC 362
Dew 366 373
Diamond 586
Discovery 668
Diskxpress 217
Distrisat 200
Ditristrad 592
DNR 692
DNT 200 458 396
Dual 373
Dune 369
Echostar 396 668
EIF 417
Einhell 333 243 421 288 252 513
518 713 501 94
Elekta 520
Page 36

36
Set-up Codes - SAT
Elta 364 421 200 369
Emanon 421
Emme Esse 369 502 328
EP Sat 455
Eurieult 417
Eurodec 526
Europa 220 589
Eurosat 243 586
Eurosky 243 369
Eurostar 539
Exator 421 515 613
Extra Sat 519
Fenner 668
Ferguson 067 183 455 336 328 711
Fidelity 252 461
Finlandia 455 108
Finlux 455 344 108 414
Fracarro 421
France Satellite 297
Freecom 335 421
FTE 368 331 589
Fuba 297 217 369 396 421 417
173 414 172 573
G-Sat 183 333
Galaxi 217
Galaxis 366 288 364 530 592 369
656
Galaxisat 321
GMI 243
Goldstar 335
Goodmans 455
Granada 108
Grundig 173 328 571 750 805
Hanseatic 605
Hantor 421 332
Hanuri 520
Harting &
Helling 333 502
Heliocom 368
Hinari 362 183 421
Hirschmann 287 333 397 173 573 495
442 502
Hisawa 332
Hitachi 328 455
Houston 592 220 668
Huth 346 332 364 366 288 220
589 502 243
Hypson 417
Imperial 254
Intertronic 243
Intervision 592
ITT/Nokia 328 108 573 172 455 397
Johansson 332 364
JVC 515 571
Kathrein 331 358 173 394 442 504
480 200 622 092 333 658
713
Key West 794
Kolon 421
Kosmos 331 442 335 502
KR 613
Kreiselmeyer 173
Kyostar 421 613
Lasat 513 520 369
Lenco 35 220 373 421 713 692
Lennox 592
Lenson 501
Lexus 200
Leyco 515
Lifesat 605 369
Lion 333
Loewe 243
Lorenzen 220 692 794
Lorraine 335
Lupus 369
Luxor 172 108 345 573
Manhattan 455 592 328 520
Marantz 200
Mascom 442
Maspro 092 336 328 495 750
Matsui 344 571 710
MB 605
Mediamarkt 243
Mediasat 530 501 292
Mega 200
Metronic 519 421 417 243 613
Micro
Technology 333 539
Minerva 571
Mitsubishi 455
Mitsumi 513
Morgans 243 200 513 794 713
Multista 331
Muratto 335 321
Mysat 713
M & B 539
Navex 332
Network 183
Neuhaus 530 501 220 589 692 592
656 713
Neusat 692 713
Nikko 243 713
Nokia 328 108 573 172 455 397
Nordmende 362 455 520 421
Novis 332
NTC 502
Oceanic 586 333
Octagon 373 421 220 366 613
Okano 243 502 331
Optex 394 592 417 792
Orbit 351 373 333
Orbitech 501 589 541 421
Origo 497
Osat 345
Oxford 344 515 668
Pace 328 067 183 336 455 791
795
Pacific 586
Palcom 297 362
Palladium 243 571
Palsat 501
Panasonic 455 328
Panda 455 067 108
Paristad 417
Patriot 515 668
Philips 200 220 183 292 455 328
667 750 710 613 805
Phoenix 366 183
Phonotrend 288 592 502 656
PK Sat 333
Polytron 394 396
Predki 332
Preisner 243 513 589
Premier 592
Profile 668
Prosat 254 288 362
Protek 586 333
Proton 333
Provision 520
Quadral 362 519 288 369 589 668
Quelle 252
Radiola 200
Radix 396 458
Rainbow 613
Redpoint 530
Red Star 369
RFT 541 288 220 200
Roadstar 713
Saba 254 183 520 328 336
Sabre 455
Sakura 366
Salora 108 172
Samsung 287 421
SAT 351 321 461 501 62
Satcom 346 605
Satec 183 328
Satford 346
Satmaster 346
Satpartner 332 502 421 335 520 613
Sat Team 368
Schäcke 613
Schneider 667 805
Schwaiger 394 183 605 504 589
Sedea
Electronique 421
Seemann 396 243 530 515
Page 37

37
Set-up Codes
SEG 421 369 539 332 605 518
519
Seleco 592
Siemens 173
Silva 335
Skantin 713
Skardin 530
SKR 713
Skymaster 288 519 605
Skymax 200 333 539
Skytwin 519
Skyvision 364
SL 692
Sony 704 455
Starion 539
Starring 332
Strong 421 613 369 520
STVI 417
Sumida 243
Sunny Sound 369
Sunsat 713 530
Sunstar 513 243 369 794
Tagra 364
Tantec 297 328 336 455
Techniland 346 592
Technisat 262 501 541 458 518
Teco 373 243 513
Telasat 605
Teleciel 613
Telefunken 421 328 710
Teleka 243 442 613 396 750
Telemaster 520
Telesat 605
Telestar 501
Televes 455 501 328
Telewire 592 656
Tensai 373
Thomson 455
Thorens 586
Thorn 328 455
Tioko 394
Tokai 200
Tonna 346 455 592 668
Toshiba 455
Trendline 513
Trend Plain 513
Triad 351 335 321 333
Triasat 414
Tristar 373
Uniden 194 792
Unisat 366 243
Unitor 217 332
Universum 173 571 397
Variosat 173
Vector 333 518
Ventana 200
Visiosat 351
Viva 220
Vortec 287 421
V-Tech 351 321
Wela 589 713
Wewa 333 455
Winersat 332
Wisi 173 321 396 589 455 351
Woorisat 520
World 332
Xrypton 518
Zaunk”nig 692
Zehnder 321 331 520 504 518 369
Zodiac 613
Zwergnase 794
Cable Converters
BT Cable 105
Cabletime 271
Decsat Canal+ 423
Filmnet
Cablecrypt 443
Grundig 529
Jerrold 003 276
M-Net 443
Pioneer 144
Salora 382
Samsung 144
Scientific
Atlanta 008 277
Tele+1 443
Telepiu 443
United Cable 003
Visiopass 451
Westminster
Cable 105
Video Accessories
Grundig PIP 104
Philips 339
Roctec 535
CD Players / Mini Disc
Players
Aiwa 124
Akai 156
Alba 536 615
Arcam 157 770
Audioton 157
Bush 615
CEC 174
California
Audio Lab 029
Carver 179
Cyrus 157
Denon 034 003
Dual 196
Eclipse 625
Fisher 048 174 179 342
Genexxa 000 037 096 179 196 032
Goldstar 525 561
Goodmans 561 625 536
Grundig 157
HCM 625
Hiro 625
Hitachi 291
Intersound 662
JVC 072
Kenwood 037 048 190 028 692 523
Linn 157
Luxman 328 589
M Electronic 525
Marantz 157 307
Matsui 288 307 157
Memorex 032
Meridian 157
Micromega 157
Mission 157
Mitsubishi 156
NAD 000
Naim 157
Nikko 174
Onkyo 101
Panasonic 029 303 367
Philips 157 274 805 806
Pioneer 032 096
Proton 157
Quad 157
Radiotone 615 625 662
Realistic 179
Revox 113 157
Roadstar 461 525
Rotel 157
Page 38

38
Set-up Codes
SAE 157
Sansui 157 202 625
Sanyo 179 342
Schneider 615
Sharp 037
Sherwood 196
Siemens 516
Sony 000 490
Supertech 625
Teac 174
Technics 029 207 303
Toshiba 481 692
Universum 157
Victor 072
Watson 615
Yamaha 036 187
Yorx 461
Phonographs
Grundig 188
Marantz 188
Philips 188
Miscellaneous Audio
Aiwa 010 159 404
Akai 377
Audio
Source Surr. 351
Behringer 351
Celestion 351
Grundig 414
JVC Surround 073
Pro-Sound 351
Siemens 414
Sony 010 159
Home Automation
One-For-All
X-10 System 167
Superswitch
System 451
Audio Amplifiers
Aiwa 406
Denon 160 272
Grundig 269
Linn 269
Marantz 269
Meridian 269
Micromega 269
Naim 269
Panasonic 308
Pioneer 013 269
Philips 269
Quad 269
Technics 308
Yamaha 354
Audio Amp/Tuners
Aiwa 405 158 301 121 480
Akai 346 115 440
Bush 389
Carver 042 360
Denon 004 273
Dual 512
Fisher 042 360
Genexxa 186
Goldstar 281
Goodmans 609
Grundig 189 281
Harman
Kardon 110
Hitachi 228
JVC 074 464
Kenwood 186 313 314 027
Marantz 189 412
M Electronic 112
Memorex 014
Micromega 189
Nakamichi 347
Okano 440
Onkyo 135
Panasonic 039 309 518 389
Philips 189 412
Phonotrend 502
Pioneer 014 080 289
Quasar 039
Revox 140 189
Roadstar 346
Samsung 112
Sansui 189
Sanyo 360
Sharp 186
Sherwood 502 491
Siemens 609
Sony 158 415
Soundwave 609
Teac 609
Technics 039 208 518 309
Uher 346
Universum 112 281
Victor 074
Yamaha 176 186
Audio Cassette Players
Aiwa 197 200 263 389
Akai 188 189 283 300 364
Arcam 076
Denon 412 076 371
Dual 383
Fisher 074
Genexxa 300
Goodmans 364
Grundig 029 442
Harman
Kardon 182
Hitachi 163
JVC 244 273 274
Kenwood 233 234 070 071
Magnavox 029
Marantz 029
Memorex 099 101
Mitsubishi 189
Nakamichi 147 247
Onkyo 136 282 135
Panasonic 229 250 272
Philips 029
Phonotrend 337
Pioneer 027 099 220 101
Revox 029
Samsung 391
Sansui 029
Sherwood 337 409
Page 39

Siemens 491
Sony 170 243
Soundwave 364
Technics 229 353
Toshiba 326
Universum 391
Victor 244 273 274
Yamaha 094
Laser Disc Players
Grundig 059
Magnavox 064
Marantz 064
Mitsubishi 059
NAD 059
Philips 064 388
Pioneer 059
Radiola 388
Sony 201
Telefunken 059
Digital Audio Tape
Denon 031
Grundig 158
Marantz 158
Philips 158
Sony 093
Technics 158
Set-up Codes
39
Page 40

Guarantee
UNIVERSAL ELECTRONICS INC./ONE FOR ALL warrants to the original purchaser that
this product will be free from defects in materials and workmanship under normal use for a
period of ninety (90) days from the date of the original purchase. Product will be replaced
free of charge if it has been proven to be defective within the 90-day period when said
product is returned at customer expense within the warranty period. THIS WARRANTY
DOES NOT COVER ANY EXPENSES INCURRED IN THE REMOVALAND
REINSTALLATION OF THIS PRODUCT.
This warranty does not cover damage or failures caused by products or services not
supplied by ONE FOR ALL, or which result from accident, misuse, abuse, neglect,
mishandling, misapplication, faulty installation, set-up adjustment, improper maintenance,
alteration, maladjustment of consumer controls, modifications, commercial use, fire, water,
lightning or other acts of God. This warranty does not cover cartons, carrying cases,
batteries, broken or marred cabinets, or any other items used in connection with the
product.
There are no express warranties except as listed above. ONE FOR ALL SHALL NOT BE
LIABLE FOR INCIDENTALOR CONSEQUENTIAL DAMAGES RESULTING FROM THE
USE OF THIS PRODUCT OR ARISING OUT OF ANY BREACH OF WARRANTY. ALL
EXPRESS AND IMPLIED WARRANTIES, INCLUDING THE WARRANTIES OF
MERCHANTABILITYAND FITNESS FOR APARTICULAR PURPOSE, ARE LIMITED TO
THE WARRANTY PERIOD SET FORTH ABOVE. Some countries do not allow the
exclusion or limitation of incidental or consequential damages, or limitation on how long an
implied warranty lasts, so the above exclusions or limitations may not apply to you. This
warranty gives you specific legal rights and you may also have other rights which vary from
country to country.
To obtain warranty service during the warranty period, please carefully pack the product
and send it prepaid and adequately insured to the address below, together with your
purchase receipt or other proof of the date of original purchase.
In the UK: In Ireland:
Strand Europe Ltd./OFA Sherlane Agencies Ltd./OFA
PO Box 197 Rockford Works
Yateley, GU46 6ZR Deansgrange Rd.
Blackrock, County Dublin
IMPORTANT:
IF THE UNIT IS RETURNED WITHIN THE WARRANTY PERIOD, YOU MUST INCLUDE
YOUR PURCHASE RECEIPT so that we may establish your eligibility for service and can
replace your unit without cost. It would be helpful if you included a note detailing the
problem. IF THE UNIT IS RETURNED FOR SERVICE OUTSIDE THE WARRANTY
PERIOD, please include a cheque to cover the cost of replacement, handling and return
postage. (Prices may differ per model. Please contact ONE FOR ALL customer service in
your country for exact amount.)
NOTHING IN THIS GUARANTEE AFFECTS YOUR STATUTORY RIGHTS.
ONE FOR ALL, and ONE FOR ALL “
TOPLINE 8
” are trademarks of Universal Electronics
Inc.
URC-8550
700716
Printed on Recycled Paper
UK
Copyright 1997 by Universal Electronics Inc. All rights are reserved. No
part of this publication may be reproduced, transmitted, transcribed,
stored in any retrieval system, or translated to any language or computer
language, in any form or by any means, electronic, mechanical,
magnetic, optical, manual, or otherwise, without the prior written
permission of Universal Electronics Inc.
DD-1197
 Loading...