

Page 1
Universal remote
Universal Fernbedienung
Télécommande universelle
Mando a Distancia Universal
Telecomando Universal
Telecomando Universale
Universele Afstandsbediening
Univerzális távvezérlő
Uniwersalny pilot zdalnego sterowania
Univerzální dálkové ovládání
URC-7781
Instruction manual . . . . . . . . . . . . . . . . . . . . . . . . . . . . . . . . . . . . . .P. 1
Bedienungsanleitung . . . . . . . . . . . . . . . . . . . . . . . . . . . . . . . . . .S. 31
Mode d’emploi . . . . . . . . . . . . . . . . . . . . . . . . . . . . . . . . . . . . . . . . . .P. 61
Guía del usario . . . . . . . . . . . . . . . . . . . . . . . . . . . . . . . . . . . . . . . . . .P. 91
Manual de instruções . . . . . . . . . . . . . . . . . . . . . . . . . . . . . . . .P. 121
Istruzioni per l’uso . . . . . . . . . . . . . . . . . . . . . . . . . . . . . . . . . . .P. 151
Gebruiksaanwijzing . . . . . . . . . . . . . . . . . . . . . . . . . . . . . . . . . .P. 181
Használati útmutató
. . . . . . . . . . . . . . . . . . . . . . . . . . . . . . .P. 211
Instrukcja obsługi
. . . . . . . . . . . . . . . . . . . . . . . . . . . . . . . . . . . . .P. 241
Návod k použití
. . . . . . . . . . . . . . . . . . . . . . . . . . . . . . . . . . . . . . . .P. 271
E
n
gli
s
h
De
uts
ch
F
rança
is
E
s
p
a
ñ
o
l
Po
r
tuguês
I
talia
n
o
N
ederlands
Ma
gy
ar
Polsk
i
Česk
y
Page 2

WW W.ONEFORALL .COM 1
Table of Contents
Eng
l
ish
PICTURE OF URC-7781 REMOTE . . . . . . . . . . . . . . . . . . . . . . . . . . . . . . . . . .
2
ABOUT YOUR URC-7781 . . . . . . . . . . . . . . . . . . . . . . . . . . . . . . . . . . . . . . . . . .
2
THE KEYPAD . . . . . . . . . . . . . . . . . . . . . . . . . . . . . . . . . . . . . . . . . . . . . . . . . . . . .
3
INSTALLING THE BATTERIES . . . . . . . . . . . . . . . . . . . . . . . . . . . . . . . . . . . . . .
5
SETTING THE LANGUAGE, DAY AND TIME . . . . . . . . . . . . . . . . . . . . . . .
5
SETTING UP THE URC-7781 . . . . . . . . . . . . . . . . . . . . . . . . . . . . . . . . . . . . .
6
(How to set up the URC-7781 to control your devices)
CODES
TV : Television / LCD / Plasma / Projector / Rear Projector
. . . . . . . . . . . . . . . .
301
VCR : Video Cassette Recorder / TV/VCR Combi / DVD/VCR Combi / PVR
. . . . . .
306
SAT : Satellite Receiver / Set-Top-Box / DVB-S / DVB-T / Freeview (UK)
/ TNT (F) / Digitenne (NL) / SAT/HDD
. . . . . . . . . . . . . . . . . . . . . . . . . . . . .
308
CBL : Cable Converter / Set-Top-Box / DVB-C
. . . . . . . . . . . . . . . . . . . . . . . . . .
310
VAC : Video Accessory like Media Centres / AV Accessories / AV Selectors
. . . . .
310
CD : CD Player / CD-R / MD
. . . . . . . . . . . . . . . . . . . . . . . . . . . . . . . . . . . . . . . .
310
PHO : Phonograph
. . . . . . . . . . . . . . . . . . . . . . . . . . . . . . . . . . . . . . . . . . . . . . .
311
MIS : Audio / Miscellaneous Audio
. . . . . . . . . . . . . . . . . . . . . . . . . . . . . . . . . .
311
HOM : Home Automation (e.g. IR controlled curtains / IR controlled
light switches etc.)
. . . . . . . . . . . . . . . . . . . . . . . . . . . . . . . . . . . . . . . . . .
311
AMP : Audio / Amplifier / Active Speaker System
. . . . . . . . . . . . . . . . . . . . . . . .
311
RCV : Audio / Audio Receiver/Tuner/Amplifier / (DVD) Home Cinema
. . . . . . . .
311
CAS : Cassette Player (Tape Deck)
. . . . . . . . . . . . . . . . . . . . . . . . . . . . . . . . . . .
312
LDP : Laser Disc Player / Video CD
. . . . . . . . . . . . . . . . . . . . . . . . . . . . . . . . . . .
312
DAT : Digital Audio Tape / DCC
. . . . . . . . . . . . . . . . . . . . . . . . . . . . . . . . . . . . .
312
DVD : DVD Player / DVD-R / DVD Home Cinema / DVD Combi / DVD/HDD
. . . . .
312
VIEW THE CURRENT CODE . . . . . . . . . . . . . . . . . . . . . . . . . . . . . . . . . . . . . . .
8
QUICK CODE REFERENCE . . . . . . . . . . . . . . . . . . . . . . . . . . . . . . . . . . . . . . . . .
8
REPLACE A DEVICE . . . . . . . . . . . . . . . . . . . . . . . . . . . . . . . . . . . . . . . . . . . . . . .
8
CHANGING A DEVICE CODE . . . . . . . . . . . . . . . . . . . . . . . . . . . . . . . . . . . . . .
9
MOVE A DEVICE . . . . . . . . . . . . . . . . . . . . . . . . . . . . . . . . . . . . . . . . . . . . . . . . .
10
DELETE A DEVICE . . . . . . . . . . . . . . . . . . . . . . . . . . . . . . . . . . . . . . . . . . . . . . .
10
THE LEARNING FEATURE . . . . . . . . . . . . . . . . . . . . . . . . . . . . . . . . . . . . . . . .
11
(How to copy functions from your original working remote
onto the URC-7781)
OPERATIONAL RESET . . . . . . . . . . . . . . . . . . . . . . . . . . . . . . . . . . . . . . . . . . . .
14
EXTRA FEATURES
• Colour, Brightness and Sleep
. . . . . . . . . . . . . . . . . . . . . . . . . . . . . . . . . . . . .
14
• Changing the device label
. . . . . . . . . . . . . . . . . . . . . . . . . . . . . . . . . . . . . . .
15
• Volume Lock
. . . . . . . . . . . . . . . . . . . . . . . . . . . . . . . . . . . . . . . . . . . . . . . . .
16
• Macro (sequence of commands)
. . . . . . . . . . . . . . . . . . . . . . . . . . . . . . . . . .
18
• Home Theatre
. . . . . . . . . . . . . . . . . . . . . . . . . . . . . . . . . . . . . . . . . . . . . . . .
22
• Code upgrade technology
. . . . . . . . . . . . . . . . . . . . . . . . . . . . . . . . . . . . . . .
24
• Key Magic® (How to program missing functions)
. . . . . . . . . . . . . . . . . . . . .
25
• Delete Learning and Key Magic
. . . . . . . . . . . . . . . . . . . . . . . . . . . . . . . . . .
27
• ONE FOR ALL Light Control
. . . . . . . . . . . . . . . . . . . . . . . . . . . . . . . . . . . . . .
30
TROUBLE-SHOOTING . . . . . . . . . . . . . . . . . . . . . . . . . . . . . . . . . . . . . . . . . . . . .
28
CUSTOMER SERVICE . . . . . . . . . . . . . . . . . . . . . . . . . . . . . . . . . . . . . . . . . . . . .
29
Page 3
2 WW W.O NEFO RALL.COM
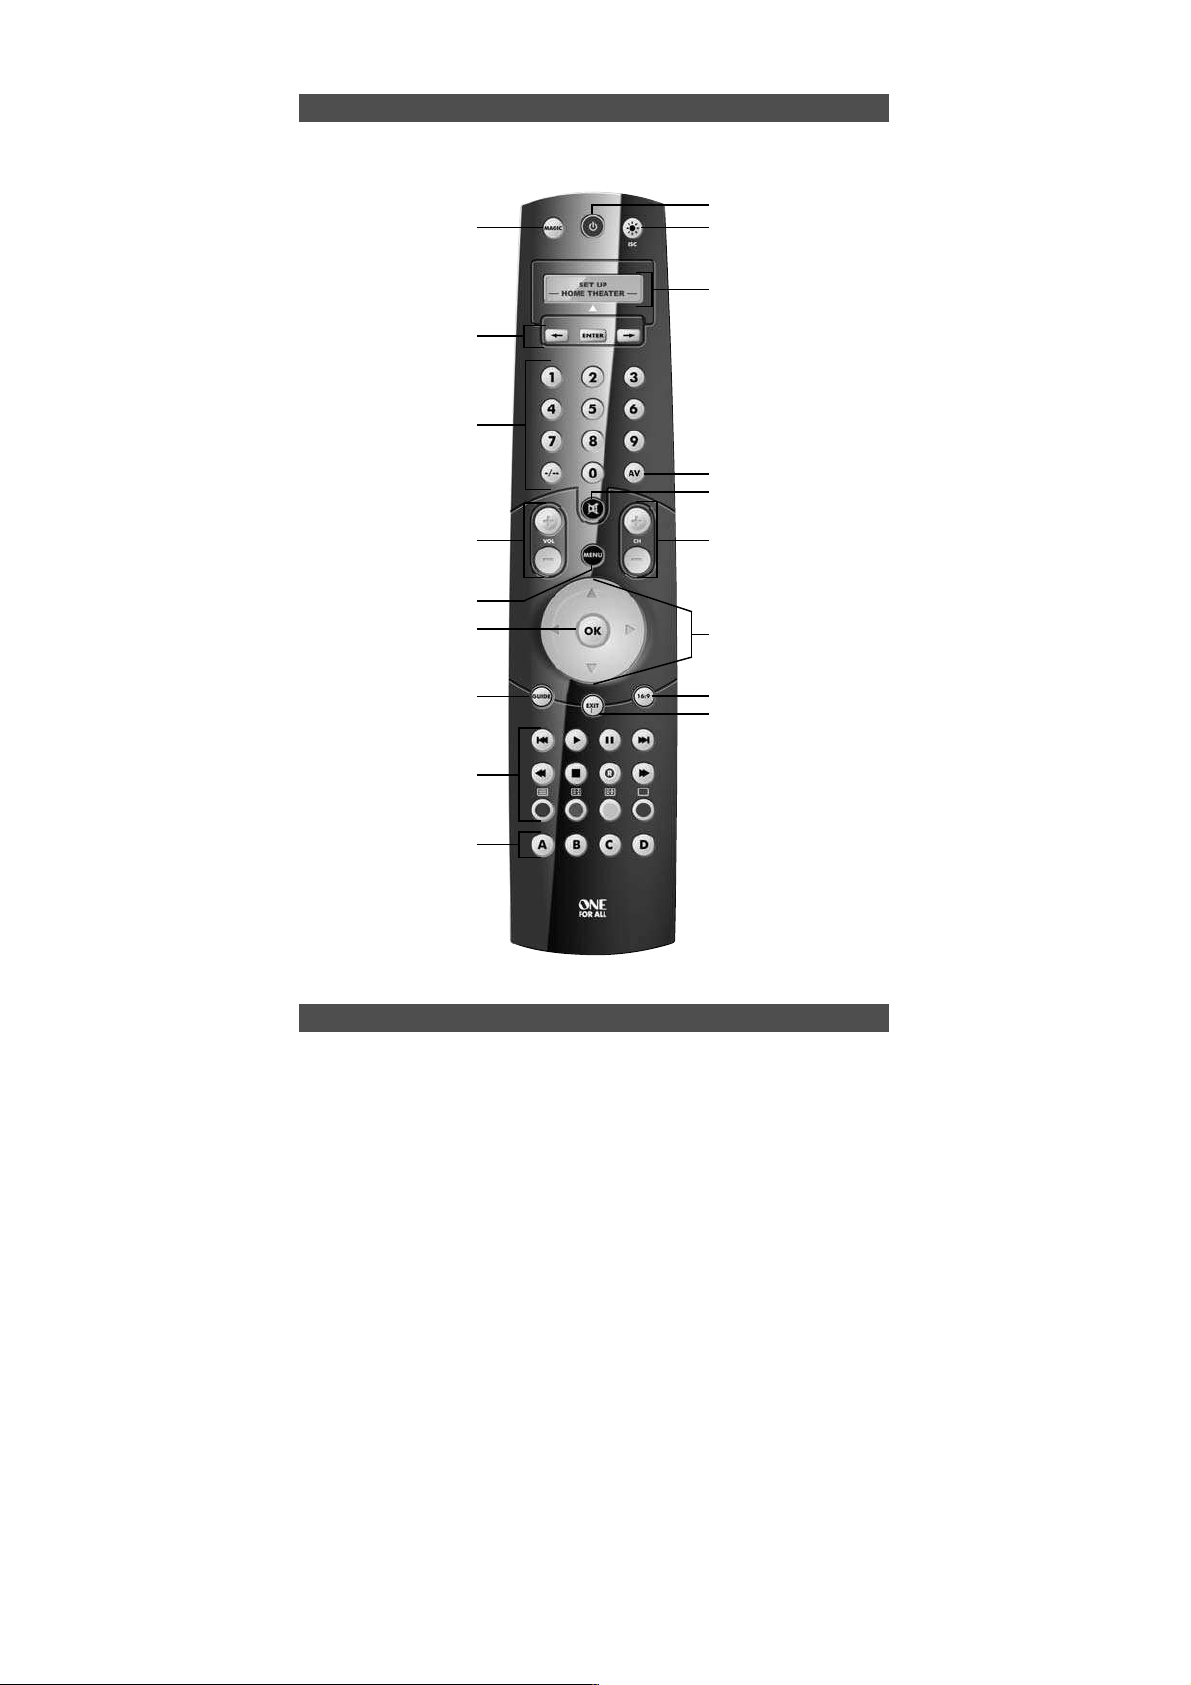
Picture of URC-7781
Your URC-7781 requires 4 new “AAA/LR03” alkaline batteries.
Your URC-7781 can operate 12 devices:
TV : Television / LCD / Plasma / Projector / Rear Projector
VCR : Video Cassette Recorder / TV/VCR Combi / DVD/VCR Combi / PVR
SAT : Satellite Receiver / Set-Top-Box / DVB-S / DVB-T / Freeview (UK) / TNT
(F) / Digitenne (NL) / SAT/HDD
CBL : Cable Converter / Set-Top-Box / DVB-C
VAC : Video Accessory like Media Centres / AV Accessories / AV Selectors
CD : CD Player / CD-R / MD
PHO : Phonograph
MIS : Audio / Miscellaneous Audio
HOM : Home Automation (e.g. IR controlled curtains / IR controlled light
switches etc.)
AMP : Audio / Amplifier / Active Speaker System
RCV : Audio / Audio Receiver/Tuner/Amplifier / (DVD) Home Cinema
CAS : Cassette Player (Tape Deck)
LDP : Laser Disc Player / Video CD
DAT : Digital Audio Tape / DCC
DVD : DVD Player / DVD-R / DVD Home Cinema / DVD Combi / DVD/HDD
The URC-7781 universal remote comes with a built in modem which allows you
to download codes that may not be pre-programmed in the memory. This means
that the URC-7781 will never become obsolete.
Also, what makes the URC-7781 even more unique is the „Learning“ feature, which
allows you to customise any of the special functions of your original remote control onto
the keypad of your new URC-7781. The following pages explain in simple steps how to
customise the URC-7781 to your devices.
About Your URC-7781
11
1
2
4
6
8
5
10
13
14
17/18
9
2
1
19
15
7
16
3
Page 4
WW W.O NEFORA LL.COM 3
The Keypad
See picture of URC-7781 remote on page 2.
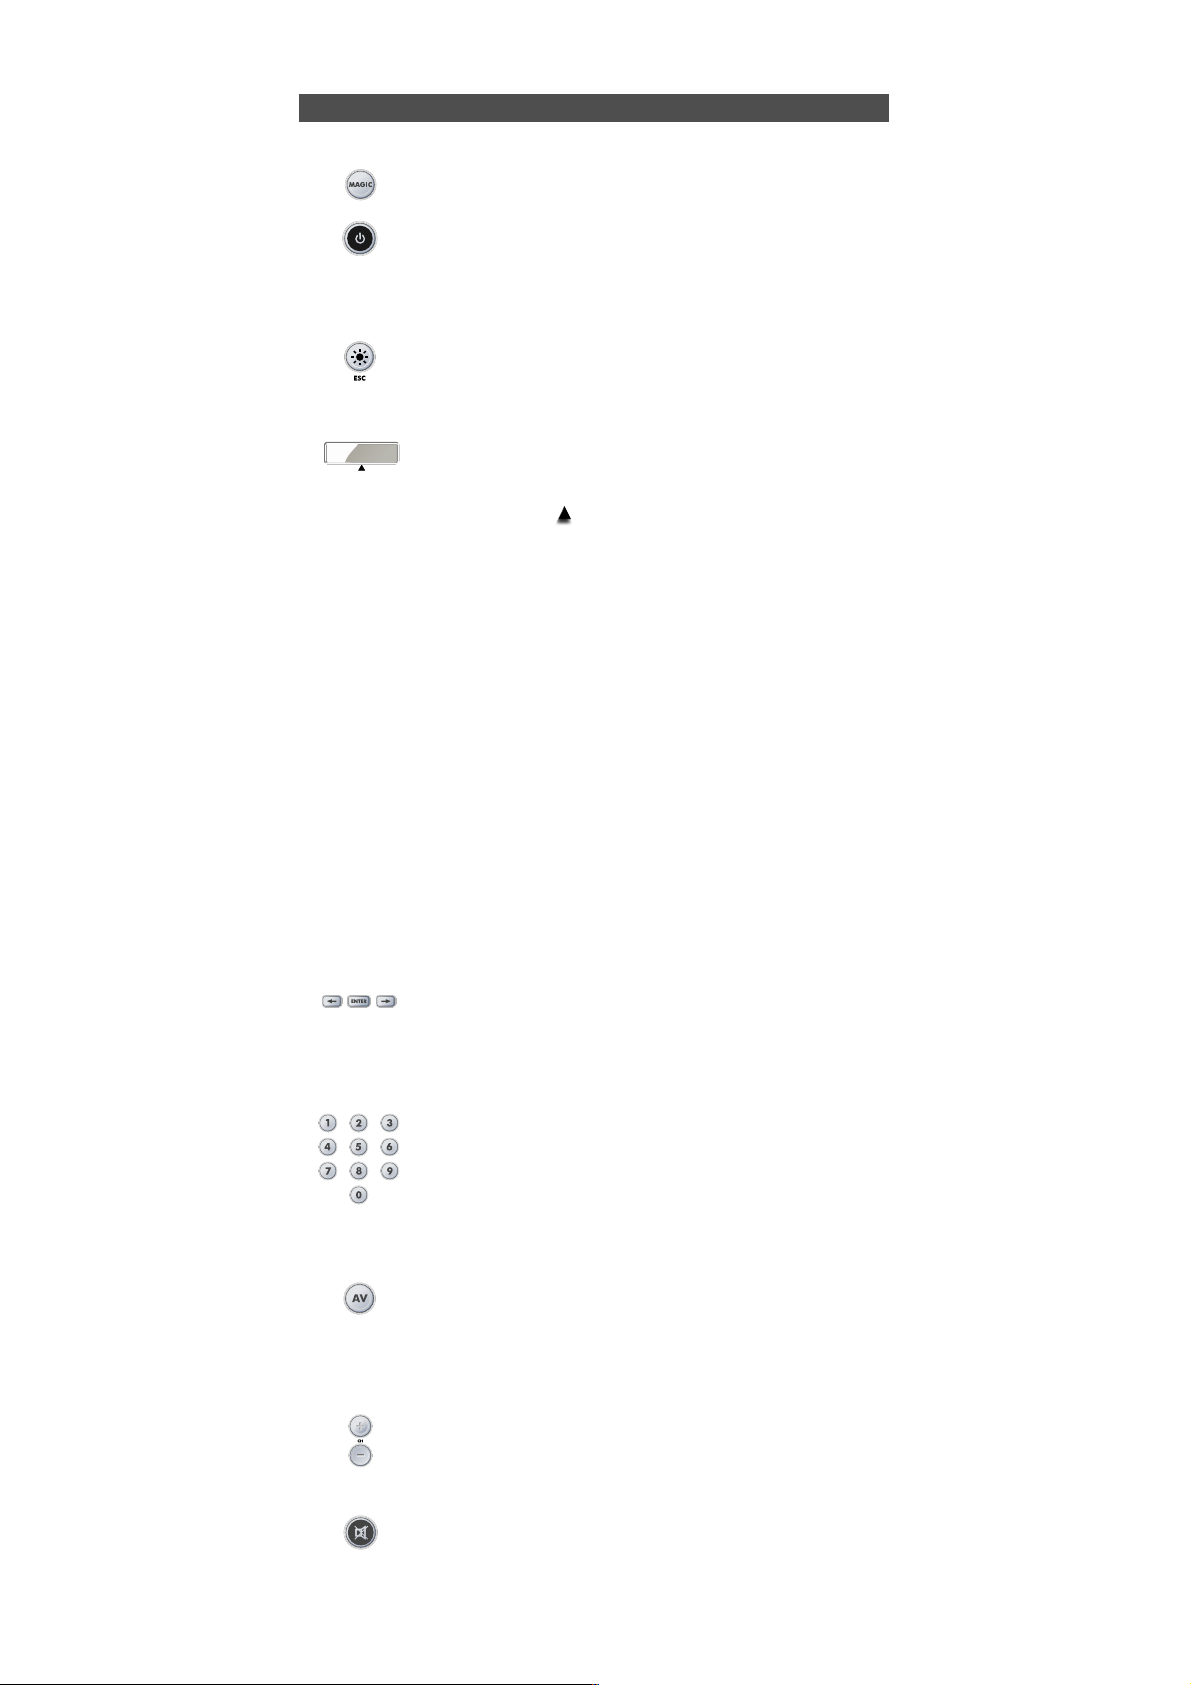
1 MAGIC Key
The MAGIC key is used to set up your URC-7781.
2 POWER (LED)
The POWER key operates the same function it did on your original
remote control. When pressing MAGIC then POWER you will obtain the
Sleep function. When you press and hold down the MAGIC key the LED
underneath the POWER key will light up twice and you will enter
programming mode.
3 LIGHT (ESC) Key
The LIGHT key lights up the LCD screen and keypad of the URC-7781.
This key will also allow you to return (escape) to the previous screen
within programming mode. If you want to exit programming mode
and return to user mode simply press and hold down the LIGHT key.
4 LCD screen
The URC-7781 can be simply programmed following the indications on
the LCD screen. During set-up the URC-7781 will list the 12 possible
device groups. The currently active device is shown in the middle of the
screen – indicated by: .
TV : (T) - Television / LCD / Plasma / Projector / Rear Projector
VCR : (V) - Video Cassette Recorder / TV/VCR Combi / DVD/VCR Combi / PVR
SAT : (S) - Satellite Receiver / Set-Top-Box / DVB-S / DVB-T / Freeview (UK) /
TNT (F) / Digitenne (NL) / SAT/HDD
CBL : (C) - Cable Converter / Set-Top-Box / DVB-C
VAC : (N) - Video Accessory like Media Centres / AV Accessories / AV Selectors
CD : (D) - CD Player / CD-R / MD
PHO : (P) - Phonograph
MIS : (M)- Audio / Miscellaneous Audio
HOM : (H) - Home Automation (e.g. IR controlled curtains / IR controlled light
switches etc.)
AMP : (A) - Audio / Amplifier / Active Speaker System
RCV : (R) - Audio / Audio Receiver/Tuner/Amplifier / (DVD) Home Cinema
CAS : (K) - Cassette Player (Tape Deck)
LDP : (L) - Laser Disc Player / Video CD
DAT : (J) - Digital Audio Tape / DCC
DVD : (Y) - DVD Player / DVD-R / DVD Home Cinema / DVD Combi / DVD/HDD
The type of code is indicated in brackets e.g. (T). When setting up your device a device
code will be displayed as e.g. T0556.
T - indicates the device type (TV code)
0556 – indicates a four-digit-code found under Philips.
It is also possible to rename/change a device label using a max of 4 characters
(see page 15).
5 Left / ENTER / Right
These keys allow you to scroll through and confirm your choices in the
remote’s “Programming menu”. When changing the device label you
can scroll through the “alphabet“, “digits” and “special symbols”
(. _ ^<) pressing the ENTER key to select the desired letter, digit or
symbol.
6 Number Keys (0-9, -/- -, AV)
The Number keys (0-9, -/—, AV) provide functions just like your original
remote, such as direct access to channel selection. If your original
remote uses one/two digit input switching (-/— symbol), this function
can be obtained by pressing the -/— key. If your original remote has a
10 key, this function can also be found under the -/— key. If your
original remote has a 20 key, this function can be found under the AV
key. In Audio (RCV, AMP, MIS) mode the Number keys may provide
source (input) selection.
7 AV key
In TV mode you will obtain the AV / Input function. In VCR mode you
will obtain the “AV” function, if available on your original remote. In
Audio (RCV, AMP, MIS) mode you will obtain the input/source function.
In DVD mode you will obtain the “TV/DVD” function, if available on
your original remote. In SAT mode you will obtain the “TV/SAT” or
“TV/DTV” function, if available on your original remote.
8 Channel +/- Keys
These keys operate the same function it did on your original remote
control. In TV mode these keys provide you the Brightness +/- when
pressing MAGIC then CH+/-. In Audio (RCV, AMP, MIS) mode these keys
will provide PRESET Up/Down.
9 MUTE Key
The Mute key operates the same function it did on your original remote
control.
Page 5
4 WWW. O NEFOR ALL.COM
The Keypad
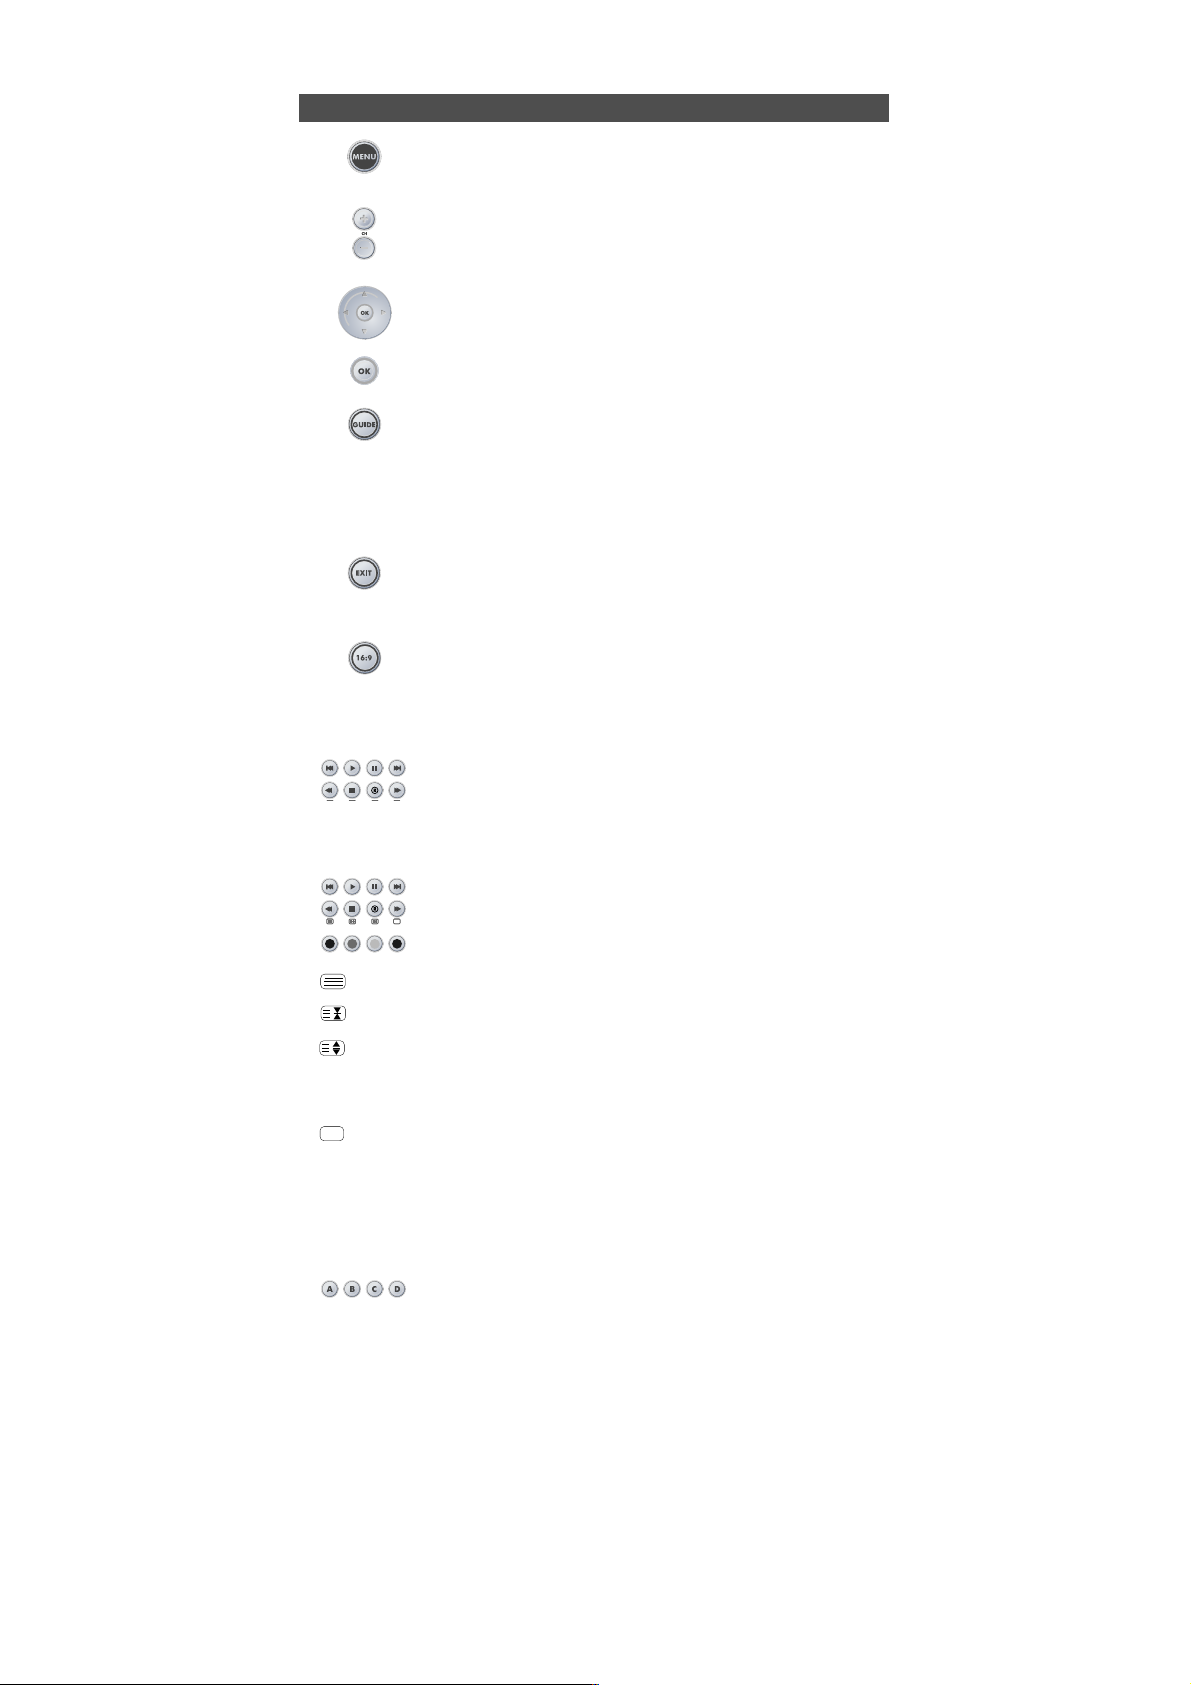
10 MENU Key
The MENU key controls the same function as it did on your original
remote.
11 Volume +/- Keys
These keys operate the same function it did on your original remote
control. In TV mode these keys provide you the Color +/- when pressing
MAGIC then VOL+/-.
12 Directional Keys
If available on your original remote, these keys will allow you to
navigate through the menu mode of your device.
13 OK
The OK key will confirm your choice in menu operation of your device.
14 Guide
In TV and/or SAT mode you will obtain the “Guide” or “Previous
Program” function, if available on your original remote. In VCR mode
you will obtain the “TV/VCR” or “Eject” function, if available on your
original remote. In AMP, RCV or MIS mode you will obtain the “Tune
Down” function, if available on your original remote. In CD mode you
will obtain the “Eject” or “Open/Close” function, if available on your
original remote.
15 Exit
In all modes you will obtain the “Menu Exit” function, if available on
your original remote. In SAT menu mode you may obtain the “back”
key to go to the previous menu screen.
16 16:9
In TV mode this key provides you the (16:9) wide screen view function,
if available on your original remote. In SAT mode you will obtain the
“Favorite” or “Info” function, if available on your original remote. In
DVD mode you will obtain “Zoom” or “Random”. In VCR mode you will
obtain “SP/LP”. In AMP, RCV or MIS mode you will obtain “Tune Up”.
17 Transport keys
These keys operate the transport functions (PLAY, FF, REW etc.) of
your device. To prevent accidental recording, the RECORD key must
be pressed twice to start recording.
18 Teletext Keys
The transport keys (REW, STOP, REC, FF) are used to operate the main
Teletext functions. The symbols below the keys are for Teletext. The text
keys are used to access the Teletext functions of your device. Of course,
your device must have Teletext capability.
TEXT ON: Puts the device (TV and/or SAT) in the Teletext mode.
HOLD/STOP: Stops changing pages.
EXPAND: Shows the top half of the Teletext page in larger letters.
By pressing again, you can see the bottom half of the Teletext page
enlarged. To return to regular Teletext viewing, press the EXPAND
key again, or press the TEXT ON key, depending on your television.
TEXT OFF: Switches the device (TV and/or SAT) back to regular viewing mode.
On some devices, this may be done by pressing the TEXT ON key
several times.
In TV mode when in text mode, the keys marked red, green, yellow and blue, allow you
to access the Fastext functions of your television. If on your original remote control these
keys are used for Menu navigation, the URC-7781 Fastext keys may operate in the same
way.
19 Custom keys (A, B, C, D)
The Custom Keys are spare keys which give you the possibility to
customise the URC-7781 remote using the learning and Key Magic®
features (page 11 and 25). These keys can also be used to program
Macros (see page 18).
Page 6
SET DAY
SUN MON TUE
ENTER
ENTER
ENTER
ENTER
ENTER
ENTER
ENTER
WW W.O NEFORA LL.COM
5
Installing the Batteries
Setting the Language, Day and Time
Your URC-7781 requires 4 new “AAA/LR03” alkaline batteries.
1 Remove the battery cover from the back of your URC-7781.
2 Match the batteries to the + and - marks inside the battery case, then insert
the batteries.
3 Press the battery cover back in place.
Important notes:
- Do not use rechargeable batteries.
- Upon changing the batteries, your set-up codes and advanced programming
will be retained.
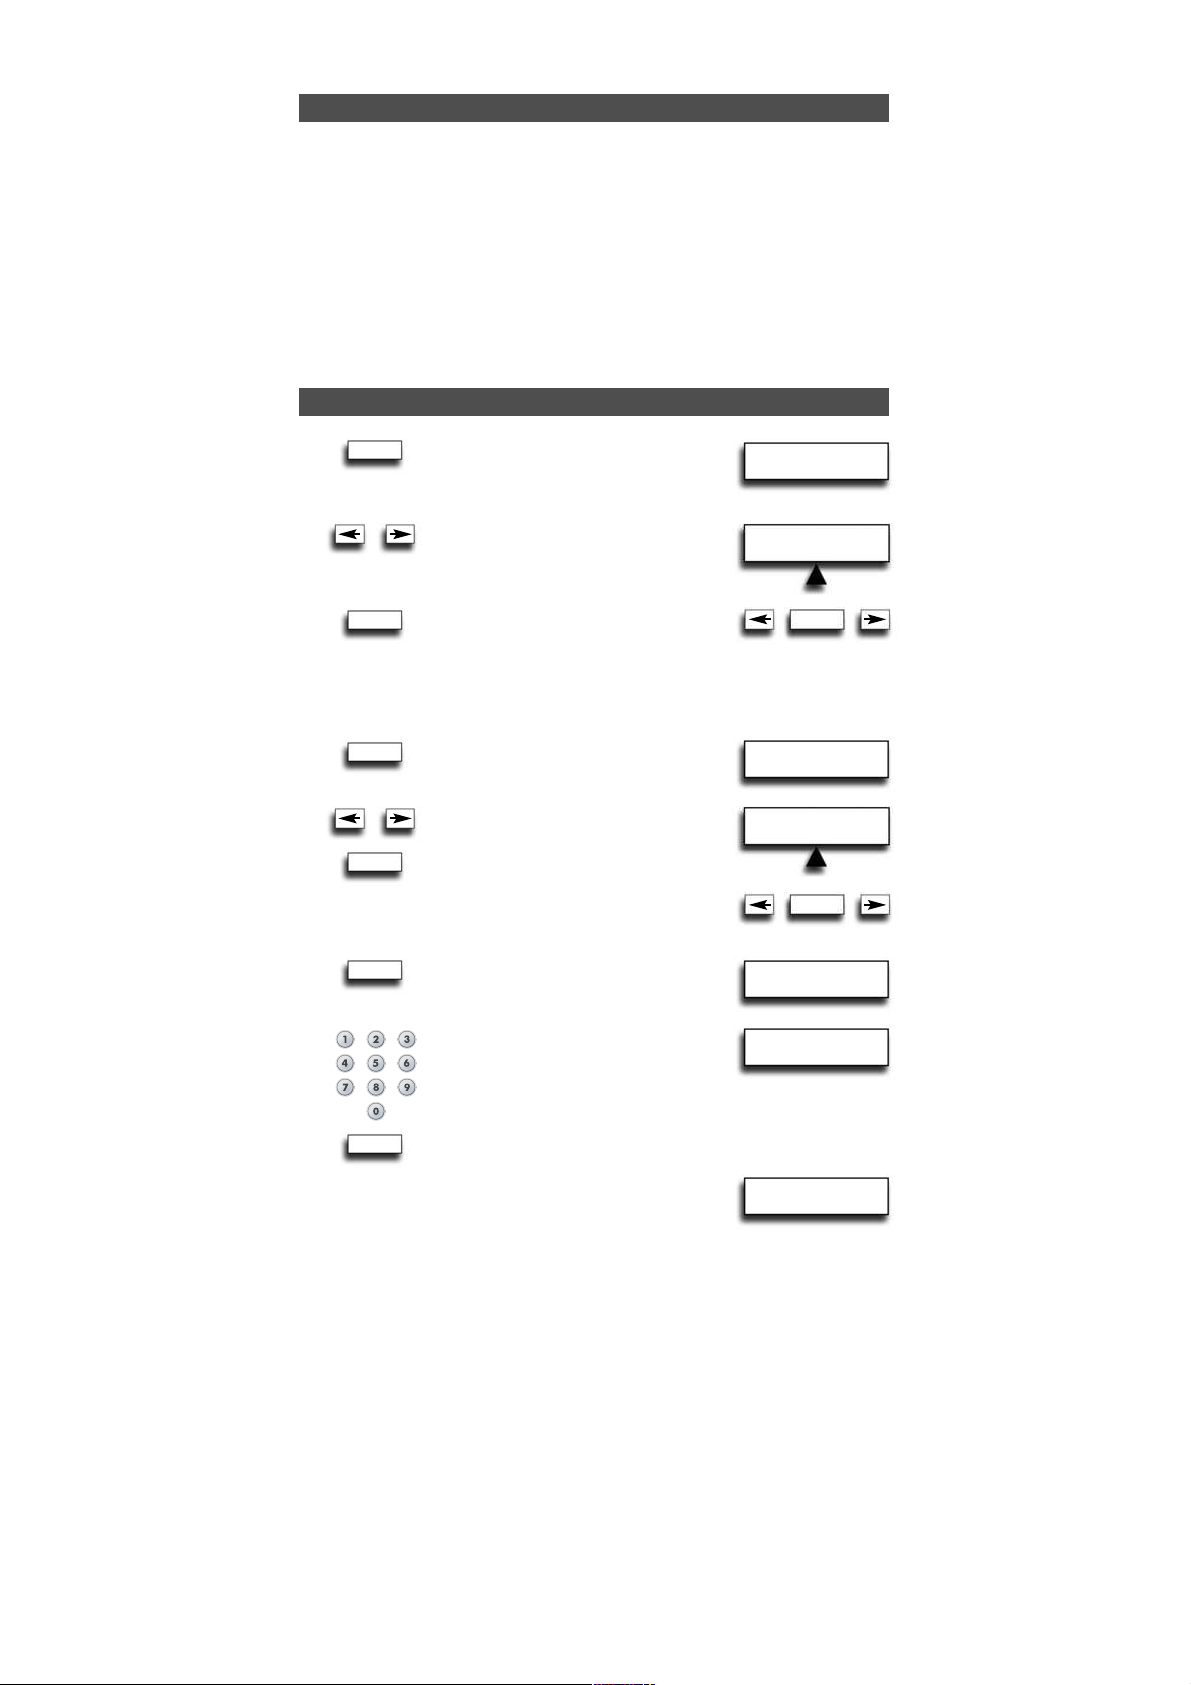
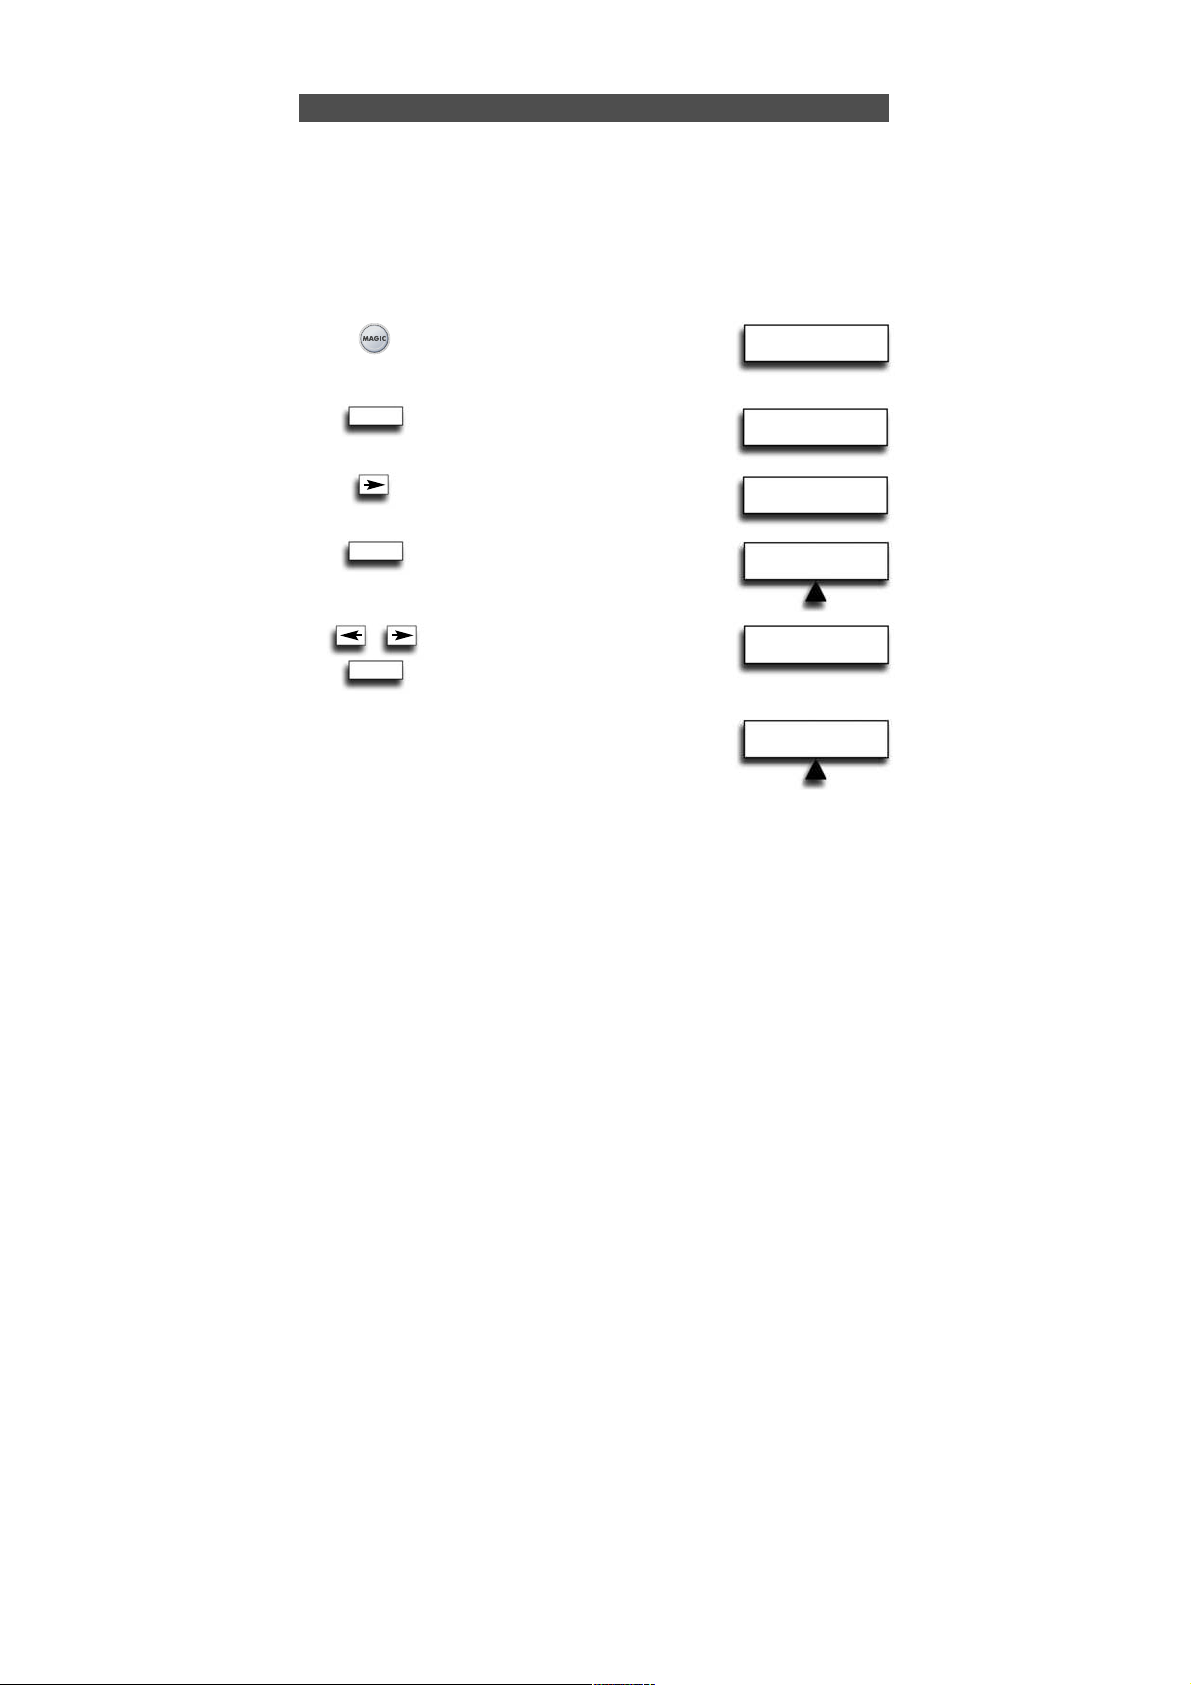
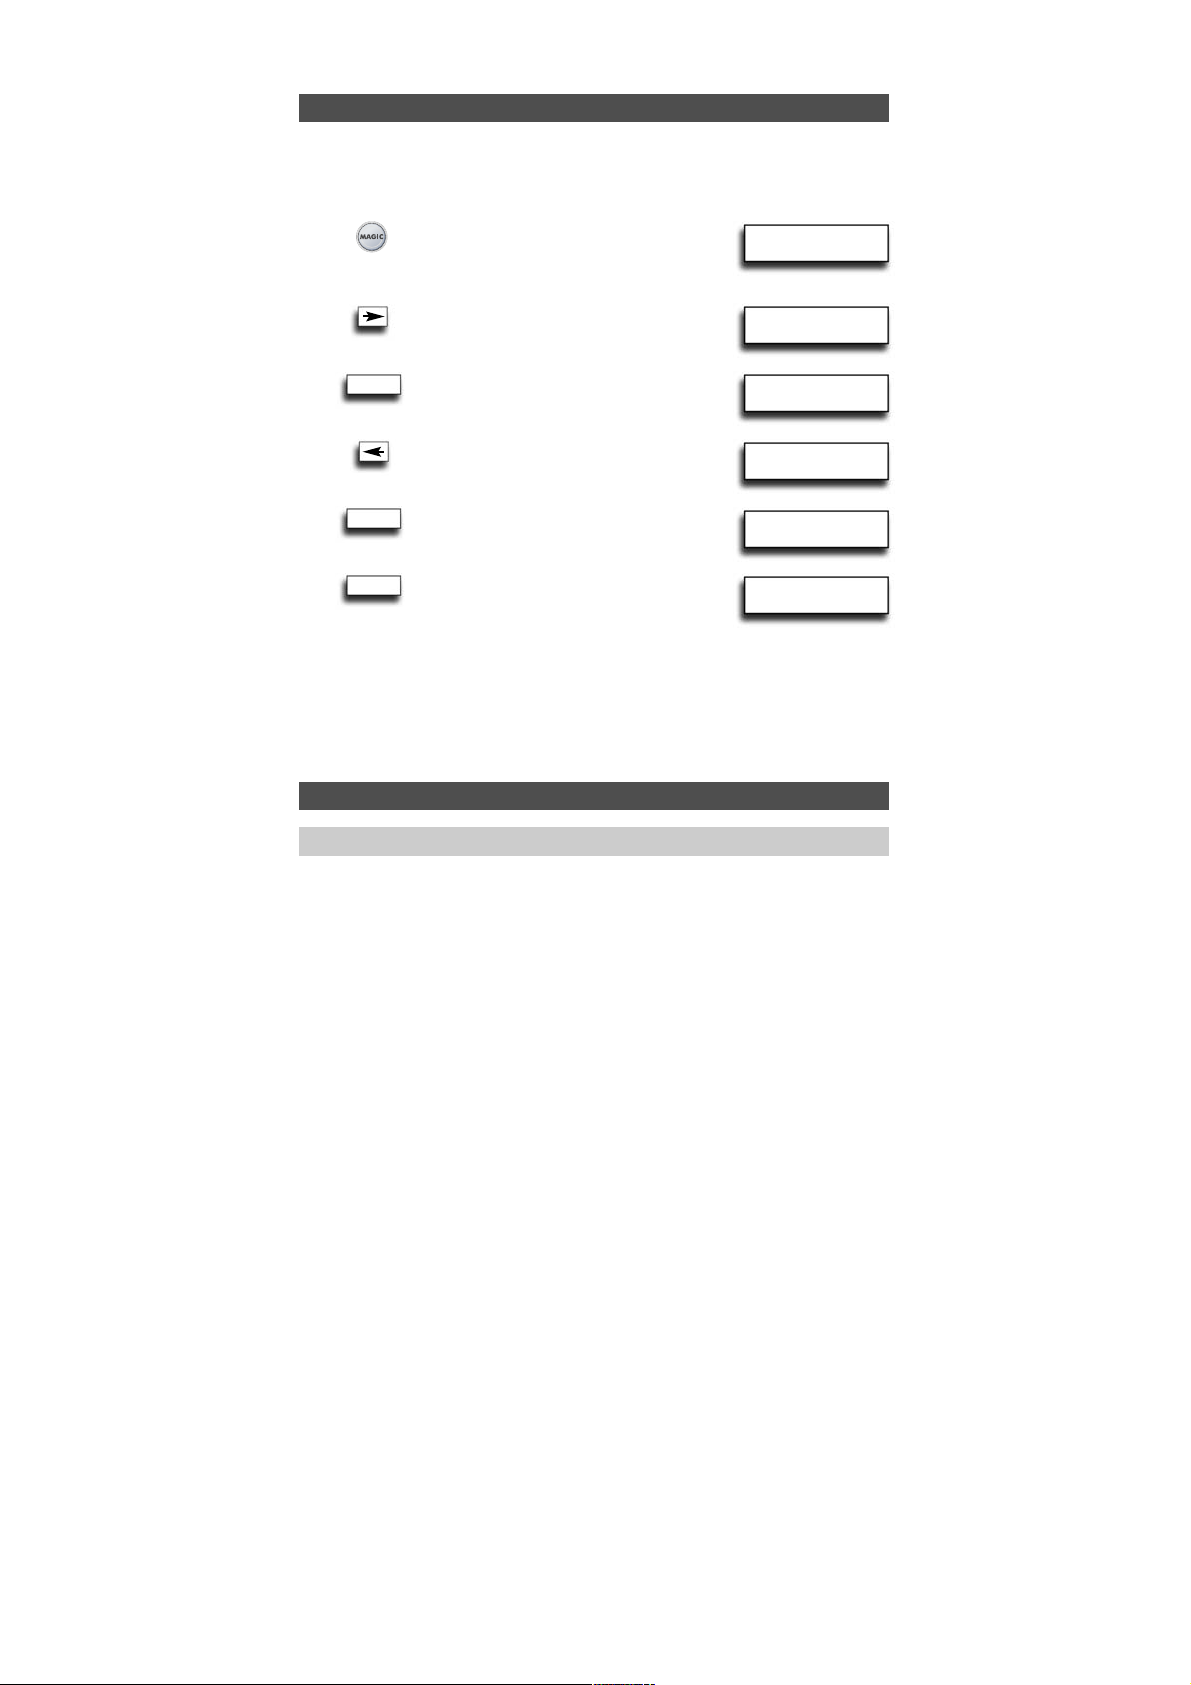
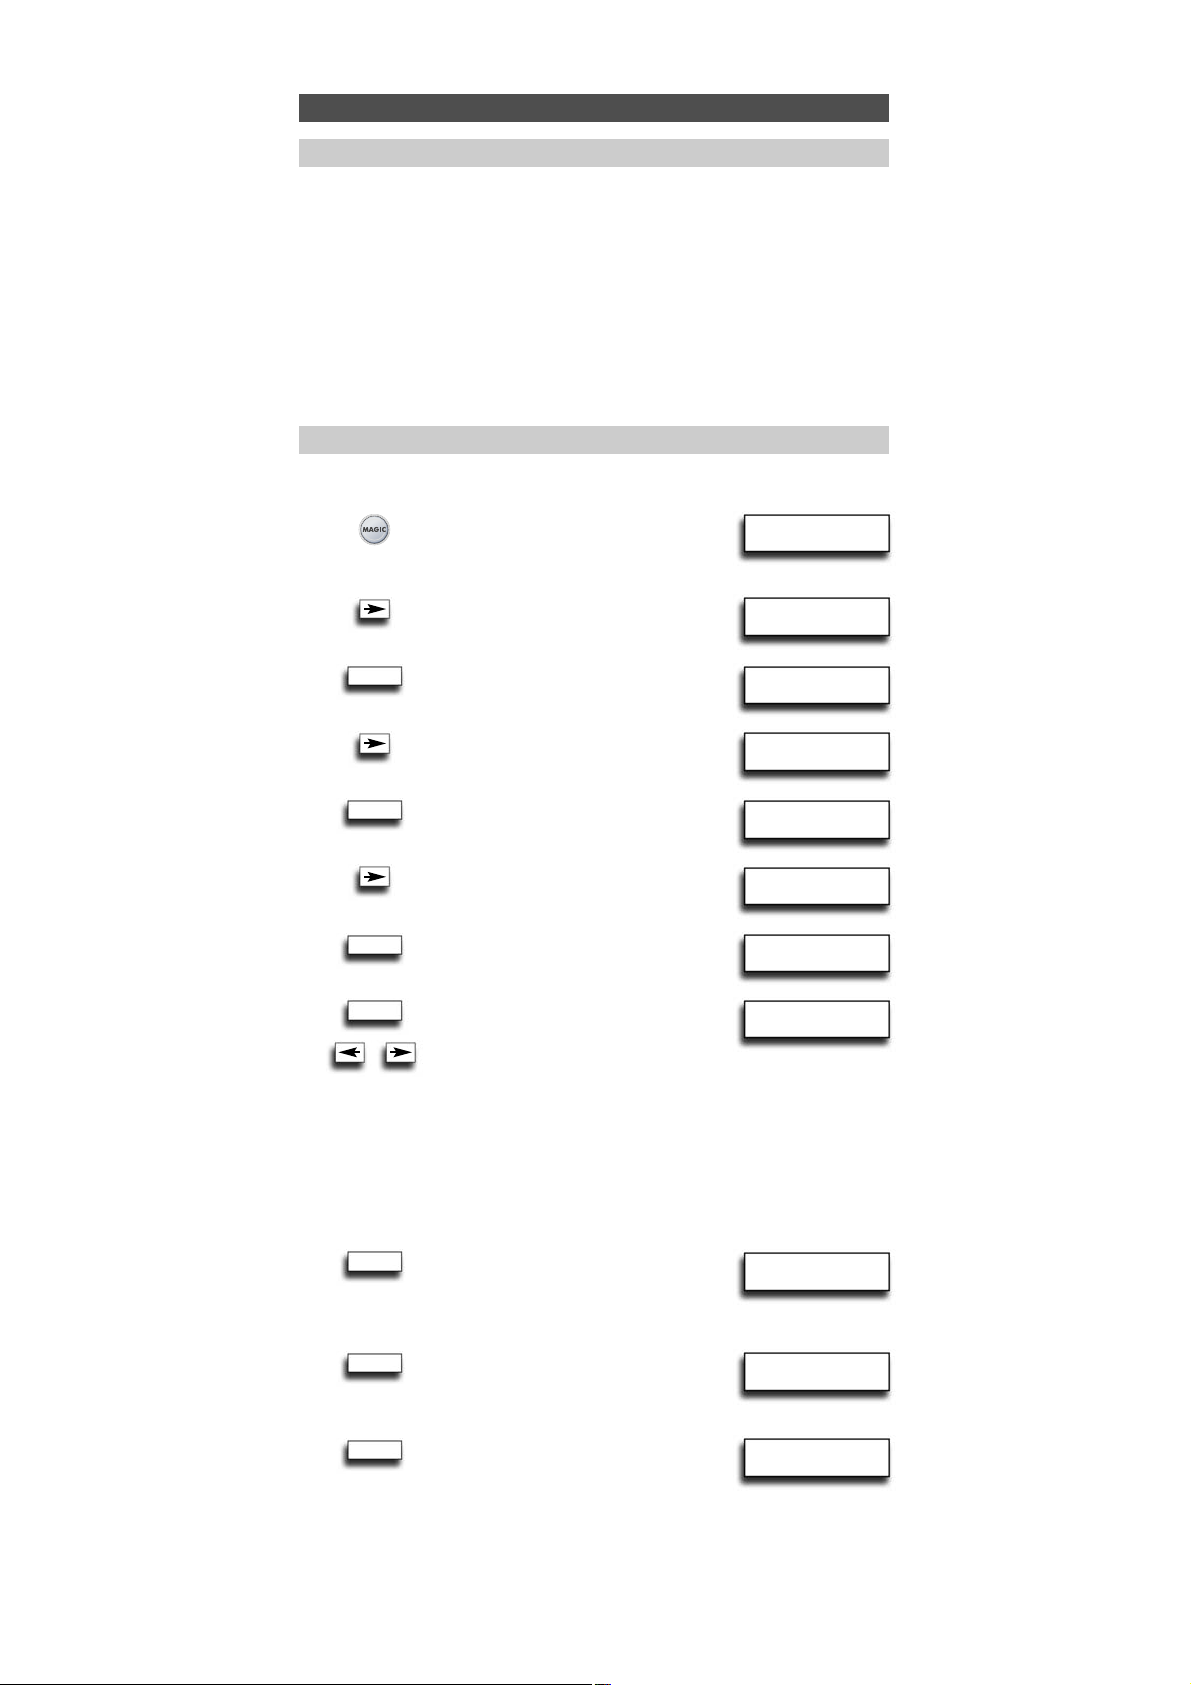
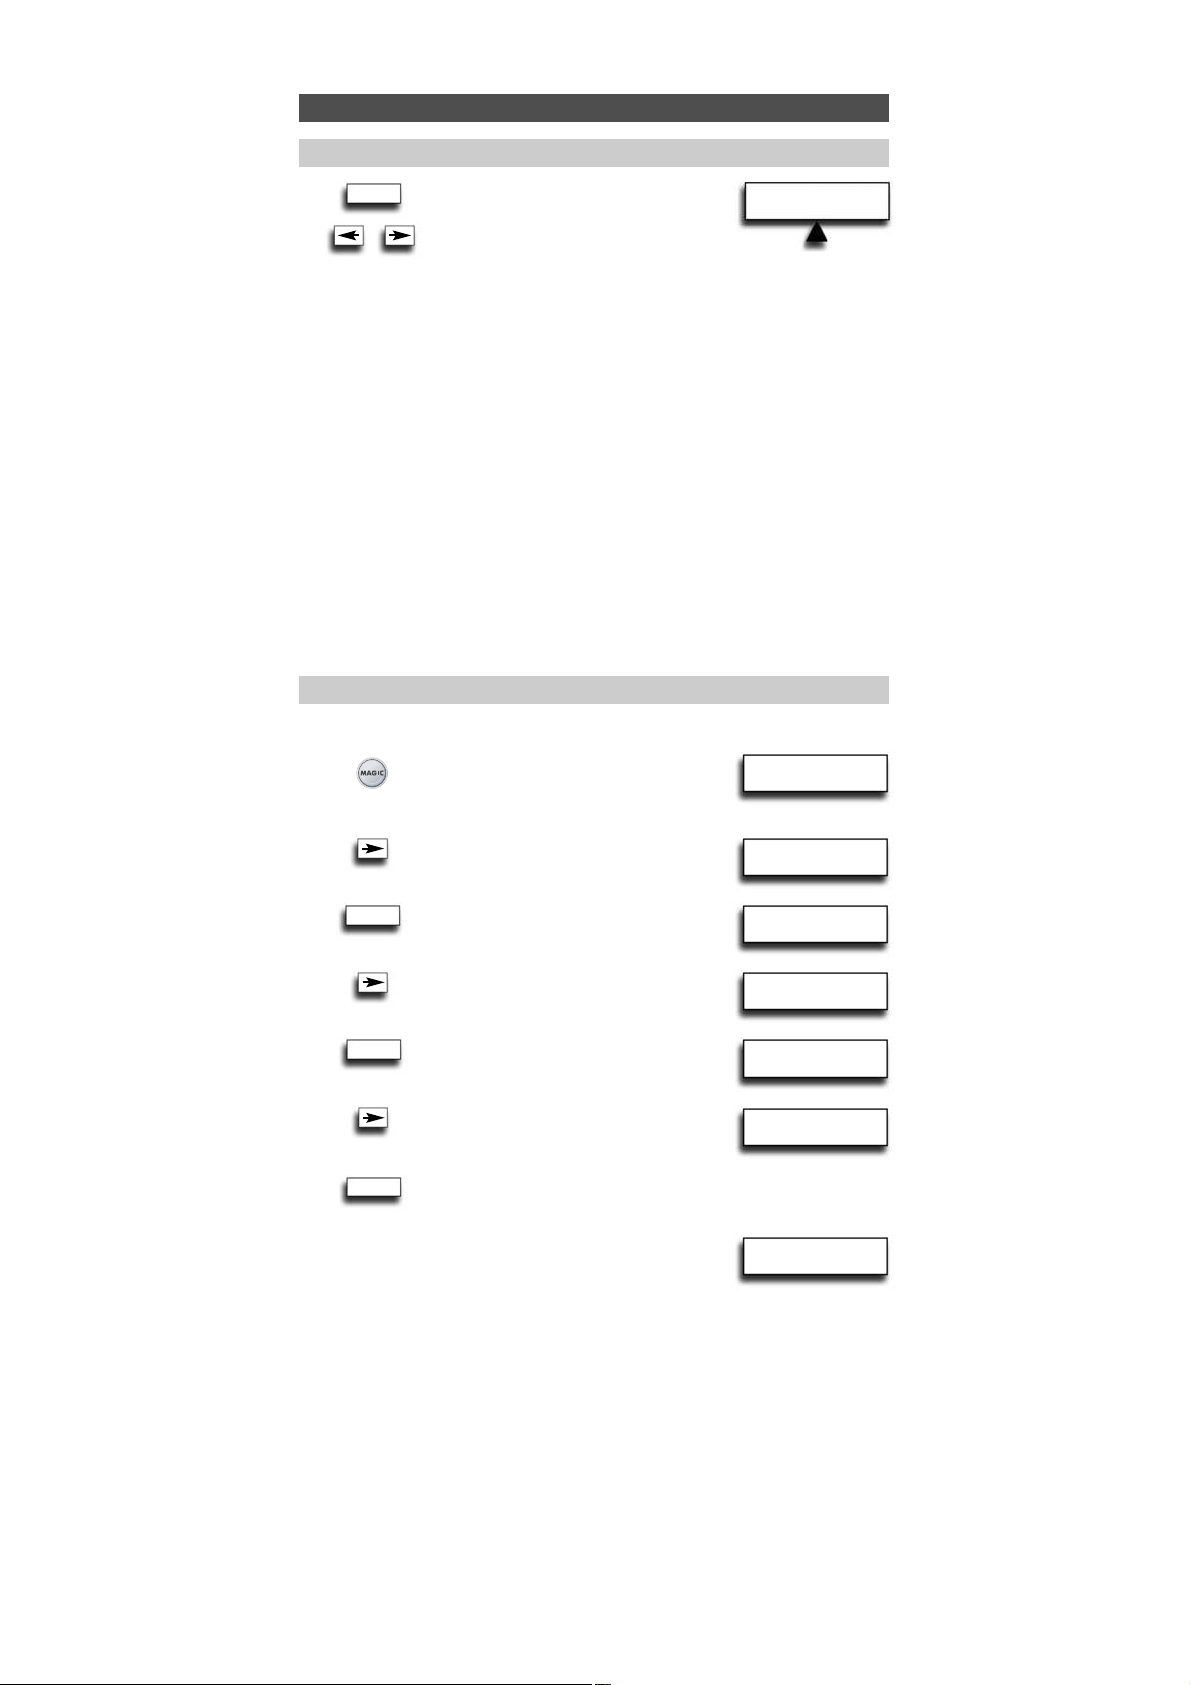
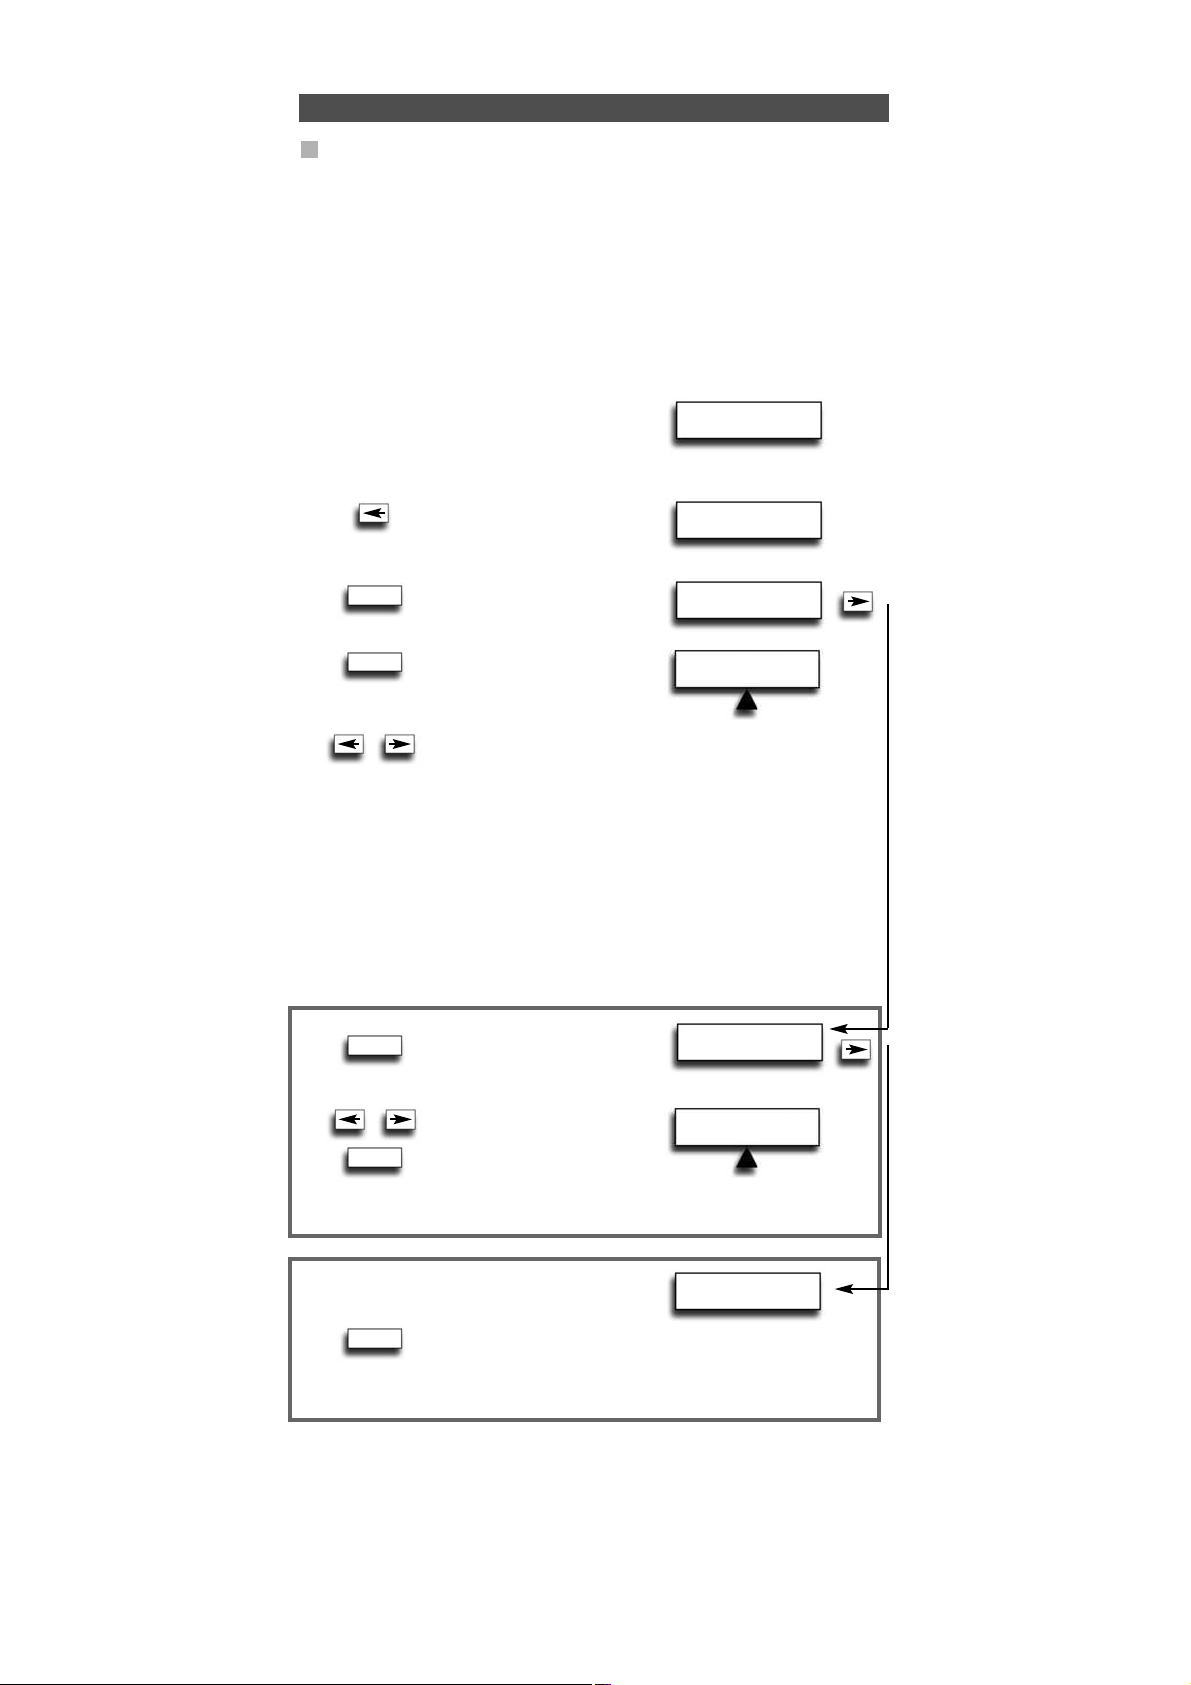
1. After inserting the batteries...
will appear on the screen. Press ENTER
to confirm.
2. Set the language to ENGLISH,
GERMAN (DEUTSCH) or FRENCH
(FRANÇAIS) using the ARROW keys.
Press ENTER to confirm the language
of your choice (e.g. ENGLISH).
The LED underneath the POWER Key will
light up twice. From now on all programming
features will be displayed in the selected language.
3. “SET DAY” will appear on the screen.
Press ENTER to confirm.
4. Select the corresponding day using
the ARROW keys and confirm by
pressing ENTER. The LED underneath
the POWER key will light up twice.
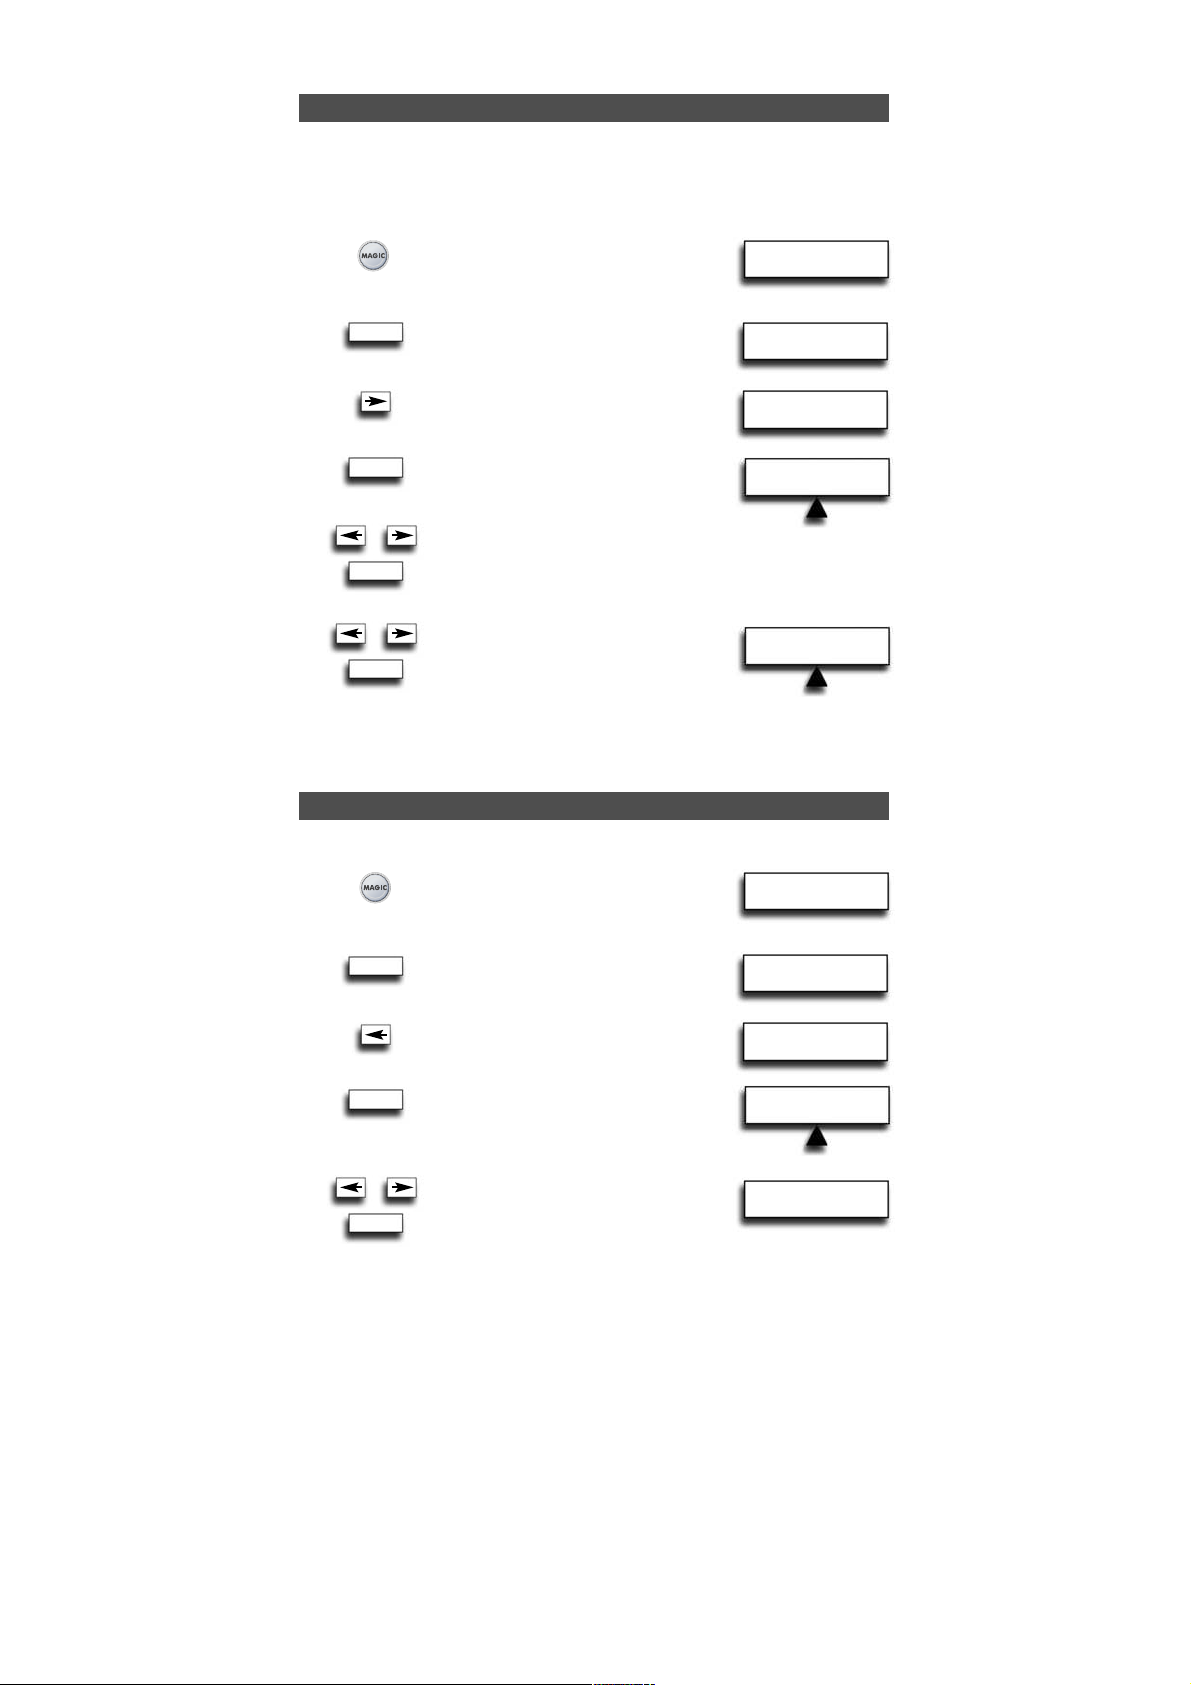
5. “SET TIME” will appear on the screen.
Press “ENTER” to confirm.
6. Enter the corresponding time using
the number keys and confirm by
pressing “ENTER”. The LED underneath
the POWER key will light up twice.
“ADD DEVICE” will appear on the screen.
Please continue on page 6 to set up the URC-7781 to control your devices.
Note: After the remote has been completely setup, to change the Language, Day or
Time again you need to enter programming mode. To do so press and hold MAGIC
until “INITIAL SETUP” appears on the screen. Next press ENTER, and “DEVICE” will
appear on the screen. Next use the ARROW keys to scroll to “LANGUAGE” or
“DAY/TIME” depending on what you require to change.
LANGUAGE
SET DAY
SET TIME
SET TIME
00:00
ADD DEVICE
SET LANGUAGE
ENGLISH
ENTER
Page 7
ADD DEVICE
PHO TV VCR
TV
T0556
6 WWW. O NEFOR ALL.COM
Setting up the URC-7781
How to set up the URC-7781 to control your devices
Example: To set up the URC-7781 for your Television:
Find the code for your device in the Code list (page 301 - 315). Codes are list-
ed by device type and brand name. The most popular code is listed first. Make
sure your device is switched on (not on standby).
If your brand is not listed at all, the URC-7781 gives you the possibility to scan
through all the codes contained in the memory for your specific device (in that case,
as explained in see step 4, use the ARROW Left / Right keys instead of the digits).
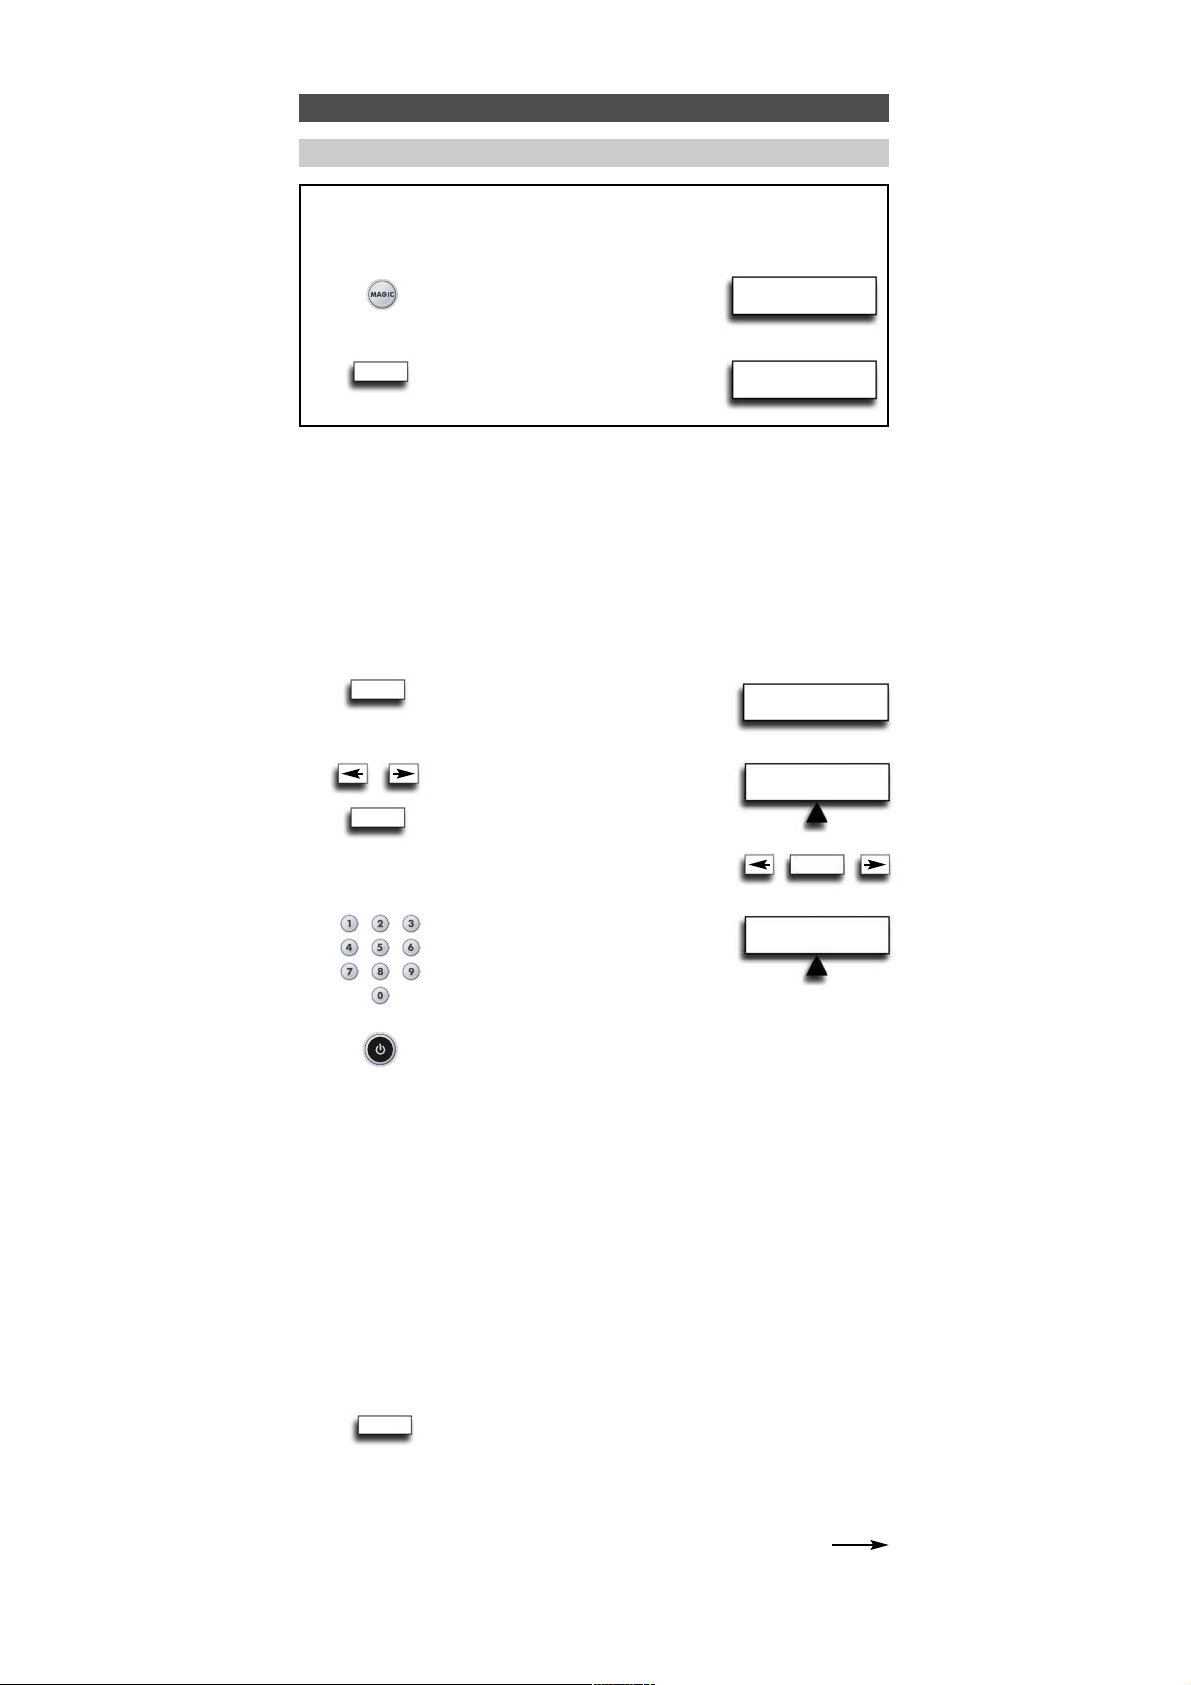
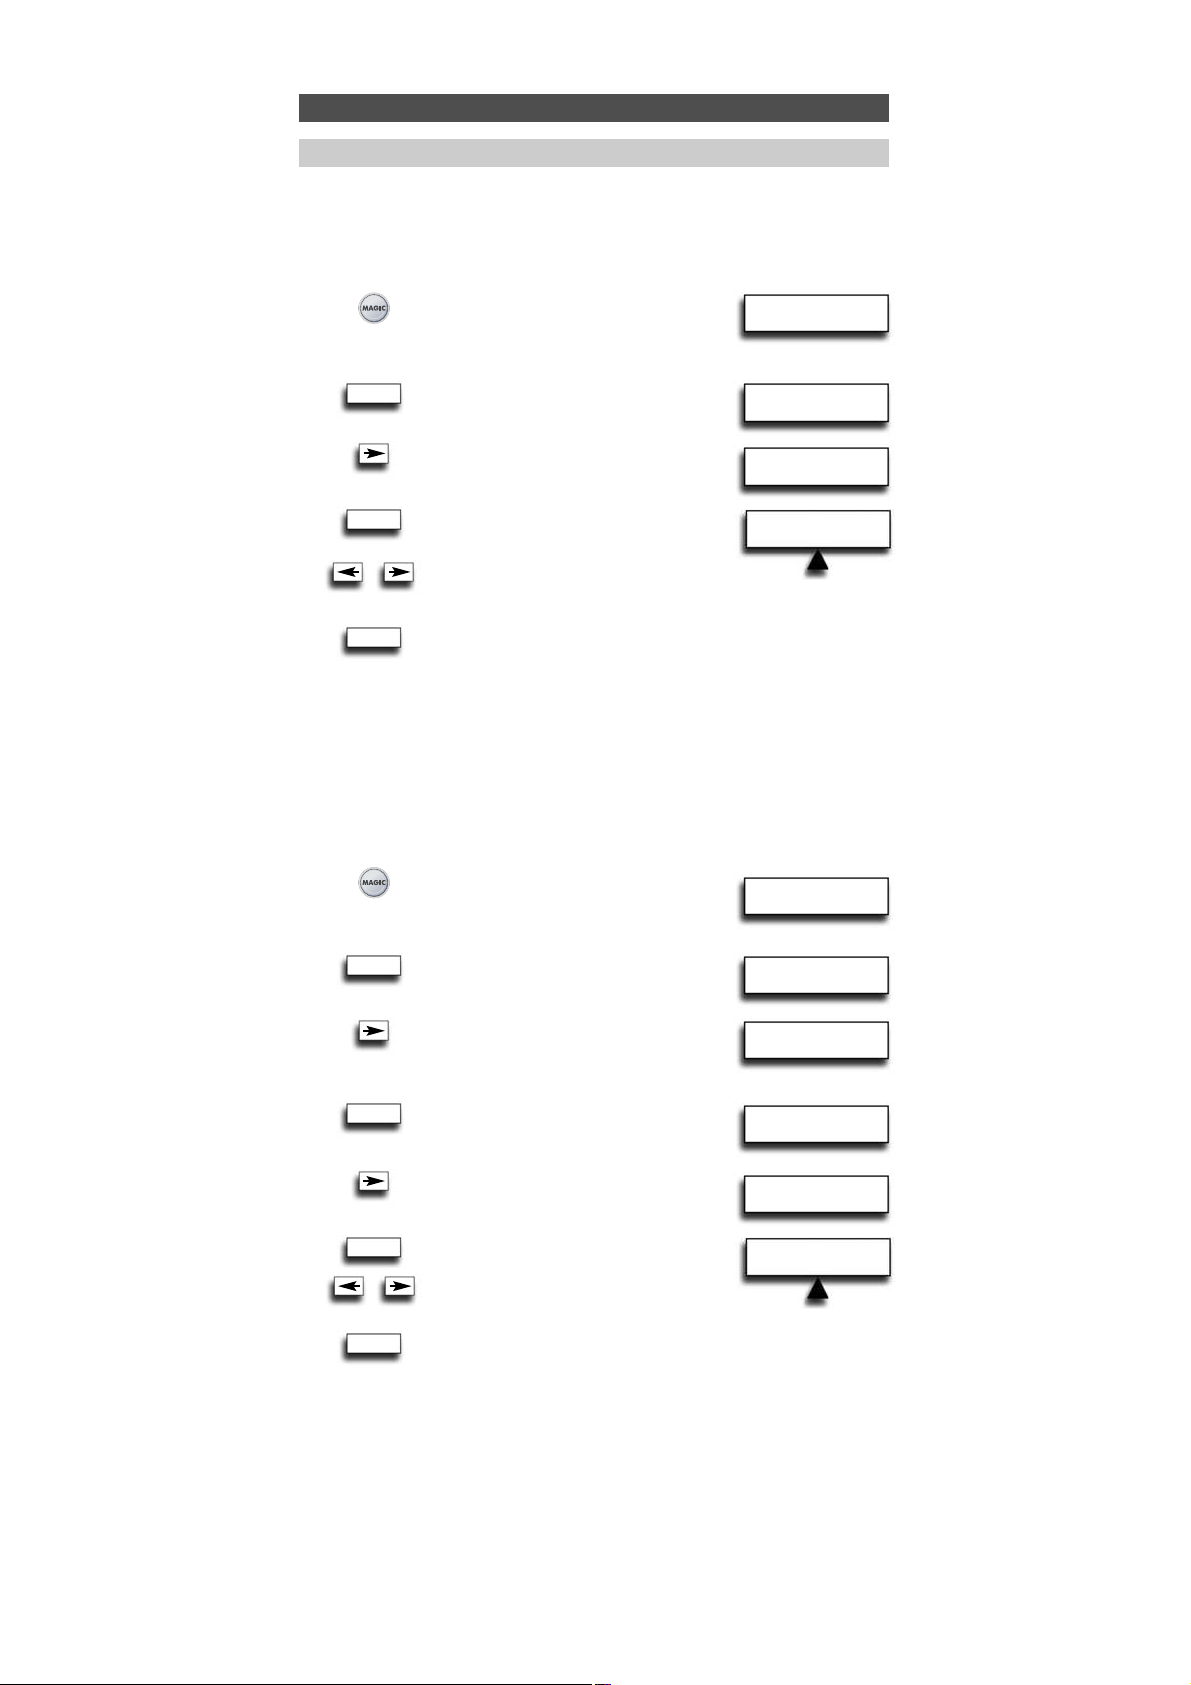
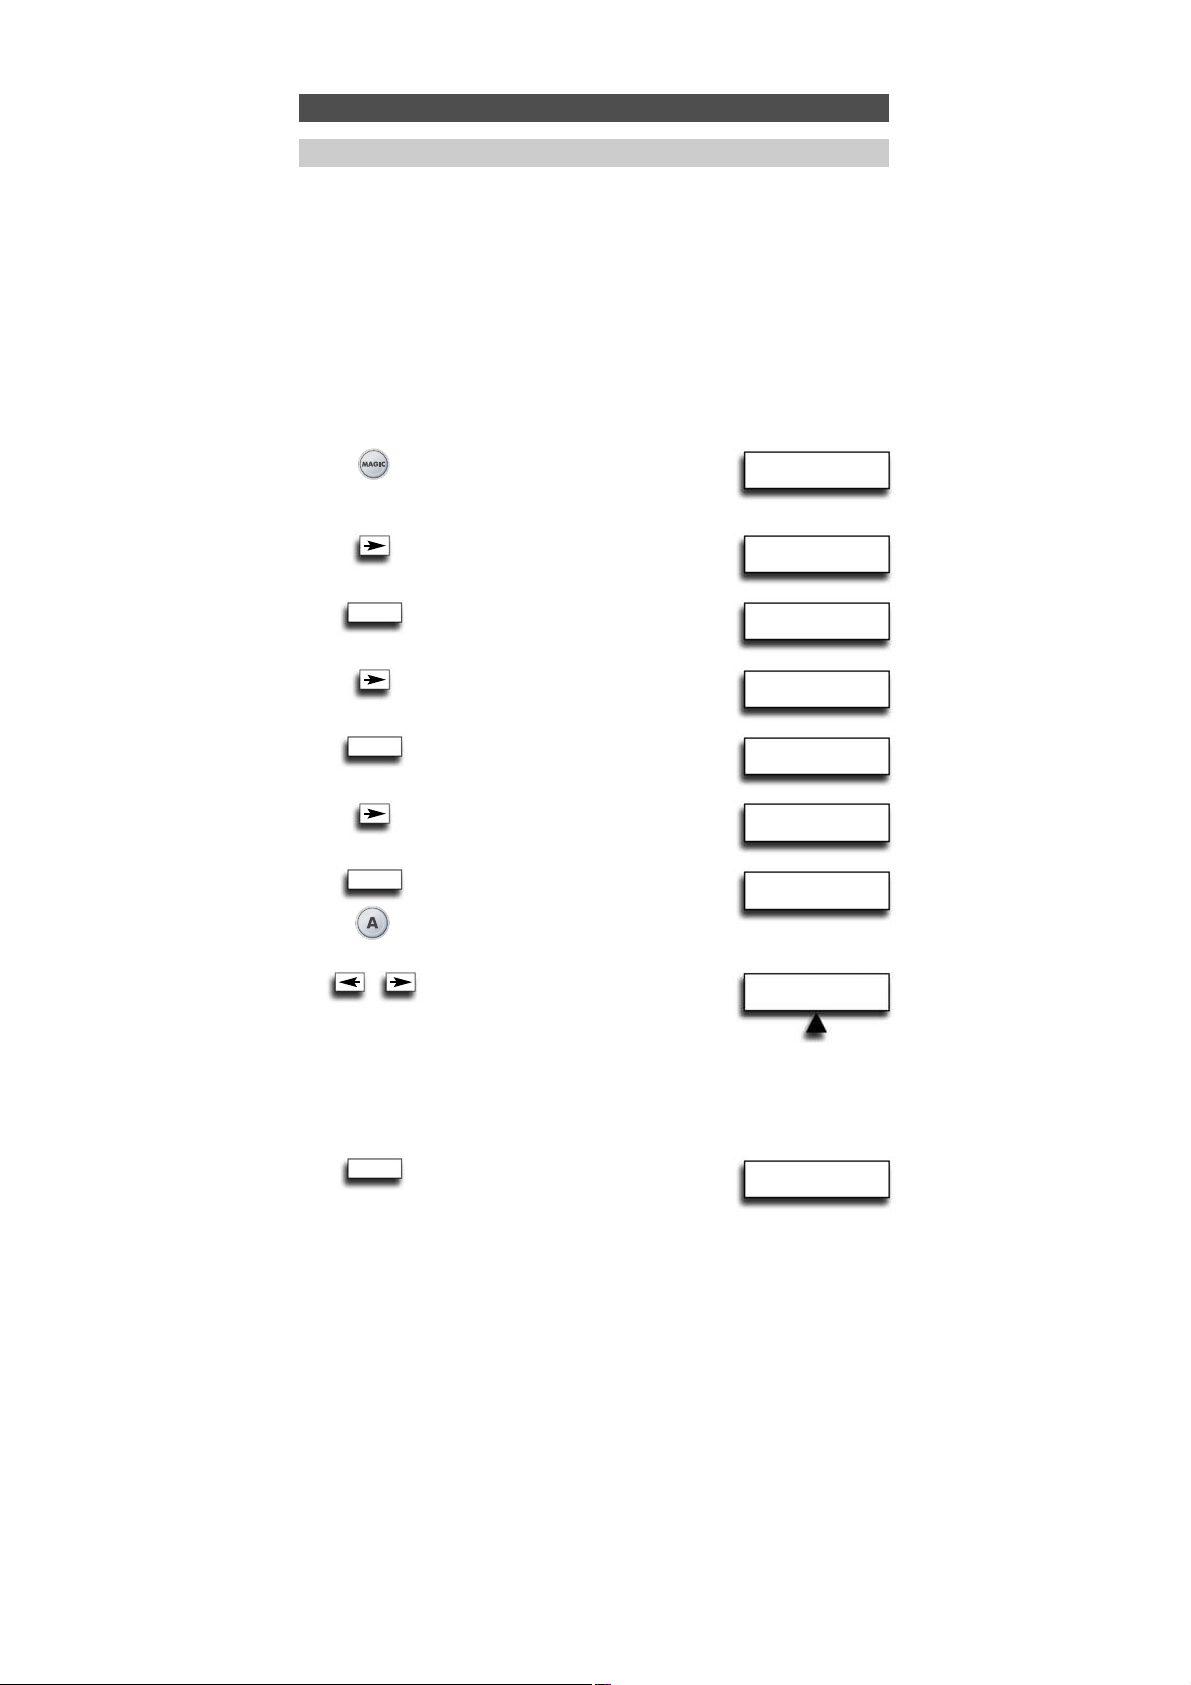
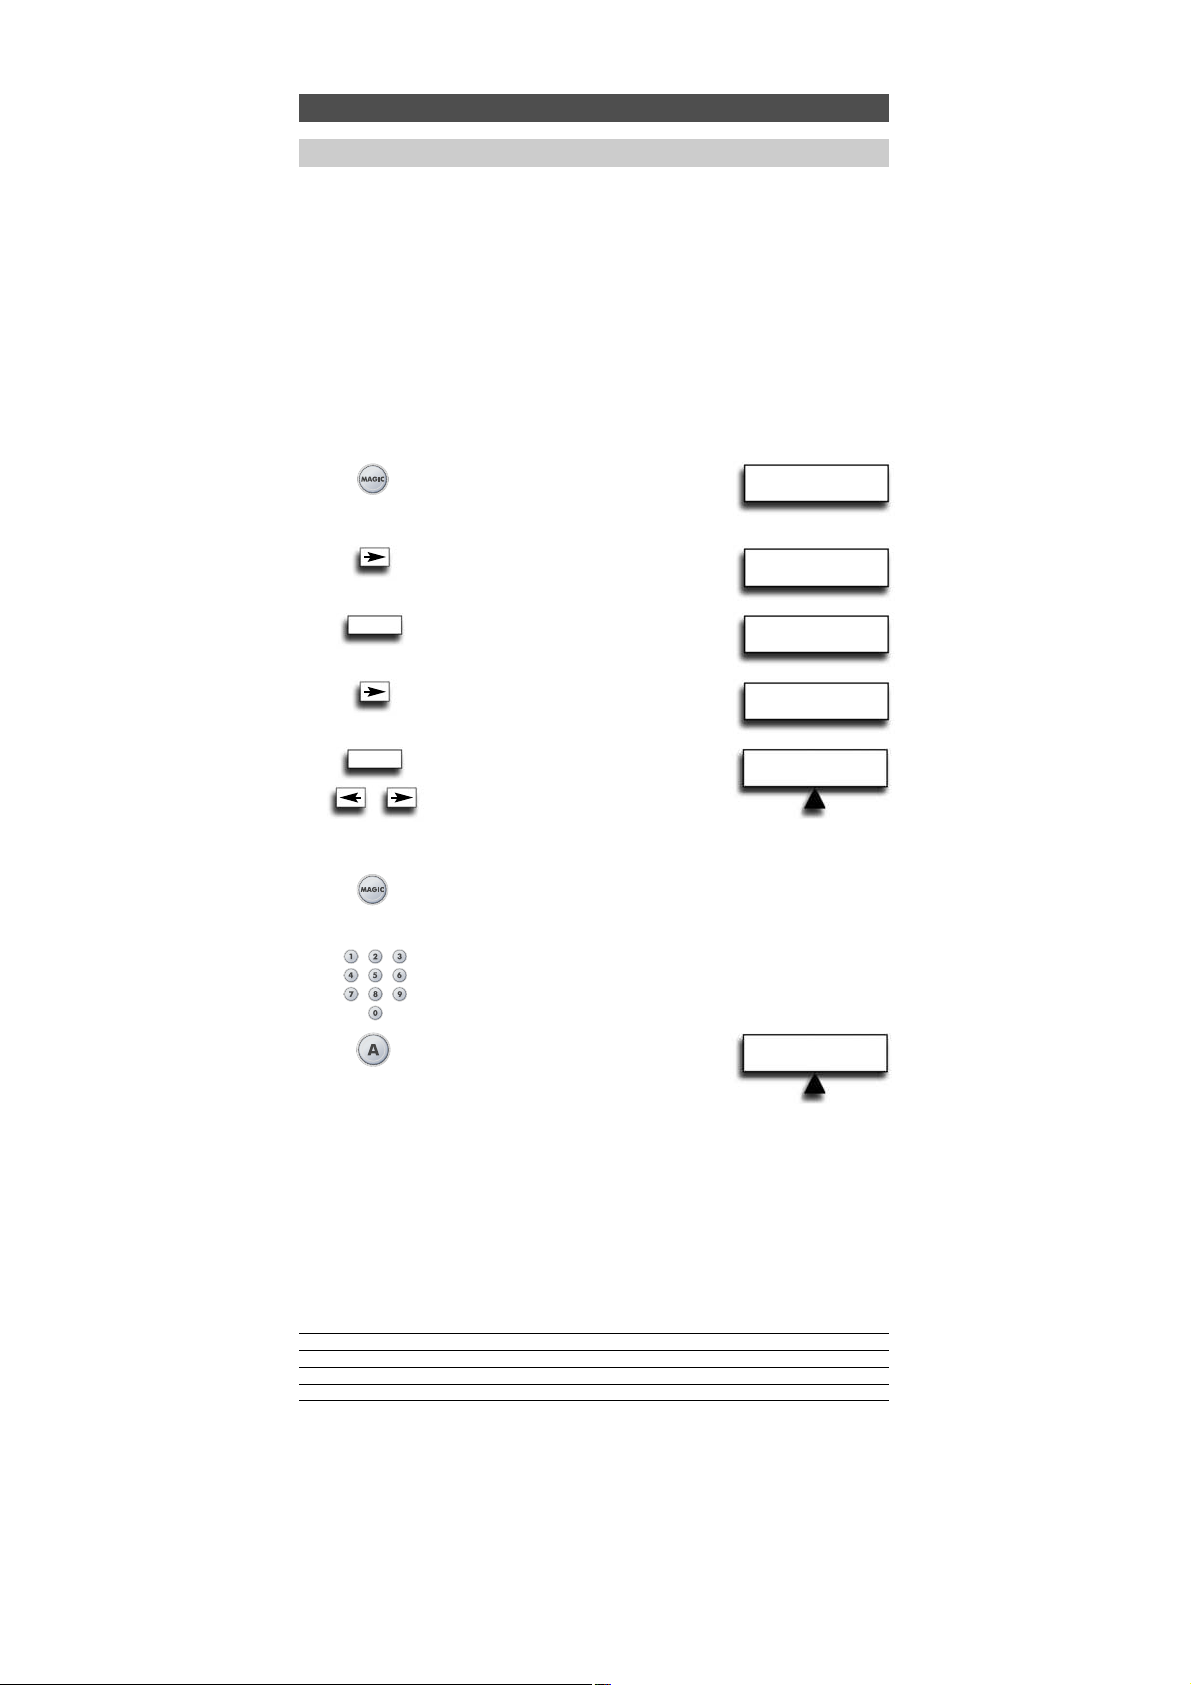
The display will read...
Press ENTER.
Select the device you wish to set up
using the ARROW left/right keys and
confirm pressing ENTER. Now you will
see CODE SET UP. Press ENTER again.
Simply use the number keys to enter
the first four-digit device code
corresponding to your brand listed
in the code list (pages 301 - 315). The LED
underneath the POWER key will light up twice.
Aim the URC-7781 at your device and press POWER.
—> IF your device switches OFF, switch your device back ON (e.g. press CH+ to
switch ON your TV) and try all the remote’s functions to ensure they are
working properly.
—> IF some functions do not work properly or if your device does not respond at
all, please try the next four-digit device code listed under your brand (pages
301 - 315).
SEARCH METHOD: Each time you press the ARROW Left of Right key, this will display
the previous or next code in the memory and send POWER of that
code.
- Do not use the digits to test if the code works as this will change the current code.
- If your device does not respond to the URC-7781 after you have tried all the codes
(page 301 - 315) listed for your brand………or…….if your brand is not listed at
all…….simply press the “ARROW right” key to scroll to the next code contained in
the memory (for your specific device).
As soon as all the remote’s functions are working properly
press ENTER to store this code.
Make sure to write down your code on page 8 for easy future reference.
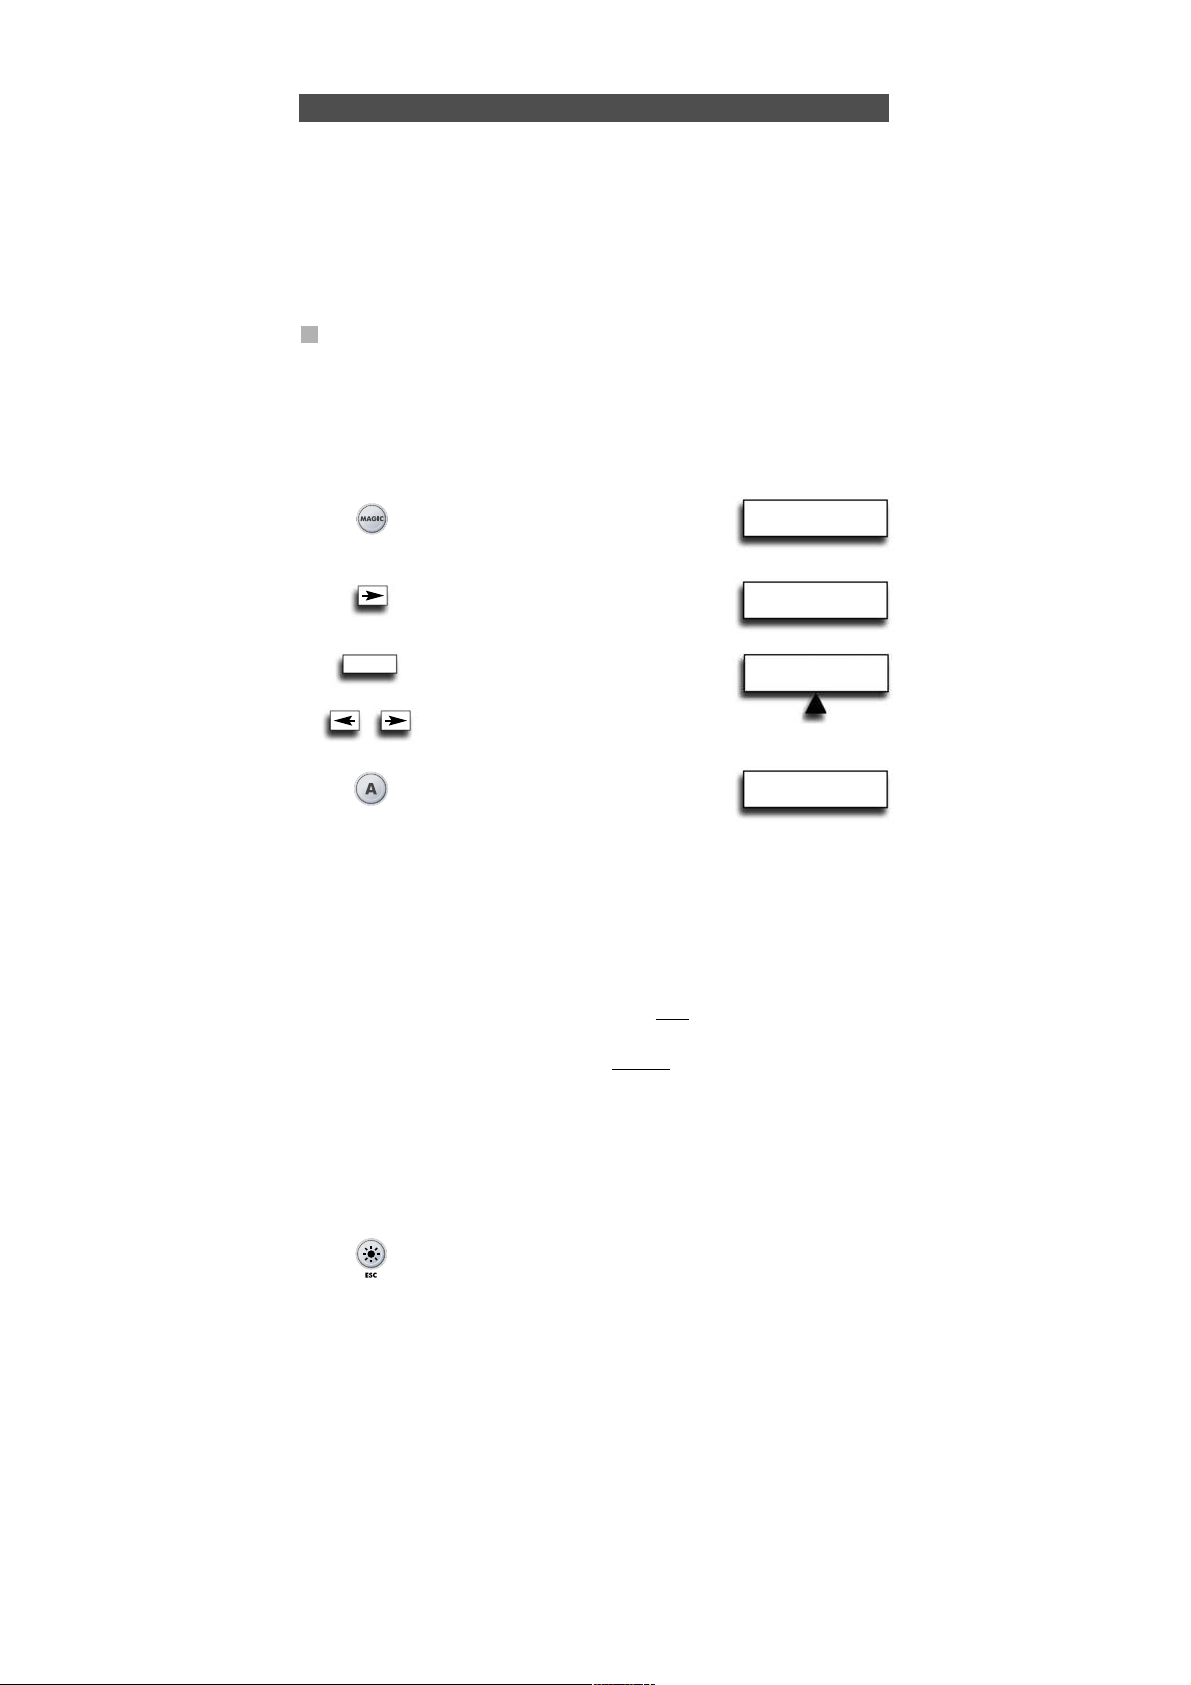
—> When setting up the URC-7781 for the first time please follow steps 1 – 6.
—> If already in User Mode you need to follow steps a and b then 1 - 6.
a Press and hold down MAGIC for about
3 sec. and...
will appear on the screen.
b Press ENTER twice...
will appear on the screen.
ENTER
ADD DEVICE
ENTER
ENTER
ENTER
INITIAL
SETUP
ADD DEVICE
ENTER
1
2
3
4
5
6
x2
Page 8
WW W.O NEFO RALL.CO M 7
Setting up the URC-7781
The URC-7781 will display a code as e.g. T0556.
T = Device Type Indicator
0556 = 4-digit-code
- Use the LIGHT key to return to the previous screen.
- Press and hold down the LIGHT key to return to user mode.
- Use the LIGHT (ESC) key to return to the previous screen.
- Press and hold down the LIGHT (ESC) key to exit programming mode and return
to the user mode.
- If your device’s original remote control does not have a POWER key, press PLAY
instead of POWER when setting up your device.
- Remember to select the corresponding device mode before operating your device.
For your convenience it is possible to rename the Device Label (max 4 characters)
see page 15.
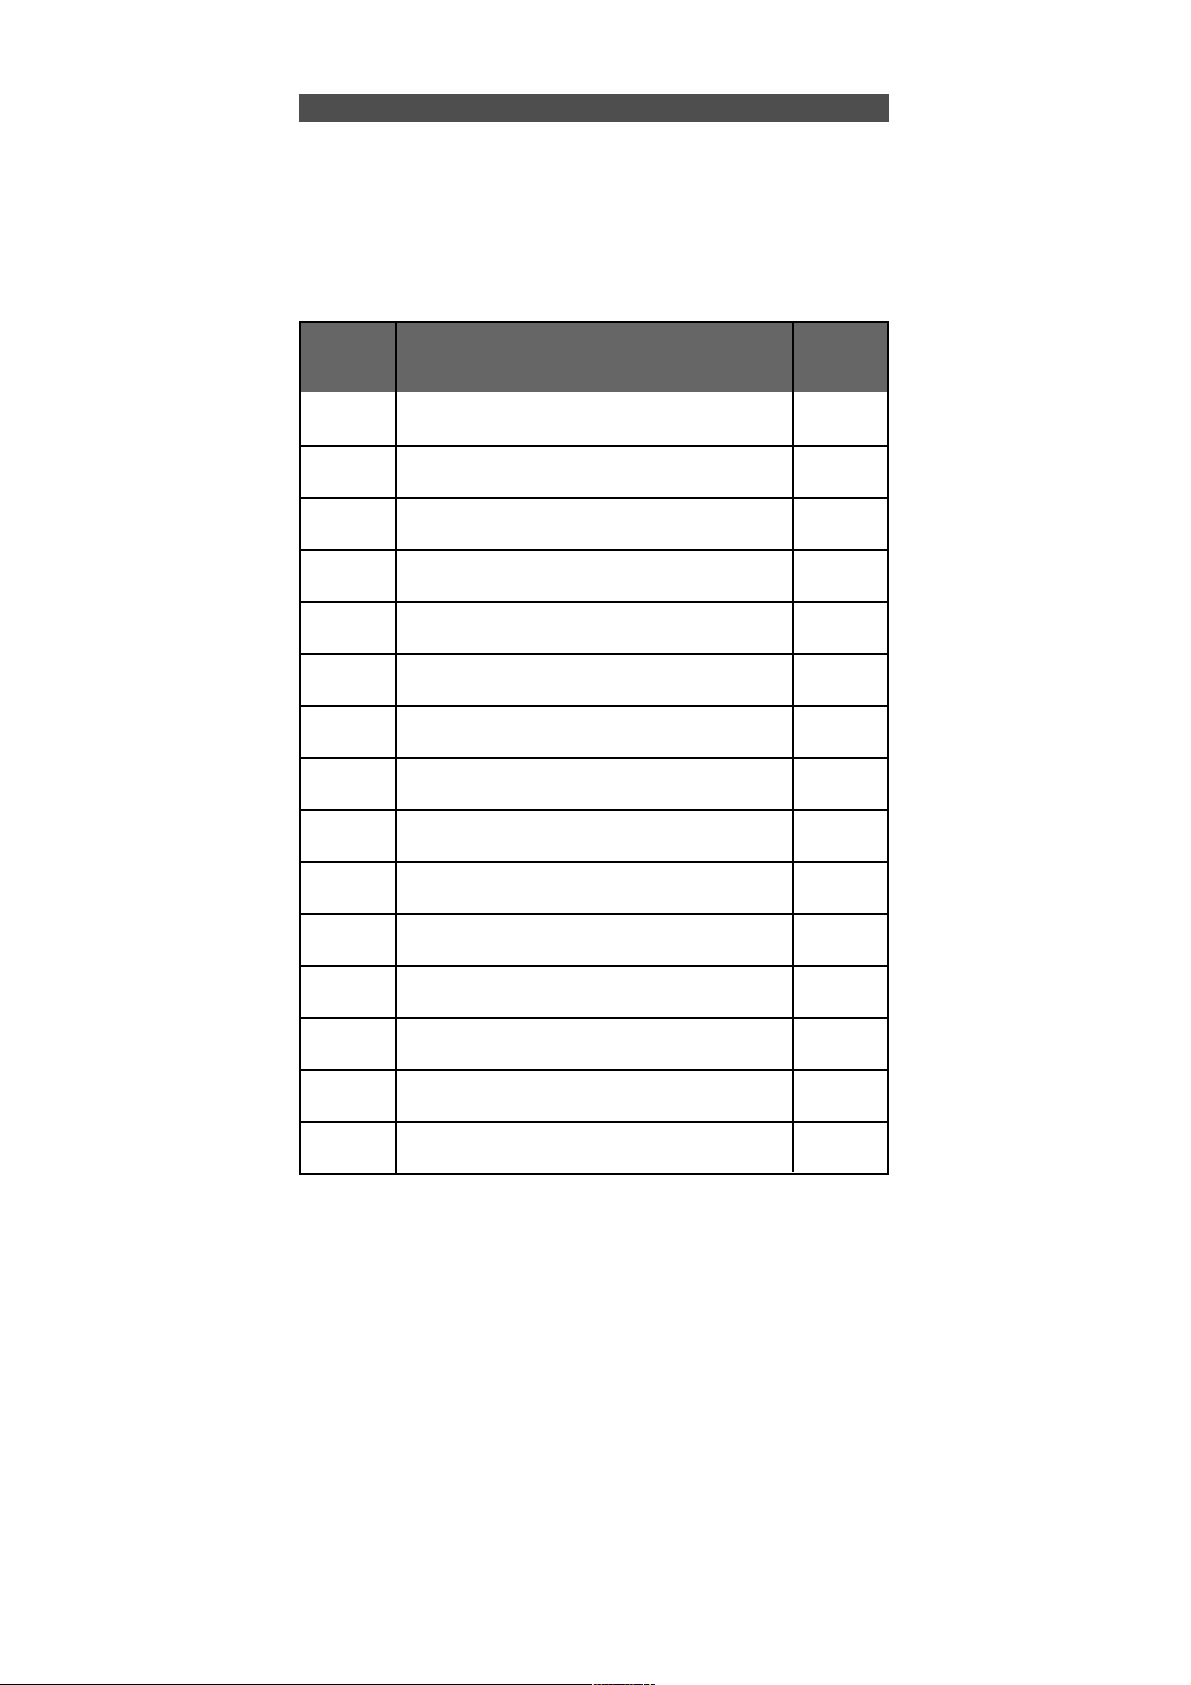
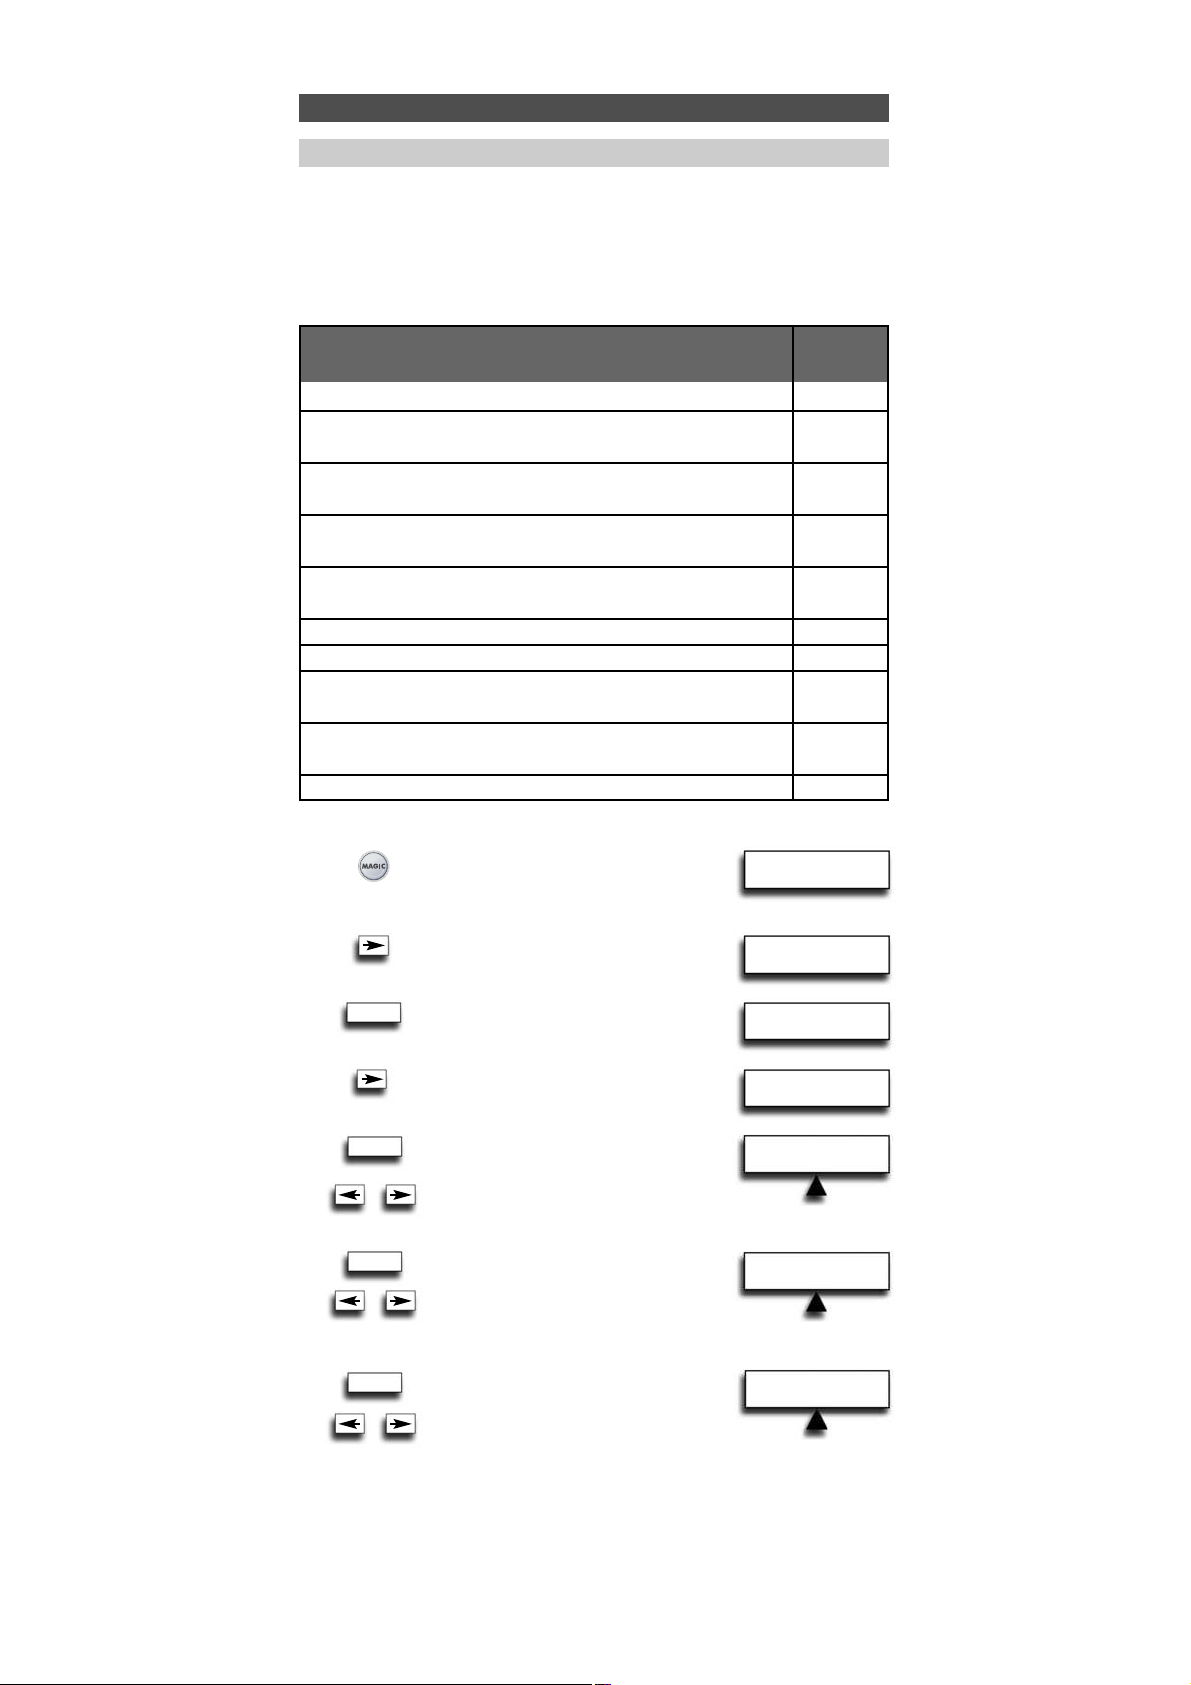
Device
Label
TV
VCR
SAT
CBL
VAC
CD
PHO
MIS
HOM
AMP
RCV
CAS
LDP
DAT
DVD
Device
type
indicator
T
V
S
C
N
D
P
M
H
A
R
K
L
J
Y
Corresponding Devices
Television / LCD / Plasma / Projector / Rear Projector
Video Cassette Recorder / TV/VCR Combi / DVD/VCR
Combi / PVR
Satellite Receiver / Set-Top-Box / DVB-S / DVB-T /
Freeview (UK) / TNT (F) / Digitenne (NL) / SAT/HDD
Cable Converter / Set-Top-Box / DVB-C
Video Accessory like Media Centres / AV Accessories /
AV Selectors
CD Player / CD-R / MD
Phonograph
Audio / Miscellaneous Audio
Home Automation (e.g. IR controlled curtains /
IR controlled light switches etc.)
Audio / Amplifier / Active Speaker System
Audio / Audio Receiver/Tuner/Amplifier / (DVD)
Home Cinema
Cassette Player (Tape Deck)
Laser Disc Player / Video CD
Digital Audio Tape / DCC
DVD Player / DVD-R / DVD Home Cinema / DVD
Combi / DVD/HDD
Page 9
ENTER
TV
T0556
DEV TO REPLACE
PHO TV VCR
REPLACE WITH
PHO TV VCR
INITIAL
SETUP
ADD DEVICE
VIEW CODE
INITIAL
SETUP
ADD DEVICE
REPLACE DEVICE
8 WWW. O NEFOR ALL.COM
View the current code
Quick Code Reference
Replace a device
Once you have Set-Up your URC-7781, you can view your SET-UP CODE for future
reference.
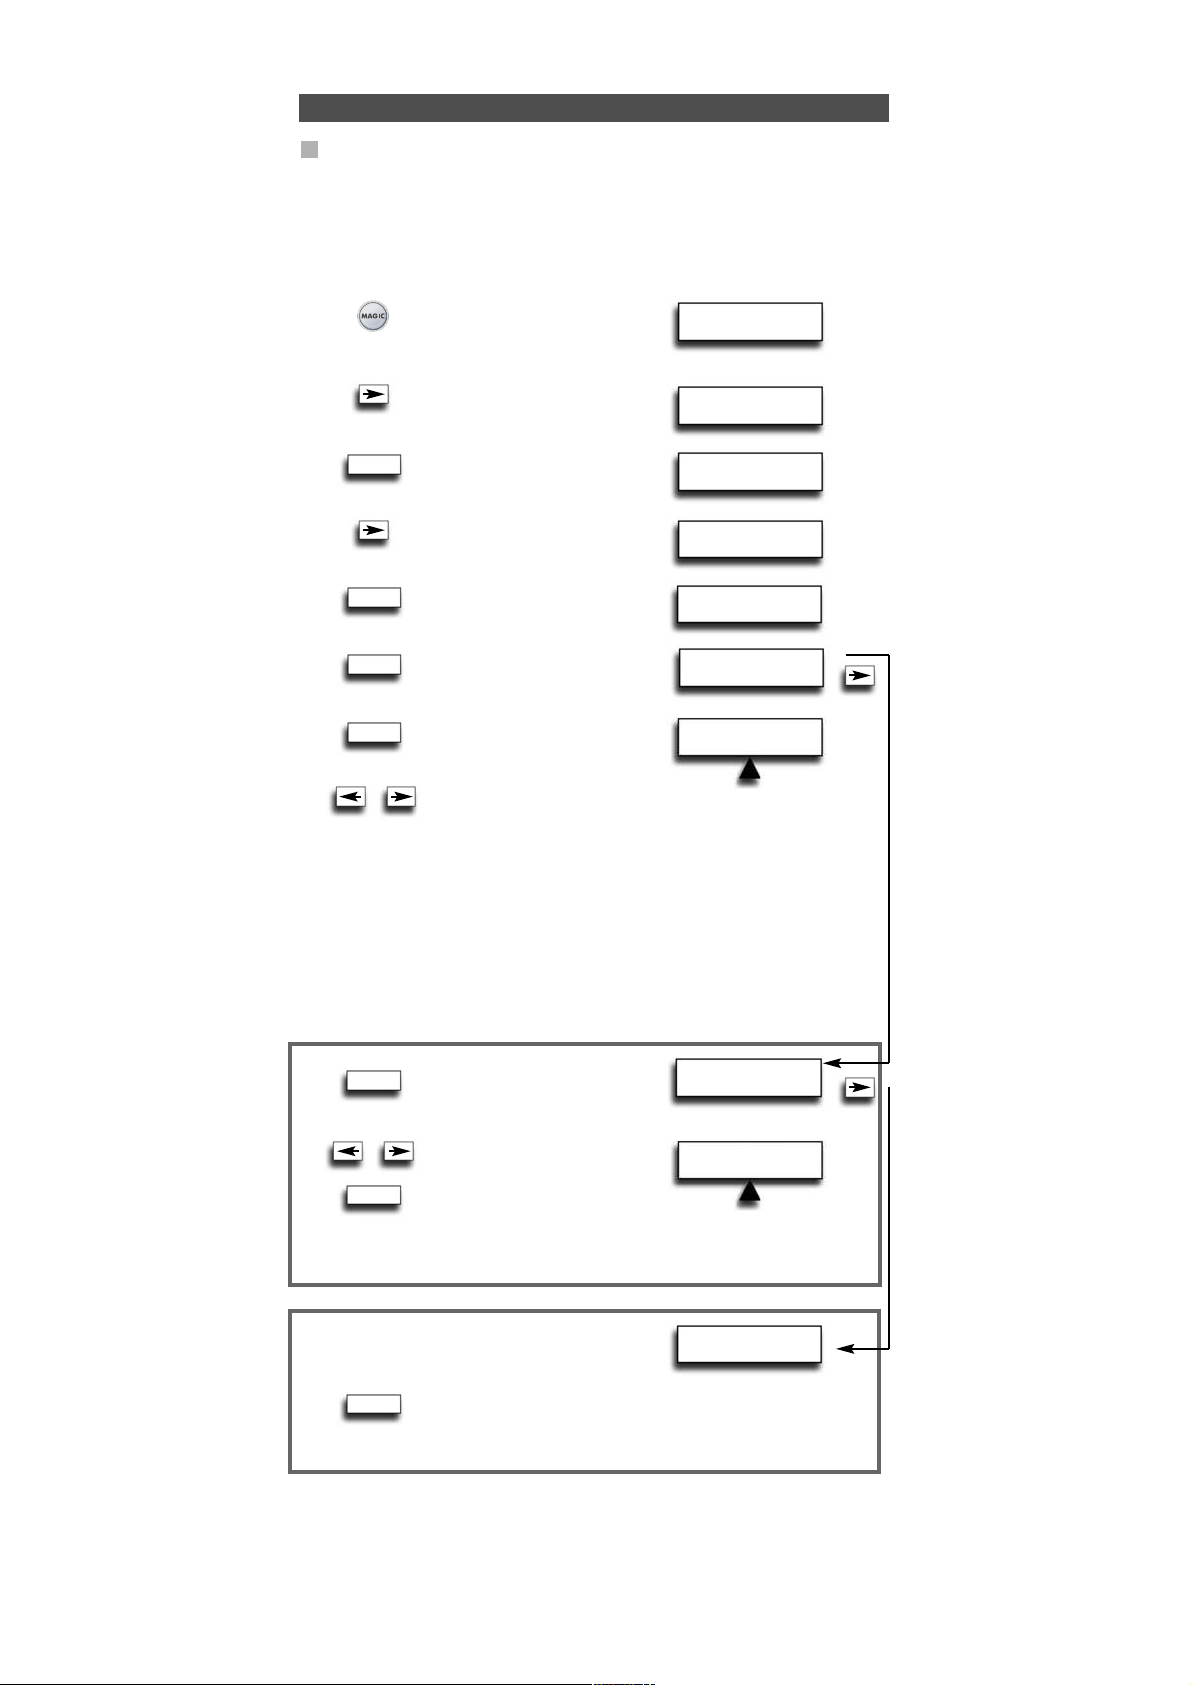
Example: To view the code saved for your TV:
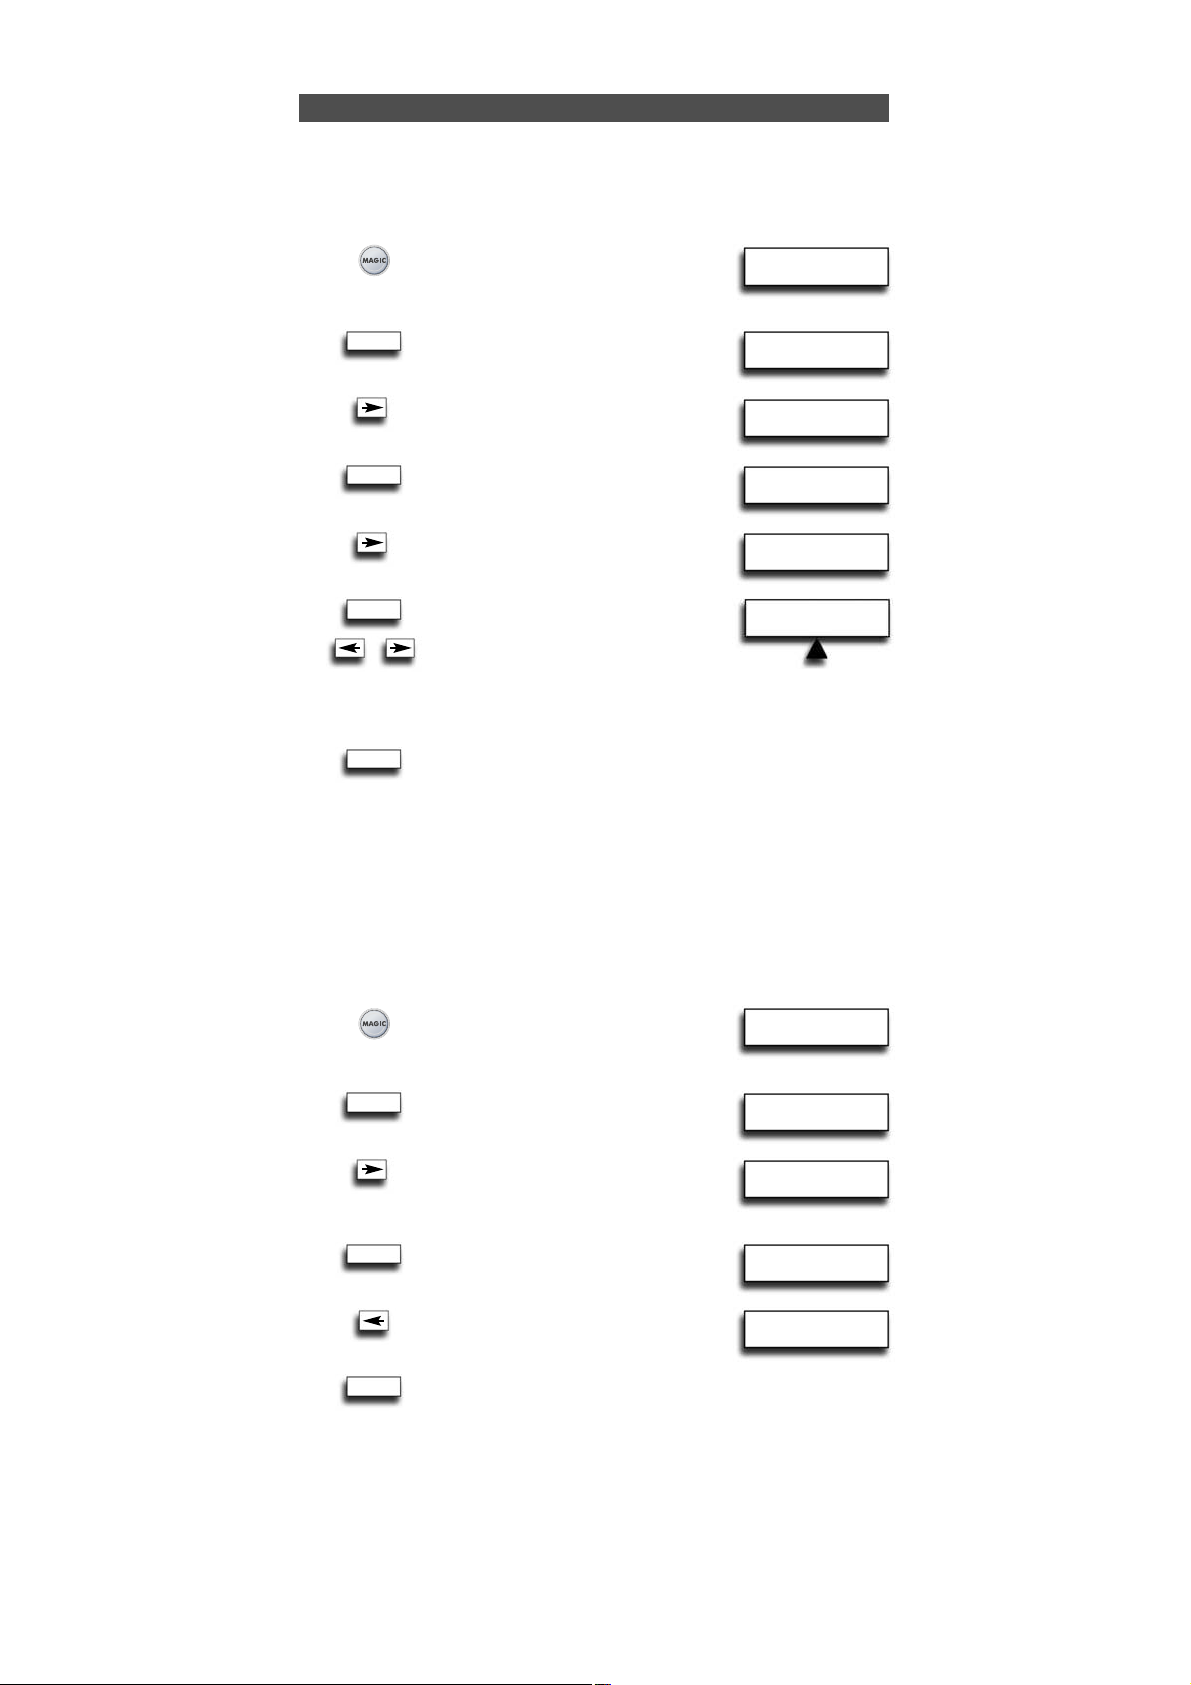
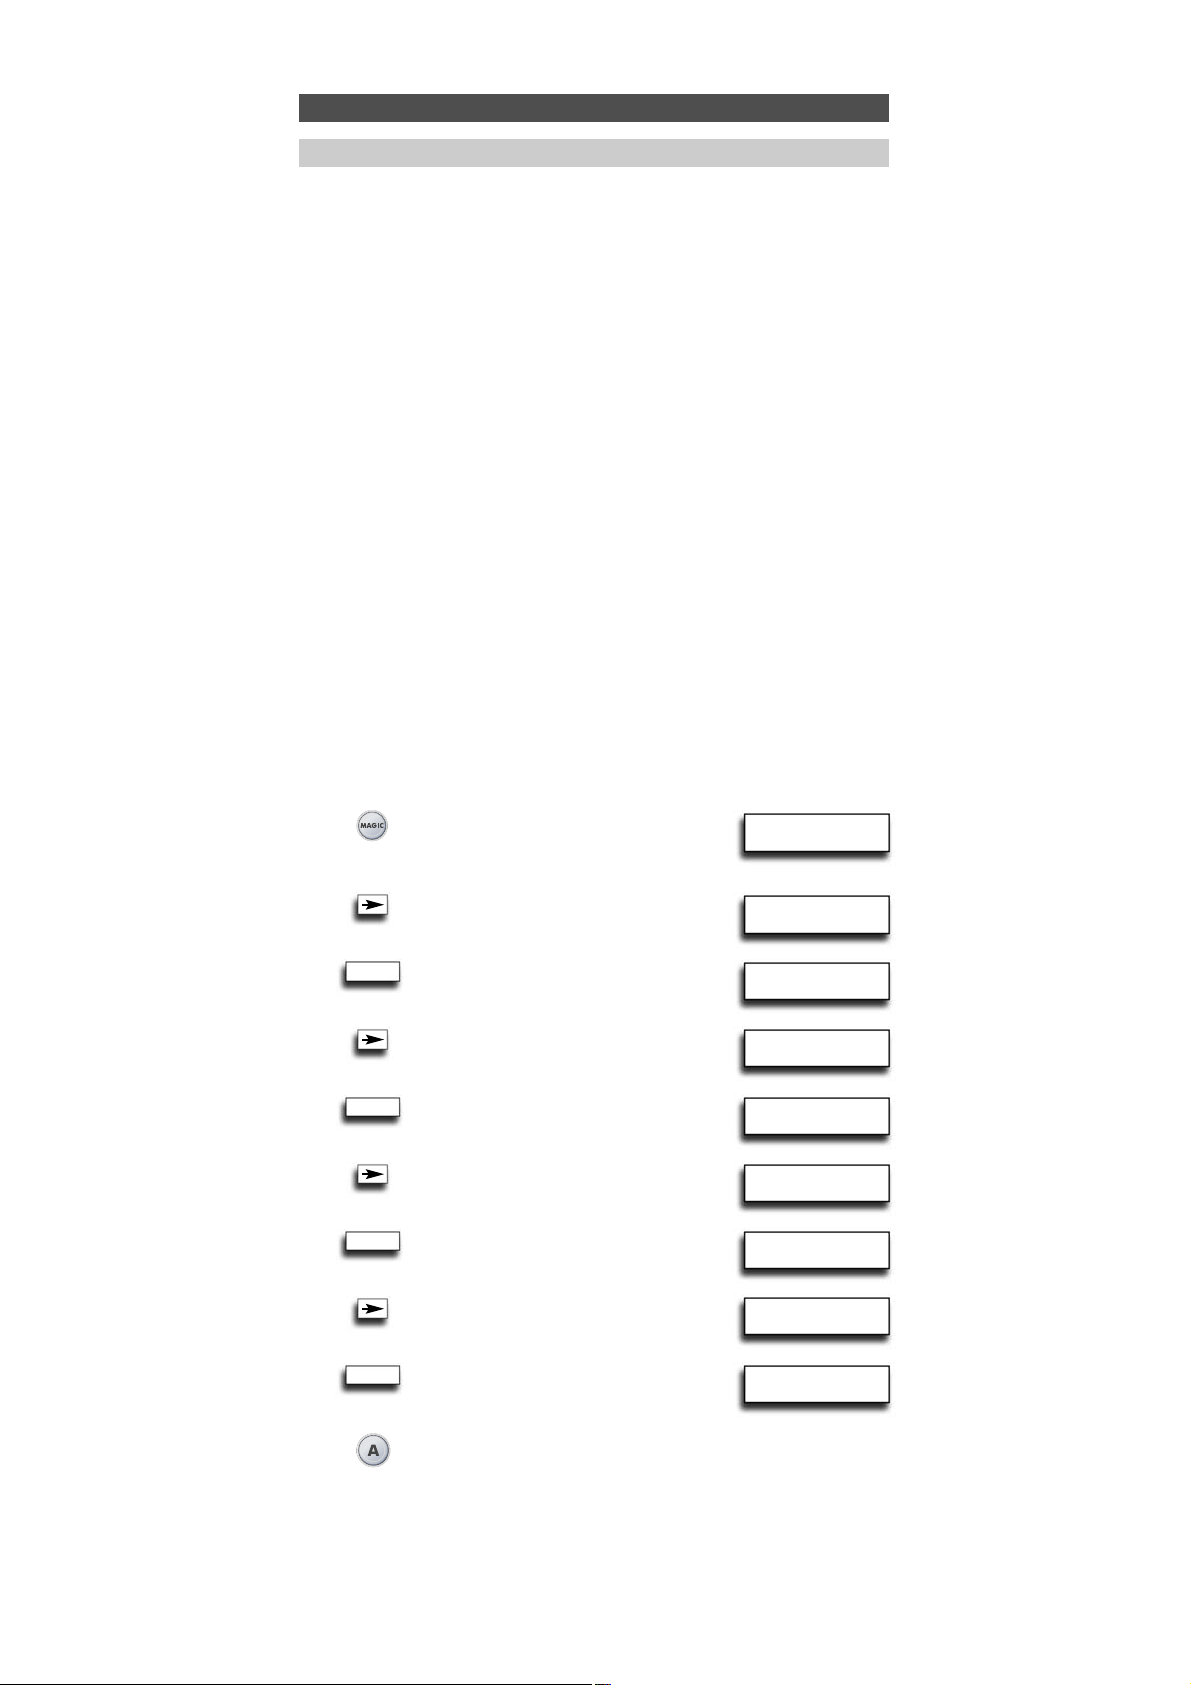
1 Press and hold down MAGIC for about
3 sec. and...
will appear on the screen.
2 Press ENTER twice...
will appear on the screen.
3 Press the ARROW Left key twice...
will appear on the screen.
4 Press ENTER and the code for your current
device will be displayed. Press the ARROW
LEFT/RIGHT keys to view the codes of your
other devices. Please write down your codes
in the boxes below.
To prevent having a device programmed that you are not using anymore it is
possible to replace this e.g. if you just bought a new TV and DVD player/recorder to
replace your old TV and Video Recorder it is not necessary to have your old TV and Video
Recorder still programmed on your URC-7781.
1 Press and hold down MAGIC for about
3 sec. and...
will appear on the screen.
2 Press ENTER twice...
will appear on the screen.
3 Press ARROW Right...
will appear on the screen.
4 Press ENTER...
will appear on the screen.
Select the “Device you wish
replace” using the ARROW
left/right keys.
5 Press ENTER...
will appear on the screen.
Select the “Device you wish to
replace it with” using the ARROW
left/right keys and confirm pressing
ENTER. Now you will see “CODE SETUP”. Press ENTER.
From here enter the codes corresponding to “device type” and “brand “ of your device
as explained on page 6.
Device
Type Code
1. _____________
2. _____________
3. _____________
4. _____________
5. _____________
6. _____________
Device
Type Code
7. _____________
8. _____________
9. _____________
10. _____________
11. _____________
12. _____________
ENTER
ENTER
ENTER
ENTER
ENTER
x2
x2
x2
Page 10
WW W.O NEFORA LL.COM 9
CHANGE DEV CODE
DVD TV SAT
TV
T0556
INITIAL
SETUP
ADD DEVICE
CHANGE DEVICE
CODE
Changing the Device Code
The following example explains how to replace the old device code with a new device
code without having to ADD a new device.
Example: You just bought a new TV for your living room. This TV may be using a
different code than your current TV in your living room. Just follow the next steps
to change the current programmed device code.
Note: When changing the device code, all settings of the currently setup device
(Key Magic, Learning) will be retained.
1 Press and hold down MAGIC for about
3 sec. and...
will appear on the screen.
2 Press ENTER twice...
will appear on the screen.
3 Press RIGHT ARROW key twice...
will appear on the screen.
4 Press ENTER...
will appear on the screen.
5 Select the mode for which you want
to change the setup code using
the ARROW left/right keys and confirm
pressing ENTER.
…
will appear on the screen.
Press ENTER to confirm.
Next go to page 6
and follow the instructions from
step 4 onwards.
ENTER
x2
ENTER
ENTER
CODE SETUP
x2
Page 11
10 WWW. O NEFOR ALL.COM
INITIAL
SETUP
ADD DEVICE
MOVE DEVICE
Move a device
Once you programmed several devices it is possible to determine the order of
appearance of the device labels.
Example: If you programmed a Television, DVD-player, Video Recorder and Satellite
Receiver the sequence of appearance may be TV, DVD, VCR, SAT. You may want to
change the order of appearance into TV, VCR, DVD, SAT.
1 Press and hold down MAGIC
for about 3 sec. and...
will appear on the screen.
2 Press ENTER twice...
will appear on the screen.
3 Press ARROW Right three times...
will appear on the screen.
4 Press ENTER...
will appear on the screen.
5 Select the Device you wish to
move to a different location using
the ARROW left/right keys and confirm
pressing ENTER.
…
6 will appear on the screen.
Use the ARROW left/right keys to move
the corresponding device and confirm
pressing ENTER.
The LED underneath the POWER key will light up twice and you will return to MOVE
DEVICE.
ENTER
x2
ENTER
ENTER
ENTER
Delete a device
To delete a certain device please follow the next steps.
1 Press and hold down MAGIC for about
3 sec. and...
will appear on the screen.
2 Press ENTER twice...
will appear on the screen.
3 Press ARROW Left key once...
will appear on the screen.
4 Press ENTER...
will appear on the screen.
5 Select the Device you wish to
delete using the ARROW
left/right keys and confirm
pressing ENTER.
The LED underneath the POWER key will light up twice and you will return to DELETE
DEVICE.
Result: The selected device has been deleted.
x3
INITIAL
SETUP
ADD DEVICE
DELETE DEVICE
ENTER
x2
ENTER
ENTER
DELETE DEVICE
MOVE TO
TV VCR DVD
TV
T0556
DEV TO MOVE
DVD VCR SAT
Page 12
WW W.O NEFORA LL.COM 11
INITIAL
SETUP
ADVANCED
SETUP
LEARNING NOW!
PRESS ORIG.KEY
The Learning Feature
The URC-7781 comes with a complete library of pre-programmed codes. After you have
set up the URC-7781 for your device, you may find that there are one or more keys that
you had on your original remote, which do not have a place on the URC-7781 keypad.
As a convenience, the URC-7781 offers a special Learning feature that allows you to copy
any function from your original remote control onto the keypad of the URC-7781.
Before you start:
- Make sure your original remote control is working correctly.
- Make sure neither your URC-7781, nor your original remote control is pointing at
your device.
Learning
Example: To copy the “mono/stereo” function from your original TV
remote onto the A-key of your URC-7781.
1 Place both remote controls (the URC-7781 and your original) on a flat
surface. Make sure the ends which you normally point at your device are
facing each other. Keep the remotes at a distance of 2 to 5 cm.
2 Press and hold down MAGIC for about
3 sec. and...
will appear on the screen.
3 Press ARROW Right...
will appear on the screen.
4 Press ENTER 4 times…
will appear on the screen.
Use the ARROW keys to scroll
to the device mode in which you want
to place the learned function (e.g. TV).
5 Press the key (on the URC-7781
remote) where you want to place
the learned function (Example: A
key). The LED underneath the POWER
key will flash rapidly and...
will appear on the screen.
6 Press the key (on your original remote) that you want to copy on the URC-7781.
(Example: “mono/stereo” key). The LED underneath the POWER key will light up
twice to confirm that the function mono/stereo has been learned successfully onto
the A key.
NOTE: If you want to copy other functions within the same
mode, simply repeat steps 5
and 6 pressing the next key you want to copy by learning.
NOTE: If you want to copy other functions in a different
device mode, in step 4 select a
different device mode by using the ARROW Left / Right keys and continue with
steps 5 and 6.
NOTE: If the display reads LEARNING FAILED, press ENTER to start from “ADD
LEARNING” and press ENTER to continue with step 4.
NOTE: If the display reads MEMORY FULL you need to prioritise the functions you want
and delete the functions with the lowest priority
7 Press LIGHT once to go back to ADD LEARNING….or…. press and
hold LIGHT to exit programming mode.
- Use the LIGHT key to return to the previous screen.
- Press and hold down the LIGHT key to return to user mode.
ENTER
x4
SELECT MODE & KEY
RCV TV DVD
Page 13

12 WW W.O NEFO RALL.COM
The Learning Feature
- Learning is mode specific. To access your learned function, you need to scroll to the
appropriate device first.
- A learned function can be assigned to any key except the ENTER, LIGHT (ESC),
ARROW Left/Right keys and the MAGIC key.
- If no key is pressed, the URC-7781 will stay for 30 seconds in programming mode.
- After step 5 you have 15 seconds to press the corresponding key on your original
remote.
- If you learn a function on another key than the „custom keys“, the original
URC-7781 function automatically becomes shifted. You can press MAGIC then
the key to access it (this excludes the POWER, Channel and Volume keys and
Digits – Press MAGIC twice and then the digit to access it).
- If a Shifted Learned function is placed on the Power, Channel and Volume keys then
Sleep and Colour/Brightness will be sacrificed.
- The Learning feature is mode specific. Therefore you can place one learned function
per mode on the same key.
- The URC-7781 can learn approximately 50 functions (depending on the original
remote).
- You can replace a learned function by placing another learned function on top or by
using “Delete Learning from One Key”, “Delete Learning from One Mode”, “Delete
Learning from All Modes”.
- Learning should not be done in direct sunlight or under incandescent lights.
- Make sure you are using new batteries before following the learning instructions.
- Upon changing the batteries, your learned functions will be retained.
- It’s not possible to program functions by learning in the Home Theatre mode.
However, if a key has been programmed in the original device mode with learning
then this function will be carried over to the Home Theatre mode.
Shifted Learning
You can also learn a function on a key of the URC-7781 without sacrificing the original
URC-7781 function. The „custom keys“ are an ideal location for this. A Shifted Learning
function can also be put on almost any other key except for the following: MAGIC key,
ARROW Left / Right, Enter and LIGHT (ESC). To install a Shifted Learning function, simply
follow steps 1-7 on the previous page. During step 5, press MAGIC once before you press
the key where you are placing the learned function. To access the shifted function, press
MAGIC and then the key you have learned on. To access the shifted function on a digit
key press MAGIC twice and then the corresponding digit.
Page 14
SELECT MODE &KEY
RCV TV
SELECT MODE &KEY
RCV TV
WW W.O NEFORA LL.COM
13
The Learning Feature
Delete Learning
It is possible to…..
- delete a learned function from a specific key within a specific device mode.
- delete all learned functions within a specific mode.
- delete all learned functions within all device modes.
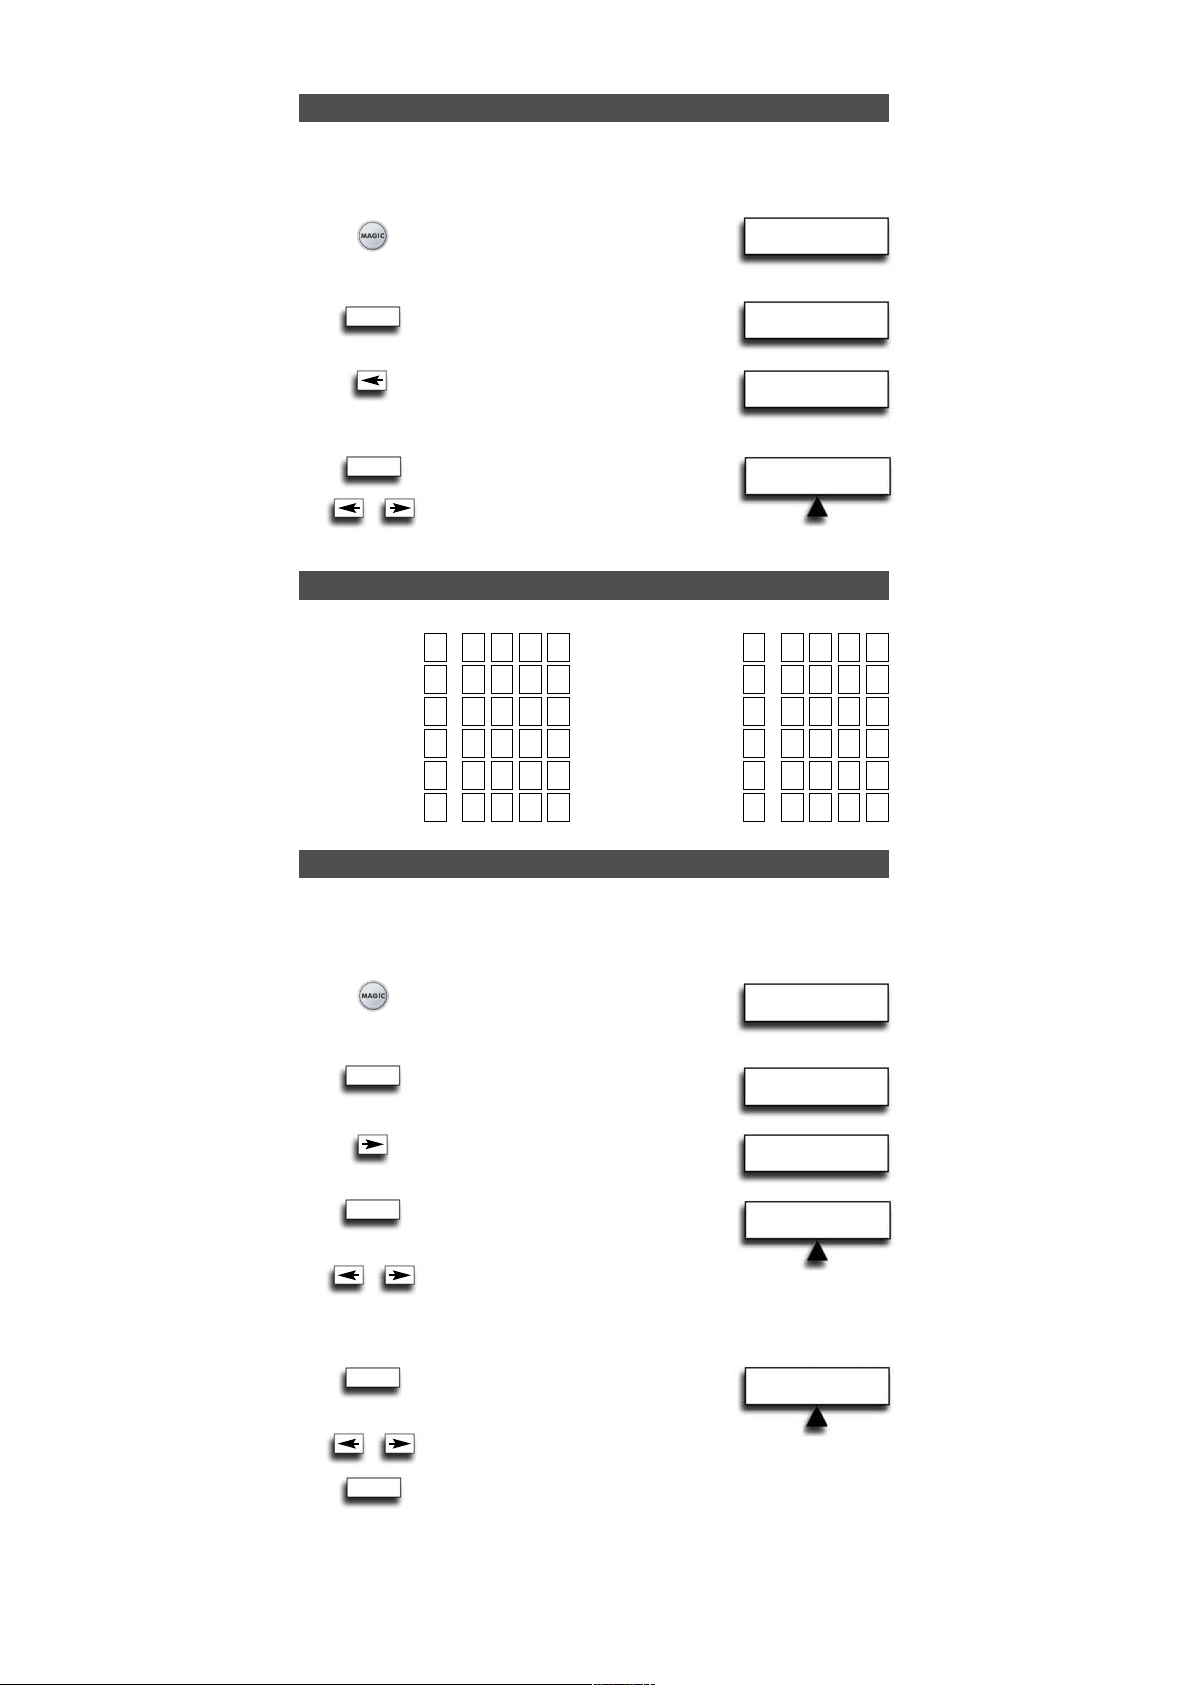
Example: to delete the copied mono/stereo function from the A key in the TV mode:
1 Press and hold down MAGIC
for about 3 sec. and...
will appear on the screen.
2 Press ARROW Right...
will appear on the screen.
3 Press ENTER twice...
will appear on the screen.
4 Press ARROW Right..
will appear on the screen.
5 Press ENTER...
will appear on the screen.
6 Press ENTER...
will appear on the screen.
7 Press ENTER...
will appear on the screen.
8 Select the corresponding device mode (Example: TV mode) in
which you want to delete the learned function by using the
ARROW left / right keys and press the key * you wish to delete
(Example: A key). The LED will blink twice and the screen will
go back to “DELETE LEARNING”.
9 If there is another key which you wish to delete, repeat steps 6 - 8.
Result: The original function on the A key in TV mode will now be present.
* To delete a Shifted Learned feature, press MAGIC before you press the learned
key to be deleted.
6 You will see…
Press ENTER.
7 Select the corresponding
device mode in which you want
to delete all learned functions
by using the ARROW left / right
keys and press ENTER. The LED underneath the POWER key
will light up twice and the screen will go back to ”DELETE
LEARNING”. All the learned functions have now been cleared
from the selected device mode.
6 You will see…
7 Press ENTER. The LED underneath the
POWER key will light up twice and
the screen will go back to ”DELETE LEARNING”. All the learned
functions have now been cleared from all device modes.
- Use the LIGHT key to return to the previous screen.
- Press and hold down the LIGHT key to return to user mode.
INITIAL
SETUP
ADVANCED
SETUP
ADD
FUNCTION
DELETE
FUNCTION
DELETE LEARNING
DELETE LEARNING
FROM ONE KEY
DELETE LEARNING
FROM ONE MODE
DELETE LEARNING
FROM ALL MODES
ENTER
ENTER
ENTER
ENTER
ENTER
ENTER
x2
ENTER
Page 15
14 WWW. O NEFOR ALL.COM
Operational Reset
Extra Features
The Operational Reset will erase all learned functions across all modes and
some other programmed functions like Language, Volume Lock, Key Magic,
Timed Macro, Key Macro, Home Theatre and Device Labels.
1 Press and hold down MAGIC for
about 3 sec. and...
will appear on the screen.
2 Press ARROW Right ...
will appear on the screen.
3 Press ENTER once...
will appear on the screen.
4 Press ARROW Left...
will appear on the screen.
5 Press ENTER...
will appear on the screen.
6 Press ENTER.
The LED underneath the POWER key
will light up 4 times...
will appear on the screen.
All your devices are still setup, but all features like Language, Volume Lock, Key Magic,
Timed Macro, Key Macro, Home Theatre and Device Label have either been reset to
default or cleared. To only clear Learning and Key Magic use the feature “Delete
Learning and Key Magic” as described on page 27.
INITIAL
SETUP
ADVANCED
SETUP
FUNCTION
RESET
USER
RESET
RESET
ENTER
ENTER
ENTER
Depending on the functions of your original remote control, the URC-7781 may operate
following functions of your television and sleep for devices that have this function on
the original remote.
Colour (+) = Press and release MAGIC then hold Volume (+)
Colour (-) = Press and release MAGIC then hold Volume (-)
Brightness (+) = Press and release MAGIC then hold Channel (+)
Brightness (-) = Press and release MAGIC then hold Channel (-)
Sleep ON/OFF = Press MAGIC then POWER repeatedly until the sleeptimer reaches the
desired amount of minutes (or disappears from your device screen).
Note: depending on your original remote you may operate this function in a different
way.
Colour, Brightness and Sleep
Page 16

NEW LABEL
RCV TV
WW W.O NEFORA LL.COM
15
Extra Features
Changing the Device label
It is possible to change the label of the devices you have setup using a maximum of 4
characters (or digits) for each label.
1 Press and hold down MAGIC
for about 3 sec. and...
will appear on the screen.
2 Press ARROW Right...
will appear on the screen.
3 Press ENTER...
will appear on the screen.
4 Press ‘ARROW Left’ twice...
will appear on the screen.
5 Press ENTER...
will appear on the screen.
6 Press ENTER.
Select the corresponding
device mode of which you
want to change the label
using ARROW left / right and
confirm pressing ENTER.
7 You will see…
The first character of
the selected device label will
start to blink. Use the ARROW
LEFT/RIGHT keys to change the label to a max. of 4 characters
and press ENTER to store each selected character. After entering
the fourth character the display will return to ”CHANGE DEVICE
LABEL”.
5 You will see...
Press ENTER.
6 Select the corresponding device
label you wish to reset by using
ARROW left / right and press
ENTER. You will see the selected
device label change back to the
default label. The LED underneath the POWER key will light up
twice and the display will return to “RESET DEVICE LABEL”.
5 You will see…
To reset ALL DEVICE LABELS...
6 Press ENTER. The LED underneath the POWER key will light up
twice. All device labels will now be reset to the original label
and the display will return to ”DEVICE LABEL”.
INITIAL
SETUP
ADVANCED
SETUP
FUNCTION
DEVICE LABEL
CHANGE
DEVICE LABEL
RESET DEVICE
LABEL
RESET ALL
DEVICE LABELS
SELECT MODE
RCV TV
SELECT MODE
RCV TV
_ e.g. TV 1 (blank space between two characters/digits)
< To return to the previous character and reset the previous character to A.
^ To store a label of less than 4 characters e.g. when you want
to label the device as “T”.
. (dot) e.g. TV.1
It is also possible to choose one of the symbols:
ENTER
ENTER
x2
ENTER
ENTER
ENTER
ENTER
ENTER
ENTER
Page 17
RCV TV VCR
UL
REMOVE VOL LOCK
RCV TV VCR
16 WWW. O NEFOR ALL.COM
Extra Features
Set Volume Lock
Example: It is possible to lock the volume to be from one particular mode e.g. TV.
Doing this will result in the fact that independent in what mode you are the volume +/and Mute keys will always send the volume from the TV mode.
1 Press and hold down MAGIC for about
3 sec. and...
will appear on the screen.
2 Press ENTER...
will appear on the screen.
3 Press ”ARROW Right” twice...
will appear on the screen.
4 Press ENTER twice...
will appear on the screen.
Use the ARROW left/right keys to select
the device (e.g. TV) you want
to lock the volume to.
5 Press ENTER to select the displayed device as the SRC (source).
The LED underneath the POWER key will light up twice and the
display will return to „VOLUME LOCK“.
Result: In the example above the TV mode will be the volume SRC (Source) for all other
installed devices. In any device mode pressing volume +/- or mute this will give
the volume functions of the TV mode.
Remove Device from Volume Lock
Example: If you want you can remove 1 device from the Volume Lock, so that it will
not send the volume of the SRC any longer but its own volume.
1 Press and hold down MAGIC
for about 3 sec. and...
will appear on the screen.
2 Press ENTER...
will appear on the screen.
3 Press ”ARROW Right” twice...
will appear on the screen.
4 Press ENTER...
will appear on the screen.
5 Press ARROW Right...
will appear on the screen.
6 Press ENTER...
will appear on the screen.
Use the ARROW left / right keys to select
the device (e.g. TV) you want to remove
from the volume lock.
7 Press ENTER to remove the displayed device from the volume lock.
The LED underneath the POWER key will light up 4 times.
The display will return to „VOLUME LOCK“.
Result: the device you selected will now send its own volume +/-, mute (instead
of the volume from the SRC device).
INITIAL
SETUP
INITIAL
SETUP
DEVICE
VOLUME LOCK
SET VOLUME LOCK
REMOVE DEVICE
FROM VOLUME LOCK
DEVICE
VOLUME LOCK
Volume Lock
L: Lock,
UL: Unlock, SRC: Source
ENTER
ENTER
x2
ENTER
ENTER
ENTER
ENTER
ENTER
x2
x2
Page 18
ADD TO VOL LOCK
RCV TV VCR
WW W.O NEFORA LL.COM
17
INITIAL
SETUP
DEVICE
VOLUME LOCK
SET VOLUME LOCK
ADD DEVICE
TO VOLUME LOCK
Extra Features
Add Device To Volume Lock
Example: It is possible to add a device to the installed volume lock (SRC). You may want
to do this for devices you added after installing the volume lock, or if you removed a
device from the volume lock.
1 Press and hold down MAGIC
for about 3 sec. and...
will appear on the screen.
2 Press ENTER...
will appear on the screen.
3 Press ”ARROW Right” twice...
will appear on the screen.
4 Press ENTER...
will appear on the screen.
5 Press ”ARROW Right” twice...
will appear on the screen.
6 Press ENTER...
will appear on the screen.
Select the device (e.g. TV) you want to add to the volume lock using
the ARROW Left / Right keys.
7 Press ENTER to add the displayed device to the volume lock. The
LED underneath the POWER key will light up twice and the display
will return to VOLUME LOCK.
Result: The selected device will now send the volume +/-, mute of the SRC device.
Reset All Volume Controls
Example: You can reset all volume controls back to their original setting, so that all
devices will send their own volume again.
1 Press and hold down MAGIC
for about 3 sec. and...
will appear on the screen.
2 Press ENTER...
will appear on the screen.
3 Press ”ARROW Right” twice...
will appear on the screen.
4 Press ENTER...
will appear on the screen.
5 Press ARROW Left...
will appear on the screen.
6 Press ENTER to reset all volume controls.
The LED underneath the POWER key will
light up four times and the display will
return to VOLUME LOCK.
Result: All devices will now send their own volume +/-, mute again.
INITIAL
SETUP
DEVICE
VOLUME LOCK
SET VOLUME LOCK
RESET ALL
VOLUME CONTROLS
ENTER
ENTER
ENTER
ENTER
ENTER
ENTER
ENTER
x2
x2
x2
Page 19
PROG SEQ & ENTER
TV VCR RCV
DAILY
TIMED MACRO
WEEKLY
TIMED MACRO
SEL MACRO DAY
TUE WED THU
18 WWW. O NEFOR ALL.COM
SEL MACRO TIME
20:45
INITIAL
SETUP
ADVANCED
SETUP
FUNCTION
MACRO
ADD
TIMED MACRO
ONCE
TIMED MACRO
Extra Features
Add Timed Macro
The Macro feature allows you to define a sequence of commands that have to be
executed at a certain time.
You can program 3 types of timed macros:
- once timed macro
- daily timed macro
- weekly timed macro
Example: To RECORD a football match using the URC-7781 with your video recorder.
1 Press and hold down MAGIC
for about 3 sec. and...
will appear on the screen.
2 Press ARROW Right...
will appear on the screen.
3 Press ENTER...
will appear on the screen.
4 Press ARROW Right...
will appear on the screen.
5 Press ENTER twice...
will appear on the screen.
6 Press ENTER...
will appear on the screen.
It is also possible to set the macro
to DAILY or WEEKLY. Use the ARROW keys to do so.
7 Press ENTER...
will appear on the screen.
Select the corresponding day when
you want to execute the Macro using the ARROW keys.
8 Press ENTER...
will appear on the screen.
Set the corresponding time when you want the macro
to execute (to start the RECORDING) using the number keys.
9 Press ENTER...
will appear on the screen.
You now have to record key
strokes in the device modes as you would
do when recording from the Video Recorder manually.
Select the corresponding device key (using the ARROW keys).
In our example scroll to VCR mode.
10 Press the corresponding key(s) you want to be sent in the timed
macro (in our exemple, press RECORD twice).
11 Press ENTER to save the macro...
will appear on the screen.
Result: you have programmed a macro to start recording today Wednesday at 20:45.
Now you need to program another macro to stop the recording on Wednesday at e.g.
22:35 so the signal that the URC-7781 will send to your video recorder at 22:35 will be
STOP.
Note: Make sure to place the URC-7781 pointed towards the video recorder
and make sure that there is a clean line of sight.
It is also possible to set the macro daily…
(the step SEL MACRO DAY will be skipped)
It is also possible to set the macro weekly…
Macros (Sequence of commands)
ADD
TIMED MACRO
ENTER
ENTER
ENTER
ENTER
ENTER
ENTER
ENTER
x2
x2
Page 20
WW W.O NEFORA LL.COM 19
INITIAL
SETUP
ADVANCED
SETUP
FUNCTION
MACRO
ADD
MACRO
DELETE
MACRO
DEL TIMED MACRO
O WED 20:45
DELETE
TIMED MACRO
DELETE
TIMED MACRO
DEL TIMED MACRO
O WED 22:35
DELETE
TIMED MACRO
Example: To delete the Timed Macro from page 18:
1 Press and hold down MAGIC
for about 3 sec. and...
will appear on the screen.
2 Press ARROW Right...
will appear on the screen.
3 Press ENTER...
will appear on the screen.
4 Press ARROW Right...
will appear on the screen.
5 Press ENTER...
will appear on the screen.
6 Press ARROW Right...
will appear on the screen.
7 Press ENTER...
will appear on the screen.
8 Press ENTER...
You will now see the Timed Macros
you programmed displayed on the
screen. Next to O, D, or W you will see
the macro day (in case of a once or
weekly timed macro) displayed.
Next to it the macro time will be displayed on the screen.
You may use the ARROW LEFT / RIGHT keys to scroll through
the programmed Timed Macros.
O : Once Timed Macro
D : Daily Timed Macro
W : Weekly Timed Macro
9 Press ENTER to delete the displayed
timed macro. The LED underneath
the POWER key will light up twice
and…will appear on the screen.
10 If you want to delete another Timed
Macro press ENTER...
will appear on the screen.
11 Press ENTER to delete this timed macro.
The LED underneath the POWER key
will light up twice and…will appear
on the screen.
Result: the Timed Macros programmed from page 18 have been deleted.
Notes:
- The amount of keystrokes in a timed macro and the number of timed macros is
limited by the available memory space.
- A ”ONCE TIMED MACRO” will only be executed once. After executing this macro it
will automatically be erased from the remote’s memory.
- A ”DAILY TIMED MACRO” will be executed every day at the same time until its
removed from the remote’s memory.
- A ”WEEKLY TIMED MACRO” will be executed every week on the same day and same
time until the macro is removed from the remote’s memory.
- To indicate that a Timed Macro has been programmed, the display will show a * at
the left from the time in user mode.
- If you include the record function in the timed macro, you have to press
the record key twice.
Delete Timed Macro
ENTER
ENTER
ENTER
ENTER
ENTER
ENTER
ENTER
Extra Features
Macros (Sequence of commands)
Page 21
20 WWW. O NEFOR ALL.COM
INITIAL
SETUP
ADVANCED
SETUP
FUNCTION
MACRO
ADD
TIMED MACRO
PRESS
MACRO KEY
ADD
KEY MACRO
ADD
KEY MACRO
Add Key Macro
You can program your URC-7781 to issue a sequence of commands at the press of one
button. For example, you may want to switch OFF your TV, VCR and Satellite by only
pressing one key. Any sequence of commands you regularly use can be reduced to one
key stroke for your convenience. A key macro can contain up to 15 keystrokes in the
sequence.
We recommend to program a macro on any of the Custom keys (A, B, C, D) as the macro
will overwrite the original function on a key. The original function on the key will be
pushed to the shifted level and will only be available by pressing MAGIC and the
corresponding key.
Example: To set up the Macro to switch off your Television, Video Recorder
and Satellite Receiver on the key labelled A on your URC-7781:
1 Press and hold down MAGIC
for about 3 sec. and...
will appear on the screen.
2 Press ARROW Right...
will appear on the screen.
3 Press ENTER...
will appear on the screen.
4 Press ARROW Right...
will appear on the screen.
5 Press ENTER twice...
will appear on the screen.
6 Press ARROW Right...
will appear on the screen.
7 Press ENTER...
will appear on the screen.
Next press the key on which you
want to set the macro (e.g. A key).
8 Now…
will appear on the screen. Now press
the keys from the modes using the
ARROW left / right keys as you would
do when manually switching off your TV,
VCR and SAT. Select TV mode by using
the ARROW Left/Right keys, then press
POWER, then select VCR, then press POWER,
then press SAT, then press POWER.
9 Press ENTER to store the Macro.
The LED underneath the POWER key
will light up twice and the display will
return to ADD KEY MACRO.
Result: Whenever you press the A key, the URC-7781 will switch OFF your TV, VCR and
Satellite.
Extra Features
Macro (Sequence of commands)
ENTER
ENTER
ENTER
ENTER
x2
PROG SEQ & ENTER
VCR TV SAT
Page 22
WW W.O NEFORA LL.COM 21
INITIAL
SETUP
ADVANCED
SETUP
FUNCTION
MACRO
ADD
MACRO
DELETE
TIMED MACRO
DELETE
KEY MACRO
PRESS
MACRO KEY
DELETE
MACRO
Shifted Macro
It is also possible to program a Shifted Macro on any key, except for
the following keys:
MAGIC, LIGHT (ESC), ARROW LEFT, ARROW RIGHT, ENTER and the number keys.
If for example, you want to program a shifted Macro on the MUTE
key, simply press the MAGIC and the Mute in step 7 on page 20.
NOTES:
- Each KEY MACRO can consist of a maximum of 15 key strokes.
- Make sure that you program a Macro on a spare key that you don’t use in any mode.
- Once you program a Macro on a specific key, the sequence will work regardless of
the mode you are using.
- To avoid accidental recordings with the URC-7781, you must press the Record key
twice to begin recording. Because of this, we do not recommend to assign a Macro
or Shifted Macro to the Record key.
- If you had to hold down a key for a few seconds on the original remote control to
get a function, this function may not work in a macro on your URC-7781 remote.
- If you program a Macro on a key, the original function will become shifted
(excluding POWER, CH+/- and VOL+/- keys). Press MAGIC then the key to access it.
If you place a Macro shifted on a digit key, access the original function by pressing
MAGIC twice and then the digit key.
- If a Shifted Macro is placed on the Power, Channel and Volume keys then Sleep and
Colour/Brightness will be sacrificed.
- You cannot set the macro on the ARROW Left/Right, ENTER, MAGIC, and LIGHT
(ESC) keys.
- If you include the record function in a Key Macro then you have to press the record
key twice.
Delete Key Macro
Example: To delete the Key Macro on the A key from page 20.
1 Press and hold down MAGIC
for about 3 sec. and...
will appear on the screen.
2 Press ARROW Right...
will appear on the screen.
3 Press ENTER...
will appear on the screen.
4 Press ARROW Right...
will appear on the screen.
5 Press ENTER...
will appear on the screen.
6 Press ARROW Right...
will appear on the screen.
7 Press ENTER...
will appear on the screen.
8 Press ARROW Right...
will appear on the screen.
9 Press ENTER...
will appear on the screen.
10 Press the A key (corresponding the Macro key you want to erase
the Key Macro from). The LED underneath the POWER key will light
up twice. You will see “DELETE KEY MACRO” on the screen again.
Result: the Key Macro on the A key programmed from page 20 has been deleted.
Extra Features
Macro (Sequence of commands)
ENTER
ENTER
ENTER
ENTER
Page 23
HT CHANNEL
DVD HTNA RCV
HT DIGITS
DVD HTNA RCV
HT POWER
DVD HTNA RCV
22 WWW. O NEFOR ALL.COM
INITIAL SETUP
ADVANCED
SETUP
FUNCTION
HOME THEATRE
The Home Theatre feature allows you to combine key groups of several modes on the
URC-7781 in one single mode.
Example: You want to configure the functions of your Television and Home Cinema Set
(programmed on TV and RCV) onto the URC-7781 keypad as shown in the table below.
This allows you mainly to control the TV functions and functions from the Home Cinema
Set without having to select the corresponding device mode.
1 Press and hold down MAGIC
for about 3 sec. and...
will appear on the screen.
2 Press ARROW Right...
will appear on the screen.
3 Press ENTER...
will appear on the screen.
4 Press ”ARROW Right” twice...
will appear on the screen.
5 Press ENTER twice...
will appear on the screen.
Select TV mode using the ARROW Left / right key
(corresponding to the example above).
6 Press ENTER...
will appear on the screen.
Select TV mode using the ARROW Left / right key
(corresponding to the example above).
7 Press ENTER...
will appear on the screen.
Select TV mode using the ARROW Left / right key
(corresponding to the example above).
Extra Features
Home Theatre Setup
Mode
TV
TV
TV
RCV
TV
TV
TV
DVD
TV
RCV
Keys
POWER
DIGITS
(1-9, 0, -/--, AV)
CHANNEL
(channel +/-)
VOLUME
(volume +/-, mute)
MENU
Menu, up, down, left, right, OK, Exit
GUIDE
16 :9
TRANSPORT
(skip-back, play, pause, skip-forward, rewind, stop, record, fast-forward
FASTEXT
(red, green yellow, blue)
A, B, C, D
ENTER
x2
ENTER
ENTER
ENTER
x2
To set up or add the Home Theatre mode:
Page 24
HT VOLUME
TV HTNA DVD
ENTER
WW W.O NEFORA LL.COM
23
INITIAL
SETUP
ADVANCED
SETUP
FUNCTION
HOME THEATRE
HOME THEATRE
SET UP
HOME THEATRE
DELETE
HOME THEATRE
- During Home Theatre setup you will see a device called HTNA. By selecting this
fictious device for a group of keys, then these keys will not sent IR in the Home
Theatre mode.
- When pressing keys in Home Theatre mode you will see the mode from which IR is
sent, displayed.
- Home Theatre mode can be moved by using the Move Device feature.
- Home Theatre mode can be renamed by using the Device Label Feature.
- Key Magic functions and learned functions are carried over to Home Theatre mode.
It’s not possible to learn to or program Key Magic functions in Home Theatre mode.
- Key Macros will not be available in Home Theatre mode.
- If a group of functions keys has been assigned to a device which gets deleted, then
as a consequence this function group will not send IR in the Home Theatre any
longer (this group is automatically assigned to HTNA).
8 Press ENTER...
will appear on the screen.
Select RCV mode using the ARROW Left /
Right key (corresponding to the example above).
etc…………….
After selecting the device for the last keygroup (A, B ,C, D) the LED underneath the
POWER key will light up twice and the display will return to “HOME THEATRE”.
Result: In Home Theatre mode the URC-7781 keypad in configured according to the
table above.
To delete the Home Theatre Mode feature:
1 Press and hold down MAGIC
for about 3 sec. and...
will appear on the screen.
2 Press ARROW Right...
will appear on the screen.
3 Press ENTER...
will appear on the screen.
4 Press ”ARROW Right” twice...
will appear on the screen.
5 Press ENTER...
will appear on the screen.
6 Press ARROW Right...
will appear on the screen.
7 Press ENTER to delete
the Home Theatre mode.
The LED underneath the POWER key
will light up twice and the display will
return to...
The Home Theatre mode will no longer be present on the URC-7781. You can add the
Home Theatre mode back by following the Home Theatre mode set up on page 22.
Extra Features
Home Theatre Setup
Delete Home Theatre
ENTER
x2
ENTER
ENTER
Page 25
24 WW W.O NEFO RALL.COM
Your URC-7781 remote contains a unique feature, which allows new codes to
be added simply by holding it to your telephone. In a matter of seconds,
our magnetic coupling technology quickly and reliably transfers information
to the URC-7781 remote without complex plugs, adapters or attachments.
This means, as you buy new products in the future, the URC-7781 remote will never
become obsolete.
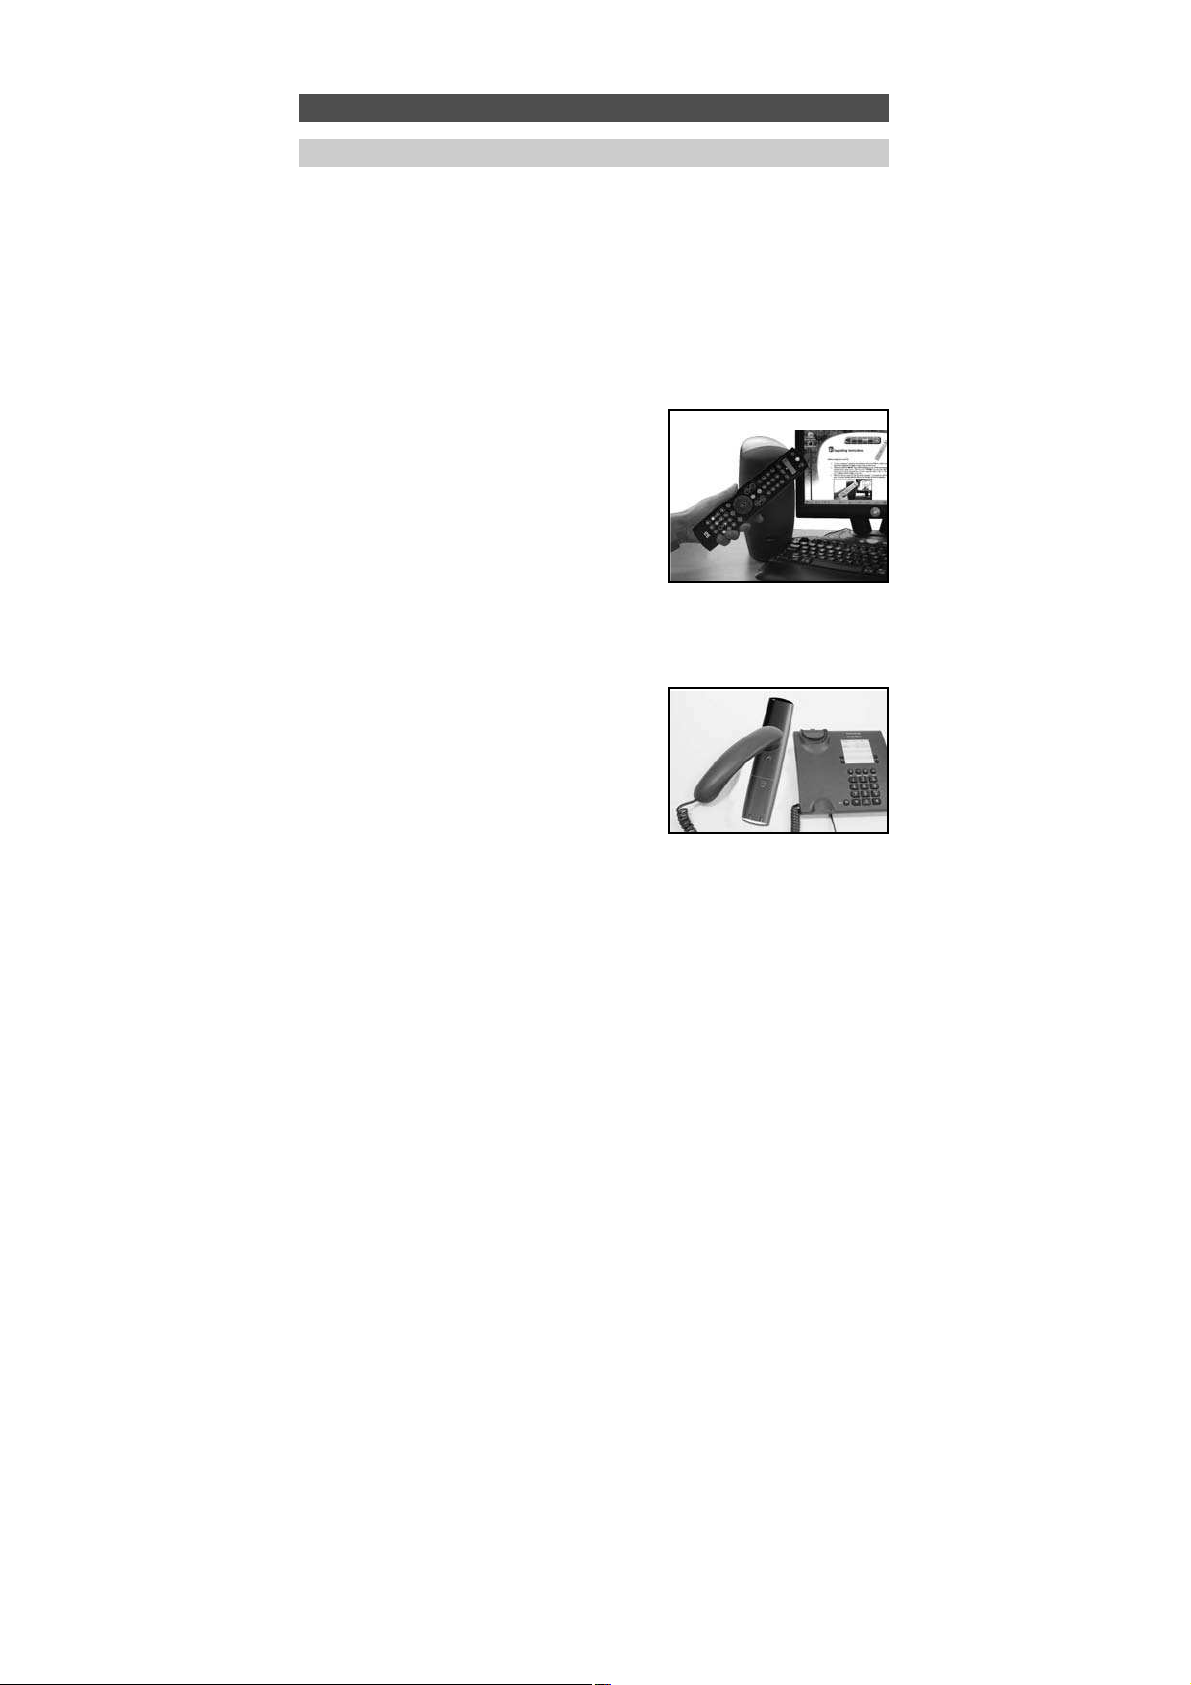
Internet download
(Upgrade your URC-7781 remote…via your PC)
1. Visit our website “www.oneforall.com”.
2. Select your region.
3. Select “Product support”.
4. Select “Universal Remote Controls”.
5. Select the ONE FOR ALL remote you want
to upgrade: URC-7781.
6. Select ‘Internet Download’.
Now you have entered our special Online
Download section. From this
point just follow the instructions on the screen
for easy upgrade of your remote.
Phone upgrade
(Upgrade your URC-7781 remote…via your phone)
Alternatively ring our consumer help-line and
o
ne of our customer service
representatives will assist you through the entire
p
rocess of upgrading your URC-7781 Remote.
To ensure the process goes smoothly, here are
a few steps to follow:
1. Write down the brand name(s) and model number(s) of your device(s) (see the
table provided on the Consumer Service page) before you call.
2. Ring our consumer help-line and explain which device(s) you would like to
add to your URC-7781 Remote.
3. After our customer service agent records the brand name(s) and model
number(s) of your device(s), he/she will lead you through the set up procedure
and then will ask you to hold the URC-7781 Remote to the speaker portion
of your telephone (see diagram below). In doing this, the information
needed for your device is transferred through the telephone on your
URC-7781 remote in a matter of seconds.
IMPORTANT: cordless telephones, speaker telephones and mobile
telephones are not recommended.
4. After your URC-7781 remote has been upgraded by telephone, stay on
the line. Our customer service agent will ensure that your URC-7781 remote is
working properly with your device(s) and will answer any other questions you
may have.
Extra Features
Code Upgrade Technology
Page 26
KM SOURCE
DVD TV RCV
WW W.O NEFORA LL.COM
25
Key Magic is an exclusive One For all feature. The design of the URC-7781 ensures that
many functions of your original remote control can be operated - even those that do not
have their own key on the URC-7781 keypad. Frequently used functions can be assigned to
a key of your choice using the Key Magic feature of your URC-7781. In order to program a
certain function with Key Magic you need to know the corresponding 5-digit function
code. As the function codes vary with different types of devices, they cannot be found in
the manual. You can request your function codes through our consumer service help-line or
by letter, fax or e-mail. All we need to know is the 4-digit set-up code your device is working with and how the function was labelled on your original remote control.
You can also visit our website (www.oneforall.com) to find an answer
to your questions.
Once you obtain(ed) your function code(s) from customer service, programming
the code is easy (eg. programming the 16:9 function on the A key).
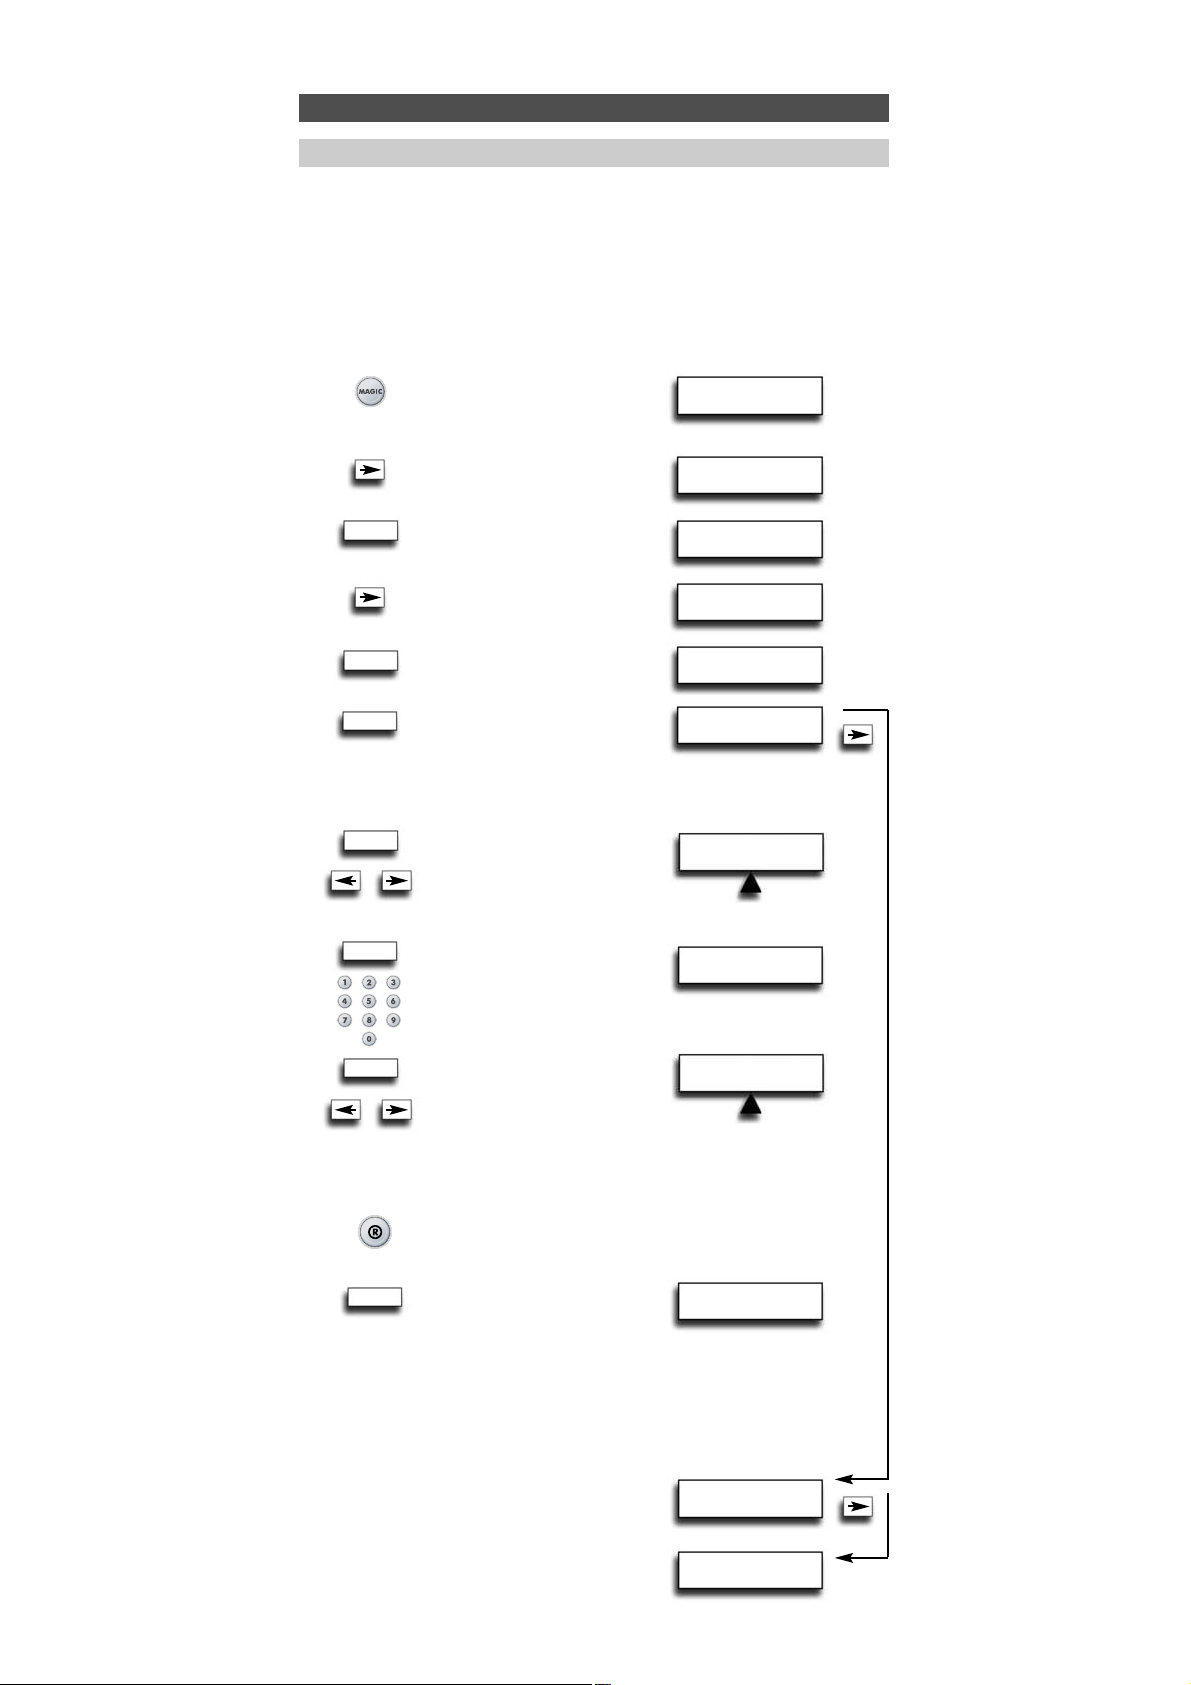
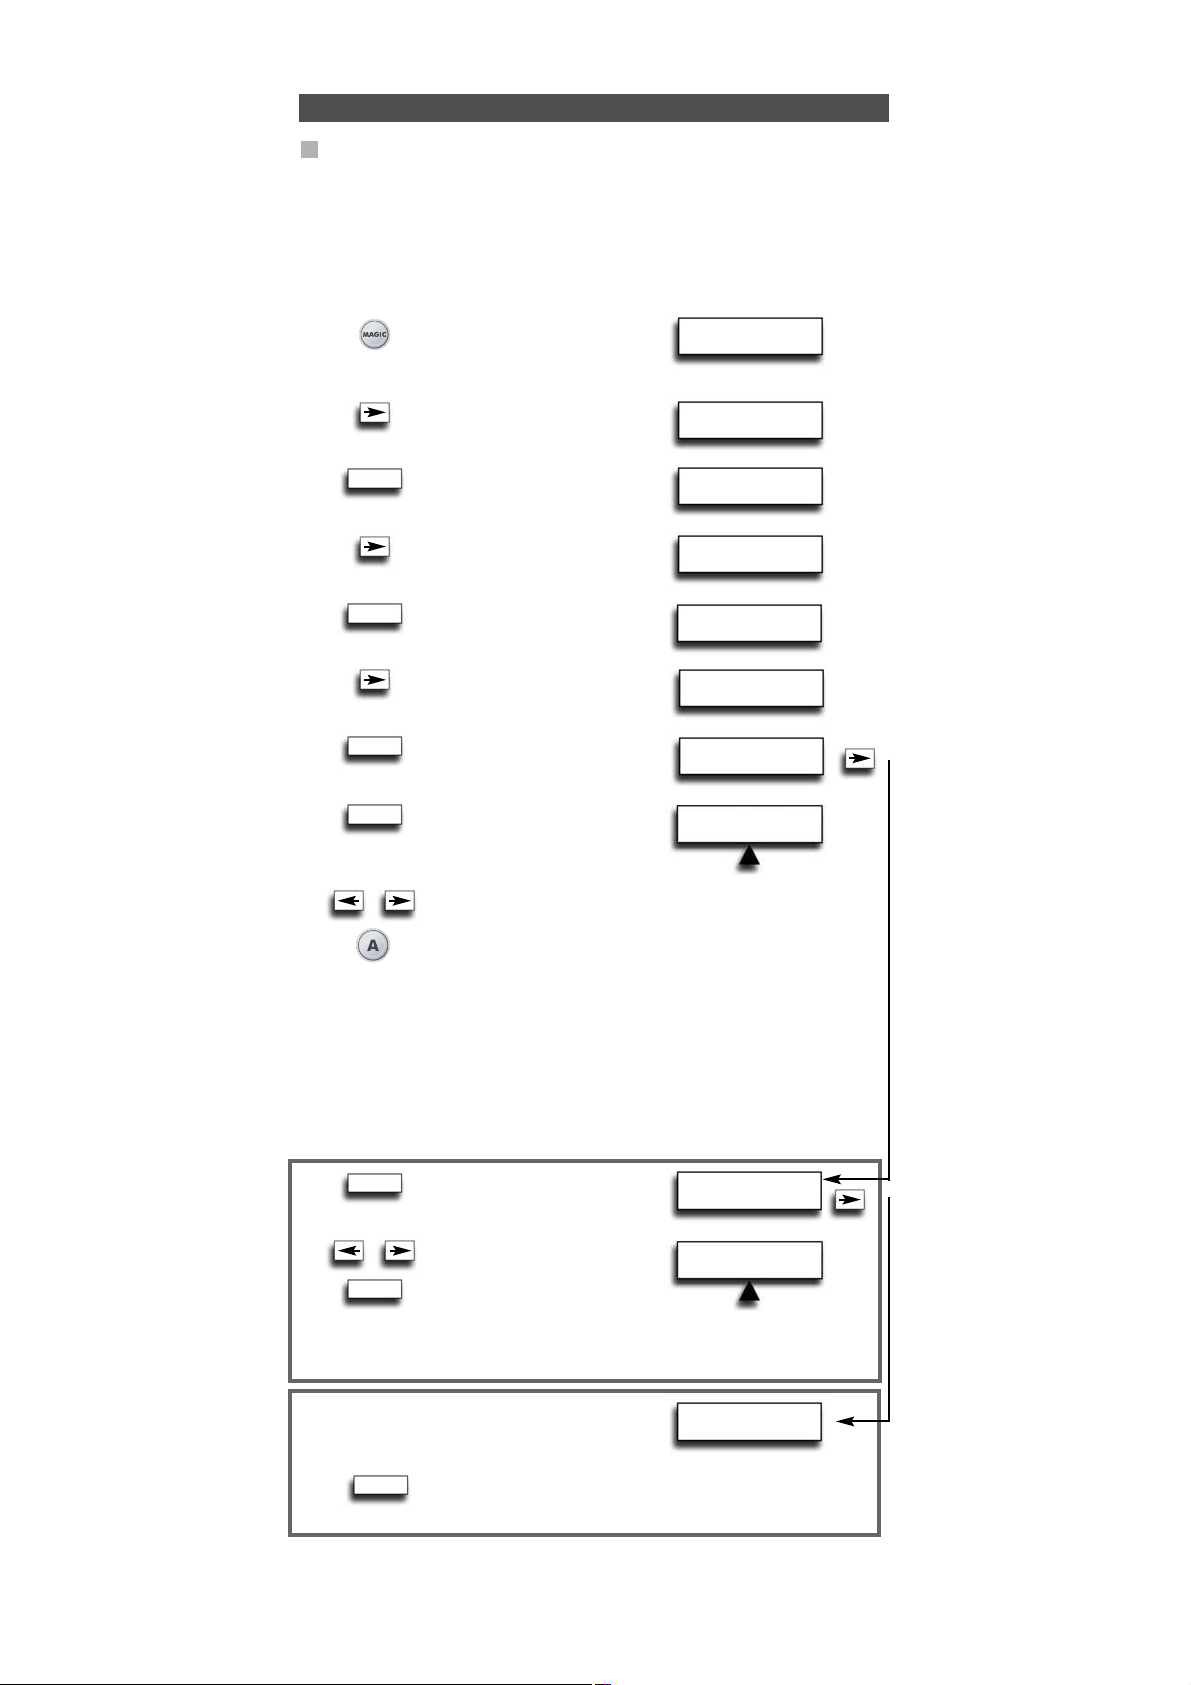
1 Press and hold down MAGIC
for about 3 sec. and...
will appear on the screen.
2 Press ARROW Right...
will appear on the screen.
3 Press ENTER twice...
will appear on the screen.
4 Press ARROW Right...
will appear on the screen.
5 Press ENTER...
will appear on the screen.
Select the corresponding device
mode using the ARROW keys in our
exemple the 16:9 function is a TV function,
so select the TV mode.
6 Press the MAGIC key once.
7 Enter the 5-digit function code (e.g. 00234)
(provided by customer service).
8 The screen will change to…
The mode in which the function will be
assigned is TV so leave the device mode
unchanged. Press the key (e.g. A key) to
which the function will be assigned.
The 16:9 function has now been programmed on the A key in the
TV mode. The LED underneath the POWER key will light up twice
and you will return to KM SOURCE to program a next function. To
return to user mode press and hold LIGHT (ESC).
EXTENDED FUNCTION REFERENCE
(first entry is an example):
DEVICE SET-UP CODE FUNCTION FUNCTION CODE
TV T0556 16/9 format 00234
- To access the function you have programmed, go to the corresponding device mode
first.
- Key Magic can be assigned to any key EXCEPT the ARROW LEFT / RIGHT, ENTER,
LIGHT (ESC) keys and the MAGIC key.
- Please note all the extended function codes you obtain from customer service above
for easy future reference.
- It’s not possible to program Key Magic functions in the Home Theatre Mode.
However, if a key has been programmed in the original device mode with Key Magic
then this function will be carried over to the Home Theatre Mode.
Extra Features
Key Magic®
INITIAL
SETUP
ADVANCED
SETUP
ADD
LEARNING
ADD
KEY MAGIC
ENTER
ENTER
x2
KM DESTINATION
DVD TV RCV
Page 27
SELECT MODE
RCV TV
26 WWW. O NEFOR ALL.COM
ENTER
Extra Features
Delete Key Magic
It is possible to…..
- delete a Key Magic function from a specific key within a specific device mode.
- delete all Key Magic functions within a specific device mode.
- delete all Key Magic functions within all device modes.
Example: to delete the programmed Key Magic function (16:9) from the A Key in the TV
mode
1 Press and hold down MAGIC
for about 3 sec. and...
will appear on the screen.
2 Press ARROW Right...
will appear on the screen.
3 Press ENTER twice...
will appear on the screen.
4 Press ARROW Right...
will appear on the screen.
5 Press ENTER...
will appear on the screen.
6 Press ARROW Right...
will appear on the screen.
7 Press ENTER...
will appear on the screen.
8 Press ENTER...
will appear on the screen.
9 Select the device mode (e.g. the TV mode) from which you want to
delete the Key Magic function by using the ARROW LEFT/RIGHT
keys and press the key you wish to delete (example: A key). The
LED underneath the POWER key will blink twice and the screen will
go back to “DELETE KEY MAGIC”.
10 If there is another Key Magic function which you wish to delete, repeat steps 6 - 9.
Result: The original function on the “A” key in the TV mode of the URC-7781 will now
be present.
* To delete a Shifted Key Magic function, press MAGIC before you press the key
to be deleted in step 9.
7 You will see...
Press ENTER
8 Select the corresponding
device mode from which
you want to delete all Key
Magic functions by using
the ARROW LEFT/RIGHT keys and press ENTER. The LED
underneath the POWER key will light up twice and
the screen will go back to DELETE KEY MAGIC. All Key Magic
functions from the selected mode are now cleared.
7 You will see...
8 Press ENTER The LED underneath the POWER key will light up
twice and the display will go back to “DELETE KEY MAGIC”. All
Key Magic functions from all modes are now cleared.
- Use the LIGHT key to return to the previous screen.
- Press and hold down the LIGHT key to return to user mode.
INITIAL
SETUP
ADVANCED
SETUP
ADD
FUNCTION
DELETE
FUNCTION
DELETE
LEARNING
DELETE
KEY MAGIC
DELETE KEY MAGIC
FROM ONE KEY
DELETE KEY MAGIC
FROM ONE MODE
DELETE KEY MAGIC
FROM ALL MODES
ENTER
ENTER
ENTER
ENTER
ENTER
ENTER
x2
SELECT MODE &KEY
RCV TV
Page 28
DELETE LEARN &KM
FROM ALL MODES
WW W.O NEFO RALL.CO M
27
Extra Features
Delete Learning and Key Magic
IF……. after some programming using both “Key Magic” and “Learning” you should not
remember if you learned or used Key Magic to obtain a specific function or if you just
would like to delete all functions obtained by Learning and Key Magic on one key,
within one device mode, or within all device modes you can use the following feature.
I
t is possible to…..
- delete a Learning & Key Magic function from a specific key within a
specific device mode.
- delete all Learning & Key Magic functions within a specific mode.
- delete all Learning & Key Magic functions within all device modes.
Example: to clear the A key in the TV mode from a Learned or Key Magic function:
1 Simply follow steps 1 – 5
as shown on page 26...
will appear on the screen.
2 Use the ARROW left
key to scroll to…
will appear on the screen.
3 Press ENTER...
will appear on the screen.
4 Press ENTER...
will appear on the screen.
5 Select the corresponding device mode (e.g. TV mode) by using
the ARROW left/right keys and press the key from which you
want to delete the Key Magic / Learned function* (Example:
A key). The LED underneath the Power key will blink twice and
the screen will go back to “DELETE LEARN & KEY MAGIC”.
6 If there is another key which you wish to delete, repeat steps 2 - 5.
Result: The original function on the A key in the TV mode of the URC-7781 will now
be present.
* To delete a Shifted Learned or Key Magic feature, press MAGIC before you press
the key to be deleted in step 5.
3 You will see...
PRESS ENTER
4 Select the corresponding
device mode using ARROW
left/right keys and press ENTER.
The LED underneath the POWER
key will light up twice and the screen
will go back to DELETE LEARN & KEY MAGIC. All Key Magic and
Learned functions from the selected device mode are cleared.
3 You will see...
4 To delete all Key Magic and Learned functions within all
device modes press ENTER. The LED underneath the POWER
key will light up twice and the screen will go back to DELETE
LEARN & KEY MAGIC. All Key Magic and Learned functions from
all device modes are cleared.
- Use the LIGHT key to return to the previous screen.
- Press and hold down the LIGHT key to return to user mode.
DELETE
LEARNING
DELETE
LEARN & KEYMAGIC
DELETE LEARN &KM
FROM ONE KEY
DELETE LEARN &KM
FROM ONE MODE
ENTER
ENTER
SELECT MODE &KEY
RCV TV
SELECT MODE
RCV TV
ENTER
ENTER
ENTER
Page 29

28 WW W.O NEFO RALL.COM
Problem:
Your brand is not listed
in the code section?
The URC-7781 does not operate
your device(s)?
The URC-7781 is not
performing commands
properly?
Problems changing channels?
Video not recording?
The URC-7781 does not respond
after pressing a key?
The LED does not
blink when you press a key?
The LED blinks 5 times every
time you press a key and
the LCD shows “BATTERY
LOW”?
You cannot enter programming
mode by pressing and holding
MAGIC?
Solution:
Just use the ARROW Left/Right keys to scroll
through the codes contained in the memory (see
Step 5 on page 6 - SEARCH METHOD).
A) Try all the codes listed for your brand see pages
301 - 315.
B) Just use the ARROW Left/Right keys to scroll
through the codes contained in the memory
(see Step 5 on page 6 - SEARCH METHOD).
You may be using the wrong code. Try repeating
the Direct Set-Up using another code listed
under your brand or start the search method over
again to locate the proper code.
Enter the programme number exactly as
you would on your original remote.
As a safety feature on your URC-7781, you must
press the Record key twice.
Make sure you are using new batteries and are
aiming the URC-7781 at your device.
Replace batteries with 4 fresh, new “AAA/LR03”
alkaline batteries.
Replace batteries with 4 fresh, new “AAA/LR03”
alkaline batteries.
Replace batteries with 4 fresh, new “AAA/LR03”
alkaline batteries.
Trouble-Shooting
Page 30

WW W.O NEFO RALL.CO M 29
Customer Service
If you still have questions about the operation of your URC-7781 universal remote and
could not find the answer(s) in the Trouble-Shooting section, you may want to contact
the customer service department for assistance.
Y
ou may care to visit our Internet-site:
www.oneforall.com
Before contacting us, by Fax, E-mail or Phone, make sure you have the
required information available by filling in the table below.
What do we need to know when you contact us:
1 That you have the ONE FOR ALL URC-7781 (*)
u
niversal remote.
2 The date of purchase (.........../.........../...........).
3 A list of your equipment/models: (see example below).
Device Brand Device Remote SET-UP
model nr. model nr. code
TV Sony KV-25C5D RM-883 T1505 (example)
Type/model numbers can often be found in your equipment owner’s manual or
on the factory plate behind the device.
4. Then Fax, E-mail or Dial us:
In the UK
E-mail : ofahelp@uebv.com (*)
Fax : +31 53 432 9816
Tel. : 0901-5510010 (£ 0,50 per minute)
In Ireland In Australia
E-mail : ofahelp@uebv.com (***) E-mail : ofahelp@uebv.com (***)
Fax : +31 53 432 9816 Fax : 03 9672 2479
Tel. : 016015986 Tel. : 1 300 888 298
In South Africa In New Zealand
E-mail : support@oneforall.co.za E-mail : ofahelp@uebv.com (***)
Fax : 011 298 2302 Fax : (06) 878 2760
Tel. : 0860 100551 Tel. : 0508 ONE 4 ALL (663 4 255)
Tel. : 011 298 2300
(*) Just send a blank message, you’ll get auto-reply.
Page 31

30 WW W.O NEFO RALL.COM
Your ONE FOR ALL 12 Remote Control is compatible with ONE FOR ALL Light Control
accessories, allowing you to control one or more of the lights in your house using the
remote. To begin, you will need to purchase the ONE FOR ALL Light Control Starters Kit
(HC-8300). The next step is to set up a code which will allow you to control up to 10 Light
Control Receivers.
To setup a code, simply follow the normal procedure on page 6 and set up one
of the following codes as a Home Automation device (HOM).:
ONE FOR ALL Light Control – 2200, 2201, 2202, 2203, 2204, 2205, 2206, 2207,
2208, 2209, 2210, 2211, 2212, 2213, 2214, 2215
It is recommended to use the first code listed. As the Light Control system works with
Radio Frequency there is the possibility of interference. If your Light Control kit is not
responding well, try one of the other codes listed.
Set up the HC Receiver
To set up your HC Receiver to work with your remote, you will need to assign a number
to it. This is a one-time process that will allow you to control individual lights separately
if you purchase additional HC Receivers in the future. To assign a number to the plug,
follow these steps:
• Plug the lamp into the HC Receiver, and plug the HC Receiver into the wall
outlet. If your lamp has a power switch it should be in the “ON” position.
• Plug the Command Centre in as close as possible to the HC Receiver, so that
they are only 10-20 cm apart (the Command Centre can be moved after the
initial setup).
• Set up a HOM code (see page 6 how to set up a code) and make sure that
your remote control is in Light (HOM) Mode.
• Press the number you wish to assign to the HC Receiver. If this is your first Plug,
number 1 is recommended, number 2 for the second etc. The LED (underneath
the POWER key) should blink twice.
• Press and hold the button on the HC Receiver until the red light begins to
blink.
• Point your remote control towards the Command Centre and press the
Channel Up (+) key. The red light should stop flashing.
The remote should now operate the HC Receiver. To test it, check if the Channel
Up (+) and Channel Down (-) keys work to turn your light on and off respectively, or if you have the HC8010 Dimmer unit, see if the Volume up key begins to
brighten or darken the light (press again to stop).
Once set up with the Starters Kit, the following keys will perform the following
functions on your ONE FOR ALL 12 Remote:
Key Name Function
Digit 1 Select Receiver 1
Digit 2 Select Receiver 2
Digit 3 Select Receiver 3
Digit 4 Select Receiver 4
Digit 5 Select Receiver 5
Digit 6 Select Receiver 6
Digit 7 Select Receiver 7
Digit 8 Select Receiver 8
Digit 9 Select Receiver 9
Digit 0 Select Receiver 10
Channel Up Turn Selected Receiver On
Channel Down Turn Selected Receiver Off
Volume Up Begin Dimming – Press Again To Stop*
Dimming feature is only available with the Light Control Dimmer unit (HC8010).
Extra Features
ONE FOR ALL Light Control
1
2
3
Page 32

WW W.O NEFO RALL.CO M 31
Inhaltsverzeichnis
D
eutsch
ABBILDUNG DER FERNBEDIENUNG URC-7781 . . . . . . . . . . . . . . . . . .
32
ALLGEMEINES . . . . . . . . . . . . . . . . . . . . . . . . . . . . . . . . . . . . . . . . . . . . . . . . . . .
32
DAS TASTENFELD . . . . . . . . . . . . . . . . . . . . . . . . . . . . . . . . . . . . . . . . . . . . . . .
33
EINSETZEN DER BATTERIEN . . . . . . . . . . . . . . . . . . . . . . . . . . . . . . . . . . . . .
35
EINSTELLEN VON SPRACHE, DATUM UND ZEIT . . . . . . . . . . . . . . . . .
35
EINRICHTEN DER URC-7781 . . . . . . . . . . . . . . . . . . . . . . . . . . . . . . . . . . .
36
(Wie Sie die URC-7781 für die Bedienung Ihrer Geräte einrichten)
CODES
TV : Fernsehgerät/LCD/Plasma/Projektor/Rückprojektor
. . . . . . . . . . . . . . . . . .
301
VCR : Video-Kassettenrecorder/TV/VCR Kombi/DVD/VCR Kombi/PVR
. . . . . . . . .
306
SAT : Satellitenempfänger/Set-Top-Box/ DVB-S/DVB-T/Freeview (UK)/TNT
(F)/Digitenne (NL)/SAT/HDD
. . . . . . . . . . . . . . . . . . . . . . . . . . . . . . . . . . .
308
CBL : Kabeldecoder/ Set-Top-Box/DVB-C
. . . . . . . . . . . . . . . . . . . . . . . . . . . . . .
310
VAC : Videozubehör wie Medienzentren/AV-Zubehör/AV-Wähler
. . . . . . . . . . .
310
CD : CD-Spieler/CD-R/MD
. . . . . . . . . . . . . . . . . . . . . . . . . . . . . . . . . . . . . . . . .
310
PHO : Plattenspieler
. . . . . . . . . . . . . . . . . . . . . . . . . . . . . . . . . . . . . . . . . . . . . .
311
MIS : Audio/Verschiedene Audio
. . . . . . . . . . . . . . . . . . . . . . . . . . . . . . . . . . . .
311
HOM : Home Automation (z.B. IR-gesteuerte Vorhänge/IR-gesteuerte
Lichtschalter usw.)
. . . . . . . . . . . . . . . . . . . . . . . . . . . . . . . . . . . . . . . . . .
311
AMP : Audio/Verstärker/Aktivlautsprechersystem
. . . . . . . . . . . . . . . . . . . . . . . .
311
RCV : Audio/Audio Receiver/Tuner/Verstärker/(DVD) Home Cinema
. . . . . . . . .
311
CAS : Kassettenrecorder (Tape Deck)
. . . . . . . . . . . . . . . . . . . . . . . . . . . . . . . . .
312
LDP : Laser-CD-Spieler/Video-CD
. . . . . . . . . . . . . . . . . . . . . . . . . . . . . . . . . . . .
312
DAT : Digitale Audio-Kassette/DCC
. . . . . . . . . . . . . . . . . . . . . . . . . . . . . . . . . .
312
DVD : DVD-Spieler/DVD-R/DVD Home Cinema/DVD Kombi/DVD/HDD
. . . . . . . .
312
A
KTUELLEN CODE ANZEIGEN
.
. . . . . . . . . . . . . . . . . . . . . . . . . . . . . . . . . .
3
8
CODE-SCHNELLREFERENZ .
. . . . . . . . . . . . . . . . . . . . . . . . . . . . . . . . . . . . . .
38
GERÄT ERSETZEN .
. . . . . . . . . . . . . . . . . . . . . . . . . . . . . . . . . . . . . . . . . . . . . . .
38
G
ERÄTECODE ÄNDERN
.
. . . . . . . . . . . . . . . . . . . . . . . . . . . . . . . . . . . . . . . . .
3
9
GERÄTE-REIHENFOLGE ÄNDERN .
. . . . . . . . . . . . . . . . . . . . . . . . . . . . . . .
40
GERÄT ENTFERNEN .
. . . . . . . . . . . . . . . . . . . . . . . . . . . . . . . . . . . . . . . . . . . . .
40
DIE LERNFUNKTION .
. . . . . . . . . . . . . . . . . . . . . . . . . . . . . . . . . . . . . . . . . . . .
41
(Kopieren von Funktionen der Originalfernbedienung auf die
URC-7781)
BENUTZER RESET . . . . . . . . . . . . . . . . . . . . . . . . . . . . . . . . . . . . . . . . . . . . . . . .
44
SONDERFUNKTIONEN
• Farbe, Helligkeit und Schlafmodus
. . . . . . . . . . . . . . . . . . . . . . . . . . . . . . . .
44
• Gerätebezeichnung ändern
. . . . . . . . . . . . . . . . . . . . . . . . . . . . . . . . . . . . . .
45
• Lautstärkesperre
. . . . . . . . . . . . . . . . . . . . . . . . . . . . . . . . . . . . . . . . . . . . . .
46
• Makros (Befehlsfolgen)
. . . . . . . . . . . . . . . . . . . . . . . . . . . . . . . . . . . . . . . . .
48
• Heimkino (Home Theater)
. . . . . . . . . . . . . . . . . . . . . . . . . . . . . . . . . . . . . . .
52
• Code-Nachladung
. . . . . . . . . . . . . . . . . . . . . . . . . . . . . . . . . . . . . . . . . . . . .
54
• Key Magic® (Programmierung fehlender Funktionen)
. . . . . . . . . . . . . . . . .
55
• Lernen und Key Magic entfernen
. . . . . . . . . . . . . . . . . . . . . . . . . . . . . . . . .
57
• Lichtsteuerung für die One For All
. . . . . . . . . . . . . . . . . . . . . . . . . . . . . . . .
60
PROBLEM & LÖSUNG . . . . . . . . . . . . . . . . . . . . . . . . . . . . . . . . . . . . . . . . . . . .
58
KUNDENDIENST . . . . . . . . . . . . . . . . . . . . . . . . . . . . . . . . . . . . . . . . . . . . . . . . .
59
Page 33

32 WW W.O NEFO RALL.COM
Abbildung der URC-7781
Für den Betrieb der URC-7781 sind 4 neue Alkalibatterien AAA/LR03 erforderlich.
Die URC-7781 kann 12 Geräte bedienen:
TV : Fernsehgerät/LCD/Plasma/Projektor/Rückprojektor
VCR : Video-Kassettenrecorder/TV/VCR Kombi/DVD/VCR Kombi/PVR
SAT : Satellitenempfänger/Set-Top-Box/ DVB-S/DVB-T/Freeview (UK)/TNT
(F)/Digitenne (NL)/SAT/HDD
CBL : Kabeldecoder/ Set-Top-Box/DVB-C
VAC : Videozubehör wie Medienzentren/AV-Zubehör/AV-Wähler
CD : CD-Spieler/CD-R/MD
PHO : Plattenspieler
MIS : Audio/Verschiedene Audio
HOM : Home Automation (z.B. IR-gesteuerte Vorhänge/IR-gesteuerte
Lichtschalter usw.)
AMP : Audio/Verstärker/Aktivlautsprechersystem
RCV : Audio/Audio Receiver/Tuner/Verstärker/(DVD) Home Cinema
CAS : Kassettenrecorder (Tape Deck)
LDP : Laser-CD-Spieler/Video-CD
DAT : Digitale Audio-Kassette/DCC
DVD : DVD-Spieler/DVD-R/DVD Home Cinema/DVD Kombi/DVD/HDD
Die Universalfernbedienung URC-7781 wird mit einem eingebauten Modem geliefert, mit
dem Codes heruntergeladen werden können, die nicht im Speicher vorprogrammiert
sind. Damit ist die URC-7781 zukunftssicher.
Was die URC-7781 noch einzigartiger macht, ist die Lernfunktion, durch die auch alle
Sonderfunktionen Ihrer Originalfernbedienung auf das Tastenfeld Ihrer neuen URC-7781
programmiert werden können.
Auf den folgenden Seiten wird in einfachen Schritten erklärt, wie die URC-7781 auf Ihre
Geräte eingestellt wird.
Allgemeines
11
1
2
4
6
8
5
10
13
14
17/18
9
2
1
19
15
7
16
3
Page 34

WW W.O NEFORA LL.COM 33
Das Tastenfeld
Siehe Abbildung der Fernbedienung URC-7781 auf Seite 32.
1 MAGIC-Taste
Mit der MAGIC-Taste wird die URC-7781 eingerichtet.
2 POWER (LED)
Die POWER-Taste steuert dieselbe Funktion wie auf Ihrer
Originalfernbedienung. Drücken Sie für die Sleep-Funktion erst auf
MAGIC und dann auf POWER. Wenn Sie die MAGIC-Taste gedrückt halten, blinkt die LED unter der POWER-Taste zweimal, und Sie gelangen in
den Programmiermodus.
3 LIGHT (ESC)-Taste
Die LIGHT (ESC)-Taste aktiviert die Beleuchtung des LCD-Displays und
des Tastenfelds der URC-7781. Mit dieser Taste kehren Sie auch zur
vorherigen Anzeige im Programmiermodus zurück (Escape-Funktion).
Wenn Sie den Programmiermodus verlassen und zum Benutzermodus
zurückkehren möchten, halten Sie einfach die LIGHT (ESC)-Taste
gedrückt.
4 LCD-Display
Die URC-7781 kann mithilfe der Anzeigen auf dem LCD-Display ganz
einfach programmiert werden. Beim Einrichten zeigt die URC-7781 die
zwölf möglichen Gerätegruppen an. Der (Cursor) zeight an welches
Gerät derzeit aktiviert ist.
TV : (T) - Fernsehgerät/LCD/Plasma/Projektor/Rückprojektor
VCR : (V) - Video-Kassettenrecorder/TV/VCR Combi/DVD/VCR Combi/PVR
SAT : (S) - Satellitenempfänger/Set-Top-Box/ DVB-S/DVB-T/Freeview (UK)/TNT
(F)/Digitenne (NL)/SAT/HDD
CBL : (C) - Kabeldecoder/Set-Top-Box/DVB-C
VAC : (N) - Video Zubehör wie Medienzentren/AV-Zubehör/AV-Wähler
CD : (D) - CD-Spieler/CD-R/MD
PHO : (P) - Tonaufzeichnungsgerät
MIS : (M) - Audio/Verschiedene Audio
HOM : (H) - Home Automation (z.B. IR-gesteuerte Vorhänge/IR-gesteuerte
Lichtschalter usw.)
AMP : (A) - Audio/Verstärker/Aktivlautsprechersystem
RCV : (R) - Audio/Audio Receiver/Tuner/Verstärker/(DVD) Heimkino
CAS : (K) - Kassettenrecorder (Kassettendeck)
LDP : (L) - Laser CD-Spieler/Video-CD
DAT : (J) - Digitale Audio-Kassette/DCC
DVD : (Y) - DVD-Spieler/DVD-R/DVD Home Cinema/DVD Combi/DVD/HDD
Der Codetyp wird in Klammern angezeigt, z.B. (T). Wenn Sie das Gerät einrichten, wird
ein Gerätecode angezeigt (z.B. T0556).
T - gibt den Gerätetyp an (TV-Code)
0556 - bezeichnet einen vierstelligen Code von Philips.
Eine Gerätebezeichnung kann auch mit bis zu 4 Zeichen umbenannt/geändert werden
(siehe Seite 45).
5 Links/ENTER/Rechts
Mit diesen Tasten können Sie Ihre Festlegungen im
„Programmiermenü” der Fernbedienung durchscrollen und bestätigen.
Beim Ändern der Gerätebezeichnung können Sie durch das Alphabet,
die Ziffern und Sonderzeichen (._ ^<) scrollen. Drücken Sie die Taste
ENTER, um den/die gewünschten Buchstaben, Ziffern und Symbole zu
wählen.
6 Nummerntasten (0-9, -/- -, AV)
Die Nummerntasten (0-9, -/—, AV) ermöglichen dieselben Funktionen
wie auf Ihrer Originalfernbedienung wie z.B. direkten Zugriff auf die
Kanalwahl. Wenn Ihre Originalfernbedienung eine Umschaltung für
einstellig/zweistellig besitzt (Symbol -/— ), kann diese Funktion gewählt
werden, indem Sie die -/— Taste drücken. Wenn Ihre
Originalfernbedienung eine Zehnertaste besitzt, ist diese Funktion
ebenfalls auf der -/— Taste zu finden. Wenn Ihre Originalfernbedienung
über eine Zwanzigertaste verfügt, ist diese Funktion auf der AV-Taste zu
finden. Im Audiomodus (RCV, AMP, MIS) ermöglichen die
Nummerntasten eine Quellen(Input-)auswahl.
7 AV-Taste
Im TV-Modus erhalten Sie die AV-/Inputfunktion. Im VCR-Modus
erhalten Sie die „AV”-Funktion, wenn diese auf Ihrer
Originalfernbedienung verfügbar ist. Im Audiomodus (RCV, AMP, MIS)
erhalten Sie die Input-/Quellenfunktion. Im DVD-Modus erhalten Sie die
„TV/DVD”-Funktion, wenn diese auf Ihrer Originalfernbedienung
verfügbar ist. Im SAT-Modus erhalten Sie die „TV/SAT” oder „TV/DTV"Funktion, wenn diese auf Ihrer Originalfernbedienung verfügbar ist.
Page 35

34 WWW. O NEFOR ALL.COM
Das Tastenfeld
8 Kanal +/- Tasten
Diese Tasten dienen der gleichen Funktion wie auf Ihrer
Originalfernbedienung. Im TV-Modus stellen Sie mit diesen Tasten die
Helligkeit (+/-) ein, wenn Sie auf MAGIC und dann auf CH+/- drücken. Im
Audiomodus (RCV, AMP, MIS) ermöglichen diese Tasten PRESET Up/Down.
9 MUTE-Taste
Mit der MUTE-Taste erhalten Sie die gleiche Funktion wie auf Ihrer
Originalfernbedienung.
10 MENU-Taste
Mit der MENU-Taste erhalten Sie die gleiche Funktion wie auf Ihrer
Originalfernbedienung.
11 Lautstärke +/- Tasten
Diese Tasten dienen der gleichen Funktion wie auf Ihrer
Originalfernbedienung. Im TV-Modus stellen Sie mit diesen Tasten die
Farbe +/- ein, wenn Sie auf MAGIC und dann auf Lautstärke +/- drücken.
12 Richtungstasten
Wenn diese Tasten auf Ihrer Originalfernbedienung verfügbarsind, können Sie mit diesen Tasten durch den Menü-Modus Ihres Geräts navigieren.
13 OK
Mit der OK-Taste bestätigen Sie Ihre Auswahlim Menübetrieb Ihres Gerätes.
14 Programmführer
Im TV- und/oder SAT-Modus erhalten Sie die Funktion
„Programmführer” oder „Vorheriges Programm”, wenn diese auf Ihrer
Originalfernbedienung verfügbar ist. Im VCR-Modus erhalten Sie die
Funktion „TV/VCR” oder „Auswerfen”, wenn diese auf Ihrer
Originalfernbedienung verfügbar ist. Im AMP-, RCV- oder MIS-Modus
erhalten Sie die Funktion „Tune Down”, wenn diese auf Ihrer
Originalfernbedienung verfügbar ist. Im CD-Modus erhalten Sie die
Funktion „Auswerfen” bzw. „Öffnen/Schließen”, wenn diese auf Ihrer
Originalfernbedienung verfügbar ist.
15 EXIT
In jedem Modus erhalten Sie die Funktion „Menü verlassen”, wenn
diese auf Ihrer Originalfernbedienung verfügbar ist. Im SAT-MenüModus erhalten Sie die Taste „Zurück”, um zum vorherigen
Menü-Fenster zurückzukehren.
16 16:9
Im TV-Modus erhalten Sie mit dieser Taste die (16:9) Breitbildfunktion,
wenn diese auf Ihrer Originalfernbedienung verfügbar ist.
Im SAT-Modus erhalten Sie die „Favoriten-” oder „Info-”Funktion, wenn
diese auf Ihrer Originalfernbedienung verfügbar ist. Im DVD-Modus
erhalten Sie „Zoom” oder „Random”. Im VCR-Modus erhalten Sie
„SP/LP”. Im AMP-, RCV- oder MIS-Modus erhalten Sie „Tune Up”.
17 Transporttasten
Mit diesen Tasten bedienen Sie die Transport-Funktionen (PLAY, FF, REW
usw.) Ihres Geräts. Um eine versehentliche Aufzeichnung zu verhindern,
muss zum Starten der Aufzeichnung die RECORD-Taste zweimal
gedrückt werden.
18 Videotext-Tasten
Die Transporttasten (REW, STOP, REC, FF) werden für die Bedienung der
wichtigsten Videotext-Funktionen verwendet. Die Symbole unter den
Tasten dienen zur Videotext-Steuerung. Die Texttasten werden für den
Zugriff auf die Videotext-Funktionen Ihres Fernsehgerätes verwendet.
Dazu muss Ihr Gerät natürlich videotextfähig sein.
TEXT ON: Setzt das Gerät (TV oder SAT) in den Videotext-Modus.
HOLD/STOP: Beendet den Seitenwechsel.
EXPAND: Zeigt die obere Hälfte der Videotextseite in größerer Schrift an.
Bei erneutem Tastendruck wird die untere Hälfte der Videotextseite vergrößert
angezeigt. Um zur normalen Videotextanzeige zurückzukehren, drücken Sie je
nach Gerät wieder auf die EXPAND-Taste oder auf die TEXT ON-Taste.
TEXT OFF: Schaltet das Gerät (TV oder SAT) in die Normalansicht zurück. Bei
manchen Geräten geschieht dies in der Weise, dass man mehrmals auf die Taste
TEXT ON drückt.
Wenn man sich im TV-Modus im Textmodus befindet, kann man mit der roten, grünen,
gelben und blauen Taste auf die Fastext-Funktionen des Gerätes zugreifen. Wenn diese
Tasten auf Ihrer Originalfernbedienung für die Menünavigation verwendet werden,
können die Tasten der URC-7781 genauso verwendet werden.
19 Benutzertasten (A, B, C, D)
Die Benutzertasten sind freie Tasten, mit denen Sie die URC-7781Fernbedienung mithilfe der Lern- und Key-Magic®-Funktionen an Ihre
Bedürfnisse anpassen können (Seite 41 und 55). Diese Tasten können
auch zur Makroprogrammierung verwendet werden (siehe Seite 48).
Page 36

ZEIT EINSTELLEN
TAG EINSTELLEN
WW W.O NEFORA LL.COM
35
TAG EINSTELLEN
SON MON DIE
ENTER
ENTER
ENTER
ENTER
ENTER
ENTER
ENTER
Einsetzen der Batterien
Einstellen von Sprache, Datum und Zeit
Für den Betrieb der URC-7781 sind 4 neue Alkalibatterien AAA/LR03 erforderlich.
1 Entfernen Sie die Batteriefachabdeckung auf der Rückseite der URC-7781.
2 Legen Sie die Batterien entsprechend der + und - -Markierungen in das Batteriefach
ein.
3 Setzen Sie den Deckel des Batteriefachs wieder ein.
Wichtige Hinweise:
- Verwenden Sie keine wiederaufladbaren Batterien.
- Beim Batteriewechsel bleiben die Setup-Codes und die erweiterte
Programmierung erhalten.
1. Nach Einlegen der Batterien erscheint ...
auf dem Display. Drücken Sie zur
Bestätigung ENTER.
2. Stellen Sie mit den Pfeiltasten die
Sprache ENGLISH, GERMAN (DEUTSCH)
oder FRENCH (FRANÇAIS) ein.
Drücken Sie ENTER, um Ihre
Sprachauswahl zu bestätigen (z.B.
DEUTSCH). Die LED unter der POWERTaste blinkt jetzt zweimal. Ab jetzt erscheinen alle
Programmieranzeigen in der ausgewählten Sprache.
3. “TAG EINSTELLEN” erscheint auf dem Display.
Drücken Sie zur Bestätigung ENTER.
4. Wählen Sie das entsprechende Datum mit
den Pfeiltasten und bestätigen Sie mit
ENTER. Die LED unter der POWERTaste blinkt jetzt zweimal.
5. “ZEIT EINSTELLEN” erscheint auf dem Display.
Drücken Sie zur Bestätigung ENTER.
6. Wählen Sie die entsprechende Uhrzeit
mit den Nummerntasten und bestätigen
Sie mit "ENTER”. Die LED unter der
POWER-Taste blinkt jetzt zweimal.
„GERÄT HINZUFUGEN” erscheint
auf dem Display.
Setzen Sie nun die Einrichtung der URC-7781 für die Steuerung Ihrer Geräte wie
auf Seite 36 beschrieben fort.
Anmerkung: Um nach dem vollständigen Einrichten der Fernbedienung Sprache,
Datum und Zeit neu einzustellen, müssen Sie wieder den
Programmiermodus wählen. Halten Sie hierzu MAGIC gedrückt, bis
„INITIAL EINSTELLUNG” auf dem Display erscheint. Drücken Sie dann
ENTER; auf dem Display erscheint „GERÄT”. Scrollen Sie dann mit den
Pfeiltasten zu “SPRACHE” bzw. “TAG/ZEIT”, je nach dem, was Sie ändern
möchten.
LANGUAGE
ZEIT EINSTELLEN
00:00
GERÄT HINZUFÜGEN
SET LANGUAGE
DEUTSCH
ENTER
Page 37

GERÄT HINZUFÜGEN
PHO TV VCR
36 WWW. O NEFOR ALL.COM
TV
T0556
EINRICHTEN DER URC-7781
Wie Sie die URC-7781 für die Bedienung
Ihrer Geräte einrichten
Beispiel: Einrichten der URC-7781 für die Bedienung Ihres Fernsehgeräts:
Ermitteln Sie den Code für Ihr Gerät im Codeverzeichnis (Seite 301 - 315).
Die Codes sind nach Gerätetyp und Markennamen aufgelistet. Der gängigste Code wird als Erster aufgeführt. Achten Sie darauf, dass Ihr Gerät
eingeschaltet ist (nicht in Standby).
Falls Ihre Marke nicht aufgeführt ist, können Sie mit der Fernbedienung URC-7781
alle Codes im Speicher nach Ihrem Gerät durchsuchen (verwenden Sie in diesem Fall
wie in Schritt 4 erläutert statt der Zifferntasten die linke/rechte Pfeiltaste).
Auf der Anzeige erscheint ...
Drücken Sie ENTER.
Wählen Sie mit der linken/rechten
Pfeiltaste das Gerät, das Sie einrichten
möchten, und drücken Sie zur
Bestätigung ENTER. Jetzt erscheint
CODE EINSTELLEN.
Drücken Sie nochmals ENTER.
Verwenden Sie einfach die
Nummerntasten, um den ersten
vierstelligen Gerätecode
entsprechend dem im Codeverzeichnis aufgeführten Code
einzugeben (Seite 301 - 315). Die LED unter der POWER-Taste blinkt
zweimal.
Richten Sie die URC-7781 auf Ihr Fernsehgerät und drücken Sie
POWER.
—> Wenn Ihr Gerät auf OFF schaltet, schalten Sie es wieder auf ON (drücken
Sie z.B. CH+, um auf ON zu schalten) und probieren Sie alle Funktionen
aus, um sicherzustellen, dass diese einwandfrei arbeiten.
—> FALLS manche Funktionen nicht einwandfrei arbeiten oder wenn das
Gerät überhaupt nicht reagiert, versuchen Sie es mit dem nächsten
vierstelligen Gerätecode unter Ihrer Marke in der Liste (Seite 301 - 315).
CODE SUCHLAUF: Wenn Sie die linke oder rechte Pfeiltaste drücken, wird der vorherige
bzw. nächste Code im Speicher angezeigt und der POWER-Befehl
dieses Codes gesendet.
- Verwenden Sie nicht die Zifferntasten, um zu überprüfen, ob der Code stimmt,
da dies den aktuellen Code ändert.
- Falls Ihr Gerät, nachdem Sie alle Codes (Seite 301 - 315) für Ihre Marke in der Liste
ausprobiert haben, nicht auf die URC-7781 reagiert ………oder……. falls Ihre Marke
überhaupt nicht aufgeführt ist…….drücken Sie einfach die rechte Pfeiltaste, um zum
nächsten Code im Speicher zu gehen (für das betreffende Gerät).
Sobald alle Funktionen einwandfrei arbeiten, drücken Sie ENTER,
um diesen Code zu speichern.
Notieren Sie Ihren Code auf Seite 38 für den Fall, dass Sie ihn in Zukunft wieder
benötigen.
—> Wenn Sie die URC-7781 erstmaligeinrichten,führen Sie bitte erst Schritt 1 – 6 durch.
—> Wenn Sie sich bereits im Benutzermodus befinden, führen Sie die
nachfolgenden Schritte a und b durch, dann 1 - 6.
a Halten Sie MAGIC
ca. 3 s gedrückt und...
erscheint auf dem Display.
b Drücken Sie zweimal ENTER...
erscheint auf dem Display.
ENTER
GERÄT HINZUFÜGEN
ENTER
ENTER
ENTER
x2
INITIAL
EINSTELLUNG
GERÄT HINZUFÜGEN
ENTER
1
2
3
4
5
6
Page 38

WW W.O NEFO RALL.CO M 37
EINRICHTEN DER URC-7781
- Drücken Sie die Taste LIGHT (ESC), um zur vorherigen Anzeige zurückzukehren.
- Halten Sie die Taste LIGHT (ESC) gedrückt, um den Programmiermodus zu verlassen
und zum Benutzermodus zurückzukehren.
- Falls die Originalfernbedienung Ihres Gerätes keine POWER-Taste besitzt, drücken Sie
beim Einrichten Ihres Gerätes PLAY statt POWER.
- Vergessen Sie nicht, den entsprechenden Gerätemodus zu wählen, bevor Sie Ihr
Gerät bedienen.
Sie können die Gerätebezeichnung nach Wunsch umbenennen (max. 4 Zeichen)
siehe Seite 45.
Gerät
Bezeich-
nung
TV
VCR
SAT
CBL
VAC
CD
PHO
MIS
HOM
AMP
RCV
CAS
LDP
DAT
DVD
Gerätetyp
Anzeige
T
V
S
C
N
D
P
M
H
A
R
K
L
J
Y
Entsprechende Geräte
Fernsehgerät/LCD/Plasma/Projektor/Rückprojektor
Video-Kassettenrecorder/TV/VCR Kombi/DVD/VCR
Kombi/PVR
Satellitenempfänger/Set-Top-Box/ DVB-S/
DVB-T/Freeview (UK)/TNT (F)/Digitenne (NL)/SAT/HDD
Kabeldecoder/ Set-Top-Box/DVB-C
Videozubehör wie Medienzentren/AV-Zubehör/
AV-Wähler
CD-Spieler/CD-R/MD
Plattenspieler
Audio/Verschiedene Audio
Home Automation (z.B. IR-gesteuerte Vorhänge/
IR-gesteuerte Lichtschalter usw.)
Audio/Verstärker/Aktivlautsprechersystem
Audio/Audio Receiver/Tuner/Verstärker/(DVD)
Home Cinema
Kassettenrecorder (Tape Deck)
Laser-CD-Spieler/Video-CD
Digitale Audio-Kassette/DCC
DVD-Spieler/DVD-R/DVD Home Cinema/DVD
Kombi/DVD/HDD
Die URC-7781 zeigt einen Code z.B. wie T0556 an.
T = Gerätetyp-Anzeige
0556 = 4-stelliger Code
- Drücken Sie die Taste LIGHT (ESC), um zur vorherigen
Anzeige zurückzukehren.
- Halten Sie die Taste LIGHT (ESC) gedrückt, um zum
Benutzermodus zurückzukehren.
Page 39

38 WWW. O NEFOR ALL.COM
ENTER
TV
T0556
ZU ERSETZ. GERÄT
PHO TV VCR
ERSETZEN DURCH
PHO TV VCR
INITIAL
EINSTELLUNG
GERÄT HINZUFÜGEN
CODE ANZEIGEN
INITIAL
EINSTELLUNG
GERÄT HINZUFÜGEN
GERÄT ERSETZEN
Aktuellen Code anzeigen
Code-Schnellreferenz
Gerät ersetzen
Wenn Sie Ihre URC-7781 eingerichtet haben, können Sie Ihren EINSTELLCODE zur
künftigen Verwendung anzeigen lassen.
Beispiel: Den für das Fernsehgerät gespeicherten Code anzeigen:
1 Halten Sie MAGIC ca.
3 s gedrückt und
erscheint auf dem Display.
2 Drücken Sie zweimal ENTER...
erscheint auf dem Display.
3 Drücken Sie zweimal die die
Pfeiltaste Links...
erscheint auf dem Display.
4 Drücken Sie ENTER, und der Code für Ihr
aktuelles Gerät wird angezeigt. Drücken
Sie die linke oder rechte Pfeiltaste, um die
Codes Ihrer anderen Geräte anzeigen zu lassen.
Bitte notieren Sie Ihre Codes in den
nachstehenden Feldern.
Um zu vermeiden, dass ein Gerät programmiert bleibt, das Sie nicht mehr brauchen, können Sie dieses ersetzen. Wenn Sie z.B. gerade ein neues Fernsehgerät oder einen neuen
DVD-Spieler/-Recorder gekauft haben, muss das alte Fernsehgerät und der alte VideoRecorder nicht mehr auf Ihrer URC-7781 einprogrammiert sein.
1 Halten Sie MAGIC ca.
3 s gedrückt und...
erscheint auf dem Display.
2 Drücken Sie zweimal ENTER ...
erscheint auf dem Display.
3 Drücken Sie die Pfeiltaste Rechts...
erscheint auf dem Display.
4 Drücken Sie ENTER...
erscheint auf dem Display.
Wählen Sie mit der linken oder rechten
Pfeiltaste das Gerät, das Sie ersetzen möchten.
5 Drücken Sie ENTER ...
erscheint auf dem Display.
Wählen Sie mit der linken oder
rechten Pfeiltaste das neu einzustellen Gerät, und bestätigen Sie
mit ENTER. „CODE EINSTELLEN” erscheint. Drücken Sie ENTER.
Geben Sie jetzt die entsprechenden Codes für “Gerätetyp” und “Marke“ Ihres Geräts ein,
wie auf Seite 36 beschrieben.
Gerät
Type Code
1. _____________
2. _____________
3. _____________
4. _____________
5. _____________
6. _____________
Device
Type Code
7. _____________
8. _____________
9. _____________
10. _____________
11. _____________
12. _____________
ENTER
ENTER
ENTER
ENTER
ENTER
x2
x2
x2
Page 40

WW W.O NEFORA LL.COM 39
ÄNDER GERÄT CODE
DVD TV SAT
INITIAL
EINSTELLUNG
GERÄT HINZUFÜGEN
ÄNDERN GERÄTE
CODE
Gerätecode ändern
Das folgende Beispiel beschreibt, wie der alte Gerätecode durch einen neuen Gerätecode
ersetzt wird, ohne ein neues Gerät hinzuzufügen.
Beispiel: Sie haben sich gerade ein neues Fernsehgerät für Ihr Wohnzimmer gekauft. Für
dieses Fernsehgerät wird möglicherweise ein anderer Code verwendet als für das aktuelle
Fernsehgerät in Ihrem Wohnzimmer. Führen Sie die folgenden Schritte durch, um den
aktuellen programmierten Gerätecode zu ändern.
Anmerkung: Einstellungen wie Key Magic und Lernen von dem ursprunglichen
Gerätecodes bleiben erhalten auch wenn der Gerätecode geändert wird.
1 Halten Sie MAGIC ca.
3 s gedrückt und...
erscheint auf dem Display.
2 Drücken Sie zweimal ENTER...
erscheint auf dem Display.
3 Drücken Sie zweimal die Pfeiltaste Rechts...
erscheint auf dem Display.
4 Drücken Sie ENTER...
erscheint auf dem Display.
5 Wählen Sie mit der linken oder rechten
Pfeiltaste das Gerät, das Sie einrichten
möchten, und bestätigen Sie mit ENTER.
…
erscheint auf dem Display.
Drücken Sie zur Bestätung ENTER.
Gehen Sie dann zu Seite 36 und
folgen Sie den Anweisungen ab Schritt 4.
ENTER
x2
ENTER
ENTER
CODE EINSTELLEN
x2
TV
T0556
Page 41

ZU BEWEGEND. GER.
DVD VCR SAT
TV
T0556
40 WWW. O NEFOR ALL.COM
INITIAL
EINSTELLUNG
GERÄT HINZUFÜGEN
ÄNDERN GERÄTE
REIHENFOLGE
Geräte-reihenfolge ändern
Wenn Sie die einzelnen Geräte programmiert haben, können Sie die Anzeigereihenfolge
der Gerätbezeichnungen festlegen.
Beispiel: Wenn Sie ein Fernsehgerät, einen DVD-Spieler, einen Videorecorder und einen
Satellitenempfänger programmiert haben, kann die Anzeigereihenfolge TV, DVD, VCR,
SAT sein. Möglicherweise möchten Sie diese Anzeigereihenfolge in TV, VCR, DVD, SAT
ändern.
1 Halten Sie MAGIC ca.
3 s gedrückt und
erscheint auf dem Display.
2 Drücken Sie zweimal ENTER...
erscheint auf dem Display.
3 Drücken Sie dreimal die Pfeiltaste Rechts...
erscheint auf dem Display.
4 Drücken Sie ENTER...
erscheint auf dem Display.
5 Wählen Sie mit der linken oder rechten Pfeiltaste
das Gerät, das Sie verschieben möchten, und bestätigen
Sie mit ENTER.
…
6 erscheint auf dem Display.
Verwenden Sie die Pfeiltasten, um das
betreffende Gerät zu verschieben,
und bestätigen Sie mit ENTER.
Der LED unterhalb der POWER-Taste wird zweimal aufleuchten.
ÄNDERN GERÄTE REIHENFOLGE wird im Display erscheinen.
ENTER
x2
ENTER
ENTER
ENTER
GERÄT ENTFERNEN
Um ein Gerät zu entfernen, führen Sie bitte folgende Schritte durch.
1 Halten Sie die Taste MAGIC ca.
3 s gedrückt und...
erscheint auf dem Display.
2 Drücken Sie zweimal ENTER...
erscheint auf dem Display.
3 Drücken Sie einmal Pfeiltaste Links...
erscheint auf dem Display.
4 Drücken Sie ENTER...
erscheint auf dem Display.
5 Wählen Sie mit den Pfeiltasten
das Gerät, das Sie entfernen möchten, und
bestätigen Sie mit ENTER.
Der LED unterhalb der POWER-Taste wird zweimal aufleuchten.
GERÄT ENTFERNEN wird im Display erscheinen.
Ergebnis: Das ausgewählte Gerät wurde entfernt.
x3
INITIAL
EINSTELLUNG
GERÄT HINZUFÜGEN
GERÄT ENTFERNEN
ENTER
x2
ENTER
ENTER
GERÄT ENTFERNEN
BEWEGEN NACH
TV VCR DVD
Page 42
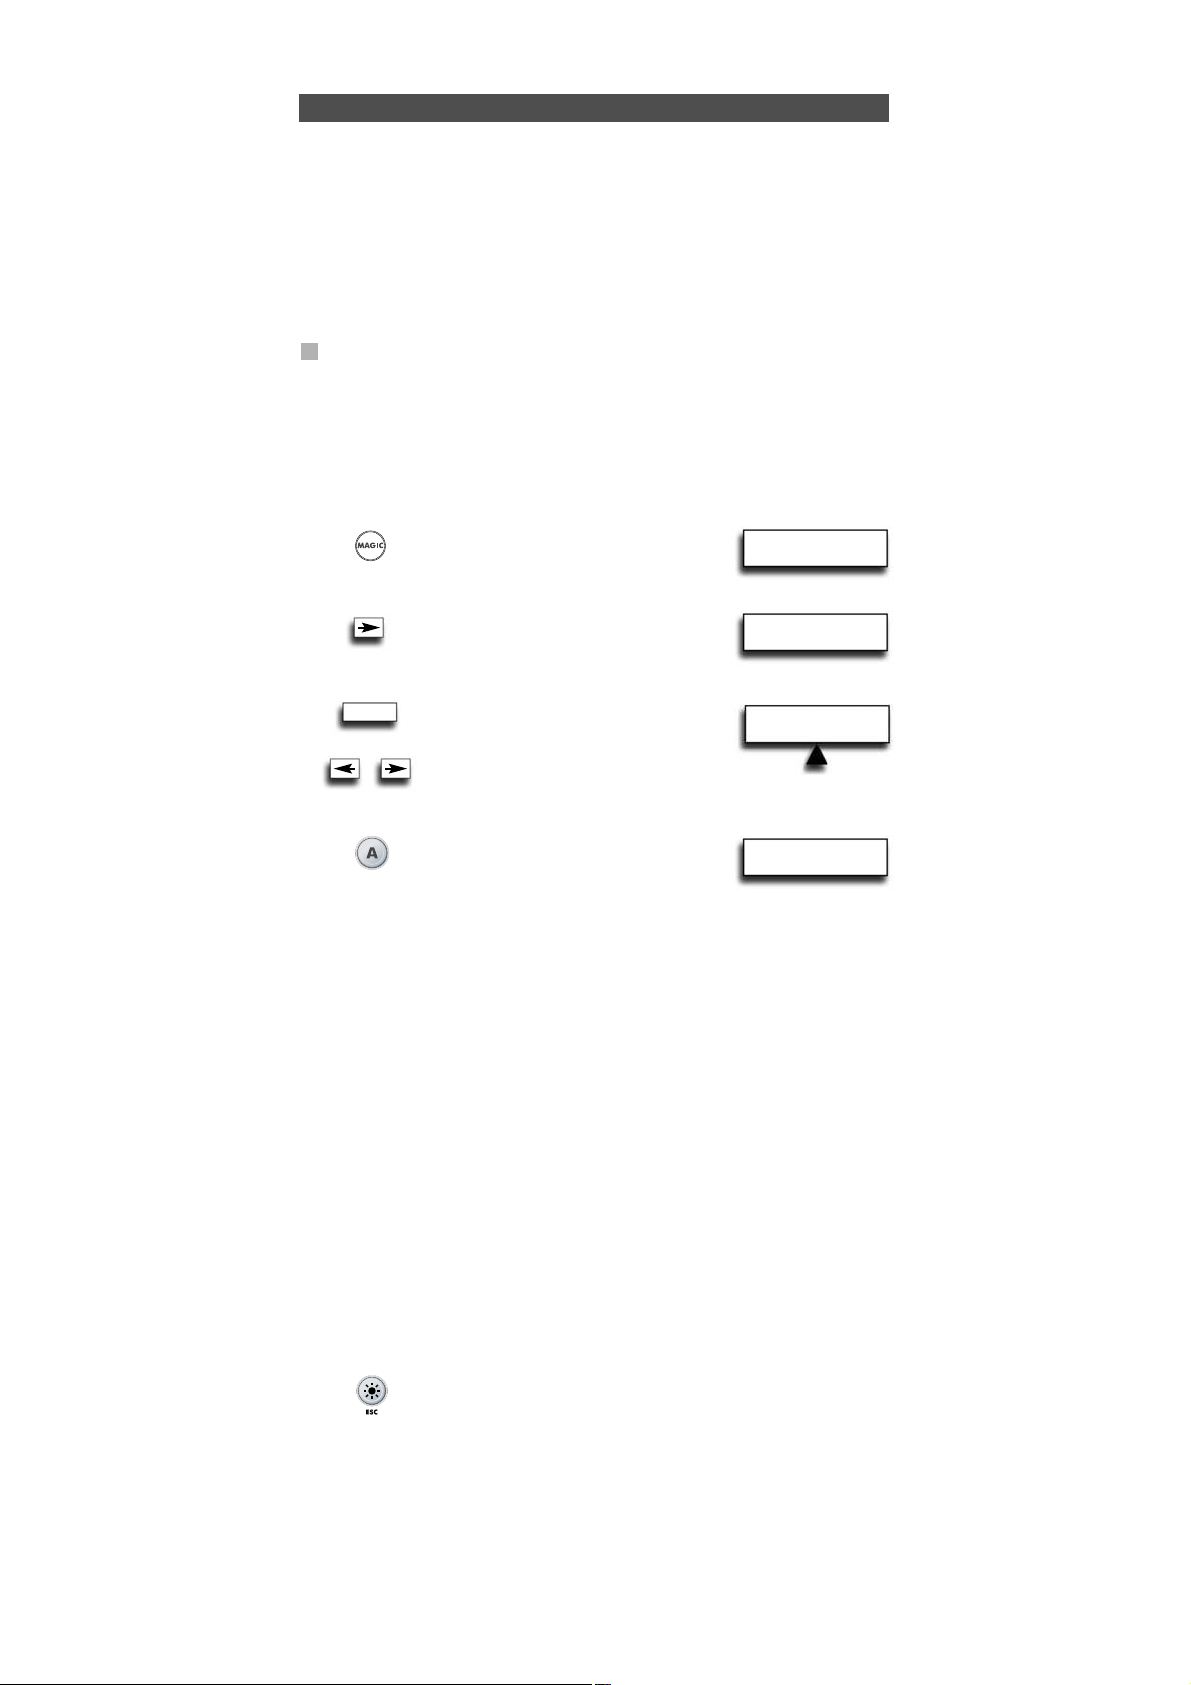
WW W.O NEFORA LL.COM 41
INITIAL
EINSTELLUNG
ERWEITERTE
EINSTELLUNG
JETZT LERNEN!
DRÜCK ORIG. TASTE
Die Lernfunktion
Die URC-7781 ist mit einem kompletten Satz vorprogrammierter Codes ausgestattet.
Nachdem Sie die URC-7781 eingerichtet haben, werden Sie möglicherweise feststellen,
dass eine oder mehrere Tasten, die auf Ihrer Originalfernbedienung vorhanden waren,
auf dem Tastenfeld der URC-7781 fehlen.
Daher besitzt die URC-7781 eine spezielle Lernfunktion, mit der Sie alle Funktionen Ihrer
Originalfernbedienung auf das Tastenfeld Ihrer neuen URC-7781 legen können.
Vorbereitungen:
- Stellen Sie sicher, dass Ihre Originalfernbedienung einwandfrei arbeitet.
- Stellen Sie sicher, dass weder die URC-7781 noch Ihre Originalfernbedienung auf Ihr
Gerät gerichtet sind.
Lernen
Beispiel: Kopieren der Funktion “Mono/Stereo” von der OriginalFernbedienung des Fernsehgerätes auf die A-Taste des URC-7781.
1 Legen Sie beide Fernbedienungen (URC-7781 und die Original-
Fernbedienung) auf eine ebene Oberfläche. Richten Sie die beiden Enden,
die normalerweise auf das Gerät zeigen, zueinander aus. Der Abstand der
beiden Fernbedienungen sollte 2 bis 5 cm betragen.
2 Halten Sie MAGIC
ca. 3 s gedrückt und...
erscheint auf dem Display.
3 Drücken Sie die Pfeiltaste Rechts...
erscheint auf dem Display.
4 Drücken Sie viermal ENTER...
erscheint auf dem Display.
Scrollen Sie mit den Pfeiltasten zu
dem Gerätemodus, in dem Sie die gelernte
Funktion (z.B. TV) ablegen wollen.
5 Drücken Sie die Taste (auf der
Fernbedienung URC-7781), die Sie
mit der gelernten Funktion belegen
wollen (Beispiel: A Taste). Die LED
unter der POWER- Taste blinkt jetzt
schnell und...
erscheint auf dem Display.
6 Drücken Sie die Taste (auf Ihrer Originalfernbedienung), die Sie auf die URC-7781
kopieren wollen (Beispiel: “Mono/Stereo”-Taste). Die LED unter der POWER- Taste
blinkt jetzt zweimal um zu bestätigen das die Funktion Mono/Stereo erfolgreich auf
die A-Taste gelernt worden ist.
Anmerkung: Wenn Sie sonstige Funktionen innerhalb desselben Modus kopieren
wollen, wiederholen Sie einfach Schritt 5 und 6, wobei Sie jeweils die nächste Taste drücken, die Sie durch Lernen kopieren möchten.
Anmerkung: Wenn Sie weitere Funktionen in einem anderen Gerätemodus kopieren
wollen, wählen Sie in Schritt 4 mit den Pfeiltasten einen anderen
Gerätemodus und fahren Sie mit Schritt 5 und 6 fort.
Anmerkung: Falls die Anzeige LERNEN FEHLGESCHLAGEN erscheint: Drücken Sie ENTER,
um wieder bei „LERNEN HINZUFÜGEN” zu beginnen, und drücken Sie
ENTER, um mit Schritt 4 fortzufahren.
Anmerkung: Wenn die Anzeige SPEICHER VOLL erscheint, müssen Sie den gewünschten
Funktionen eine Priorität zuweisen und die Funktionen mit der niedrigsten
Priorität entfernen.
7 Drücken Sie LIGHT (ESC) einmal, um zu LERNEN HINZUFÜGEN
zurückzukehren ….oder…. halten Sie LIGHT (ESC) gedrückt,
um den Programmiermodus zu beenden.
- Drücken Sie die Taste LIGHT (ESC), um zur vorherigen
Anzeige zurückzukehren.
- Halten Sie die Taste LIGHT (ESC) gedrückt, um zum
Benutzermodus zurückzukehren.
ENTER
x4
WÄHL MODUS&TASTE
RCV TV DVD
Page 43

42 WW W.O NEFO RALL.COM
Die Lernfunktion
- Das Lernen ist modusspezifisch. Um auf die gelernte Funktion zuzugreifen, müssen
Sie zuerst zu dem entsprechenden Gerät scrollen.
- Sie können jeder Taste eine gelernte Funktion zuweisen, außer ENTER, LIGHT (ESC),
den Pfeiltasten und der MAGIC-Taste.
- Wenn keine Taste gedrückt wird, bleibt die URC-7781 30 Sekunden im
Programmiermodus.
- Nach Schritt 5 haben Sie 15 Sekunden Zeit, um die entsprechende Taste auf Ihrer
Originalfernbedienung zu drücken.
- Wenn Sie eine Funktion auf eine andere Taste als die „Benutzertasten“ legen wollen,
wird die ursprüngliche URC-7781-Funktion automatisch auf die zweite Ebene verlegt.
Um auf diese zuzugreifen, drücken Sie MAGIC, dann die Taste (dies gilt nicht für die
POWER-, Kanalwahl- und Lautstärketasten und die Ziffern – drücken Sie MAGIC
zweimal und dann die Ziffer, um auf diese Funktionen zuzugreifen).
- Wenn eine verschobene gelernte Funktion auf die POWER, Kanal- oder
Lautstärketaste gelegt wird, fallen Schlafmodus und Farbe/Helligkeit weg.
- Die Lernfunktion ist modusspezifisch. Deshalb können Sie pro Modus eine gelernte
Funktion auf dieselbe Taste legen.
- Die URC-7781 kann etwa 50 Funktionen lernen (je nach der Originalfernbedienung).
- Sie können eine gelernte Funktion ersetzen, indem Sie sie mit einer anderen gelernten Funktion überschreiben, oder mittels “Lernen entfernen von einer Taste”,
“Lernen entfernen in einem Modus”, “Lernen entfernen in allen Modi”.
- Vermeiden Sie beim Lernen direkte Sonneneinstrahlung und das Licht von
Glühlampen.
- Stellen Sie sicher, dass die Batterien neu sind, bevor Sie die Lernanweisungen
durchführen.
- Bei einem Batteriewechsel bleiben die gelernten Funktionen erhalten.
- Im Home Theatre-Modus können keine Lernfunktionen programmiert werden. Wenn
jedoch eine Taste im Originalgerätemodus mit Lernen programmiert wurde, wird
diese Funktion in den Home Theatre-Modus übernommen.
Lernen auf der zweiten Ebene
Sie können auch eine gelernte Funktion auf eine Taste der URC-7781 legen, ohne die
ursprüngliche URC-7781-Funktion zu verlieren. Hierfür eignen sich insbesondere die
Benutzertasten. Lernfunktionen der zweiten Ebene können auch auf fast jede andere
Taste außer den folgenden gelegt werden: MAGIC-Taste, ARROW links/rechts, ENTER und
LIGHT (ESC). Um eine Lernfunktion auf der zweiten Ebene einzurichten, folgen Sie einfach Schritt 1 - 7 auf der vorherigen Seite. Drücken Sie bei Schritt 5 einmal MAGIC, bevor
Sie die Taste drücken, die Sie mit der gelernten Funktion belegen wollen. Um dann auf
die Funktion der zweiten Ebene zuzugreifen, drücken Sie erst MAGIC, dann die Taste,
auf der sich die gelernte Funktion befindet. Um auf die gelernte Funktion der zweiten
Ebene auf einer Zifferntaste zuzugreifen, drücken Sie MAGIC zweimal, dann die
entsprechende Ziffer.
Page 44
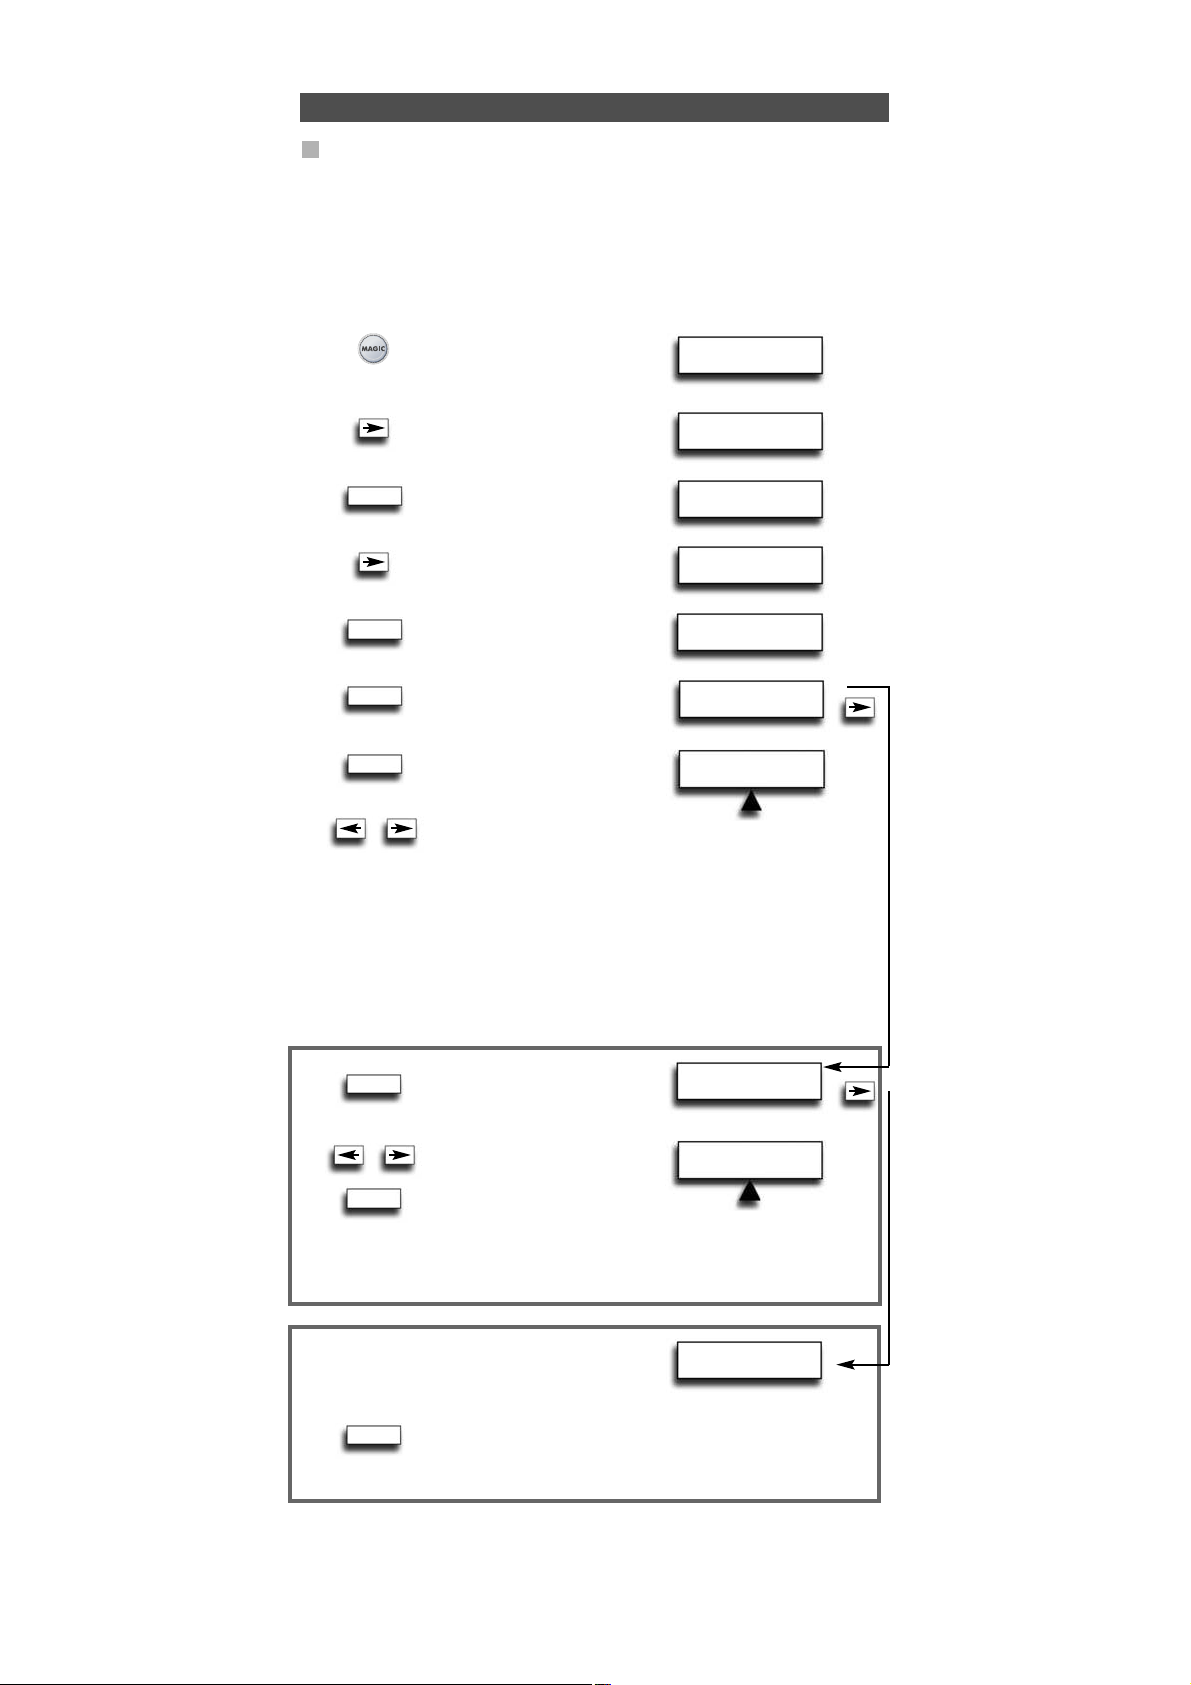
ERWEITERTE
EINSTELLUNG
FUNKTION
ENTFERNEN
MODUS AUSWÄHLEN
RCV TV
WÄHL MODUS&TASTE
RCV TV
WW W.O NEFORA LL.COM
43
Die Lernfunktion
Lernen entfernen
Es ist möglich …..
- eine gelernte Funktion innerhalb eines bestimmten Gerätemodus von einer bestimmten
Taste zu entfernen.
- alle gelernten Funktionen innerhalb eines bestimmten Gerätemodus zu entfernen.
- alle gelernten Funktionen in allen Gerätemodi zu entfernen.
Beispiel: das entfernen der in TV-Modus auf der A-Taste gelernte mono/stereo Funktion.
1 Halten Sie MAGIC
ca. 3 s gedrückt, und ..
erscheint auf dem Display.
2 Drücken Sie die PfeiltasteRechts...
erscheint auf dem Display.
3 Drücken Sie zweimal ENTER...
erscheint auf dem Display.
4 Drücken Sie die Pfeiltaste Rechts...
erscheint auf dem Display.
5 Drücken Sie ENTER ...
erscheint auf dem Display.
6 Drücken Sie ENTER ...
erscheint auf dem Display.
7 Drücken Sie ENTER ...
erscheint auf dem Display.
8 Wählen Sie den Gerätemodus (Beispiel: TV Modus),
aus dem Sie die gelernte Funktion entfernen wollen, mit den
Pfeiltasten und drücken Sie die Taste *, die Sie entfernen wollen
(Beispiel: A-Taste). Die LED blinkt zweimal, und die Anzeige kehrt
zu „LERNEN ENTFERNEN" zurück.
9 Wenn Sie eine weitere Taste entfernen möchten, wiederholen Sie Schritt 6 - 8.
Ergebnis: die ursprüngliche Funktion der A-Taste in TV Modus ist wieder vorhanden.
* Um eine gelernte Funktion der zweiten Ebene zu entfernen, drücken Sie MAGIC, bevor
Sie die gelernte Taste drücken die zu entfernen ist.
6 Es erscheint...
Drücken Sie ENTER.
7 Wählen Sie den betreffenden
Gerätemodus, in dem Sie
alle gelernte Funktionen
entfernen wollen mit den
Pfeiltasten, und drücken
Sie ENTER. Die LED unter der POWER-Taste blinkt zweimal,
und die Anzeige kehrt zu ”LERNEN ENTFERNEN” zurück.
Alle gelernten Funktionen sind jetzt aus dem gewählten
Gerätemodus entfernt.
6 Es erscheint...
7 Drücken Sie ENTER. Die LED unter der POWER-Taste blinkt
zweimal, und die Anzeige kehrt zu ”LERNEN ENTFERNEN”
zurück. Alle gelernten Funktionen sind jetzt aus allen
Gerätemodi entfernt.
- Drücken Sie die Taste LIGHT (ESC), um zur vorherigen Anzeige
zurückzukehren.
- Halten Sie die Taste LIGHT (ESC) gedrückt, um zum Benutzermodus
zurückzukehren.
INITIAL
EINSTELLUNG
FUNKTION
HINZUFÜGEN
LERNEN
ENTFERNEN
LERNEN ENTFERNEN
VON EINER TASTE
LERNEN ENTFERNEN
IN EINEM MODUS
LERNEN ENTFERNEN
IN ALLEN MODI
ENTER
ENTER
ENTER
ENTER
ENTER
ENTER
x2
ENTER
Page 45

44 WWW. O NEFOR ALL.COM
Benutzer Reset
Sonderfunktionen
Der benutzer reset entfernt alle gelernten Funktionen in allen Modi sowie einige andere
programmierte Funktionen wie Sprache, Lautstärkesperre, Key Magic®, Zeitmakro,
Tastenmakro, Home Theatre und Gerätebezeichnungen.
1 Halten Sie MAGIC ca.
3 s gedrückt und...
erscheint auf dem Display.
2 Drücken Sie die Pfeiltaste Rechts...
erscheint auf dem Display.
3 Drücken Sie einmal ENTER...
erscheint auf dem Display.
4 Drücken Sie die Pfeiltaste Links...
erscheint auf dem Display.
5 Drücken Sie ENTER ...
erscheint auf dem Display.
6 Drücken Sie ENTER.
Die LED unter der POWER-Taste blinkt
jetzt viermal...erscheint auf dem Display.
Alle Geräte sind noch eingerichtet, aber alle Funktionen wie Lernen, Sprache,
Lautstärkesperre, Key Magic, Zeit Makro, Tasten Makro, Home Theatre und
Gerätebezeichnung sind entweder in die Standardeinstellung zurückgesetzt oder
entfernt. Um nur die Lernfunktion und Key Magic zu entfernen, verwenden Sie „Lernen
und Key Magic entfernen” wie auf Seite 57 beschrieben.
INITIAL
EINSTELLUNG
ERWEITERTE
EINSTELLUNG
FUNKTION
RESET
ANWENDER
RESET
RESET
ENTER
ENTER
ENTER
Je nach den Funktionen Ihrer Originalfernbedienung kann die URC-7781 folgende
Funktionen auf Ihrem Fernsehgerät bedienen und den Schlafmodus für Geräte wählen,
die diese Funktion auf der Originalfernbedienung besitzen.
Farbe (+) = Drücken Sie kurz MAGIC und halten Sie Volume (+) gedrückt
Farbe (-) = Drücken Sie kurz MAGIC und halten Sie Volume (-) gedrückt
Helligkeit (+) = Drücken Sie kurz MAGIC und halten Sie Kanal (+) gedrückt
Helligkeit (-) = Drücken Sie kurz MAGIC und halten Sie Kanal (-) gedrückt
Schlafmodus ON/OFF = Drücken Sie MAGIC, dann POWER so oft, bis der Sleeptimer die
gewünschte Minutenzahl erreicht hat (oder der Sleeptimer vom Display Ihres Geräts
verschwindet).
Anmerkung: Je nach Originalfernbedienung kann diese Funktion in unterschiedlicher
Weise zu bedienen sein.
Farbe, helligkeit und Schlafmodus
Page 46

ERWEITERTE
EINSTELLUNG
NEUE BEZEICHNUNG
RCV TV
MODUS AUSWÄHLEN
RCV TV
MODUS AUSWÄHLEN
RCV TV
GERÄTE
BEZEICHNUNG
WW W.O NEFORA LL.COM
45
Sonderfunktionen
Gerätebezeichnung ändern
Für die eingerichteten Geräte kann eine bis zu vier Zeichen (oder Ziffern) lange
Gerätebezeichnung eingegeben werden.
1 Halten Sie MAGIC
ca. 3 s gedrückt und...
erscheint auf dem Display.
2 Drücken Sie die Pfeiltaste Rechts...
erscheint auf dem Display.
3 Drücken Sie ENTER ...
erscheint auf dem Display.
4 Drücken Sie zweimaldie
Pfeiltaste Links...
erscheint auf dem Display.
5 Drücken Sie ENTER ...
erscheint auf dem Display.
6 Drücken Sie ENTER.
Wählen Sie mit den Pfeiltasten
den betreffenden Gerätemodus,
dessen Bezeichnung Sie ändern
wollen, und bestätigen Sie mit ENTER.
7 Es erscheint...
Das erste Zeichen der
gewünschten
Gerätebezeichnung
beginnt zu blinken. Ändern Sie mit den Pfeiltasten
die Bezeichnung (bis zu 4 Zeichen) und drücken Sie jeweils ENTER,
um das gewünschte Zeichen zu speichern. Nachdem Sie das vierte
Zeichen eingegeben haben, erscheint im Display wieder ӀNDERN
GERÄTE BEZEICHNUNG”.
5 Es erscheint…
Drücken Sie ENTER.
6 Wählen Sie die betreffende
Gerätebezeichnung, die Sie
rücksetzen wollen, mit den
Pfeiltasten, und drücken Sie
ENTER Die gewählte Gerätebezeichnung wird auf die
Standardbezeichnung rückgesetzt. Die LED unter der POWERTaste blinkt zweimal, und die Anzeige kehrt zu „RESET GERÄTE
BEZEICHNUNG” zurück.
5 Es erscheint…
6 Drücken Sie ENTER. Die LED unter der POWER-Taste blinkt
zweimal. Alle Gerätebezeichnungen werden jetzt auf die
Originalbezeichnung rückgesetzt und das Display kehrt zu
„GERÄTE BEZEICHNUNG” zurück.
INITIAL
EINSTELLUNG
FUNKTION
ÄNDERN GERÄTE
BEZEICHNUNG
RESET GERÄTE
BEZEICHNUNG
RESET ALLE GERÄT
BEZEICHNUNGEN
_ z.B. TV 1 (Leerzeichen zwischen zwei Zeichen/Ziffern)
< um zum vorherigen Zeichen zurückzukehren und das vorherige Zeichen
auf A zurückzusetzen.
^ um eine Bezeichnung mit weniger als 4 Zeichen zu speichern, z.B. wenn
Sie dem Gerät ein „T” als Bezeichnung zuweisen wollen.
. (Punkt) z.B. TV.1
Sie können auch eines der nachfolgenden Symbole wählen:
ENTER
ENTER
x2
ENTER
ENTER
ENTER
ENTER
ENTER
ENTER
Page 47

VOLUMEN
DIREKT BEDIENUNG
VOLUMEN
DIREKT BEDIENUNG
46 WWW. O NEFOR ALL.COM
RCV TV VCR
EN
ENTF. VOL DIREKT
RCV TV VCR
Sonderfunktionen
Lautstärkesperre einrichten
Beispiel: Es kann eingestellt werden, dass die Lautstärke immer aus einem bestimmten
Modus stammt, z.B. TV. Dann wird unabhängig vom Modus, in dem Sie sich gerade
befinden, mit den Tasten Lautstärke +/- und Mute die Lautstärke immer aus dem TVModus gesendet.
1 Halten Sie MAGIC
ca. 3 Sek. gedrückt, und...
erscheint auf dem Display.
2 Drücken Sie ENTER ...
erscheint auf dem Display.
3 Drücken Sie zweimal die Pfeiltaste Rechts...
erscheint auf dem Display.
4 Drücken Sie zweimal ENTER...
erscheint auf dem Display.
Wählen Sie mit den Pfeiltasten
das Gerät (z.B. Fernsehgerät) ,
auf das Sie die Lautstärkewahl
festlegen wollen.
5 Drücken Sie ENTER, um das angezeigte Gerät als QUE (Quelle) zu
wählen. Die LED unter der POWER-Taste blinkt zweimal, und die
Anzeige kehrt zu „VOLUMEN DIREKT BEDIENUNG” zurück.
Ergebnis: Im oben genannten Beispiel ist nun der TV-Modus die Lautstärkequelle (QUE)
für alle anderen installierten Geräte. Wenn Sie in einem beliebigen
Gerätemodus VOLUME +/- oder MUTE drücken, erhalten Sie immer die
Lautstärkefunktionen des TV-Modus.
Gerät von der Lautstärkesperre entfernen
Beispiel: Es ist möglich, 1 Gerät von der Lautstärkesperre auszunehmen, sodass es nur
seine eigene Lautstärke sendet und nicht diejenige der QUE.
1 Halten Sie MAGIC
ca. 3 Sek. gedrückt, und...
erscheint auf dem Display.
2 Drücken Sie ENTER ...
erscheint auf dem Display.
3 Drücken Sie zweimal die Pfeiltaste Rechts...
erscheint auf dem Display.
4 Drücken Sie ENTER...
erscheint auf dem Display.
5 Drücken Sie die Pfeiltaste Rechts...
erscheint auf dem Display.
6 Drücken Sie ENTER ...
erscheint auf dem Display.
Wählen Sie mit den Pfeiltasten das Gerät
(z.B. Fernsehgerät), das Sie von der
Lautstärkesperre ausnehmen möchten.
7 Drücken Sie ENTER, um das angezeigte Gerät von der
Lautstärkesperre auszunehmen. Die LED unter der POWER-Taste
blinkt jetzt viermal.
Die Anzeige kehrt zu „VOLUMEN DIREKT BEDIENUNG“ zurück.
Ergebnis: Das von Ihnen gewählte Gerät sendet jetzt seine eigene Lautstärke (VOL +/-.
Mute) statt die des QUE-Gerätes.
INITIAL
EINSTELLUNG
INITIAL
EINSTELLUNG
GERÄT
VOLUMEN
QUELLE WÄHLEN
ENTFERN GERÄT
VON VOL DIREKT
GERÄT
Lautstärkesperre
GE: Gesperrt
EN: Ensperrt, QUE: Quelle
ENTER
ENTER
x2
ENTER
ENTER
ENTER
ENTER
ENTER
x2
x2
Page 48

VOLUMEN
DIREKT BEDIENUNG
WW W.O NEFORA LL.COM
47
ZU VOL DIR. HINZU
RCV TV VCR
INITIAL
EINSTELLUNG
GERÄT
VOLUMEN
DIREKT BEDIENUNG
VOLUMEN
QUELLE WÄHLEN
GERÄT HINZUFÜGEN
ZU VOL DIREKT
Sonderfunktionen
Gerät zur Lautstärkesperre hinzufügen
Beispiel: Es ist möglich, ein Gerät der eingerichteten Lautstärkesperre (SRC)
hinzuzufügen. Dies ist z.B. erwünscht, wenn Sie nach der Einrichtung der
Lautstärkesperre ein Gerät hinzugefügt haben oder wenn Sie ein Gerät von der
Lautstärkesperre ausgenommen haben.
1 Halten Sie MAGIC
ca. 3 Sek. gedrückt, und...
erscheint auf dem Display.
2 Drücken Sie ENTER...
erscheint auf dem Display.
3 Drücken Sie zweimal die Pfeiltaste Rechts...
erscheint auf dem Display.
4 Drücken Sie ENTER ...
erscheint auf dem Display.
5 Drücken Sie zweimal die Pfeiltaste Rechts...
erscheint auf dem Display.
6 Drücken Sie ENTER...
erscheint auf dem Display.
Wählen Sie mit den Pfeiltasten das Gerät (z.B. ein Fernsehgerät), das Sie der
Lautstärkesperre hinzufügen möchten.
7 Drücken Sie ENTER, um das angezeigte Gerät der Lautstärkesperre
hinzuzufügen. Die LED unter der POWER-Taste blinkt zweimal, und
die Anzeige kehrt zu „VOLUMEN DIREKT BEDIENUNG” zurück.
Ergebnis: Das ausgewählte Gerät sendet jetzt die Lautstärke Vol+/-, Mute
des QUE-Gerätes.
Alle Lautstärkeregelungen rücksetzen
Beispiel: Sie können alle Lautstärkeregelungen auf ihre Standardeinstellung rücksetzen,
sodass alle Geräte ihre eigene Lautstärke senden.
1 Halten Sie MAGIC
ca. 3 Sek. gedrückt, und...
erscheint auf dem Display.
2 Drücken Sie ENTER...
erscheint auf dem Display.
3 Drücken Sie zweimal die Pfeiltaste Rechts...
erscheint auf dem Display.
4 Drücken Sie ENTER ...
erscheint auf dem Display.
5 Drücken Sie die Pfeiltaste Links...
erscheint auf dem Display.
6 Drücken Sie ENTER, um alle Lautstärkeregelungen rückzusetzen.
Die LED unter der POWER-Taste blinkt viermal, und die Anzeige
kehrt zu „VOLUMEN DIREKT BEDIENUNG” zurück.
Ergebnis: Alle Geräte senden jetzt ihre eigene Lautstärke Vol+/-, Mute.
INITIAL
EINSTELLUNG
GERÄT
VOLUMEN
QUELLE WÄHLEN
RESET VOLUMEN
KONTROLLEN
ENTER
ENTER
ENTER
ENTER
ENTER
ENTER
ENTER
x2
x2
x2
Page 49

WÖCHENTLICHES
ZEIT MAKRO
TÄGLICHES
ZEIT MAKRO
48 WWW. O NEFOR ALL.COM
PROG SEQ & ENTER
TV VCR RCV
WÄHL MAKRO TAG
DIE MIT DON
WÄHL MAKRO ZEIT
20:45
INITIAL
EINSTELLUNG
ERWEITERTE
EINSTELLUNG
FUNKTION
MAKRO
ZEIT MAKRO
HINZUFÜGEN
EINMALIGES
ZEIT MAKRO
Sonderfunktionen
Timer-Makro hinzufügen
Mit der Makrofunktion können Sie Tastenanschläge aus Gerätemodi aufzeichnen, wie
wenn Sie die Fernbedienung im Benutzermodus bedienen würden.
Sie können 3 Arten von Timer-Makros programmieren:
- Timer-Makro ohne Wiederholung
- Timer-Makro mit täglicher Wiederholung
- Timer-Makro mit wöchentlicher Wiederholung
Beispiel: Aufzeichnung eines Fußballspiels mittels der URC-7781 auf Ihrem Videorecorder.
1 Halten Sie MAGIC
ca. 3 Sek. gedrückt, und...
erscheint auf dem Display.
2 Drücken Sie die Pfeiltaste Rechts...
erscheint auf dem Display.
3 Drücken Sie ENTER ...
erscheint auf dem Display.
4 Drücken Sie die Pfeiltaste Rechts...
erscheint auf dem Display.
5 Drücken Sie zweimal ENTER...
erscheint auf dem Display.
6 Drücken Sie ENTER ...
erscheint auf dem Display.
Sie können das Makro auch auf TÄGLICH oder
WÖCHENTLICH setzen. Sie können hierfür die Pfeiltasten verwenden.
7 Drücken Sie ENTER ...
erscheint auf dem Display.
Wählen Sie mit den Pfeiltasten den Tag,
an dem das Makro ausgeführt werden soll.
8 Drücken Sie ENTER ...
erscheint auf dem Display.
Wählen Sie mit den Zifferntasten die Zeit, zu der das Makro
starten soll (Start der Aufzeichnung).
9 Drücken Sie ENTER ...
erscheint auf dem Display.
Zeichnen Sie jetzt
die Tastenanschläge in der Weise auf, wie
wenn Sie von Hand auf dem Videorecorder aufzeichnen würden.
Wählen Sie mit den Pfeiltasten das entsprechende Gerät.
In unserem Beispiel scrollen Sie zum VCR-Modus.
10 Drücken Sie die entsprechende(n) Taste(n), die das Timer-Makro
senden soll (in unserem Beispiel drücken Sie zweimal RECORD).
11 Drücken Sie ENTER, um das
Makro zu speichern...
erscheint auf dem Display.
Ergebnis: Sie haben nun ein Makro programmiert, das am heutigen Mittwoch um 20:45
Uhr mit der Aufzeichnung beginnen soll. Jetzt müssen Sie ein weiteres Makro für das
Aufnahmeende z.B. am Mittwoch um 22:35 Uhr programmieren, sodass die URC-7781
um 22:35 ein STOP-Signal an den Videorecorder sendet.
Anmerkung: Achten Sie darauf, dass Sie die URC-7781 auf den Videorecorder richten,
und dass keine Sichthindernisse bestehen.
Sie können das Makro auch auf täglich setzen…
Sie können das Makro auch auf wöchentlich setzen…
Macros (Befehlssequenz)
ZEIT MAKRO
HINZUFÜGEN
ENTER
ENTER
ENTER
ENTER
ENTER
ENTER
ENTER
x2
x2
Page 50

WW W.O NEFORA LL.COM 49
INITIAL
EINSTELLUNG
ERWEITERTE
EINSTELLUNG
FUNKTION
MAKRO
MAKRO
HINZUFÜGEN
MAKRO
ENTFERNEN
ENTF. ZEIT MAKRO
E MIT 20:45
ZEIT MAKRO
ENTFERNEN
ZEIT MAKRO
ENTFERNEN
ENTF. ZEIT MAKRO
E MIT 22:35
ZEIT MAKRO
ENTFERNEN
Beispiel: Das Timer-Makro von Seite 48 entfernen:
1 Halten Sie MAGIC
ca. 3 Sek. gedrückt, und...
erscheint auf dem Display.
2 Drücken Sie die Pfeiltaste Rechts...
erscheint auf dem Display.
3 Drücken Sie ENTER ...
erscheint auf dem Display.
4 Drücken Sie die Pfeiltaste Rechts...
erscheint auf dem Display.
5 Drücken Sie ENTER ...
erscheint auf dem Display.
6 Drücken Sie die Pfeiltaste Rechts...
erscheint auf dem Display.
7 Drücken Sie ENTER ...
erscheint auf dem Display.
8 Drücken Sie ENTER ...
Die von Ihnen programmierten
Timer-Makros werden jetzt auf dem
Display angezeigt. Neben E, T oder W
wird der Makro-Tag (bei einem Einmal- oder wöchentlichen
Timer-Makro) angezeigt. Daneben wird die Makro-Zeit dem
Display angezeigt. Sie können mit den Pfeiltasten durch die
programmierten Timer-Makros scrollen.
E : Einmalig
T : Täglich
W : Wöchentlich
9 Drücken Sie ENTER, um das angezeigte
Timer-Makro zu entfernen.
Die LED unter der POWER-Taste blinkt
zweimal, und... erscheint auf dem Display.
10 Wenn Sie ein anderes Timer-Makro
entfernen möchten, drücken Sie ENTER.
11 Drücken Sie ENTER, um dieses Timer-Makro
zu entfernen. Die LED unter der POWERTaste blinkt zweimal, und...
erscheint auf dem Display.
Ergebnis: die auf Seite 48 programmierten Timer-Makros sind entfernen.
Anmerkungen:
- Die Zahl der Tastenanschläge in einem Timer-Makro und die Zahl der Timer-Makros
ist nur durch den verfügbaren Speicherplatz begrenzt.
- Das Timer-Makro mit einmaliger Wiederholung wird nur einmal ausgeführt.
Nachdem dieses Makro ausgeführt ist, wird es automatisch aus dem Speicher der
Fernbedienung entfernt.
- Das Timer-Makro mit täglicher Wiederholung wird jeden Tag zur gleichen Zeit
ausgeführt, bis es aus dem Speicher der Fernbedienung entfernt wird.
- Das Timer-Makro mit wöchentlicher Wiederholung wird jede Woche zur gleichen Zeit
ausgeführt, bis es aus dem Speicher der Fernbedienung entfernt wird.
- Um anzuzeigen, dass ein Timer-Makro programmiert wurde, ist auf dem Display links
von der Zeit im Benutzermodus ein * zu sehen.
- Wenn Sie im Timer-Makro eine Aufnahmefunktion eingeben wollen, müssen Sie die
Aufnahmetaste zweimal drücken.
Timer-Makro Entfernen
ENTER
ENTER
ENTER
ENTER
ENTER
ENTER
ENTER
Sonderfunktionen
Macros (Befehlsfolge)
Page 51

PROG SEQ & ENTER
VCR TV SAT
50 WWW. O NEFOR ALL.COM
INITIAL
EINSTELLUNG
ERWEITERTE
EINSTELLUNG
FUNKTION
MAKRO
ZEIT MAKRO
HINZUFÜGEN
MAKRO TASTE
DRÜCKEN
TASTEN MAKRO
HINZUFÜGEN
TASTEN MAKRO
HINZUFÜGEN
Tastenmakro hinzufügen
Sie können Ihre URC-7781 so programmieren, dass bei einem Tastendruck eine
Befehlsfolge ausgeführt wird. Sie können z.B.Fernsehgerät, Videorecorder und Satellit
mit einem Tastendruck ausschalten. Eine Befehlsfolge, die Sie regelmäßig verwenden,
kann auf einen einzigen Tastendruck reduziert werden. Ein Tastenmakro kann bis zu 15
Tastenanschläge hintereinander enthalten. Wir empfehlen, Makros auf eine
Benutzertaste (A, B, C, D) zu legen, da das Makro die ursprüngliche Funktion einer Taste
überschreibt. Die ursprüngliche Funktion der Taste wird auf die zweite Ebene verschoben
und ist nur durch Drücken von MAGIC und der betreffenden Taste verfügbar.
Beispiel: Aufzeichnung eines Makros, um Fernsehgerät, Videorecorder
und Satellitenempfänger mit der mit A beschrifteten Taste Ihrer URC-7781
auszuschalten:
1 Halten Sie MAGIC
ca. 3 Sek. gedrückt, und...
erscheint auf dem Display.
2 Drücken Sie die Pfeiltaste Rechts...
erscheint auf dem Display.
3 Drücken Sie ENTER ...
erscheint auf dem Display.
4 Drücken Sie die Pfeiltaste Rechts...
erscheint auf dem Display.
5 Drücken Sie zweimal ENTER...
erscheint auf dem Display.
6 Drücken Sie die Pfeiltaste Rechts...
erscheint auf dem Display.
7 Drücken Sie ENTER ...
erscheint auf dem Display.
Drücken Sie dann die Taste, die Sie
mit dem Makro belegen möchten (z.B. die A-Taste).
8 Jetzt erscheint ...
auf dem Display. Drücken Sie jetzt mit den
Pfeiltasten die Tasten der Modi, wie wenn
Sie von Hand TV, VCR und SAT ausschalten
würden. Wählen Sie mit den Pfeiltasten den
TV-Modus und drücken Sie dann POWER; wählen Sie dann VCR und
drücken Sie POWER; drücken Sie dann SAT und drücken Sie POWER.
9 Drücken Sie ENTER, um das Makro zu
speichern. Die LED unter der POWER-Taste
blinkt zweimal und im Display erscheint
TASTEN MAKRO HINZUFÜGEN.
Ergebnis: Jedes Mal, wenn Sie die A-Taste drücken, schaltet die URC-7781 Fernsehgerät,
Videorecorder und Satellitenreceiver aus.
Sonderfunktionen
Macro (Befehlsfolge)
ENTER
ENTER
ENTER
ENTER
x2
Page 52

WW W.O NEFORA LL.COM 51
INITIAL
EINSTELLUNG
ERWEITERTE
EINSTELLUNG
FUNKTION
MAKRO
MAKRO
HINZUFÜGEN
ZEIT MAKRO
ENTFERNEN
TASTEN MAKRO
ENTFERNEN
MAKRO TASTE
DRÜCKEN
MAKRO
ENTFERNEN
Makro der zweiten Ebene
Ein Makro kann auch auf die zweite Ebene fast jeder anderen Taste außer
den folgenden gelegt werden:
MAGIC, LIGHT (ESC), ARROW LEFT, ARROW RIGHT, ENTER und die Ziffertasten.
Wenn Sie z.B. ein Makro der zweiten Ebene auf die Taste MUTE
legen möchten, drücken Sie MAGIC und Mute wie für Schritt 7 auf Seite 50
beschrieben.
Anmerkungen:
- Jedes KEY MACRO kann maximal 15 Tastenanschläge lang sein.
- Achten Sie darauf, dass Sie Makros auf eine freie Taste programmieren, die Sie in
keinem Modus verwenden.
- Wenn ein Makro auf eine bestimmte Taste gelegt wurde, wird die Befehlsfolge
ungeachtet des Modus durchgeführt, in dem Sie sich befinden.
- Um unerwünschte Aufzeichnungen mit der URC-7781 zu vermeiden, müssen
Sie zu Beginn der Aufzeichnung die Record-Taste zweimal drücken. Deshalb raten wir
davon ab, ein Makro oder Makro der zweiten Ebene auf die Record-Taste zu legen.
- Wenn die Taste auf der Originalfernbedienung zum Aufrufen einer Funktion einige
Sekunden gedrückt werden muss, kann diese Funktion möglicherweise nicht in
einem Makro auf der Fernbedienung URC-7781 verwendet werden.
- Wenn ein Makro für eine Taste programmiert wird, wird die ursprüngliche Funktion
dieser Taste auf die zweite Ebene verlegt (außer POWER, CH+/- und VOL+/-). Drücken
Sie MAGIC und dann die Taste, um das Makro zu starten. Wenn Sie ein Makro auf
die zweite Ebene einer Zifferntaste legen, greifen Sie auf die Originalfunktion zu,
indem Sie zweimal MAGIC drücken und dann auf die Zifferntaste.
- Wenn ein Makro auf die zweite Ebene der Tasten POWER, Kanal oder Lautstärke
gelegt wird, sind Schlafmodus und Farbe/Helligkeit nicht mehr verfügbar.
- Ein Makro kann nicht auf die Pfeiltasten, ENTER,MAGIC, und LIGHT (ESC) gelegtwerden.
- Wenn Sie die Aufnahmefunktion in einem Tastenmakro aufnehmen möchten,
müssen Sie die Aufnahmetaste zweimal drücken.
Tastenmakro entfernen
Example: Das Tastenmakro der A Taste von Seite 50 entfernen.
1 Halten Sie MAGIC
ca. 3 Sek. gedrückt, und...
erscheint auf dem Display.
2 Drücken Sie die Pfeiltaste Rechts...
erscheint auf dem Display.
3 Drücken Sie ENTER ...
erscheint auf dem Display.
4 Drücken Sie die Pfeiltaste Rechts...
erscheint auf dem Display.
5 Drücken Sie ENTER ...
erscheint auf dem Display.
6 Drücken Sie die Pfeiltaste Rechts...
erscheint auf dem Display.
7 Drücken Sie ENTER ...
erscheint auf dem Display.
8 Drücken Sie die Pfeiltaste Rechts...
erscheint auf dem Display.
9 Drücken Sie ENTER ...
erscheint auf dem Display.
10 Drücken Sie die A-Taste (entsprechend der Makro-Taste, von der
Sie das Tastenmakro entfernen möchten). Die LED unter der
POWER-Taste blinkt zweimal. Es erscheint wieder “TASTEN MAKRO
ENTFERNEN” auf dem Display.
Ergebnis: Das Tastenmakro der „A”-Taste von Seite 50 wurde entfernt.
Sonderfunktionen
Macro (Befehlsfolge)
ENTER
ENTER
ENTER
ENTER
Page 53

52 WWW. O NEFOR ALL.COM
HT PROGRAMME
DVD HTNA RCV
HT NUMMERN
DVD HTNA RCV
HT POWER
DVD HTNA RCV
INITIAL
EINSTELLUNG
ERWEITERTE
EINSTELLUNG
FUNKTION
HOME THEATRE
Mit der Funktion Home Theater können Sie Tastengruppen verschiedener Modi auf der
URC-7781 in einem einzigen Modus zusammenfassen.
Beispiel: Sie möchten die Funktionen Ihres Fernsehgeräts und Ihrer Heimkino-Anlage
(auf TV und RCV programmiert) wie in der nachstehenden Tabelle beschrieben auf
dem Tastenfeld der URC-7781 konfigurieren. Auf diese Weise können Sie insbesondere
die TV-Funktionen und Funktionen aus der Heimkino-Anlage bedienen, ohne den
entsprechenden Gerätemodus wählen zu müssen.
1 Halten Sie MAGIC
ca. 3 Sek. gedrückt, und...
erscheint auf dem Display.
2 Drücken Sie die Pfeiltaste Rechts...
erscheint auf dem Display.
3 Drücken Sie ENTER ...
erscheint auf dem Display.
4 Drücken Sie zweimal die Pfeiltaste Rechts...
erscheint auf dem Display.
5 Drücken Sie zweimal ENTER...
erscheint auf dem Display.
Wählen Sie mit den pfeiltasten den TV-Modus
(wie im obigen Beispiel).
6 Drücken Sie ENTER ...
erscheint auf dem Display.
Wählen Sie mit den pfeiltasten den TV-Modus
(wie im obigen Beispiel).
7 Drücken Sie ENTER ...
erscheint auf dem Display.
Wählen Sie mit den pfeiltasten den TV-Modus
(wie im obigen Beispiel).
Sonderfunktionen
Heimkino (Home Theatre)
modus
TV
TV
TV
RCV
TV
TV
TV
DVD
TV
RCV
Tasten
POWER
NUMMERN
(1-9, 0, -/--, AV)
PROGRAMME
(Kanal +/-)
LAUTSTÄRKE / VOLUMEN
(Lautstärke +/-, Mute)
MENÜ
Menü, auf, ab, links, rechts, OK, Beenden
PROGRAMMFÜHRER / GUIDE
16:9
TRANSPORT
(skip-back, play, pause, skip-forward, rewind, stop, record, fast-forward
FASTEXT / TOP TEXT
(rot, grün gelb, blau)
A, B, C, D
ENTER
x2
ENTER
ENTER
ENTER
x2
Den Heimkino-Modus einrichten oder hinzufügen:
Page 54

WW W.O NEFORA LL.COM 53
HT VOLUMEN
TV HTNA DVD
ENTER
INITIAL
EINSTELLUNG
ERWEITERTE
EINSTELLUNG
FUNKTION
HOME THEATRE
HOME THEATRE
HOME THEATRE
EINRICHTEN
HOME THEATRE
ENTFERNEN
- Beim Einrichten des Home Theaters sehen Sie ein als HTNA bezeichnetes Gerät. Bei
Auswahl dieses fiktiven Geräts für eine Gruppe von Tasten senden diese Tasten im
Home Theatre-Modus kein IR-Signal.
- Beim Drücken von Tasten im Home Theatre-Modus wird der Modus angezeigt,
aus dem ein IR-Signal gesendet wird.
- Der Home Theatre-Modus kann mithilfe der Funktion "ÄNDERN GERÄTE REIHENFOLGE"
verschoben werden.
- Der Home Theatre-Modus kann mithilfe der Funktion "GERÄTE BEZEICHNUNG"
umbenannt werden.
- Die Key Magic-Funktionen und die gelernten Funktionen werden in den Home
Theatre-Modus übernommen. Im Home Theatre-Modus können keine Funktionen
gelernt oder Key Magic Funktionen programmiert werden.
- Tastenmakros stehen im Home Theatre-Modus nicht zur Verfügung.
- Wenn eine Gruppe von Funktionstasten einem Gerät zugewiesen wurde, das
entfernt wird, sendet diese Funktionsgruppe im Home Theater kein IR-Signal mehr
(diese Gruppe wird automatisch HTNA zugewiesen).
8 Drücken Sie ENTER ...
erscheint auf dem Display.
Wählen Sie mit den pfeiltasten den RCV-Modus
(wie im obigen Beispiel).
etc…………….
Nachdem Sie das Gerät für die letzte Tastengruppe (A, B, C, D) gewählt haben, blinkt die
LED unter der POWER-Taste zweimal, und die Anzeige kehrt zu „HOME THEATRE”
zurück.
Ergebnis: Im Home Theatre-Modus ist das Tastenfeld der URC-7781 wie in der obigen
Tabelle konfiguriert.
Um Home Theatre zu entfernen:
1 Halten Sie MAGIC
ca. 3 Sek. gedrückt, und...
erscheint auf dem Display.
2 Drücken Sie die Pfeiltaste Rechts...
erscheint auf dem Display.
3 Drücken Sie ENTER ...
erscheint auf dem Display.
4 Drücken Sie zweimal RIGHT ARROW ...
erscheint auf dem Display.
5 Drücken Sie ENTER ...
erscheint auf dem Display.
6 Drücken Sie die Pfeiltaste Rechts...
erscheint auf dem Display.
7 Drücken Sie ENTER, um den
Home Theatre-Modus zu entfernen.
Die LED unter der POWER-Taste
blinkt zweimal, und im Display enscheint ...
Der Home Theatre-Modus ist auf der URC-7781 nicht mehr verfügbar. Sie können den
Home Theatre-Modus wieder programmieren, indem Sie die Einrichtung des Home
Theatre-Modus gemäß Seite 52 durchführen.
Sonderfunktionen
Heimkino (Home Theatre)
Home Theatre entfernen
ENTER
x2
ENTER
ENTER
Page 55
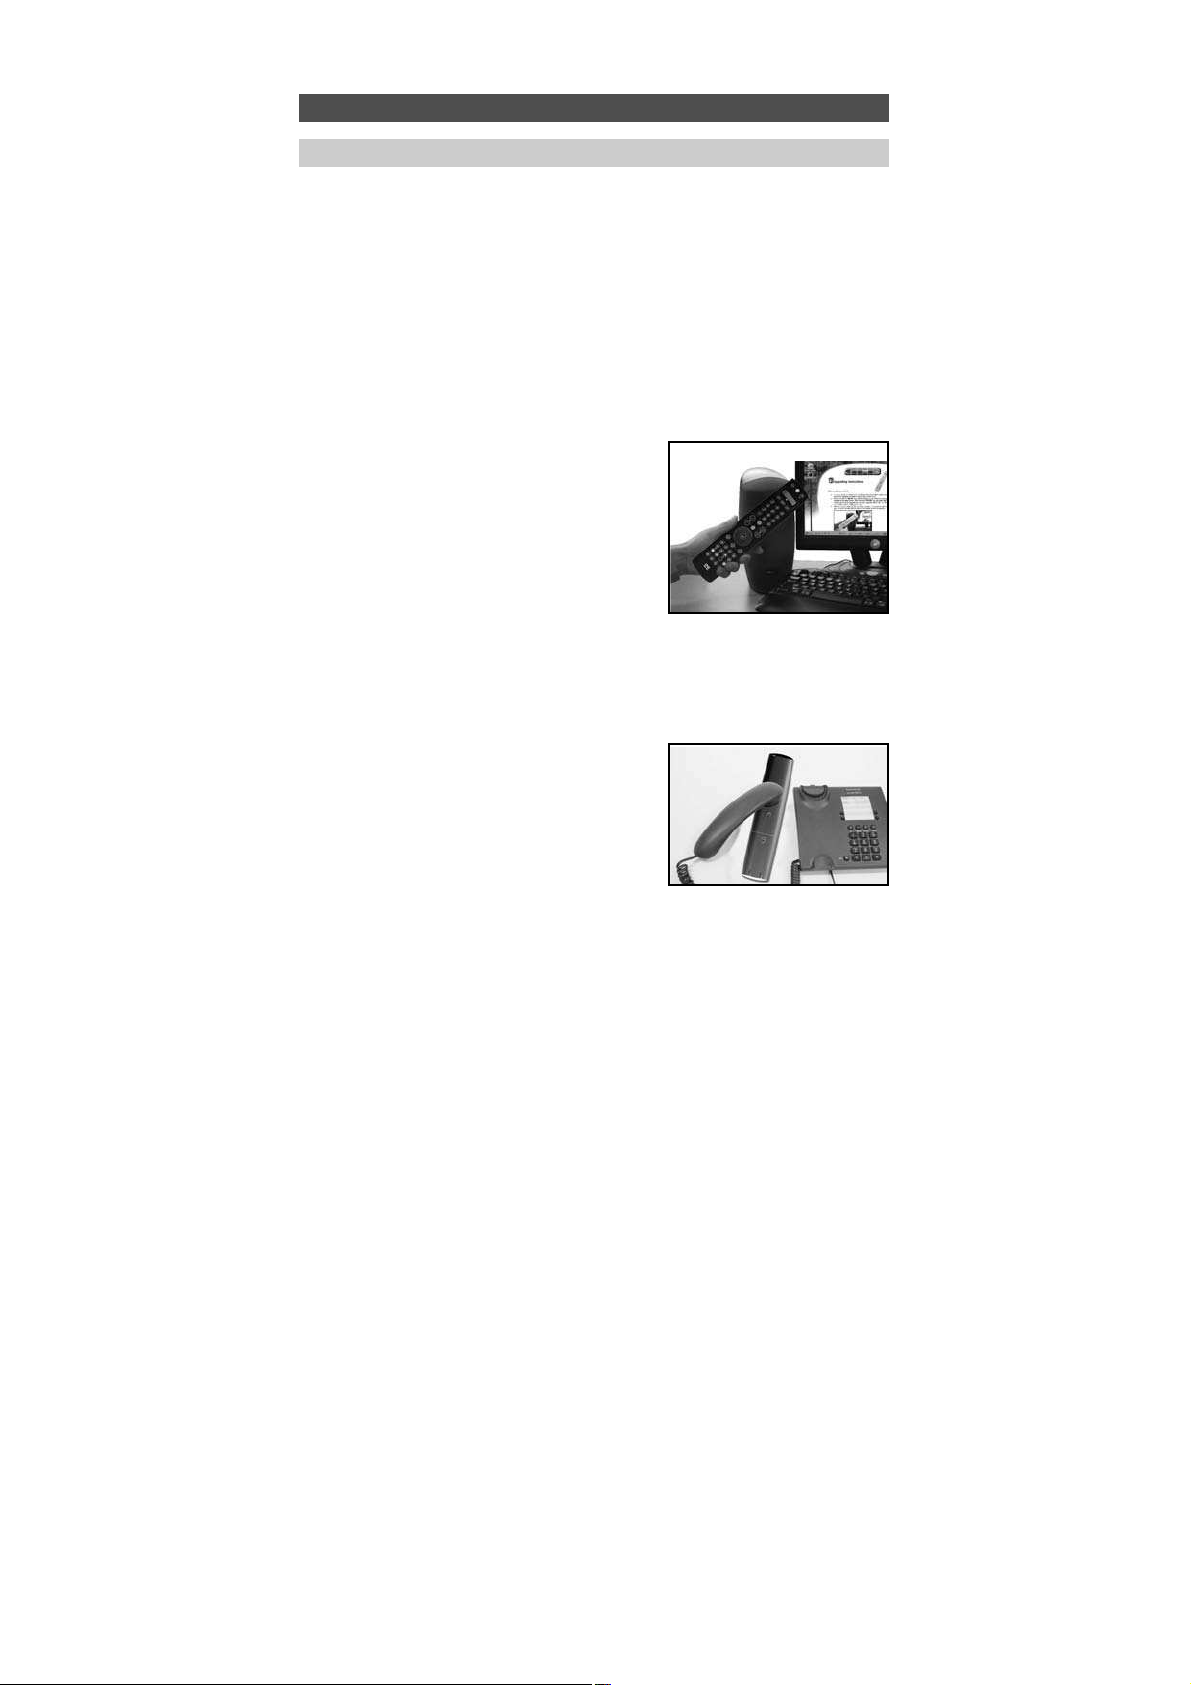
54 WW W.O NEFO RALL.COM
Die Fernbedienung URC-7781 beinhaltet eine einzigartige Funktion, mit der neue Codes
einfach über Telefon nachgeladen werden können.
Innerhalb von Sekunden werden mittels unserer Magnetkopplungstechnik schnell und
zuverlässig ohne aufwändige Stecker, Adapter oder Zusatzgeräte Informationen auf die
Fernbedienung URC-7781 übertragen. Das bedeutet, dass die Fernbedienung URC-7781
niemals veraltet sein wird, wenn Sie in Zukunft neue Produkte kaufen.
Internet download
(Aktualisieren Sie Ihre Fernbedienung URC-7781 …über den PC)
1. Gehen Sie zu unserer Website
“www.oneforall.com”.
2. Wählen Sie Ihre Region.
3. Wählen Sie “Produktunterstützung”.
4. Wählen Sie “Universal-Fernbedienungen”.
5. Wählen Sie die ONE FOR ALL-Fernbedienung,
die Sie aktualisieren möchten: URC-7781.
6. Wählen Sie "Internet-Download".
Sie befinden sich jetzt in unserem speziellen
Online-Download-Bereich. Folgen
Sie jetzt einfach den Anweisungen auf
dem Bildschirm, um Ihre Fernbedienung
in einfacher Weise zu aktualisieren.
Telefonische Aktualisierung
(
Aktualisieren Sie Ihre Fernbedienung URC-7781
…über das Telefon)
Sie können auch unsere Benutzer-Hotline anrufen,
und einer unserer Kundendienstmitarbeiter wird
Sie bei dem ganzen Vorgang der Aktualisierung
der Fernbedienung URC-7781 unterstützen.
Damit dies möglichst reibungslos verläuft,
sollten Sie Folgendes beachten:
1. Notieren Sie sich den/die Markennamen und die Modellnummer(n) Ihres/Ihrer Geräte
(siehe Tabelle auf der Kundendienstseite), bevor Sie anrufen.
2. Rufen Sie unsere Kundenhotline an und sagen Sie, welche(s) Gerät(e) Sie zu Ihrer
Fernbedienung URC-7781 hinzufügen möchten.
3. Nachdem sich unser Kundendienstmitarbeiter den/die Markennamen und die
Typnummer Ihres/Ihrer Geräts/Geräte notiert hat, wird er Sie durch das
Einrichtverfahren führen und Sie anschließend bitten, die Fernbedienung URC-7781
an die Sprechmuschel Ihres Telefons zu halten (siehe Zeichnung unten).
Damit werden die Informationen, die für Ihr Gerät benötigt werden, innerhalb von
Sekunden durch das Telefon auf Ihre Fernbedienung URC-7781 übertragen.
ACHTUNG: Die Benutzung von schnurlosen Telefonen, Lautsprechertelefonen
und Mobiltelefonen wird nicht empfohlen.
4. Bleiben Sie nach der Aktualisierung der Fernbedienung URC-7781 noch einen
Augenblick am Apparat. Unser Kundendienstmitarbeiter wird sich vergewissern,
dass Ihre Fernbedienung URC-7781 einwandfrei mit Ihrem/Ihren Gerät(en)
zusammenarbeitet, und eventuelle Fragen Ihrerseits beantworten.
Sonderfunktionen
Code-Nachladung
Page 56

KEY MAGIC ZIEL
DVD TV RCV
KEY MAGIC QUELLE
DVD TV RCV
INITIAL
EINSTELLUNG
ERWEITERTE
EINSTELLUNG
LERNEN
HINZUFÜGEN
KEY MAGIC
HINZUFÜGEN
WW W.O NEFORA LL.COM
55
Key Magic ist eine exklusives Merkmal der One For All-Geräte. Die URC-7781 ist so konzipiert, dass viele Funktionen Ihrer Originalfernbedienung genutzt werden können - auch
solche, für die es auf dem Tastenfeldder URC-7781 keine eigene Taste gibt. Häufig
genutzte Funktionen können mit der Key Magic-Funktion der URC-7781 einer Taste Ihrer
Wahl zugewiesen werden. Um eine bestimmte Funktion mit Key Magic programmieren zu
können, müssen Sie den entsprechenden 5-stelligen Funktionscode kennen. Da die
Funktionscodesje nach Gerätetyp unterschiedlich sind, wurden sie nicht in das Handbuch
aufgenommen. Sie können Ihre Funktionscodes über unsere Kundenhotline oder mit Brief,
Fax oder E-Mail in Erfahrung bringen. Wir benötigen dazu nur den 4-stelligen Setup-Code,
mit dem Ihr Gerät arbeitet, und wie die Funktion auf Ihrer Originalfernbedienung hieß.
Sie können auch auf unserer Website (www.oneforall.com) eine Antwort auf
Ihre Frage finden.
Sobald Sie vom Kundendienstmitarbeiter Ihre(n) Funktionscode(s) erhalten haben, ist die
Programmierung des Codes ganz einfach (z.B. Programmierung der 16:9-Funktion auf der
A-Taste).
1 Halten Sie MAGIC ca.
3 s gedrückt und ...
erscheint auf dem Display.
2 Drücken Sie die Pfeiltaste Rechts...
erscheint auf dem Display.
3 Drücken Sie zweimal ENTER...
erscheint auf dem Display.
4 Drücken Sie die Pfeiltaste Rechts...
erscheint auf dem Display.
5 Drücken Sie ENTER ...
erscheint auf dem Display.
Wählen Sie mit den Pfeiltasten
den entsprechenden Geräte modus.
In unser Beispiel selektieren Sie entsprechend den TV-Modus.
6 Drücken Sie einmal die MAGIC-Taste.
7 Geben Sie den 5-stelligen Funktionscode ein (z.B. 00234)
(vom Kundendienstmitarbeiter genannt).
8 Das Display ändert sich in …
Der Modus, in dem der Funktion zugewiesen
wird, ist TV; lassen Sie also den
Gerätemodus unverändert. Drücken Sie
die Taste (z.B. die A-Taste), der die Funktion
zugewiesen wird.
Damit ist die Funktion 16:9 auf der A-Taste im TV-Modus programmiert. Die LED unter der POWER-Taste blinkt zweimal, und Sie
kehren zu KM QUELLE zurück, wo Sie eine weitere Funktion
programmieren können. Um in den Benutzermodus zurückzukehren, halten Sie LIGHT (ESC) gedrückt.
ERWEITERTE FUNKTIONSREFERENZ (der erste Eintrag ist ein Beispiel):
GERÄT SET-UP CODE FUNKTION FUNKTIONSCODE
TV T0556 16/9 format 00234
- Um auf die programmierte Funktion zuzugreifen, wechseln Sie zuerst in den
entsprechenden Gerätemodus.
- Sie können jeder Taste Key Magic zuweisen, außer LEFT / RIGHT, ENTER, LIGHT (ESC)
und der MAGIC-Taste.
- Bitte notieren Sie sich alle erweiterten Funktionscodes, die Sie vom
Kundendienstmitarbeiter erhalten haben, damit Sie sie später wieder zur Verfügung
haben.
- Im Home Theatre-Modus können keine Key Magic-Funktionen programmiert werden. Wenn jedoch eine Taste im Originalgerätemodus mit Key Magic programmiert
wurde, wird diese Funktion in den Home Theatre-Modus übernommen.
Sonderfunktionen
Key Magic®
ENTER
ENTER
x2
Page 57

KEY MAGIC
ENTFERNEN
FUNKTION
ENTFERNEN
ERWEITERTE
EINSTELLUNG
MODUS AUSWÄHLEN
RCV TV
56 WWW. O NEFOR ALL.COM
ENTER
Sonderfunktionen
Key Magic entfernen
Es ist möglich …..
- eine Key Magic-Funktion innerhalb eines bestimmten Gerätemodus von einer
bestimmten Taste zu entfernen.
- alle Key Magic-Funktionen innerhalb eines bestimmten Gerätemodus zu entfernen.
- alle Key Magic-Funktionen in allen Gerätemodi zu entfernen.
Beispiel: entfernen der programmierten Key Magic-Funktion (16:9) von der A-Taste im
TV-Modus:
1 Halten Sie MAGIC ca.
3 s gedrückt und ..
erscheint auf dem Display.
2 Drücken Sie die Pfeiltaste Rechts...
erscheint auf dem Display.
3 Drücken Sie zweimal ENTER...
erscheint auf dem Display.
4 Drücken Sie die Pfeiltaste Rechts...
erscheint auf dem Display.
5 Drücken Sie ENTER ...
erscheint auf dem Display.
6 Drücken Sie die Pfeiltaste Rechts...
erscheint auf dem Display.
7 Drücken Sie ENTER ...
erscheint auf dem Display.
8 Drücken Sie ENTER ...
erscheint auf dem Display.
9 Wählen Sie den Gerätemodus (Beispiel TV-Modus), aus dem Sie
die Key Magic-Funktion entfernen wollen, mit den Pfeiltasten und
drücken Sie die Taste, die Sie entfernen wollen (Beispiel: A-Taste).
Die LED unter der POWER-Taste blinkt zweimal, und die Anzeige
kehrt zu ”KEY MAGIC ENTFERNEN” zurück.
10 Wenn Sie eine weitere Key Magic-Funktion entfernen möchten, wiederholen Sie
Schritt 6 - 9.
Ergebnis: Die ursprüngliche Funktionder ”A"-Taste im TV-Modusist wieder vorhanden.
* Um eine Key Magic-Funktion der zweiten Ebene zu entfernen, drücken Sie MAGIC,
bevor Sie die zu entfernende Taste in Schritt 9 drücken.
7 Es erscheint...
8 Wählen Sie den betreffenden
Gerätemodus, aus dem Sie
alle gelernten Key MagicFunktionen enfernen wollen,
mit den Pfeiltasten und
drücken Sie ENTER. Die LED unter der POWER-Taste
blinkt zweimal, und das Display kehrt zu
”KEY MAGIC ENTFERNEN” zurück.
7 Es erscheint...
8 Drucken Sie ENTER. Die LED unter der POWER-Taste blinkt
zweimal, und die Anzeige kehrt zu “KEY MAGIC ENTFERNEN”
zurück.
- Verwenden Sie die Taste LIGHT (ESC), um zur vorherigen Anzeige zurückzukehren.
- Halten Sie die Taste LIGHT (ESC) gedrückt, um zum Benutzermodus zurückzukehren.
INITIAL
EINSTELLUNG
FUNKTION
HINZUFÜGEN
LERNEN
ENTFERNEN
KEY MAGIC ENTF.
VON EINER TASTE
KEY MAGIC ENTF.
IN EINEM MODUS
KEY MAGIC ENTF.
IN ALLEN MODI
ENTER
ENTER
ENTER
ENTER
ENTER
ENTER
x2
WÄHL MODUS&TASTE
RCV TV
Page 58

ENTFERN LERN & KM
IN ALLEN MODI
WÄHL MODUS&TASTE
RCV TV
LERNEN&KEY MAGIC
ENTFERNEN
WW W.O NEFO RALL.CO M
57
Sonderfunktionen
Lernen und Key Magic entfernen
FALLS……. Sie sich nach einer Programmierung mit “Key Magic” und “Lernen” nicht
mehr sicher sind, ob Sie eine bestimmte Funktion mit Lernen oder Key Magic programmiert haben, oder wenn Sie einfach alle Funktionen entfernen möchten, die Sie mit
Lernen und Key Magic auf einer Taste, innerhalb eines Gerätemodus, oder innerhalb aller
G
erätemodi eingestellt haben, können Sie die folgende Funktion nutzen.
Es ist möglich …..
- eine Lern- und Key Magic-Funktion innerhalb eines bestimmten Gerätemodus von
einer bestimmten Taste zu entfernen.
- alle Lern- und Key Magic-Funktionen innerhalb eines bestimmten Gerätemodus zu
entfernen.
- alle Lern- und Key Magic-Funktionen in allen Gerätemodi zu entfernen.
Beispiel: Das entfernen der lern oder Key Magic Funktion der A-Taste in TV-Modus
1 Führen Sie einfach Schritt 1 – 5 wie auf
Seite 56... angegeben aus...
erscheint auf dem Display.
2 Scrollen Sie mit der Pfeiltaste links
zu …
erscheint auf dem Display.
3 Drücken Sie ENTER ...
erscheint auf dem Display.
4 Drücken Sie ENTER ...
erscheint auf dem Display.
5
Wählen Sie den entsprechenden Gerätemodus (Beispiel: TV-Modus)
m
it den Pfeiltasten und drücken Sie die Taste, von der Sie die Key
Magic/gelernte* Funktion entfernen möchten (Beispiel: A-Taste).
Die LED unter der POWER-Taste blinkt zweimal, und die Anzeige
kehrt zu ”LERNEN & KEY MAGIC ENTFERNEN” zurück.
6 Wenn Sie eine weitere Taste entfernen möchten, wiederholen Sie Schritt 2 - 5.
Ergebnis: Die ursprüngliche Funktion auf der ”A"-Taste im TV-Modus der URC-7781 ist
wieder vorhanden.
* Um eine gelernte oder Key Magic-Funktion der zweiten Ebene zu entfernen,
drücken Sie MAGIC, bevor Sie die zu entfernende Taste in Schritt 5 drücken.
3 Es erscheint...
Drücken Sie ENTER.
4 Wählen den entsprechenden
Gerätemodus mit den
Pfeiltasten und drücken
Sie ENTER. Die LED unter
der POWER-Taste blinkt zweimal,
und die Anzeige kehrt zu ”LERNEN & KEY MAGIC ENTFERNEN”
zurück. Alle Key Magic- und gelernten Funktionen aus
dem ausgewählten Gerätemodus werden entfernt.
3 Es erscheint...
4 Drücken Sie ENTER. Die LED unter der POWER-Taste
blinkt zweimal, und die Anzeige kehrt zu ”LERNEN & KEY MAGIC
ENTFERNEN” zurück. Alle Key Magic- und gelernten Funktionen
aus allen ausgewählten Gerätemodi werden entfernt.
- Drücken Sie die Taste LIGHT (ESC), um zur vorherigen Anzeige zurückzukehren.
- Halten Sie die Taste LIGHT (ESC) gedrückt, um zum Benutzermodus zurückzukehren.
LERNEN
ENTFERNEN
ENTFERN LERN & KM
VON EINER TASTE
ENTFERN LERN & KM
IN EINEM MODUS
ENTER
ENTER
MODUS AUSWÄHLEN
RCV TV
ENTER
ENTER
ENTER
Page 59

58 WW W.O NEFO RALL.COM
Problem:
Ihre Marke ist im CodeAbschnitt nicht aufgeführt?
Die URC-7781 steuert Ihr(e)
Gerät(e) nicht?
Die URC-7781 führt Befehle
nicht einwandfrei aus?
Probleme beim Kanalwechsel?
Videogerät zeichnet nicht auf?
Die URC-7781 reagiert nicht auf
Tastendruck?
Die LED blinkt nicht
bei Tastendruck?
Die LED blinkt fünfmal, sooft
Sie eine Taste drücken, und
auf dem LCD steht "BATTERIE
LEER"?
Sie gelangen nicht in den
Programmiermodus, wenn Sie
MAGIC gedrückt halten?
Lösung:
Benutzen Sie Bitte die Pfeil Links/Rechts –Tasten um
die Codes zu durchlaufen die im Speicher des URC7781 vorhanden sind (siehe Schritt 5 auf Seite 36 CODE SUCHLAUF).
A) A) Versuchen Sie Bitte alle für Ihre Marke
gelisteten Codes sehe Seiten 301 - 315.
B) Benutzen Sie bitte die Pfeil Links/Rechts –Tasten
um die Codes zu durchlaufen die im Speicher des
URC-7781 vorhanden sind (siehe Schritt 5 auf
Seite 36 - CODE SUCHLAUF).
Sie verwenden möglicherweise den falschen Code.
Versuchen Sie, die Direkteinrichtung mit einem
anderen für Ihre Marke aufgeführten Code
zu wiederholen, oder führen Sie das ganze
Suchverfahren nochmals durch, um den richtigen
Code zu finden.
Geben Sie die Programmnummer genau so wie
mit Ihrer Originalfernbedienung ein.
Es ist eine Sicherheitsfunktion der URC-7781, dass
Sie die Taste Record zweimal drücken müssen.
Stellen Sie sicher, dass die Batterien neu sind und
Sie das URC-7781 auf Ihr Gerät gerichtet halten.
Setzen Sie 4 neue Alkalibatterien des
Typs AAA/LR03 ein.
Setzen Sie 4 neue Alkalibatterien des
Typs AAA/LR03 ein.
Setzen Sie 4 neue Alkalibatterien des
Typs AAA/LR03 ein.
Problem & Lösung
Page 60

WW W.O NEFO RALL.CO M 59
Kundendienst
Wenn Sie trotzdem noch Fragen zur Bedienung der Universalfernbedienung URC-7781
haben und im Bereich Problem & Lösung keine Antwort finden können, können Sie sich
an den Kundendienst wenden.
V
ersuchen Sie es auch auf unserer Website:
www.oneforall.com
Wenn Sie sich per Fax, E-Mail oder Telefon an uns wenden, halten Sie bitte die
nachfolgenden Informationen bereit (bitte Tabelle ausfüllen).
Was wir wissen müssen, wenn Sie sich an uns wenden:
1 Sie besitzen die Universal-Fernbedienung ONE FOR ALL URC-7781
2 Kaufdatum (.........../.........../...........).
3 Verzeichnis Ihrer Geräte/Modelle: (siehe nachfolgendes Beispiel).
Gerät Marke Gerät Fernbedienung SET-UP
Typnr. Typnr. code
TV Sony KV-25C5D RM-883 T1505 (example)
Die Typ-/Modellnummer finden Sie meist im Benutzerhandbuch des Geräts oder
auf dem Typschild auf der Rückseite des Geräts.
4. Faxen, E-mailen oder rufen Sie uns an:
In Deutschland
E-Mail : ofahelp@uebv.com (*)
Fax : +31 53 432 9816
Tel. : 06966984962
In Õsterreich In der Schweiz
E-Mail : ofahelp@uebv.com (*) E-Mail : ofahelp@uebv.com (*)
Fax : +31 53 432 9816 Fax : +31 53 432 9816
Tel. : 01790876064 Tel. : 0443420449
In Luxemburg
E-Mail : ofahelp@uebv.com (*)
Fax : +31 53 432 9816
Tel. : 4066615632
(*) Senden Sie einfach eine leere Nachricht; Sie erhalten eine automatische Antwort.
Page 61

60 WW W.O NEFO RALL.COM
Die Fernbedienung ONE FOR ALL 12 ist geeignet für ONE FOR ALLLichtsteuerungszubehör, mit dem Sie mit der Fernbedienung eine oder mehrere Leuchten
im Haus bedienen können. Hierzu müssen Sie zuerst das Starterkit für die ONE FOR ALLLichtsteuerung (HC-8300) erwerben. Dann müssen Sie einen Code einrichten, mit dem Sie
bis zu 10 Lichtsteuerungsempfänger bedienen können.
Gehen Sie zum Einrichten eines Codes einfach wie auf Seite 36 beschrieben vor
und richten Sie einen der folgenden Codes als Home Automation-Gerät (HOM)
ein.
ONE FOR ALL Light Control – 2200, 2201, 2202, 2203, 2204, 2205, 2206, 2207,
2208, 2209, 2210, 2211, 2212, 2213, 2214, 2215
Es wird empfohlen, den als ersten aufgelisteten Code zu verwenden. Falls das
Lichtsteuerungssystem mit einer Funkfrequenz arbeitet, besteht die Möglichkeit einer
Interferenz. Wenn das Lichtsteuerungs-Kit nicht gut anspricht, versuchen Sie es mit einem
anderen aufgelisteten Code.
Einrichtung des HC-Empfängers
Um Ihren HC-Empfänger so einzurichten, dass er mit Ihrer Fernbedienung zusammenarbeitet, müssen Sie ihm eine Nummer zuweisen. Dies ist ein einmaliger Vorgang, der es
Ihnen erlaubt, verschiedene Leuchten einzeln zu schalten, wenn Sie in der Zukunft zusätzliche HC-Empfänger kaufen. Um dem Stecker eine Nummer zuzuweisen, gehen Sie wie
folgt vor:
• Stecken Sie die Lampe in den HC-Empfänger ein und stecken sie den HCEmpfänger in die Wandsteckdose. Wenn die Leuchte einen Netzschalter hat,
m
uss sich dieser in Stellung „Ein” befinden.
• Stecken Sie das Befehlszentrum so nahe wie möglich beim HC-Empfänger
ein, sodass sie höchstens 10 - 20 cm voneinander getrennt sind (das
Befehlszentrum kann nach dem ersten Einrichten verschoben werden).
• Richten Sie einen HOM-Code ein (Einrichten eines Codes siehe Seite 36) und
stellen Sie sicher, dass sich die Fernbedienung im Lichtmodus (HOM)
befindet.
• Drücken Sie die Nummer, die Sie dem HC-Empfänger zuweisen möchten.
Wenn dies der erste Stecker ist, empfehlen wir Nummer 1, Nummer 2 für
den zweiten Stecker usw. Die LED (unter der POWER-Taste) sollte zweimal
blinken.
• Drücken und halten Sie die Taste auf dem HC-Empfänger gedrückt, bis die
rote Leuchte zu blinken beginnt.
• Halten Sie die Fernbedienung in Richtung Befehlszentrum und drücken Sie
die Taste „Kanal auf” (+) . Die rote LED sollte aufhören zu blinken.
Die Fernbedienung sollte jetzt den HC-Empfänger steuern. Um dies zu überprüfen,
stellen Sie fest, ob die Taste „Kanal auf” (+) bzw. „Kanal ab” (-) das Licht einbeziehungsweise ausschaltet oder, falls Sie das Dimmergerät HC-8010 besitzen, ob die
Taste „Lautstärke auf” die Lampe heller oder dunkler macht (zum Abbrechen die Taste
nochmals drücken).
Nach der Einrichtung mit dem Starterkit haben die nachfolgenden Tasten die
folgende Funktion auf der Fernbedienung ONE FOR ALL 12:
Tastenbezeichnung Funktion
Digit 1 Auswahl Empfänger 1
Digit 2 Auswahl Empfänger 2
Digit 3 Auswahl Empfänger 3
Digit 4 Auswahl Empfänger 4
Digit 5 Auswahl Empfänger 5
Digit 6 Auswahl Empfänger 6
Digit 7 Auswahl Empfänger 7
Digit 8 Auswahl Empfänger 8
Digit 9 Auswahl Empfänger 9
Digit 0 Auswahl Empfänger 10
Kanal auf Ausgewählten Empfänger einschalten
Channel Down Ausgewählten Empfänger ausschalten
Volume Up Dimmen beginnen – erneut drücken, um zu beenden*
Die Dimmfunktion ist nur mit dem Lichtsteuerungs-Dimmergerät (HC-8010)
verfügbar.
Sonderfunktionen
Lichtsteuerung für die One For All
1
2
3
Page 62

WW W.O NEFO RALL.CO M 61
Table des matières
Français
IMAGE DE LA TÉLÉCOMMANDE URC-7781 . . . . . . . . . . . . . . . . . . . . . .
62
À PROPOS DE VOTRE URC-7781 . . . . . . . . . . . . . . . . . . . . . . . . . . . . . . . . .
62
LE CLAVIER . . . . . . . . . . . . . . . . . . . . . . . . . . . . . . . . . . . . . . . . . . . . . . . . . . . . . .
63
INSTALLATION DES PILES . . . . . . . . . . . . . . . . . . . . . . . . . . . . . . . . . . . . . . .
65
RÉGLAGE DE LA LANGUE, DE LA DATE ET DE L'HEURE . . . . . . . . .
65
CONFIGURATION DE L'URC-7781 . . . . . . . . . . . . . . . . . . . . . . . . . . . . .
66
(Comment configurer l’URC-7781 pour commander vos appareils)
CODES
TV : Téléviseur/à cristaux liquides/plasma/projecteur/rétroprojecteur
. . . . . . .
301
VCR : Magnétoscope / Combiné TV/Magnétoscope / Combiné DVD/
Magnétoscope / Enregistreur vidéo
. . . . . . . . . . . . . . . . . . . . . . . . . . . . .
306
SAT : Récepteur satellite / Décodeur / DVB-S / DVB-T / Freeview (R-U) /
TNT(F) / Digitenne (NL) / SAT / HDD
. . . . . . . . . . . . . . . . . . . . . . . . . . . . .
308
CBL : Décodeur câble / Décodeur / DVB-C
. . . . . . . . . . . . . . . . . . . . . . . . . . . . .
310
VAC : Centres multimédia tels que les accessoires vidéo / accessoires AV /
sélecteurs AV
. . . . . . . . . . . . . . . . . . . . . . . . . . . . . . . . . . . . . . . . . . . . . .
310
CD : Lecteur de CD / CD-R / MD
. . . . . . . . . . . . . . . . . . . . . . . . . . . . . . . . . . . .
310
PHO : Électrophone
. . . . . . . . . . . . . . . . . . . . . . . . . . . . . . . . . . . . . . . . . . . . . .
311
MIS : Audio / Audio divers
. . . . . . . . . . . . . . . . . . . . . . . . . . . . . . . . . . . . . . . . .
311
HOM : Automatisation à domicile (par exemple rideaux commandés par IR /
commutateurs d'éclairage commandés par IR, etc.)
.
. . . . . . . . . . . . . . . .
311
AMP : Audio / Amplificateur / Système de haut-parleurs actifs
. . . . . . . . . . . . . .
311
RCV : Audio / Récepteur audio / Tuner / Amplificateur / Cinéma à
domicile (DVD)
. . . . . . . . . . . . . . . . . . . . . . . . . . . . . . . . . . . . . . . . . . . . .
311
CAS : Lecteur de cassette (magnétophone)
. . . . . . . . . . . . . . . . . . . . . . . . . . . .
312
LDP : Lecteur de disque laser / CD vidéo
. . . . . . . . . . . . . . . . . . . . . . . . . . . . . .
312
DAT : Digital Audio Tape / DCC
. . . . . . . . . . . . . . . . . . . . . . . . . . . . . . . . . . . . .
312
DVD : Lecteur de DVD / DVD-R / Cinéma à domicile DVD / Combi DVD /
DVD / HDD
. . . . . . . . . . . . . . . . . . . . . . . . . . . . . . . . . . . . . . . . . . . . . . . .
312
AFFICHER LE CODE ACTUEL . . . . . . . . . . . . . . . . . . . . . . . . . . . . . . . . . . . . .
68
RÉSUMÉ DES CODES . . . . . . . . . . . . . . . . . . . . . . . . . . . . . . . . . . . . . . . . . . . .
68
REMPLACEMENT D'UN APPAREIL . . . . . . . . . . . . . . . . . . . . . . . . . . . . . . .
68
MODIFIER LE CODE D’UN APPAREIL . . . . . . . . . . . . . . . . . . . . . . . . . . . .
69
DÉPLACER UN APPAREIL . . . . . . . . . . . . . . . . . . . . . . . . . . . . . . . . . . . . . . . .
70
SUPPRIMER UN APPAREIL . . . . . . . . . . . . . . . . . . . . . . . . . . . . . . . . . . . . . . .
70
LA FONCTION D'APPRENTISSAGE . . . . . . . . . . . . . . . . . . . . . . . . . . . . . . .
71
(Comment copier les fonctions de votre télécommande
d'origine fonctionnelle dans l’URC-7781)
RÉINITIALISATION DU FONCTIONNEMENT . . . . . . . . . . . . . . . . . . . . . .
74
FONCTIONS COMPLÉMENTAIRES
• Couleur, luminosité et veille
. . . . . . . . . . . . . . . . . . . . . . . . . . . . . . . . . . . . .
74
• Modification du libellé de l’appareil
. . . . . . . . . . . . . . . . . . . . . . . . . . . . . . .
75
• Verrouillage du volume
. . . . . . . . . . . . . . . . . . . . . . . . . . . . . . . . . . . . . . . . .
76
• Macro (séquence de commandes)
. . . . . . . . . . . . . . . . . . . . . . . . . . . . . . . . .
78
• Cinéma à domicile
. . . . . . . . . . . . . . . . . . . . . . . . . . . . . . . . . . . . . . . . . . . . .
82
• Technologie de mise à niveau des codes
. . . . . . . . . . . . . . . . . . . . . . . . . . . .
84
• Key Magic® (comment programmer les fonctions manquantes)
. . . . . . . . . .
85
• Effacer l’apprentissage et Key Magic
. . . . . . . . . . . . . . . . . . . . . . . . . . . . . . .
87
• Commande d'éclairage ONE FOR ALL
. . . . . . . . . . . . . . . . . . . . . . . . . . . . . .
90
PROBLÈMES ET SOLUTIONS . . . . . . . . . . . . . . . . . . . . . . . . . . . . . . . . . . . . .
88
SERVICE CLIENT . . . . . . . . . . . . . . . . . . . . . . . . . . . . . . . . . . . . . . . . . . . . . . . . .
89
Page 63

62 WW W.O NEFO RALL.COM
Image de l’URC-7781
Votre URC-7781 requiert 4 piles alcalines "AAA/LR03" neuves.
Votre URC-7781 peut commander 12 appareils :
TV : Téléviseur/à cristaux liquides/plasma/projecteur/rétroprojecteur
VCR : Magnétoscope / Combiné TV/Magnétoscope / Combiné
DVD/Magnétoscope / Enregistreur vidéo
SAT : Récepteur satellite / Décodeur / DVB-S / DVB-T / Freeview (R-U) / TNT(F)
/ Digitenne (NL) / SAT / HDD
CBL : Décodeur câble / Décodeur / DVB-C
VAC : Centres multimédia tels que les accessoires vidéo / accessoires AV /
sélecteurs AV
CD : Lecteur de CD / CD-R / MD
PHO : Électrophone
MIS : Audio / Audio divers
HOM : Automatisation à domicile (par exemple rideaux commandés par IR /
commutateurs d'éclairage commandés par IR, etc.)
AMP : Audio / Amplificateur / Système de haut-parleurs actifs
RCV : Audio / Récepteur audio / Tuner / Amplificateur / Cinéma à domicile
(DVD)
CAS : Lecteur de cassette (magnétophone)
LDP : Lecteur de disque laser / CD vidéo
DAT : Digital Audio Tape / DCC
DVD : Lecteur de DVD / DVD-R / Cinéma à domicile DVD / Combi DVD / DVD /
HDD
La télécommande URC-7781 universelle possède un modem intégré permettant de
télécharger les codes qui ne sont pas déjà programmés en mémoire. Ceci signifie que
l’URC-7781 ne sera jamais obsolète.
En outre, l’URC-7781 est encore plus unique par sa fonction "Apprentissage", qui vous
permet de personnaliser n’importe quelle fonction spéciale de votre télécommande
d'origine sur le clavier de votre nouvelle télécommande URC-7781.
Les pages suivantes expliquent en étapes simples comment personnaliser l’URC-7781
en fonction de vos appareils.
À propose de votre URC-7781
11
1
2
4
6
8
5
10
13
14
17/18
9
2
1
19
15
7
16
3
Page 64

WW W.O NEFORA LL.COM 63
Le clavier
Voir l’image de la télécommande URC-7781 en page 62.
1 Touche MAGIC
La touche MAGIC sert à configurer votre URC-7781.
2 POWER (DEL)
La touche POWER fonctionne comme celle de votre télécommande
d'origine. En appuyant sur MAGIC puis sur POWER, vous obtenez
la fonction Sleeptimer. Quand vous maintenez la touche MAGIC
enfoncée, la DEL sous la touche POWER s'allume deux fois et vous
entrez en mode de programmation.
3 Touche LIGHT (ESC)
La touche LIGHT (ESC) allume l'écran à cristaux liquides et le clavier de
l’URC-7781. Cette touche vous permet également de revenir (échappement) à l’écran précédent en mode de programmation. Si vous voulez
sortir du mode de programmation et revenir au mode utilisateur, il suffit d'enfoncer et de maintenir la touche LIGHT (ESC).
4 Écran à cristaux liquides
L’URC-7781 peut être programmée simplement en suivant les indications
de l’écran à cristaux liquides. Pendant la configuration, l’URC-7781 liste
les 12 groupes d’appareils possibles. L’appareil actuellement actif
apparaît au milieu de l’écran – indiqué par .
TV : (T) - Téléviseur/à cristaux liquides/plasma/projecteur/rétroprojecteur
VCR : (V) - Magnétoscope / Combiné TV/Magnétoscope / Combiné
DVD/Magnétoscope / Enregistreur vidéo
SAT : (S) - Récepteur satellite / Décodeur / DVB-S / DVB-T / Freeview (R-U) /
TNT(F) / Digitenne (NL) / SAT / HDD
CBL : (C) - Décodeur câble / Décodeur / DVB-C
VAC : (N) - Centres multimédia tels que les accessoires vidéo / accessoires AV /
sélecteurs AV
CD : (D) - Lecteur de CD / CD-R / MD
PHO : (P) - Électrophone
MIS : (M)- Audio / Audio divers
HOM : (H) - Automatisation à domicile (par exemple rideaux commandés par
IR / commutateurs d'éclairage commandés par IR, etc.)
AMP : (A) - Audio / Amplificateur / Système de haut-parleurs actifs
RCV : (R) - Audio / Récepteur audio / Tuner / Amplificateur / Cinéma à
domicile (DVD)
CAS : (K) - Lecteur de cassette (magnétophone)
LDP : (L) - Lecteur de disque laser / CD vidéo
DAT : (J) - Digital Audio Tape / DCC
DVD : (Y) - Lecteur de DVD / DVD-R / Cinéma à domicile DVD / Combi DVD /
DVD / HDD
Le type de code est indiqué entre parenthèses, par exemple (T). Lors de la configuration
de votre appareil, un code d’appareil est affiché, par exemple T0556.
T - indique le type d’appareil (code de TV)
0556 : indique un code à quatre chiffres trouvé sous Philips.
Il est également possible de renommer/modifier un libellé d’appareil avec un maximum
de 4 caractères (voir page 75).
5 Gauche/ENTER/Droite
Ces touches vous permettent de faire défiler et de confirmer vos choix
dans le "menu de programmation" de la télécommande. Lors de la modification du libellé de l’appareil, vous pouvez faire défiler l’"alphabet",
les "chiffres" et les "symboles spéciaux" (. _ ^ <) appuyant sur la touche
ENTER pour sélectionner la lettre, le chiffre ou le symbole désiré.
6 Touches numériques (0-9, -/--, AV)
Les touches numériques (0 à 9, -/--. AV) fournissent les même fonctions
que votre télécommande d'origine, telles que l’accès direct à la sélection
des chaînes. Si votre télécommande d'origine utilise un commutateur
d'entrée numérique (symbole -/--), cette fonction peut être obtenue en
appuyant sur la touche -/--. Si votre télécommande d'origine a une
touche 10, cette fonction se trouve également sous la touche -/--. Si
votre télécommande d'origine comporte une touche 20, cette fonction
se trouve sous la touche AV. En mode audio (RCV, AMP, MIS), les touches
numériques peuvent fournir la sélection de la source (entrée).
7 Touche AV
En mode TV, vous obtenez la fonction AV/Entrée. En mode VCR, vous
obtenez la fonction "AV", si elle existe sur votre télécommande d'origine.
En mode audio (RCV,AMP, MIS) vous obtenez la fonction entrée/source.
En mode DVD, vous obtenez la fonction "TV/DVD", si elle existe sur votre
télécommande d'origine. En mode SAT, vous obtenez la fonction
"TV/SAT" ou "TV/DTV", si elle existe sur votre télécommande d'origine.
8 Touches Chaîne +/-
Ces touches fonctionnent comme celles de votre télécommande
d'origine. En mode TV, ces touches vous fournissent Luminosite +/- en
appuyant sur MAGIC puis CH +/-. En mode audio (RVC, AMP, MIS), ces
touches correspondent à PRESET haut/bas.
Page 65

64 WWW. O NEFOR ALL.COM
Le clavier
9 Touche MUTE (coupure du son)
La touche MUTE fonctionne comme celle de votre télécommande
d'origine.
10 Touche MENU
La touche MENU commande la même fonction que celle de votre
télécommande d’origine.
11 Touches Volume +/-
Ces touches fonctionnent comme celles de votre télécommande
d’origine. En mode TV, ces touches correspondent à Couleur +/- en
appuyant sur MAGIC puis Volume +/-.
12 Touches de direction
Si elles existent sur votre télécommande d’origine, ces touches vous
permettent de parcourir le mode menu de votre appareil.
13 OK
La touche OK confirme votre choix lors de l’utilisation d’un menu
de votre appareil.
14 Guide
En mode TV et/ou SAT, vous obtenez la fonction „Guide“ ou
„Programme précédent“, si elle existe sur votre télécommande
d’origine. En mode VCR, vous obtenez la fonction „TV/VCR“ ou „Eject“,
si elle existe sur votre télécommande d’origine. En mode AMP, RCV ou
MIS, vous obtenez la fonction Tune - (Réglage descendant), si elle existe
sur votre télécommande d’origine. En mode CD, vous obtenez
la fonction „Éjecter“ ou „Ouvrir/Fermer“, si elle existe sur votre
télécommande d’origine.
15 Quitter
Dans tous les modes, vous obtenez la fonction „Sortie du menu“, si elle
existe sur votre télécommande d’origine. En mode de menu SAT, vous
pouvez obtenir la touche „arrière“ pour revenir à l’écran de menu
précédent.
16 16:9
En mode TV, cette touche appelle la fonction d’affichage en écran large
(16:9), si elle existe sur votre télécommande d’origine. En mode SAT,
vous obtenez la fonction „Favoris“ ou „Info“, si elle existe sur votre
télécommande d’origine. En mode DVD, vous obtenez „Zoom“ ou
„Aléatoire“. En mode VCR, vous obtenez „SP/LP“. En mode AMP, RCV
ou MIS, vous obtenez Tune + (Réglage ascendant).
17 Touches de transfert
Ces touches actionnent les touches de transfert (LECTURE, AVANCE
RAPIDE, RETOUR RAPIDE, etc.) de votre appareil. Pour éviter un
enregistrement accidentel, la touche RECORD (ENREGISTREMENT) doit
être enfoncée deux fois pour démarrer l’enregistrement.
18 Touches télétexte
Les touches de transfert (RETOUR RAPIDE, LECTURE, REC, AVANCE
RAPIDE) servent à actionner les fonctions principales du système
télétexte. Les symboles sous les touches sont pour le télétexte.
Les touches texte servent à accéder aux fonctions télétexte de votre
téléviseur. Votre appareil doit bien sûr disposer de capacités télétexte.
TEXTE/MARCHE : Met en marche le mode télétexte de l’appareil (TV ou SAT).
PAUSE/ARRÊT : Arrête le défilement des pages.
ÉLARGISSEMENT: Affiche la moitié supérieure de la page télétexte en plus
gros caractères.
En appuyant encore, vous pouvez voir la moitié inférieure de la page télétexte
agrandie. Pour revenir à l’affichage télétexte normal, appuyez à nouveau sur la
touche ÉLARGISSEMENT, ou appuyez sur la touche TEXTE/MARCHE, selon votre
téléviseur.
TEXTE/ARRÊT : Rappelle le mode de visualisation normal de l’appareil (TV ou
SAT). Sur certains appareils, ceci peut se faire en appuyant sur la touche
TEXTE/MARCHE plusieurs fois.
En mode TV et avoir sélectionné le mode texte, les touches rouge, verte, jaune et bleue
vous permettent d’accéder aux fonctions fastexte de votre téléviseur. Si, sur votre
télécommande d’origine, ces touches servent à la navigation dans les menus, les touches
fastexte de l’URC-7781 peuvent fonctionner de la même manière.
19 Touches personnalisées (A, B, C, D)
Les Touches personnalisées sont des touches disponibles qui vous
donnent la possibilité d’adapter la télécommande URC-7781 avec
les fonctions d’apprentissage et la Key Magic® (pages 71 et 85).
Ces touches peuvent également servir à la programmation de macros
(voir en page 78).
Page 66

WW W.O NEFORA LL.COM 65
RÉGLER LE JOUR
DIM LUN MAR
ENTER
ENTER
ENTER
ENTER
ENTER
ENTER
ENTER
Installation des piles
Réglage de la langue, de la date et de l'heure
Votre URC-7781 requiert 4 piles alcalines „AAA/LR03“ neuves.
1 Retirez le couvercle des piles au dos de votre URC-7781.
2 Placez les piles dans le logement en respectant les polarités + et - indiquées.
3 Replacez le couvercle en appuyant dessus.
Remarques importantes :
- N’utilisez pas les piles rechargeables.
- Lors du remplacement des piles, vos codes de configuration et votre programmation avancée sont conservés.
1. Une fois les piles insérées…
apparaît sur l’écran. Appuyez sur
ENTER pour confirmer.
2. Réglez la langue sur ENGLISH,
DEUTSCH ou FRANÇAIS avec
les touches fléchées.
Appuyez sur ENTER pour confirmer la
langue de votre choix (par exemple
FRANÇAIS). La DEL sous la touche POWER
s’allume deux fois. Toutes les fonctionnalités de programmation
sont à présent affichées dans la langue sélectionnée.
3. „RÉGLER LE JOUR“ apparaît sur l’écran.
Appuyez sur ENTER pour confirmer.
4. Sélectionnez le jour correspondant avec
les touches fléchées et confirmez en
appuyant sur ENTER. La DEL sous
la touche POWER s’allume deux fois.
5. „RÉGLER L’HEURE“ apparaît sur l’écran.
Appuyez sur „ENTER“ pour confirmer.
6. Sélectionnez l’heure correspondante avec
les touches fléchées et confirmez en
appuyant sur „ENTER“. La DEL sous la
touche POWER s’allume deux fois.
„AJOUTER APPAREIL“ apparaît sur l’écran.
Continuez en page 66 pour configurer l’URC-7781 afin de commander vos
appareils.
Remarque : Une fois la télécommande complètement configurée, pour modifier la
langue, la date ou l’heure, vous devez passer au mode de programmation.
Pour ce faire, appuyez et maintenez MAGIC jusqu’à ce que „INSTALLATION
INITIALE“ apparaisse sur l’écran, appuyez ensuite sur ENTER et „APPAREIL“
apparaît sur l’écran. Utilisez alors les touches fléchées pour faire défiler
„LANGUE“ ou „JOUR/HEURE“ selon ce que vous devez modifier.
LANGUAGE
RÉGLER LE JOUR
RÉGLER L’HEURE
RÉGLER L’HEURE
00:00
AJOUTER APPAREIL
SET LANGUAGE
FRANÇAIS
ENTER
Page 67

TV
T0556
ENTER
66 WWW. O NEFOR ALL.COM
AJOUTER APPAREIL
PHO TV VCR
Configuration de l’URC-7781
Comment configurer l’URC-7781 pour commander
vos appareils
Exemple : pour configurer l’URC-7781 pour votre téléviseur :
Trouvez le code de votre appareil dans la liste des codes (page 301 - 315). Les
codes sont listés par type d’appareil et nom de marque. Le code le plus utilisé
est présenté en premier. Vérifiez que votre appareil est allumé (et non en veille).
Si votre marque n’est pas du tout listée, l’URC-7781 vous donne la possibilité de balayer tous les codes contenus dans la mémoire pour l'appareil en question (dans ce
cas, comme expliqué dans l'étape 4, utilisez les touches des FLÈCHES gauche/droite
au lieu des chiffres).
L’affichage indique…
Appuyez sur ENTER.
Sélectionnez l’appareil que vous
souhaitez configurer avec les touches
des flèches gauche/droite et confirmez
en appuyant sur ENTER. Vous verrez
alors PROGRAMMER CODE.
Appuyez à nouveau sur ENTER.
Utilisez simplement les touches
numériques pour saisir le premier
code d'appareil à quatre chiffres
correspondant à votre marque listé dans
la liste des codes (pages 301 - 315).
La DEL sous la touche POWER s'allume deux fois.
Pointez l’URC-7781 vers votre appareil et appuyez sur POWER.
—> Si votre appareil s'éteint, rallumez-le (appuyez par exemple sur CH + pour
allumer votre téléviseur) puis essayez toutes les fonctions de la télécommande
pour vérifier qu'elles agissent correctement.
—> Si certaines fonctions ne s'exécutent pas correctement ou si votre appareil ne
répond pas du tout, essayez le code d’appareil à quatre chiffres suivant listé
sous votre marque (pages 301 - 315).
MÉTHODE DE RECHERCHE: Chaque fois que vous appuyez sur la touche FLÈCHE gauche
ou droite, ceci affiche le code précédent ou suivant en
mémoire et envoie l'action POWER de ce code.
- n’utilisez pas les chiffres pour tester le fonctionnement du code car ceci modifie
le code courant.
- si votre appareil ne répond pas à l’URC-7781 après avoir essayé tous les codes
(pages 301 - 315) listés pour votre marque......... ou....... si votre marque n’est pas
listée du tout ...... appuyez simplement sur la touche "flèche droite" pour passer
au code suivant contenu dans la mémoire (pour votre appareil spécifique).
Dès que toutes les fonctions de la télécommande fonctionnent
correctement, appuyez sur ENTER pour mémoriser ce code.
Veillez à noter votre code en page 68 pour faciliter toute référence future.
—> Lors de la première configuration de l’URC-7781, suivez les étapes 1 à 6.
—> Si vous êtes déjà en mode utilisateur, vous devez exécuter les étapes suivantes
a et b, suivez les étapes 1 à 6.
a Appuyez et maintenez
MAGIC pendant environ 3 s. et…
apparaît sur l’écran.
b Appuyez deux fois sur ENTER...
apparaît sur l’écran.
AJOUTER APPAREIL
ENTER
ENTER
ENTER
x2
INSTALLATION
INITIALE
AJOUTER APPAREIL
ENTER
1
2
3
4
5
6
Page 68

WW W.O NEFO RALL.CO M 67
Configuration de l’URC-7781
L’URC-7781 affiche un code, par exemple T0556.
T = indicateur de type d'appareil
0556 = code à 4 chiffres
- Utilisez la touche LIGHT (ESC) pour revenir à l’écran
précédent.
- Appuyez et maintenez la touche LIGHT (ESC) pour revenir
au mode utilisateur.
- Utilisez la touche LIGHT (ESC) pour revenir à l’écran précédent.
- Appuyez et maintenez la touche LIGHT (ESC) pour sortir du mode de programmation
et pour revenir au mode utilisateur.
- Si la télécommande d’origine de votre appareil n’a pas de touche POWER, appuyez
sur PLAY au lieu de POWER lors de la configuration de votre appareil.
- N'oubliez pas sélectionner le mode de l’appareil avant d’actionner votre appareil.
Pour votre commodité, il est possible de modifier le libellé de l’appareil (maximum 4
caractères) voir page 75.
Libellé
d'appareil
TV
VCR
SAT
CBL
VAC
CD
PHO
MIS
HOM
AMP
RCV
CAS
LDP
DAT
DVD
Indicateur
de type
d'appareil
T
V
S
C
N
D
P
M
H
A
R
K
L
J
Y
Appareils correspondants
Téléviseur/à cristaux liquides/plasma/projecteur/
rétroprojecteur
Magnétoscope / Combiné TV/Magnétoscope /
Combiné DVD/Magnétoscope / Enregistreur vidéo
Récepteur satellite / Décodeur / DVB-S / DVB-T /
Freeview (R-U) / TNT(F) / Digitenne (NL) / SAT / HDD
Décodeur câble / Décodeur / DVB-C
Centres multimédia tels que les accessoires vidéo /
accessoires AV / sélecteurs AV
Lecteur de CD / CD-R / MD
É
lectrophone
Audio / Audio divers
Automatisationà domicile (par exemple rideaux commandés
par IR / commutateurs d'éclairagecommandés parIR,etc.)
Audio / Amplificateur / Système de haut-parleurs actifs
Audio / Récepteur audio / Tuner / Amplificateur /
Cinéma à domicile (DVD)
Lecteur de cassette (magnétophone)
Lecteur de disque laser / CD vidéo
Digital Audio Tape / DCC
Lecteur de DVD / DVD-R / Cinéma à domicile DVD /
Combi DVD / DVD / HDD
Page 69

68 WWW. O NEFOR ALL.COM
ENTER
TV
T0556
APP. À REMPLACER
PHO TV VCR
REMPLACER PAR
PHO TV VCR
INSTALLATION
INITIALE
AJOUTER APPAREIL
VOIR CODE
INSTALLATION
INITIALE
AJOUTER APPAREIL
REMPLACER
APPAREIL
Affichage du code courant
Résumé des codes
Remplacer un appareil
Lorsque votre URC-7781 est configurée, vous pouvez afficher votre CODE DE
CONFIGURATION pour toute référence future.
Exemple : pour afficher le code mémorisé pour votre téléviseur :
1 Appuyez et maintenez MAGIC
pendant environ 3 s. et…
apparaît sur l’écran.
2 Appuyez deux fois sur ENTER…
apparaît sur l’écran.
3 Appuyez deux fois sur la touche
FLÈCHE GAUCHE...
apparaît sur l’écran.
4 Appuyez sur ENTER pour afficher
le code courant de votre appareil.
Appuyez les touches fléchées
GAUCHE/DROITE pour afficher
les codes de vos autres appareils. Notez vos codes dans
les cases ci-dessous.
Pour qu'un appareil que vous n'utilisez plus ne soit plus programmé, il est possible de le
remplacer, par exemple si vous venez d'acheter un nouveau téléviseur et un lecteur/
enregistreur de DVD pour remplacer vos anciens téléviseur et magnétoscope, il n’est pas
nécessaire que vos anciens téléviseur et magnétoscope soient toujours programmés dans
votre URC-7781.
1 Appuyez et maintenez MAGIC
pendant environ 3 s. et…
apparaît sur l’écran.
2 Appuyez deux fois sur ENTER…
apparaît sur l’écran.
3 Appuyez sur la FLÈCHE DROITE…
apparaît sur l’écran.
4 Appuyez sur ENTER…
apparaît sur l’écran.
Sélectionnez l’"appareil que vous
souhaitez remplacer" avec les touches
fléchées gauche/droite.
5 Appuyez sur ENTER…
apparaît sur l’écran.
Sélectionnez L’appareil que vous souhaitez installer
avec les touches fléchées gauche/droite et confirmez en appuyant
sur ENTER. Vous verrez alors "PROGRAMMER CODE". Appuyez sur
ENTER.
Saisissez alors les codes correspondant au "type d’appareil" et à la "marque" de votre
appareil comme expliqué en page 66.
Appareil
Type Code
1. _____________
2. _____________
3. _____________
4. _____________
5. _____________
6. _____________
Device
Type Code
7. _____________
8. _____________
9. _____________
10. _____________
11. _____________
12. _____________
ENTER
ENTER
ENTER
ENTER
ENTER
x2
x2
x2
Page 70

WW W.O NEFORA LL.COM 69
CHANGER CODE APP.
DVD TV SAT
INSTALLATION
INITIALE
AJOUTER APPAREIL
CHANGER CODE
APPAREIL
Modification du code de l’appareil
L’exemple suivant explique comment remplacer l'ancien code de l’appareil par un
nouveau code d’appareil sans devoir AJOUTER un nouvel appareil.
Exemple : Vous venez d'acheter un nouveau téléviseur pour votre séjour. Ce téléviseur
peut ne pas utiliser le même code que le téléviseur actuel de votre séjour. Suivez simplement les étapes suivantes pour modifier le code d’appareil actuellement programmé.
Remarque : Lorsque vous changez le code d’appareil, tous les réglages de l’appareil
installé auparavant seront maintenus (Key Magic, apprentissage).
1 Appuyez et maintenez MAGIC
pendant environ 3 s. et…
apparaît sur l’écran.
2 Appuyez deux fois sur ENTER...
apparaît sur l’écran.
3 Appuyez deux fois sur la FLÈCHE DROITE...
apparaît sur l’écran.
4 Appuyez sur ENTER…
apparaît sur l’écran.
5 Sélectionnez l’appareil que vous souhaitez
configurer avec les touches des flèches
gauche/droite et confirmez en appuyant
sur ENTER.
…
apparaît sur l’écran. Appuyez sur
ENTER pour confirmer. Allez ensuite
en page 66 et suivez les instructions
à partir de l'étape 4.
ENTER
x2
ENTER
ENTER
PROGRAMMER
CODE
x2
TV
T0556
Page 71

TV
T0556
APP À DÉPLACER
DVD VCR SAT
DÉPLACER VERS
TV VCR DVD
70 WWW. O NEFOR ALL.COM
INSTALLATION
INITIALE
AJOUTER APPAREIL
DÉPLACER
APPAREIL
Déplacer l’appareil
Lorsque plusieurs appareils sont programmés, il est possible de déterminer l’ordre
d'apparition de leurs libellés.
Exemple : si vous avez programmé un téléviseur, un lecteur de DVD, un magnétoscope et
un récepteur satellite, la séquence d'affichage peut être TV, DVD, VCR, SAT.
Vous pouvez vouloir modifier l’ordre d'apparition en TV, VCR, DVD, SAT.
1 Appuyez et maintenez MAGIC
pendant environ 3 s. et…
apparaît sur l’écran.
2 Appuyez deux fois sur ENTER...
apparaît sur l’écran.
3 Appuyez trois fois sur la FLÈCHE DROITE...
apparaît sur l’écran.
4 Appuyez sur ENTER...
apparaît sur l’écran.
5 Sélectionnez l’appareil que vous souhaitez
déplacer avec les touches des flèches
gauche/droite et confirmez en appuyant sur ENTER.
…
6 apparaît sur l’écran.
Utilisez les touches fléchées gauche/droite
pour déplacer l’appareil correspondant
et pour confirmer appuyez sur ENTER.
La lumière rouge (LED sous la touche POWER) s’allumera deux fois et vous retournerez
à DÉPLACER APPAREIL.
ENTER
x2
ENTER
ENTER
ENTER
Supprimer un appareil
Pour supprimer un appareil donné, exécutez les étapes suivantes.
1 Appuyez et maintenez MAGIC
pendant environ 3 s. et…
apparaît sur l’écran.
2 Appuyez deux fois sur ENTER…
apparaît sur l’écran.
3 Appuyez une fois sur la FLÈCHE GAUCHE…
apparaît sur l’écran.
4 Appuyez sur ENTER…
apparaît sur l’écran.
5 Sélectionnez l’appareil que vous souhaitez
supprimer avec les touches des flèches
gauche/droite et confirmez en appuyant
sur ENTER.
La lumière rouge (LED sous la touche POWER) s’allumera deux fois et vous retournerez
à EFFACER APPAREIL.
Résultat : l’appareil sélectionné a été supprimé.
x3
INSTALLATION
INITIALE
AJOUTER APPAREIL
EFFACER APPAREIL
ENTER
x2
ENTER
ENTER
EFFACER APPAREIL
Page 72

WW W.O NEFORA LL.COM 71
INSTALLATION
INITIALE
INSTALLATION
COMPLÉMENTAIRE
APPR. EN COURS
TOUCHE D’ORIGINE
La fonction d’apprentissage
L’URC-7781 est fournie avec une bibliothèque complète de codes préprogrammés. Une
fois l’URC-7781 configurée pour votre appareil, vous pouvez constater qu’une ou
plusieurs touches de votre télécommande d’origine ne se trouvent pas sur le clavier de
l'URC-7781. Par souci de commodité, l’URC-7781 comprend une fonction d’apprentissage
spéciale qui vous permet de copier n’importe quelle fonction de votre télécommande
d’origine sur le clavier de l’URC-7781.
Avant de commencer :
- Assurez-vous que votre télécommande d’origine fonctionne correctement.
- Veillez à ce que ni votre URC-7781, ni votre télécommande d’origine, ne soient
pointées vers votre appareil.
Apprentissage
Exemple : pour copier la fonction "mono/stéréo" de la télécommande d’origine
de votre téléviseur sur la touche A de votre URC-7781.
1 Placez les deux télécommandes (l’URC-7781 et celle d’origine) sur une sur-
face plate. Veillez à ce que les côtés que vous dirigez normalement vers
votre appareil soient pointés l'un vers l'autre. Placez les télécommandes à
une distance de 2 à 5 centimètres.
2 Appuyez et maintenez MAGIC pendant
environ 3 s. et…
apparaît sur l’écran.
3 Appuyez sur la FLÈCHE DROITE…
apparaît sur l’écran.
4 Appuyez 4 fois sur ENTER...
apparaît sur l’écran. Utilisez les touches
fléchées pour faire défiler jusqu'au mode
d'appareil dans lequel vous voulez
placer la fonction apprise (par exemple TV).
5 Appuyez sur la touche (de
la télécommande
URC-7781) dans laquelle vous voulez
mémoriser la fonction apprise (exemple
: touche A). La DEL sous la touche POWER clignote rapidement
et… apparaît sur l’écran.
6 Appuyez sur la touche (de votre télécommande d’origine) que vous voulez copier
sur l’URC-7781. (Exemple : touche "mono/stéréo"). La lumière rouge (LED sous la
touche POWER) s’allumera deux fois pour confirmer que l’apprentissage de la fonction mono/stéréo sur la touche A a été réalisé avec succès.
NOTE: Si vous voulez copier d’autres fonctions dans le même mode
, répétez simplement
les étapes 5 et 6 en appuyant sur l'autre touche que vous voulez copier par
apprentissage.
NOTE: Si vous voulez copier d'autres fonctions dans un mode d’appareil différent,
sélectionnez dans l'étape 4 un mode d’appareil différent avec les touches FLÈCHES
gauche/droite et continuez avec les étapes 5 et 6.
NOTE: si l’affichage indique APPRENTISSAGE ÉCHOUÉ. Appuyez sur ENTER pour
redémarrer de "AJOUTER APPRENTISSAGE" et appuyez sur ENTER pour continuer
à l'étape 4.
NOTE: Si l’affichage indique MÉMOIRE PLEINE, vous devez attribuer une priorité aux
fonctions que vous voulez et supprimer les fonctions les moins importantes.
7 Appuyez une fois sur LIGHT (ESC) pour revenir à AJOUTER
APPRENTISSAGE....ou.... appuyez et maintenez LIGHT (ESC)
pour sortir du mode de programmation.
- Utilisez la touche LIGHT (ESC) pour revenir à l’écran
précédent.
- Appuyez et maintenez la touche LIGHT (ESC) pour revenir
au mode utilisateur.
ENTER
x4
CHOIX APP & TOUCHE
RCV TV DVD
Page 73

72 WW W.O NEFO RALL.COM
La fonction d’apprentissage
- L’apprentissage dépend du mode. Pour accéder à votre fonction apprise, vous devez
atteindre d'abord l’appareil approprié.
- Une fonction apprise peut être affectée à n’importe quelle touche sauf ENTER, LIGHT
(ESC), les touches FLÈCHE gauche/droite et la touche MAGIC.
- Si aucune touche est enfoncée, l’URC-7781 reste 30 secondes en mode de
programmation.
- Après l'étape 5, vous avez 15 secondes pour appuyer sur la touche correspondante
de votre télécommande d'origine.
- Si vous apprenez une fonction sur une autre touche que les "touches
personnalisées", la fonction initiale de l'URC-7781 est automatiquement décalée.
Vous pouvez appuyer sur MAGIC puis sur la touche pour y accéder (ceci exclut
POWER, les touches des chaînes, de volume et les chiffres, appuyez deux fois sur
MAGIC et sur le chiffre pour y accéder).
- Si une fonction décalée par apprentissage est placée sur les touches Power, de
chaînes ou de volume, la Sleeptimer et la couleur/luminosité sera sacrifiée.
- La fonction d’apprentissage dépend du mode. Par conséquent, vous pouvez
mémoriser sur la même touche une fonction apprise par mode.
- L’URC-7781 peut apprendre environ 50 fonctions (selon la télécommande d’origine).
- Vous pouvez remplacer une fonction apprise en l'écrasant par une autre fonction
apprise ou en utilisant "Effacer apprent. d'une touche", "Effacer apprent. d'un
appareil", "Effacer apprent. de tous les app.".
- L’apprentissage ne doit pas être fait à la lumière directe du soleil ou sous un
éclairage incandescent.
- Assurez-vous d'utiliser des piles neuves avant de suivre les instructions
d'apprentissage.
- Lors du changement de piles, vos fonctions apprises sont conservées.
- Il n’est pas possible de programmer des fonctions par apprentissage en mode Home
Theatre. Cependant, si une touche a été programmée dans le mode d’origine de l’appareil avec l’apprentissage, cette fonction sera reportée dans le mode Home Theatre.
Apprentissage décalé
Vous pouvez également apprendre une fonction sur une touche de l’URC-7781 sans
sacrifier sa fonction d’origine. Les "touches personnalisées" sont un emplacement idéal
pour ceci. Une fonction d'apprentissage décalé peut également être affectée à
pratiquement n’importe quelle autre touche à part les suivantes : touche MAGIC, FLÈCHE
gauche/droite, Enter et LIGHT (ESC). Pour installer une fonction d'apprentissage décalé,
suivez simplement les étapes 1 à 7 de la page précédente. Pendant l'étape 5, appuyez
une fois sur MAGIC avant d'appuyer sur la touche à laquelle vous affectez la fonction.
Pour accéder à la fonction décalée, appuyez sur MAGIC puis sur la touche qui a reçu
l'apprentissage. Pour accéder à la fonction décalée sur une touche de chiffre, appuyez
deux fois sur MAGIC puis sur le chiffre correspondant.
Page 74
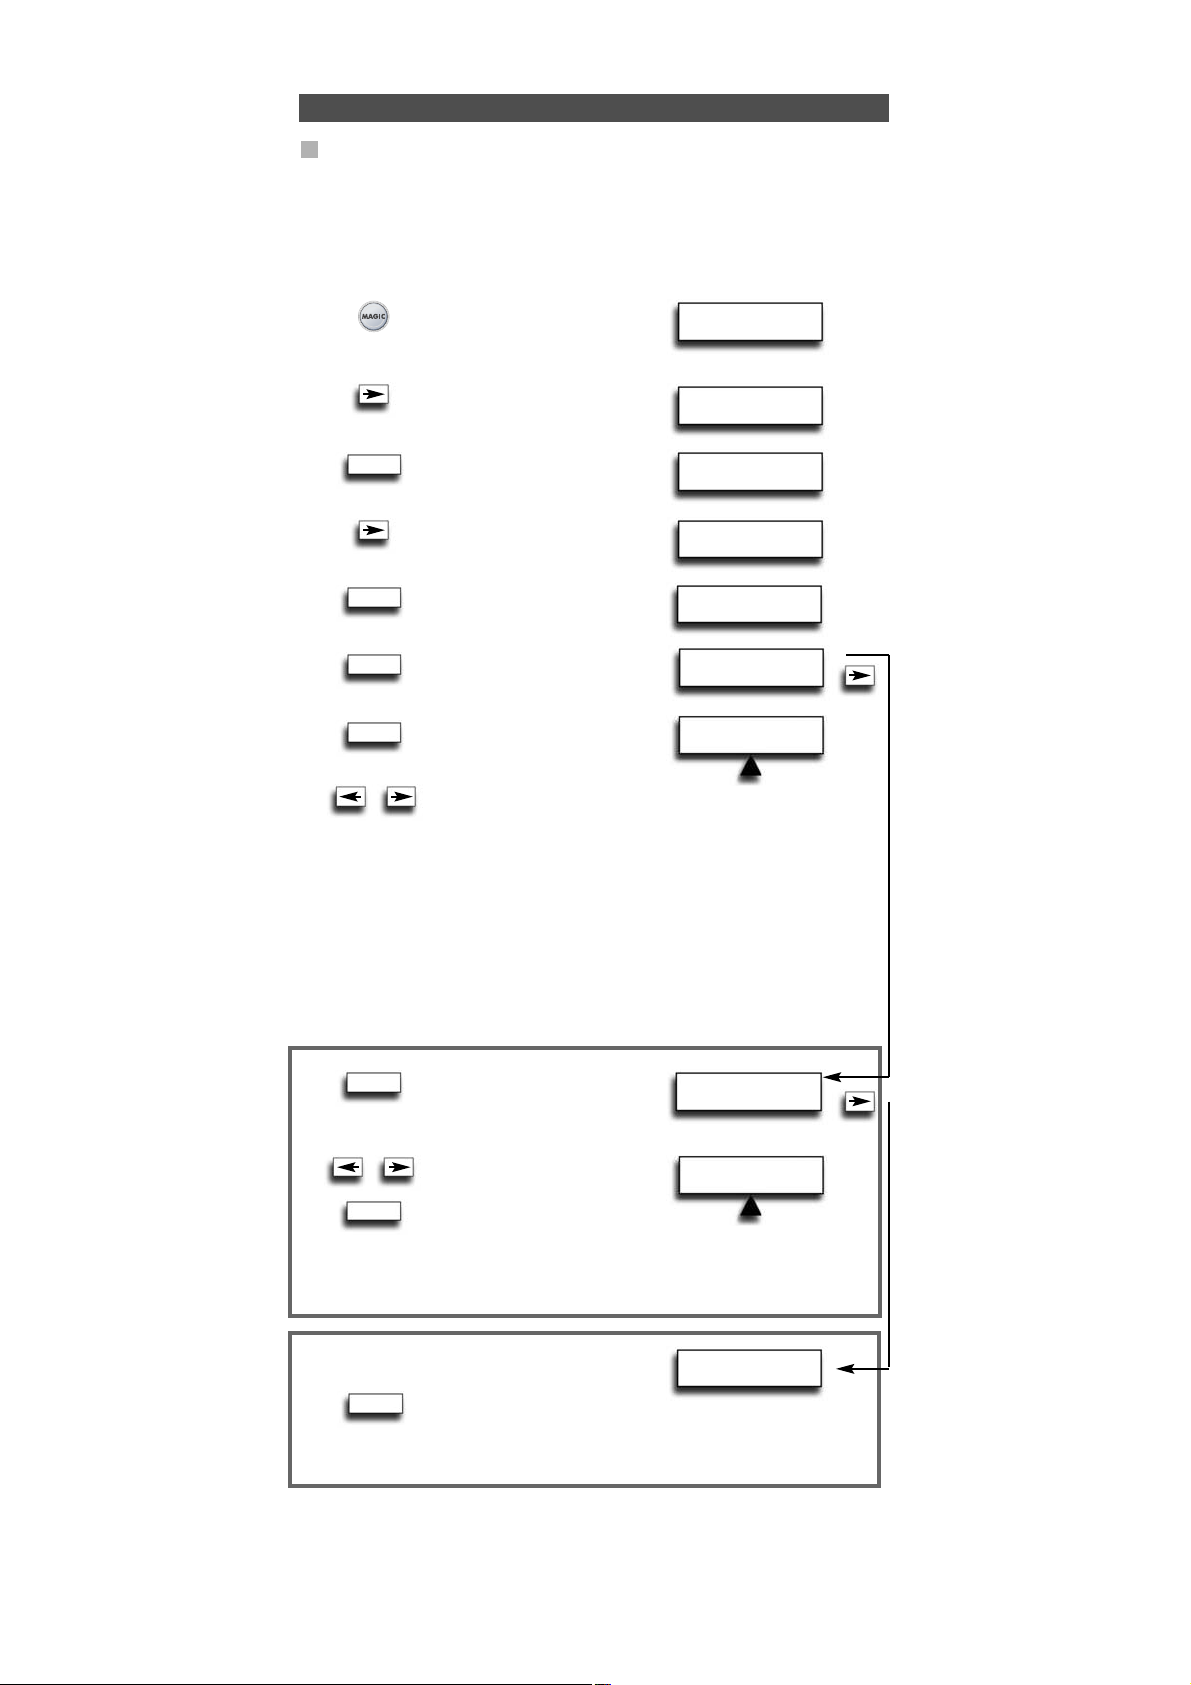
EFFACER APPRENT.
DE TOUS LES APP.
CHOISIR APPAREIL
RCV TV
CHOIX APP. & TOUCHE
RCV TV
WW W.O NEFORA LL.COM
73
La fonction d’apprentissage
Supprimer un apprentissage
Les possibilités sont.....
- supprimer une fonction apprise sur une touche donnée dans un mode d’appareilspécifique.
- supprimer toutes les fonctions apprises dans un mode donné.
- supprimer toutes les fonctions apprises dans tous les modes d'appareils.
Exemple: pour effacer la fonction mono/stereo de la touche A key en mode TV:
1 Appuyez et maintenez MAGIC
pendant environ 3 s. et…
apparaît sur l’écran.
2 Appuyez sur la FLÈCHE DROITE…
apparaît sur l’écran.
3 Appuyez deux fois sur ENTER
apparaît sur l’écran.
4 Appuyez sur la FLÈCHE DROITE…
apparaît sur l’écran.
5 Appuyez sur ENTER…
apparaît sur l’écran.
6 Appuyez sur ENTER…
apparaît sur l’écran.
7 Press ENTER...
will appear on the screen.
8 Sélectionnez le mode d’appareil correspondant (exemple mode TV)
dans lequel vous voulez supprimer la fonction apprise avec les
touches FLÈCHE gauche/droite et appuyez sur la touche * que
vous voulez
supprimer (exemple : touche A). La DEL clignote deux fois et
l’écran revient à "EFFACER APPRENTISAGE".
9 Si vous souhaitez supprimer une autre touche, répétez les étapes 6 à 8.
Résultat: la fonction d’origine de la touche A en mode sera présante.
* Pour supprimer un fonction d'apprentissage décalée, appuyez sur MAGIC avant
d'appuyer sur la touche apprise à supprimer.
6 Vous verrez…
Appuyez sur ENTER.
7 Sélectionnez le mode
d’appareil correspondant
dans lequel vous voulez
supprimer toutes les fonctions
apprises avec les touches FLÈCHE gauche/droite et appuyez
sur ENTER. La DEL sous la touche POWER s'allume deux
fois et l’écran revient à "EFFACER APPRENTISSAGE". Toutes
les fonctions apprises sont à présent effacées du mode d’appareil
sélectionné.
6 Vous verrez…
7 Appuyez sur ENTER. La DEL sous la touche POWER s'allume deux
fois et l’écran revient à "EFFACER APPRENTISSAGE". Toutes
les fonctions apprises sont à présent effacées de tous les modes
d’appareils.
- Utilisez la touche LIGHT (ESC) pour revenir à l’écran précédent.
- Appuyez et maintenez la touche LIGHT (ESC) pour revenir au mode
utilisateur.
INSTALLATION
INITIALE
INSTALLATION
COMPLÉMENTAIRE
AJOUTER
FONCTION
EFFACER
FONCTION
EFFACER
APPRENTISSAGE
EFFACER APPRENT.
D’UNE TOUCHE
EFFACER APPRENT.
D’UN APPAREIL
ENTER
ENTER
ENTER
ENTER
ENTER
ENTER
x2
ENTER
Page 75

74 WWW. O NEFOR ALL.COM
Réinitialisation du fonctionnement
Fonctions complémentaires
La réinitialisation du fonctionnement efface toutes les fonctions apprises de tous les
modes et certaines autres fonctions programmées telles que la langue, le verrouillage du
volume, Key Magic, la macro programmée, la macro de touche, le Home Theatre et les
libellés des appareils.
1 Appuyez et maintenez MAGIC
pendant environ 3 s. et…
apparaît sur l’écran.
2 Appuyez sur la FLÈCHE DROITE…
apparaît sur l’écran.
3 Appuyez une fois sur ENTER…
apparaît sur l’écran.
4 Appuyez sur la FLÈCHE GAUCHE…
apparaît sur l’écran.
5 Appuyez sur ENTER…
apparaît sur l’écran.
6 Appuyez sur ENTER.
La DEL sous la touche POWER
s'allume 4 fois et …
apparaît sur l’écran.
Tout vos appareils sont toujours configurés, mais toutes les fonctionnalités telles que
l'apprentissage, la langue, le verrouillage du volume, la Key Magic, Macro,
Home Theatre et le libellé d’appareil ont été réinitialisées à leurs valeurs par défaut ou
effacées. Pour n'efffacer que l'apprentissage et Key Magic, utilisez la fonctionnalité
"EFFACER APPR.&KEYMAGIC" décrite en page 71 et 85.
INSTALLATION
INITIALE
INSTALLATION
COMPLÉMENTAIRE
FONCTION
REMISE À ZÉRO
REMISE À ZÉRO
UTILISATEUR
REMISE À ZÉRO
ENTER
ENTER
ENTER
Selon les fonctions de votre télécommande d’origine, l’URC-7781 peut actionner
les fonctions suivantes de votre téléviseur et la veille pour les appareils qui ont cette
fonction sur leur télécommande d'origine.
Couleur (+) = appuyez et relâchez MAGIC puis maintenez Volume (+)
Couleur (-) = appuyez et relâchez MAGIC puis maintenez Volume (-)
Luminosité (+) = appuyez et relâchez MAGIC puis maintenez Channel (+)
Luminosité (-) = appuyez et relâchez MAGIC puis maintenez Channel (-)
Veille activée / désactivée = appuyez plusieurs fois sur MAGIC puis POWER jusqu’à ce
que le minuteur de veille atteigne le nombre de minutes
souhaité (ou disparaît de votre écran d’appareil).
Remarque : selon votre télécommande d’origine, vous pouvez actionner cette fonction
d’une manière différente.
Couleur, luminosité et veille
Page 76

CHOISIR APPAREIL
RCV TV
INSTALLATION
COMPLÉMENTAIRE
NOUVEAU NOM
RCV TV
CHOISIR APPAREIL
RCV TV
WW W.O NEFORA LL.COM
75
Fonctions complémentaires
Modification du libellé de l’appareil
Il est possible d'affecter un libellé aux appareils que vous avez configuré avec un maximum de 4 caractères (ou de chiffres) par libellé.
1 Appuyez et maintenez MAGIC
pendant environ 3 s. et…
apparaît sur l’écran.
2 Appuyez sur la FLÈCHE DROITE…
apparaît sur l’écran.
3 Appuyez sur ENTER…
apparaît sur l’écran.
4 Appuyez deux fois sur
la FLÈCHE GAUCHE…
apparaît sur l’écran.
5 Appuyez sur ENTER…
apparaît sur l’écran.
6 Appuyez sur ENTER.
Sélectionnez le mode
d’apparel correspondant dont
vous voulez modifier le libellé
avec la FLÈCHE gauche/droite
et confirmez en appuyant sur ENTER.
7 Vous verrez…
Le premier caractère du libellé
d’appareil sélectionné se met à
clignoter. Utilisez les touches
FLÈCHE GAUCHE/DROITE pour modifier le libellé à un maximum
de 4 caractères et appuyez sur ENTER pour mémoriser chaque
caractère sélectionné. Après la saisie du quatrième caractère,
l’affichage revient à "CHANGER LE NOM DE L’APPAREIL".
5 Vous verrez…
Appuyez sur ENTER.
6 Sélectionnez le libellé d’appareil
correspondant que vous
souhaitez réinitialiser en
utilisant la FLÈCHE gauche/droite
et appuyez sur ENTER. Vous voyez
le libellé d’appareil sélectionné revenir au libellé par défaut.
La DEL sous la touche POWER s'allume deux fois et l’écran
revient à "ANNULER LE NOM DE L’APPAREIL".
5 Vous verrez…
6 Appuyez sur ENTER. La DEL sous la touche POWER s'allume deux
fois. Tout des libellés d’appareil sont à présent réinitialisés à leur
libellé d’origine et l’affichage revient à "NOM DE L’APPAREIL".
INSTALLATION
INITIALE
FONCTION
NOM DE
L’APPAREIL
CHANGER LE NOM
DE L’APPAREIL
ANNULER LE NOM
DE L’APPAREIL
ANNULER TOUS LES
NOMS D’APPAREILS
_ p. ex. : TV 1 (espace blanc entre deux caractères/chiffres)
< Pour revenir au caractère précédentet réinitialiser le caractère précédent à A.
^ Pour mémoriser un libellé de moins de 4 caractères, par exemple si vous
voulez nommer l’appareil "T".
. (point) p. ex. : TV.1
Il est également possible de choisir l'un des symboles :
ENTER
ENTER
x2
ENTER
ENTER
ENTER
ENTER
ENTER
ENTER
Page 77

VERROUILLER
LE VOLUME
VERROUILLER
LE VOLUME
76 WWW. O NEFOR ALL.COM
RCV TV VCR
DÉ
DÉVERROU. VOLUME
RCV TV VCR
Fonctions complémentaires
Définition du verrouillage de volume
Exemple: il est possible de verrouiller le volume d'un mode donné, par exemple TV.
Ainsi, quel que soit le mode actif, les touches Volume +/- et Mute envoient toujours le
volume du mode TV.
1 Appuyez et maintenez MAGIC
pendant environ 3 s. et…
apparaît sur l’écran.
2 Appuyez sur ENTER…
apparaît sur l’écran.
3 Appuyez deux fois sur la FLÈCHE DROITE…
apparaît sur l’écran.
4 Appuyez deux fois sur ENTER…
apparaît sur l’écran. Utilisez les touches
fléchées gauche/droite pour sélectionner
l’appareil (par exemple TV) sur lequel
vous voulez verrouiller le volume.
5 Appuyez sur ENTER pour sélectionner l’appareil affiché comme SRC
(source). La DEL sous la touche POWER s'allume deux fois et l’écran
revient à "VERROUILLER LE VOLUME".
Résultat: dans l’exemple ci-dessus, le mode TV est le volume SRC (Source) pour tous les
autres appareils installés. Dans n’importe quel mode, une pression sur Volume
+/- ou Mute donne les fonctions de volume du mode TV.
Supprimer l’appareil du verrouillage de volume
Exemple: si vous le souhaitez, vous pouvez supprimer un appareil du verrouillage du
volume, afin qu’il n’envoie plus le volume SRC mais son propre volume.
1 Appuyez et maintenez MAGIC
pendant environ 3 s. et…
apparaît sur l’écran.
2 Appuyez sur ENTER…
apparaît sur l’écran.
3 Appuyez deux fois sur la FLÈCHE DROITE…
apparaît sur l’écran.
4 Appuyez sur ENTER…
apparaît sur l’écran.
5 Appuyez sur la FLÈCHE DROITE…
apparaît sur l’écran.
6 Appuyez sur ENTER…
apparaît sur l’écran. Utilisez les touches
FLÈCHES gauche/droite pour sélectionner
l’appareil (par exemple TV) que vous voulez
retirer du verrouillage du volume.
7 Appuyez sur ENTER pour supprimer l’appareil affiché du
verrouillage de volume. La DEL sous la touche POWER s'allume
quatre fois. L’affichage revient à "VERROUILLER LE VOLUME".
Résultat: l’appareil que vous avez sélectionné envoie à présent son propre vol +/-, mute
(au lieu du volume de l’appareil SRC).
INSTALLATION
INITIALE
INSTALLATION
INITIALE
APPAREIL
INSTALLER LE
VERROU. DU VOLUME
DÉVERROUILLER LE
VOLUME D’UN APP
APPAREIL
Verrouillage du volume
V: Verrouiller,
DÉ: Déverrouiller,
SRC: Source
ENTER
ENTER
x2
ENTER
ENTER
ENTER
ENTER
ENTER
x2
x2
Page 78

VERROUILLER
LE VOLUME
WW W.O NEFORA LL.COM
77
VERROUILLER VOL.
RCV TV VCR
INSTALLATION
INITIALE
APPAREIL
VERROUILLER
LE VOLUME
INSTALLER LE
VERROU. DU VOLUME
VERROUILLER LE
VOLUME D’UN APP.
Fonctions complémentaires
Ajouter un appareil au verrouillage du volume
Exemple : il est possible d’ajouter un appareil au verrouillage du volume (SRC) installé.
Vous pouvez vouloir le faire pour des appareils que vous avez ajoutés après avoir installé
le verrouillage du volume, ou si vous avez retiré un appareil du verrouillage du volume.
1 Appuyez et maintenez MAGIC
pendant environ 3 s. et…
apparaît sur l’écran.
2 Appuyez sur ENTER…
apparaît sur l’écran.
3 Appuyez deux fois sur la FLÈCHE DROITE…
apparaît sur l’écran.
4 Appuyez sur ENTER…
apparaît sur l’écran.
5 Appuyez deux fois sur la FLÈCHE DROITE…
apparaît sur l’écran.
6 Appuyez sur ENTER…
apparaît sur l’écran.
Sélectionnez l’appareil (par exemple TV) que vous voulez ajouter au verrouillage du
volume avec les touches FLÈCHE gauche/droite.
7 Appuyez sur ENTER pour ajouter l’appareil affiché au verrouillage
du volume. La DEL sous la touche POWER s'allume deux fois et
l’écran revient à VERROUILLER LE VOLUME.
Résultat: l’appareil sélectionné envoie présent le vol +/-, mute de l’appareil SRC.
Réinitialiser toutes les commandes de volume
Exemple: vous pouvez réinitialiser toutes les commandes de volume à leurs réglages
d’origine, afin que tous les appareils envoient à nouveau leur propre volume.
1 Appuyez et maintenez MAGIC
pendant environ 3 s. et…
apparaît sur l’écran.
2 Appuyez sur ENTER…
apparaît sur l’écran.
3 Appuyez deux fois sur la FLÈCHE DROITE…
apparaît sur l’écran.
4 Appuyez sur ENTER…
apparaît sur l’écran.
5 Appuyez sur la FLÈCHE GAUCHE…
apparaît sur l’écran.
6 Appuyez sur ENTER pour réinitialiser toutes les commandes
de volume. La DEL sous la touche POWER s'allume quatre fois
et l’écran revient à VERROUILLER LE VOLUME.
Résultat: tous les appareils envoient maintenant à nouveau leur propre vol +/-, mute.
INSTALLATION
INITIALE
APPAREIL
INSTALLER LE
VERROU. DU VOLUME
RÉINITIALISER
TOUS LES VOLUMES
ENTER
ENTER
ENTER
ENTER
ENTER
ENTER
ENTER
x2
x2
x2
Page 79

MACRO TEMPORELLE
HEBDOMADAIRE
78 WWW. O NEFOR ALL.COM
MACRO TEMPORELLE
QUOTIDIENNE
PROG SÉQ & ENTER
TV VCR RCV
CHOIX JOUR MACRO
MAR MER JEU
CHOIX HEURE MAC.
20:45
INSTALLATION
INITIALE
INSTALLATION
COMPLÉMENTAIRE
FONCTION
MACRO
AJOUTER
MACRO TEMPORELLE
MACRO TEMPORELLE
UNIQUE
Fonctions complémentaires
Ajouter une macro programmée
La fonction Macro vous permet d'enregistrer les frappes des modes d’appareil que vous
utilisez sur la télécommande en mode utilisateur.
Vous pouvez programmer 3 types de macros programmées :
- macro programmée une fois
- macro programmée tous les jours
- macro programmée toutes les semaines
Exemple: pour ENREGISTRER un match de football avec l’URC-7781 et votre magnétoscope.
1 Appuyez et maintenez MAGIC
pendant environ 3 s. et…
apparaît sur l’écran.
2 Appuyez sur la FLÈCHE DROITE…
apparaît sur l’écran.
3 Appuyez sur ENTER…
apparaît sur l’écran.
4 Appuyez sur la FLÈCHE DROITE…
apparaît sur l’écran.
5 Appuyez deux fois sur ENTER…
apparaît sur l’écran.
6 Appuyez sur ENTER…
apparaît sur l’écran.
Il est aussi possible programmer un Macro Quotidienne ou
Hebdomadaire.
7 Appuyez sur ENTER…
apparaît sur l’écran.
Sélectionnez le jour d'exécution
de la macro avec les touches fléchées.
8 Appuyez sur ENTER…
apparaît sur l’écran.
Réglez l'heure à laquelle vous voulez exécuter la macro (pour
démarrer l’ENREGISTREMENT) avec les touches numériques.
9 Appuyez sur ENTER…
apparaît sur l’écran. Vous devez
maintenant mémoriser les frappes
des touches dans les modes que vous
utilisez pour enregistrer manuellement sur le magnétoscope.
Sélectionnez la touche d’appareil correspondante (avec les touches
fléchées). Dans notre exemple, allez jusqu'au mode VCR.
10 Appuyez sur la ou les touches correspondantes à envoyer dans les
macros programmées (dans notre exemple, appuyez deux fois sur
RECORD).
11 Appuyez sur ENTER pour
enregistrer la macro…
apparaît sur l’écran.
Résultat: vous avez programmé une macro pour démarrer l’enregistrement aujourd’hui
mercredi à 20h45. Vous devez à présent programmer une autre macro mercredi pour
arrêter l’enregistrement, par exemple à 22h35, le signal que l’URC-7781 enverra à votre
magnétoscope à 22h35 sera donc ARRÊT.
Remarque : veillez à placer l’URC-7781 dirigée vers le magnétoscope et à ce que la
portée soit dégagée.
Il est également possible de régler la macro
quotidiennement…
Il est également possible de régler la macro toutes
les semaines…
Macros (séquence de commandes)
AJOUTER
MACRO TEMPORELLE
ENTER
ENTER
ENTER
ENTER
ENTER
ENTER
ENTER
x2
x2
Page 80

WW W.O NEFORA LL.COM 79
INSTALLATION
INITIALE
INSTALLATION
COMPLÉMENTAIRE
FONCTION
MACRO
AJOUTER
MACRO
EFFACER
MACRO
EFF. MACRO TEMPOR.
U MER 20:45
EFFACER
MACRO TEMPORELLE
EFFACER
MACRO TEMPORELLE
EFF. MACRO TEMPOR.
U MER 22:35
EFFACER
MACRO TEMPORELLE
Exemple : pour effacer la macro programmée en page 78 :
1 Appuyez et maintenez MAGIC
pendant environ 3 s. et…
apparaît sur l’écran.
2 Appuyez sur la FLÈCHE DROITE…
apparaît sur l’écran.
3 Appuyez sur ENTER…
apparaît sur l’écran.
4 Appuyez sur la FLÈCHE DROITE…
apparaît sur l’écran.
5 Appuyez sur ENTER…
apparaît sur l’écran.
6 Appuyez sur la FLÈCHE DROITE…
apparaît sur l’écran.
7 Appuyez sur ENTER…
apparaît sur l’écran.
8 Appuyez sur ENTER…
Vous voyez maintenant la macro
programmée que vous avez programmée
affichée sur l’écran. À côté de U, Q, ou H
vous voyez le jour de la macro (pour une macro programmée une
fois ou hebdomadaire). L'heure de la macro est affichée à côté.
Vous pouvez utiliser les touches fléchées GAUCHE/DROITE pour
parcourir les macros programmées.
U : Unique
Q : Quotidienne
H : Hebdomadaire
9 Appuyez sur ENTER pour supprimer
la macro programmée affichée.
La DEL sous la touche POWER s'allume
deux fois et … apparaît sur l’écran.
10 Si vous voulez supprimer une autre
macro programmée, appuyez sur ENTER…
apparaît sur l’écran.
11 Appuyez sur ENTER pour supprimer
cette macro programmée. La DEL sous
la touche POWER s'allume deux fois et …
apparaît sur l’écran.
Résultat : les macros programmées de la page 78 sont effacées.
Remarques :
- Le nombre de frappes dans une macro programmée et le nombre de macros
programmées sont limités par l’espace mémoire disponible.
- La macro programmée une fois est seulement exécutée une fois. Après son exécution, cette macro est automatiquement effacée de la mémoire de la télécommande.
- Cette macro programmée quotidiennement est exécutée chaque jour à la même
heure jusqu’à sa suppression de la mémoire de la télécommande.
- Une macro programmée de façon hebdomadaire sera exécutée chaque semaine
le même jour et la même heure jusqu’à ce qu'elle soit effacée de la mémoire.
- Pour indiquer qu’une macro programmée a été programmée, l’affichage montre
une * à gauche de l'heure en mode utilisateur.
- Si vous incluez la fonction d’enregistrement dans la macro programmée, vous
devez appuyer deux fois sur la touche d’enregistrement.
Effacer une macro programmée
ENTER
ENTER
ENTER
ENTER
ENTER
ENTER
ENTER
Fonctions complémentaires
Macros (séquence de commandes)
Page 81
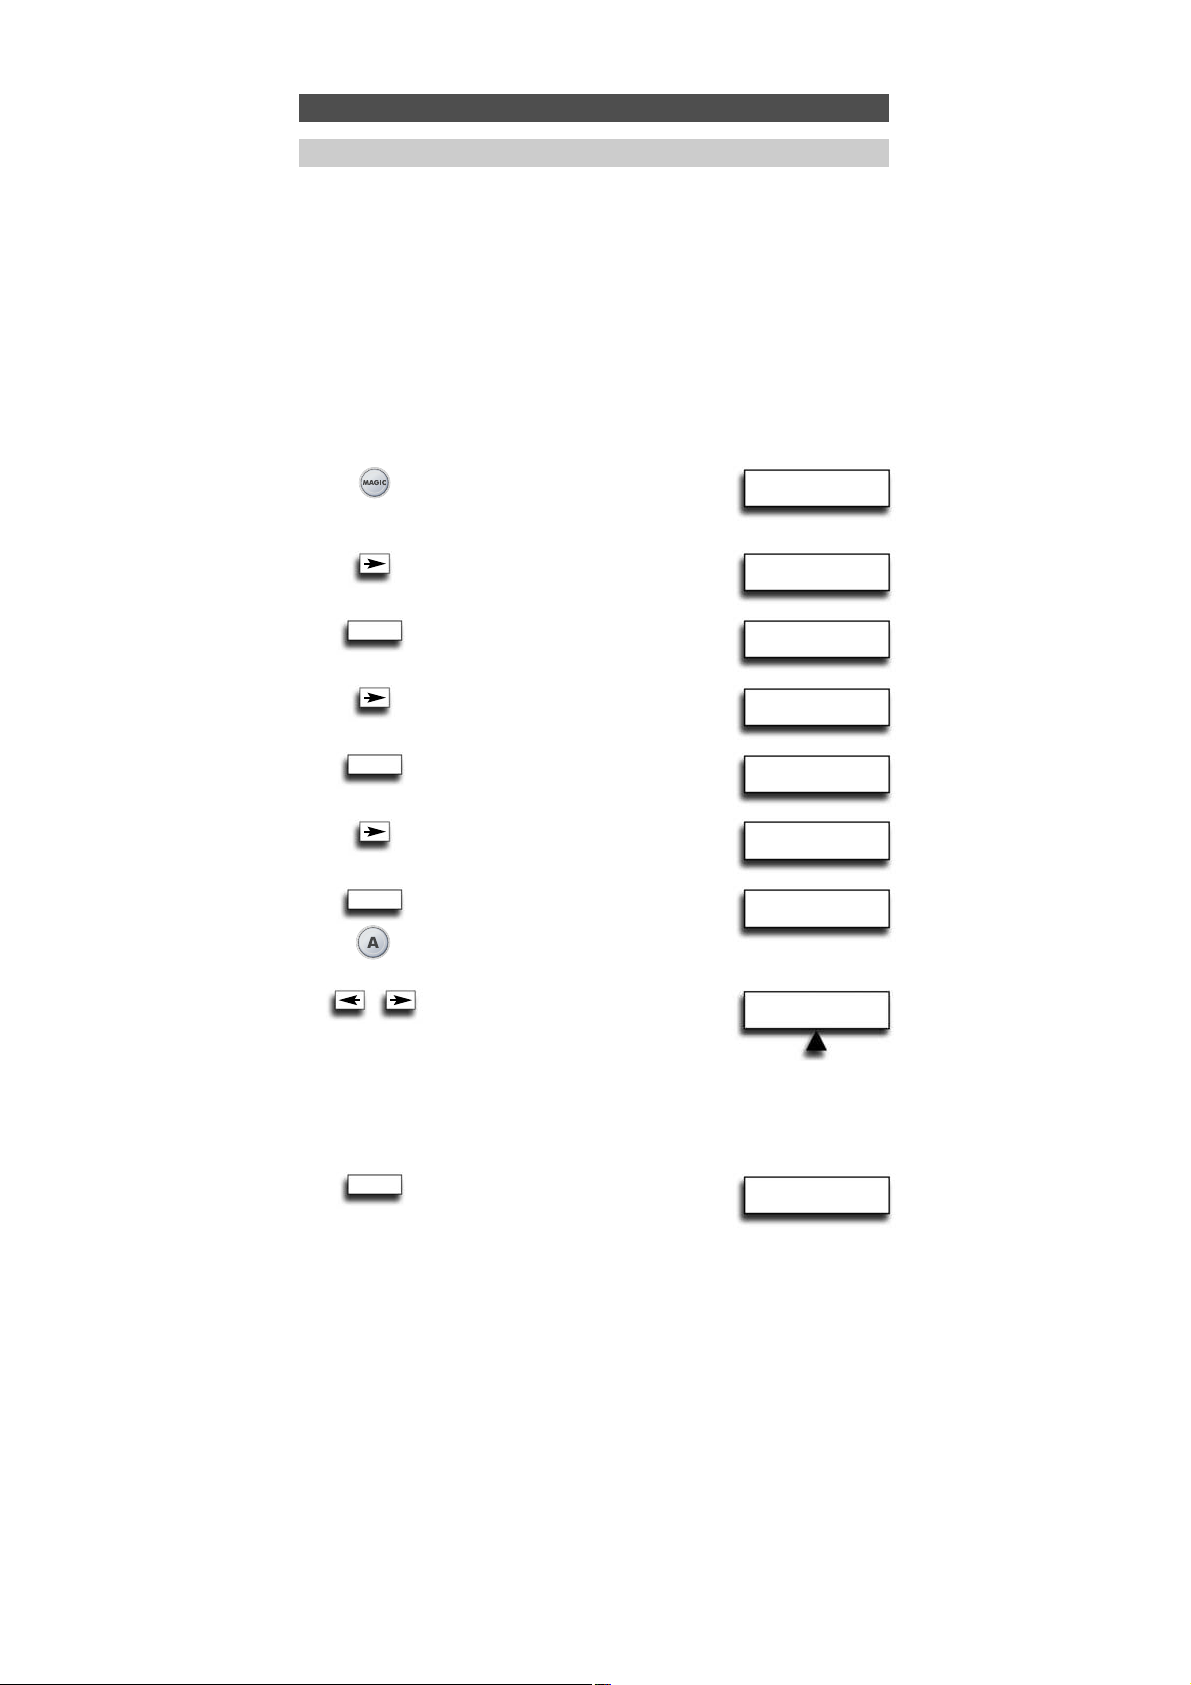
80 WWW. O NEFOR ALL.COM
INSTALLATION
INITIALE
INSTALLATION
COMPLÉMENTAIRE
FONCTION
MACRO
AJOUTER
MACRO TEMPORELLE
APPUYER
TOUCHE MACRO
AJOUTER
TOUCHE MACRO
AJOUTER
TOUCHE MACRO
Ajouter une macro de touche
Vous pouvez programmer votre URC-7781 pour émettre une séquence de commandes en
appuyant sur un seul bouton. Vous pouvez par exemple vouloir éteindre vos téléviseur,
magnétoscope et récepteur satellite en appuyent sur une seule touche. Toute séquence
de commandes que vous utilisez régulièrement peut être réduite à une pression sur une
touche pour votre commodité. Une macro de touche peut contenir jusqu’à 15 frappes
dans la séquence. Nous recommandons de programmer une macro sur l'une des touches
personnalisées (A, B, C, D) car la macro écrase la fonction d’origine de la touche. La fonction d’origine de la touche sera repoussée au niveau décalé et ne sera disponible qu'en
appuyant sur MAGIC et la touche correspondante.
Exemple : pour configurer la macro afin d'éteindre votre téléviseur, votre
magnétoscope et votre récepteur satellite avec la touche marquée A de votre
URC-7781 :
1 Appuyez et maintenez MAGIC
pendant environ 3 s. et…
apparaît sur l’écran.
2 Appuyez sur la FLÈCHE DROITE…
apparaît sur l’écran.
3 Appuyez sur ENTER…
apparaît sur l’écran.
4 Appuyez sur la FLÈCHE DROITE…
apparaît sur l’écran.
5 Appuyez deux fois sur ENTER…
apparaît sur l’écran.
6 Appuyez sur la FLÈCHE DROITE…
apparaît sur l’écran.
7 Appuyez sur ENTER…
apparaît sur l’écran. Appuyez ensuite sur
la touche à laquelle vous voulez affecter
la macro (par exemple la touche A).
8 Maintenant...
apparaît sur l’écran. Appuyez maintenant
sur les touches des modes avec les touches
FLÈCHE gauche/droite comme vous
le feriez pour éteinde manuellement vos
téléviseur, magnétoscope et récepteur satellite.
Séletionnez le mode TV avec la FLÈCHE Gauche/Droite, appuyez
ensuite sur POWER, puis sélectionnez VCR, appuyez sur POWER,
appuyez sur SAT et sur POWER.
9 Appuyez sur ENTER pour enregistrer
la macro. La DEL sous la touche POWER
s'allume deux fois. Appuyez et maintenez
la touche LIGHT (ESC) pour revenir au mode utilisateur.
Résultat: quand vous appuyez sur la touche A, l’URC-7781 éteint vos téléviseur,
magnétoscope et récepteur satellite.
Fonctions complémentaires
Macro (séquence de commandes)
ENTER
ENTER
ENTER
ENTER
x2
PROG SÉQ & ENTER
VCR TV SAT
Page 82

WW W.O NEFORA LL.COM 81
INSTALLATION
INITIALE
INSTALLATION
COMPLÉMENTAIRE
FONCTION
MACRO
AJOUTER
MACRO
EFFACER
MACRO TEMPORELLE
EFFACER
TOUCHE MACRO
APPUYER
TOUCHE MACRO
EFFACER
MACRO
Macro décalée
Il est également possible de programmer une Macro décalée sur n’importe quelle
touche, excepté les touches suivantes :
MAGIC, LIGHT (ESC), FLÈCHE GAUCHE, FLÈCHE DROITE, ENTER et les touches
numériques. Si par exemple, vous voulez programmer une Macro décalée sur la
touche MUTE, appuyez simplement sur MAGIC et Mute dans l'étape 7 de la page 80.
REMARQUES :
- Chaque TOUCHE MACRO peut contenir au maximum 15 pressions de touches.
- Assurez-vous de programmer une macro sur une touche disponible que vous n’utilisez dans aucun mode.
- Si vous programmez une macro sur une touche donnée, la séquence fonctionne quel
que soit le mode utilisé.
- Pour éviter un enregistrement accidentel avec l’URC-7781, vous devez appuyer deux
fois sur la touche Record pour démarrer un enregistrement. Pour cette raison, nous ne
recommandons pas d’affecter une Macro ou une Macro décalée à la touche Record.
- Si vous devez maintenir une touche enfoncée pendant plusieur secondes sur
la télécommande d'origine pour obtenir une fonction, celle-ci peut ne pas
fonctionner dans une macro de votre télécommande URC-7781.
- Si vous programmez une macro sur une touche, la fonction d’origine sera décalée
(à l’exclusion des touches POWER, CH +/- et VOL+/-). Appuyez sur MAGIC puis sur la
touche pour y accéder. Si vous placez une Macro décalée sur une touche numérique,
vous accédez à la fonction d’origine en appuyant deux fois sur MAGIC puis sur la
touche numérique.
- Si une Macro décalée est placée sur les touches Power, Channel ou Volume, la
Sleeptimer et la couleur/luminosité seront sacrifiées.
- Vous ne pouvez pas définir la macro sur les touches FLÈCHE Gauche/Droite, ENTER,
MAGIC et LIGHT (ESC).
- Si vous incluez la fonction d’enregistrement dans une macro de touche, vous devez
appuyer deux fois sur la touche d’enregistrement.
Effacer une macro de touche
Exemple : pour supprimer la macro de touche A de la page 80.
1 Appuyez et maintenez MAGIC
pendant environ 3 s. et…
apparaît sur l’écran.
2 Appuyez sur la FLÈCHE DROITE…
apparaît sur l’écran.
3 Appuyez sur ENTER…
apparaît sur l’écran.
4 Appuyez sur la FLÈCHE DROITE…
apparaît sur l’écran.
5 Appuyez sur ENTER…
apparaît sur l’écran.
6 Appuyez sur la FLÈCHE DROITE…
apparaît sur l’écran.
7 Appuyez sur ENTER…
apparaît sur l’écran.
8 Appuyez sur la FLÈCHE DROITE…
apparaît sur l’écran.
9 Appuyez sur ENTER…
apparaît sur l’écran.
10 Appuyez sur la touche A (correspondant à la macro de touche que
vous voulez effacer). La DEL sous la touche POWER s'allume deux
fois. Vous voyez à nouveau "EFFACER TOUCHE MACRO" sur l’écran.
Résultat: La macro de la touche "A" (en page 80) est effacée.
Fonctions complémentaires
Macro (séquence de commandes)
ENTER
ENTER
ENTER
ENTER
Page 83

82 WWW. O NEFOR ALL.COM
HT CHAîNE
DVD HTNA RCV
HT CHIFFRES
DVD HTNA RCV
HT VEILLE
DVD HTNA RCV
INSTALLATION
INITIALE
INSTALLATION
COMPLÉMENTAIRE
FONCTION
HOME THEATRE
1 Appuyez et maintenez MAGIC
pendant environ 3 s. et…
apparaît sur l’écran.
2 Appuyez sur la FLÈCHE DROITE…
apparaît sur l’écran.
3 Appuyez sur ENTER…
apparaît sur l’écran.
4 Appuyez deux fois sur la FLÈCHE DROITE…
apparaît sur l’écran.
5 Appuyez deux fois sur ENTER…
apparaît sur l’écran.
Sélectionnez le mode TV avec les touches
FLÈCHE Gauche/Droite
(correspondant à l’exemple ci-dessus).
6 Appuyez sur ENTER…
apparaît sur l’écran.
Sélectionnez le mode TV avec les touches
FLÈCHE Gauche/Droite (correspondant
à l’exemple ci-dessus).
7 Appuyez sur ENTER…
apparaît sur l’écran.
Sélectionnez le mode TV avec les touches
FLÈCHE Gauche/Droite (correspondant
à l’exemple ci-dessus).
Fonctions complémentaires
Home Theatre
Mode
TV
TV
TV
RCV
TV
TV
TV
DVD
TV
RCV
Touches
POWER
CHIFFRES
(1-9, 0, -/--, AV)
CHANNEL
(chaîne + / -)
VOLUME
(volume +/-, mute)
MENU
Menu, haut, bas, gauche, droite, OK, Exit
GUIDE
16 :9
TRANSPORT (sauter en arrière, lecture, pause, sauter en avant, rembobi-
nage, arrêt, enregistrement, avance rapide
FASTEXTE
(rouge, jaune, vert, bleu)
A, B, C, D
ENTER
x2
ENTER
ENTER
ENTER
x2
Pour configurer ou ajouter le mode Home Theatre:
La fonction Home Theatre vous permet de combiner des groupes de touches de plusieurs
modes sur l’URC-7781 en un seul mode.
Exemple : vous voulez configurer les fonctions de votre téléviseur et ensemble de Home
Theatre (programmé sur TV et RCV) sur le clavier de l’URC-7781 comme montré dans le
tableau ci-dessous. Ceci vous permet principalement de commander les fonctions du
téléviseur et les fonctions de l'ensemble de Home Theatre sans devoir sélectionner le
mode d’appareil correspondant.
Page 84

WW W.O NEFORA LL.COM 83
HT VOLUME
TV HTNA DVD
ENTER
INSTALLATION
INITIALE
INSTALLATION
COMPLÉMENTAIRE
FONCTION
HOME THEATRE
HOME THEATRE
PROGRAMMER
HOME THEATRE
EFFACER
HOME THEATRE
- Pendant la configuration du Home Theatre, vous voyez un appareil appelé HTNA.
En sélectionnant cet appareil fictif pour un groupe de touches, celles-ci ne sont pas
envoyées par infrarouge en mode Home Theatre.
- Lors des appuis sur les touches en mode Home Theatre, le mode d'émission
infrarouge est affiché.
- Le mode Home Theatre peut être déplacé en utilisant la fonctionnalité DÉPLACER
APPAREIL.
- Le mode Home Theatre peut être renommé en utilisant la fonctionnalité CHANGER
LE NOM DE L’APPAREIL.
- Les fonctions de Key Magic et les fonctions apprises sont transmises au mode Home
Theatre. Il n’est pas possible d'apprendre ou de programmer les fonctions de Key
Magic en mode Home Theatre.
- Les Macros de touche ne sont pas disponibles en mode Home Theatre.
- Si un groupe de touches de fonctions a été affecté à un appareil qui est supprimé,
ce groupe de touches n’émettra plus d'infrarouge en mode Home Theatre
(ce groupe est automatiquement affecté à HTNA).
8 Appuyez sur ENTER…
apparaît sur l’écran.
Sélectionnez le mode RCV avec les touches
FLÈCHE Gauche/Droite.
etc…………….
Après avoir sélectionné l’appareil du dernier groupe de touches (A, B,C, D) la DEL sous
la touche POWER s'allume deux fois et l’affichage revient à "HOME THEATRE".
Result: Résultat : En mode Home Theatre, le clavier de l’URC-7781 est configuré
conformément au tableau ci-dessus.
Pour effacer la mode Home Theatre:
1 Appuyez et maintenez MAGIC
pendant environ 3 s. et…
apparaît sur l’écran.
2 Appuyez sur la FLÈCHE DROITE…
apparaît sur l’écran.
3 Appuyez sur ENTER…
apparaît sur l’écran.
4 Appuyez deux fois sur la FLÈCHE DROITE…
apparaît sur l’écran.
5 Appuyez sur ENTER…
apparaît sur l’écran.
6 Appuyez sur la FLÈCHE DROITE…
apparaît sur l’écran.
7 Appuyez sur ENTER pour supprimer
le mode Home Theatre.
La DEL sous la touche POWER s'allume
deux fois et l’affichage revient à…
Le mode Cinéma à domicile est supprimé de l’URC-7781. Vous pouvez programmer
le mode Home Theatre en exécutant sa configuration en page 82.
Fonctions complémentaires
Home Theatre
Effacer le Home Theatre
ENTER
x2
ENTER
ENTER
Page 85

84 WW W.O NEFO RALL.COM
Votre télécommande URC-7781 contient une fonction unique, qui permet d'ajouter simplement de nouveaux codes en la tenant contre votre téléphone. En quelques secondes,
notre technologie de connexion magnétique transfère rapidement et sûrement les informations dans la télécommande URC-7781 sans prise, adaptateur ni branchement compliqué.
Ceci signifie que si vous achetez de nouveaux produits dans le futur, la télécommande
URC-7781 ne deviendra jamais obsolète.
Téléchargement par Internet
(Mettez à niveau votre télécommande URC-7781…
via votre PC)
1. Visitez notre site Web "www.oneforall.com".
2. Sélectionnez votre région.
3. Sélectionnez "Assistance sur les produits".
4. Sélectionnez "Télécommandes universelles".
5. Sélectionnez la télécommande ONE FOR ALL
que vous voulez mettre à niveau : URC-7781.
6. Sélectionnez "Téléchargement à partir d’Internet".
Vous êtes à présent dans notre section spéciale
de téléchargement en ligne. Suivez alors
les instructions à l’écran pour mettre facilement
à niveau votre télécommande.
Mise à niveau par téléphone
(
Mettez à niveau votre télécommande URC-7781…
via votre téléphone)
Vous pouvez également appeler notre assistance au
consommateur et l'un de nos techniciens de clientèle
vous guidera tout au long du processus de la mise
à niveau de votre télécommande URC-7781. Pour
être sûr que le processus se passe bien, voici
quelques étapes à suivre :
1. Notez le ou les noms des marques et les numéros de modèle de vos appareils (voyez
le tableau de la page du service clientèle) avant d'appeler.
2. Appelez notre assistance au consommateur et expliquez quels appareils vous voulez
ajouter à votre télécommande URC-7781.
3. Lorsque notre agent du service clientèle a enregistré le ou les noms de marque et
modèles de vos appareils, il/elle vous guide dans la procédure de configuration puis
vous demande de tenir la télécommande URC-7781 contre le haut-parleur de votre
téléphone (voir le schéma ci-dessous). En faisant ceci, les informations requises pour
votre appareil sont transférées par le téléphone dans votre télécommande URC-7781
en quelques secondes.
IMPORTANT : les téléphones sans fil, les téléphones sur haut-parleur et les
téléphones mobiles ne sont pas recommandés.
4. Après la mise à niveau de votre télécommande URC-7781 par téléphone, restez en
ligne. Notre agent du service clientèle vérifiera que votre télécommande URC-7781
fonctionne correctement avec votre ou vos appareils et répondra à toutes vos autres
questions éventuelles.
Fonctions complémentaires
Technologie de mise à niveau des codes
Page 86

DESTINATION KM
DVD TV RCV
SOURCE KM
DVD TV RCV
WW W.O NEFORA LL.COM
85
Key Magic est une fonctionnalité exclusive de One For All. La conception de l’URC-7781
garantit l'utilisationde nombreuses fonctions de votre télécommande d’origine, même
celles qui n’ont pas leur propre touche sur le clavier de l’URC-7781. Les fonctions fréquemment utilisées peuvent être affectées à une touche de votre choix par la fonctionnalité de
Key Magic de votre URC-7781. Pour programmer une certaine fonction avec Key Magic,
vous devez connaître le code à 5 chiffres de la fonction correspondante. Les codes de
fonction varient selon le type de l’appareil, ils ne se trouvent pas dans le manuel. Vous
pouvez demander vos codes de fonction à la ligne directe de notre service clientèle ou par
courrier,télécopie ou courrier électronique. Il nous suffit de connaître le code 4 chiffres
configuré qui fonctionne pour votre appareil et le libellé de la fonction sur votre
télécommande d’origine.
Vous pouvez également visiter notre site Web (www.oneforall.com) pour trouver une réponse à vos questions.
Lorsque vous avez obtenu votre ou vos codes de fonction auprès de notre service clientèle, leur programmation est facile (par exemple, programmation de la fonction 16:9 sur
la touche A).
1 Appuyez et maintenez MAGIC
pendant environ 3 s. et…
apparaît sur l’écran.
2 Appuyez sur la FLÈCHE DROITE…
apparaît sur l’écran.
3 Appuyez deux fois sur ENTER…
apparaît sur l’écran.
4 Appuyez sur la FLÈCHE DROITE…
apparaît sur l’écran.
5 Appuyez sur ENTER…
apparaît sur l’écran. Sélectionnez le mode
d’appareil correspondant avec les touches
fléchées. (exemple mode TV).
6 Appuyez une fois sur la touche MAGIC.
7 Saisissez le code de fonction à 5 chiffres (par exemple 00234),
fourni par service clientèle.
8 L’écran indique alors…
Le mode auquel ce fonction est affecté
est TV, nous ne modifions donc pas le mode
d’appareil. Appuyez sur la touche (par exemple
la touche A) à laquelle la fonction est affectée.
La fonction 16:9 est à présent programmée sur la touche A en
mode TV. La DEL sous la touche POWER s'allume deux fois et vous
revenez à SOURCE KM pour programmer une autre fonction. Pour
revenir au mode utilisateur, appuyez et maintenez LIGHT (ESC).
RÉFÉRENCE DES FONCTIONS AVANCÉES
(la première entrée est un exemple) :
APPAREIL CODE CONFIGURÉ FONCTION CODE DE FONCTION
TV T0556 16/9 format 00234
- Pour accéder à la fonction que vous avez programmée, allez d'abord dans le mode
d’appareil correspondant.
- La Key Magic peut être affectée à n’importe quelle touche EXCEPTÉ les touches des
flèches GAUCHE/DROITE, ENTER, LIGHT (ESC) et la touche MAGIC.
- Notez tous les codes des fonctions avancées obtenus auprès de notre service clientèle
ci-dessus pour faciliter toute référence future.
- Il n’est pas possible de programmer des fonctions Key Magic par apprentissage en
mode Home Theatre. Cependant, si une touche a été programmée dans le mode de
l’appareil d’origine avec la Key Magic, cette fonction sera reportée dans le mode
Home Theatre.
Fonctions complémentaires
Key Magic®
INSTALLATION
INITIALE
INSTALLATION
COMPLÉMENTAIRE
AJOUTER
APPRENTISSAGE
AJOUTER
KEY MAGIC
ENTER
ENTER
x2
 Loading...