

Page 1
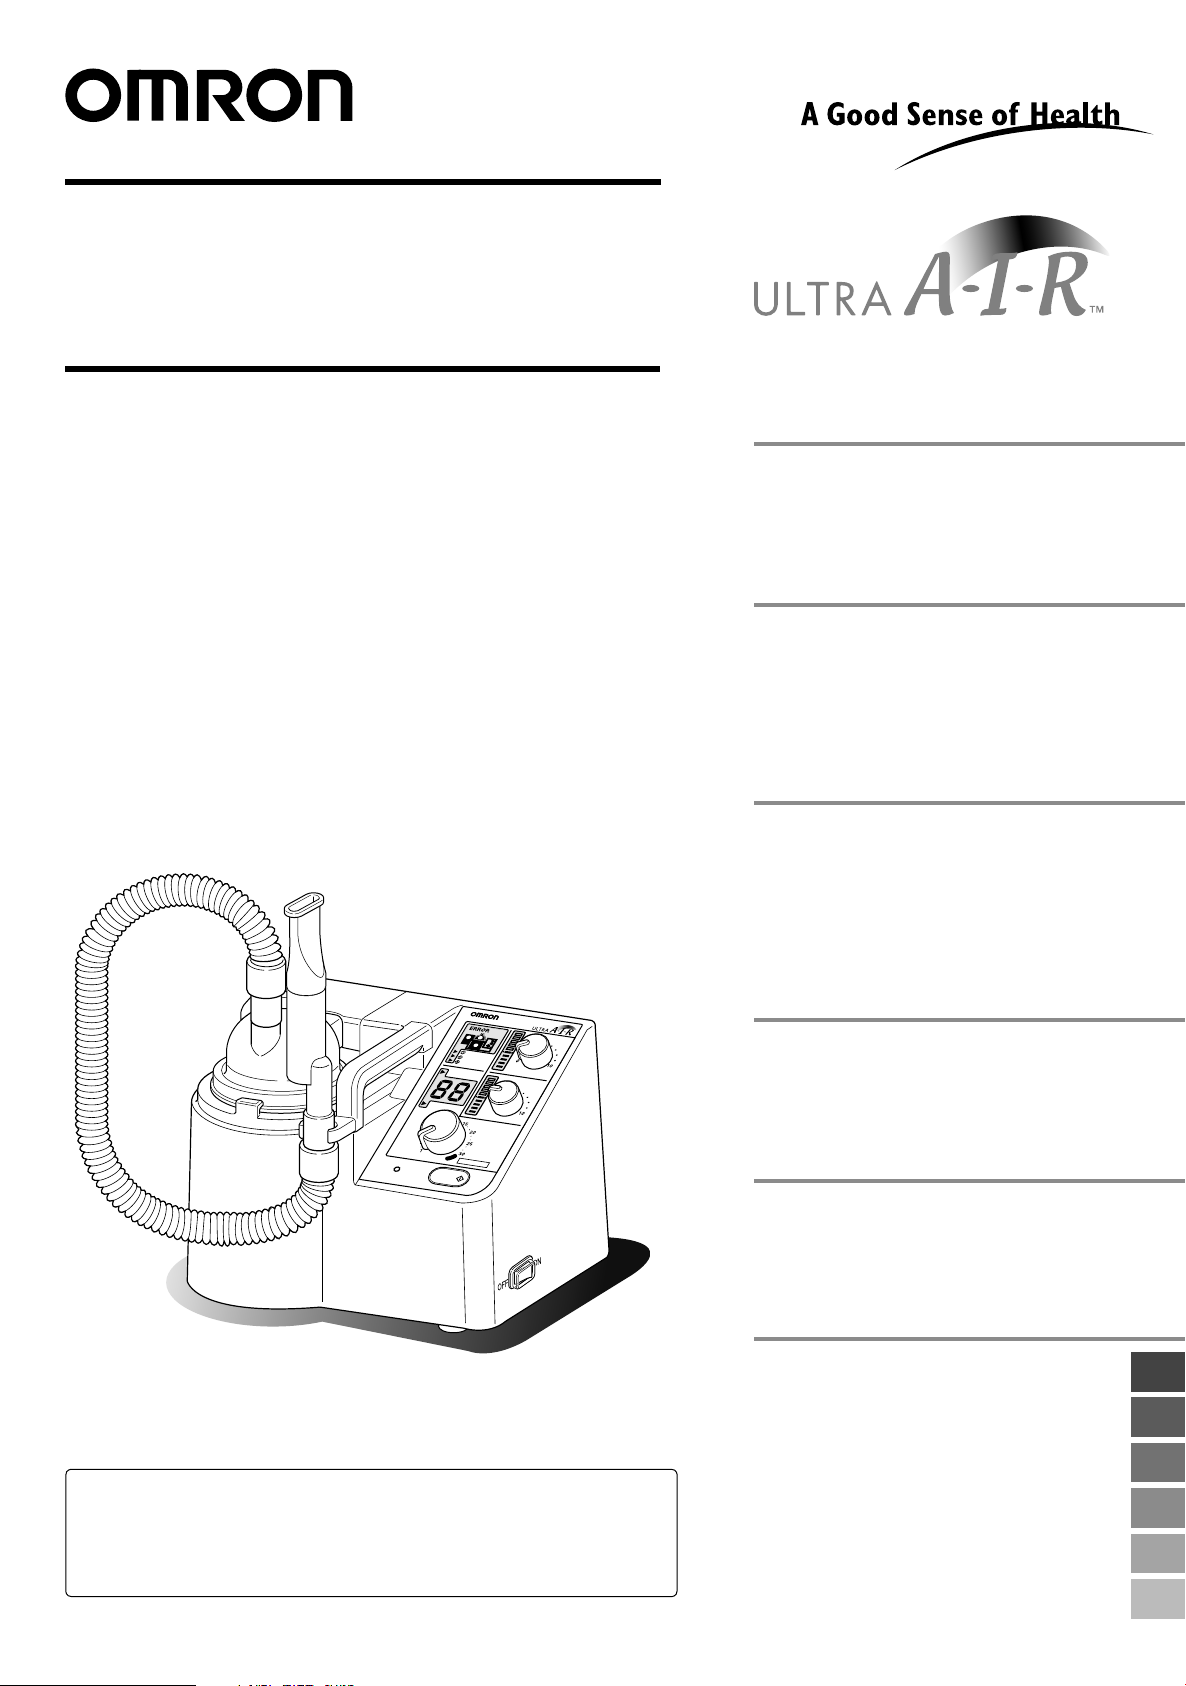
OMRON ULTRASONIC
Ultrasonic N
ebuliser
NE-U17
AIR-FLOW VOLUME
NEBULISATION VOLUME
T
IMER(MIN)
W
ATER LEVEL
MEDICATION CUP
COVER
FAN COVER
TIMER
POWER
CONTINUOUS
CONTINUOUS
START/
STOP
NEBULISER
Model NE-U17
Instruction Manual
■ Thank you very much for purchasing this OMRON
Ultrasonic Nebuliser.
■ Be sure to read this instruction manual carefully
before using the unit so that you can use it safely and
correctly.
■ Please keep this instruction manual always at hand
for future reference.
Table of Contents
Be sure to Read This Section
Exemptions from Liabilities ......... 1
Intended Use .............................. 2
Notes on Safety .......................... 3
About the Product
Features of the Product .............. 6
Composition of the Product ........7
Description of the LCD Display .. 7
Names of the Parts .................... 8
■ This unit is a medical instrument. Be sure to use the unit properly
according to instructions given by medical professionals.
Only use medications as prescribed and instructed by your doctor.
How to Use the Unit
How to Prepare the Unit
before Inhalation ...................... 9
How to Inhale ........................... 11
How to Inhale
(using optional parts) ............ 13
How to Take Care of the Unit
How to Take Care of the Unit ... 15
How to Disinfect the Unit .......... 17
How to Store the Unit ............... 18
Specifications
Troubleshooting ........................ 19
Specifications ........................... 20
List of Optional Parts ................22
EN
DE
NL
FR
IT
IM-NE-U17-E-01-11/2010
1615886-5E
ES
Page 2

Exemptions from Liabilities
Please understand that OMRON is not liable for the following:
1. Occurrence of trouble and/or damage caused by the maintenance and/or repair conducted
by other than OMRON or OMRON’s authorized dealer.
2. Trouble and/or damage of OMRON’s product caused by the product of other manufacturer
not delivered by OMRON.
3. Trouble and/or damage caused by the maintenance and/or repair using the repair part(s)
not authorized by OMRON.
4. Trouble and/or damage caused as a result of not observing the Notes on Safety or
operating method mentioned in this Instruction Manual.
5. Deviation from the operating conditions of the unit mentioned in this Instruction Manual
including the power source and installation environment.
6. Trouble and/or damage caused as a result of modifying and/or improper repair of the
product.
7. Trouble and/or damage caused by supreme forces such as fire, earthquake, flood, or
lightning.
1. The contents of this Instruction Manual are subject to change for improvement without prior
notice.
2. The contents of this Instruction Manual have been prepared with care and attention.
However, if you find any omission or error, please inform your local OMRON representative
or dealer.
3. It is prohibited to copy all or a part of this Instruction Manual without getting OMRON’s
permission. Unless you use this Instruction Manual for your personal (corporate) purpose,
you are not allowed to use it without OMRON’s permission in accordance with the Copyright
Act.
11
Page 3

Intended Use
Medical Purpose This product is intended to be used for inhaling medication for respiratory
disorders or for humidification in combination with oxygen therapy.
Intended User • Legally certified medical experts, such as doctor, nurse and therapist, or
healthcare personnel or patient under the guidance of qualified medical
experts.
• The user should also be capable of understanding general machine
operation and the content of instruction manual.
Intended Patients This product should not be used by patients, who are unconscious or are
not breathing spontaneously.
Environment This product is intended for use in a medical facility, such as Hospital, clinic
and doctor’s office.
Durable period Durable periods are as follows, provided the product is used to nebulise
saline 3 times a day for 10 minutes each time at room temperature (23°C).
Durable period may vary depending on usage environment.
Main unit 5 years
Inhalation hose(M) with a cuff, 70cm 1 year
Mouthpiece set 1 year
Inhalation mask(L) 1 year
Nebulisation set 1 year
Medication cup 6 months
Precautions for use Warnings and cautions described in the instruction manual should be
observed.
EN
2
Page 4

Notes on Safety
■ The warning signs and the sample icons shown here are listed for you to use this product safely and correctly as well as to
prevent the risk of injury to you and others.
■ The icons and meanings are as follows.
Warning sign Contents
Warning
Caution
icon indicates caution (including warning and danger).
The
Matters involving actual caution are indicated by statements
or pictures in or near
The icon indicates prohibitions (what you cannot do).
Matters involving specific prohibitions are indicated by text or
pictures shown in or near
The
icon indicates something that is compulsory (must be
●
observed at any time).
Matters involving specific compulsory actions are indicated by
statements or pictures shown in or near
Indicates matters in which the possibility of death or severe bodily injury may arise as a result of
incorrect handling.
Indicates matters in which bodily injury or material damage* may arise as a result of incorrect
handling.
* Material damage refers to a wide range of damage involving your house, household goods, domestic animals, and pets.
Examples of signs
The pictured
icon refers to
.
.
.
●
“caution for
flammability”.
The pictured
icon refers to
“prohibition to
disassemble”.
The pictured
icon refers
to “general
compulsion”.
Warning
Only use medications as prescribed and instructed by your doctor.
• Your physical conditions may change for the worse.
When you use the unit for the first time after purchasing it or after having not used it for a long time, be
sure to clean and disinfect it. (Refer to Pages 15 to 17.)
• Miscellaneous types of bacteria may propagate and you may get infected.
Clean and disinfect the medication cup, medication cup cover, mouthpiece and inhalation hose, each
time the unit is used.
• Miscellaneous bacteria may propagate and you may become infected. If the unit is going to be used
by more than one person, prepare a disinfected medication cup, medication cup cover, mouthpiece
and inhalation hose, for each person before using it. This will prevent cross-infection.
Be sure to immediately dry the cleaned and disinfected parts, then store them in a dry place in order to
prevent them from getting contaminated in the future.
In case of any problem with your nebuliser please contact your local OMRON service representative
(address on/ inside package).
The pictured
icon refers to
“caution for
electric shock”.
The pictured
icon refers
to “general
prohibition”.
The pictured
icon refers to
“unplugging the
power plug”.
Do not use this device in combination with ventilation equipment.
• The pressure in the ventilation system may reduce significantly.
When assembling the cleaned, disinfected, and dried parts, do not touch the places where the
medication and the nebulised medication pass through directly with your hands to prevent possible
infection.
Do not make any contact with the vibrator while the power plug is plugged into the electric outlet.
• You may suffer electric shock or injure yourself.
Do not plug in or pull the power plug from the electric outlet with wet hands.
• You may suffer electric shock or injure yourself.
Do not wash the main unit with water, or splash water to the power source, do not use the nebuliser
while you are in bath or having a shower, never submerge the nebuliser in water.
• Short circuit may occur in the unit or you may suffer electric shock.
3
Page 5
Notes on Safety
Caution
If the nebulisation parts have already become dirty before using the unit, clean them first before use.
• If the medication remains in the nebulisation unit, your physical conditions may change for the worse.
Wash off the remaining medication in the parts thoroughly with water after cleaning these parts with
disinfectant.
• If you inhale with the remaining disinfectant in the parts, your physical conditions may change for the
worse.
Replace the water in the water tank each time you use the unit.
• A dirty vibrator may cause lower nebulisation rate.
If the medication is attached to the fan installation axis, wipe it off.
• Overheating may cause the motor to stop.
Disposal of this product should be carried out in accordance with the national regulations for the
disposal of electronic products.
If you are not going to use the unit for a long time, be sure to unplug the power plug from the electric
outlet.
• You may suffer electric shock or the unit may ignite due to electric leakage.
Be sure to turn off the power and unplug the power plug from the electric outlet when you install, or
remove the device, or take care of the parts.
• You may suffer electric shock or injure yourself.
Do not look into the nebulisation section during nebulisation.
• A large amount of medication may get into your eyes and cause injury.
Do not operate the unit when the medication cup is empty.
• The unit may become overheated or damaged.
Do not fill the water tank with the liquid other than water (tap water or distilled water).
• The vibrator will deteriorate and may be damaged.
When parts are sterilised in an autoclave, make sure these parts do not directly contact the heater
inside the autoclave.
• As the temperature of the heater is very high, these parts may be melted or deformed.
Do not use the power cord or the power plug if it is damaged, or do not plug the power cord into a
loose electric outlet.
• You may suffer electric shock or the unit may be shorted or ignite.
Do not scratch, tear, modify, forcibly bend, pull, twist, or bundle the power cord. Do not place a heavy
material on the power cord. Keep power cord away from heated or hot surfaces.
• You may suffer electric shock or the unit may ignite due to short circuit because of deteriorated
insulation.
Do not disassemble, repair, or modify the unit.
• The unit may malfunction or cause injury.
Contact your nearest OMRON service representative.
Do not use a power cord other than the supplied one.
• The unit may ignite or you may suffer electric shock.
Be sure to use the power source as specified on the device.
• The unit may ignite or you may suffer electric shock.
Do not share the electric outlet with other electric appliances.
• The unit may ignite or you may suffer electric shock.
To unplug the power plug from the electric outlet, do not pull the power cord, instead hold the power
plug with your hand.
• The power cord may be broken or short-circuited and cause fire or you may suffer electric shock.
EN
4
Page 6

Notes on Safety
General Advice
Do not use the unit for the purpose other than for inhalation.
Do not use any parts other than the accessories or the optional parts listed on page 22.
Do not fill the medication cup with more than 150 ml medication or less than 5 ml.
• The unit may not nebulise.
Do not move the unit while medication remains in the unit.
Do not block the air ventilation holes at the rear side of the nebuliser.
Place the nebuliser on a plain and stable surface during operation.
Do not apply strong shocks to or drop the main unit.
Do not bend the inhalation hose.
• The medication may be pooled in the hose and the nebulisation rate may be lowered.
Do not inhale from the inhalation hose if the main unit is higher than your head.
• The medication may spill onto your face or clothes.
Be careful not to damage the vibrator when cleaning the water tank of the main unit.
Do not disinfect the unit by boiling in a microwave oven.
After cleaning and disinfecting the parts, assemble them after they are completely dried.
Do not wipe the main unit with volatile chemicals, such as benzine or thinners.
Although this nebuliser fulfils the provisions of the EMC (Electromagnetic Compatibility)
directive, the use of it should be avoided in direct vicinity of other electric devices.
Do not allow unsupervised children or infirm persons to use the unit.
Maintenance
Before using the unit, be sure to confirm that the main unit operates normally and safely.
How to handle faults or accidents
If an equipment error (E1) occurs, immediately take the following measures. (Also refer to Page 19.)
(1) Power-off the unit and unplug the power plug from the electric outlet to make the unit inoperable.
(2) Write “Faulty-Do not use” on the main unit so that it will not be used.
(3) Contact the store where you purchased the unit or the nearest OMRON dealer.
5
Page 7

Features of the Product
About the principle of
nebulisation in the NE-U17
➀ The NE-U17 transmits the energy of ultrasonic
vibration from the vibrator located at the bottom
of the water tank into water.
➁ The ultrasonic vibration is transmitted to the
medication in the medication cup through the
water in the water tank.
➂ The ultrasonic vibration emits medication from
the medication cup (like a fountain) and this is
dispersed as aerosol.
➃ Air from the fan carries this nebulised medication
out of the medication cup.
– Nebulisation: The state in which the medication
is converted into aerosol.
Aerosol= Nebulised
medication
Air
Medication
Water
Vibrator
Features of the Product
Easy to see large LCD displays air volume, nebulisation rate, set time, remaining
1
time, and error location. The back-light illumination featured in the unit enables
checking of the display in the dark.
The unit can nebulise for 72 hours continuously (with the use of the optional long-
2
time nebulisation set and the supply medication set).
The unit has a notification buzzer. The buzzer sounds when an error occurs or the
3
time set by the timer is completed.
With the use of a dial, the air volume, nebulisation rate, and time can be set easily
4
and quickly. The unit can handle various inhalation therapies with the use of
various optional parts.
EN
6
Page 8

Composition of the Product
Ultrasonic Nebuliser
NE-U17
AIR-FLOW VOLUME
NEBULISATION VOLUME
T
IMER(MIN)
W
ATER LEVEL
MEDICATION CUP
COVER
FAN COVER
TIMER
POWER
CONTINUOUS
CONTINUOUS
START/
STOP
AIR-FLOW VOLUME
NEBULISATION VOLUME
TIMER(MIN)
WATER LEVEL
MEDICATION CUP
COVER
FAN COVER
TIMER
POWER
CONTINUOUS
CONTINUOUS
1
2
3
START/
STOP
Mouthpiece set
Inhalation hose (M)
with a cuff, 70 cm
Two medication cups
Main unit
Power cord
– As the unit is a Class I
electroshock protection
type, be sure to use only the
supplied power cord with an
“earth”.
■ Instruction manual (with warranty card)
For the optional parts, refer to the “List of Optional Parts” on Page 22.
Description of the LCD Display
Display of air volume:
The “air volume” is displayed in 11 levels.
Display of nebulisation rate:
The “nebulisation rate” is displayed in 10 levels.
When the timer is used:
illuminates and the buzzer beeps to notify the end time.
illuminates and the digital display indicates
A timer mark
For continuous operation:
A continuous operation mark
this.
ERROR display
When the water level in the water tank is too low or the medication cup
cover or the fan cover is not installed, the corresponding error location is
indicated at the upper left corner of the panel.
(For the error display, refer to Page 19.)
7
Page 9

water level
Ultrasonic Nebuliser
NE-U17
AIR-FLOW VOLUME
NEBULISATION VOLUME
TIMER(MIN)
W
AT
ER LEVEL
M
ED
ICA
TIO
N
CU
P
CO
V
ER
FA
N
CO
V
ER
TIMER
POWER
CONTINUOUS
CONTINUOUS
START/
STOP
Medication cup cover
Names of the Parts
* indicates replaceable supplies.
Medication cup*
Medication
cup holder
Nebulisation unit
Washer
Mouthpiece set
Inhalation hose M
Power lamp
Timer knob
Medication cup cover
fixing lever
Handle
Air duct cover
Display
START/STOP
Button( )
Fan cover
Air filter case
Air filter*
Display of air volume
(Refer to the “Description of the LCD Display” on Page 7.)
Air volume adjustment knob
Display of nebulisation rate
(Refer to the “Description of the LCD Display” on Page 7.)
Nebulisation rate adjustment knob
Electric
power
socket
Power Button
)
(
Fuse holder
Power cord
Back of the
main unit
Fan
Fan installation axis
Draining
hose
Draining hose
holder
Overflow
Water tank
Top of the main unit
Vibrator
Float Button
(Detection of the shortage
of water)
Hose holder
EN
8
Page 10

How to Prepare the Unit before Inhalation
2
1
water leve
l
water level
water level
– Clean the parts before starting the inhalation.
[Parts that can be disinfected by boiling]
(For the disinfecting method, refer to Page 17.)
Submerge these parts in a container filled with
sufficient water and boil for 10 minutes.
Medication
cup cover
Inhalation hose (M)
Washer
How to remove the washer
Place the medication cup cover
on its side and insert a small item
(such as a paper clip) into the
hole of the cover.
Pinch and remove the washer
gently.
How to attach the washer
Hold the medication cup cover and
place the washer securely with
your fingertips as illustrated in the
figures on the left.
Make sure the washer is placed
flat and not upside down.
with a cuff
Filling the cooling water.
1
1) Remove the nebulisation section
by rotating the medication cup
cover-fixing lever clockwise.
2) Fill the cooling water.
Fill the cooling water up to the “water
level” mark that specifies the water level
in the water tank. The proper amount is
approximately 375 ml.
[Parts that cannot be disinfected by boiling]
(For the care and disinfection, refer to Page 17.)
Air duct cover
Mouthpiece
set
Fan cover
Medication cup holder
Medication cup
Be sure to immediately dry the cleaned and disinfected
parts, then store them in a dry place in order to prevent
them from getting contaminated in the future.
Fan
Warning
Air filter case
Air filter
– If the water level in the water tank is lower than
the “water level” mark, a “lower water level in water
tank” error will be displayed.
– If the water temperature in the water tank is low,
the nebulisation rate may drop. (Recommended
temperature is approximately 26°C (78.8 °F).
– Replace water in the water tank each time the unit
is used.
– When the unit is used for a long time continuously,
replace water at least every twenty-four hours.
(For continuous use or long periods, refer to
Page 13.)
9
Page 11

How to Prepare the Unit before Inhalation
1
2
WATER LEVEL
MEDICATION CUP
COVER
FAN COVER
1
2
3
WATER LEVEL
MEDICATION CUP
COVER
FAN COVER
1
2
3
1
2
water level
Filling medication into the medication
cup.
2
1) Remove the medication cup cover
by rotating it counterclockwise.
Fill medication into the medication cup.
2)
Assembling and attaching the
nebulisation unit to the main unit
3
1) Fix the nebulisation unit by rotating
the medication cup cover-fixing
lever counterclockwise.
Attach the inhalation hose and the
2)
mouthpiece set.
Maximum of 150 ml
Minimum of 5 ml.
3) Assemble the medication cup cover
by turning it clockwise, then install
it to the main unit.
Be sure to turn the
cover securely as
far as it goes.
Hose holder
3)
Turn on the Power Button ( ). After all
items on the LCD display illuminate, check
that the “ERROR display” does not flash.
If the “ERROR display” flashes, check the place where
the error number is indicated by referring to Page 19.
All items on
the display
illuminate.
Note: As soon as the Power Button (
fan to cool the parts inside the main unit will start
rotating. This is normal.
Now the preparation
for inhalation is
completed.
) is turned on, the
EN
10
Page 12

How to Inhale
16
min.
18
min.
21
min.
23
min.
26
min.
28
min.
CONTINUOUS
TIMER(MIN)
TIMER
CONTINUOUS
CONTINUOUS
POWER
AIR-FLOW VOLUME
NEBULISATION VOLUME
1
Setting the inhalation time by rotating
the timer knob clockwise.
1) To set the timer
2) Continuous nebulisation
Setting the inhalation time.
The timer can be adjusted by 1 minute when
setting the time up to 15 minutes.
Please note that the timer has intervals of
1 or 2 minutes between 15 and 30 minute
timer settings.
Turn the timer knob clockwise to the position
of “continuous”.
The display of “Continuous” on the timer will
turn on and the digital characters will rotate
to indicate that the unit is in the continuous
operation.
TIMER
Push the START/STOP Button ( ).
2
The fan will rotate and the unit starts
to nebulise.
When the timer is used:
The display counts down by 1 minute.
To change the setting during the
operation:
Turn the timer knob to the desired time. The
timer is reset and the unit starts to operate.
Adjust the air volume and the nebulisation rate.
Adjust the air-flow volume and the nebulisation
rate with the “air volume” knob and the
“nebulisation volume” adjustment knob while
observing the aerosol coming out from the
inhalation hose.
– For inhalation using the accessories such
as mouthpiece, adjust the air volume and
the nebulisation rate according to your
preferences and the accessories being
used.
The air volume (11 levels) and the nebulisation
rate (10 levels) can be checked by the “level
display” adjacent to each knob.
The air-flow volume
adjusts the volume of
air sent through the
medication cup cover.
The nebulisation volume
adjusts the rate of
aerosol released from
the medication.
11
CONTINUOUS
TIMER(MIN)
CONTINUOUS
– Depending on the type of the medication, nebulised aerosol may
not come out constantly.
– Medication with high viscosity and surface tension may have a
lower nebulisation rate.
– When the unit starts to operate with the medication volume of
150 ml and the air volume and the nebulisation rate at level “10”,
it nebulises intermittently.
In this case, adjust the nebulisation rate by the nebulisation rate
adjustment knob.
Page 13

How to Inhale
TIMER(MIN)
TIMER
CONTINUOUS
CONTINUOUS
TIMER(MIN)
TIMER
CONTINUOUS
CONTINUOUS
POWER
Inhaling the aerosol.
3
<Example of correct use>
You can use an optional inhalation mask instead
of a mouthpiece.
Wrong examples of use:
Do not bend the
inhalation hose or
block the nozzle.
• The medication
will be pooled in
the hose and the
nebulisation rate may
be lowered.
Finishing the treatment.
4
When the timer is used:
The buzzer sound notifies the completion
of time set by the timer and the unit stops
operation.
When the operation ends, “0” on the display
illuminates and the display changes to the
initial set time.
Sample display when the timer is set to 10 minutes.
In approximately
3 seconds
When the
timer comes
to end.
To terminate inhalation while using the
timer, push the START/STOP Button
), then the unit stops operation.
(
At this time, the remaining time is reset and
the timer returns to the initial set time.
To start inhalation again, push the
START/STOP Button (
).
Do not use the unit
if the main unit is
higher than your
head.
• The medication may
splash onto your face
or clothes.
In the following cases, the buzzer sounds
and the unit stops operation.
• When the time set by the timer is completed
• When the medication cup cover is removed
during inhalation
• When the amount of water in the water tank is
far from sufficient
• When the fan cover is removed
In case the buzzer sounds due to an error,
the error display flashes. Push the
START/STOP Button (
will stop.
In this case, check the error display and
inspect the unit by referring to Page 19.
), then the buzzer
Caution: In case the treatment is paused by
pressing START/STOP button, be sure to re-enter
the remaining time, before the treatment is
resumed.
To terminate the inhalation during the
continuous operation, push the
START/STOP Button (
), then the
unit stops operation.
To start the inhalation again, push the
START/STOP Button (
start continuous operation.
), then the unit will
When the inhalation is finished, turn
off the power and unplug the power
cord from the electric outlet.
EN
12
Page 14

How to Inhale (Using Optional Parts)
Using the unit for a long time
1
By using the optional “long time nebulisation set (4997217-7)” and the “supply medication set (4997206-1)”,
the unit can nebulise continuously for a long time.
➀ Remove the medication cup cover of the main unit. Attach an optional long time nebulisation set in place
of the medication cup cover and assemble the unit according to the procedure shown on Page 10.
At this time, check that the air duct is not blocked by the air duct cap.
➁ Fill medication into the supply medication bottle.
➂ Tightly close the supply medication bottle cap. At this time, check that the washer is correctly set inside
the cap.
➃ Remove the cap of the supply medication pipe of the long time nebulisation set and attach the tube of the
supply medication set.
➄ Hang the supply medication bottle on a proper place, higher than the device.
At this time, check that the tube is not bent. If the tube is bent, the medication cannot be supplied. If the
tube is too long, cut it to a proper length.
Attach the inhalation hose.
➅ Set the timer to “Continuous”.
➆ Turn the air volume adjustment knob to the far right (the position of 10).
➇ Push the START/STOP Button (
Supply
medication
pipe
Cap
) and start inhalation.
Air duct
cap
Supply
medication set
(4997206-1)
Supply
medication
bottle
Cap
Tu be
Air duct
Long time nebulisation
set (4997217-7)
Using the unit for (oxygen) humidification
2
If you use the unit for humidification in combination with oxygen therapy, connect the equipment to the
oxygen supply pipe of the “long time nebulisation set” (optional, 4997217-7). Please refer to the illustration
on the next page.
In order to stop the air from the fan on the main unit during the oxygen therapy, set the “air-flow volume”
adjustment knob to “0”, and attach an air duct cap to the air duct of the long time nebulisation set.
13
The operating and inhalation methods are the same as those of the normal operation.
Page 15

How to Inhale (Using Optional Parts)
Oxygen supply pipe
Using a bacterial filter
3
Having passed through a bacterial filter, the filtered air can be supplied to the inside of the long time nebulisation set.
➀ Remove the medication cup cover and assemble the long time nebulisation set with the main unit.
To assemble, use the long time nebulisation set in place of the medication cup cover by following the procedure
shown on Page 10. At this time, close the air duct with the air duct cap.
➁ Remove the air duct cover from the main unit.
➂ Remove the bacterial filter cap of the long time nebulisation set.
➃ Attach a bacterial filter to the long time nebulisation set.
➄ Attach a connector to the bacterial filter.
➅
Attach the inhalation hose to the connector and connect the other end of the hose to the air duct of the fan cover.
– When using the bacterial filter, set the “air volume adjustment knob” to “10”.
Inhalation hose (M)
Connector
Bacterial filter
(4997213-4)
Bacterial filter
cap
(4997209-6)
Air duct cap
Long time nebulisation
set (4997217-7)
Air duct
EN
14
Page 16

How to Take Care of the Unit
How to Take Care of the Parts
Turn off the power by pushing the ON/
1
OFF Button (
power plug from the electric outlet.
Remove the mouthpiece set, or
2
inhalation mask.
), and unplug the
Rotate the medication cup cover-fixing
3
lever clockwise.
Remove the nebulisation
4
unit for disassembling.
Discard the remaining medication.
5
Discard the cooling water in the water
tank by using the draining hose.
Draining
hose
15
Clean and disinfect the parts.
6
• Wipe the inside of the water tank by using alcohol.
• Clean, disinfect, and immediately dry the medication cup cover, medication cup holder,
medication cup, inhalation hose, mouthpiece set. (For the disinfection method, refer to Page 17.)
Warning
When assembling the cleaned, disinfected, and dried parts, do not touch the places where the medication and
the nebulised medication pass through directly with your hands to prevent possible infection.
Do not make any contact to the vibrator while the power plug is plugged into the electric outlet.
• You may suffer electric shock or injure yourself.
Page 17

How to Take Care of the Unit
3
4
1
2
How to Take Care of the Air Filter
Replace the air filter when it becomes dirty.
➀ Remove the nebulisation unit from the main
device.
➁ Remove the fan cover by lifting it up.
➂ Remove the air filter case from inside the fan
cover.
➃ Remove the air filter from the air filter case to
replace with a new one.
Assemble the above mentioned parts in the
reverse order.
Nebulisation
section
How to Take Care of the Fan
Open the fan cover and remove the fan.
Clean the fan by washing it with water or detergent.
– If the medication is stuck to the fan installation
axis, remove the medication.
Remove the fan cover by lifting it up after removing
the nebulisation unit from the main device. The
dirty fan cover can be washed with water or
detergent.
In order to install the fan, position the fan to the fan
installation axis securely as far as it goes.
How to Take Care of the Main Unit
Fan cover
Nebulisation
section
Fan
Fan installation
axis
Clean the dust on the main unit by wiping it with a
lightly squeezed cloth after being moistened with
water or alcohol.
After draining water from the water tank of the
main unit through the draining hose, wipe off the
leftover water with a clean and dry cloth.
General Advice
• Do not wipe the main unit with volatile
chemicals, such as benzine or thinners.
• Do not damage the surface of the vibrator.
EN
16
Page 18

How to Disinfect the Unit
How to Disinfect the Unit
Disinfection by boiling cannot be done to some parts. They may become deformed.
[Parts that can be disinfected by boiling]
Medication
cup cover
[Parts that cannot be disinfected by boiling]
Air duct cover Fan cover Air filter
Fan
Medication
cup
Washer
Air filter case
Medication cup
holder
Inhalation hose (M)
with a cuff, 70 cm
Mouthpiece
set
Disinfection by disinfectant
Different disinfectants have different anti-bacterial actions. For sterilization and disinfection, follow the
instruction manual and the notes on each disinfectant.
The time to immerse the parts in the disinfectant
differs with the type of the disinfectant used.
However, 30 to 60 minutes or longer is common.
After immersing the parts, wash them sufficiently
with water and dry promptly. Carefully store the
parts so that they are not re-infected.
If a coloured disinfectant solution such as Hibitane
is used, some parts may be discoloured with
repeated use. However, it does not affect the
nebulising properties.
Be sure to immediately dry the cleaned and disinfected parts, then store them in
order to prevent them from getting contaminated in the future.
• Miscellaneous types of bacteria may propagate and you may get infected.
[Typical disinfectants that can be used]
• Disinfecting ethanol
• Glutaraldehyde: Sterihyde (0.5%)
(and other equivalent products)
• Sodium hypochlorite: Milton (0.1%), Purax (0.1%)
(and other equivalent products)
• Benzalkonium chloride: Osvan (0.1%)
• Chlorhexidine: Hibitane (0.5%), Maskin (0.5%)
• Amphetamine surfactant: Tego (0.2%)
(and other equivalent products)
Note: These products cannot be used for the air filter.
Warning
17
Do not wash the main unit with water, or splash water to the power source.
• Electric leakage may occur in the unit or you may suffer electric shock.
Page 19

How to Disinfect and Store the Unit
Sterilization with ethylene oxide gas (E.O.G.)
Observe the Instruction Manual of the sterilizer and consult with the
manufacturer of the E.O.G. sterilizer for the details.
Some of the rubber and plastic parts of the nebuliser may have residual ethylene oxide gas. After
sterilization, consult with the manufacturer of the sterilizer and provide sufficient aeration until the safe
level to human beings can be obtained.
The equipment and the parts to be sterilized by E.O.G. must be sufficiently dried in advance.
Wash and dry the parts, then conduct the E.O.G. sterilization.
Sterilization by autoclave
Refer to the Instruction Manual and the Notes on Handling of the sterilizer.
[Option parts that can be sterilized by autoclave]
Inhalation mask (L)
(4997205-3)
Inhalation mask (S)
(4997207-0)
Caution
When parts are sterilised in an autoclave, make sure these parts do not directly contact the heater
inside the autoclave.
* As the temperature of the heater is very high, these parts may be melted or deformed.
How to store the unit
Store the parts after thoroughly drying them.
When storing the parts, be careful for the infection.
Do not store the unit under direct sunlight, where
temperature and humidity are high, in a dusty place, where
they can be easily sprayed with water, or where vibration or
shock can be easily applied.
EN
18
Page 20

Troubleshooting
Trouble
The power
lamp does not
illuminate.
The unit does not
nebulise.
The nebulisation
rate is low.
The nebulisation
power is lowered.
Where to Inspect
Is the power plug securely plugged into the
electric outlet?
Is ➀ of ERROR display flashing due to
insufficient amount of water in the operating
chamber?
Is the medication cup correctly set to the
main unit?
Is the fan cover open?
Is the fan set?
Is the amount of medication in the medication
cup too much?
Is the inhalation hose bent and the medication
pooled in the hose?
Is the amount of medication in the medication
cup too small?
Is the lower portion of medication cup
damaged or deformed?
Is the amount of medication in the medication
cup much?
Is the value of nebulisation rate adjustment
knob or the air volume adjustment knob set
too low?
Is the room temperature and/or water
temperature too low?
How to Correct
Plug the power plug in the electric outlet
correctly. (Refer to Page 10.)
Fill the water up to the specified water level
mark in the operating chamber.
(Refer to Page 9.)
Set the medication cup correctly.
(Refer to Page 10.)
Close the fan cover correctly.
Set the fan properly.
Reduce the amount of medication to less than
150 ml. (Refer to Page 10.)
Adjust the bent hose correctly and drain the
pooled medication. (Refer to Page 12.)
Increase the amount of medication to more
than 5 ml.
Replace the medication cup with a new one.
Reduce the amount of medication to less than
150 ml. (Refer to Page 10.)
Turn the knob to the right and adjust the value.
(Refer to Page 11.)
Operate the unit without medication for about
4 minutes, then use the unit.
Nebulisation is
unstable.
2
3
1
WATER LEVEL
MEDICATION CUP
COVER
FAN COVER
After cleaning the medication cup with the
Is the medication cup dirty?
detergent, wash off the detergent sufficiently
under running water before using the cup.
Is the amount of medication exceeding
150 ml?
Reduce the amount of medication to less
than 150 ml. (Refer to Page 10.)
Are the air volume and the nebulisation rate
set to the maximum level when the amount of
Adjust the nebulisation rate. (Refer to Page 11.)
medication is 150 ml?
Trouble Where to Inspect How to Correct
➀ flashes.
➁ flashes.
➂ flashes.
E1 is displayed.
The water level in the operating
chamber has been lowered.
The medication cup cover is open.
The fan cover is open.
The fan inside the main unit has
stopped.
– If the unit does not operate normally after taking the above-mentioned
measures, do not touch the internal mechanism and consult the store where
you purchased the unit or the nearest OMRON dealer.
Fill in the water up to the water level
of the operating chamber.
Securely close the medication cup
cover.
Securely close the fan cover.
Contact the nearest OMRON dealer.
19
Page 21

Specifications
Technical data
Product name : Omron Ultrasonic Nebuliser
Model : NE-U17 (NE-U17-E)
Power source : 230 VAC, 50 Hz
Power consumption : Approx. 80 VA
Fuse : T2A L250V
Ultrasonic frequency : Approx. 1.7 MHz
Particle size : * MMAD 4.4 µm (MMAD=Mass Median Aerodynamic Diameter)
Nebulisation rate : ** Approx. 0 to 3 ml adjustable
Sound : ** Less than 45 dB
Air volume : Maximum of 17 l/min
Amount of cooling water : Approx. 375 ml
Capacity of medication cup : Approx. 150 ml (min. 5 ml)
External dimensions : Approx. 276 (W) x 243 (H) x 226 (D) mm
Weight of the main unit : Approx. 4.0 kg
Protection class : Class I
Operating condition : Continuous
Operating temperature / : 5°C to 40°C (41°F to 104°F) / 30 to 85% RH
humidity
Storage temperature / : -20°C to 60°C (-4°F to 140°F) / 10 to 95% RH / 700 to 1060 hPa
humidity / air pressure
Accessories included : Inhalation hose M (with a cuff, 70 cm), Mouthpiece set, 2 Medication cups,
Power cord, Instruction manual (with warranty card)
Result of cascade impactor measurements for particle size
Cumulative % particle mass of sodium fluoride under size
100
50
individual
Cumulative Undersize %
0
0.1 1 10 100
Dp (µm)
* Independently measured at SolAero Ltd., Canada, Dr. John Dennis, according to EN13544-1:2007.
** Measured by OMRON HEALTHCARE Co., Ltd..
Notes:
• Subject to technical modification without prior notice.
• This OMRON product is produced under the strict quality system of OMRON HEALTHCARE Co., Ltd., Japan.
• The device may not work if the temperature and voltage conditions are different to those defined in the specifications.
• Do not use the device where it may be exposed to flammable gas.
• The Nebulisation rate is measured with saline 0.9% solution at 23°C and can vary with medication and ambient conditions.
• The distribution of particle size is measured with 2.5% NaF solution and can vary with medication and ambient conditions.
• Performance may vary with drugs such as suspensions or high viscosity. See drug supplier’s data sheet for further details.
• See web site of OMRON HEALTHCARE EUROPE to update technical information.
URL: www.omron-healthcare.com
• This device fulfils the provisions of the EC directive 93/42/EEC (Medical Device Directive) and the European Standard
EN13544-1:2007, Respiratory therapy equipment - Part1: Nebulising systems and their components.
mean
EN
Symbols:
=Type B
Read the instruction
manual carefully
20
Page 22

Specifications
Important information regarding Electro Magnetic Compatibility (EMC)
With the increased number of electronic devices such as PC’s and mobile (cellular) telephones, medical devices in use
may be susceptible to electromagnetic interference from other devices. Electromagnetic interference may result in incorrect
operation of the medical device and create a potentially unsafe situation.
Medical devices should also not interfere with other devices.
In order to regulate the requirements for EMC (Electro Magnetic Compatibility) with the aim to prevent unsafe product
situations, the EN60601-1-2 standard has been implemented. This standard defines the levels of immunity to electromagnetic
interferences as well as maximum levels of electromagnetic emissions for medical devices.
This medical device manufactured by OMRON Healthcare conforms to this EN60601-1-2:2007 standard for both immunity
and emissions.
Nevertheless, special precautions need to be observed:
• Do not use mobile (cellular) telephones and other devices, which generate strong electrical or electromagnetic fields,
near the medical device. This may result in incorrect operation of the unit and create a potentially unsafe situation.
Recommendation is to keep a minimum distance of 7 m. Verify correct operation of the device in case the distance is
shorter.
Further documentation in accordance with EN60601-1-2:2007 is available at OMRON Healthcare Europe at the address
mentioned in this instruction manual.
Documentation is also available at www.omron-healthcare.com.
Correct Disposal of This Product
(Waste Electrical & Electronic Equipment)
This marking shown on the product or its literature, indicates that it should not be disposed of, with other household wastes
at the end of its working life. To prevent possible harm to the environment or human health from uncontrolled waste disposal,
please separate this from other types of wastes and recycle it responsibly to promote the sustainable reuse of material
resources.
Household users should contact either the retailer where they purchased this product, or their local government office, for
details of where and how they can take this item for environmentally safe recycling.
Business users should contact their supplier and check the terms and conditions of the purchase contract. This product
should not be mixed with other commercial wastes for disposal.
This product does not contain any hazardous substances.
21
Page 23

List of Optional Parts
Medication cup
(4997211-8)
Used to transmit the ultrasonic
vibration. (If it has any damage or
deformation, the unit may not be able
to nebulise. Handle this part carefully.)
Material: PP
Packaging unit: 5 cups
Nebulisation set
(4997216-9)
Used for normal nebulisation.
Materials: medication cup; PP,
medication cup holder; ABS,
medication cup cover; PMP, packing;
silicone
Packaging unit: 1 set
Inhalation mask (S) set
(4997207-0)
Attached with the fixing rubber string.
Exclusive for the inhalation by mouth.
A size that can be used by an infant.
Material: SEBS
Packaging unit: 3 sets
Bacterial filter
(4997213-4)
Used for inhalation such as for
tracheal lavage.
Materials: filter; PP, connector; PMP
Packaging unit: 1 filter + 1 adapter
Long time nebulisation set
(4997217-7)
Used for continuous nebulisation.
To be used in combination with the
supply medication set (4997206-1).
Materials: cover; PMP, cap; silicone
Packaging unit: 1 set
(20/22mm, ISO compatible)
Inhalation hose S (30 cm) with a
cuff having the diameter of 20 mm
(4997208-8)
White hose guide tube (cuff) can be
removed and installed.
Attach it to the hose by rotating
clockwise. Cut it to the proper length.
Material: SEBS
Packaging unit: 1 hose
Air filter set
(4997214-2)
Protects the unit from the dust in air.
Materials: case; PP, filter; PS
Packaging unit: 1 set
Mouthpiece set
(4997212-6)
Used for inhalation by being held by
the mouth.
Material: EVA
Packaging unit: 5 sets
Inhalation hose M (70 cm) with a
cuff having the diameter of 20 mm
(4997209-6)
White hose guide tube (cuff) can be
removed and installed.
Attach it to the hose by rotating
clockwise. Cut it to the proper length.
Material: SEBS
Packaging unit: 1 hose
Air filter
(4997215-0)
Material: PS
Packaging unit: 5 filters
Inhalation mask (L) set
(4997205-3)
Attached with the fixing rubber string.
Enables the simultaneous inhalation
by mouth and nose.
Material: SEBS
Packaging unit: 3 sets
Inhalation hose L (150 cm) with a
cuff having the diameter of 20 mm
(4997210-0)
White hose guide tube (cuff) can be
removed and installed.
Attach it to the hose by rotating
clockwise. Cut it to the proper length.
Material: SEBS
Packaging unit: 1 hose
Adapter
(4997218-5)
Material: PMP
Used for connecting 22 mm parts
e.g. bacterial filter.
Supply medication set
(4997206-1)
Supplies the meditation in order to keep
the medication in the medication cup at
a certain level. Used for humidifying or
inhalation for a long time.
Material: PP
Packaging unit: 1 set
Washer, 5 pcs
(4997285-1)
Materials: silicone
– Materials are indicated by
abbreviations.
ABS : Acrylonitrile-butadiene-ethylene
resin
EVA : Ethylene vinyl acetic acid resin
PMP : Polymethyle pentane
PP : Polypropylene resin
PS : Polyethylene resin
SEBS : Styrene elastomer
EN
22
Page 24

Manufacturer OMRON HEALTHCARE Co., Ltd.
24, Yamanouchi Yamanoshita-cho, Ukyo-ku, Kyoto, 615-0084
JAPAN
EU-representative
Production facility
Subsidiary
OMRON HEALTHCARE EUROPE B.V.
Kruisweg 577, 2132 NA Hoofddorp, THE NETHERLANDS
www.omron-healthcare.com
OMRON MATSUSAKA Co., Ltd.
1855-370, Kubo-cho, Matsusaka-city, Mie-prefecture
515-8503, Japan
OMRON HEALTHCARE UK LIMITED
Opal Drive, Fox Milne Milton Keynes, MK15 0DG U.K.
OMRON MEDIZINTECHNIK HANDELSGESELLSCHAFT mbH
John-Deere-Str. 81a 68163 Mannheim, GERMANY
www.omron-medizintechnik.de
OMRON Santé France SAS
14, rue de Lisbonne 93561 Rosny-sous-Bois Cedex, FRANCE
Made in Japan
 Loading...