

Activity monitor
Jog style
• Instruction Manual 1
• Gebrauchsanweisung 23
• Manuale di istruzioni 45
• Mode d’emploi 67
EN
DE
IT
FR
IM-HJA-300-E-06-10/2011
5328882-5B
1 Introduction
■
The OMRON Jog style Features
Fat burned/Calories burned
By measuring the intensity of your activity, the unit can
calculate the amount of fat and calories burned.
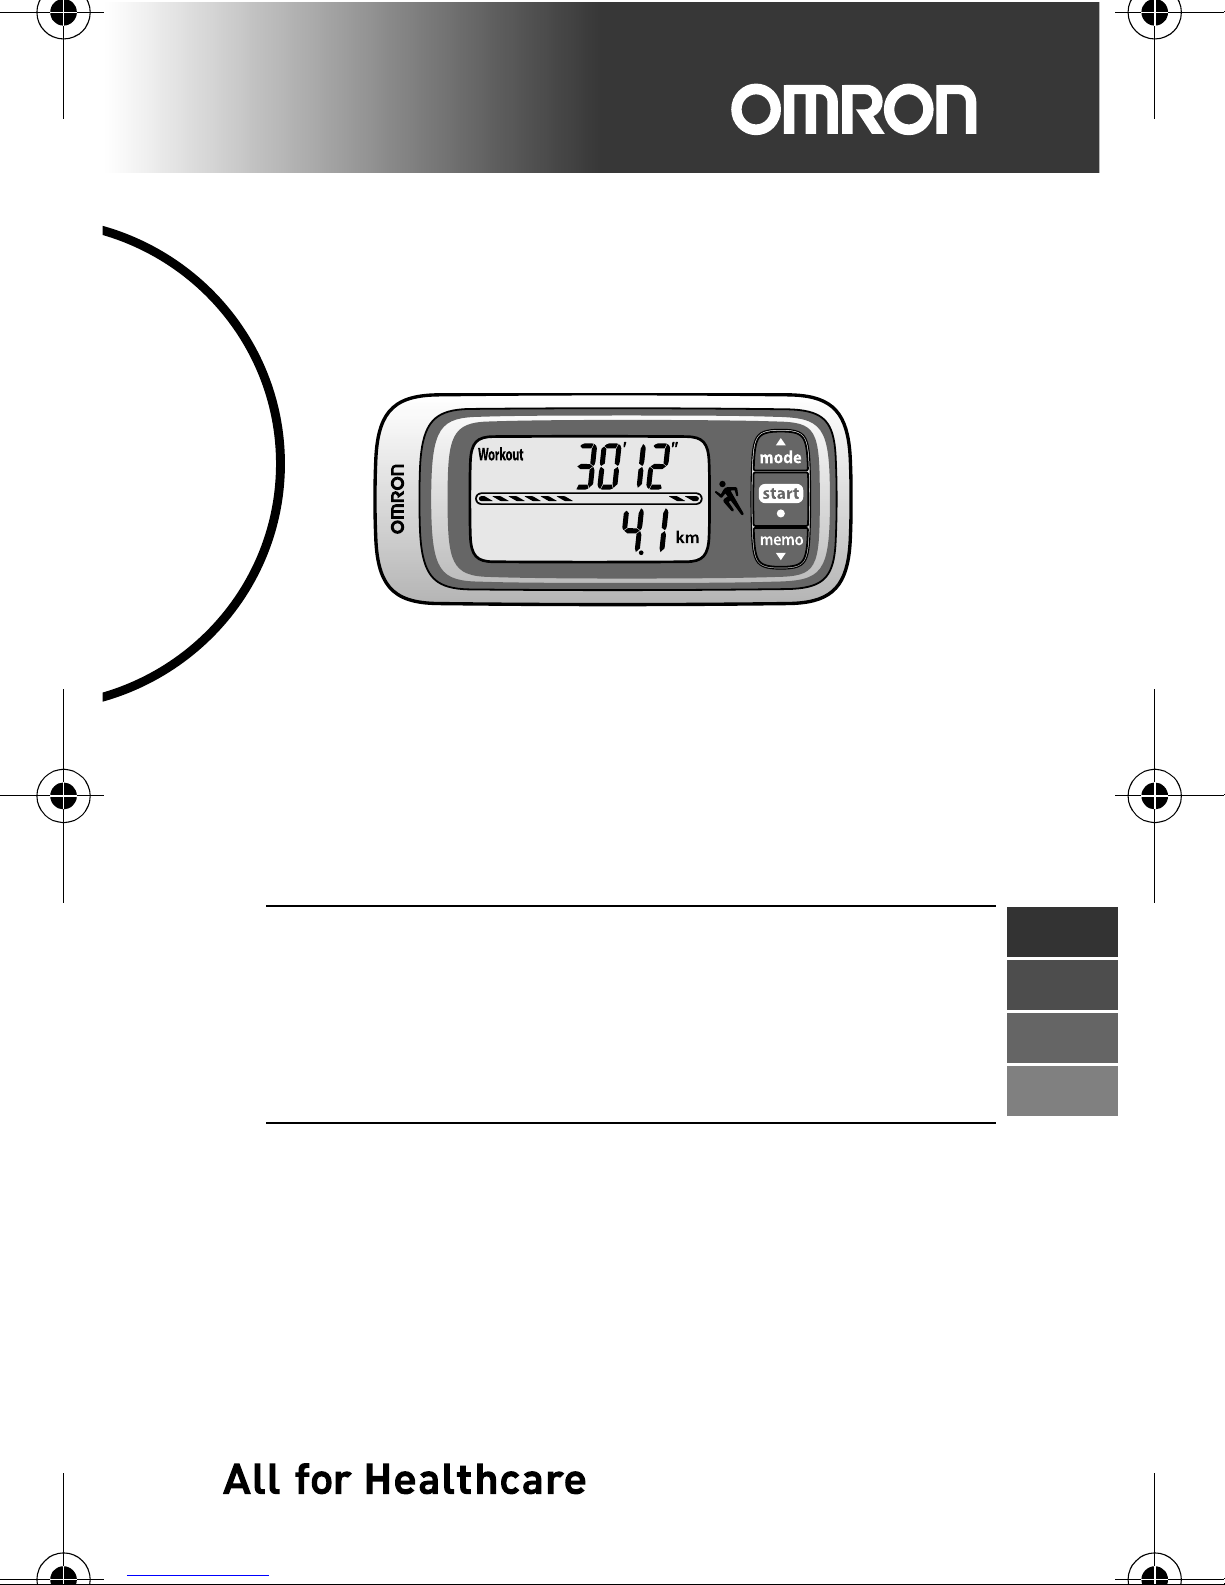
Workout mode
Workout mode records the time between when a workout
is started and when it is stopped as single record, using
stopwatch like display (refer to Chapter 6.3).
The data includes the distance, time, calories burned and
average speed for each workout.
The unit automatically records the workout data for up to
7 previous sessions.
Workout stopped
If a workout continues for more than 30 minutes, the
message “Good job” scrolls on the display after you finish
Workout mode.
Dear customer,
Thank you for purchasing this high-quality OMRON activity
monitor. The new Jog style will keenly measure your physical
activity and helps to assist with your diet or motivates you to
reach your daily walking target.
The OMRON Jog style HJA-300 uses OMRON’s new Active
Engine technology to measure the intensity and amount of
exercise, ranging from walking to jogging and running.
In addition to measuring the step count and the number of
calories burned during everyday activities, it can also keep a
record of each workout. This makes it useful for planning an
exercise program based on the intensity of your training.
■
Active Engine
This OMRON technology can accurately detect and calculate
any fast or slow signals caused by physical activity.
Active Engine makes it possible to monitor not only the
physical activity of walking, but can also capture the more
intense activity of jogging in real time and calculate the
amount of fat and calories burned.
■
Workout
For most health related activities, “workout” means a training
program to improve your fitness. However, in this instruction
manual it is used to refer to one training period of jogging or
walking.
EN
1

2 Use of the OMRON Jog style
2.1 Cautions
• Do not look at the display while jogging. Always stop where
it is safe to do so before checking the display.
• Contact your doctor or healthcare provider before beginning
a weight reduction or exercise program.
• Always take a rest if you feel tired or experience pain while
exercising. If the pain or discomfort continues, immediately
stop your exercise and consult a doctor.
• Keep the unit out of the reach of young children.
• If young children swallow the battery, battery cover or screw,
immediately consult a doctor.
• Do not swing the unit by the strap. Swinging the unit while
holding the strap may cause an injury.
• Do not put the unit in the back pocket of your shorts or
trousers. It could be damaged if you sit down while the unit
is still in your pocket.
• If battery fluid should get in your eyes, immediately rinse
with plenty of clean water. Consult a doctor immediately.
• If battery fluid should get on your skin or clothing,
immediately rinse with plenty of clean water.
• Do not insert the battery with the polarities in the wrong
direction.
• Always use the type of battery indicated.
• Replace a worn battery with a new one immediately.
• Remove the battery from this unit when you are not going to
use it for a long period of time (approximately 3 months or
more).
• Do not throw the battery into fire because it may explode.
• When disposing the product, remove the battery and follow
local regulations on environmental protection.
2
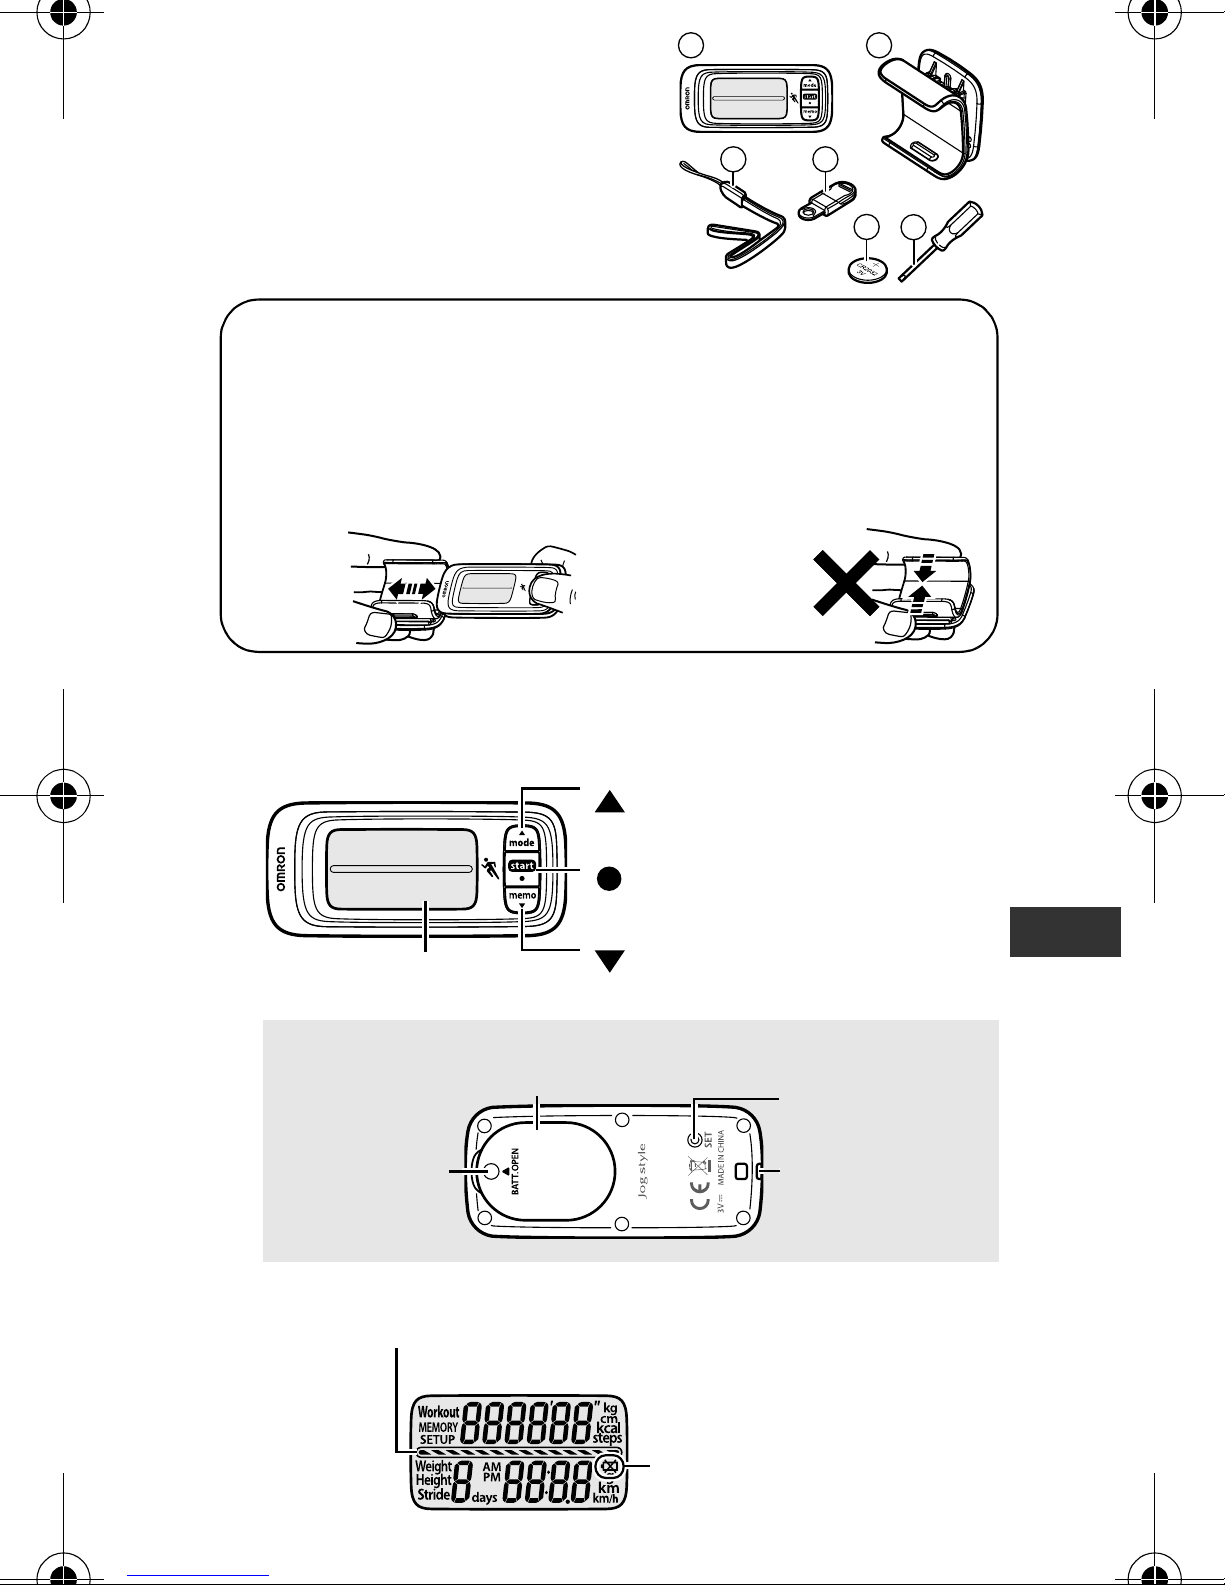
3 Overview
Holder
Use this holder when attaching the unit to your belt or the top
of your pants.
Attach/remove the holder as
shown in the illustrations
below.
Note:
When attaching the holder, do
not grip it strongly at the top
and bottom.
Strap
attachment
(Back of the main unit)
Battery cover
SET button
/mode (mode switch) button
Display
/start button
/memo (memory) button
■
Display
Workout indicator
(Refer to Chapter
6.3
)
Battery low indicator
Note:
This illustration displays all items.
Battery cover
screw
■
Main Unit
A
Main unit
C
Strap
E
Battery
* The battery is already installed in
the unit.
F
Screwdriver
B
Holder
D
Clip
A
C
B
D
E
F
4 Know your unit
EN
3

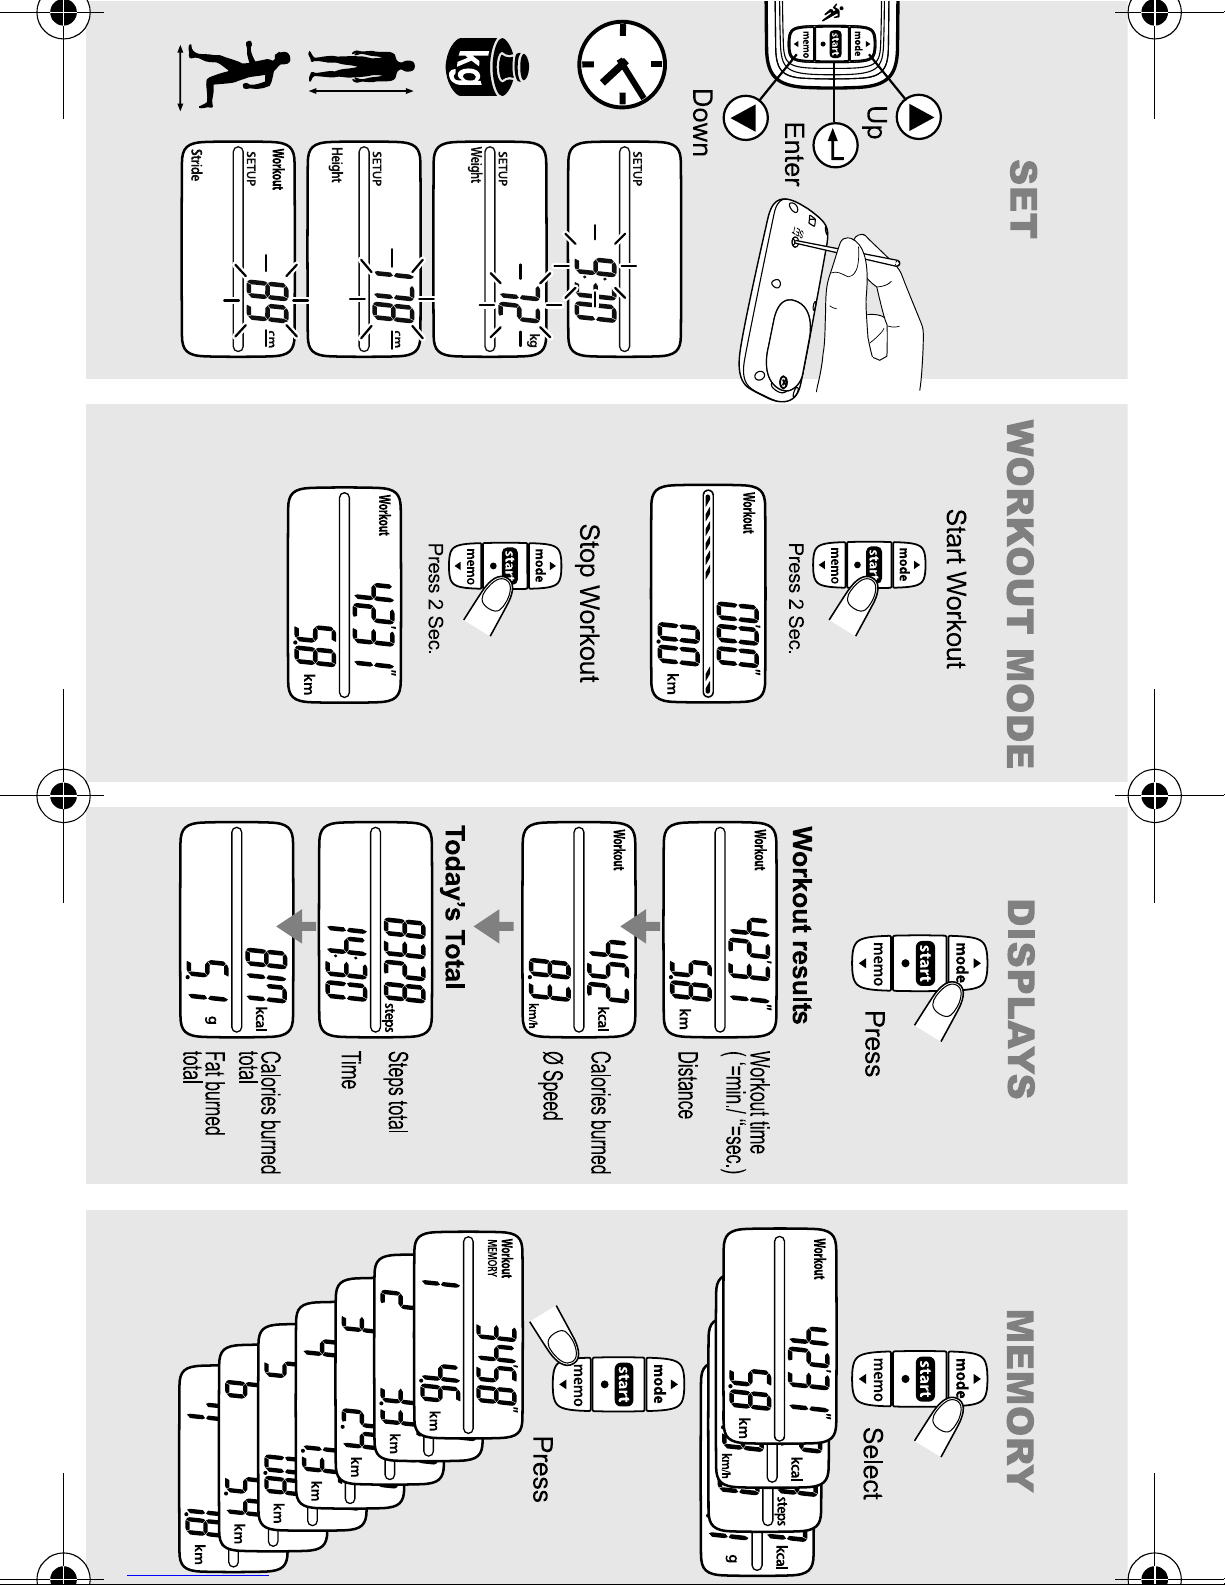
5 Settings
5.1 Setting the Time, Weight, Height and Stride Length
When you use the unit for the first time or you want to change
settings, follow the steps below.
1
Press the SET button on the back of the unit with
a thin, sturdy, stick that will not break easily.
Note:
Do not press the button with a sharp point. This
could cause damage.
The hour flashes on the display.
Note:
* Setting range details refer to Chapter 13 “Technical data”.
2
Setting the hour.
If no settings are made for more than 5 minutes...
• When setting up the unit for the first time
The display will be turned off.
• When adjusting the settings
The display will revert to the Workout time/distance
display.
(1) Press or to select the desired
value for a setting.
• Press ( ) to advance (go back) one.
• Hold ( ) down to advance (go back)
rapidly.
(2) Press to confirm the setting.
3
Repeat steps (1) to (2) to set the minute.
4
Repeat steps (1) to (2) to set the weight.
5
Repeat steps (1) to (2) to set the height.
6
Repeat steps (1) to (2) to set the stride length for workout.
This completes the setup.
■
About stride length setting
The initial stride length value* that blinks on the display is an
estimated stride length calculated from the Height set in
step 5.
Set the actual stride length to use for workouts based on the
type of training (jogging/walking) you will use and your own
physique.
* When setting up the unit for the first time, or after the
settings have been reset.
Refer to Chapter 6.3, if you want to set the stride length more
accurately.
4
6 Using the OMRON Jog style
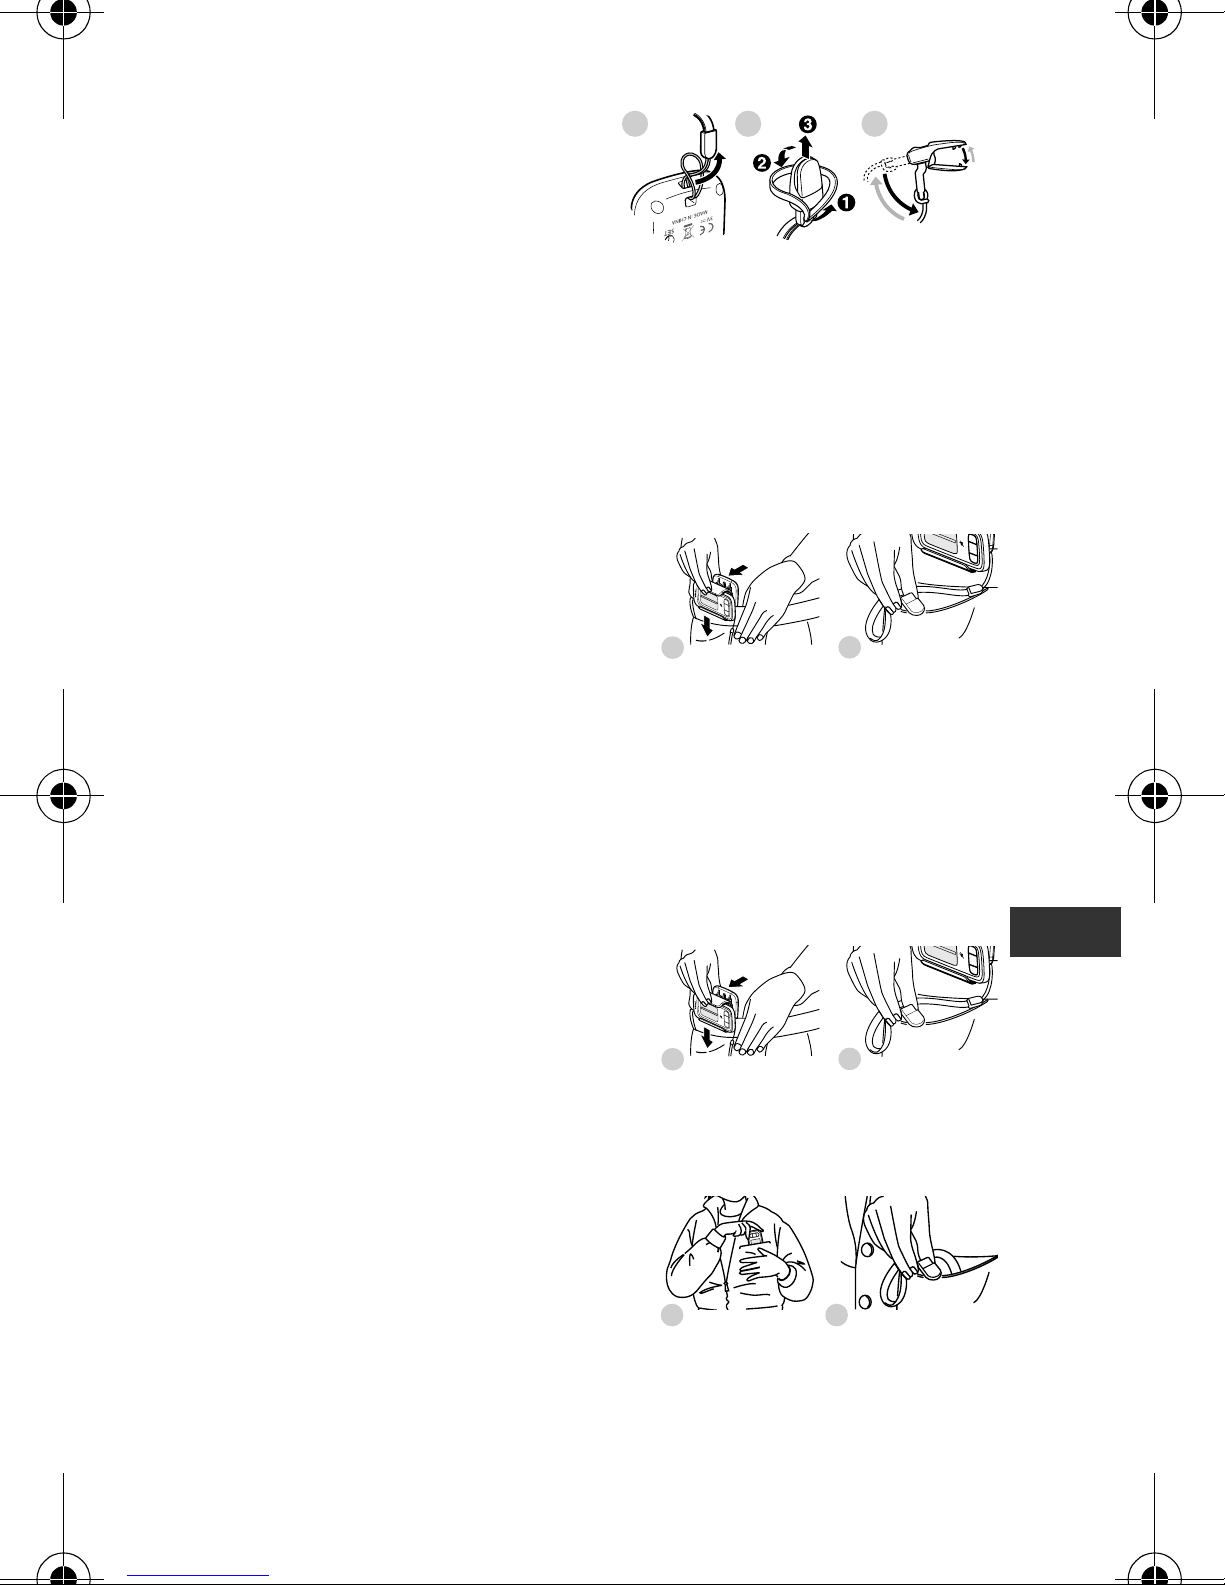
1
2
1
2
1 2
6.1 Assemble the OMRON Jog style
1
Attach the strap to the unit.
2
Attach the clip to the strap.
3
Open and close the clip.
Note:
Press the clip open to
remove the unit.
Depending on the material, the clip may cause damage or
scratches to your clothes if it is attached or removed
roughly.
6.2 How to attach the OMRON Jog style
[During workout]
Belt
1
Clip the holder with the unit to
the band or belt of your shorts or
1 2 3
trousers.
2
Clip the strap to your shorts or
trousers.
Note:
Always attach the unit to your waist when jogging.
[During workout off (walking)]
We recommend attaching the unit to your belt, your pocket,
your bag or hanging it from your neck.
Belt
1
Clip the holder with the unit to
the band or belt of your shorts or
trousers.
2
Clip the strap to your shorts or
trousers.
Pocket
EN
1
Put the unit in your upper front
or trousers pocket.
2
Clip the strap to the edge of
your pocket.
Note:
Do not put the unit in the back pocket of your shorts or
trousers.
5
 Loading...