

Olympus Stylus Zoom 140 QD, Stylus Zoom Owner's Manual

INSTRUCTIONS
Before using your Stylus Zoom, read this manual
carefully to ensure correct use.
We recommend that you take test shots to get
accustomed to your Stylus Zoom before taking
important photographs.
PREPARATIONS
BASIC
OPERATIONS
ADVANCED
TECHNIQUES
CAMERA
MAINTENANCE
Thank you for purchasing the Olympus Stylus Zoom.
Please read this instruction manual carefully before using the camera.
MAIN FEATURES
Built-in 35 mm—70 mm 2X zoom lens.
Weatherproof.
Remote control (optional).
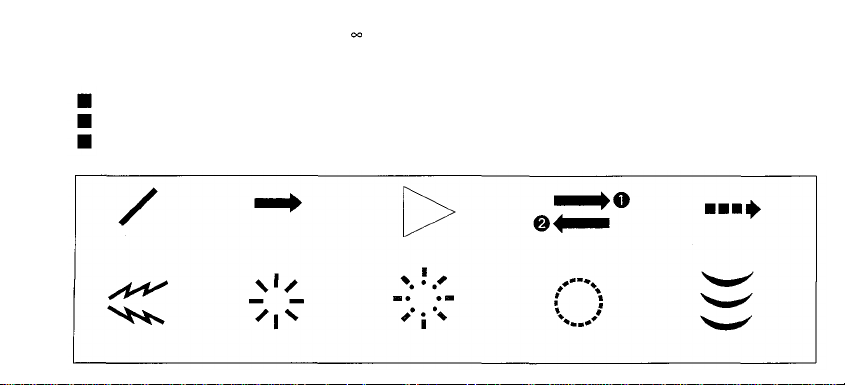
Symbols used in this manual:
Incorrect
Operation
2
sound
Manual
operation
Indicator on
Next
operation
Indicator
blinking
Operation
order
Attention
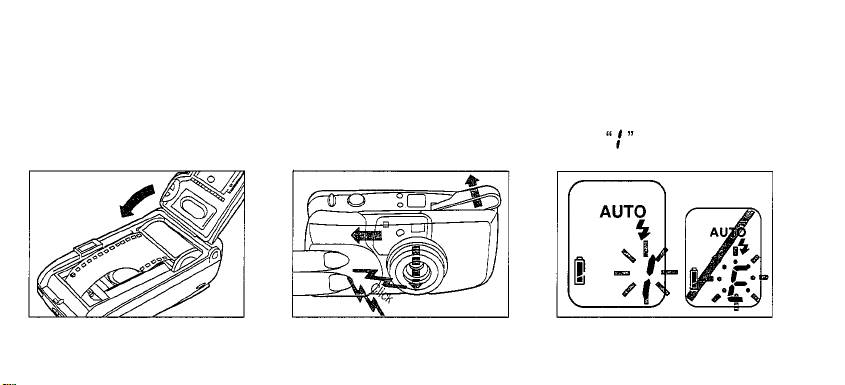
Automatic
operation
Depress
halfway

PREPARATIONS
Names
and
functions
of
parts
Viewfinder
LCD panel .......................................
Attaching the strap .......................... 8
Using the soft case (optional) ......... 9
.......................................
.........
4
6
7
Outline of operations....................... 10
Loading the battery ......................... 14
Checking the battery....................... 15
Points to remember......................... 16
BASIC
OPERATIONS
ADVANCED
TECHNIQUES
CAMERA
MAINTENANCE
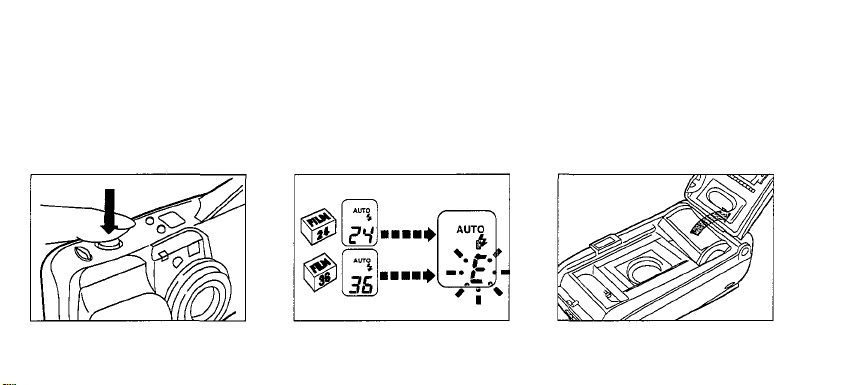
Loading the film............................... 18
Taking pictures................................ 20
Using
the
flash
modes
Auto
(Auto
Auto-S (Red-Eye Reducing Flash) .... 33
OFF (Flash Override) ...................... 34
FILL-IN (Forced Activation) ............. 35
Caring for your weatherproof camera ... 42
Care and storage ............................ 44
Remote control RC-100 handling .... 45
Battery handling .............................. 45
Flash)
....................
............................
30
32
Using the focus lock........................ 25
After shooting.................................. 27
Unloading the film ........................... 29
Night Scene .................................... 36
Selftimer..........................................37
Remote control (optional) ................ 38
Spot................................................. 40
Questions and answers .................. 46
Troubleshooting .............................. 47
Specifications.................................. 50
3
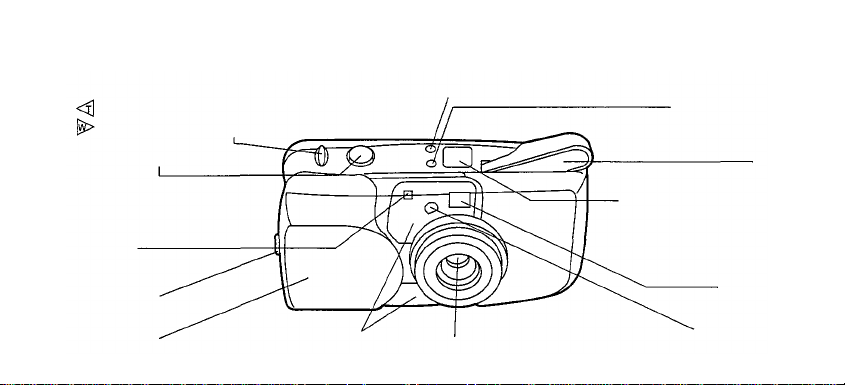
NAMES AND FUNCTIONS OF PARTS
Zoom lever (p. 21)
Zooms in—telephoto.
Zooms out—wide-angle.
Shutter release button
(p. 17)
Selftimer
indicator
PREPARATIONS
Strap eyelet
Lens barrier
4
Autofocus
windows
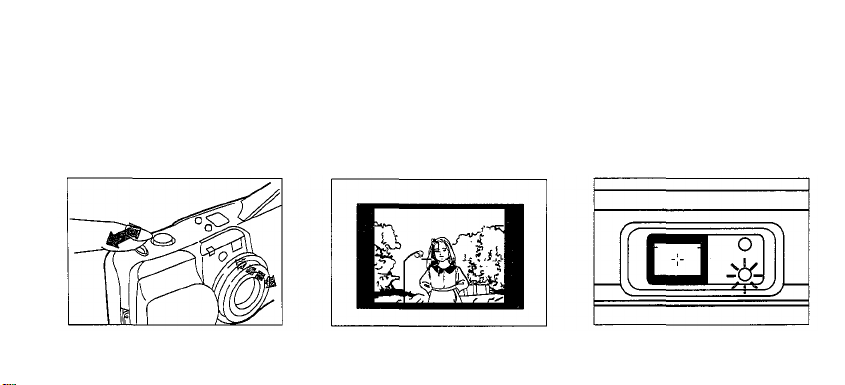
Flash mode button (p. 30)
Lens
Selftimer/remote
control button
(p. 37/38)
Flash
LCD panel
Displays the camera's mode
and operation conditions.
(p. 7)
Viewfinder
Light sensor
Viewfinder
(P. 6)
Orange lamp
Green lamp
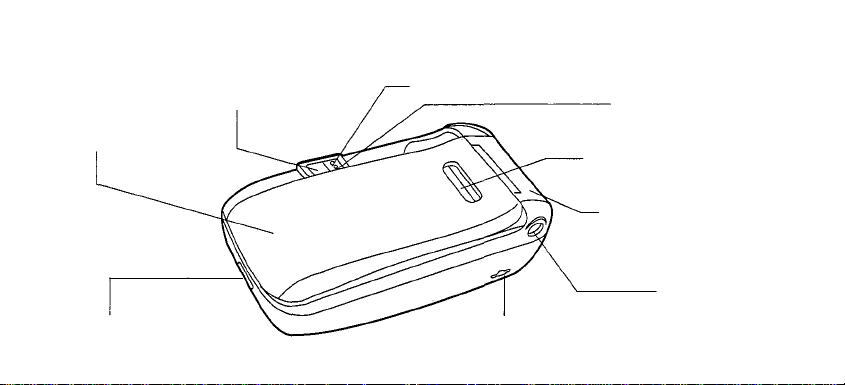
Back cover
Back cover
release
Film window
Battery compartment
cover
Tripod socket
Mid-roll rewind
button (p. 29)
5
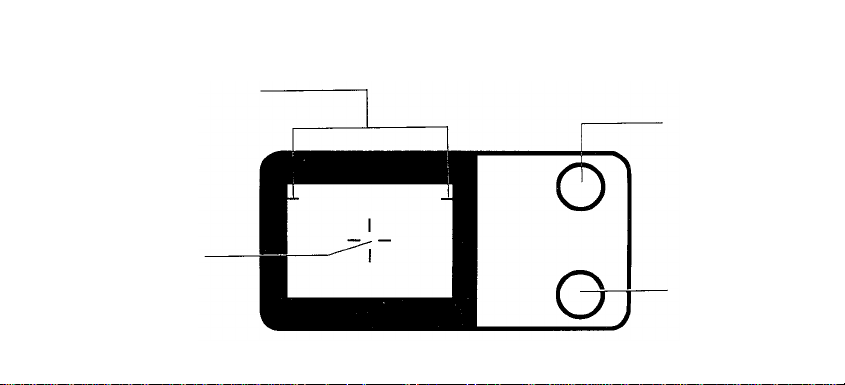
VIEWFINDER
Close-up correction marks
At a close distance, your subject must
be positioned within the close-up
correction marks.
Autofocus mark
Position your subject
within the autofocus
mark.
6
Orange lamp
When this lamp lights,
the flash will fire when
you press the shutter
button all the way.
Green lamp
Lights when the
subject is in focus.
Selftimer/remote
control (p. 37/38)
Spot mode (p. 40)
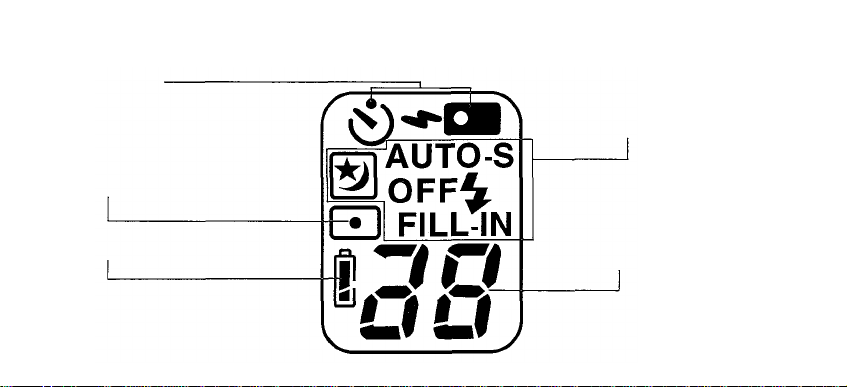
LCD PANEL
Flash modes (p. 31)
Battery check (p. 15)
Exposure counter (p. 19)
7
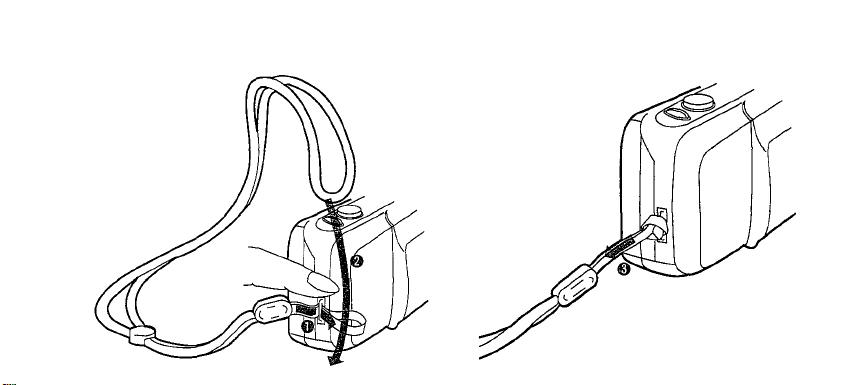
ATTACHING THE STRAP
8
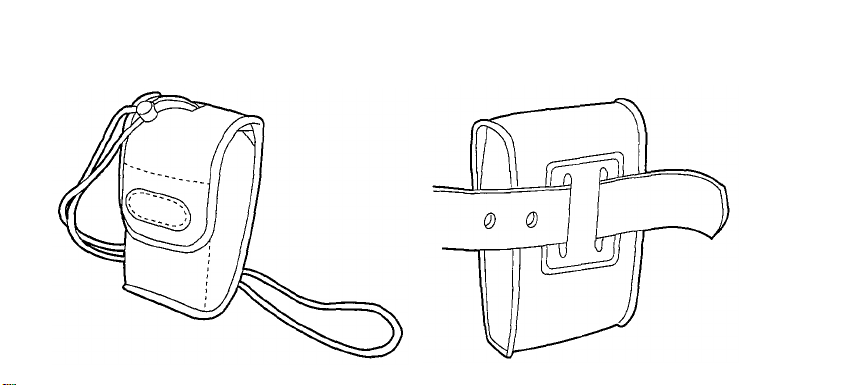
USING THE SOFT CASE (Optional)
9
OUTLINE OF OPERATIONS
Basic Shooting Procedures
10
Load the battery
(p. 14).
1.
Open the back cover
(P. 18).
2.
Load the film aligning
the film leader with
3.
the red mark (p. 19).
Close the back cover.
The film automatically
4.
advances to the first
frame (p. 19).
Open the lens barrier
until you hear a
5.
"Click" (p. 19).
Make sure the
exposure counter on
6.
the LCD panel reads
(p. 19)
11
7.
12
Press the zoom lever
for telephoto or wide-
angle photography
(p. 21).
Place the autofocus
mark on the main
8.
subject (p. 22).
Depress the shutter
release button halfway
9.
to make sure the
green lamp lights
(p. 22).
Depress the shutter
10.
release button fully
to take a picture
(p.
22).
11.
When the film
reaches the end, it
will automatically
rewind (p. 29).
12.
Open the back cover
to remove the
rewound film (p. 29).
13
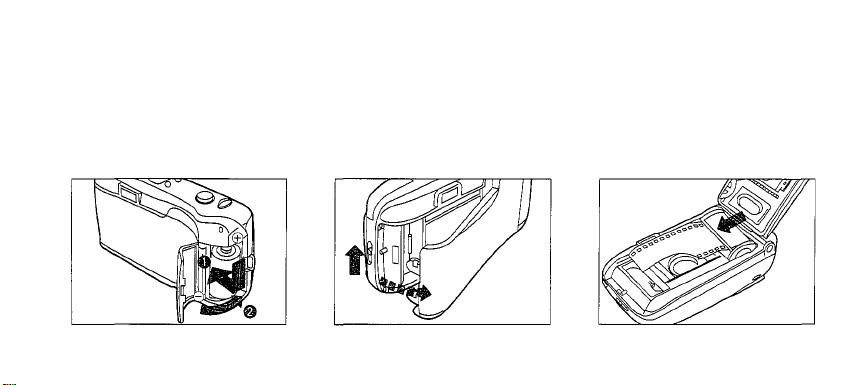
LOADING THE BATTERY
Close the lens barrier. Gently use a coin to open the
battery compartment cover.
1.
Read "Battery Handling" on page 45.
14
Do not twist the coin.
Insert the new battery
correctly as indicated
2.
below and close the
battery compartment
cover tightly.
Use a 3 V lithium battery
(Duracell DL123A,
Panasonic CR123A, or
equivalent.)
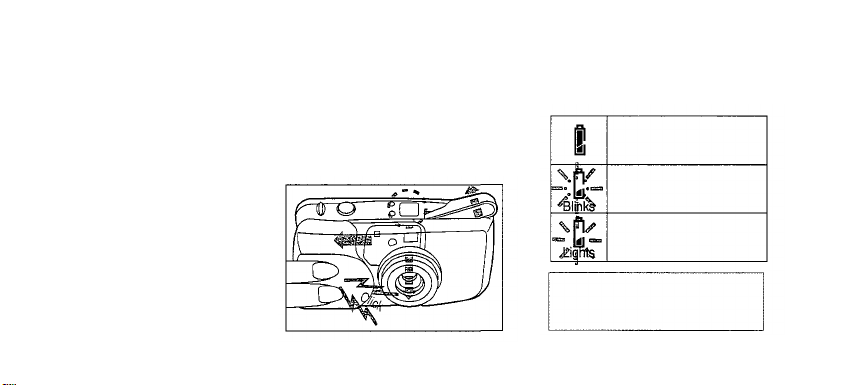
CHECKING THE BATTERY
Open the lens barrier
as shown below until
1.
you hear a "Click" and
check the battery
power remaining.
Batteries are OK. The mark
disappears after 12 sec.
Batteries are low.
Have spares handy.
Batteries should be
replaced immediately.
Note: Keep a spare battery on
hand when going on a long trip or
to a cold area.
15
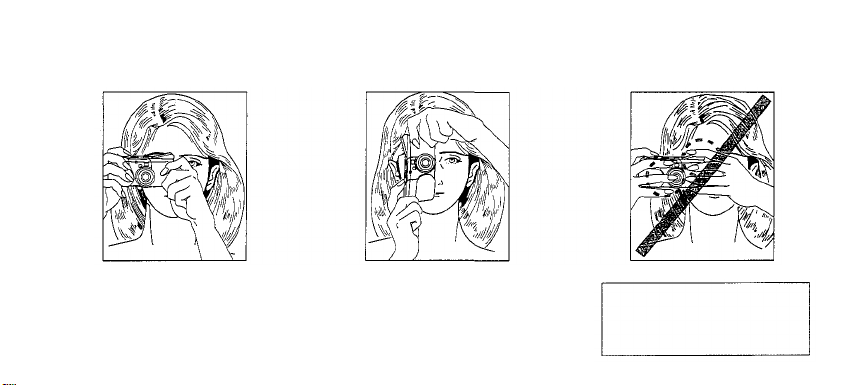
POINTS TO REMEMBER
Hold the Camera Correctly.
Correct.
Hold the camera firmly
with both hands.
16
Correct.
In the vertical position,
hold the camera with its
flash positioned at the top.
Incorrect.
Caution:
Keep your fingers and strap
away from the lens, flash, autofocus windows and light sensor.
 Loading...