

Page 1
Advanced Manual
DIGITAL CAMERA
1 Taking Pictures
2 Viewing
3Setting Up
4 Printing Pictures
5 Connecting Computer
6 Appendix
Page 2
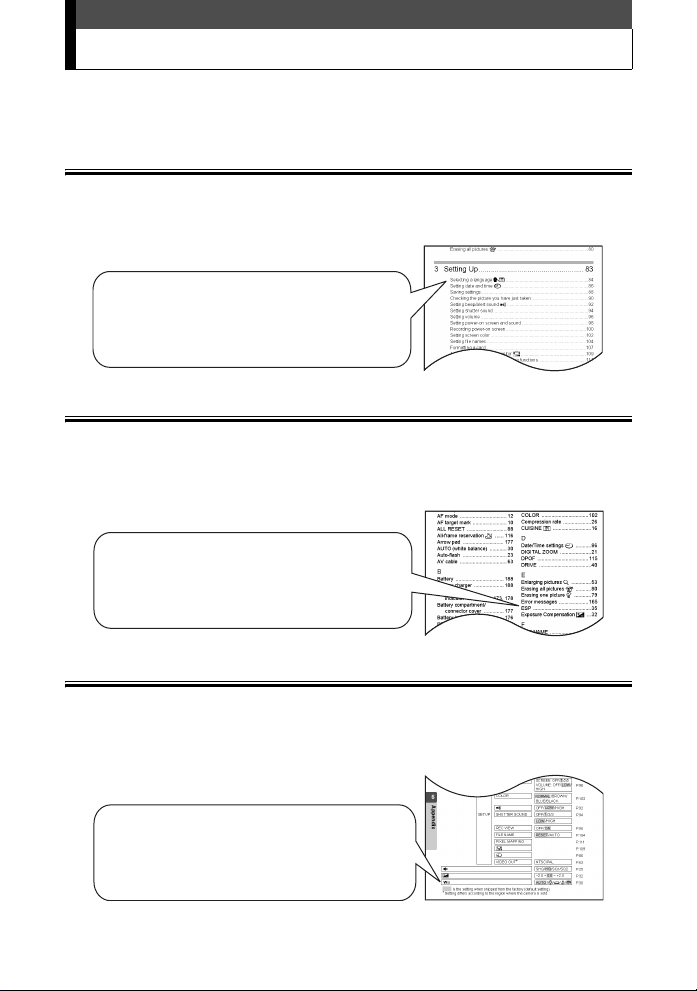
How to use this manual
This manual contains a table of contents, an index and menus to enable
you to easily find the topic that you want to use or learn out more about.
Using the table of contents gP. 5
All the titles in the manual are listed here, grouped into chapters.
The chapters are composed of the shooting, playback, printing, etc.
based on their purposes.
For example...
when you want to select the language
in which the menus and error
messages are displayed
Go to Chapter 3 Seeting Up for the page
titled “Selecting a language W....84.”
Using the index gP.189
The index lists the camera’s functions, parts and terms used in this
manual in alphabetical order. When you come across a word in the
manual that you do not understand or when you want to find a certain
term, use the index to find the page(s) where it is used.
For example...
when you want to know more about
ESP metering
Go to the index at the end of the manual
and look under E for “ESP....35”
Using the menu list gP. 18 0
The camera's menus are laid out in the form of a tree diagram
according to tab and show the setting options for each available
function. First find the menu you are looking for, then look for the
reference page number for each function.
For example...
when you want to find out which setting
to choose for 0
Go through the menus until you find 0
and look for the reference page number.
2
Page 3
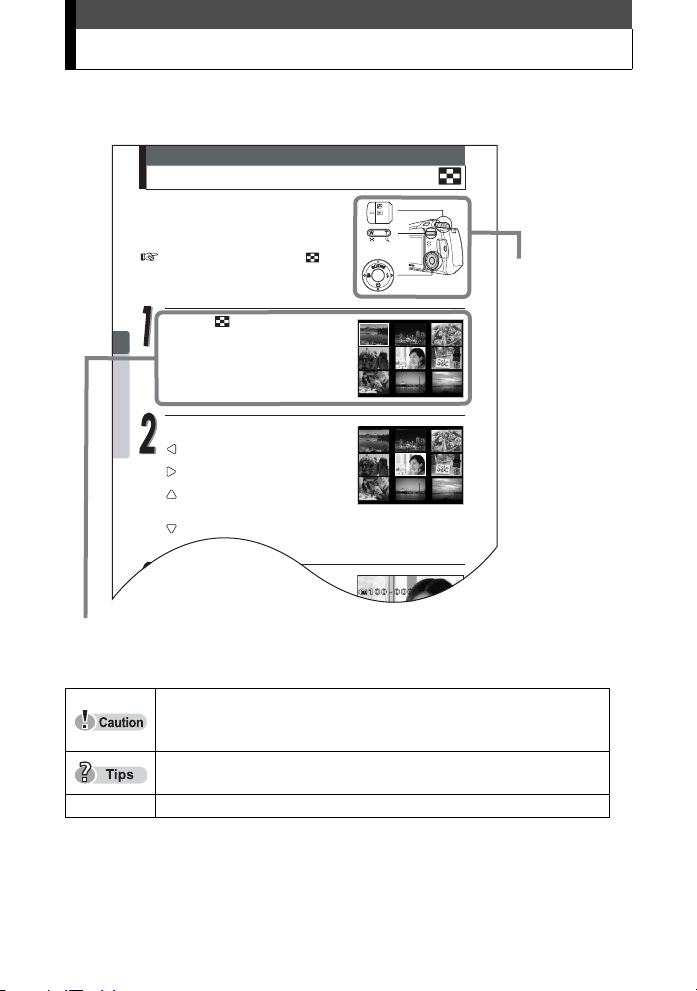
How to read the instructions
2
Viewing
Displaying several pictures at once
This function lets you view several thumbnail
pictures on the monitor at once. It is useful
when you are looking for a specific picture. You
can change the number of pictures displayed.
“Selecting the number of pictures ” (P.51)
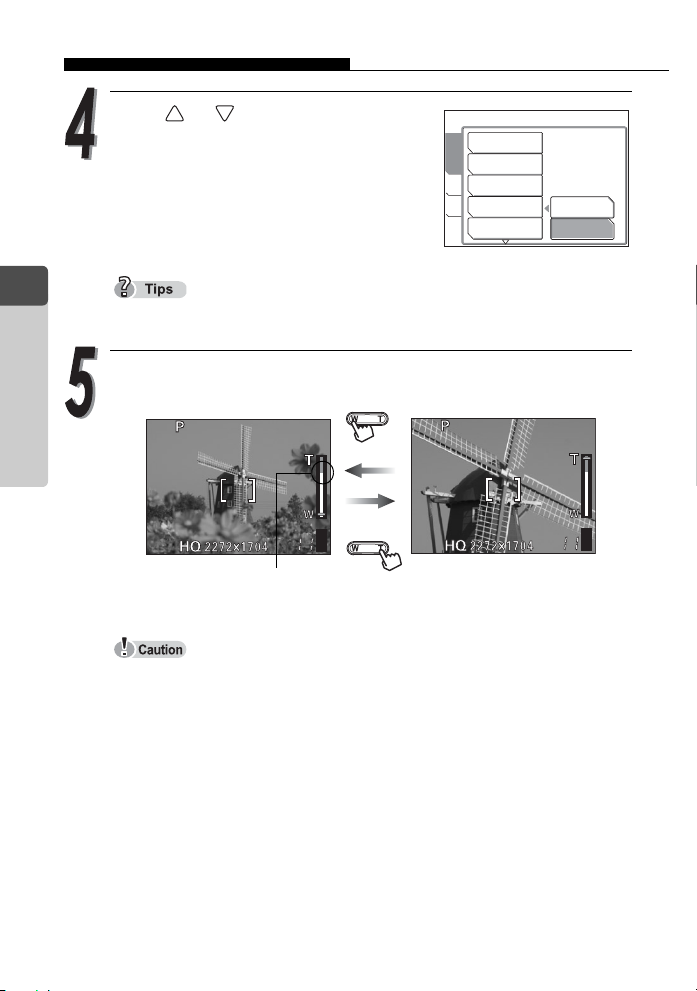
Press the side of the zoom button
in the playback mode.
The index display appears.
Use the arrow pad to select a picture.
: Moves to the previous picture.
: Moves to the next picture.
: Jumps to the previous index display.
(the frames before the top left frame)
: Jumps to the next index display.
(the frames following the bottom right frame)
Press the side of the zoom button.
The screen returns to single-frame
1 2 3
475 6
8 9
1 2 3
475 6
8 9
HQ
100-0005
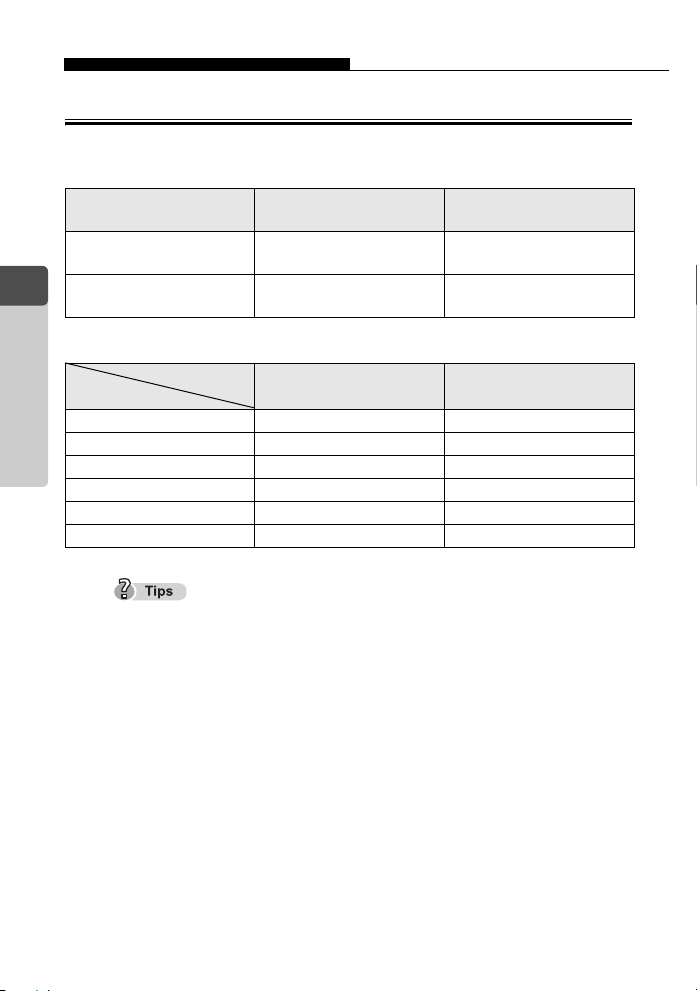
A sample page is shown below to explain how to read the instructions in
this manual. Look at it carefully before taking or viewing pictures.
This shows the
buttons and
button locations
for the function
concerned.
Procedure and the corresponding monitor display are shown.
zIndications used in this manual
g Reference pages describing details or associated information.
This sample page is only for your reference. It may differ from the actual
page in this manual.
Important information on factors which may lead to a malfunction or operational problems. Also warns of operations that
should be absolutely avoided.
Useful information and hints that will help you get the most out
of your camera.
3
Page 4
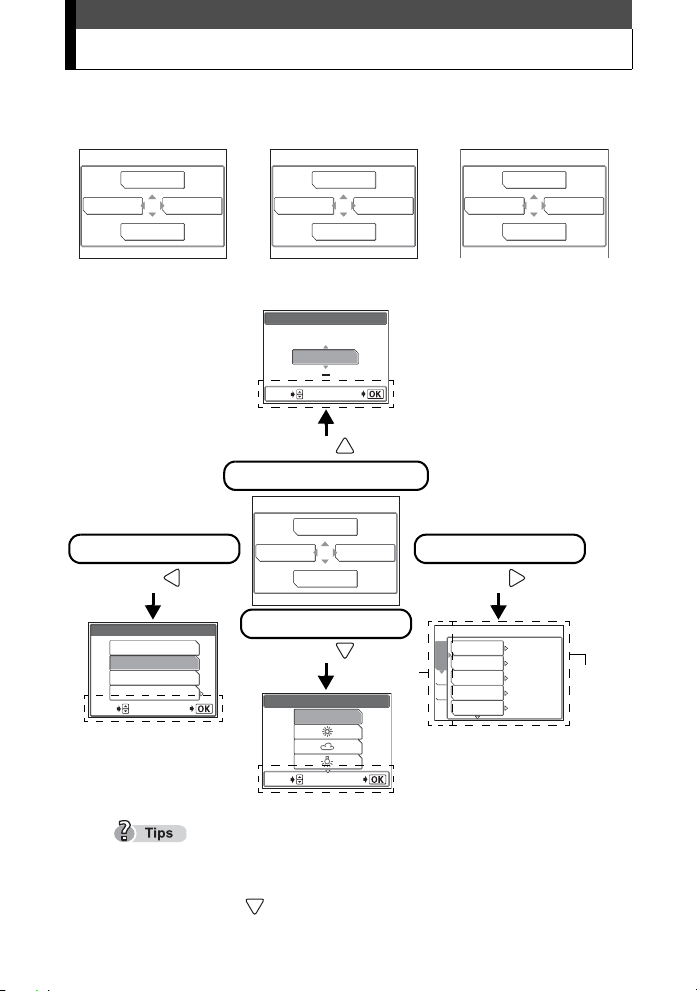
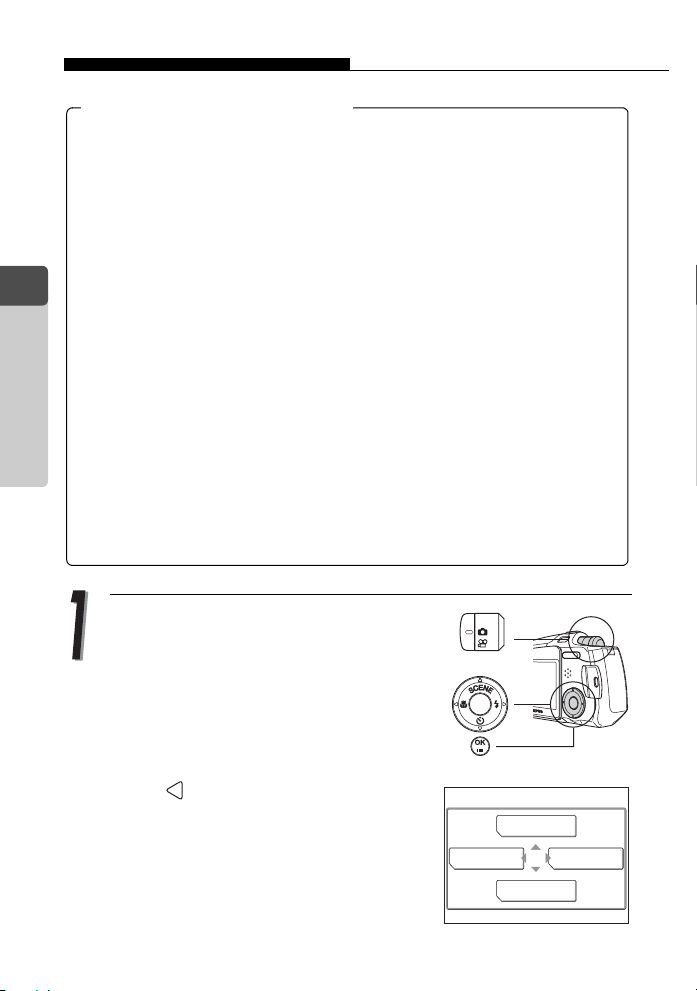
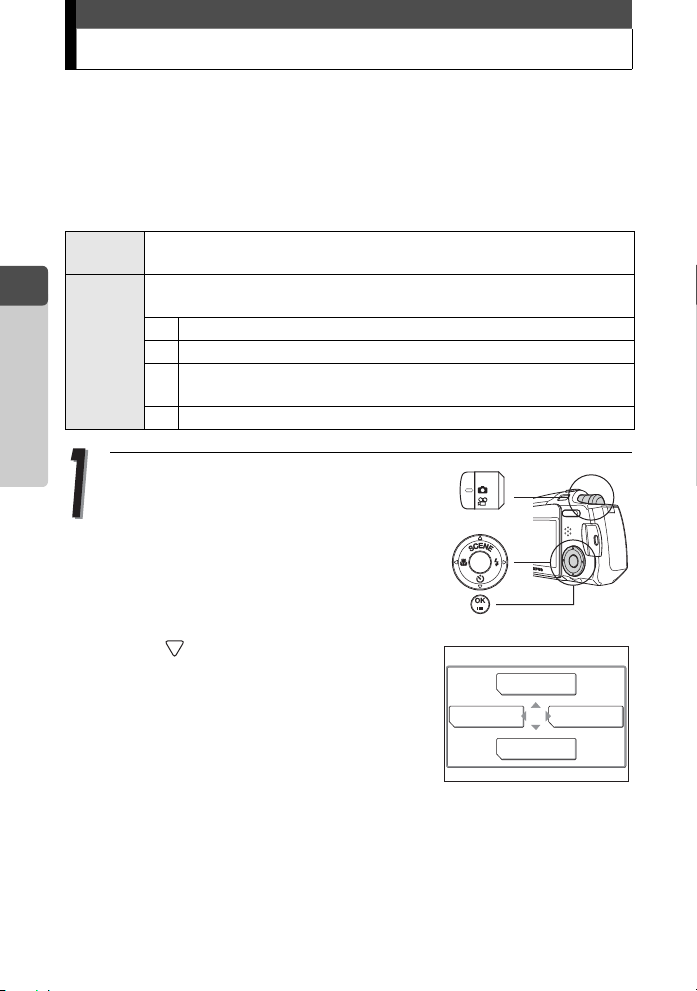
Menu operations
The screen that appears on the monitor when you turn the camera on and press
the OK/MENU button is called the “Top menu.” There are three top menus as
shown below.
MOVIE PLAYBACK
INFO
S ERASE
MODE MENU
K
F
MODE MENU
WB
INFO
m
MODE MENU
S ERASE
Shooting mode Playback mode (still picture) Playback mode (movie)
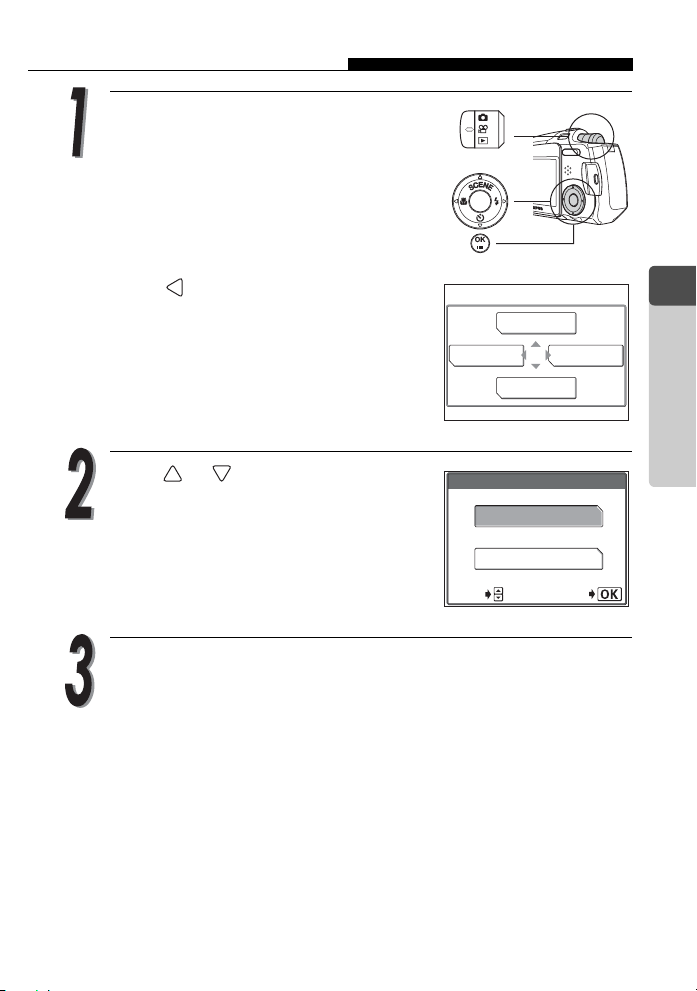
The shooting mode screens will be used here to explain how to use the menus.
F
+
0.0
Operational buttons
SELECT
GO
(arrow pad and OK/MENU
button)
Press
Exposure compensation
F
Image quality mode
Press
K
SHQ 2272×1704
HQ 2272×1704
SQ1 2048×1536
SQ2 640×480
SELECT
Operational buttons
(arrow pad and OK/MENU
button)
GO
Operational buttons (arrow pad and OK/MENU button)
K
MODE MENU
WB
White Balance
Press
WB
AUTO
SELECT
GO
MODE MENU
Press
ESP/n
ESP
o
DRIVE
CAMERA
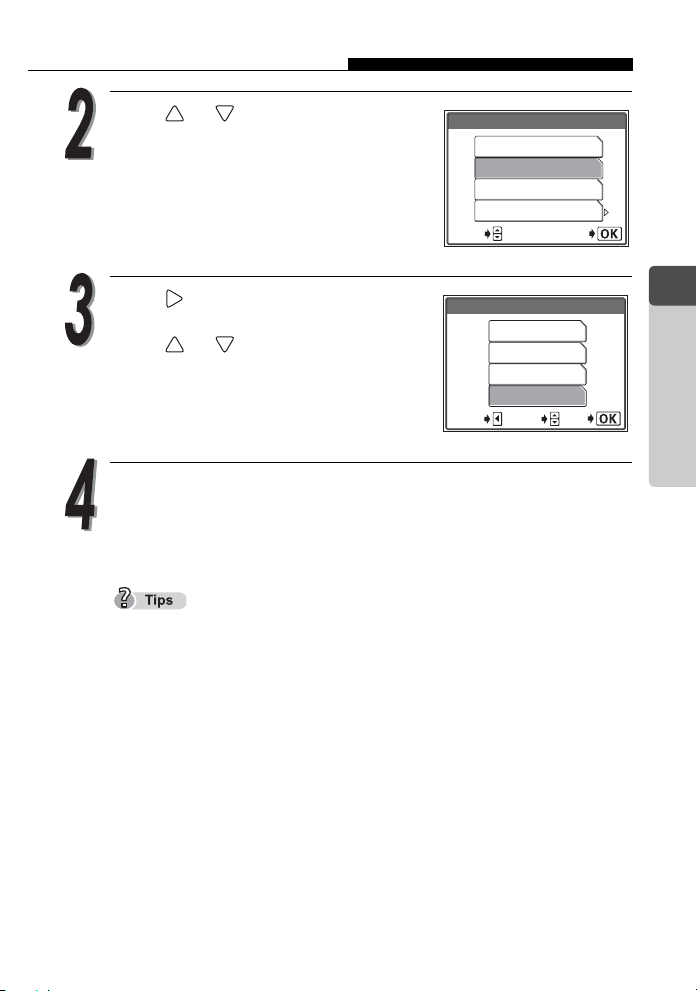
Ta b Function
Use the arrow pad to select a tab
and a mode.
ISO
CARD
DIGITAL ZOOM
SET
AF MODE
AUTO
OFF
SPOT
See gP.180 for the Menu List.
To cancel the menu display, press the OK/MENU button again.
The arrow mark ( ) at the bottom or top of the menu indicates that there
are more options available.
4
Page 5

Contents
How to use this manual...........................................................................2
How to read the instructions....................................................................3
Menu operations .....................................................................................4
1 Taking Pictures .............................................. 9
Focusing on a subject that is not in center of frame (Focus lock) .........10
Changing focus zone (AF) ....................................................................12
Changing shooting scene modes l............................................14
Shooting scene modes ...............................................................15
Recording movies N ...........................................................................18
Using zoom systems .............................................................................20
Using the optical zoom................................................................20
Enabling digital zoom..................................................................21
Using flash #........................................................................................23
Changing resolution and quality K .....................................................25
Picture quality modes for still pictures.........................................25
Picture quality modes for movie..................................................28
Selecting white balance according to surrounding lighting 0 ..........30
Setting Exposure Compensation F....................................................32
Changing ISO sensitivities ....................................................................33
When brightness of subject and background differs 5.......................35
Taking close-up pictures & ..................................................................37
Setting up Super macro mode % ..............................................38
Using self-timer Y ................................................................................39
Taking successive pictures j.............................................................40
Panoramic shooting ..............................................................................42
Stitching together two pictures/ ..................................................45
Recording sound with still pictures R....................................................47
5
Page 6

2 Viewing ........................................................ 49
Displaying several pictures at once G ................................................50
Selecting the number of pictures G ..........................................51
Enlarging pictures U ............................................................................53
Rotating pictures y ..............................................................................54
Displaying pictures one after another m .............................................56
Recording sound with pictures taken R ................................................57
Playing back movies q .......................................................................59
Creating an index........................................................................61
Playback on a TV ..................................................................................63
Displaying shooting information ............................................................66
Editing pictures......................................................................................67
Creating soft focus pictures ........................................................67
Creating fish-eye pictures ...........................................................69
Creating black and white pictures ...............................................71
Creating sepia-tone pictures .......................................................73
Changing the resolution Q .......................................................75
Protecting pictures 0.........................................................................77
Erasing one picture S...........................................................................79
Erasing all pictures R .........................................................................80
3 Setting Up .................................................... 83
Selecting a language W ..................................................................84
Setting date and time X .....................................................................86
Saving settings......................................................................................88
Checking the picture you have just taken .............................................90
Setting beep/alert sound 8 .................................................................92
Setting shutter sound ............................................................................94
Setting volume ......................................................................................96
Setting power-on screen and sound .....................................................98
Recording power-on screen ................................................................100
Setting screen color ............................................................................102
Setting file names................................................................................104
Formatting a card ................................................................................107
Adjusting brightness of monitor s....................................................109
Adjust CCD and image processing functions......................................111
6
Page 7

4 Printing Pictures......................................... 113
Selecting printing method....................................................................114
Making print reservations <...............................................................115
All-frame reservation U...........................................................116
Single-frame reservation <......................................................118
Canceling print reservations .....................................................120
Printing with PictBridge-compatible printer .........................................122
Using the direct printing function...............................................122
Connecting the camera to a printer...........................................123
Printing pictures ........................................................................124
Easiest Printing .........................................................................125
PRINT mode/MULTI PRINT mode............................................127
ALL PRINT mode......................................................................131
ALL INDEX mode/PRINT ORDER mode..................................134
Exiting direct printing.................................................................136
5 Connecting Computer................................ 137
Operational Sequence ........................................................................138
Using provided OLYMPUS Master software .......................................139
What is OLYMPUS Master? .....................................................139
Installing OLYMPUS Master .....................................................140
Connecting the camera to computer ...................................................146
Activating OLYMPUS Master ..............................................................148
Displaying camera images on computer .............................................150
Transferring and storing the camera images on a computer ....150
Viewing still images/movies ................................................................153
Printing images ...................................................................................155
Transferring and storing camera images to a computer without using
OLYMPUS Master application ............................................................157
7
Page 8

6 Appendix.................................................... 159
Precautions .........................................................................................160
Handling the camera.................................................................160
Battery handling precautions ....................................................162
Card handling precautions ........................................................163
LCD monitor..............................................................................164
Error messages...................................................................................165
If a problem arises...............................................................................169
Green and red lamps and indicators ................................................... 173
Camera maintenance..........................................................................174
AC adapter (sold separately) ..............................................................175
Names of parts....................................................................................176
Monitor Display List.............................................................................178
Menu List.............................................................................................180
List of functions by shooting mode......................................................184
Camera specifications.........................................................................186
Specifications of accessories ..............................................................188
Index ...................................................................................................189
8
Page 9
1
This chapter describes how to take successive pictures, movies
and how to use the flash, zoom, etc.
To change the shooting settings, refer to “3: Setting Up.”
Taking Pictures
1
Taking Pictures
9
Page 10
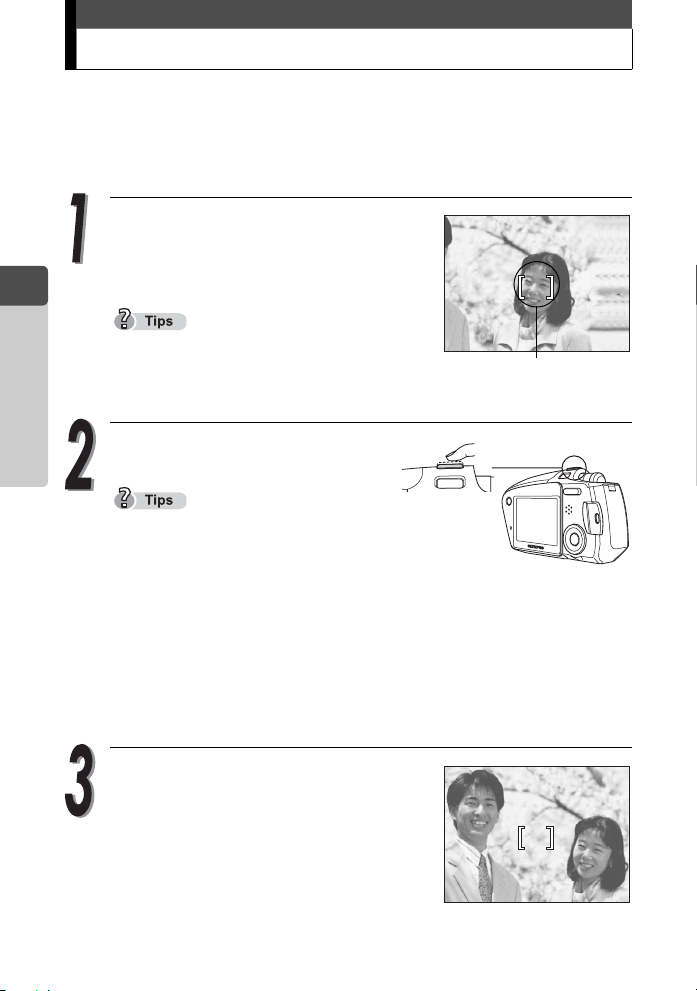
Focusing on a subject that is not in center of frame (Focus lock)
2272*1704
20
HQ
2272*1704
20
HQ
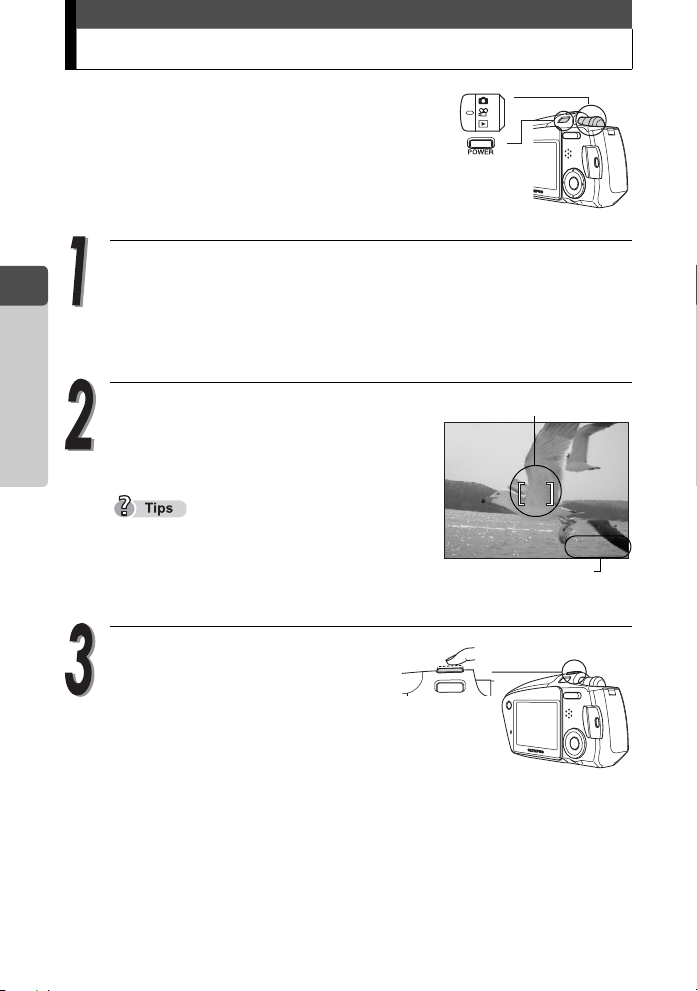
When the subject you want to focus on is not exactly in the center of the
monitor and you cannot position the AF target mark on it, you can focus
on another point at roughly the same distance (focus lock) and take the
picture as explained below. This is called “focus lock.”
In shooting mode, position the AF
P
target mark on the subject you want to
focus on.
1
Taking Pictures
When shooting a hard-to-focus subject, point
the camera at an object about the same
distance away as the subject.
Press the shutter button halfway.
When the green lamp lights steadily,
the focus, exposure and white balance
are locked.
When the green lamp blinks:
c You are too close to the subject take the picture at least 50 cm/1.6 ft.
away from the subject. When the distance from the camera to the
subject is less than 50 cm/1.6 ft, select the macro mode. g“Taking
close-up pictures &” (P.37)
d Focus is not locked so release your finger from the shutter button, re-
position your subject and press the shutter button halfway again.
Recompose your shot while keeping
the shutter button pressed halfway.
o
HQ
AF target mark
P
(
2272*1704
2020
a
10
o
2272*1704
HQ
2020
a
Page 11

Focusing on a subject that is not in center of frame (Focus lock)
Press the shutter button
completely down to take the
picture.
Subjects that are difficult to focus on
The purpose of the camera’s auto focus feature is to bring the subject into
focus automatically, but under certain conditions, the auto focus may not
function effectively. If this happens, focus on an object with high contrast at
the same distance as the intended subject (focus lock), recompose your
shot and then take the picture.
For details of the focus lock procedure, refer to g P.10.
Subject
with low contrast
Subjects at different
distances
Subject with an
extremely bright area
in the center of the frame
Fast-moving subject Subject is not in center
Subject
without vertical lines
(See “Tips” below)
of monitor
1
Taking Pictures
If the subject has no vertical lines, hold the camera vertically and focus on
the subject using the focus lock function by pressing the shutter button
halfway, then return the camera to the horizontal position while keeping the
shutter button pressed halfway and take the picture.
11
Page 12
Changing focus zone (AF)
You can select the focusing mode.
The camera focuses on the subject in the
SPOT
AF target mark.
Select the subject on the monitor that you
would like to focus on. The camera can
iESP
focus on the subject even when it is not
exactly centered.
1
Taking Pictures
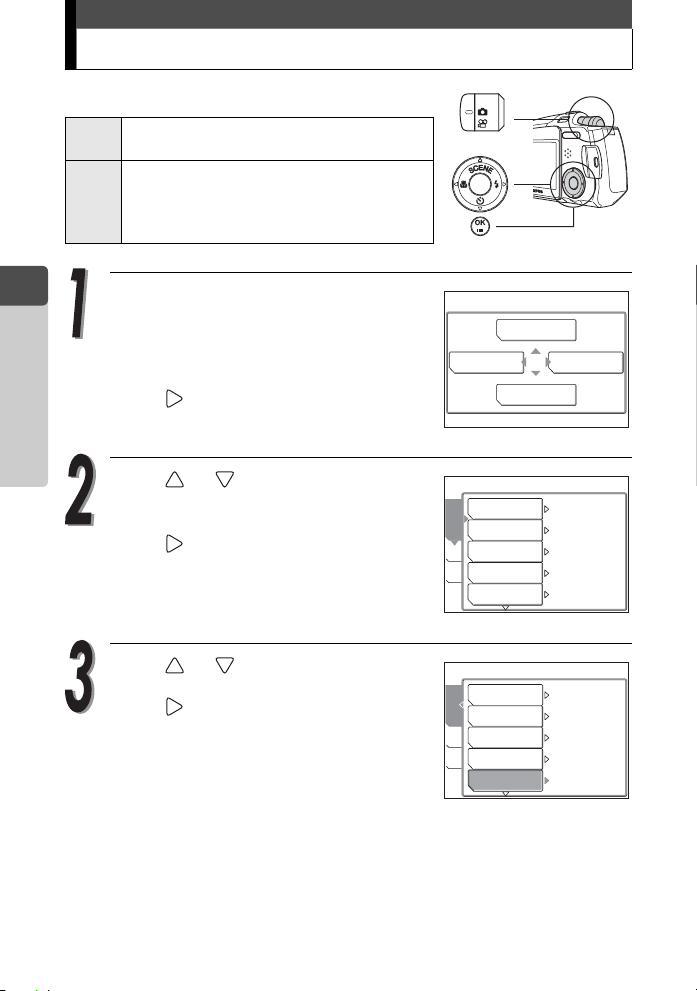
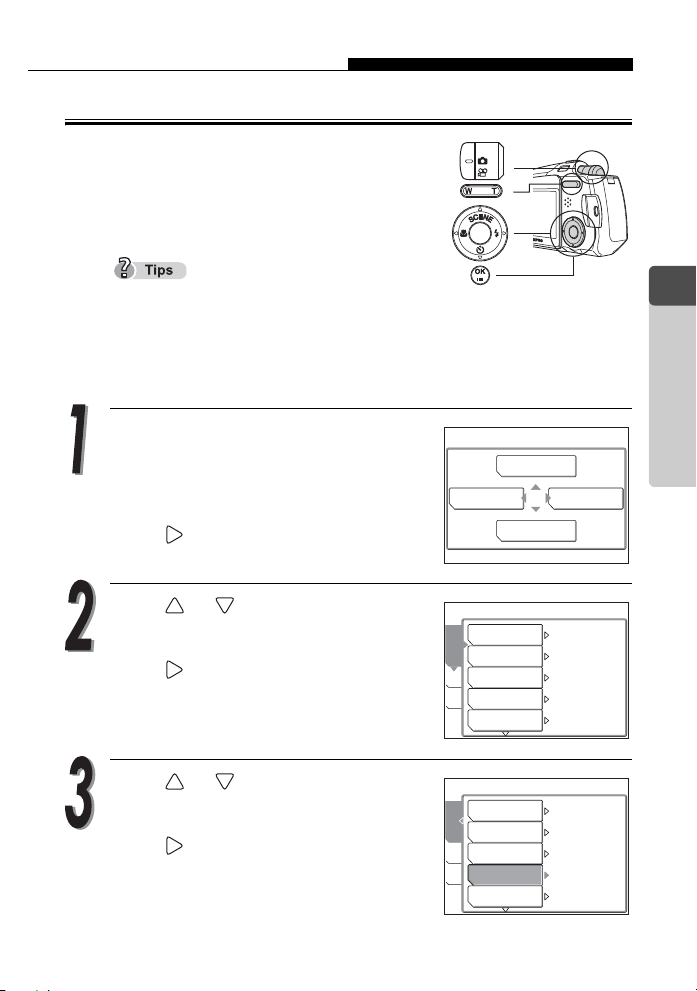
Press the OK/MENU button in
shooting mode (K).
The top menu is displayed.
Press to go to [MODE MENU].
K
F
MODE MENU
WB
Press or to select the
[CAMERA] tab.
Press to go to the [CAMERA]
menu.
ESP/n
DRIVE
CAMERA
ISO
CARD
DIGITAL ZOOM
SET
AF MODE
ESP
o
AUTO
OFF
SPOT
Press or to select [AF MODE].
Press to go to the AF mode
settings.
ESP/n
DRIVE
CAMERA
CARD
DIGITAL ZOOM
SET
AF MODE
ISO
ESP
o
AUTO
OFF
SPOT
12
Page 13

Changing focus zone (AF)
Press or to select [iESP] or
[SPOT] and press the OK/MENU
button.
The AF mode is set.
Press the OK/MENU button again to exit
the menu.
Take the picture using the monitor.
ESP/n
DRIVE
CAMERA
ISO
CARD
DIGITAL ZOOM
SET
AF MODE
iESP
SPOT
1
Taking Pictures
13
Page 14
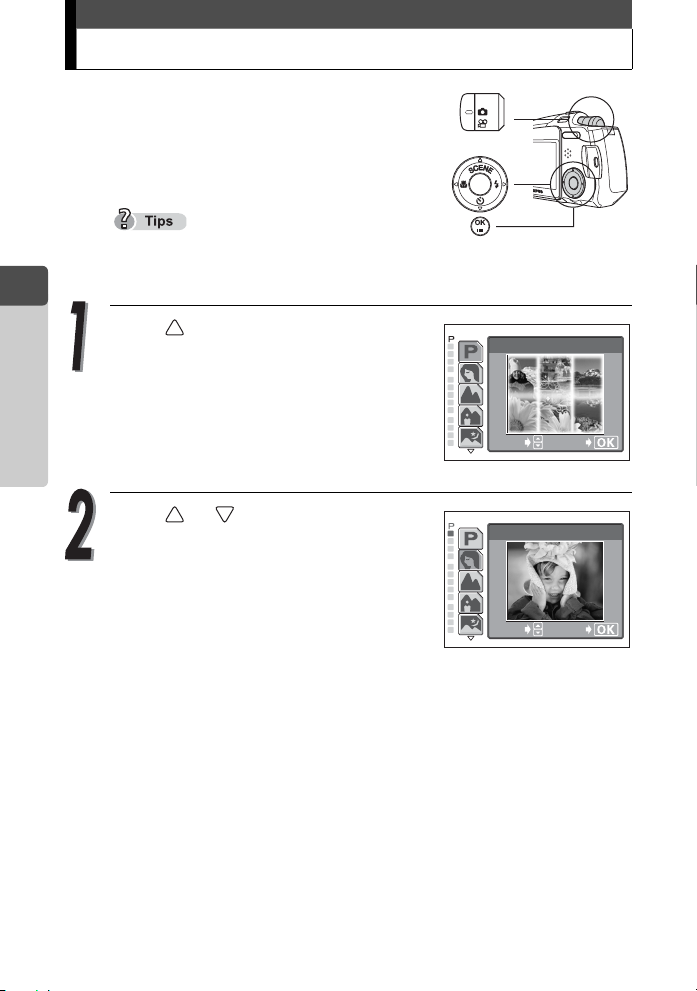
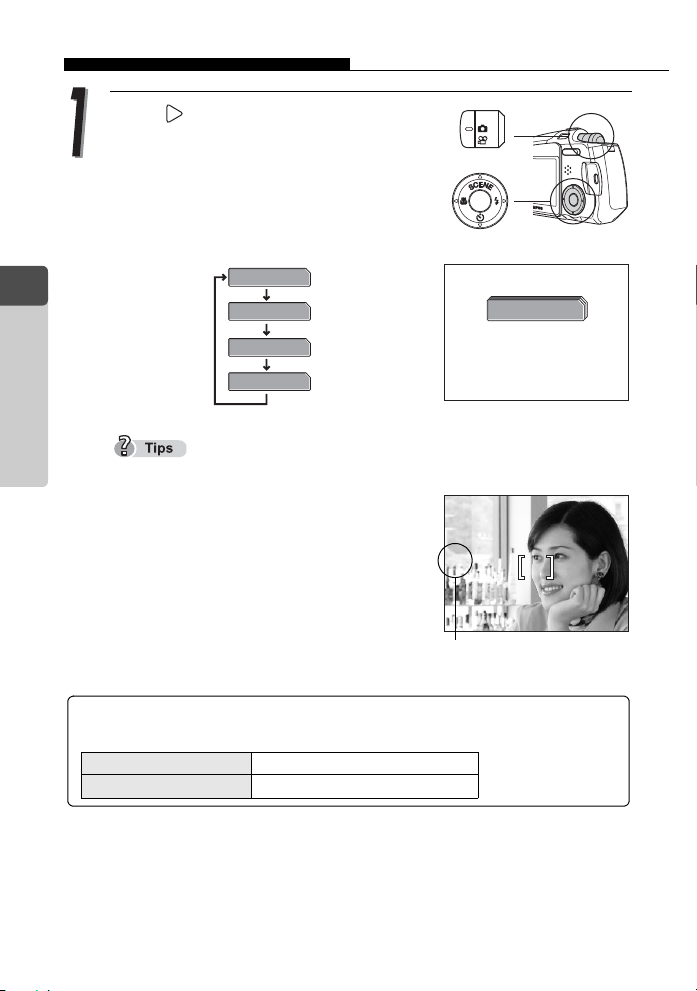
Changing shooting scene modes
There are 14 shooting scene modes to choose
from on this camera. To create the effects you
want, simply select the mode best suited to
your purpose or conditions.
Until you become familiar with the camera, it is
recommended that [PROGRAM AUTO] be used to take pictures.
1
Taking Pictures
Press (l) in shooting mode
(K).
l
PROGRAM AUTO
14
The scene selection palette for selecting
the shooting scene mode is displayed at
left of the monitor.
Press or to select shooting
scene mode, and press the OK/
MENU button.
The selected shooting scene mode is set.
SELECT
SELECT
For normal
shooting
GO
PORTRAIT
GO
Page 15

Changing shooting scene modes l
Shooting scene modes
PROGRAM AUTO P
All you need to do is press the shutter button. The camera automatically
selects the optimal settings.
PORTRAIT
Suitable for taking a full-frame portrait shot of
a person. Ideal for capturing accurate skin
tones.
LANDSCAPE L
Lets you take clear and sharp pictures of
distant scenery. Creates a very broad depth of
field to keep the entire view in focus.
LANDSCAPE + PORTRAIT
Suitable for taking pictures of both your
subject and the landscape.
NIGHT SCENE
Suitable for taking pictures of night views such
as illuminated buildings.
I
K
m
1
Taking Pictures
Slower shutter speeds are used when m (NIGHT
SCENE) mode is set.
The use of a tripod is recommended to prevent your pictures from being blurred by
camera movement when the shutter speed is slow.
15
Page 16

Changing shooting scene modes l
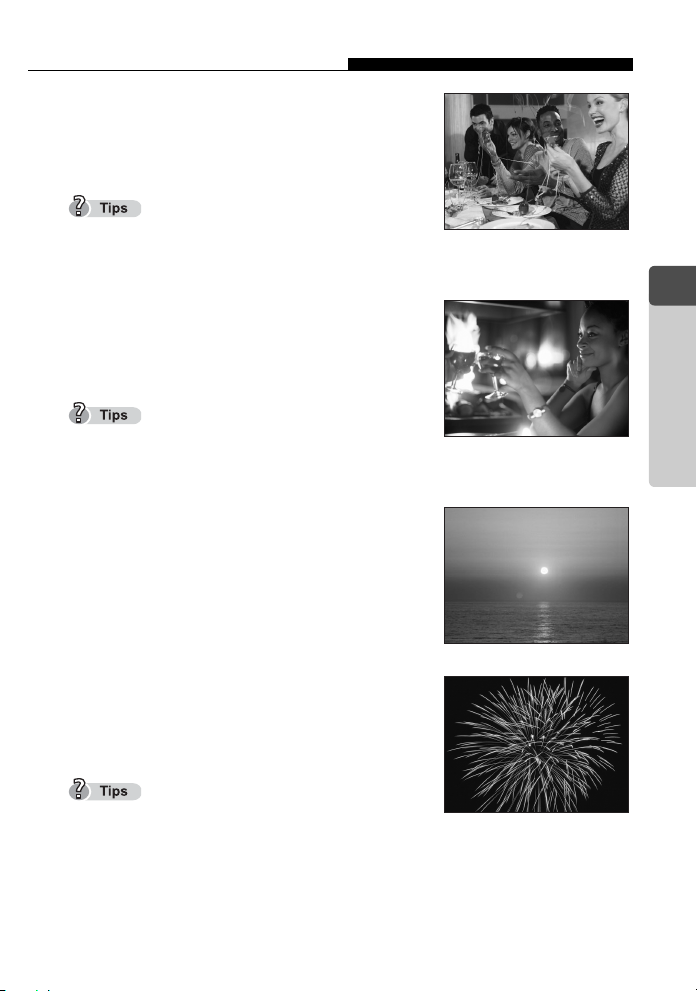
CUISINE G
Lets you take beautiful pictures of food. The
saturation, sharpness and contrast settings
are increased to take sharp, vivid pictures of
the subject.
BEACH & SNOW R
1
Suitable for taking pictures at a beach or in
Taking Pictures
snow. Lets you take beautiful pictures of
scenery with white sand or snow.
SELF PORTRAIT + SELF TIMER
Lets you take pictures of yourself and the
landscape.
BEHIND GLASS v
Suitable for taking pictures of items displayed
in a shop’s window or through glass.
SELF PORTRAIT
Enables you to take a picture of yourself while
holding the camera.
The zoom function is locked at the W position and
cannot be changed while in self portrait mode.
Spot metering is not available in this mode.
o
16
N
Page 17
Changing shooting scene modes l
INDOOR H
Suitable to take pictures of the subject indoors
together with background scene.
Picture quality mode can only be set to SQ2 “1280 ×
960”, “1024 × 768” and “640 × 480.”
CANDLE U
The optimum mode to take a picture of
candles preserving warm light of candles.
Picture quality mode can only be set to SQ2 “1280 ×
960”, “1024 × 768” and “640 × 480.”
SUNSET S
Preserves the deep hues seen in sunsets and
sunrises.
1
Taking Pictures
FIREWORKS y
Lets you capture the expanding burst of light
from a fireworks.
Slower shutter speeds are used when y
(FIREWORKS) mode is set.
The use of a tripod is recommended to prevent your pictures from being blurred by
camera movement when the shutter speed is slow.
17
Page 18
Recording movies N
$
00:36
HQ
You can record movies as well as still pictures
with this camera. The camera maintains the
correct exposure during movie recording even if
your subject moves.
The sound is automatically recorded when
recording a movie.
Set the mode dial to n, then press the POWER switch to turn
1
Taking Pictures
the camera on.
When power is turned on, the lens extends, the monitor turns on, and
the camera enters shooting mode.
18
Position the AF target mark on the
subject while looking at the picture on
the monitor.
During movie recording, the remaining
recording time is displayed on the monitor.
Press the shutter button halfway
and hold.
The focus and white balance are
locked and the green lamp lights
steadily.
AF target mark
N
$
$
R
HQ
Remaining recording
time
00:3600:36
Page 19

Press the shutter button the rest
of the way and release it to start
recording.
While a movie is taken, N indicator
lights red.
Recording movies N
Press the shutter button again to stop recording.
When the remaining recording time has been used up, recording stops
automatically.
To view the movie you have just taken, see g“Playing back movies
q” (P.59)
Press the POWER switch to turn off the camera.
The sound quality deteriorates temporarily if water gets on the microphone
or speaker. It returns to normal when the water has evaporated.
The optical zoom system cannot be used. When you want to use the zoom
system, select [ON] in the [DIGITAL ZOOM] settings. g”Using zoom
systems” (P.20)
1
Taking Pictures
19
Page 20
Using zoom systems
This camera has two zoom systems, one is a normal optical zoom
system and the other is a digital zoom system.
Using the zoom systems, you can change the scope and composition of
the picture you are taking.
Optical zoom up to 2×
Optical zoom + digital zoom up to 8×
Using the optical zoom
1
Taking Pictures
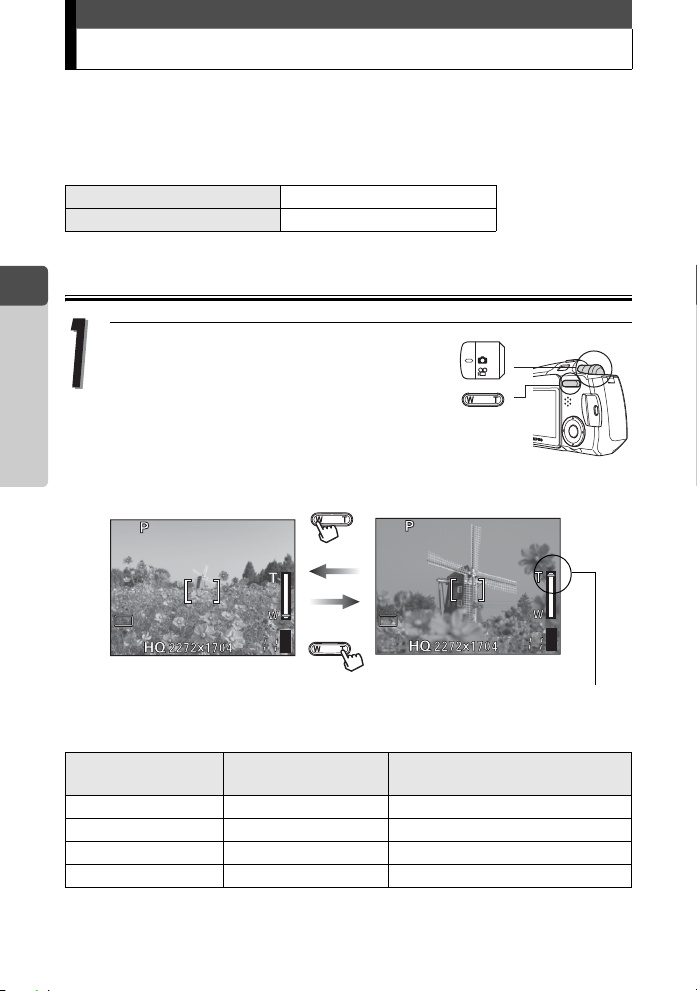
Press the zoom button in shooting
mode (K).
Press and hold the T side of the zoom button
to zoom in on a distant object. (Telephoto)
Press and hold the W side of the zoom
button to zoom out and obtain a broader view. (Wide-angle)
Wide-angle (W)
Shooting distance and shooting range
Zoom position Shooting distance
Macro mode (W) 20 cm (0.7 ft.) to ) 209 × 154 mm (20cm (0.7ft.))
Macro mode (T) 20 cm (0.7 ft.) to ) 105 × 78 mm (20cm (0.7ft.))
Normal shooting (W) 50 cm (1.6 ft.) to ) 509 × 376 mm (50cm (1.6ft.))
Normal shooting (T) 50 cm (1.6 ft.) to ) 255 × 191 mm (50cm (1.6ft.))
Telephoto (T)
The zoom bar goes up or down.
Shooting range (W × H)
(minimum shooting distance)
20
Page 21
Enabling digital zoom
The optical zoom is operated simply by
pressing the zoom button, but to use the digital
zoom, [DIGITAL ZOOM] must be set to [ON] on
the monitor.
Using zoom systems
The optical zoom magnifies the subject by
extending the lens. The digital zoom, on the other hand, enlarges the picture
by digitizing the image captured by the camera. The area in the center of the
image is cropped and magnified on the monitor. Pictures taken with the
digital zoom may appear grainy as a result.
Press the OK/MENU button in
shooting mode.
The top menu is displayed.
Press to go to [MODE MENU].
K
F
MODE MENU
WB
Press or to select the
[CAMERA] tab.
Press to go to the [CAMERA]
menu.
ESP/n
DRIVE
CAMERA
ISO
CARD
DIGITAL ZOOM
SET
AF MODE
ESP
o
AUTO
OFF
SPOT
Press or to select [DIGITAL
ZOOM].
Press to go to the digital zoom
settings.
ESP/n
DRIVE
CAMERA
ISO
CARD
DIGITAL ZOOM
SET
AF MODE
ESP
o
AUTO
OFF
SPOT
1
Taking Pictures
21
Page 22
Using zoom systems
Press or to select [ON] and
press the OK/MENU button.
The digital zoom is set.
Press the OK/MENU button again to exit
the menu.
1
Taking Pictures
The digital zoom cannot be used when [OFF] is selected.
Press the zoom button to operate the digital zoom.
o o
ESP/n
DRIVE
CAMERA
ISO
CARD
DIGITAL ZOOM
SET
AF MODE
White area : Range of optical zoom magnification.
Red area : Range of digital zoom magnification.
OFF
ON
22
Pictures taken with the digital zoom may appear grainy.
Camera movement is likely to occur at higher magnifications. Stabilize the
camera with a tripod, etc. to avoid camera movement.
The zoom systems cannot be used in the self portrait mode.
Page 23
Using flash #
The camera is initially set to Auto-flash, but you can select from the
following four flash modes according to the shooting conditions.
Auto-flash (Factory default setting)
The flash fires automatically in low light or backlight conditions.
!Red-eye reduction flash
The light from the flash may make the subject’s eyes appear red in
pictures taken in dark places. The red-eye reduction flash mode [!]
reduces this phenomenon by emitting pre-flashes before firing the
regular flash. This helps accustom the subject’s eyes to the bright light
and minimizes the red-eye phenomenon.
After the pre-flashes, it takes about 1 second until the picture is taken. Hold
the camera firmly to avoid camera movement.
Effectiveness may be limited if the subject is not looking directly at the pre-
flashes, or if the subject is too far from the camera. Individual physical
characteristics may also limit effectiveness.
#Fill-in flash
The flash fires regardless of the available light. This mode is useful for
eliminating shadows on the subject’s face (such as shadows from tree
leaves), in a backlight situation, or for correcting the color shift produced
by artificial lighting (especially fluorescent light).
1
Taking Pictures
$Flash off
The flash does not fire even in low-light conditions. Use this mode in
places such as art museums where flash photography is prohibited.
Since a slow shutter speed is automatically selected in low light situations
when in the flash off mode, the use of a tripod is recommended to prevent
camera movement.
23
Page 24
Using flash #
2272*1704
11
HQ
2272*1704
11
HQ
Press (#) repeatedly in shooting
mode (K) to change the flash setting.
The flash settings change in the order
of the arrow. After [$], the setting
returns to [AUTO].
1
Taking Pictures
The flash charging lamp (#) blinks while the flash is charging.
Example: When [#] is set, the display
shows # indicator.
The flash setting mode display automatically
turns off.
AUTO
!
#
$
#
o
Flash mode indicator
Flash working range
The appropriate shooting distance when using the flash is shown below.
Shooting distance (W) 0.2 to 2.8 m (0.7 to 9.2 ft.)
Shooting distance (T) 0.2 to 2.0 m (0.7 to 6.6 ft.)
P
2272*1704
HQ
P
2272*1704
HQ
AUTO
1111
1111
a
a
24
Page 25
Changing resolution and quality K
L
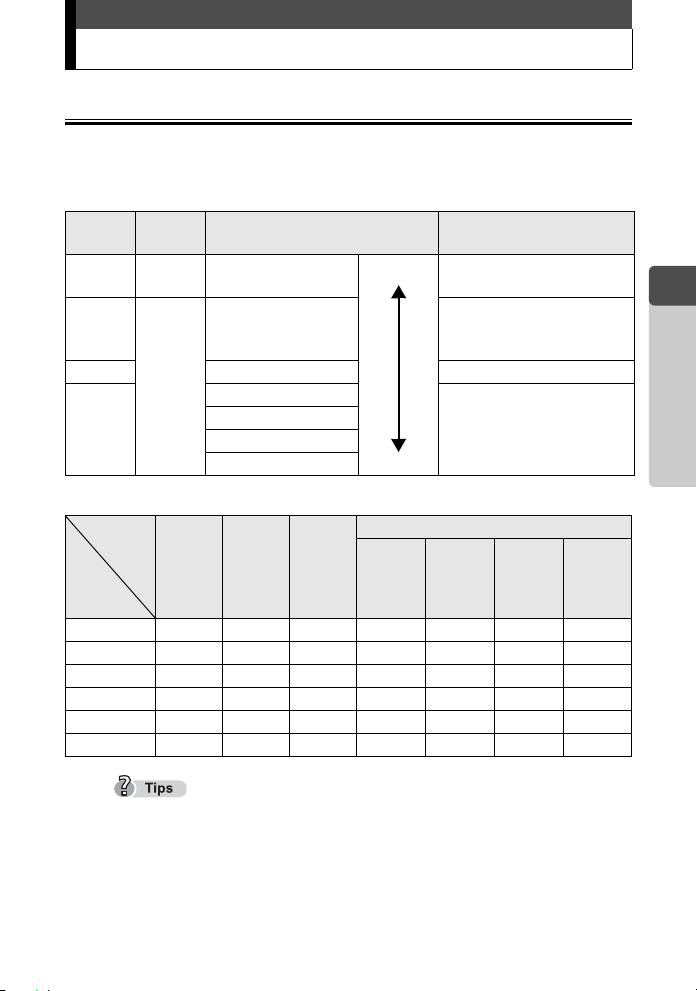
Picture quality modes for still pictures
This function lets you select the resolution and quality when recording
pictures on the card. It is best to choose the resolution and quality
according to the purpose. The camera is preset to HQ mode.
Record
mode
SHQ Detailed
SQ1 2048 × 1536 For printing 3" × 5" prints.
SQ2
Card capacity and number of storable pictures
Card
capacity
128MB 45 130 163 194 307 469 726
256MB 90 262 326 389 614 940 1453
512MB 180 523 652 779 1229 1879 2904
Picture
quality
(Low compression)
HQ
Normal
Record
mode
16MB 5 16 20 24 38 58 90
32MB 11 32 40 48 76 117 180
64MB 22 65 81 97 153 234 362
(Hereafter standard
SHQ HQ SQ1
Resolution Usage examples
2272 × 1704
2272 × 1704
compression)
1600 × 1200
1280 × 960
1024 × 768
640 × 480
Small
1600 ×
1200
For making large prints
arge
or editing on a computer.
For printing in postcard
size.
For small prints, posting
on the Internet or attaching to e-mail.
SQ2
1280 ×
960
1024 ×
768
640 ×
480
1
Taking Pictures
The number of storable pictures listed in the table is approximate.
The number of remaining pictures may change according to the subject or
print reservation.
The number of remaining pictures sometimes does not change even when a
picture is taken or a stored picture is erased.
Recording sound with still pictures reduces the number of pictures you can take.
25
Page 26
Changing resolution and quality K
Resolution and Compression rate
Compression rate and picture quality
The quality of the picture depends on the compression rate. Pictures taken in
a low compression record mode are clearer than pictures taken in standard
compression record mode. However, lower compression makes the file size
larger, reducing the number of pictures that can be stored on the card.
Resolution
1
This refers to the number of pixels (vertical × horizontal) used when saving
an picture. If the picture will be printed, higher resolution (larger number of
Taking Pictures
pixels) is recommended so that the picture will be clearer. However, higher
resolution pictures make the file size (amount of data) larger, so the number
of pictures that can be saved will be fewer.
Resolution and picture size on a computer screen
When a picture is transferred to a computer, the size of the picture on the
computer screen varies depending on the computer’s monitor setting. For
instance, a picture taken in 1024 × 768 resolution is the same size as the
screen if you set the picture to 1× when the monitor setting is 1024 × 768.
However, if the monitor setting is greater than 1024 × 768 (such as
1280 × 1024), the picture only takes up part of the screen.
Press the OK/MENU button in shooting
mode (K).
26
The top menu is displayed.
Press to select [K].
K
F
MODE MENU
WB
Page 27
Changing resolution and quality K
Press or to select [SHQ], [HQ],
[SQ1] or [SQ2].
If you selected [SHQ], [HQ] or [SQ1], go to
step 4.
If you selected [SQ2], go to step 3.
Press to display the [SQ2] setup
screen.
Press or to choose a
resolution and press the OK/MENU
button.
SELECT
CANCEL
K
SHQ 2272×1704
HQ 2272×1704
SQ1 2048×1536
SQ2 640×480
GO
SQ2
1600×1200
1280×960
1024×768
640×480
GO
SELECT
Press the OK/MENU button.
The selected record mode and the number of shootable still pictures
are displayed.
To save the selected picture quality mode for the next time you use the
camera, set [ALL RESET] to [OFF]. g “Saving settings” (P.8 8 )
1
Taking Pictures
27
Page 28
Changing resolution and quality K
Picture quality modes for movie
You can select between two picture quality modes. The recording time
varies depending on the picture quality mode.
Record mode
HQ
1
SQ
Taking Pictures
Total recording time per card
Record mode
Card capacity
16MB Approx. 41 sec. Approx. 150 sec.
32MB Approx. 83 sec. Approx. 300 sec.
64MB Approx. 170 sec. Approx. 600 sec.
128MB Approx. 330 sec. Approx. 1200 sec.
256MB Approx. 670 sec. Approx. 2400 sec.
512MB Approx. 1300 sec. Approx. 4800 sec.
The recording time shown in the above table are approximate.
Resolution
(Frames per second)
320 × 240
(15 frames/sec.)
160 × 120
(15 frames/sec.)
HQ SQ
Recording time (16MB)
Approx. 41 sec.
Approx. 150 sec.
28
Page 29
Changing resolution and quality K
Press the OK/MENU button in the
MOVIE (n) shooting mode.
The top menu is displayed.
Press to select [K].
F
K
Press or to select [HQ] or [SQ].
HQ 320×240
SQ 160×120
SELECT
MODE MENU
WB
K
Press the OK/MENU button.
The selected record mode and time remaining are displayed.
1
Taking Pictures
GO
29
Page 30
Selecting white balance according to surrounding lighting
When daylight, the sun or tungsten lighting are reflected on white
substance, the shade of white produced will differ for each. People’s
eyes recognize white objects as being white irrespective of the
surrounding lighting, but with a digital camera the color needs to be
adjusted to suit the situational lighting so that white objects appear
white in the picture. This adjustment function is called “white balance.”
AUTO
1
Taking Pictures
PRESET
The camera automatically adjusts the white balance according to
the situational lighting so that colors look natural.
Choose from one of the following white balance settings according
to the situational lighting.
5 Suitable for taking pictures under a clear sky.
3 Suitable for taking pictures under a cloudy sky.
Suitable for taking pictures under tungsten lighting
1
(incandescent).
> Suitable for taking pictures under fluorescent lighting.
Press the OK/MENU button in shooting
mode.
The top menu is displayed.
0
30
Press to select [0].
K
F
MODE MENU
WB
Page 31

Selecting white balance according to surrounding lighting 0
-1.0
2272*1704
11
HQ
Press or to select [AUTO], [5],
[3], [1] or [>], then press the OK/
MENU button.
The selected white balance mode is set.
When the white balance mode is selected,
the white balance indicators [5, 3, 1,
>] are displayed on the monitor.
When [AUTO] white balance mode is set,
no indicator is displayed.
Set the white balance to [5] or [3] to
capture a sunrise or sunset with beautiful reddish tones.
SELECT
SELECT
P
o
HQ
WB
AUTO
GO
WB
>
GO
Indicator
2272*1704
-1.0
5
1111
1
Taking Pictures
a
The white balance feature may not be effective under some special light
sources, such situations where multiple lights are used.
If you set a white balance mode other than [AUTO], play back the picture
and check the colors on the monitor.
When the flash is fired with a white balance setting other than [AUTO],
colors may appear different in the resulting picture from those in the picture
you see on the monitor.
31
Page 32

Setting Exposure Compensation F
If your subject is extremely bright or dark, or if
the contrast between the subject and the
background is high, you can adjust the
brightness using the exposure compensation
feature. You can adjust the exposure between
+2.0 and –2.0 in 1/3 EV (Exposure Value) steps.
1
Taking Pictures
Press the OK/MENU button in
shooting mode.
The top menu is displayed.
Press to select [ F ].
Press or to select the exposure
compensation value.
:Adjusts towards [+] to give a brighter
picture.
:Adjusts towards [–] to give a darker
picture.
K
SELECT
F
MODE MENU
WB
F
+
0.0
GO
Press the OK/MENU button.
The selected exposure compensation value is set.
Often bright subjects (such as snow) will turn out darker on the picture than their
natural colors. Adjusting towards [+] makes these subjects closer to their real
shades. For the same reason, adjust towards [–] when shooting dark subjects.
We recommend that you return the exposure compensation value to 0 after
taking a picture with an adjusted exposure compensation.
32
If the flash is used, the picture brightness (exposure) may differ from the
intended brightness (exposure).
Page 33

Changing ISO sensitivities
Setting ISO sensitivity at a high level is
effective in taking pictures of the subject in
dark or low-lighting conditions. However, the
picture may contain noise or become grainy.
AUTO
The camera automatically compensates by raising or lowering sensitivity depending on the subject.
Use lower ISO sensitivities for taking pictures in bright day-
64/100/200/400
light to obtain a sharp picture. Use higher ISO sensitivities to
take pictures using a faster shutter speed.
Press the OK/MENU button in
shooting mode.
The top menu is displayed.
Press to go to [MODE MENU].
Press or to select the
[CAMERA] tab.
Press to go to the [CAMERA]
menu.
Press or to select [ISO].
Press to go to the selected the ISO
sensitivity setting.
K
ESP/n
DRIVE
CAMERA
ISO
CARD
DIGITAL ZOOM
SET
AF MODE
ESP/n
DRIVE
CAMERA
ISO
CARD
DIGITAL ZOOM
SET
AF MODE
1
Taking Pictures
F
MODE MENU
WB
ESP
o
AUTO
OFF
SPOT
ESP
o
AUTO
OFF
SPOT
33
Page 34

Changing ISO sensitivities
Press or to select a desired
ISO sensitivity and press the OK/
MENU button.
The selected ISO sensitivity is set.
Press the OK/MENU button again to exit
the menu.
1
Taking Pictures
Take the pictures.
The higher ISO sensitivity setting you select, the higher noise level the
picture has.
The ISO sensitivities are measured based on silver-halide films but the
figures are approximate.
When [ISO] is set to [AUTO] and a picture is taken in a dark place without
using the flash, the camera automatically sets to a high shutter speed in
order to avoid camera shake.
When [ISO] is set to [AUTO] and the subject is so far as the flash light does
not reach it the camera automatically raises the ISO sensitivity.
ESP/n
DRIVE
CAMERA
ISO
CARD
DIGITAL ZOOM
SET
AF MODE
AUTO
64
100
200
400
34
Page 35

When brightness of subject and background differs
Taking pictures of a backlit subject may result
in darkened faces or other foreground objects.
Using the spot metering in such situations will
ensure that the subject is clear regardless of
the background light.
5
ESP (no indication)
n
Meters the subject at the center of the monitor and the
area around it separately to obtain the optimum exposure.
Meters only the subject in the AF target mark at the center
of the monitor to obtain the appropriate exposure for the
subject in the center.
Press the OK/MENU button in
shooting mode.
The top menu is displayed.
Press to go to [MODE MENU].
Press or to select the
[CAMERA] tab.
Press to go to the [CAMERA]
menu.
Press or to select [ESP/n].
Press to go to the metering
settings.
K
ESP/n
DRIVE
CAMERA
ISO
CARD
DIGITAL ZOOM
SET
AF MODE
ESP/n
DRIVE
CAMERA
ISO
CARD
DIGITAL ZOOM
SET
AF MODE
1
Taking Pictures
F
MODE MENU
WB
ESP
o
AUTO
OFF
SPOT
ESP
o
AUTO
OFF
SPOT
35
Page 36

When brightness of subject and background differs 5
Press or to select [n] and
press the OK/MENU button.
The spot metering is set.
Press the OK/MENU button again to exit
the menu.
ESP/n
DRIVE
CAMERA
ISO
CARD
DIGITAL ZOOM
SET
AF MODE
ESP
n
1
Taking Pictures
Take the picture using spot metering.
c Position the subject in the center of the frame and press
the shutter button halfway.
d Compose your shot and press the shutter button all the
way to take the picture.
36
Page 37

Taking close-up pictures &
2272*1704
11
HQ
Use the macro mode when you want to shoot a
close up of the subject, for example when
taking a picture of a flower.
With the macro mode, you can take pictures as
close as 20 cm (7.8 in.) to the subject. To shoot
even closer, select the super macro mode.
This lets you shoot as close as 8 cm (3.1 in.) to the subject.
Press (&) repeatedly in shooting
P
mode to select [&].
&
When the macro mode has been selected,
& is displayed on the monitor.
2272*1704
HQ
1111
a
Take the picture using the monitor.
To cancel the macro mode, select [&OFF].
You can take pictures of your subject at a distance of more than 50 cm (1.6
ft.) with the macro mode set to ON. However, the camera will take longer
than usual to focus.
If you use the flash in macro shootings, shadows may be noticeable and the
appropriate exposure may not be obtained.
Shooting distance and shooting range
Zoom position Shooting distance
Macro mode (W) 20 cm (7.8 in.) to ) 209 × 154 mm (20 cm (7.8 in.))
Macro mode (T) 20 cm (7.8 in.) to ) 105 × 78 mm (20 cm (7.8 in.))
Shooting range (W × H)
(minimum shooting distance)
1
Taking Pictures
37
Page 38

Taking close-up pictures &
2272*1704
11
HQ
Setting up Super macro mode %
Select the super macro mode to take pictures
as close as 8 cm (3.1 in.) to the subject.
The lens will be set to T (Telephoto) and the
flash will not operate.
1
Taking Pictures
Press (&) repeatedly in shooting
P
mode to select [%].
The lens is set in the T (Telephoto) position
and the camera is set in the super macro
mode. When the super macro mode has
2272*1704
been selected, % is displayed on the
monitor.
HQ
Take the picture using the monitor.
To cancel the super macro mode, set to [&OFF].
If you try to take a picture of a subject at a distance greater than 20 cm (7.9
in.) in the super macro mode, the camera takes longer to focus.
%
1111
a
38
Shooting distance and shooting range
Zoom position Shooting distance
Super macro mode (T)
8 cm (3.1 in.) to
50 cm (19.7 in.)
Shooting range (W × H)
(minimum shooting distance)
44.3 × 33.2 mm
(8 cm(3.1 in.))
Page 39

Using self-timer Y
2272*1704
11
HQ
In the self-timer mode, the picture is taken approximately 12 seconds
after the shutter button is pressed. You are recommended to stabilize
the camera by using a tripod.
Press (Y) repeatedly in shooting
mode to select [YON].
1
Taking Pictures
When the self-timer mode has been
selected, Y is displayed on the monitor.
Take the picture.
To cancel the self-timer mode, select [YOFF].
The self-timer lamp lights for approximately 10
seconds, then starts blinking. After blinking for
approximately 2 seconds, the picture is taken.
To stop functioning of the self-timer, press .
The self-timer mode is automatically canceled
after one shot.
Do not operate the self-timer while standing directly in front of the camera
lens. The focus and exposure will not be able to lock.
P
2272*1704
HQ
Lights
Blinks
Y ON
1111
a
39
Page 40

Taking successive pictures j
This function allows you to take a rapid succession of still pictures at
approximately 1.3 frames per second (7 pictures in [SHQ] mode) by
keeping the shutter button pressed.
As you can choose the best picture from a series of sequential shots,
you are recommended to use this mode when photographing a moving
subject.
1
Taking Pictures
Press the OK/MENU button in shooting
mode (K).
The top menu is displayed.
Press to go to [MODE MENU].
F
K
MODE MENU
WB
Press or to select the
[CAMERA] tab.
Press to go to the [CAMERA]
menu.
ESP/n
DRIVE
CAMERA
ISO
CARD
DIGITAL ZOOM
SET
AF MODE
ESP
o
AUTO
OFF
SPOT
Press or to select [DRIVE].
Press to go to the successive
picture settings.
ESP/n
DRIVE
CAMERA
CARD
DIGITAL ZOOM
SET
AF MODE
ISO
ESP
o
AUTO
OFF
SPOT
40
Page 41

Taking successive pictures j
2272*1704
11
HQ
Press or to select [j] and
press the OK/MENU button.
The successive picture shooting is set.
Press the OK/MENU button again to exit
the menu.
ESP/n
DRIVE
CAMERA
ISO
CARD
DIGITAL ZOOM
SET
AF MODE
o
j
Take the pictures.
P
The sequential shooting indication is
displayed on the monitor.
j
2272*1704
HQ
Press the shutter button fully and keep it pressed. The camera will continue
to take pictures until you release your finger from the shutter button.
Focus is set at the first frame.
1111
a
1
Taking Pictures
41
Page 42

Panoramic shooting
You can take advantage of the panoramic
shooting feature with the Olympus xD-Picture
Card.
The panoramic shooting lets you connect
pictures with overlapping edges into a single
panoramic picture, using the OLYMPUS
Master software contained in the CD-ROM
provided.
1
Taking Pictures
The panoramic mode is only available when using the Olympus xD-Picture
Card.
Press the OK/MENU button in
shooting mode (K).
The top menu is displayed.
Press to go to [MODE MENU].
Press or to select the
[CAMERA] tab.
Press to go to the [CAMERA]
menu.
K
ESP/n
DRIVE
CAMERA
ISO
CARD
DIGITAL ZOOM
SET
AF MODE
F
MODE MENU
WB
ESP
o
AUTO
OFF
SPOT
42
Press or to select
[PANORAMA].
Press to go to the panoramic
shooting display.
R
PANORAMA
CAMERA
2 IN 1
CARD
SET
OFF
Page 43

On the monitor, use the arrow
pad to choose the direction you
want to take the pictures in.
: Takes pictures from left to right.
: Takes pictures from right to left.
: Takes pictures from bottom to
top.
: Takes pictures from top to
bottom.
Take the first picture.
Focus, exposure and white balance
are set by the first picture. Do not
select an extremely bright subject
(such as the sun) for the first picture.
Panoramic shooting
Takes pictures from left to right
Takes pictures
from bottom to top
1
Taking Pictures
43
Page 44

Panoramic shooting
Make sure that the edges of the pictures overlap, then take
your pictures.
Use the frames at the edges of the screen as a guide when
composing your pictures. The first and second shots are taken so that
they overlay part A. The second and third pictures are taken so that
they overlay part B. Remember the picture in the frame so that you
can compose the next picture.
1
Taking Pictures
First picture Second picture Third picture
The panoramic shooting is possible for up to 10 pictures.
When you have taken 10 pictures, a warning mark is displayed.
When you have finished taking pictures, press the OK/MENU button
to exit the panoramic shooting.
A B
44
To compose a panoramic picture, stitch the pictures taken together
using the OLYMPUS Master software contained in the CD-ROM.
Page 45

Stitching together two pictures /
2272*1704
20
HQ
2272*1704
20
HQ
This function allows you to position two pictures taken in succession
next to each other and store them as a single picture. You can combine
two different subjects in one picture.
First picture Second picture
P
1st
P
2nd
o
2272*1704
HQ
Positioned on left. Positioned on right.
2020
Picture during playback
o
HQ
Press the OK/MENU button in shooting
mode (K).
The top menu is displayed.
Press to go to [MODE MENU].
2272*1704
F
K
WB
b
2020
MODE MENU
1
Taking Pictures
45
Page 46

Stitching together two pictures /
2272*1704
20
HQ
2272*1704
20
HQ
Press or to select the
[CAMERA] tab.
Press to go to the [CAMERA]
menu.
ESP/n
DRIVE
CAMERA
ISO
CARD
DIGITAL ZOOM
SET
AF MODE
ESP
o
AUTO
OFF
SPOT
1
Taking Pictures
Press or to select [/].
Press to go to the composite 2
pictures shooting display.
Take the first shot using the monitor.
Take the second shot.
Once the second picture is taken, the
PANORAMA
CAMERA
CARD
SET
P
o
HQ
P
R
2 IN 1
2272*1704
OFF
1st
2020
2nd
monitor automatically returns to the top
menu.
To cancel shooting in [/] mode before taking the first or second
picture, press the OK/MENU button. The first picture taken is not stored.
o
2272*1704
HQ
2020
b
46
Page 47

Recording sound with still pictures R
This function lets you record sound when
taking a still picture. Recording begins about
0.5 seconds after pressing the shutter button
and lasts for about 4 seconds. When this
function is enabled, sound is automatically
recorded after each picture is taken. This is
useful for adding an audio comment to the
picture just taken.
Press the OK/MENU button in
shooting mode (K).
The top menu is displayed.
Press to go to [MODE MENU].
Press or to select the
[CAMERA] tab.
Press to go to the [CAMERA]
menu.
CAMERA
CARD
SET
F
K
WB
ESP/n
DRIVE
ISO
DIGITAL ZOOM
AF MODE
MODE MENU
ESP
o
AUTO
OFF
SPOT
1
Taking Pictures
Press or to select [R].
Press to go to the Recording
sound with still pictures setting.
R
PANORAMA
CAMERA
2 IN 1
CARD
SET
OFF
47
Page 48

Recording sound with still pictures R
Press or to select [ON] and
press the OK/MENU button.
Recording sound with still pictures is set.
Press the OK/MENU button again to exit the
menu.
1
Taking Pictures
Press the shutter button to start the
sound recording. When the sound
recording is started, position the
microphone toward the sound source.
The volume of the recorded sound can be
adjusted during playback. g“Setting
volume” (P.96)
If the source of the sound you are recording
is more than 1 m (3.3 ft.) away from the microphone, the recorded sound
may not be very clear.
The next picture cannot be taken until sound recording has stopped.
Sound cannot be recorded during successive shooting (P.40), panoramic
shooting (P.42) or composite 2 pictures shooting mode (P.45).
PANORAMA
CAMERA
2 IN 1
CARD
SET
BUSY
R
OFF
ON
Microphone
48
Page 49

2
This chapter describes how to play back the still pictures and
movies.
To change the playback settings, refer to “3: Setting Up.”
Viewing
2
Viewing
49
Page 50

Displaying several pictures at once G
HQ
$04.12.18 15:30
100-0005
This function lets you view several thumbnail
pictures on the monitor at once. It is useful
when you are looking for a specific picture. You
can change the number of pictures displayed.
g
“Selecting the number of pictures G” (P.51)
Press the G side of the zoom button
2
Viewing
in the playback mode.
The index display appears.
1 2 3
4
5 6
Use the arrow pad to select a picture.
: Moves to the previous picture.
: Moves to the next picture.
: Jumps to the previous index display.
: Jumps to the next index display.
Press the U side of the zoom button.
The screen returns to single-frame
playback.
50
(the frames before the top left frame)
(the frames following the bottom right frame)
100-0005
7
1 2 3
4
7
$04.12.18 15:30
8 9
5 6
8 9
HQ
5
Page 51

Displaying several pictures at once G
Selecting the number of pictures G
You can choose to display 4, 9 or 16 thumbnail
pictures on the monitor.
Press the OK/MENU button in
playback mode.
The top menu is displayed.
Press to go to [MODE MENU].
Press or to select the [SETUP]
tab.
Press to go to the [SETUP] menu.
Press or to select [G].
Press to go to the index display
settings.
m
INFO
S ERASE
ALL RESET
PLAY
W
EDIT
PW ON SETUP
CARD
SCREEN SETUP
COLOR
SETUP
G
PLAY
EDIT
CARD
SETUP
2
Viewing
MODE MENU
ON
ENGLISH
NORMAL
9
51
Page 52

Displaying several pictures at once G
Press or to choose the number
of pictures [4], [9] or [16] and press the
OK/MENU button.
The number of pictures in the index display
is set.
Press the OK/MENU button again to exit
the menu.
2
Viewing
PLAY
EDIT
CARD
SETUP
G
4
9
16
52
Page 53

Enlarging pictures U
3.0*
A picture displayed on the monitor can be
enlarged up to 4 times their original size to
check the clarity of the picture.
Press the U side of the zoom button
in the playback mode.
The picture is enlarged in steps (1.5×,
×, 2.5×, 3.0×, 3.5× and 4.0×) each time
2.0
the U side of the zoom button is pressed.
When a picture is enlarged, you can view different areas of the picture by
pressing the arrow pad.
3.0*
Press the G side of the zoom button.
The screen returns to single-frame
playback.
2
Viewing
53
Page 54

Rotating pictures y
HQ
20
$04.12.18 15:30
100-0020
20
$04.12.18 15:30
100-0020
20
$04.12.18 15:30
100-0020
Pictures taken when the camera is held vertically are displayed
horizontally.
100-0020
100-0020
$04.12.18 15:30
2
Viewing
Original picture
HQ
20
$04.12.18 15:30
Rotated 90 degrees clockwise (+90°)
100-0020
$04.12.18 15:30
Rotated 90 degrees
counterclockwise (–90°)
HQ
20
HQ
20
In playback mode, display the picture you want to rotate.
Press the OK/MENU button.
The top menu is displayed.
Press to go to [MODE MENU].
54
INFO
m
MODE MENU
S ERASE
Page 55

Press or to select the [PLAY]
tab.
Press to go to the [PLAY] menu.
Press or to select [y].
Press to go to the rotation display
settings.
Press or to select [+90°] or
[–90°].
The picture is rotated and displayed.
Rotating pictures y
OFF
0
0°
y
PLAY
<
EDIT
R
CARD
SET
OFF
0
0°
y
PLAY
<
EDIT
R
CARD
SET
0
-
PLAY
EDIT
CARD
SET
y
<
R
90°
2
Viewing
Press the OK/MENU button.
The rotated picture is saved.
Press the OK/MENU button again to exit the menu.
Protected pictures cannot be rotated. Cancel the protection setting
before rotating a protected picture.
The following pictures cannot be rotated:
-movies
- pictures edited on a computer
- pictures taken with other cameras.
g“Protecting pictures 0” (P.77)
55
Page 56

Displaying pictures one after another
This function automatically displays the
pictures in order (slideshow). For movies, only
the first frame is displayed.
Press the OK/MENU button in
playback mode.
2
Viewing
The top menu is displayed.
Press to start the slideshow.
Pictures are displayed in sequence at
approximately 3 second intervals.
Still pictures recorded with sound are
displayed at in about 4 second intervals.
INFO
m
m
MODE MENU
S ERASE
56
Press the OK/MENU button to exit the slideshow.
You are recommended to use an AC adapter and power coupler (sold
separately) when running a slideshow for a long period of time. If the battery
is used, the camera will automatically stop the slideshow after about 30
minutes and turn off.
Page 57

Recording sound with pictures taken R
This function lets you record sound to the still
pictures already taken, or renew recorded
sound. Recording time for each picture is for
about 4 seconds.
Play back the picture you wish to add sound to in playback
mode.
Press the OK/MENU button.
2
Viewing
The top menu is displayed.
Press to go to [MODE MENU].
Press or to select the [PLAY]
tab.
Press to go to the [PLAY] menu.
Press or to select [R].
INFO
PLAY
EDIT
CARD
SET
PLAY
EDIT
CARD
SET
S ERASE
0
y
<
R
0
y
<
R
m
MODE MENU
OFF
0°
OFF
0°
57
Page 58

Recording sound with pictures taken R
Press to select [START] and press
the OK/MENU button.
Sound recording starts.
If the source of the sound you are recording is more than 1 m (3.3 ft.) away
from the camera, the recorded sound may not be very clear.
2
Viewing
When sound is recorded on the picture with sound, previous sound will be
erased and only newly recorded sound will be stored.
If the card has not enough memory space left (cards which can show a
warnig display), recording sound may not be possible.
If the camera buttons are operated while recording sound, camera operation
sound may be recorded.
Once sound has been recorded onto a picture, it cannot be erased unless
you record a new sound.
PLAY
EDIT
CARD
SET
0
y
<
R
START
58
Page 59

Playing back movies q
HQ
20
100-0020
$04.12.18 15:30
HQ
00:02/01:45
100-0020
$04.12.18 15:30
This function lets you play back movies on the
camera’s monitor.
When the playback mode is activated, the last
picture recorded is played back on the monitor.
Follow the instructions below to select a picture
with
n mark and play it back.
Press or in playback
mode to select the picture with the n
mark.
Press the OK/MENU button.
The top menu is displayed.
Press
to select [MOVIE
PLAYBACK].
The movie is played back.
The playing time and the total recording time
are displayed on the monitor.
The time it takes to start movie playback
depends on the length of the movie and the record mode.
n
100-0020
$04.12.18 15:30
MOVIE PLAYBACK
INFO
100-0020
$04.12.18 15:30
Playing time
Total recording time
MODE MENU
S ERASE
n
00:02/01:45
H
HQ
2
Viewing
20
H
HQ
7
59
Page 60

Playing back movies q
00:03/01:45
HQ
100-0020
$04.12.18 15:30
While a movie is playing back, you can select
the following operations.
:Rewind
:Fast forward
:Raise volume
:Lower volume
OK/MENU button: Pause
In pause mode, you can operate as follows.
:Reverse playback while the button is pressed
:Normal playback while the button is pressed
:Displays the first frame
:Displays the last frame
2
OK/MENU button: Displays the movie playback menu
100-0020
$04.12.18 15:30
00:03/01:45
H
n
HQ
Viewing
The movie playback menu is
MOVIE PLAYBACK
displayed when playback is finished.
Press
or
to select [RESTART] or
RESTART
[EXIT] from the menu, then press the
OK/MENU button.
RESTART: Plays back the entire movie again.
EXIT: Cancels the movie playback.
SELECT
EXIT
GO
60
Page 61

Playing back movies q
Creating an index
The camera automatically selects nine frames
from the movie and stores as still pictures,
enabling you to see the content of the movie at
a glance.
Select a movie with n and play it back.
Press the OK/MENU button.
The top menu is displayed.
Press to select [MODE MENU].
Press or to select the [EDIT]
tab.
Press to go to the [EDIT] menu.
INFO
PLAY
EDIT
CARD
SET
INDEX
2
Viewing
MOVIE PLAYBACK
MODE MENU
S ERASE
61
Page 62

Playing back movies q
Press again to go to the index
creation mode.
PLAY
EDIT
CARD
SET
INDEX
Press or to select [INDEX],
then press the OK/MENU button.
2
Viewing
When the processing is completed, the
frames are saved as new still pictures.
SELECT
The index is stored as pictures in different record modes from the original
movie.
Record mode
when the movie was shot.
HQ SQ2 (1024 × 768 pixels)
SQ SQ2 (640 × 480 pixels)
The interval between the frames that are automatically selected for the
index varies depending on the length of the movie.
Image quality
when stored as an index
INDEX
INDEX
CANCEL
GO
62
Page 63

Playback on a TV
You can play back pictures on a TV. Use the
AV cable provided with the camera to connect
the camera to the TV.
Select NTSC or PAL according to your TV
video signal system.
TV video signal systems
NTSC: North America, Taiwan, Korea, Japan
PAL: European countries, China
Press the OK/MENU button in the
playback mode.
The top menu is displayed.
Press to go to [MODE MENU].
Press or to select the [SETUP]
tab.
Press to go to the [SETUP] menu.
m
INFO
S ERASE
ALL RESET
W
PW ON SETUP
CARD EDIT PLAY
SCREEN SETUP
COLOR
SETUP
2
Viewing
MODE MENU
ON
ENGLISH
NORMAL
Press or to select [VIDEO
OUT].
Press to go to the video signal
system selection.
VOLUME
8
s
CARD EDIT PLAY
X
VIDEO OUT
SETUP
HIGH
LOW
,
04.01.01
00:00
NTSC
63
Page 64

Playback on a TV
Press or to select [NTSC] or
[PAL] and press the OK/MENU
button.
The video signal system is set.
Press the OK/MENU button again to exit
the menu.
Turn the camera and the TV off.
2
Viewing
Plug the AV cable into the Multiconnector on the camera.
Plug the yellow plug and the
white plug of the AV cable into
the TV video (yellow) and audio
(white) input jacks respectively.
VOLUME
8
s
CARD EDIT PLAY
X
VIDEO OUT
SETUP
Multi-connector
NTSC
PAL
64
For information on your TV audio/video
input jacks, refer to your manual of the
TV.
Page 65

Playback on a TV
HQ
20
$04.12.18 15:30
100-0020
Turn the TV on and switch to the video input mode.
For information on the video input mode, refer to your manual of the TV.
Press the POWER switch to turn the
camera on.
The picture is displayed on the TV.
100-0020
2
Viewing
HQ
Operate the camera in the same way as normal playback to display pictures
on your TV.
When the pictures are played back on a TV, we recommed you to use an AC
adaptor and a power coupler (sold separately) to save battery power in the
camera.
Press the POWER switch to turn the camera off before disconnecting the AV
cable.
$04.12.18 15:30
20
65
Page 66

Displaying shooting information
HQ
20
$04.12.18 15:30
SIZE:
2272*1704
+2.0
ISO100
10
100-0020
HQ
20
$04.12.18 15:30
10
100-0020
HQ
20
$04.12.18 15:30
SIZE:
2272*1704
ISO100
10
+2.0
100-0020
This function changes the shooting information displayed on the monitor.
Detailed information display Normal information display
<
*
100-0020
SIZE:
2272*1704
$04.12.18 15:30
10
ISO100
+2.0
9H
HQ
5
20
100-0020
2
Viewing
The shooting information is displayed for approximately 3 seconds.
Press the OK/MENU button in the
playback mode.
The top menu is displayed.
<
*
10
$04.12.18 15:30
INFO
9H
HQ
20
m
S ERASE
MODE MENU
Press to select [INFO].
The detailed shooting information is
displayed.
66
To return to normal display, repeat steps 1
and 2.
<
*
10
100-0020
SIZE:
2272*1704
$04.12.18 15:30
9H
HQ
+2.0
5
ISO100
20
Page 67

Editing pictures
Creating soft focus pictures
This function enables you to add soft focus
effects to the selected pictures and store them
as new pictures.
By using soft focus effects, you can change
your picture to a vignette picture to give a
fantastic atmosphere.
While in playback mode, display the picture you want to
convert into soft focus picture.
Press the OK/MENU button.
The top menu is displayed.
Press to go to [MODE MENU].
INFO
2
Viewing
m
MODE MENU
S ERASE
Press or to select the [EDIT]
tab.
Press to go to the [EDIT] menu.
SOFT FOCUS
PLAY
FISHEYE
EDIT
BLACK & WHITE
SEPIA
CARD
Q
SET
67
Page 68

Editing pictures
Press or to select [SOFT
FOCUS].
Press to go to the soft focus picture
settings.
SOFT FOCUS
PLAY
FISHEYE
EDIT
BLACK & WHITE
SEPIA
CARD
Q
SET
Press or to select [SOFT
2
FOCUS].
SOFT FOCUS
SOFT FOCUS
Viewing
CANCEL
CANCEL
SELECT
GO
Press the OK/MENU button to create the soft focus picture.
Once the soft focus picture is created, it is stored as a new picture.
A new picture cannot be created if the card is full.
68
Page 69

Creating fish-eye pictures
This function enables you to add fish-eye view
effects to the selected pictures and store them
as new pictures.
When the fish-eye view mode is selected, the
picture is transformed into a spherical picture.
While in playback mode, display the picture you want to
convert into fish-eye pictures.
Press the OK/MENU button.
The top menu is displayed.
Press to go to [MODE MENU].
INFO
Editing pictures
2
Viewing
m
MODE MENU
S ERASE
Press or to select the [EDIT]
tab.
Press to go to the [EDIT] menu.
SOFT FOCUS
PLAY
FISHEYE
EDIT
BLACK & WHITE
SEPIA
CARD
Q
SET
69
Page 70

Editing pictures
Press or to select [FISHEYE].
Press to go to the fish-eye picture
settings.
SOFT FOCUS
PLAY
FISHEYE
EDIT
BLACK & WHITE
SEPIA
CARD
Q
SET
Press or to select [FISHEYE].
2
FISHEYE
FISHEYE
Viewing
CANCEL
CANCEL
SELECT
GO
Press the OK/MENU button to create the fish-eye picture.
Once the fish-eye picture is created, it is stored as a new picture.
A new picture cannot be created if the card is full.
70
Page 71

Creating black and white pictures
This function enables you to convert selected
pictures into black and white pictures and store
them as new pictures.
Editing pictures
While in playback mode, display the picture you want to
convert into black and white pictures.
Press the OK/MENU button.
INFO
m
MODE MENU
S ERASE
The top menu is displayed.
Press to go to [MODE MENU].
Press or to select the [EDIT]
tab.
Press to go to the [EDIT] menu.
SOFT FOCUS
PLAY
FISHEYE
EDIT
BLACK & WHITE
SEPIA
CARD
Q
SET
2
Viewing
71
Page 72

Editing pictures
Press or to select [BLACK &
WHITE].
Press to go to the black and white
picture settings.
SOFT FOCUS
PLAY
FISHEYE
EDIT
BLACK & WHITE
SEPIA
CARD
Q
SET
Press or to select [BLACK &
2
WHITE].
BLACK & WHITE
BLACK & WHITE
Viewing
CANCEL
CANCEL
SELECT
GO
Press the OK/MENU button to create the black and white
picture.
Once the black and white picture is created, it is stored as a new
picture.
A new picture cannot be created if the card is full.
72
Page 73

Creating sepia-tone pictures
This function enables you to convert selected
pictures into sepia-tone pictures and store
them as new pictures.
Editing pictures
While in playback mode, display the picture you want to
convert into sepia color.
Press the OK/MENU button.
INFO
m
MODE MENU
S ERASE
The top menu is displayed.
Press to go to [MODE MENU].
Press or to select the [EDIT]
tab.
Press to go to the [EDIT] menu.
SOFT FOCUS
PLAY
FISHEYE
EDIT
BLACK & WHITE
SEPIA
CARD
Q
SET
2
Viewing
73
Page 74

Editing pictures
Press or to select [SEPIA].
Press to go to the sepia-tone
picture settings.
SOFT FOCUS
PLAY
FISHEYE
EDIT
BLACK & WHITE
SEPIA
CARD
Q
SET
Press or to select [SEPIA].
2
SEPIA
SEPIA
Viewing
CANCEL
CANCEL
SELECT
GO
Press the OK/MENU button to create the sepia-tone picture.
Once the sepia-tone picture is created, it is stored as a new picture.
A new picture cannot be created if the card is full.
74
Page 75

Editing pictures
Changing the resolution Q
This function enables you to change the
resolution of selected pictures and store them
as new pictures. This is useful when you want
to reduce the volume of picture data, such as
when posting pictures on the Internet or
attaching them to e-mail.
You can choose from two resolutions,
640 × 480 and 320 × 240.
While in playback mode, display the picture you want to
resize.
Press the OK/MENU button.
INFO
m
MODE MENU
S ERASE
The top menu is displayed.
Press to go to [MODE MENU].
2
Viewing
Press or to select the [EDIT]
tab.
Press to go to the [EDIT] menu.
SOFT FOCUS
PLAY
FISHEYE
EDIT
BLACK & WHITE
SEPIA
CARD
Q
SET
75
Page 76

Editing pictures
Press or to select [Q].
Press to go to the resize settings.
SOFT FOCUS
PLAY
FISHEYE
EDIT
BLACK & WHITE
SEPIA
CARD
Q
SET
Press or to select the picture
2
size.
Viewing
CANCEL
Q
640×480
320×240
CANCEL
SELECT
GO
Press the OK/MENU button to create the resized picture.
Once the picture is resized, it is stored as a new picture.
A new picture cannot be created if the card is full.
If the resolution is 640 × 480 when the picture is taken, you cannot set
to [640 × 480].
76
Page 77

Protecting pictures 0
You can protect important pictures to avoid
accidentally erasing them. Protected pictures
cannot be erased by the single-frame or allframe erase function.
Formatting erases both unprotected and
protected pictures. g“Formatting a card” (P.107)
While in playback mode, display the picture you want to
protect.
Press the OK/MENU button.
INFO
m
MODE MENU
S ERASE
The top menu is displayed.
Press to go to [MODE MENU].
Press or to select the [PLAY]
tab.
Press to go to the [PLAY] menu.
PLAY
EDIT
CARD
SET
0
y
<
R
OFF
0°
2
Viewing
77
Page 78

Protecting pictures 0
HQ
20
$04.12.18 15:30
100-0020
9
Press or to select [0].
Press to go to the protection
settings.
Press or to select [ON].
2
Viewing
To cancel protection, select [OFF].
PLAY
EDIT
CARD
SET
PLAY
EDIT
CARD
SET
0
y
<
R
0
y
<
R
OFF
0°
OFF
ON
Press the OK/MENU button.
The selected picture is protected.
9 is displayed on the screen.
78
mark
100-0020
$04.12.18 15:30
9
HQ
20
Page 79

Erasing one picture S
Digital cameras let you erase pictures that you
do not want to keep.
You can also erase all the pictures stored
(except protected ones) on the card at once.
g“Erasing all pictures R” (P.80)
The protected pictures cannot be erased. g“Protecting pictures 0”
(P.77)
Once erased, pictures cannot be restored.
While in playback mode, display the picture you want to erase.
Press the OK/MENU button.
2
Viewing
The top menu is displayed.
Press to select [SERASE].
Press to select [YES], and press
the OK/MENU button.
The picture displayed on the monitor is
erased.
INFO
SELECT
m
MODE MENU
S ERASE
S
ERASE
YES
NO
GO
79
Page 80

Erasing all pictures R
This function erases all pictures stored on the
card.
The protected pictures cannot be erased.
g“Protecting pictures 0” (P.77)
Once erased, pictures cannot be restored.
2
Viewing
Press the OK/MENU button in the
playback mode.
The top menu is displayed.
Press to go to [MODE MENU].
Press or to select the [CARD]
tab.
Press to go to the [CARD] menu.
INFO
ALL ERASE
PLAY
FORMAT
EDIT
CARD
SET
m
MODE MENU
S ERASE
80
Press or to select [ALL
ERASE].
Press .
ALL ERASE
PLAY
FORMAT
EDIT
CARD
SET
Page 81

Erasing all pictures R
Press to select [YES], and press
the OK/MENU button.
All pictures, except for protected ones, are
erased.
R ALL ERASE
CAUTION ERASING ALL
YES
NO
SELECT
GO
2
Viewing
81
Page 82

MEMO
2
Viewing
82
Page 83

3
Describes how to set operation modes and change settings.
When the same settings are available for “Shooting mode” and “Playback
mode,” the monitor displays for “Shooting mode” are used in this chapter.
Setting Up
3
Setting Up
83
Page 84

Selecting a language W
You can select the language in which the
menus and error messages are displayed on
the monitor.
Press the OK/MENU button.
3
Setting Up
The top menu is displayed.
Press to go to [MODE MENU].
Press or to select the [SETUP]
tab.
Press to go to the [SETUP] menu.
Press or to select [W].
Press to go to the language
settings.
K
ALL RESET
CAM
W
CARD
PW ON SETUP
COLOR
SETUP
8
ALL RESET
CAM
W
W
CARD
PW ON SETUP
COLOR
SETUP
8
F
MODE MENU
WB
ON
ENGLISH
NORMAL
LOW
ON
ENGLISH
NORMAL
LOW
84
Page 85

Selecting a language W
Press or to select the desired
language.
Available languages vary depending on
the region where you purchased the
camera.
SELECT
W
ENGLISH
FRANCAIS
ESPAÑOL
PORTUGUES
GO
Press the OK/MENU button.
The selected language is set.
Press the OK/MENU button again to exit the menu.
You can select other languages too. The firmware for other languages can
be downloaded using Olympus homepage. For details, see Olympus
homepage.
3
Setting Up
85
Page 86

Setting date and time X
You can set the date and time.
This feature is handy when managing pictures
on a computer or printing pictures.
Press the OK/MENU button.
The top menu is displayed.
Press to go to [MODE MENU].
3
Setting Up
Press or to select the [SETUP]
tab.
Press to go to the [SETUP] menu.
K
ALL RESET
CAM
W
CARD
PW ON SETUP
COLOR
SETUP
8
F
MODE MENU
WB
ON
ENGLISH
NORMAL
LOW
86
Press or to select [X].
Press to go to the date/time
setting.
X
CAM
VIDEO OUT
CARD
SETUP
,
04.01.01
00:00
NTSC
Page 87

Setting date and time X
200
01
00
2004
01
00
2004
23
34
Press or to select one of the
X
following date formats: [Y]-[M]-[D]
20
(Year/Month/Day), [M]-[D]-[Y] (Month/
Day/Year), [D]-[M]-[Y] (Day/Month/
Year).
Press to go to the year input.
The following steps show the procedure used when the date format is set to
[Y]-[M]-[D].
SELECT
Press or to set each of the last
4 . .010101
YMD
:000000
SET
GO
X
two digits of the year.
2004
SET
X
. .121201
:000000
GO
Press to go to the month input.
Repeat the above step to finish the
date and time inputtings.
The time is displayed in 24-hour format. For example, 1:00 p.m. is displayed
as 13:00.
SELECT
Press the OK/MENU button.
3
Setting Up
2004
. .121223
For a more accurate setting, press the OK/
MENU button when the time hits 00 seconds.
The clock starts when you press the button.
SELECT
SET
:121234
GO
Press the OK/MENU button again to exit
the menu.
If the camera is left for about a day with the battery removed, the date and
time settings will revert to the factory default settings.
87
Page 88

Saving settings
This function lets you save the shooting and
other settings you have made during shooting
or playback.
All settings are reset to the factory default
ON
settings when the camera is turned off.
The settings made before the camera is
OFF
turned off are saved.
The camera is set to [ON] at the time of purchase.
The settings affected by [ALL RESET] are listed on g P.89.
3
Setting Up
88
Press the OK/MENU button.
The top menu is displayed.
Press to go to [MODE MENU].
Press or
to select the [SETUP]
tab.
Press to go to the [SETUP] menu.
Press or to select
[ALL RESET].
Press to go to the save on/off
settings.
K
ALL RESET
CAM
W
CARD
PW ON SETUP
COLOR
SETUP
8
ALL RESET
CAM
W
W
CARD
PW ON SETUP
COLOR
SETUP
8
F
MODE MENU
WB
ON
ENGLISH
NORMAL
LOW
ON
ENGLISH
NORMAL
LOW
Page 89

Press or to select [OFF].
Press the OK/MENU button.
The save setting is turned on.
Saving settings
ALL RESET
CAM
W
CARD
PW ON SETUP
COLOR
SETUP
8
OFF
ON
Press the OK/MENU button again to exit the menu.
The functions and settings to save or reset your settings
Function Factory default setting Ref. page
l PROGRAM AUTO P.14
Flash AUTO P.23
&
%
F 0.0 P.32
K HQ P.25
n ESP P.35
DRIVE o P. 4 0
ISO AUTO P.33
DIGITAL ZOOM OFF P.21
R(still picture) OFF P.47
AF MODE SPOT P.12
0 AUTO P.30
Settings not mentioned above are always saved.
See g“Menu List” (P.180 - 183) for information about all the default
settings (the settings when shipped from the factory).
&OFF P.37
3
Setting Up
89
Page 90

Checking the picture you have just taken
REC VIEW lets you check the picture you have
just taken on the monitor. The picture is
displayed for a few seconds between shots,
letting you check each picture as it is taken. If
you want to move on to the next shot
immediately without checking the previous
picture, set [REC VIEW] to [OFF].
Press the OK/MENU button in
shooting mode (K).
3
Setting Up
The top menu is displayed.
Press to go to [MODE MENU].
Press or to select the [SETUP]
tab.
Press to go to the [SETUP] menu.
K
ALL RESET
CAM
W
CARD
PW ON SETUP
COLOR
SETUP
8
F
MODE MENU
WB
ON
ENGLISH
NORMAL
LOW
90
Press or to select [REC VIEW].
Press to go to the rec view
settings.
SHUTTER SOUND
CAM
REC VIEW
CARD
FILE NAME
PIXEL MAPPING
SETUP
s
ON
RESET
Page 91

Checking the picture you have just taken
Press or to select [ON] or [OFF],
and press the OK/MENU button.
Press the OK/MENU button again to exit
the menu.
For movie shooting mode, [REC VIEW] cannnot be set.
For successive pictures mode, the REC VIEW pictures do not appear.
SHUTTER SOUND
CAM
REC VIEW
CARD
FILE NAME
PIXEL MAPPING
SETUP
s
OFF
O N
3
Setting Up
91
Page 92

Setting beep/alert sound 8
This function lets you adjust the volume of the
beep sound used for warnings and button
operations, or turn off.
Press the OK/MENU button.
The top menu is displayed.
Press to go to [MODE MENU].
3
Setting Up
Press or to select the [SETUP]
tab.
Press to go to the [SETUP] menu.
K
ALL RESET
CAM
W
CARD
PW ON SETUP
COLOR
SETUP
8
F
MODE MENU
WB
ON
ENGLISH
NORMAL
LOW
92
Press or to select [8].
Press to go to the beep sound
settings.
ALL RESET
CAM
W
W
CARD
PW ON SETUP
COLOR
SETUP
8
ON
ENGLISH
NORMAL
LOW
Page 93

Setting beep/alert sound 8
Press or to select [OFF], [LOW]
or [HIGH].
To turn off the beep sound, select [OFF].
Press the OK/MENU button.
The beep sound is set to the selected level.
ALL RESET
CAM
W
W
CARD
PW ON SETUP
COLOR
SETUP
8
OFF
LOW
HIGH
Press the OK/MENU button again to exit the menu.
3
Setting Up
93
Page 94

Setting shutter sound
You can select from three different sounds to
use as the shutter sound. You can also set the
sound level to [HIGH] or [LOW].
Press the OK/MENU button in
shooting mode (K).
The top menu is displayed.
3
Setting Up
Press to go to [MODE MENU].
Press or to select the [SETUP]
tab.
Press to go to the [SETUP] menu.
K
ALL RESET
CAM
W
CARD
PW ON SETUP
COLOR
SETUP
8
F
MODE MENU
WB
ON
ENGLISH
NORMAL
LOW
94
Press or to select [SHUTTER
SOUND].
Press to go to the shutter sound
settings.
SHUTTER SOUND
CAM
REC VIEW
CARD
FILE NAME
PIXEL MAPPING
SETUP
s
ON
RESET
Page 95

Setting shutter sound
Press or to select [1], [2], [3] or
[OFF].
If you have selected a shutter sound ([1],
[2] or [3]), press to set the sound level.
To turn off the sound, select [OFF].
Press or to select [HIGH] or
[LOW] and then the OK/MENU button.
Again, press the OK/MENU button twice to
exit the menu.
The shutter sound is set.
The shutter sound level cannot be changed in the movie shooting mode.
SHUTTER SOUND
OFF
1
2
3
CANCEL
SELECT
SHUTTER SOUND
OFF
1
2
3
SELECT
LOW
LOW
LOW
GO
LOW
HIGH
GO
3
Setting Up
95
Page 96

Setting volume
You can adjust the volume when playing back
a still picture with sound or a movie.
Press the OK/MENU button in
playback mode.
The top menu is displayed.
3
Setting Up
Press to go to [MODE MENU].
Press or to select the [SETUP]
tab.
Press to go to the [SETUP] menu.
F
K
WB
ALL RESET
W
PW ON SETUP
CARD EDIT PLAY
SCREEN SETUP
COLOR
SETUP
MODE MENU
ON
ENGLISH
NORMAL
96
Press or to select [VOLUME].
Press to go to the volume setting.
VOLUME
8
EDIT PLAY
s
CARD
X
VIDEO OUT
SETUP
HIGH
LOW
,
04.01.01
00:00
NTSC
Page 97

Press or to select [OFF], [LOW]
or [HIGH].
To disable the sound, select [OFF].
Press the OK/MENU button.
The volume is set.
Setting volume
VOLUME
8
EDIT PLAY
s
CARD
X
VIDEO OUT
SETUP
OFF
LOW
HIGH
Press the OK/MENU button again to exit the menu.
H is displayed on the monitor while recorded pictures with sound are
played back.
3
Setting Up
97
Page 98

Setting power-on screen and sound
You can set the screen to be displayed and
sound to be played each time the camera is
turned on. You can record and set your own
screen as the power-on screen.
g
“Recording power-on screen” (P.100)
Press the OK/MENU button.
The top menu is displayed.
Press to go to [MODE MENU].
3
Setting Up
Press or to select the [SETUP]
tab.
Press to go to the [SETUP] menu.
K
ALL RESET
CAM
W
CARD
PW ON SETUP
COLOR
SETUP
8
F
MODE MENU
WB
ON
ENGLISH
NORMAL
LOW
98
Press or to select [PW ON
SETUP].
Press to go to the power-on
screen and sound setting.
ALL RESET
CAM
W
W
CARD
PW ON SETUP
COLOR
SETUP
8
ON
ENGLISH
NORMAL
LOW
Page 99

Setting power-on screen and sound
Press or to select [SCREEN]
and then press .
Press or to select [OFF], [1], [2]
or [3] and then press the OK/MENU
button.
The screen [3] can be customized as your screen. If no screen is recorded,
no screen will be displayed when the camera is turned on.
Press or to select [VOLUME]
and then press .
Press or to select [OFF], [LOW]
or [HIGH].
[OFF] cannot be selected for [VOLUME] when [SCREEN] is set to [OFF].
PW ON SETUP
SCREEN
VOLUME
SELECT
PW ON SETUP
SCREEN
VOLUME
SELECT
OFF
1
2
3
GO
OFF
LOW
HIGH
GO
Press the OK/MENU button.
Again, press the OK/MENU button twice to exit the menu.
The screen and sound level are set.
3
Setting Up
99
Page 100

Recording power-on screen
Record the screen that appears on the monitor
when the camera is turned on. You can select it
from the pictures stored on the card.
Press the OK/MENU button in
playback mode.
The top menu is displayed.
3
Setting Up
Press to go to [MODE MENU].
Press or to select the [SETUP]
tab.
Press to go to the [SETUP] menu.
m
INFO
S ERASE
ALL RESET
W
PW ON SETUP
CARD EDIT PLAY
SCREEN SETUP
COLOR
SETUP
MODE MENU
ON
ENGLISH
NORMAL
100
Press or to select [SCREEN
SETUP].
Press to go to the power-on
screen setting.
If a screen is already recorded, the
monitor displays the screen shown at right.
For recording the screens press or
to select [RESET] and press the OK/
MENU button.
CARD EDIT PLAY
SETUP
CANCEL
ALL RESET
W
PW ON SETUP
SCREEN SETUP
COLOR
SCREEN SETUP
IMAGE EXISTING
ON
ENGLISH
NORMAL
RESET
KEEP
SELECT
GO
 Loading...